Rich Chernosky
-
Posts
2,142 -
Joined
-
Last visited
Content Type
Profiles
Forums
Events
Gallery
Everything posted by Rich Chernosky
-
Italeri - Ferrari 275 GTS (Spyder N.A.R.T.)
Rich Chernosky replied to 89AKurt's topic in WIP: Model Cars
That's absolutly gorgeous considering you did it long ago. Hope mine turns out as good. Both mine are Tamiya TS8 red. I have that set of wire wheels BTW. Fujimi makes the best plastic wires around. -
Italeri - Ferrari 275 GTS (Spyder N.A.R.T.)
Rich Chernosky replied to 89AKurt's topic in WIP: Model Cars
Kurt...both kits are the Fujimi Enthusiast series Daytona's...a berlinetta and the spyder. Bodies are all finished and polished nicely. Just have to make room in the Ferrari case for them. -
Italeri - Ferrari 275 GTS (Spyder N.A.R.T.)
Rich Chernosky replied to 89AKurt's topic in WIP: Model Cars
Kurt....that tool kit is amazing. If and when I ever do mine I will keep this in mind. Thanks for posting this excellent work. -
Good work on this so far...nice attention to detail.
-
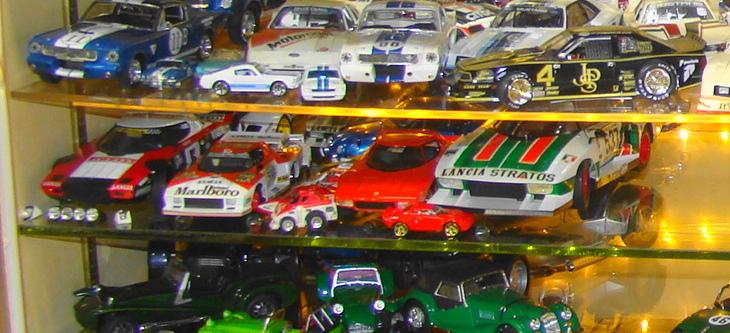
Doug...the Nitto and Doyusha are the same kit, and yah, I got one. Had it quite awhile and its started but only the basics. The Lancia's you see there are in 5 different scales.....1/16, 1/20, 1/24, 1/28, 1/64.
-
John...when I did this kit I painted the graphics on. It was a lot of tedious masking and mixing of paint but in the end it was worth it to not have to try and stuff those decals around those vents. And no wrinkles to contend with. I only used the sponsor decals. I see you had as much fun as I did cleaning up those vents. Good job BTW.
-
Nice job on one of my favorite Toyota builds.
-
Doug..here is a shot of my Lancia collection from one of my display cases. I still have a few more to build including the 1/12 Nitto Alitalia version. I am surprised at the amount of models made of this car but after seeing one in person...I can see why.

-
Doug....that turned out really sweet. I followed that in the WIP section. I have a nice section for this car myself so it is nice you are opening up a thread.
-
Interesting color fer sure....like the wheel combo.
-
Very cool Gary, thanks for sharing. Can't wait to start my C4.
-
Italeri - Ferrari 275 GTS (Spyder N.A.R.T.)
Rich Chernosky replied to 89AKurt's topic in WIP: Model Cars
Kurt...paint looks really good....knew you could fix it. I doubt as if I have ever had a paint job that didn't have some little imperfection in it. But I have discovered that polishing pads make great painters out of all of us. -
Italeri - Ferrari 275 GTS (Spyder N.A.R.T.)
Rich Chernosky replied to 89AKurt's topic in WIP: Model Cars
Kurt...bummer about your paint...happens to all of us. Are you still going to go the nail polish route. I have sprayed a lot of that and most of my success has been over black primer. Especially for the real fine pearl. The black makes it stand out. Do a test. Here's a good word in for you to the paint gods. ... -
Very nice work...that paint really shines.
-
Lamborghini Aventador Lp720-4 50th (finished)
Rich Chernosky replied to Timonator's topic in Model Cars
Real nice...that orange looks good on a Lambo, like the interior too. -
Thanks Tim....I was thinking of cutting them out and replacing them with sheet styrene. Yours looks better than mine.
-
Scott...really like your choice of colour for this project. Never used Spash paints before. Do you need primer underneath or can you use them straight up like Tamiya. I did this kit many moons ago. It is a cool kit and fits well.
-
Very Nice and a great idea turning it into a street car. I did one of these box stock and know what they are like. Good job.
-
Tim...what did you do with the louvers on the front fenders. Took a look at mine and they are pretty rough. Yours look nice and clean from what I can see.
-
My sentiments....exactly.
-
The Ferrari is a 333SP and is made by Perry's Resins...also of Canada.
-
Well.....as a matter of fact....I am currently working on the Shadow DN4 Can Am. Should be done soon. I also have the Riley& Scott and the Ferrari 312PB and finished the Lola T600.
-
Tim, nice to see you back modeling. I have that Porsche kit so I will be following this build. Like what you have done so far. And it was nice to meet you in person at Allentown.
-
Lookin good so far. What livery are you using ?.
-
Dave..the race series was called Fast Masters and was a made for television series featuring retired drivers over 50. It ran in 1993 and featured many racers from all forms of racing. I had the opportunity to talk to George Follmer (one of the participants) about it and he was none to happy about how it was run or managed. It would seem he had one race all locked up until David Pearson decided to intentionally punt him into the wall. Suffice to say George did not spare the expletives. Check it out on Google if you are interested. Some good history.