

Rich Chernosky
-
Posts
2,142 -
Joined
-
Last visited
Content Type
Profiles
Forums
Events
Gallery
Everything posted by Rich Chernosky
-
Italeri - Ferrari 275 GTS (Spyder N.A.R.T.)
Rich Chernosky replied to 89AKurt's topic in WIP: Model Cars
Ditto from me, you are doing a helluve job there. -
Thanks Gary, cool photo,s , this is very helpful information
-
The track perspectives, (which I really want to do), certainly do take more work. Tried one with a poster a friend gave me and it turned out horrible. So much so I am afraid to post it. Cool Mini BTW
-
Pat...just wanted to give you a big thank you for all the help. You have some great ideas and have added to my knowledge base. What you said about something not looking right is on the money. In my modeling if it looks good, it is right...even if it is not totally accurate.
-
Kurt....looks OK to me. I think in this respect we are both on a steep learning curve. Most of the relpies to this thread have been a great help and I will use them in the future. I like your Porsche BTW.
-
I have a tripod and all my pictures come out way better with it. I have "steady shot" in my camera which is supposed to take the blurr out of pictures when you hand hold the camera. But it doesn't work for close up detail or even normal distance shots like 3-4 ft. So it is probably highly recommended.
-
Gary....I have been using a digital camera for about 10yrs now. There are so many settings and things you can do that i haven't tried yet. I am still very much in the learning stage. The chief advantage of digital is you can take 100 pictures and then pick the one you like best and not waste a bit of film or wait for prints to come back. You can even edit them right on your computer. I really like the shot of the Cunnigham C4R....and of course...you know why.
-
I like this one....especially the car. My next purchase will probably a warehouse or garage scene like this one. Eventually I want to do a diorama like some i have seen here. There is some really nice work to be seen here.
-
Thank you Matt....I will be trying a lot of different things and that will be one of them. I usually shootin full HD and then trim away what i don't want.
-
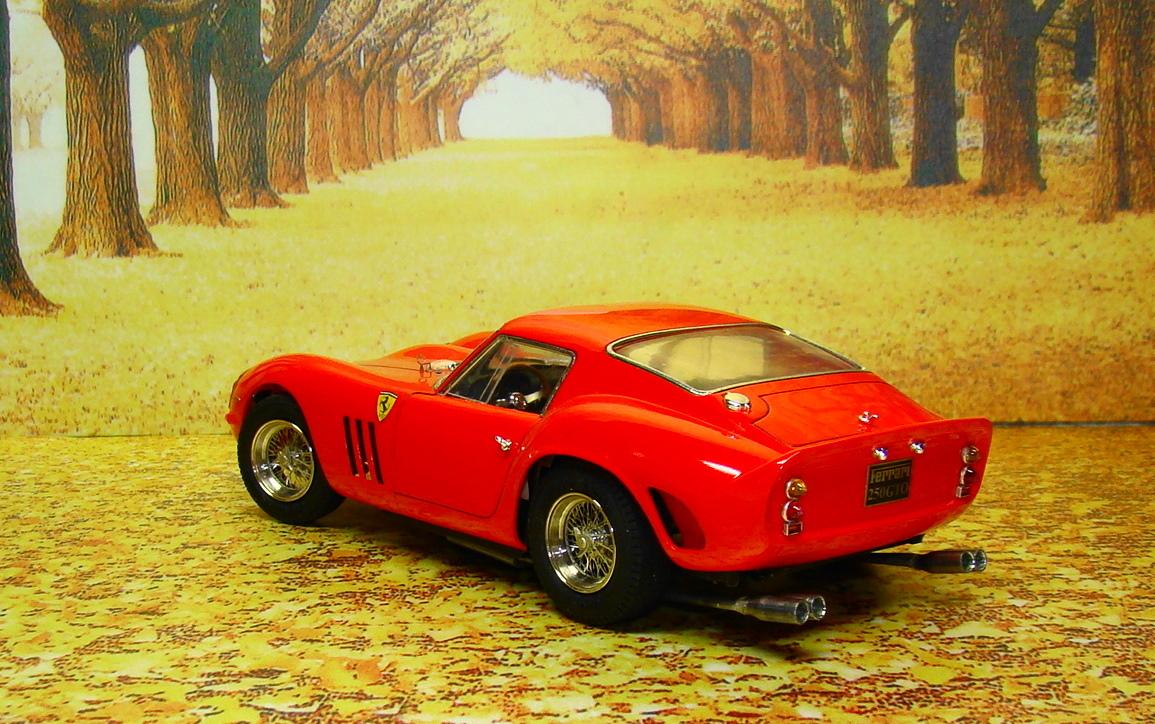
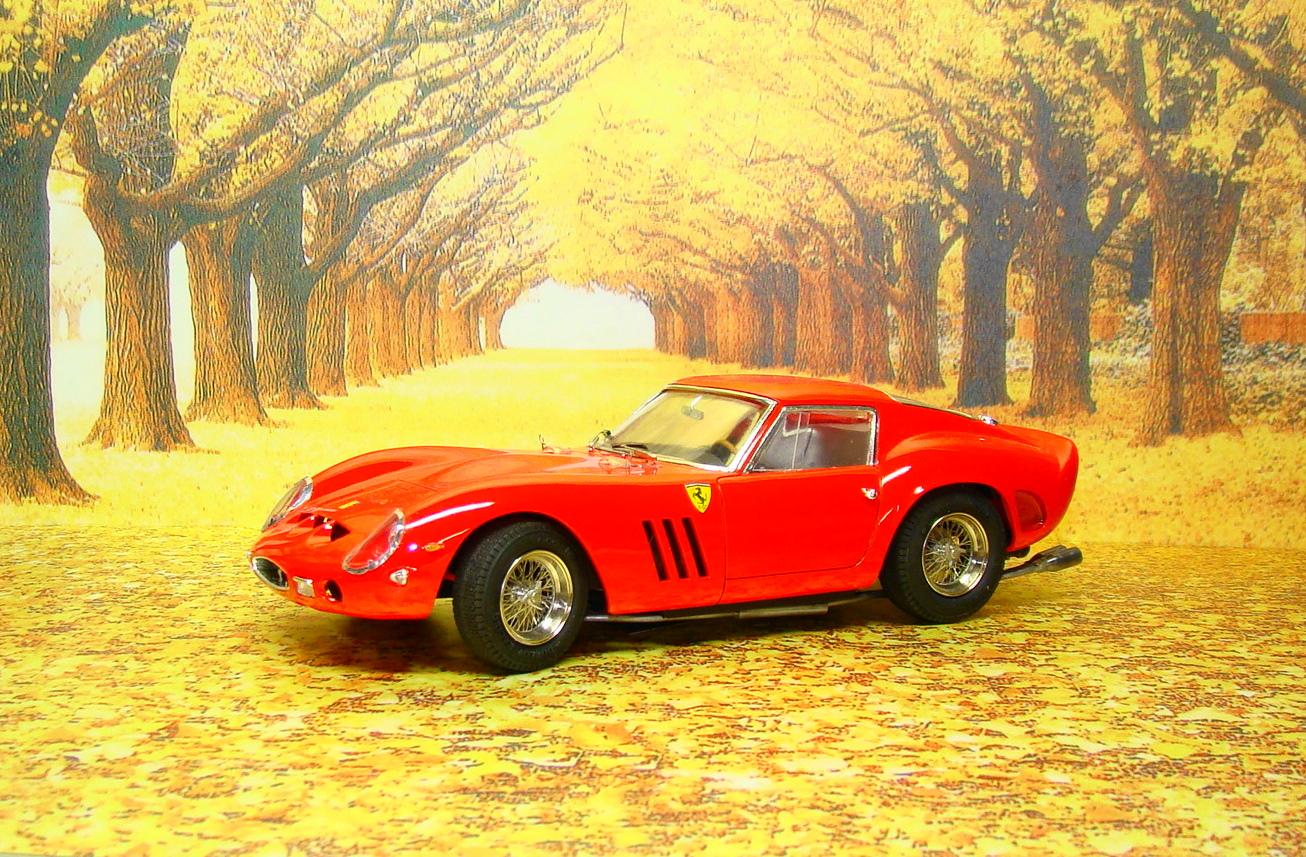
My first attempt with a background for photographs. Would like some help. In the past I have taken all my photos with just a white background. I have a Sony DSC-H7 that has a 15x optical zoom. Its great for very close detail shots. But I am still learning my way around the camera. I use the auto setting the most, and turn the macro on for my close-ups. I have tried several lighting sources. I also use a tri-pod. Here are some shots with my new background. It was purchased from http://www.modelalice.com/. The background was designed for 1/18 scale models. See the comments under each picture. This is my Gunze Hi-tech Ferrari GTO in 1/24. This is the angle I usually shoot at. Same car with a slightly lower angle. I like this 3/4 veiw of this particular model. A 1/18 scale diecast of the same Ferrari GTO, taken at my usual angle. 3/4 view of the diecast. I have raised the base and lowered the camera angle. Now the car doesn't look so lost in the background. I plan on using this for most of my 1/24 cars even though it was designed for 1/18 Last shot, changed the angle slightly again and played with the contrast, tone, and brightness. I like this one the best

-
Aoshima's Lamborghini Countach QV 5000
Rich Chernosky replied to Dann Tier's topic in WIP: Model Cars
Dann...thanks for this comparison. I don't have any of the Aoshima Countach's, but have done a couple of the Fujimi. I really like the Fujimi Enthusiast series and have just about every kit they have made, including all the Countach's. In particular I like the way Fujimi doors open and fit. I have two done. The rest of them are in a state of build with bodies done. I might consider an Aoshima after this. Yuda Mann -
Ford Escort RS1800 - '79 RAC Rally
Rich Chernosky replied to afx's topic in Other Racing: Road Racing, Salt Flat Racers
Nice clean build JC. The engine is a work of art all by itself. -
What the... I never introduced myself??
Rich Chernosky replied to Nells250's topic in Welcome! Introduce Yourself
Welcome to the site Jonelle. Took a look at your site and you have some terrific builds on there. I am a big Ferrari fan and yours are great. In particular you did a Fisher 312P resin and I posted the same kit here on July 1. You should build more...you have talent. -
Built models I found
Rich Chernosky replied to Howard Cohen's topic in General Automotive Talk (Trucks and Cars)
Every once in awhile you can get a real deal on hard to find kits in built models. You have a nice score there Howard. Is that MGB an Aoshima kit or a diecast...hard to tell. And the Howmet was a great find...looks like it was well built. -
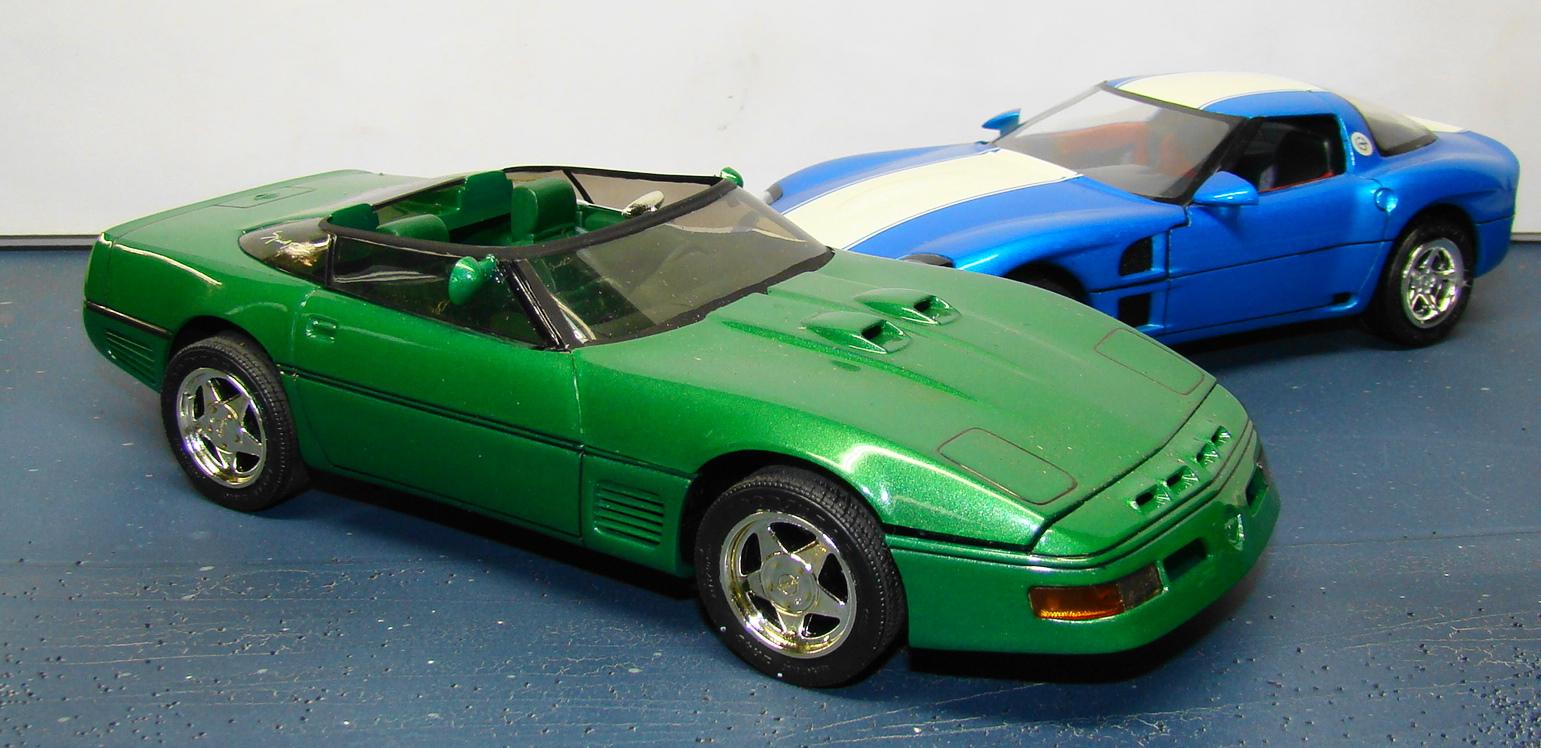
Here they are: in retrospect I probably should have paid more attention to the hood fit. Magnets might have been the answer. I used the box art for the paint scheme but disliked the nose treatment. The stripe is painted but the thin stripe is vinyl tape cut down. As long as I was digging these out I might as well show you the Callaway too. My Corvettes are usually a paint exercise and this one is a pearlescent yellow green. Interior is green to match. No notes on the Callaway.
-
Very nice build there JC. I have an entire shelf devoted to the Martini livery (about 40+) so yah...I'm a big fan.
-
Had to go into the archives for this. I have detailed build notes on most of my current builds.... this one included. The Guldstrand is an AMT kit I completed 5/10/04. Colour is Tamiya X-23 clear blue over and light pearlescent blue. The stripe was a special mix pearl white. All the vents were cut out and screens added, wheels steer on mine (pet peeve) and the hood is removable. It was a decent kit and other than those mods it was built box stock. It had the usual fit problems most domestic kits have. I also have the Monogram Callaway Corvette speedster in the collection.
-
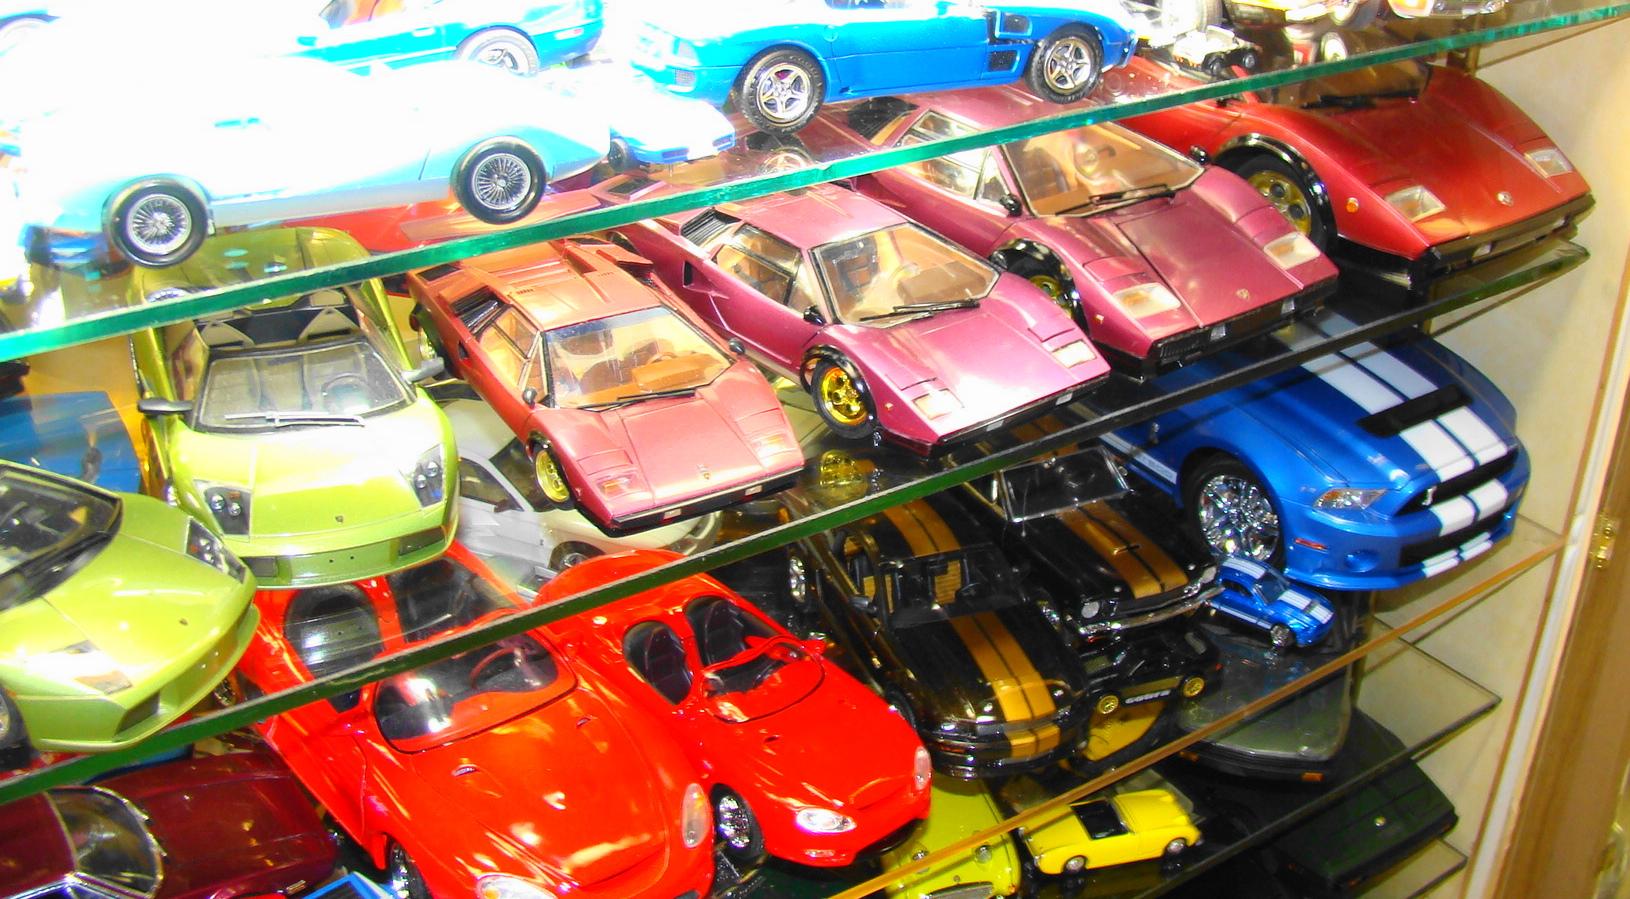
It sure is...you have a keen eye despite the glare. There is an entire shelf dedicated to Vettes above the Lambos (about 50 of em although I have more on another shelf) and below is the Mustang shelf (also about 50+) I believe the first Lambo in line is the Tamiya. The rest are 1/20, 1/16, 1/12
-
Dann...another veiw of the Lamborghini shelf. This time the Countach's. The Tamiya kit is in there somewhere. I did it when it first came out. Its kinda cool having the same model in 4 different scales.
-
A great kit and you did it justice.
-
Hasegawas Lamborghini Miura SV....new update!
Rich Chernosky replied to Dann Tier's topic in WIP: Model Cars
Dann...I am glad to see I am not the only one that is a big fan of the Miura. I have a whole shelf dedicated to Lamborghini's. Fell in love with the Muira in 1970 when I followed one into Watkins Glen track. There is a tunnel that goes under the track and the tradition is to pushyour clutch in and rev the engine so the sound just reverberates off the walls. It sounded a lot better than my Austin Healy. One of these Lambos is probably the kit you are working on but the interior is not as tasty as yours since it was built a long time ago. I have images of a friends Miura if you need them.
-
Nice builds Jerry and welcome to the group. Look forward to seeing more of your stuff.
-
Dann....as per usual your interiors are over the top. Much engineering and thought went into this. As one of my heros would say....aaaaahhh, much better.
-
Good looking model, I have built several of these and did not encounter all the problems you did. I fixed the wheel problem by bolting them on with jeweler screws. Glue didn't seem to hold them.
-
Very cool layout. A lot of thought and creativity went into this. Keep working at it...it gonna be great. A lot of the modelers on this forum are also slot racers and that includes me. Here is my 4 lane layout on a 8 x 40 table. Thanks for looking


.JPG.86000664f1a8bc5cdd55e086d599e0d3.JPG)
