Rich Chernosky
-
Posts
2,142 -
Joined
-
Last visited
Content Type
Profiles
Forums
Events
Gallery
Everything posted by Rich Chernosky
-
Lola T70 Mk1 Spider, Union (IMC), 1/24 (or 1/25, or maybe 1/27...)
Rich Chernosky replied to Matt Bacon's topic in Model Cars
Matt....that turned out superb. I followed your build in "on the Workbench" and will incorporate the mods into mine. This build was the incentive for me to search out and get the Fred Cady decal set for the Gurney 66 car. Now to find that Ford engine. Thanks again for posting it. -
Dave...thank you for the kind offer. Like many modelers on this forum I have a large stash...about 300+ , so I really don't know when I will get to it. And the Porsche section of my display cases is pretty full to boot. But ya never know when the fancy strikes...so thanks again. I will follow your posts....it just might be the incentive to dig into this project.
-
Italeri - Ferrari 275 GTS (Spyder N.A.R.T.)
Rich Chernosky replied to 89AKurt's topic in WIP: Model Cars
Great progress Kurt, luv your handmade vacuum form machine. I made one of those a long time back and it worked OK. But then i got lucky and scored a dental vacuum form machine. But you do what you gotta do with what you have and yours is excellent. Look f0orward to seeing more. -
Otaki 1/12 Lamborghini Countach Twin Turbo...Mission Statement
Rich Chernosky replied to Dann Tier's topic in WIP: Model Cars
Very cool Dann, luv what you did with the carbs and other engine detail. This is going to be great when painted. You are a plastic maniac. Keep it up. -
Thanks for putting this up. I just recently got this kit and your build notes will be of great value. I have looked this kit over and it kinda looks like one of Revells 1/24 kits only made in 1/16 scale. Your opinion would be appreciated.
-
Nice build on an old kit. Didn't know Airfix made one of these. I have the MPC kit.
-
Very cool paint job, well done.
-
Nice clean build.
-
I built this kit many, many moons ago. Early 70's I think. I have another boxed as a Union kit. Will be following this build as I have long wanted to re-visit it. Still looking for the Gurney decals that were once made.
-
Italeri - Ferrari 275 GTS (Spyder N.A.R.T.)
Rich Chernosky replied to 89AKurt's topic in WIP: Model Cars
Those Fujimi Ferrari Daytona Enthusiast Series kits were the best. I have both the berlinetta and spyder in my stash. Bodies are done with great paint jobs and I am just waiting for some room to open up in my Ferrari case to finish them. The wire wheels are some of the nicest to be seen in a plastic kit. I stuck the tires in a moto-tool and sanded the square edges off so they don't look so much like truck tires. -
Italeri - Ferrari 275 GTS (Spyder N.A.R.T.)
Rich Chernosky replied to 89AKurt's topic in WIP: Model Cars
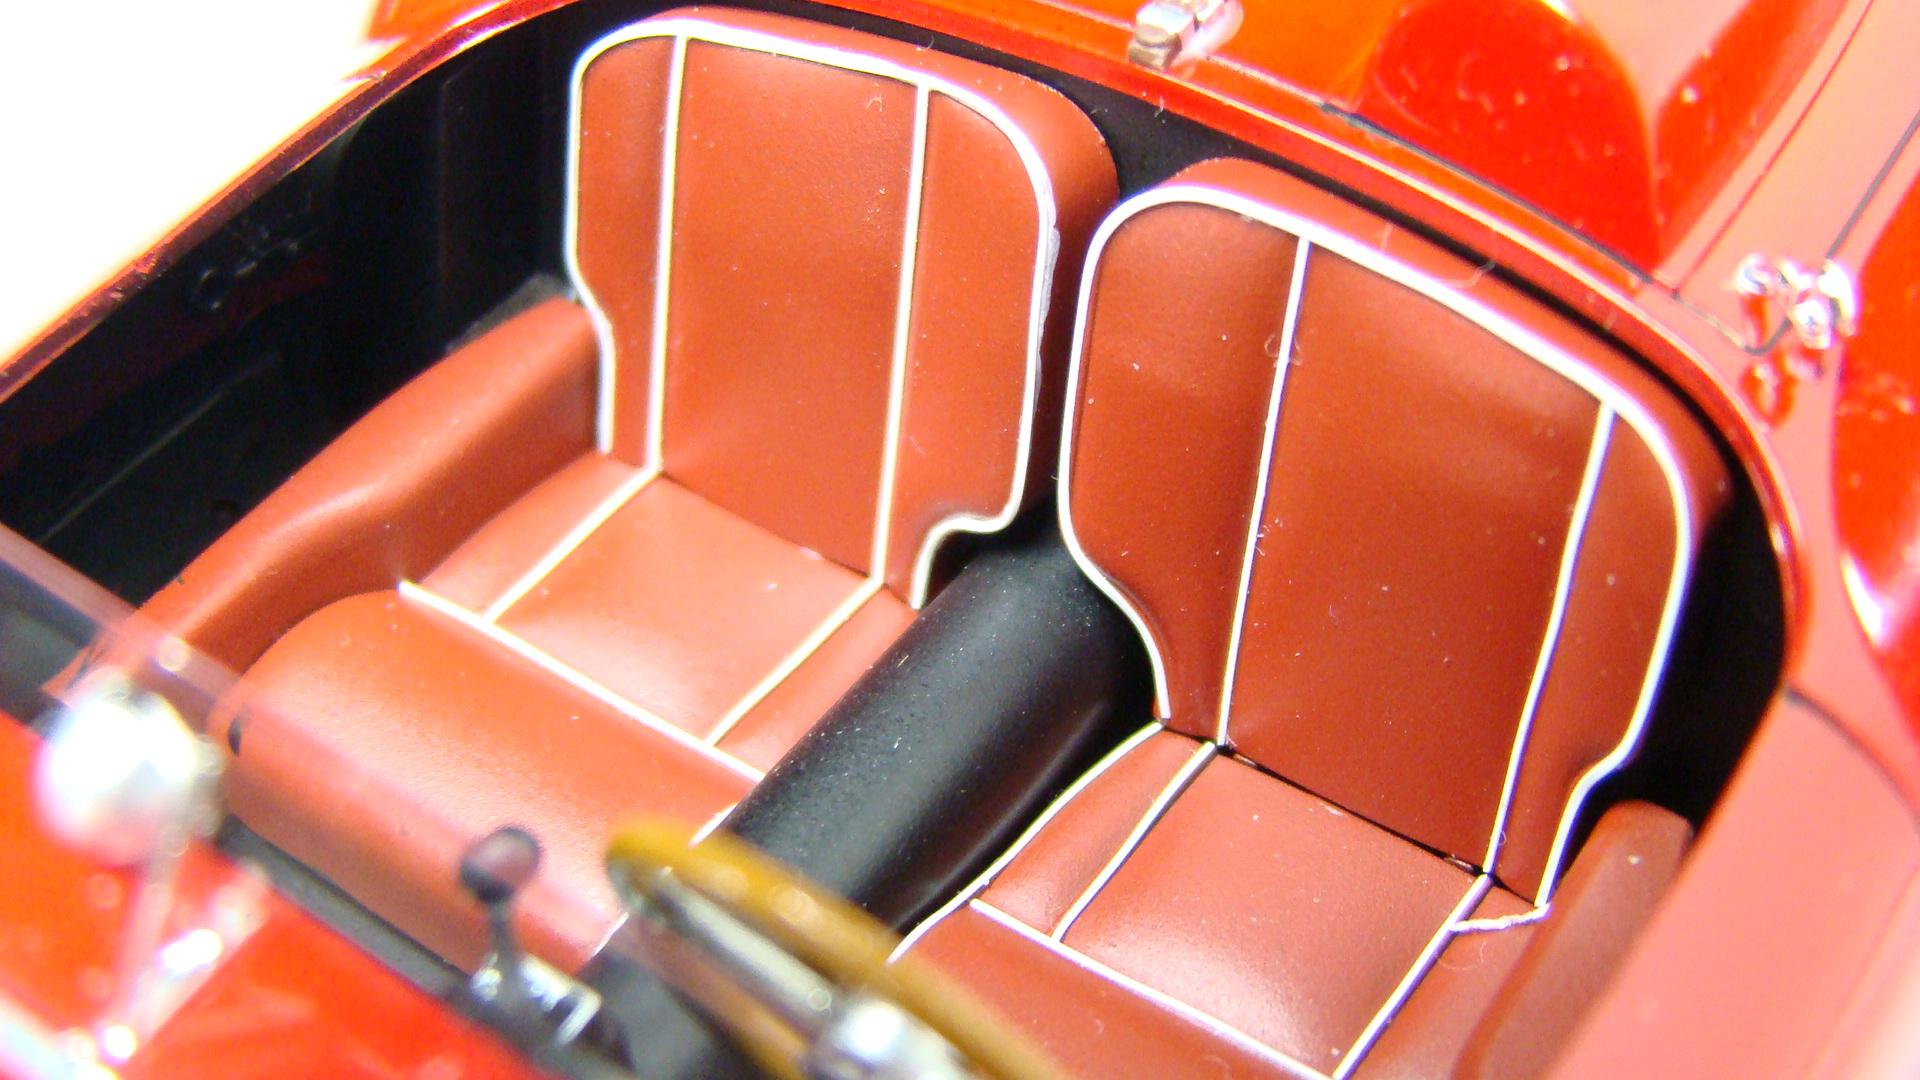
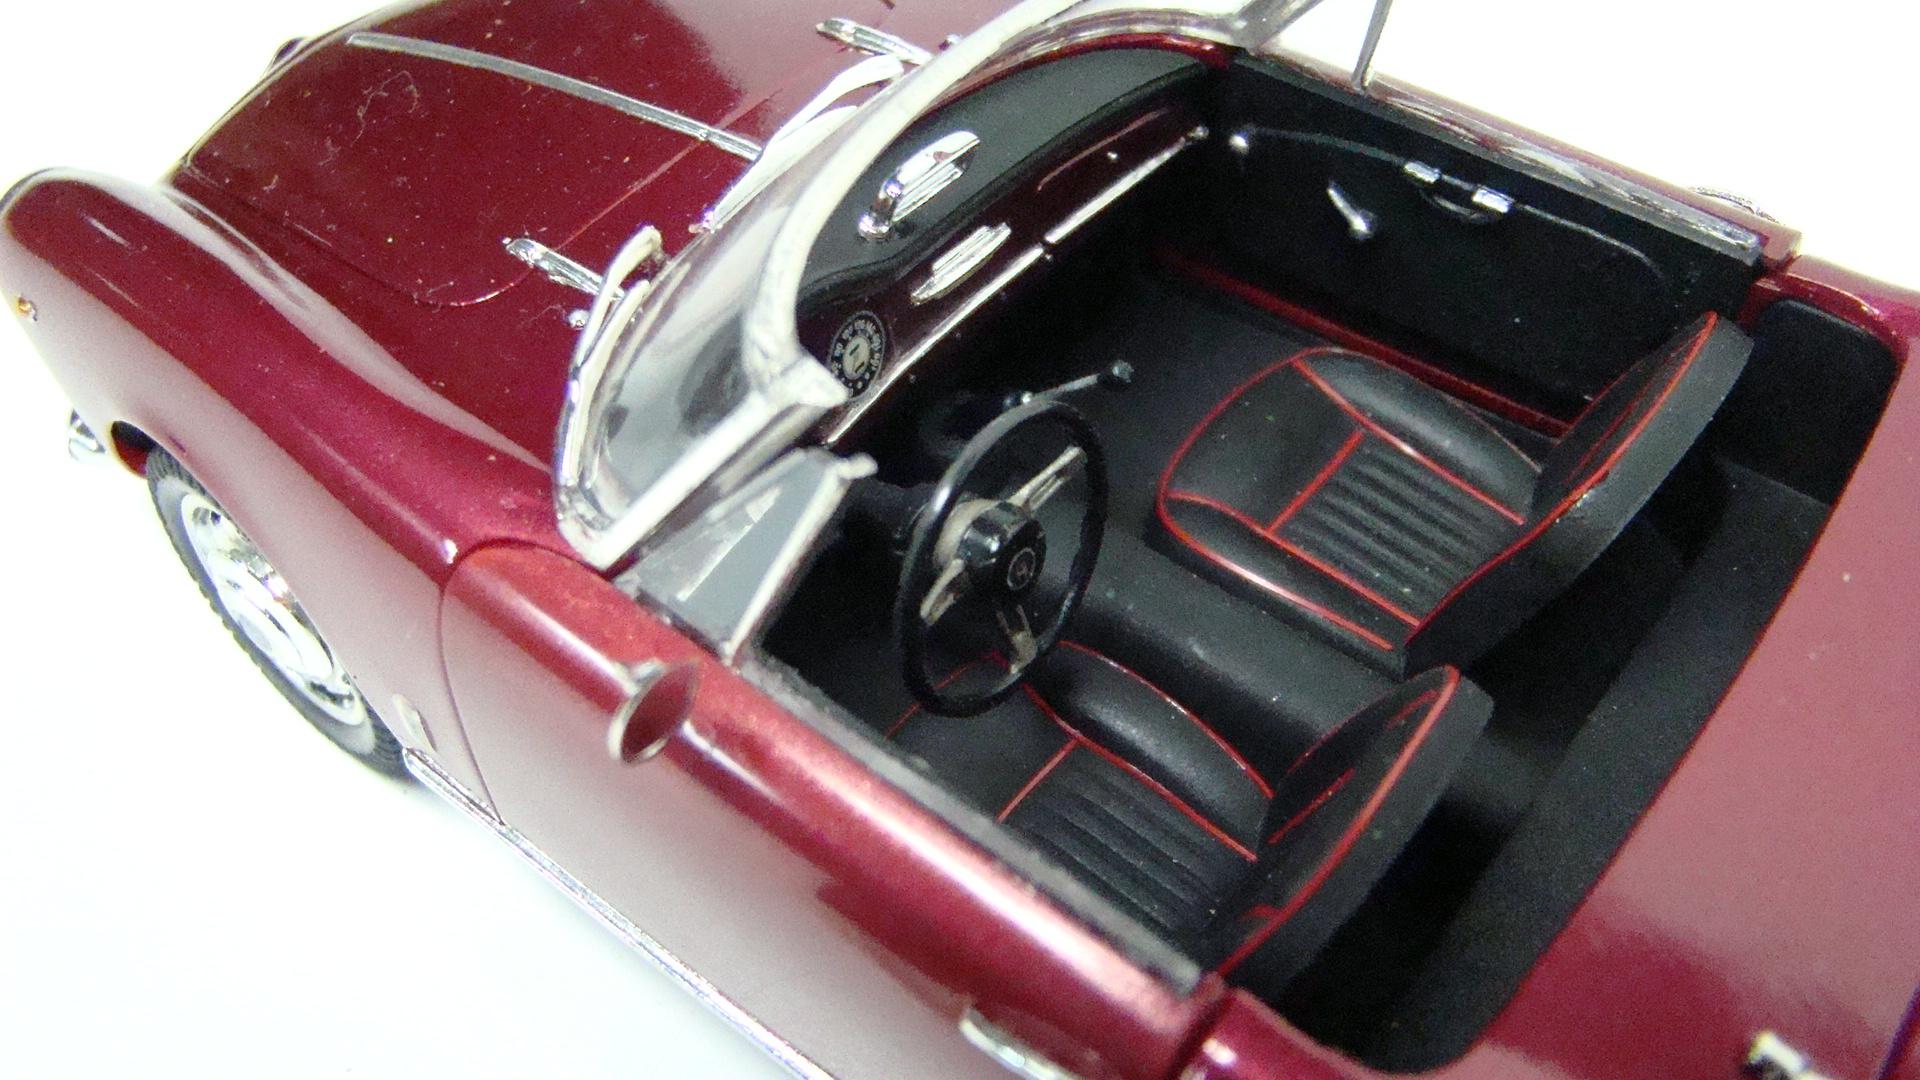
Kurt, hope you don't mind me posting these pictures. Luv what you are doing to the seats. These two are from my Hasegawa Testa Rossa build and a Protar Alfa Romeo. Both were done with vinyl tape. The tape was laid on a piece of glass and cut thin with a steel ruler and sharp knife. Takes a few cuts to get them consistent. Once stuck on they were sealed down with waterbase matte varnish to stop them from moving. Thanks for the update on this project. Its coming along great.
-
Its a Ferrari, what's not to like. Paint is very cool. Flourescents are very tricky, what did you use for clear..???
-
Re-engineering Monograms Lotus Esprit...new update!
Rich Chernosky replied to Dann Tier's topic in WIP: Model Cars
Dann....that is a great engine conversion you are doing. Good work. Of course, you do realize that Colin Chapman would be turning over in his grave if he saw it. Enzo probably would too. They were great rivals. -
Level of detail is incredible, if i didn't know it was a model I would swear it was real.
-
Very nice job, I recognize a lot of those parts. You did a great job combining them into a new and different model. I was at Watkins Glen when they filmed Gran Prix. They filmed all day and then used just 17sec of the film. James Garner could really drive a race car....it showed. He did all his own driving.
-
Thank you Brett and welcome to the group. You are always welcome here.
-
A big welcome to my good friend Brett. A frequent visitor to my shop and a long standing email friend. A lot of information has passed hands here and I am sure you will be a welcome addition to all the talent found on this site.
-
Dave...let me know if you ever decide to tackle it. I keep extensive build notes and am happy to share. This kit was not without its problems.
-
Otaki 1/12 Lamborghini Countach Twin Turbo...Mission Statement
Rich Chernosky replied to Dann Tier's topic in WIP: Model Cars
Dann....great to see you back at this project. Attention to detail right down to the wing nuts...unbelievable. -
Thank you for the compliment, Gary. You are not the only one to tell me that. That is why I take all those detail photos.
-
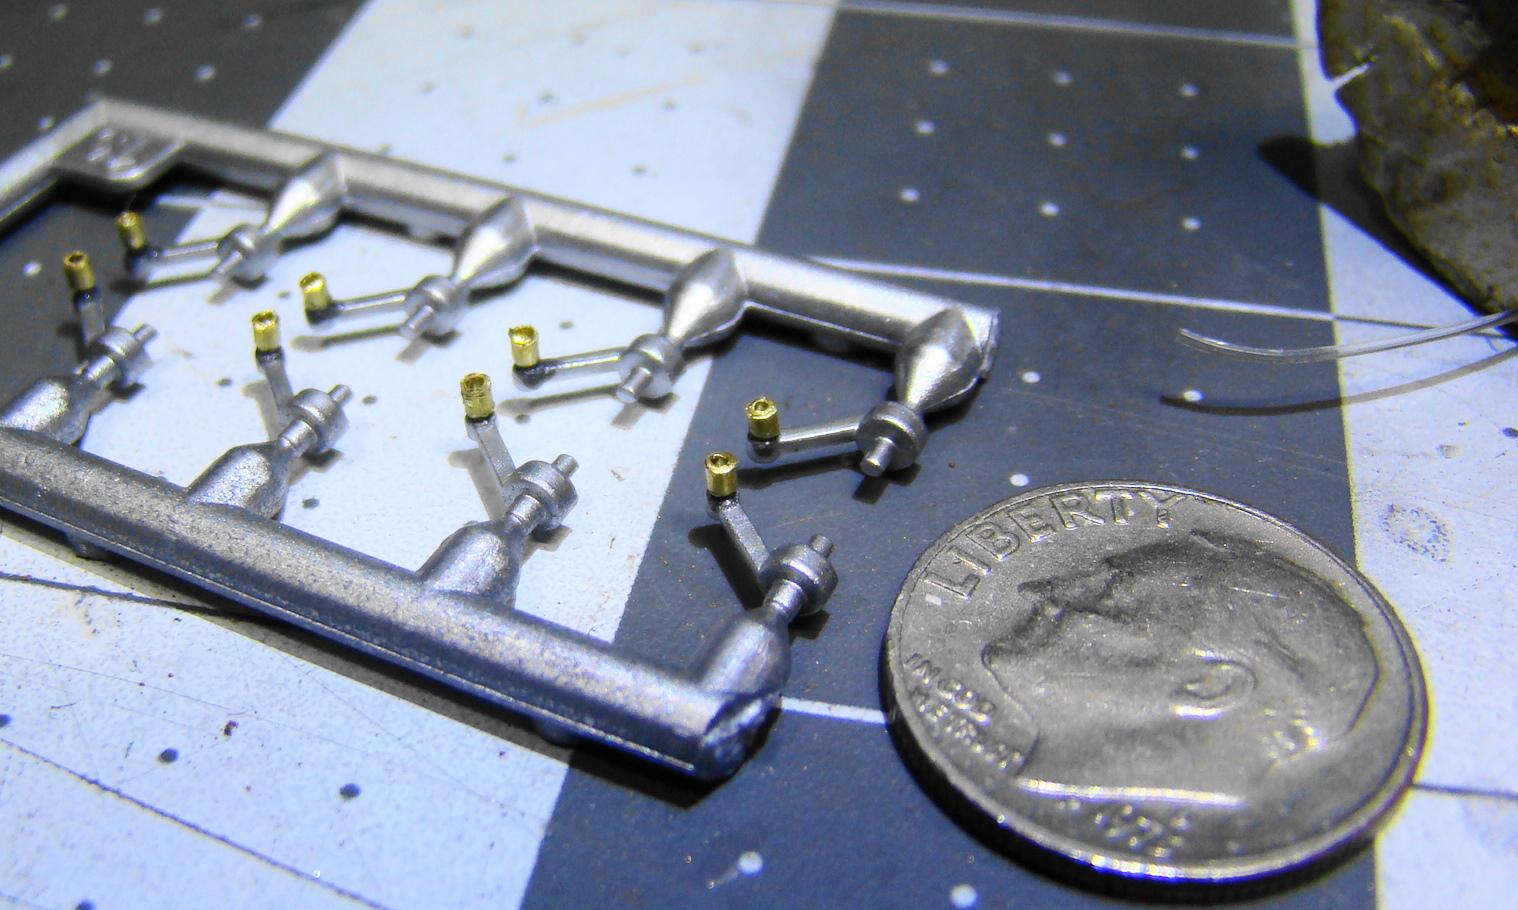
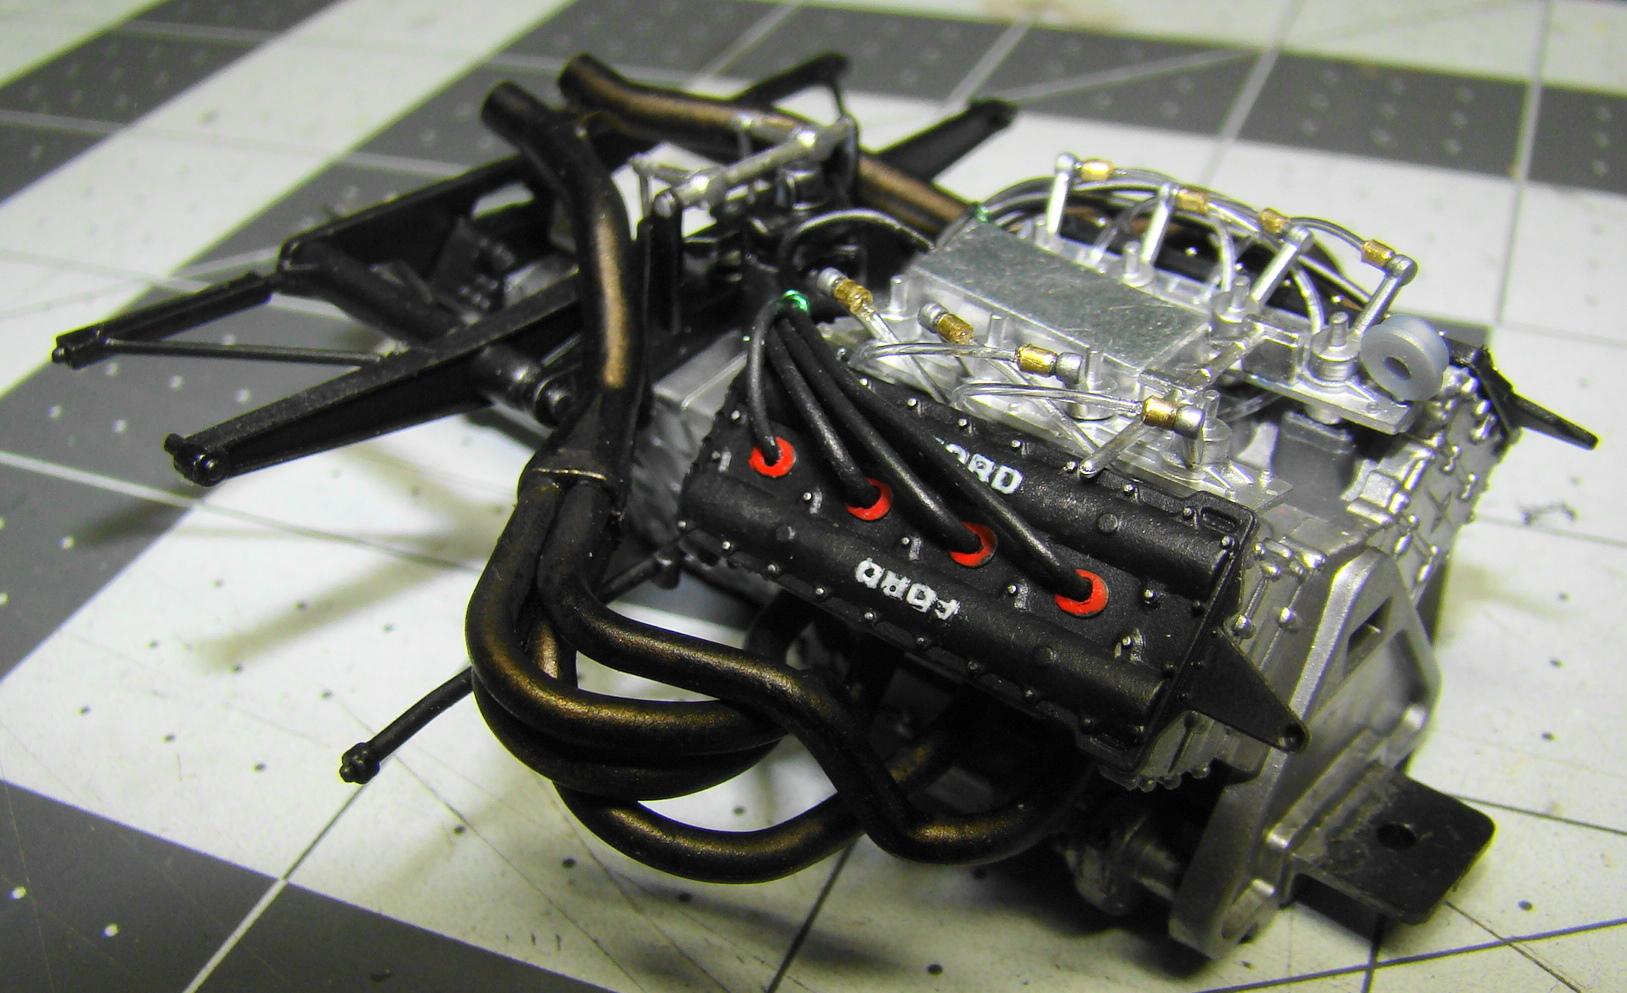
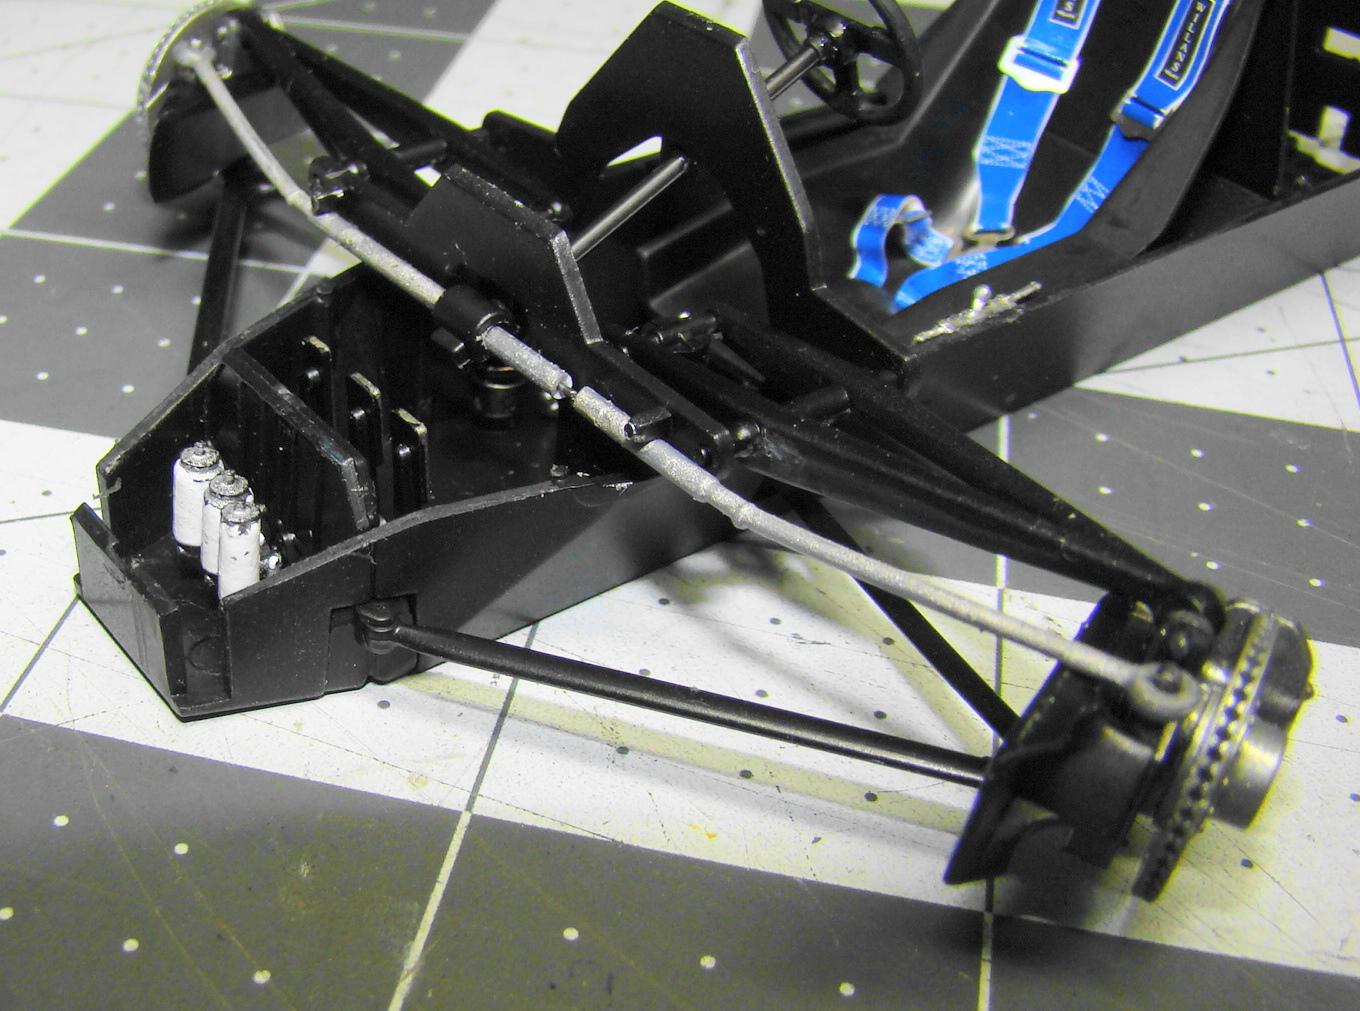
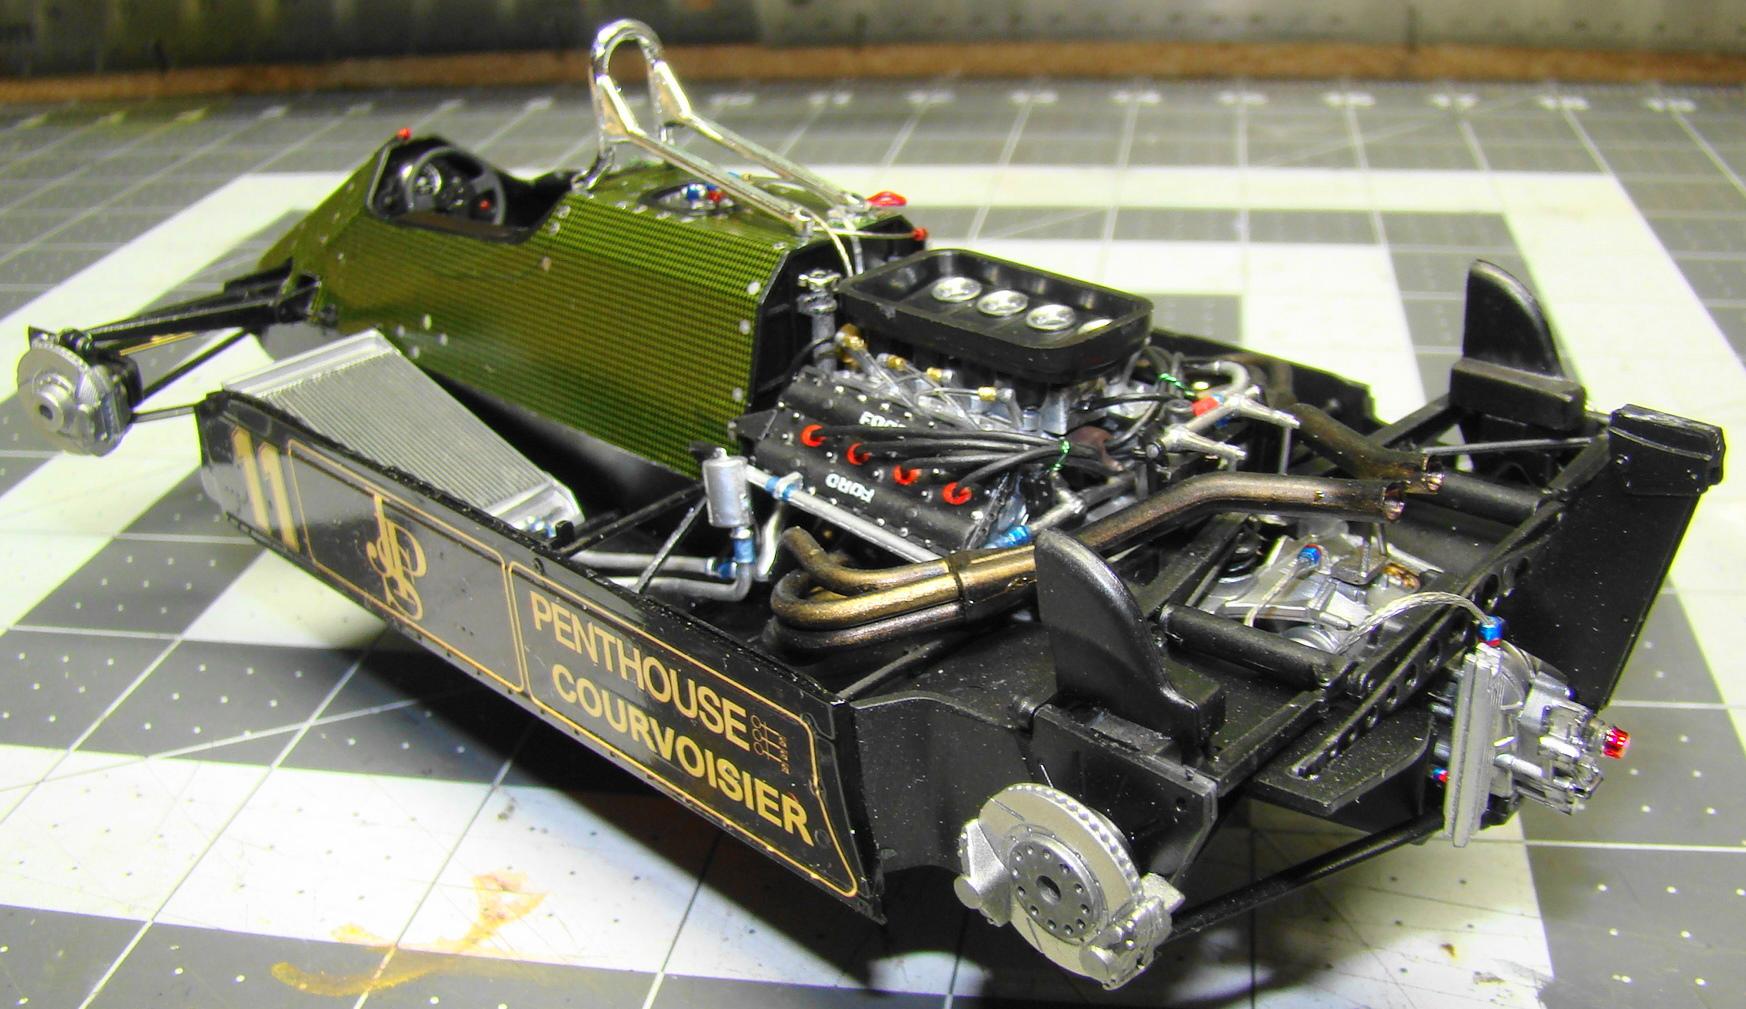
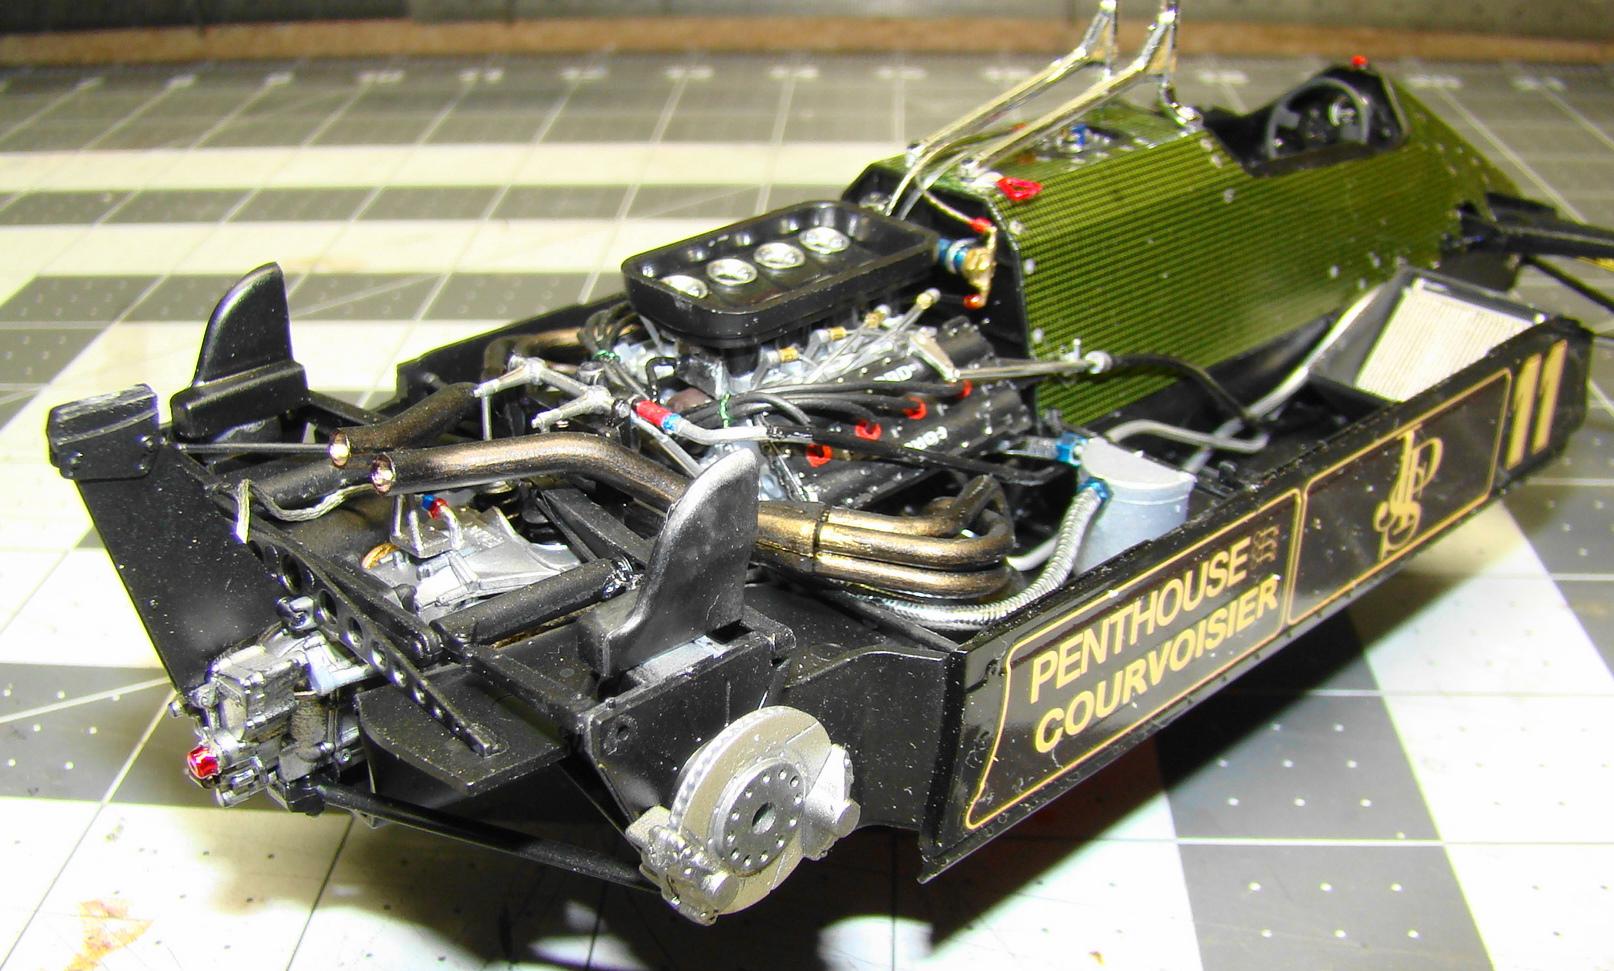
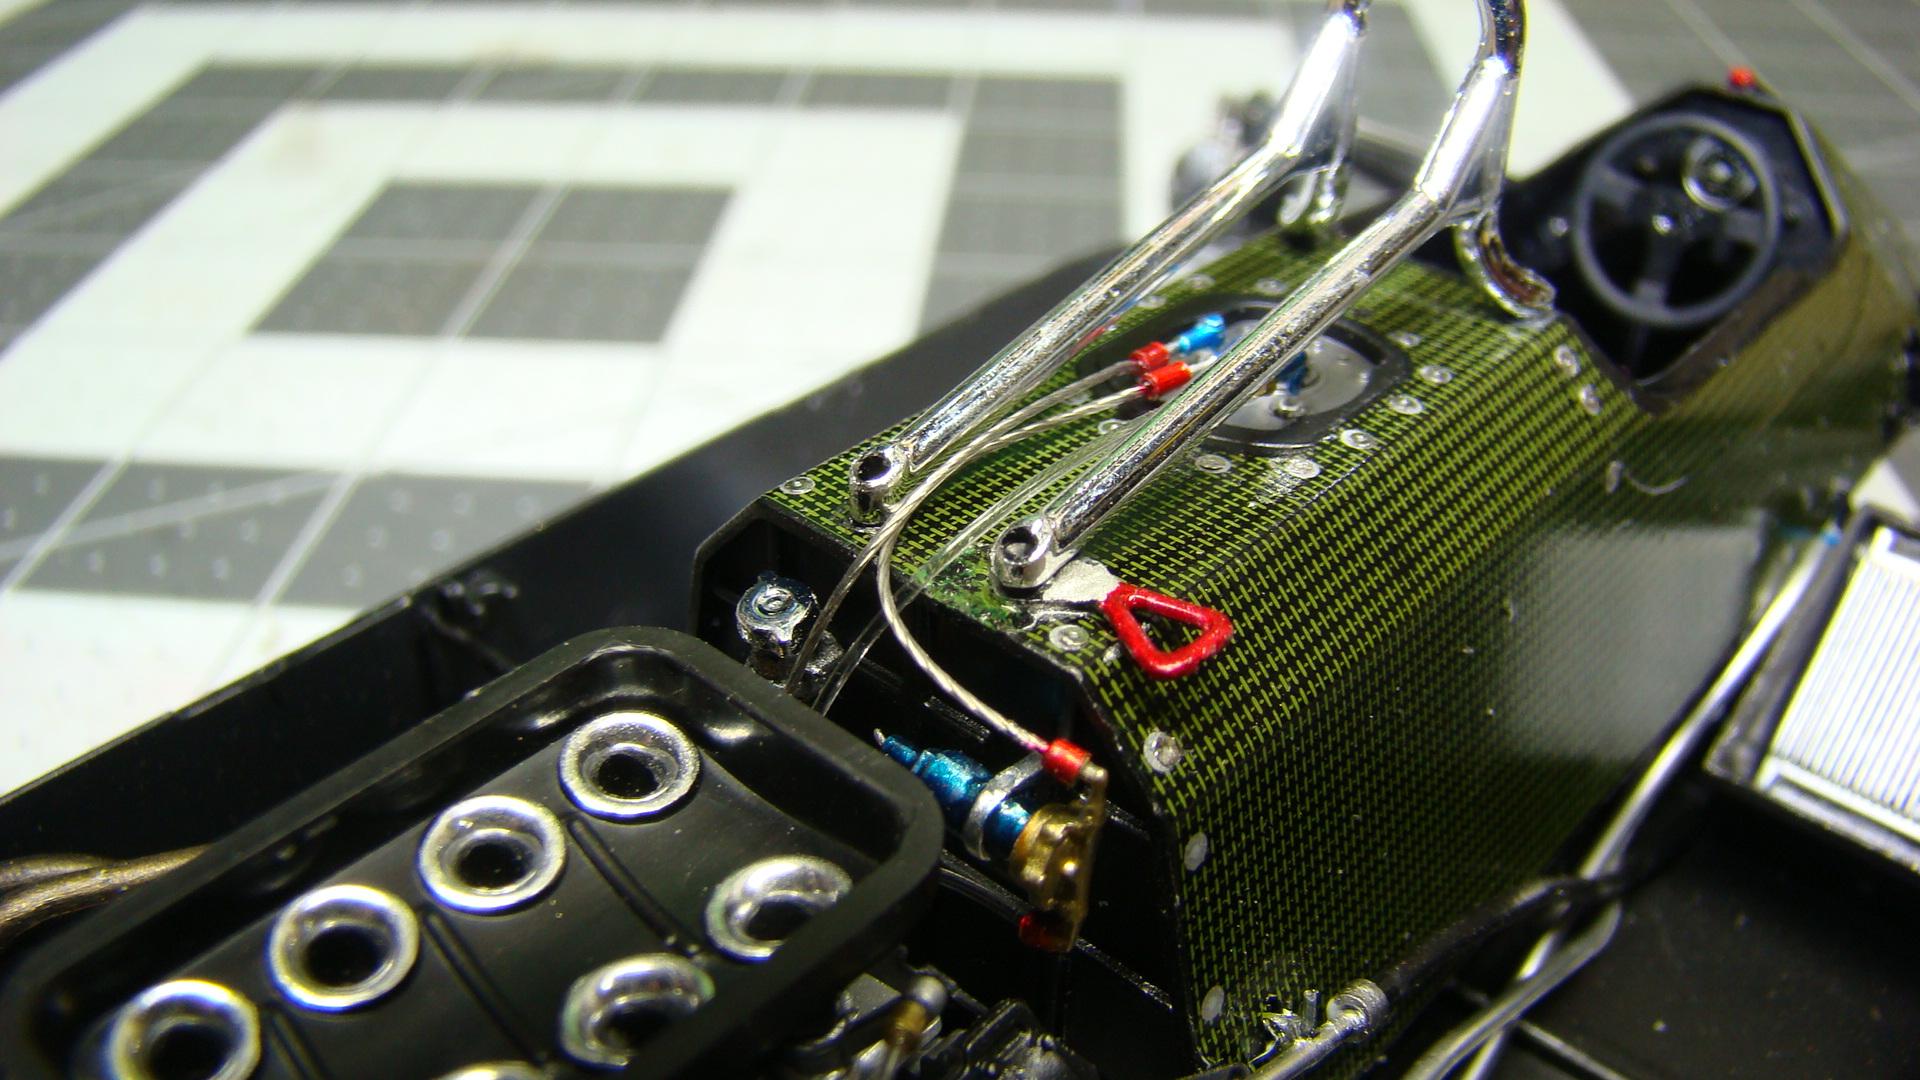
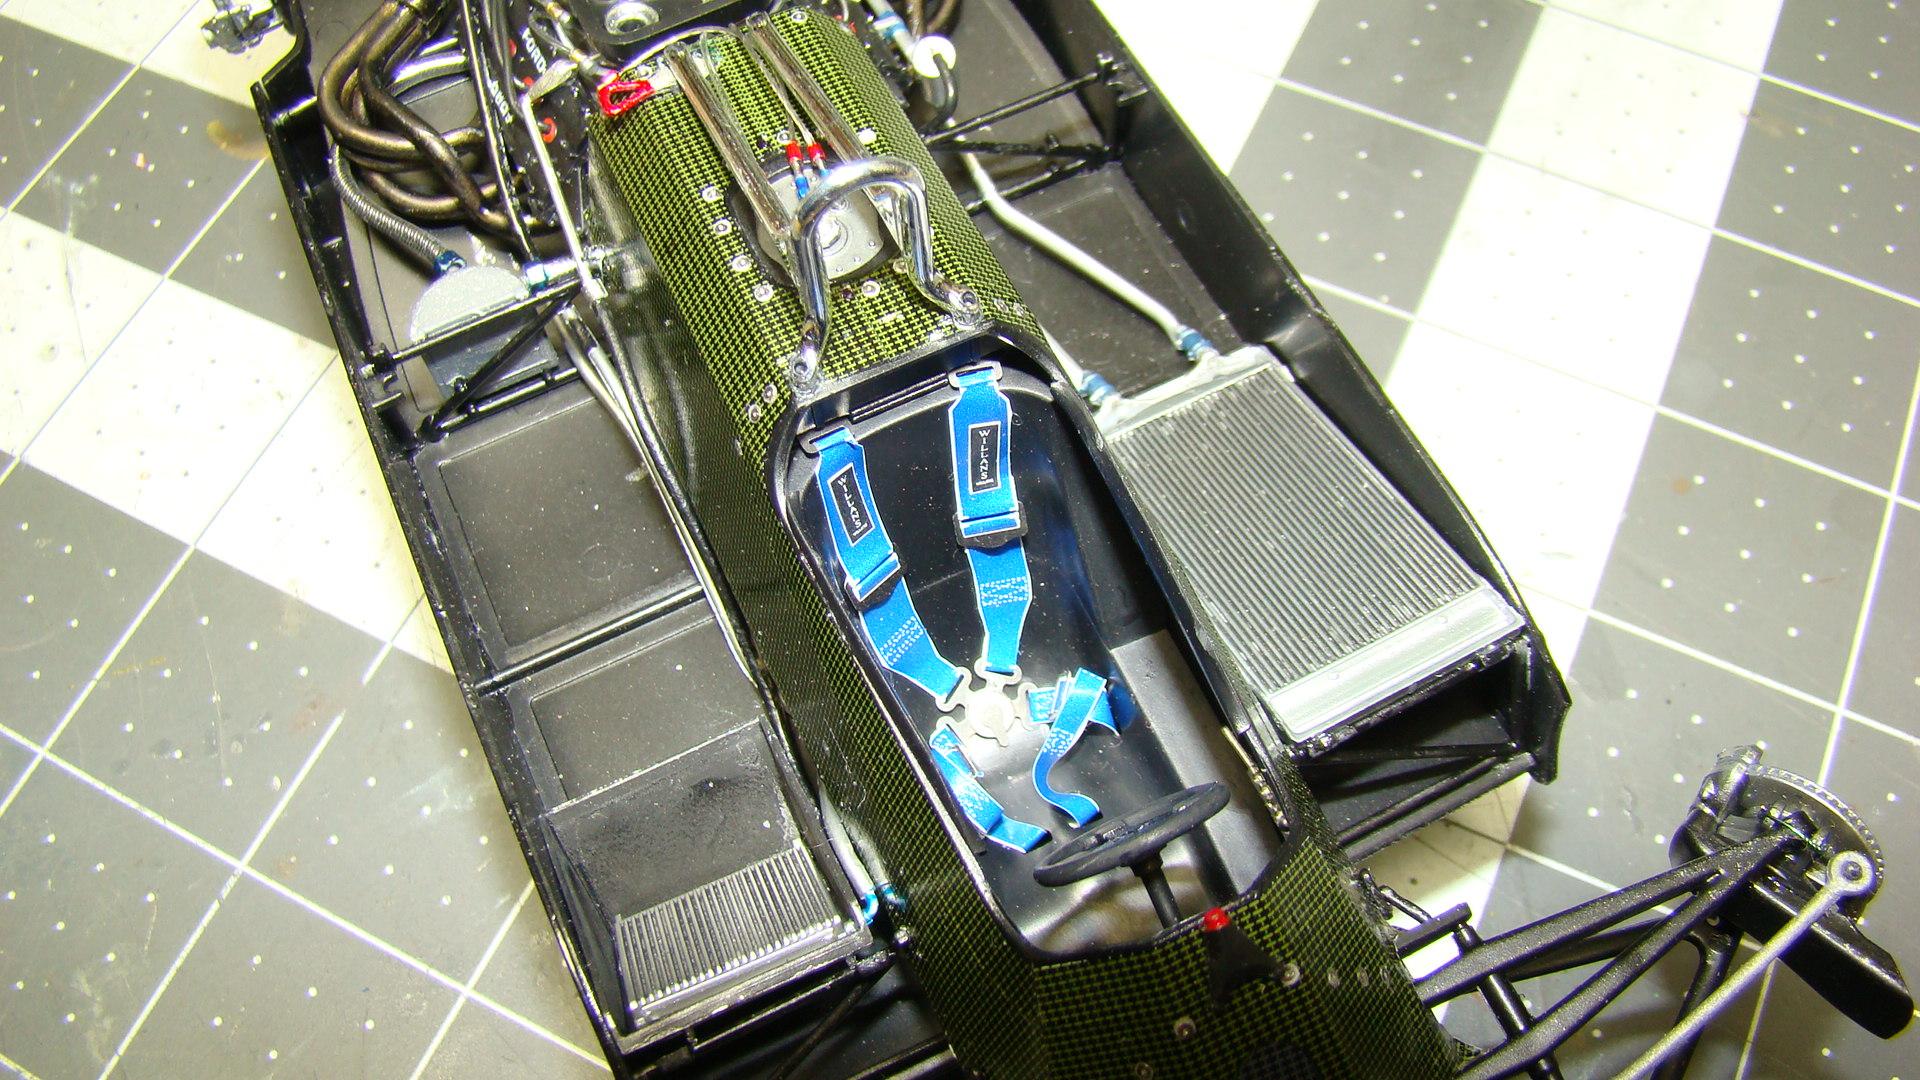
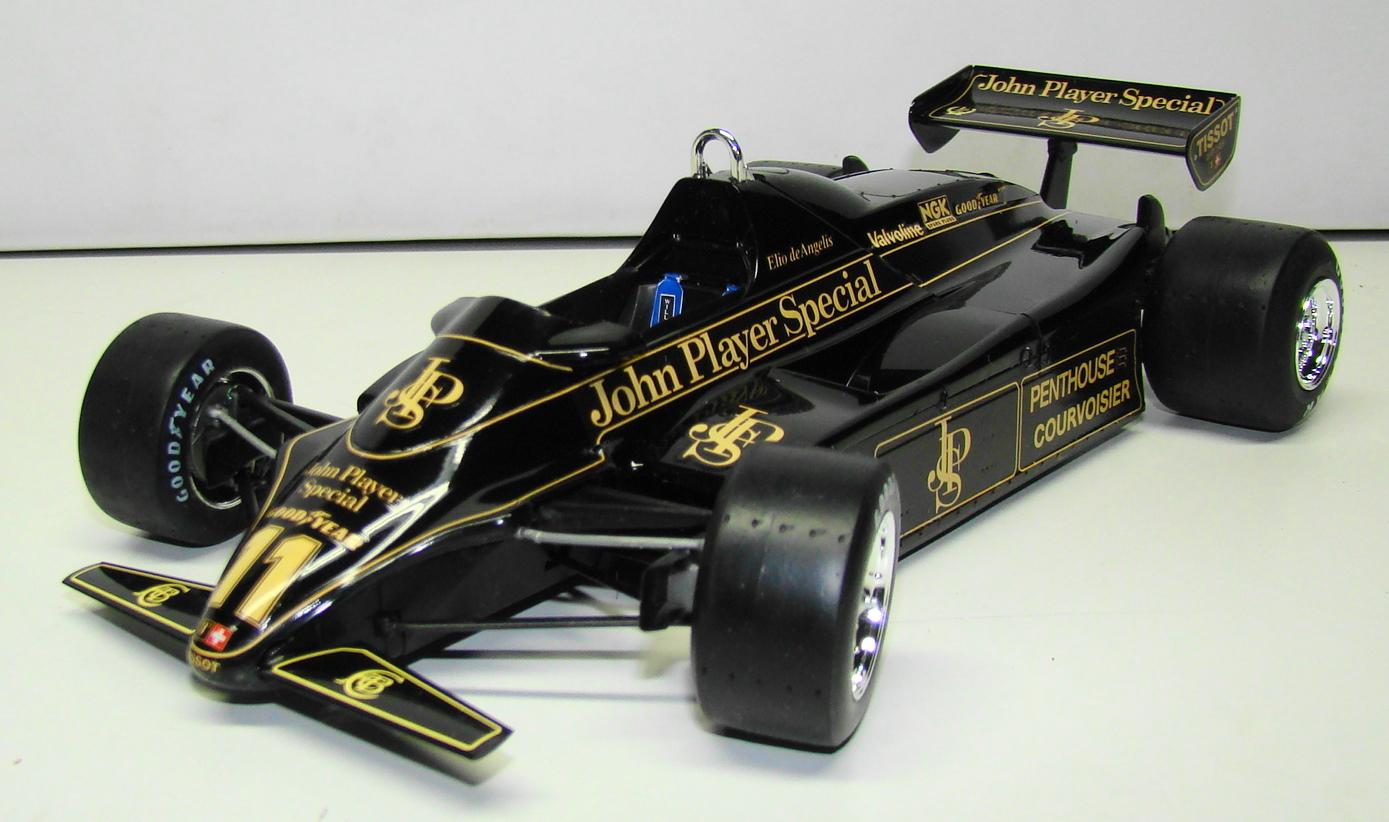
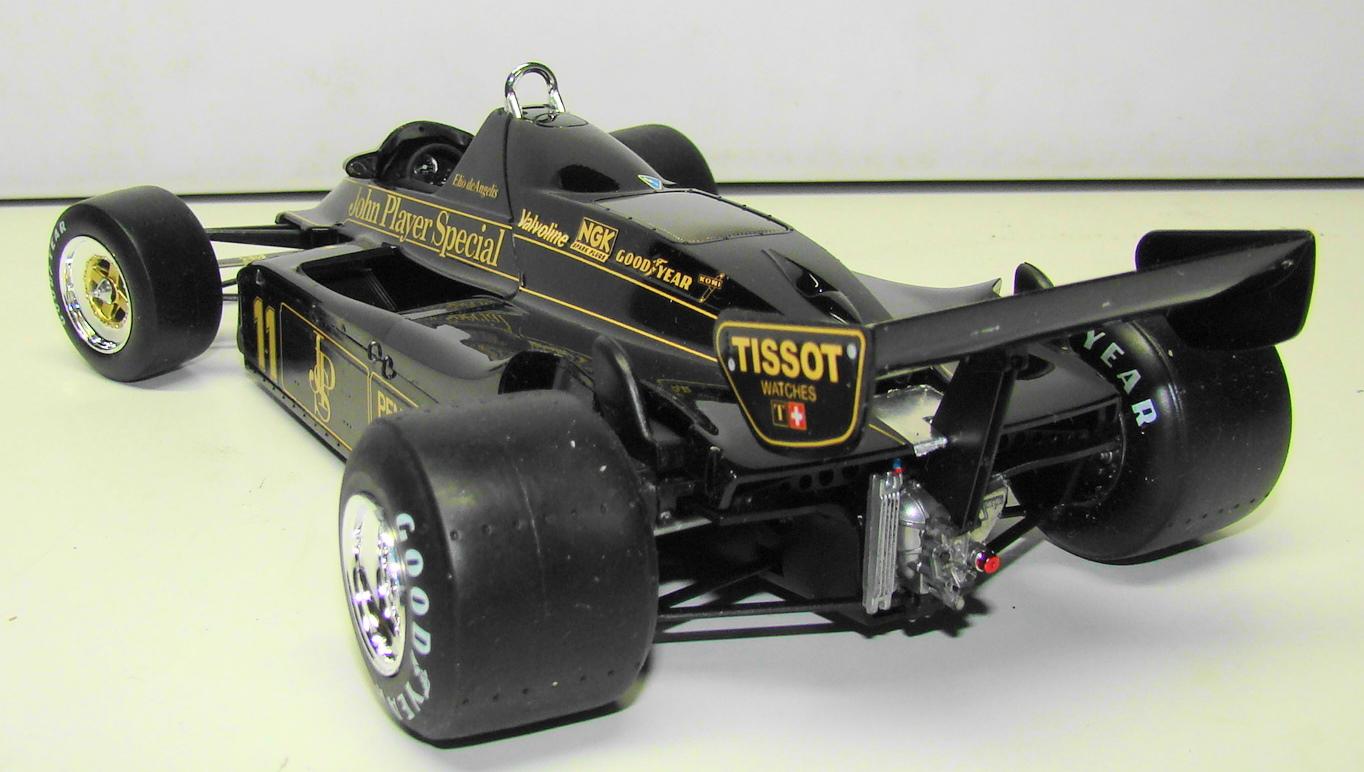
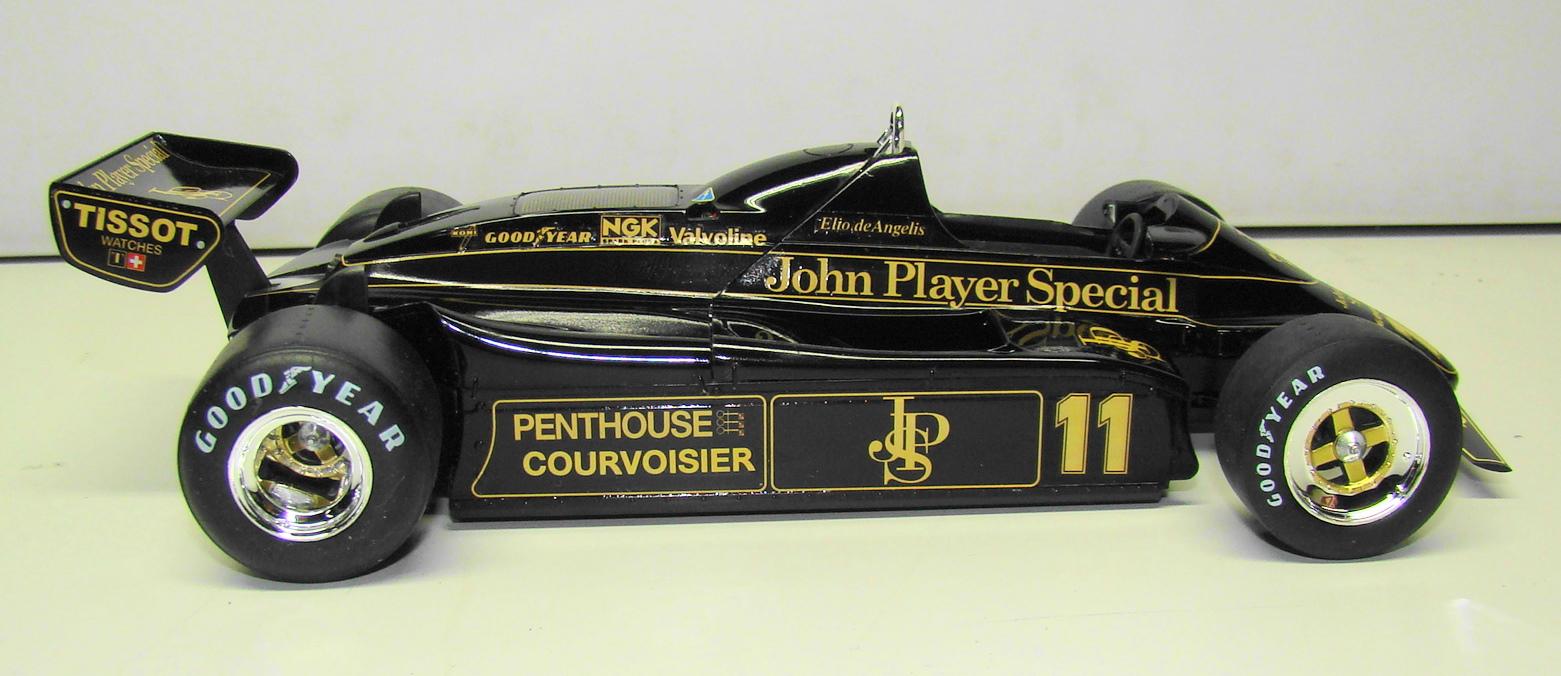
Just off the bench is this Lotus 91 form Ebbro in 1/20 scale. Mostly box stock with added details like correct sponser decals by Indycals, seatbelts and many scratchbuilt lines hoses and linkages. Can't say this was the easiest kit to build. Several obstacles had to be overcome. Body fit was very tight. Getting the front clip on required much grinding and cutting. And that was to just get it into place without much force. U shaped pins made from .020 wire had to be used to secure the upper panels in place. Not proto-typical but necessary to get a decent looking finished model. Pictures tell the rest of the story. Thanks for looking. Note: this was the last Colin Chapman designed Lotus. Elio DeAngelis recorded his only F-1 win in this car at Austria in 1982. Fittings made from 1mm brass tube. Only 1mm long these requred a special technique to cut and drill to fit. Engine wired and fuel lines installed. Lines are made from .o10 clear. hanger tread front suspension installed. Note -the tie rod had to be cut and a steel rod added to adjust the track. Engine all snuggled into the chassis and extra details added. Other side of engine installation Fuel tank lines, very delicate work , those lines and fittings are very small, Seat belts from Tamiya On its wheels at last Business end of the racer Side view, note the tiny clips holding the body down and carefully painted black to hide them.
-
Taking a break from NASCAR - trying this one out
Rich Chernosky replied to Vietnam Vet67's topic in WIP: Model Cars
You will enjoy this kit. Decals are a little tricky but not bad. I painted the large red areas of the decals and just used the stripe part. Its your call though. -
Absolutely stunning paint jobs. This Tamiya kit is one of their better ones and you have done them both justice.
-
Great job, your work is always a pleasure to see. Thanks for posting.