Rich Chernosky
-
Posts
2,141 -
Joined
-
Last visited
Content Type
Profiles
Forums
Events
Gallery
Everything posted by Rich Chernosky
-
I like it, great idea.
-
Great looking build. The added details like shocks and CF are excellent. I am a huge Ferrari fan and you did this kit justice.
-
Very nice build, Like the color combination and choice of wheels.
-
Autokits Lotus and Ferrari Trading Places ...
Rich Chernosky replied to absmiami's topic in WIP: Model Cars
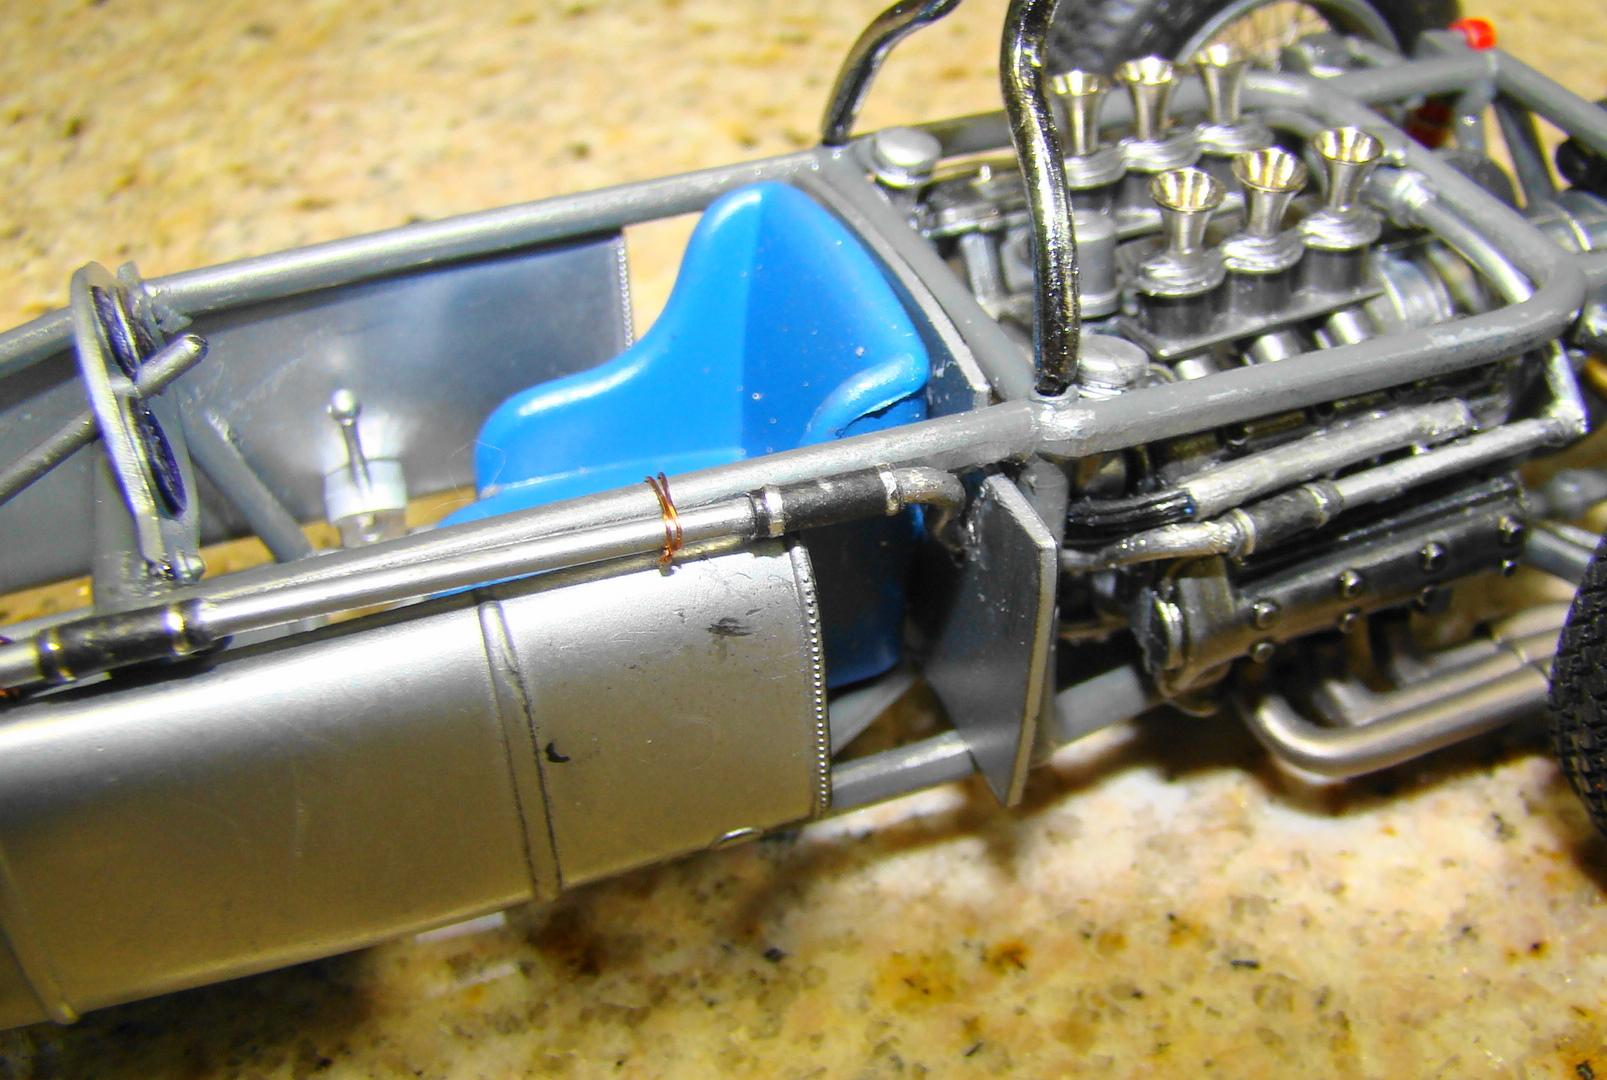
Andy, Thanks for putting this up. It is going to be great fun doing this. I have already started with just a few things. Mostly looking the kit over in great detail. Some body seams cleaned up and cutting out the openings for the rear engine screens. I don't plan on going to quite the great lengths as Andy but there will be many modifications for sure. I plan on fabricating most of the suspension and coil over shock units, cutting open the engine cover and detailing the engine as much as possible. Filling in the seam between the upper and lower body panels will be a must. After market wheels and tires have already be obtained many years ago. We traded these kits in 2010. Most of my reference will come from my experience with the Revival 1/20 version of this car. Shown is the built model I did in 2011. There is also plenty of reference on this car on the web as it is a heavily modeled subject. Not in 1/24 but both CMC and Exoto have done this in 1/18. The chassis on this kit was very detailed to begin with but I added a few extras I am not new to making these screens.
-
Cooper barn find
Rich Chernosky replied to absmiami's topic in WIP: Other Racing: Road Racing, Land Speed Racers
Looked at mine the other day and there is not much to change since they used only one engine. Probably scratchbuild a lot of the suspension as the metal will probably not support the wieght of the finished model. I am more concerned about the seam between the two halfs. I did the 1/20 revival version of this car and the seam was not a problem because the body fit well and it looked like it belonged there. Also all the interior has to be finished before the body goes together and i am just not used to this technique, so doing these at the same time will be a huge help for me. -
Cooper barn find
Rich Chernosky replied to absmiami's topic in WIP: Other Racing: Road Racing, Land Speed Racers
I have an email pal who has built one. Specifically the Ferrari. He is not on this forum but I can contact him for info and post it. He is in Germany and it takes awhile for him to respond. -
Great build Scott. I was glad to be part of it. Awesome pictures, and amazing attention to detail. I wanted this kit and one was recently for sale but I was outbid by $50.....Oh well.
-
Very nice build, the added picture is a great idea.
-
Cooper barn find
Rich Chernosky replied to absmiami's topic in WIP: Other Racing: Road Racing, Land Speed Racers
Yes....that's the one. Sounds like a great idea. I post here on "under glass" all the time so it should be no problem with pictures and text. -
Cooper barn find
Rich Chernosky replied to absmiami's topic in WIP: Other Racing: Road Racing, Land Speed Racers
Aaahh..you remember. I am still on the commitee but I don't host a show there. I let the Motor Racing Research Center have my show and they hold it in the early part of April. Did you ever finish that AutoKit Lotus I traded with you. I have worked on the Ferrari but have yet to finish an Autokit. -
Cooper barn find
Rich Chernosky replied to absmiami's topic in WIP: Other Racing: Road Racing, Land Speed Racers
Andy....good to see you are still active. You are doing some interesting work here. I have this kit in my stash, along with a few other Merits, so i will be watching your progress with interest. -
Very nice, I remember doing this kit many years ago and had to replace the decals too.
-
Fisher 1/24 Ferrari 365P White Elephant.
Rich Chernosky replied to Rich Chernosky's topic in Model Cars
Thanks for the compliment Dave. I also have the Matra to do and the multi colour paint job looks to be a real challenge. I'll race ya.... -
Nice clean build and the color looks great. Keep up the good work.
-
Fisher 1/24 Ferrari 365P White Elephant.
Rich Chernosky replied to Rich Chernosky's topic in Model Cars
Thank you Gary, especially for the reference disc, which was an invaluable aid to finishing this kit. Yes....the shovel did come with the kit and it looks like it was very much needed according to some of your reference pics. If I remember correctly this was standard equipment on many cars at the time. The drivers were not allowed outside aid. -
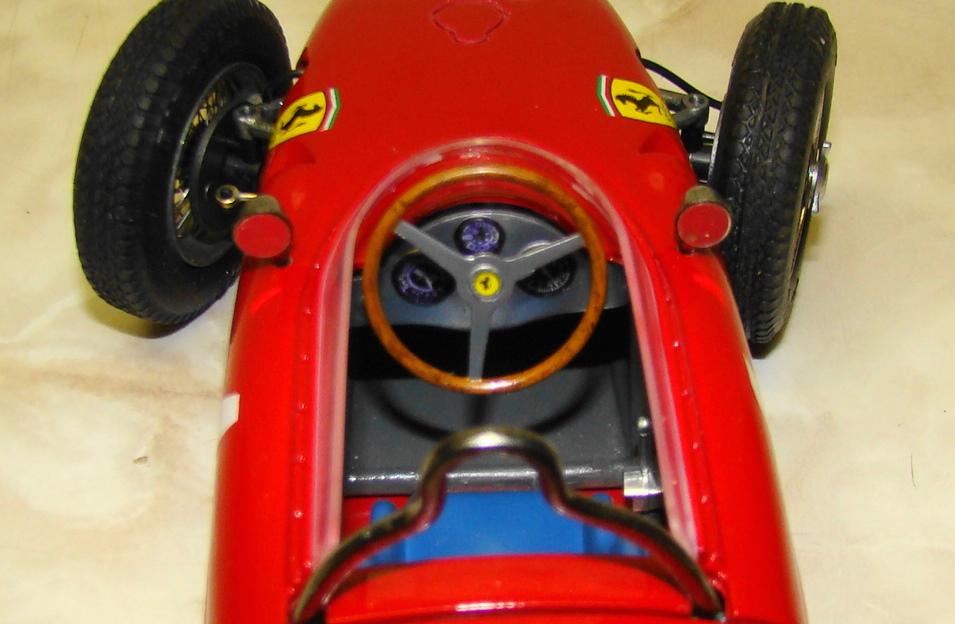
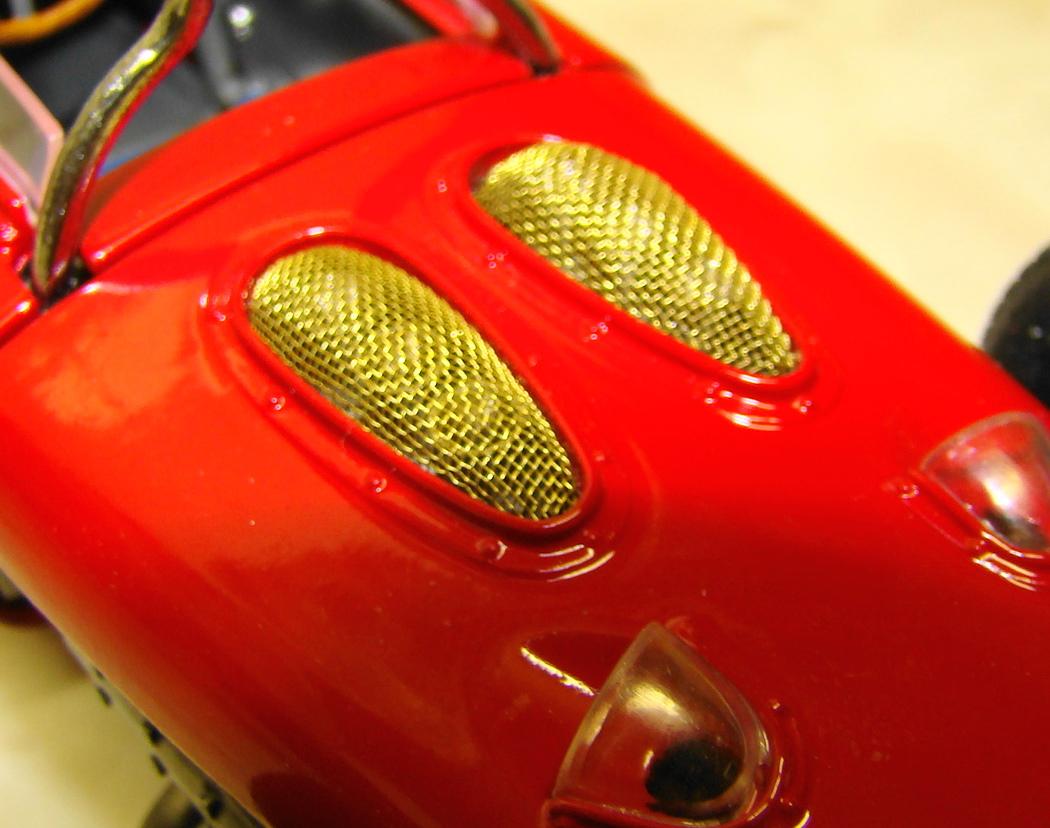
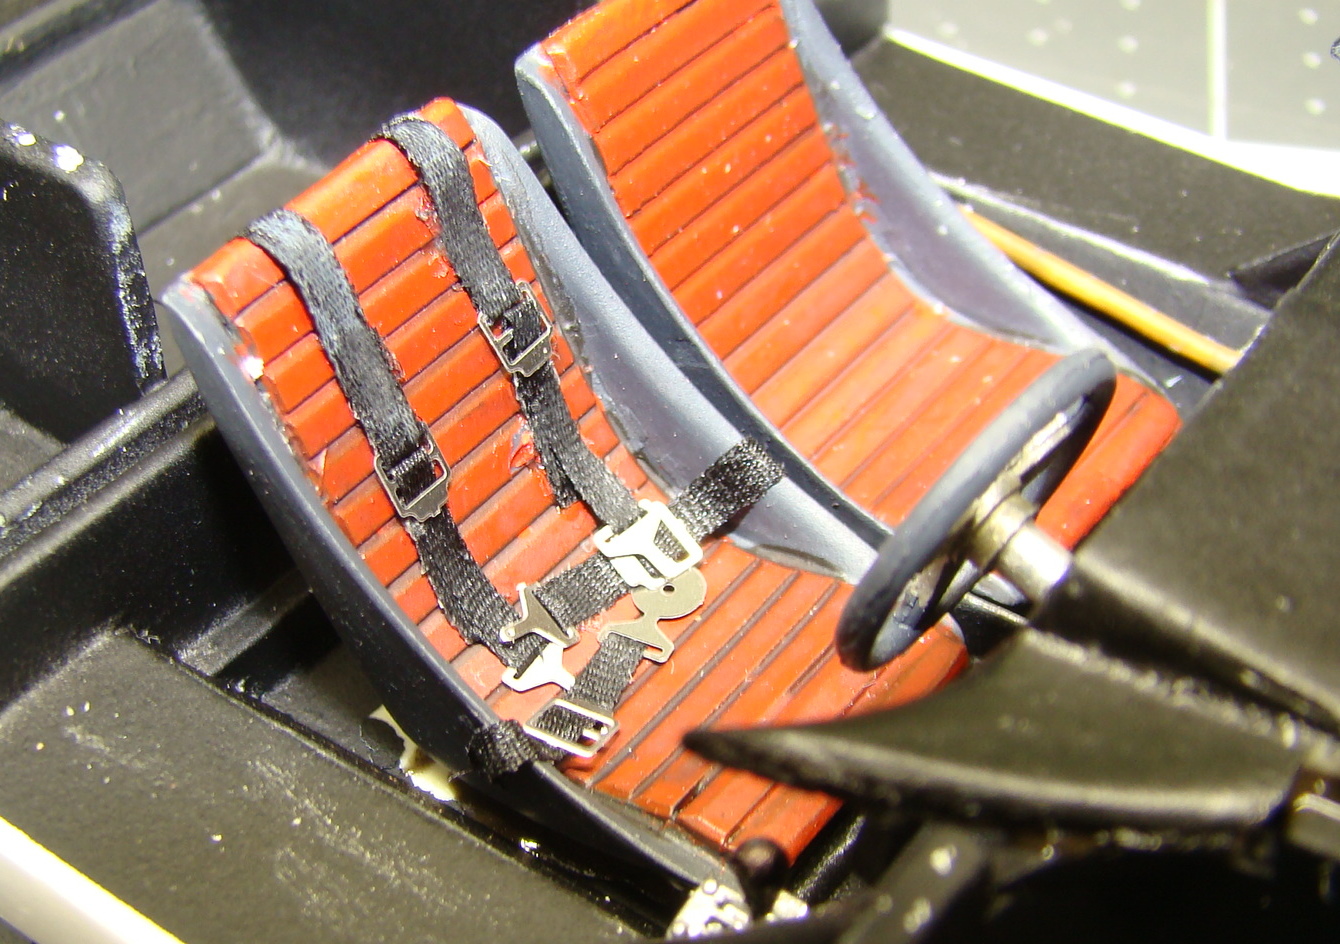
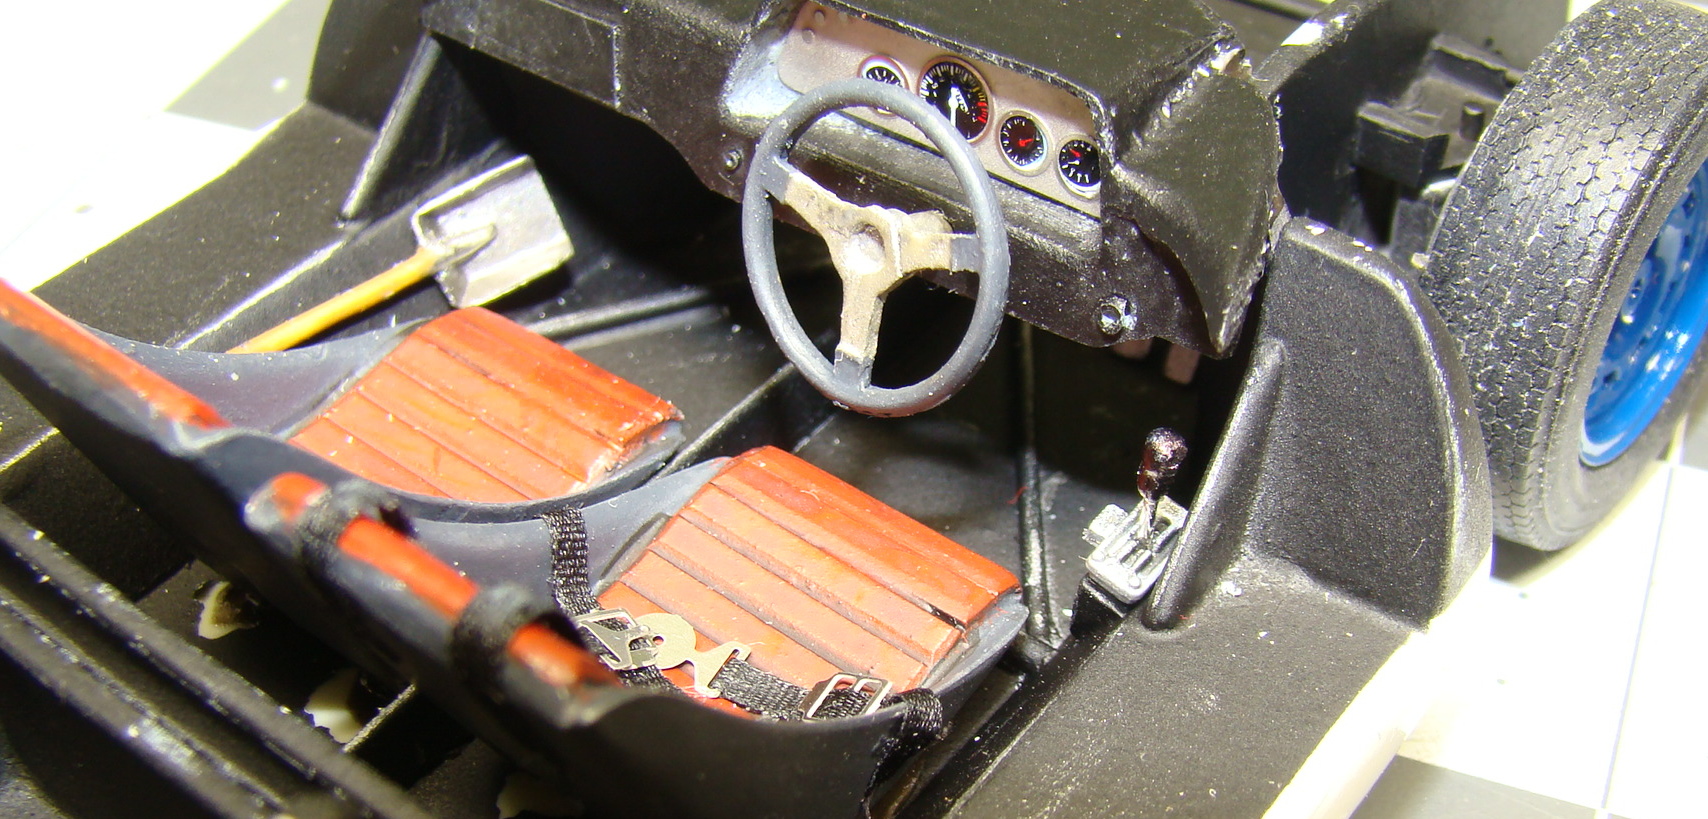
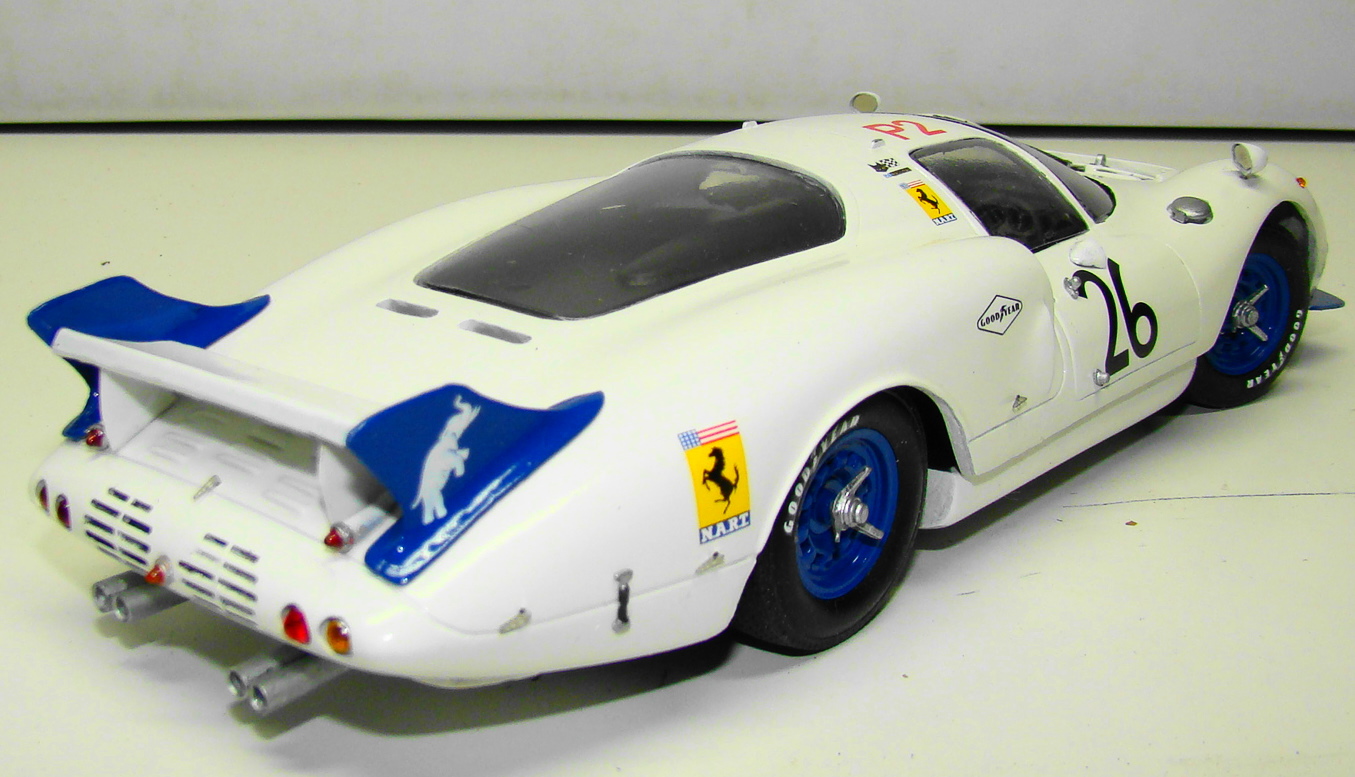
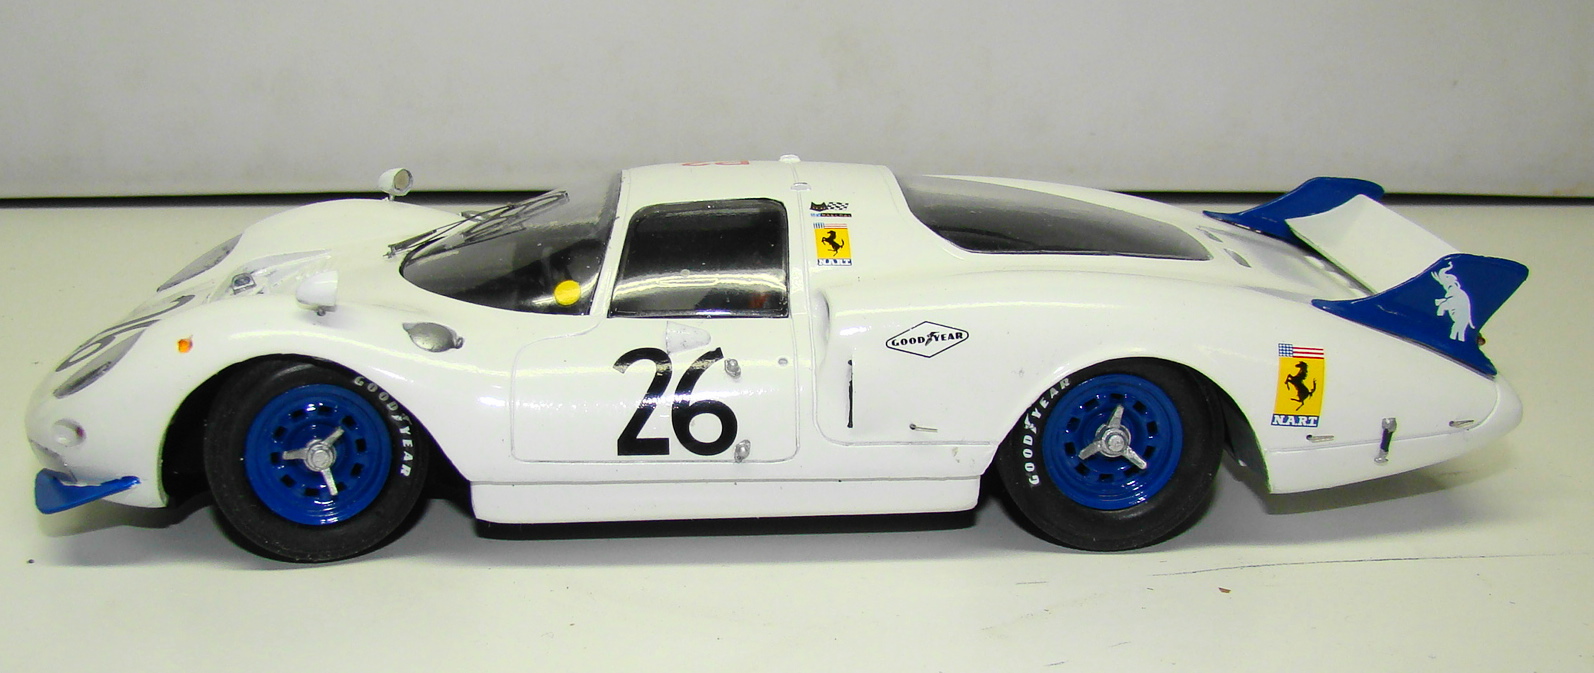
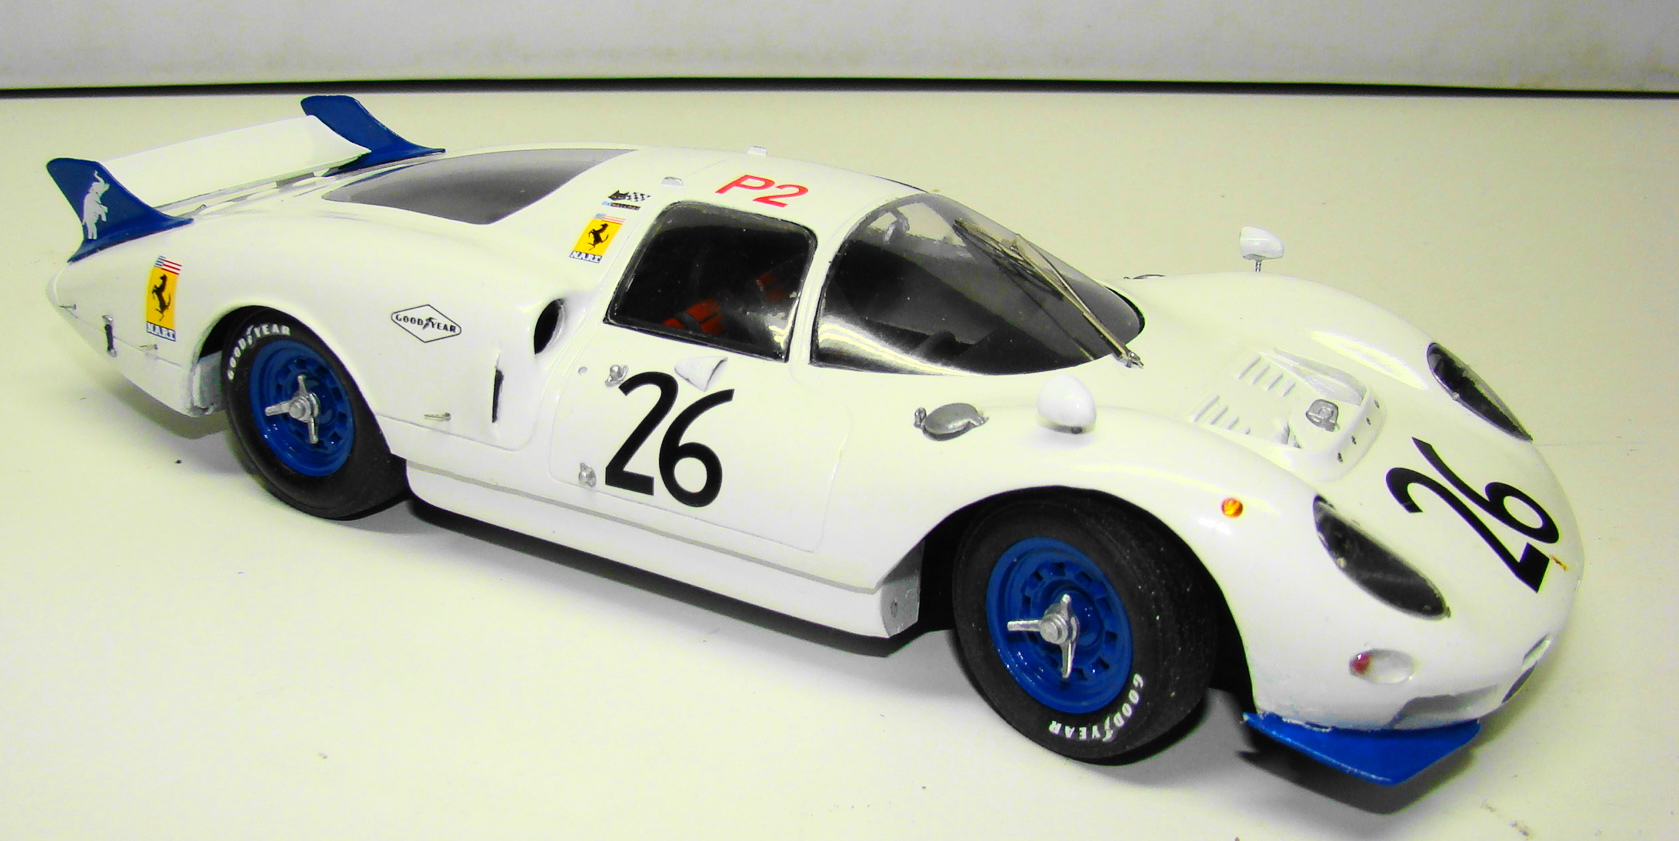
Another Fisher kit under my belt. This one is the Ferrari 365P White Elephant car that ran at Le Mans in 1966. Colour is Tamiya TS26 white and Testors 1111 dk blue. Extra features include seat belts, steering wheels, wing mounts, extra photo etch, mirror mounts. A lot of very fussy details went into this project and it slowed me down quite a bit but done it is. This model represents the car as it was raced. This car was run by North American Racing Team (NART) and went through quite a few changes before it hit the track. Seat blet materila is 4mm silk ribbon cut in half, Hardware came with the kitWhite elephant on the wing support is how the car got its nick nameOne of these knock-offs had one of it ears broken when I got the kit. Found it in the box and repaired it. It was very tiny and I was lucky to find it. Learned a new trick when I applied these bolt heads. They are almost microscopic.Original photo had a blue paint smudge above the front winglet. The camera never lies
-
very nice
-
Great looking build....like the color and decal choice.
-
Great job on this kit . I especially like the work you did with the emblems. so crisp and clean. This is one of my favorite Ferrari's and you have done it justice.
-
Do it step by step right along with the directions. Tamiya tape and Parafilm are my go to's. There are also guides etched into the plastic to help. Don't try and do it all at once...that was scary. Everything lines up like magic if you follow the lines.
-
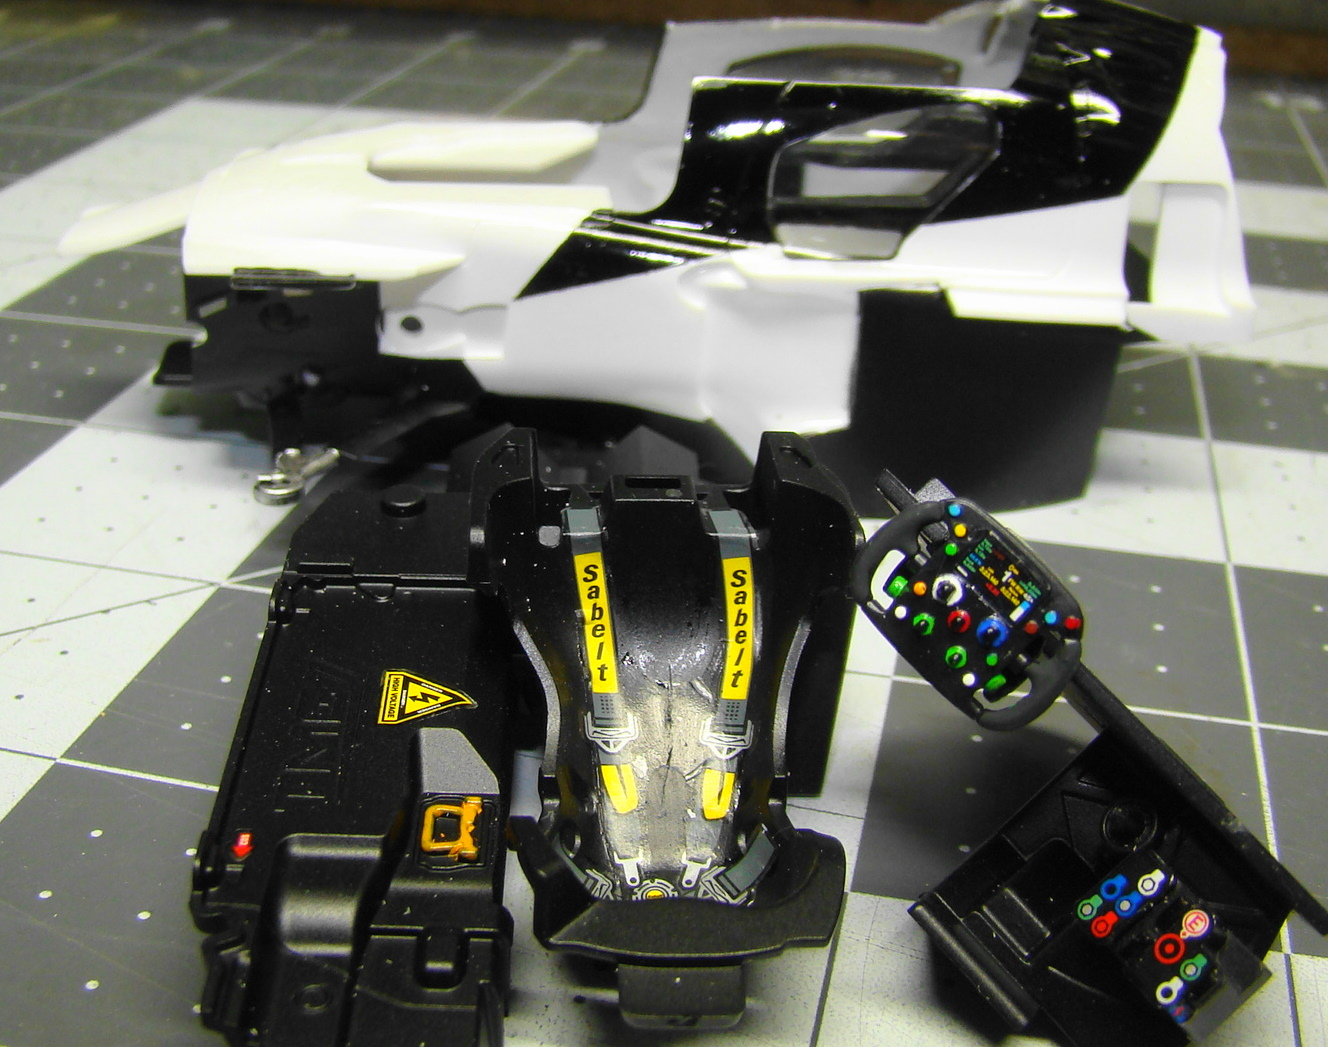
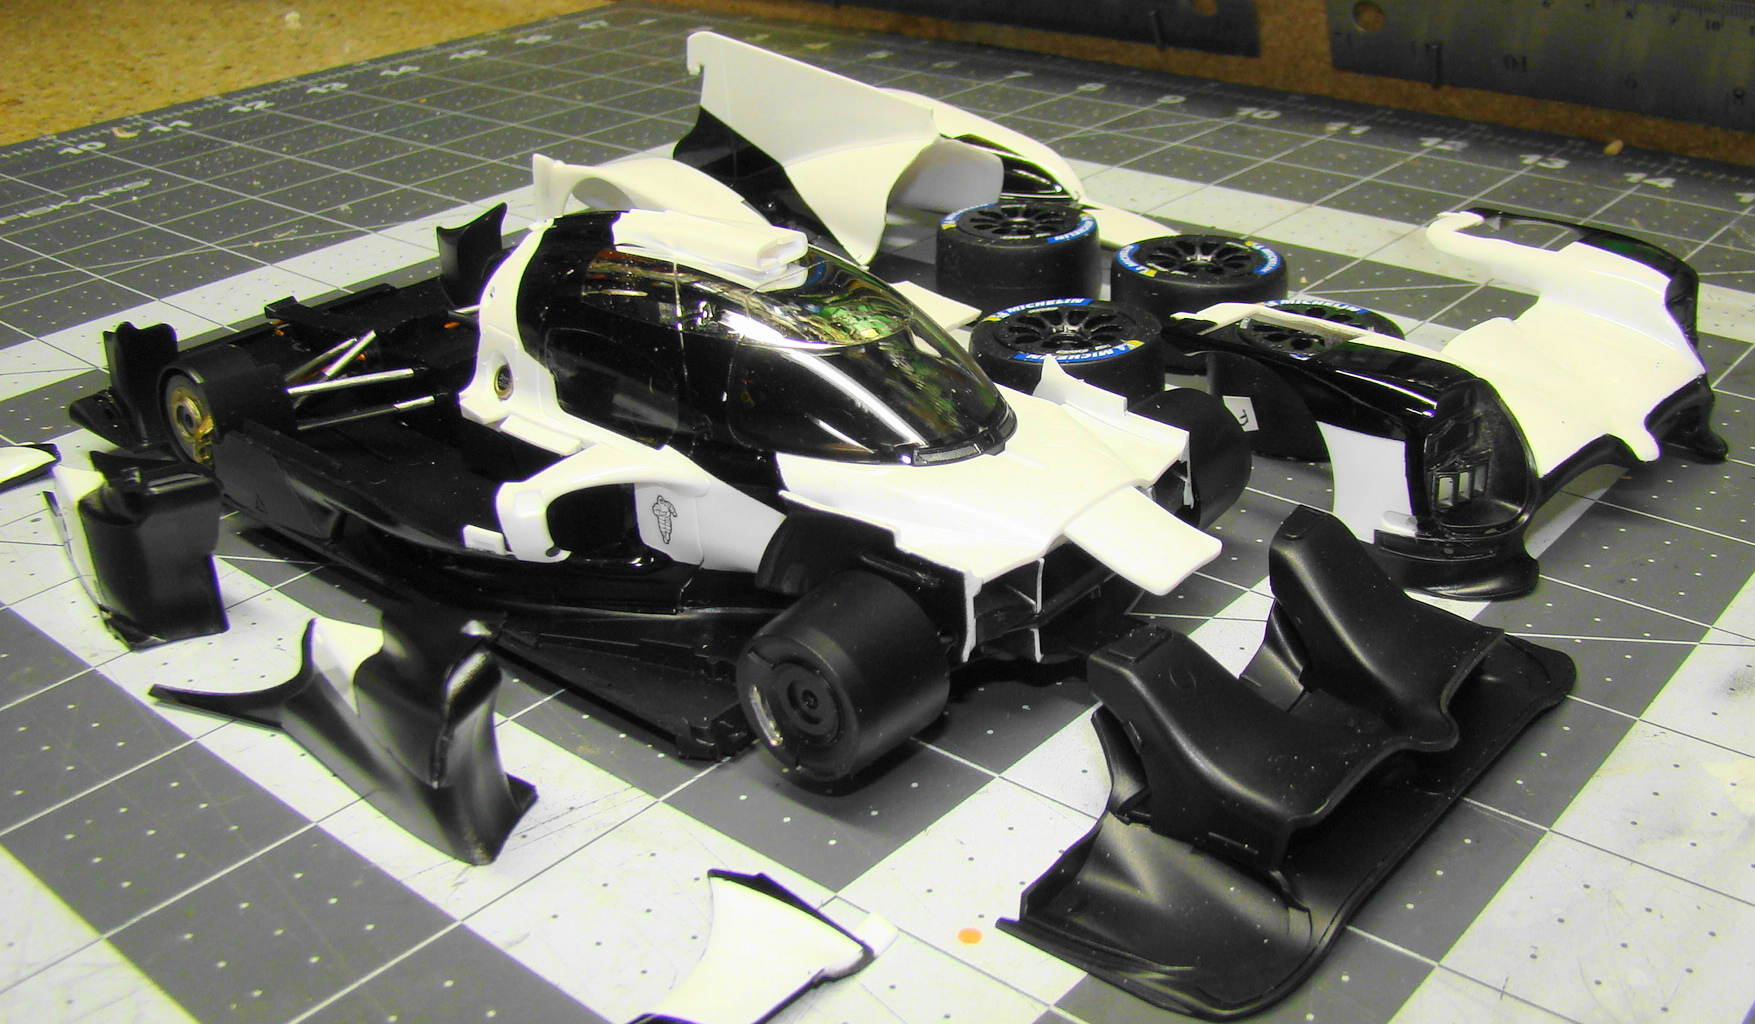
Another one off the bench. Built this box stock. What an awesome kit. Not really much else to do. The fit on the parts was unbelievable. But also a very complicated kit,not for the faint of heart. Much masking and painting to be done here. Black is both semi gloss and gloss and had to be masked and painted seperately. Decals were many and only the red ones in front p[osed any real problems. After building this kit I can appreciate the engineering that went into one of these cars. They are basically built like and F-1 car but with fenders. The kit goes together the same way. Tamiya went to a lot of trouble to includes all this detail. You can barely see it through the tiny windows. I like to take pictures of the work that is going to be hidden. This looks more like an f-1 cockpit. Most of the semi and gloss black has been sprayed in these photos. getting ready for final assembly. All done, note how slick the body panels fit.
-
Built mine the same way. You did a great job on a great little kit
-
Unbelievable paint job, like the colour
-
Excellent work, like the wire wheels, good choice.
-
I didn't interpret your comment as criticism. I have actually answered that question many times. We are all artists here in some form or another. Our choice of techniques and preferences are what makes us unique. So all is good. Gary.....here is a site that may answer your questions.....https://gravity-colors.com/model-car-paints/colors-by-manufacturer/ferrari/page/2/ Just click on any of the colors and it will tell you what era it was used in. This is the site for Europe. There are two seperate companies...one here and one in Spain. I have some of thier colors and have used them and they take some getting used to. Which is why I went with what I know. I will use them in the future when I am experimenting.


.JPG.6fba87089d2fded23d1d0a9c6330f43f.JPG)