Plowboy
-
Posts
3,434 -
Joined
-
Last visited
Content Type
Profiles
Forums
Events
Gallery
Everything posted by Plowboy
-
Thanx Bernard! I was never at the Scale Racing Lobby. Didn't even know it existed. Maybe it was The Modelers Haven?
-
It can't be shortened any more. As it is, the quarters are the same length as the Del Rio's. The floor pan/frame from the Del Rio fits like it should. It does look deep. But, there's no way to lean the center section in without wrecking the rest of it. My idea for it is to make it like a lift gate where all of it would simply raise up. I've been contemplating opening and hinging it. But, I don't know if I could make hinges that wouldn't be visible.
-
@ Aftermarket Wheels for the Chevy LUV ?
Plowboy replied to 1972coronet's topic in Model Building Questions and Answers
There's a set of six lug Outlaws in the MPC '69 Barracuda of all kits. There's also a set of six lugs in the latest issue of the MPC '84 GMC Deserter. No six lugs that I'm aware of that will fit the kit tires. -
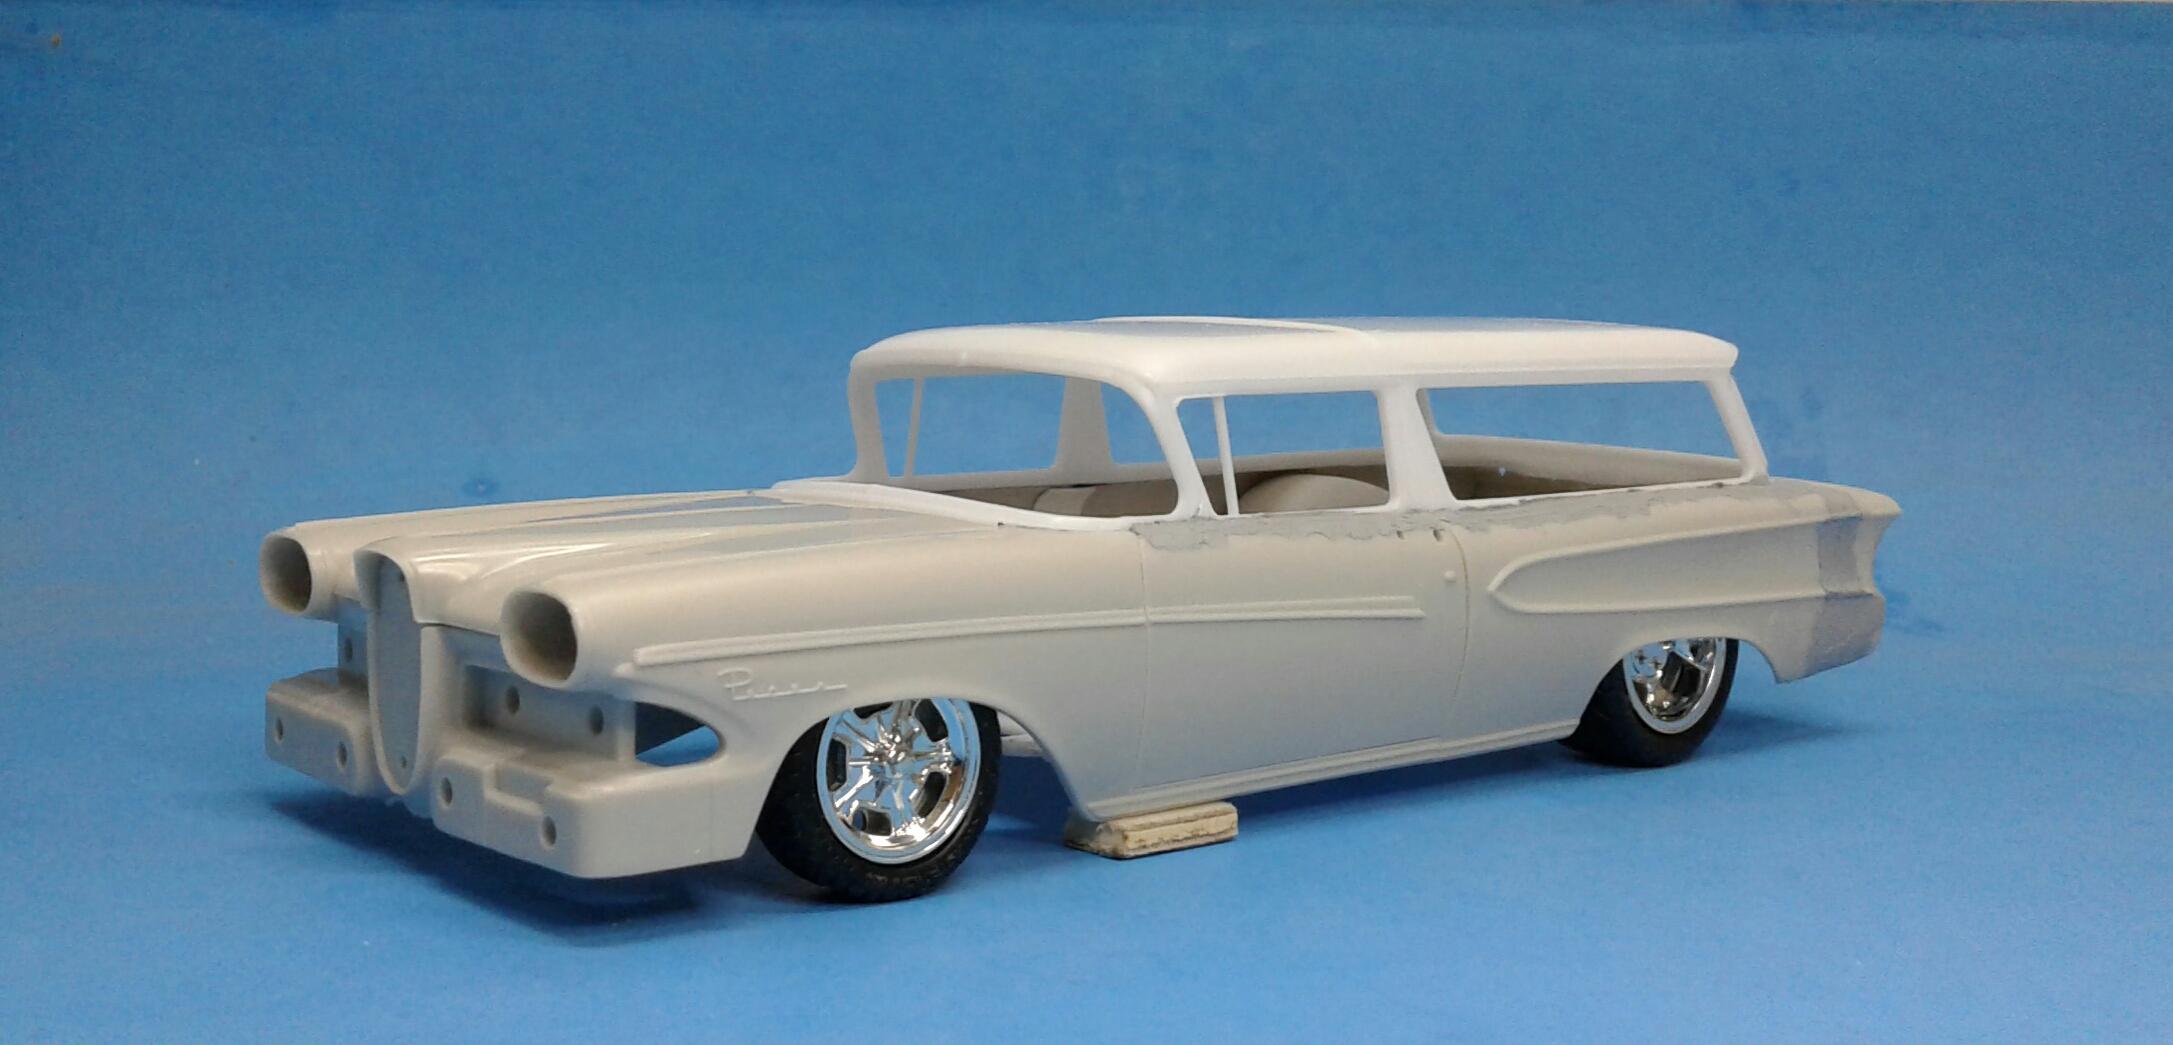
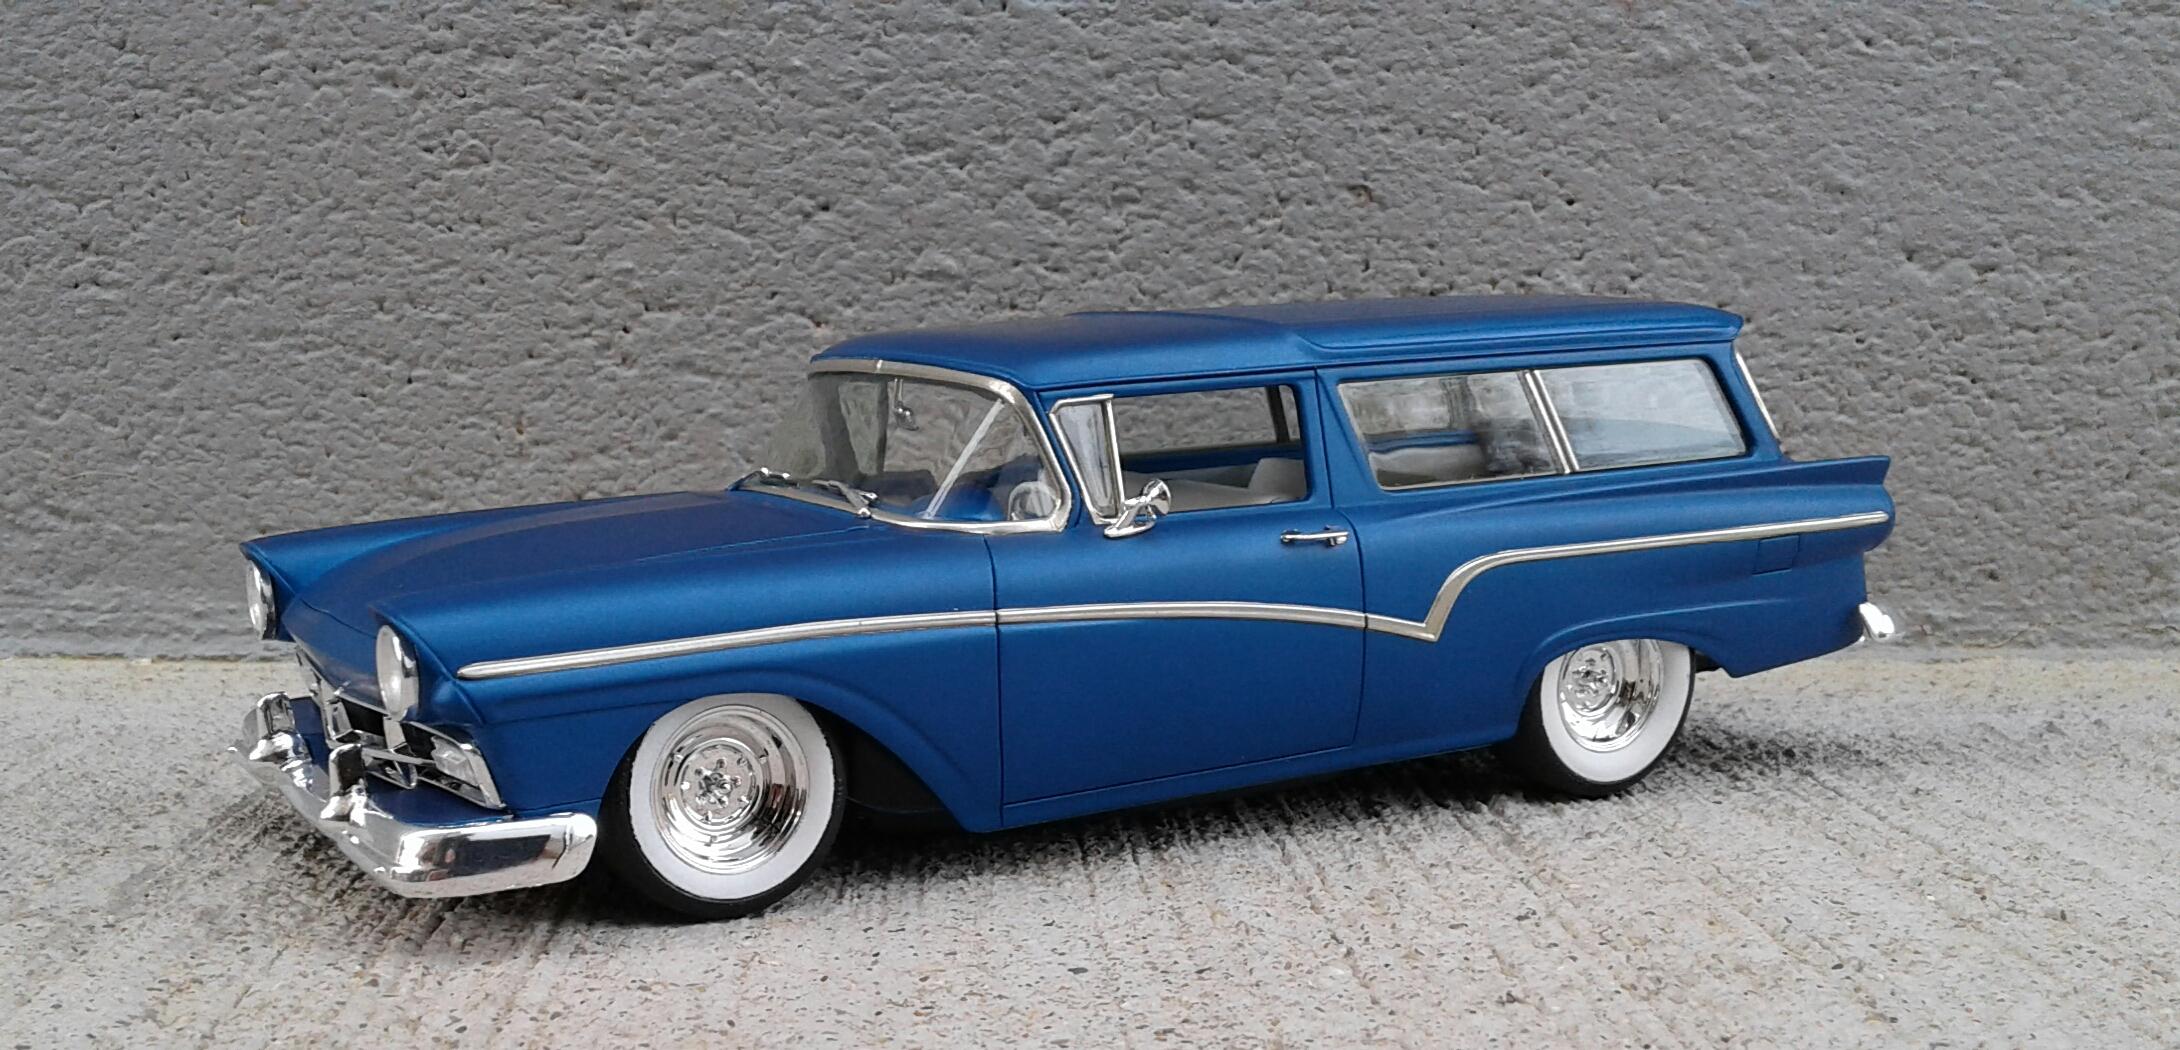
Just started this one yesterday. I've had this idea ever since the Del Rio came out. The full scale wagon is pretty much the Del Rio with the Edsel clip and different tail lights. I wanted my wagon to look like an Edsel front to rear. The coved quarter panels and tail lights are important styling elements to me I started by removing the top from the Edsel. I'm going to hang onto it in case I ever need it. Then I cut the roof from the Del Rio and stuck it on the Edsel. The Edsel has a lot more rear overhang than the Del Rio. So, I sectioned 7 mms out of the length behind the wheel wells. The plan is to use the Edsel interior and modify it with the Del Rio parts necessary. The engine will be from the AMT Phantom Vickie. I may use these wheels or maybe the ones from the AMT Wagonrod.

-
Something I noticed on the '75 that I built was that the front wheel openings sweep back too much. I modified them to make them more accurate.
-
The color on your father in laws pickup looks a lot like Model Masters Diamond Green. If you find a source for the F-100 decals, please let me know. I need a set for a tribute build to my late father.
-
Thanx Pete! I can't remember exactly how long ago it was that I built it. Thinking around 12-14 years ago.
-
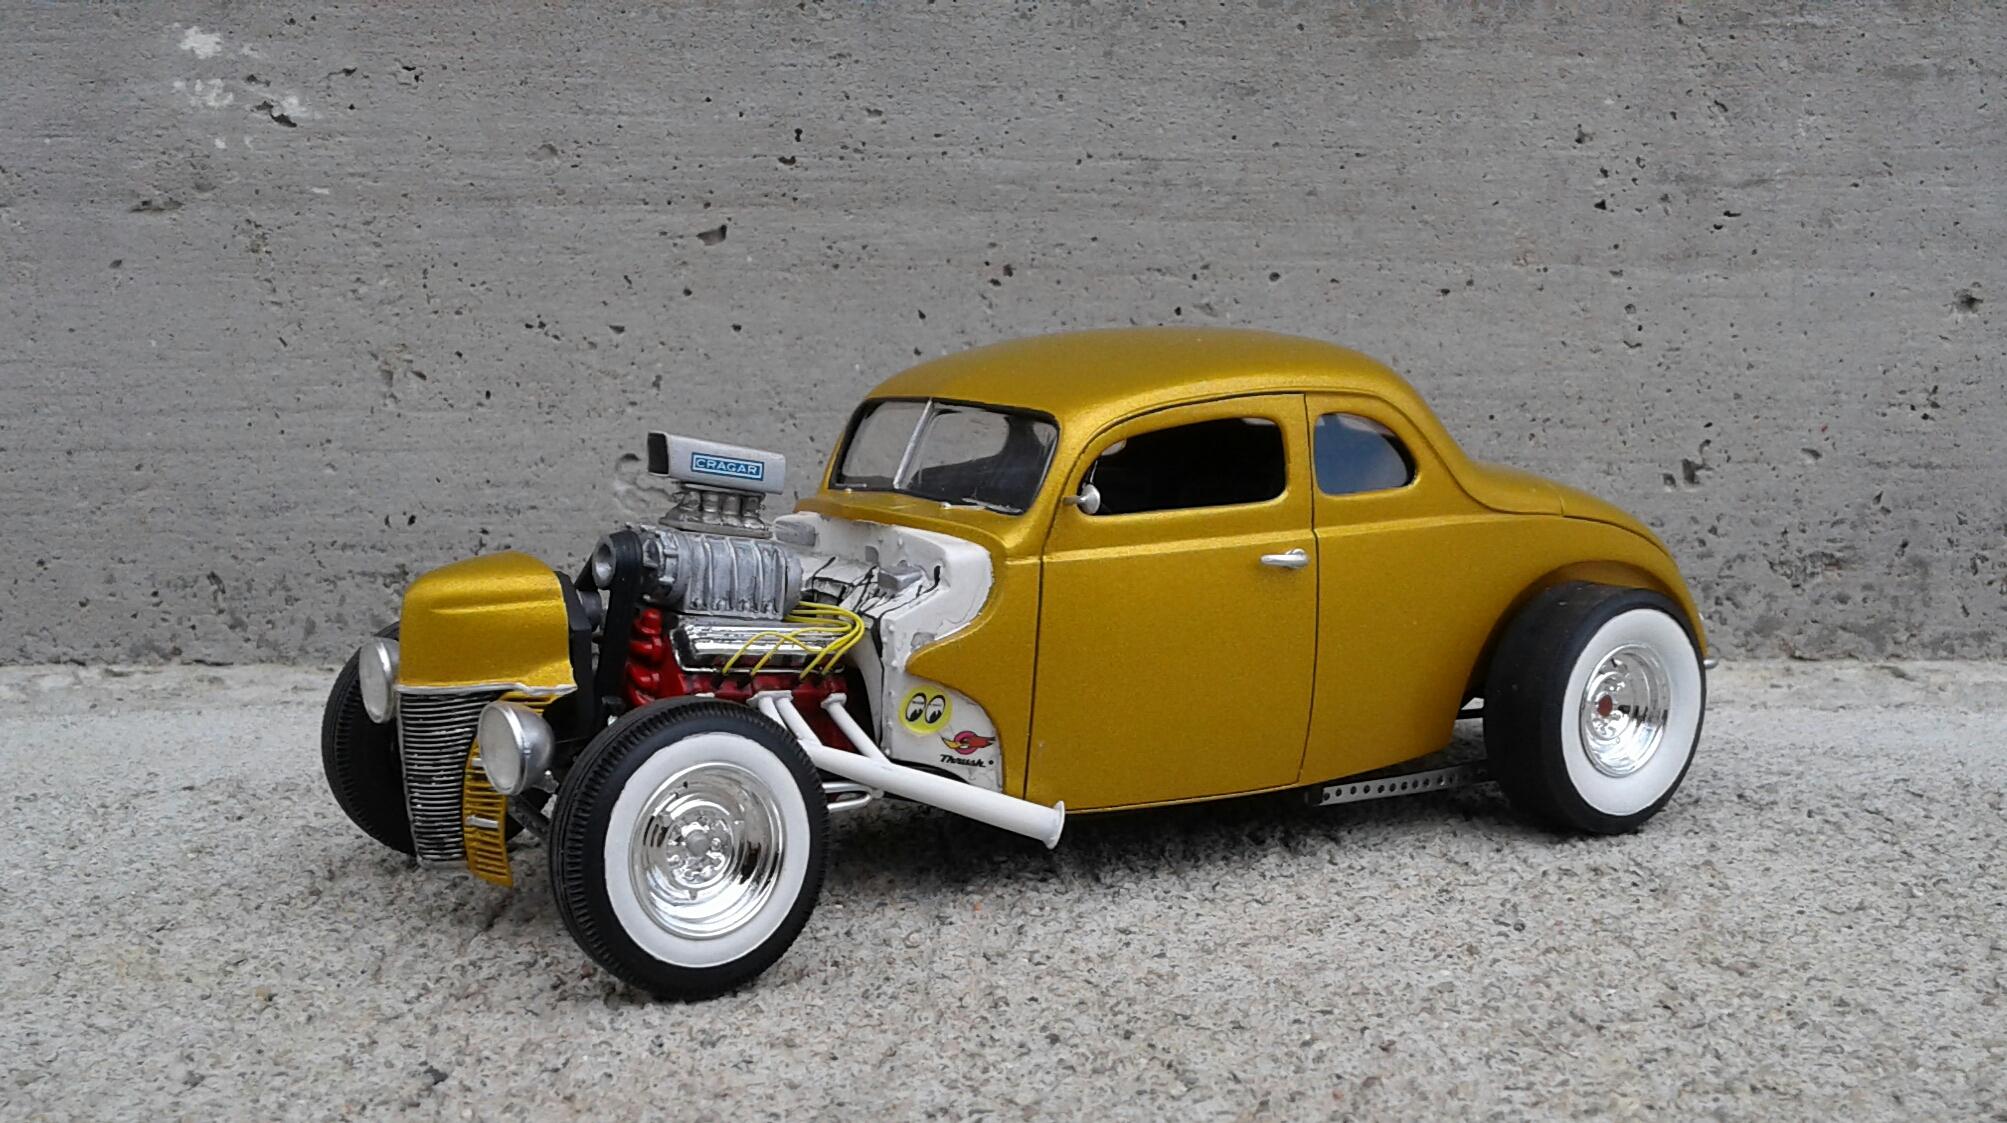
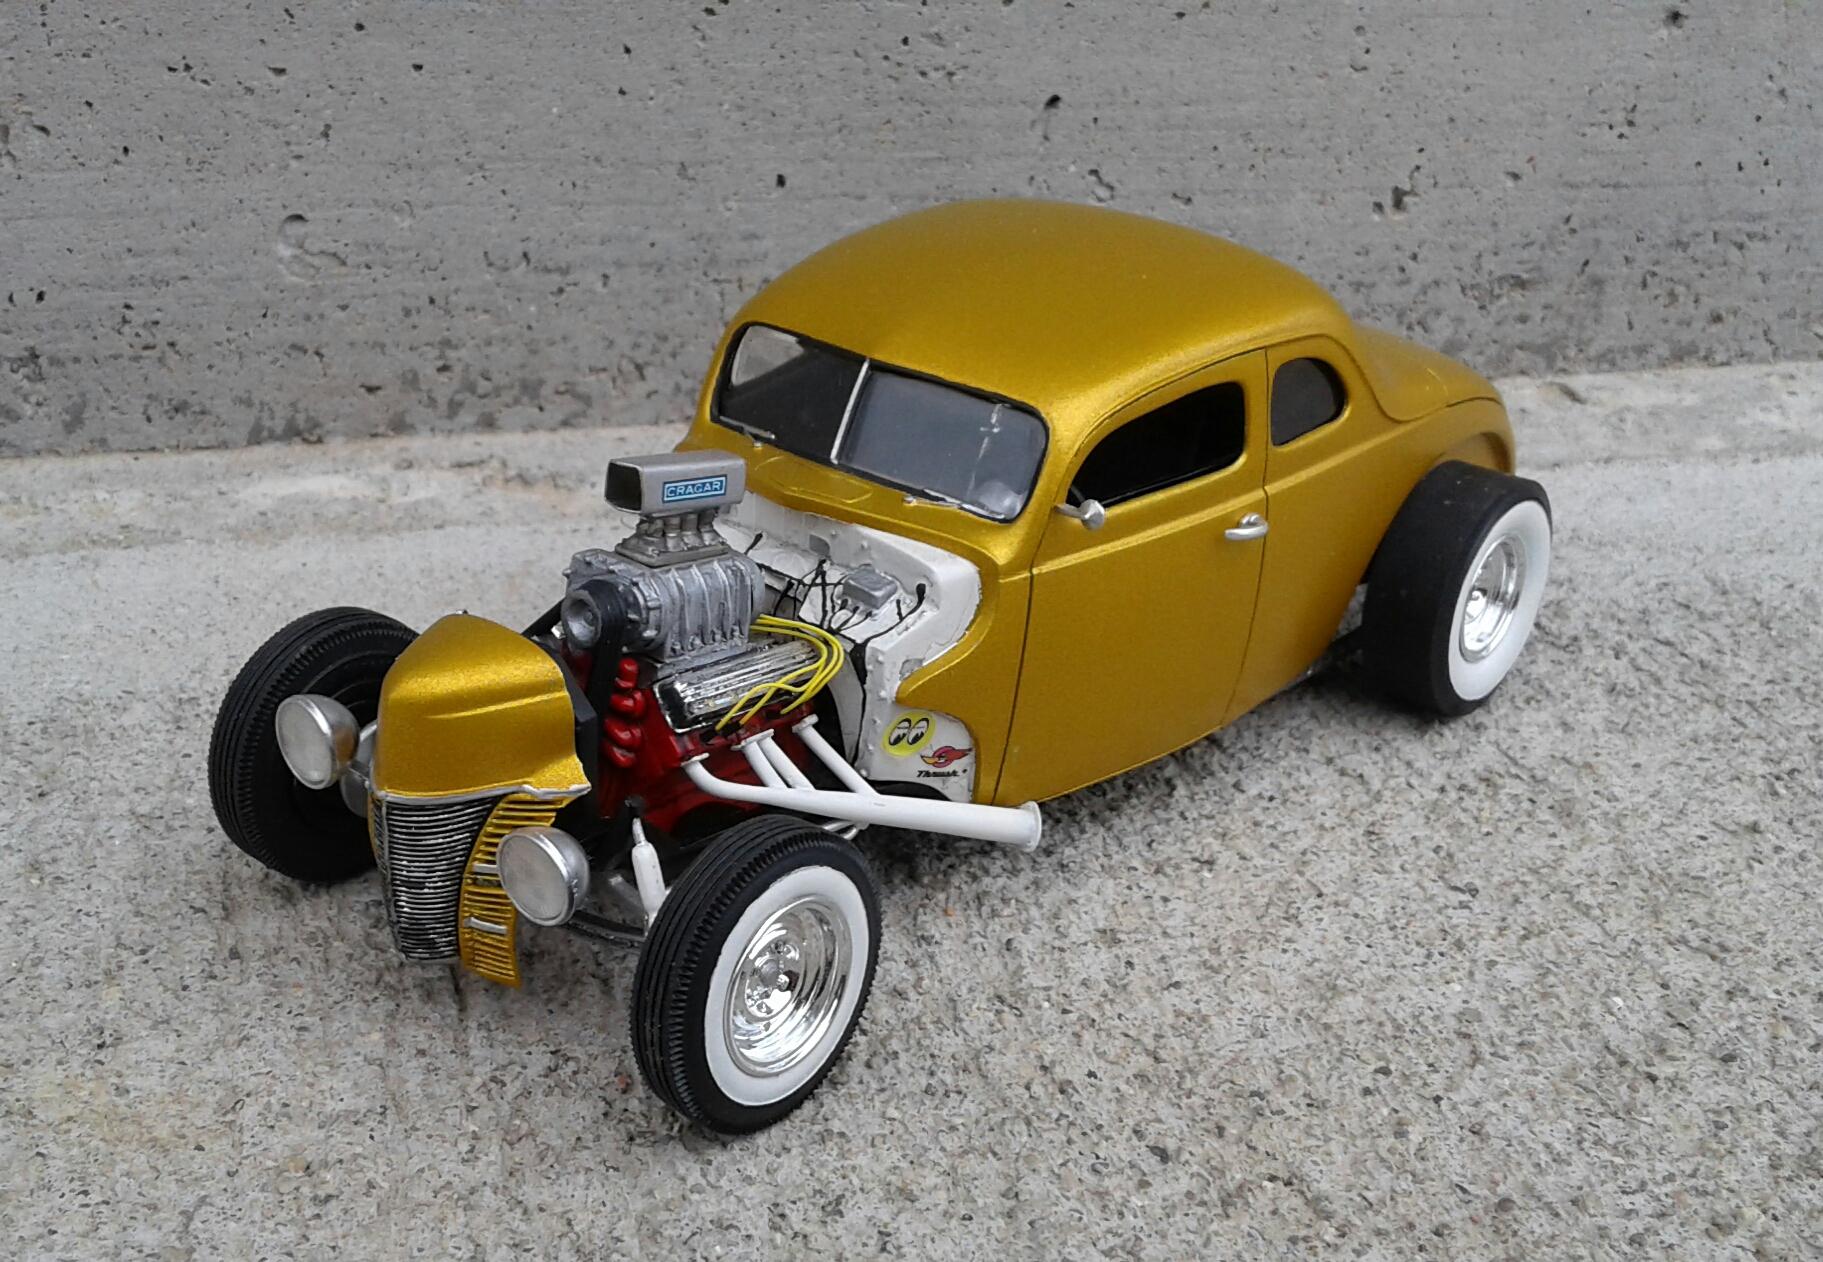
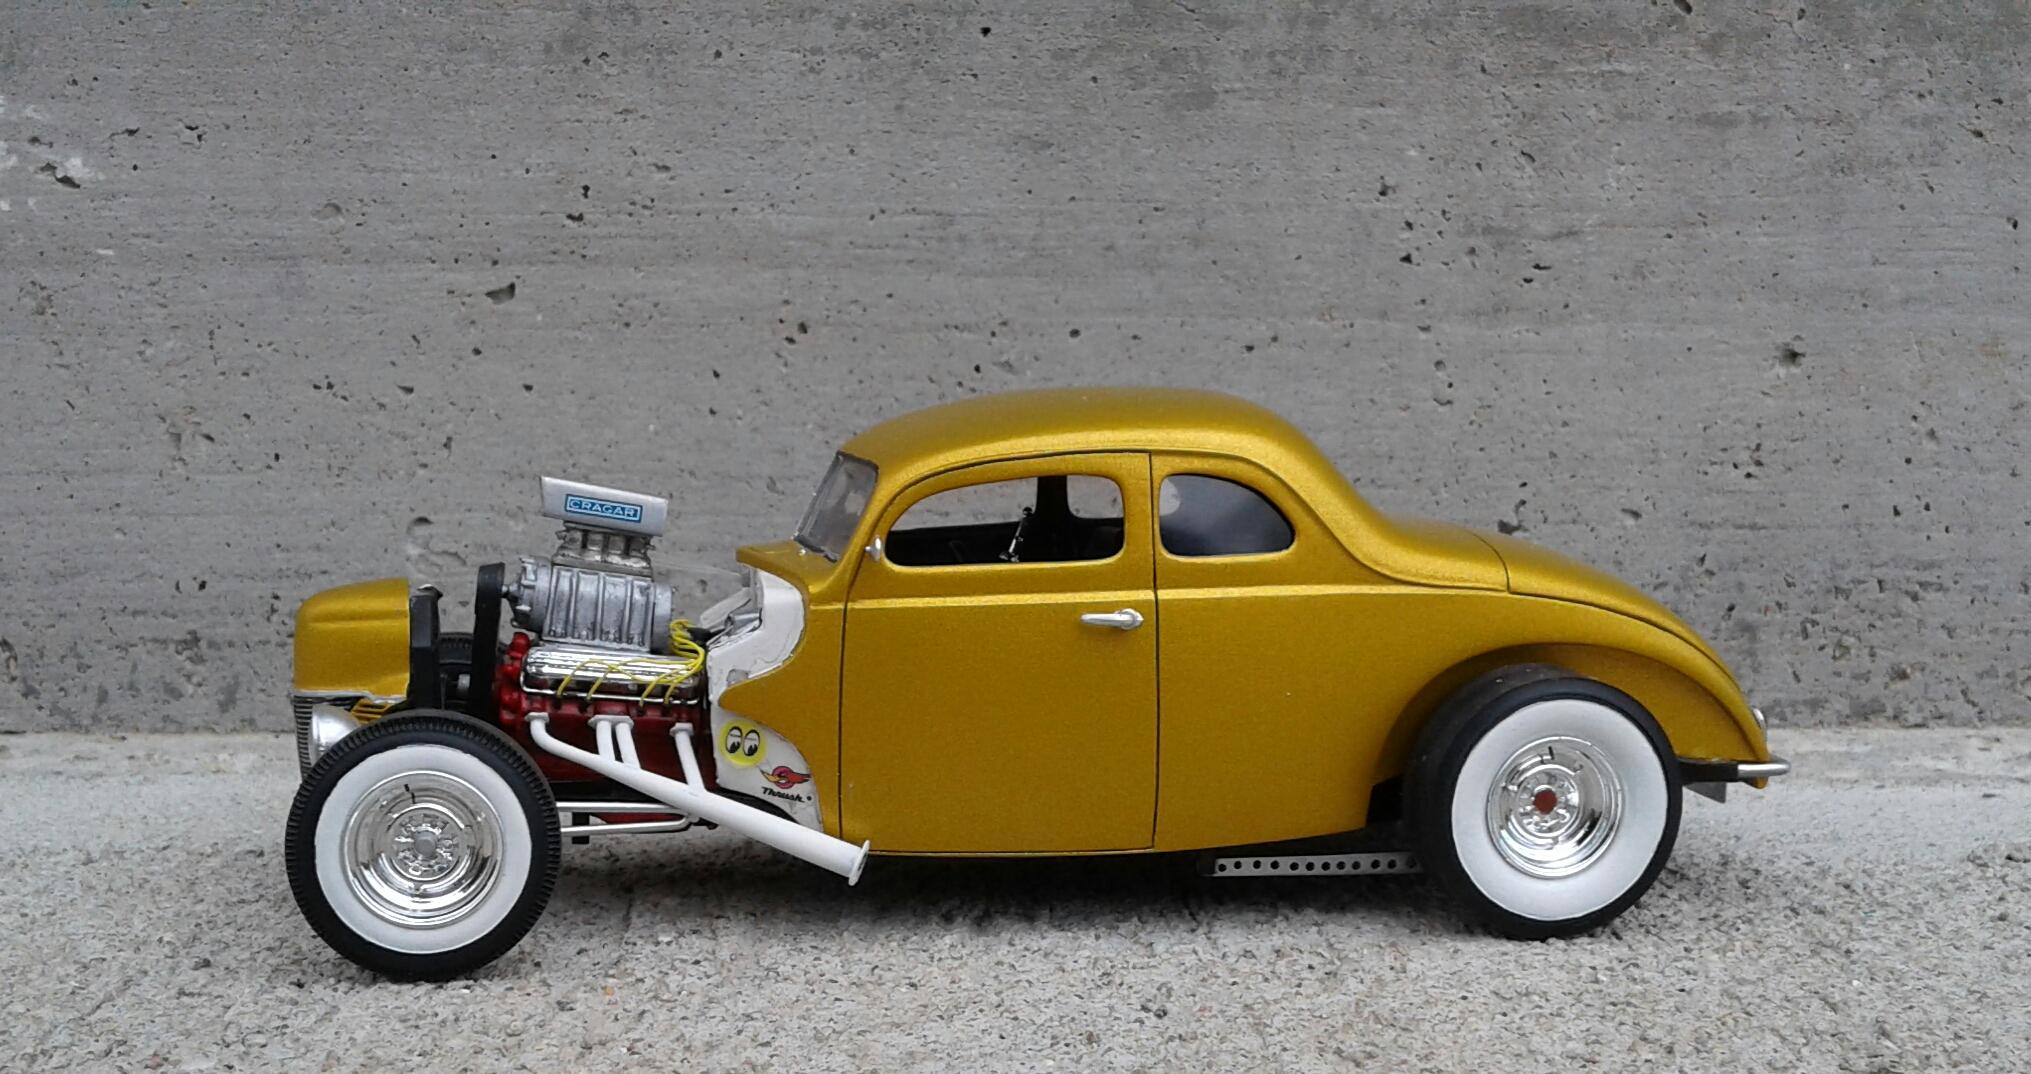
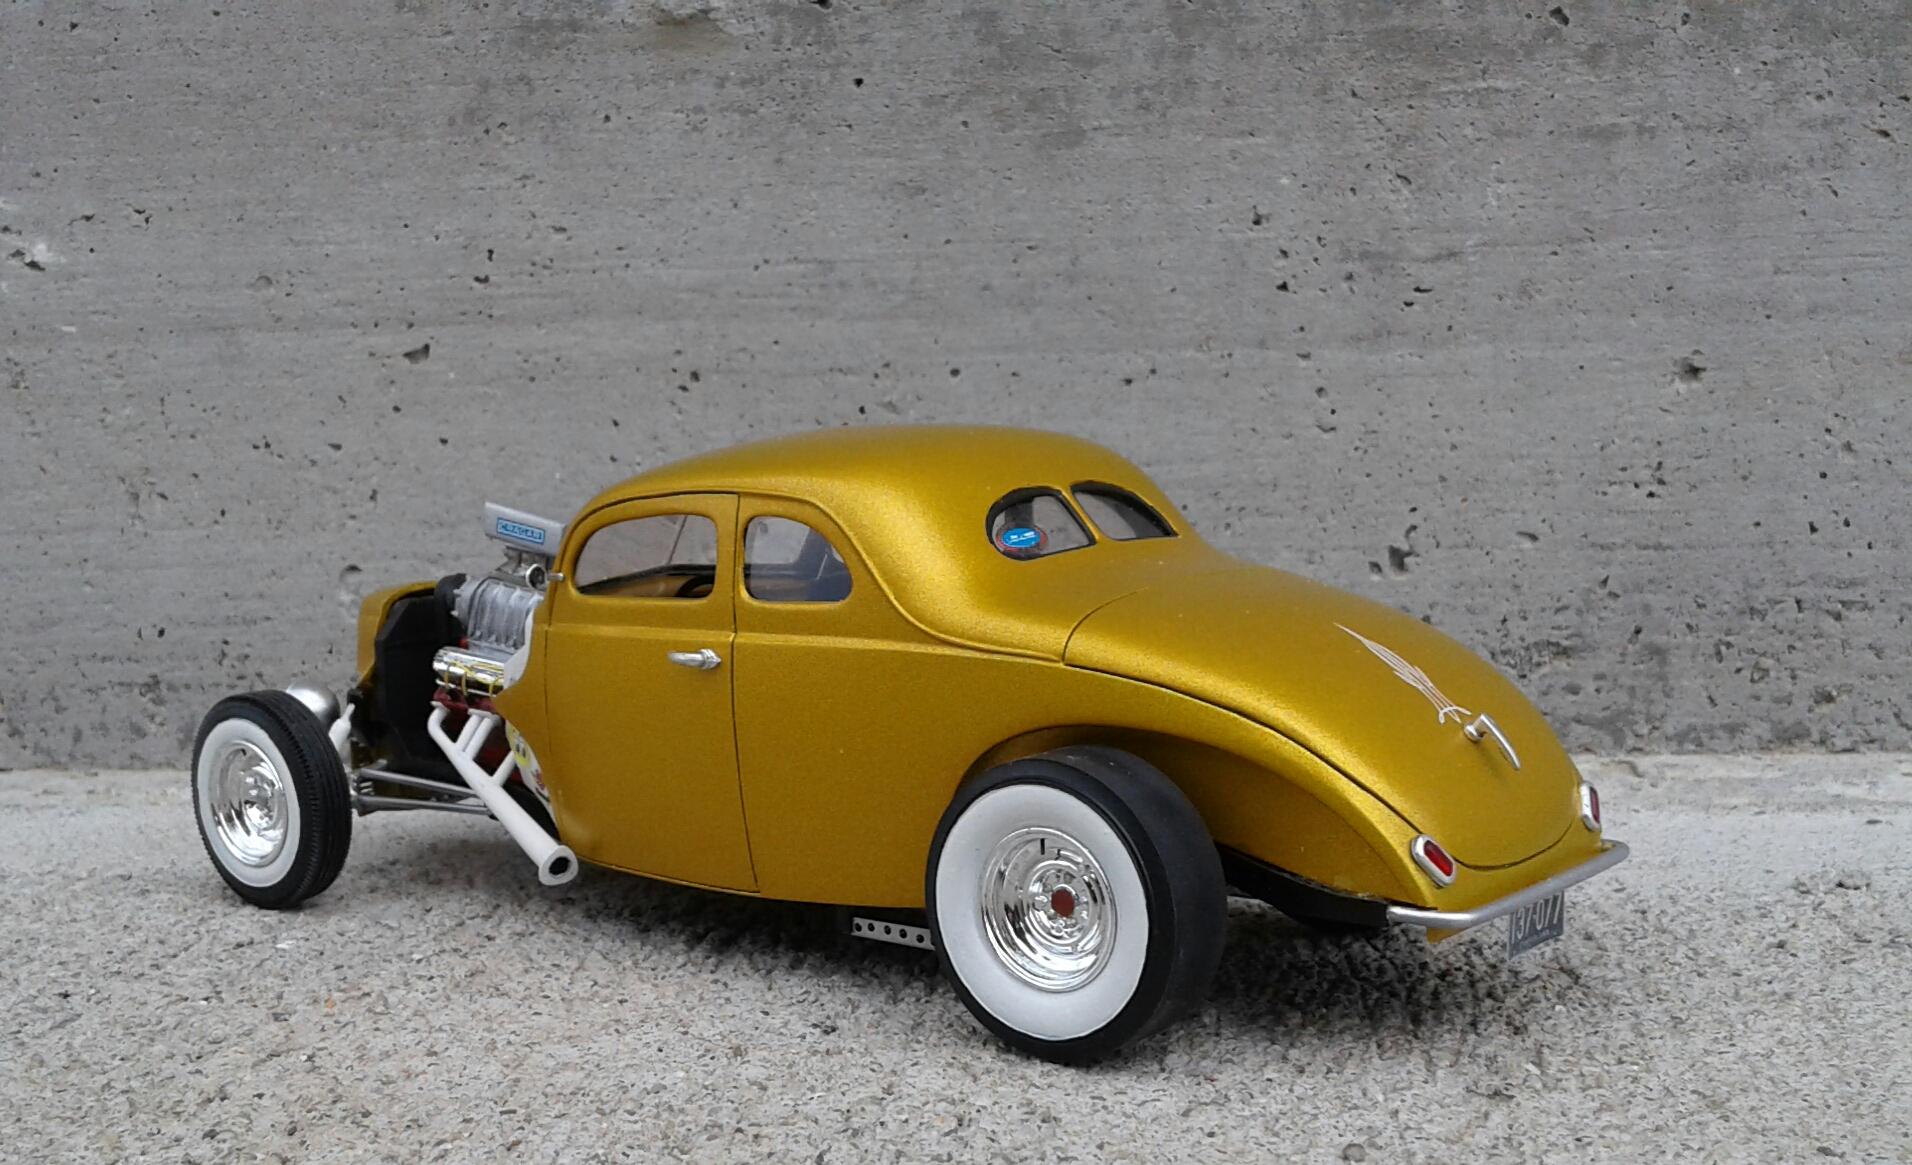
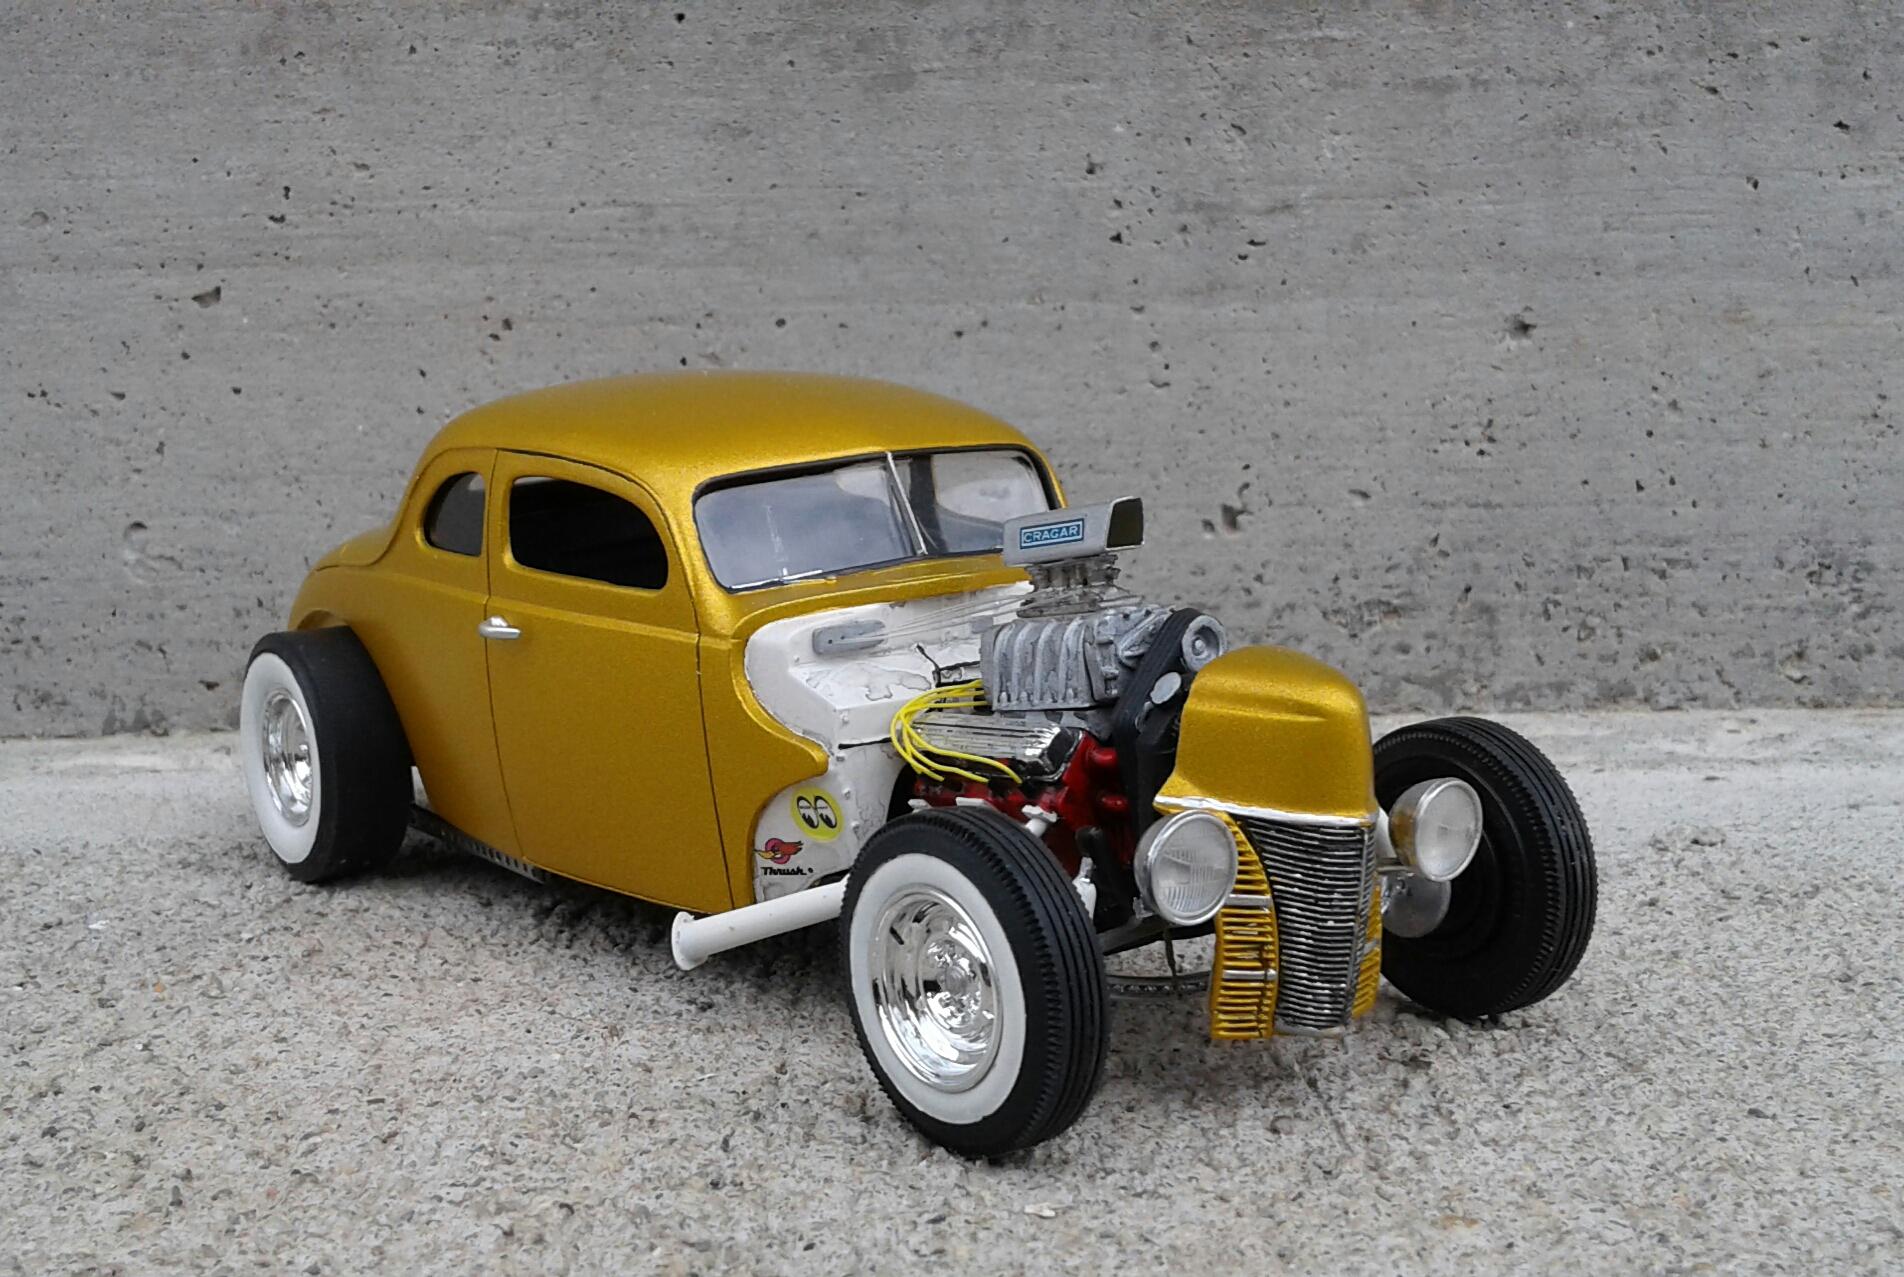
This old model was one that really got me into hot rods. It was an old glue bomb from my youth. All I had left of it was the body, interior, chassis and part of the front end. I started with chopping the top. Once I got it into shape, I painted it with Testors Inca Gold. I had the Cadillac engine from an AMT '49 Ford and added scratch built headers, scoop and a few details. The wheels came from the Modelhaus and the tires were hand painted. It's not much to look at. But, it's still one of my favorite hot rods! Since this build, I've built several more. Thanx for checking it out!
-
Chevy LUV
Plowboy replied to Rbray47's topic in WIP: Model Trucks: Pickups, Vans, SUVs, Light Commercial
Someone else mentioned the same problems with the styrene in the review thread. It's obviously an issue. It's strange that Tamiya Extra Thin won't bond it. It'll bond any styrene. Does the styrene seem to be hard and brittle or soft? I want this kit. But, I don't if it can't even be glued together. -
I use windshield glue and Future Floor Polish for the windows. I first run a small bead of windshield glue around the perimeter of the opening. After it has set enough to hold, I take a small paint brush, dip it in Future Floor Polish and then just touch it to the edge of the glass on the inside around the perimeter. The future will wick into any voids there may be. I allow it to set overnight and then remove any fingerprints with a soft cotton cloth. Once the future is set, you won't have to worry about knocking it loose while cleaning. I also use a thick coat of windshield glue over chrome headlights.
-
'72 Chevy Stepside
Plowboy replied to Plowboy's topic in WIP: Model Trucks: Pickups, Vans, SUVs, Light Commercial
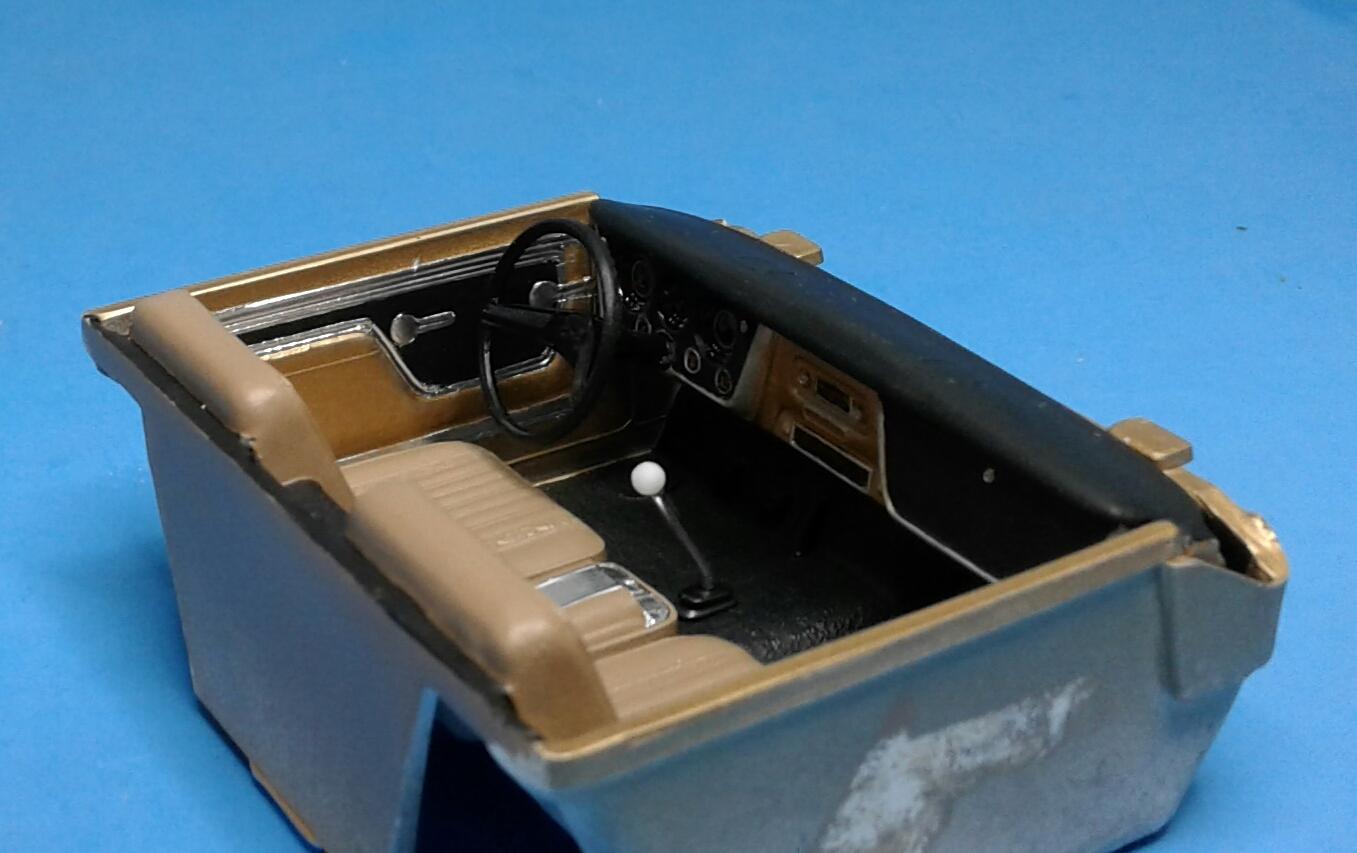
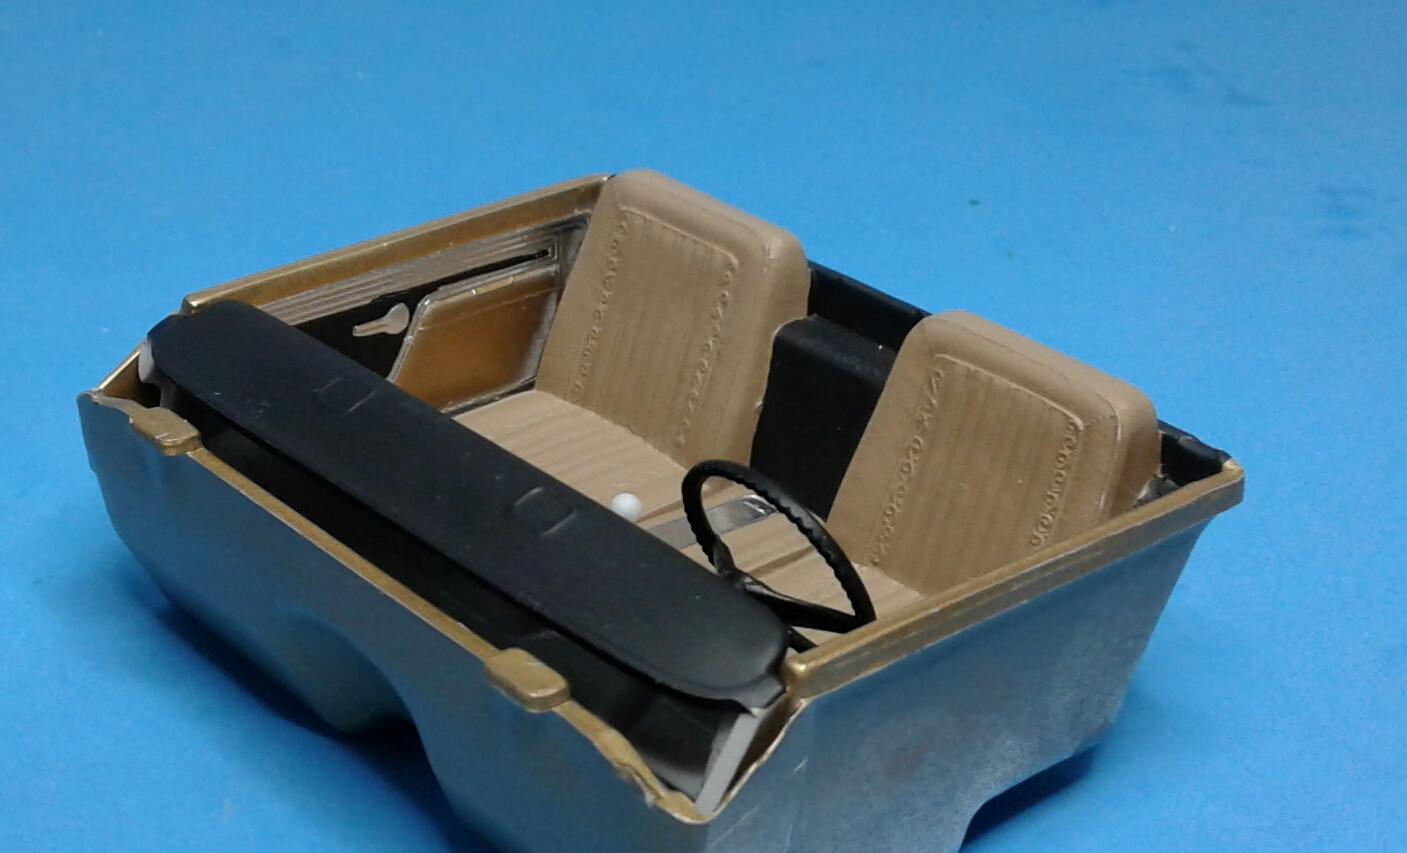
Thanx Carl! I got the interior finished and ready to install. I tried to de-Cheyenne it some by painting the woodgrain sections black. And big surprise. The decals didn't work out even after sealing them. May be a good thing as I probably wouldn't have liked them anyway. I'm liking the way it looks now that I have the paint polished. I should have it done in a couple of days or so.
-
That's a nice looking little Golf! I really like the plaid seats! Were those decals supplied in the kit? Great touch that brings out the interior. Nice work!
-
Thanx for the work you put into this Erik! This thread should be pinned.
-
I only have two wagons. Photos of only one.
-
1962 F100 rebuild
Plowboy replied to mchook's topic in WIP: Model Trucks: Pickups, Vans, SUVs, Light Commercial
I wonder what was glued there? When I restored my '61, it had some glue burn (nothing that bad) in the same spots. That's why I suggested putty and careful sanding. It can be saved. The letters on my tail gate are simply sanded back down to bare styrene. -
'72 Chevy Stepside
Plowboy replied to Plowboy's topic in WIP: Model Trucks: Pickups, Vans, SUVs, Light Commercial
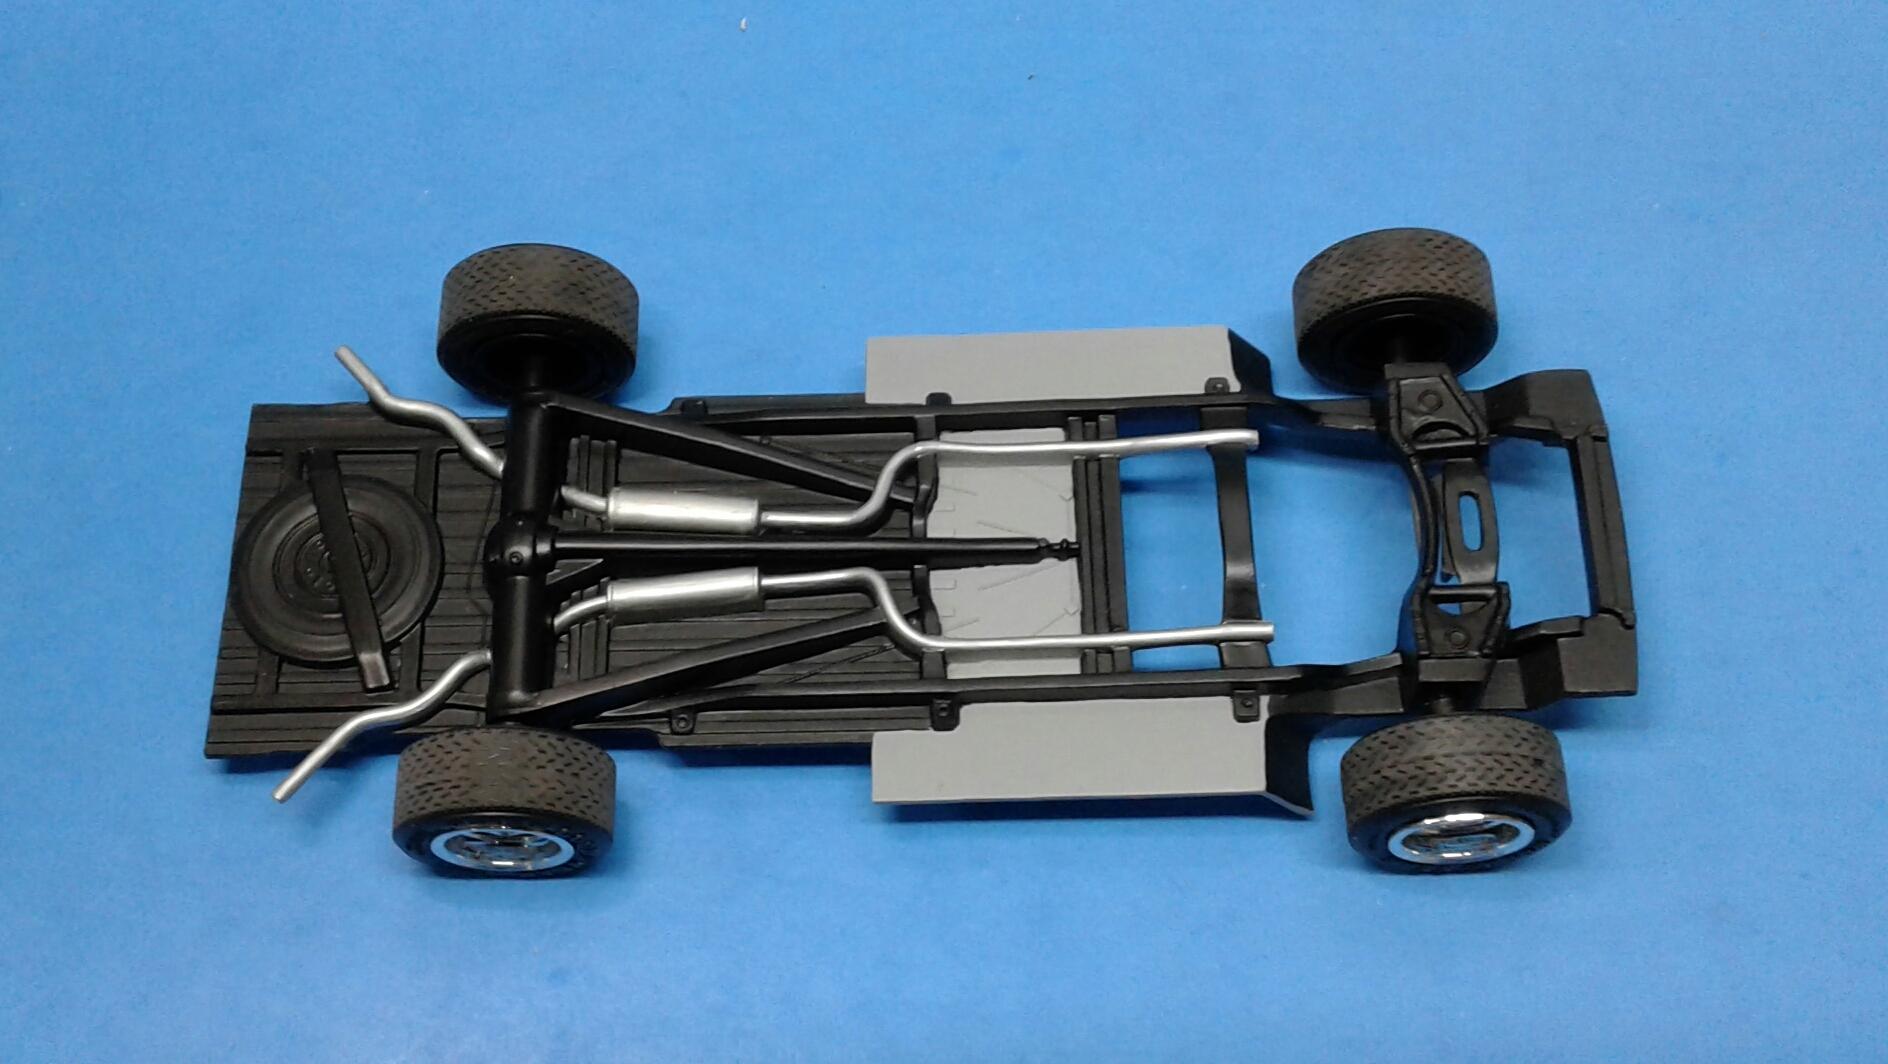
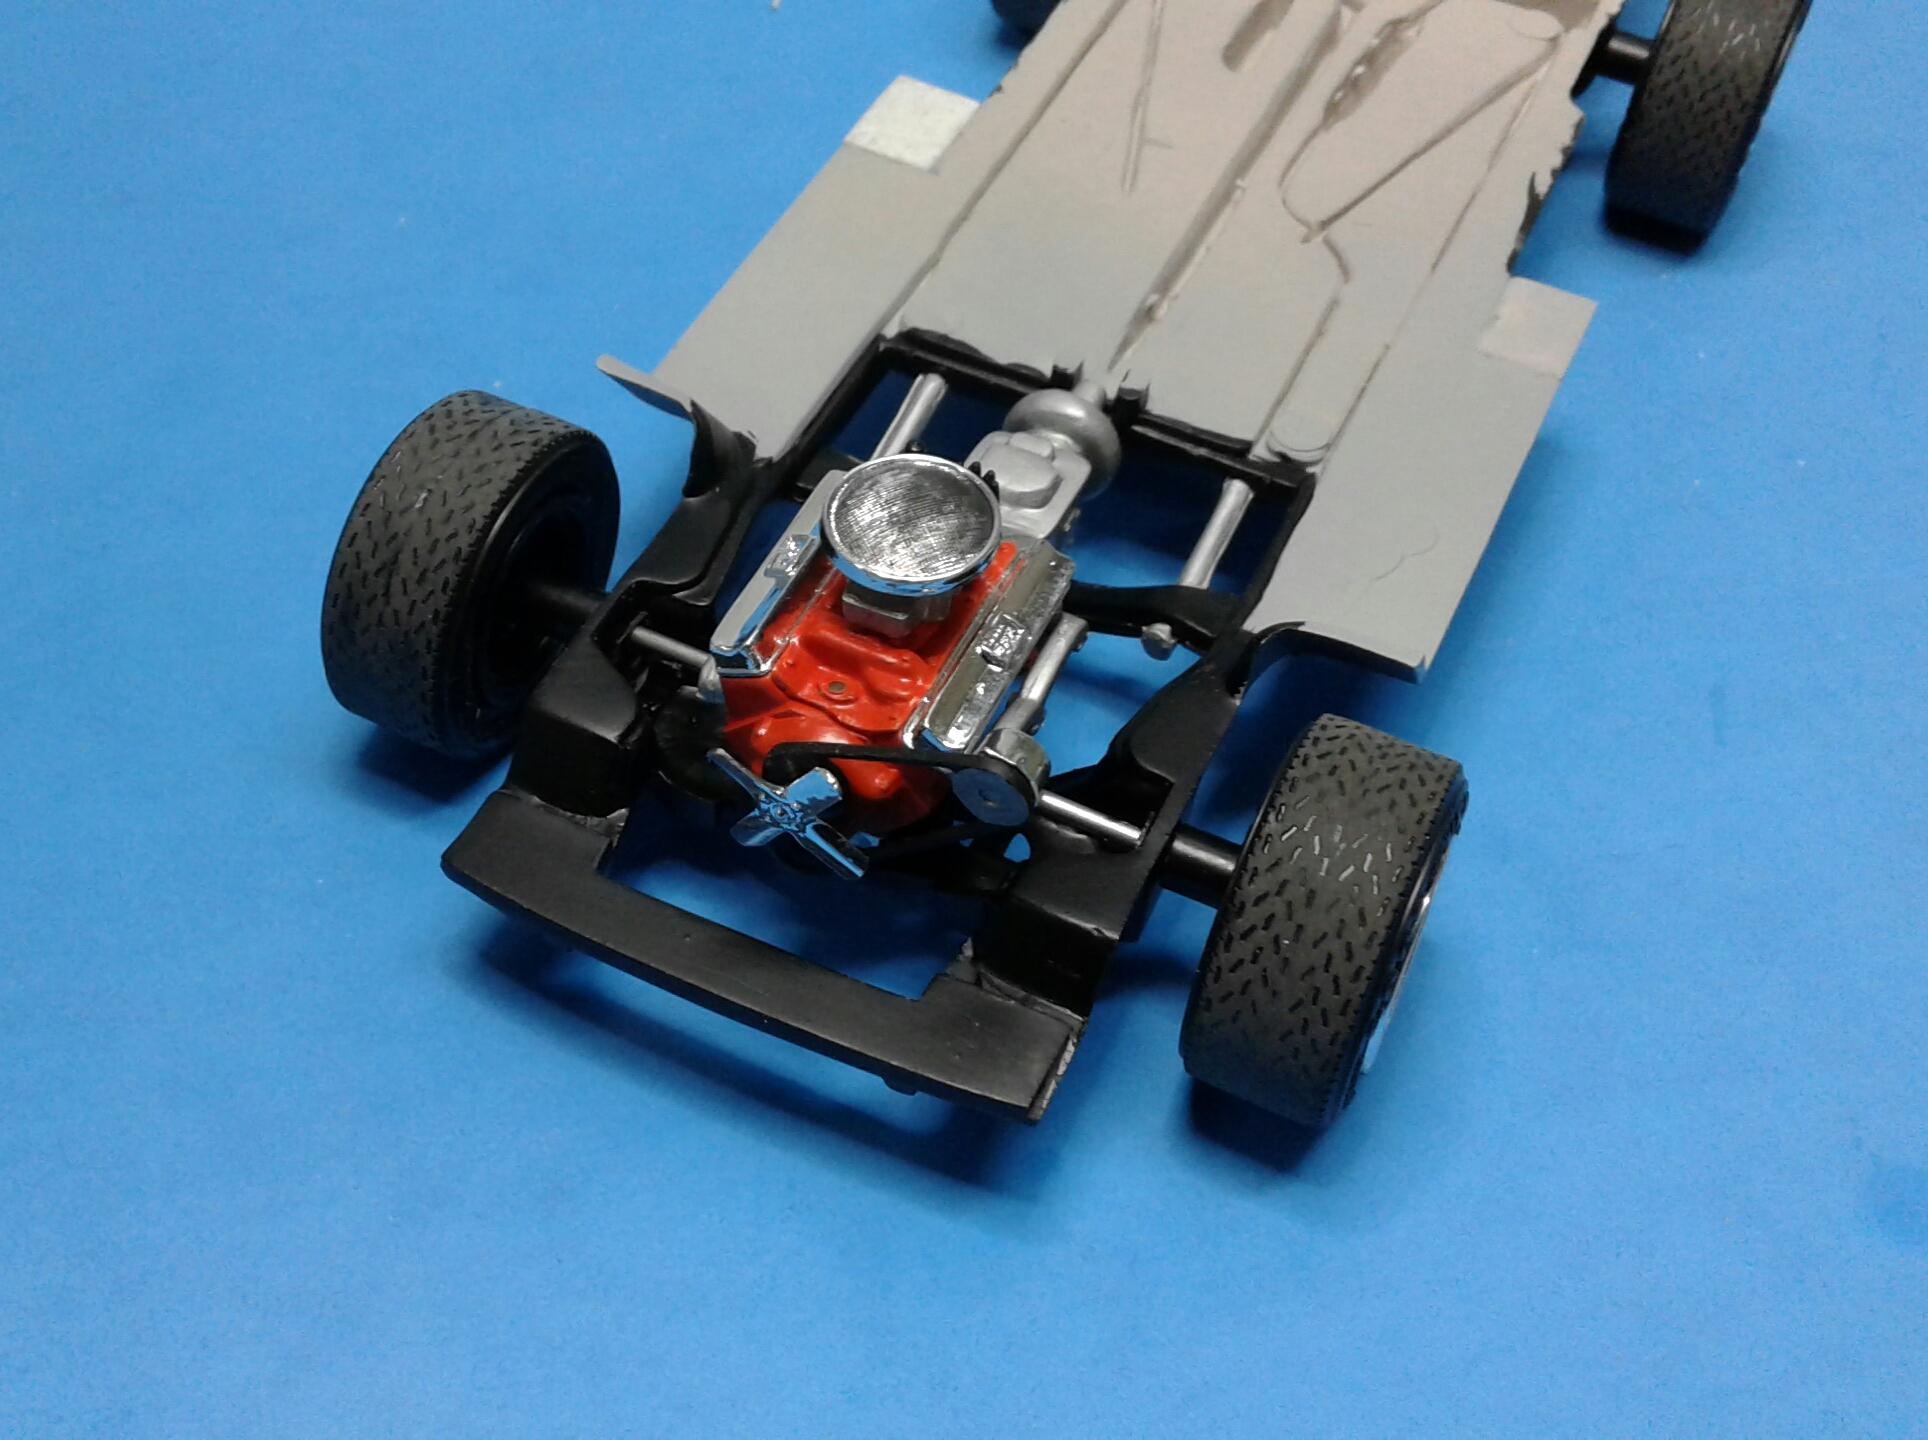
I got the chassis finished up. Nothing to write home about for sure. Detail painting it does help it somewhat. One thing I did to improve it was add pieces of styrene at the cab corners to make the floorpan meet them. You can see them along with the piece I added to the front of the chassis plate in the next photo. Engine is also done. Same story as the chassis.
-
2003 Jeep Wrangler Rubicon Kit
Plowboy replied to martinfan5's topic in Model Trucks: Pickups, Vans, SUVs, Light Commercial
That's a nice looking Jeep Jonathan! The color is perfect for it! Looks 10x better than the first one I saw! You've convinced me that I need one now. Does the snorkel have to be installed with this kit or can it be omitted? -
Very well done hot rod Pete! Just goes to show what capable hands can do with an old AMT kit and a few parts! Excellent looking model! I would take this rendition over the Revell kit any day.
-
I don't have a Facebook account. My wife does. Even if I did have a FB account, I'm not going to message back and forth, drive to the post office, fill out a money order and buy a stamped envelope to place an order.
-
I wish I could order some other way than through Facebook. Could be a good thing though as I would probably spend way too much money.
-
'72 Chevy Stepside
Plowboy replied to Plowboy's topic in WIP: Model Trucks: Pickups, Vans, SUVs, Light Commercial
I hadn't just because I'm not concerned about it. This build is just for fun. I measured the cab and bed. The cab is 77 mms. The bed is 74. Off quite a bit. But, not enough for this model. I don't know if it would be worth the effort to add 1.5 mms to each fender and the stepboards. I probably would if I wanted to tuck the tires in. -
'72 Chevy shortbox stepside
Plowboy replied to Can-Con's topic in WIP: Model Trucks: Pickups, Vans, SUVs, Light Commercial
Your photo of the chassis got me to wondering how well the chassis from the '84 GMC would work under one of these bodies. It already has the right wheelwells up front. Just have to convert it to a 2wd or one could build it as a 4wd. Did the '67 and up short bed Chevies have a carrier style driveshaft? -
66 Fairlane stance suggestions
Plowboy replied to Mopar440_93's topic in Model Building Questions and Answers
Try flipping the spindles top to bottom and see if that gives you enough drop for the front. The rear can be lowered by de-arching the springs and or adding spacers between the rearend and springs. -
1962 F100 rebuild
Plowboy replied to mchook's topic in WIP: Model Trucks: Pickups, Vans, SUVs, Light Commercial
That's gonna be tough to fix. But, some careful sanding and putty work should take care of it. Patience will be a key factor. I would primer it lightly to give the putty a better surface to bond to. -
'72 Chevy Stepside
Plowboy replied to Plowboy's topic in WIP: Model Trucks: Pickups, Vans, SUVs, Light Commercial
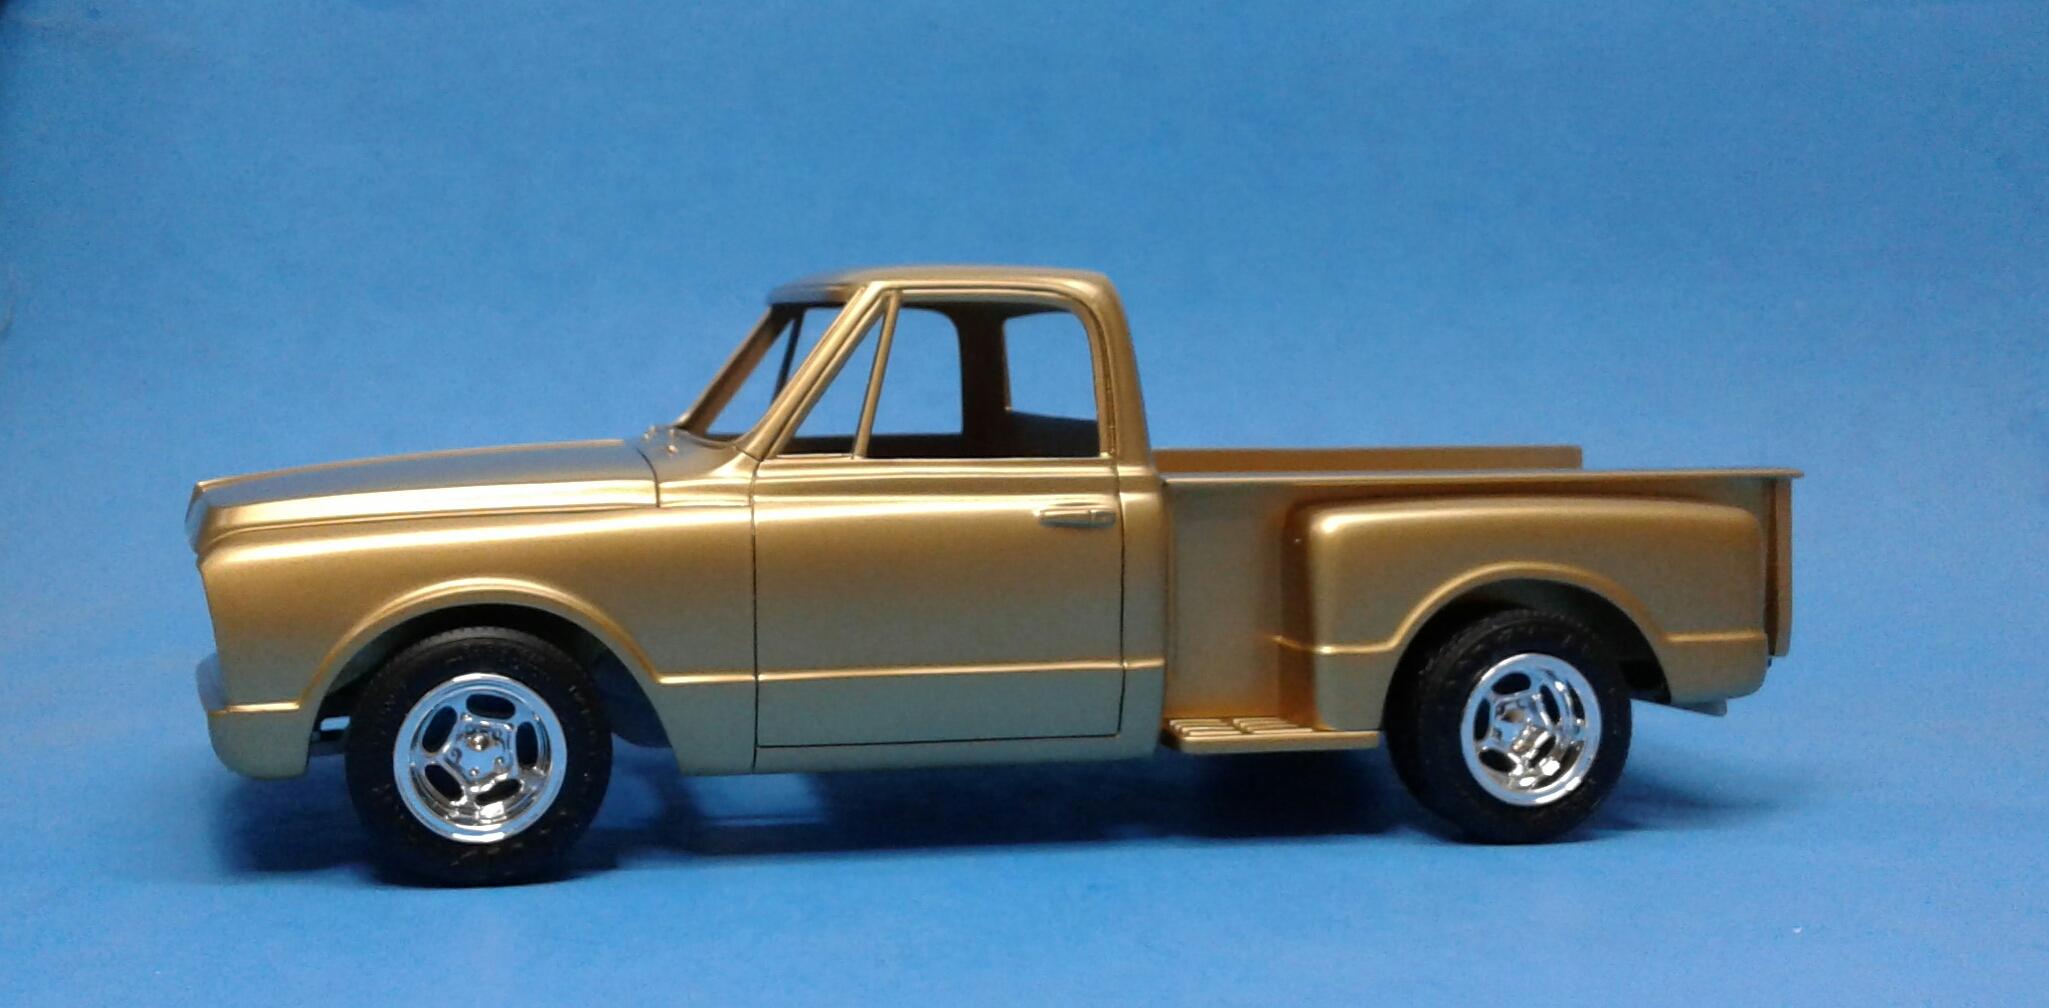
I got the body in paint! It's Tamiya Gold. I'm going to shoot a coat of clear, add the decals and shoot more clear.