PHPaul
-
Posts
491 -
Joined
-
Last visited
Content Type
Profiles
Forums
Events
Gallery
Everything posted by PHPaul
-
Could you elaborate on that? I could use some of those fittings. Handrail looks great! Nice work!
-

Correct engine color for '57 Ford Y block?
PHPaul replied to PHPaul's topic in Model Building Questions and Answers
Thanks! -
My next project (after I finish up detail work on a couple on the bench) is a '57 Ford Fairlane I was gifted. I intend to build it stock as a tribute to a black and yellow '57 one of my older brothers had when I was a kid. Not a Ford guy. What color would the engine be for this application?
-
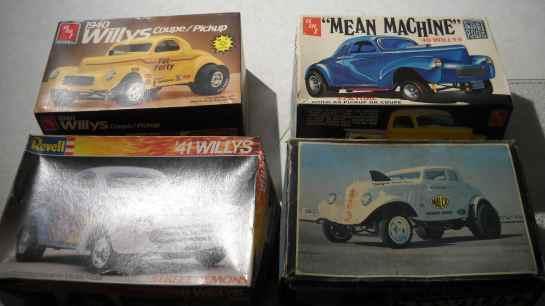
I took a quick look through the boxes. All have been opened, two are missing engines/frames/suspension bits but have some cherry body and interior pieces. The other two appear to be pretty complete and I have two sets of pickup options to work with, several sets of my favorite "bean slot" mags and a couple of bitchin' sets of slicks! I'll have to see if I can find a nice Hemi engine package and build another gasser.
- 38,991 replies
-
- 1
-

-
- johan
- glue bombs
- (and 1 more)
-
I post pictures of my various model projects on a non-related board I hang out on. A member there asked if I was interested in "some old models" and of course I said "Sure!" I got a box today with these 4 variations on the classic Willys. I've often looked at a Willys kit but never pulled the trigger. No excuse now!

- 38,991 replies
-
- 2
-
-
- johan
- glue bombs
- (and 1 more)
-
That turned out well!
-
That works really well! Did you build the double-decker bus?
-
Just finished my first diorama! Asbury, NJ streets!
PHPaul replied to GlueSniffer's topic in Dioramas
Nicely done! Excellent details! Careful tho, dioramas can be addictive and are serious space hogs! -
Well Done!
-
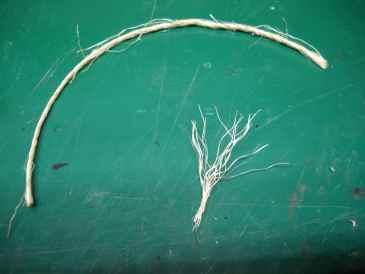
This may not be original, but it occurred to me to try this and I'm happy with the results: Start with a length of jute package twine, cut a suitable piece off, glue a short section together for the "trunk" and fan the rest out as branches. Coat the result with a liberal dose of spray adhesive. You may paint the armature first to match the color of bark you want. Let the paint dry before spraying the adhesive. Sprinkle it with scale leaves. I like Noch brand, available in various shades of green and some Fall colors. Glue to the base and spread the branches as desired.
-
Nicely done hand-held work! That sort of variety and focus on details is what I'm aiming for on my next one. I ordered a better tripod today. I was aghast at what you can spend on a video tripod!
-
Thanks. I need to look into a better tripod so I can pan more smoothly and get a steadier shot. Now that I have an idea of how to go about it, I may re-do it with commentary and pauses on various scenes. I can see where one could disappear down the Videography and YouTube rabbit hole!
-
A quick video tour of the overall layout.
-
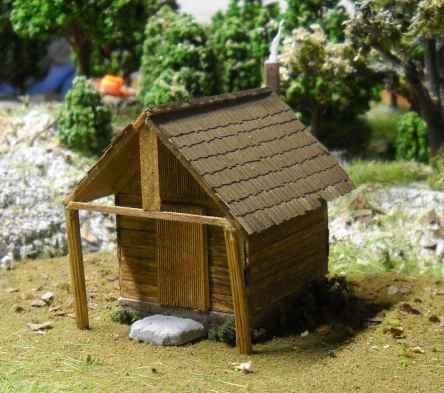
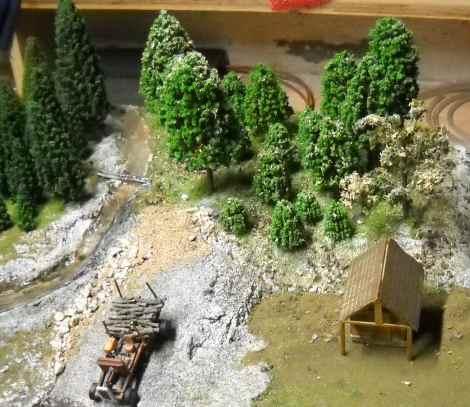
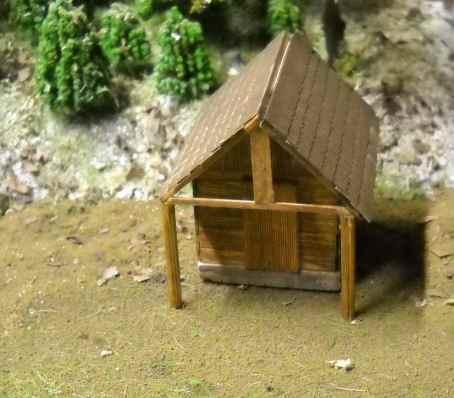
Turns out that a little heat was all that was needed to remove the material from the edge of the quarry casting. Now I see a couple of bubble lines from the separate pours. Sigh... Smokehouse in place and details around the foundation. Working on so other stuff like rusty buckets and maybe a bench.
-
Very, VERY nice! Scale?
-
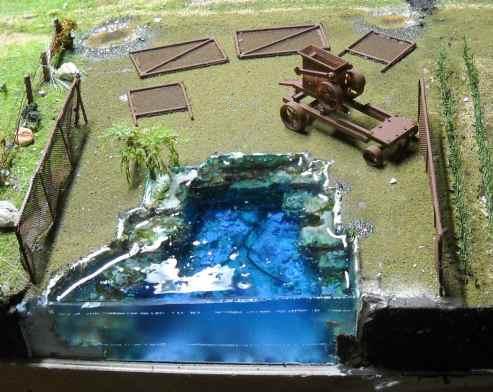
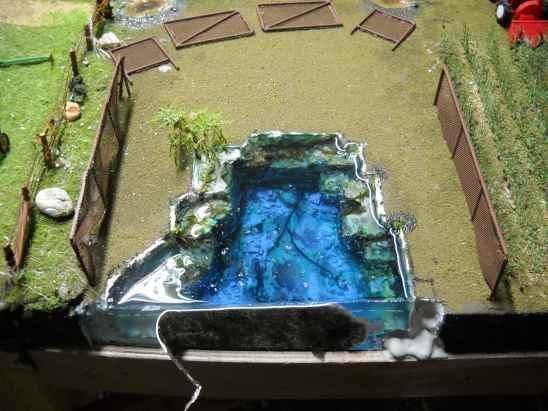
Couple of things didn't go quite to plan on the quarry. The last pour bubbled on me (I have an idea or two on how to fix that) and the material I used to define the front edge bonded to the epoxy. I thought it was slick enough that that wouldn't be a problem and didn't use any sort of a release agent. Oops... Trying various methods to remove it as I REALLY want a view through the front edge. I'm working on an old belt-driven rock crusher that will be parked inside the fence, rusting away and sinking into the ground. Also need to add a bit to the fence as I didn't visualize quite enough area for the details I have in mind. I tucked a smoke house over by the woodlot. Not finished yet, need to trim out the roof and add the chimney and firebox, plus detail around the building.
-
VERY nice detailing on the SSKL! And I know what you mean about the eyes. I work in 1:64 and the magnifying lamp is my favorite tool!
-
Second pour on the quarry. That's taken within moments of the pour so the bubbles haven't all risen to the surface just yet. One more pour should do it. Destructions say to wait 4-6 hours between pours. Have an electric space heater running as my basement is usually around 55°F in the winter. Bit cool for epoxy...
-
Excellent. Just a bit of detritus dredged up from my days as a model railroader.
-
Looking good so far! Are you going to "quarter" the drivers? IE, pins on one side 90 degrees from the pins on the other side? This is so the piston on one side or the other is not at Top (or Bottom) Dead Center. If both are at TDC the engine won't be able to get the wheels moving.
-
Good thing we can just hit "print" and walk away, isn't it?
-
Thanks! Pretty much, yup. Epoxy is here, tint is supposed to be here by Friday. Meanwhile, working on the rock crusher for the quarry and the smokehouse.
-
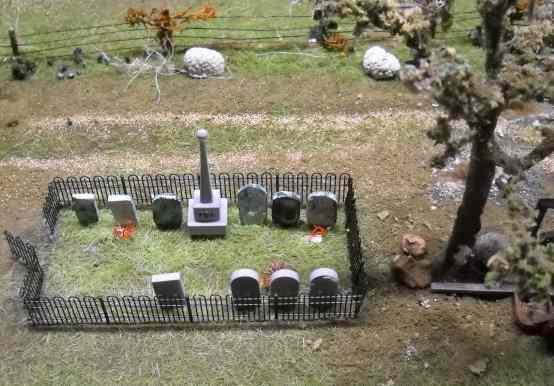
The family plot is pretty much done. When the glue is cured and everything is solidly in place, I'll probably do a little more detailing in terms of flowers and such.
-
1940's Sprint car - from scratch
PHPaul replied to skipstitch's topic in WIP: Other Racing: Road Racing, Land Speed Racers
Very nice. Cars from that era interest me. -
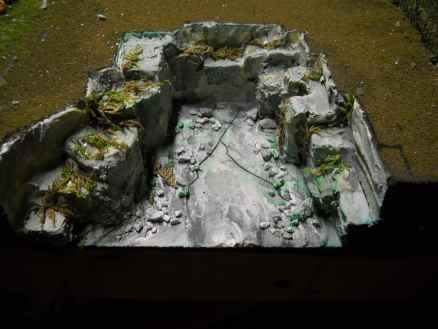
Quarry is colored and the aquatic growth and bottom litter in place. Waiting on my epoxy and tint to show up from Santa-zon. Also working on a smoke house and a small family cemetery. Pics as things develop. (Ooooo, bad pun...)