Rbray47
-
Posts
437 -
Joined
-
Last visited
Content Type
Profiles
Forums
Events
Gallery
Everything posted by Rbray47
-
Awesome project! Bonus points for the use of 45C casings. I dont know if 458 socom is available in Italy, but it would probably work as well (45 cal at the opening with a larger diameter below the bottleneck)
-
Yep. The AMT kit, if built from the box, represents a truck built from several model years of junkyard parts with an odd shaped windshield and no lug nuts. It actually looks terrible if it isnt modified.
-
Chevrolet Butternut Yellow?
Rbray47 replied to Rbray47's topic in Model Building Questions and Answers
I dont have an airbrush. I didnt see any aerosols on their website. Maybe I missed it. I guess I'll just use Phoenician Yellow. -
Chevrolet Butternut Yellow?
Rbray47 replied to Rbray47's topic in Model Building Questions and Answers
Haha, just judging from the little sticker on the can lid. -
Chevrolet Butternut Yellow?
Rbray47 replied to Rbray47's topic in Model Building Questions and Answers
Thanks for the replies. I have Phoenician Yellow, but it looked a little too light. Might use it anyway. I'll still check the Rustoleum rack at Meijer. -
I've built several from the amt Firestone and earlier kits. Modifying the bed isnt super easy, but its not too bad. Still, it would be cool if we had some kit based options. The worst part is having to use two kits to make one bed (due to the spare tire bulge)
-
Is there a Rustoleum equivalent? Gotta go to town this weekend, thought I might get some paint.
-
Thanks. I didnt know how much AMT changed the tooling. I have the SS427 on my bench right now. The engine doesn't have any chrome. The TV car had chrome valve covers and air cleaner. Not that it matters a whole lot. I'll be building it for my wife and she wont notice.
-
Anyone know what engine is in the kit? On the show, it's stated that it's a 327. But, I remember one episode where the hood was up. It was clearly a big block.
-
I'll be the odd man here... I'd like a Tundra, Colorado, or Ram.
-
Good point. Right now my interests are building kits from my childhood (80s) that I screwed up the first time. Its nostalgia for the time, not the particular vehicle. I would much rather build modern subjects, like from the late 80s until now. I think it would be awesome to have full detail modern Jeeps and new pickups. I'm sure those younger than me may feel the same.
-
Time for LUVin'! Retro Street Truck (OOB)
Rbray47 replied to Faust's topic in Truck Kit News & Reviews
Rob, I think most of them rusted away. I bought my 76 when it was already over 20 yrs old and had over 100k miles. It was pretty rusty then. I put another 50-60k on it before I sold it to my ex-BIL. The frame was almost rusted through, and I made sure to tell him beforehand. He forgot one day and loaded it down with rocks. One frame rail snapped when he drove it loaded over a hump in his yard. Outside of electrical issues, it ran fine until the very end. -
Time for LUVin'! Retro Street Truck (OOB)
Rbray47 replied to Faust's topic in Truck Kit News & Reviews
As far as the single wall beds go, I've seem home brewed solutions involving plywood. If ya did that mod when the truck was new it kept the dents out, but accelerated the rust (held moisture) My 1:1 was beat to heck when I got it, so I didnt even try. -
Thanks! I "think" the paint is Testors one coat star spangled blue.
-
I like it a lot. Never would've thought of those wheels, but they work well.
-
I used a 1996 4.3 V6. It fit almost perfect. My other choice was the optional 4 cyl from MPC's Fiero kits.
-
The Ads Are Now Out of Control!
Rbray47 replied to Snake45's topic in General Automotive Talk (Trucks and Cars)
One ad in particular keeps breaking my train of thought...
-
Hobby Lobby re-opening
Rbray47 replied to Mike999's topic in General Automotive Talk (Trucks and Cars)
I've been buying whatever I need online. Since I'm in the People's Republic of Kentucky, who knows when non essential businesses will be open. -
Tamiya 1/24 Alfa Romeo GTV (1996) Twin Spark 16V
Rbray47 replied to Italianhorses's topic in Model Cars
That's awesome! -
Should work. Plenty strong enough. 20 years ago I used the same trans mated to a 4.6 V8. It actually fit in the Taurus, too. Wish I still had it.
-
Phil, that F1 is awesome. Here's my one and only:
-
Chevy LUV finished
Rbray47 replied to Rbray47's topic in Model Trucks: Pickups, Vans, SUVs, Light Commercial
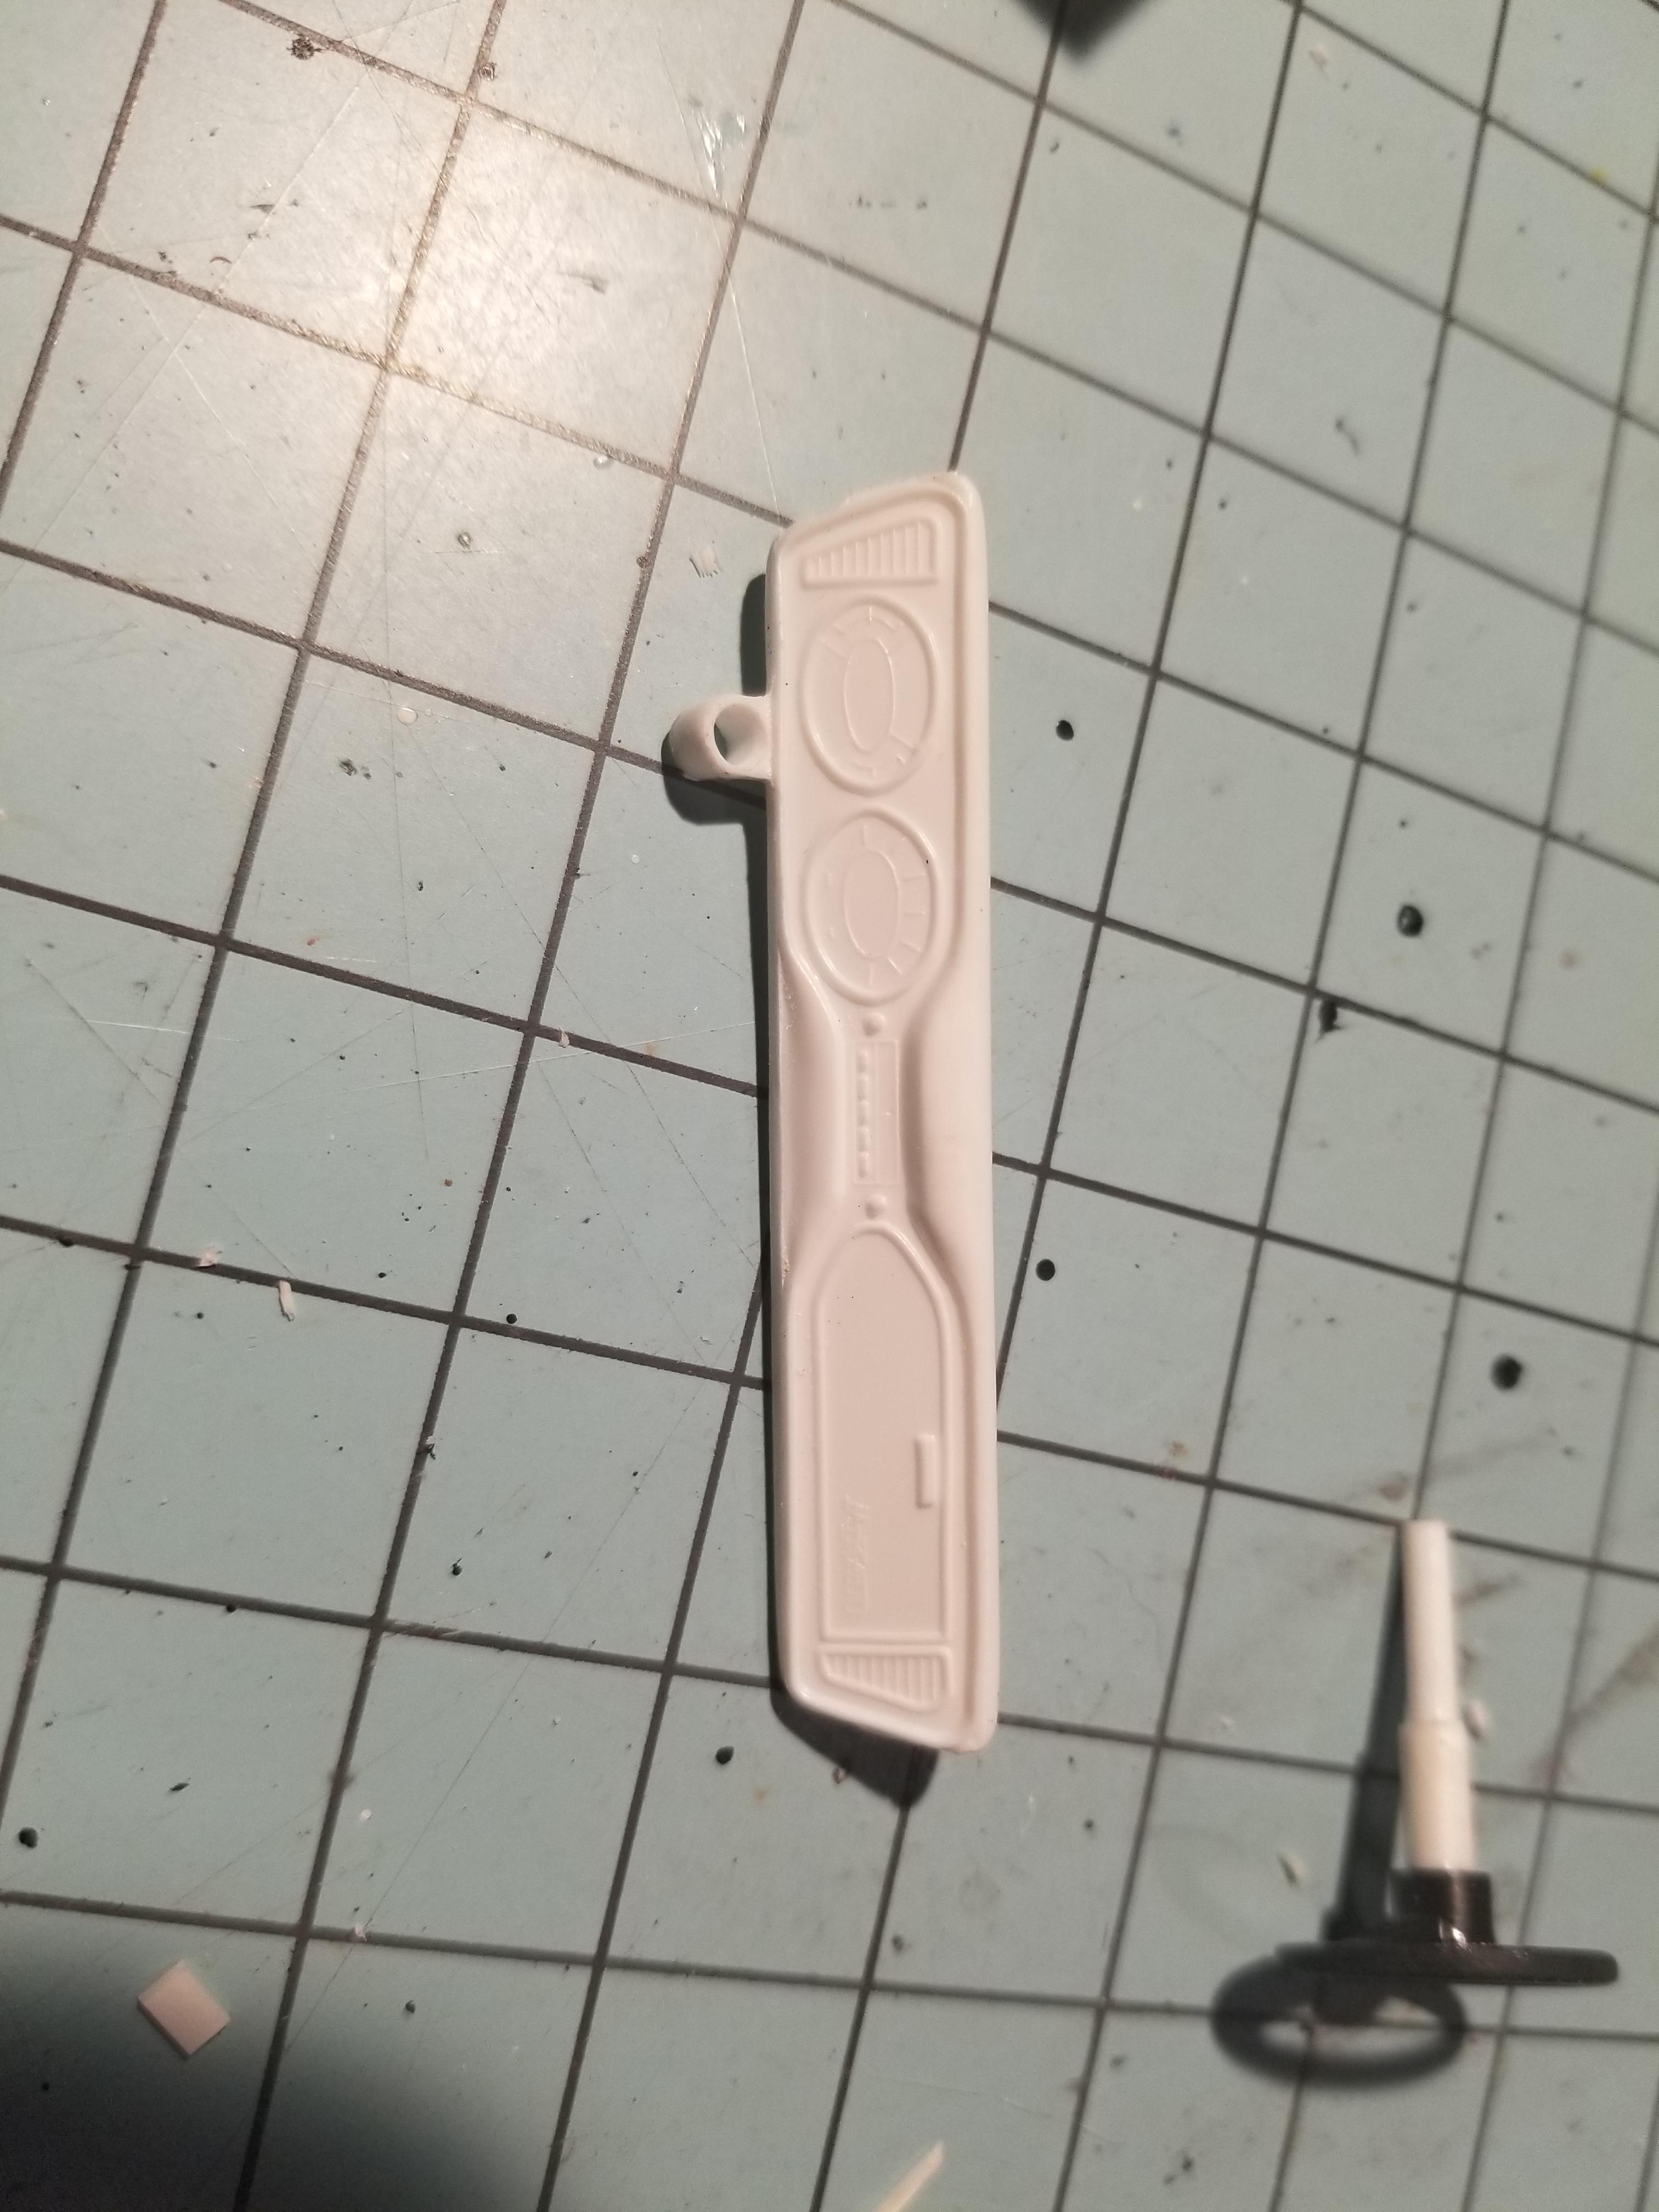
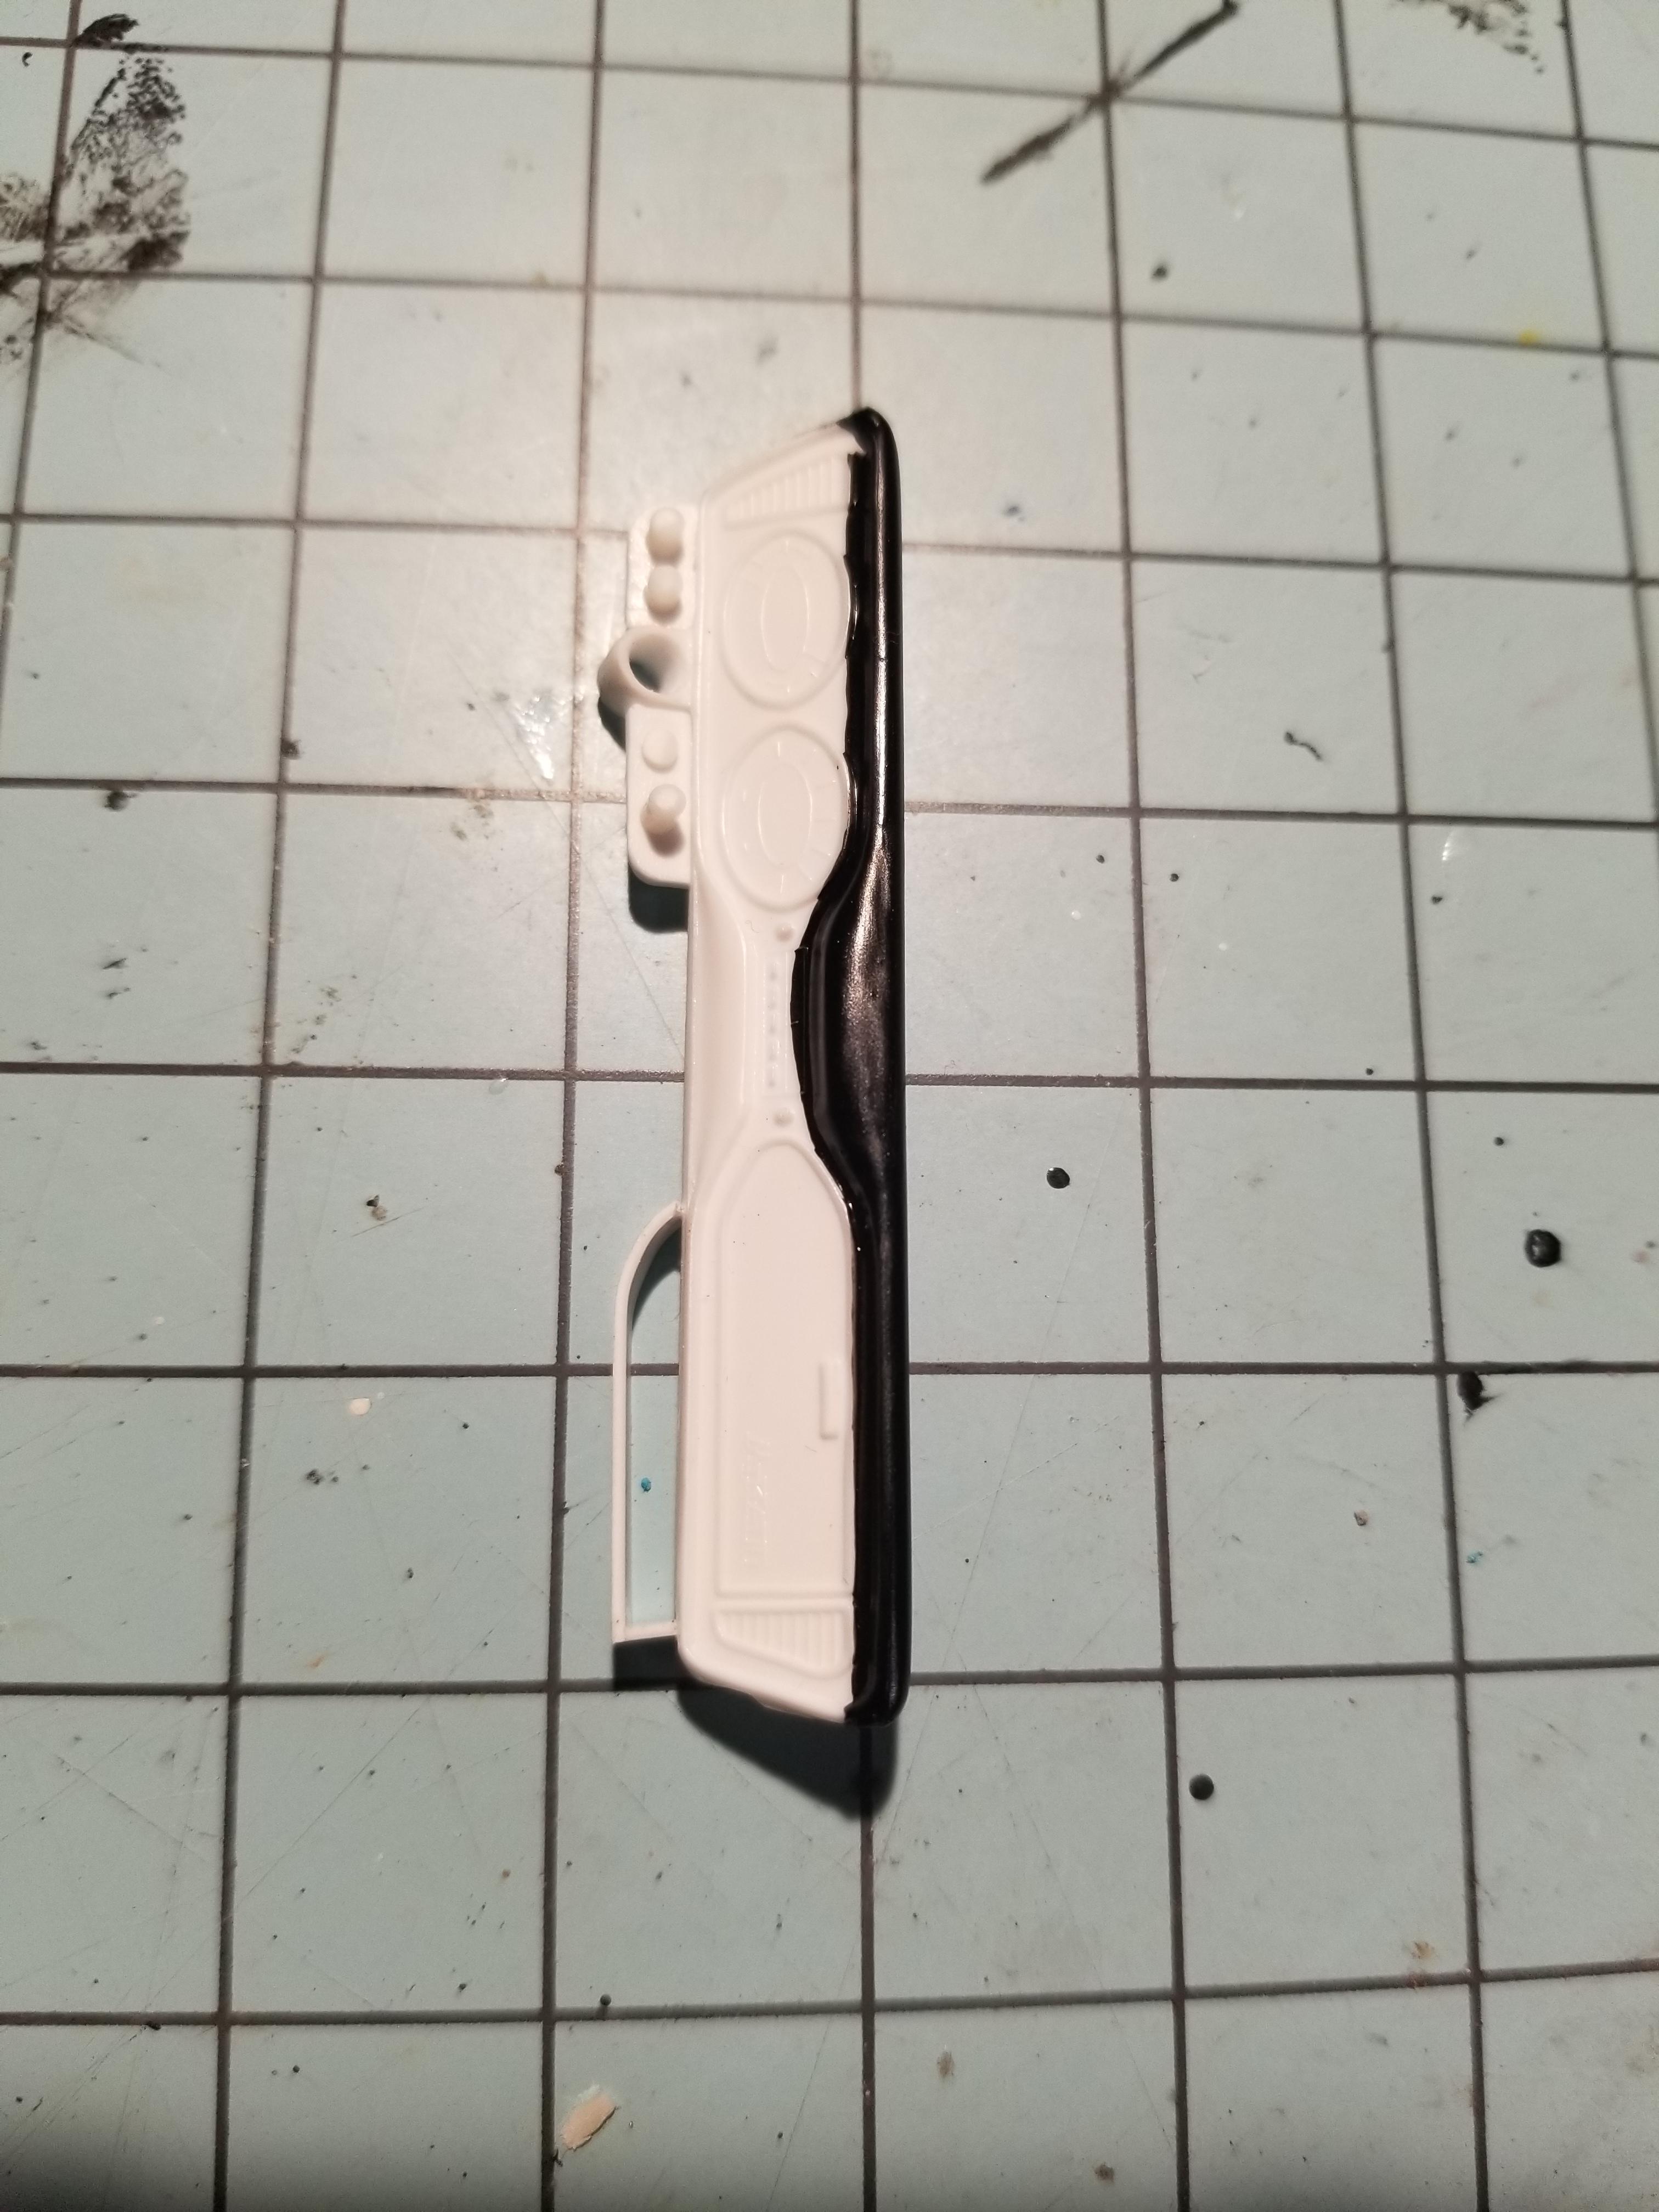
Before and after dash pics. Once I realized that it would be so hard to see, I have up before scratchbuilding the missing heater that would go under it.
-
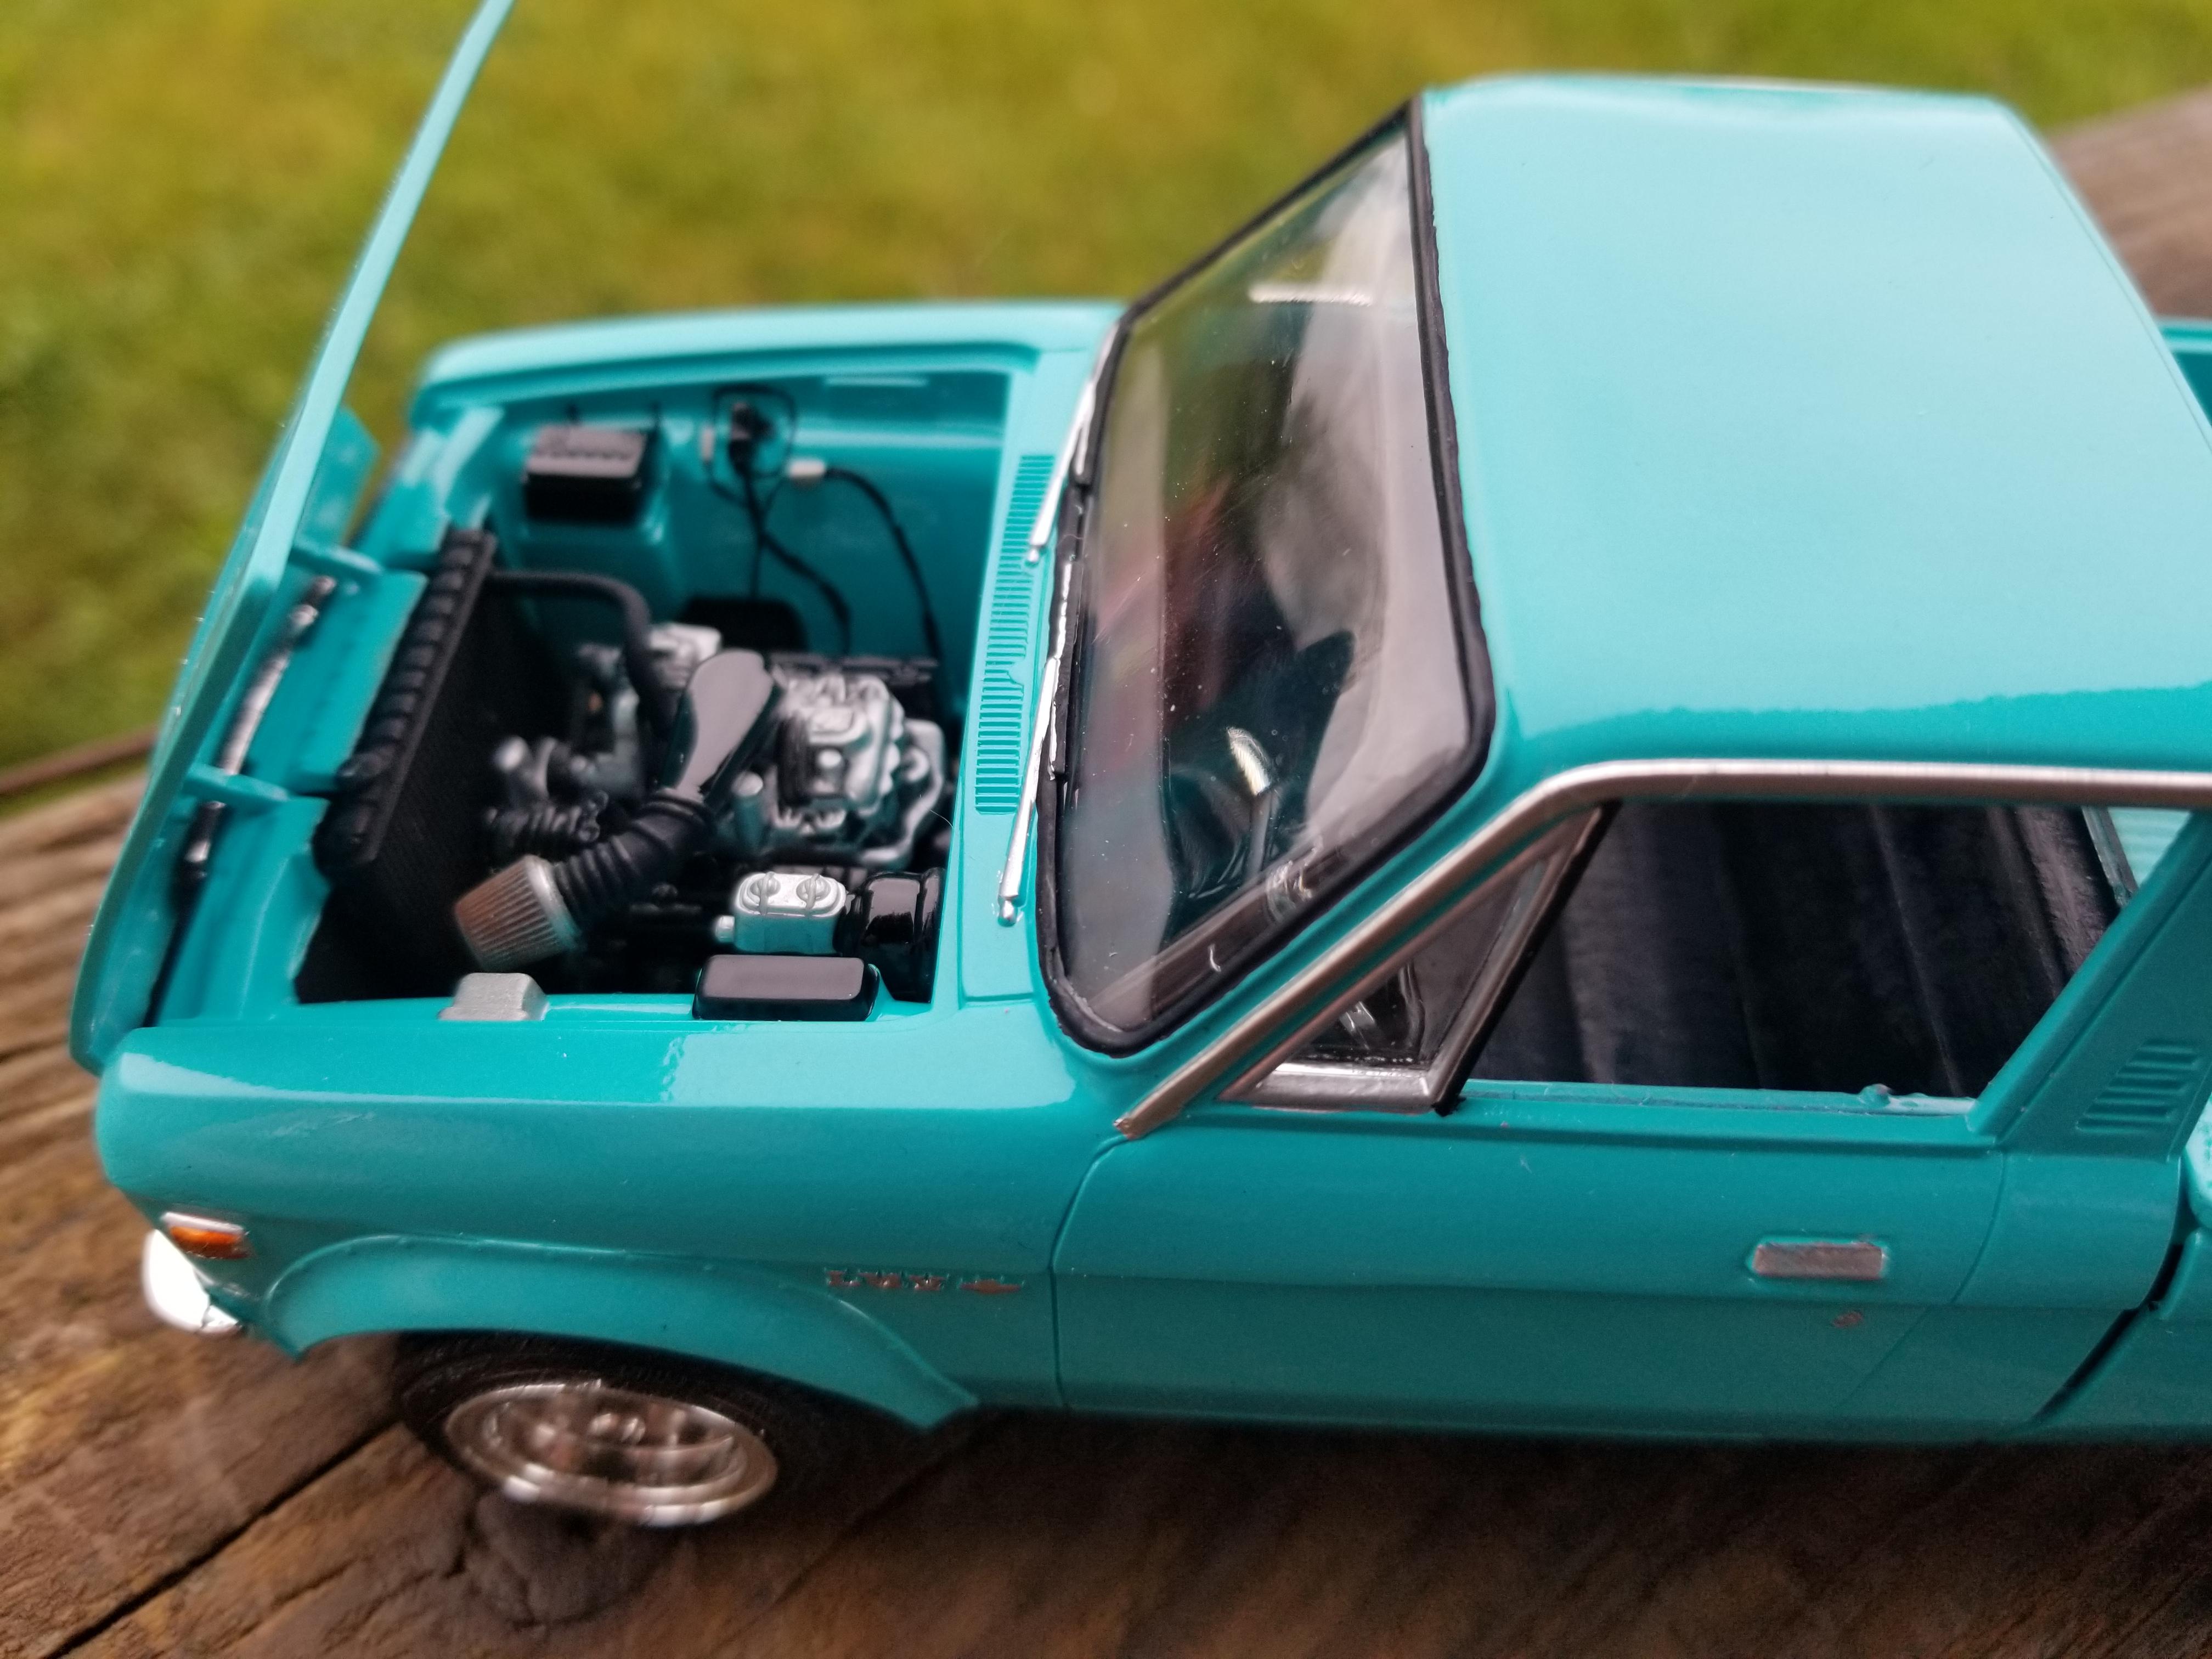
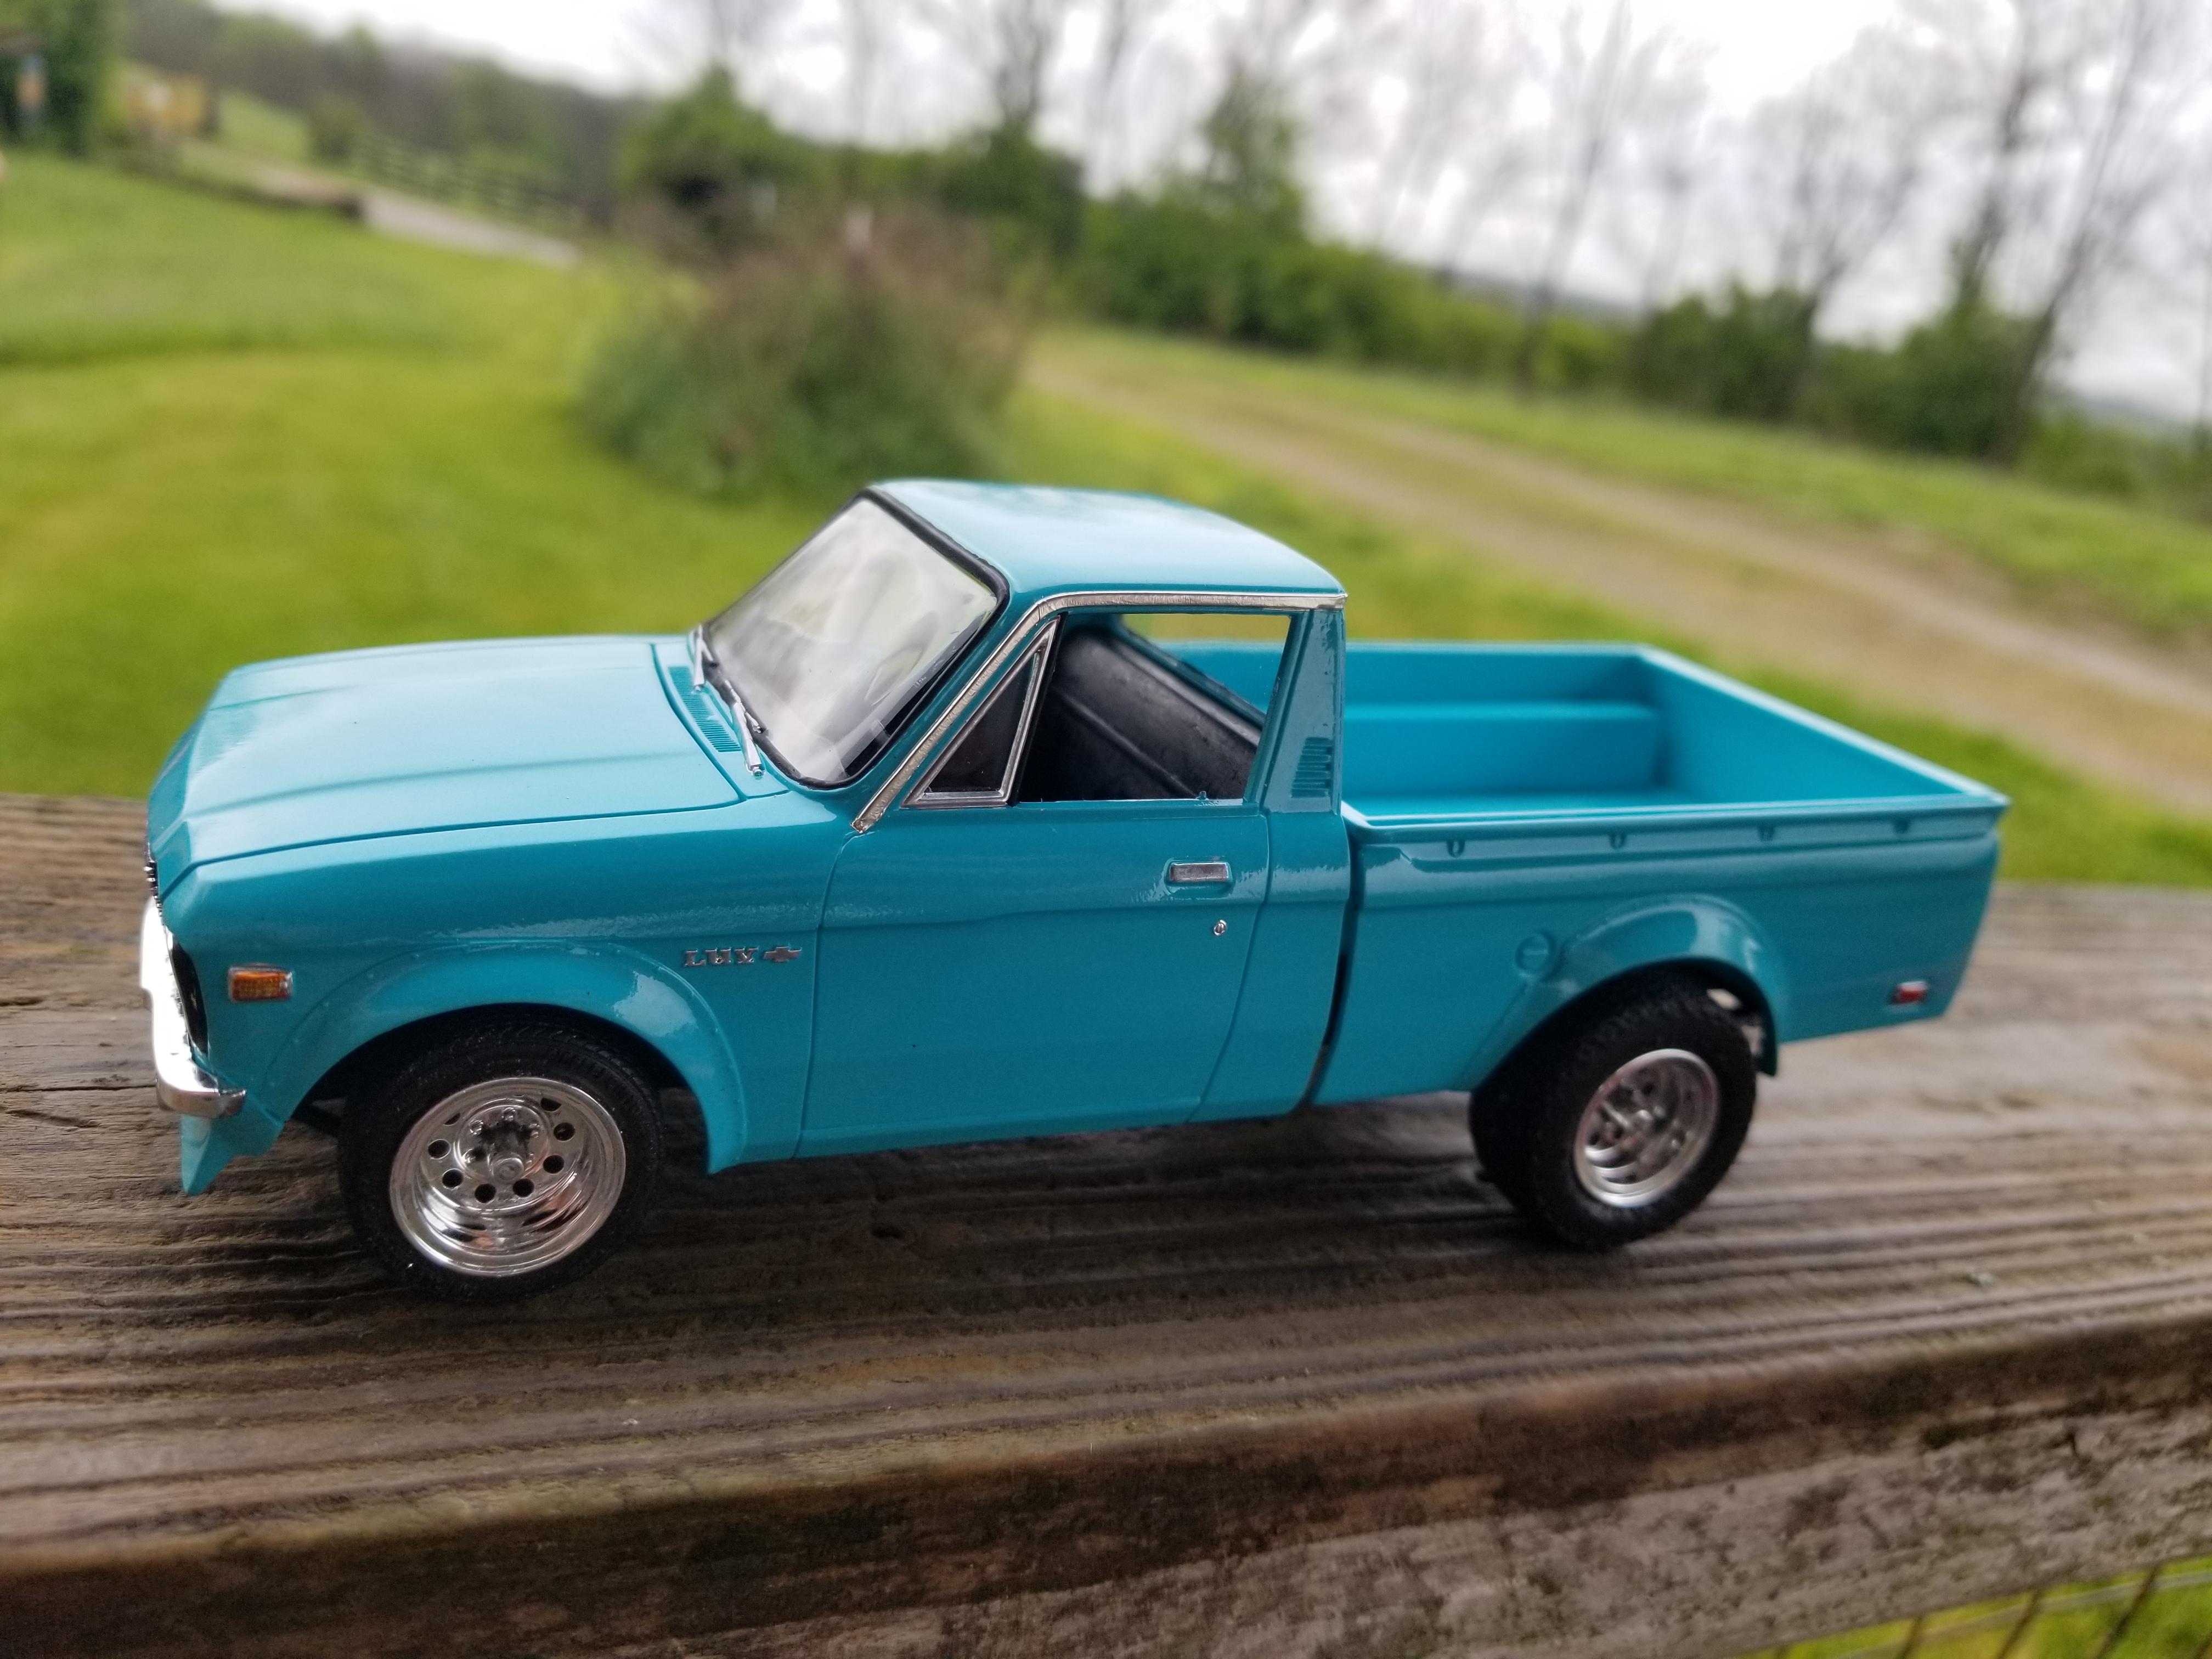
I'm calling this one done. No point in doing too much detailing given the wonky plastic. If Revell can fix the styrene issue, I'd gladly buy more, as I like old pickups. The kit didnt supply a master cylinder or radiator hose, so I sourced one from the parts box. I also omitted the goofy rear bumper. Since I swapped the V8 out for a 4.3/auto, I modified a parts box console and shifter, and even though it cant be seen, I ground off the manual pedals and replaced them with a wide one for the brake. The dash isnt complete, as the areas on either side of the steering column just wasn't there, so out of the box, there's no ignition, wipers, or light switch. Again I added that, along with the tray under the glove box even though they're hard to see.
-
No box damage. Only real damage was where whomever cut the cab and bed from the sprue.
-
Casey, I purchased mine from "ballzanos_hobby_warehouse" When I searched ebay for the kit, I used the "sort by price, lowest to highest" They were the cheapest. Maybe that's how so many people are getting one from them?