Biggu
-
Posts
1,713 -
Joined
-
Last visited
Content Type
Profiles
Forums
Events
Gallery
Everything posted by Biggu
-

The Same but “ a little “ Different
Biggu replied to Biggu's topic in WIP: Model Trucks: Big Rigs and Heavy Equipment
🤣you have such great confidence …. I do hope you’re right. -
The Same but “ a little “ Different
Biggu replied to Biggu's topic in WIP: Model Trucks: Big Rigs and Heavy Equipment
Thanks Sean. Trust me the pipes don’t look that bad in real life…. 😉😳 and thanks for the tip. I may have to use that. It is a good idea. I think the hinges are ok for as much as I will be lifting the cab and your approach is really one I need to try. And it was a very puckering moment to remove those hinges and I was really careful. I hope I have the issue solved. If not I will have to ask the experts … thanks for checking in and your comments , I always learn things here… -
The Same but “ a little “ Different
Biggu replied to Biggu's topic in WIP: Model Trucks: Big Rigs and Heavy Equipment
If this doesn’t work mine may be the same. ….and I’m not a real fan of cab overs as it goes anyway as a rule …. This one is a bit different and a homage to my late mom …. And I took my Class 1 drivers test on a 63 Kenworth K 100 250 Cummins 13 speed. Had to parallel park it with a 40ft trailer ! Guess I did ok. Passed and bace bad my Class 1 for 45 years.. -
The Same but “ a little “ Different
Biggu replied to Biggu's topic in WIP: Model Trucks: Big Rigs and Heavy Equipment
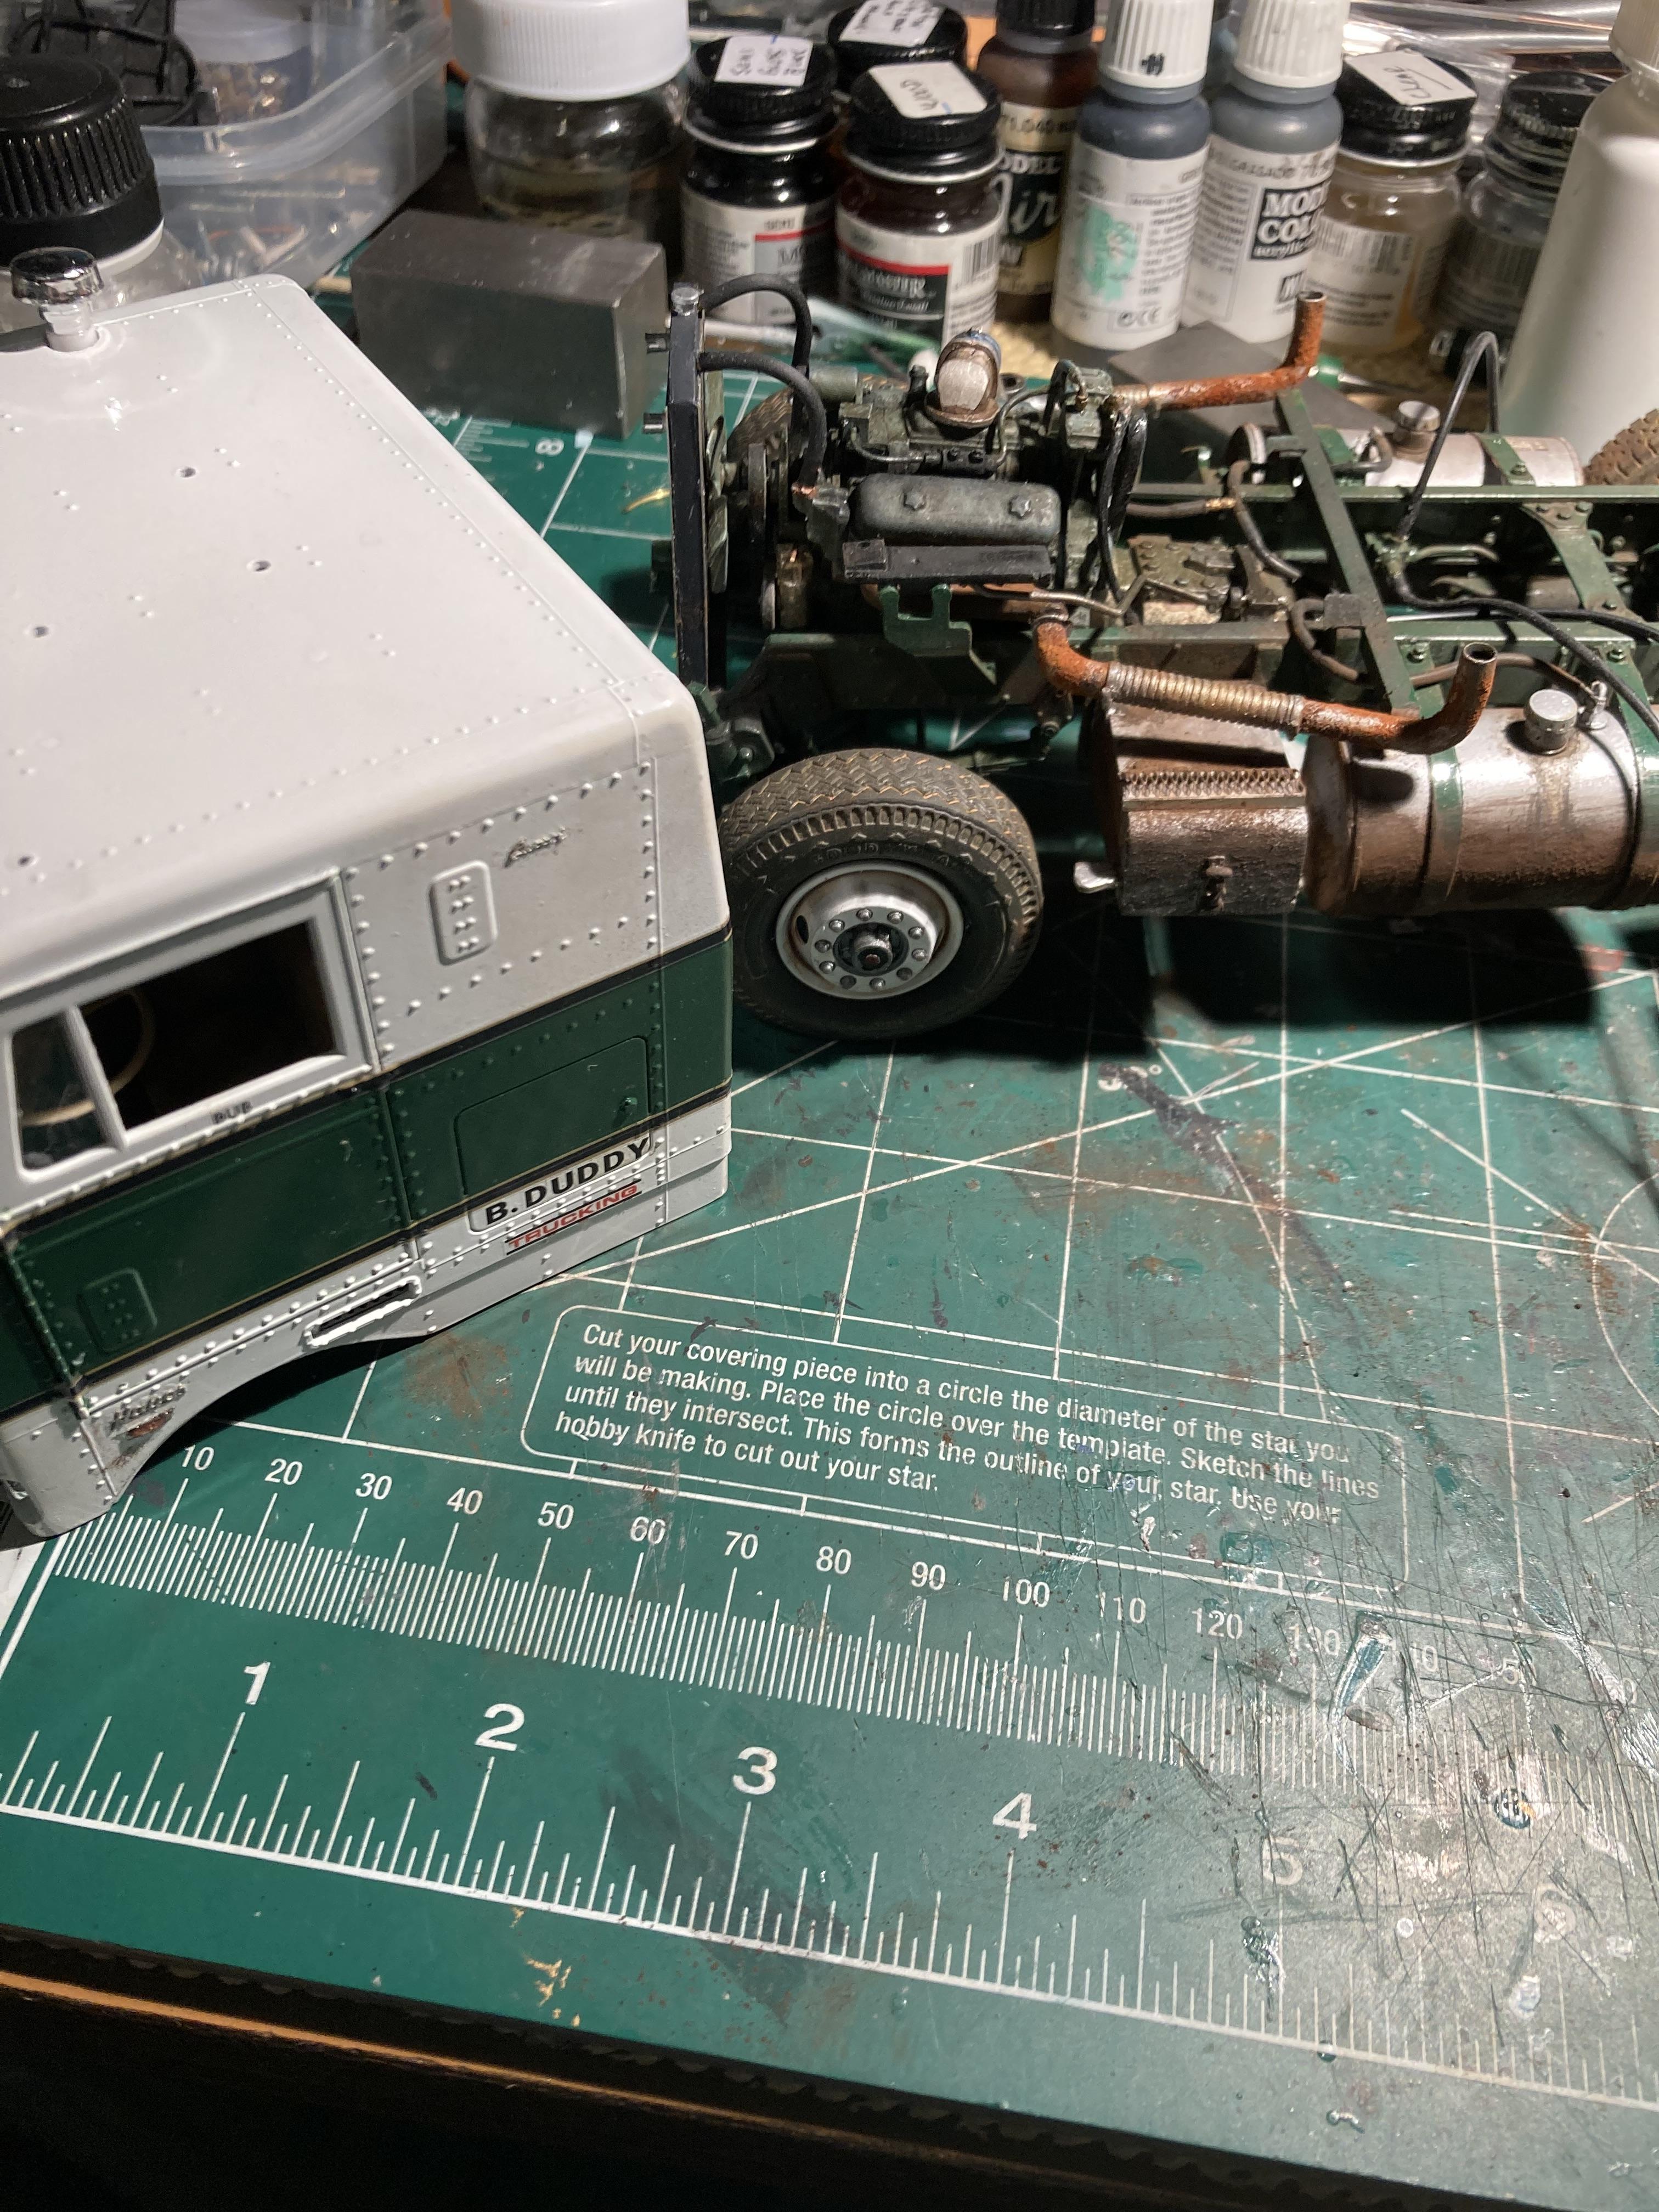
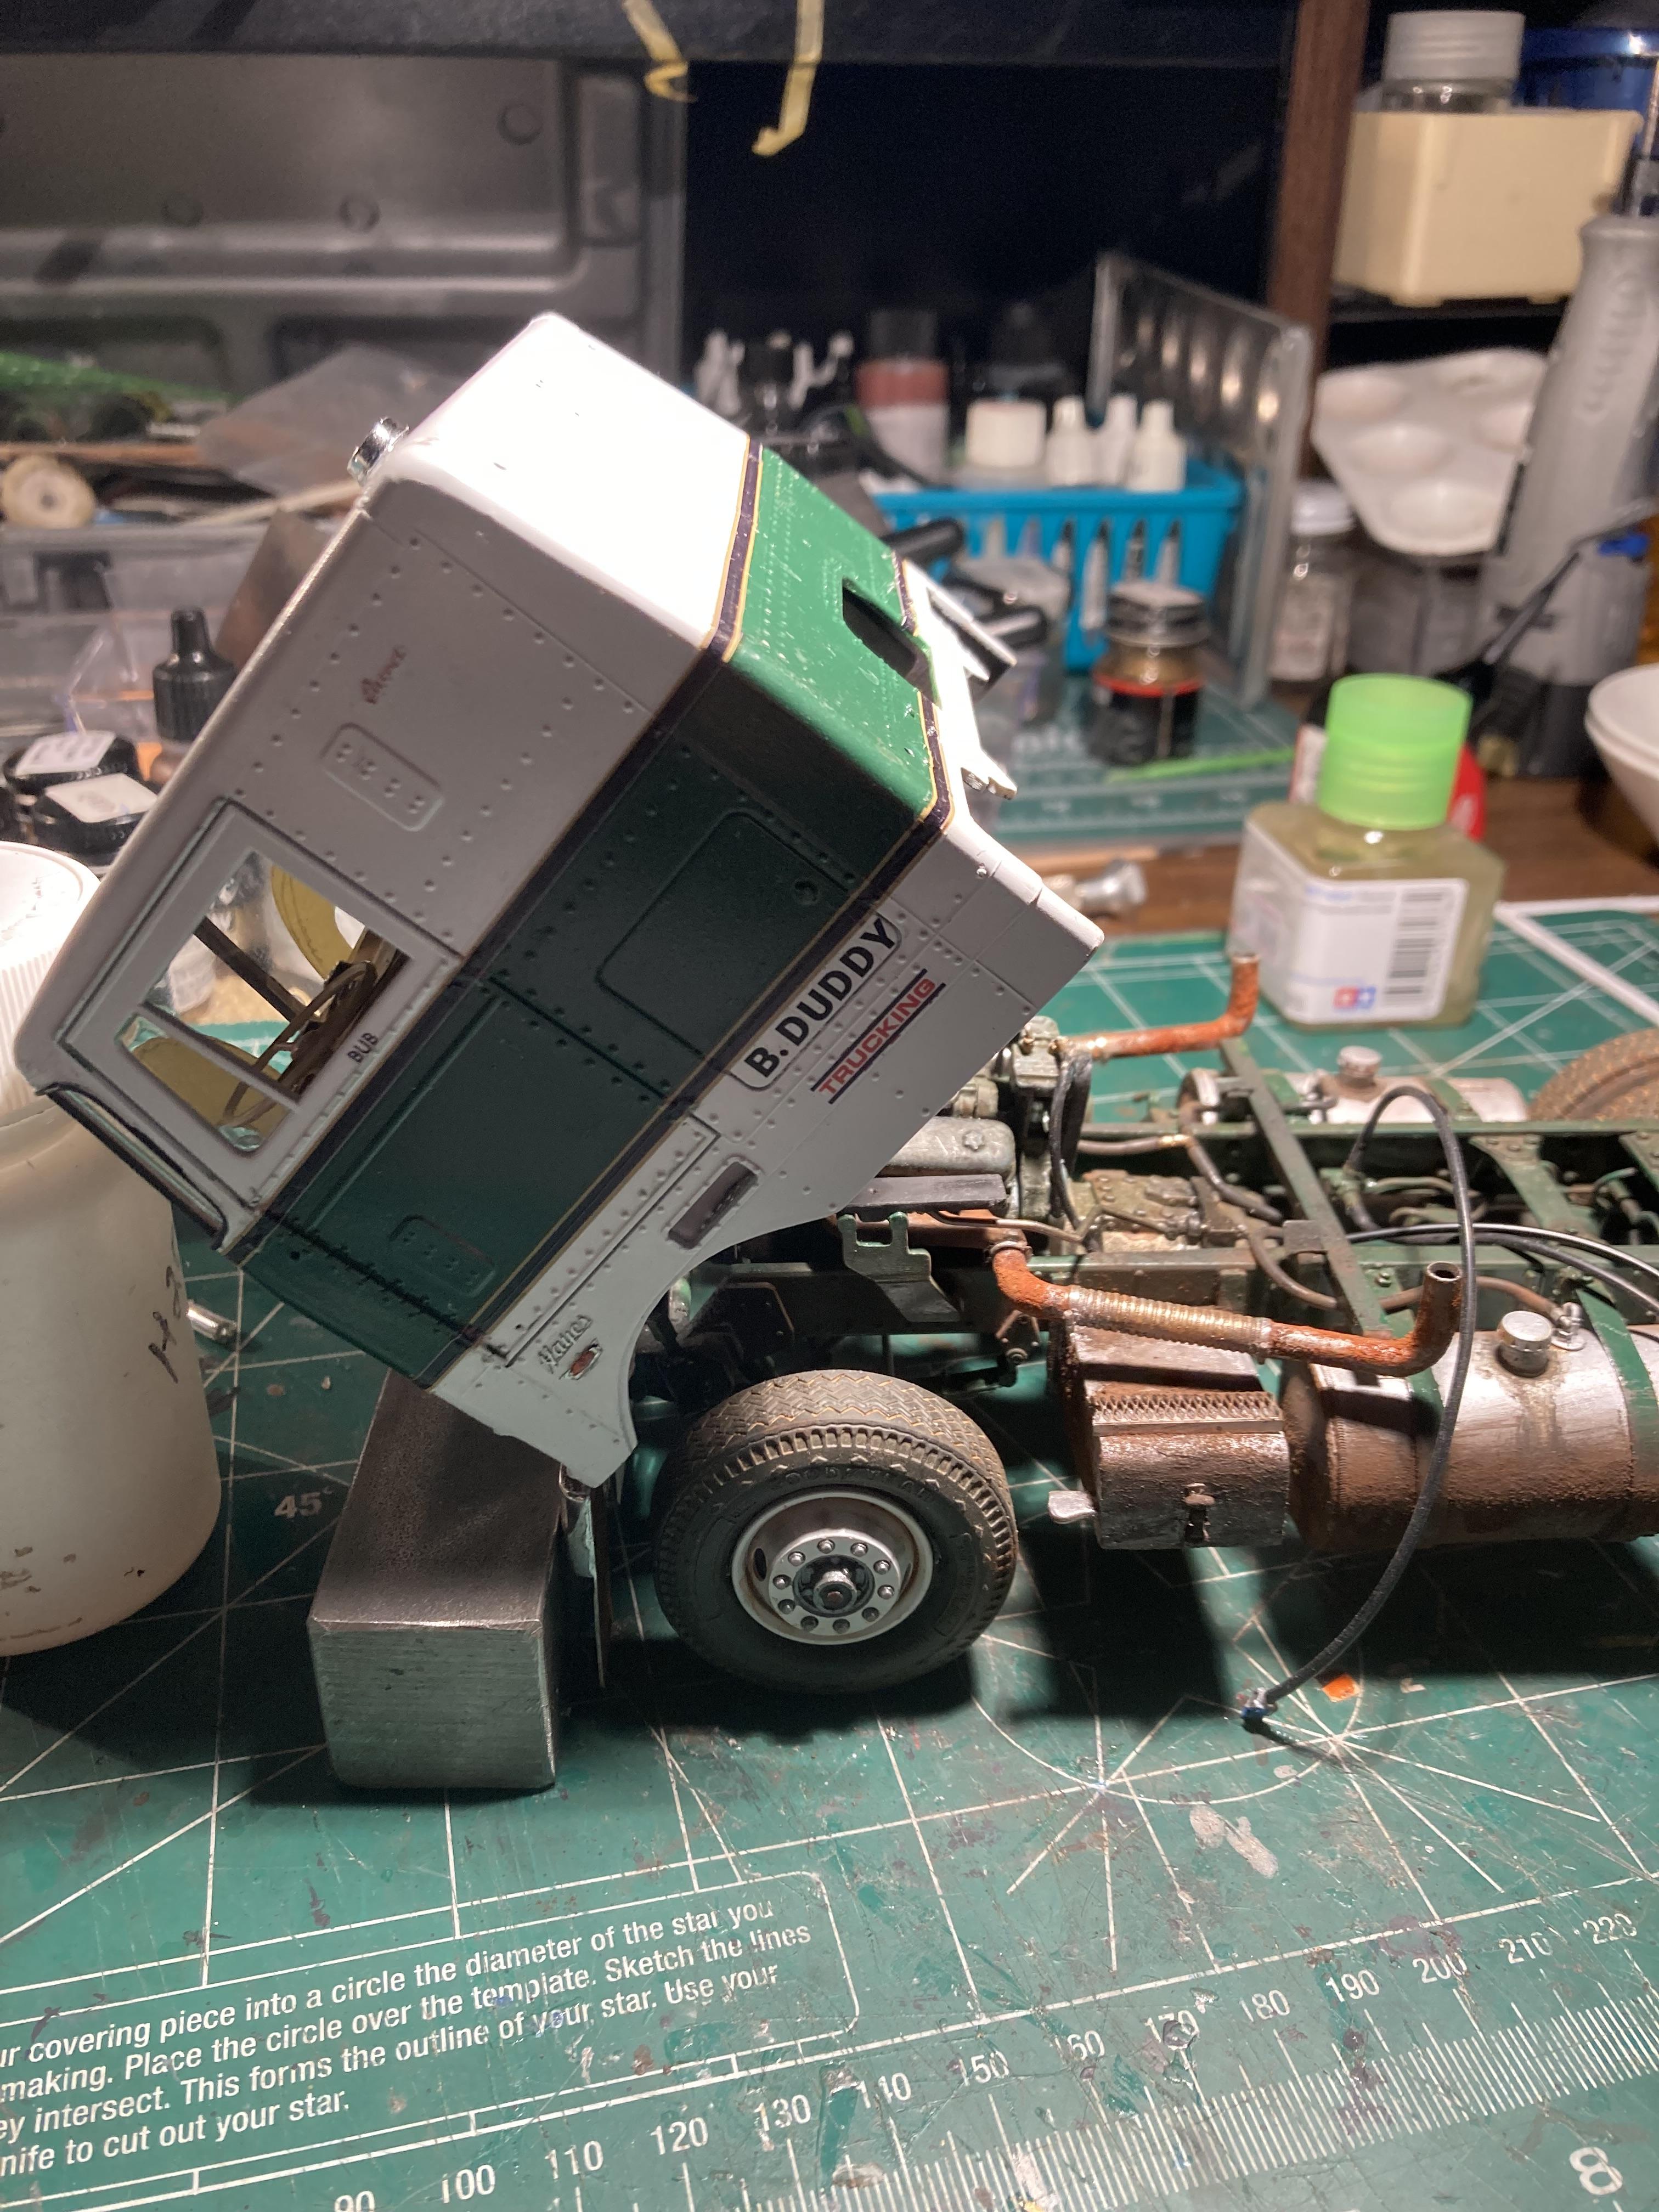
Well….. that was short lived …… as my good friend Brian suggested, go back and double check. …… naw , I got this…….. then I thought yeah , he’s right and good thing I did. When I tried to set the cab down on it’s rear mounts it didn’t do what I wanted ……. Seemed like it was hanging up on what I ‘think’ ( as I can’t see for sure) is the shifting tower and linkage. Try as I might there was no joy ……. Now the thought of tossing it crossed my mind for a fleeting second…… so I pulled the bumper glue joint from the frame , had a good look at what might be the issue…… I was thinking about what Ron said about his cab issues and then much to my chagrin, I actually looked at the instructions. It suggested that the hinges be ‘adjusted’ ….. when I glued the hinges and bumper to the cab , silly me I actually consulted photos of the real truck …. Not accurate for this build. … so a long winded story shortened up …. I discovered that I ‘think’ there has to be about 10 mm between the bottom of the cab and the top of the bumper to prevent any fouling of engine parts ….. I managed to pry the well glued hinges from the cab and boy I was puckered doing that….. got them off with a little persuasion, love and a few choice words ….. the hinges are now set at 10 mm and lightly glued so I can maybe give it another try tomorrow. If it works I will permanently set the hinges and carry on …….. always some sort of challenge. ….. I am cautiously optimistic …. -
The Same but “ a little “ Different
Biggu replied to Biggu's topic in WIP: Model Trucks: Big Rigs and Heavy Equipment
Back to the drawing board
-
The Same but “ a little “ Different
Biggu replied to Biggu's topic in WIP: Model Trucks: Big Rigs and Heavy Equipment
Thanks Brian, I may have to 'dust' up the cab a bit to tie it all together.... I'm at the nervous point now..... -
The Same but “ a little “ Different
Biggu replied to Biggu's topic in WIP: Model Trucks: Big Rigs and Heavy Equipment
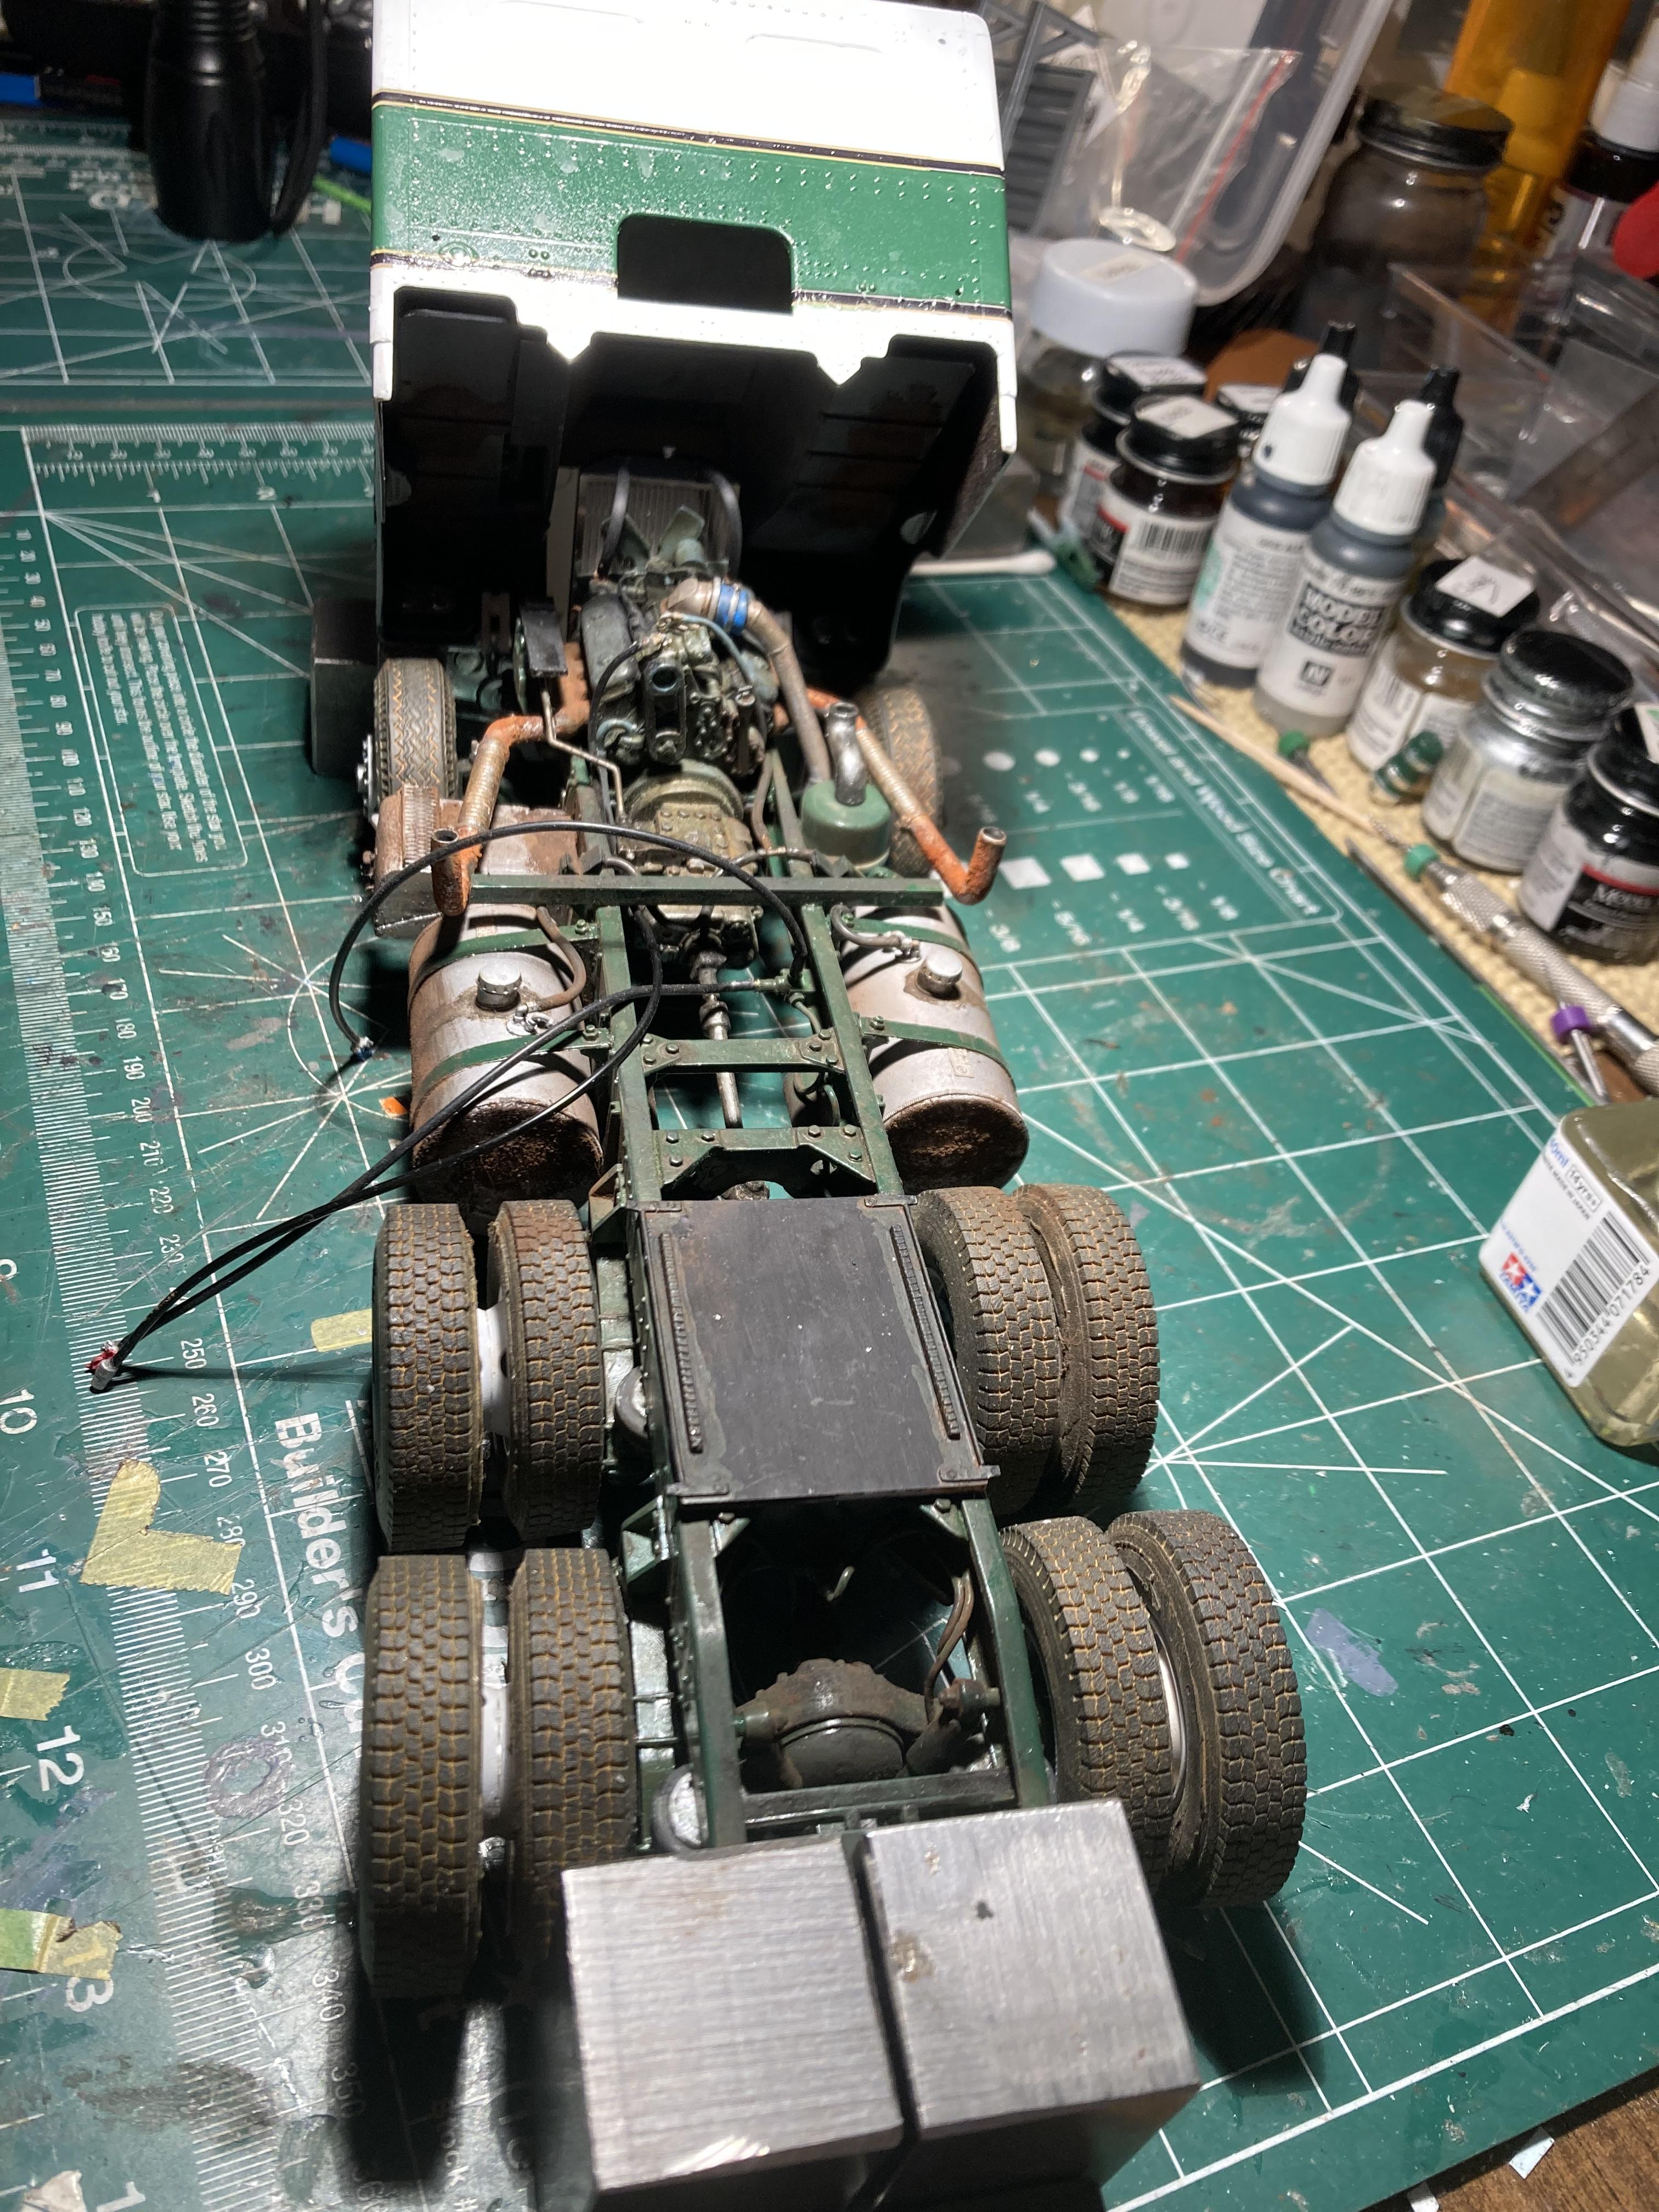
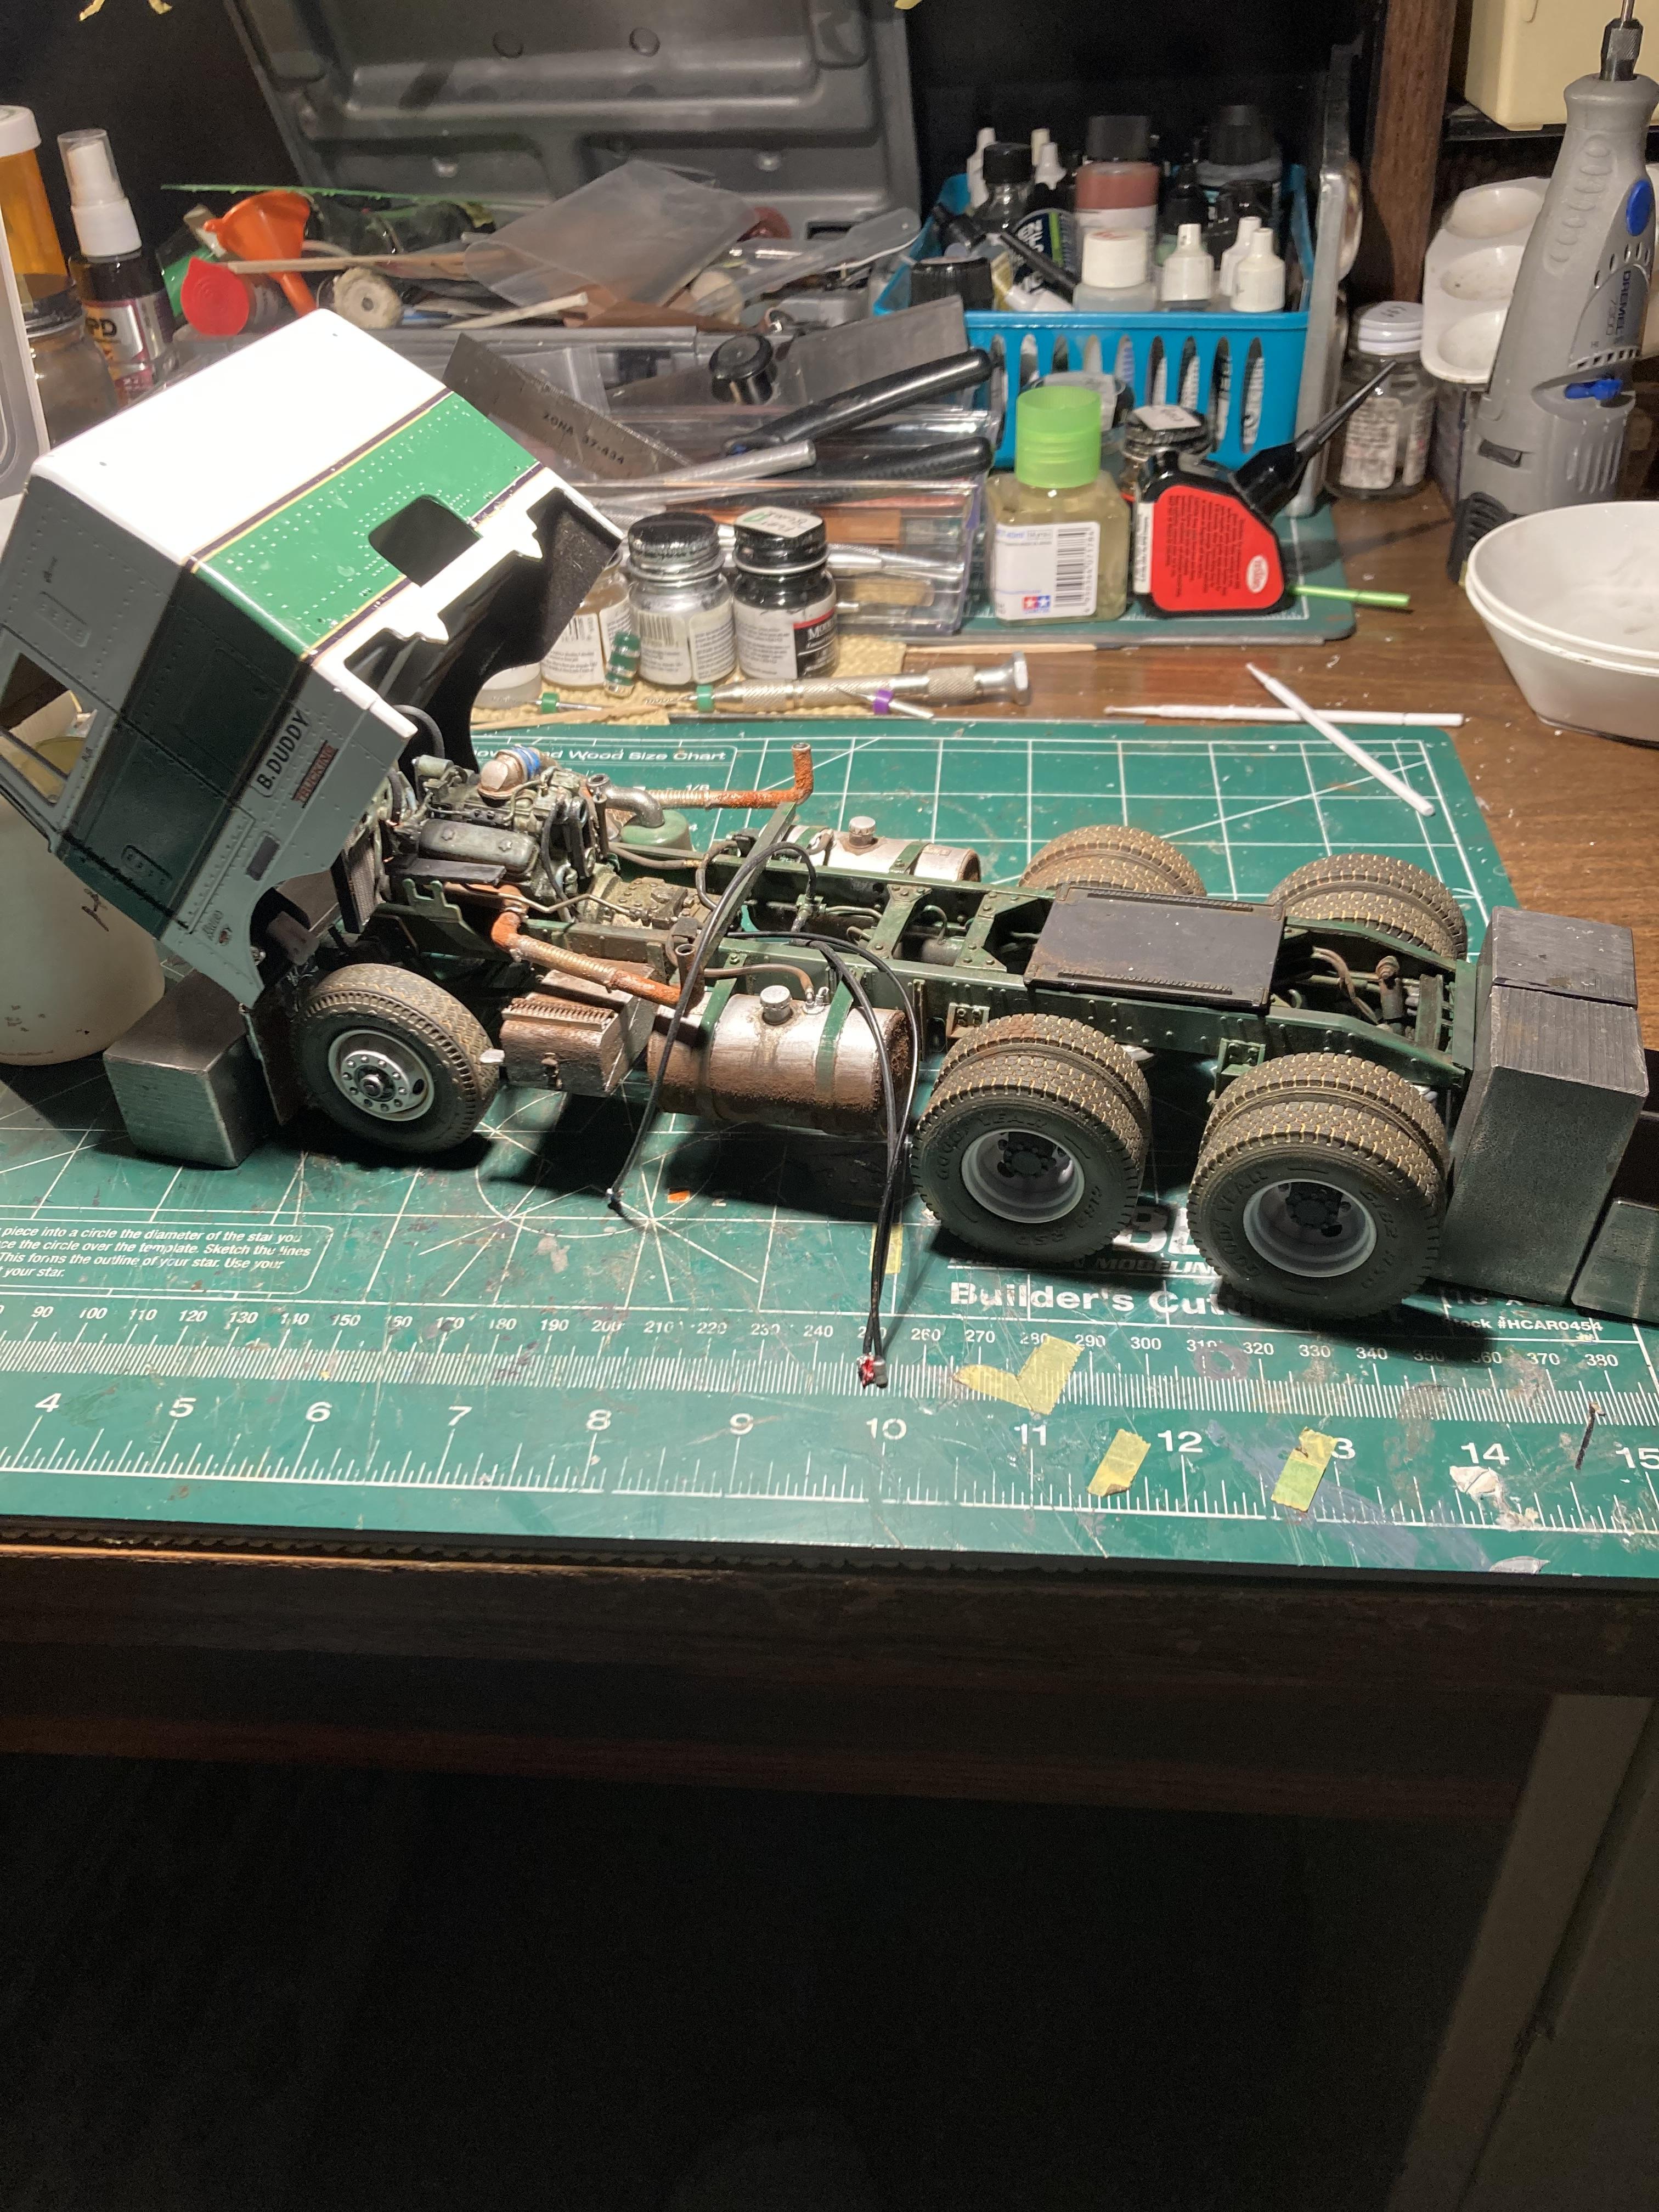
Little bit of a ‘milestone’ …… no turning back now , I guess ……🤞🤞🤞🤞
-
Looks like I am late to this party, Ron …… but as they guys are saying , a basic ‘cookie cutter’ truck and there are thousands of them on tje roads and I for one don’t give them a second look , BUT, this one is very unique as it is a rare one to be modelled, you made it basically from scratch and it is an important cog in the history of trucking in North America, AND you nailed the look perfectly, thats one to be proud of my friend, nice job ! Looks great. Jeff
-
West coast Freightliner
Biggu replied to leafsprings's topic in Model Trucks: Big Rigs and Heavy Equipment
Looks really sharp .. excellent tractor trailer combo , you nailed the look perfectly. Jeff -
1/32 Monogram Chevy Bison Flat Bed Hauler
Biggu replied to Pete68's topic in Model Trucks: Big Rigs and Heavy Equipment
Lee, I totally agree with Brian , this is a very crisp build , your photographic prowess makes it look right at home in the pics , well done, I really like how this came out. Again the rims really make this stand out. Jeff -
That looks really sweet ! The Dayton rims make that a real working truck ! Looks like Jamie Davis’ General , this is a beauty, Lee
-
Western Star 4900 FA plow truck
Biggu replied to BK9300's topic in WIP: Model Trucks: Big Rigs and Heavy Equipment
Oh yeah , he likes it a lot , and good call on that wear saver…. Have you shown Craig any pics of this magnificent build? He will appreciate the details you are replicating…. -
Love it. …… it’s a Pete! Lookin good Lee
-
Western Star 4900 FA plow truck
Biggu replied to BK9300's topic in WIP: Model Trucks: Big Rigs and Heavy Equipment
Brian, I showed Ken this update …….. he is speechless as am I , one detail you may want to include on the front ram lift lines ….. the boys in the shop used to also zip tie some heater hose at the bumper hole to prevent wear of the hydraulic lines going thru the hole when we raised and lowered the front plow. The heater hose was the red stuff. Ken also mentioned ( I had forgotten about this ) that the hole was also used for lines for the wear saver, to which I was NO fan of and I can explain why if interested… are you planning on a wear saver ? Maybe not would be a good thing …….. absolutely love what you are doing. ….Top notch update …. Thank you. -
Making Tracks
Biggu replied to Chariots of Fire's topic in WIP: Model Trucks: Big Rigs and Heavy Equipment
Fantastic, Charles....... -
Steve, your attention is really good. You take what at fist blush looks to be a toy like model and transform it into a very convincing real life replica. The small adjustments you make seem like no real big deal, at the time, BUT, it is those small changes that absolutely transforms the kit into a much higher level and changes the truck to a convincing realistic replica of the 1-1 truck. It’s a pleasure to watch your work and the transformation …. Keep going as its all in the details… I love what you are doing.
-
1/32 1977 Chevy Bison Steel Hauler.
Biggu replied to Pete68's topic in WIP: Model Trucks: Big Rigs and Heavy Equipment
Another one I’d be proud to drive down the highway ! Nice clean straight build. Looking forward to seeing the final product, Lee… -
What primer are you using, Lee? Bill’s trick looks like it worked. This sure is coming together smooth and quickly…. The mix and match is working quite well. I really like this …. Keep going
-
Western Star 4900 FA plow truck
Biggu replied to BK9300's topic in WIP: Model Trucks: Big Rigs and Heavy Equipment
What an update ! Just eye watering. There is so much to see and take in. Every time I look at your updates I see something new. Just incredible ….. Brian , you are an amazing talent. -
I’ve always been a 1/25 - 1/24 guy I had no idea that there were so many 1/32 kits! Very cool
-
Chevrolet Road Tractor
Biggu replied to DRIPTROIT 71's topic in WIP: Model Trucks: Big Rigs and Heavy Equipment
The 427 and the 409, sucked fuel like flushing a toilet under heavy pulls, and always seemed to have an exhaust leak somewhere and I can still hear the ticking sound.... -
I see what you mean, if it were me, I might be inclined to add a sheet for rigidity, and for fudge factor .... this is looking good..... like Brian says, this is quite the conversion..... I like it...
-
The Same but “ a little “ Different
Biggu replied to Biggu's topic in WIP: Model Trucks: Big Rigs and Heavy Equipment
AND, I have NEVER crushed a fuel tank with the loader wheel either ............ same here with CVSE, and then ..............." while we have you pulled over here, .... lets have a look at the rest of the truck....." -
Pete 359 tanker with trailer
Biggu replied to Jürgen M.'s topic in WIP: Model Trucks: Big Rigs and Heavy Equipment
Holy …. I go away for a few minutes to work on my kit and come back to a major update !!! You are ripping along with this rebuild … the tank looks great, I think your extra work in smoothing it out will be well worth every minute spent on that task. And I am REALLY impressed with the spare tire holder , you did a great job on that, again, something I never would have come up with, this is a real interesting rebuild and coming together really well, I am looking forward to what you do next ….. keep going buddy -
The Same but “ a little “ Different
Biggu replied to Biggu's topic in WIP: Model Trucks: Big Rigs and Heavy Equipment
Lee, a man after my own heart….. even on our fleet trucks , I could not abide a weak hanging flap or partly torn …..just looks so unprofessional…. A couple things I NEVER did in 38 years of driving is tear a mudflap off OR break a box side board , I am quite proud of that little thing and only a gravel truck driver will get that 🤭 . Here in B.C., CVSE find no humour in missing mud flaps, and if spotted would garner an exchange of some money to the provincial Gov 🤭🤭🤣🤣🤣