70 Sting
-
Posts
1,365 -
Joined
-
Last visited
Content Type
Profiles
Forums
Events
Gallery
Everything posted by 70 Sting
-
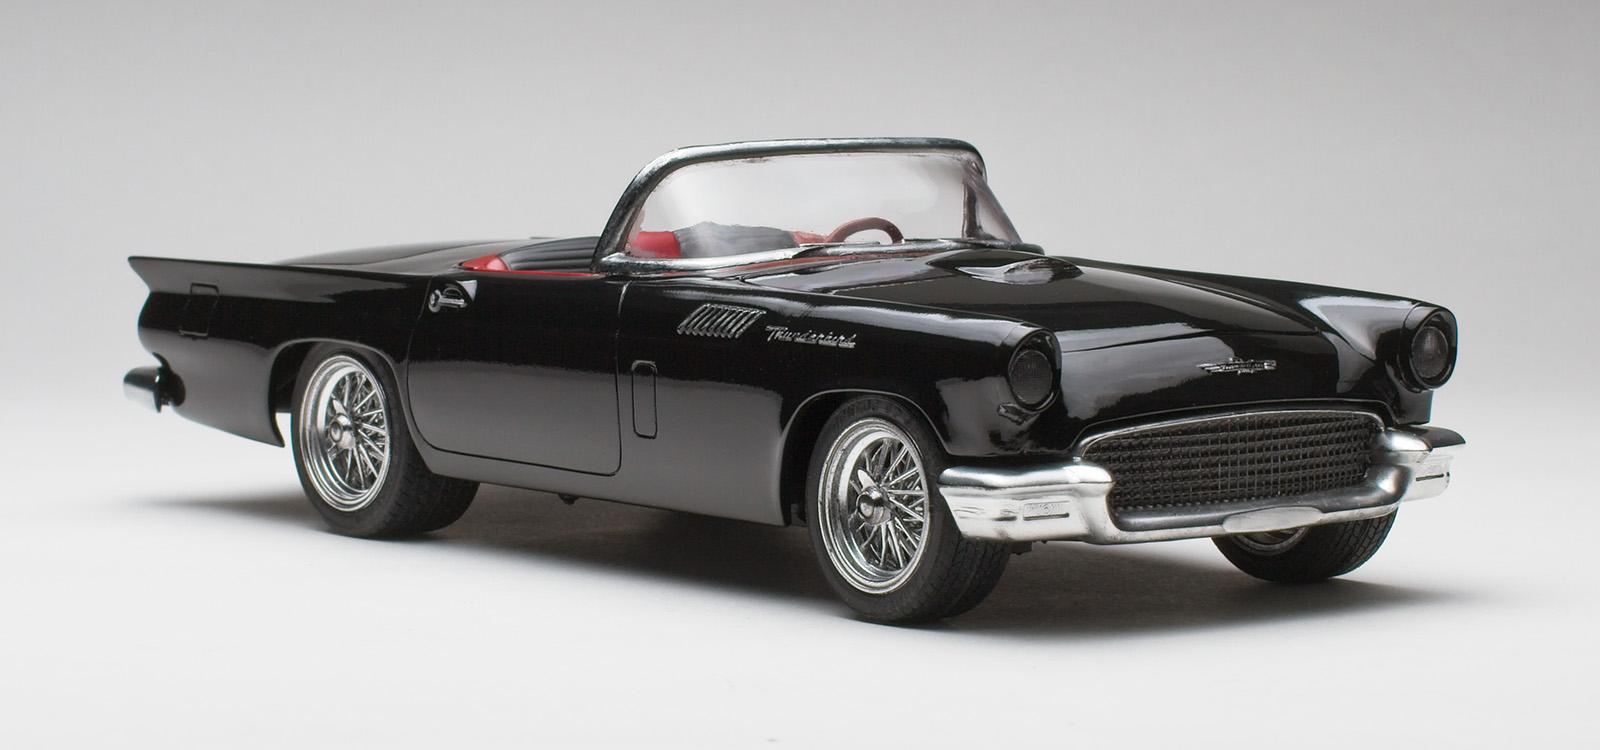
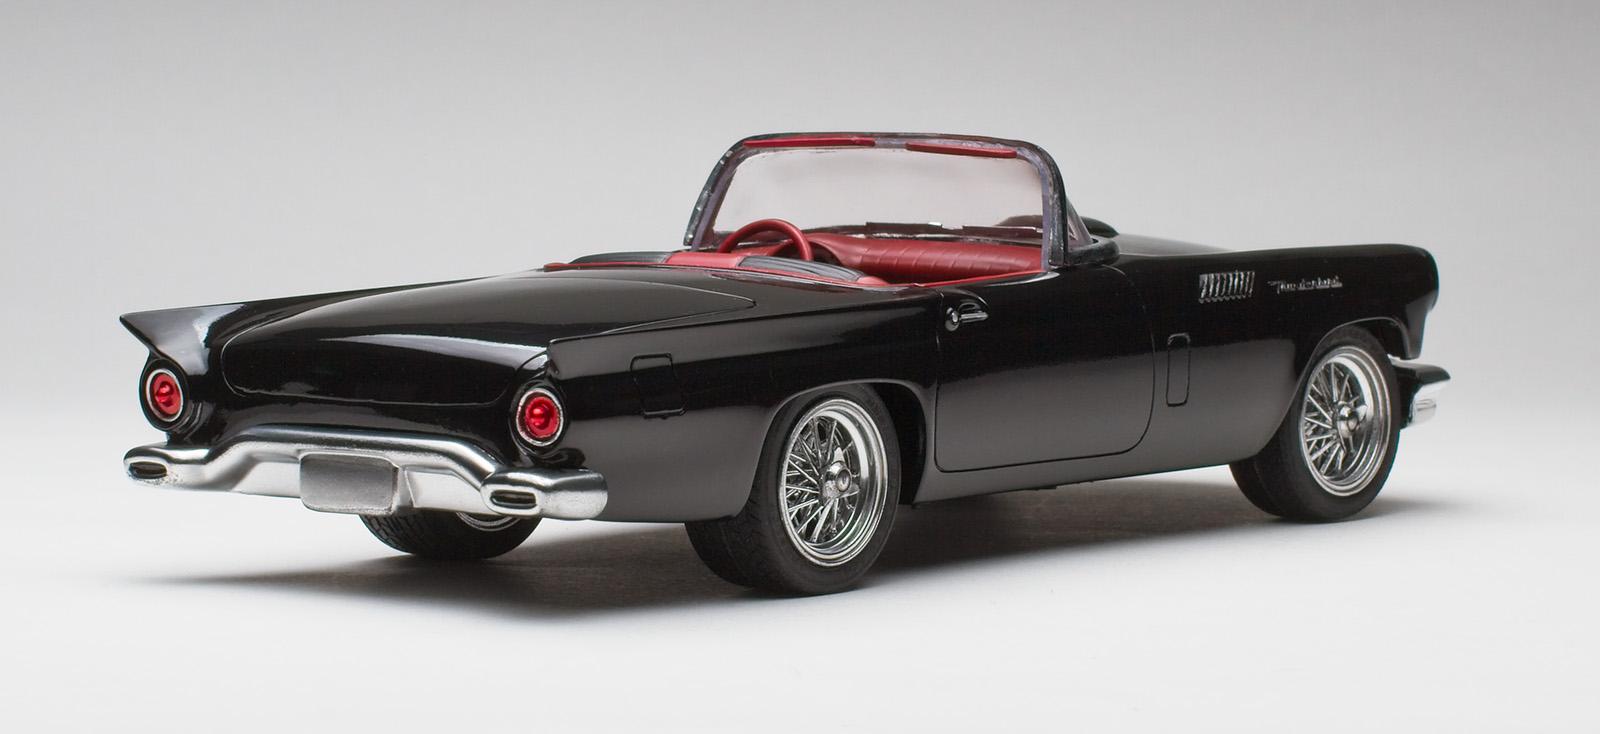
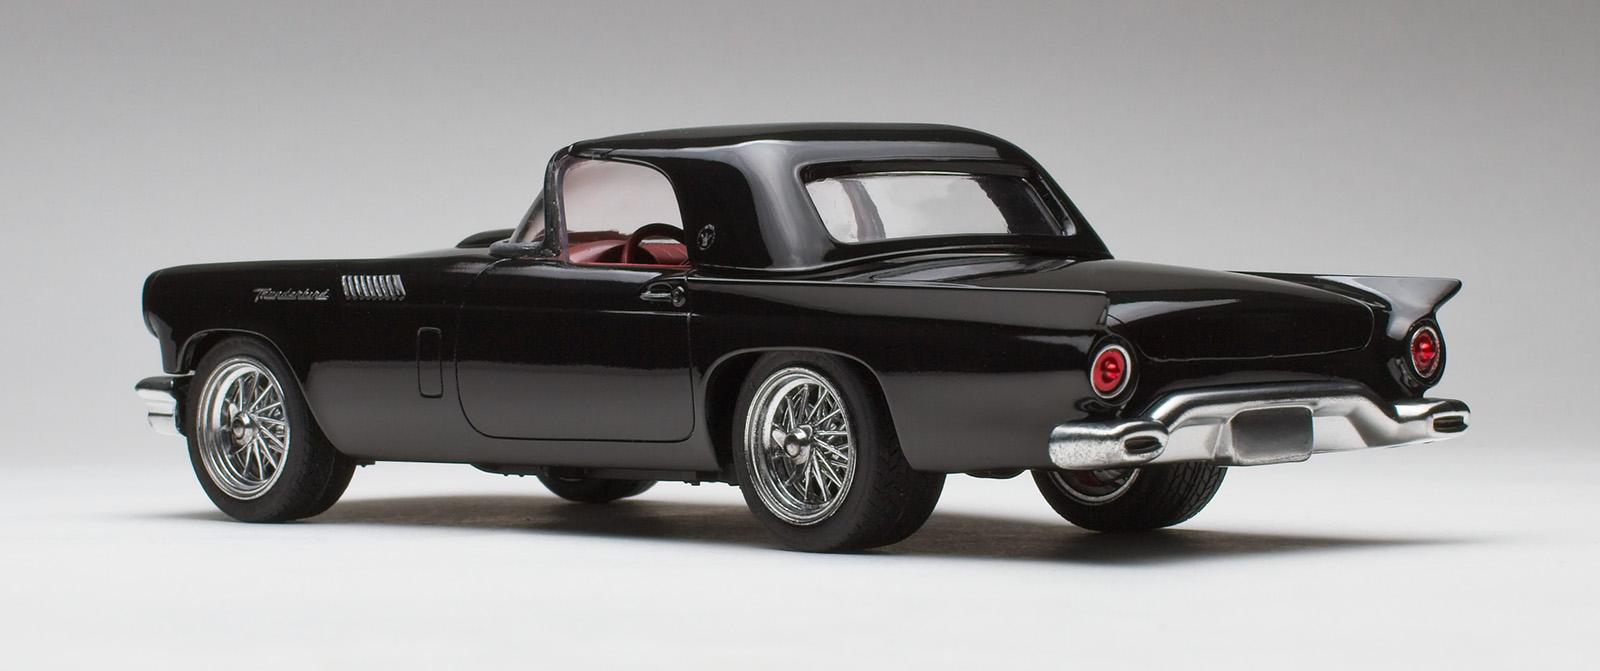
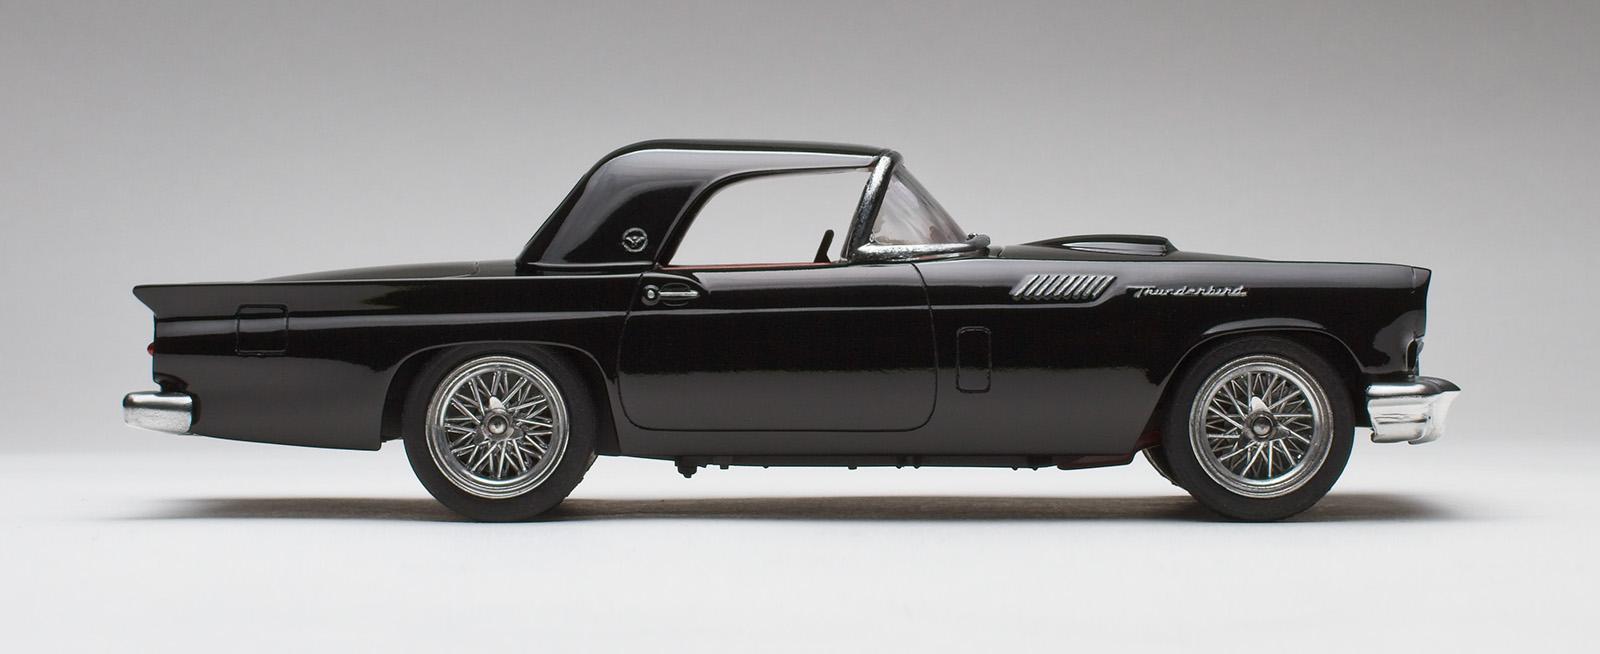
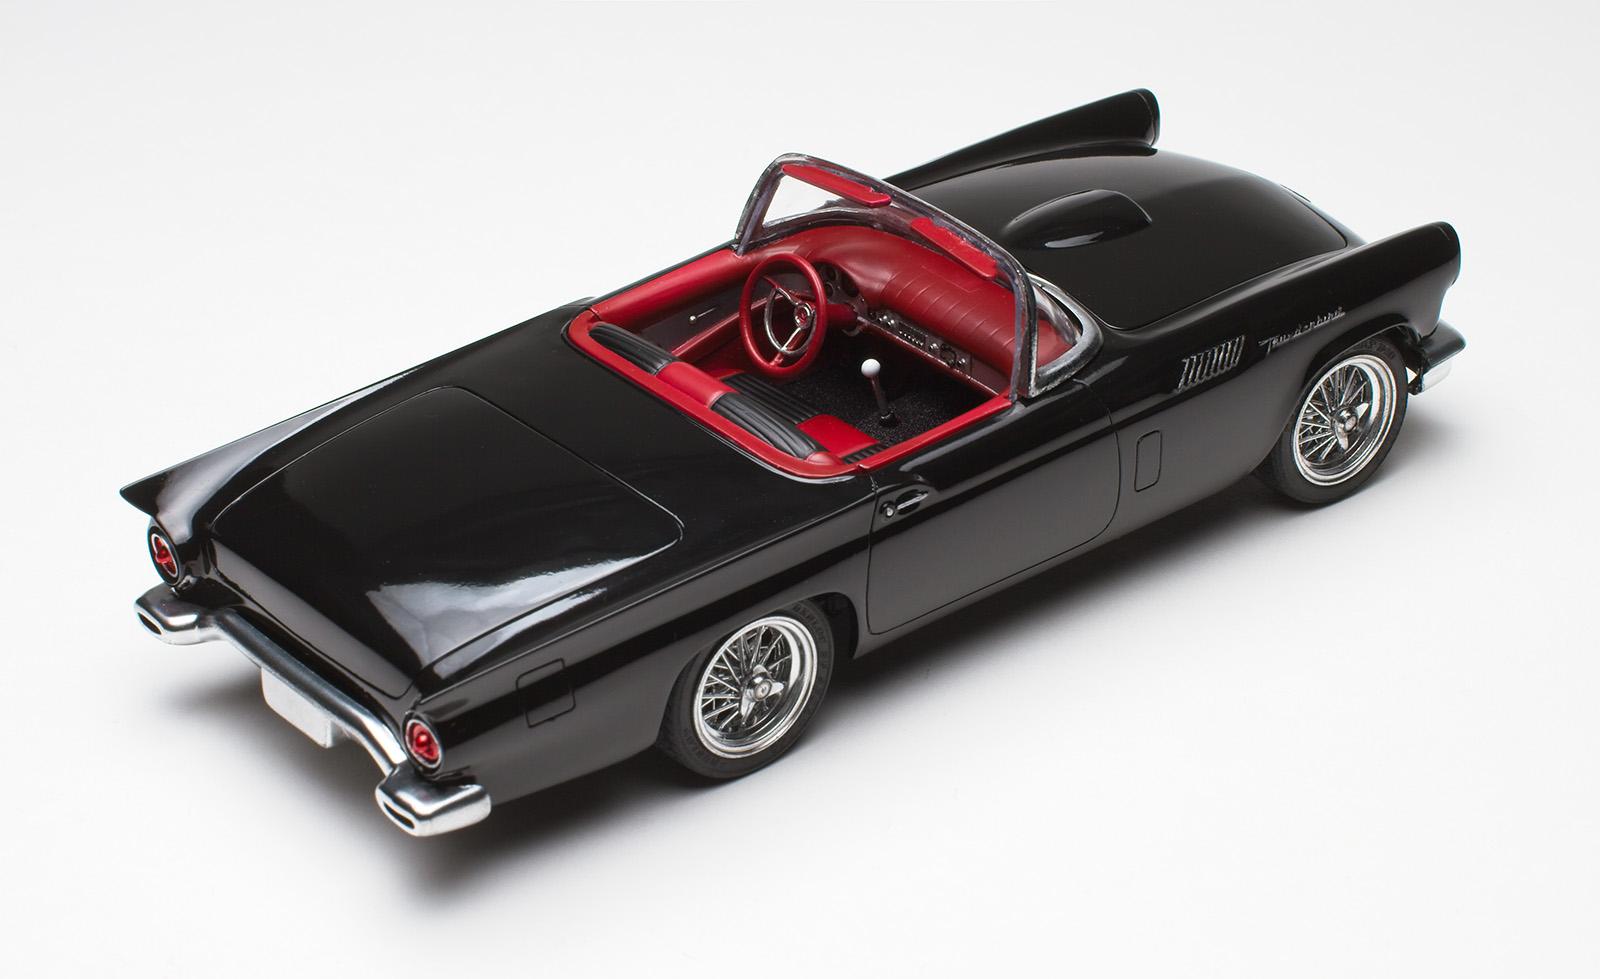
Good morning, I bought this kit at a flea market and thought it might look cool with some updated wheels. The body was painted Tamiya LP-1 Black and clear coated with Tamiya X-22. The interior is leftover red from a previous build with LP-5 Semi Gloss seat accents. The carpet is black embossing powder. The wheels are Fujimi #101 17” painted AK Chrome. There are some flaws with this kit and my job in building it, but overall it was fun to build. What I Learned 1. Test fit then test fit some more. Both bumpers needed shaving down; the engine mounting points were not obvious; the RR wheel well is 2 mm forward from the RL - I offset the wheel mounting to compensate. The RR tail light was kinda soft and mangled and I tried to re-scribe it as best I could but it didn’t turn out so well. 2. I chickened out on sanding the entire paint as there was some texture in the finish. I did try the 3 Tamiya compounds and even Novus on the removable hard top but I could not get the swirls and scratches to disappear. Fortunately the X-22 completely hid them. 3. I didn’t like the shade of black on the embossing powder (bluish hue) so brush painted it with X-18 Semi Gloss Black. It held the paint quite well. 4. There were very few decals in the kit so I tried dry brushing the badges for the first time. It didn’t turn out perfect but with a little practice I hope to use this technique more in the future. Thanks for looking! P.S. Wouldn’t be a completed kit if I didn’t get a little glue on the windshield :^(

-
Another great one!
-
Beautiful! Great engine work. Love the chrome… how did you paint it?
-
That’s a good lookin’ car. ?
-
Kindly transfer your skills to me. Thank you.
-
Great build and finish quality.
-
Geez, looks 1:1!
-

model car kit Polar Lights 1:25 Volkswagen Beetle Coca Cola Snap Kit
70 Sting replied to Lee_S's topic in Model Cars
That looks like a lot of work. Nicely done. -
@Can-Con My order is in the mail. Thanks again.
-
Superb!
-
Fun video, must have been a lot of work. You’re building kits of that quality after only 1 year? ?
-
Looks great - especially in that setting. ??
-
Thanks for sharing @galaxyg. Simple is often best. Nice use of the tiny fill light. It was the reflections in the paint that got thinking. Very well done. ?
-
@Dragonhawk1066 I enjoy scrolling through your album on Scalemates. ?
-
@espo That lighting setup is the most forgiving way to shoot a car and it flatters the build.
-
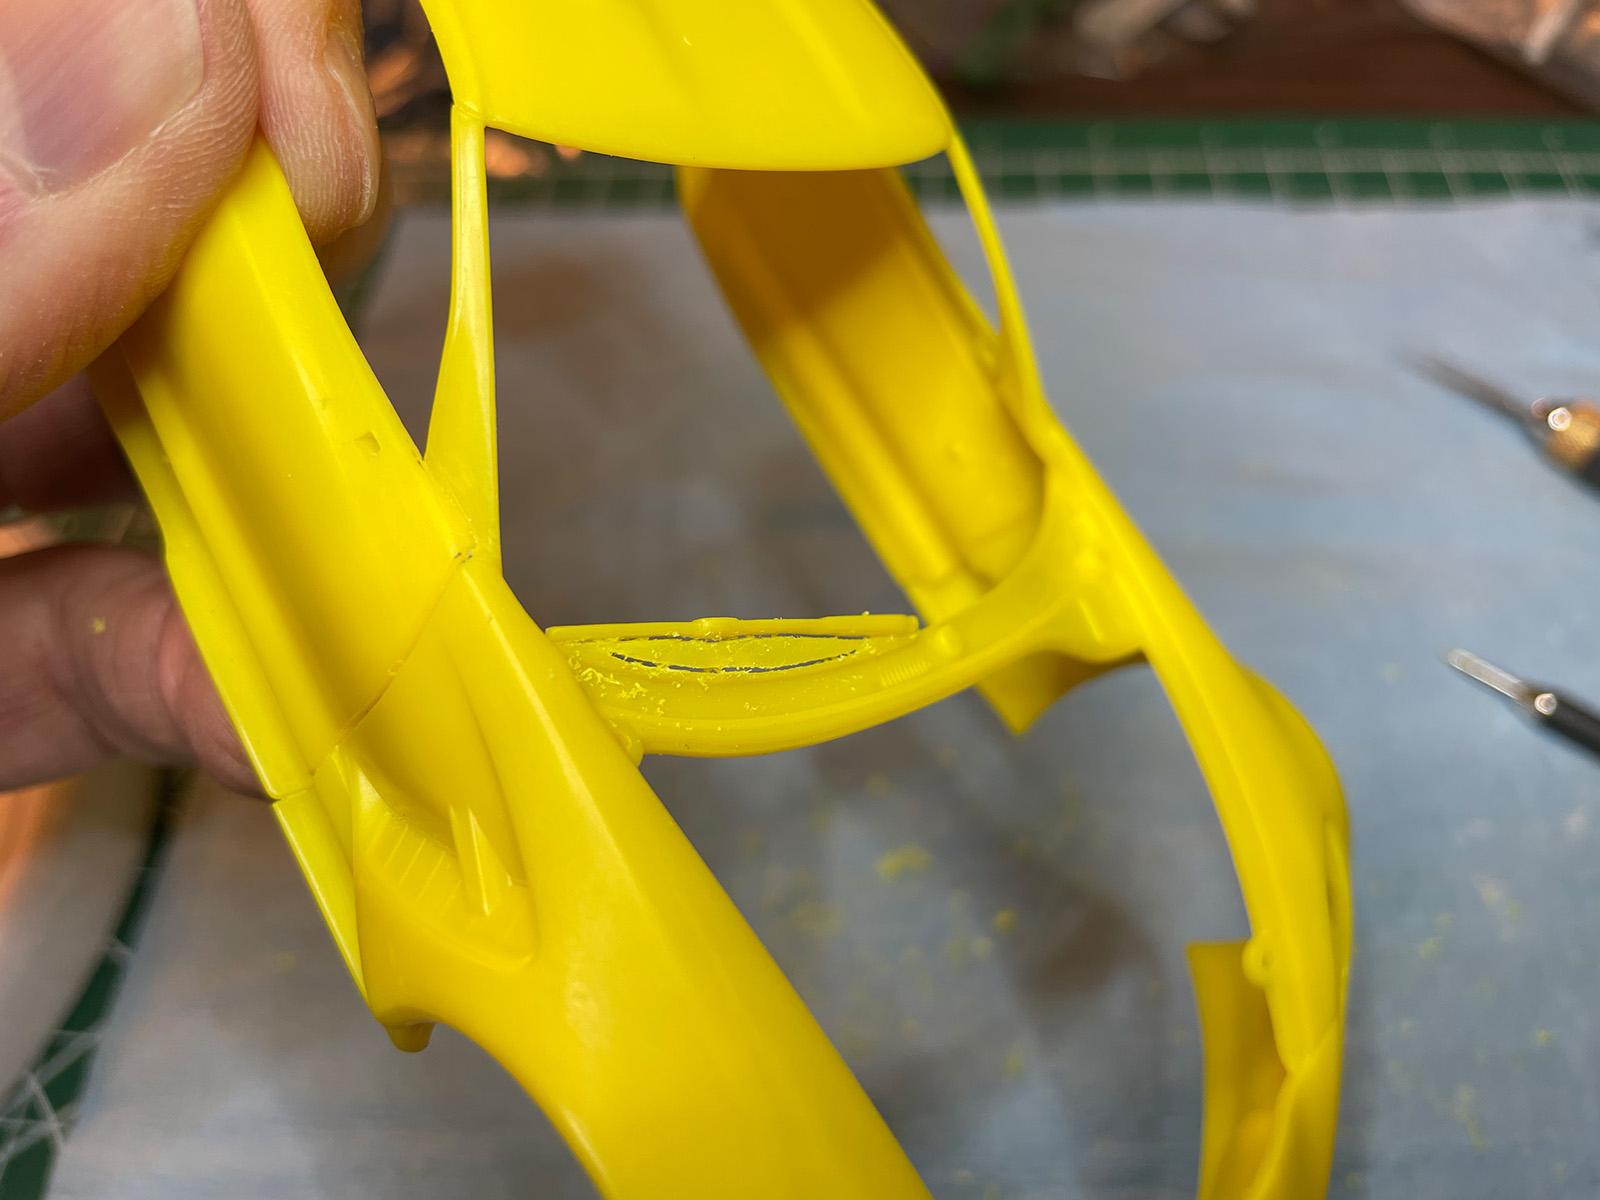
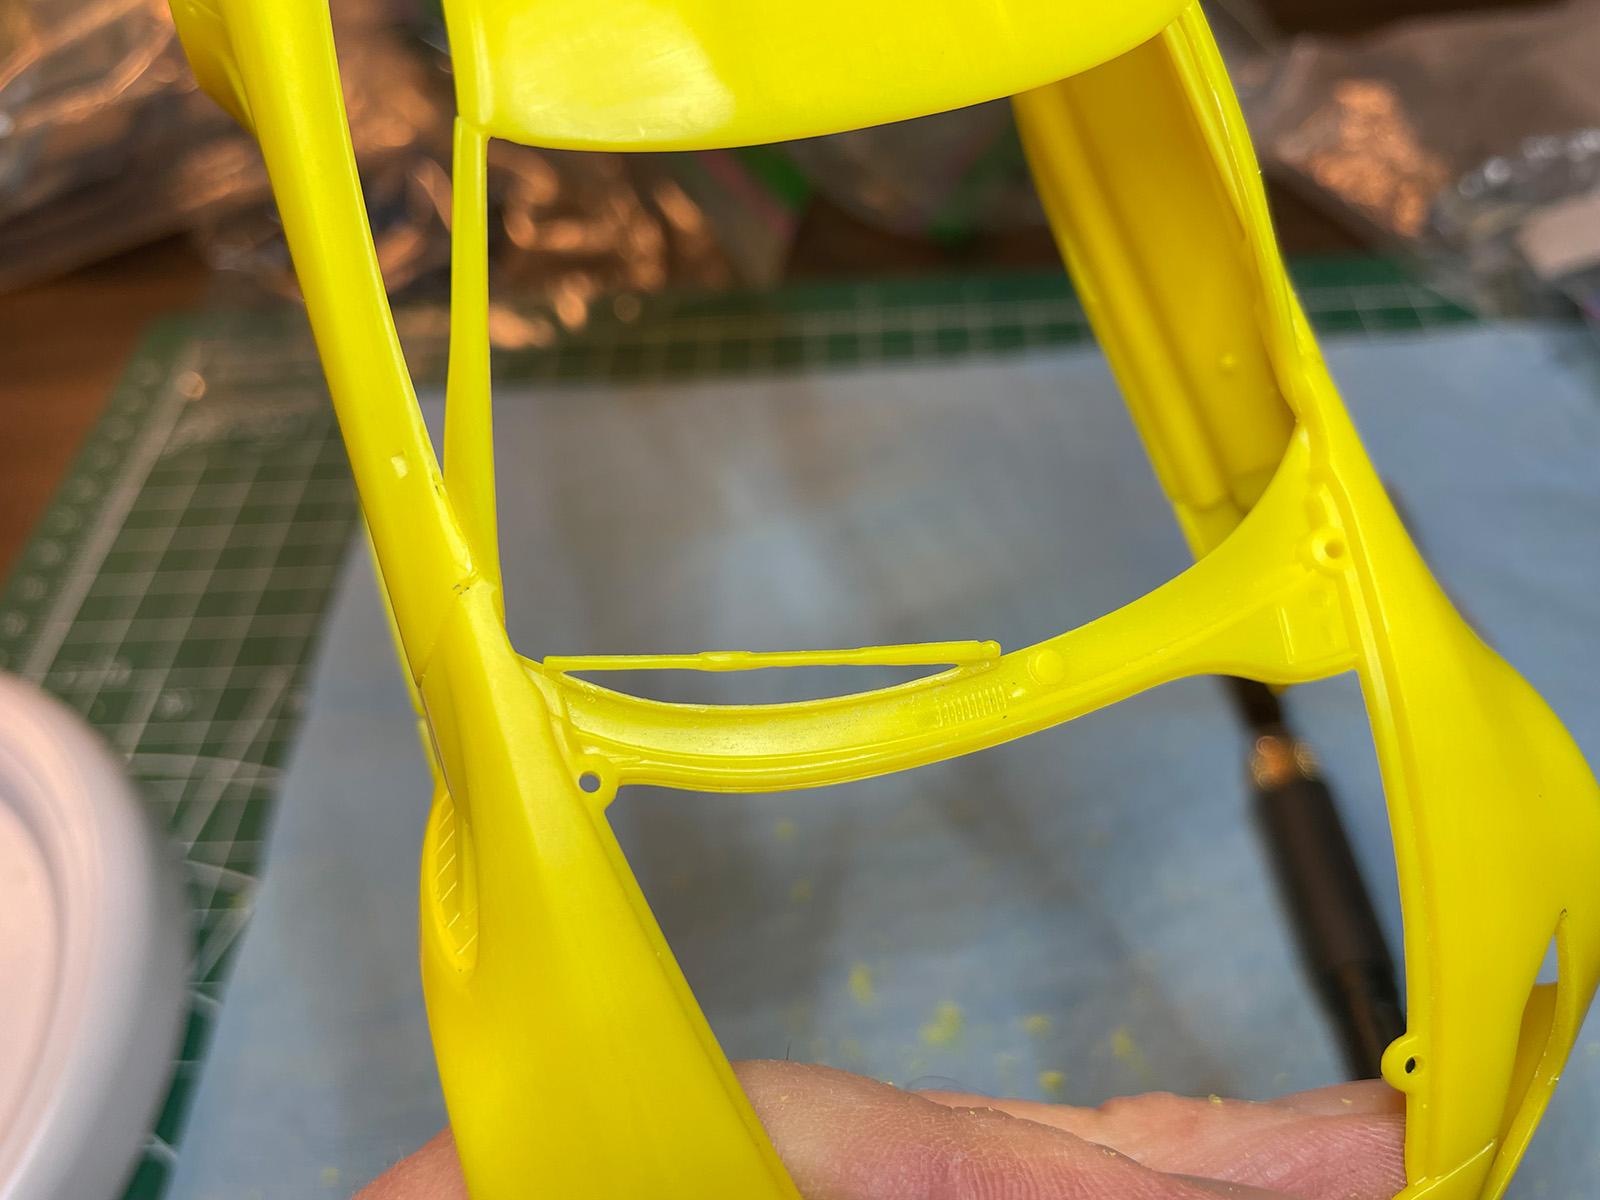
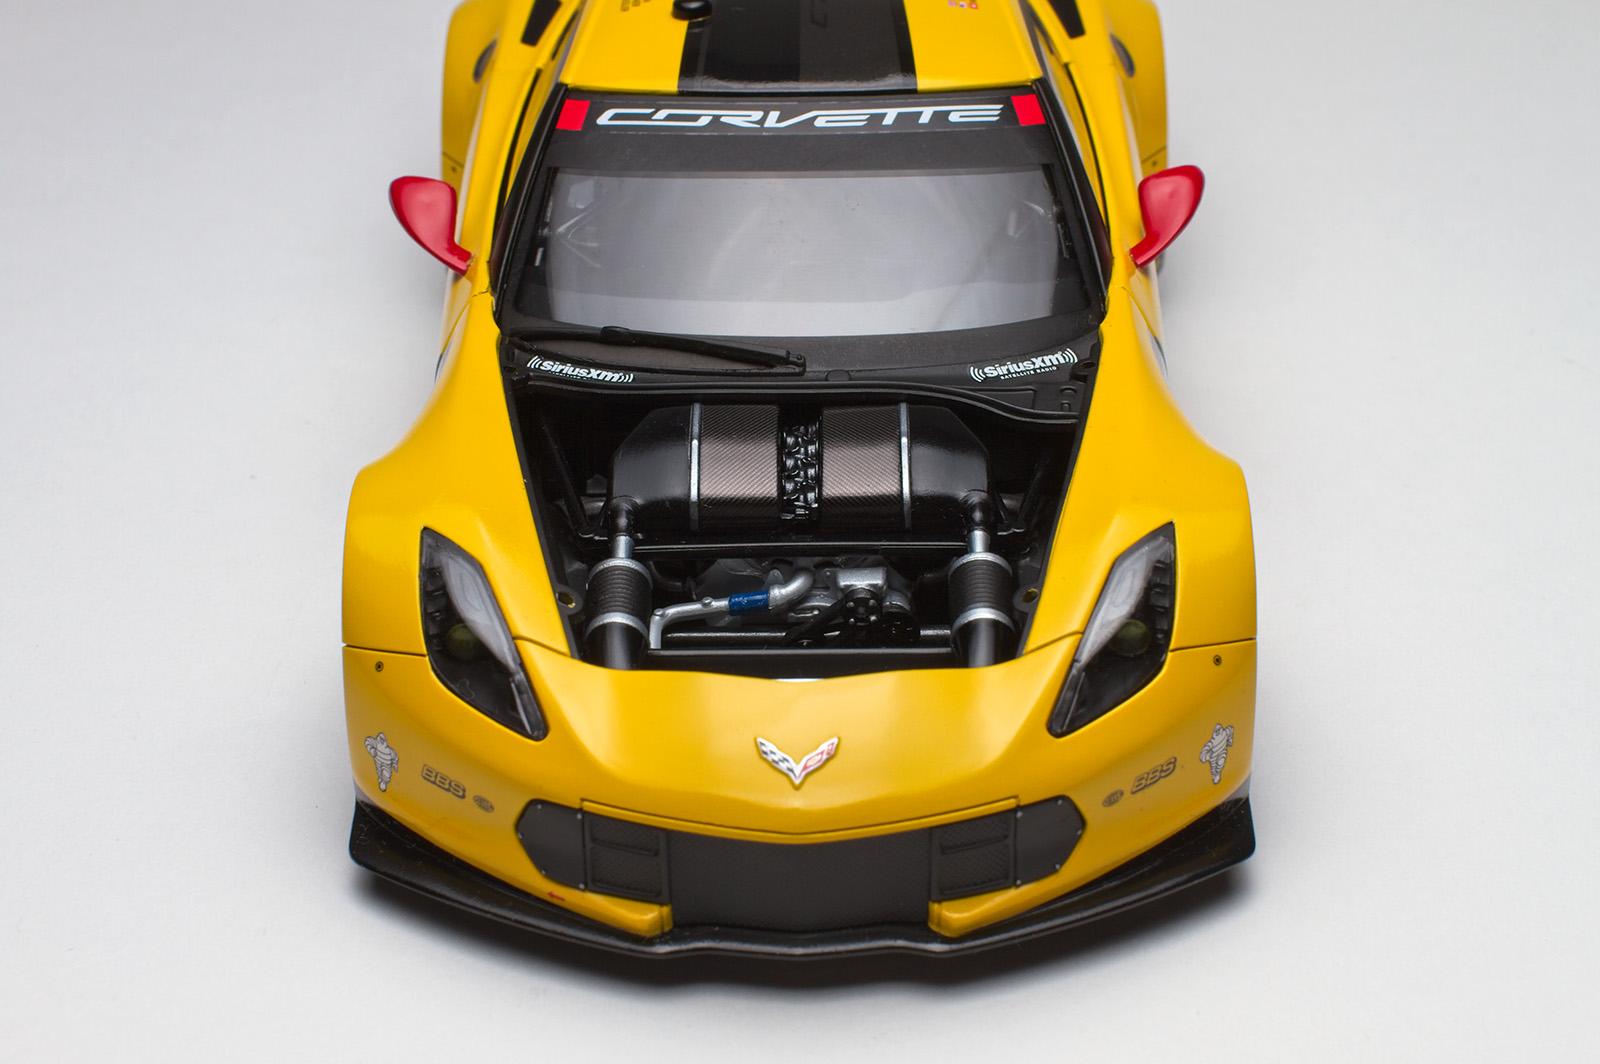
Thanks @Mattilacken. Yes. I thought it was something I did at first. Most of the glass in this kit gets pushed and snapped into place and holds very well including the rear and side windows. Where I had a problem was the two sides and windshield (even though all the glass is one piece) - they didn't want to fit tight against the body. This is where the Insta-Set I mentioned above came in handy. I had to push the side windows upward with a fair bit of pressure while applying the Insta-Set. I did this one side at a time and they held fast. <- I probably should have mentioned this in #3 of my original post. I can't say for sure that the dash played a part in the fitment issues. If you look closely at the the photos you can see that the engine hood does not sit perfectly flush all around, this might be due to the strain/torque I placed on the kit while speed glueing. ?
-
Thanks for the reply @Can-Con. I did use the email address you listed above and mentioned decals in the email title. That was Wednesday last week. Glad to hear that he is still in business. Perhaps I’ll send him another message. ?
-
@ea0863 @Just Jim Too funny. ?
-
Good morning, I've been looking for a more complete set of decals for the Bandit as the Revell kit does not include the full set of graphics, stripes and text. The one retailer I found does not seem to be in business any longer: https://public.fotki.com/mofobow/pontiac/firebird/7677_trans-am_gold/ Can anyone recommend another supplier? Many Thanks!
-
I’ve been analyzing your photography trying to figure out how you shot this beautiful car. Great choice of angles - they look like sales brochure images.? Did you photograph the car outdoors with available light using various white and black fill cards?
-
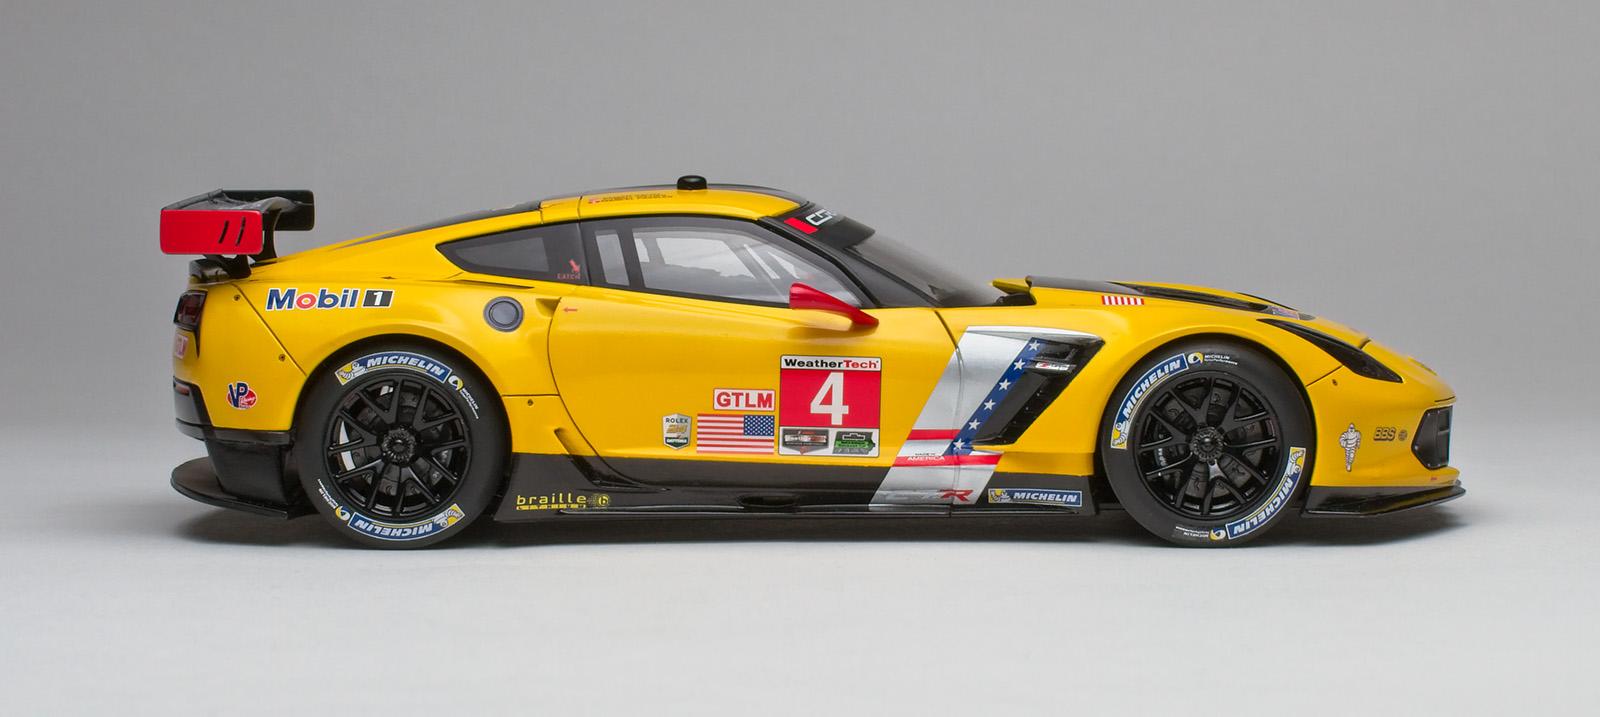
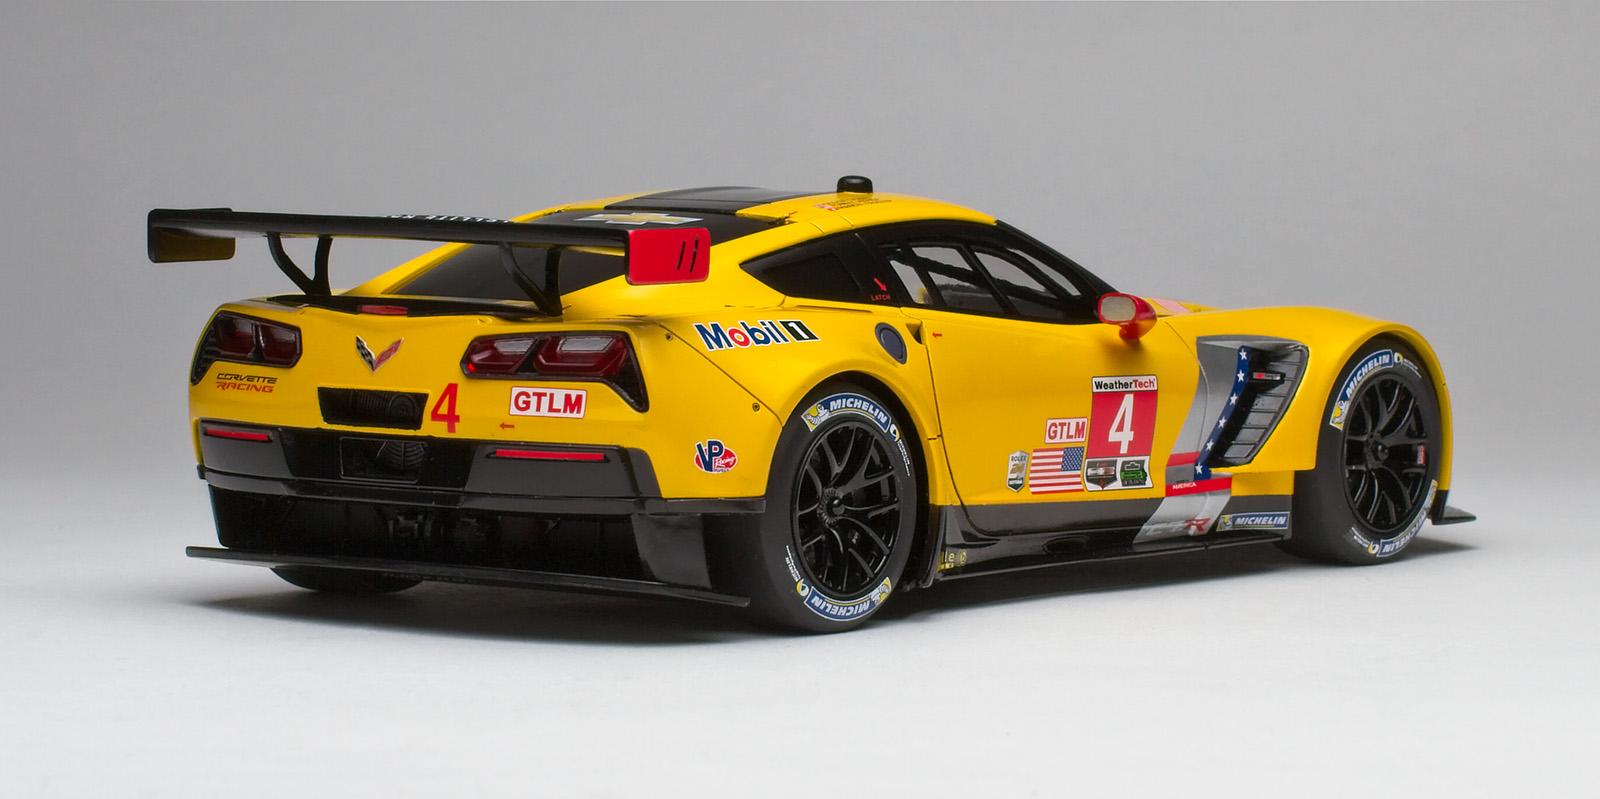
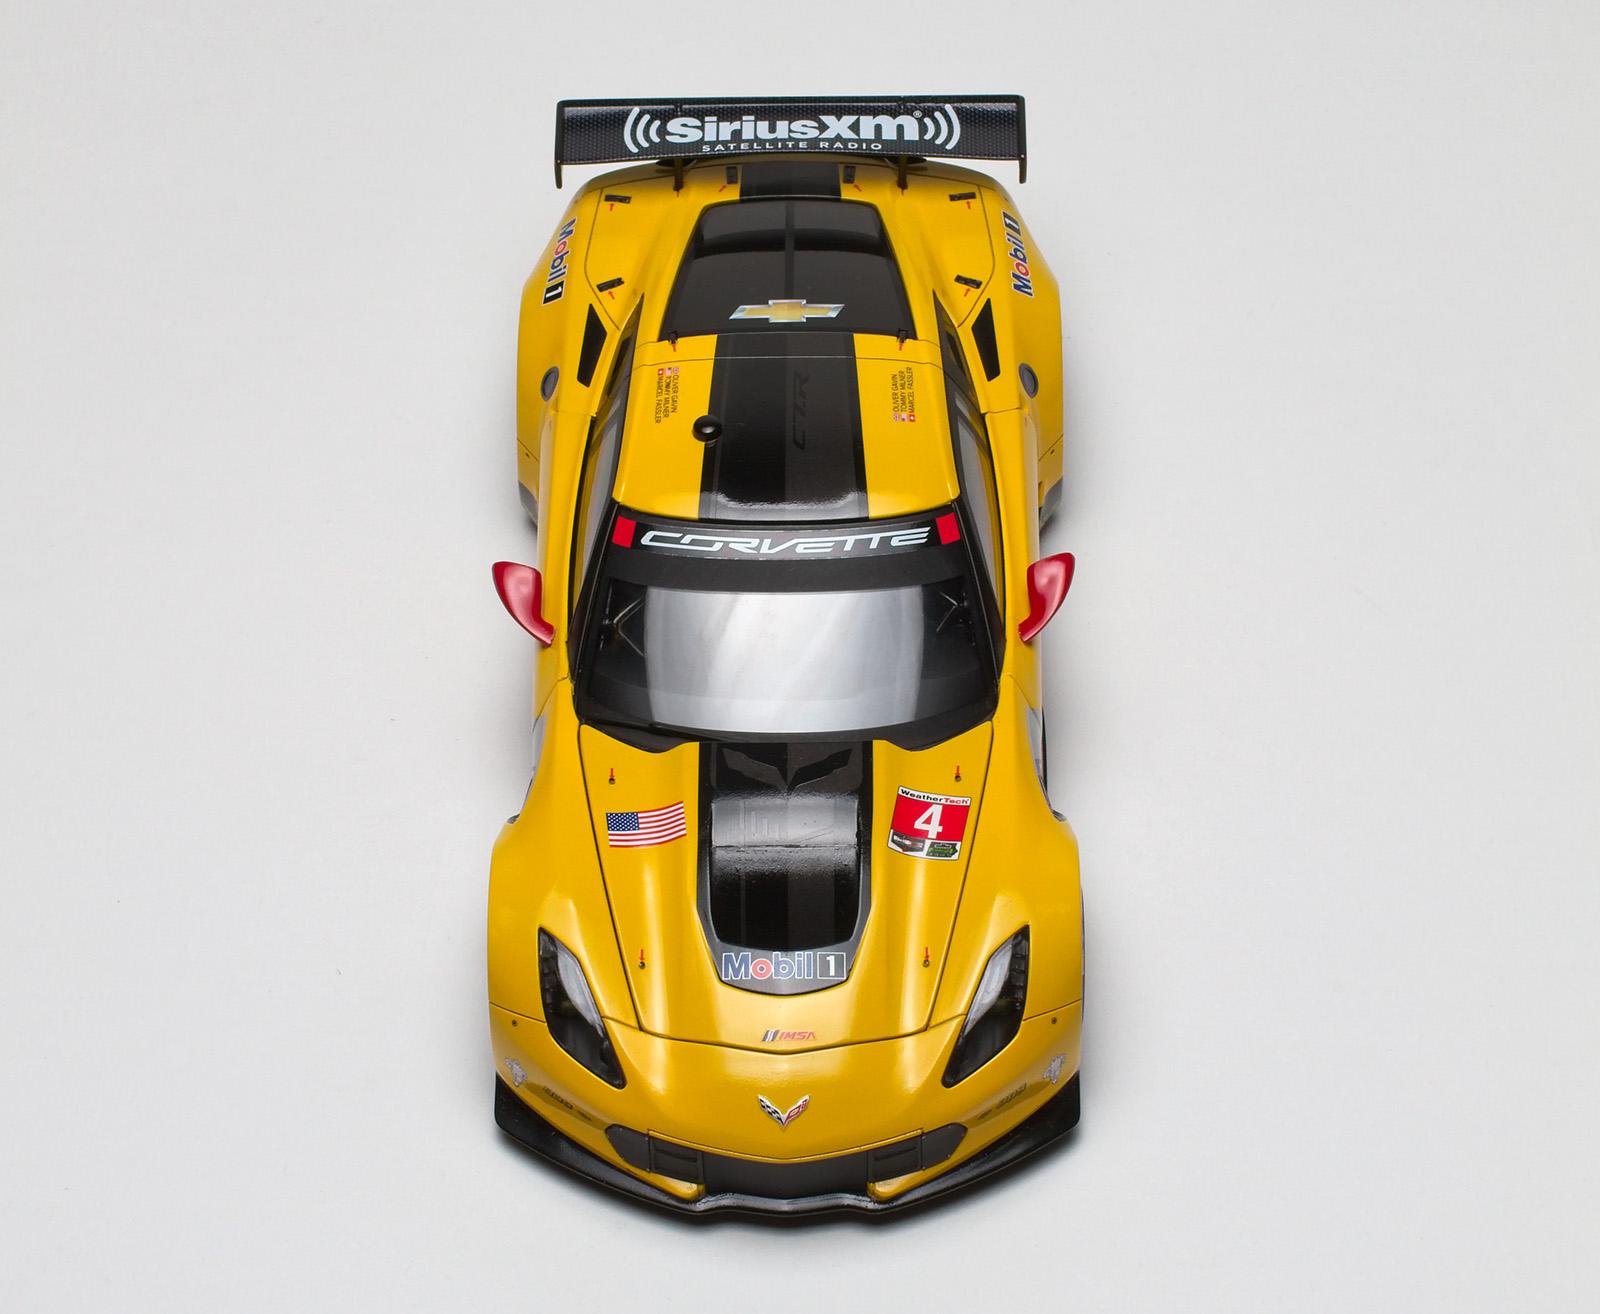
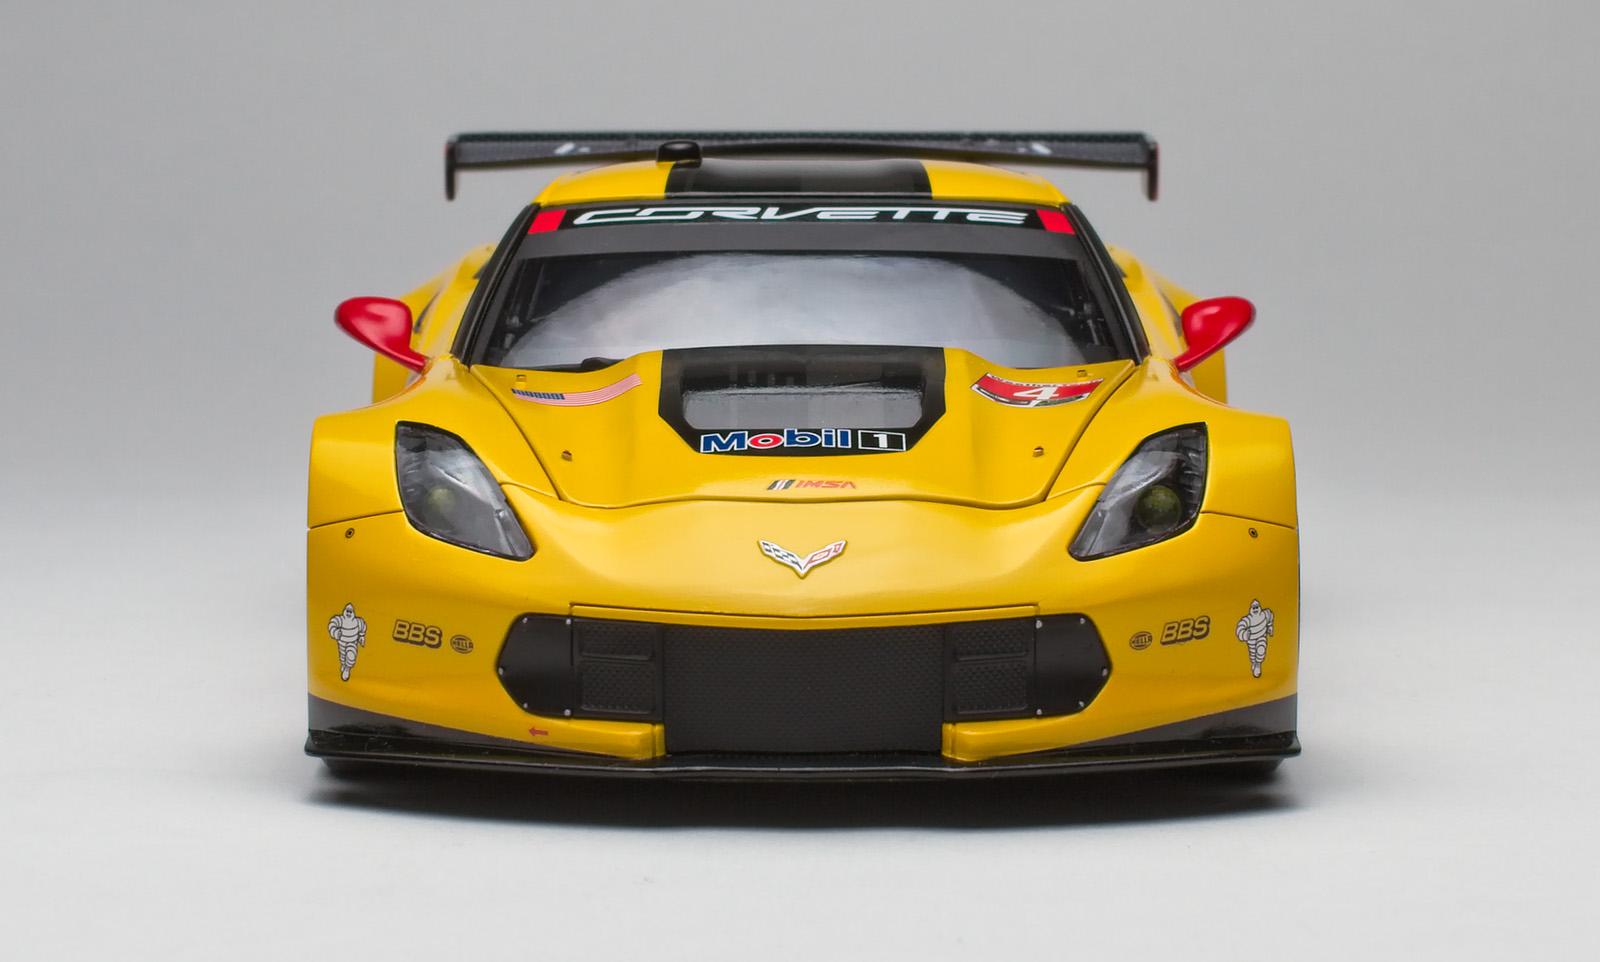
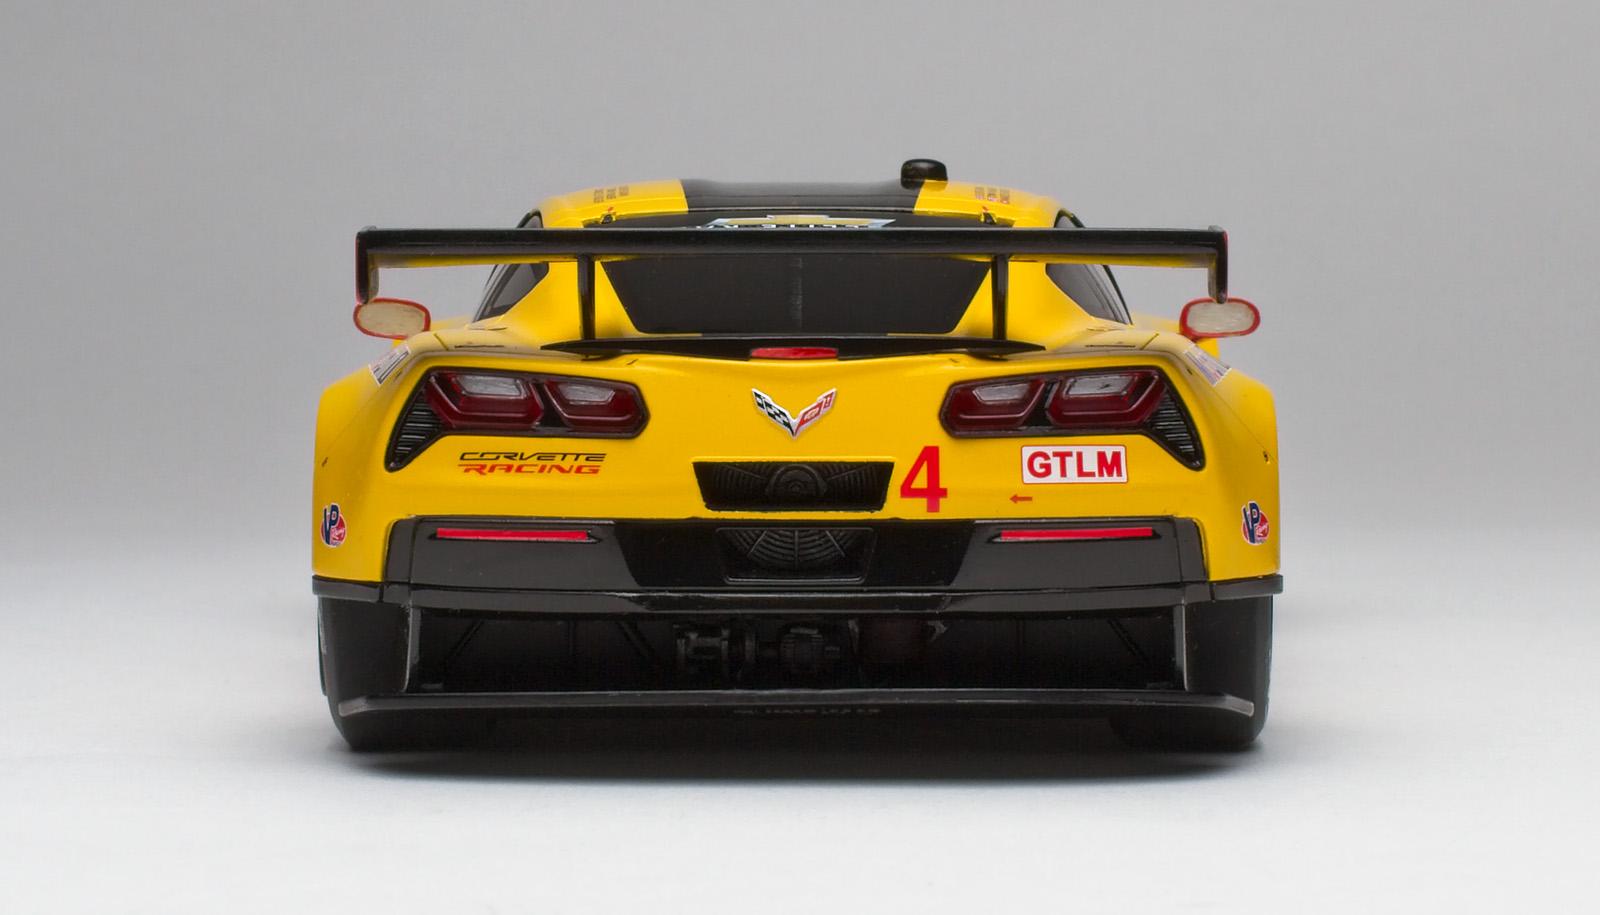
Good evening, I built Revell Germany's version of C7.R which differs mainly in the decals from the USA version. It was primed with Tamiya Fine Surface Grey and paint with Tamiya TS-16 Yellow then cleared with TS-13. I opened up the 2 air intakes in front of the rear wheels and side exhaust pipes. Also removed a section of plastic between the wiper and body. I'm 80% satisfied with this build - would have liked a smoother paint job and the silver decals behind the front wheels were placed a bit off on both sides along with the unwanted texture from the setting solution (see below). What I learned from this build: 1. The decals didn't like Tamiya's Mark Fit Strong solution as it added a bumpy texture and made the colour bleed a touch - in particular to the one on the hood. I switched to Micro Set & Sol which seemed to play nicer. I think I will keep the Tamiya product for Japanese kits. 2. I should have lightly sanded the colour and/or cleared the body before applying the decals. 3. Used Bob Smith's Insta-Set for the first time. Cool stuff! Needed it to speed-set the body to the chassis on both sides of the engine hood. 4. Used Scale Motorsport's carbon fibre decals for the first time on a couple engine parts. Nice product! Thanks for looking ?
-
Looks 1:1! Nice photography as well.
-
Super clean build!