Dpate
-
Posts
1,279 -
Joined
-
Last visited
Content Type
Profiles
Forums
Events
Gallery
Everything posted by Dpate
-

At Walmart (at least one store)
Dpate replied to Classicgas's topic in General Automotive Talk (Trucks and Cars)
I've yet to see a display in walmart too. Crazy at some of the kits on the display how cheap they are when i paid $30+ for some of them. My local hobbytown store sells the coca cola kits for $38 no lie. -
Favourite files and sprue cutters
Dpate replied to Steve H's topic in Model Building Questions and Answers
You don't need a file to smooth the area where the gate has been removed if properly done right with good nippers - than all it takes is good sandpaper ..swipe swipe and buff with 4000 polishing stick, and it's back to fresh original plastic. I also don't scratch build or do mock ups. I'm a sandpaper guy, but I am thinking about getting micro files though for certain things. -
Can be a bit wonky at first, but once the bands are on they'll never come back out the hole unless you do it yourself.
-
Favourite files and sprue cutters
Dpate replied to Steve H's topic in Model Building Questions and Answers
I'm not that big of a fan of files. Only file i own is tamiya for photo etch parts, but I am thinking about getting the micro needle file set from micromark though. Far as cutters go i own the micro mark pair and godhands(red handle), and cheap pair from hobby lobby. I cut the part from runner leaving some of the gate still on the part using cheap nippers, than micro mark to cut the gate off, and than godhand for finishing cut. Barely have to do any sanding if at all. The thing with god hand nippers is the Blue and red handle versions work as a pair. You use the red pair for cutting the gate off the part, and than the blue pair for the last cut that's so flush you'd be hard pressed to see where the gate was attached to the part. This is how they do it in the gunpla world lol. I keep my nippers oiled up to using sewing machine oil. Also the blue handle god hand nippers are so delicate that you better never drop them or the tips will break. -
Sweet! I thought it was a hudson at first or something similar.
-
Questions about the Lunar Lander kit
Dpate replied to Oldcarfan27's topic in Model Building Questions and Answers
If you look up the kit you'll see how it's more along the lines of silver/or aluminum along with black. Don't know about a real picture of it though. Best metal colors for that would be Ak, Alcald, or even vallejo metal colors Silver or aluminum. -
Rustoleum 2X spray paints
Dpate replied to Smoke Wagon's topic in Model Building Questions and Answers
Probably should just stop using cheap spray cans and buy better paint. Tamiya, Mr color, scalefinishes, MCW. I would even use vallejo before i would use rusto. -
What model is that in the first pic? That is a beautiful model.
-
Parts by park sells few dog dish hubcaps, but nothing specific to a make. There generic versions.

-
Faux Fabrix...Has anyone use this before?
Dpate replied to Dpate's topic in Model Building Questions and Answers
I had some test pieces, but i threw them away sadly. I wont be retesting until i get some new nozzles and hopefully that fixes the issue i have with the can, and if not I'll decant it. But even though the can isn't spraying right it did leave a good texture even though little rough. I'm sure if can sprayed right and not like you're at the john taking a leak lol it would be much better. Should be similar to the picture even though what is in the picture is a vinyl top kit by MCG.
-
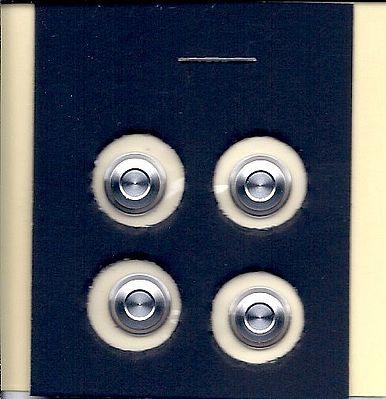
I used rubber bands too hold the metal holders in place in the holes
-
Faux Fabrix...Has anyone use this before?
Dpate replied to Dpate's topic in Model Building Questions and Answers
I'll try n find some nozzles. If the can is bad i doubt the paint is so i'll decant it. -
So i been curious about this product for a long time and finally got a can of it (black version not red)few weeks ago. I remember testing it out on some spoons and scrap parts, but the stuff when you spray it comes out runny and like a straight shot almost like shooting a water gun. Don't know how you're suppose to spray this stuff with mist coats if it comes out like that lol, but from my test parts it did turn out okay looked pretty good on the spoons. It wasn't soft though did have a rough texture too it, and looked nothing like anything you'd see on seats, but more on the lines of underneath the chassy or engine bay or bed liner. I did shake the mess out of it too, but no matter how much i shake it - it doesn't spray like regular paint just comes out watery and straight like a water gun, and also makes a darn mess. Is it best to just decant the stuff and air brush it? I do have texture black paint from MCW i haven't tried. But i paid $11 for this can faux fabrix, and wanted to know if its a bad can or I'm just doing something wrong?
-
Bare metal foil, before or after final glosscoat?
Dpate replied to dmthamade's topic in Model Building Questions and Answers
Best to do it at the end, because if you mess up on the clear coat than yeah. -
Washes on top of alclad and spaz stix chrome....Hmmm
Dpate replied to Dpate's topic in Model Building Questions and Answers
Alright thank you guys so much for the help. Hope y'all have a merry christmas. -
Washes on top of alclad and spaz stix chrome....Hmmm
Dpate replied to Dpate's topic in Model Building Questions and Answers
Dang that looks good man. Would tamiya acrylic flat black watered down work? Or just get some cheap black craft paint like apple barrel or something and thin it down? How much do you thin? Because too much thinning it would lose its properties i would think. -
Your best bet is a carney display case. Little pricey but for $130ish you can hold 24 cars in the case with or without dividers and can have it mirror backed. https://shop.carneyplastics.com/NASCAR-Diecast-Model-Car-Display-Case-24-Car-124-Scale-P445.aspx
-
I know this isn't a car, but i recently picked up this motorcycle chopper "Grim ripper" kit by monogram. The chrome is actually pretty good, but locator points are to be questioned once i take a real good look at it next time I'm able too, but I'll probably be re-chroming everything as i love doing it and gives a more realistic look to a model. But my question is as in the pic the cylinder heads have I'm sure a black wash on the kit chrome, but would a wash even be compatible with alclad and spaz stix? Only wash i have is tamiya panel line black. I probably should just do some testing, but figured I'd ask just incase someone has already done the dirty work lol. If tamiya wouldn't work? What would? Would i have to make a acrylic wash?
-
Mr.Setter is used first and after it's dried you use Mr. softer. Softer is really good for getting the decal around curves etc like your hood decal, but you really need to get the air out. Use mr setter and than with a cotton swap or whatever you use gently roll over the problem areas getting any moister trapped underneath out. Don't do too much just take your time and apply more setter as needed. Apply, (wait about a min or so) gently roll, dry, and repeat. The micro mark stuff is good, but when you got older thick decals you have to get the big boys out. Mr. hobby setter and Softer can destroy decals too, but mainly the more touchy decals that are new and fresh not so thick. Solvaset is probably just as strong if not stronger than the Mr.hobby. Honestly if you wouldn't of said they were decals i would of thought they were really bad stickers lol. No offense, but those happen to be the worse decals I've ever seen lol. Guessing because of the 90's you said? Also I' am not EXPERT at all just making suggestion trying to help a fellow member out
-
Looks good. Def has that: " I haven't had an inspection in about 8 years" look too it.
-
Walther's solvaset and Mr hobby solutions are much stronger than micro marks solutions. Either get better solutions for these tough decals or use a pin needle and BLAH_BLAH_BLAH_BLAH around and use micro sol until you get it.
-
Food Dehydrators & Paint Dryers
Dpate replied to JayVee's topic in Model Building Questions and Answers
Never used either, but i would go with the 1K clear because UV protection that the engine clear doesnt have. -
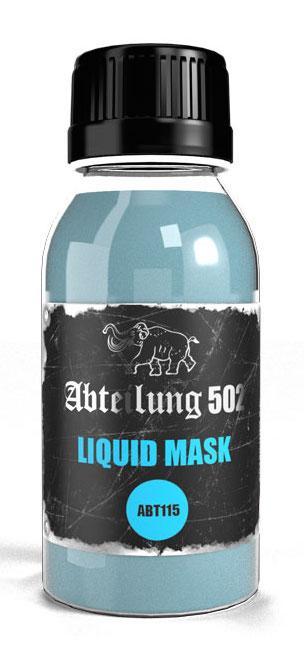
Question: best way to mask interiors for painting?
Dpate replied to customline's topic in Tips, Tricks, and Tutorials
? -
Question: best way to mask interiors for painting?
Dpate replied to customline's topic in Tips, Tricks, and Tutorials
Yeah tamiya tape cut and thinned however you need and the holy grail of liquid mask helps a ton.
-
Food Dehydrators & Paint Dryers
Dpate replied to JayVee's topic in Model Building Questions and Answers
First two are nice. It's not important to have 100% adjustable temp just long as you can get around 100-110F you're good. Those cheap ones will work fine just use a temp checker to make sure temps are right, and keep an eye on it.