radiohd10
-
Posts
286 -
Joined
-
Last visited
Content Type
Profiles
Forums
Events
Gallery
Everything posted by radiohd10
-
thanks! primed then sprayed with tamiya linoleum deck brown. then took some crinkled plastic wrap and dabbed it in some semi gloss black lacquer and applied it bit by bit over the brown - swirling with a pointed cotton swab in between applications. then a very light spray of clear red and light spray of clear orange to get the desired darkness level. then a couple coats of semi gloss clear. letting the paint dry completely between each step is the key.
-
Some bonus tweak footage ? Tunes…

-
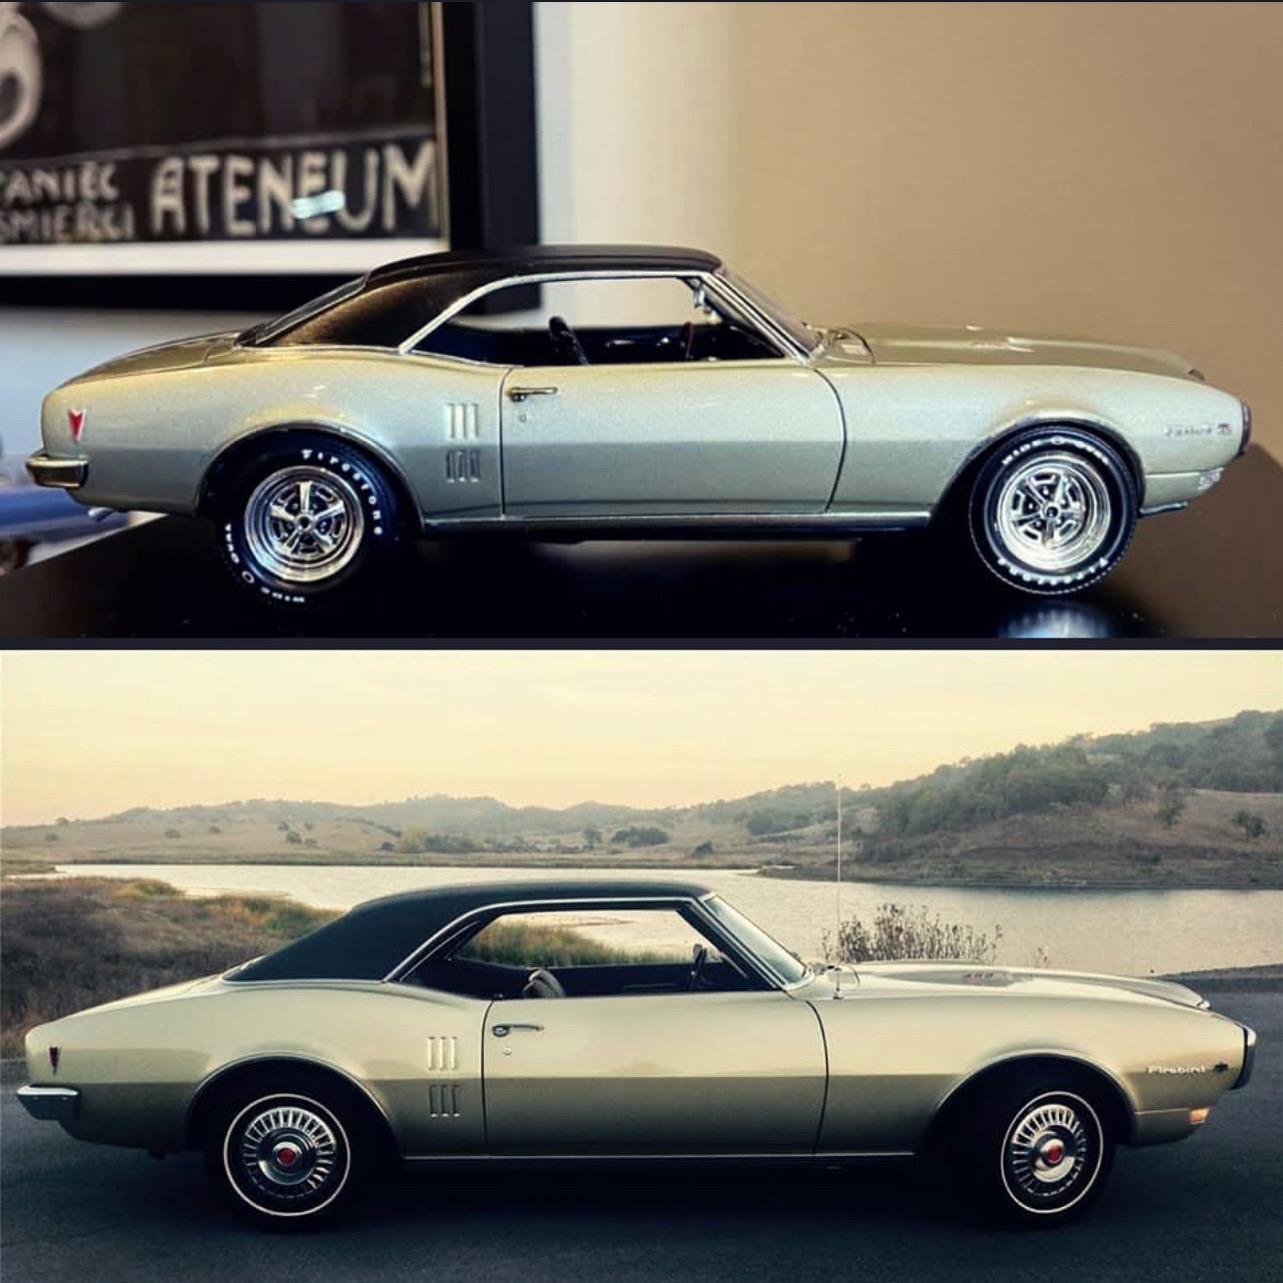
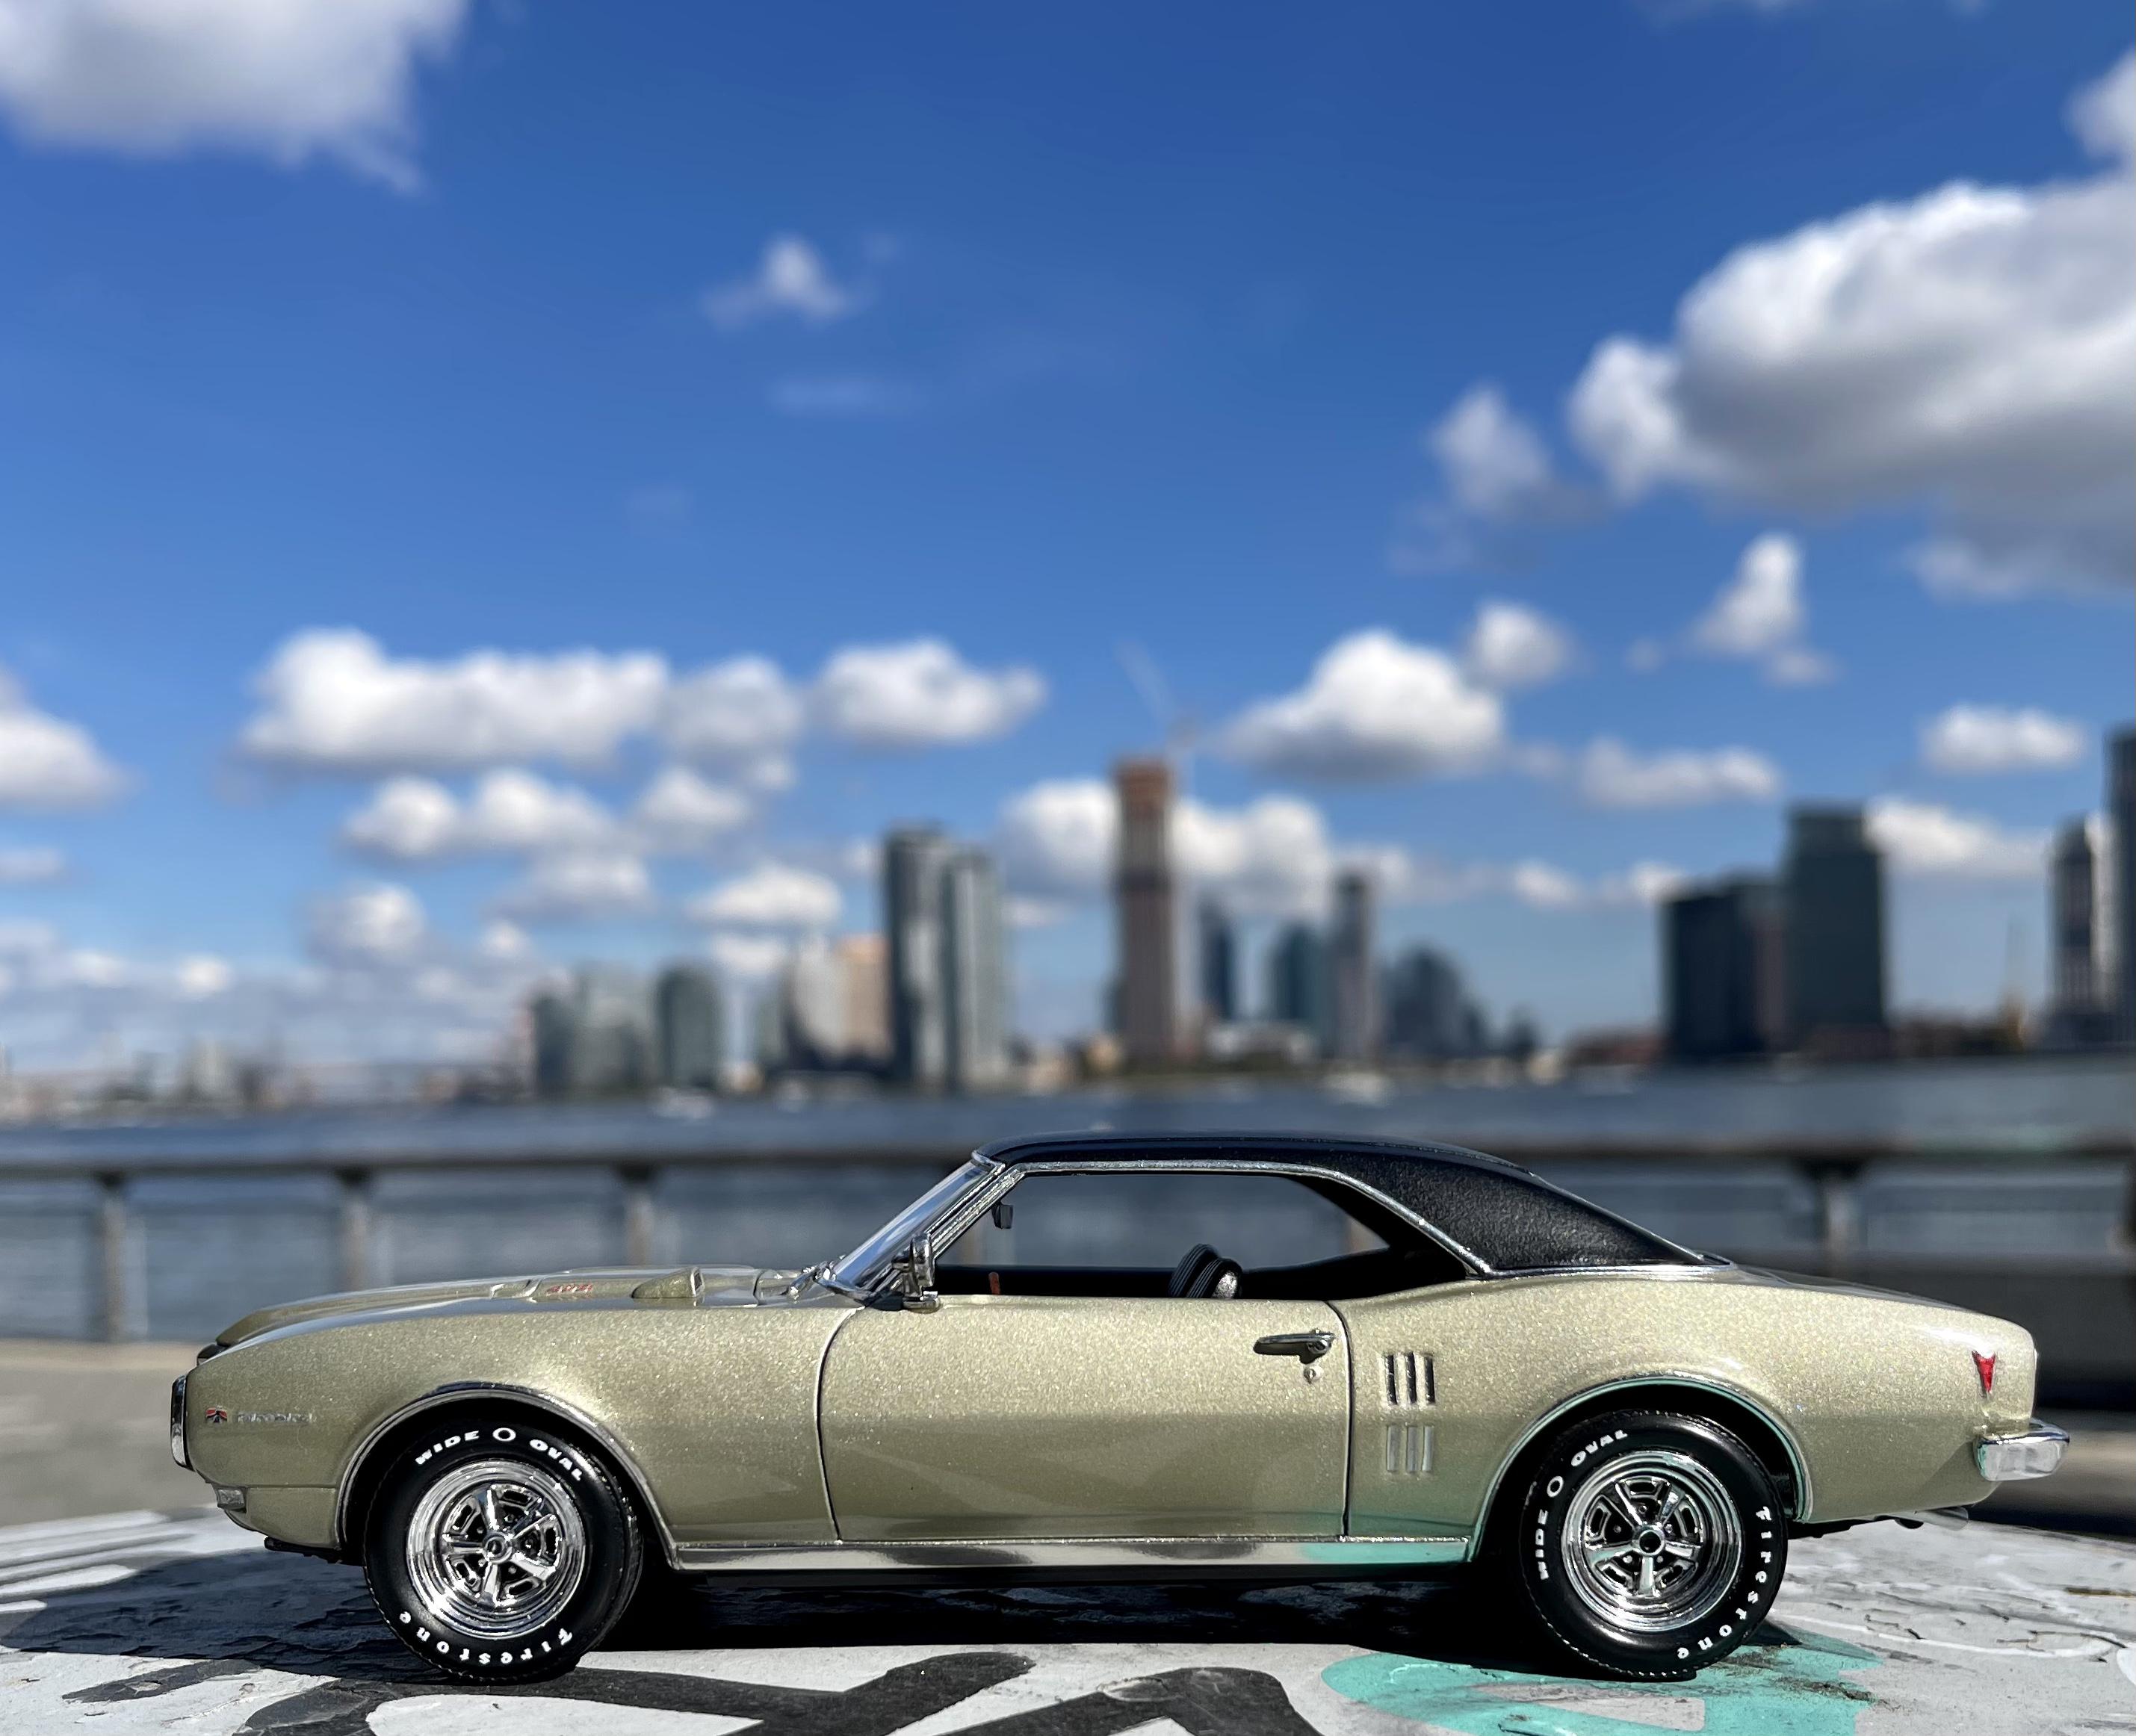
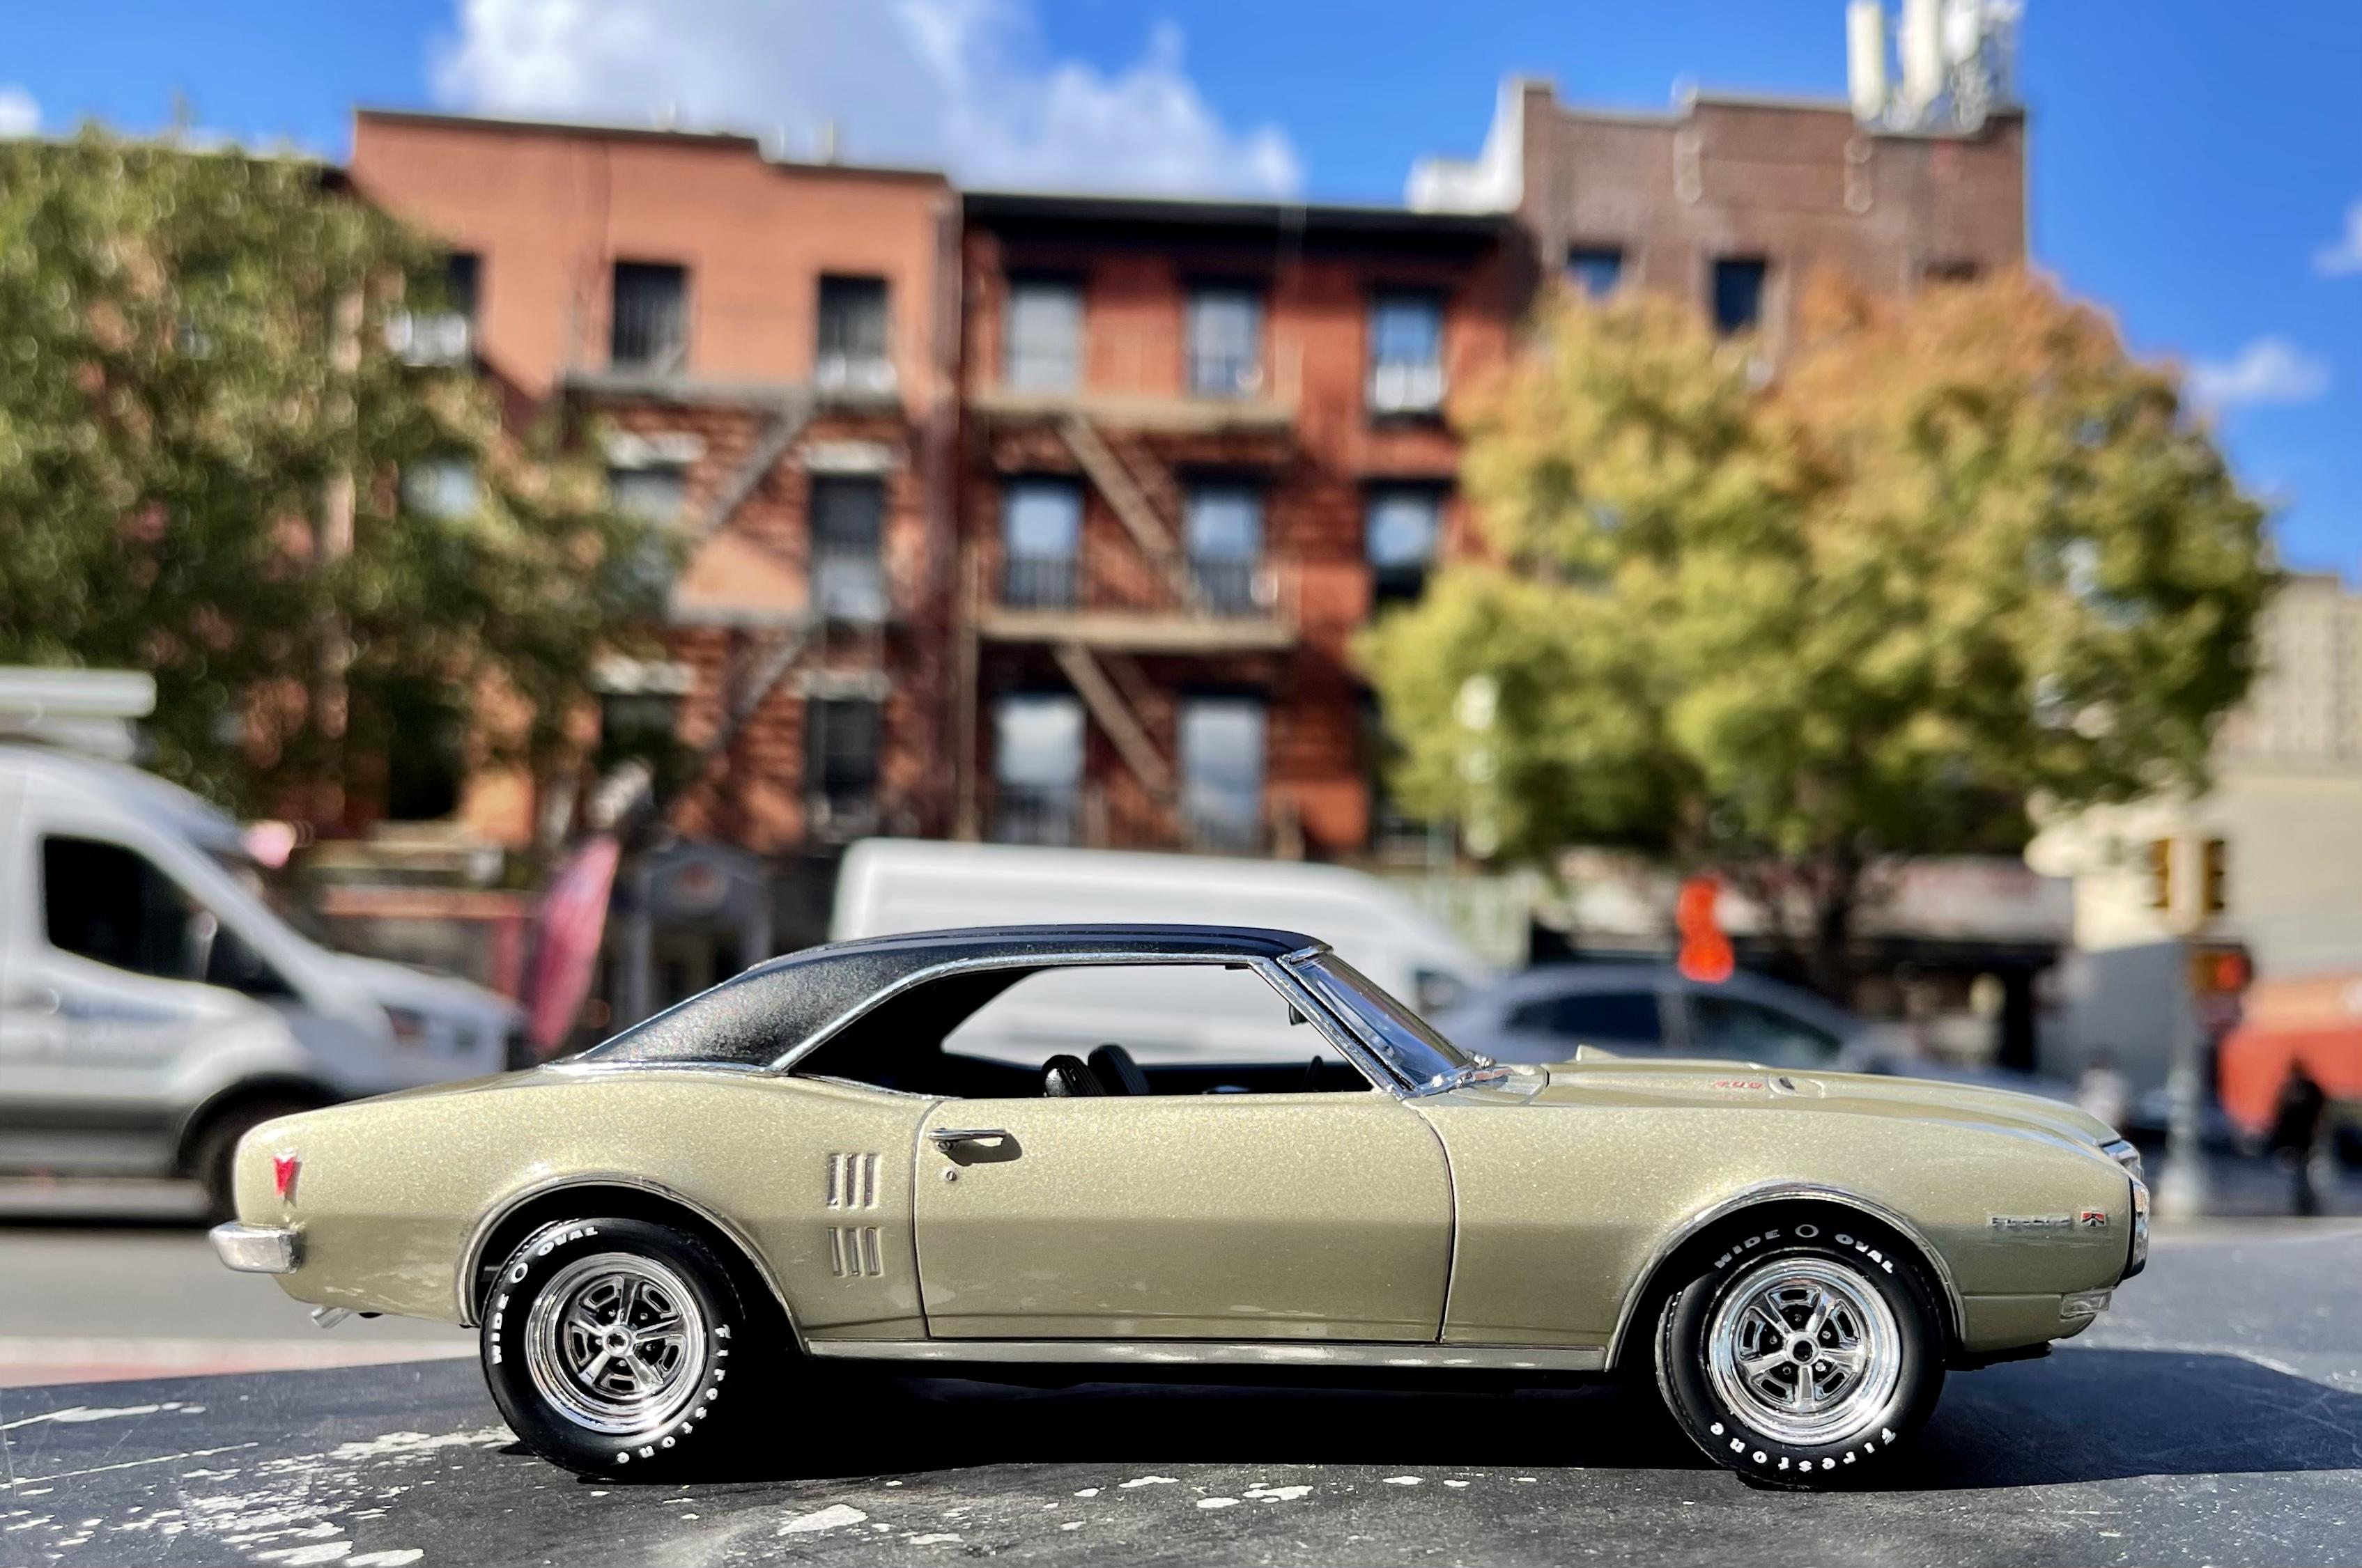
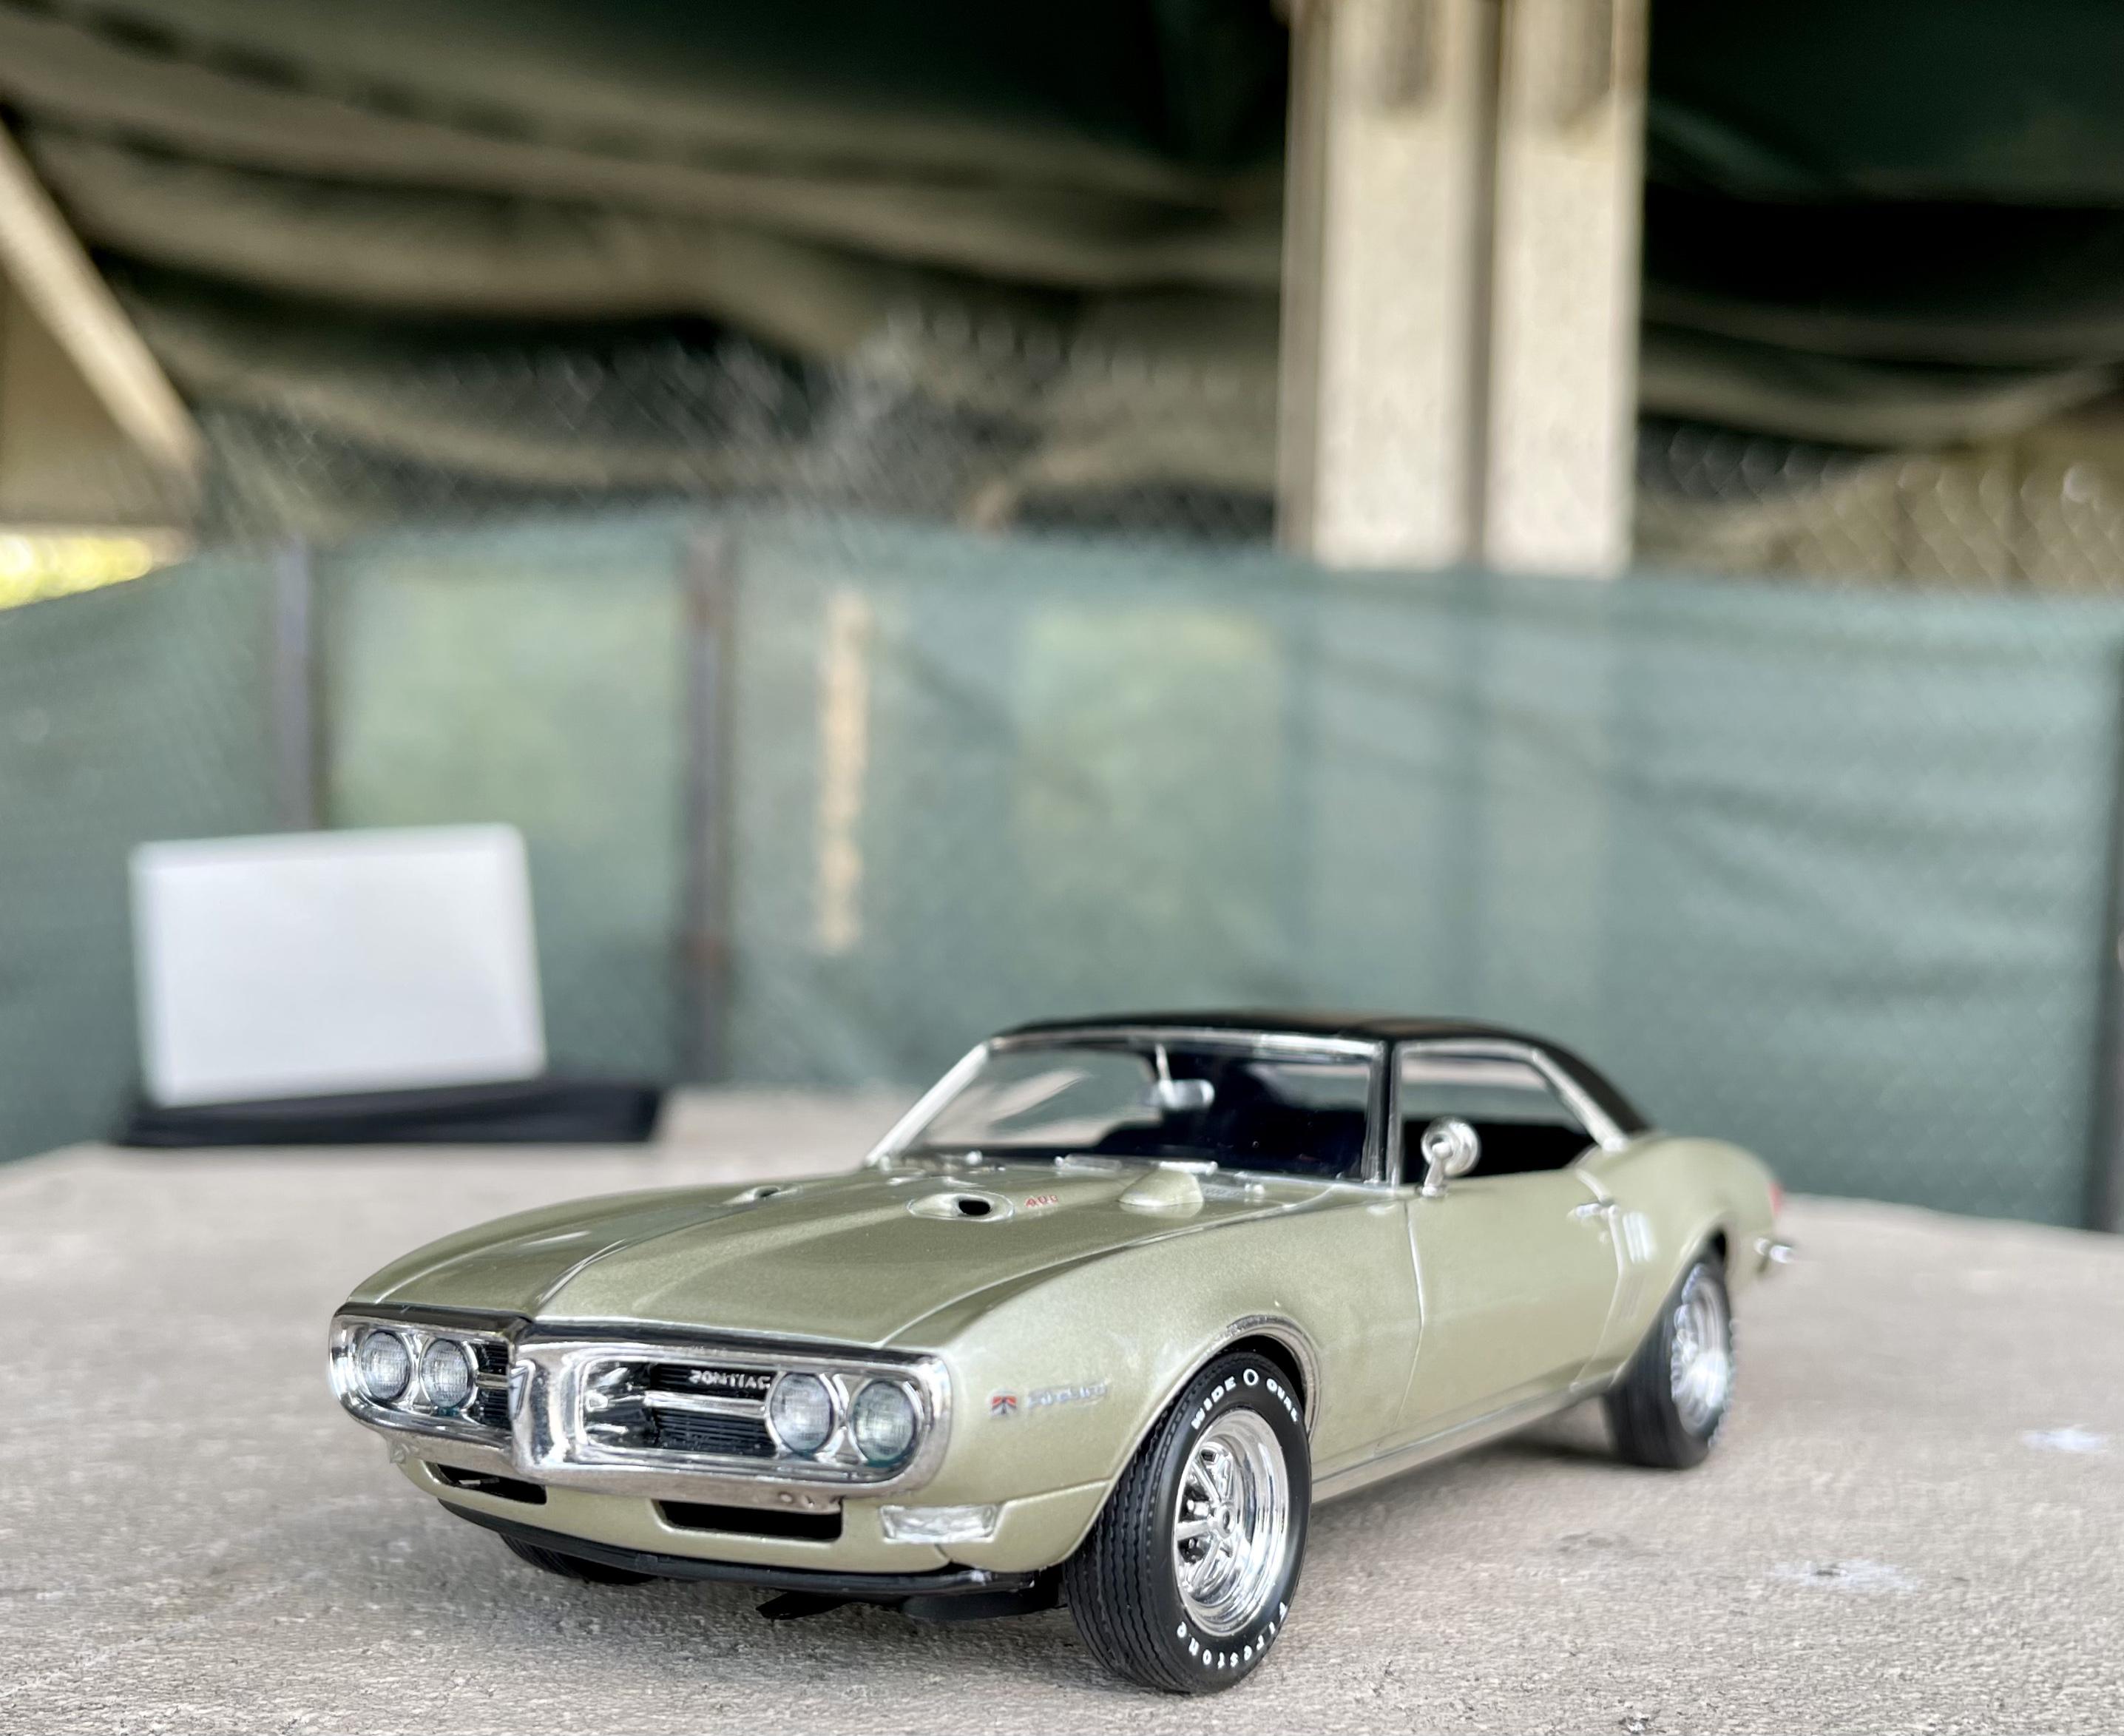
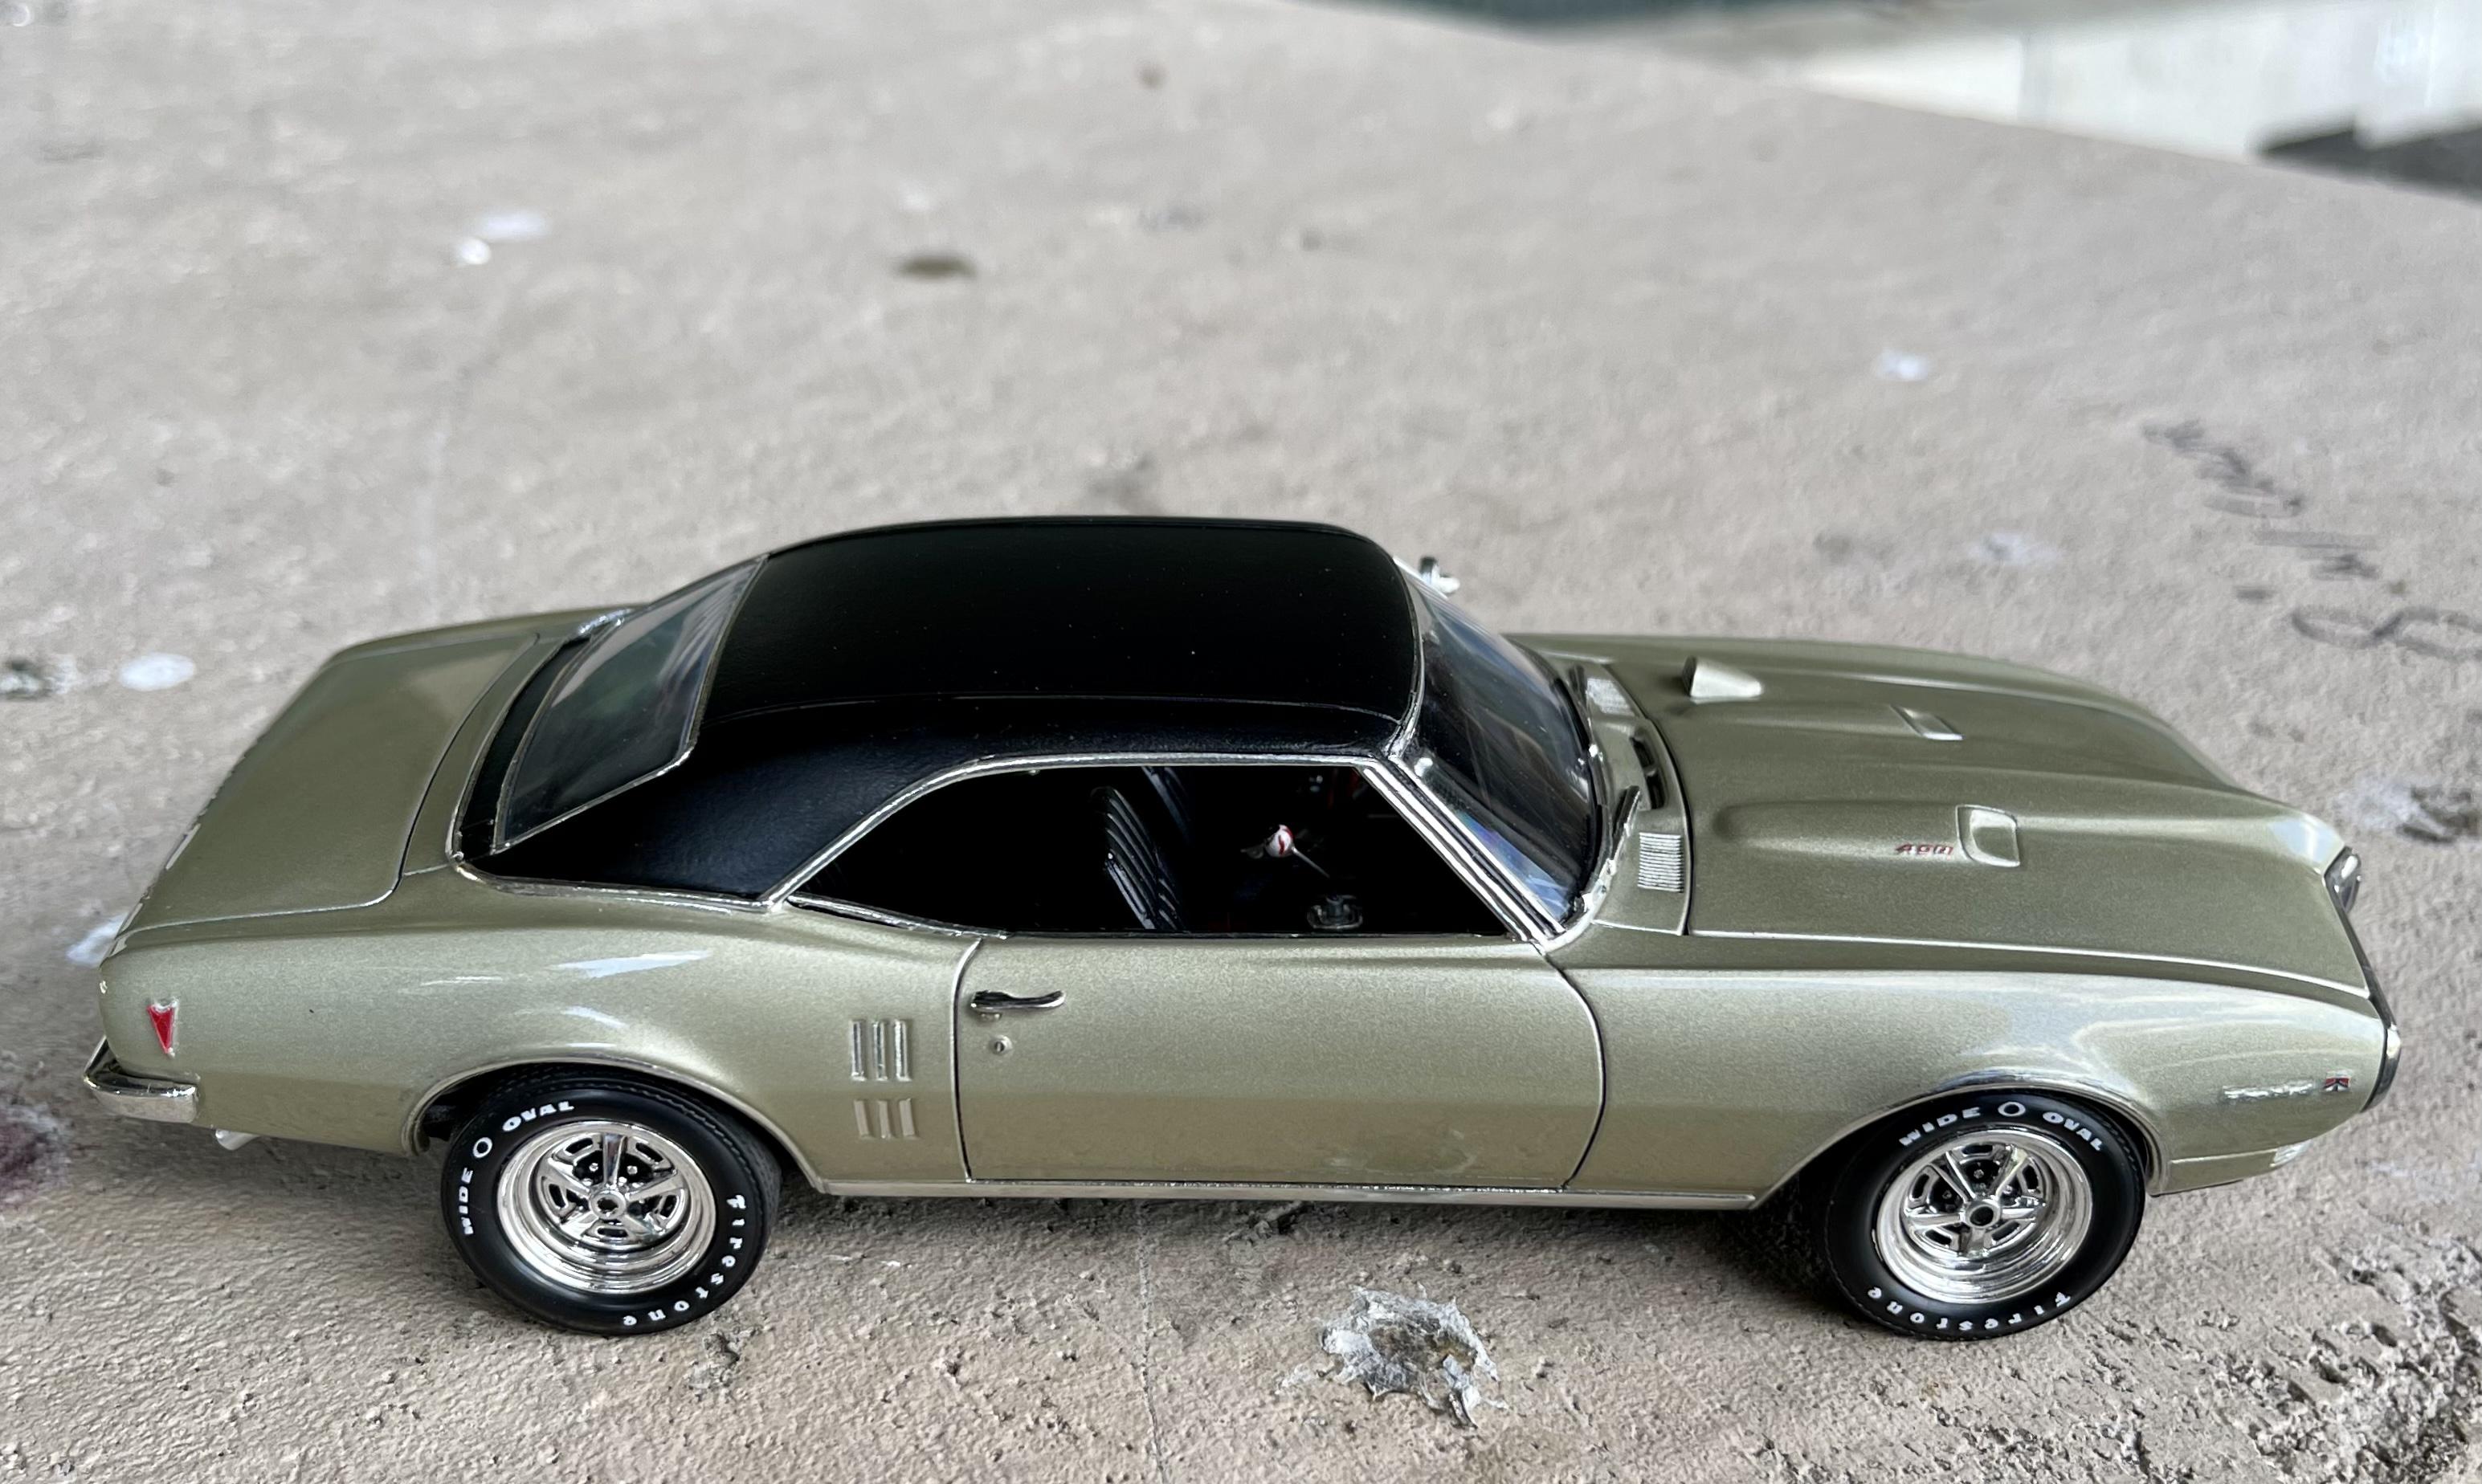
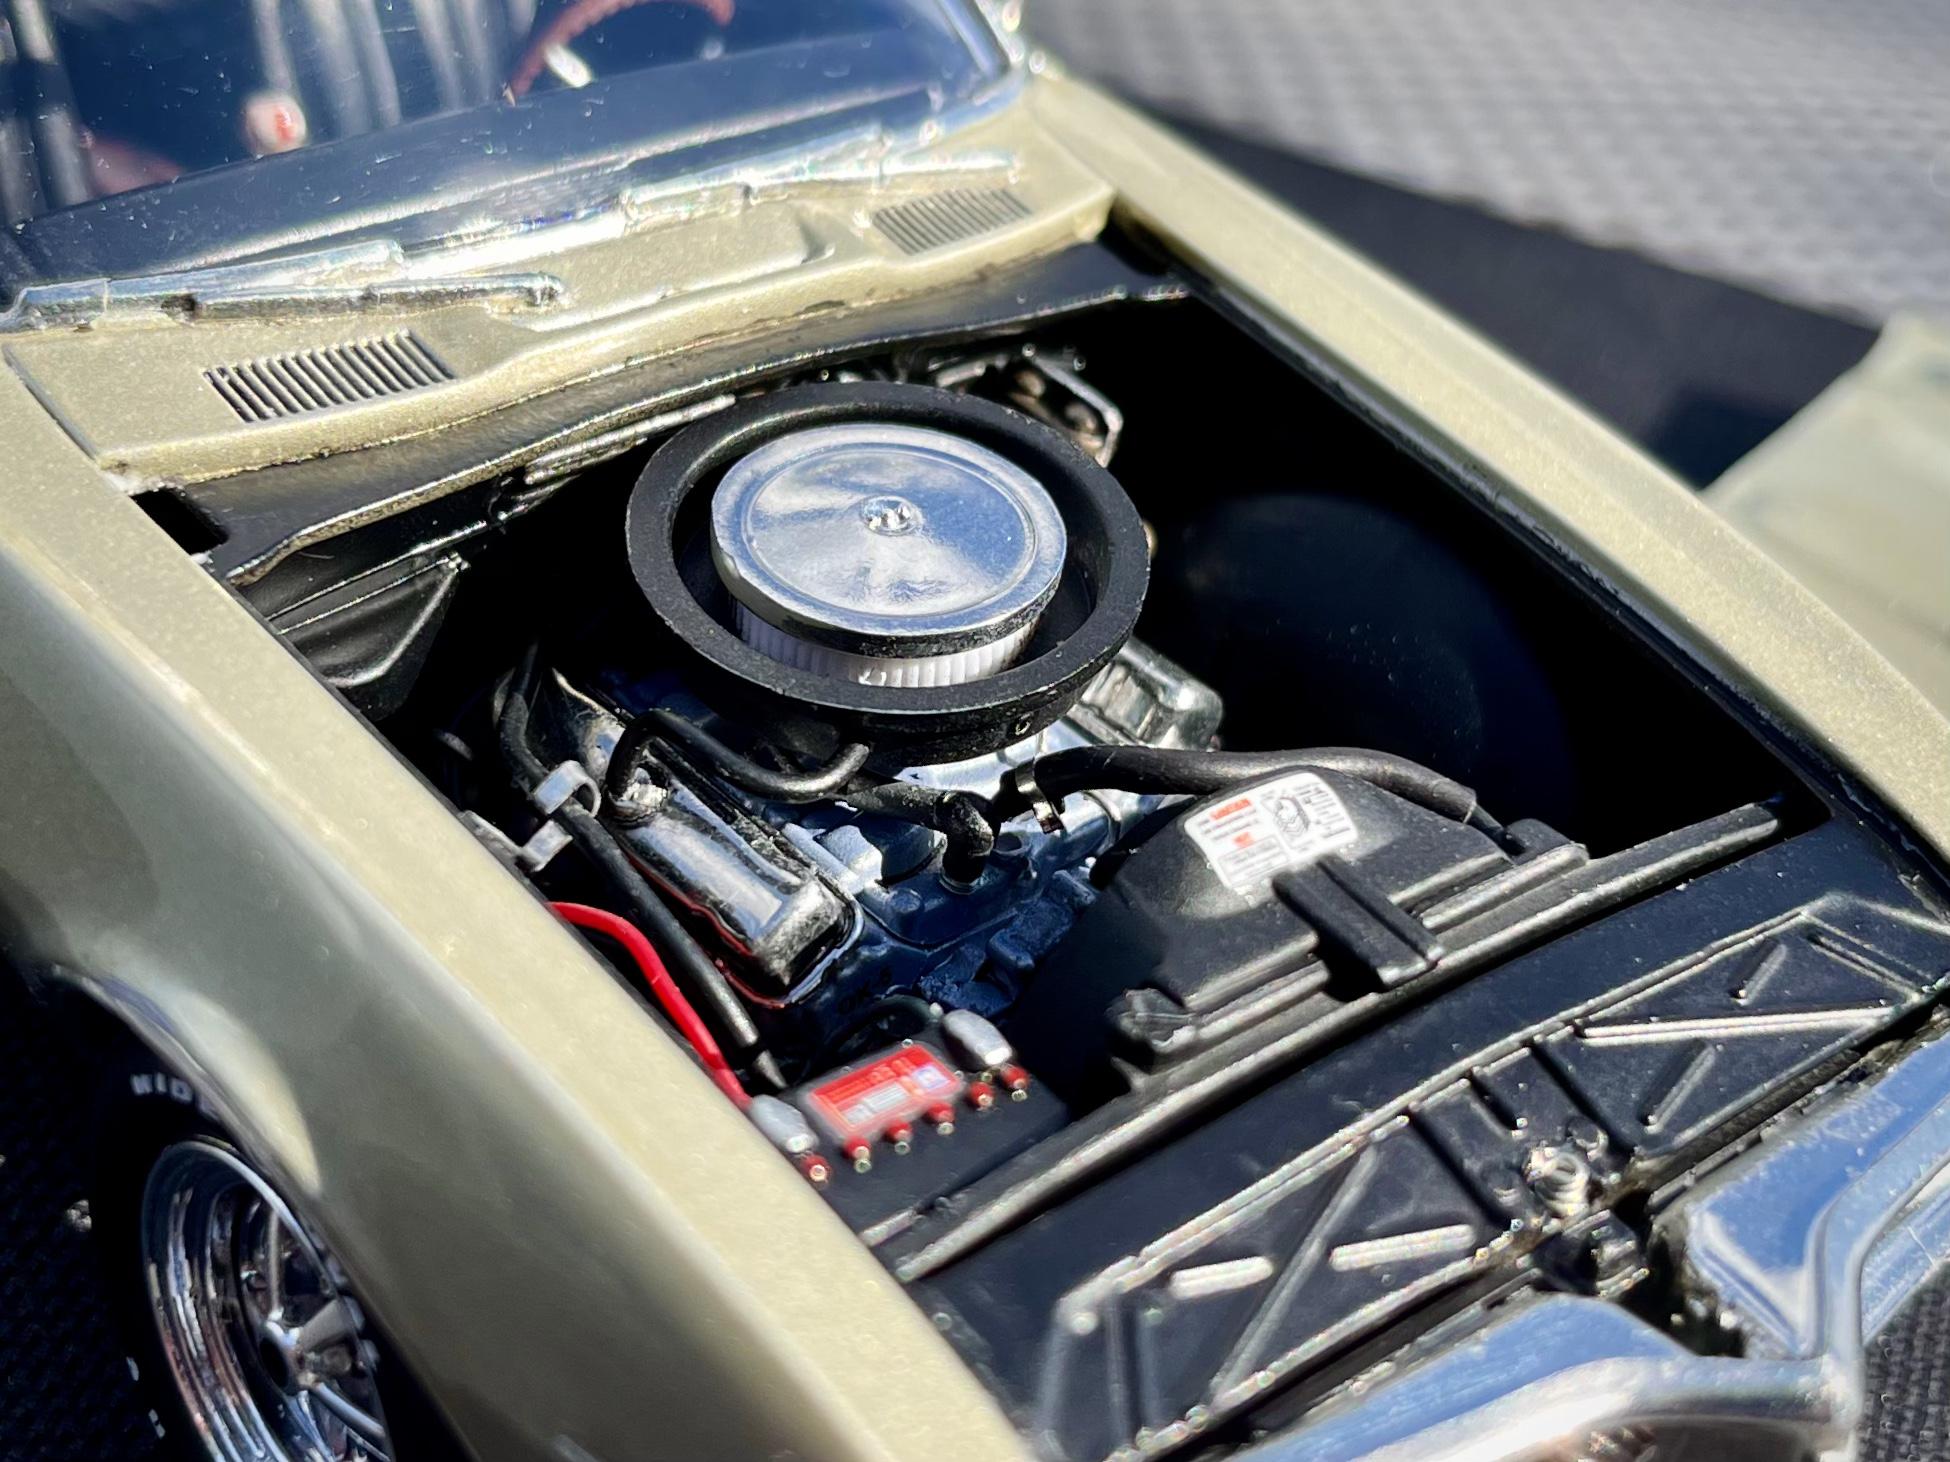
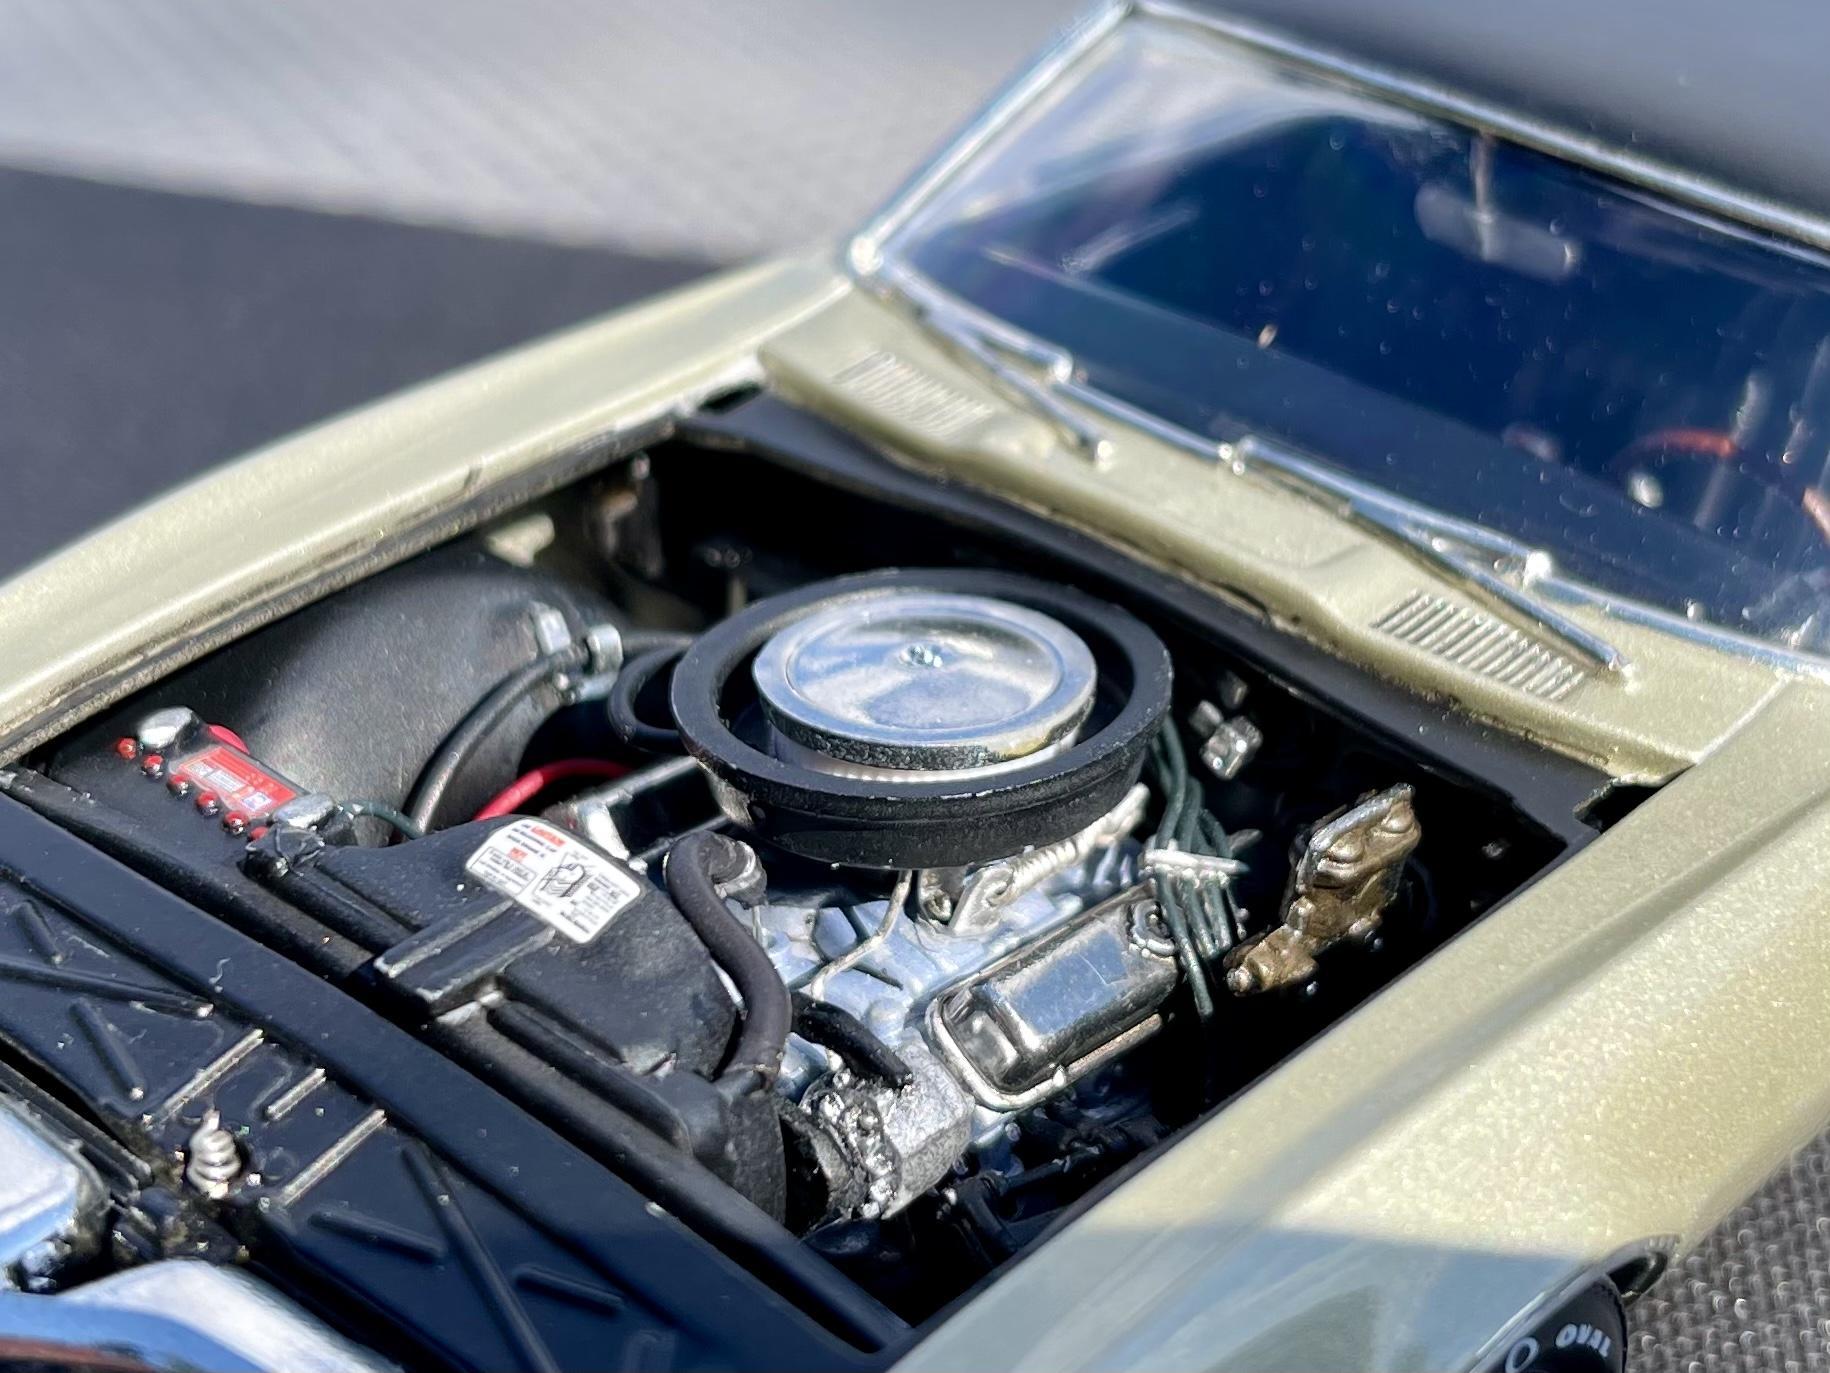
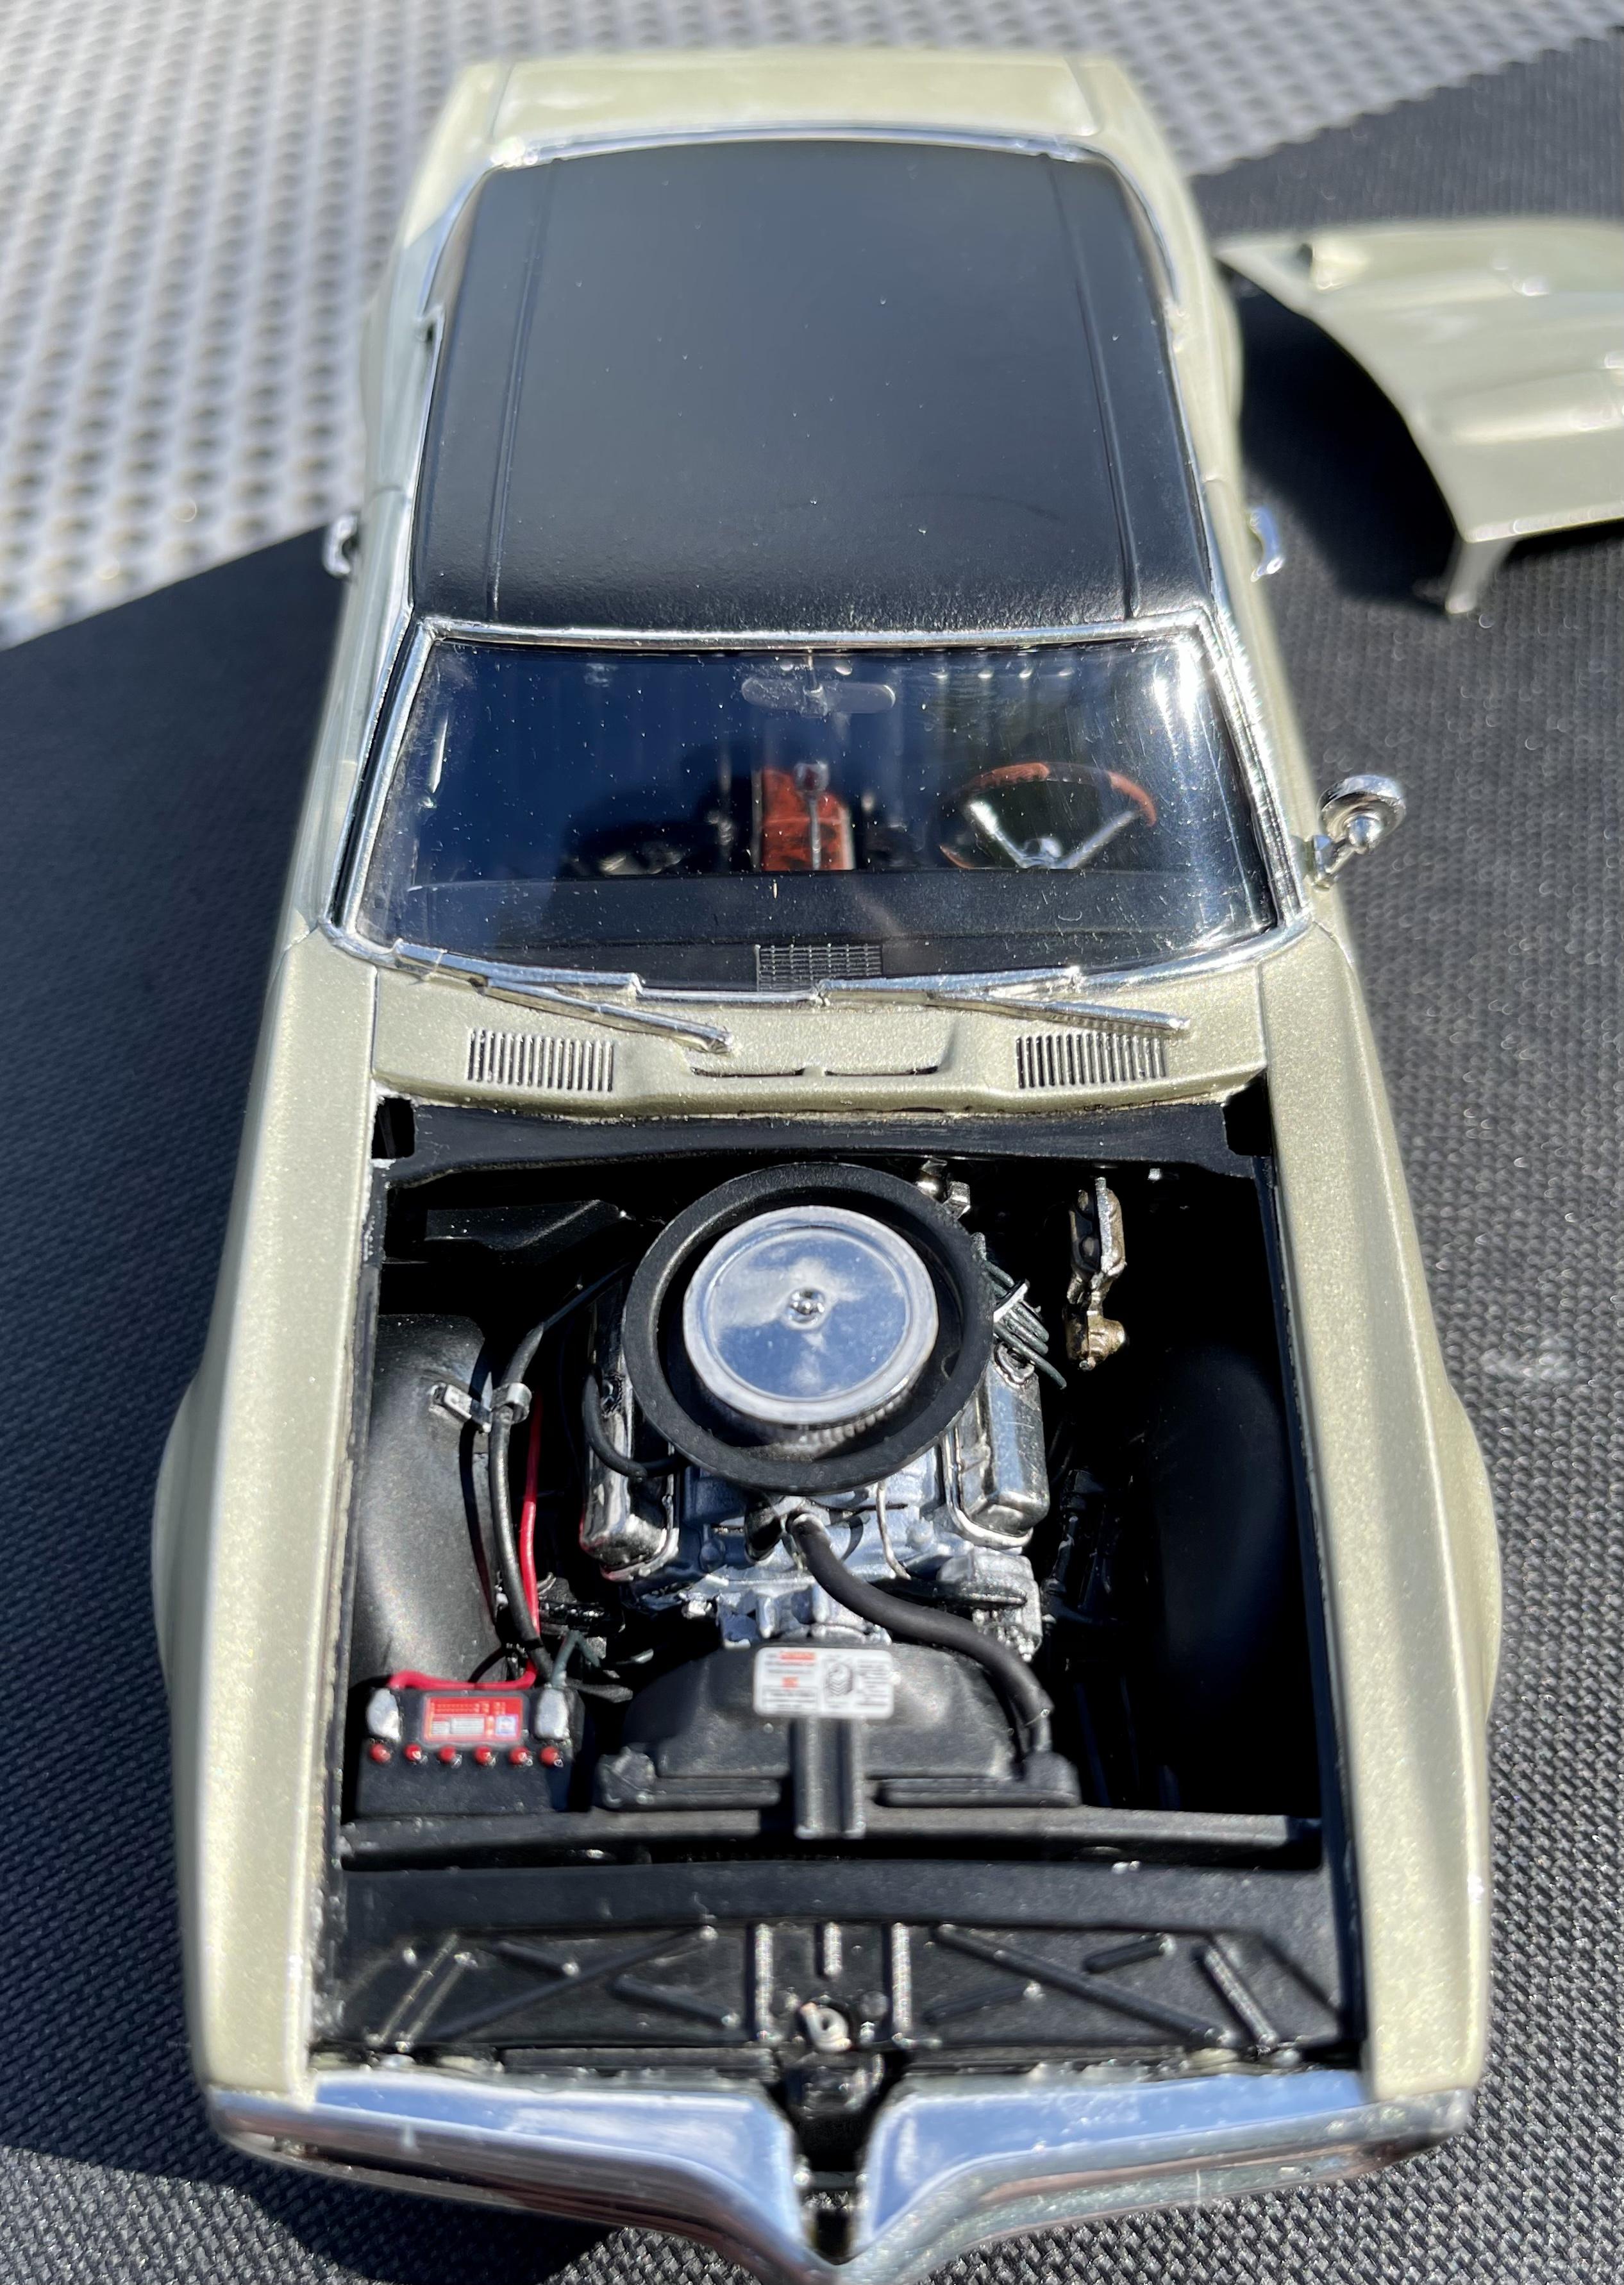
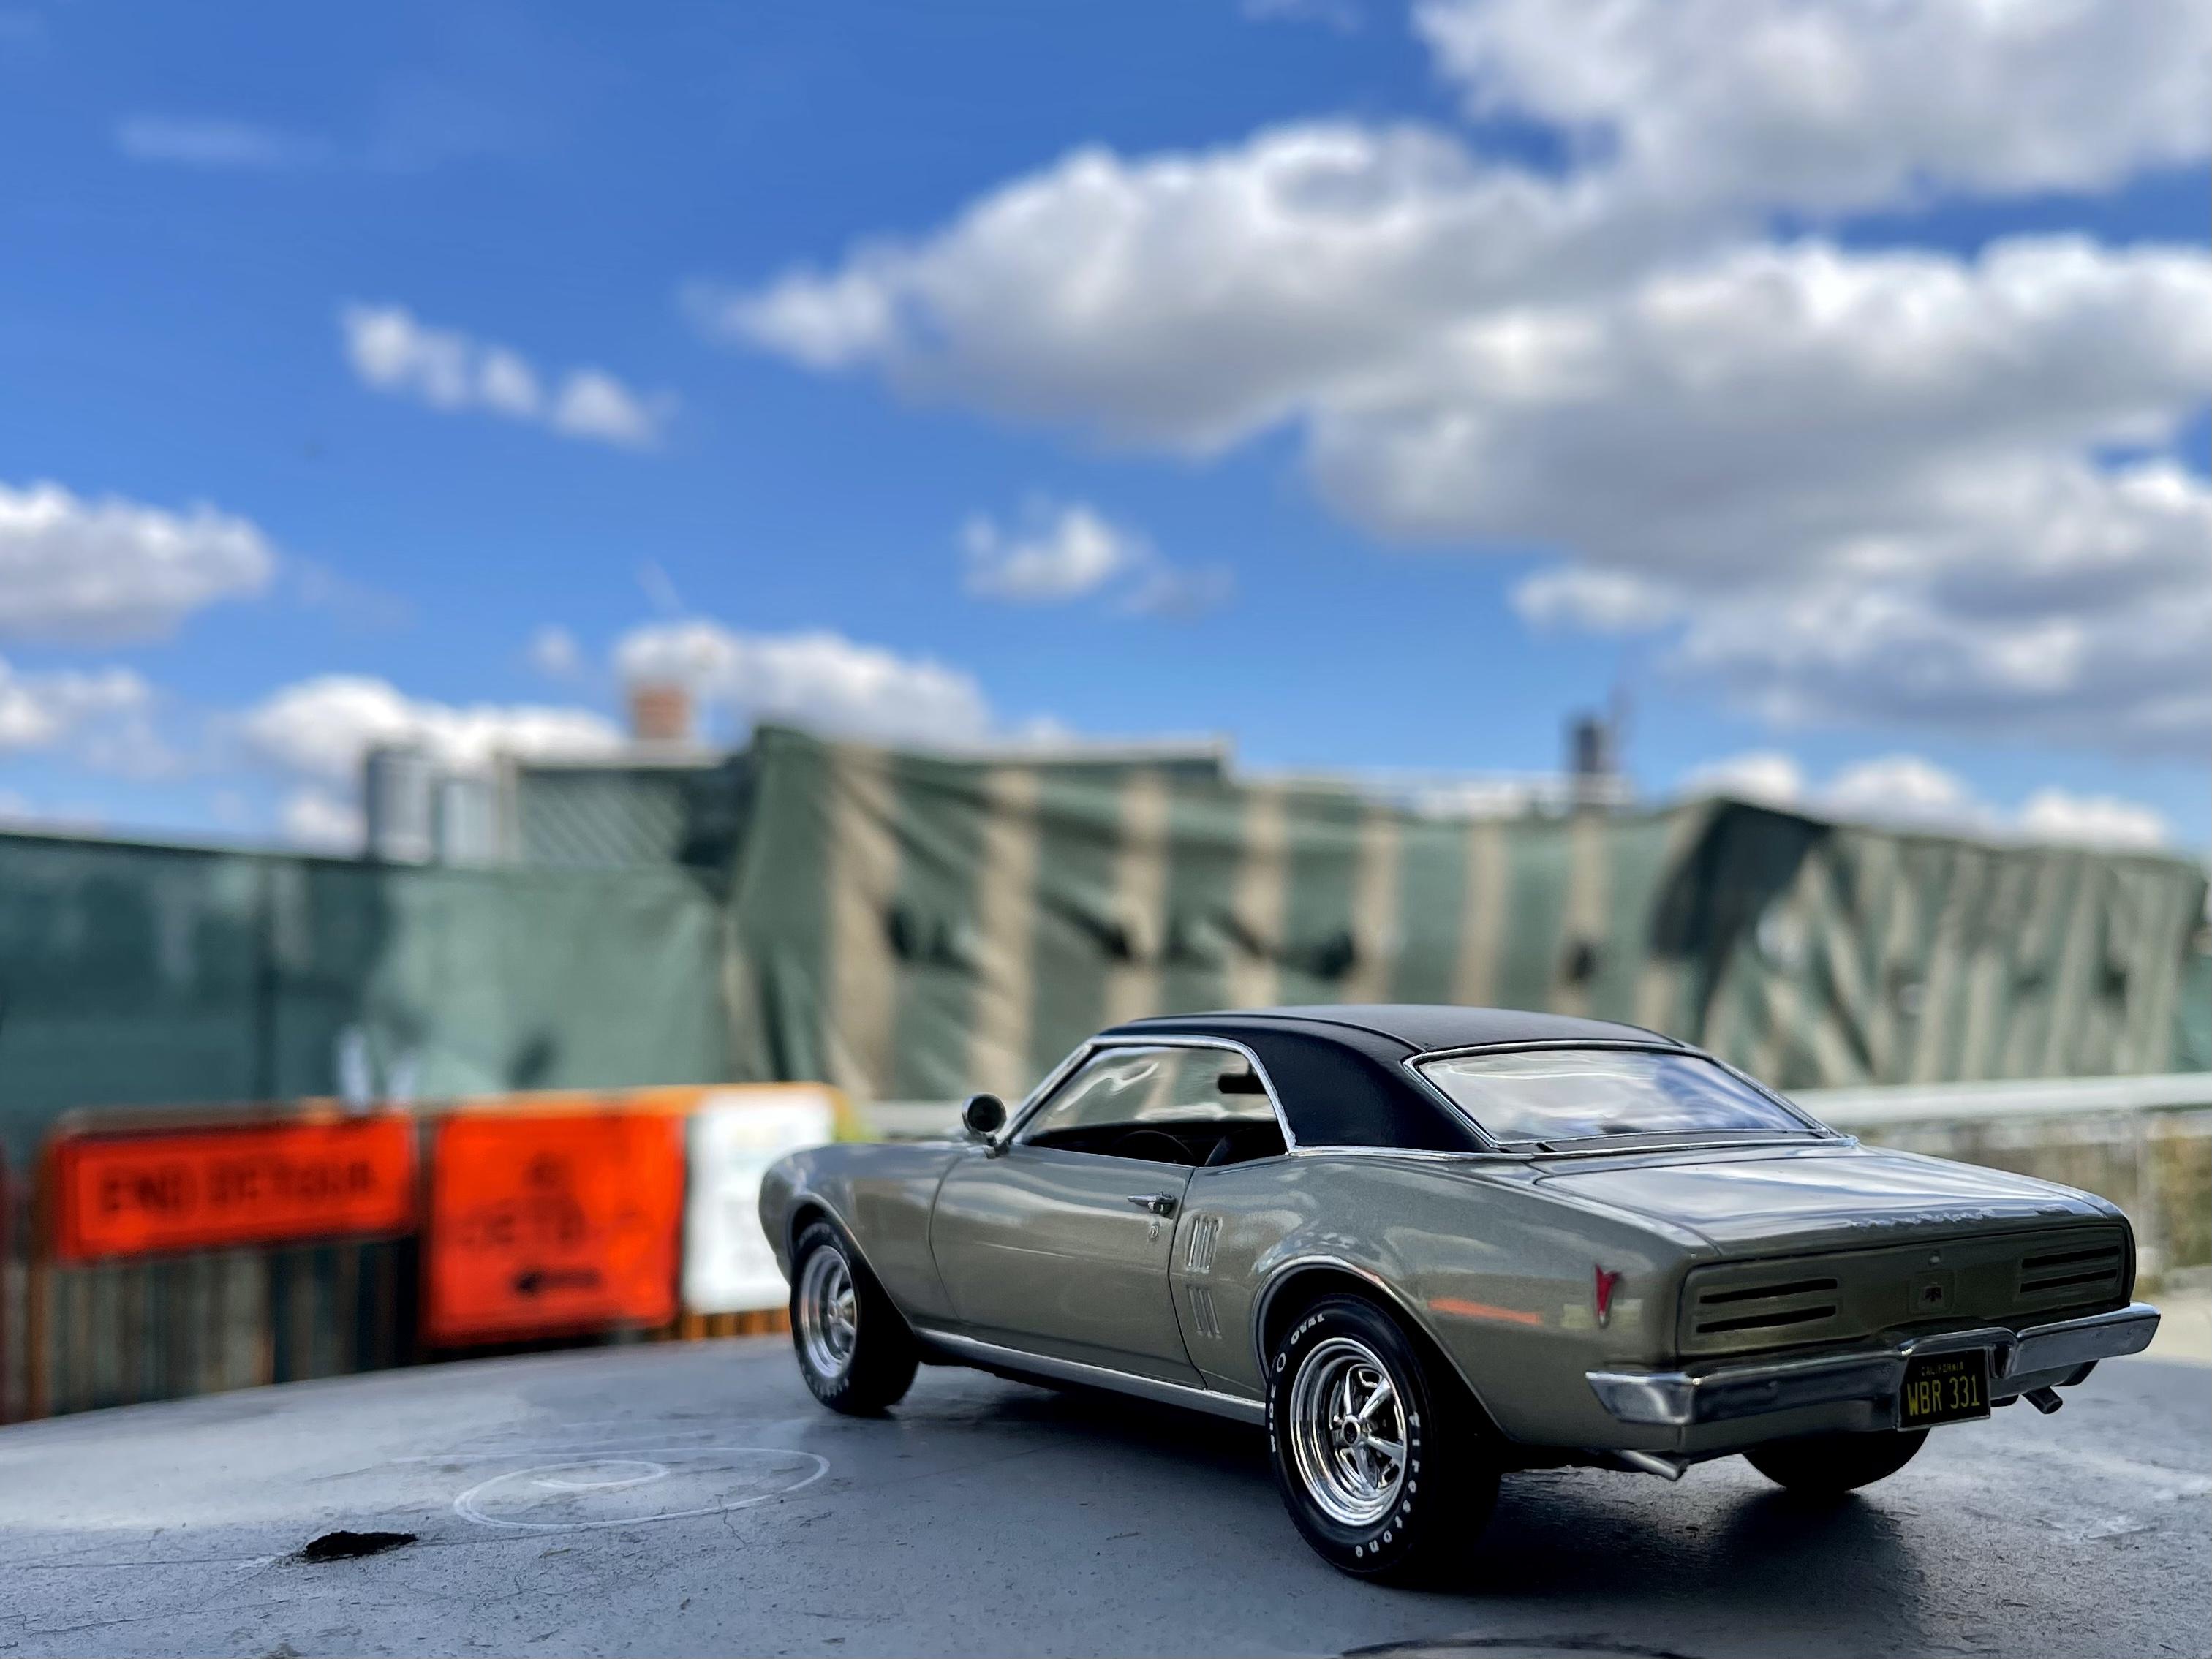
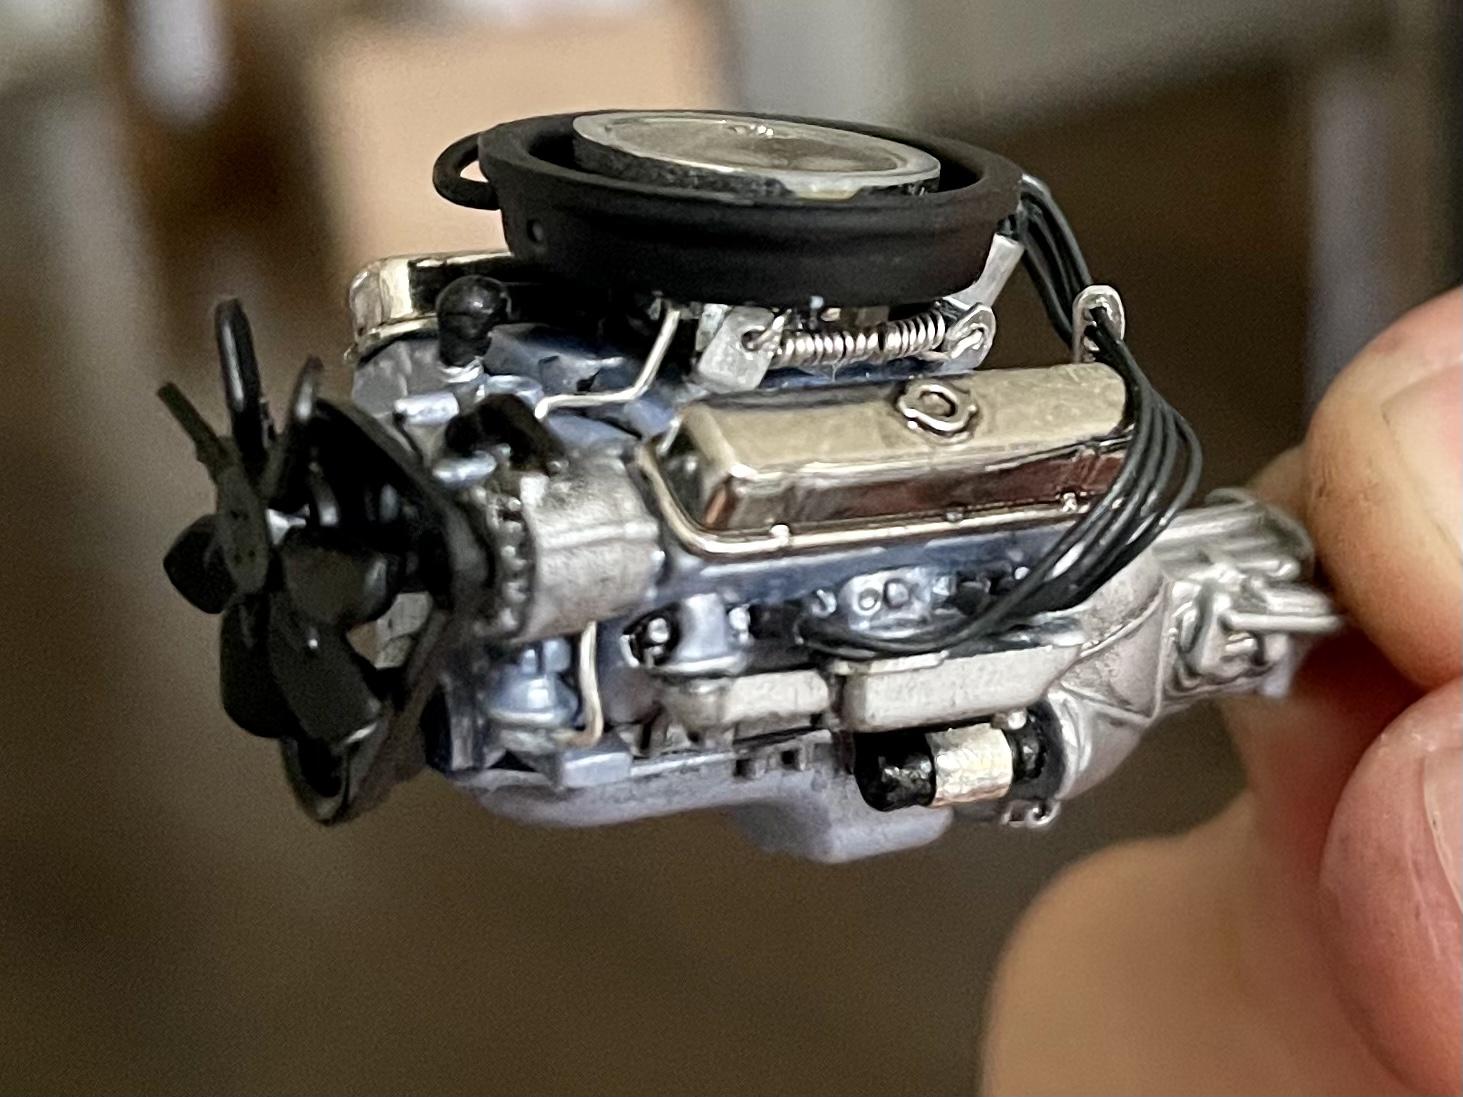
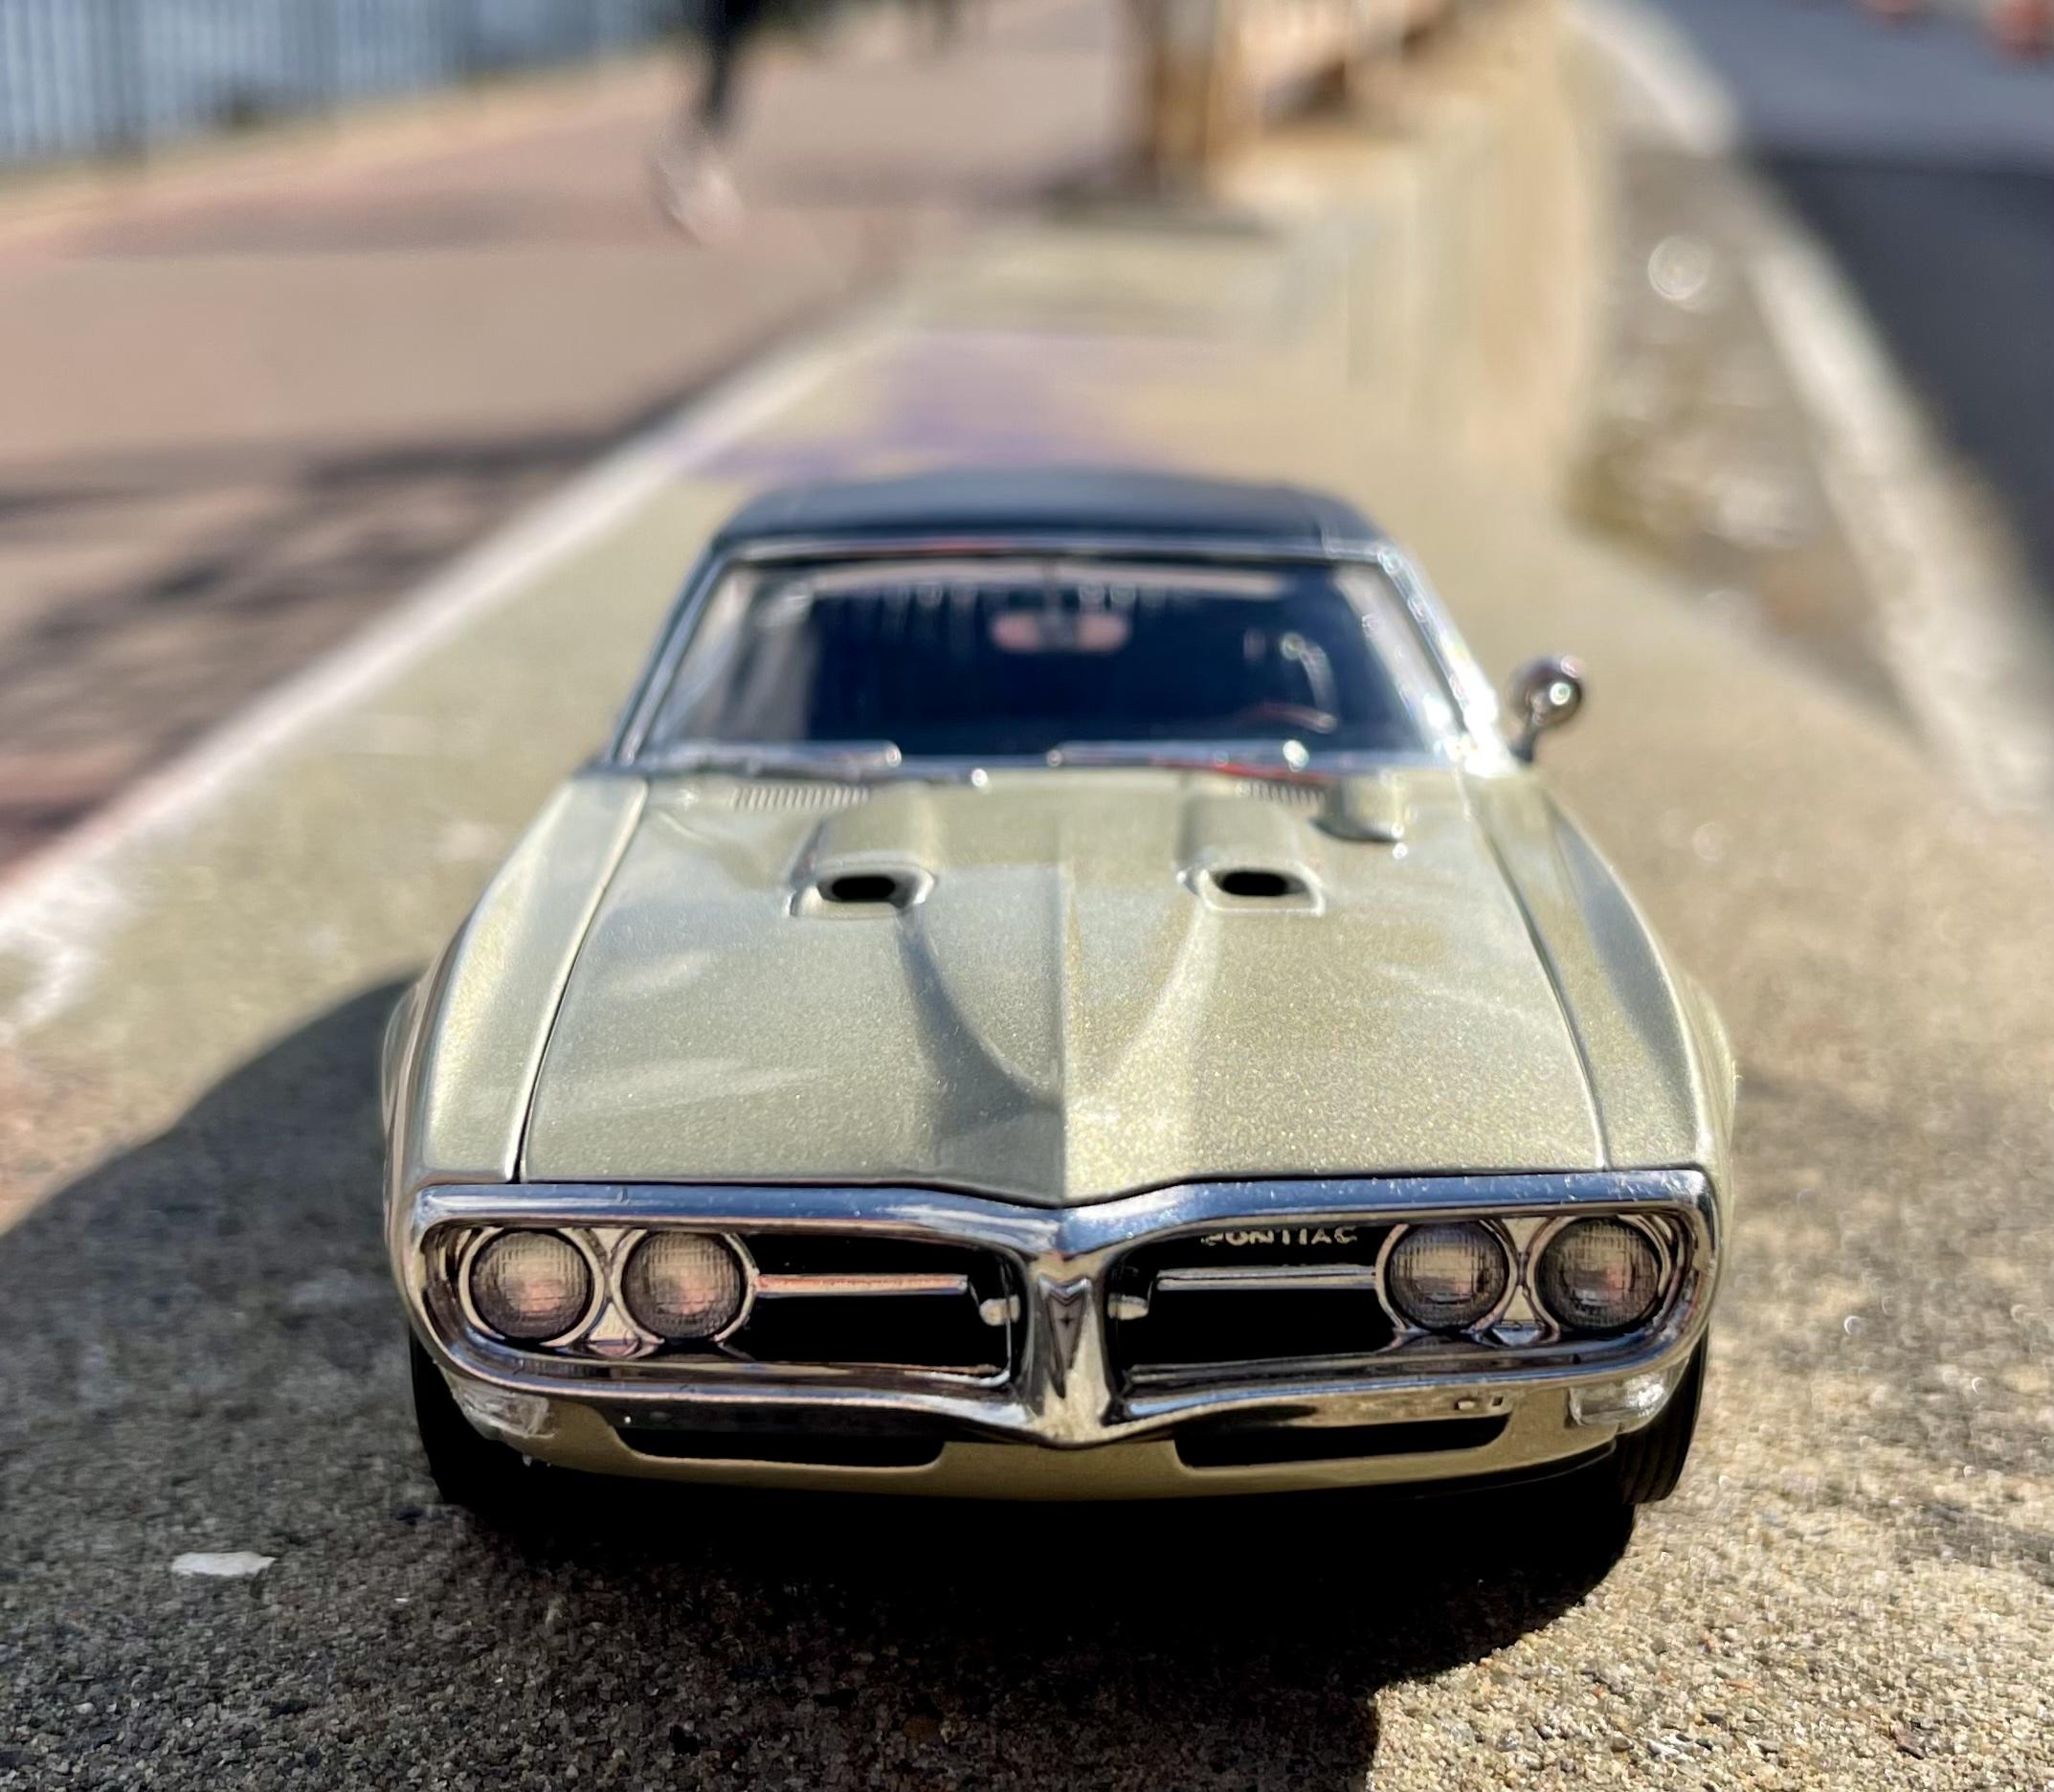
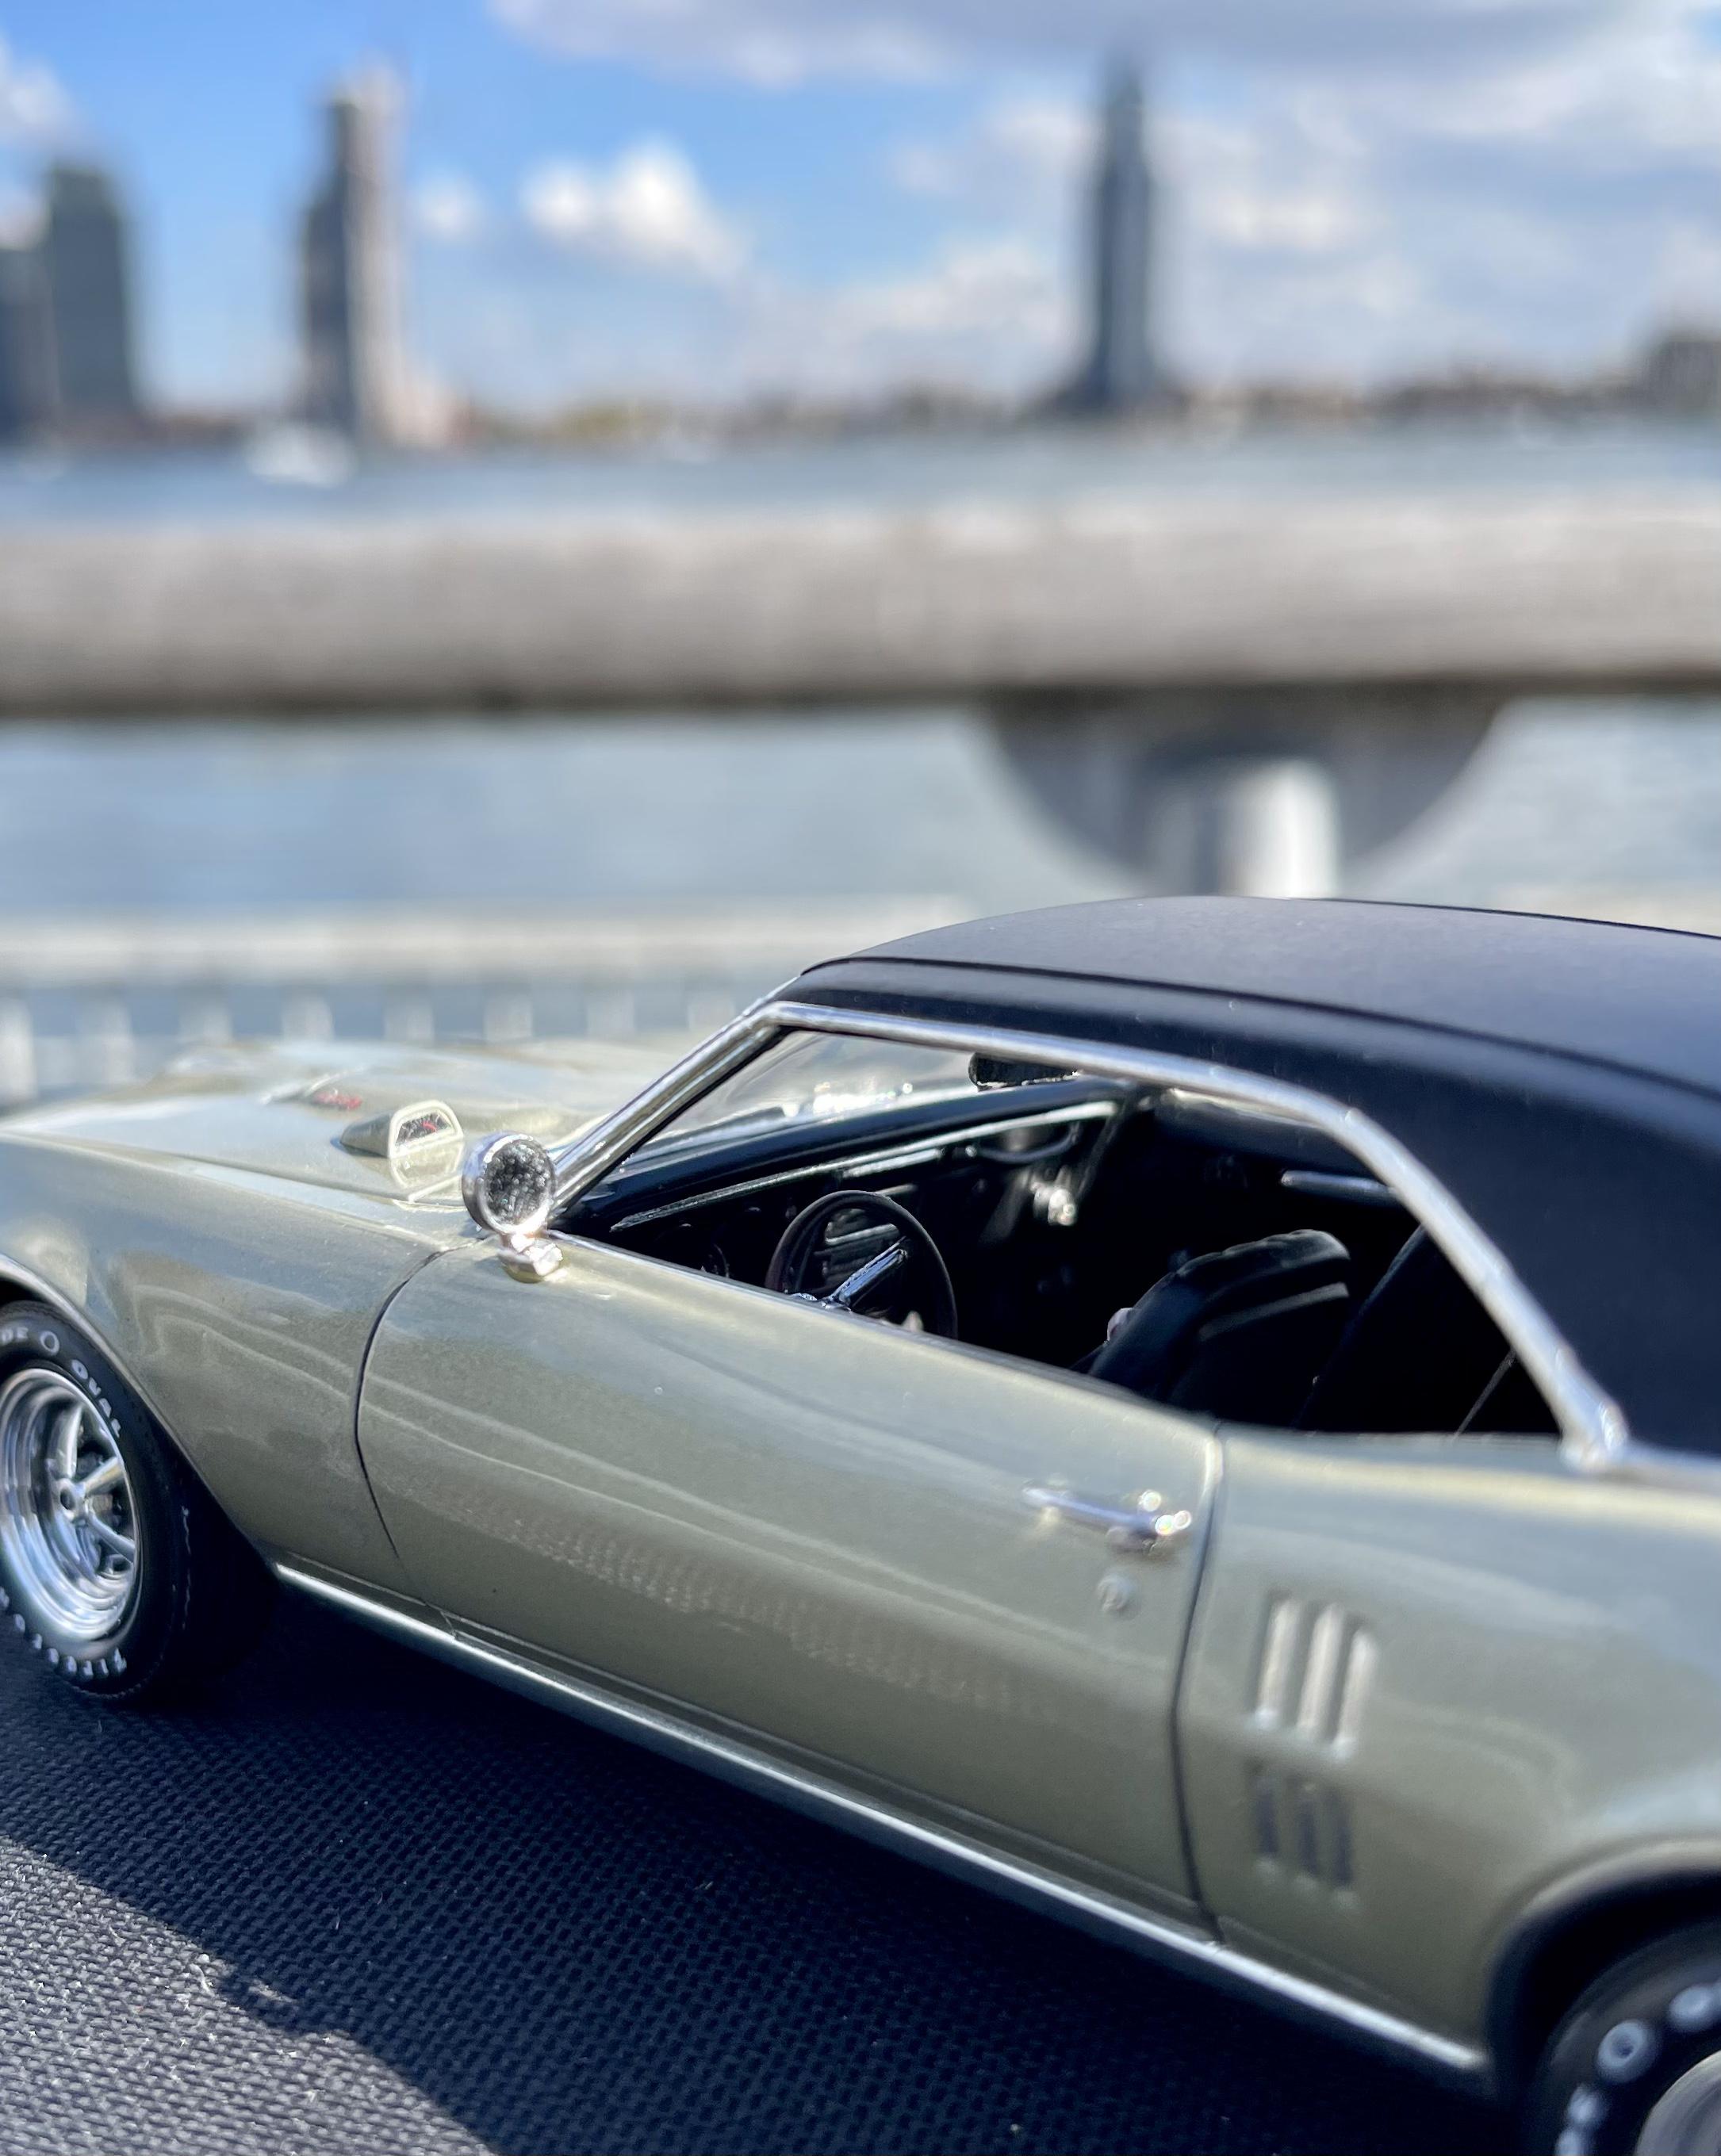
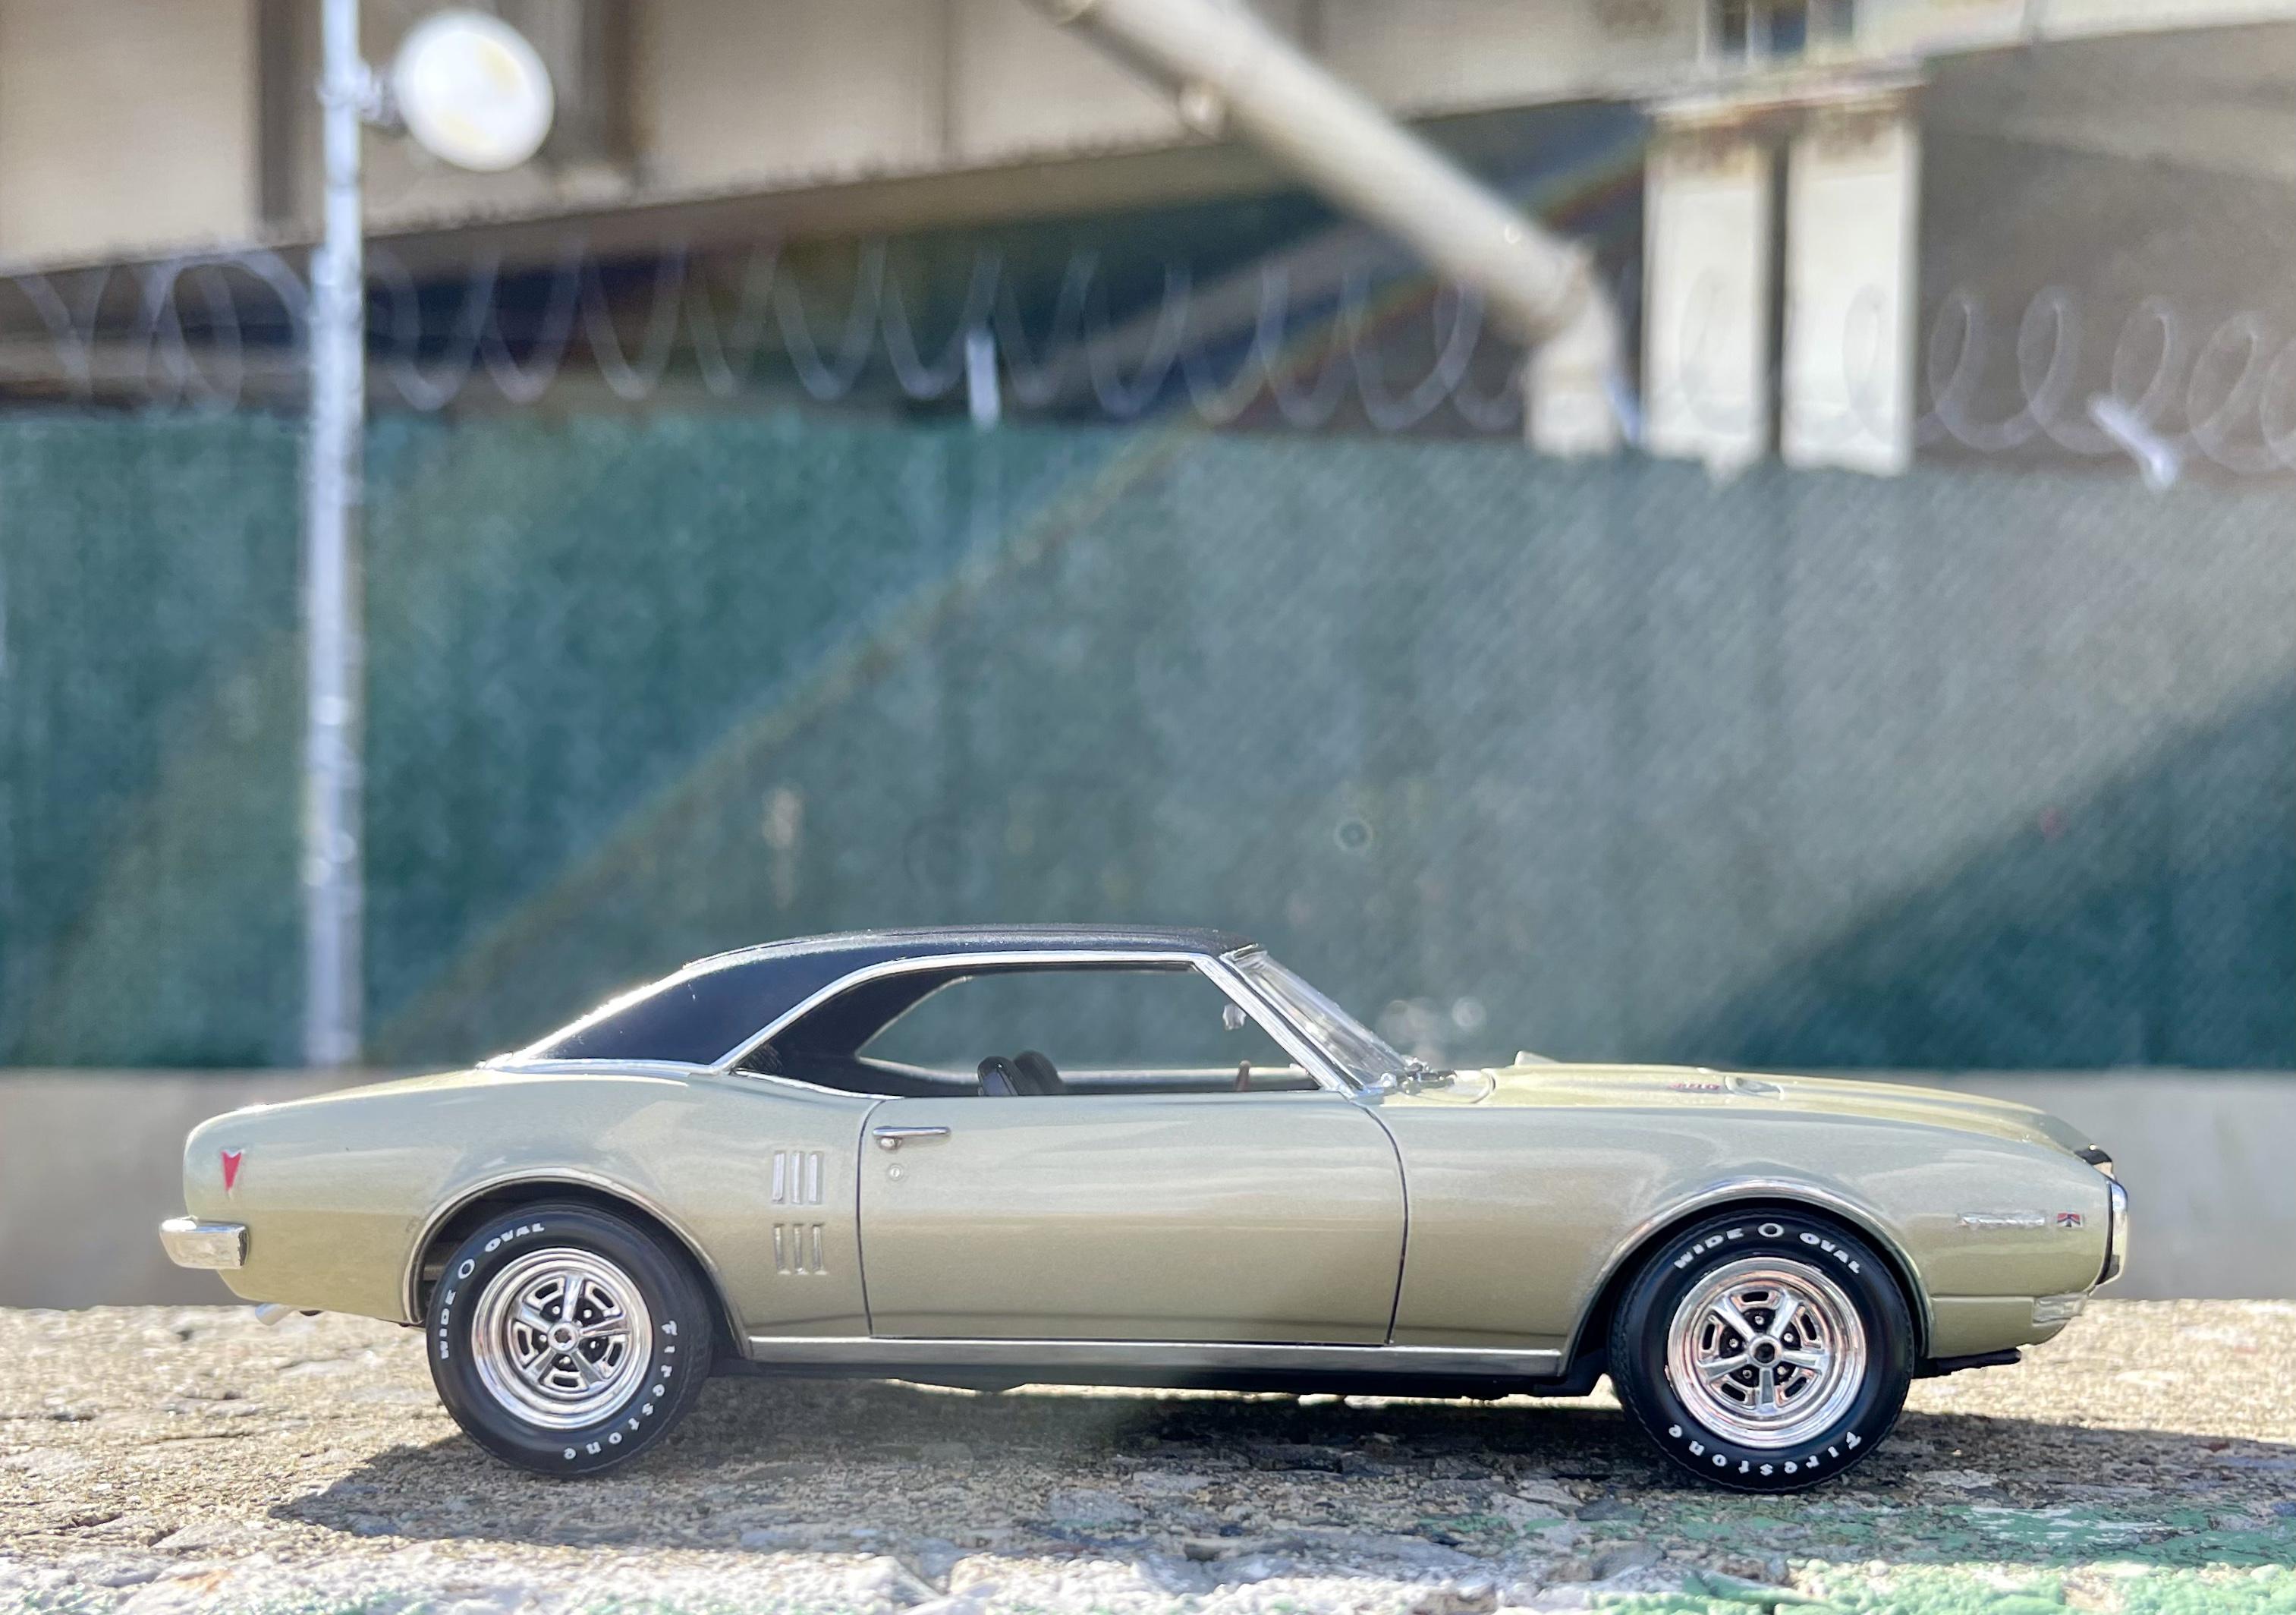
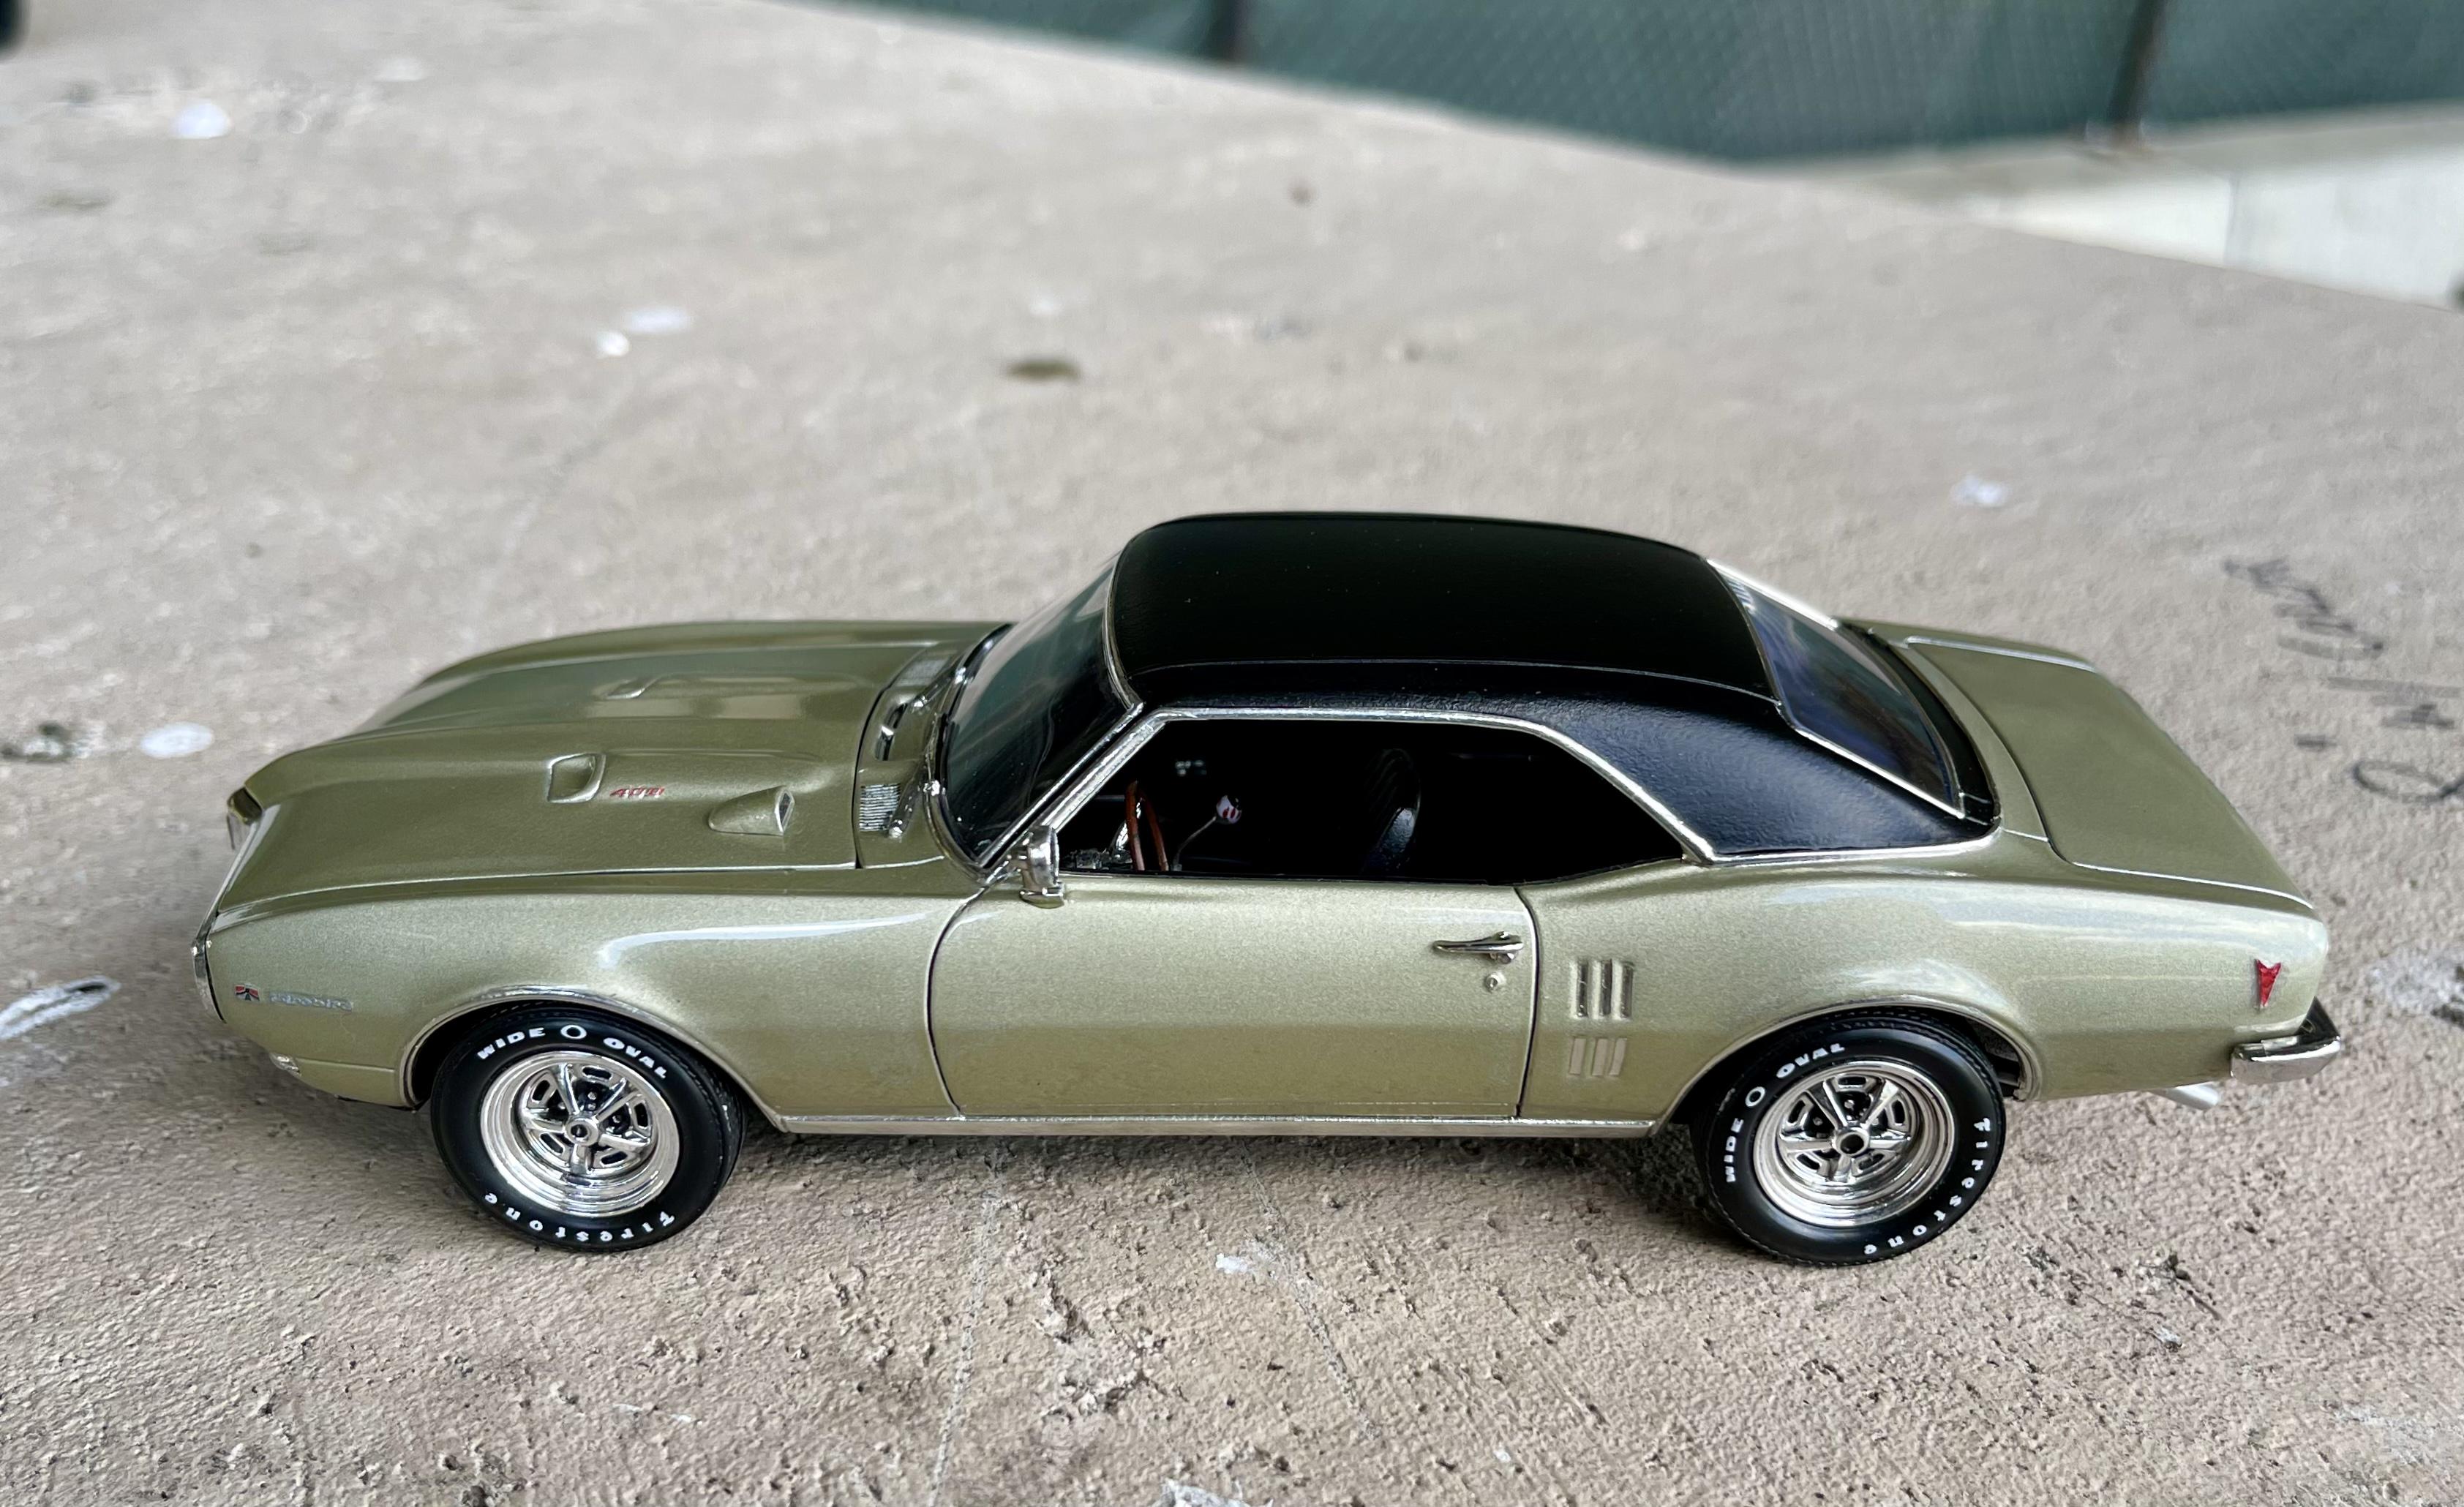
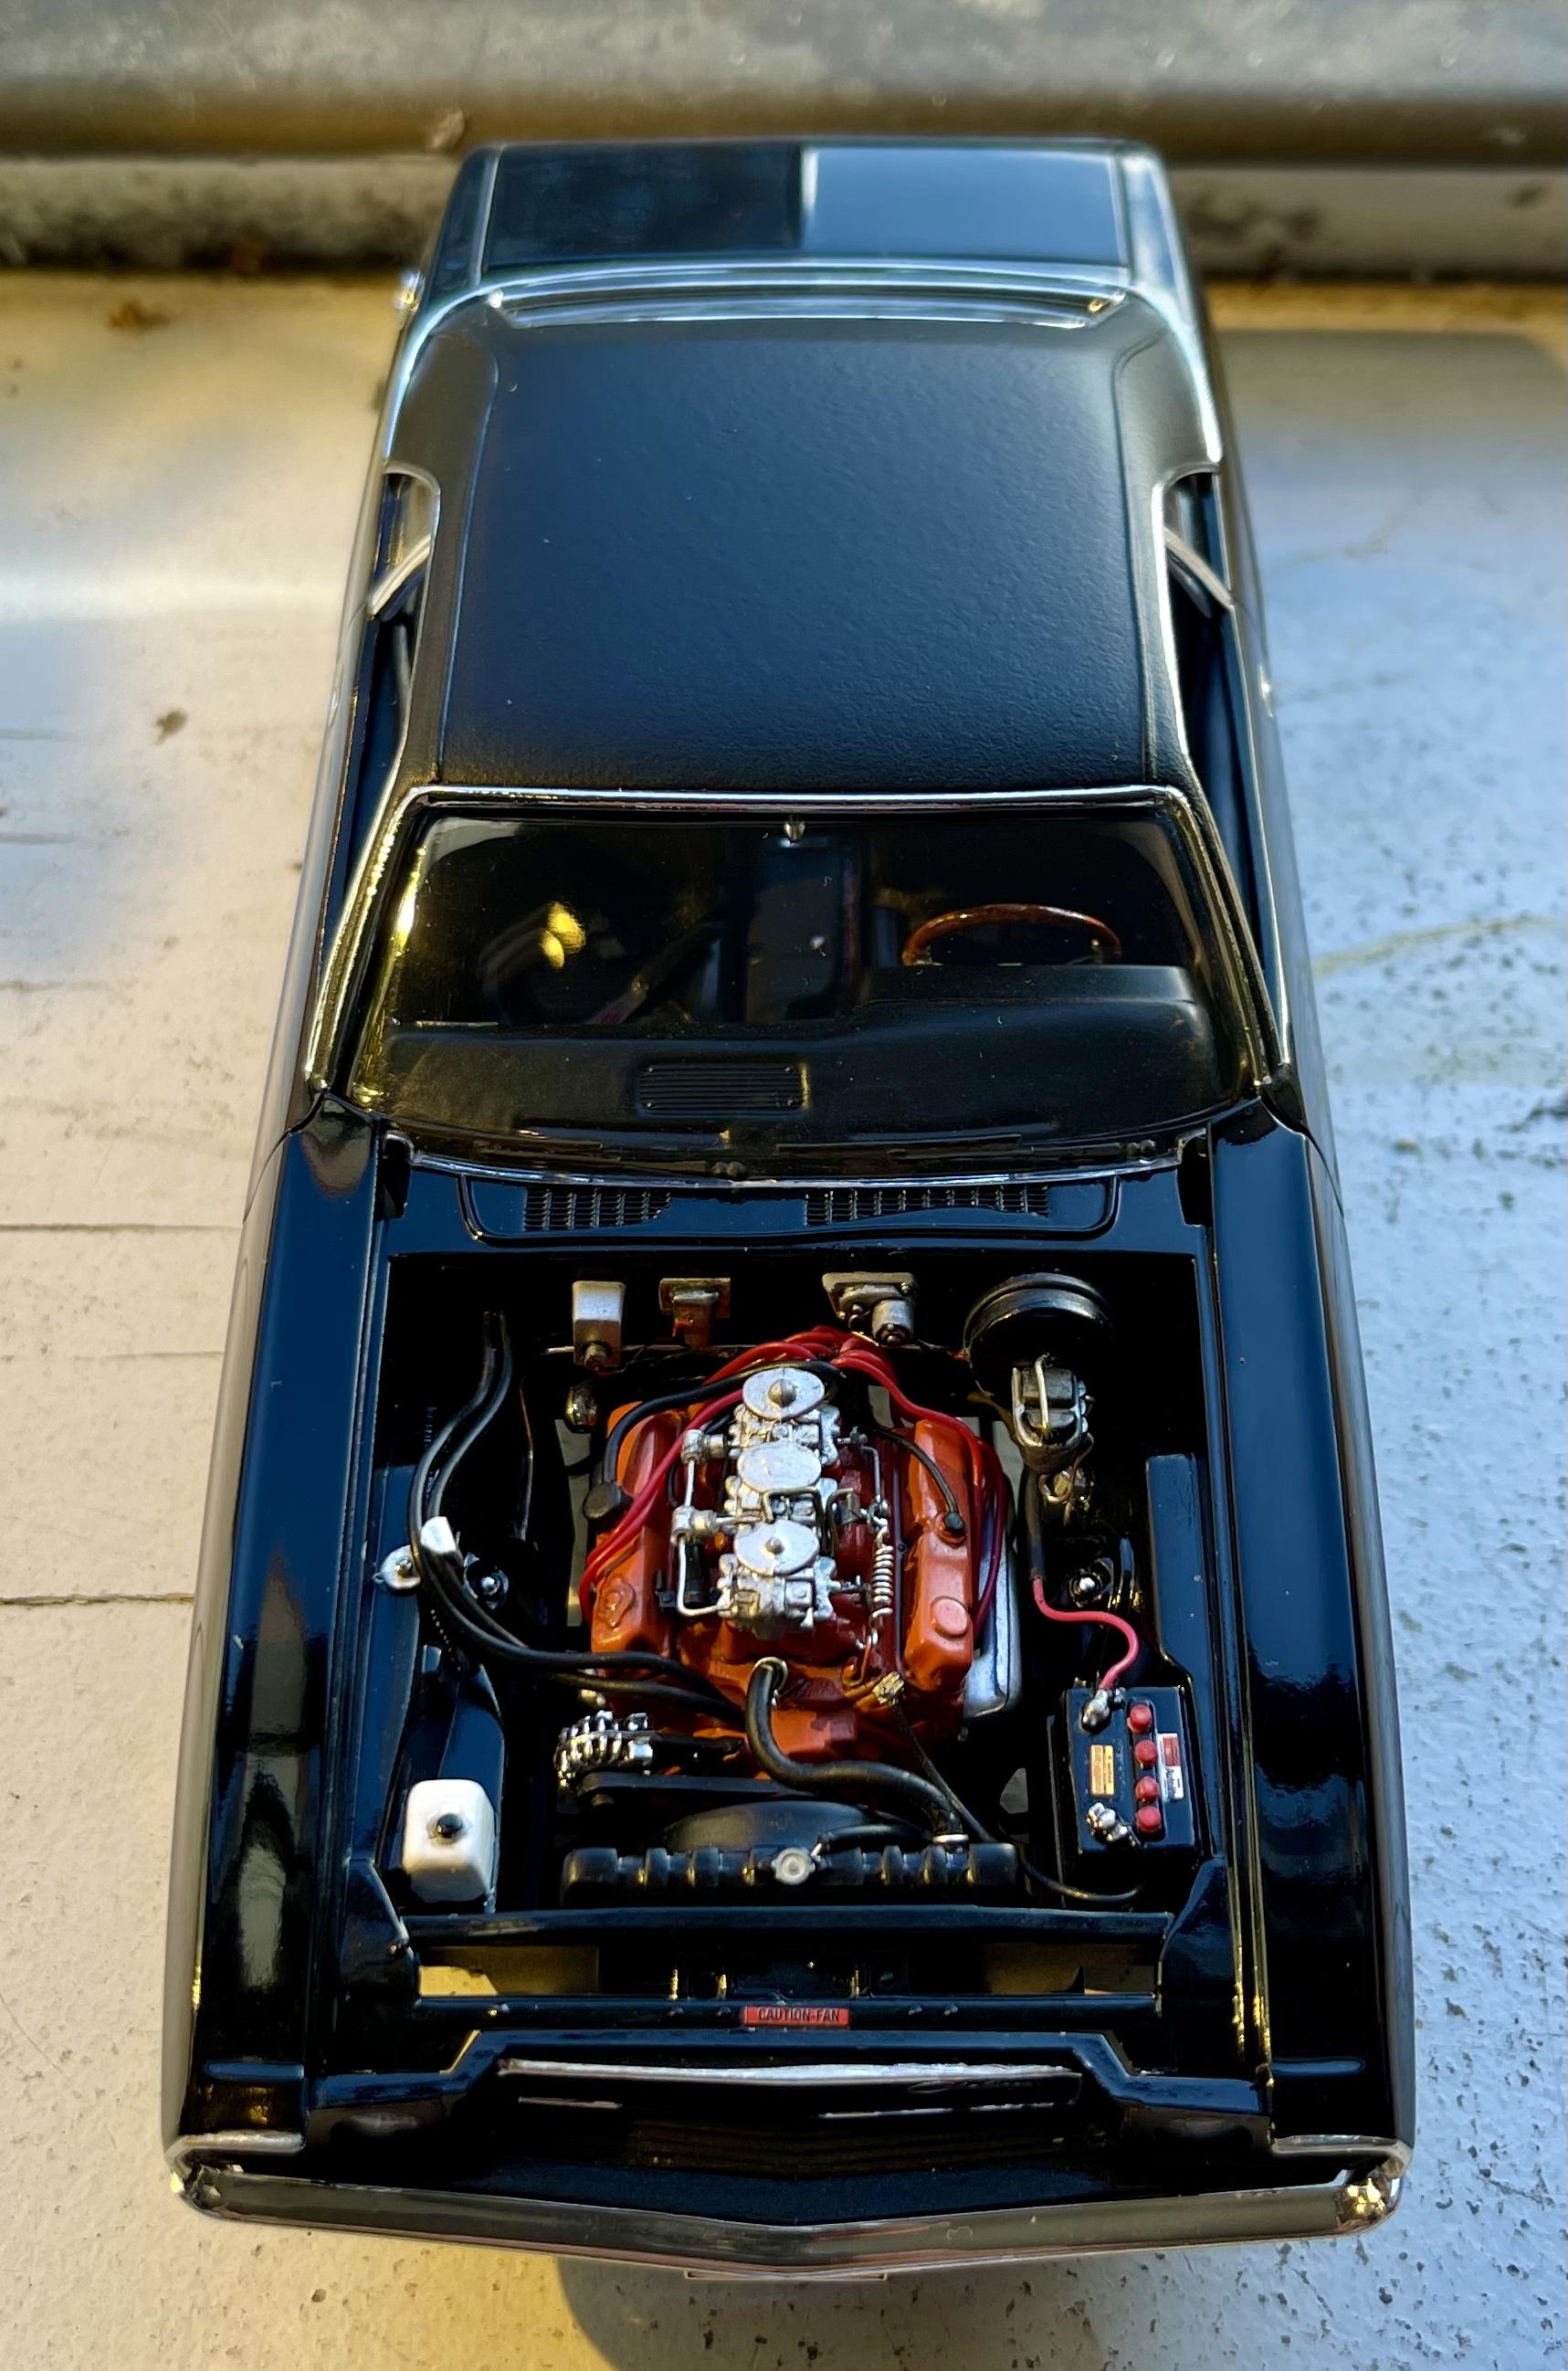
Finally got this one wrapped up on Friday. I modeled it after the firebird I want to own someday (bottom of this pic). Can’t tell you how much I loved this kit. It’s basically everything the current Revell 69 Camaro WISHES it could be. The wheels were its only minor weakness - so I replaced them with a set from my mustang ? Gonna get some proper Pontiac wheels on it someday. Made a few tweaks - vinyl top, hood vents, exhaust tips, cut up the dash and added an 8-track player with some tunes, detailed the engine a bit, the aforementioned wheels, etc. - but it’s mostly right out of the box. I really hope Revell reissues this one. I want to do it again in a few different styles, and they’re getting pricey on EBay. Tamiya champagne gold, clear, and matte black rattle cans for the bod and top ??
-
thanks my dudes ??
-
love that kit..think it’s time to do another one. great looking car and awesome pics!
-
AMT 1967 Chevy Impala SS427. Factory Stock 1/25 Scale.
radiohd10 replied to Dragonhawk1066's topic in Model Cars
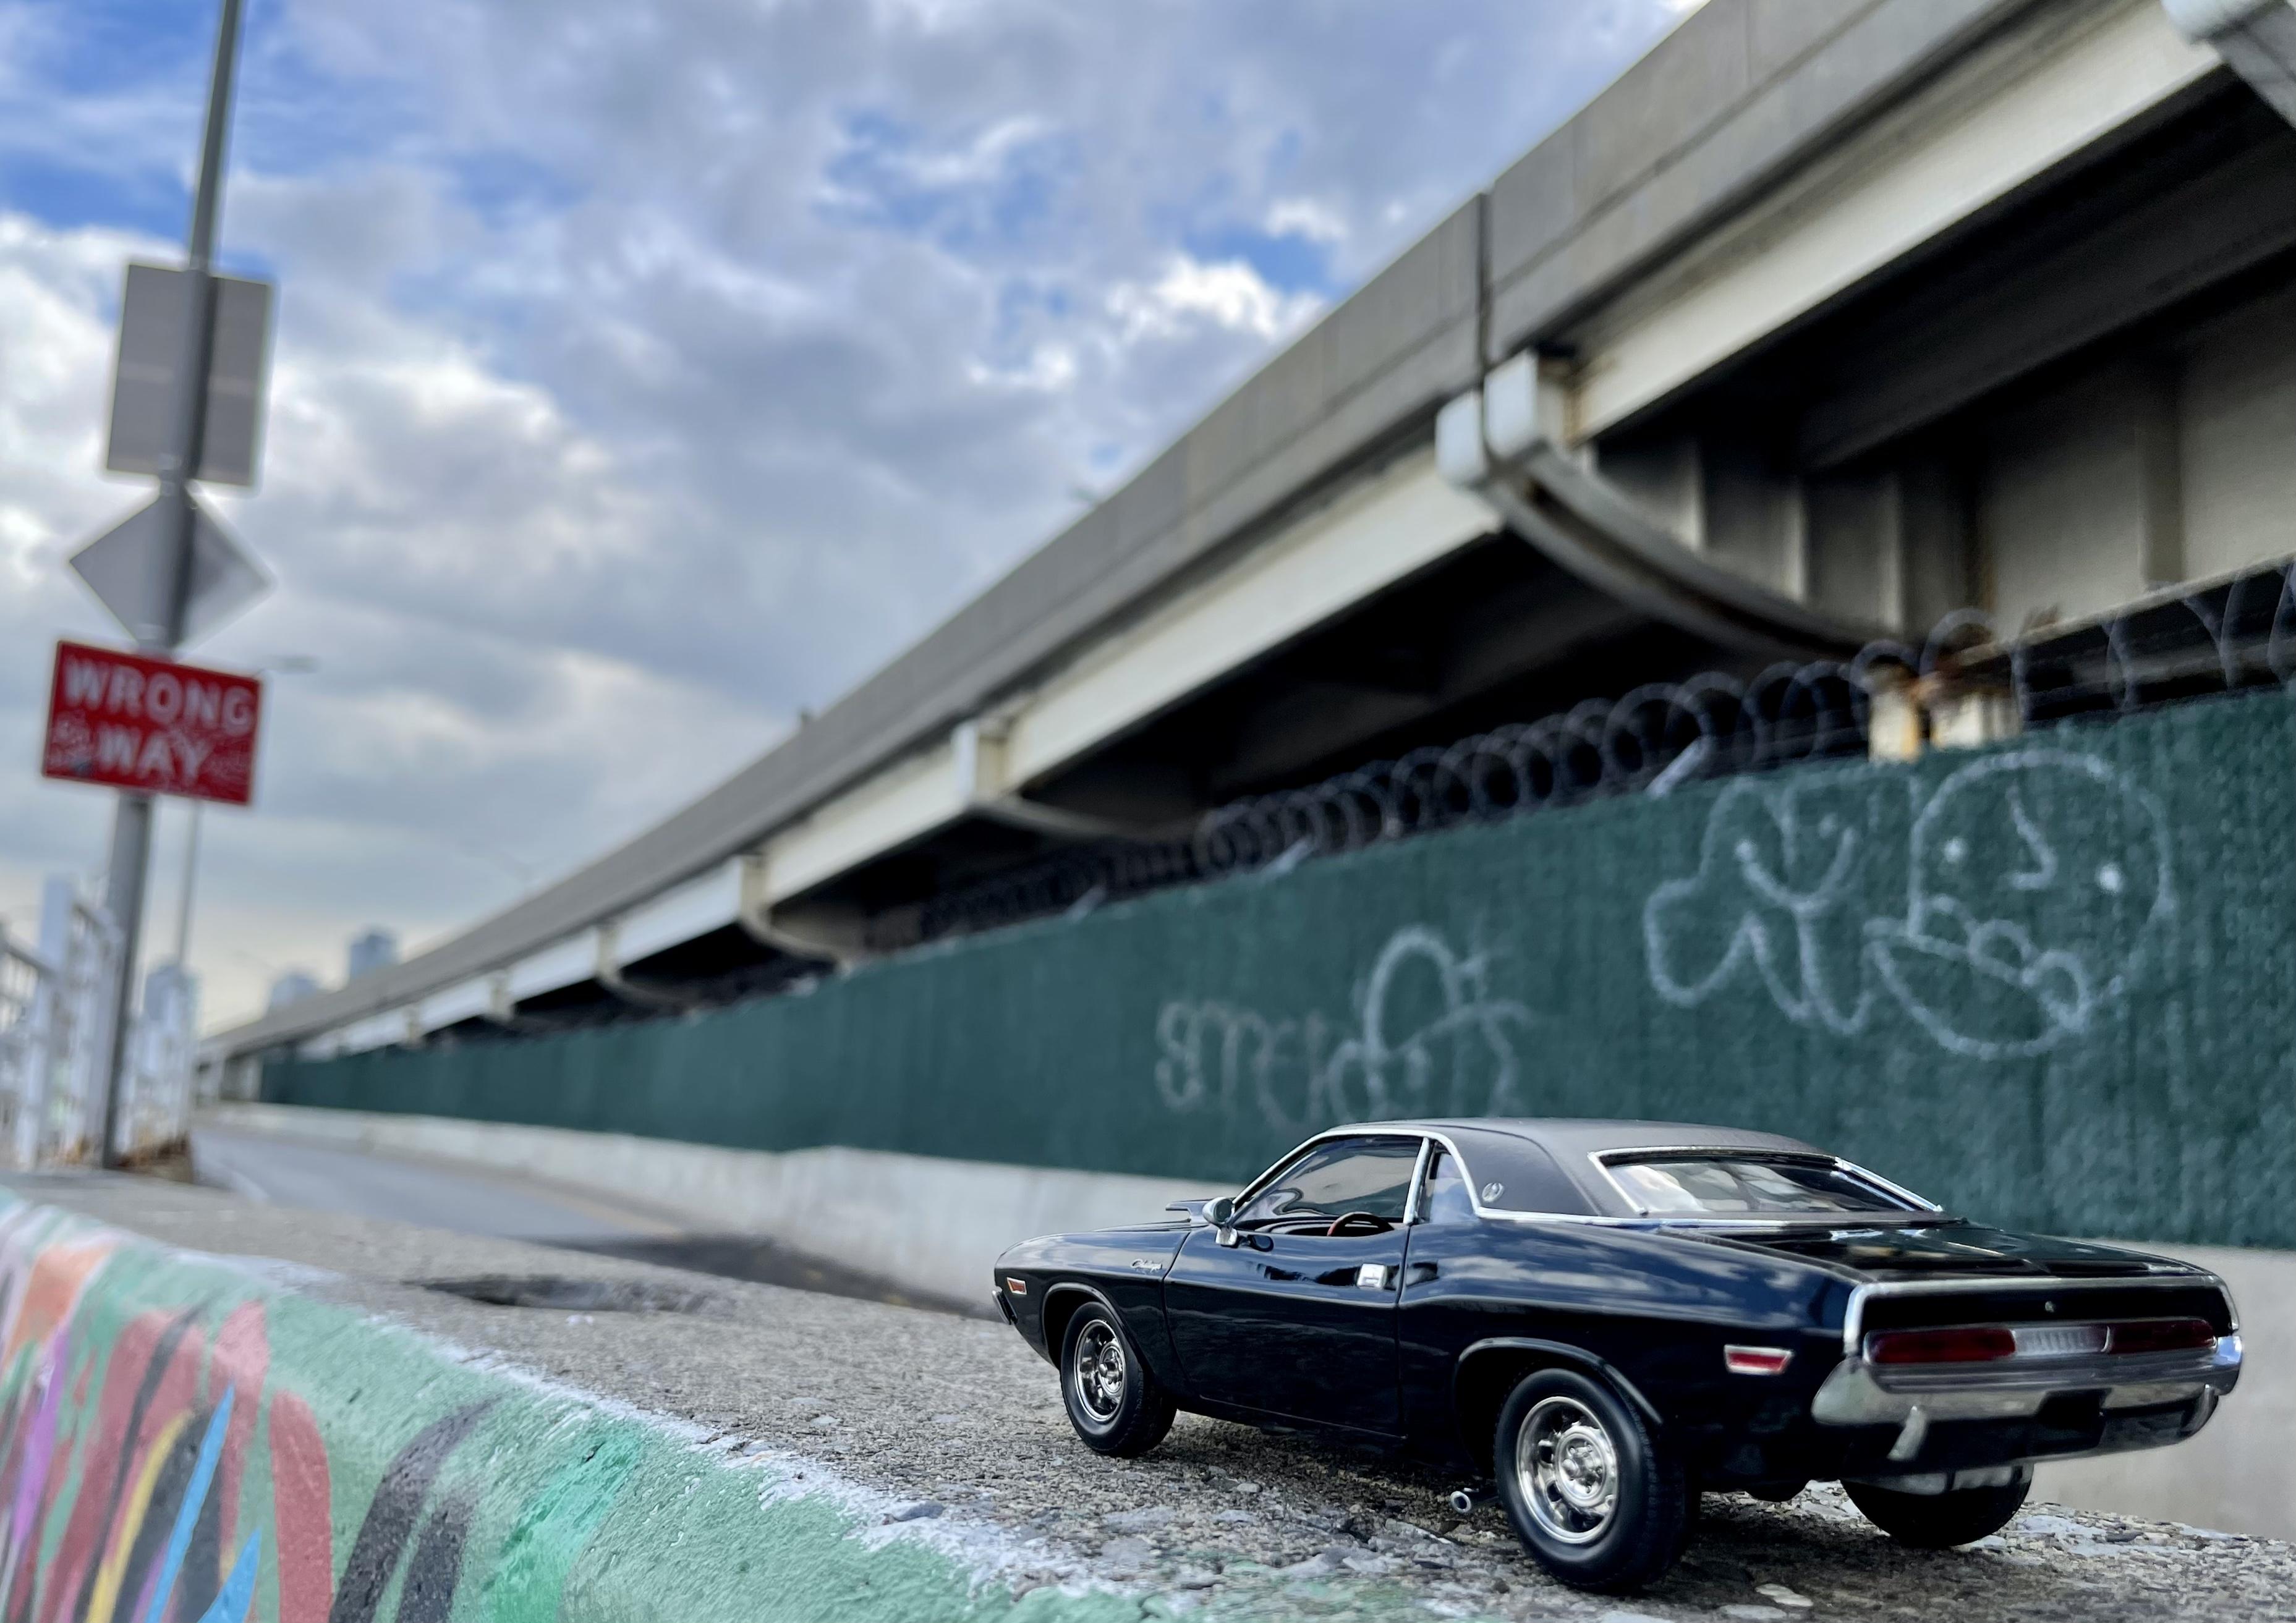
Really really nice build. Doing a similar color combo now on a 68 firebird…super sharp ?? -
Thanks - they’re in the photo etch kit from model car garage. I also used them for the side scripts and the one on the trunk. What kit is your model? I’m looking everywhere for that hood but have only found resin copies - unfortunately they were too full of air bubbles to be of any use.
-
been watching your builds on youtube for a few months now, and each one is exceptional. good stuff.
-
Ooh that’s the dream. Saw a purple one on the Brooklyn bridge on Friday…that will be me someday!!
-
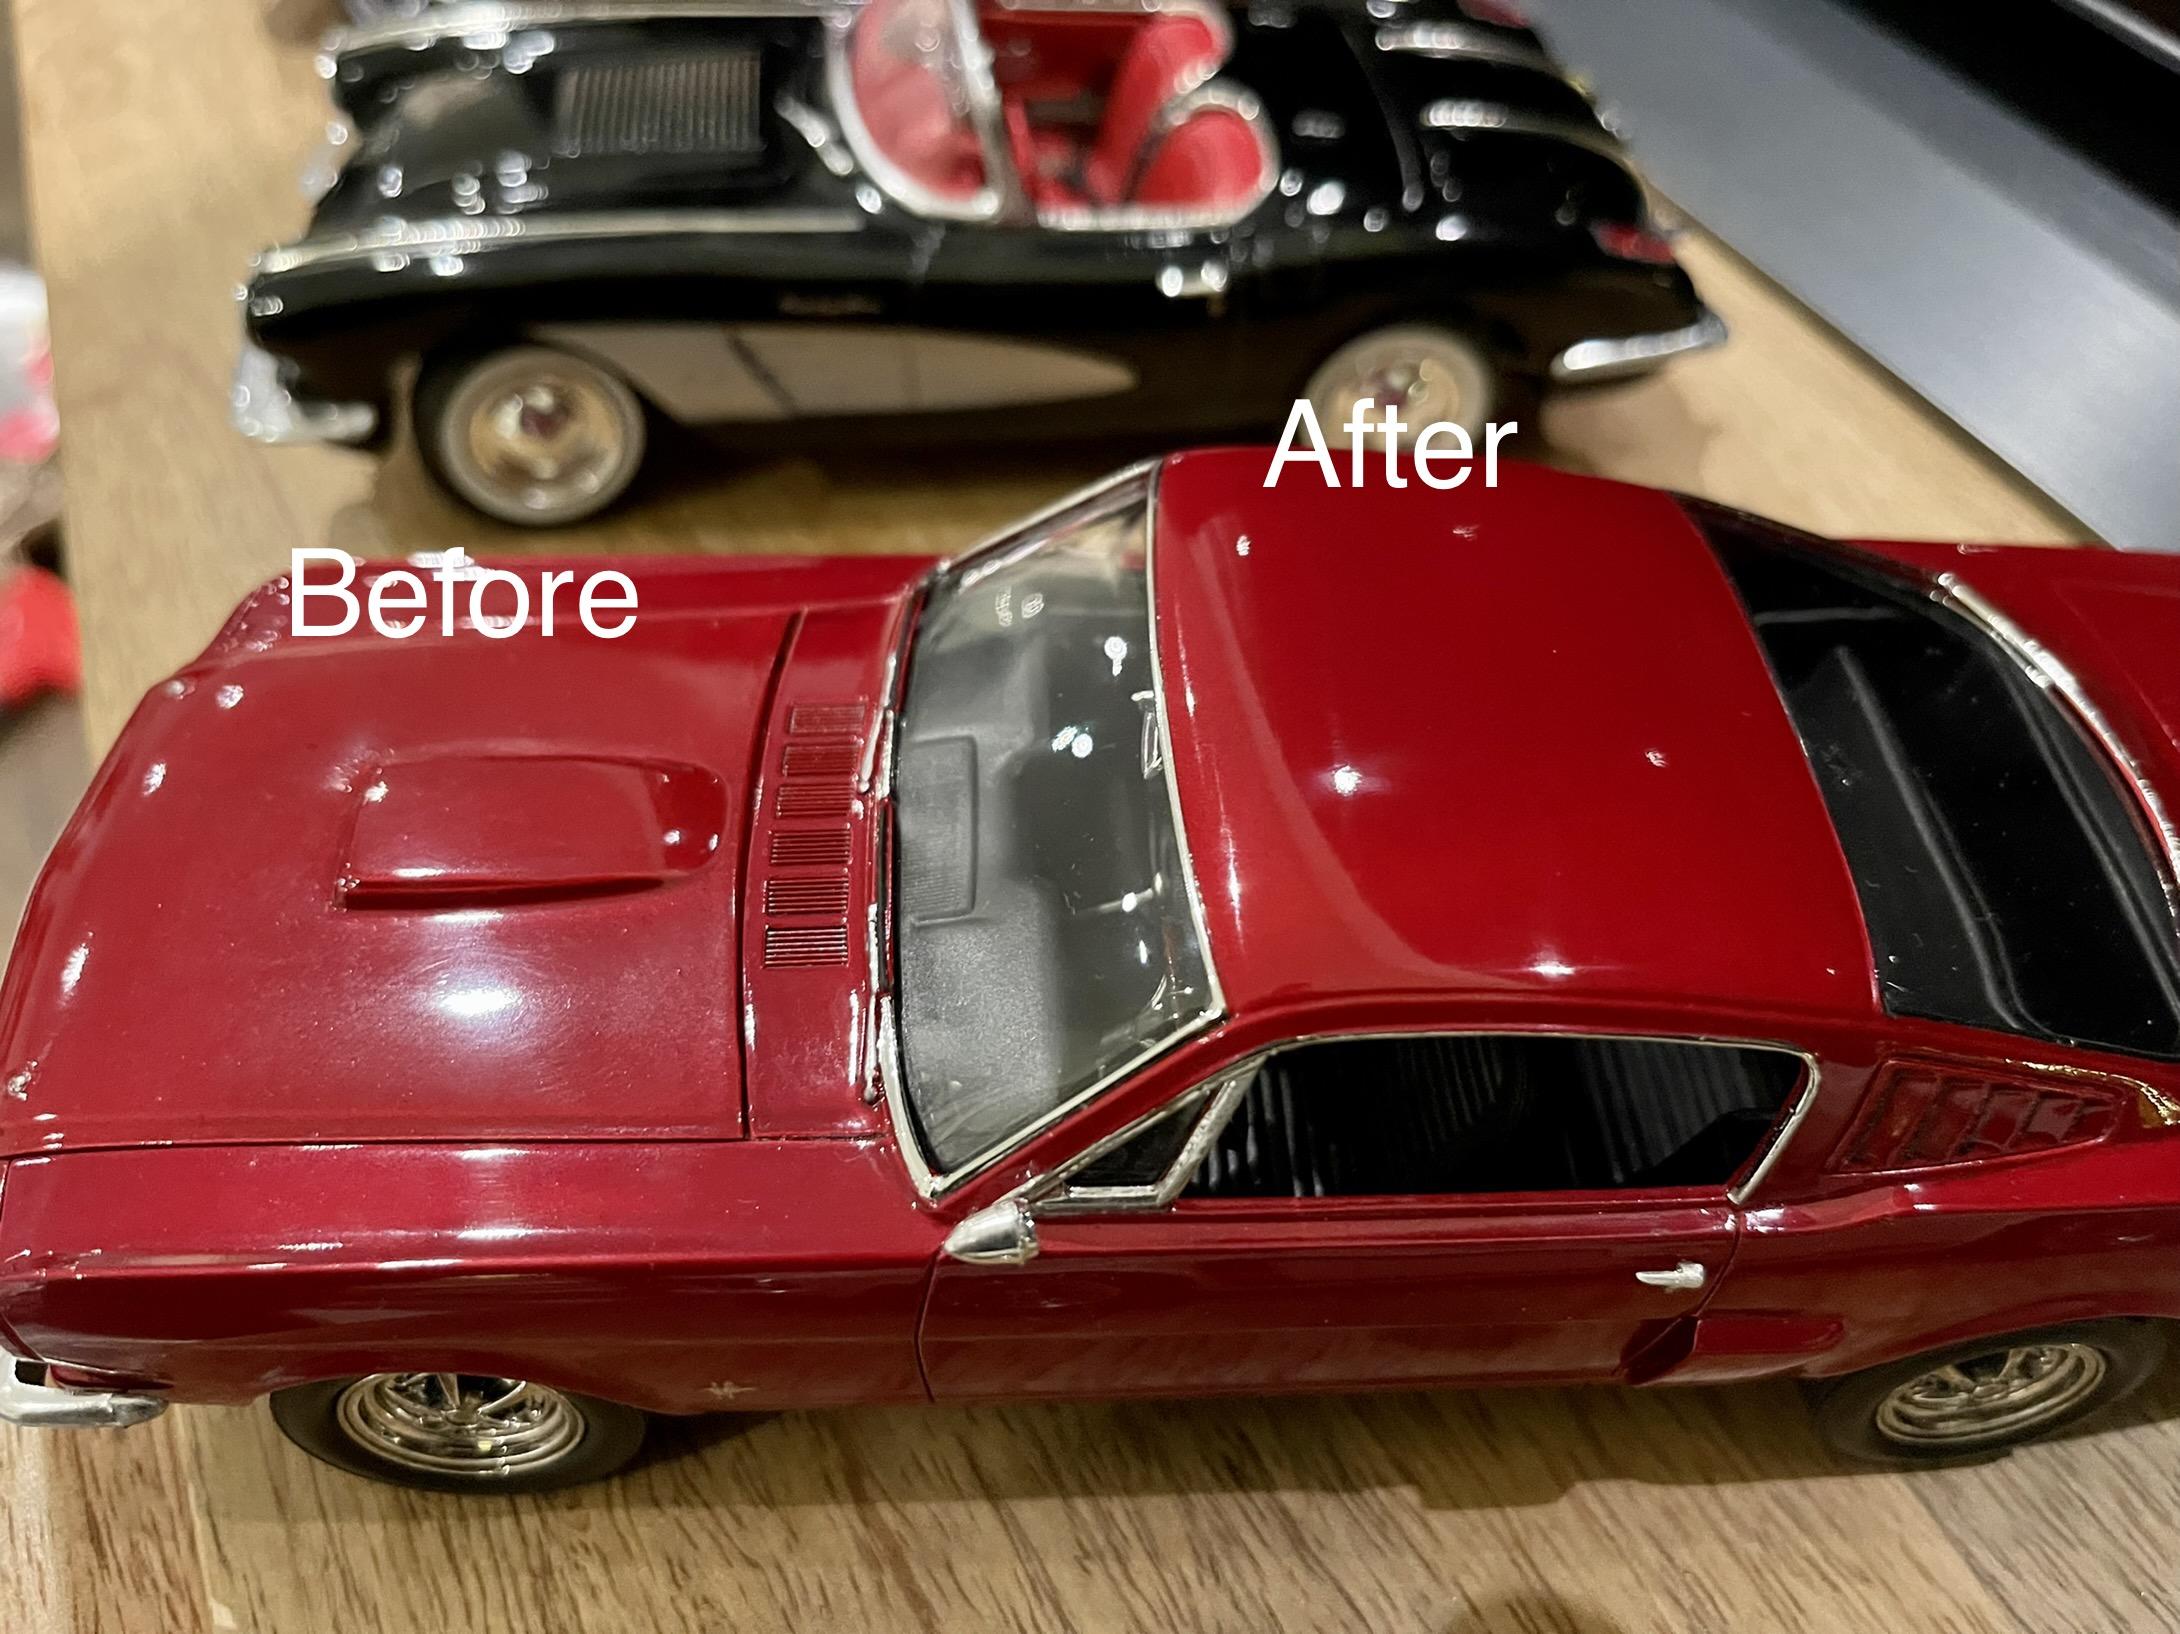
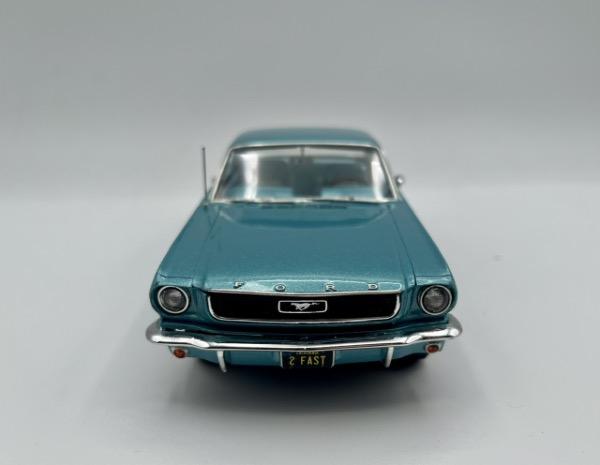
It comes in a spray bottle. I just spray some on a microfiber towel, spread it over the car (including the glass) evenly by hand, let it fog up for a few minutes, then buff it off. Keeps everything clean and shiny. I tried it out on a crappy old practice mustang before using it on my newer builds to see if it was any good…see below
- 40 replies
-
- 1
-

-
- challenger
- revell
- (and 1 more)
-
thanks fellas - forgot to mention...i started using this awesome ceramic spray on my last few builds. it's the final step in the polishing process. its called "mothers cmx ceramic spray coating" and the shine it brings to these little cars is amazing. looks pretty darn good on my jeep too haha
-
wow - awesome
-
great looking car! love that color for it.
-
thanks! i love them too. thinking of doing a wall case full of black cars only. they're a pain, but so worth it.
-
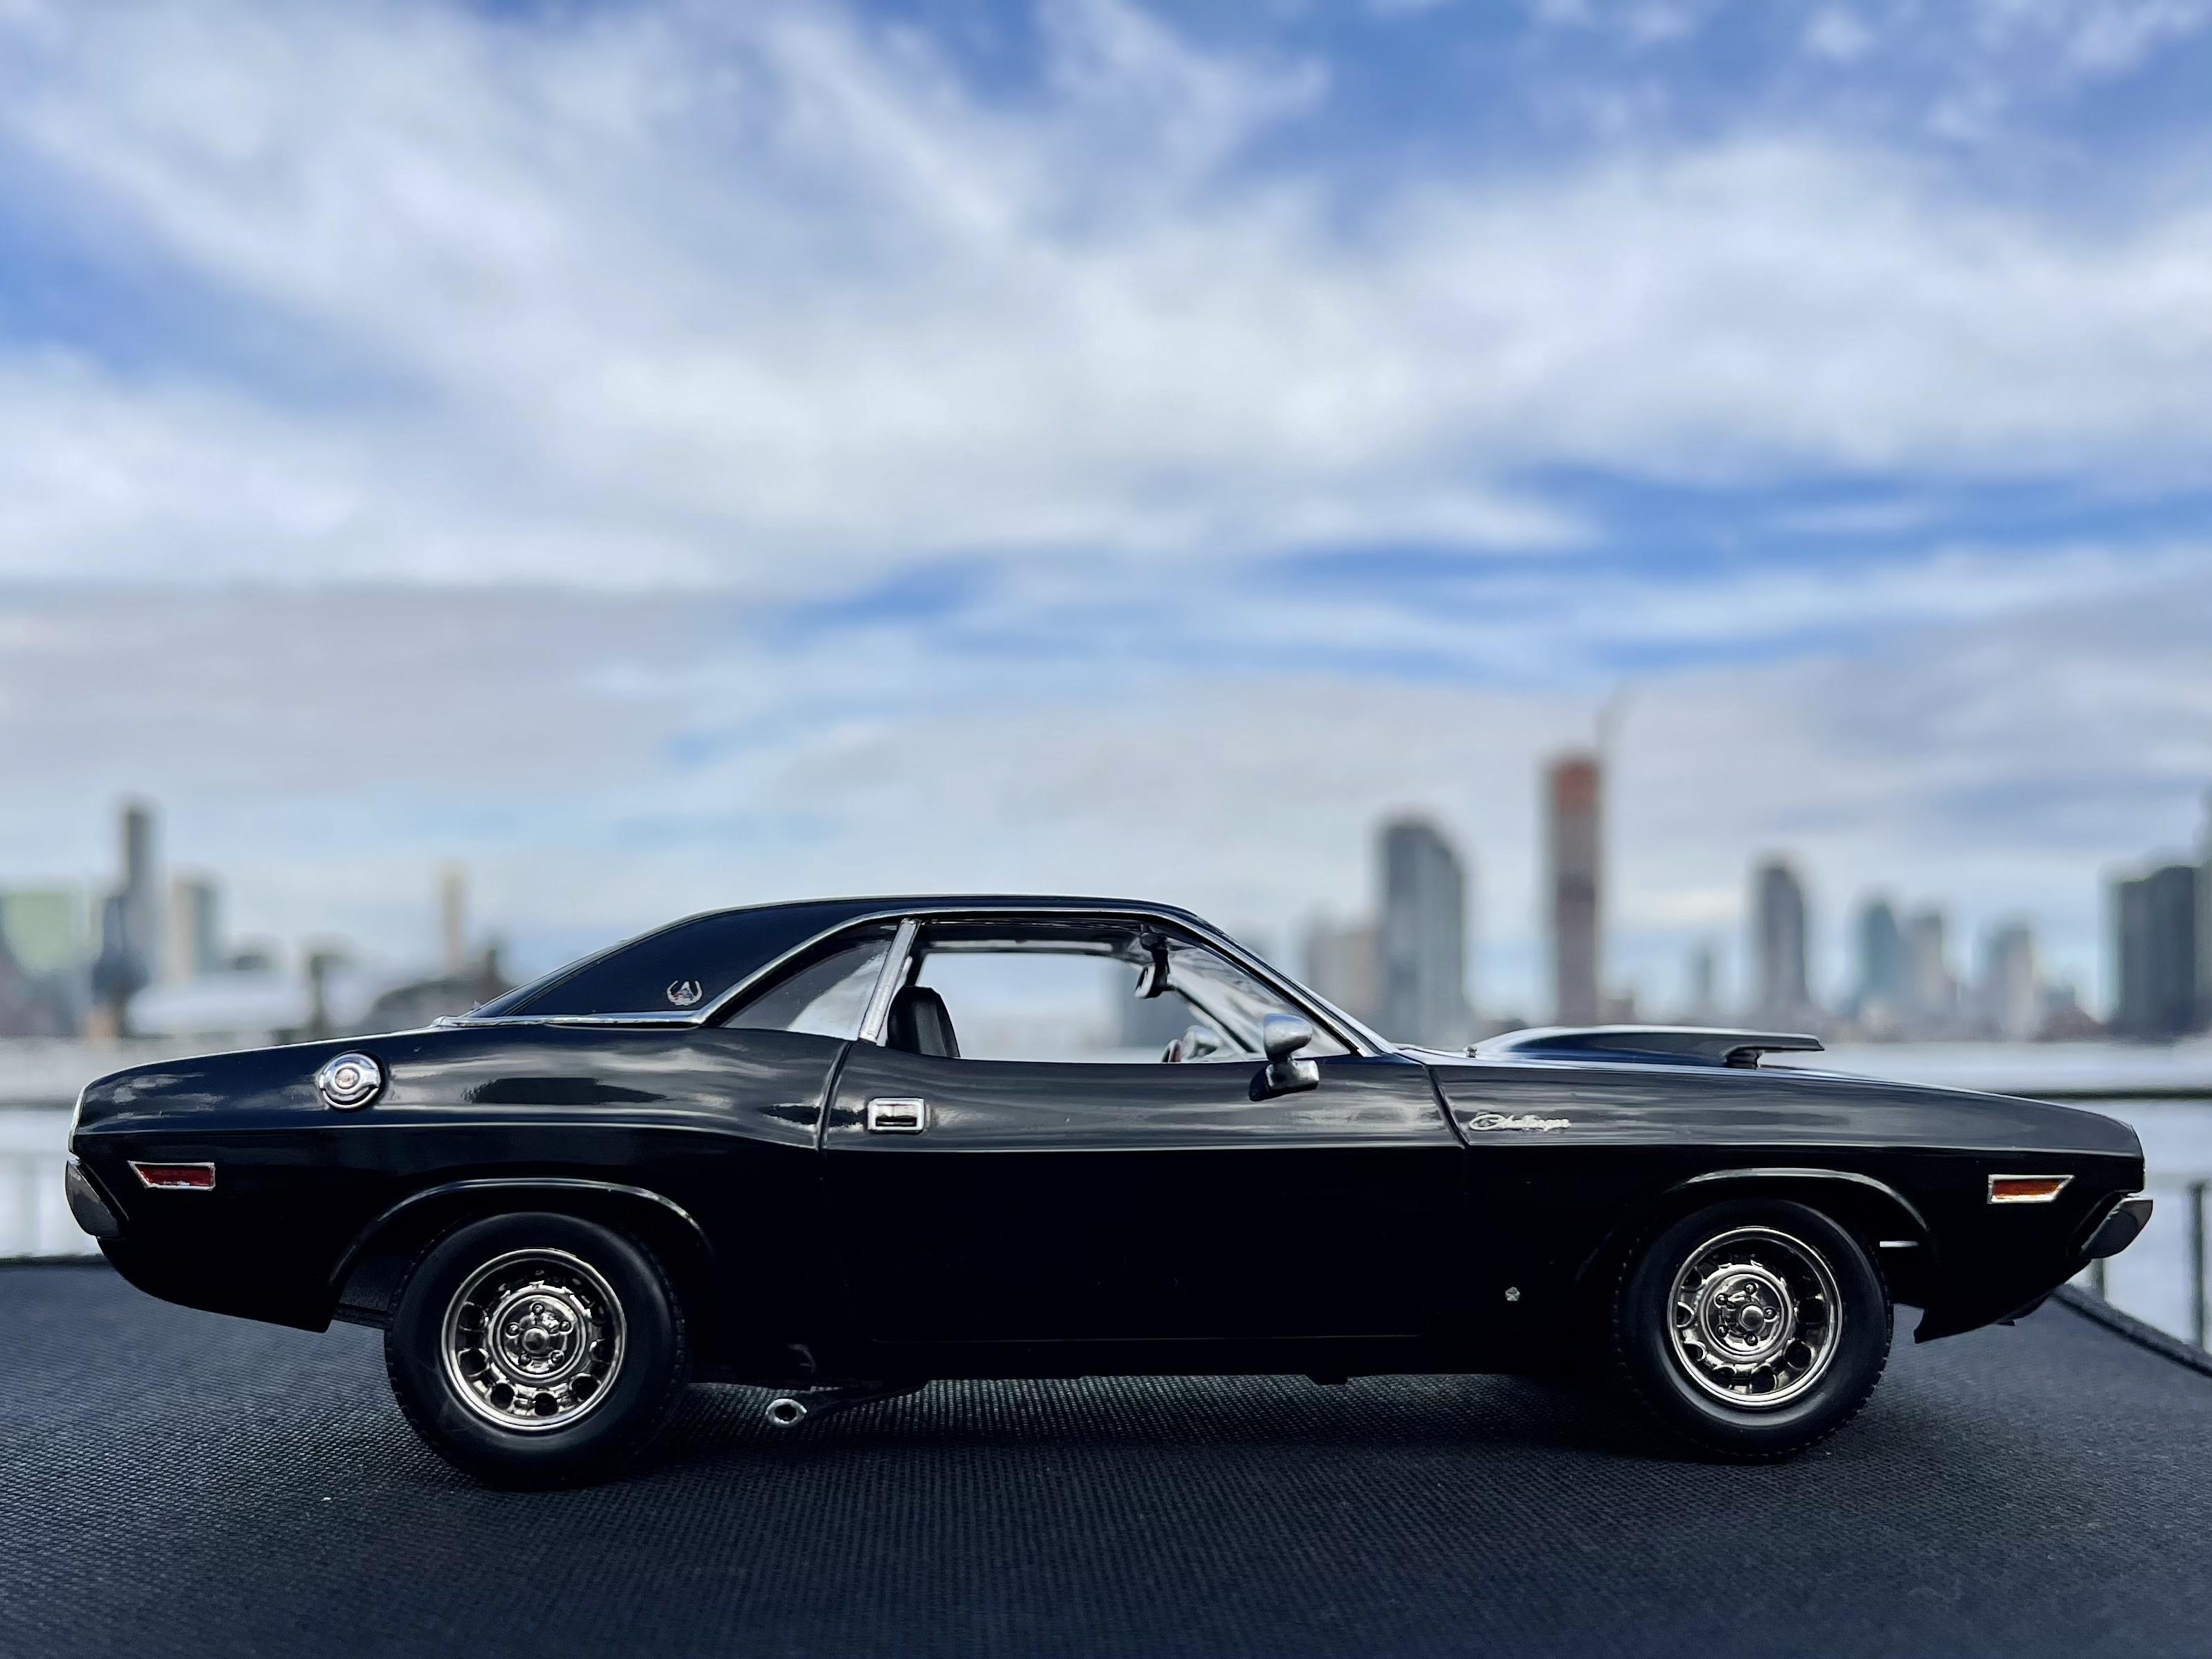
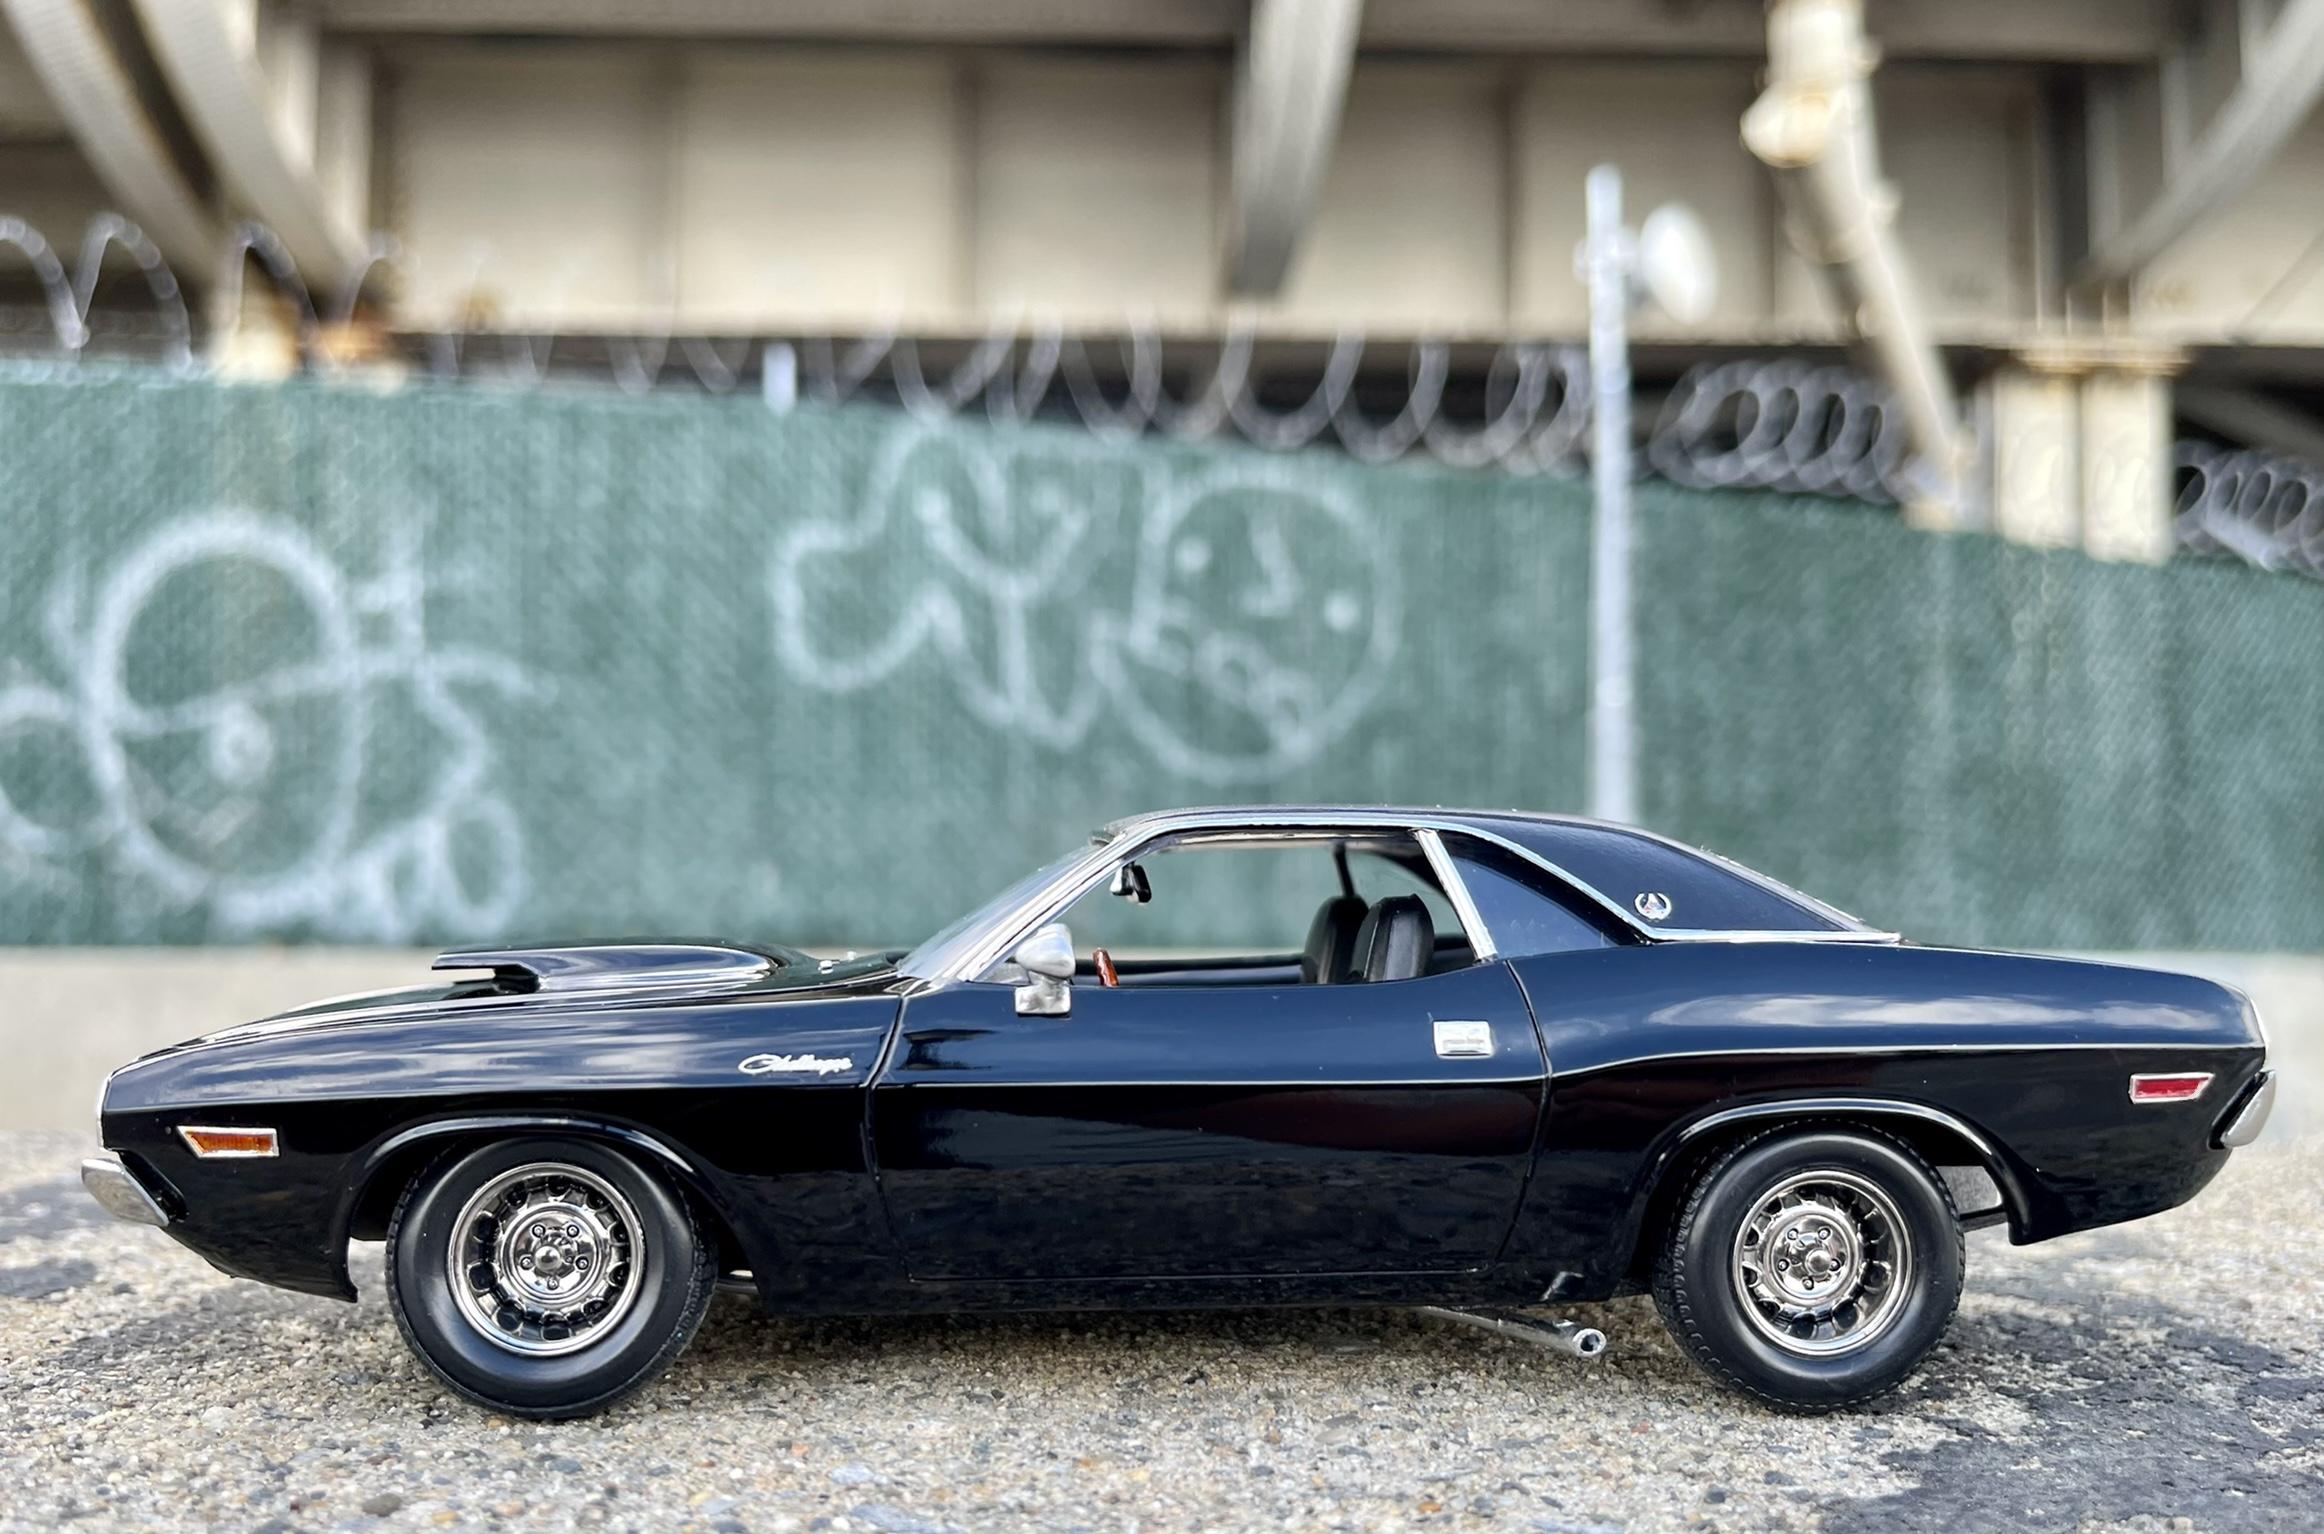
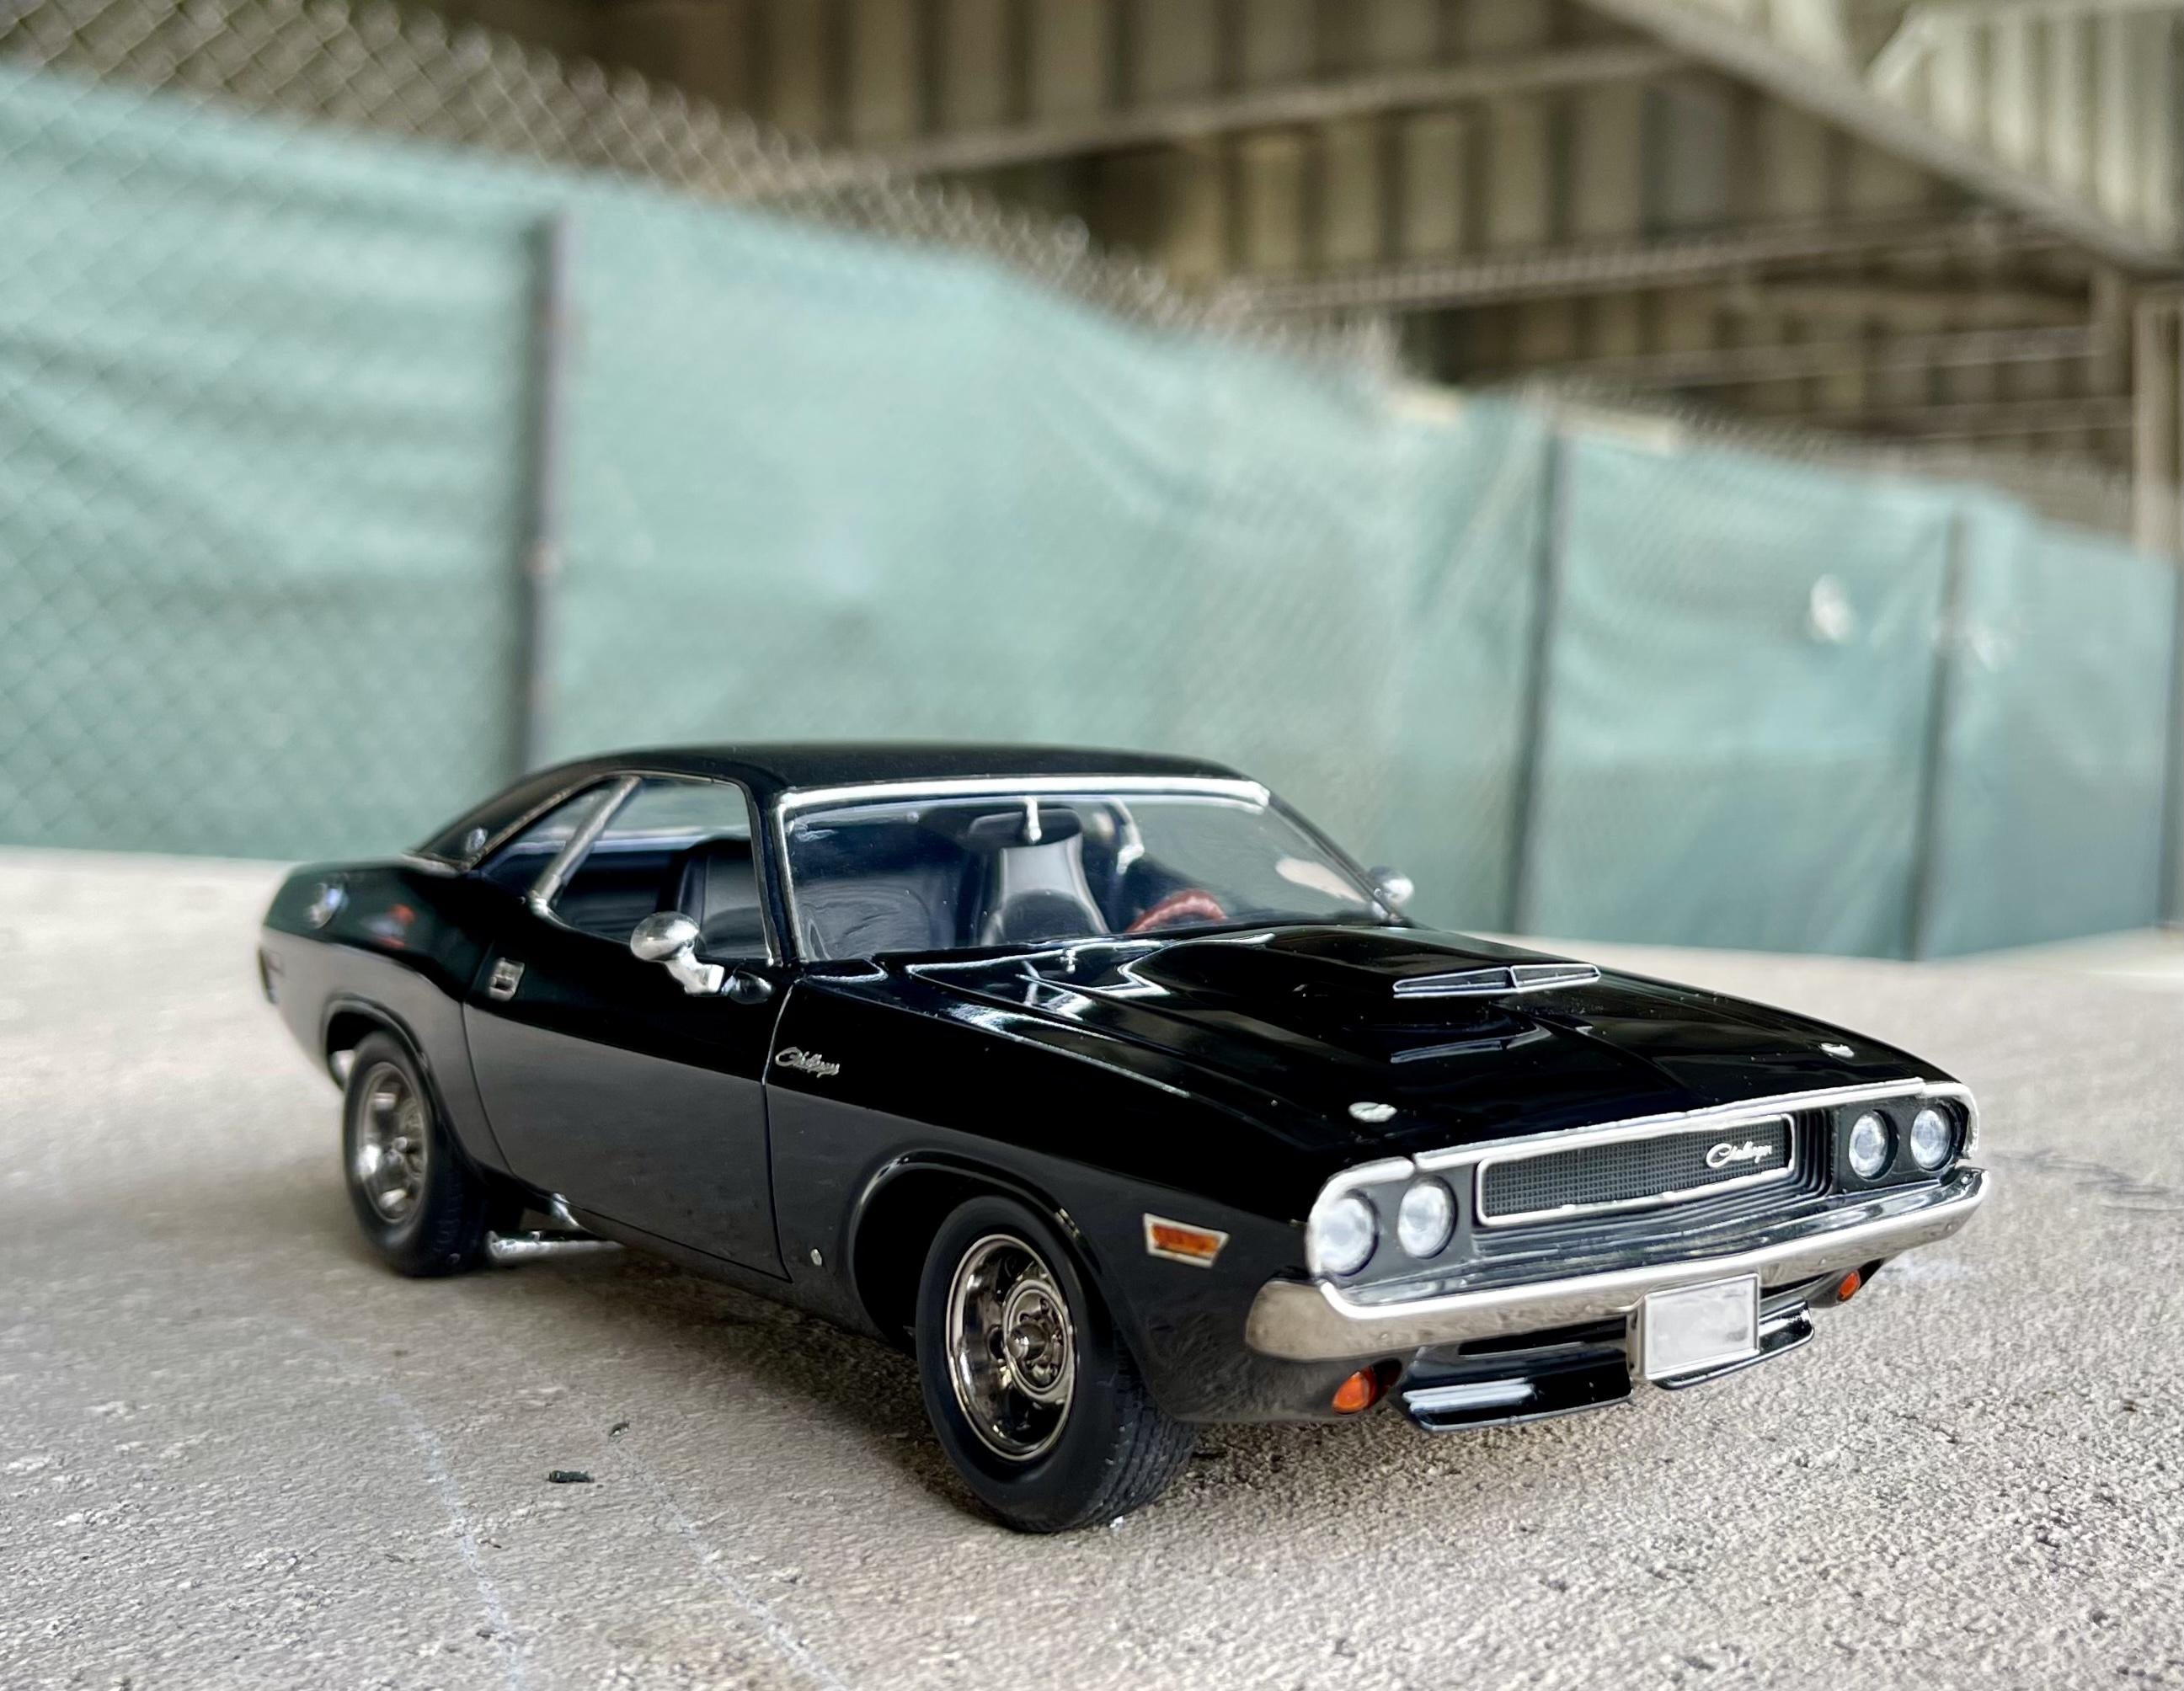
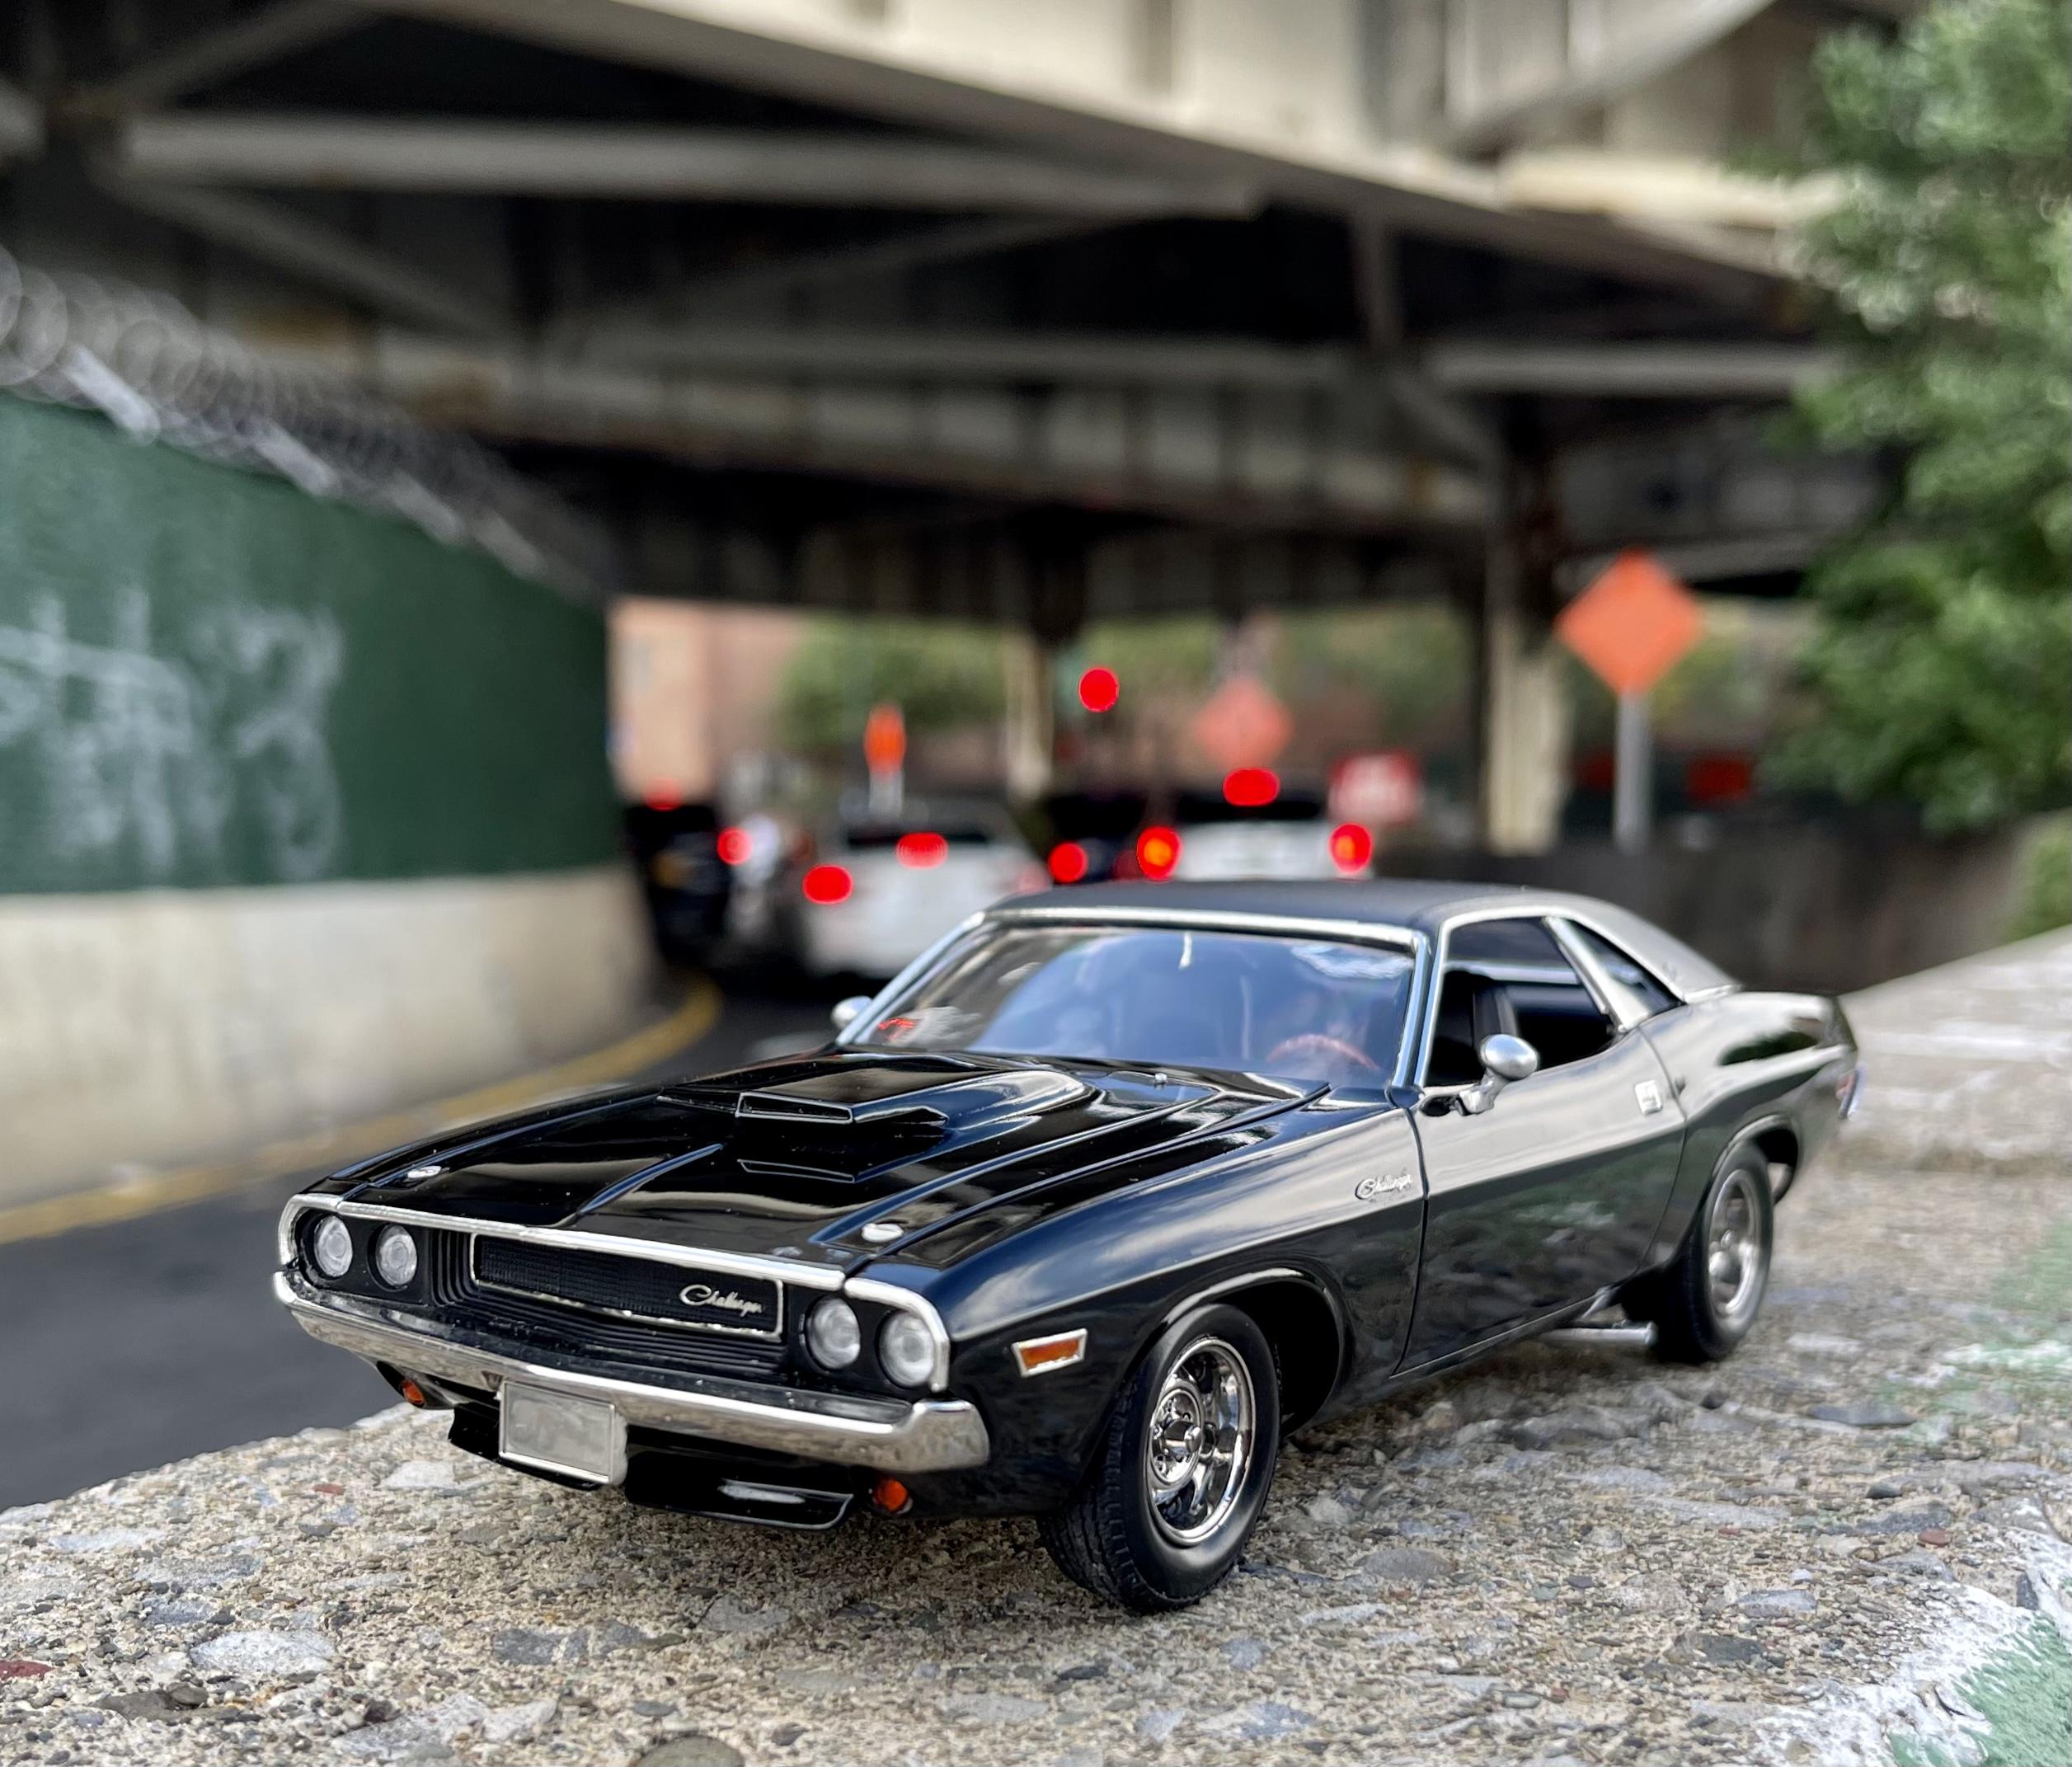
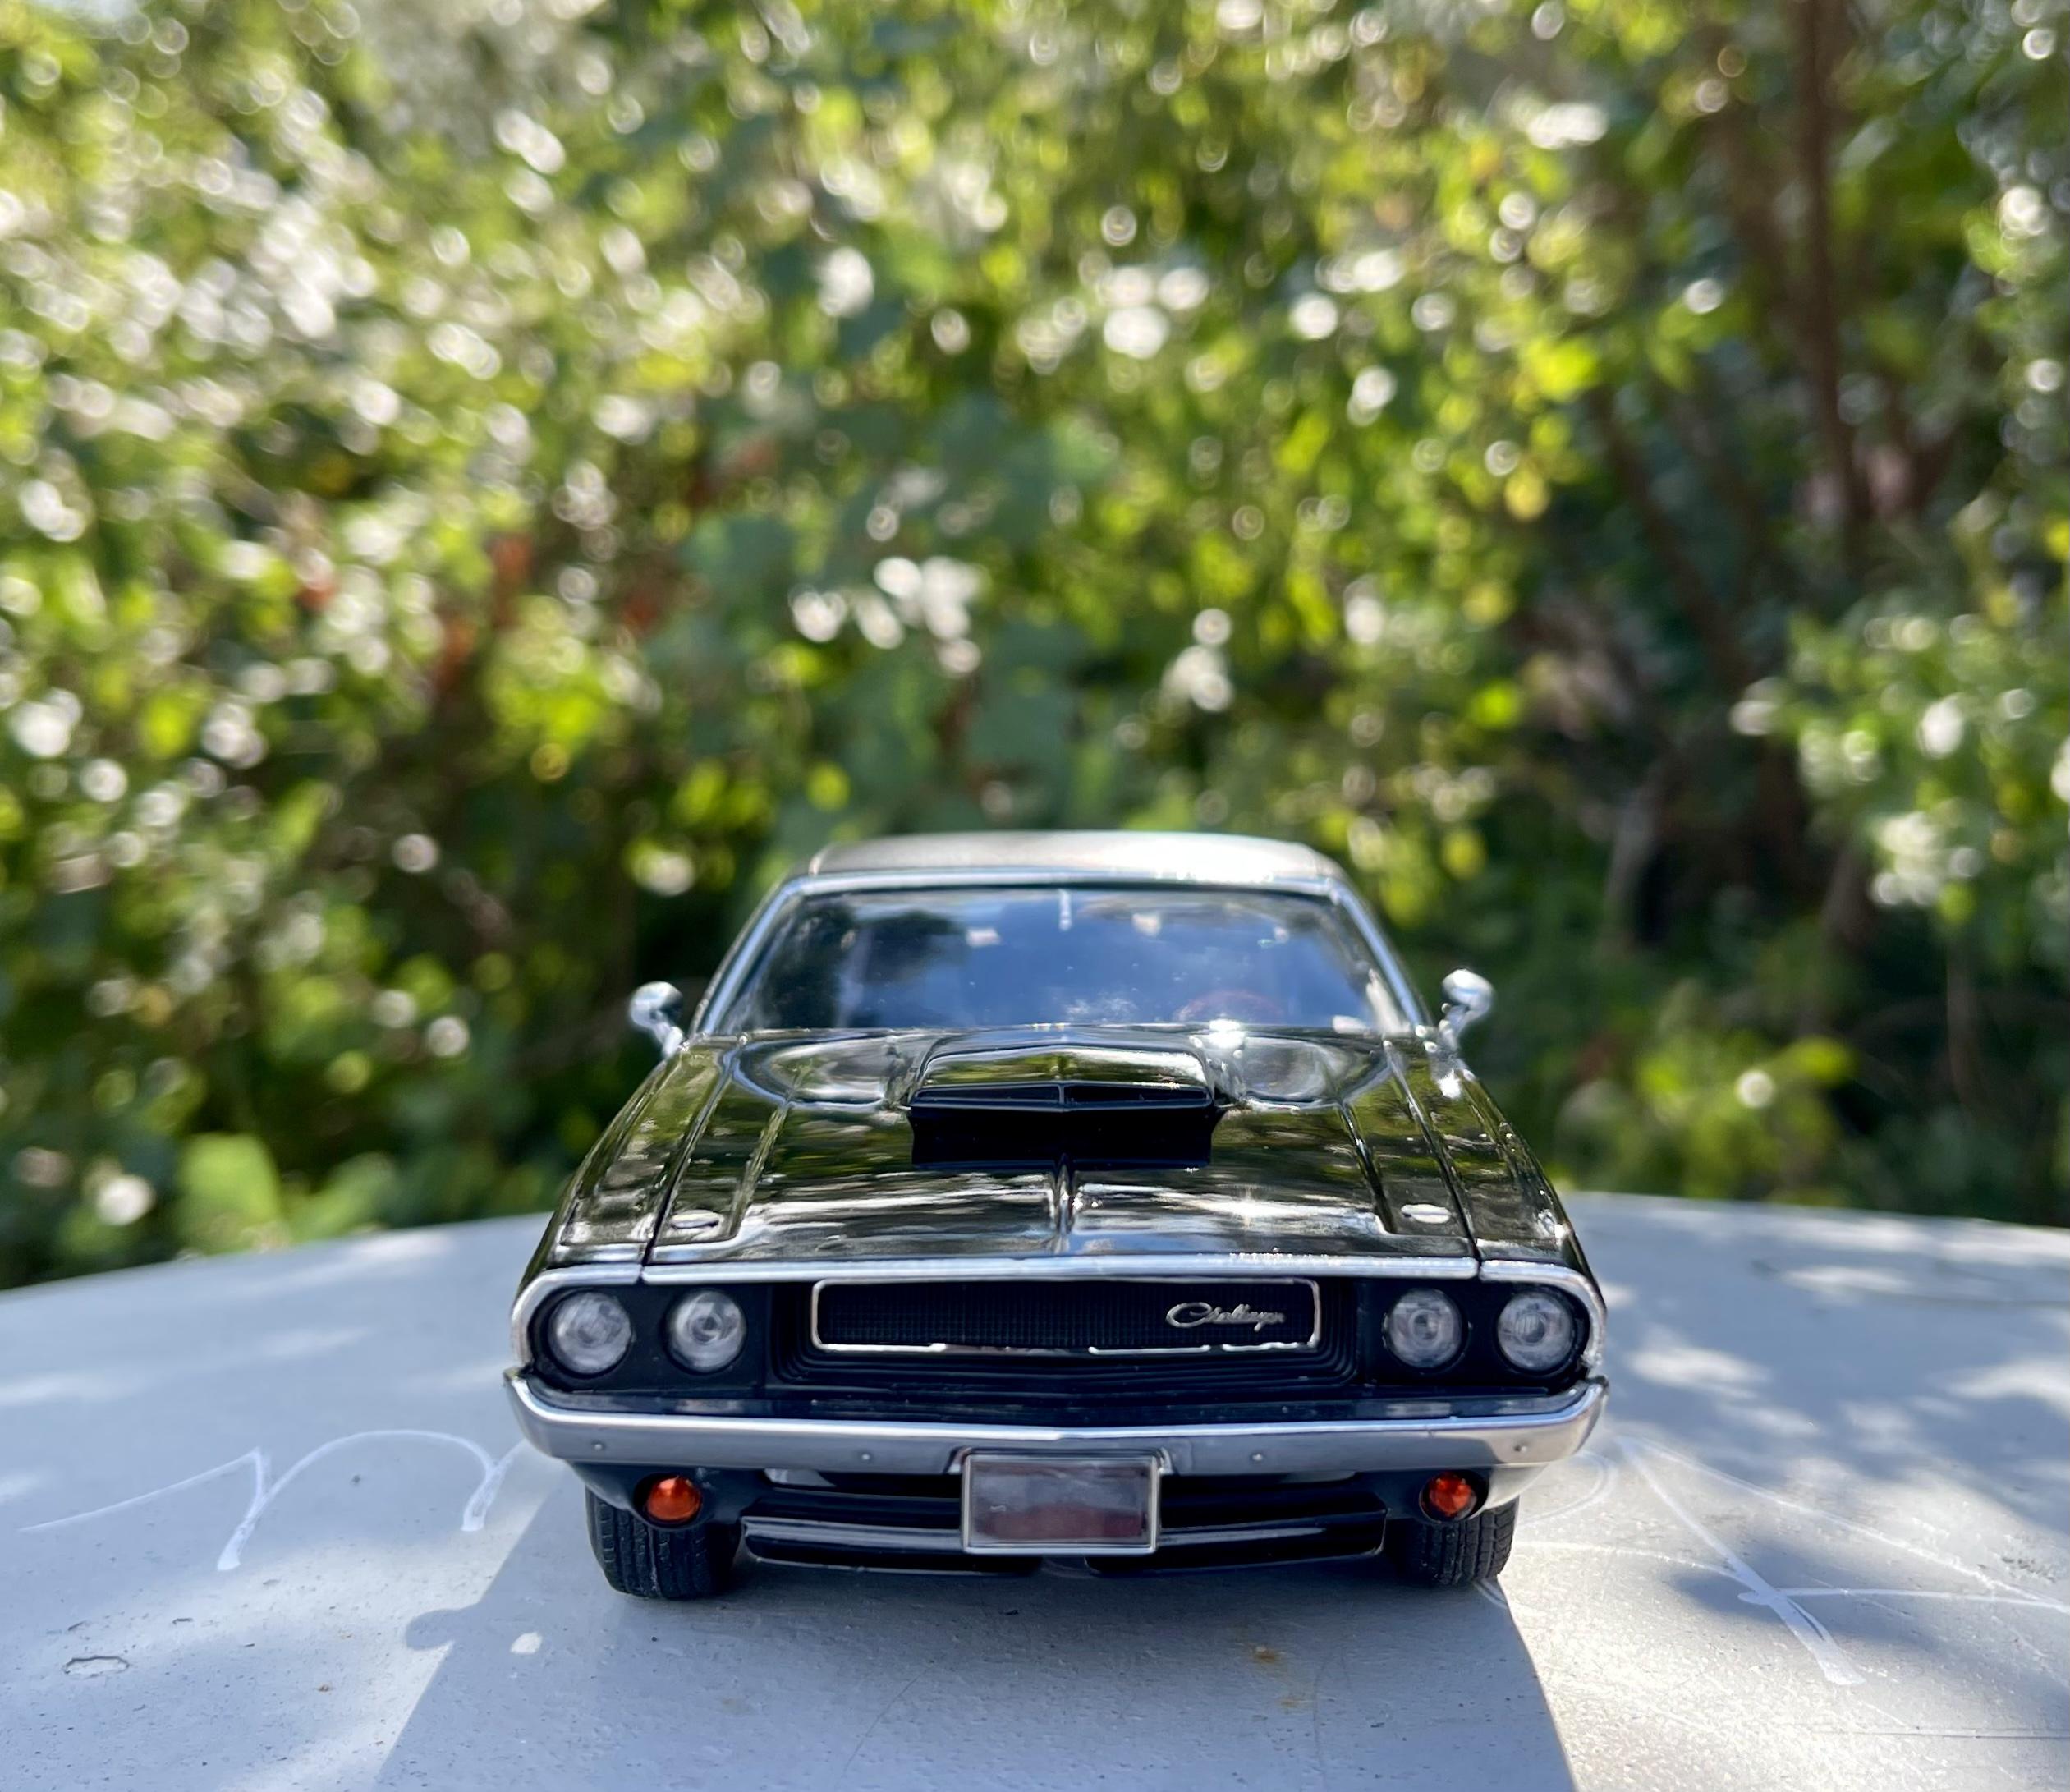
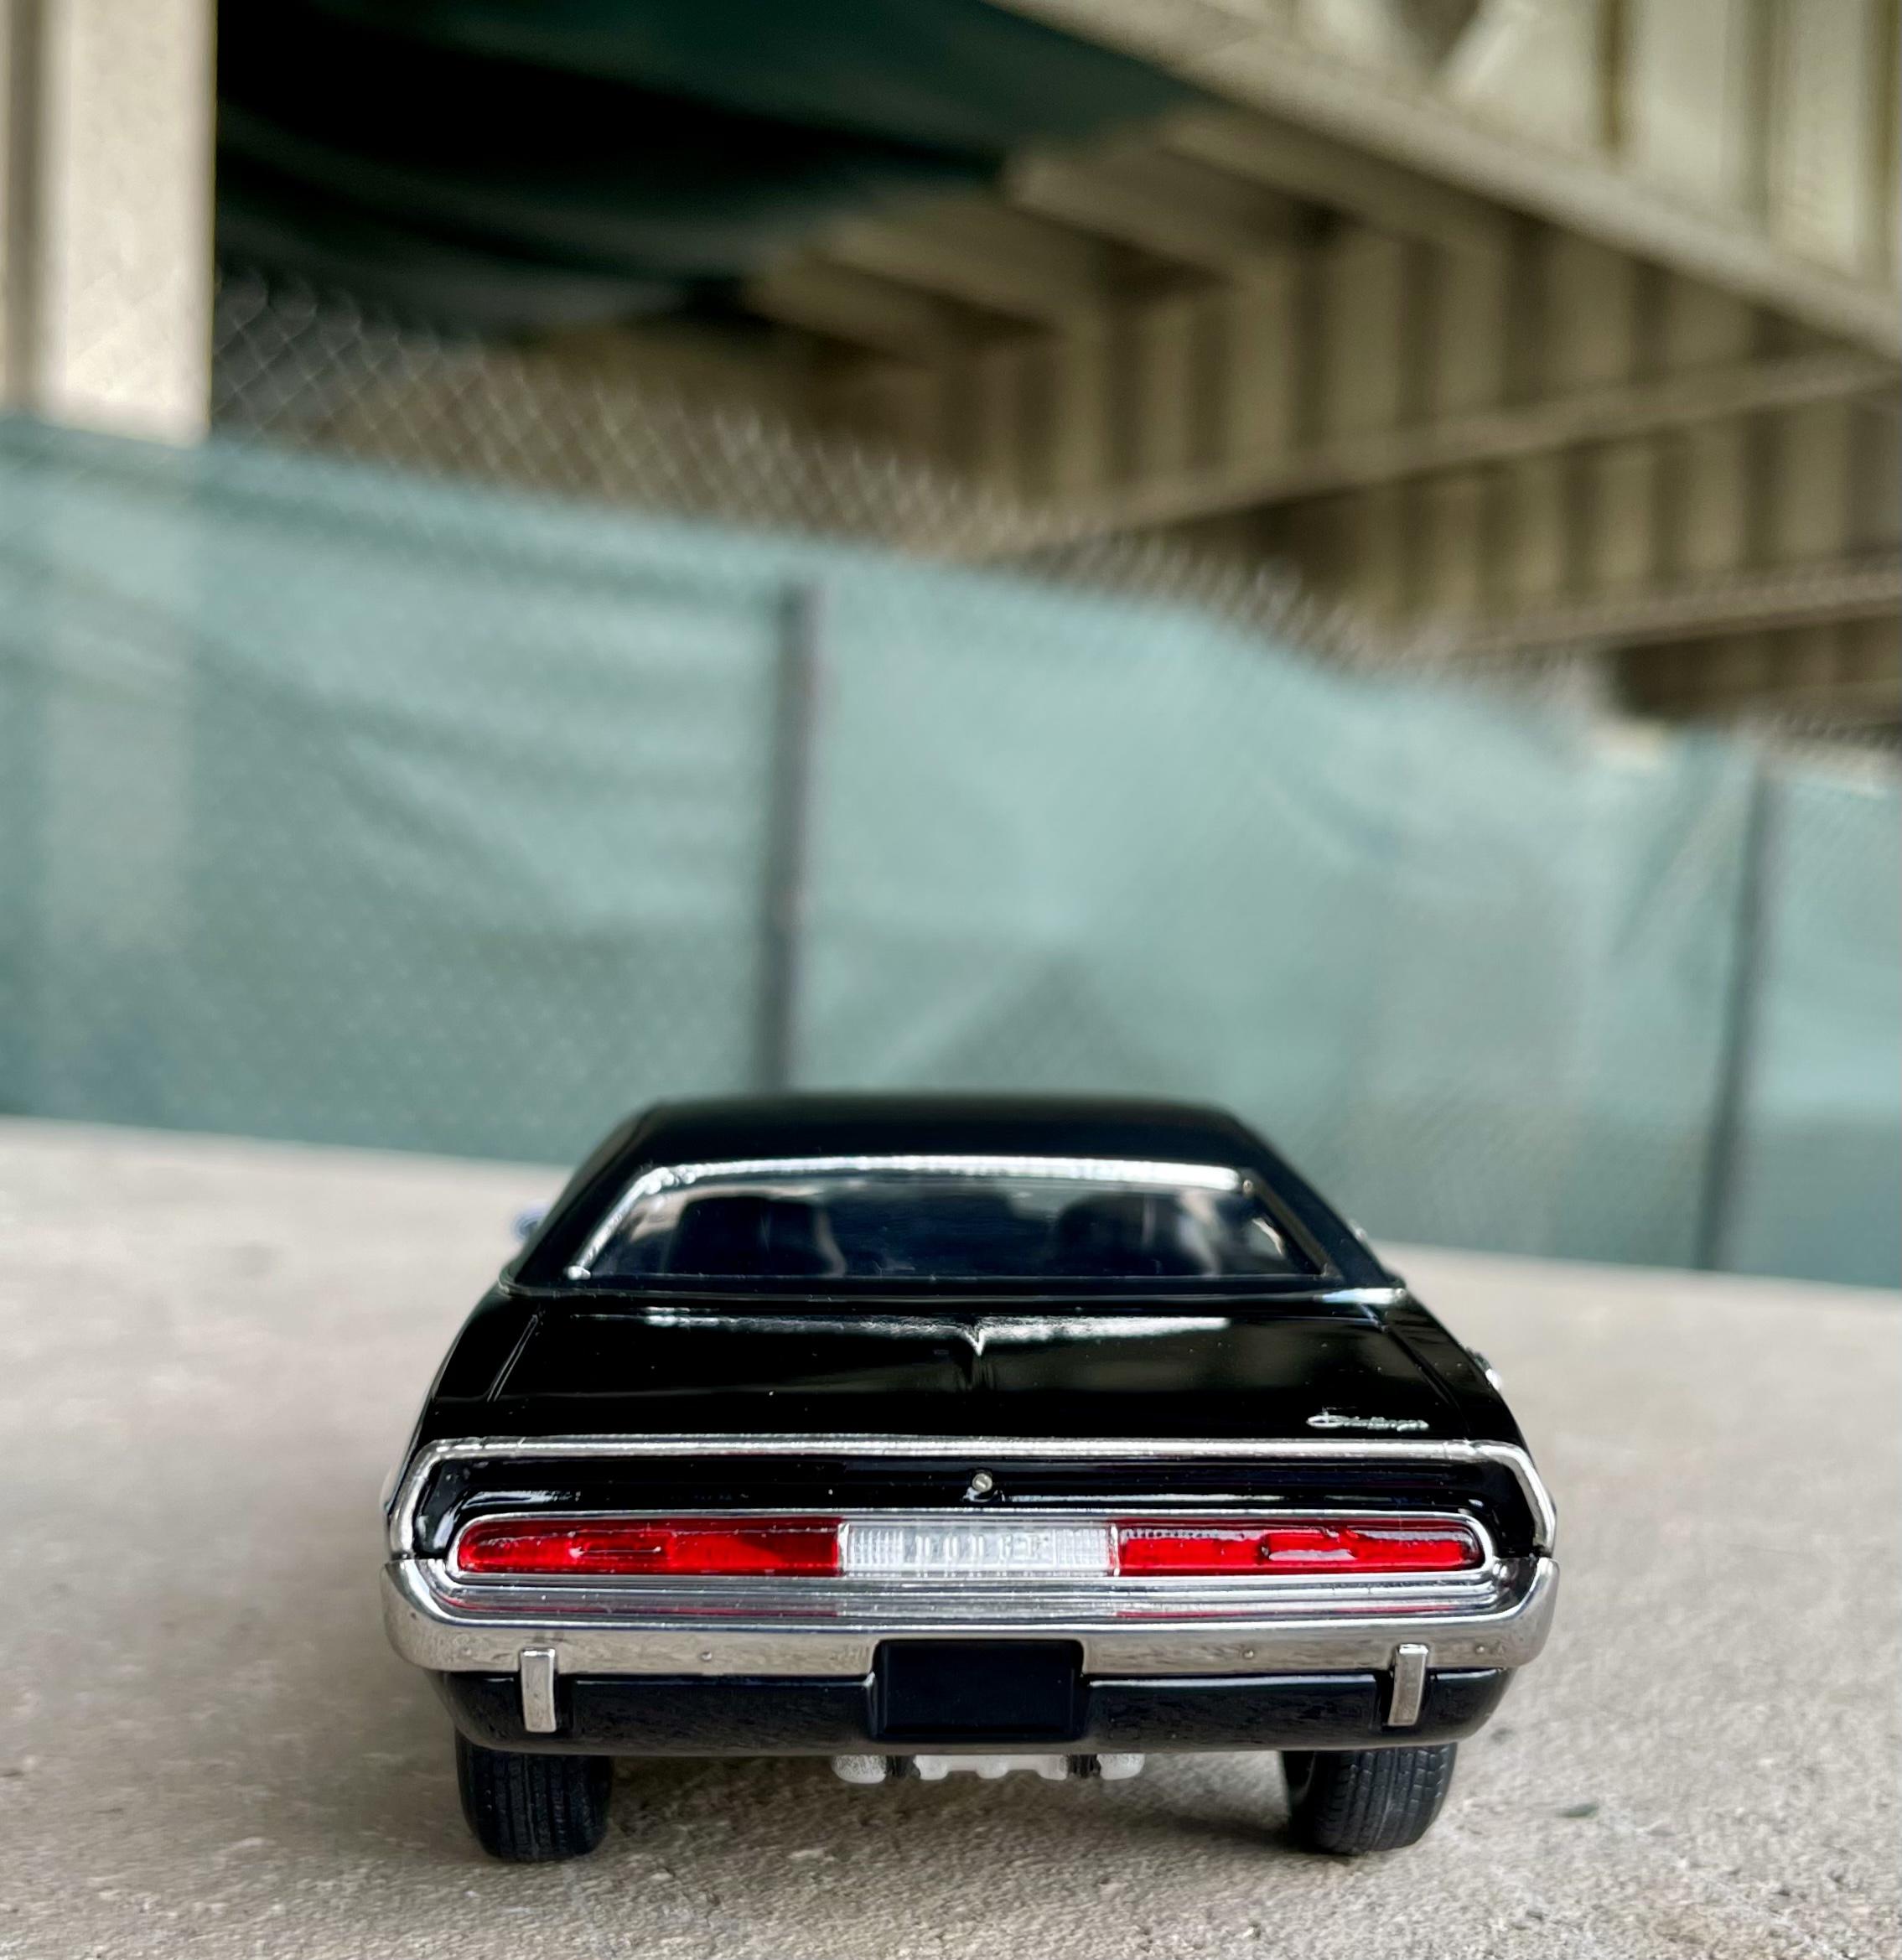
Finished this one a couple of weeks ago and finally got it outside for some pics. Not the most detailed kit in the world but still a lot of fun... My plan was to convert it to a full r/a with a rallye hood, but I couldn’t find a decent one online. I’ll keep looking and someday I’ll swap them out and add the r/t badges. Until then, we have a little custom r/t-t/a hybrid. Paints are all tamiya cans…gloss black for the body and matte for the vinyl top. I like to think a baaaad man drove this thing.
-
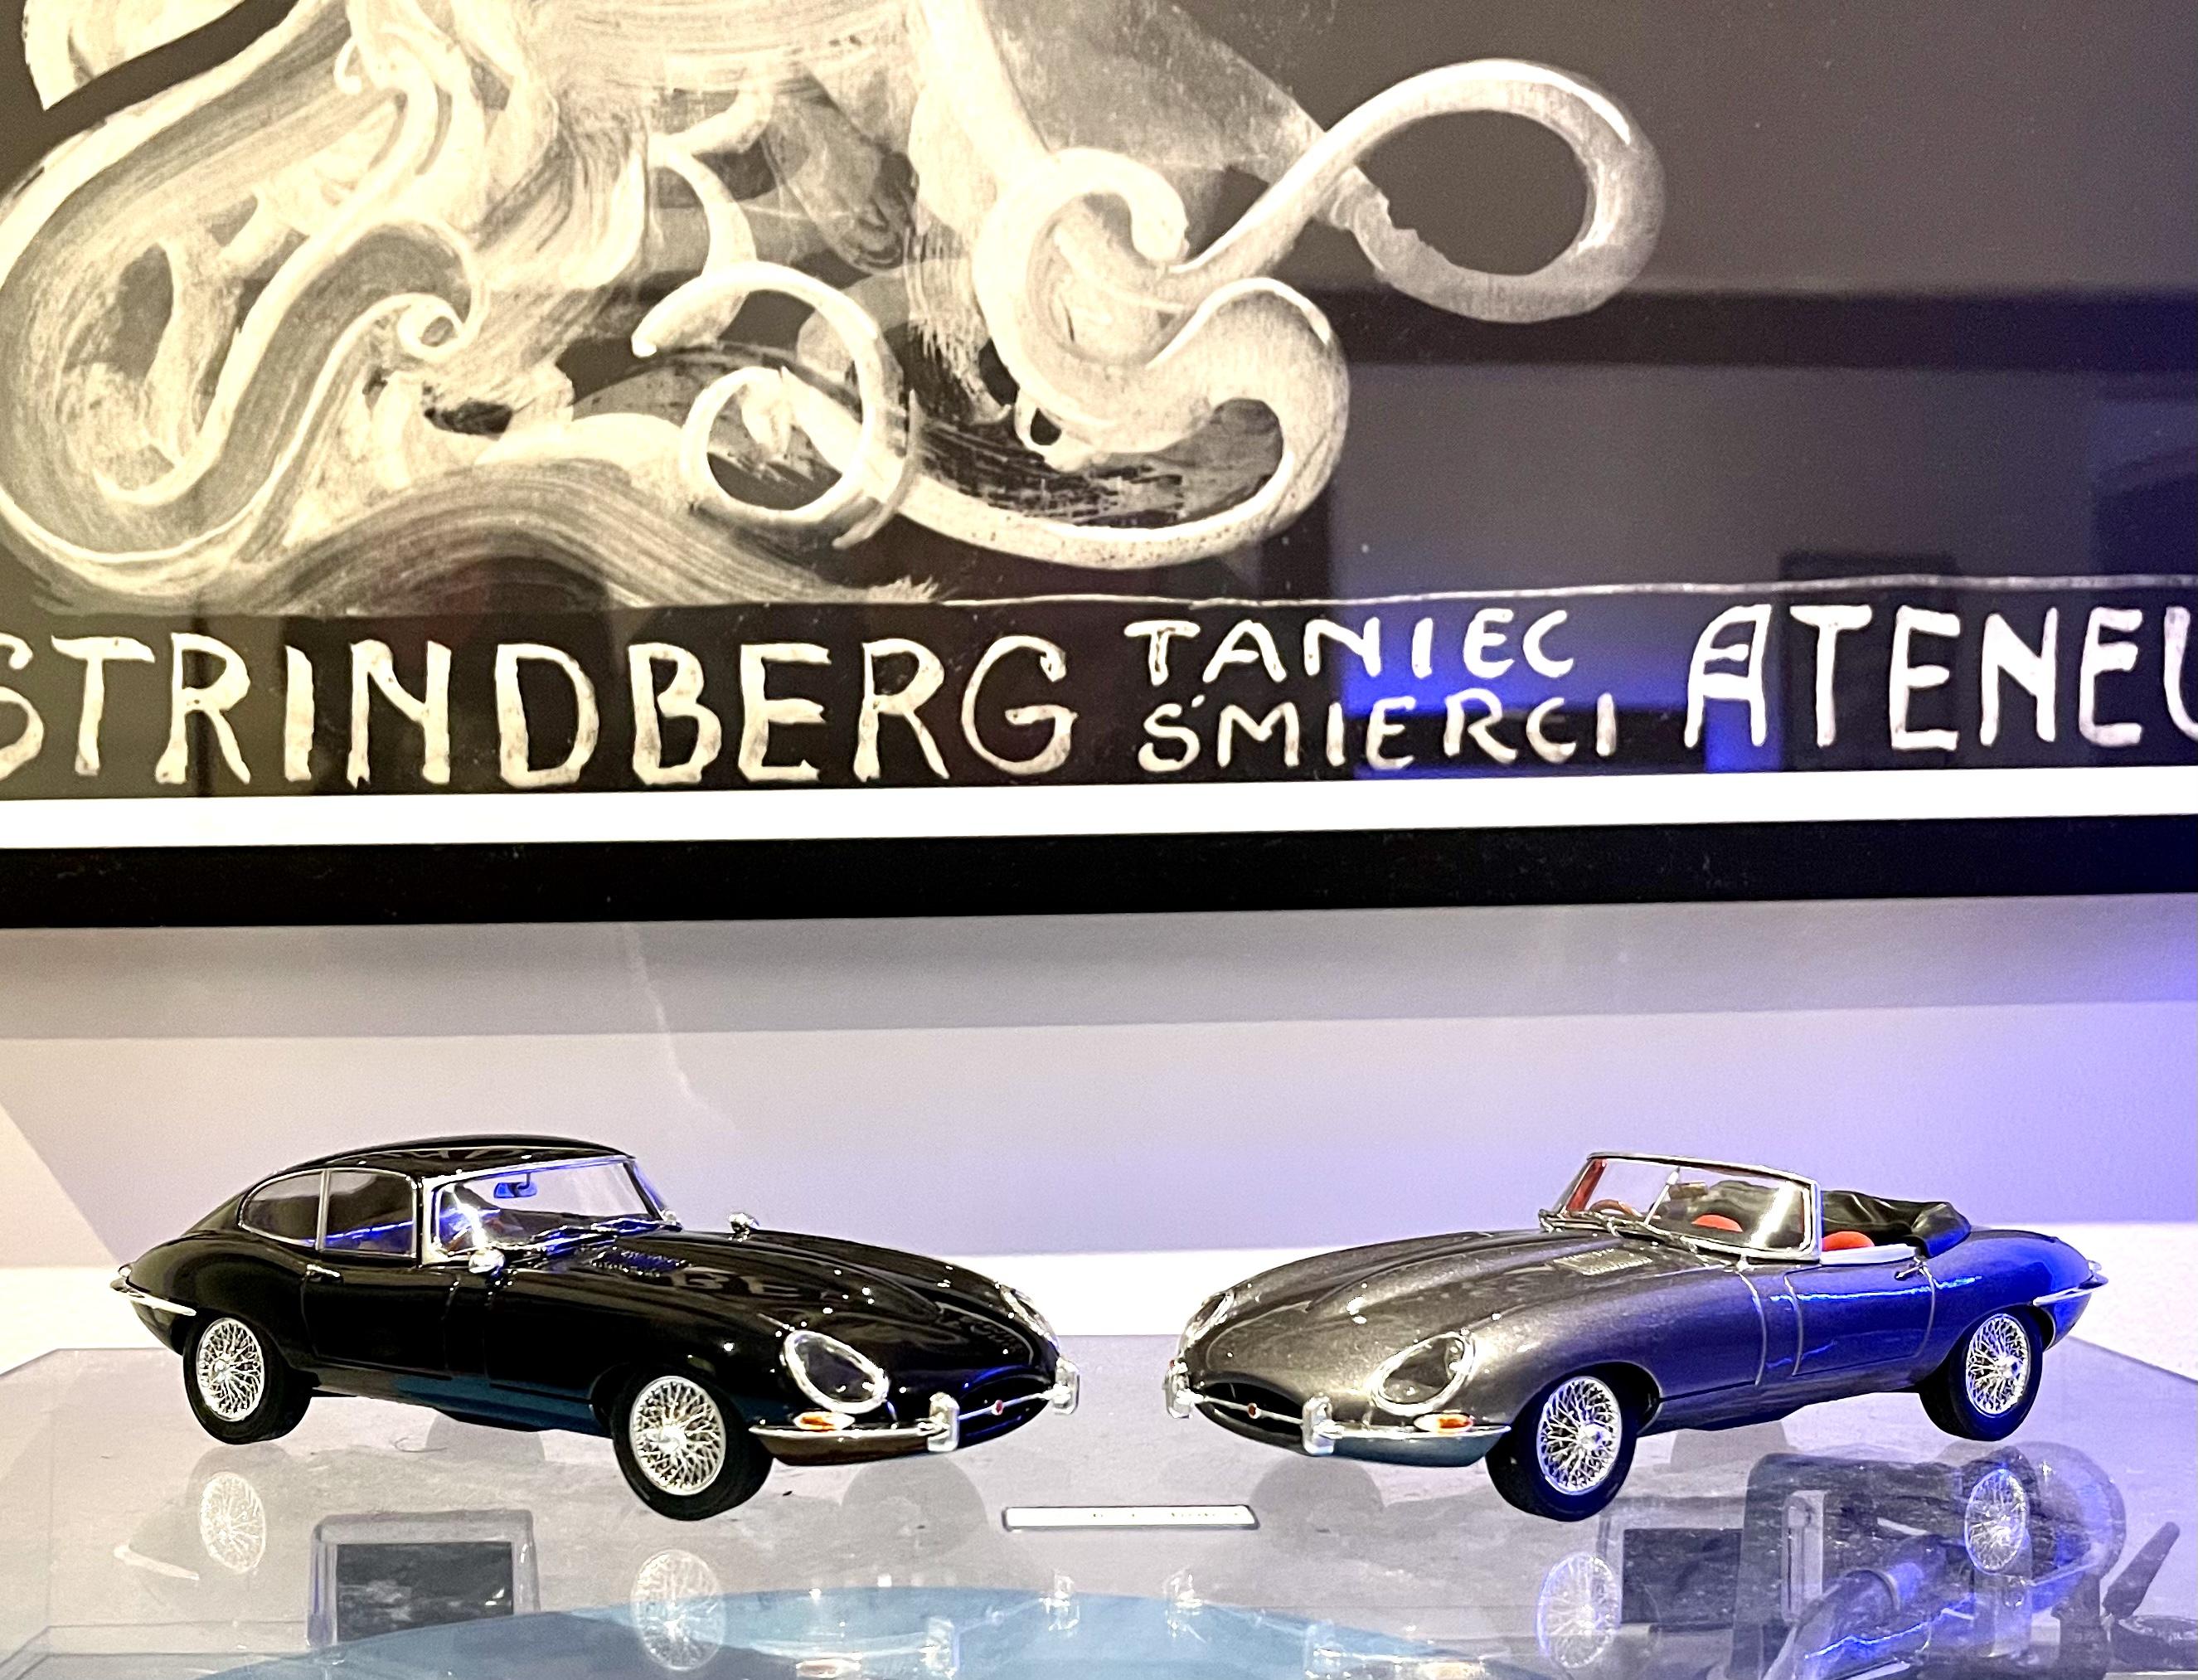
Thanks! I was looking for a pair of those too but I honestly don’t hate the kit set. I’ve got 4 more coupes in the stash so I may buy some down the road…we’ll see. I also may try to convert one into an Eagle E-type, but that would involve a lot of chopping. Could be fun though!
-
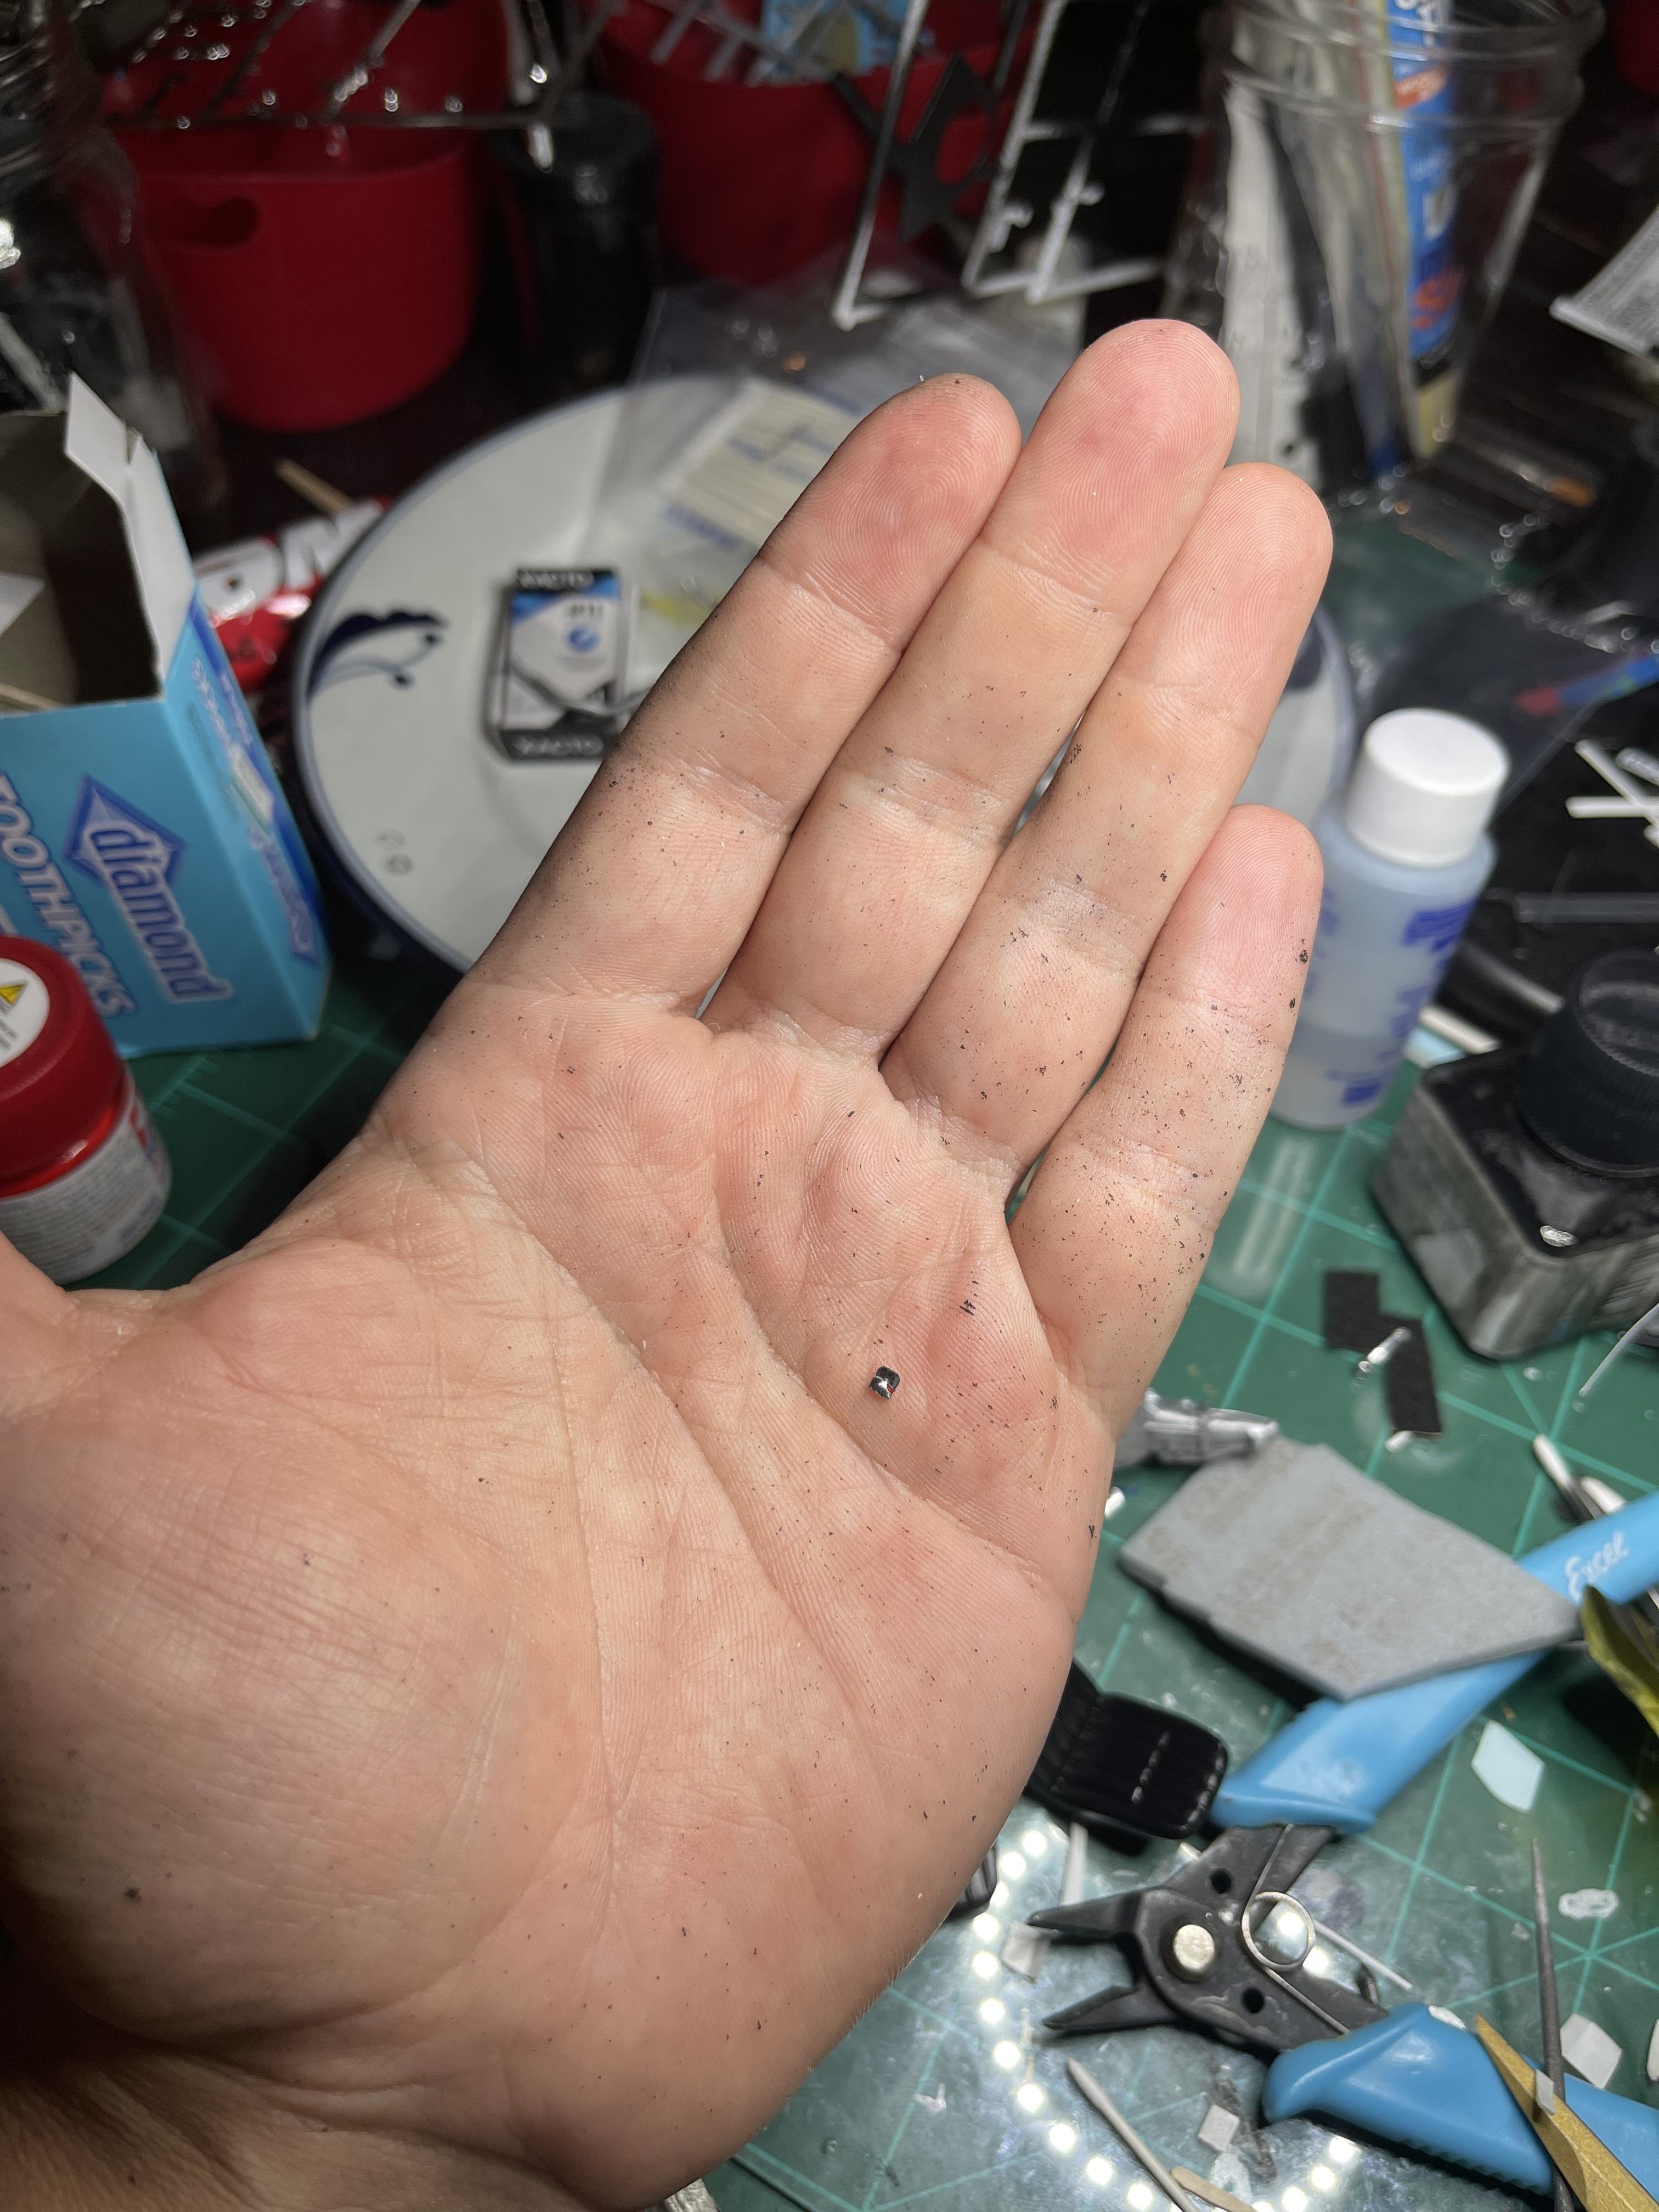
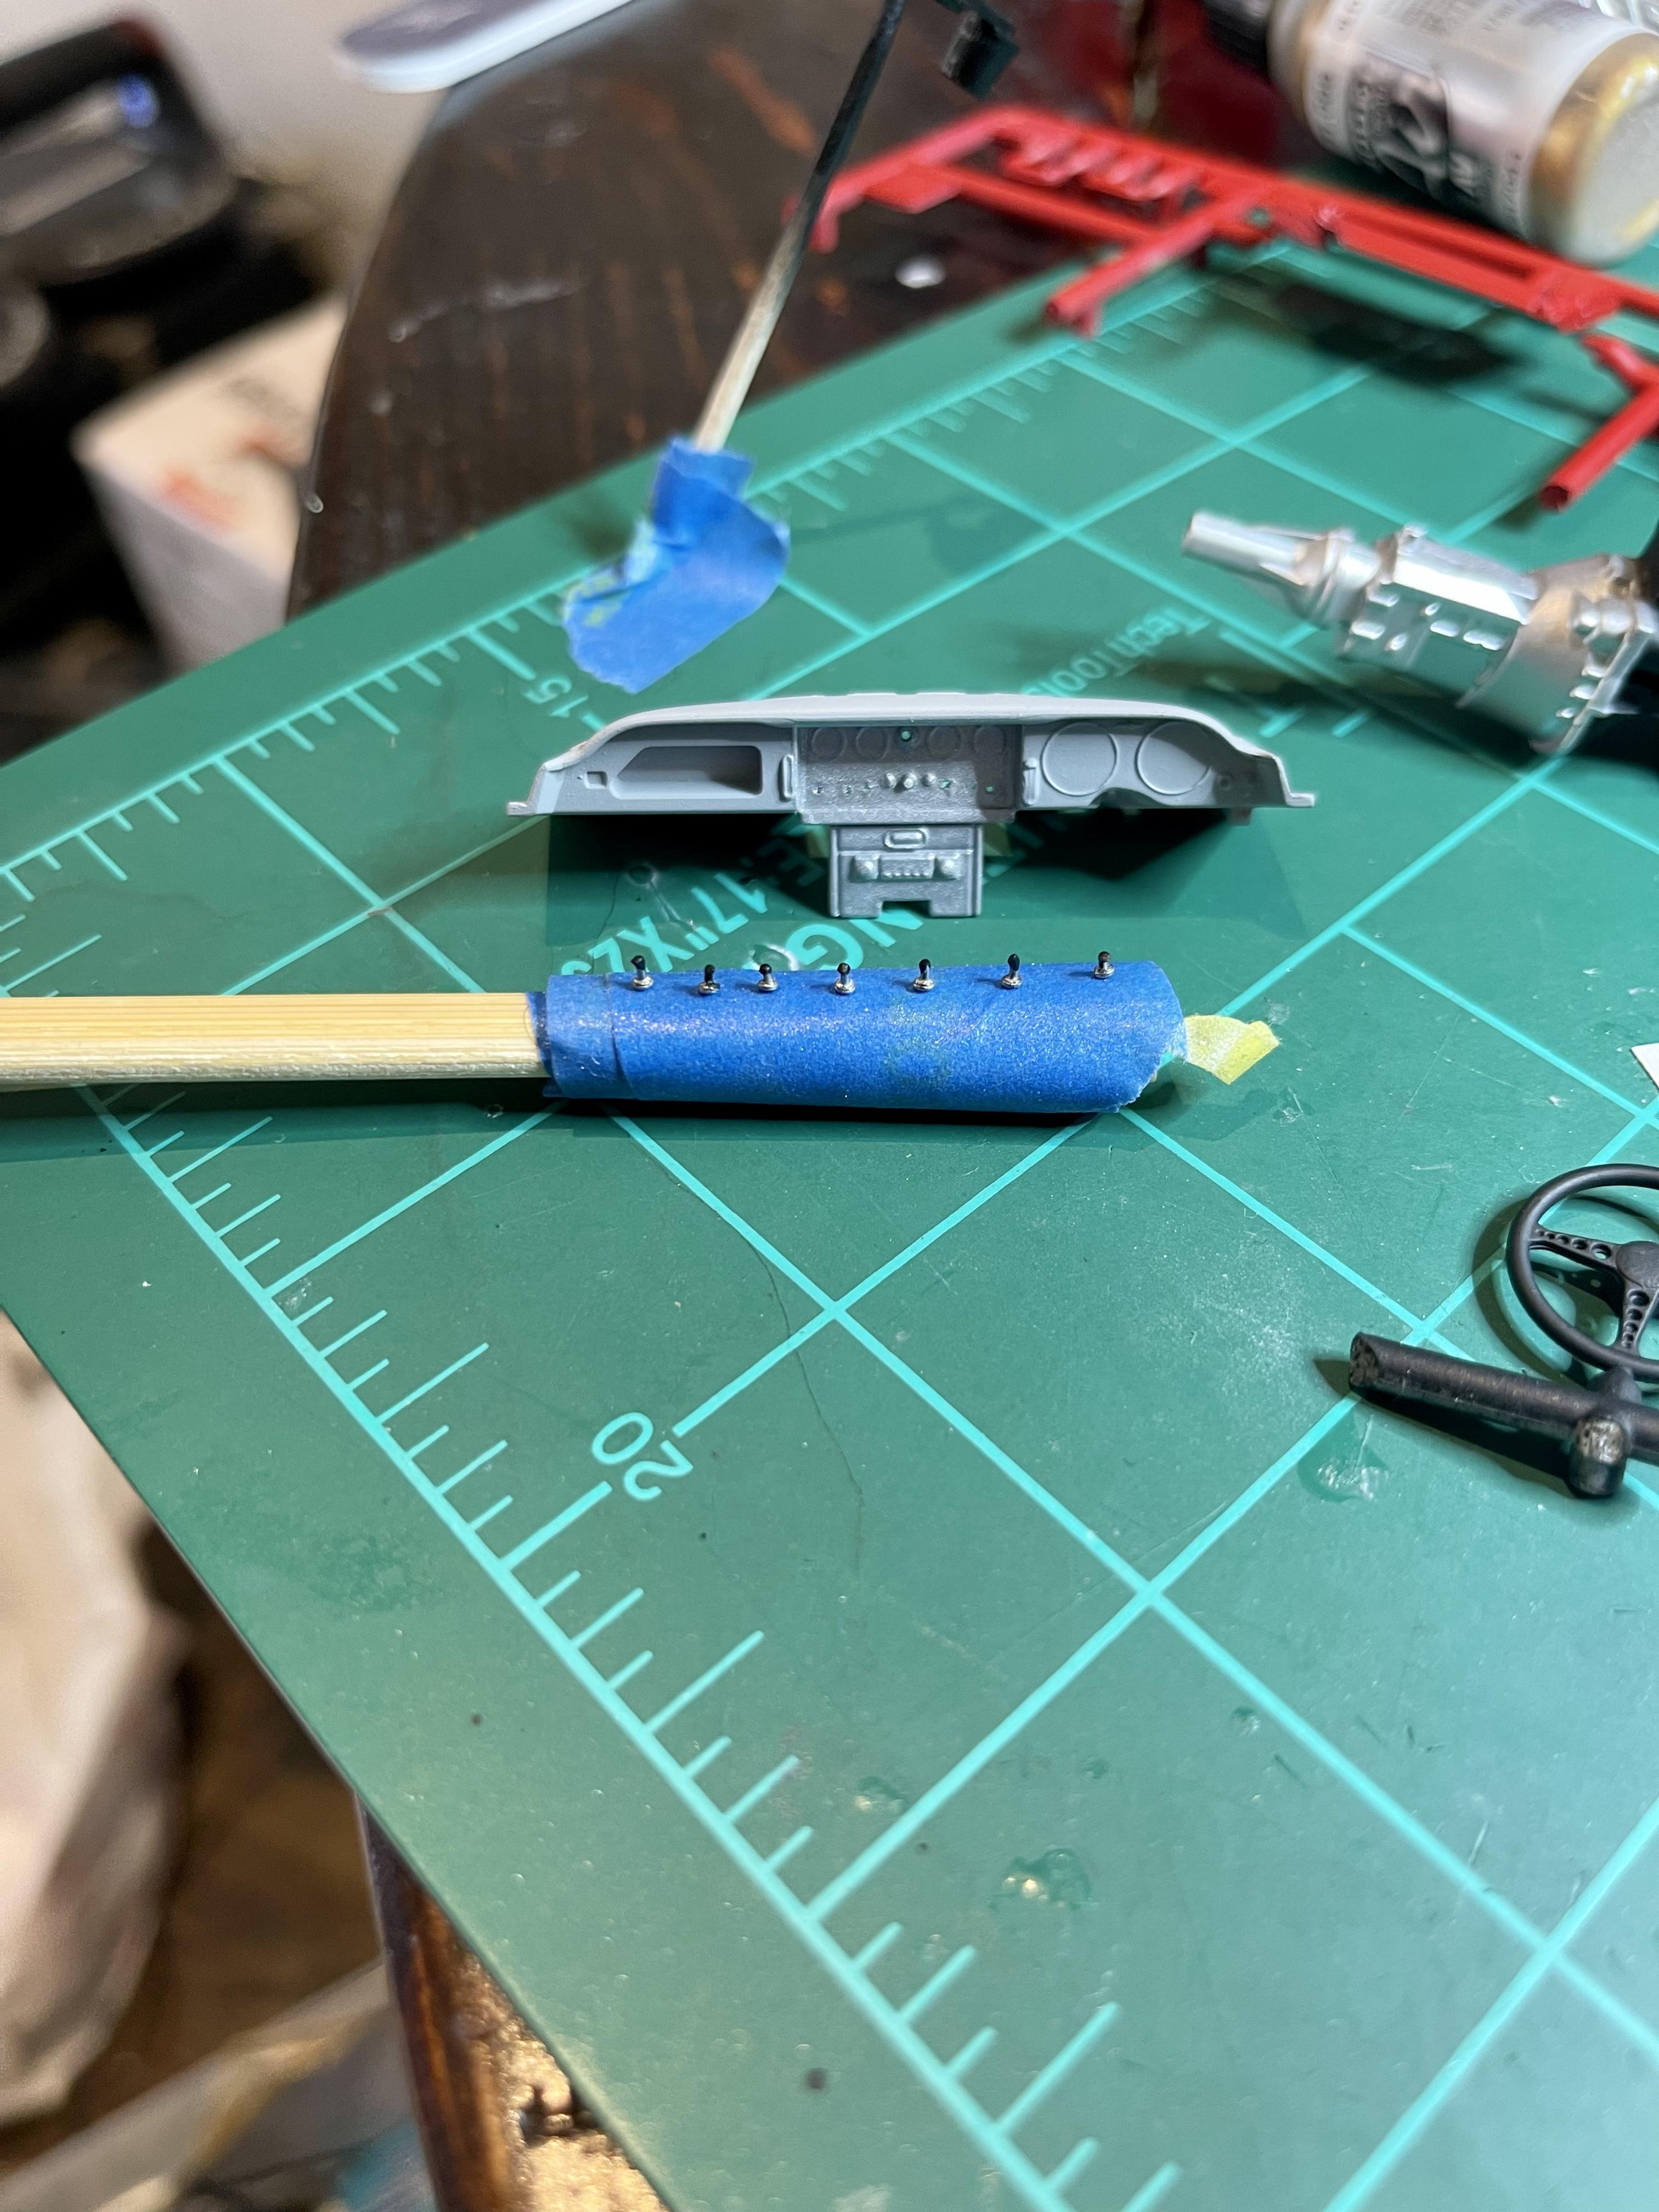
Thanks! I was a little worried about the wheels and decided I’d strip them if the wash didn’t work, but luckily it did! I kind of just winged it on the switches…I bent some very thin tailoring needles right below the pin head and then snipped them just after the bend. Then I stuck them to some tape on a piece of wood, dabbed the cut tips with a drop of matte black paint and let them dry upside down. Super easy, but I’m sure there is a better way out there!
-
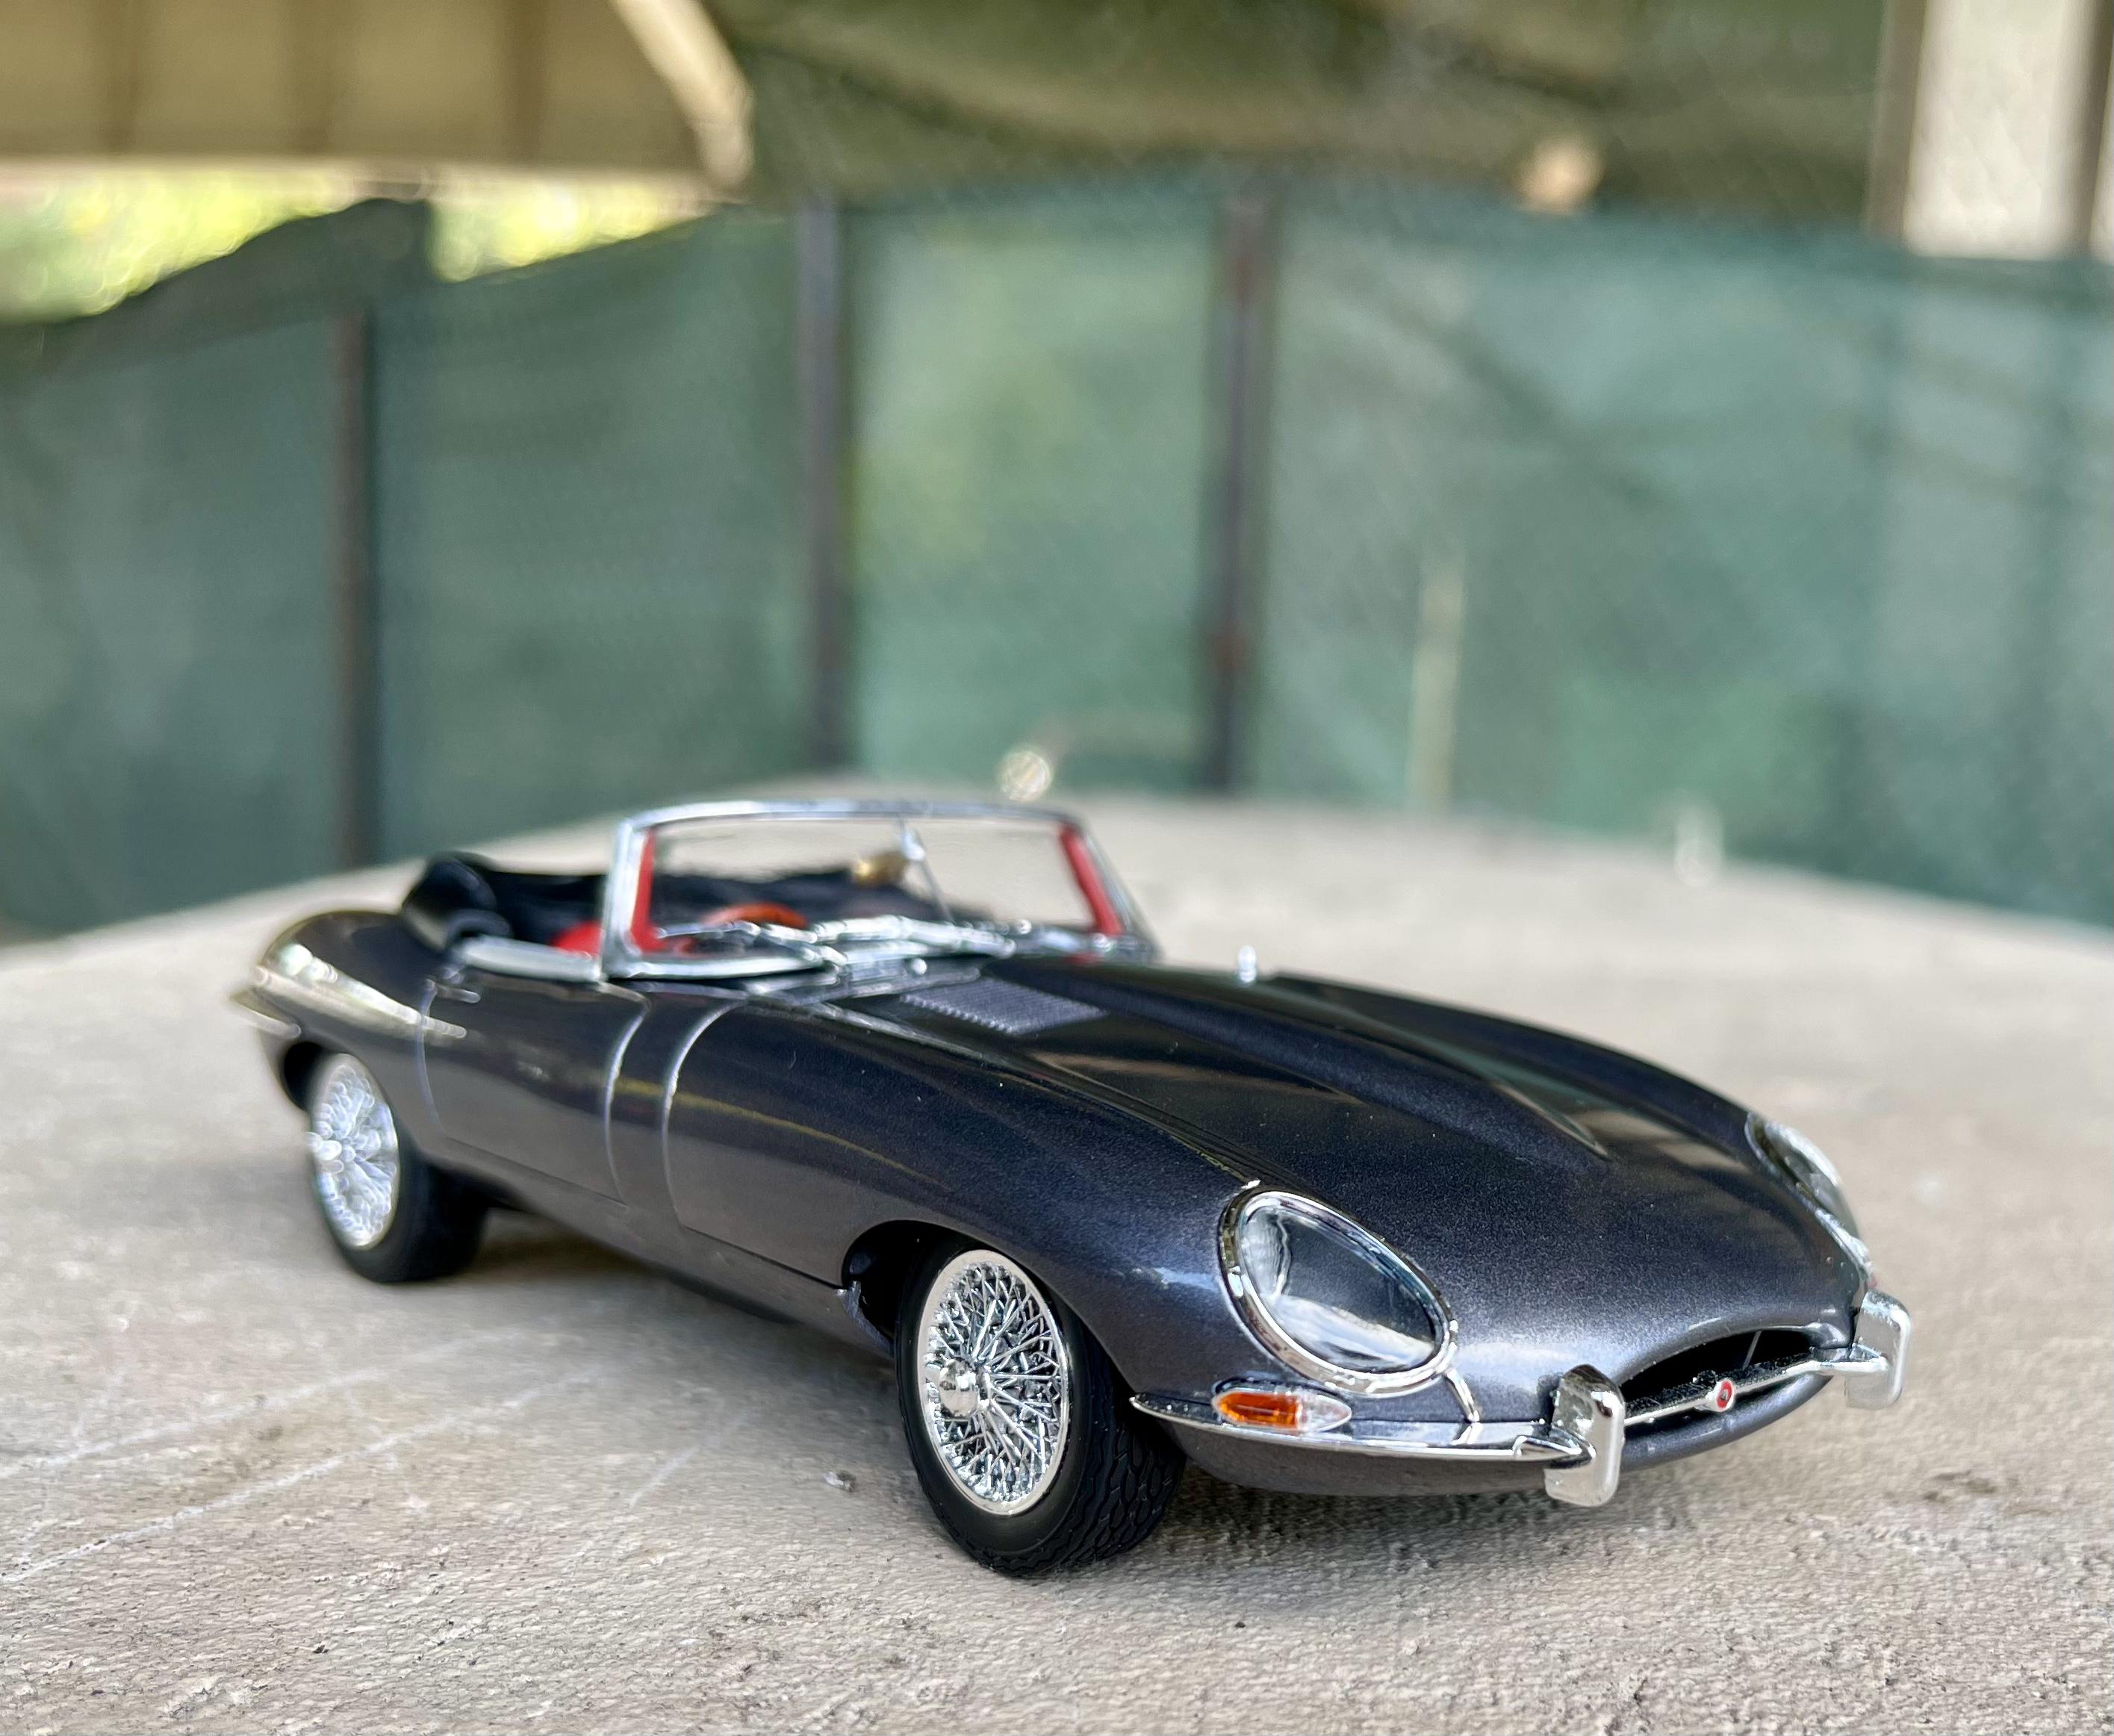
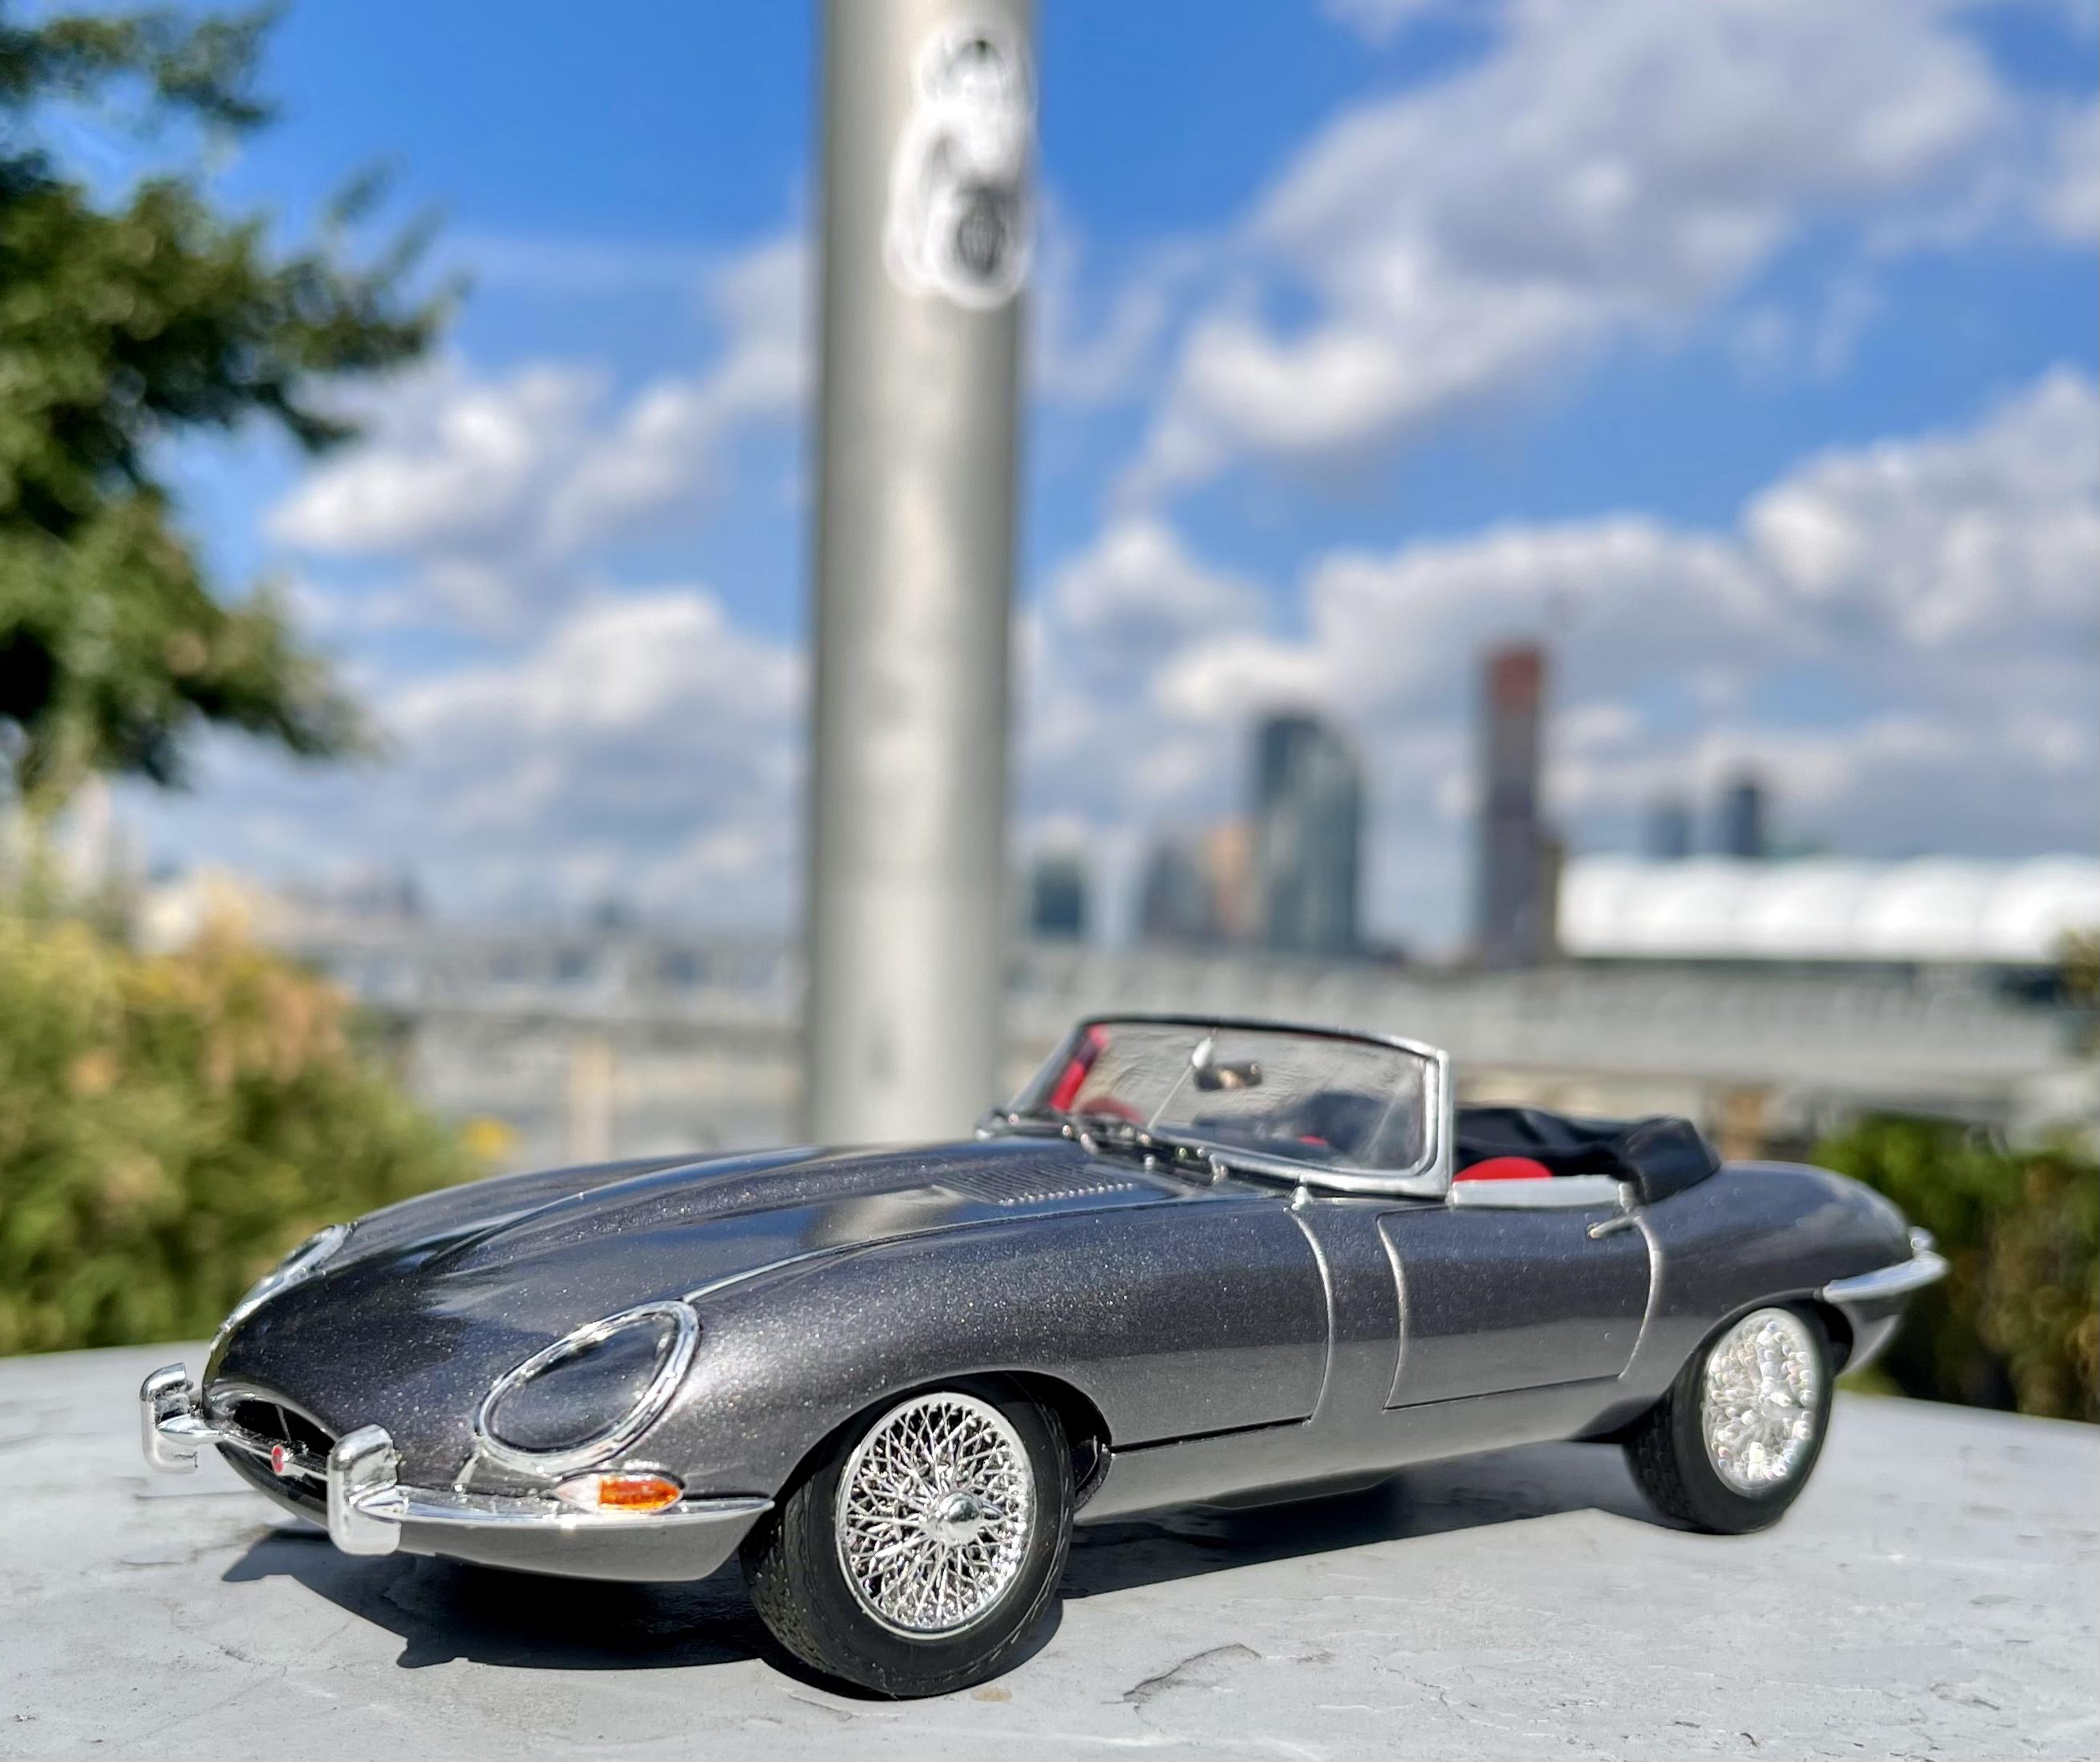
Thanks - yeah my favorite colors for this car are definitely opalescent silver gray or blue. The green is nice but it’s everywhere. This gunmetal was as close as I could get to the op. silver gray in a spray can. Wish it was a bit less metallic but what can you do ??♂️
-
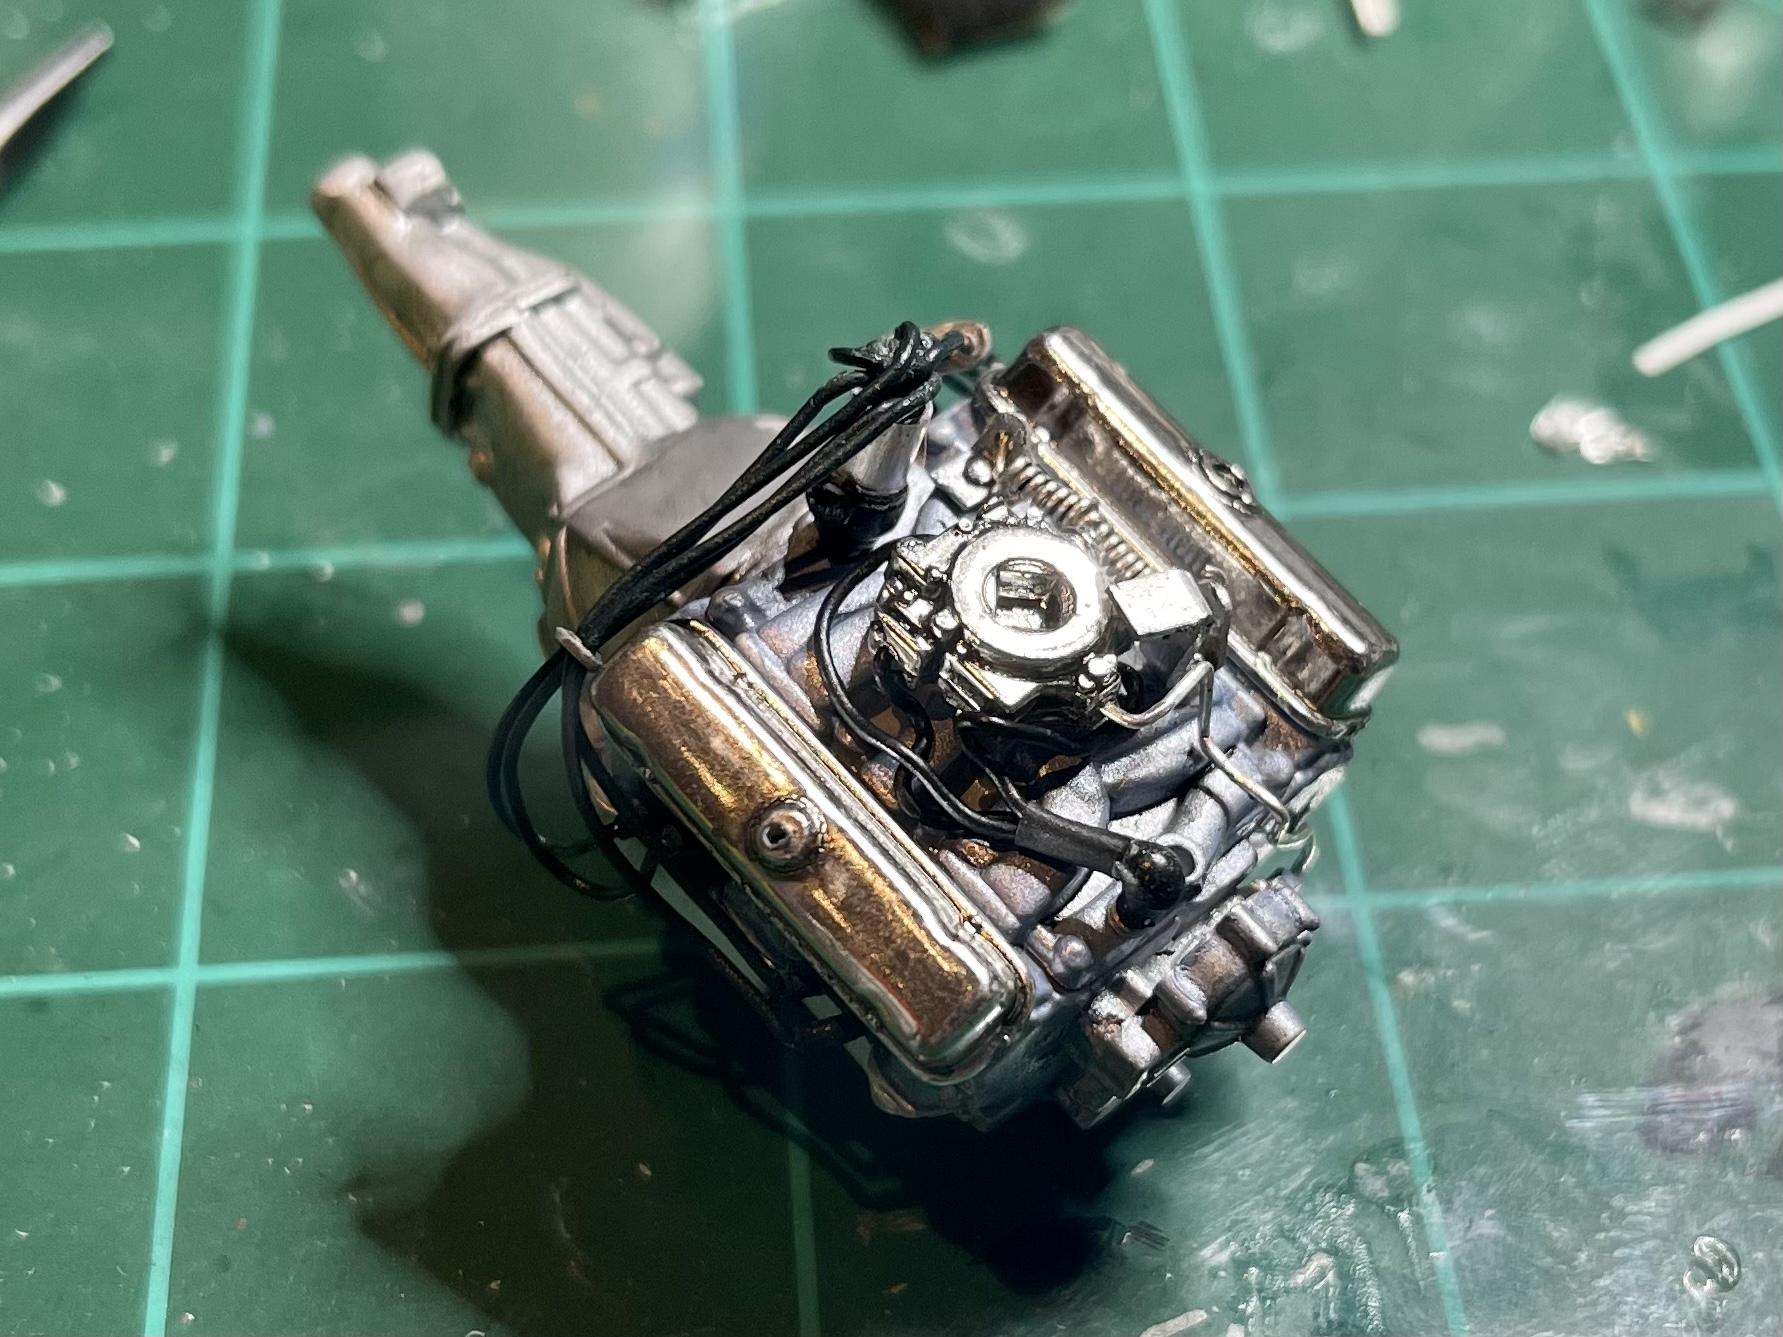
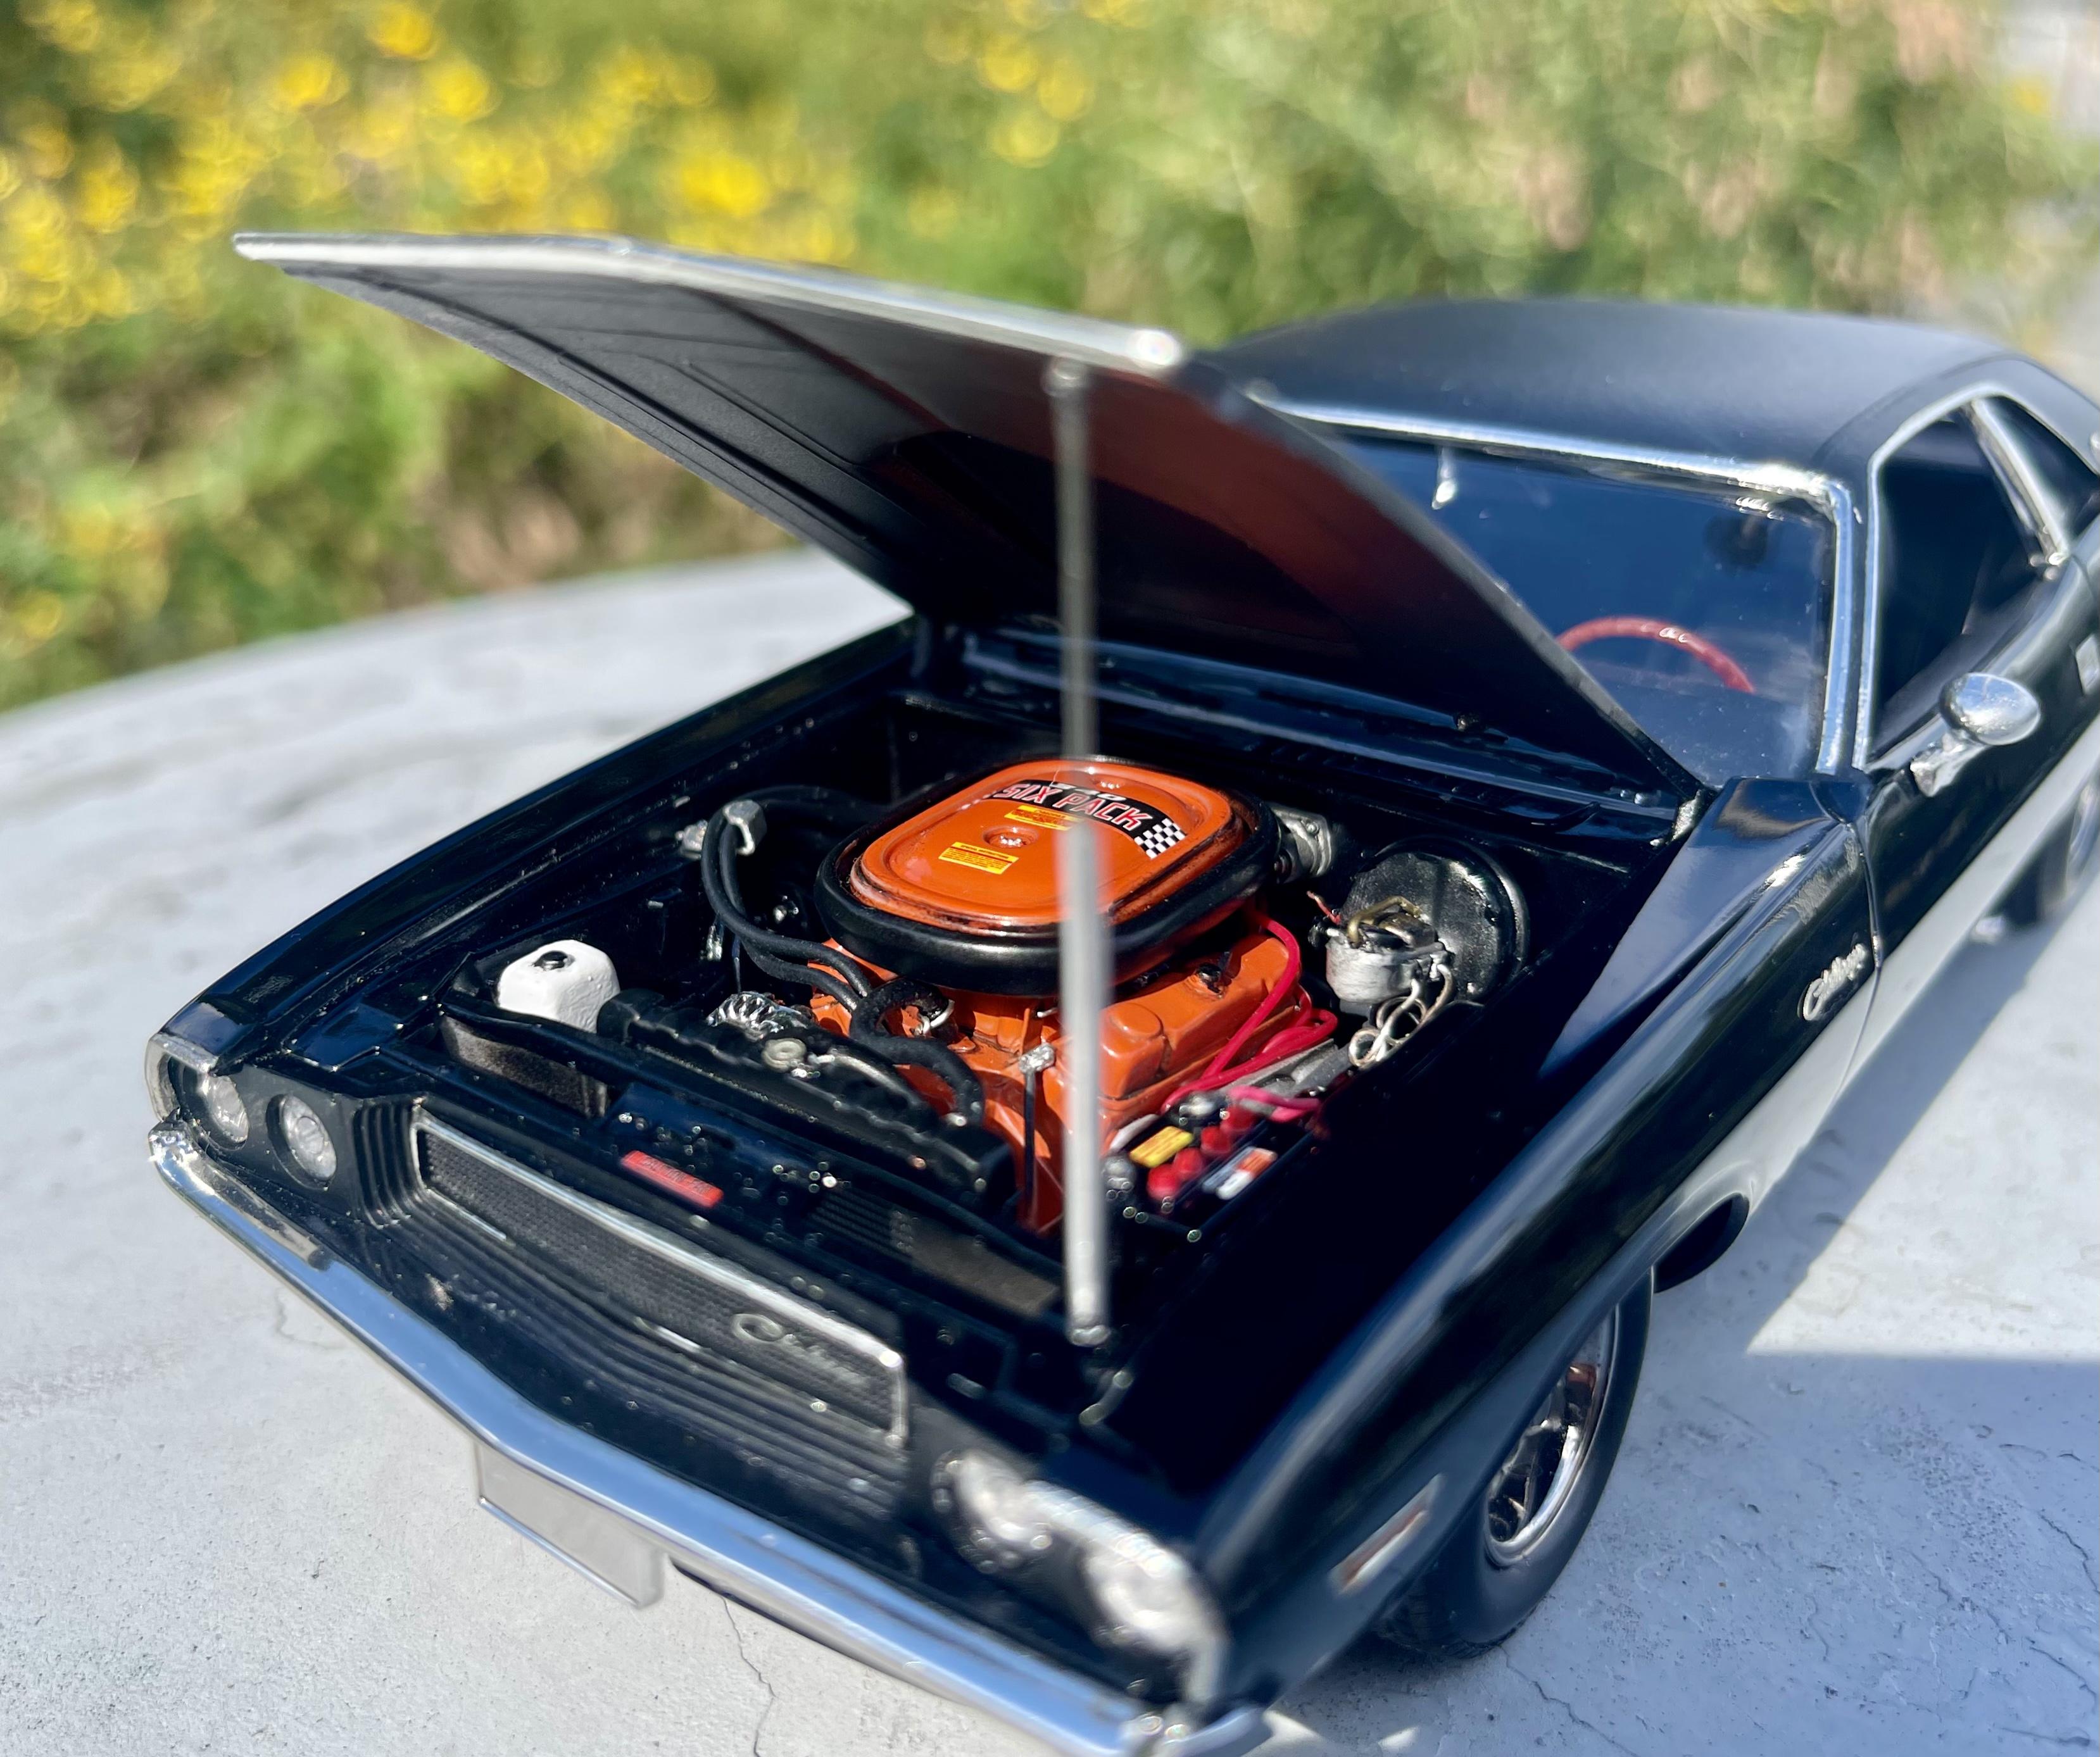
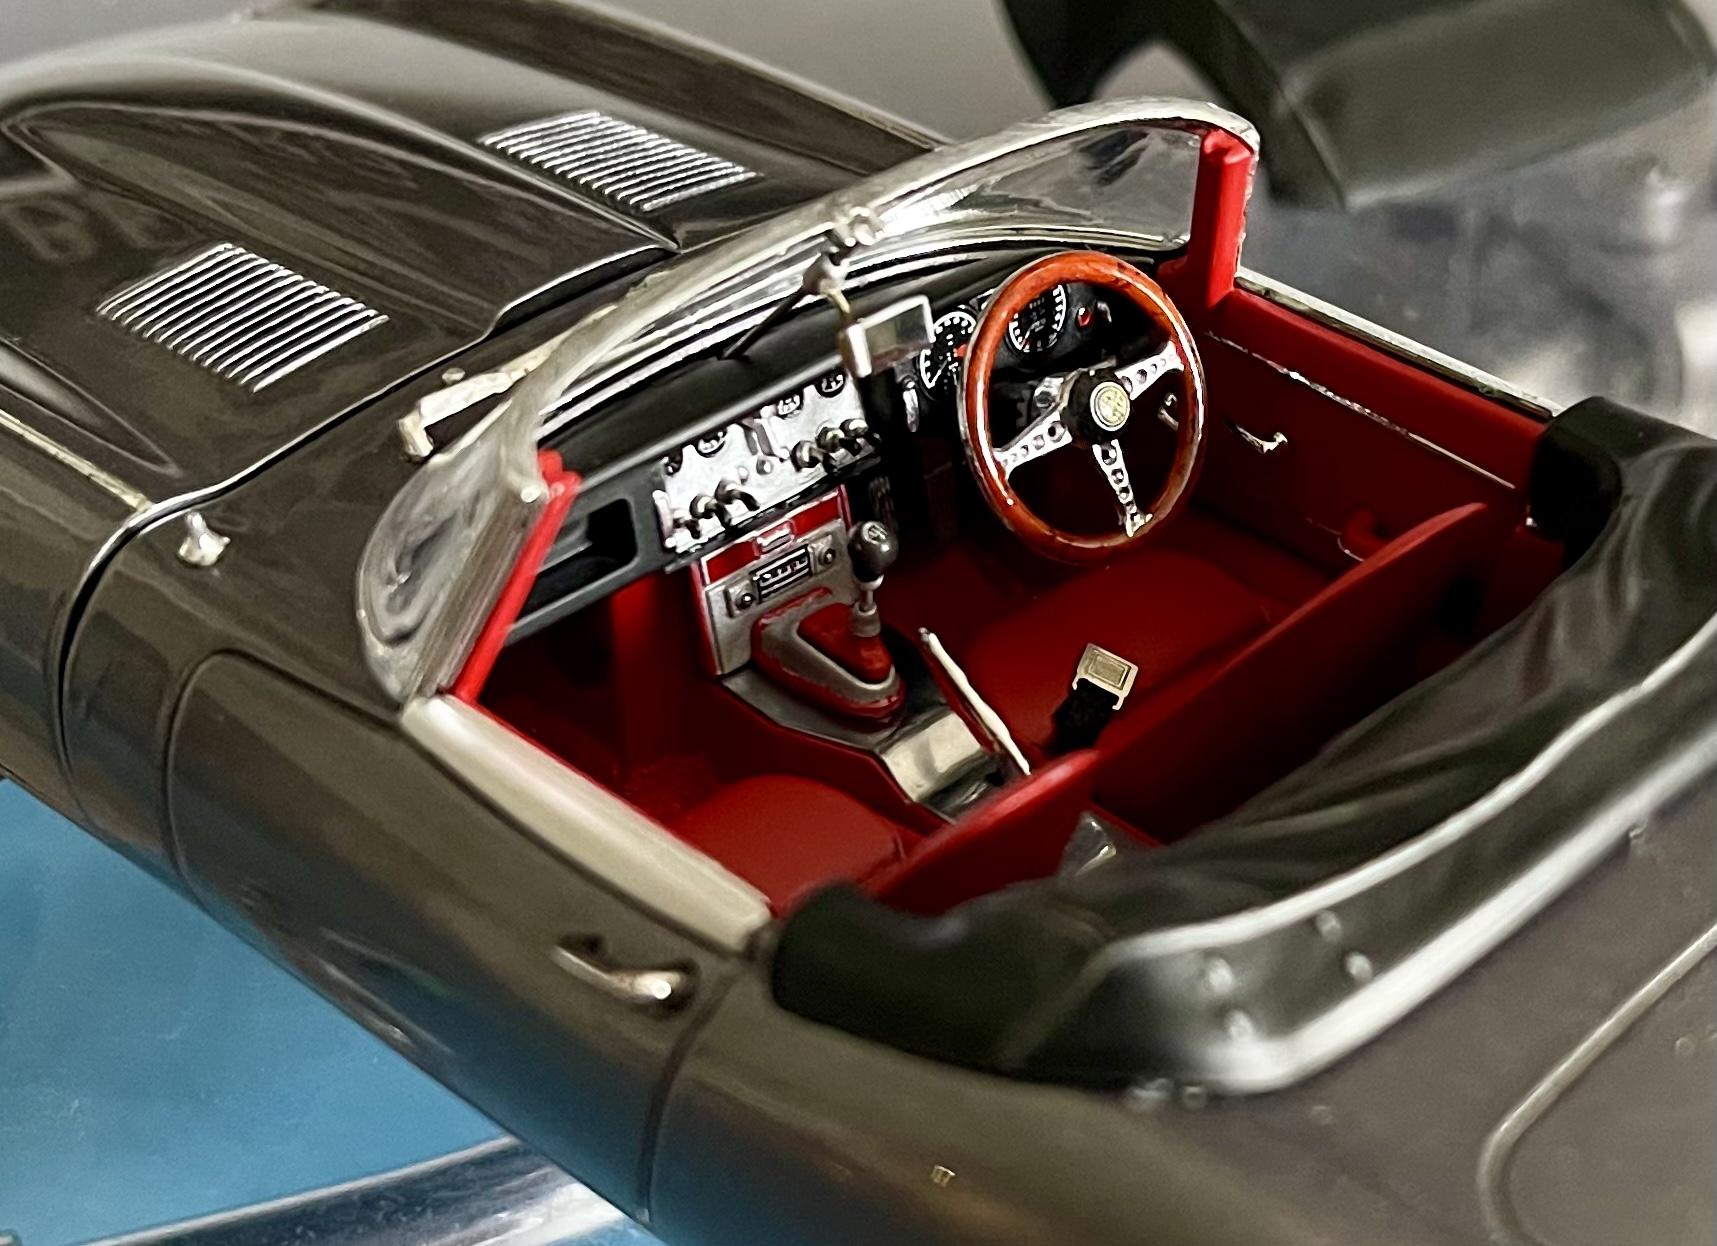
Thanks! It’s my dream car for sure. And the kit truly is amazing. Just a tip if you plan on wiring the engine… there’s a part that runs along the engine and connects to the radiator (I think it’s #49 on the tree) that may interfere with your distributor. Just fiddle with it an bit before gluing so you don’t end up with a massive headache. It’s the same deal for the coupe and roadster.
-
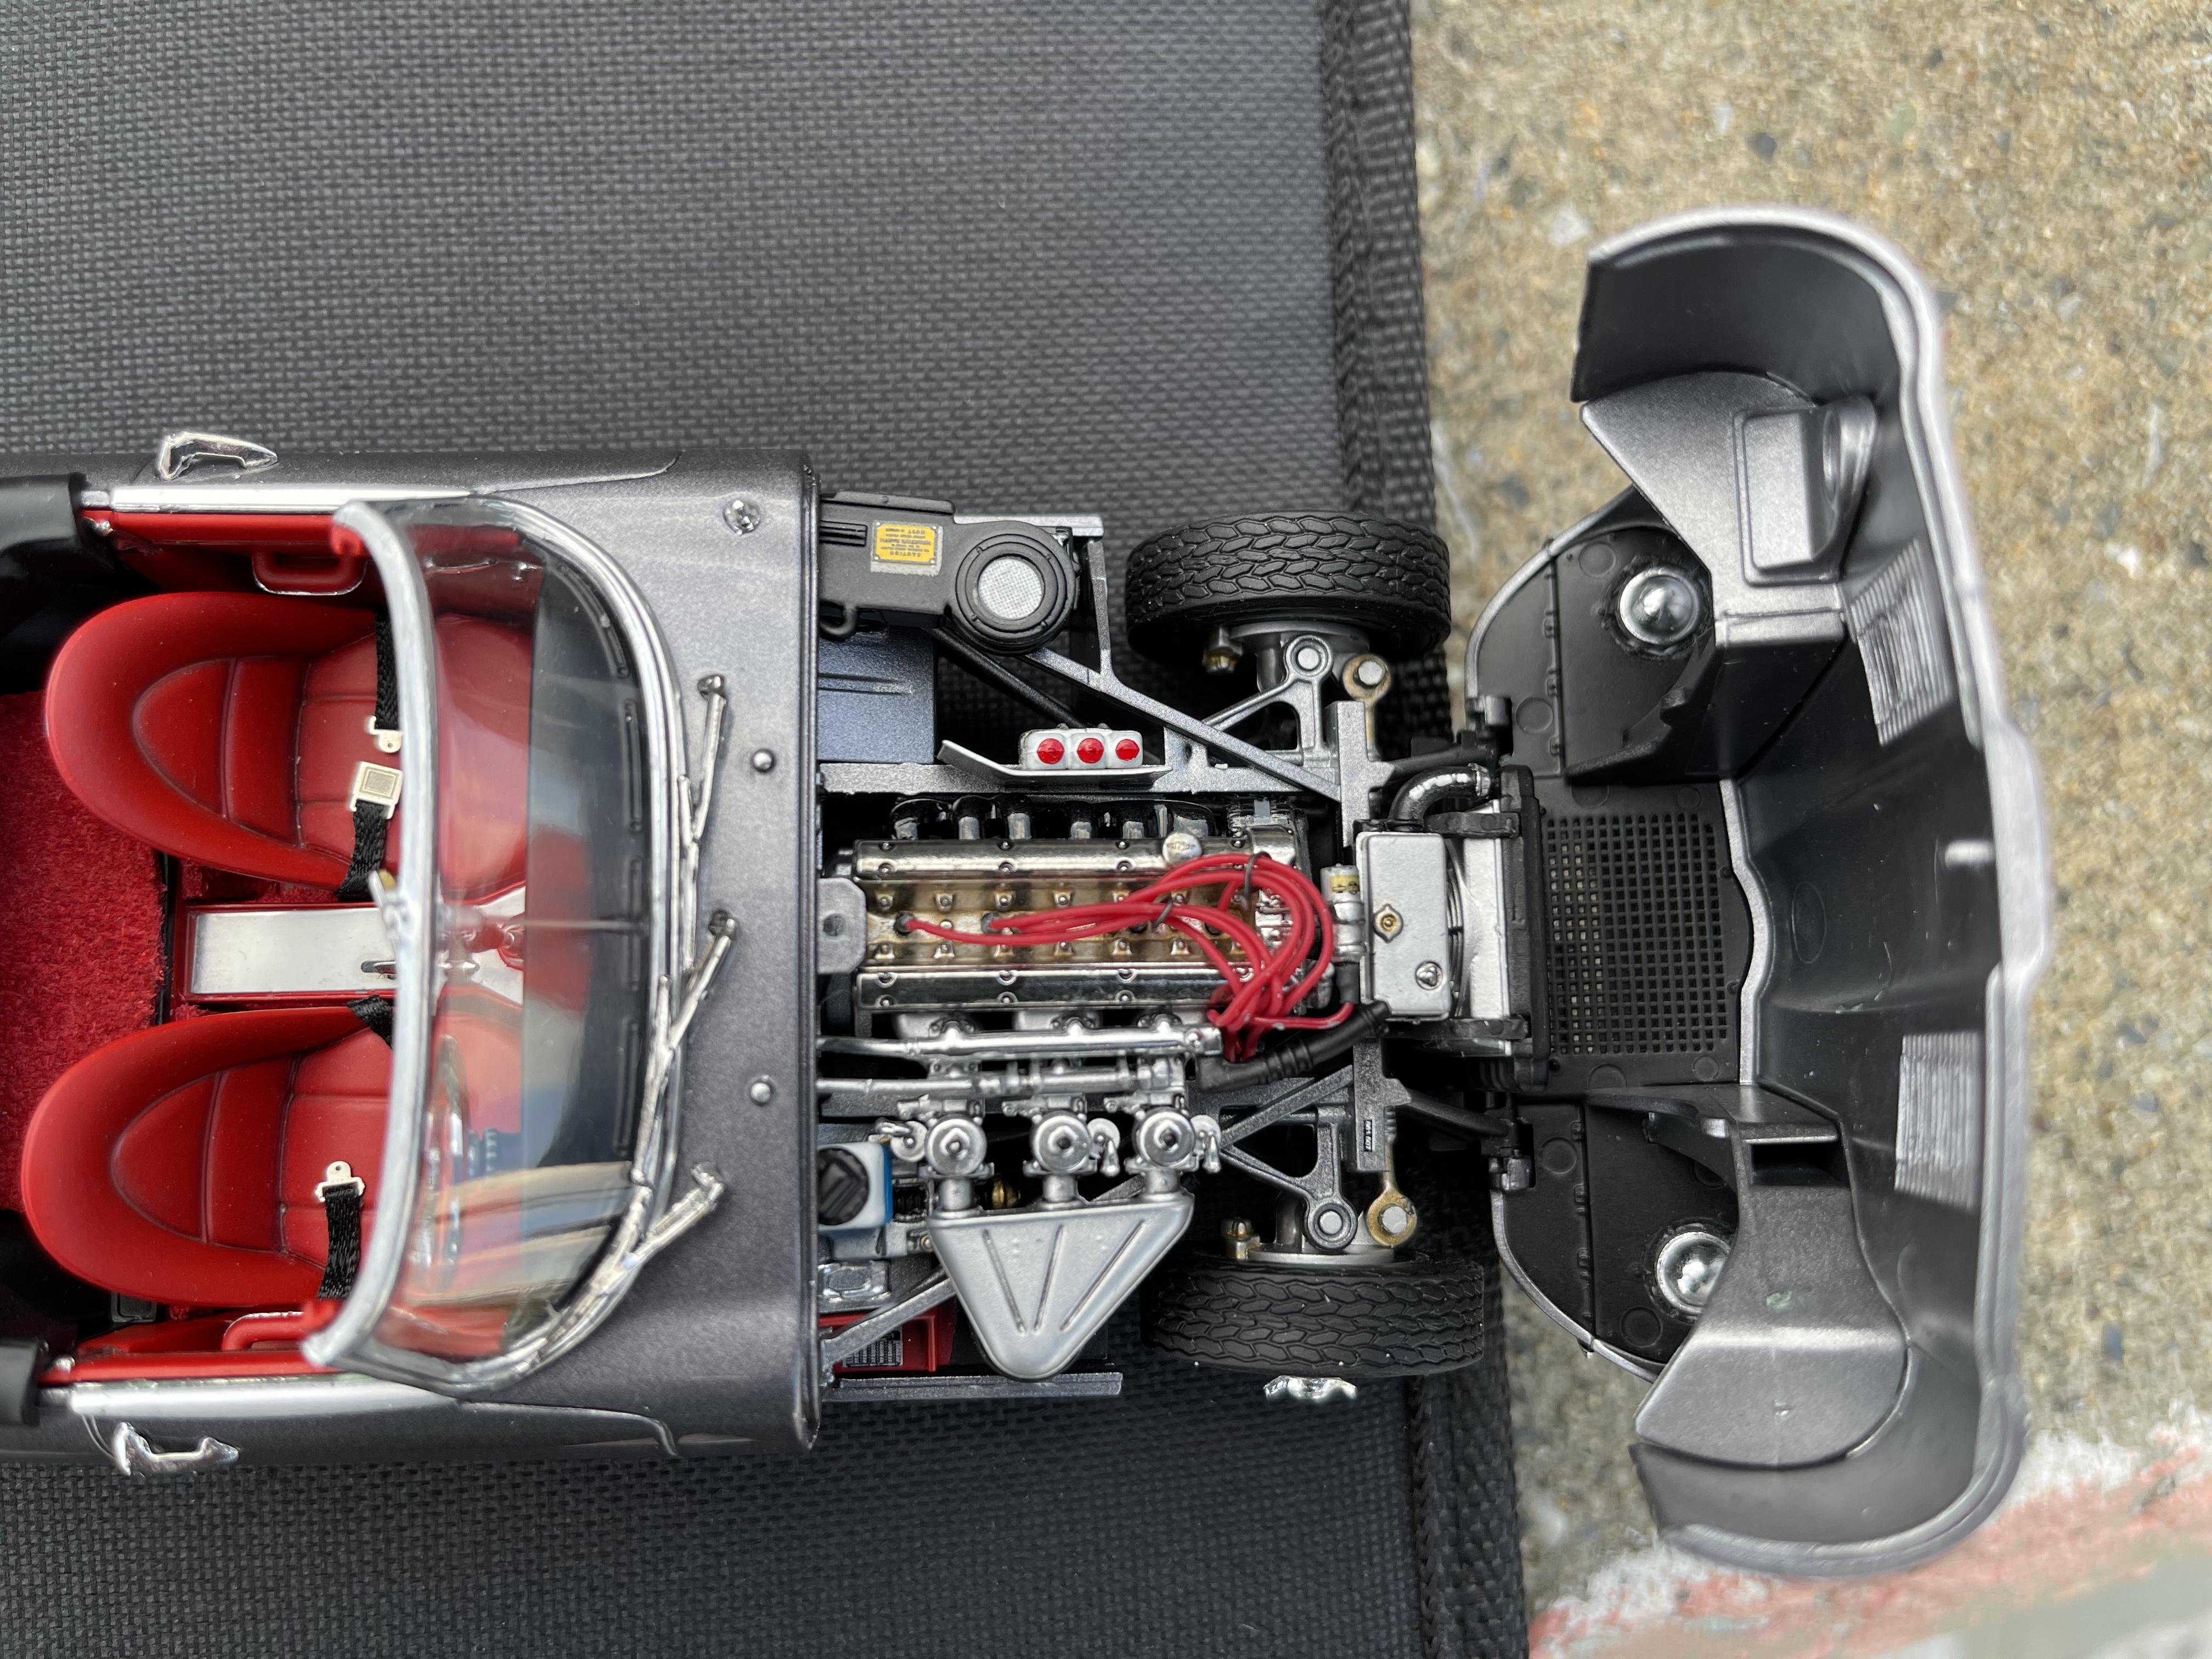
Here are a few of the tweaks I made…
-
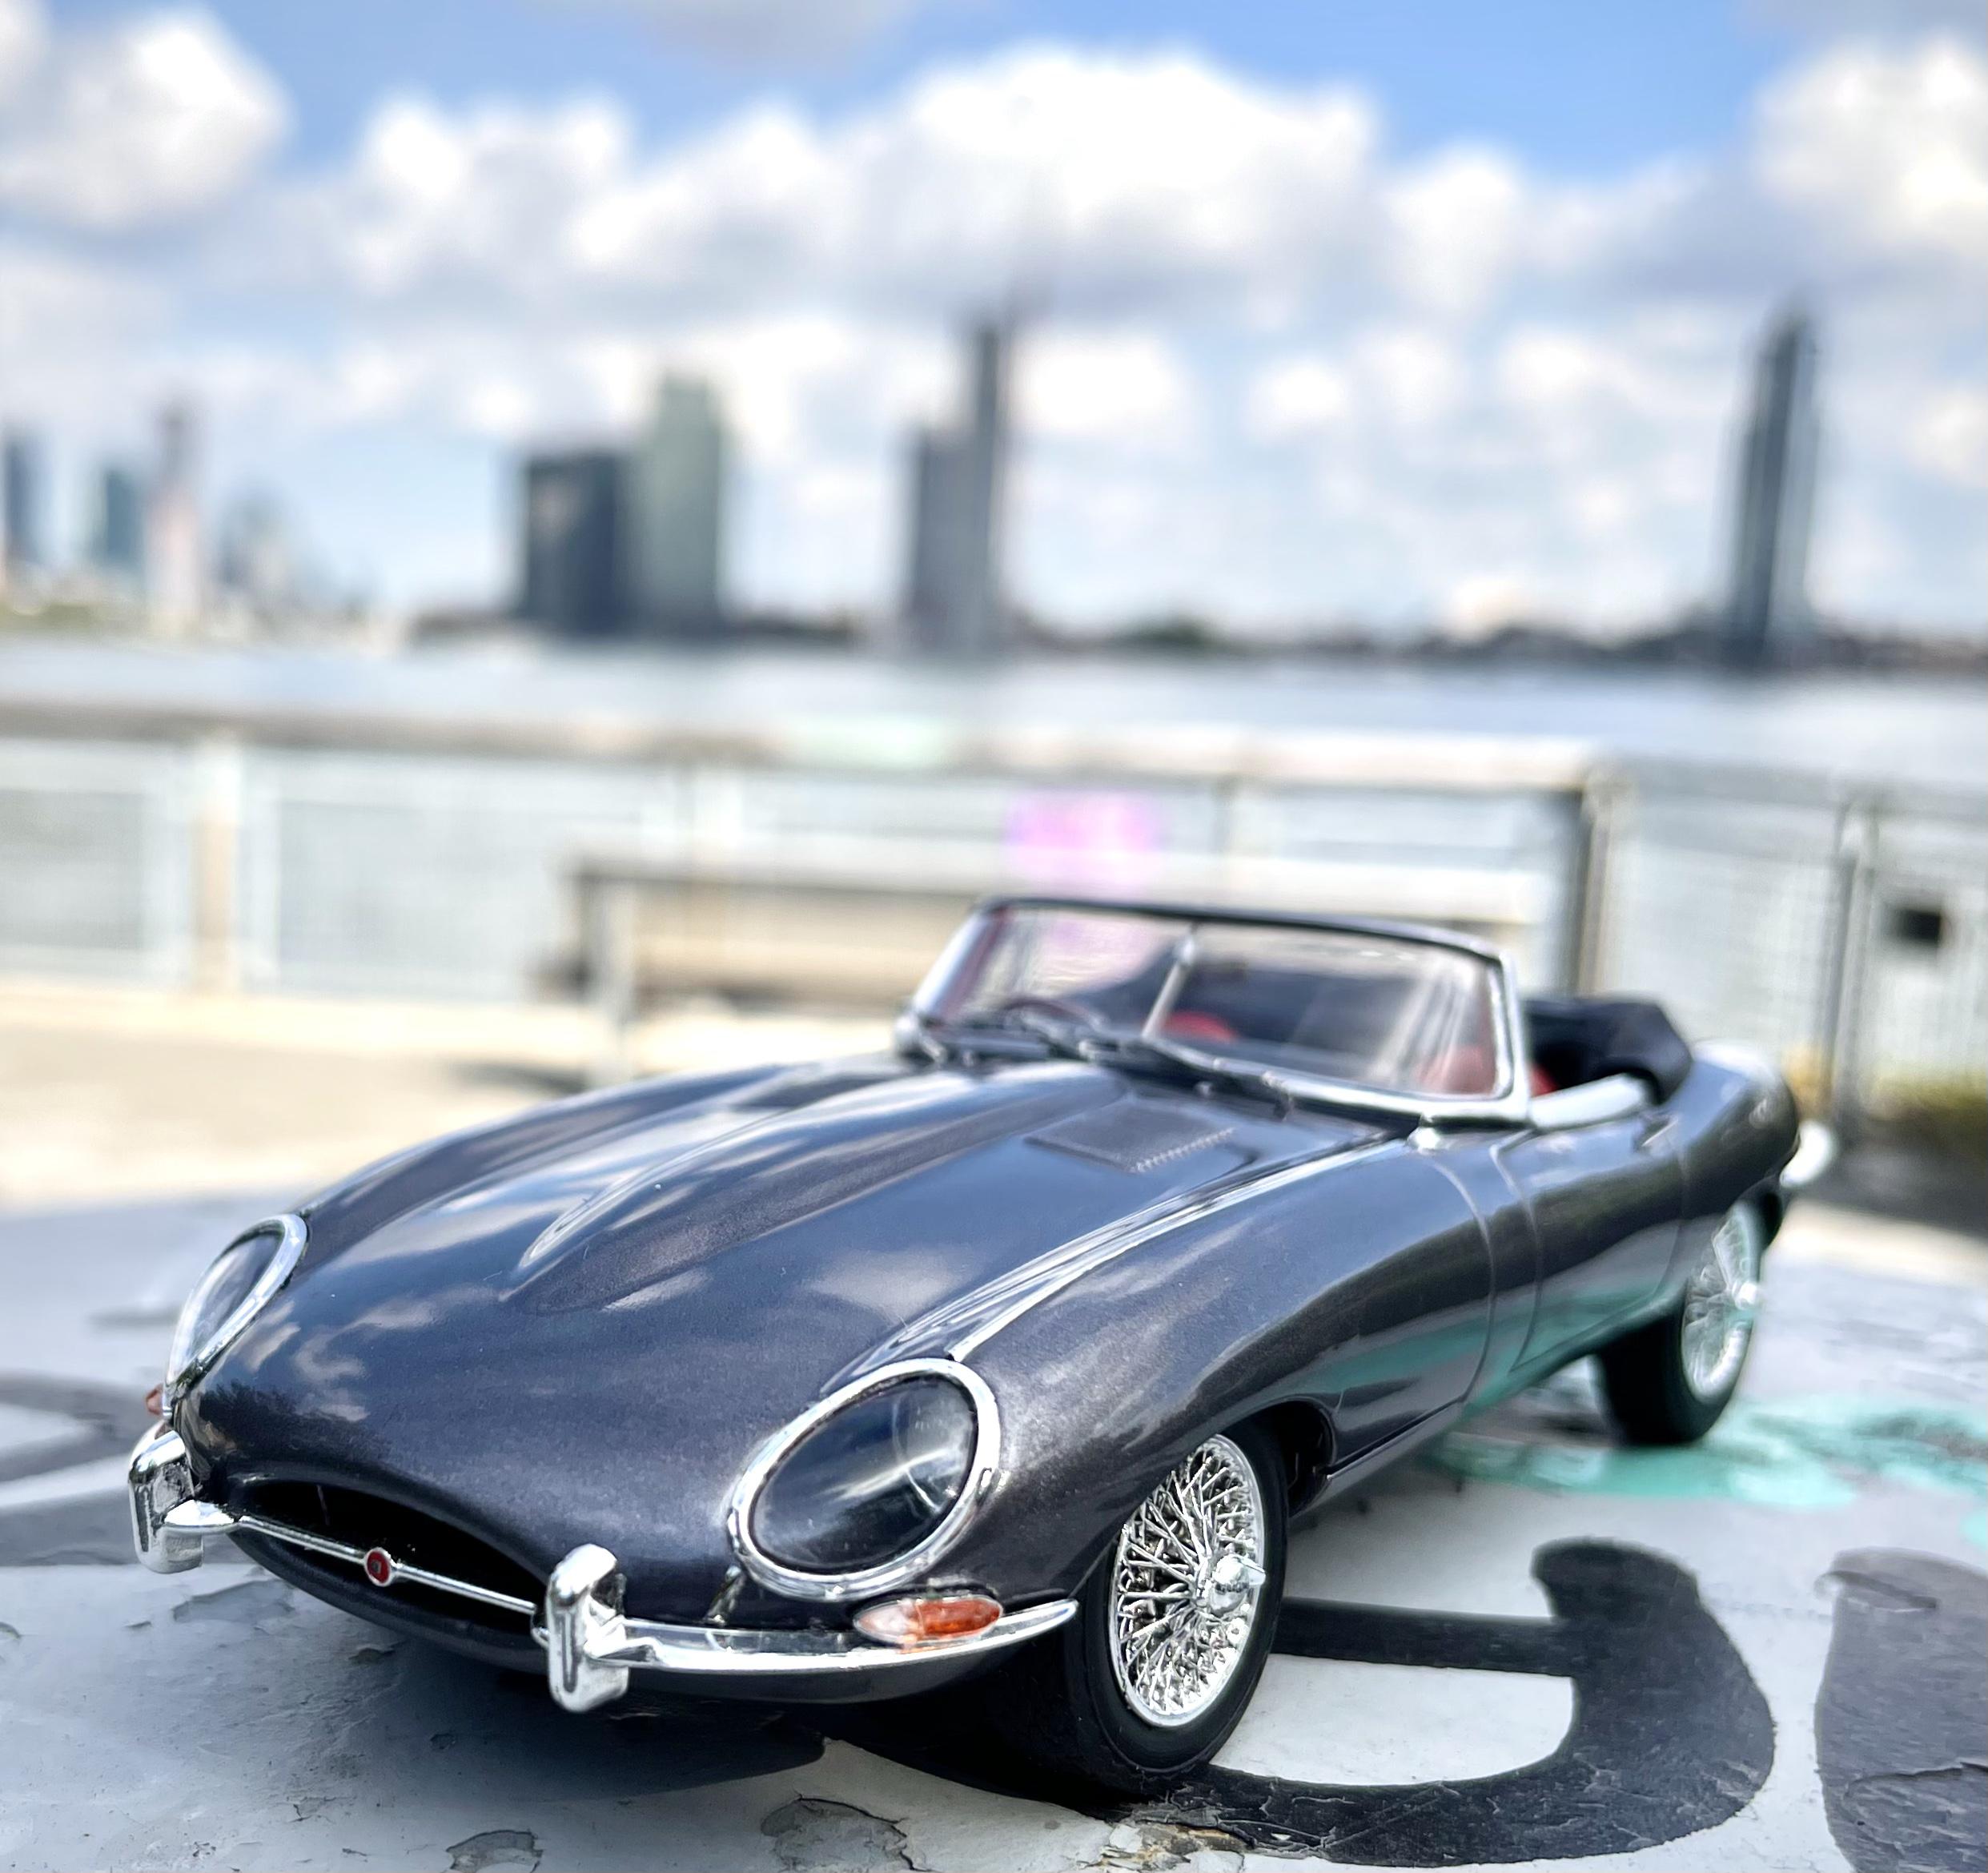
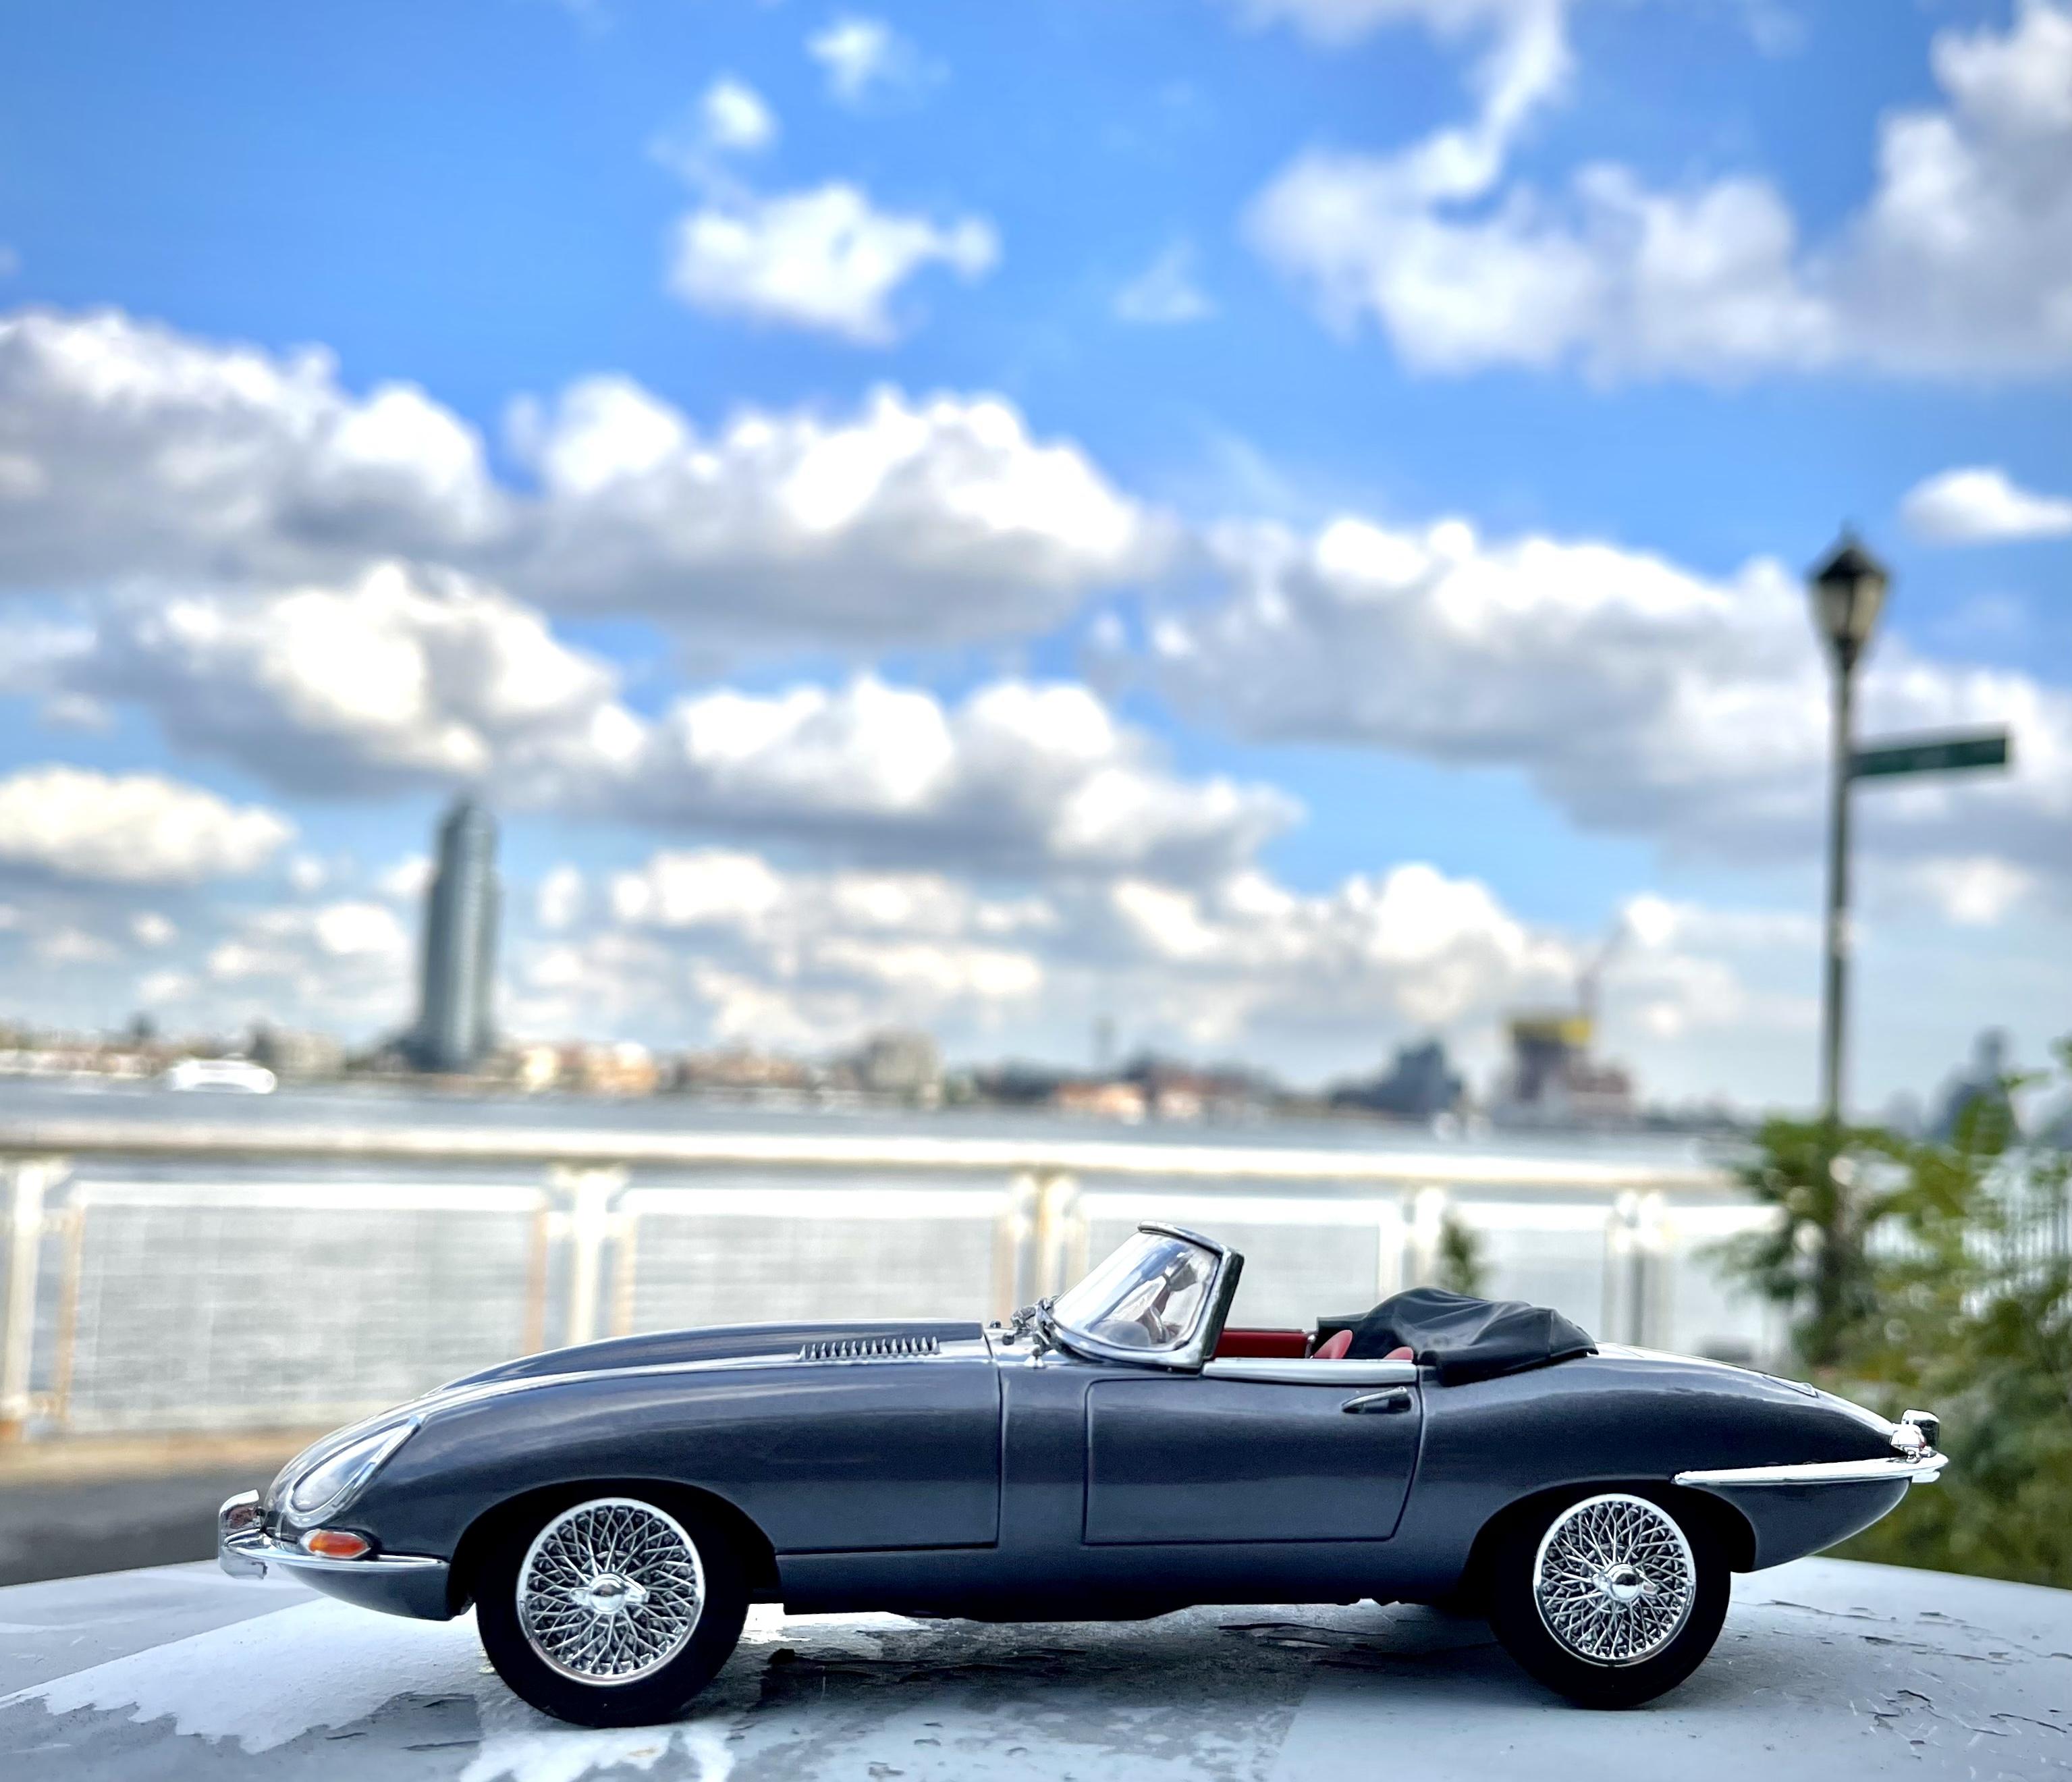
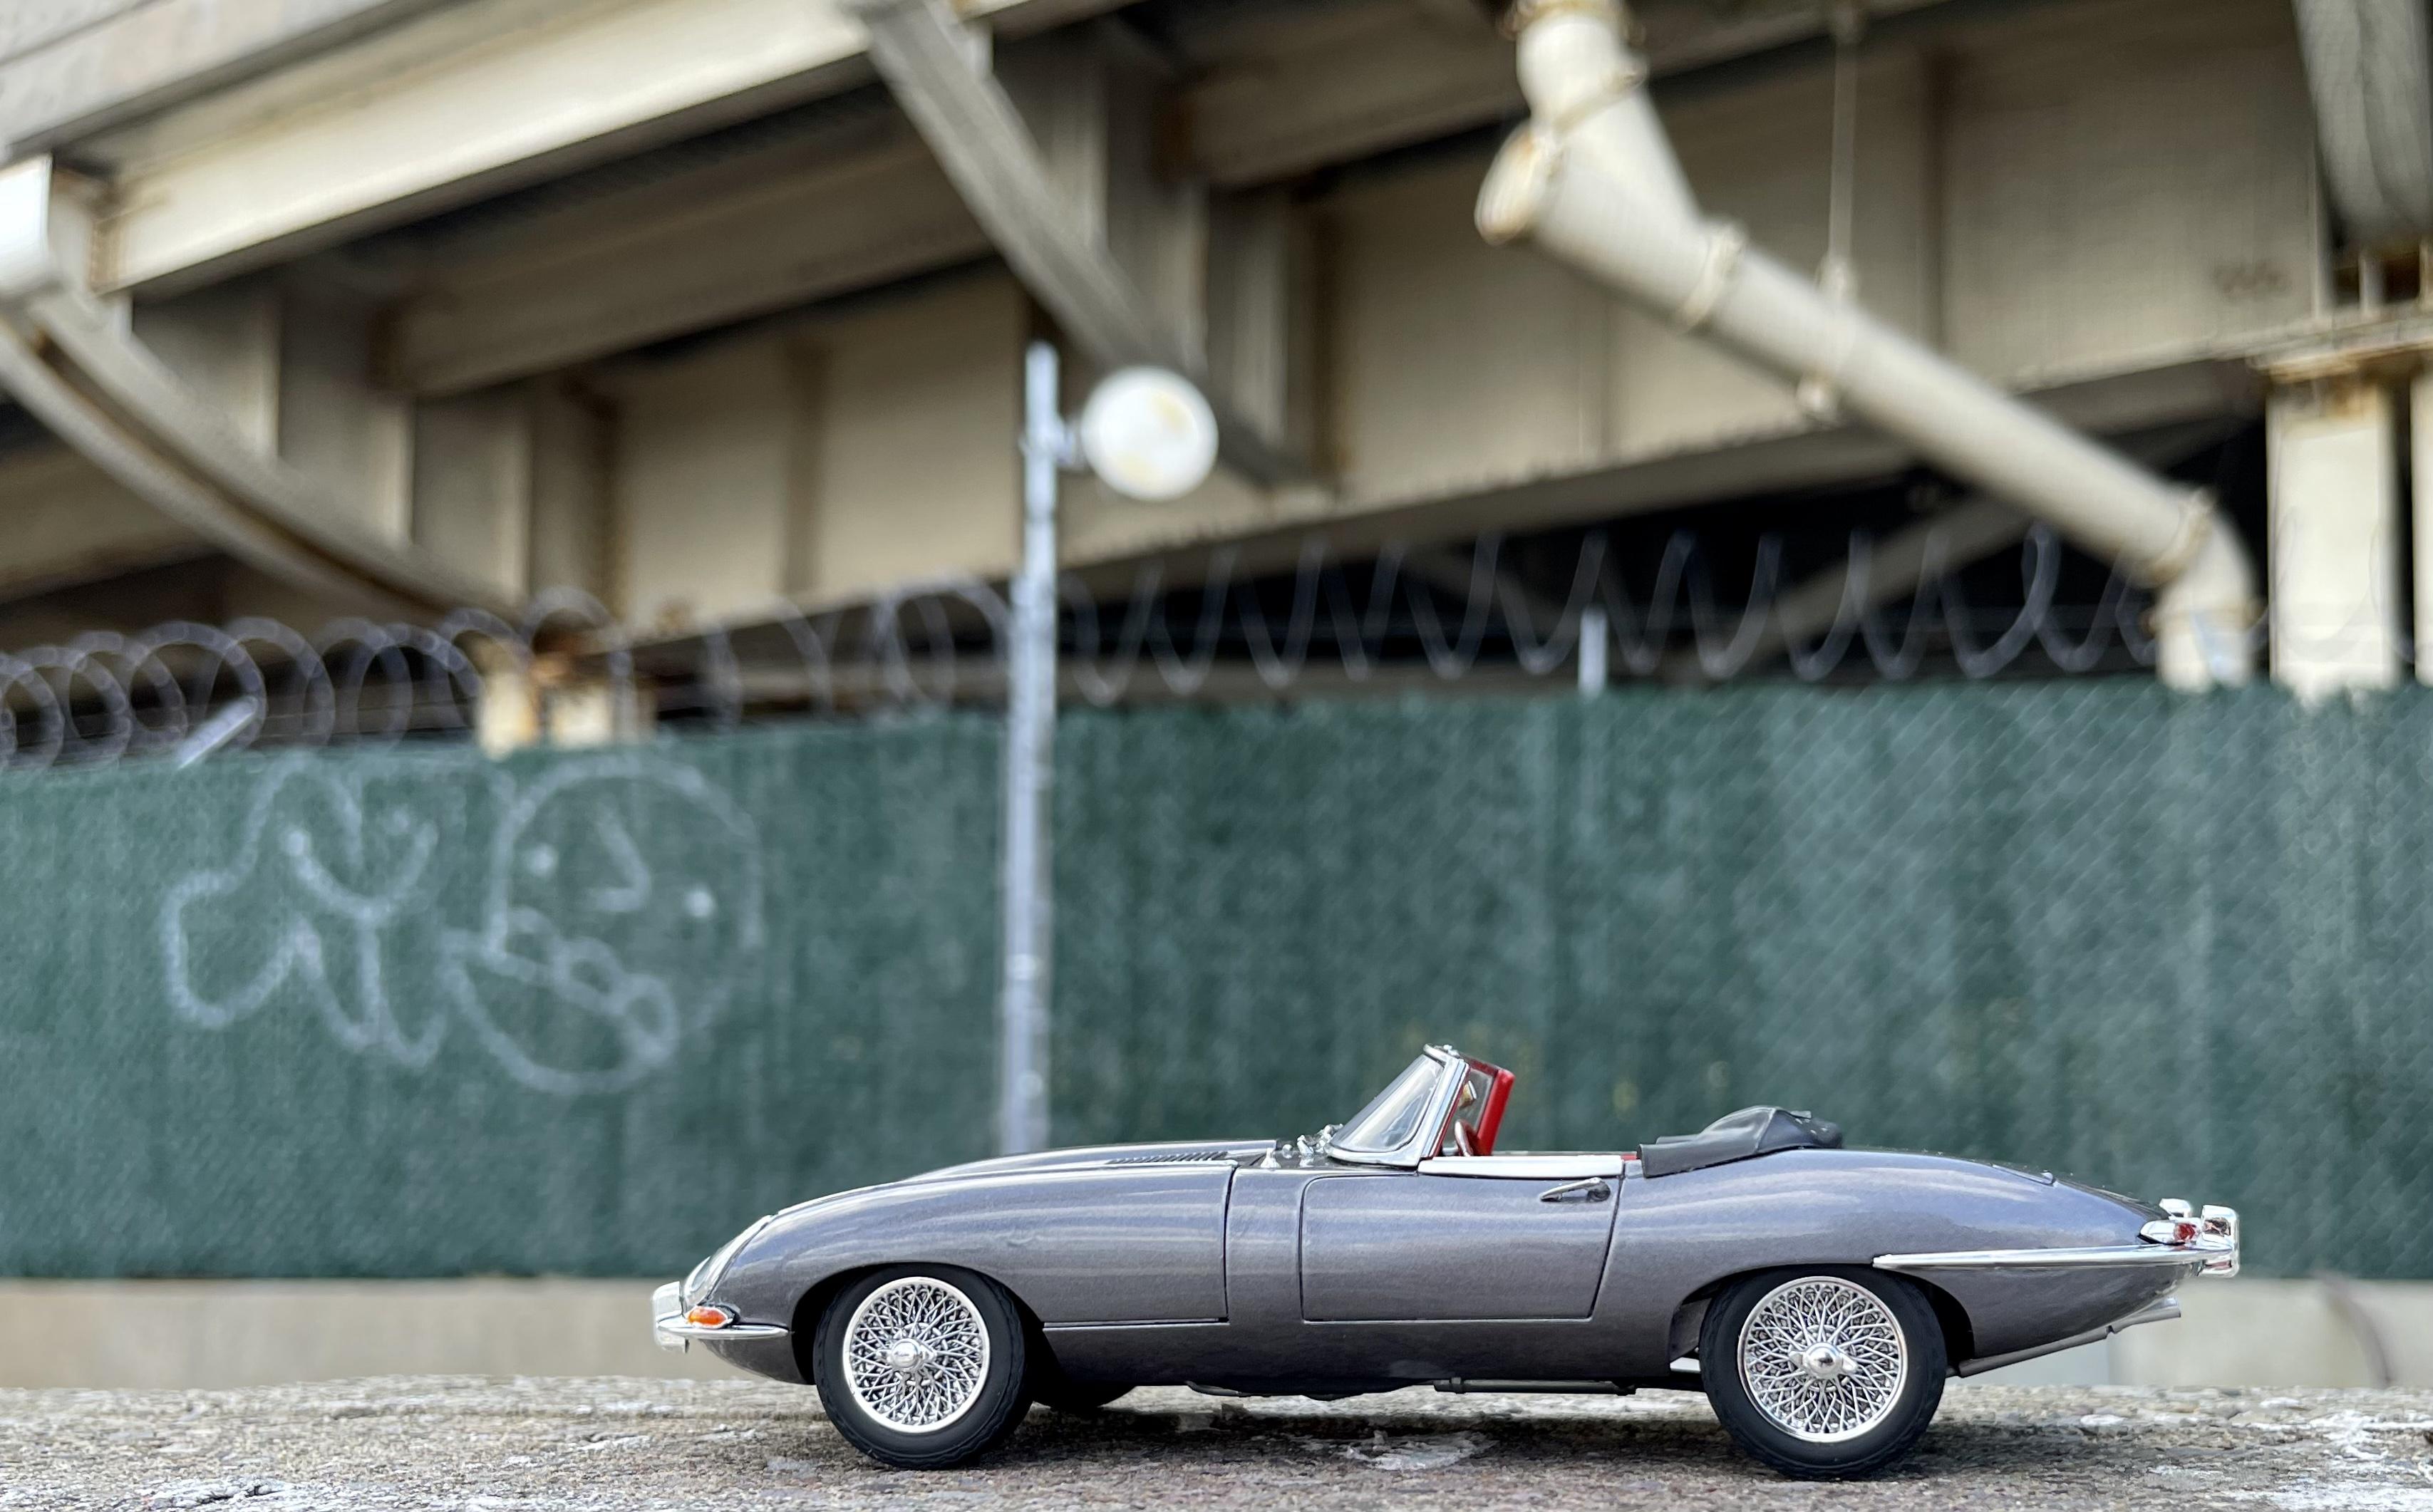
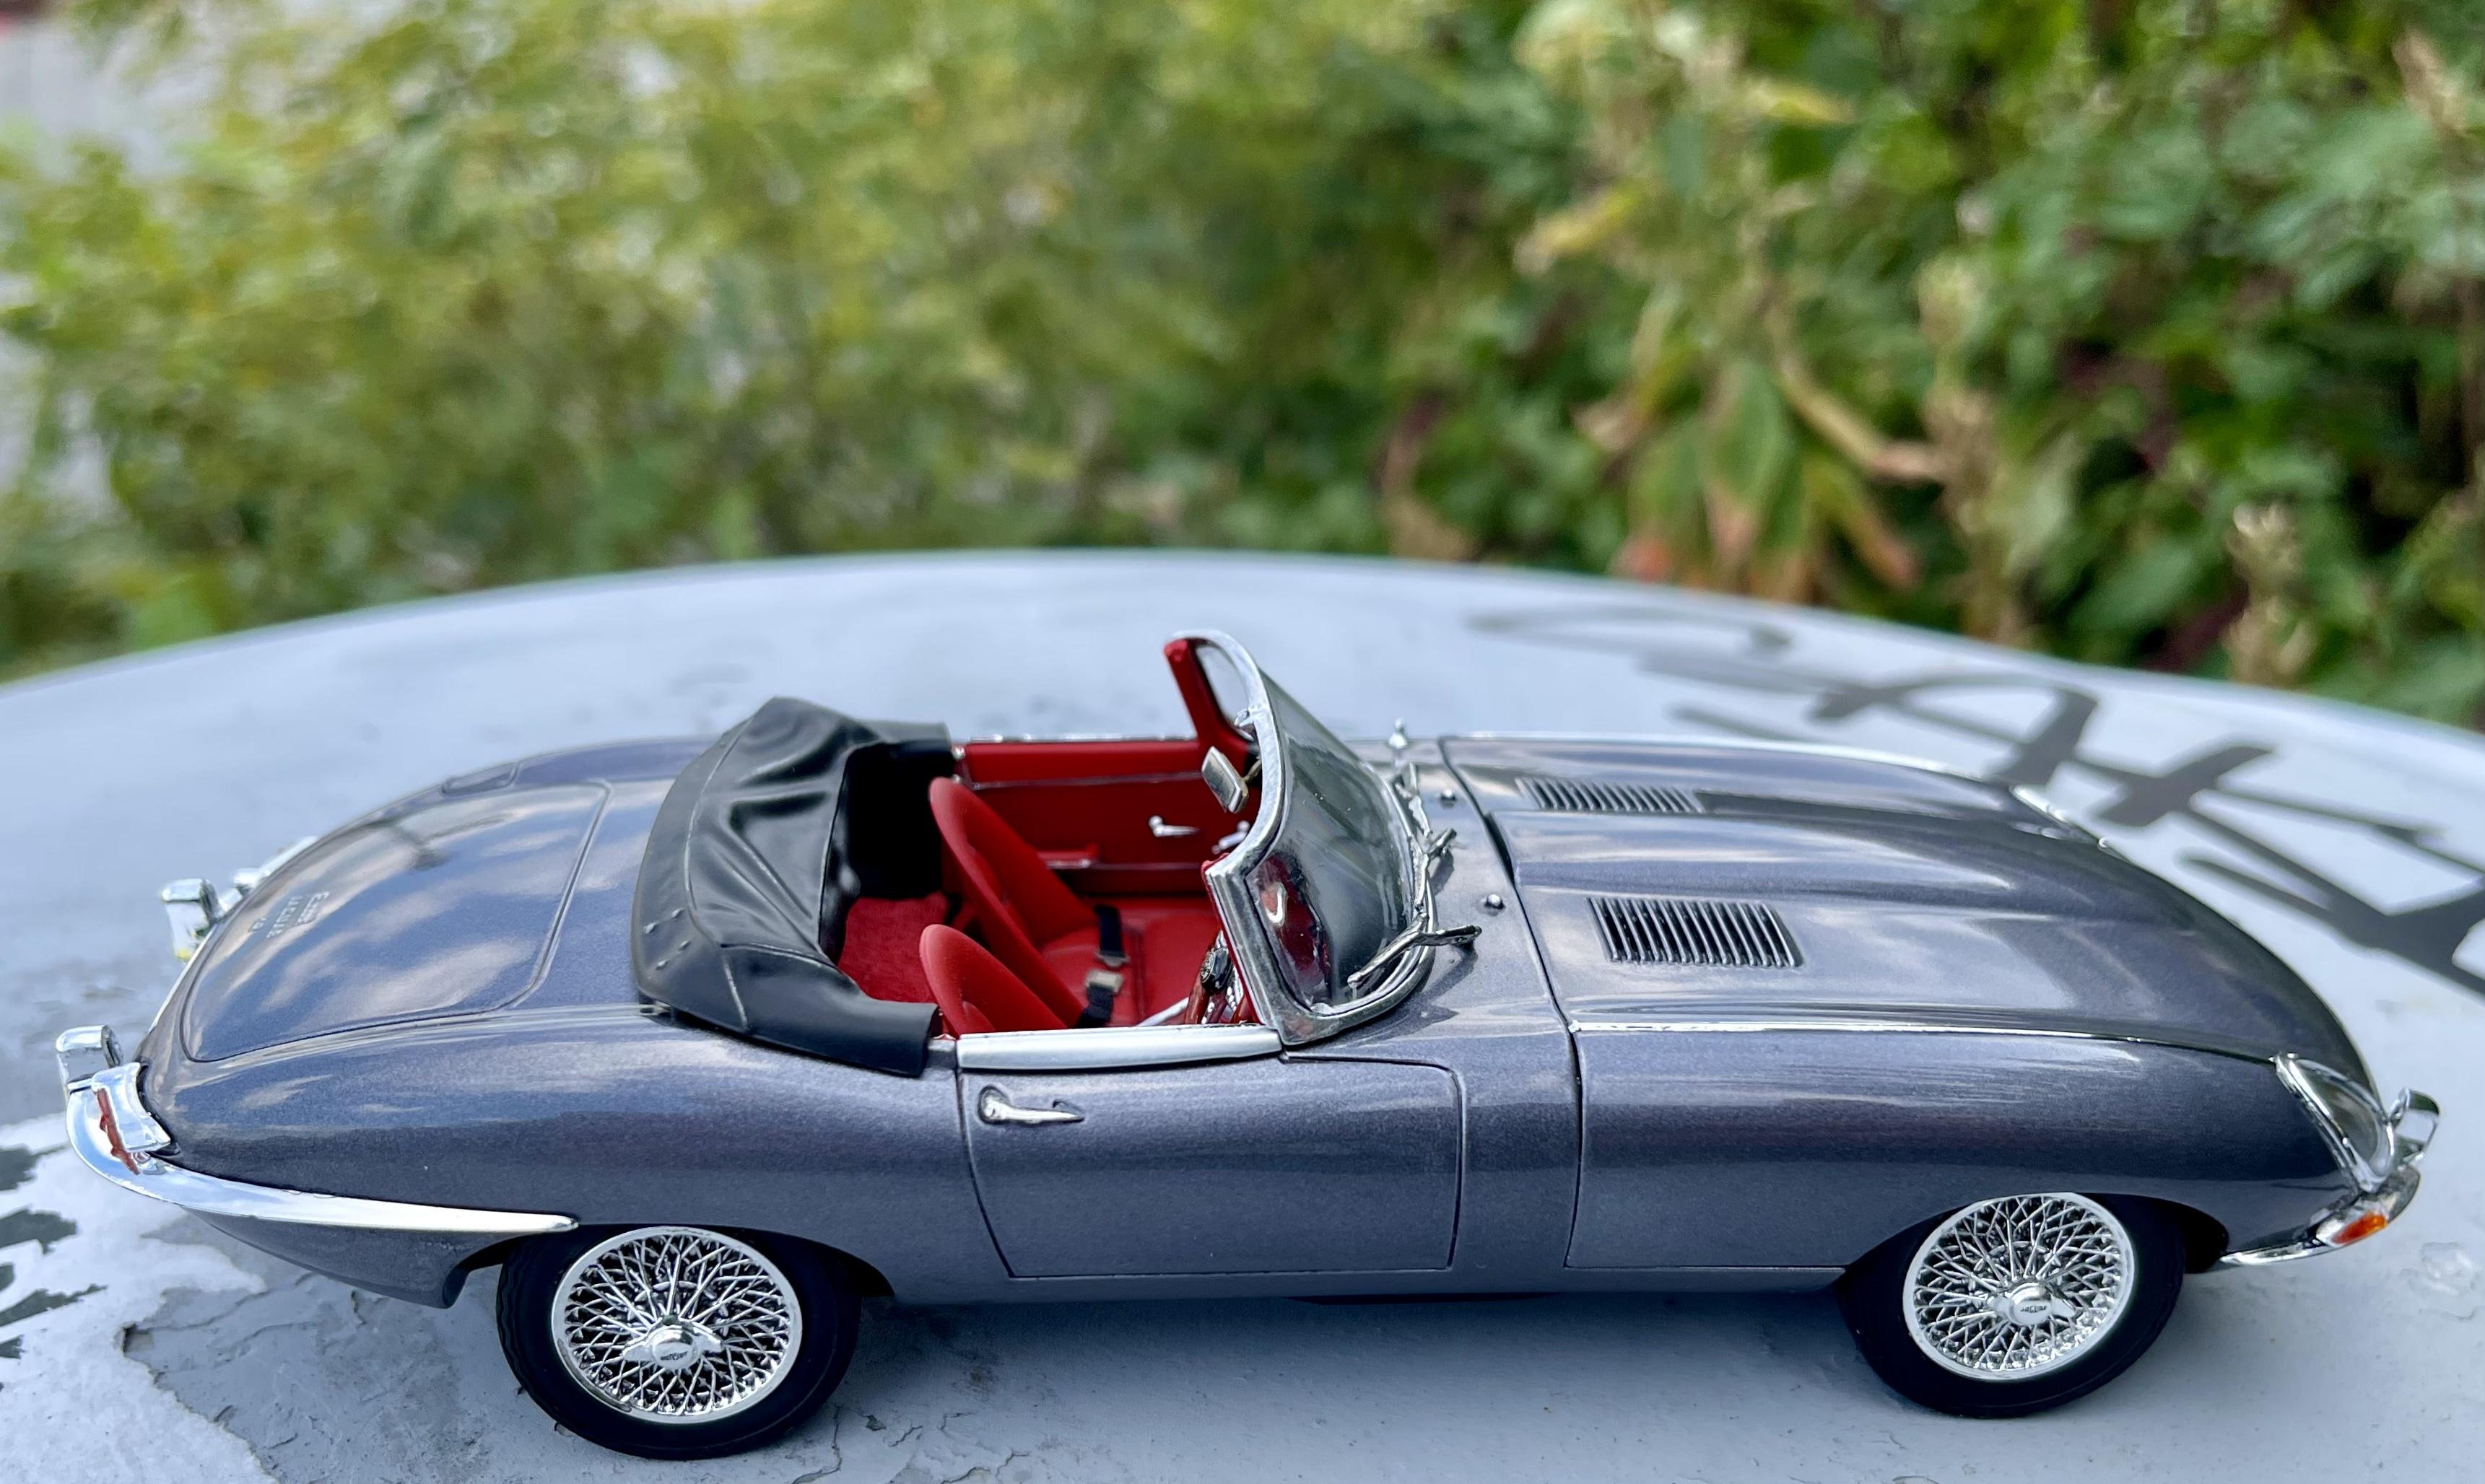
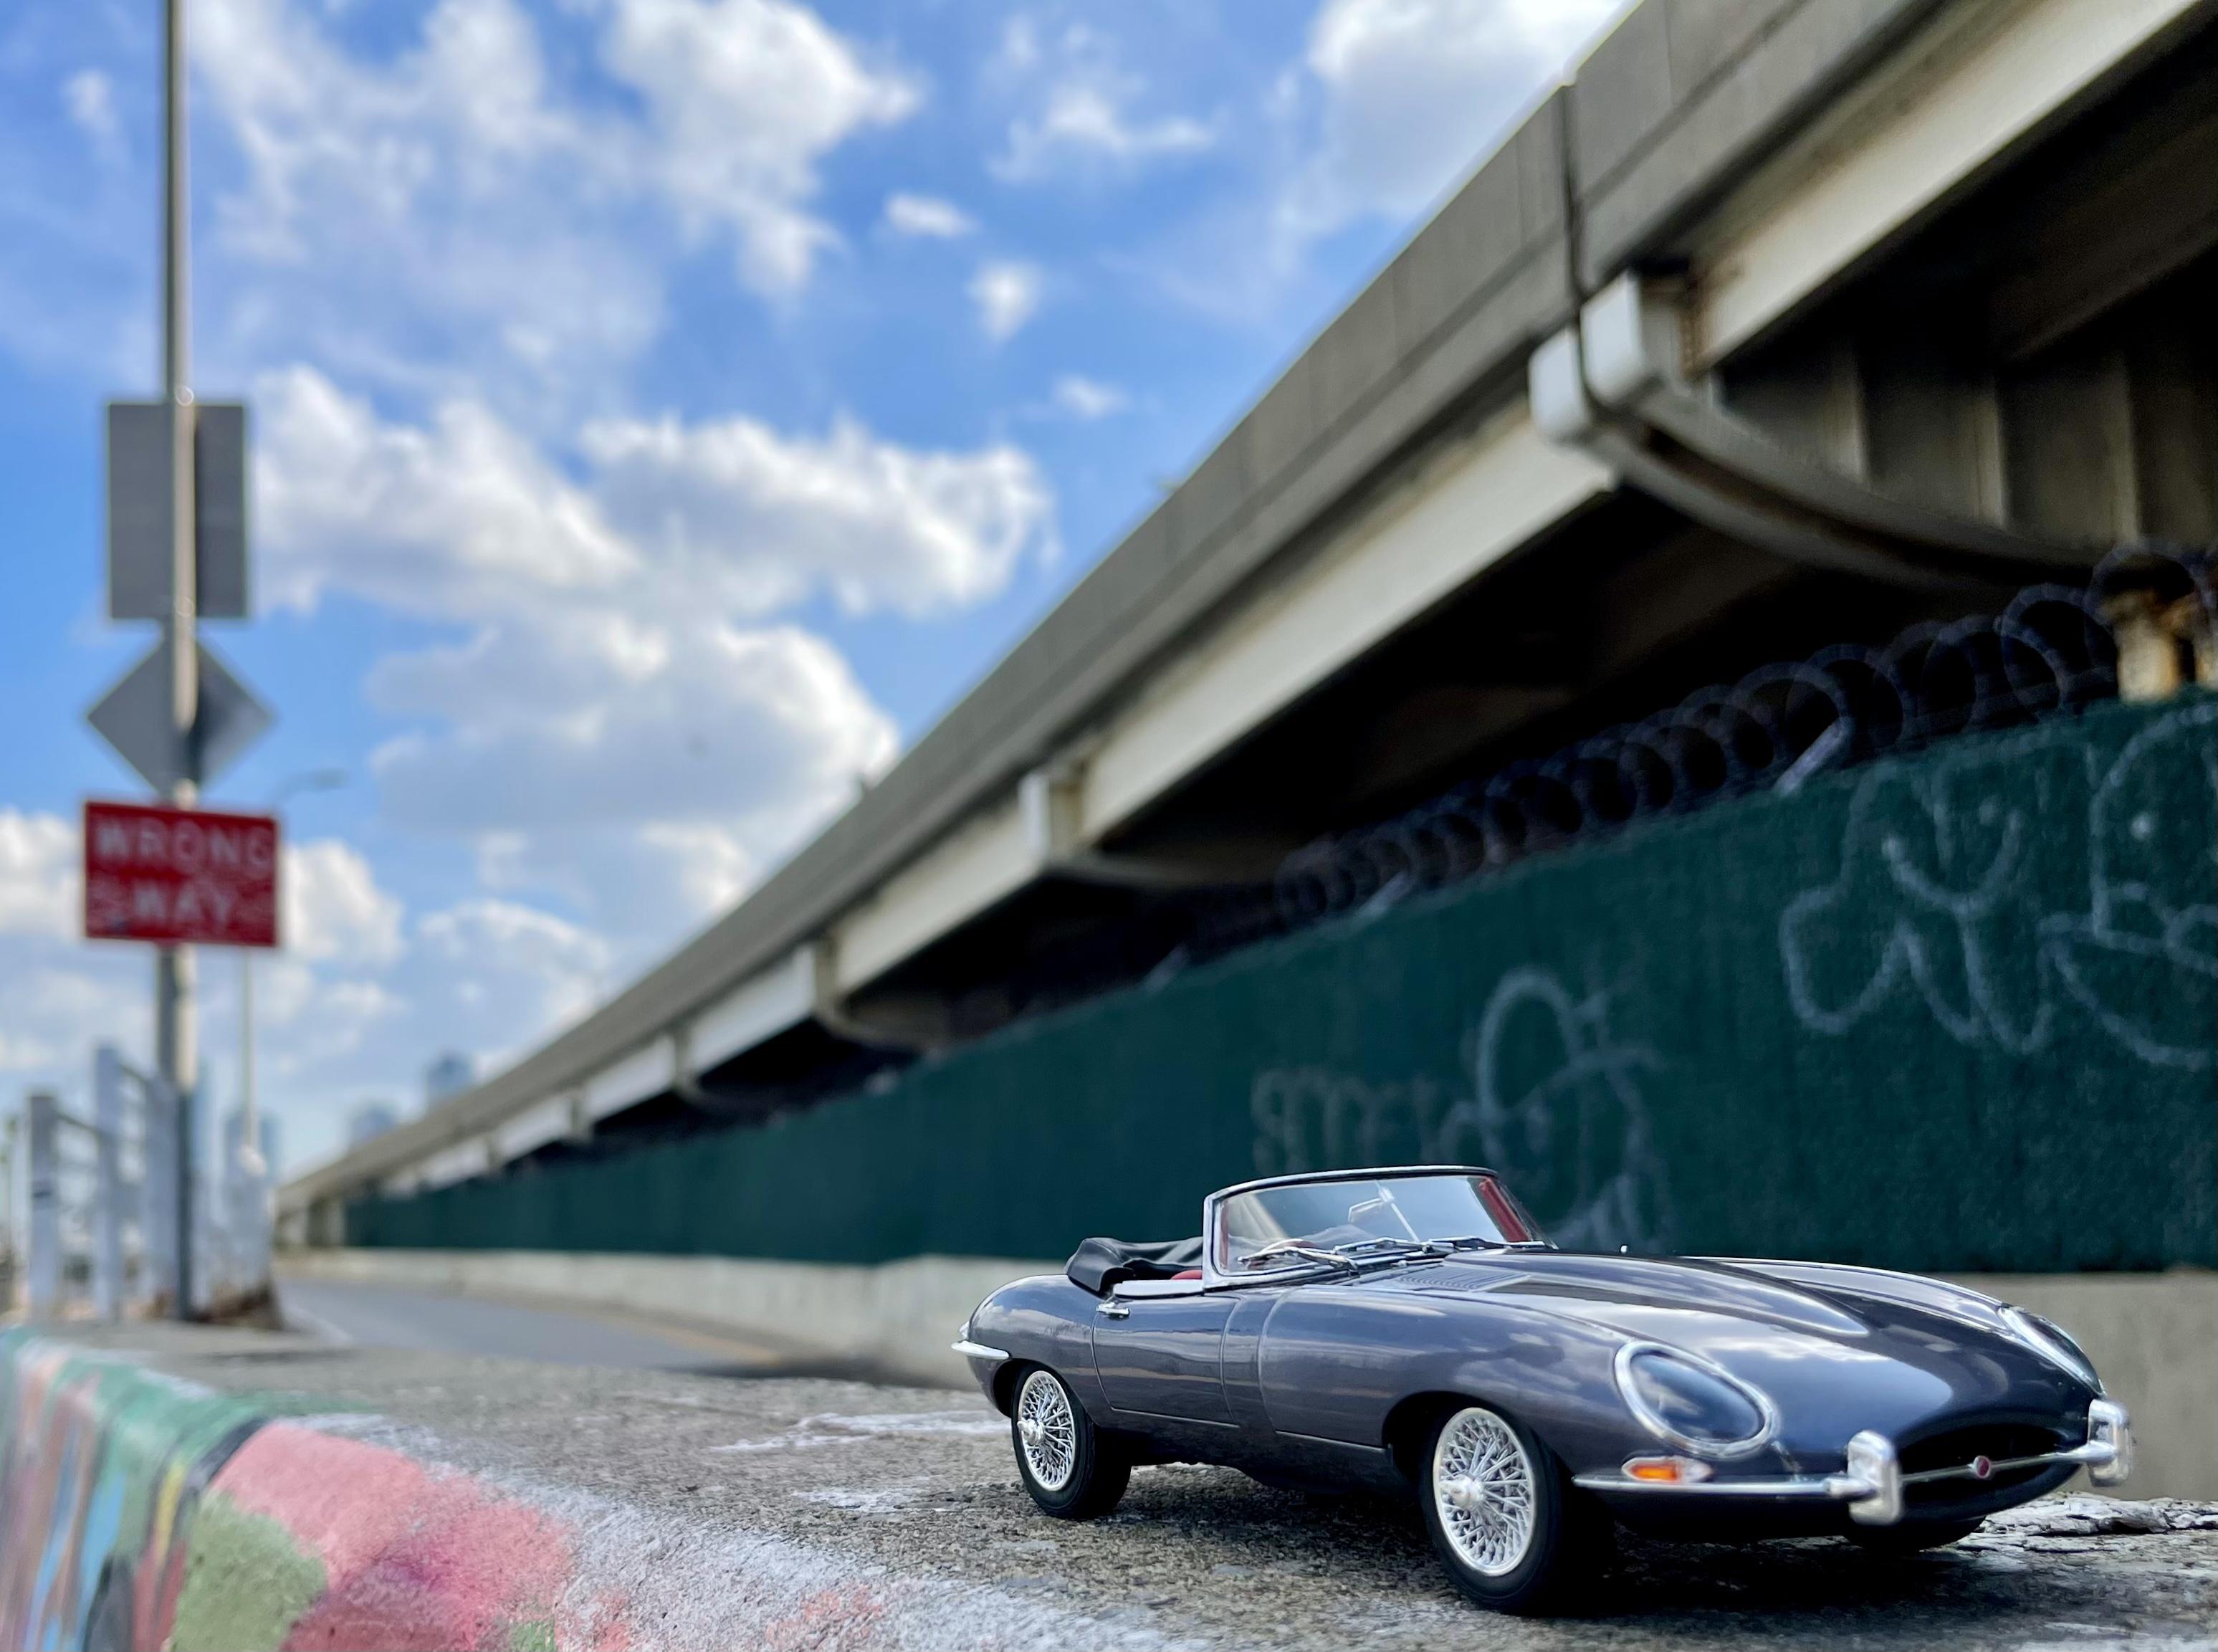
Hey guys - we’ve been having some beautiful weather here in nyc so I took another recent build down to the water for some pics. The joggers must think I’m crazy but I’m having too much fun to care. Anyway…here’s the Jaguar E-type roadster from Revell. Body is tamiya light gunmetal and gloss clear. The interior is tamiya pure red with tamiya flat clear. Might be the best kit I’ve bought to date - the quality is outstanding. I’d buy another one but I can’t find it anymore! The good news is they also make it in a coupe and it’s just as good (I bought 5 of them ?). This one was pretty much right out of the box except for some engine and interior detailing. I’ll post pics of my upgrades down below. This kit came so detailed it barely needed any help, but where’s the fun in that? ??
-
Thanks man - really appreciate it. Yeah it’s only been a few months but I’ve built a decent number of kits already. I’m having too much fun. Working on a 68 firebird now and hope to finish it up this week. I have a couple of other builds that I think are decent enough to post so I’ll upload some pics soon ??
-
Thank you sir! Yeah, the vinyl top was a late addition based on a small mishap I had with some clear coat (but don’t tell anybody). It actually turned out to be a happy accident because I like the contrast of the black and blue. I have a couple other builds I’ll be posting on here soon. Just need to make some time for a quick photo shoot…
-
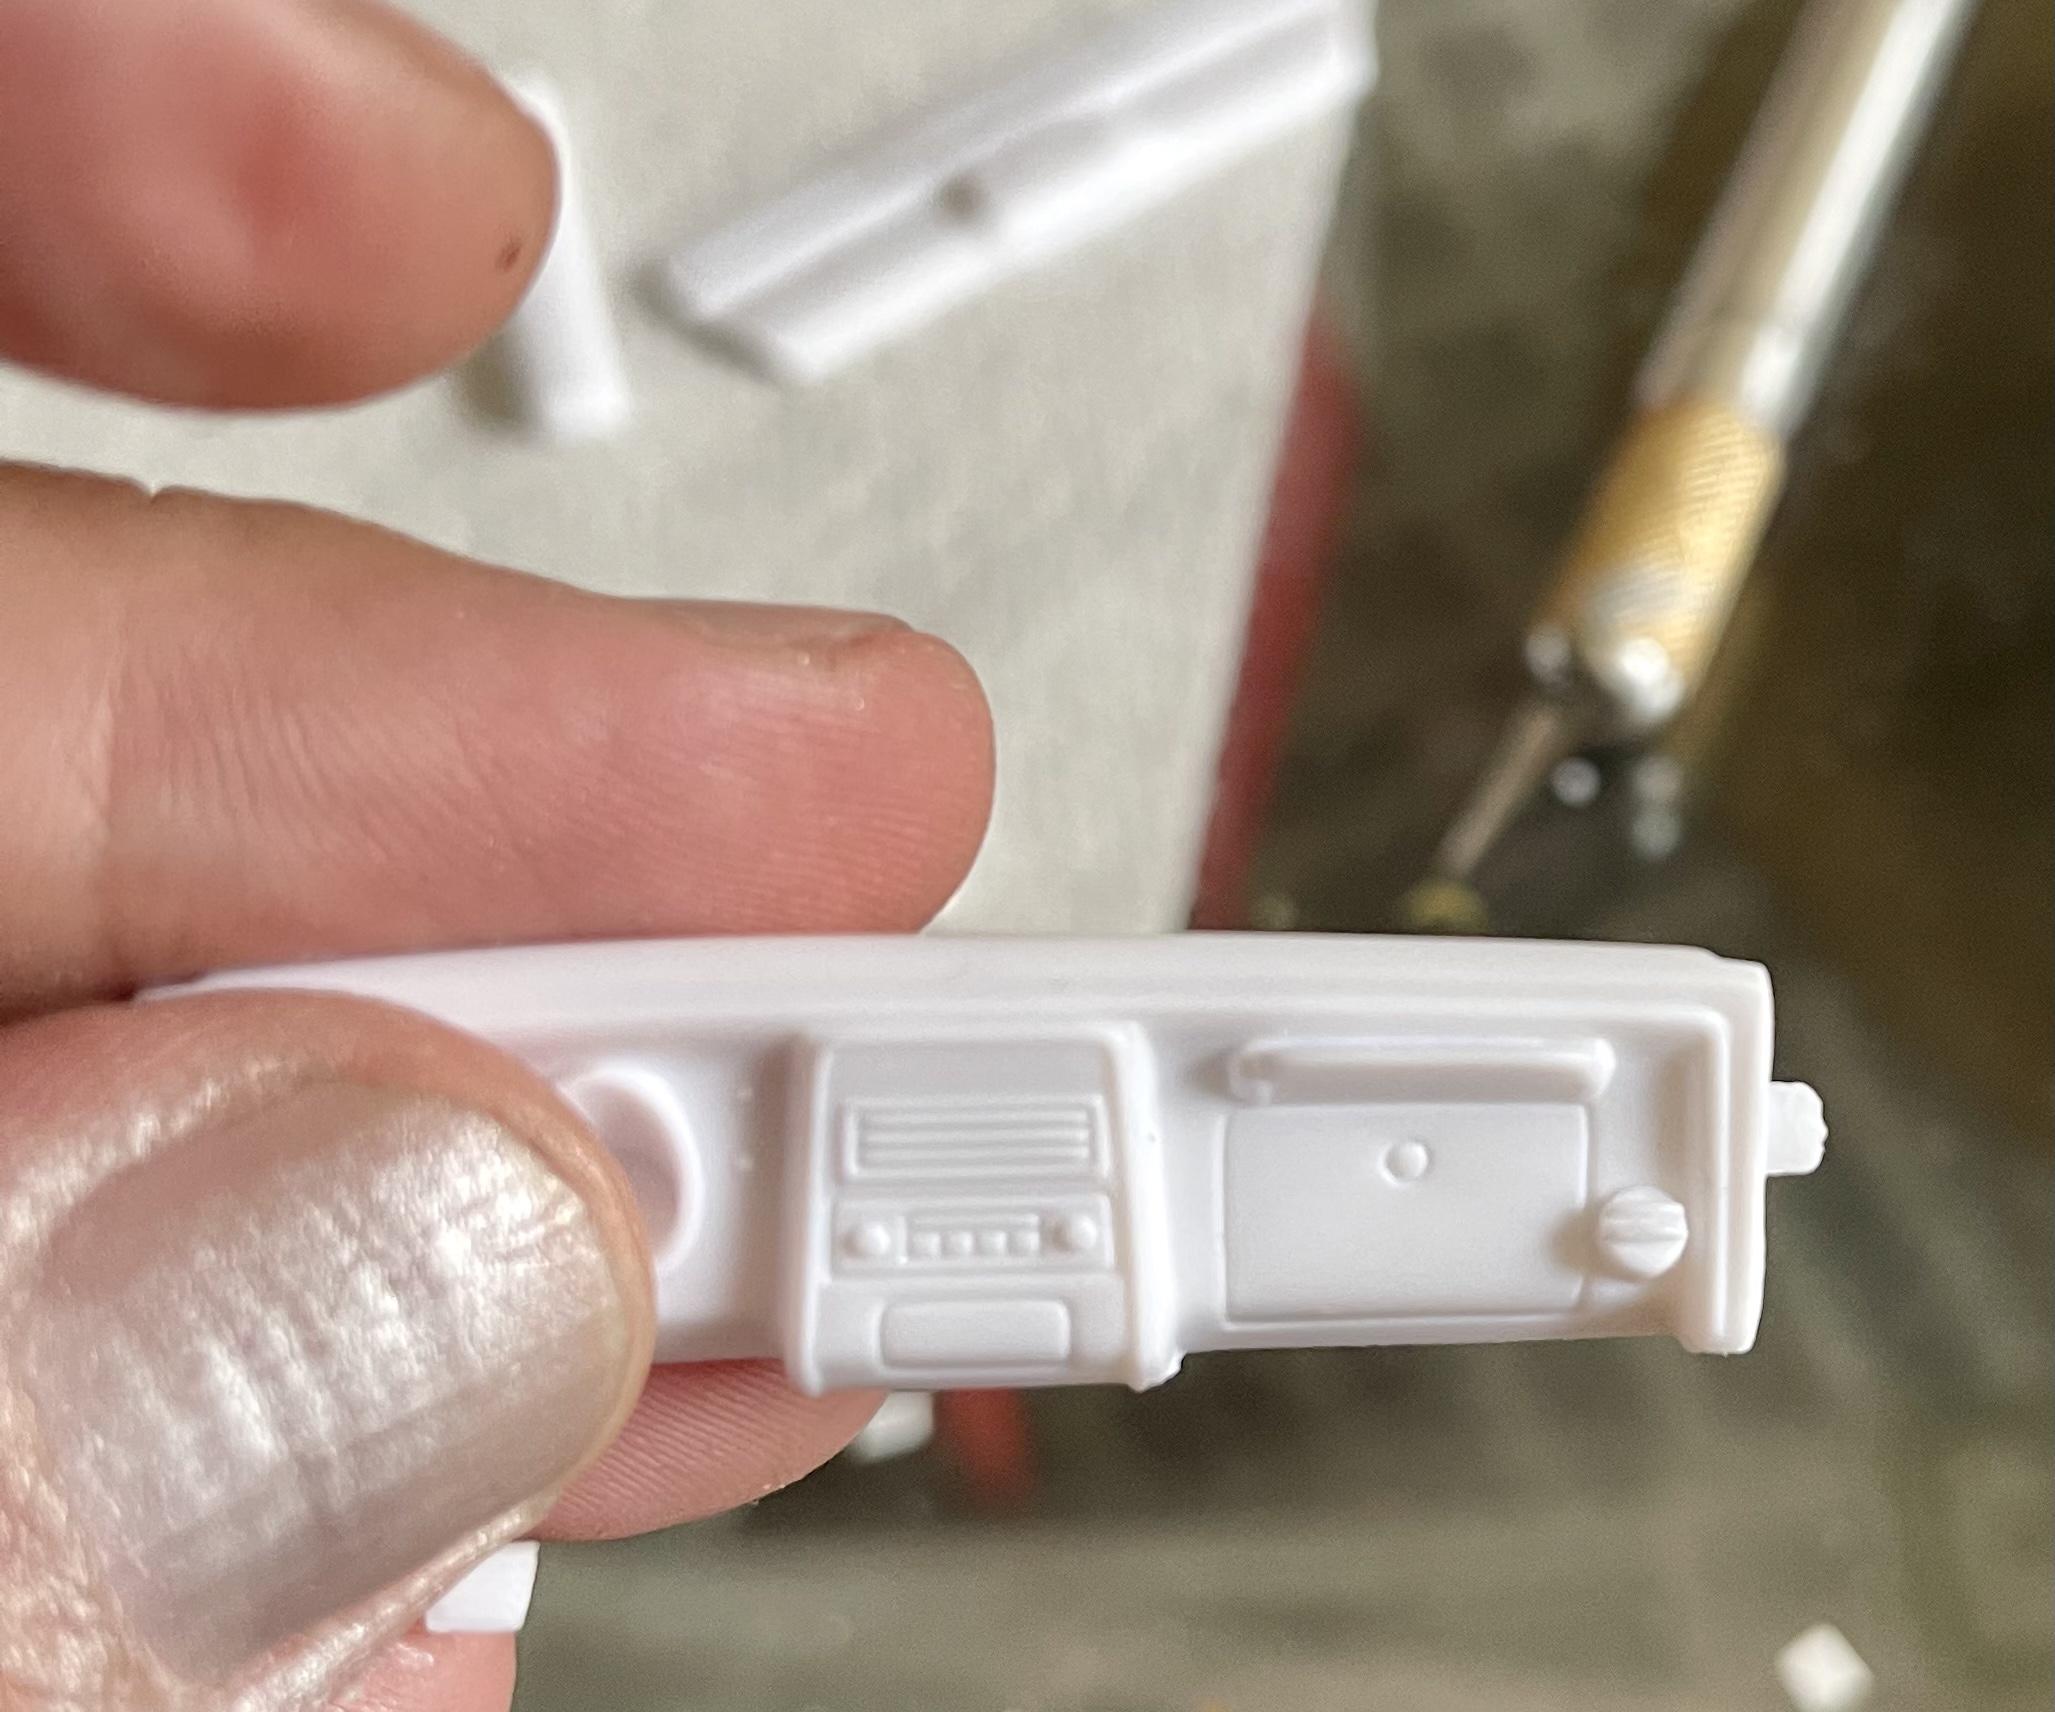
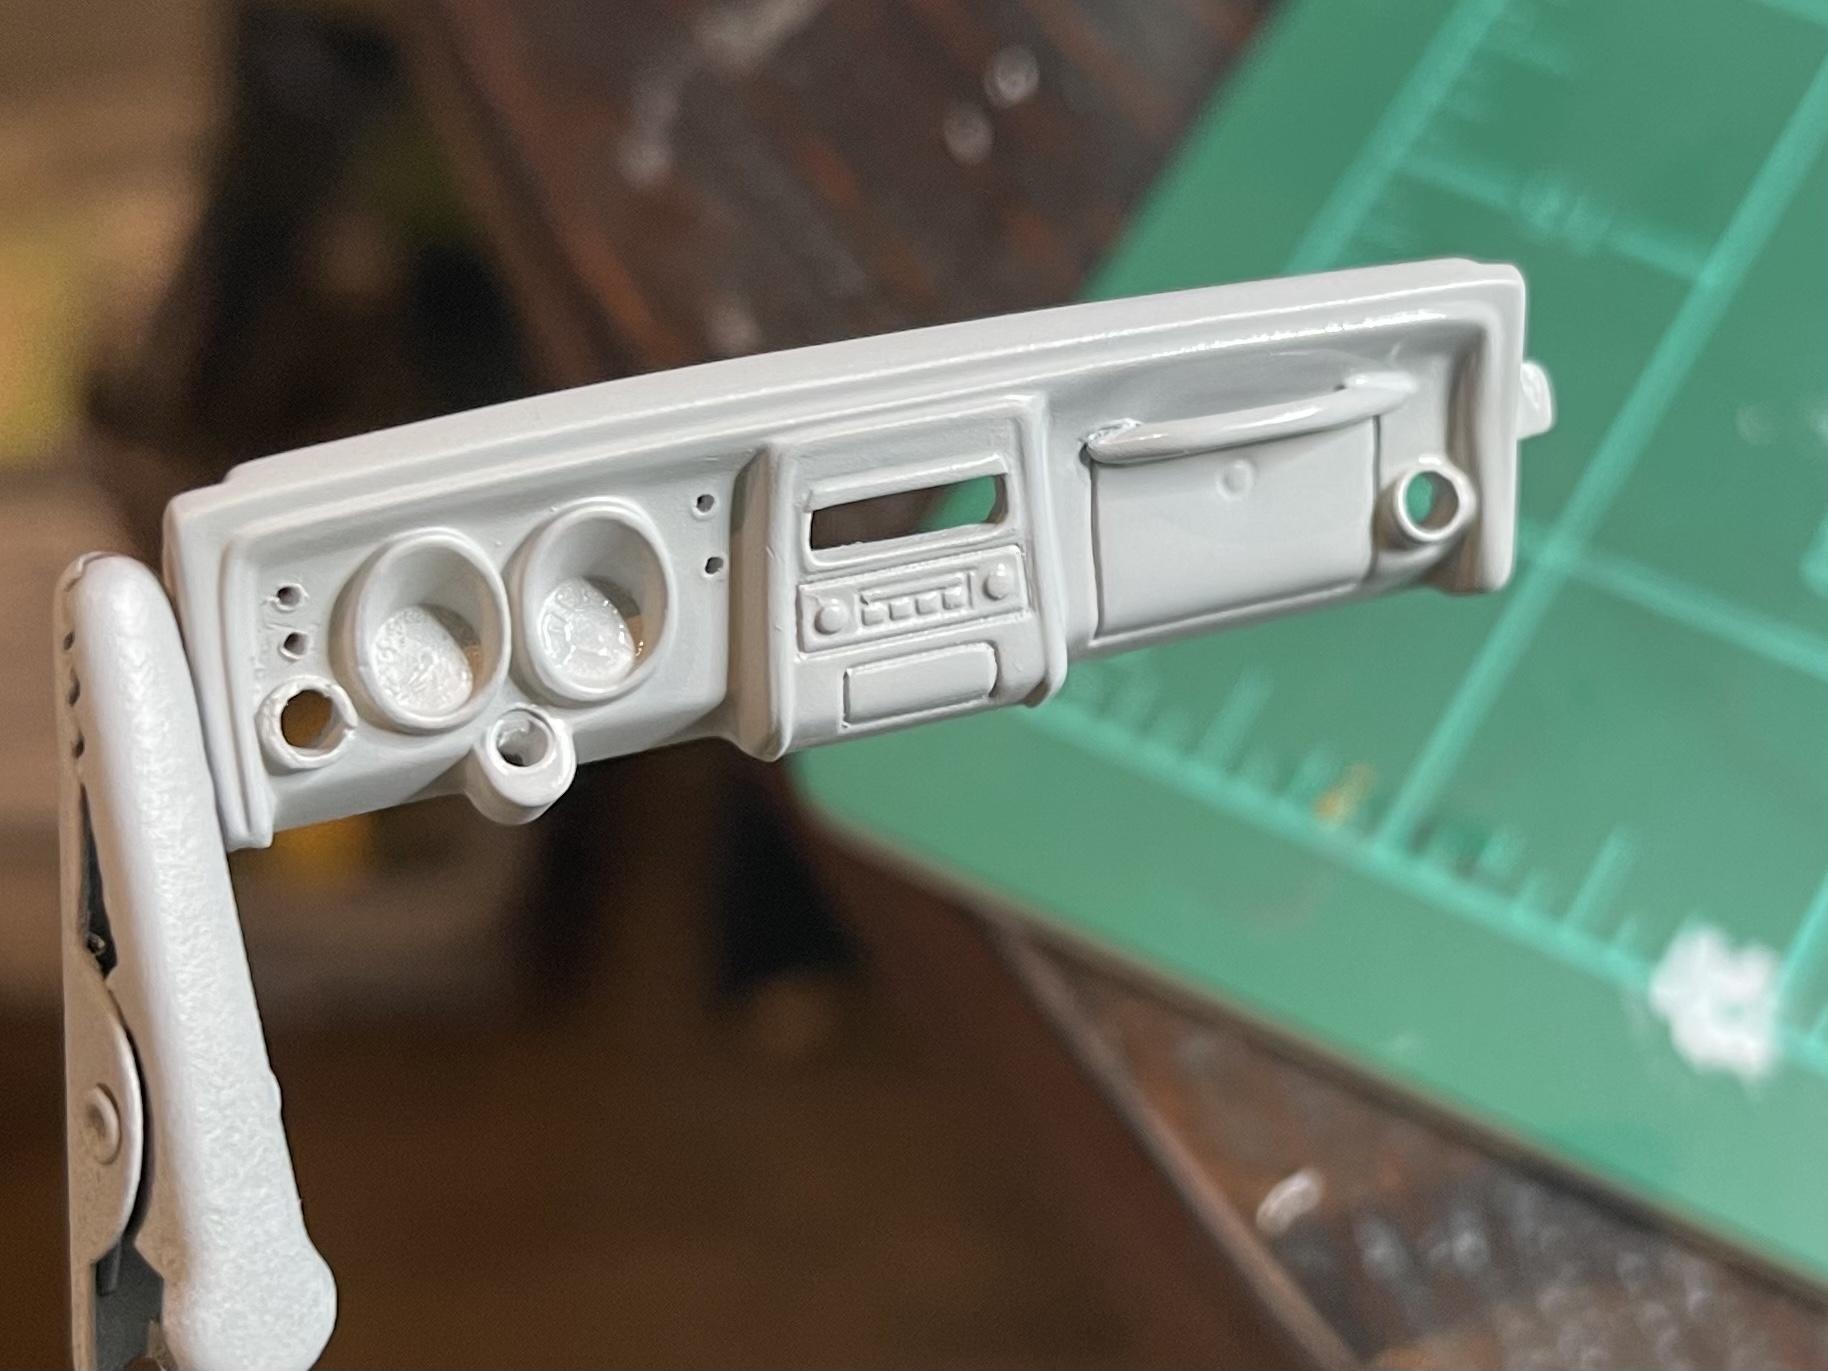
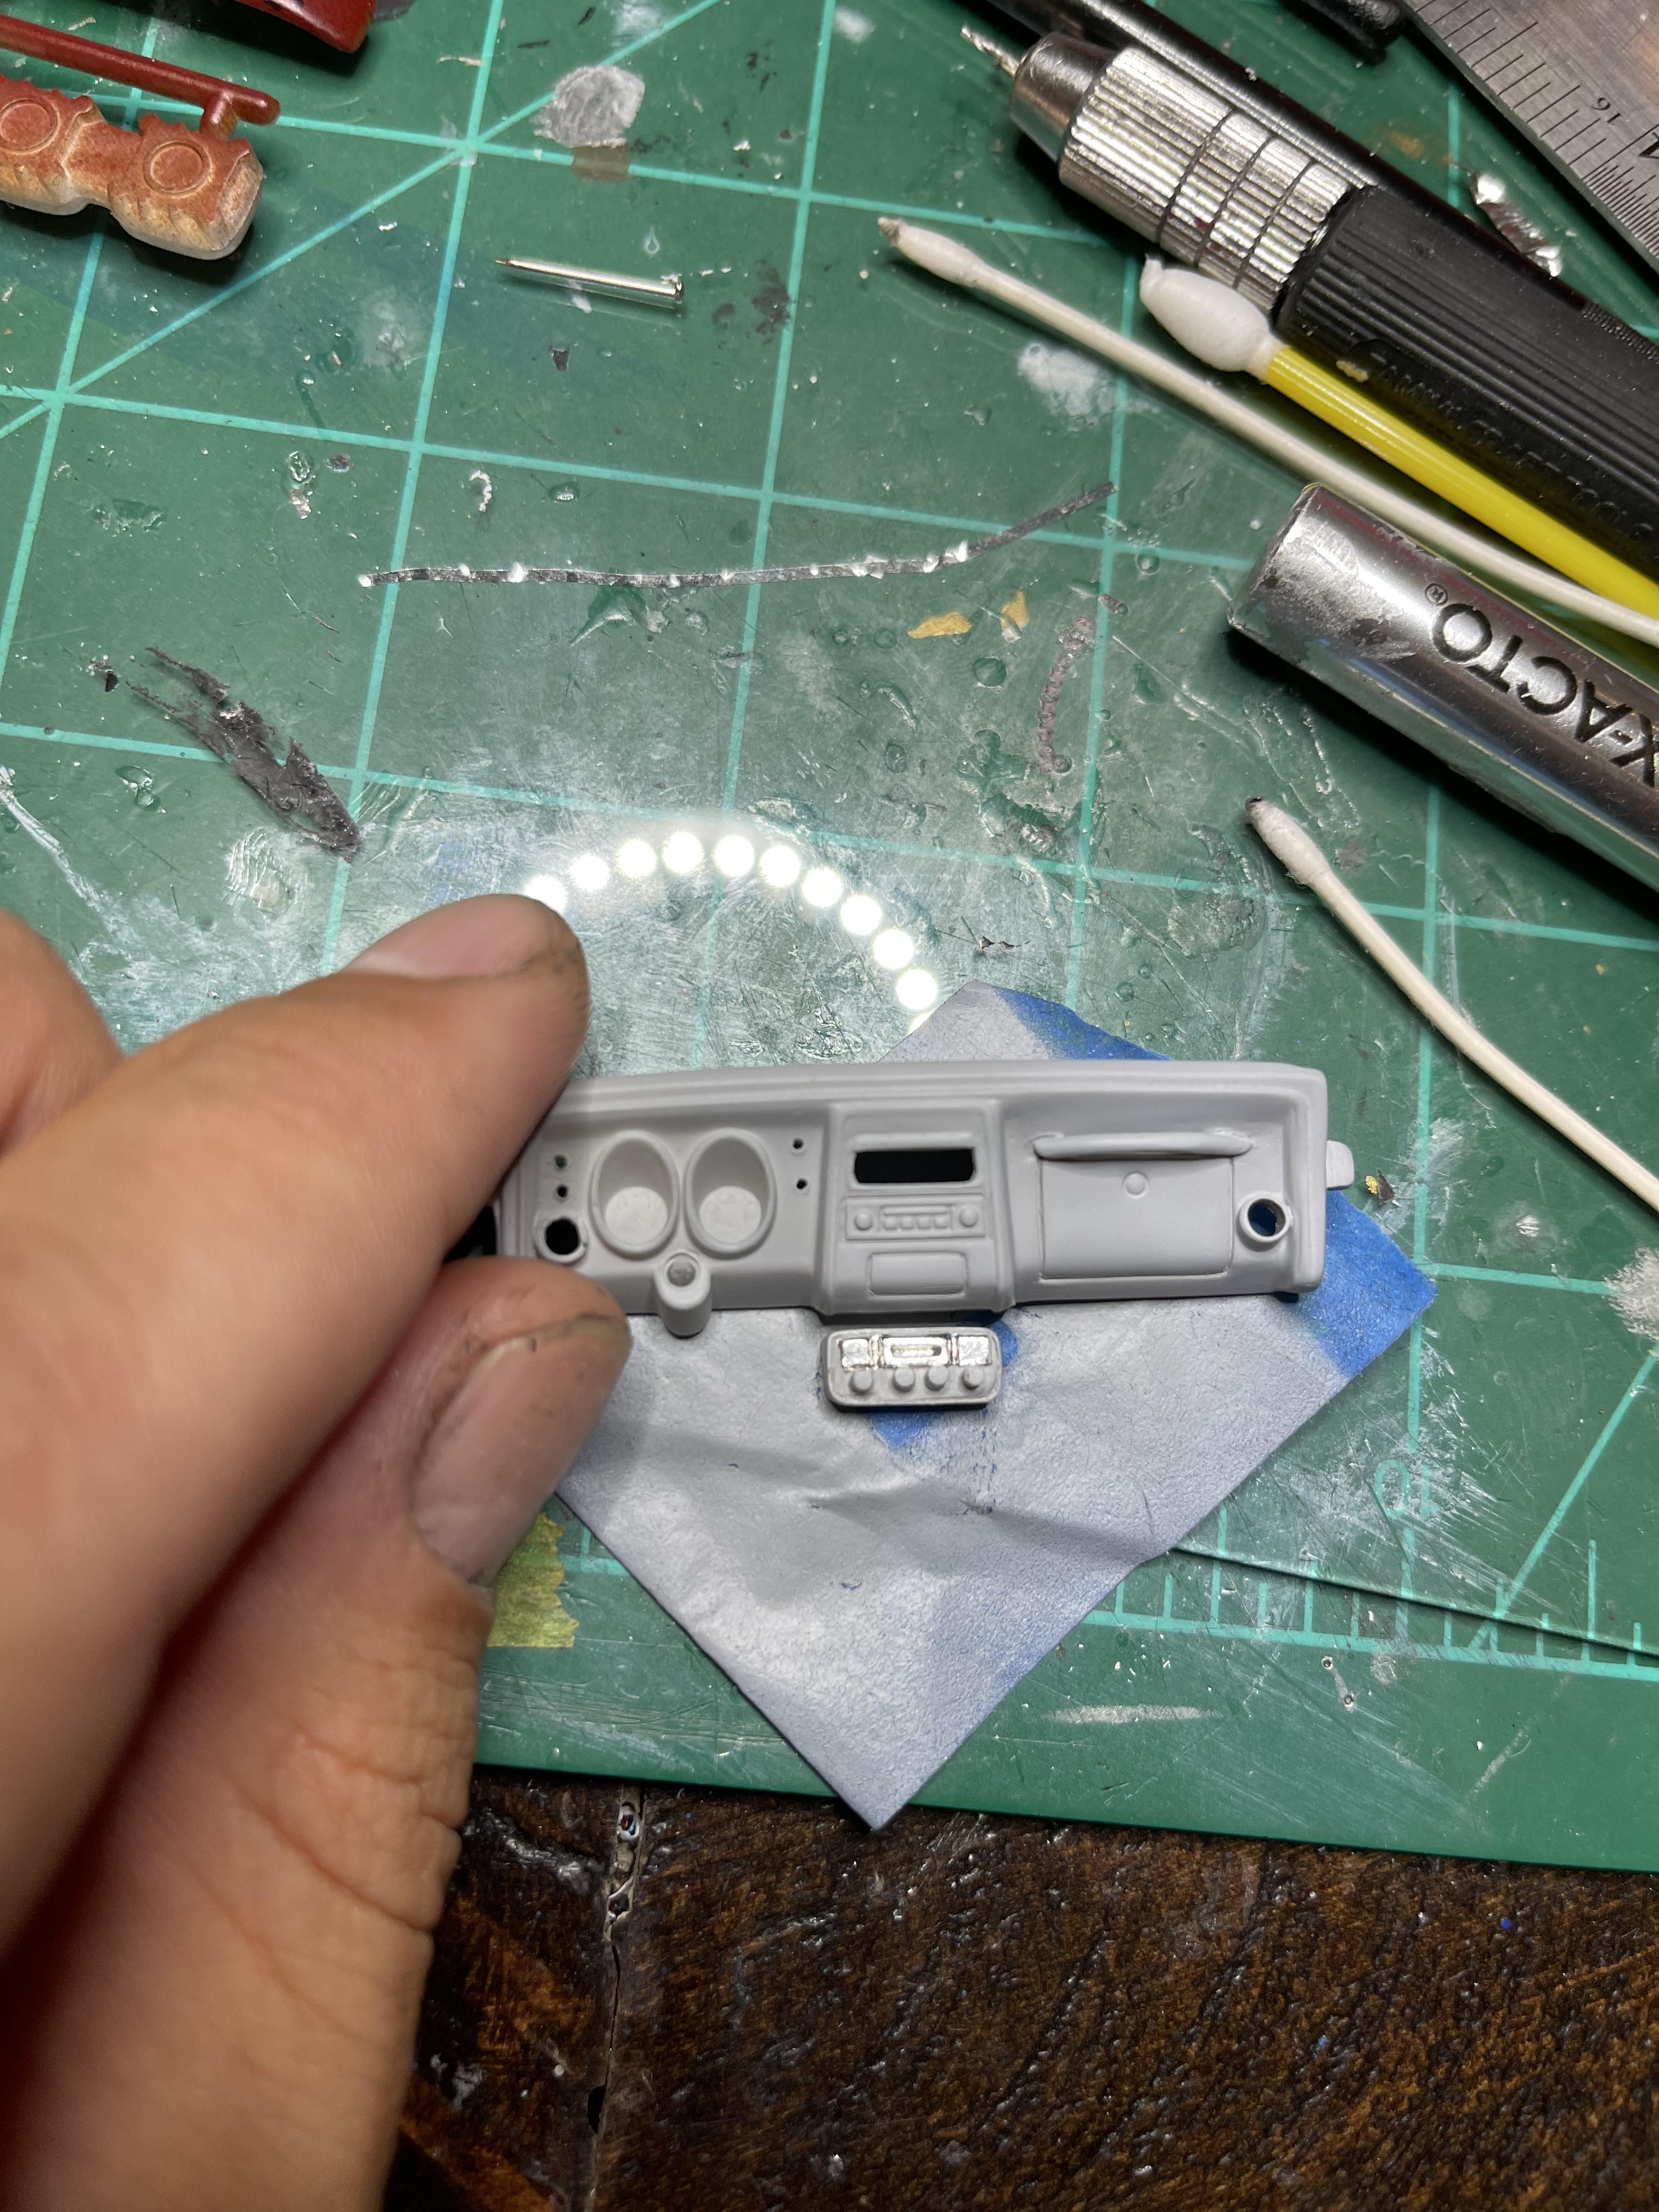
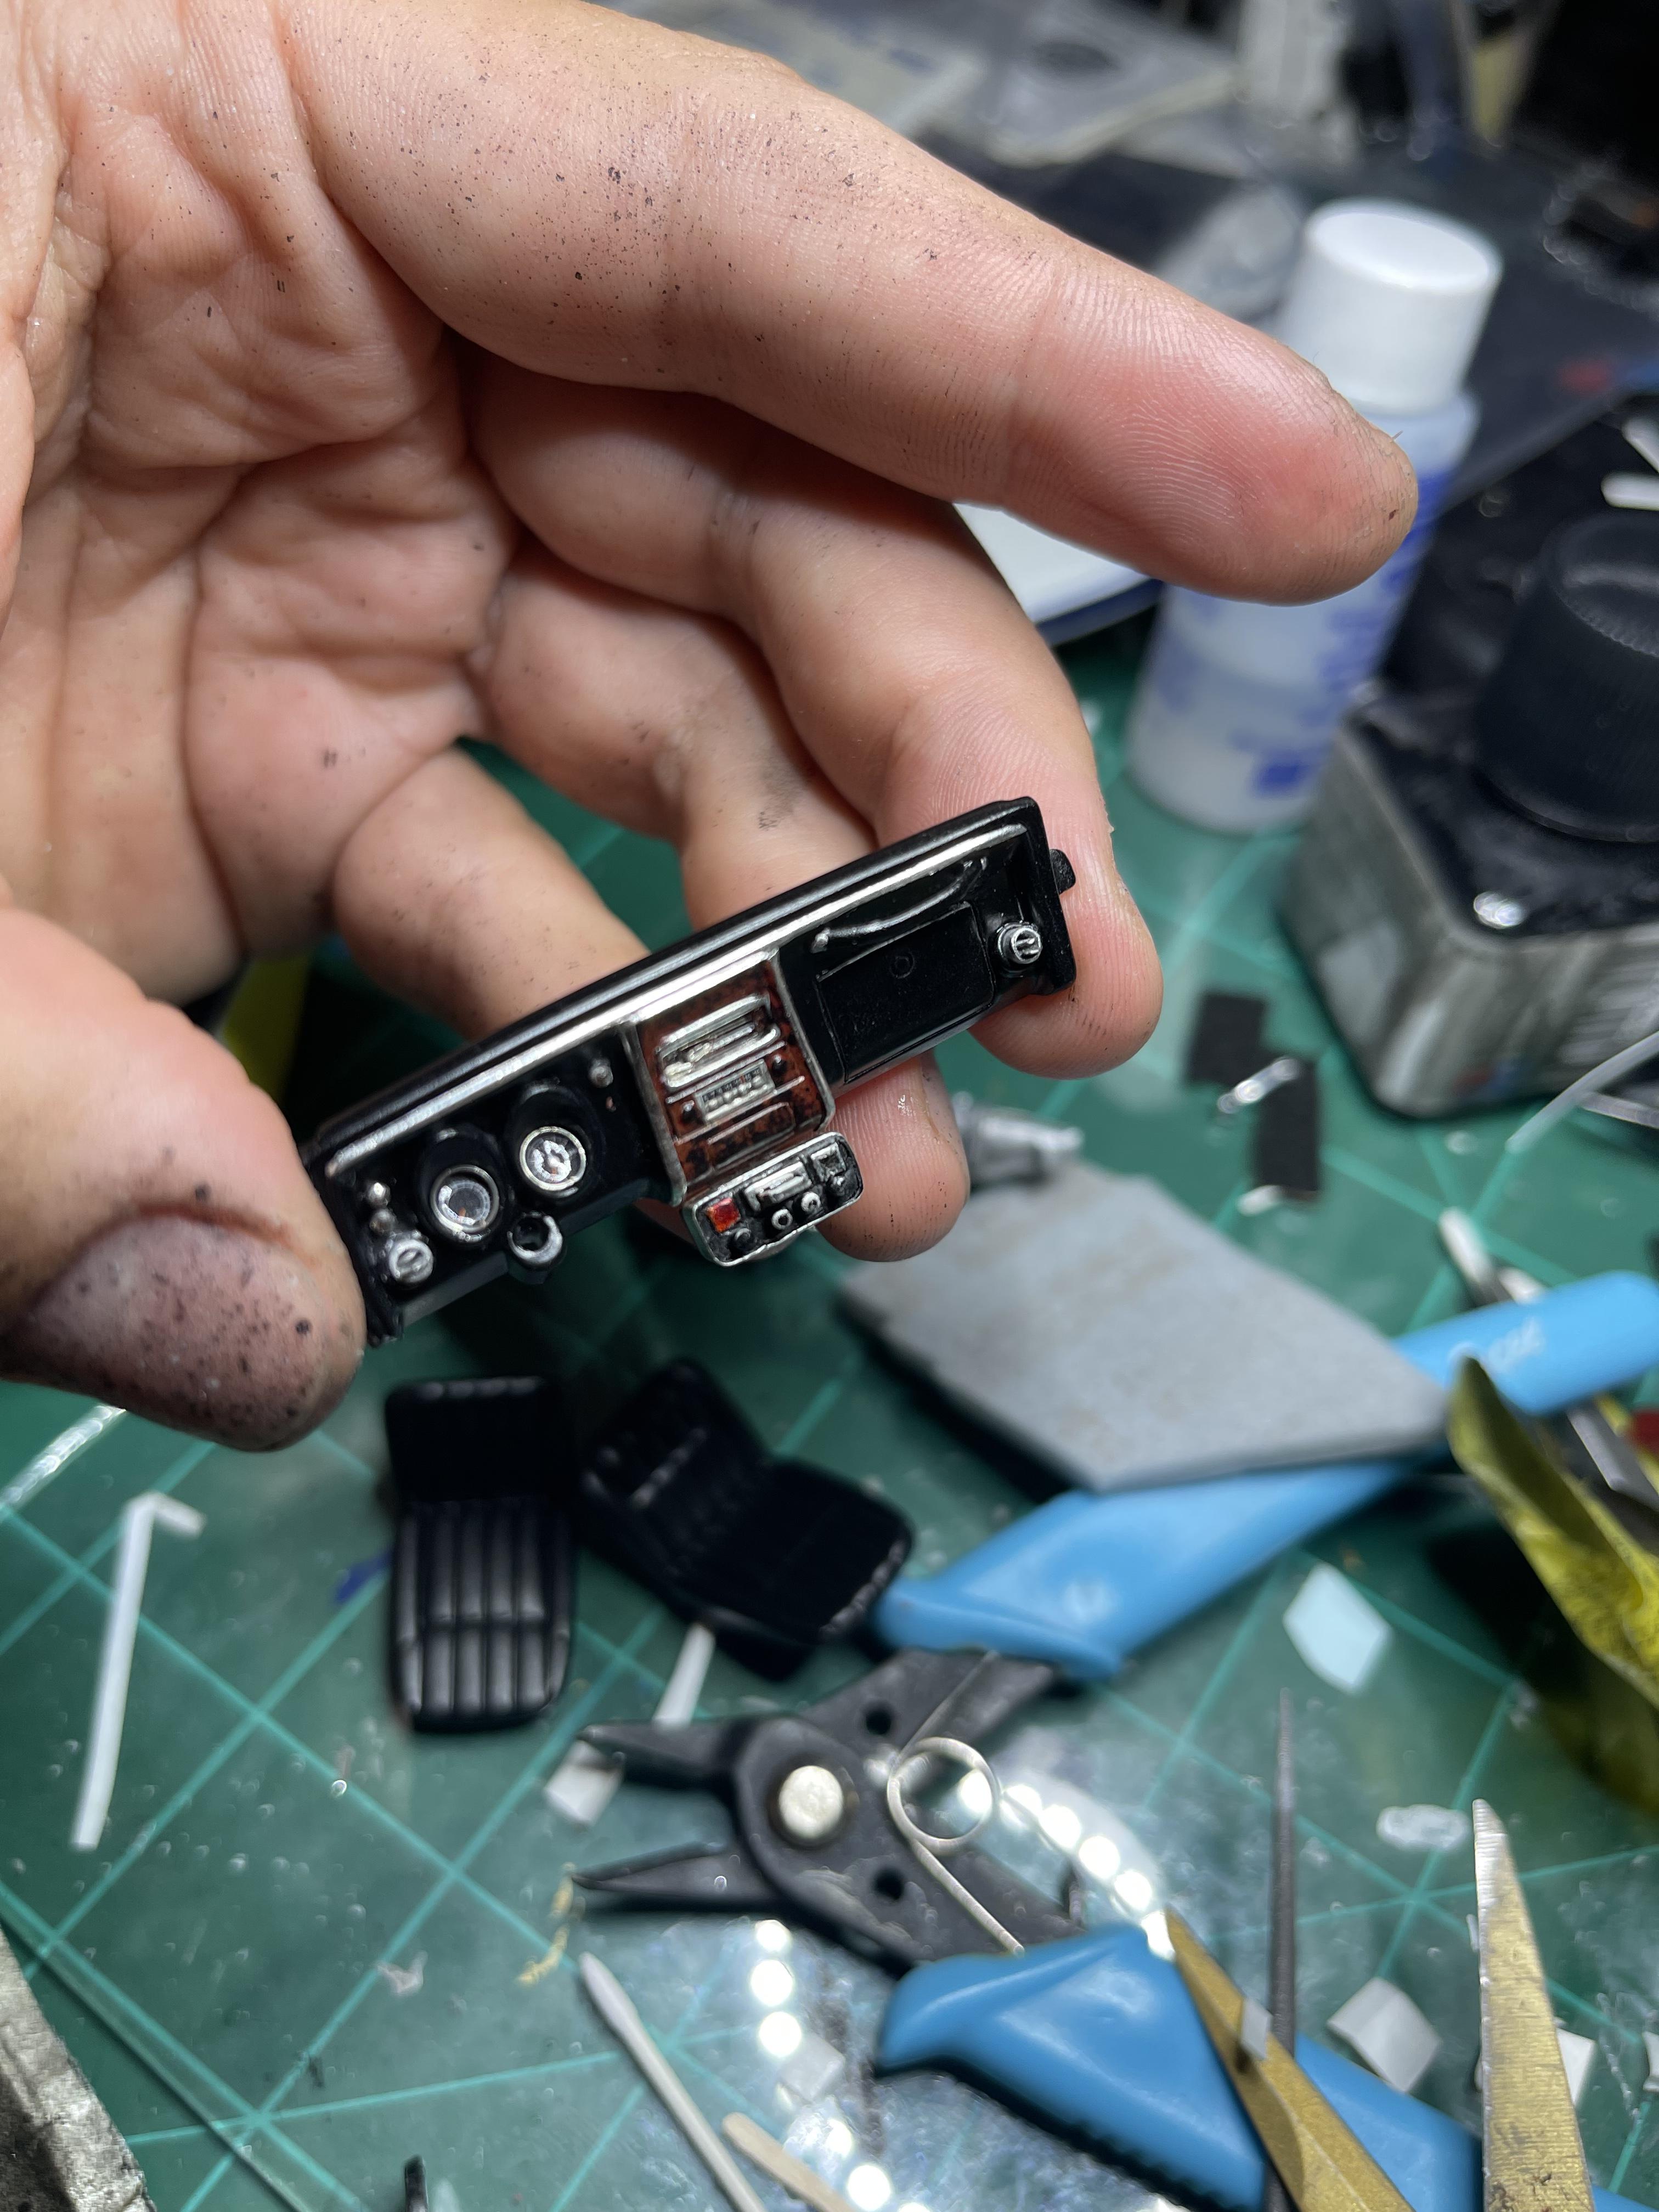
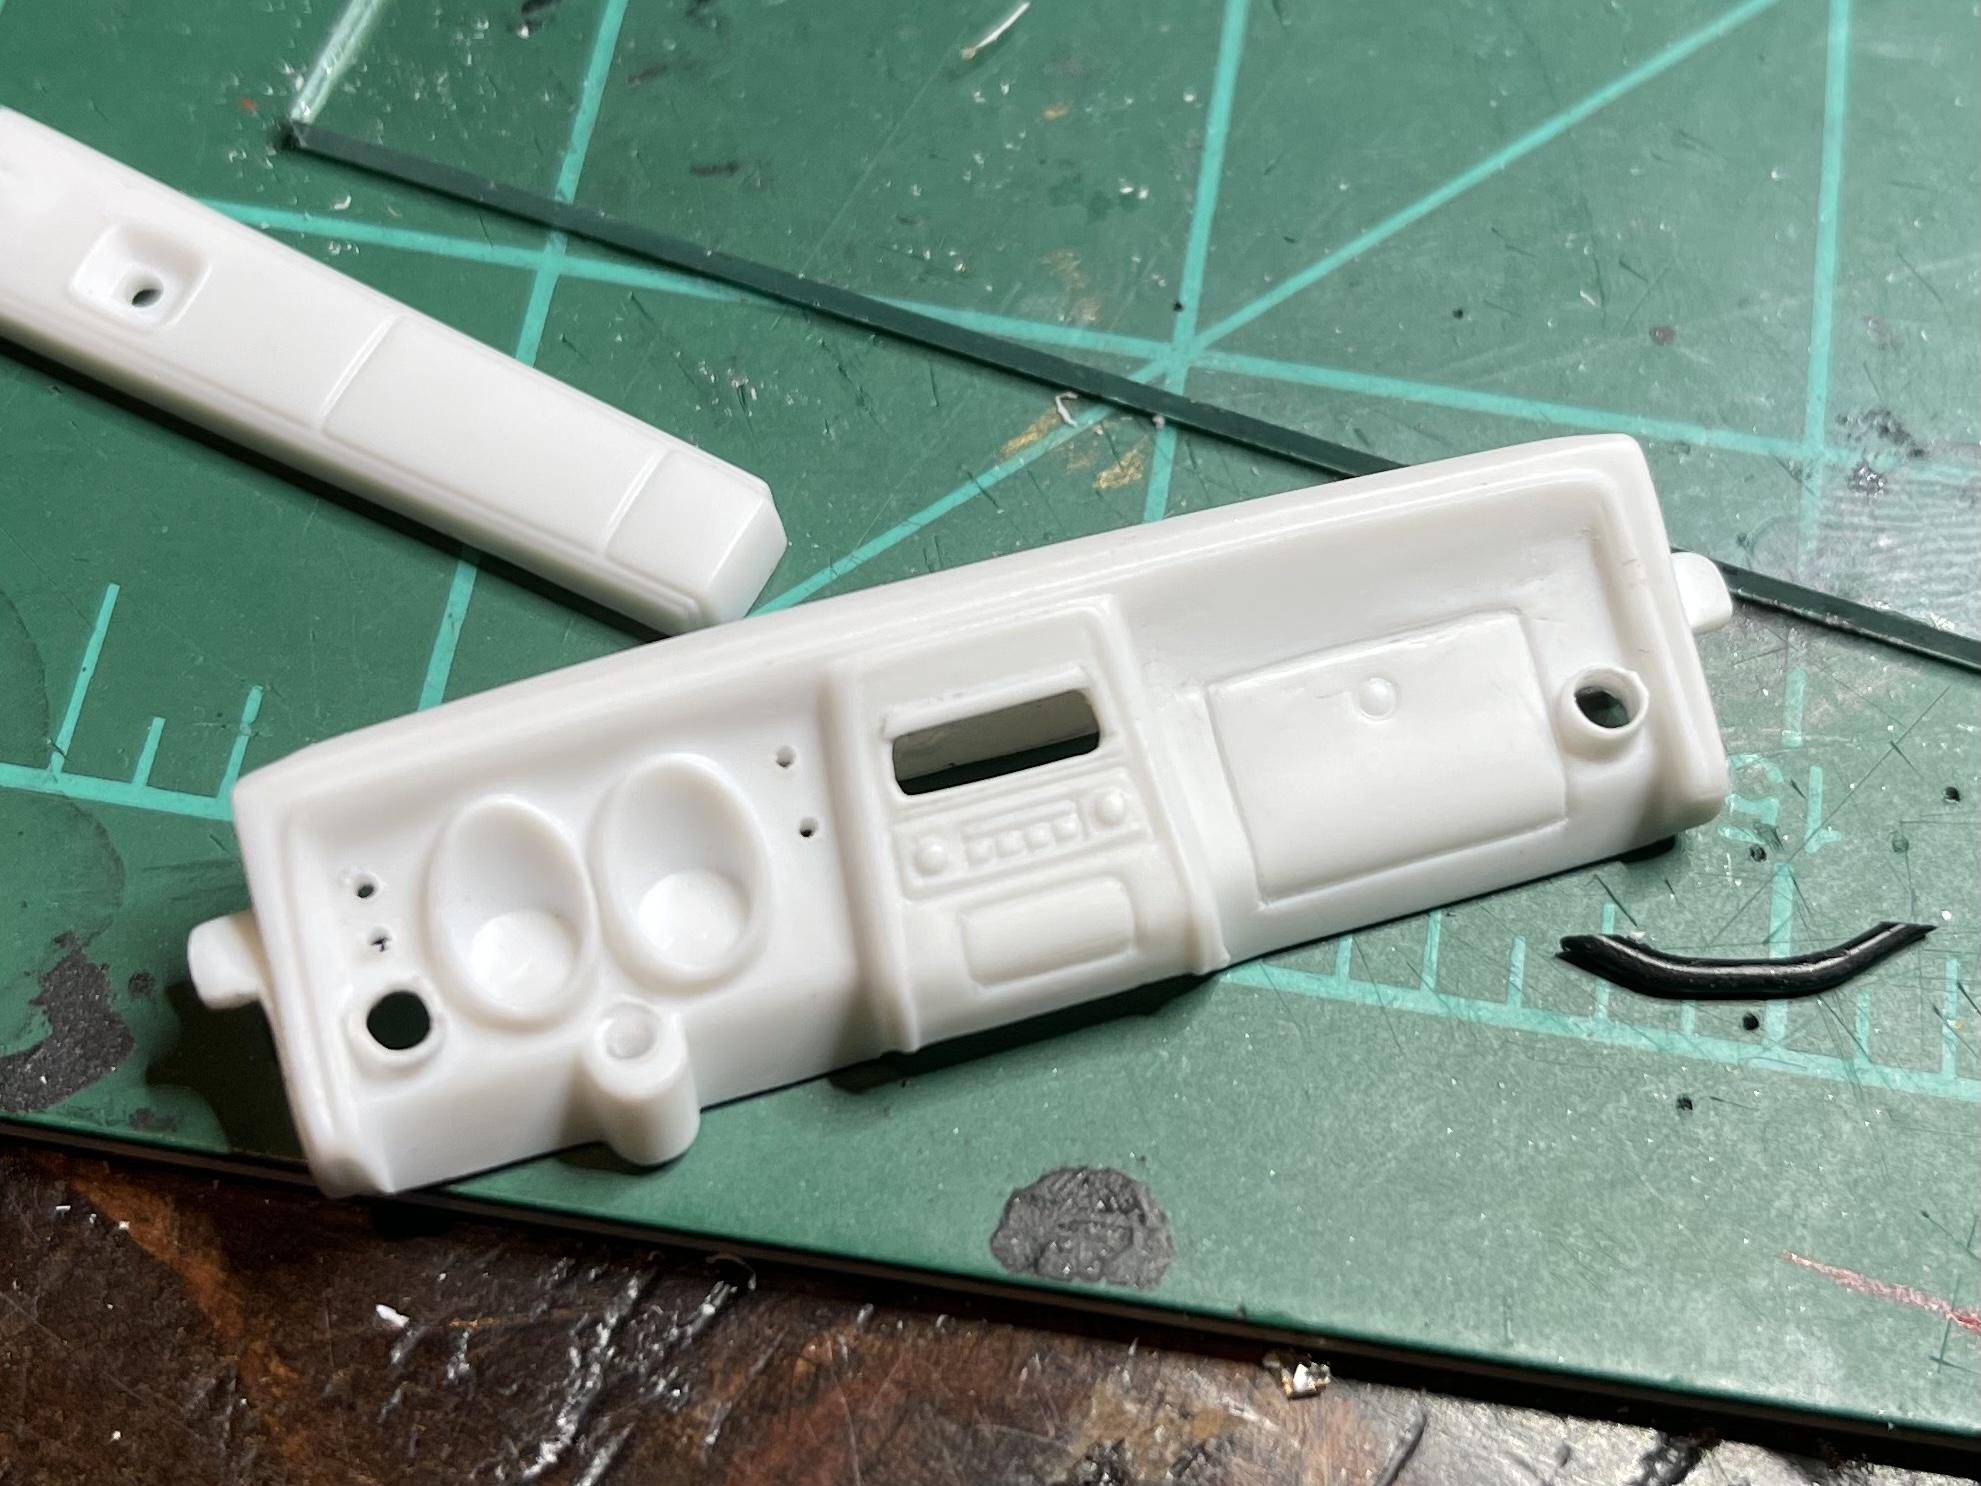
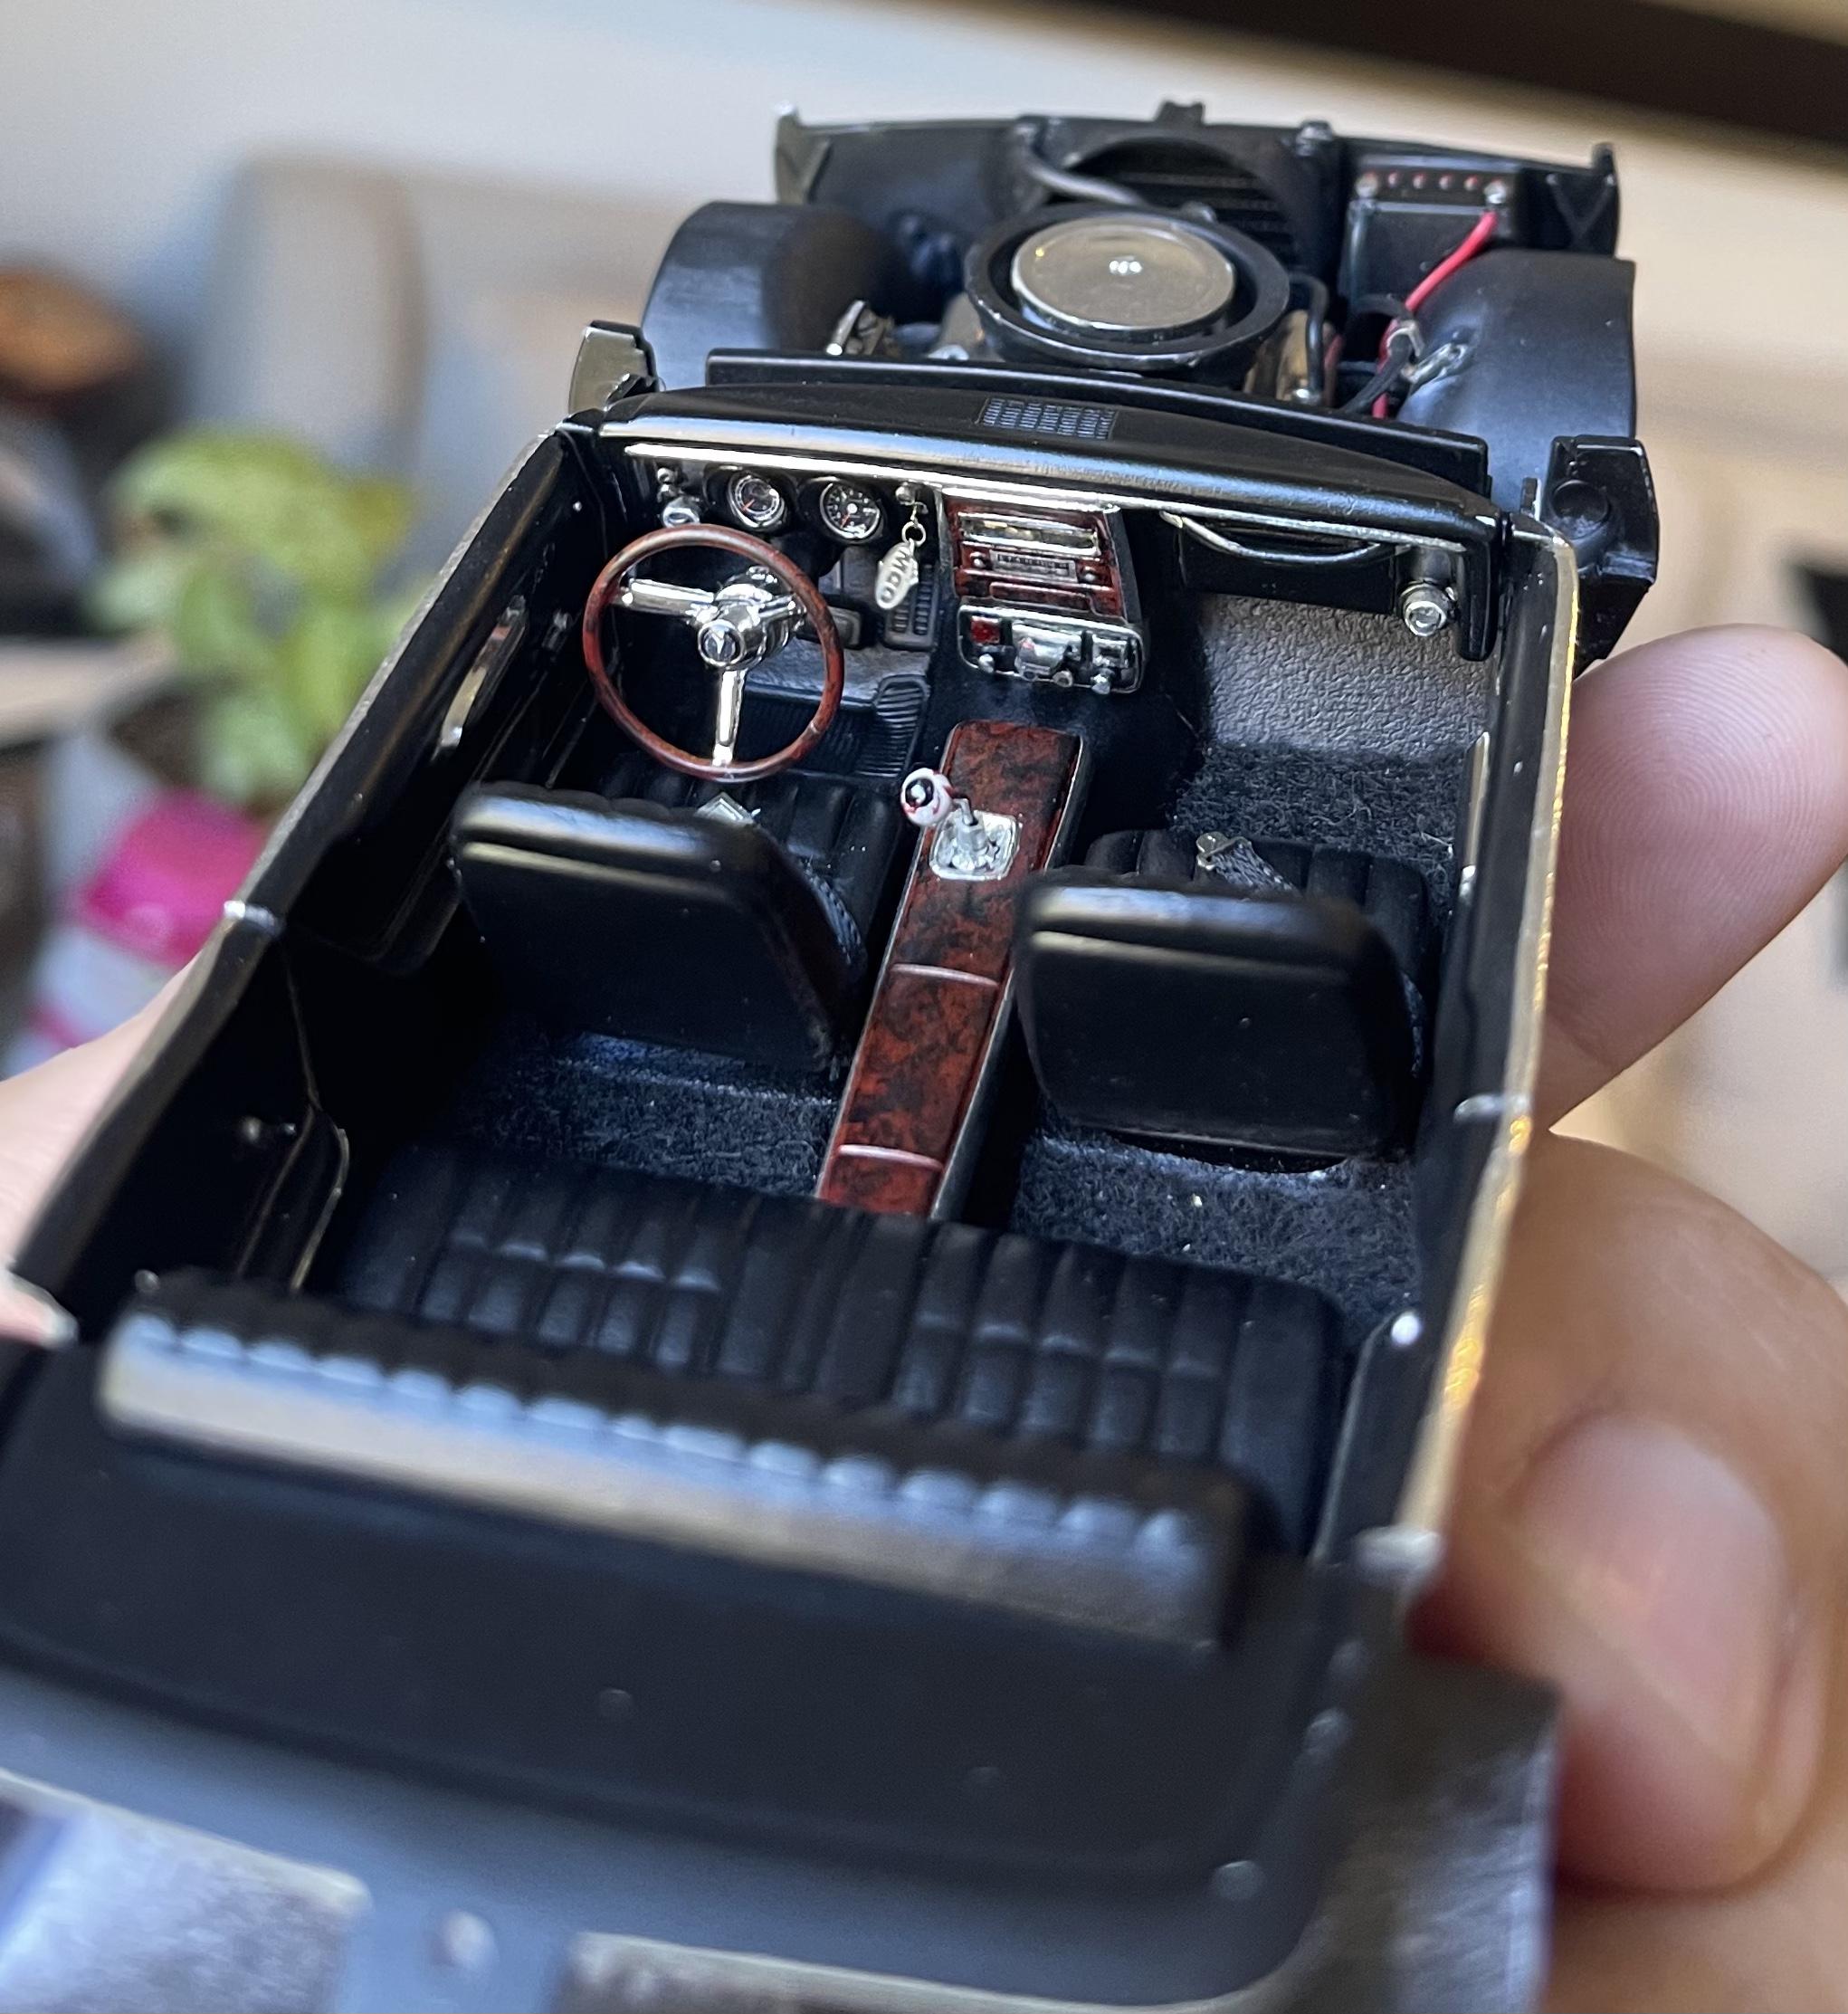
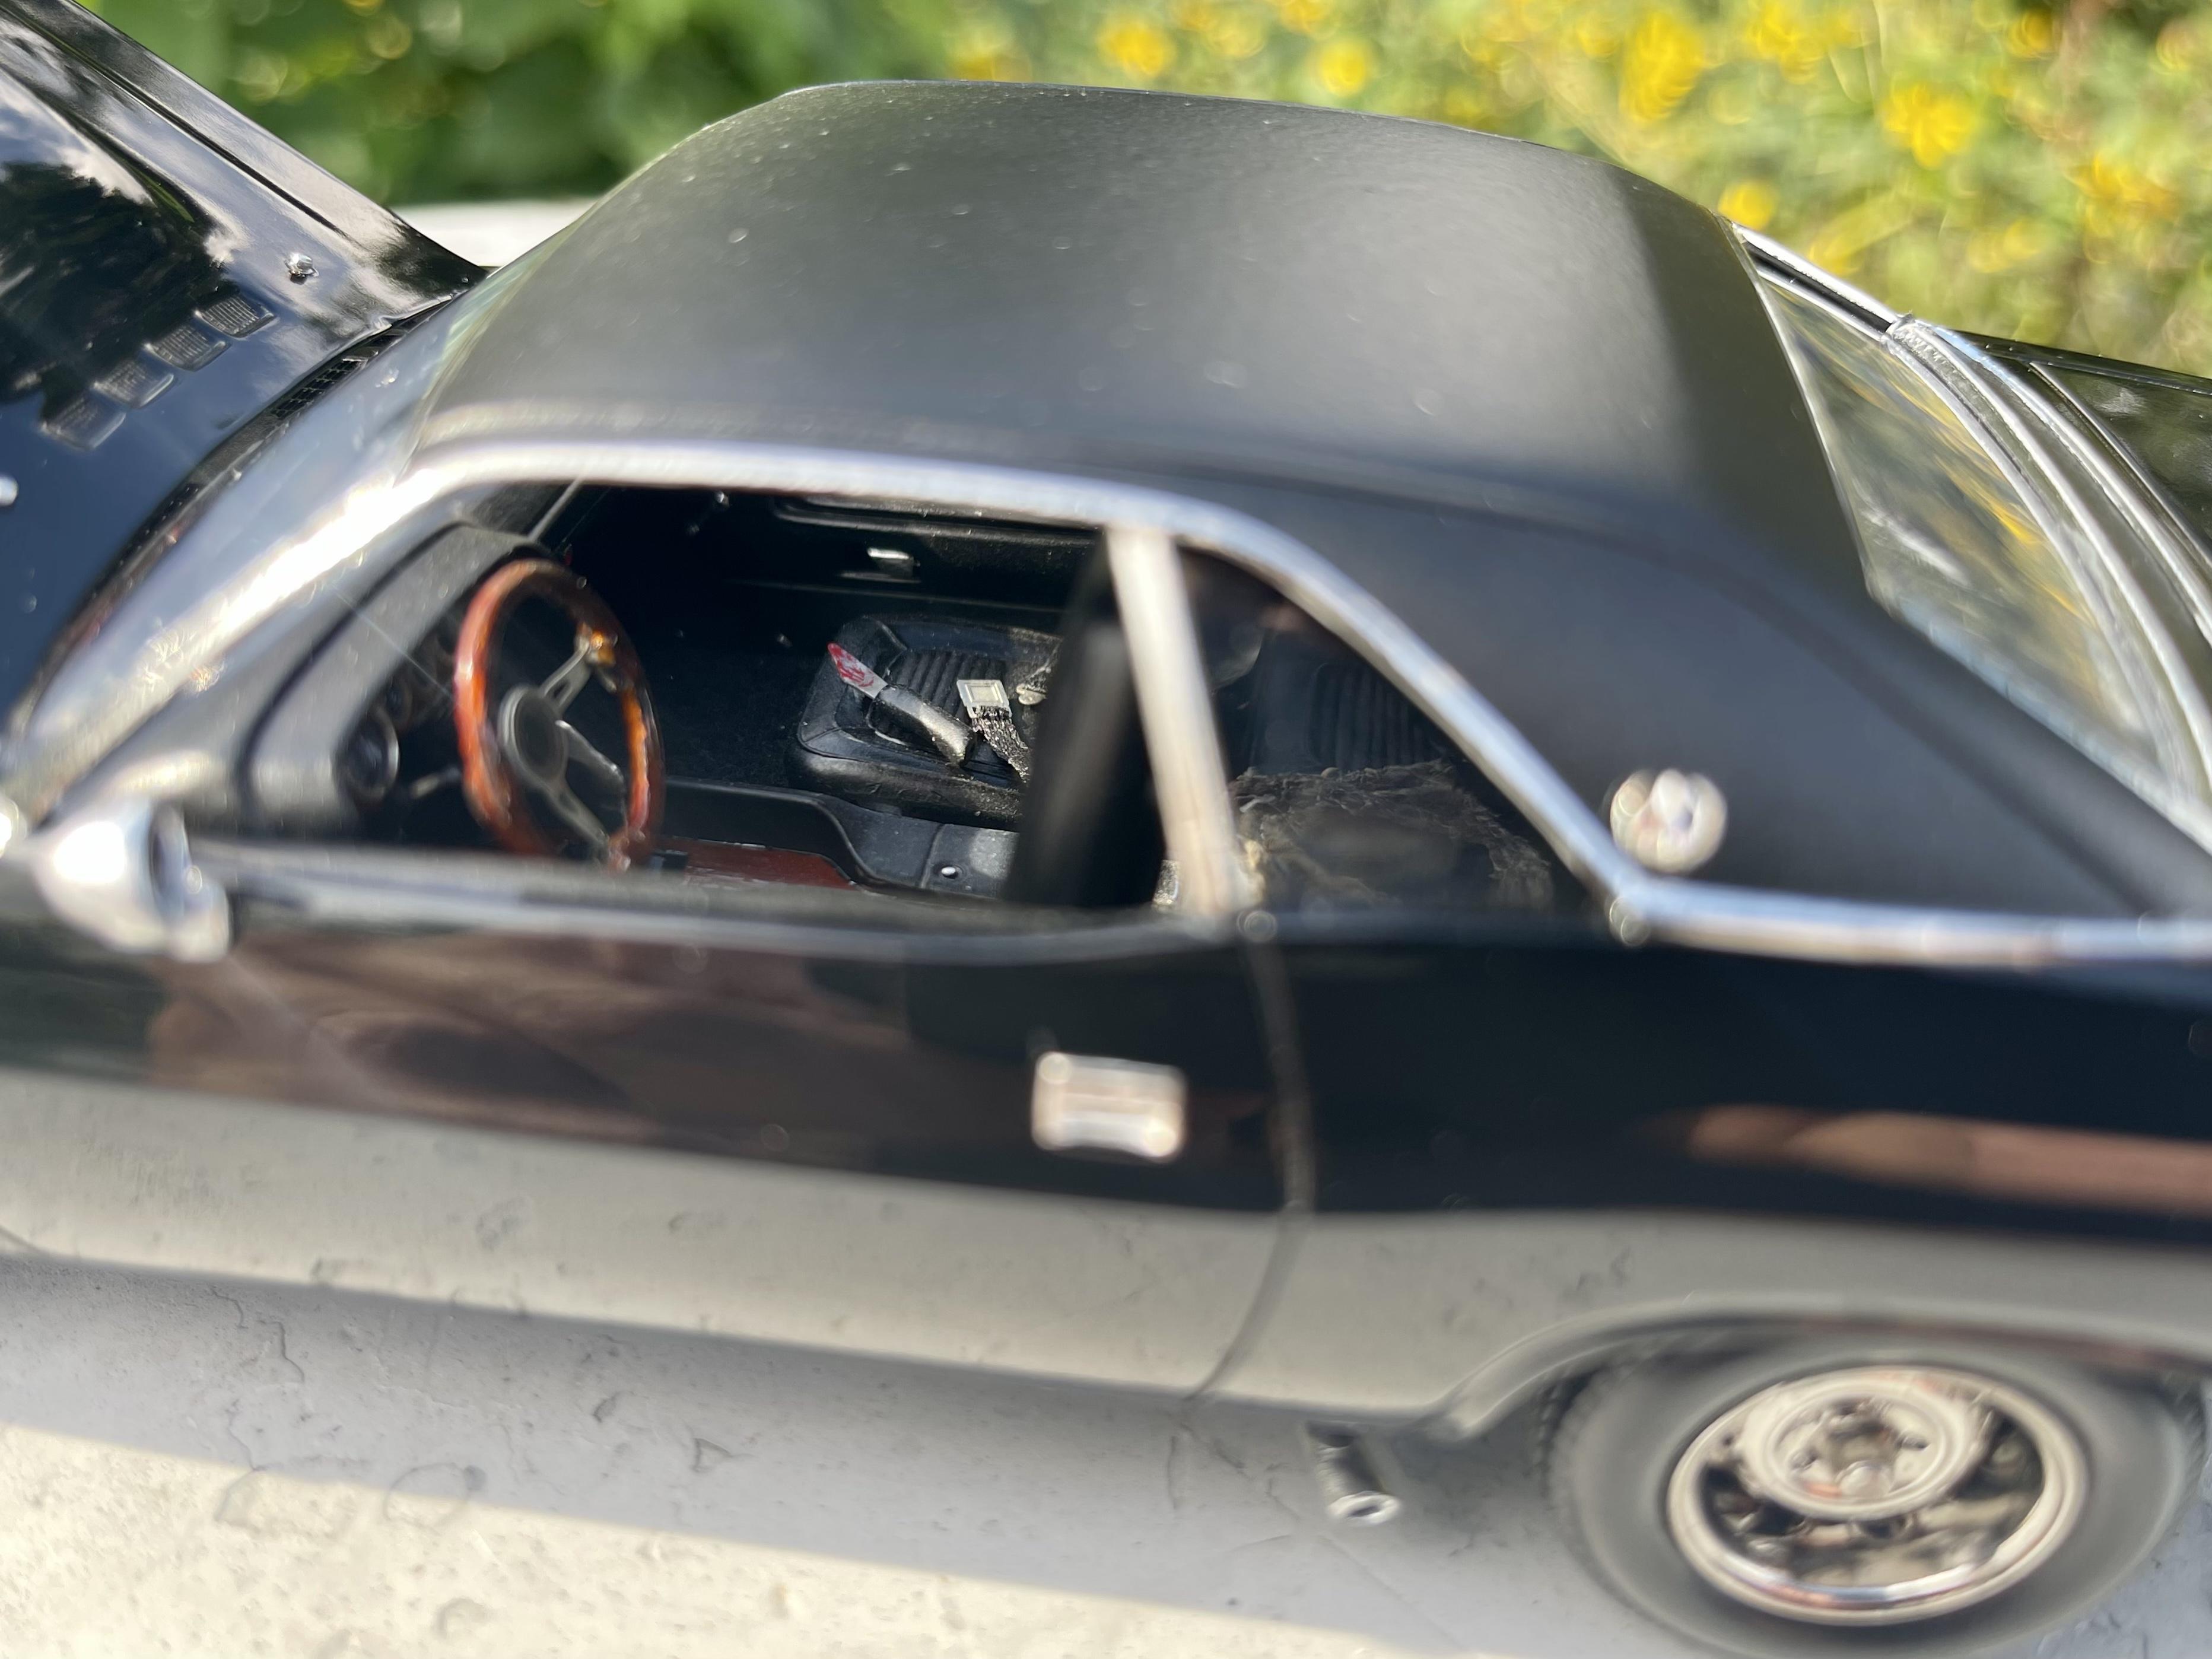
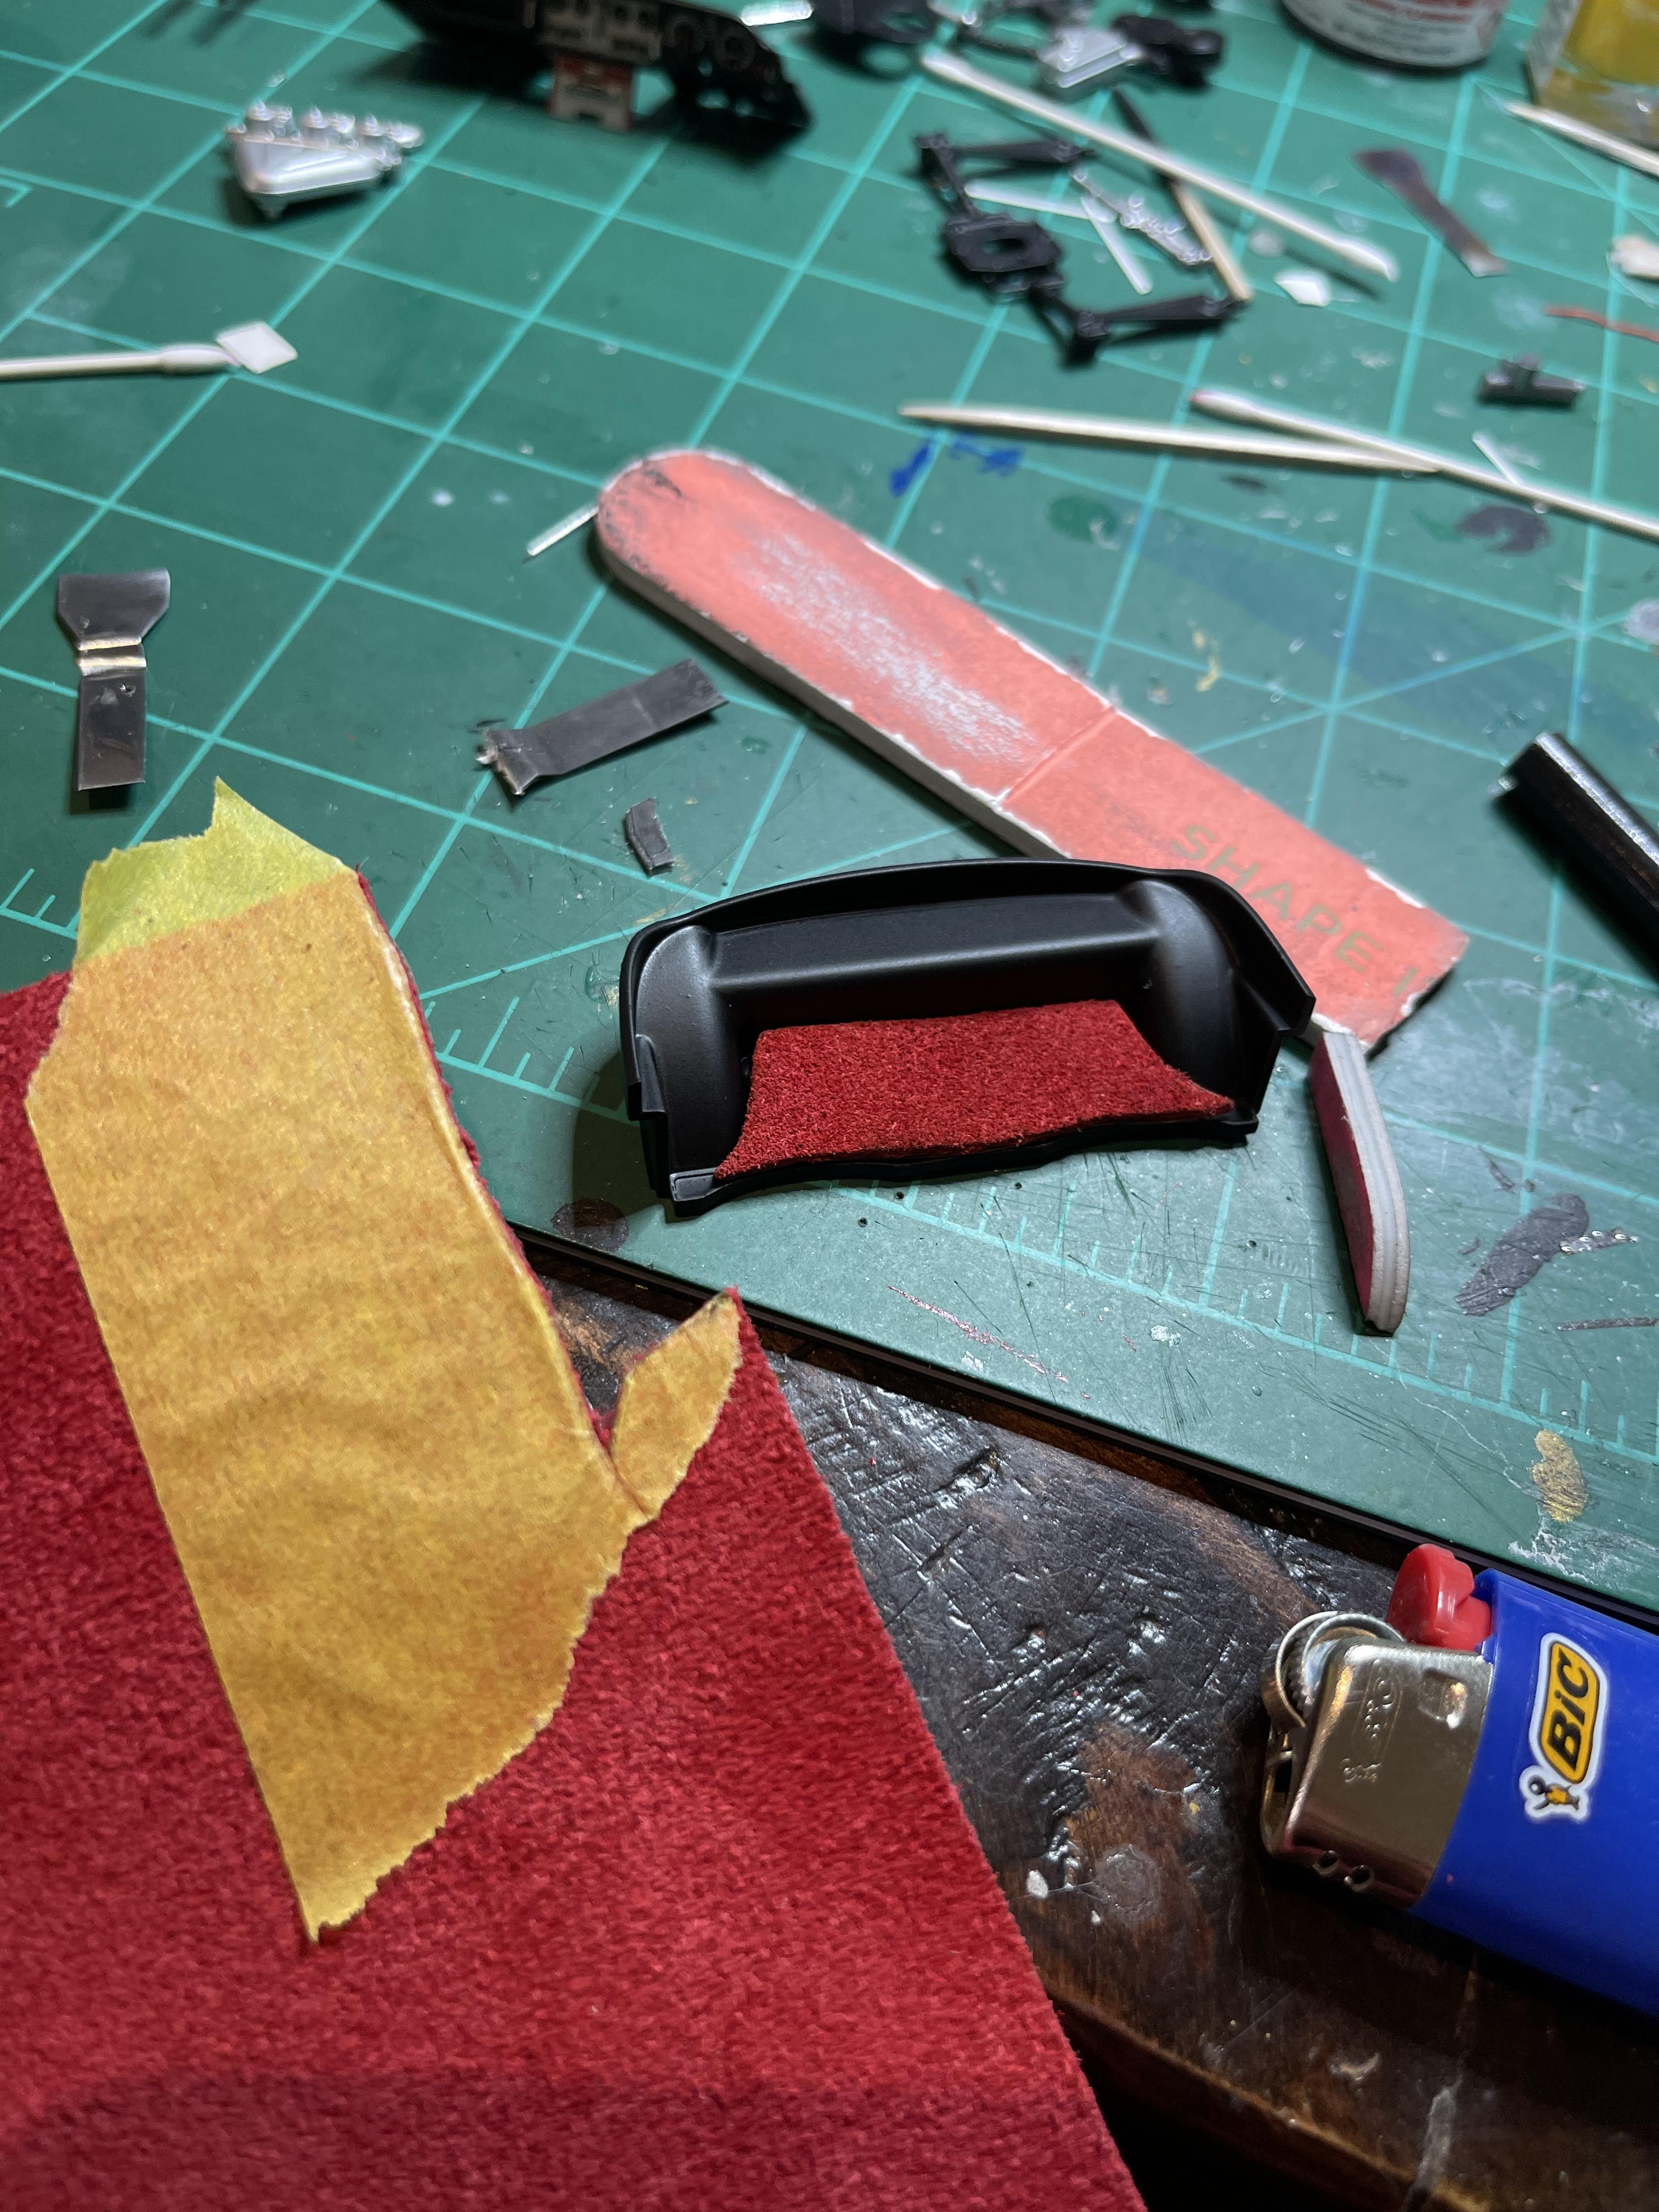
Thanks…I hit it with gray primer followed by tamiya silver leaf. Then I masked the gauges and radio, foiled the glove box and trim around the gauges, and painted the whole thing semigloss black. Then I rubbed out the foiled trim and script with thinner and pointed q-tips. Had to brush detail the gauge faces since this was an old kit that only came with tire and engine decals. When it was dry, I put a few drops of uv resin on the gauges and radio dial and covered them with some clear plastic, cut to shape. Then I just foiled the lower trim around the steering wheel and called it a day ?? Working on a firebird dash now which is proving to be much more challenging… the kit wasn’t cheap and I really hope I don’t ruin it ?
-
Awesome thanks - that actually makes a lot of sense. I actually just uploaded everything from my phone because that’s where all my pics were, but I’ll keep that in mind next time for sure. Appreciate the help.