Casey
-
Posts
15,091 -
Joined
-
Last visited
Content Type
Profiles
Forums
Events
Gallery
Everything posted by Casey
-
That's it, thanks Steve: That's it, Mark, thank you:

-
 The Banana Boat has arrived.
-
Just saw this on eBay, '64 Olds hardtop engine compartment. Are those supposed to be Latham axial flow superchargers? Maybe something more exotic and odd?? They are Judson superchargers...wild stuff, kids!:
-
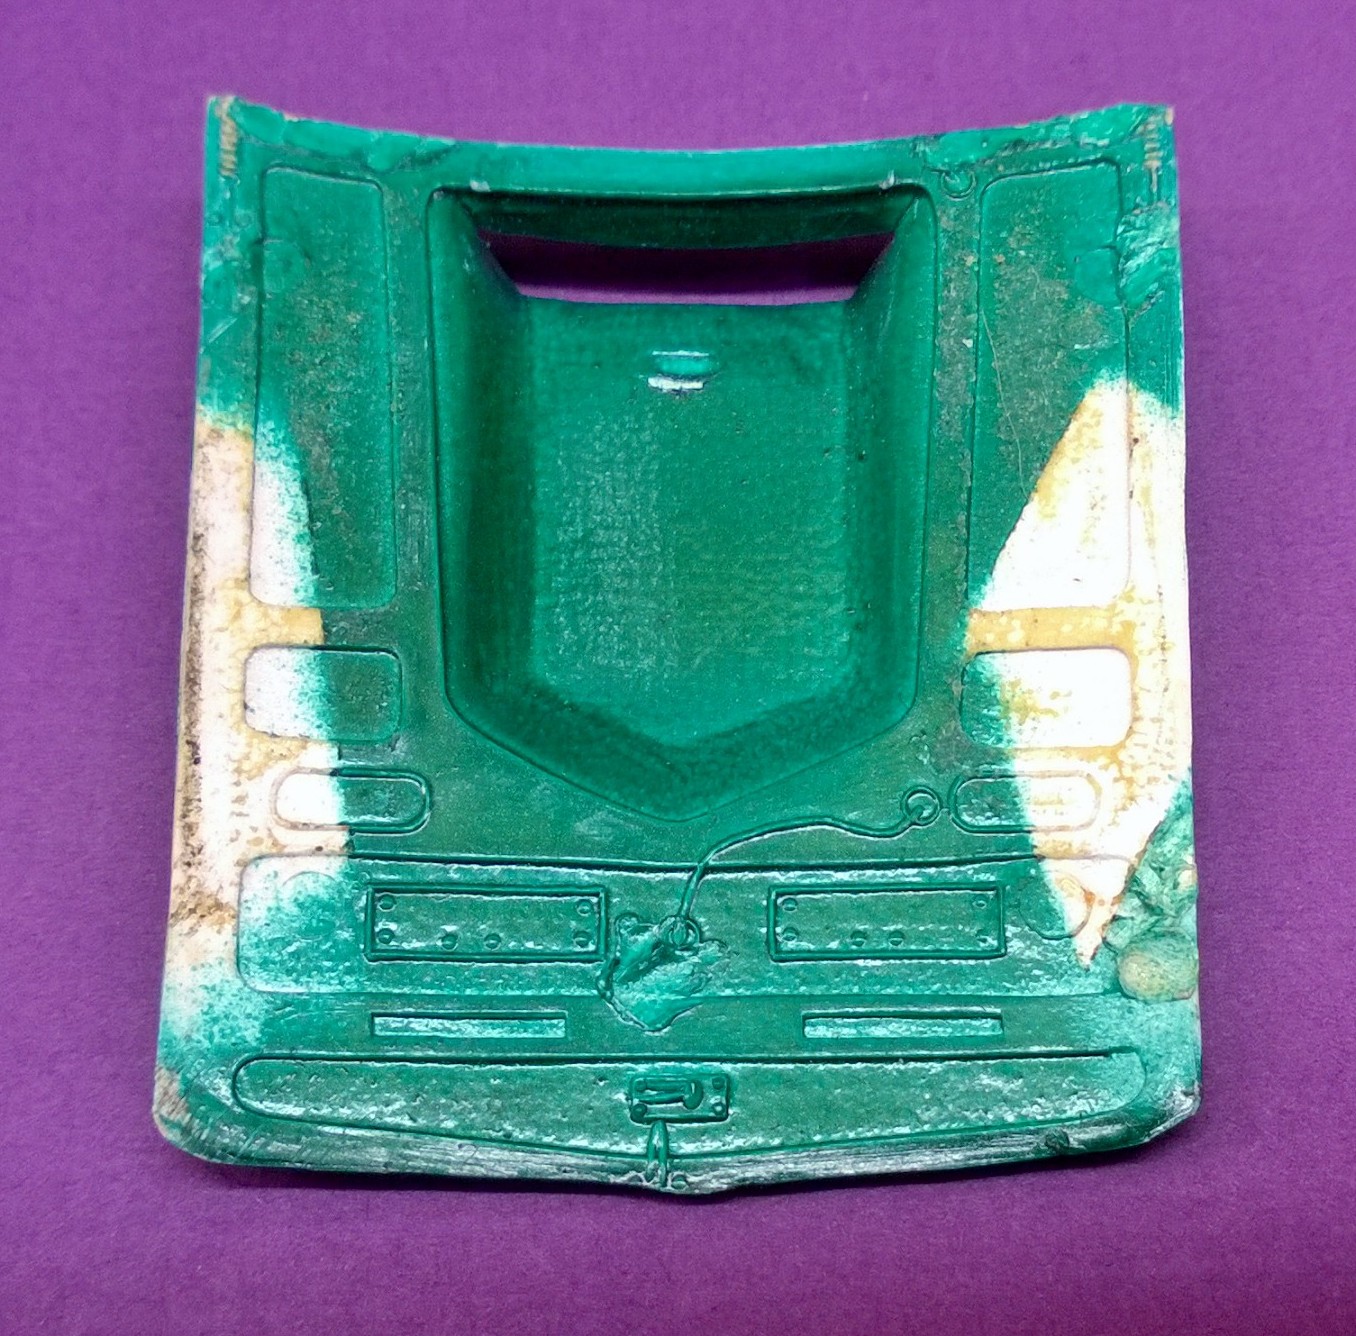
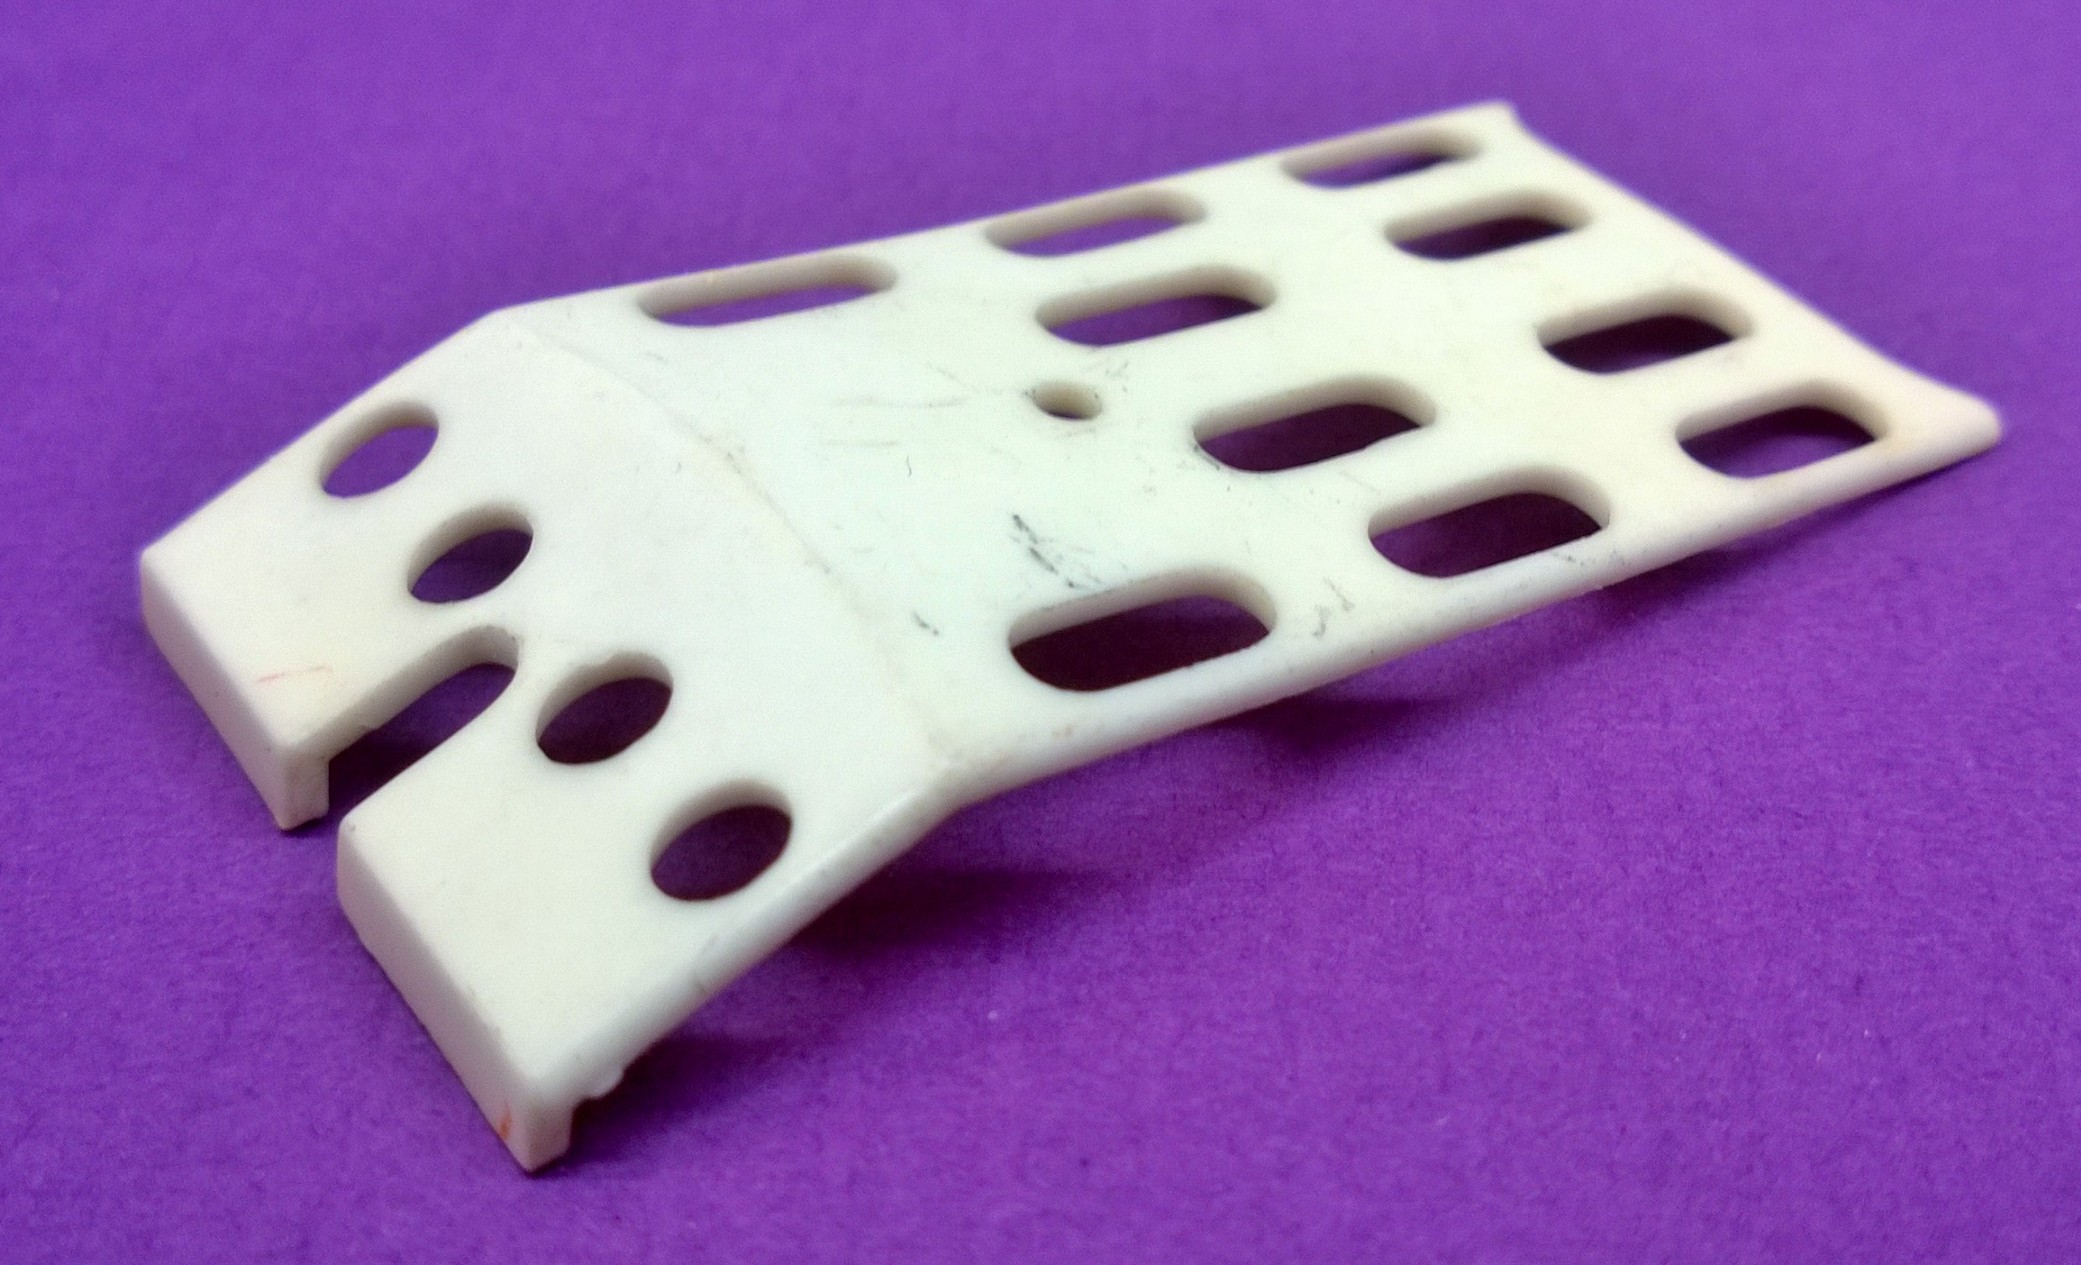
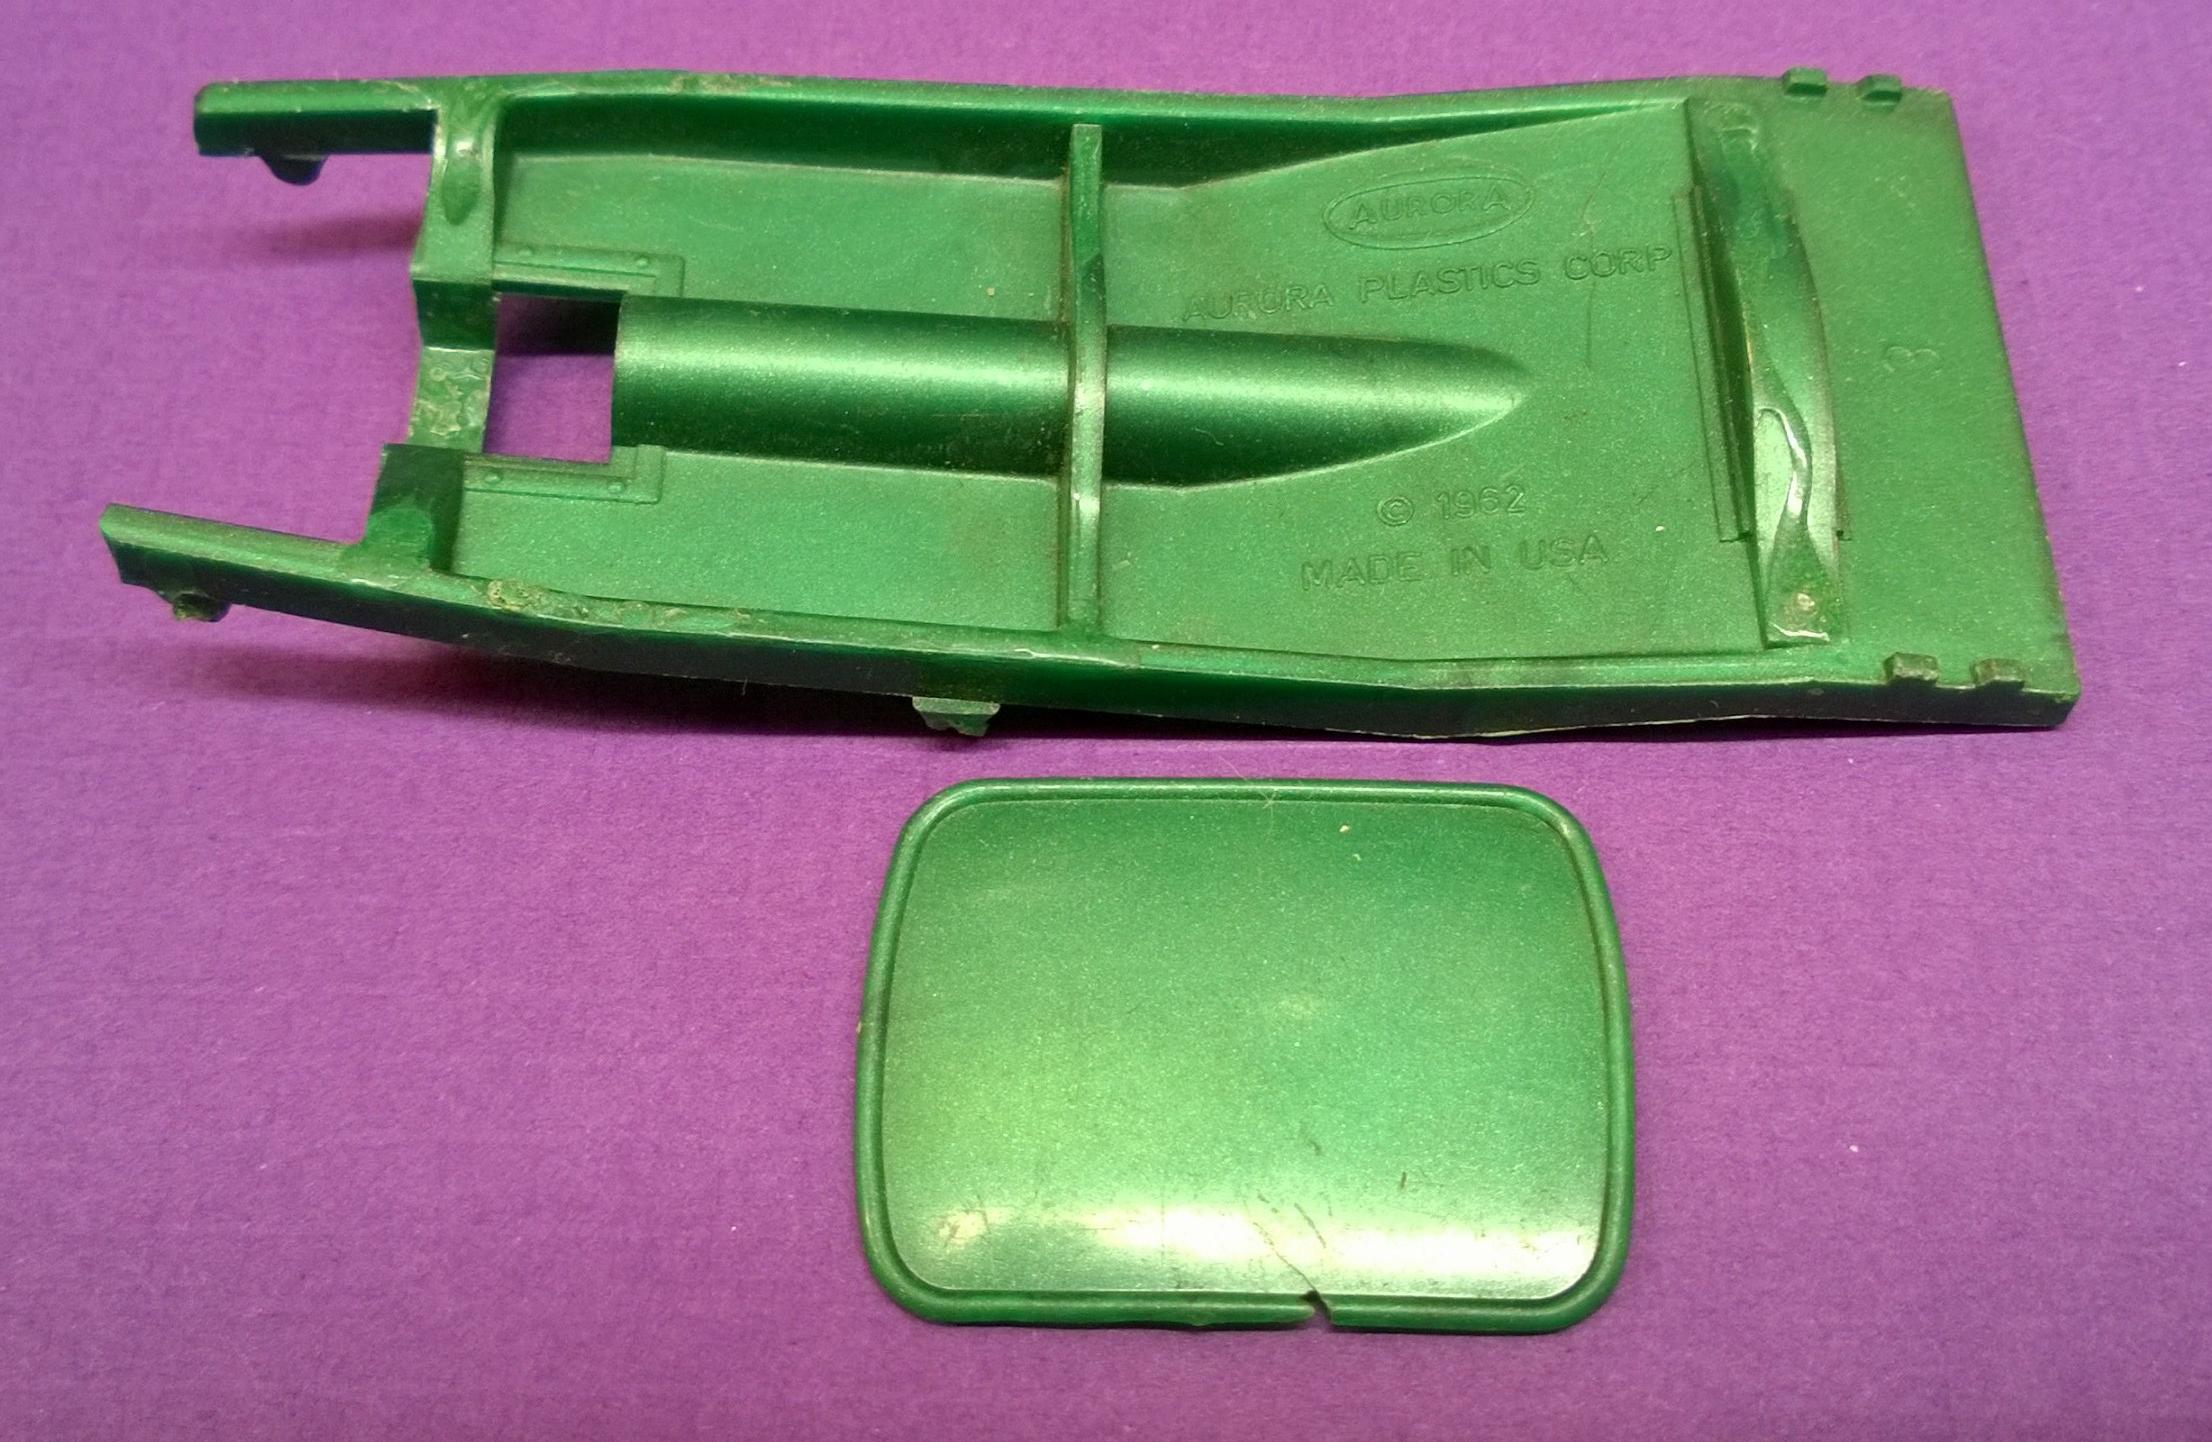
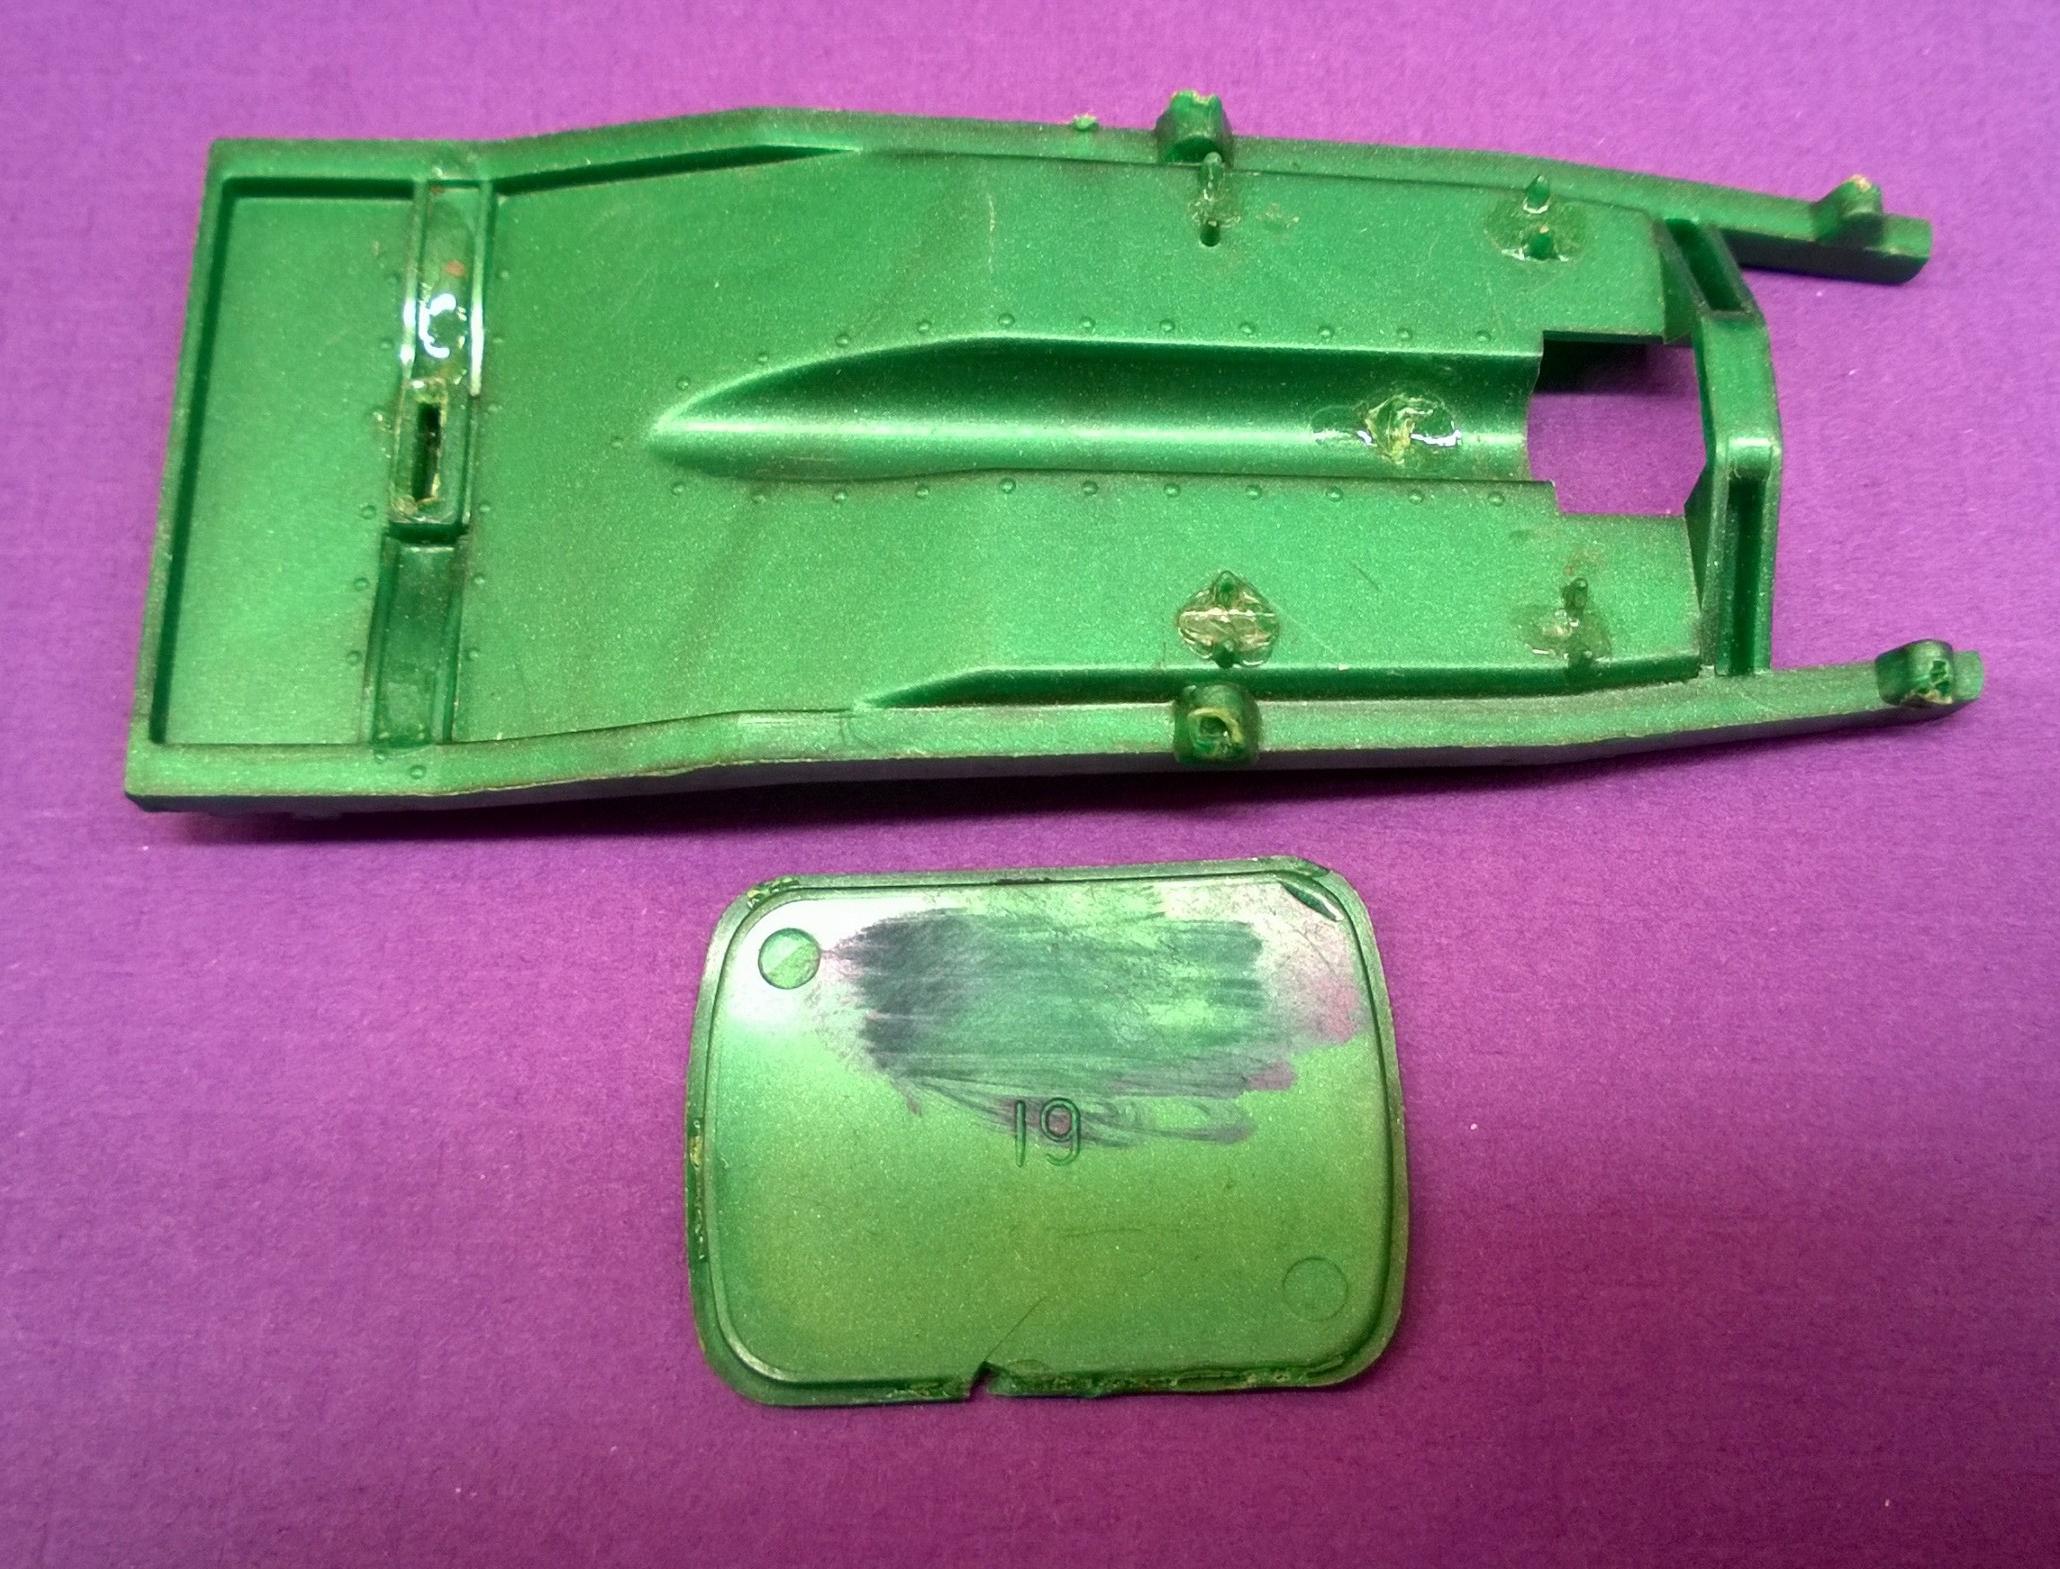
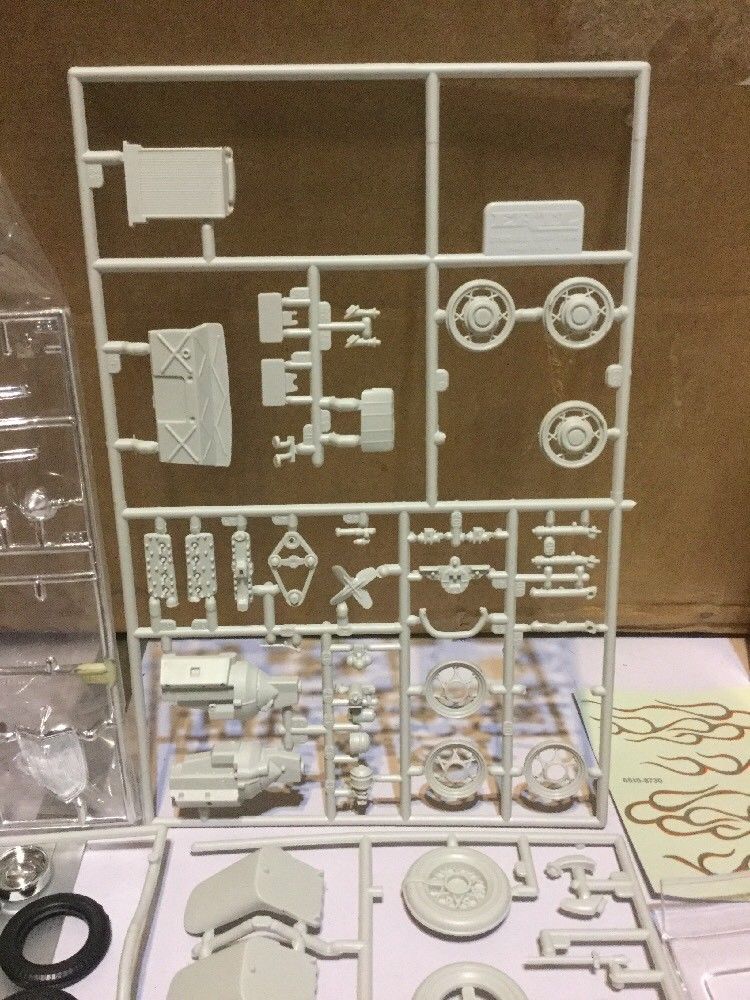
Found a few more I could use some help identifying, please: 1) AMT(?) hood...early to mid-'60s, Ford maybe?: 2) Skid platefrom ????: 3) Pretty sure these are from the Aurora '34 Ford Coupe:
-
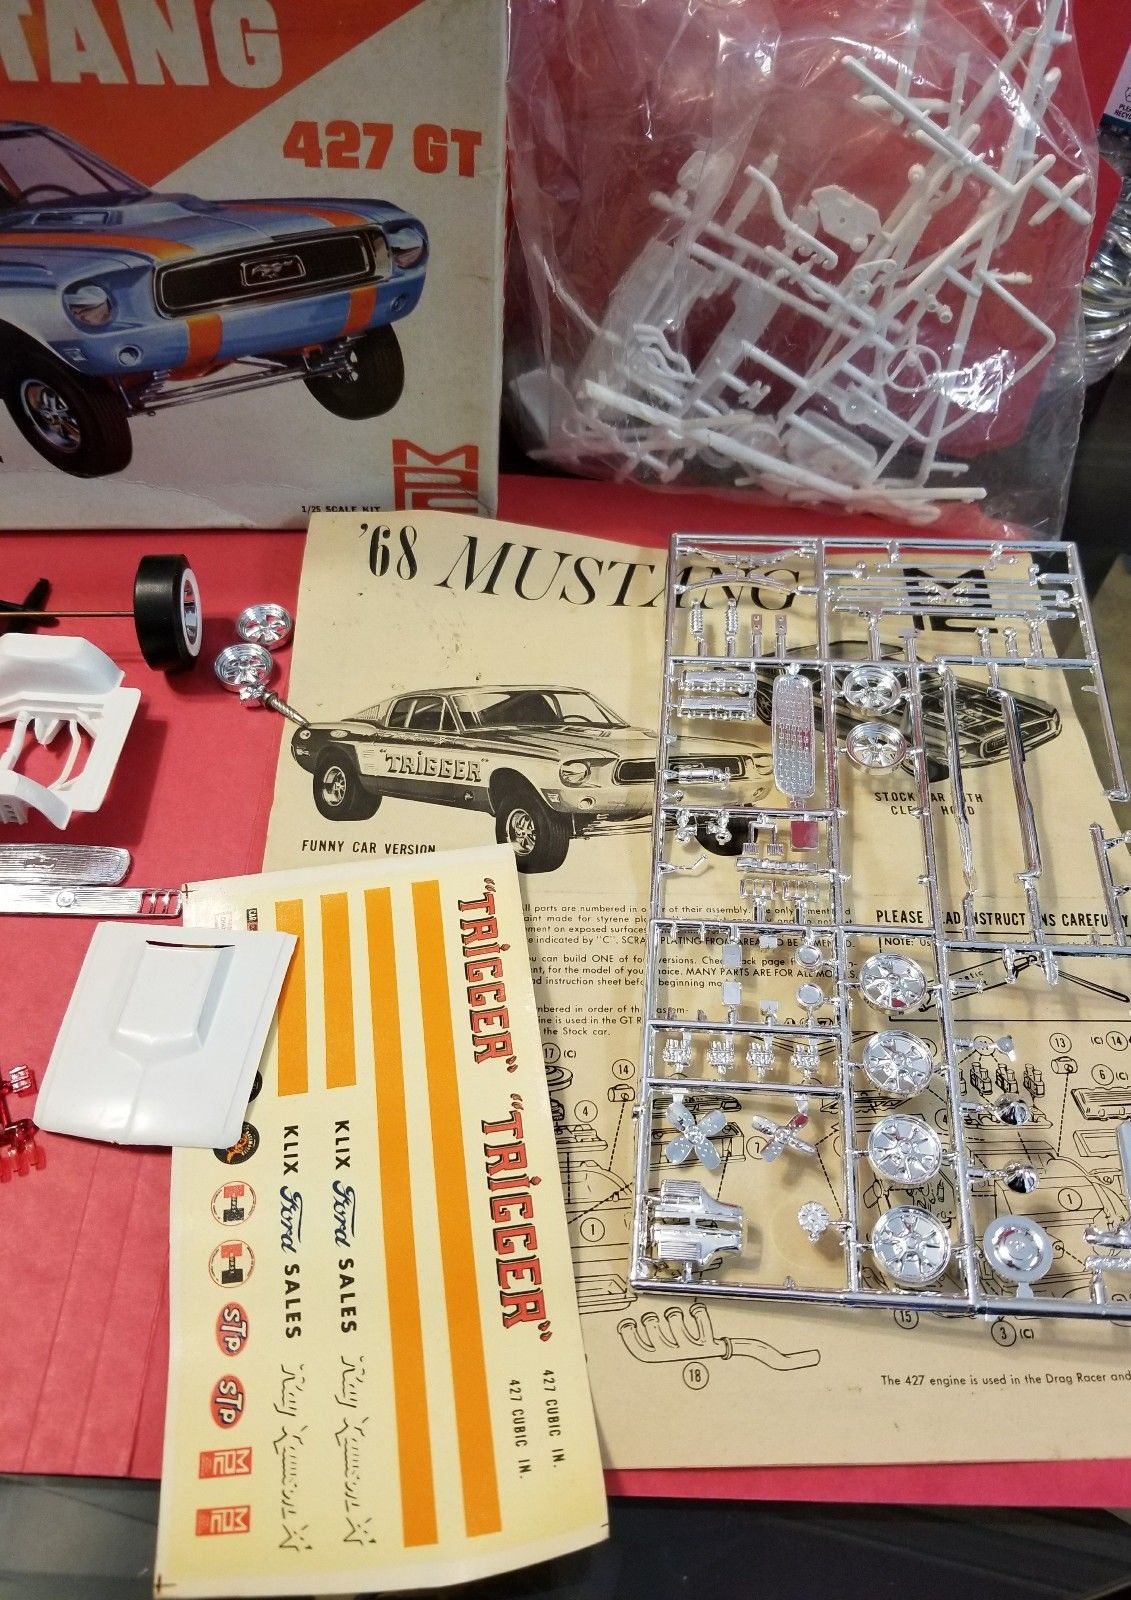
Those chrome turn signals/parking light lenses were the most obvious weakness of that kit. Good to see you addressed that in a major way. I built this kit long ago and used Bare Metal Foil's Black Chrome for the window trim, but ended up going over it all with Testors Semi-flat black to tone it down. Hopefully you have a steady hand. IIRC the catalytic converter is HUGE on this kit (possibly in real life, too), but is rather blob-like, so a good wash and some detailing will really help. Looks great so far. Love the SVO Mustangs.
-
"Chiv-ra-lay" Gotta love that Southern accent. SEGA have been at it a while, and at least one member here has built a replica of "Monnshiner" Josh Owens' '53 Chevy Chiv-ra-lay:
-
Best stock early flathead?
Casey replied to OldNYJim's topic in Model Building Questions and Answers
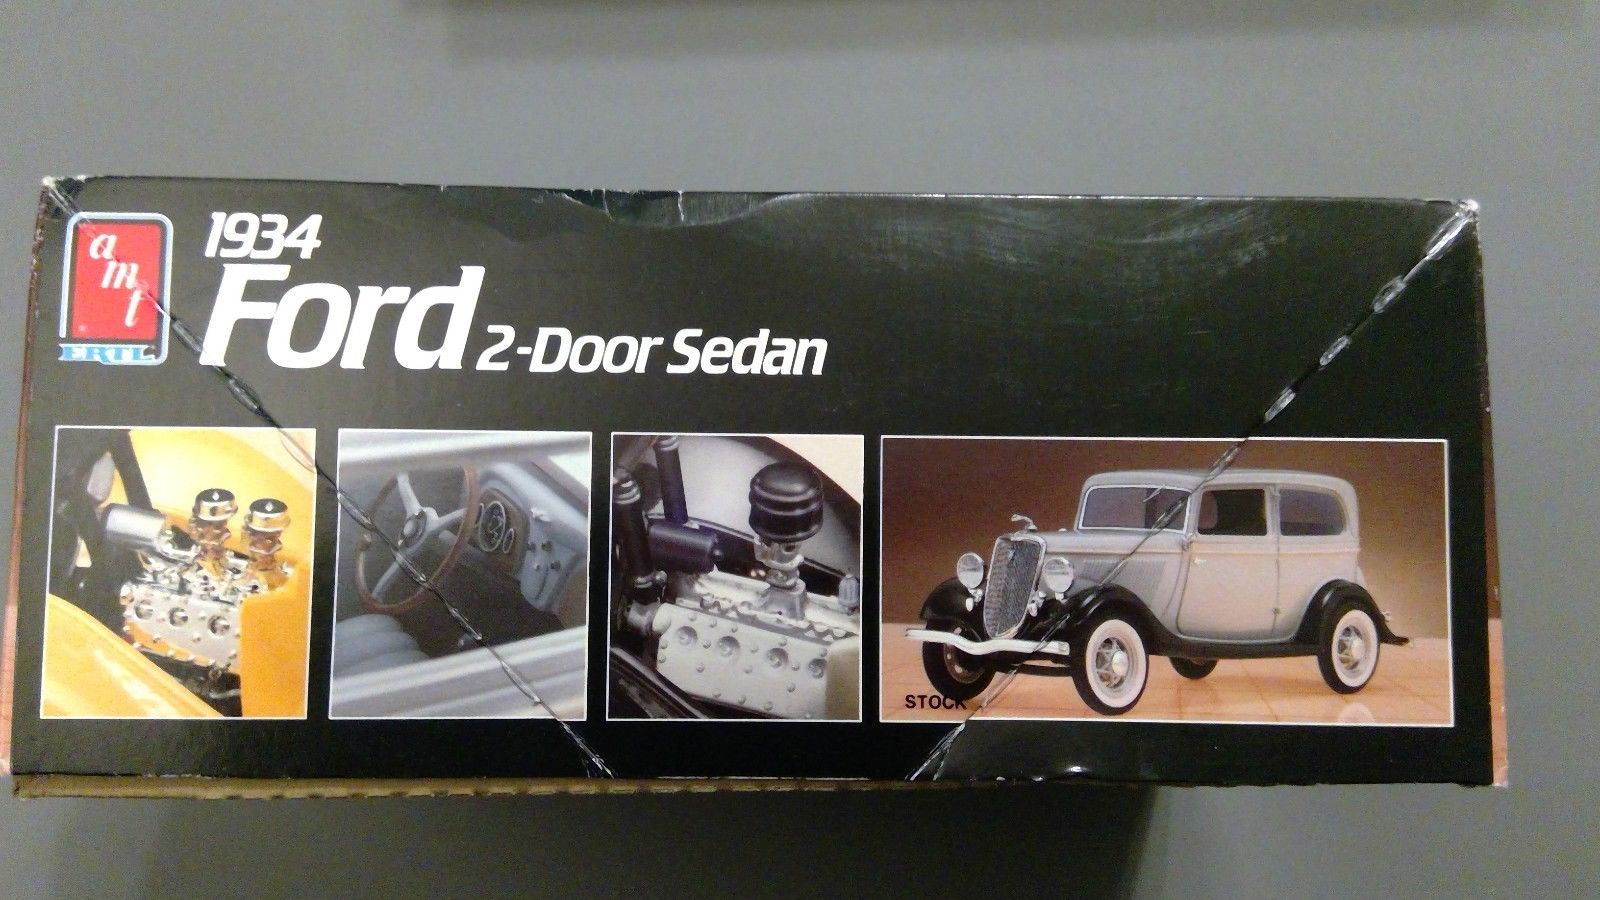
Looks like that would work fine for use in a stock '32: I think this was the kit Roger suggested, which probably shares the stock parts with the AMT '34 Sedan:
-
Maybe this post and the third one above can be merged with the first post, so they're all together. The Q&A section seems to be the best catch all place for question like this.
-
-
I'll probably just keep it curbside.
-
Whoops, sorry. I totally missed that. That would probably be the best all inclusive donor.
-
Not sure if that would be possible considering space constraints, but I have no doubt we'll see both the 427 Fairlane and '67 Mercury Comet kits released individually within the next few years. While both '66 Fairlane kits share many parts, I think the differences are unique enough to justify separate kits, much like the '69 Olds 442 and Hurst/Olds Cutlass kits.
-
I'm pretty sure someone had, and has posted pics, but I can't seem to pull them up with a search. Might've been on another forum, though. I have one of the Revell snap kits, but my plan, if it ever proceeds, is to use the snap kit's interior and body with either the MPC '69 Cutlass or Revell '72 Cutlass frame and suspension, then use the 454 BBC from the AMT '70 Monte Carlo or AMT '70.5 B-M Camaro. The old AMT kits and it multiple year versions is not good and IMHO not worthy of using as a donor when there are far better options available.
-
'Stink Bug' - detailed-up AMT Superbug Showrod Beetle build
Casey replied to OldNYJim's topic in WIP: Model Cars
This is gonna be one sweet ride to the roller rink Saturday night. -
1/25 Studebaker Turbine Truck
Casey replied to Casey's topic in WIP: Model Trucks: Big Rigs and Heavy Equipment
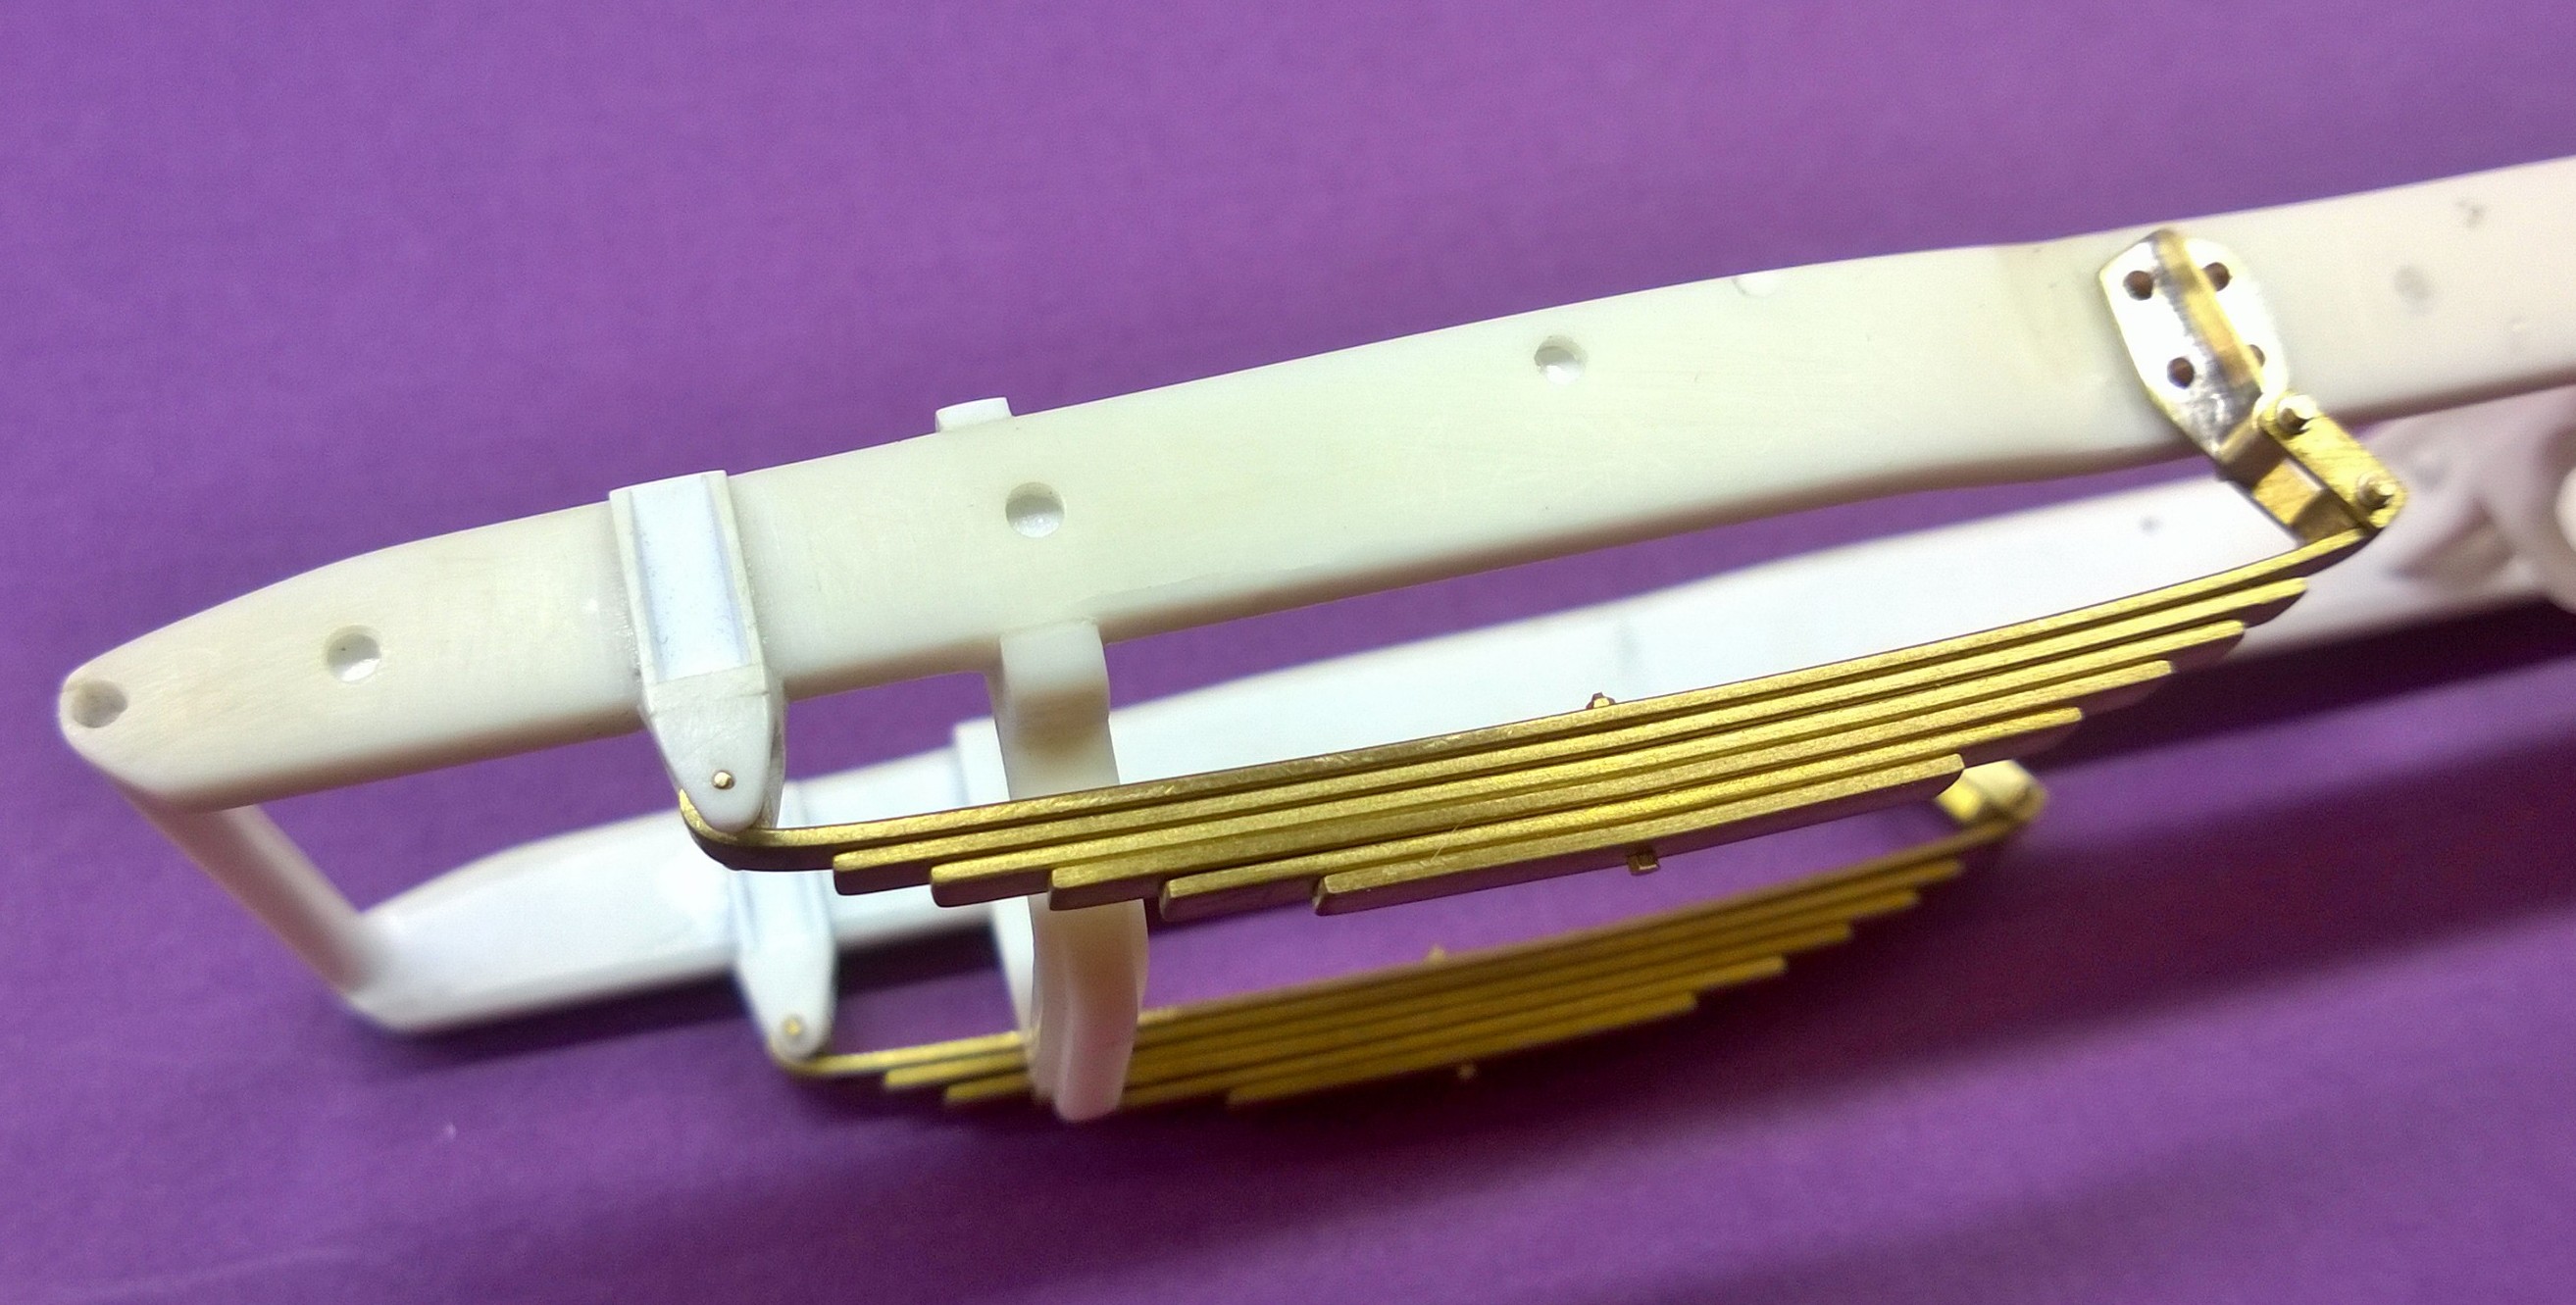
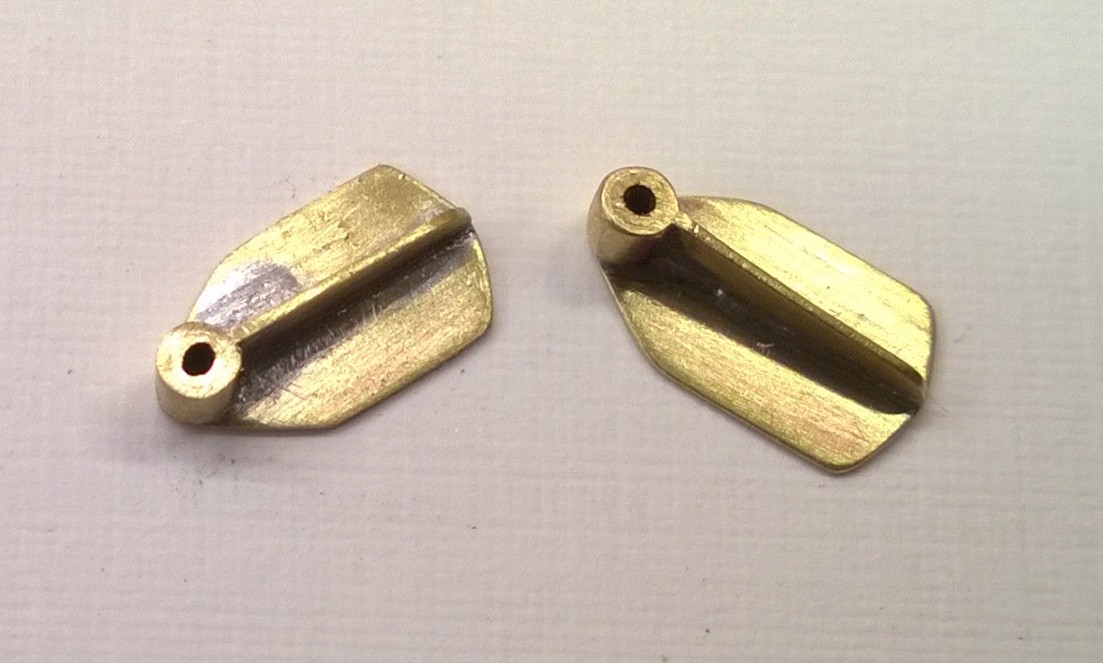
Test fitting the front axle to the leaf springs confirmed the slight taper from back-to-front previous measuring foretold, so I'm going to make new front spring brackets to ensure the springs will be truly parallel. New brass brackets will better match the rear brackets and keep things a bit more cohesive overall, plus it will provide a tighter bracket to front spring eye union. The existing plastic brackets were never ideal, so now is the time to improve them. Here's how things look with the axle resting in place: You can see the small gaps between the brackets and sides of the front spring eyes above, and the brackets are overly thick, too, so replacing them should correct both issues. Below is a test fit with the turbine engine and (Allison?) transmission in place, showing the axle just clears the bottom of the engine. Clearance might be even tighter once the axle is fully seated on the springs, but I'll deal with that when I set the final ride height: In the side view of the left leaf spring below you can see how the 4mm bolt barely passes through the bracket, which was also a problem needing correction, and again, something which will be corrected with new, thinner brackets: I added Tichy Train Group's .05" diameter rivet heads to the rear leaf spring brackets and where the frame cross members meet the frame rails, like so:
-
Perfect, thank you, Ron.
-
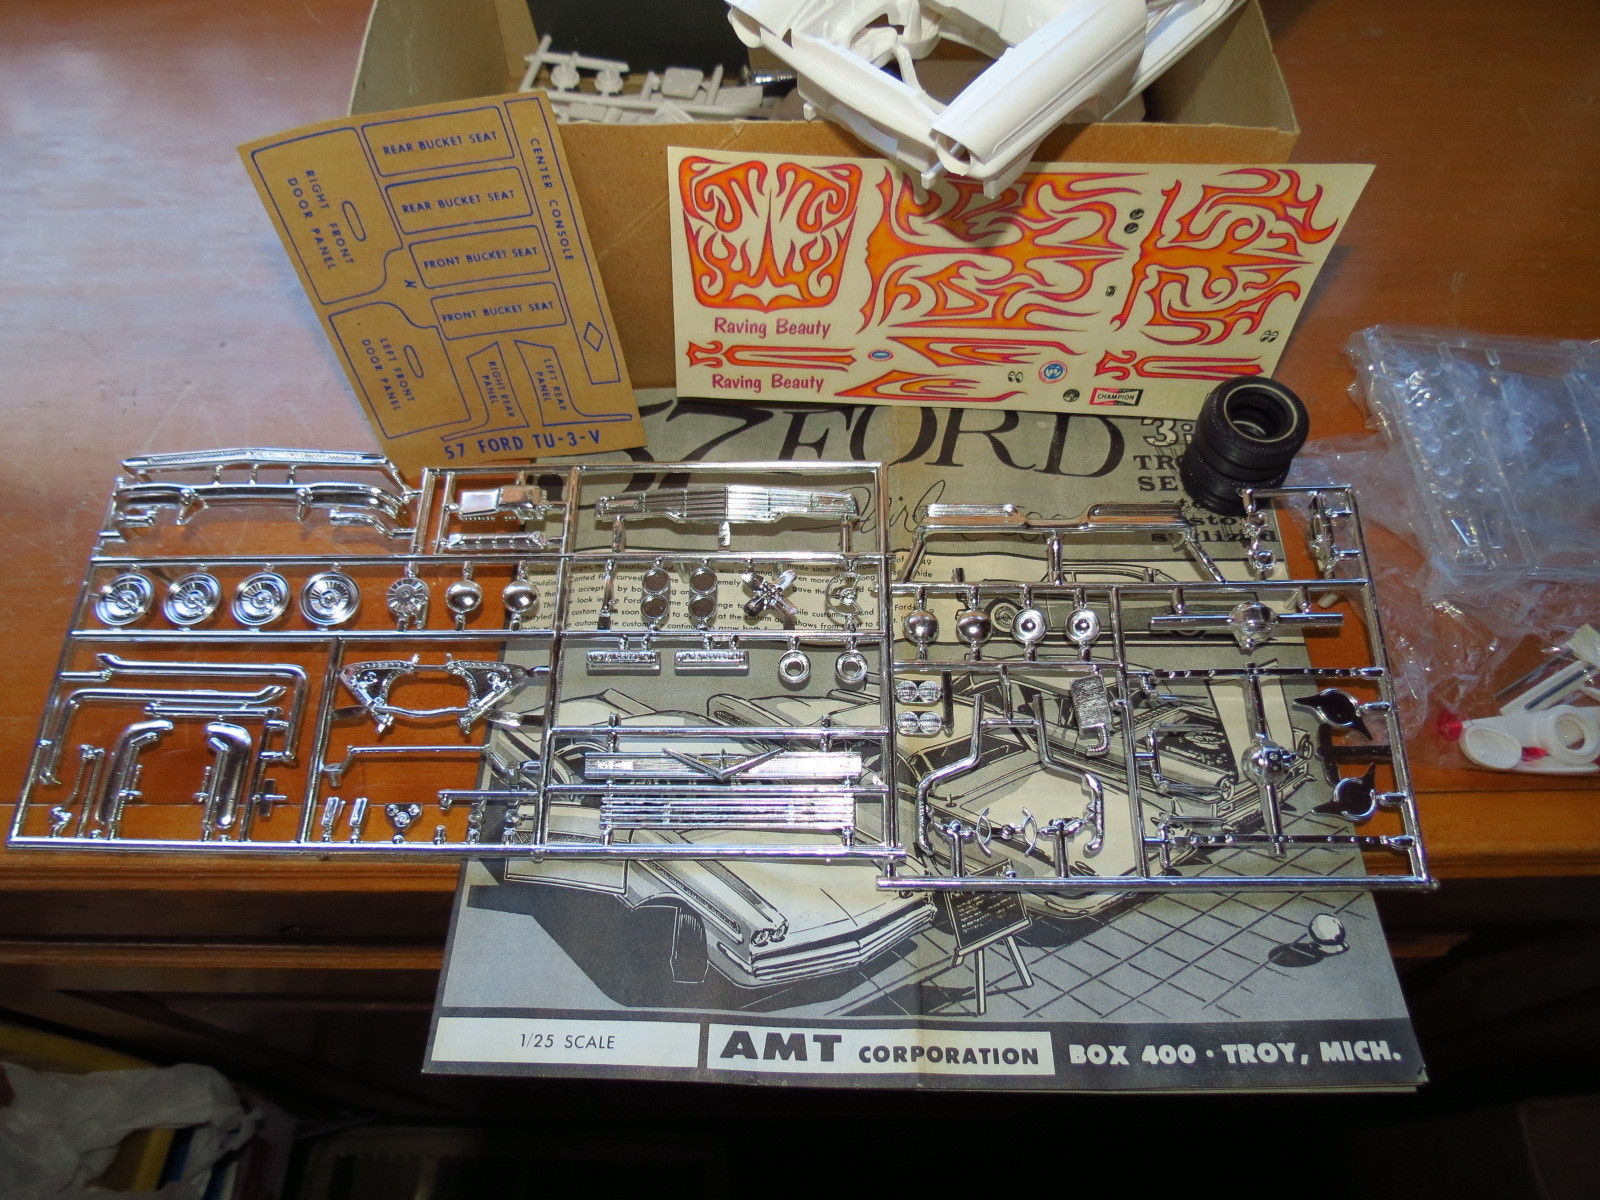
The chromed parts on the right (pipes, baby moon caps, etc.) are-- the outer perimeter runner radii are prefect, the gates for the individual pieces are different then in previous issues in which the same parts were included, and the parts arrangement is different, too. The seats and rear roll pan pieces appear to be "old" parts-- you can see where the sprue was snipped with a cutting tool, so perhaps Round2 decided to cut these parts free from the rest, anticipating them being plated, and included the seats to fill out the parts pack package? Looking at the original Trophy Series instruction sheet, the rear roll pan was not chrome plated. Maybe someone thought it was a bumper piece of some sort? Original Trophy Series chrome plated parts for comparison:
-
Looks like the Hurst wheels just might be included...: I'm sure there will be a Collector Model blog post to spell out all the details.
-
Could someone with this kit please measure the distance between the two stops/brake backing plate flanges on the rear axle? Basically the distance between the red lines in the (poor) image below:
-
-
Source for 13" Minilite Wheels
Casey replied to Miatatom's topic in Model Building Questions and Answers
The Minilite style wheels in this kit might work, too, as they are undersized and you might be able to turn down the lip enough to get close to 13"...I doubt it, but closest I can think of in 1/25 scale, and they will be five lug.
-
1966 Buick Engines
Casey replied to Casey's topic in 1:1 Reference Photos: Auto Shows, Personal vehicles (Cars and Trucks)
Not a single chrome valve cover on any of 'em, either. Were the red engines the first to use the B-O-P trans pattern on the rear block face? -
-
1/25 Studebaker Turbine Truck
Casey replied to Casey's topic in WIP: Model Trucks: Big Rigs and Heavy Equipment
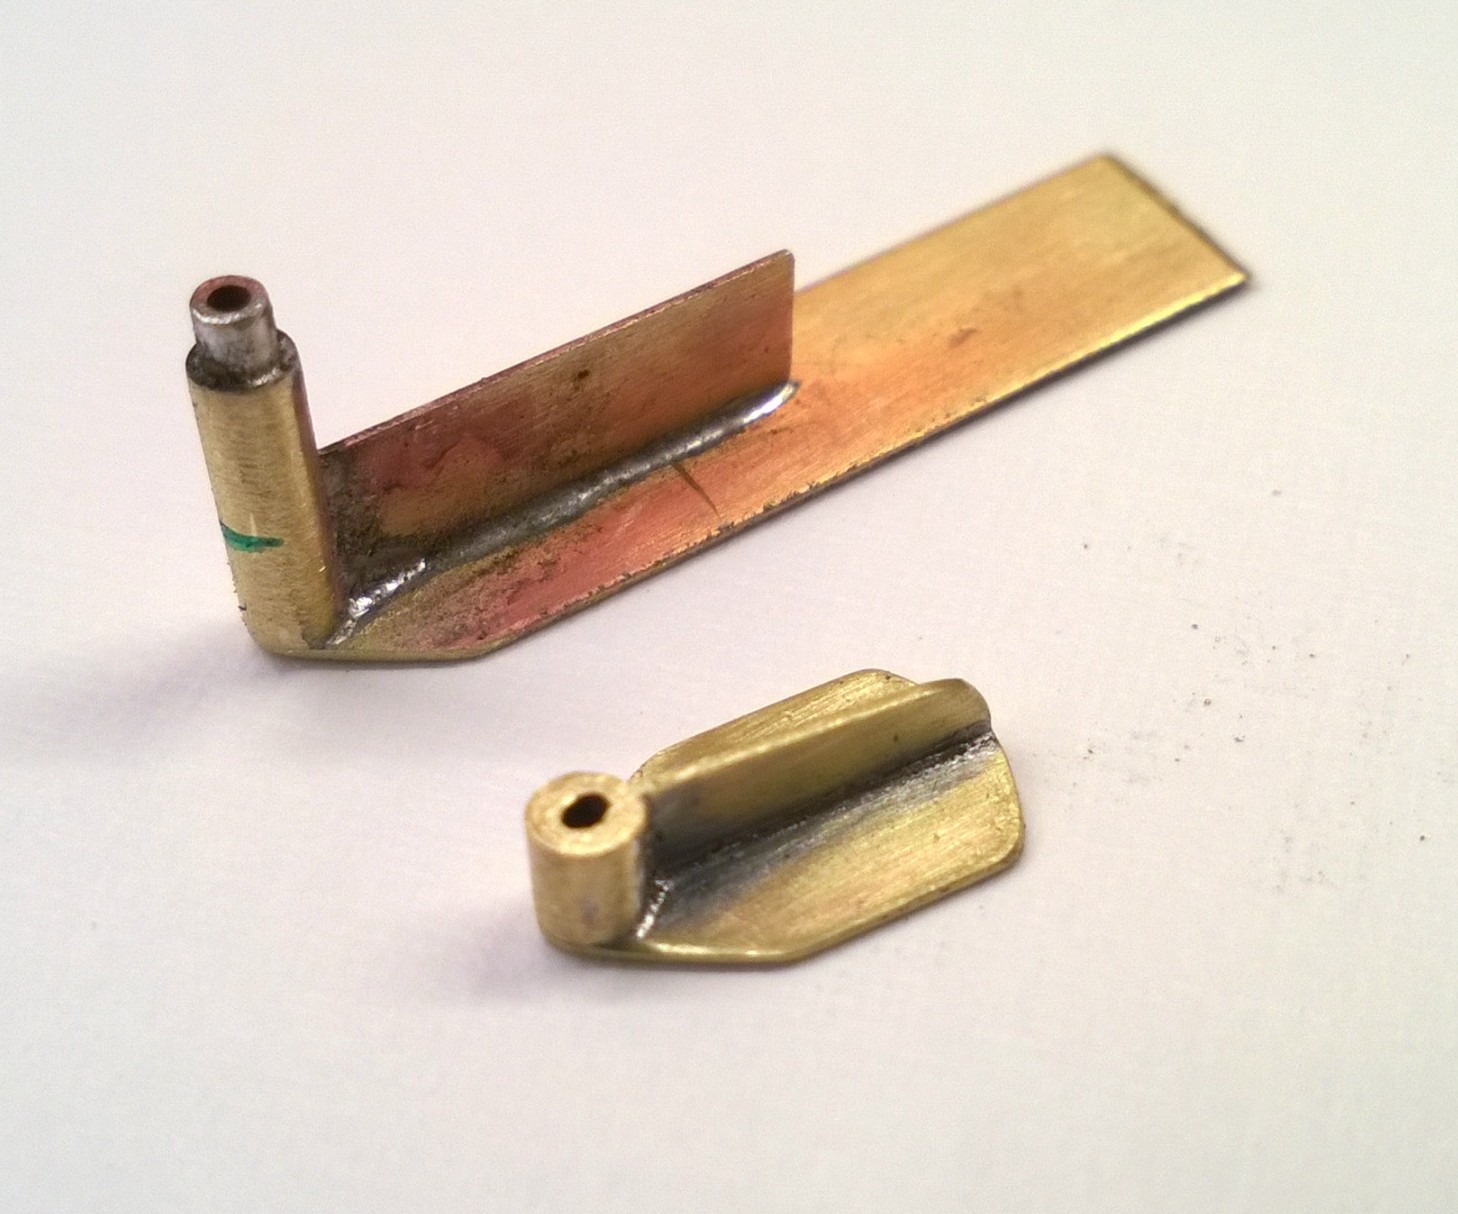
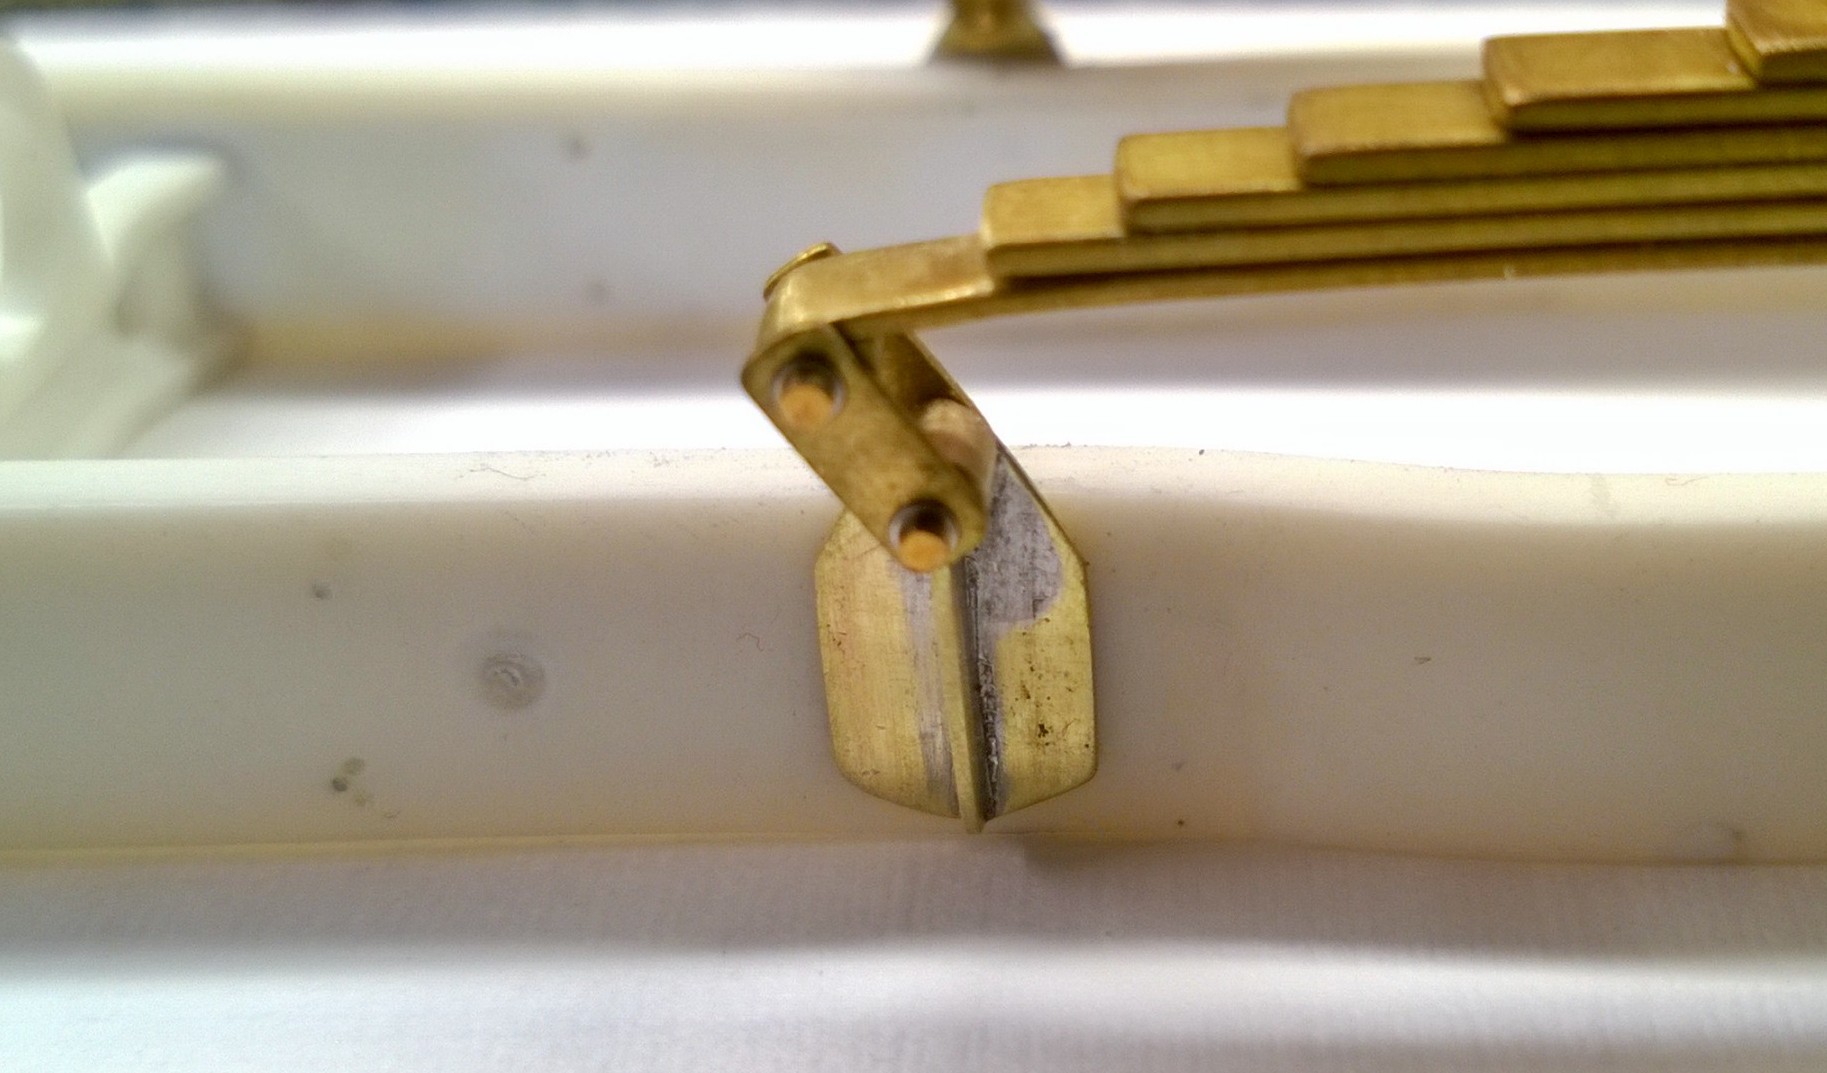
Thanks, I will probably need some at some point. Well, the third try at making the rear shackle brackets didn't work out, but the fourth try did. I probably should've used brass from the start, but hindsight and all. I got some pieces of 1/8" and 1/4" brass strip and various small pieces of tubing together after sketching up a design, then went about cutting, filing, and soldering until I was satisfied with the brackets. Nothing fancy here, but a third hand hold-down is pretty much necessary when working with a hot micro torch and pieces this small, especially it you want accurate positioning when soldering. Here are a few pics of the brackets, from immediately after soldering the piece together to final installation on the frame rails: I will eventually add some rivet detail to "attach" the brackets to the frame rails, but technically they are already permanently attached with superglue. The leaf springs and shackles were test fit once again to check alignment and fit, and while the left (foreground) shackle angle is good, the right side is a bit too vertical, so I will tweak the rear spring eye a bit to flatten the end of the spring out: Glad to be done and past this step.
-
Michaels 60% off today 3/7/2018
Casey replied to MeatMan's topic in General Automotive Talk (Trucks and Cars)
The coupon is valid at all stores: http://www.michaels.com/coupons/ca-coupons.html?promo=20180307_Digital_60MVS We have four Michaels within a 20 mile radius, and one seems to carry more stock than the others, so it may be hit and miss. I did see the stock Revell Bronco kit at one the last time I used the 60% off coupon, and who doesn't need a sixth or seventh Revell '68 Charger R/T? My local stores used to have twelve or so Round2 kits, but they've never been restocked, so only ECTO-1s and Petty Sportsman kits left.