Gary Chastain
-
Posts
2,504 -
Joined
-
Last visited
Content Type
Profiles
Forums
Events
Gallery
Everything posted by Gary Chastain
-
 I have not seen the paper clip hood hinge, it looks very neat/clean. May have to experiment with that. Truck is looking really good.
 -
White Western Star
Gary Chastain replied to Rbray47's topic in Model Trucks: Big Rigs and Heavy Equipment
Sharp looking truck -
1950 Ford Pikes Peak Truck
Gary Chastain replied to Zippi's topic in Model Trucks: Pickups, Vans, SUVs, Light Commercial
Well done, great build -
Another "Convoy" Truck!
Gary Chastain replied to Jürgen M.'s topic in WIP: Model Trucks: Big Rigs and Heavy Equipment
Fantastic work -
Lookin good, like where this is going Jeff
-
Just ordered a MX13 engine from A&N. Yes it is 1:24 scale, Not sure if I will be able to use it but we will see.
-
Peterbilt 359 'needle nose' conversion
Gary Chastain replied to robdebie's topic in Model Building Questions and Answers
https://stsupplyco.com/collections/cab-hood-parts/products/kenworth-w825-needle-nose-cab-conversion-kit-1-25 not sure if this will help -
70's Diamond Reo
Gary Chastain replied to leafsprings's topic in Model Trucks: Big Rigs and Heavy Equipment
Really good adjustments, looks good -
Another one for my stash
Gary Chastain replied to JerseeJerry55's topic in WIP: Model Trucks: Big Rigs and Heavy Equipment
An idea
-
Another one for my stash
Gary Chastain replied to JerseeJerry55's topic in WIP: Model Trucks: Big Rigs and Heavy Equipment
Just picked that one up myself and have the same dilemma. Wish I could find an updated hood for it. Be watching suggestions -
The finish is pretty good, the detail is good, will let you know about paint.
-
The neighbor,s truck has a straight six, I am guessing it is a Pakcar motor. I heard A&N is coming out with a Pakcar motor.
-
International 4300 tractor
Gary Chastain replied to Gary Chastain's topic in WIP: Model Trucks: Big Rigs and Heavy Equipment
I had enough left over Modeus rims and tires, had to add a bushing to the inside wheel to fit the axle. PS…old toolmakers never stop using their tools ??? -
Nash Haul-Thrift Wrecker
Gary Chastain replied to RoninUtah's topic in Model Trucks: Big Rigs and Heavy Equipment
Very cool build, history I didn’t know -
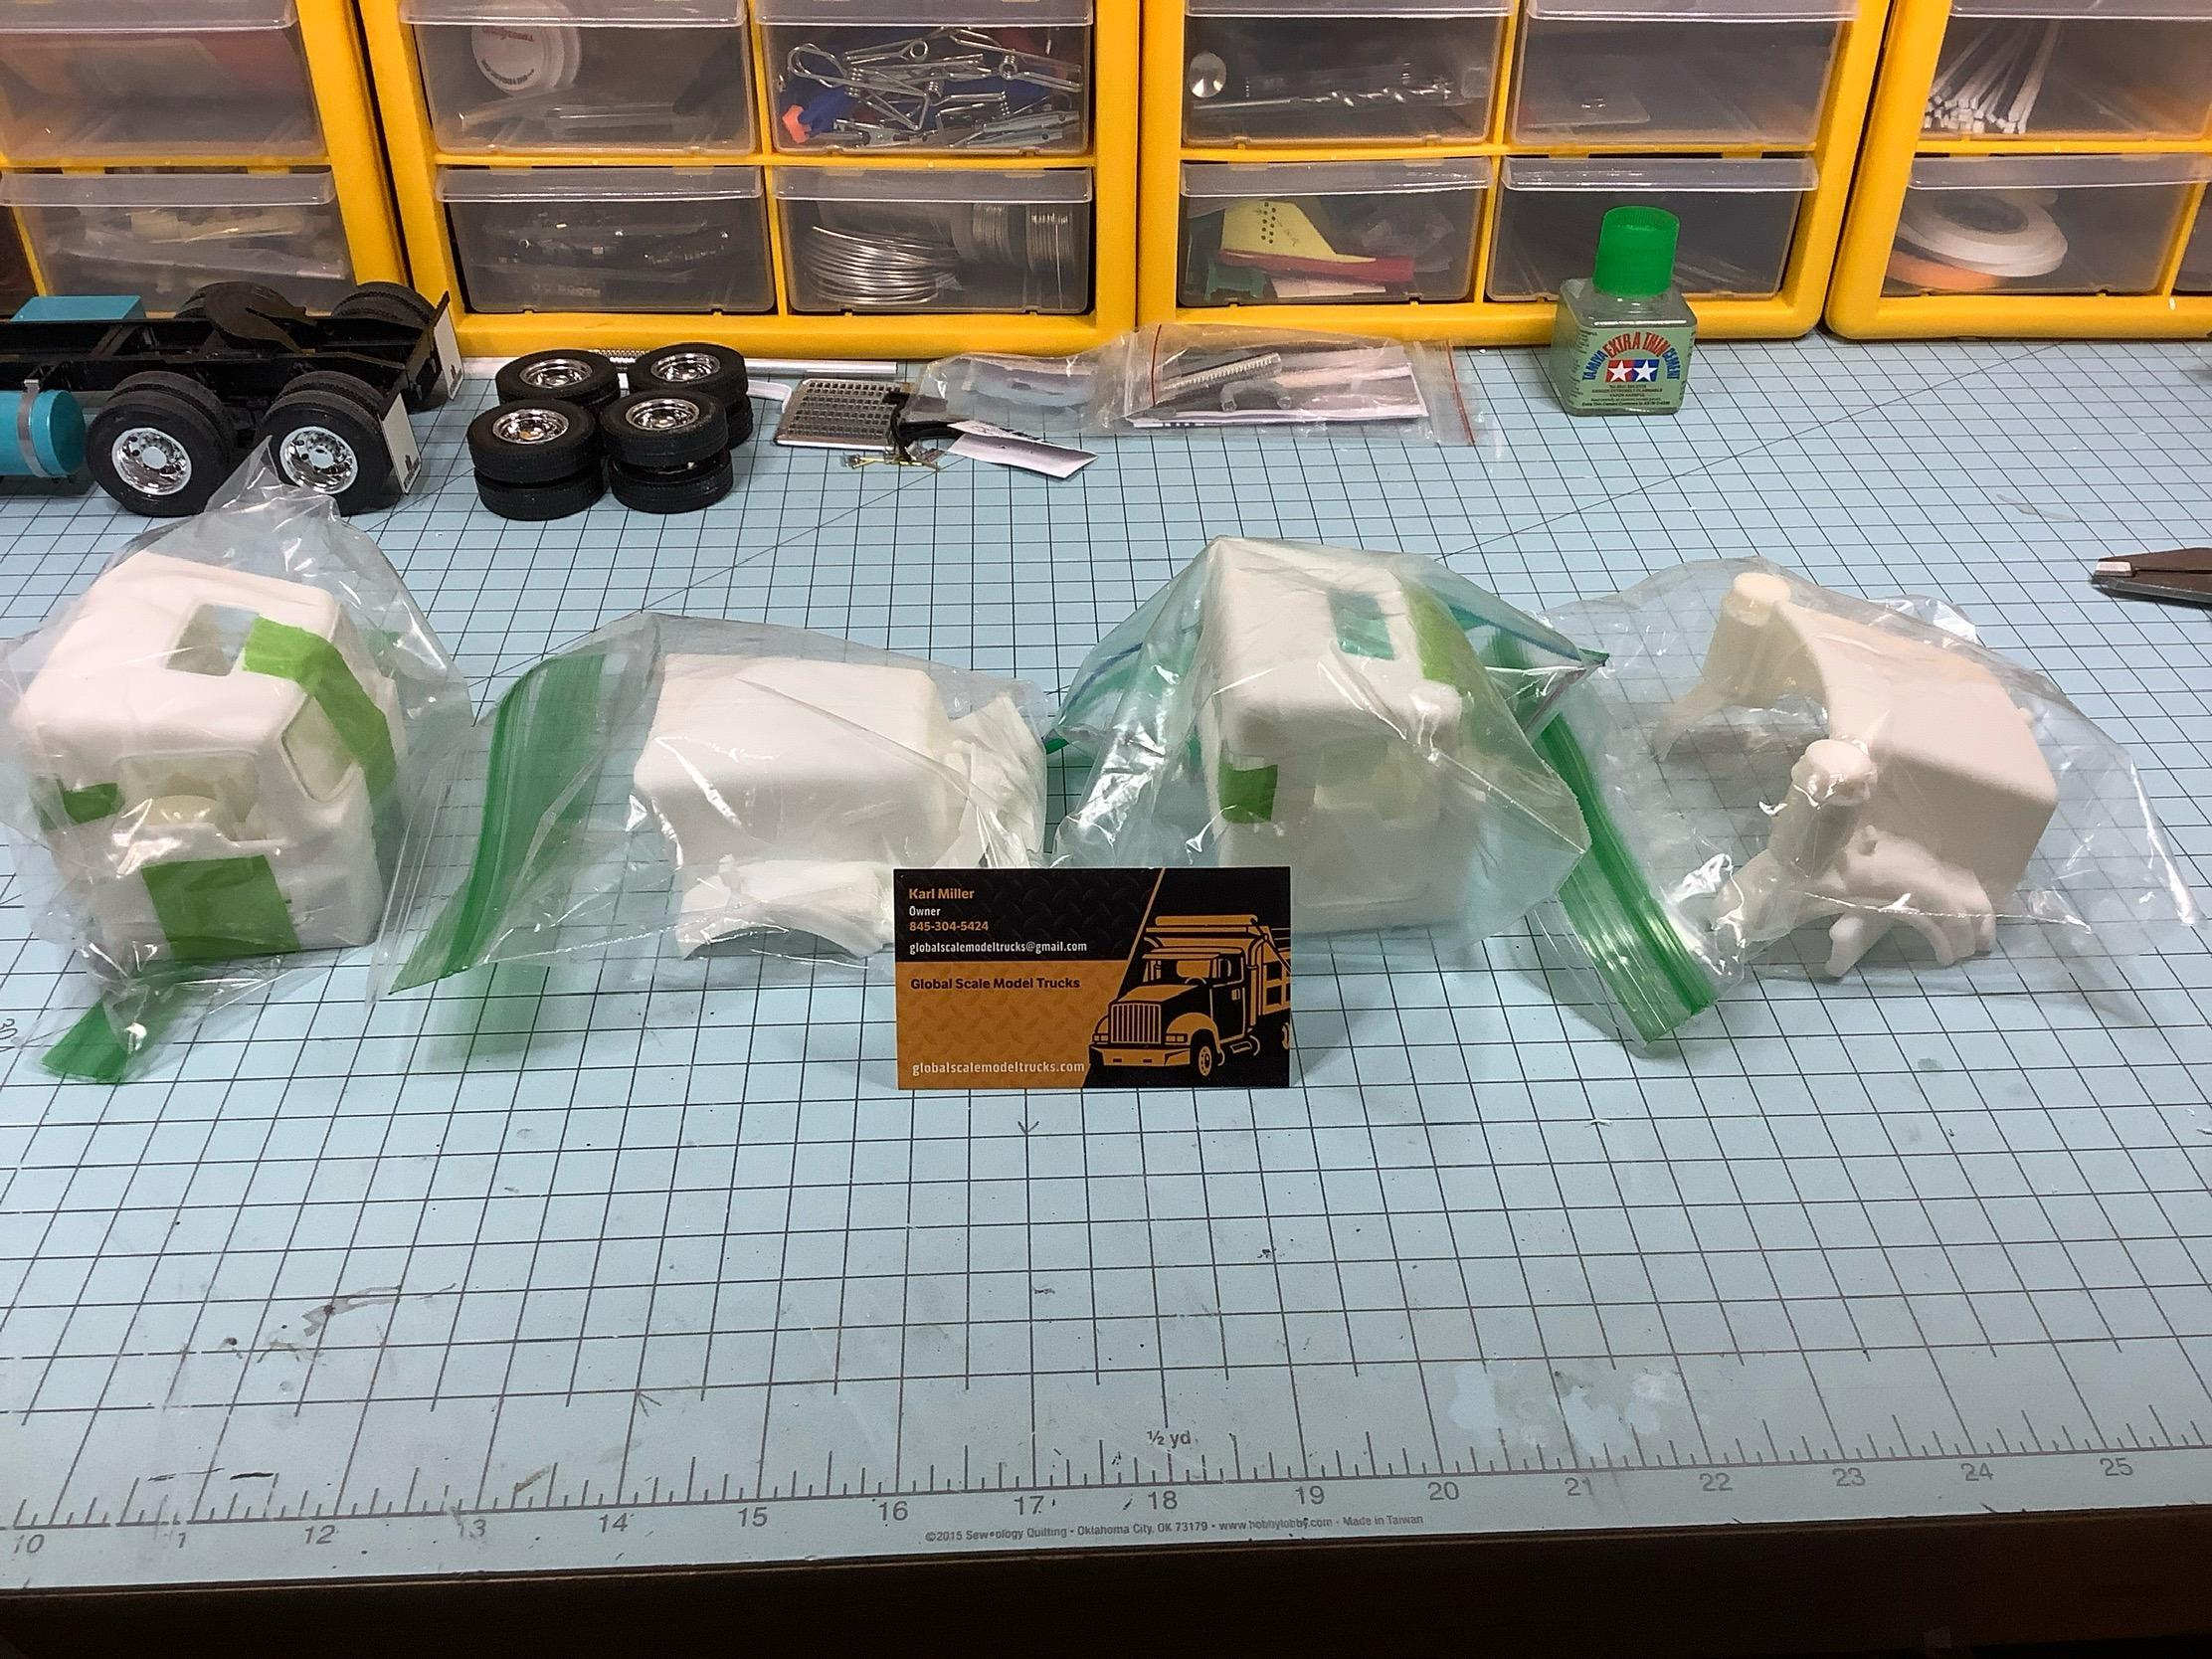
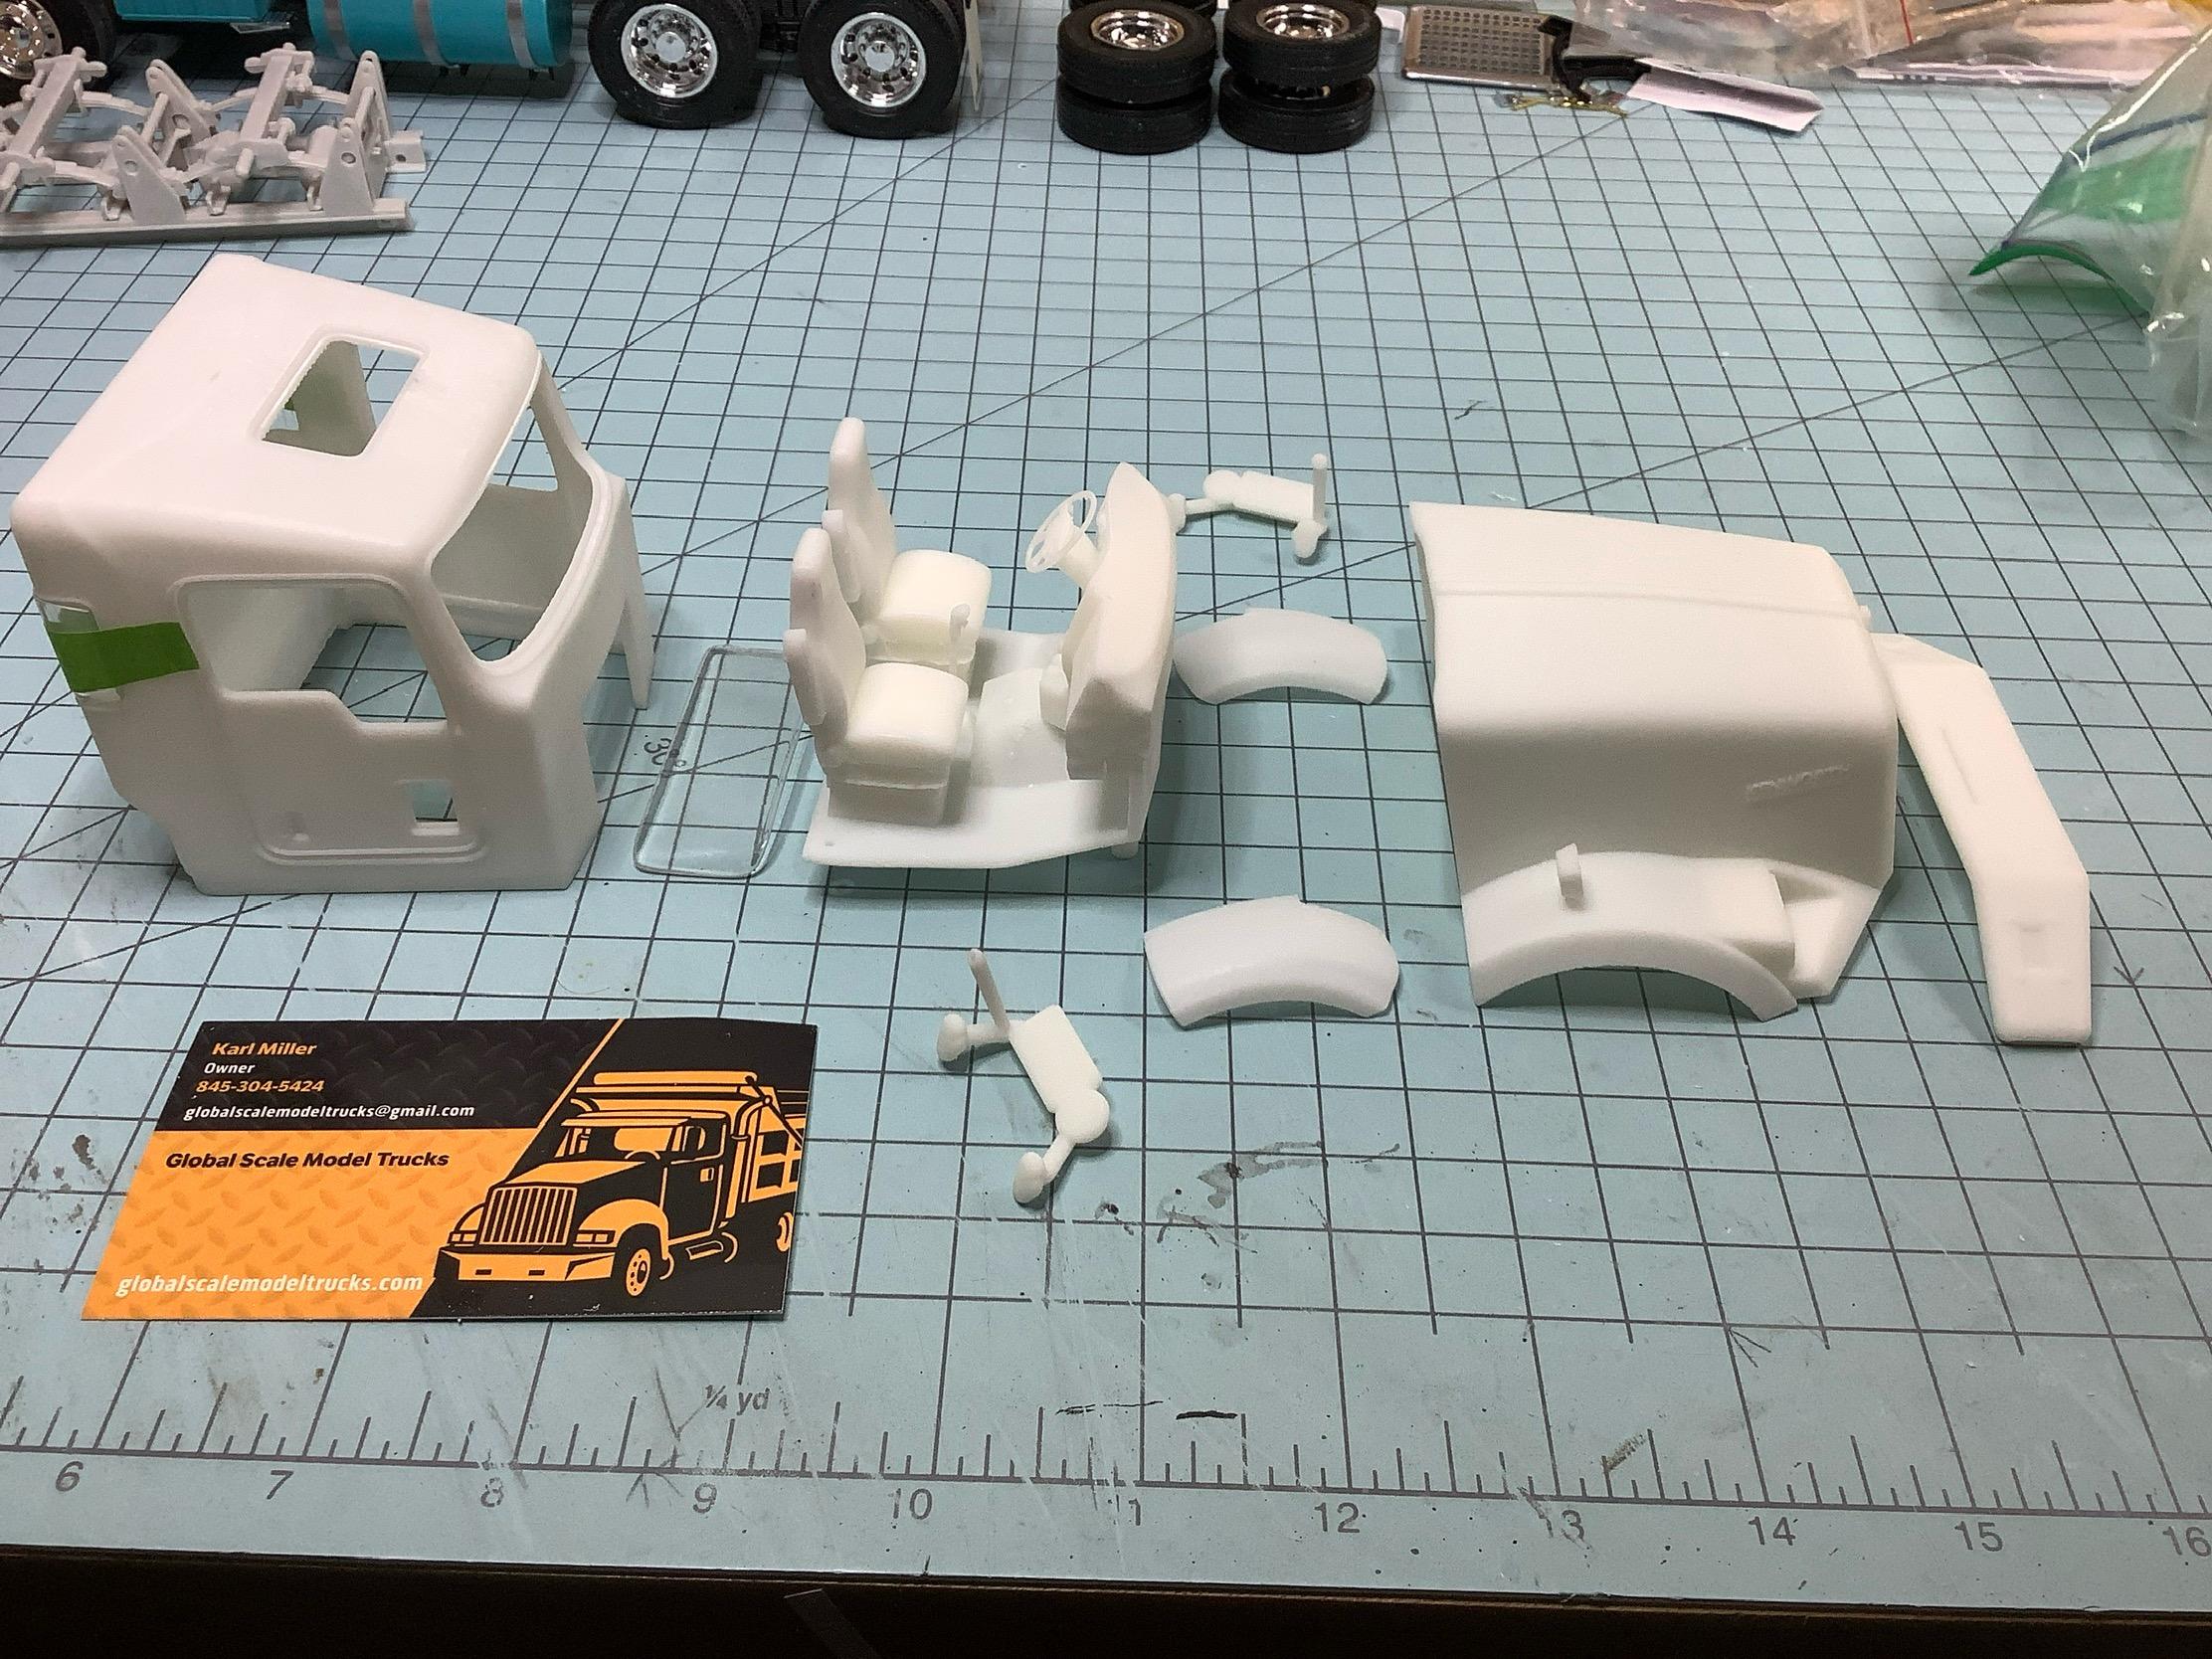
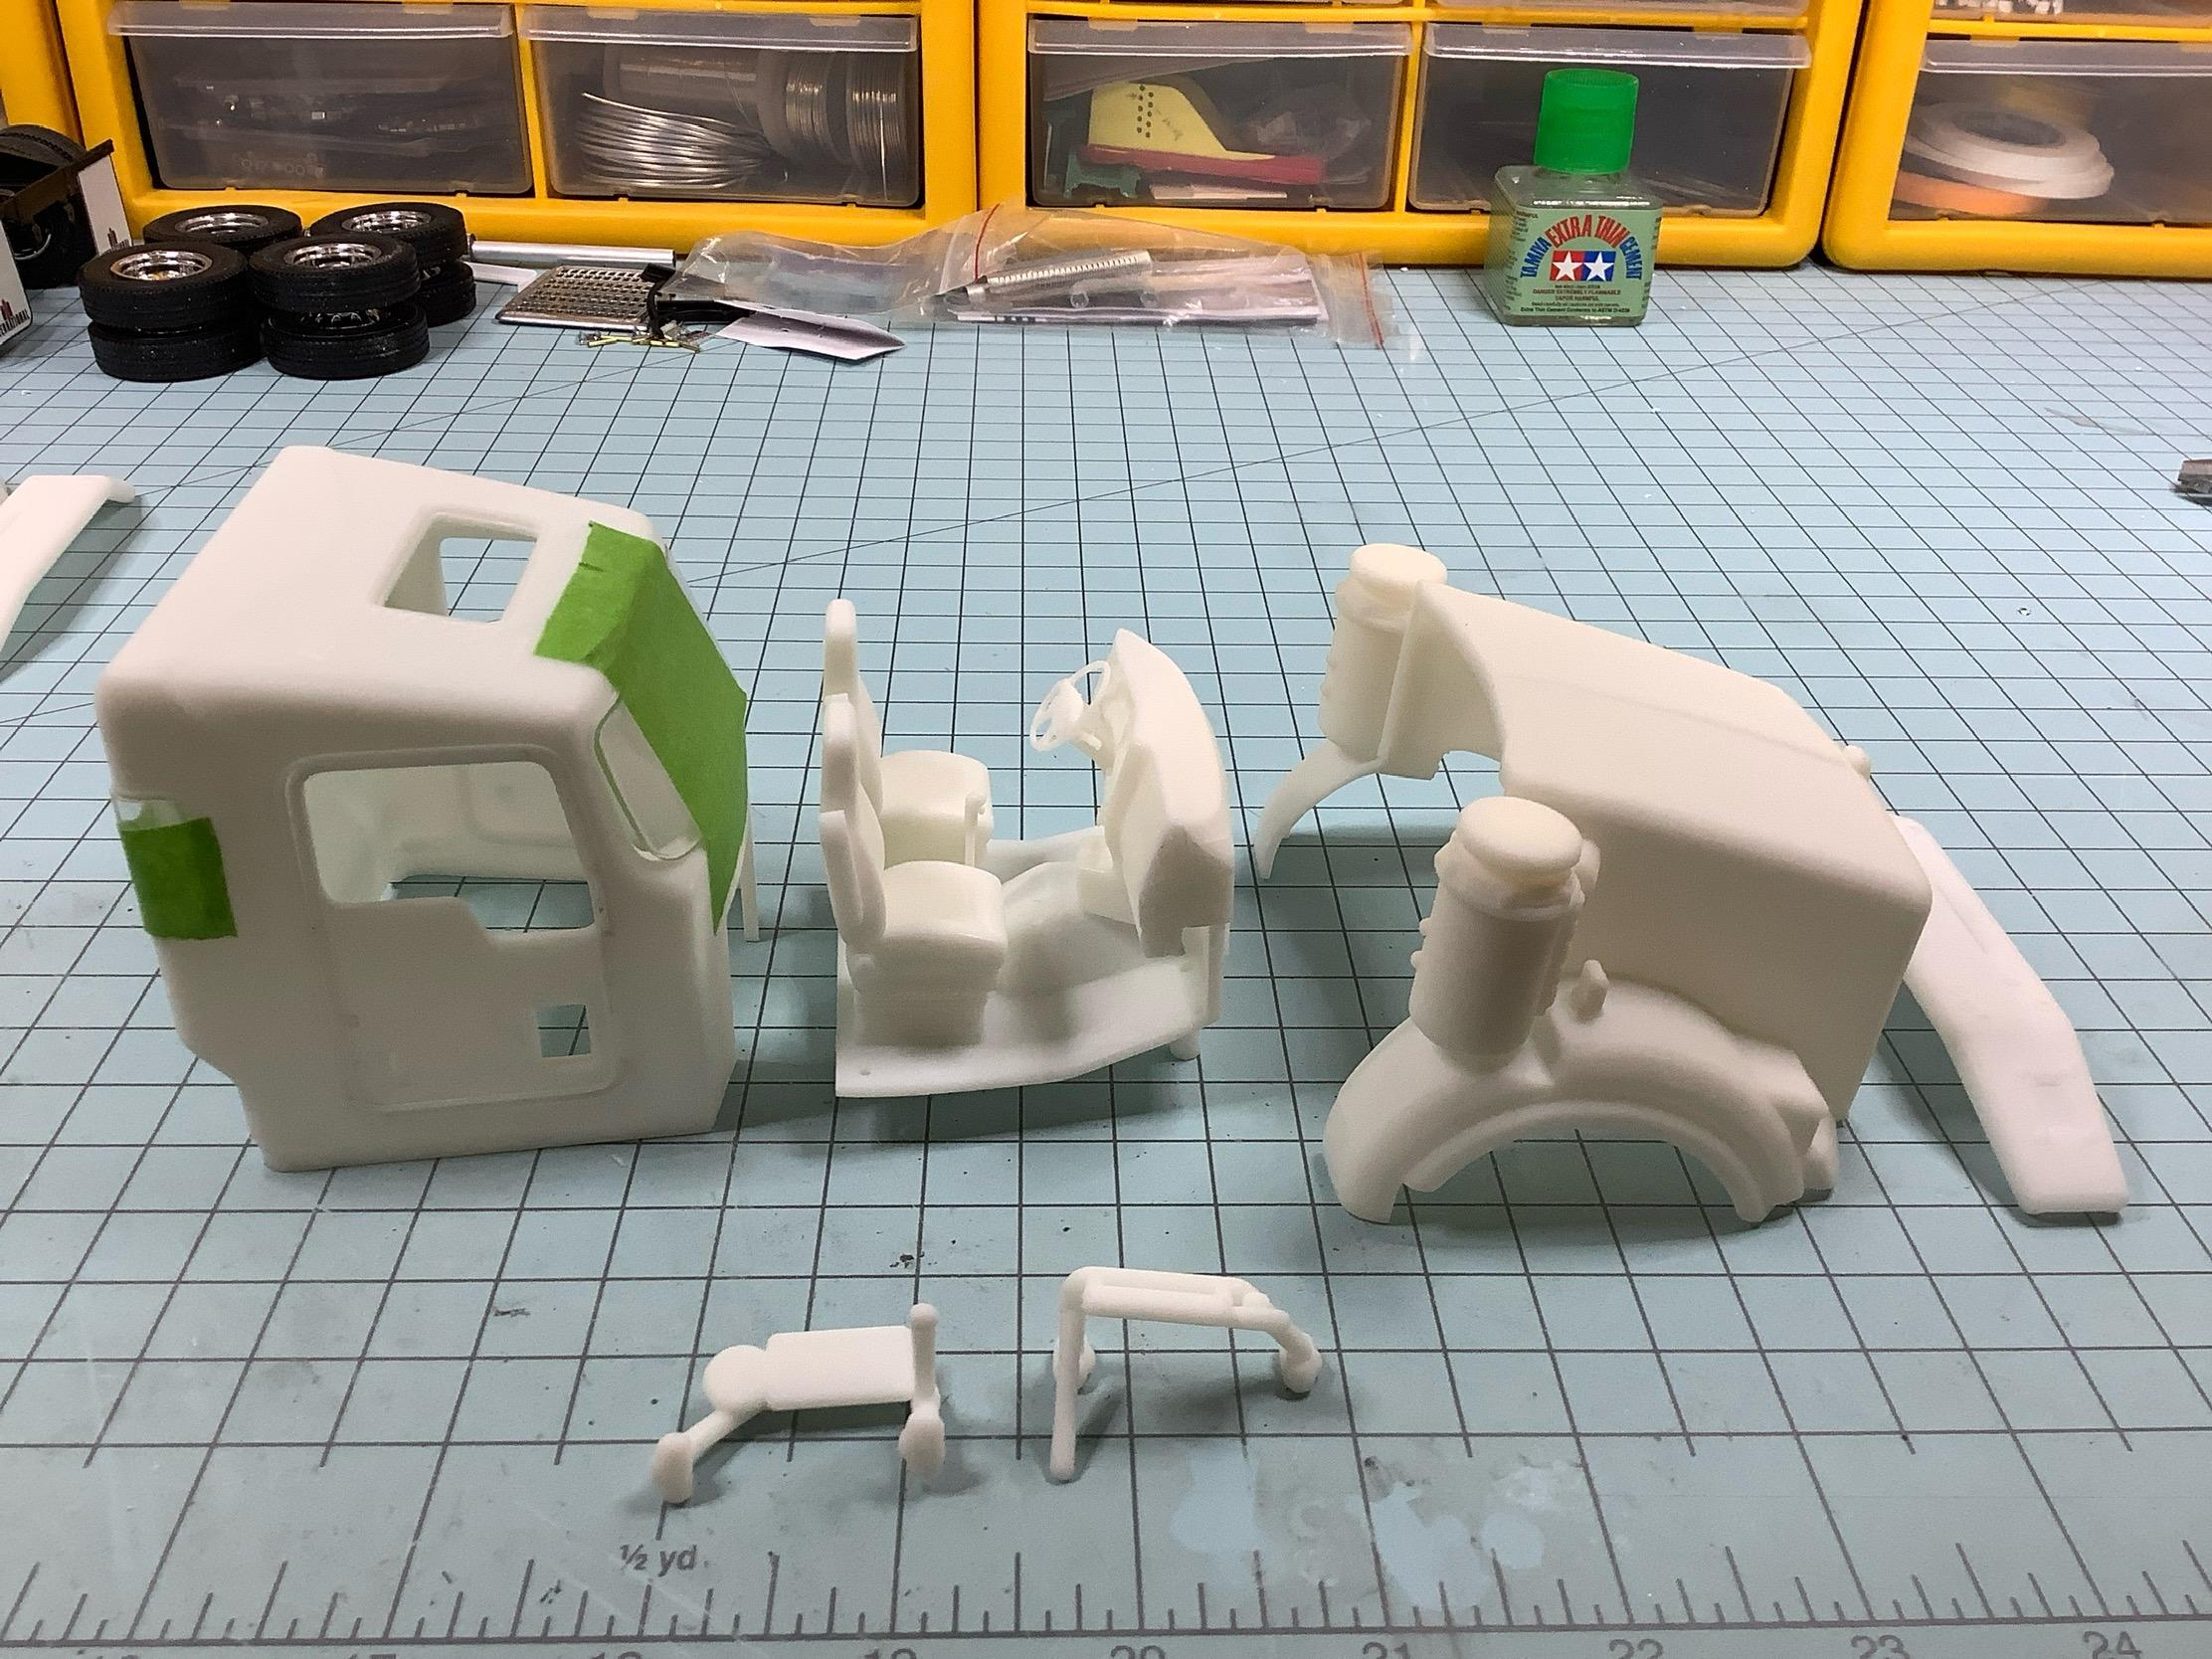
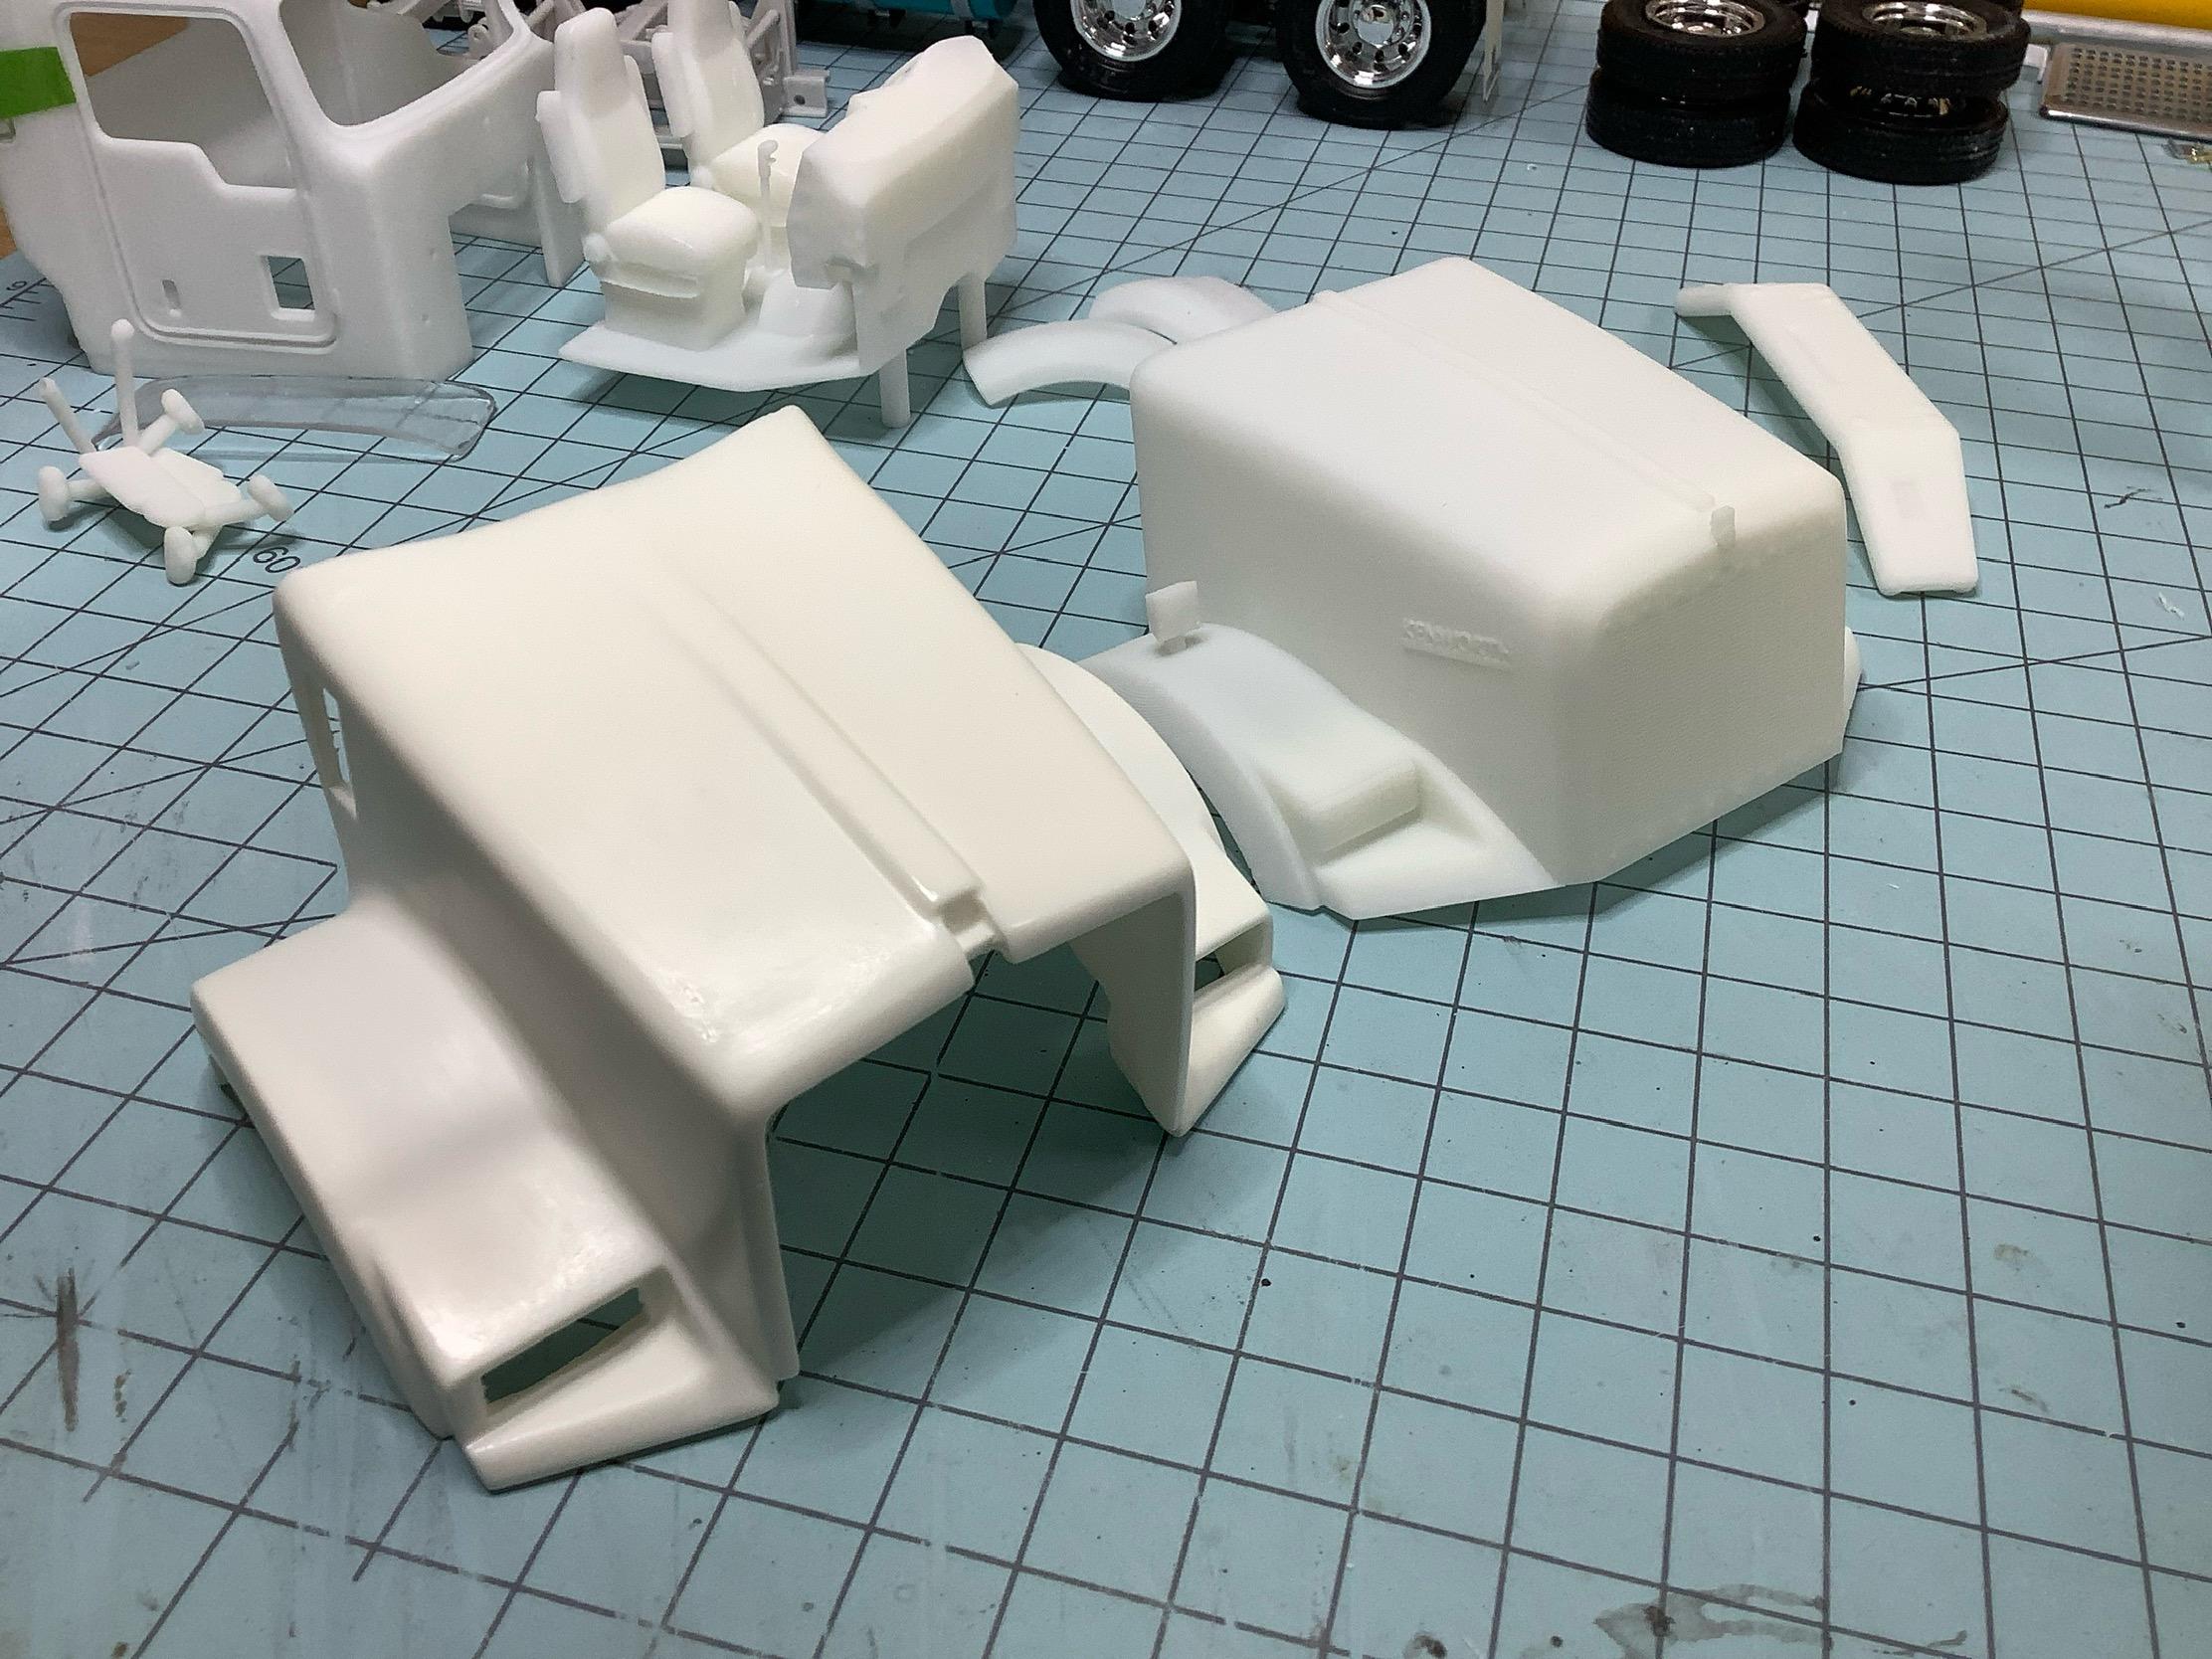
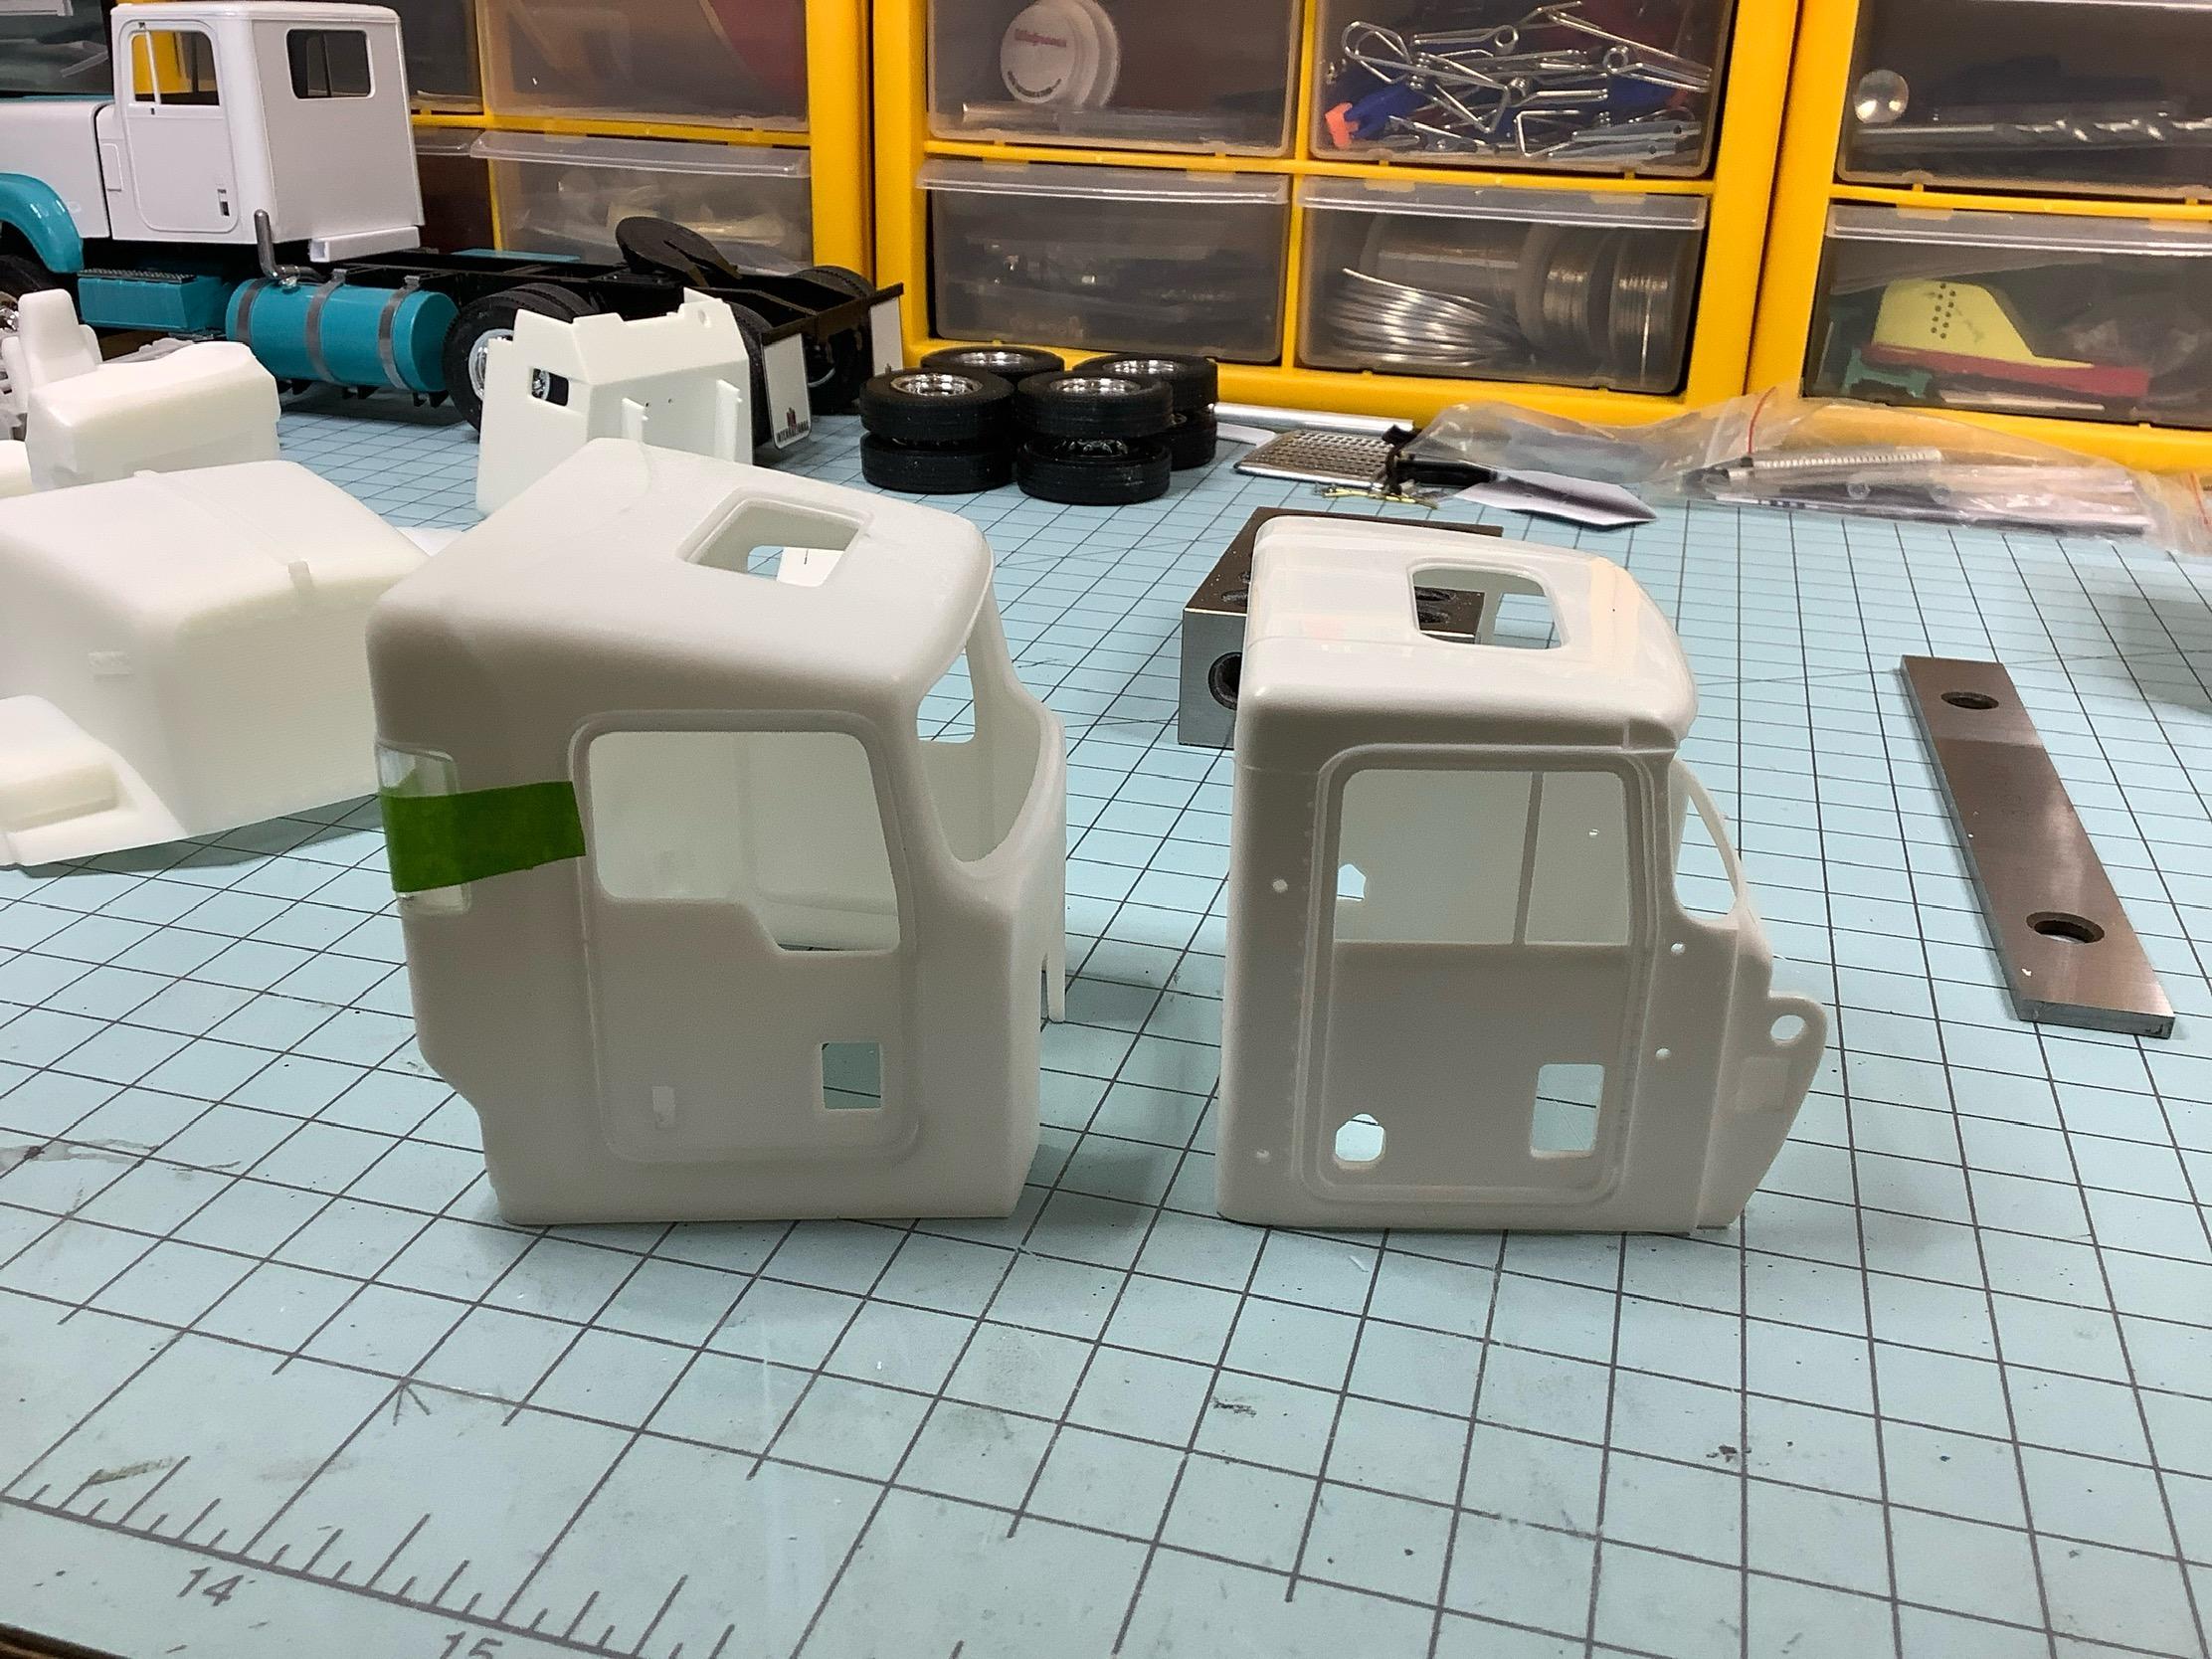
Global Scale Model Trucks, review of the cabs I just received last week. Karl has been outstanding to work with and always answers my emails. I purchased two T800 cabs, one long nose and one short nose. I will be using the short nose on this truck build. The scale on these two cabs is pretty good comparatively with the AMT T600 Kenworth. The hoods from GSM are a little wider than the AMT kit and the aftermarket T800 hood I have. The GSM hood and cab do fit well together, but there is no shelf on the firewall to capture its placement. The GSM firewall is totally smooth, so using a firewall panel for the detail and location shelf could be added. The T600 cab material thickness is .056, the GSM cab in the same location is .076, Karl did a good job of keeping the thickness appropriate and the finish is very smooth. Using the interior tub from the T600 fits loose by about .100, although it could be widened to fit easily. The GSM interior as shown has no door panels, but those could be fabricated easy enough if you desired. The aftermarket T800 uses the headlight assembly from the T600 and fits well, the GSM has a headlight panel molded in. The grill area on the GSM hood is molded in, the T800 grill is fairly simple and easy to fabricate. I will probably remove the grill and fab up my own grill and screen for the extra detail, that is only personal preference. I will remove the molded in turn signals, again only personal preference so I can add more detail. The hood thickness on the GSM hood is .057, on the T600 hood is .046, again very good on the thickness. I will also remove the air breather cans and remount to the cab, again personal preference and I can add to ton of detail to those units. All the glass glues in from the outside of the cab much like real life trucks and cars these days as opposed to glueing the glass in from the inside like the T600. There is an ample shelf to glue the glass in. I will not be using the mirrors from the GSM kit. I am up in the air about using the bumpers but again it’s just me being picky, they are good parts. All in all I will buy more products from GSM. I will add more detail about these cabs as I build, but for now still chasing parts. Need to find a correct motor/transmission combo for this build.
-
International 4300 tractor
Gary Chastain replied to Gary Chastain's topic in WIP: Model Trucks: Big Rigs and Heavy Equipment
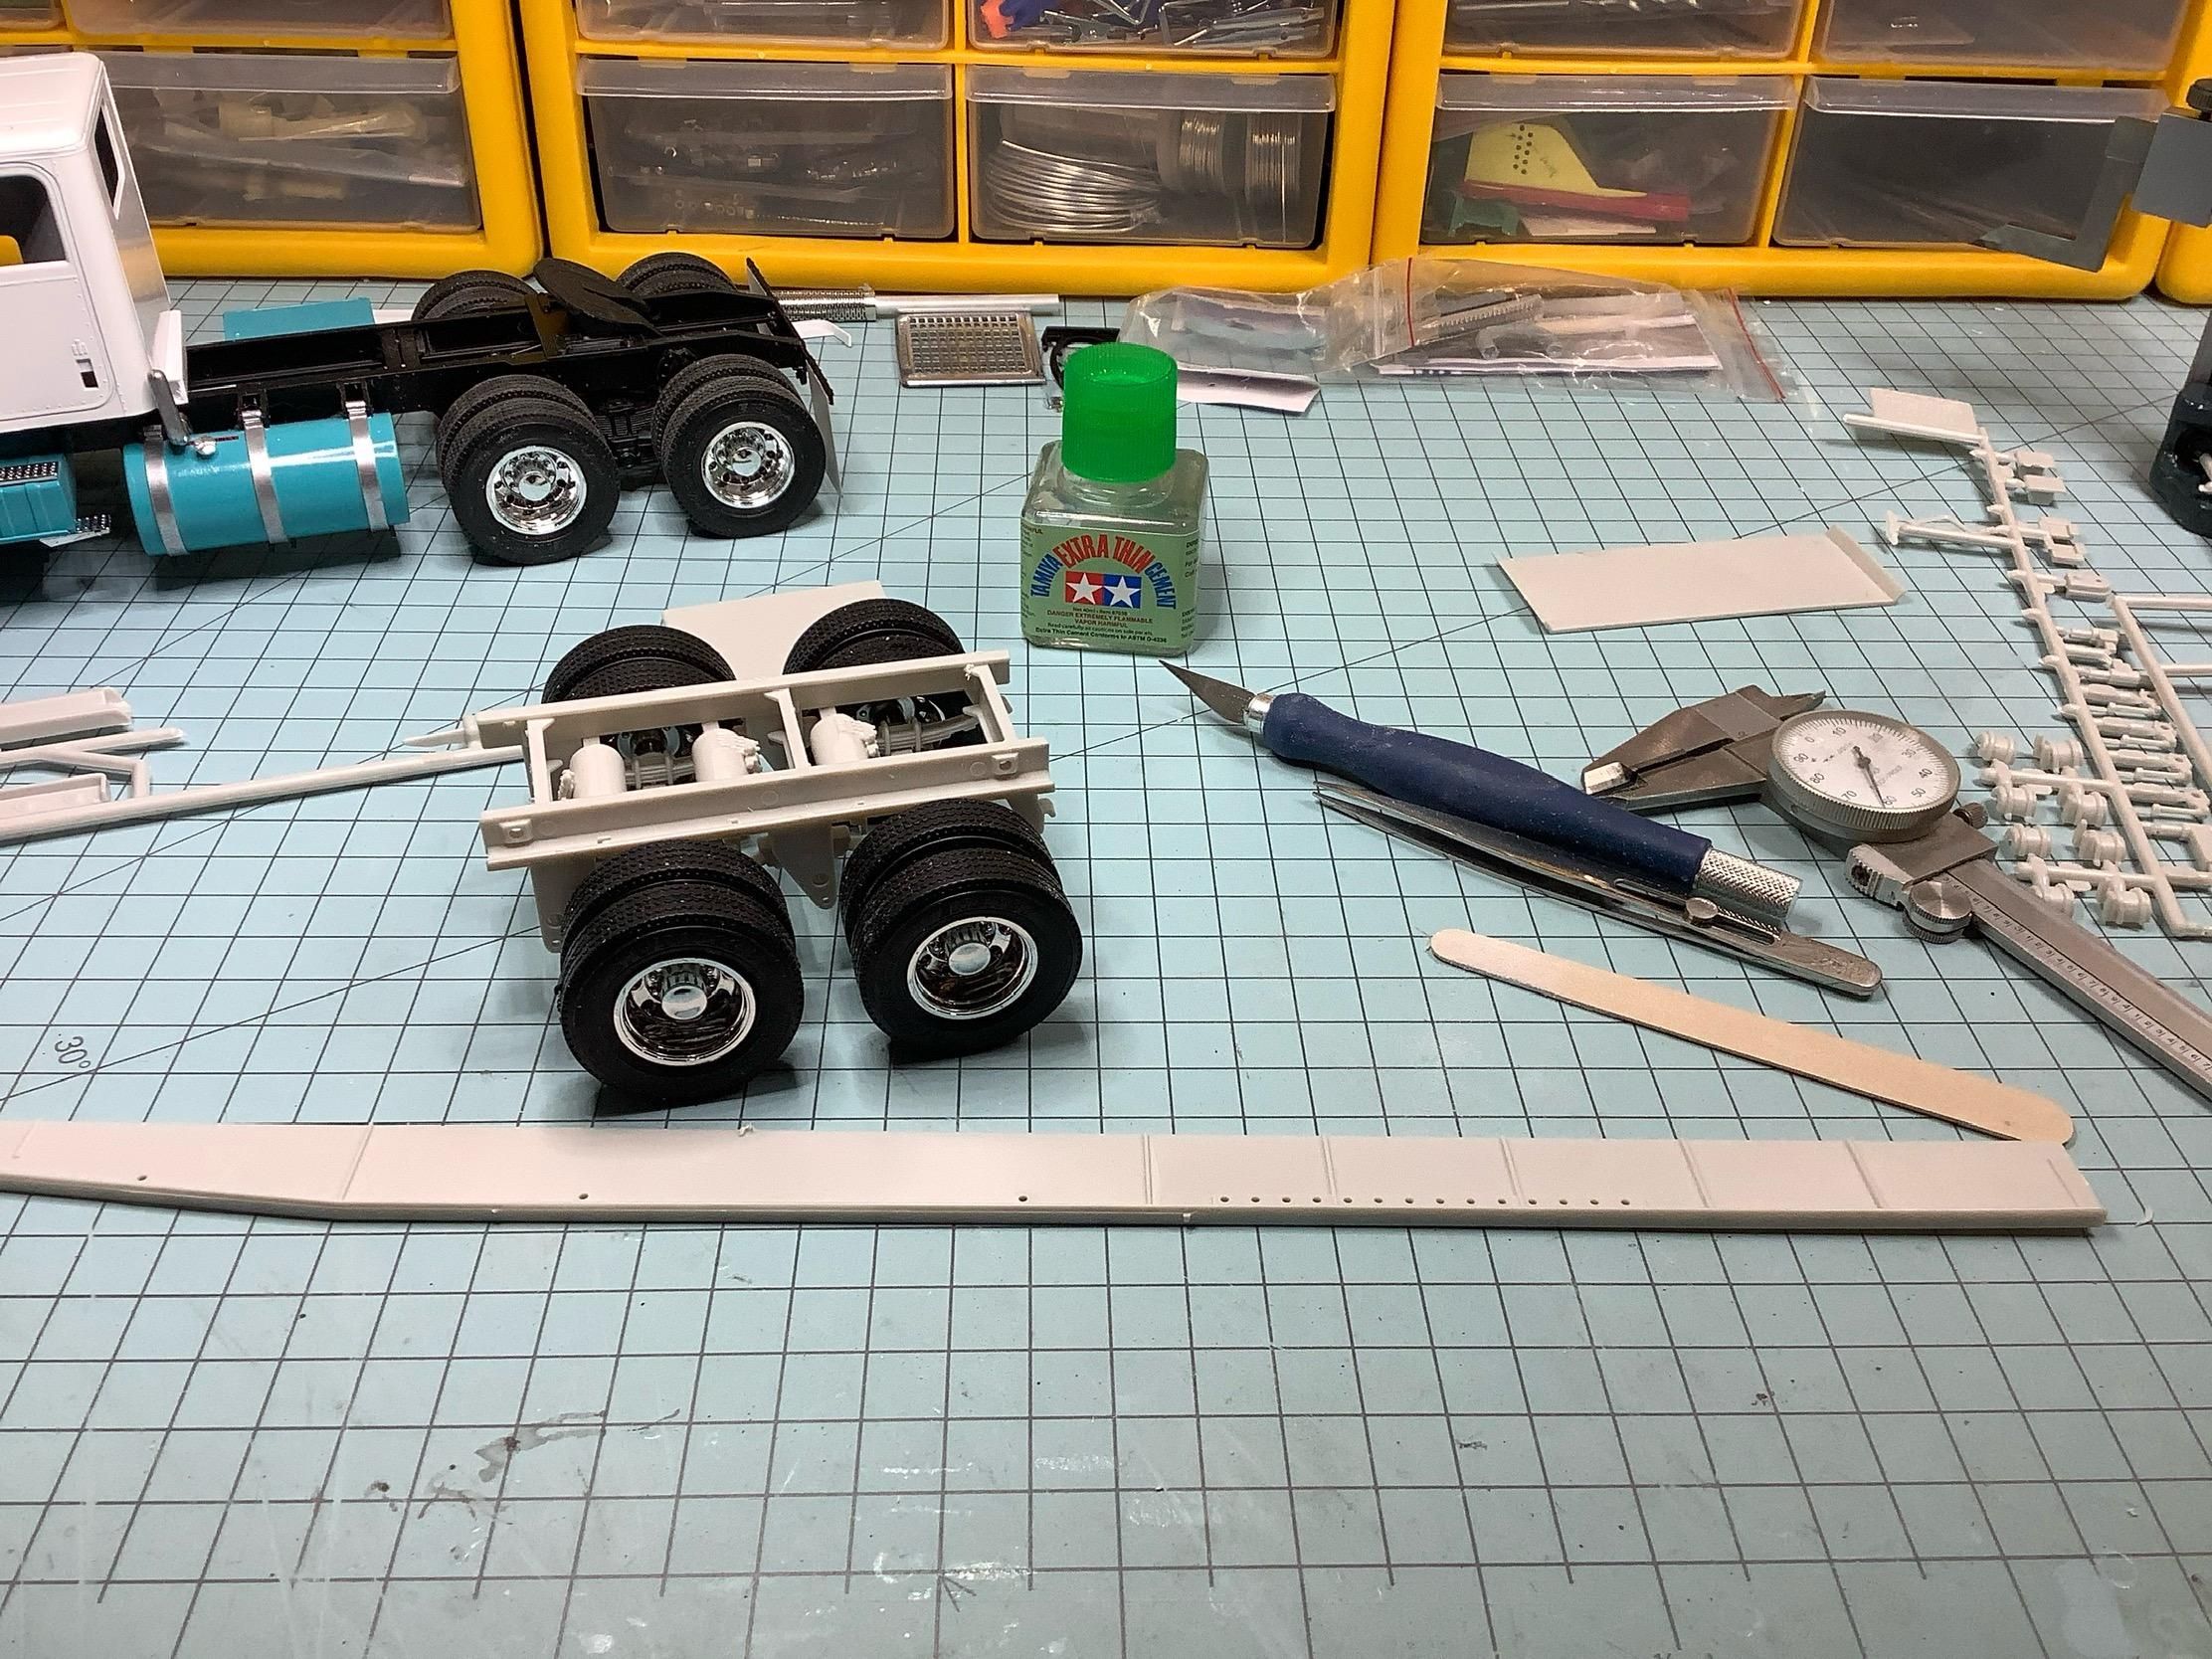
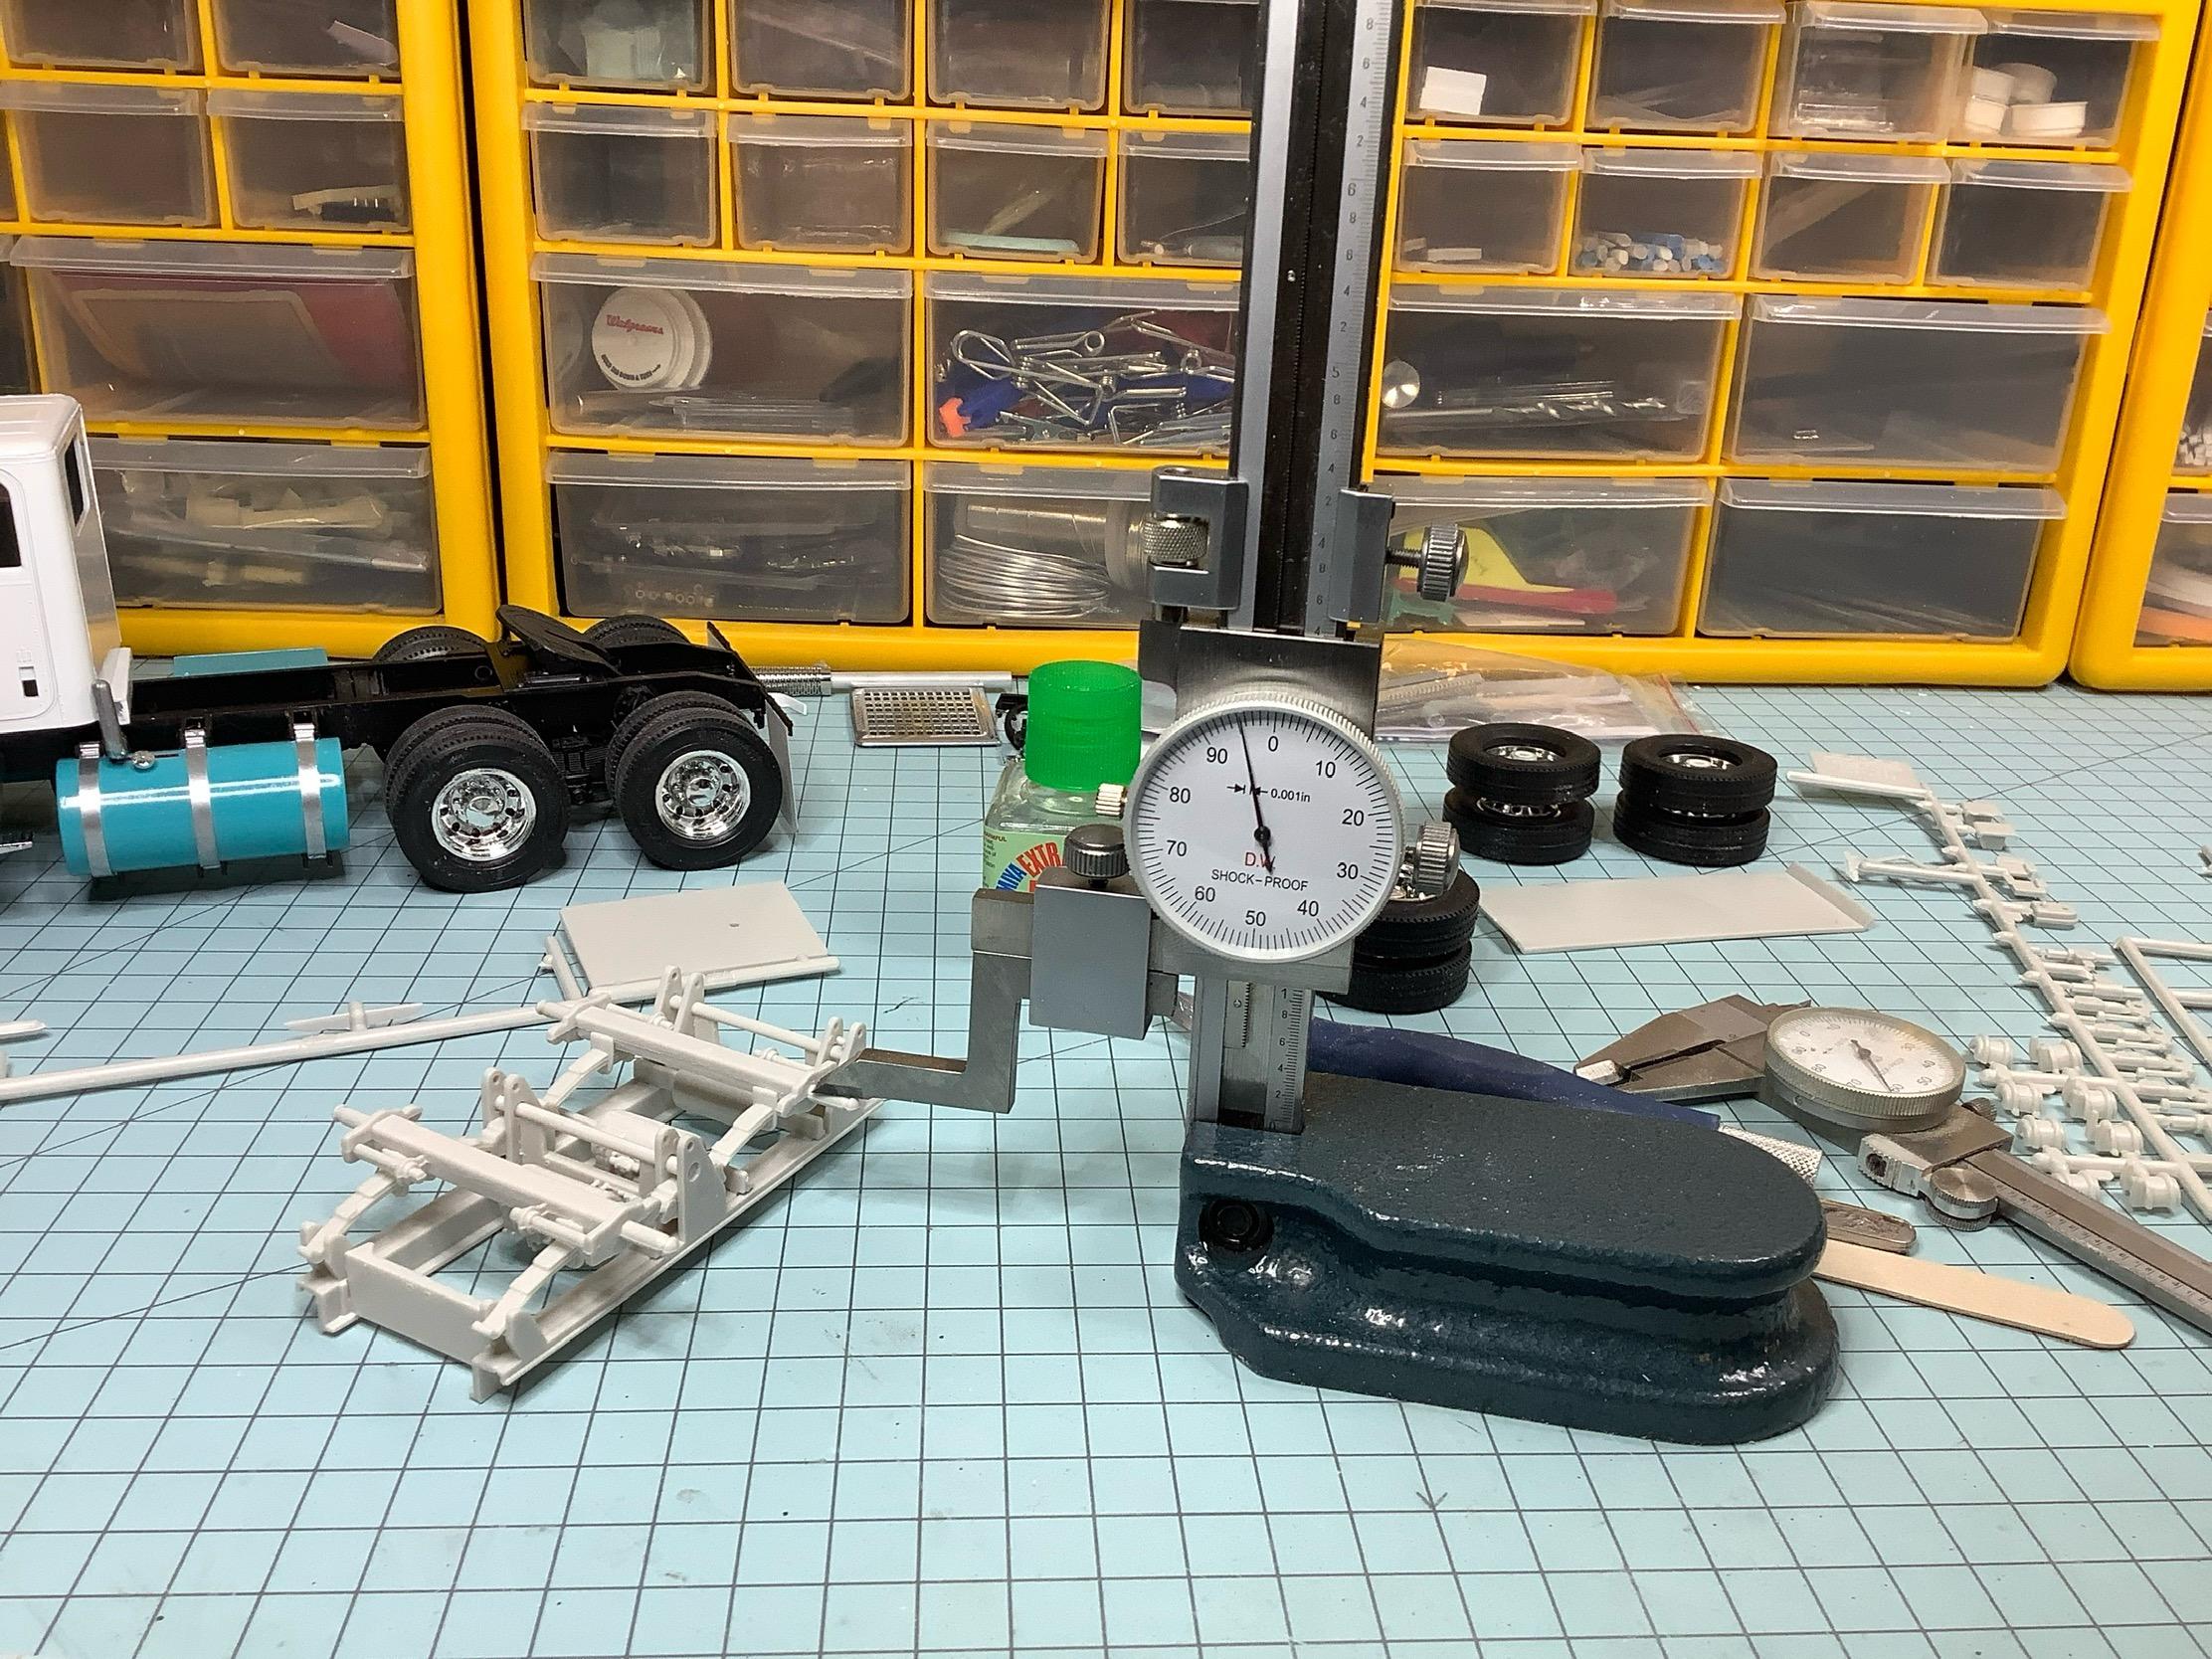
The trailer bogies are somewhat together, need to adjust the axle heights yet. I added a height gage to my collection of tools to help me get the axles at the same height. Nothing worse than scratch building a trailer to find one wheel hanging in the air when completed.
-
Revell Mack CF
Gary Chastain replied to Gmatta691's topic in WIP: Model Trucks: Big Rigs and Heavy Equipment
Looks very well done, will look good sitting on your display. -
M-20 Prime Mover
Gary Chastain replied to Chariots of Fire's topic in WIP: Model Trucks: Big Rigs and Heavy Equipment
Wow, Charles, your builds are always at a high skill level, love watching. ? -
1/32 Ford LTL9000
Gary Chastain replied to Rockford's topic in WIP: Model Trucks: Big Rigs and Heavy Equipment
Your skill in this scale is outstanding, I have never considered buying built rigs to rebuild but watching you has made me rethink that idea. -
International 4300 tractor
Gary Chastain replied to Gary Chastain's topic in WIP: Model Trucks: Big Rigs and Heavy Equipment
Well Steve, already went over the edge on the build, will use the trailer suspension, main frame rails and Dollie’s. But am going to correct the length to a true 40 foot, so will be remaking the floor/bed so that I can have a real wood floor. Also found some 10 hole wheels and larger tires. Post up later today. -
International 4300 tractor
Gary Chastain replied to Gary Chastain's topic in WIP: Model Trucks: Big Rigs and Heavy Equipment
Agree Jeff, after I seen the price tag, I got to looking at some other older kits I have, the one that surprised me was the GMC Cabover tractor with a price tag just under 15 bucks. Not sure what the new GMC Astro sells for these days. -
International 4300 tractor
Gary Chastain replied to Gary Chastain's topic in WIP: Model Trucks: Big Rigs and Heavy Equipment
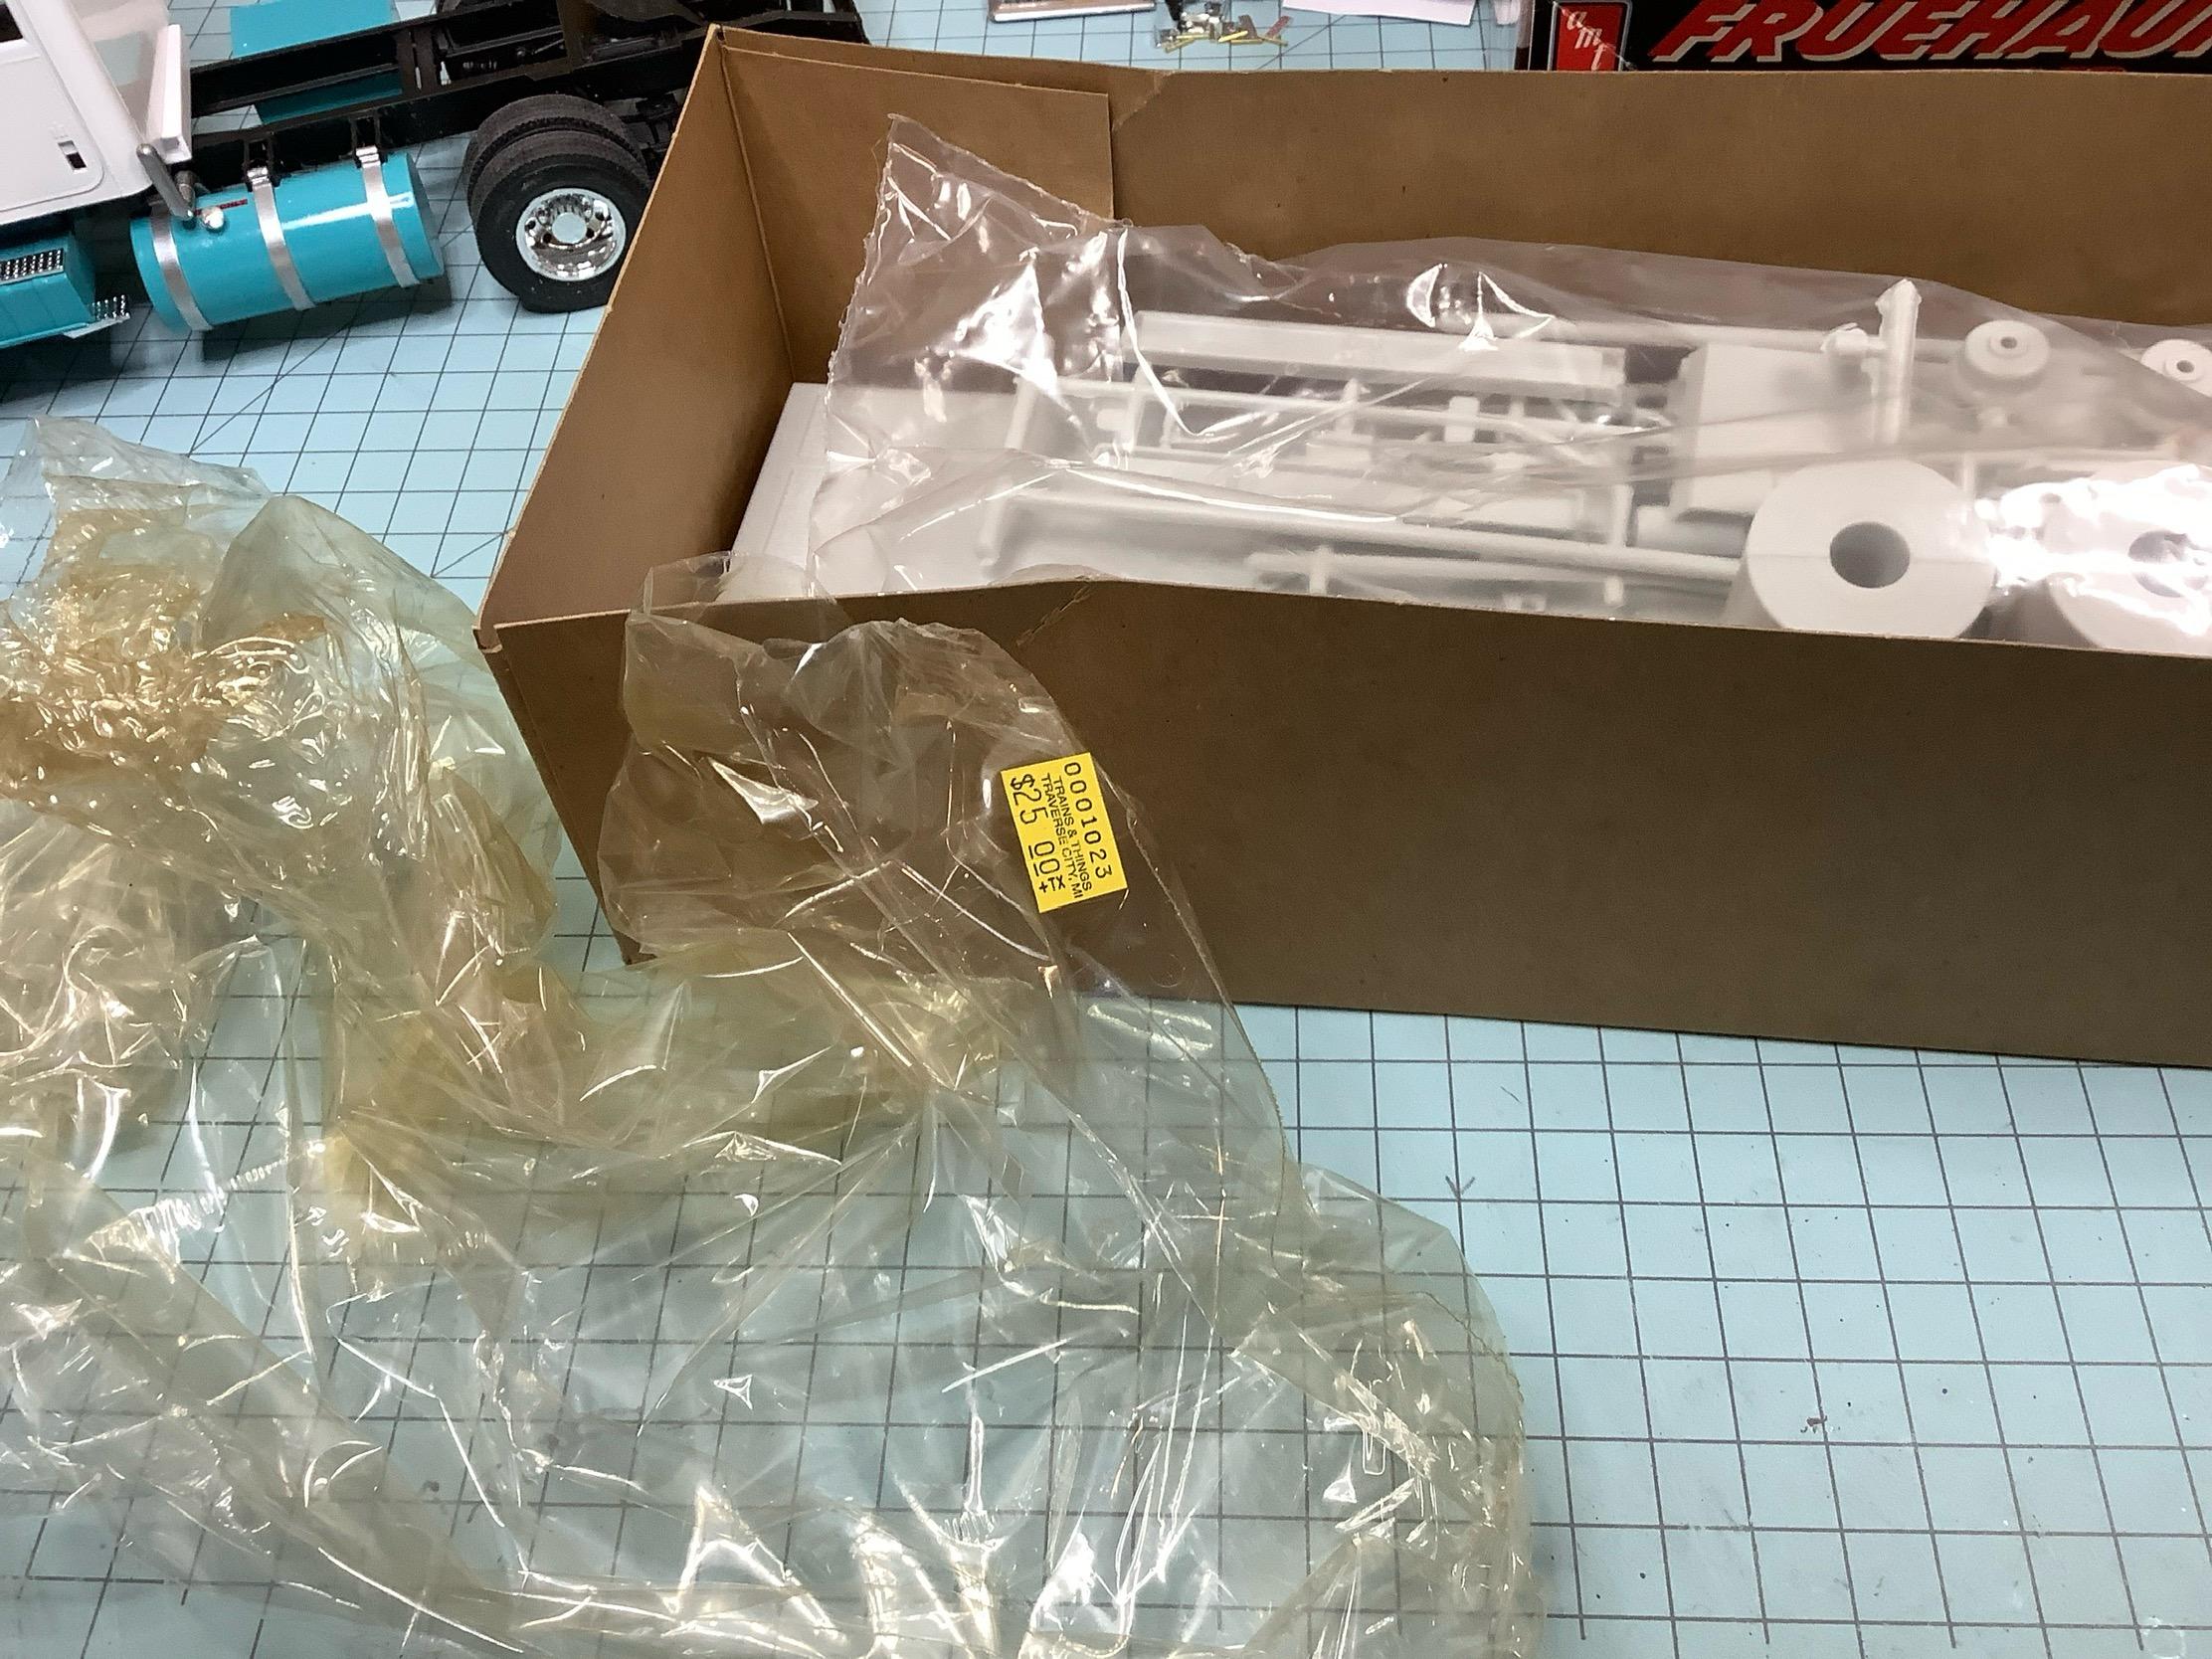
Wow, had this kit so long the plastic turned yellow and the list price was 25 bucks.
-
International 4300 tractor
Gary Chastain replied to Gary Chastain's topic in WIP: Model Trucks: Big Rigs and Heavy Equipment
Getting some bench time today with rain and cold. First clean up bench to figure out where I left off, second, decide on a trailer. I have one drop deck and one flat bed (running out of trailer kits, need to restock I guess). Going with the flat bed, maybe some ten hole wheels and a wood bed. And yes the truck is not done yet but couldn’t help myself.
-
Oh, this will be good, will be watching??