hct728(Bob)
-
Posts
586 -
Joined
-
Last visited
Content Type
Profiles
Forums
Events
Gallery
Everything posted by hct728(Bob)
-
 The plan now is to make the cab a Mercury, to go with the neat Mercury Electric decals that come in the kit. Working on some lettering decals for the hood, my first attempt at the artwork pictured! Tips or suggestions welcome!
-
Body mounting mocked up, seems kinda low on the chassis to me. You can see where I removed the side moulding and rocker panel trim, a primer coat will reveal all mistakes. Also practicing posting from an iPad instead of my ancient computer, good to learn new tricks! Found I can just copy and paste the picture from an email, couldn’t be easier!
-
1962 Peterbilt 351
hct728(Bob) replied to leafsprings's topic in Model Trucks: Big Rigs and Heavy Equipment
Very nice! Great use of that sleeper, the perfect compliment to the gleaming trimwork, well done! -
LNT8000 feed truck
hct728(Bob) replied to tom pierce's topic in Model Trucks: Big Rigs and Heavy Equipment
Wow, I’ve never seen that old AMT Shorthauler truck kit look so good! The hopper and feed system look so realistic, and so neatly assembled, painted and decalled! My compliments! -
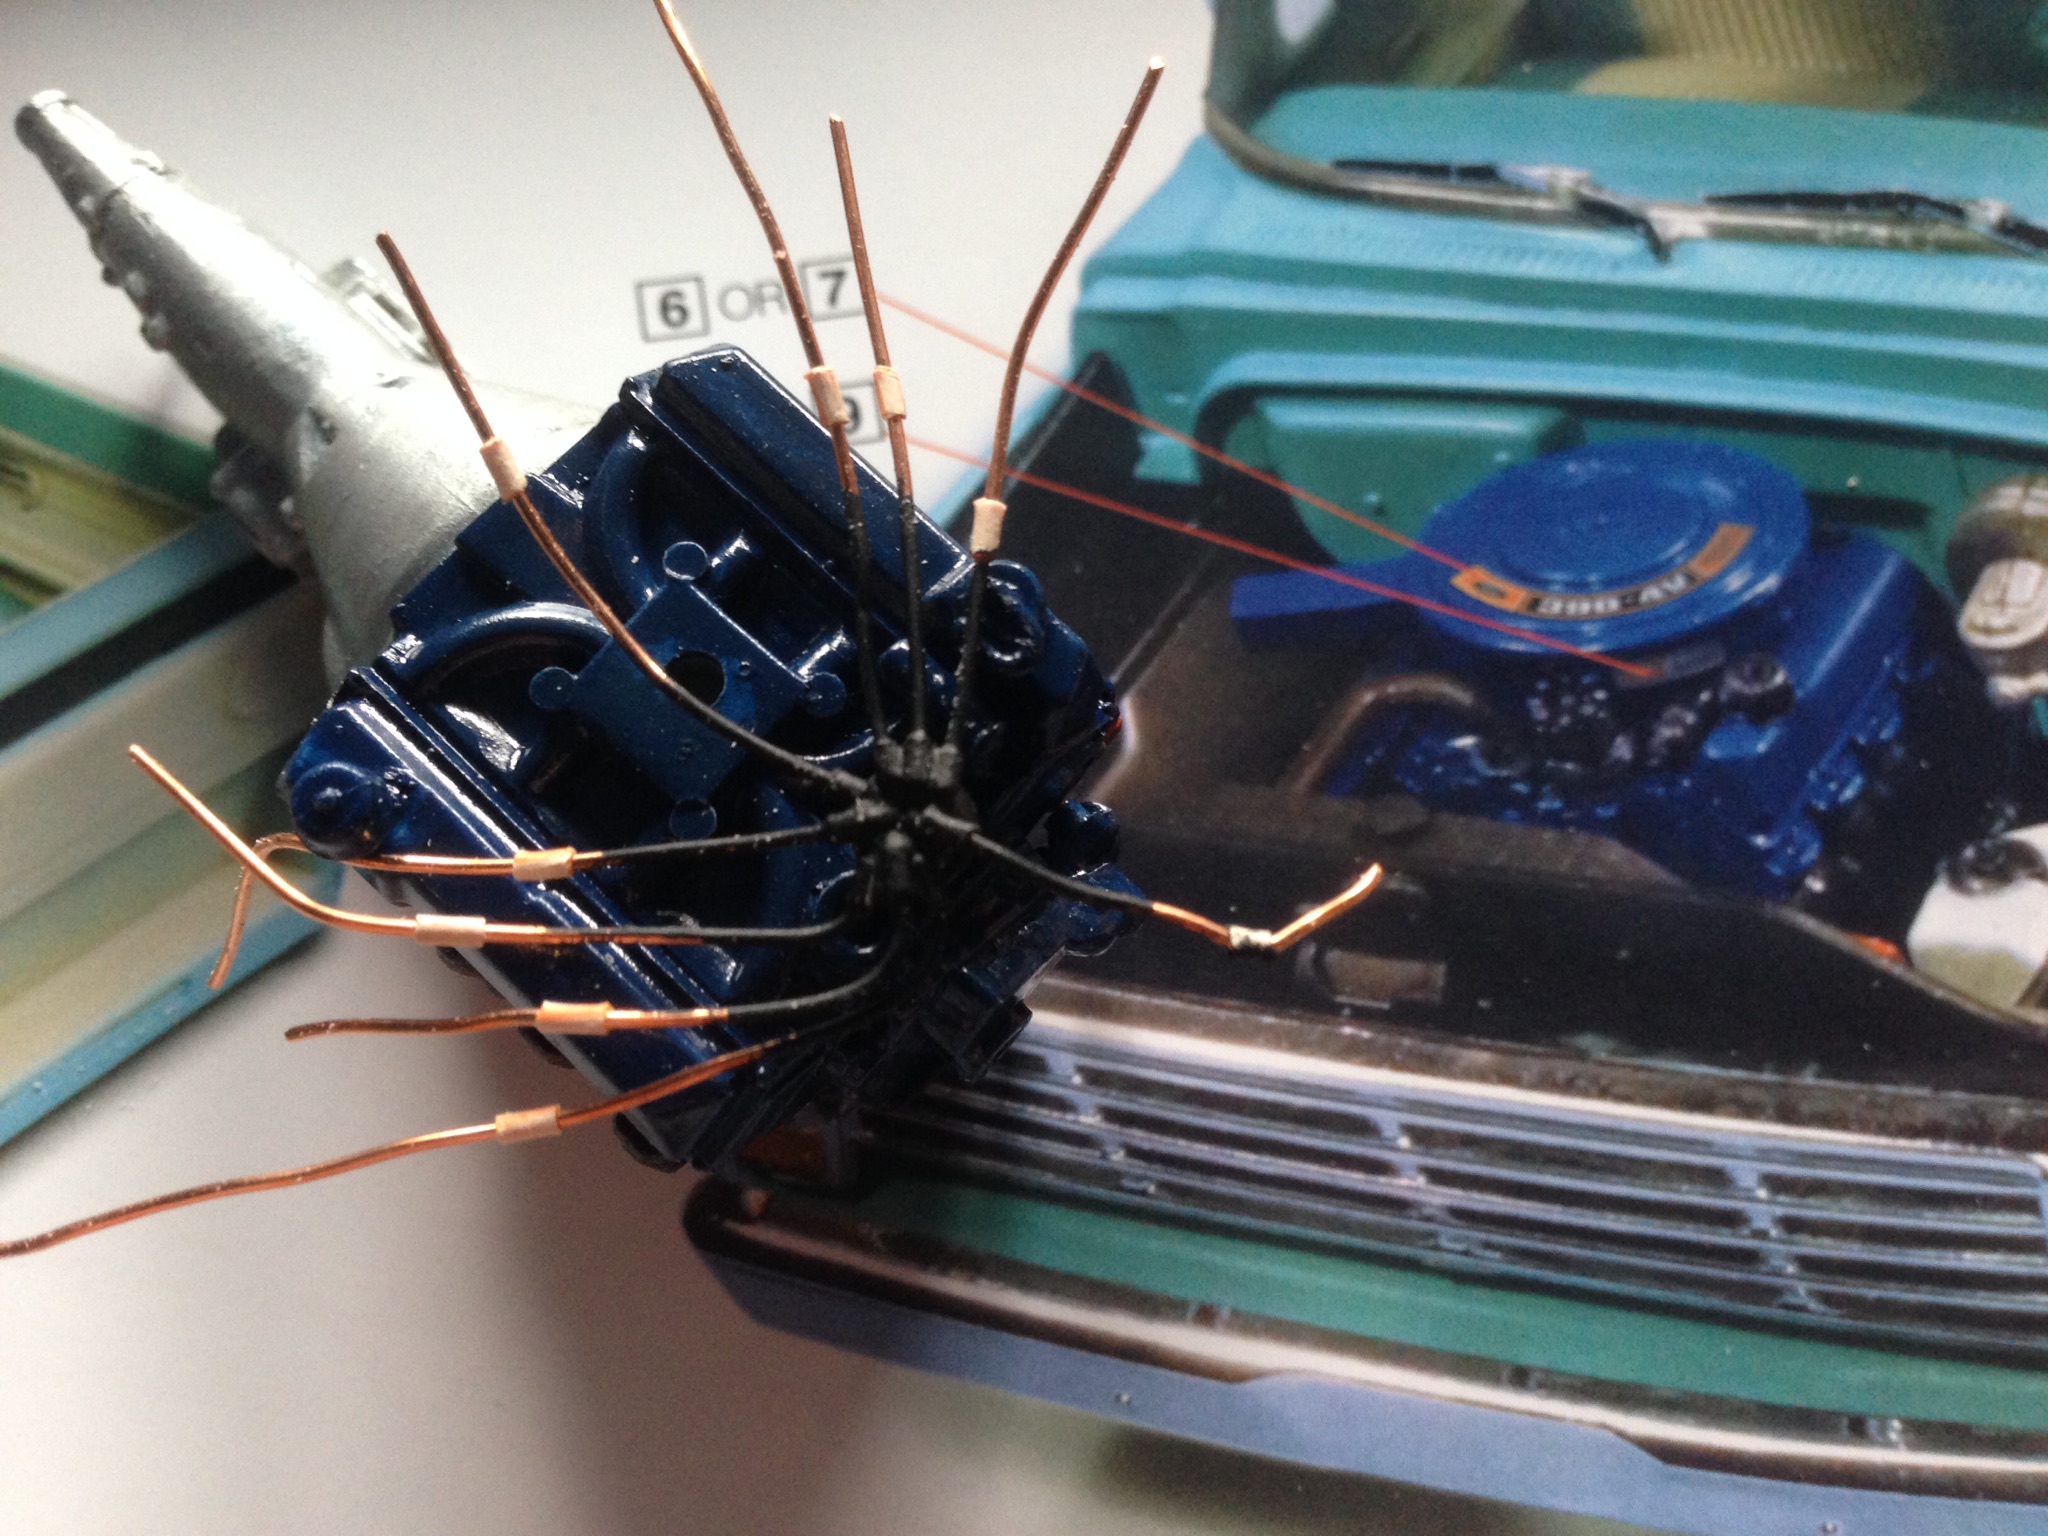
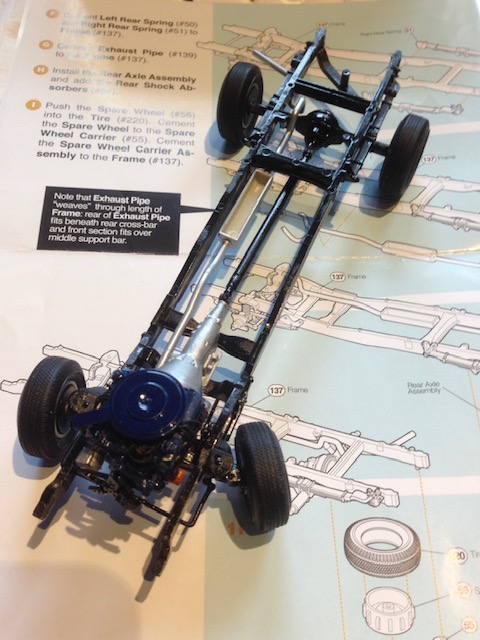
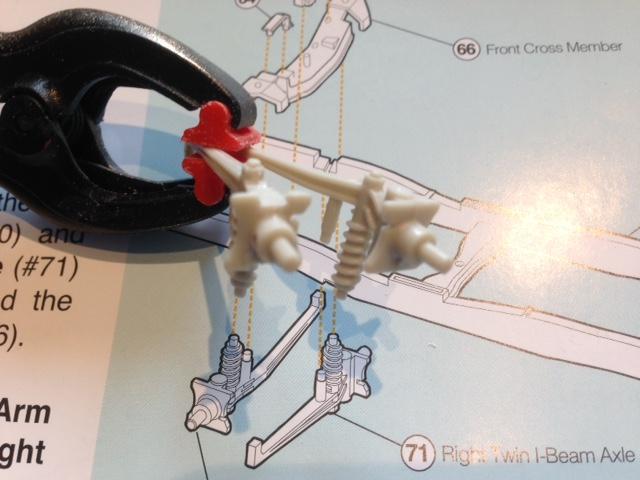
I have an in-progress engine picture too, as I made my own distributor with bare telephone wire, 24 gauge copper, with bits of insulation used as boots. Fortunatly Acrylic paint seems to work okay for finishing off the copper. Too late I noticed the overall blue paint colour is too dark, I’ll get it right in the next one Tried to assemble the drivetrain and found the auto transmission pan interferes with the middle crossmember! I had to cut out the middle of the crossmember to clear the pan and will be adding a strip below the pan. Then I found the engine contacts the steering gear so it mounts tilted, so I had to do some trimming. Is it me or what?
-
Wheels are supposed to be glued in place, but I want them to roll, so I added rings to hold on the wheel backs so they can rotate. Wheels must be hogged out inside to clear the ring, but then they can be glued to the backs and will turn. Now working on backdating the dashboard to 1967 and removing deluxe trim on the body
-
Well done! Authentic replica of a beautiful and very unique truck, so nice to see it done in scale!
-
My Moebius Pickup Kit Summary, all 11 of them!
hct728(Bob) replied to hct728(Bob)'s topic in Truck Kit News & Reviews
Why were you disappointed with the ‘65 service truck? -
My Moebius Pickup Kit Summary, all 11 of them!
hct728(Bob) replied to hct728(Bob)'s topic in Truck Kit News & Reviews
The 4x4s have different (lower) mounting points for the suspension parts. I plan to extend them even more to get the chassis higher, though the Fireball Models F250 conversion kit is really the way to go for a nice looking 4x4 -
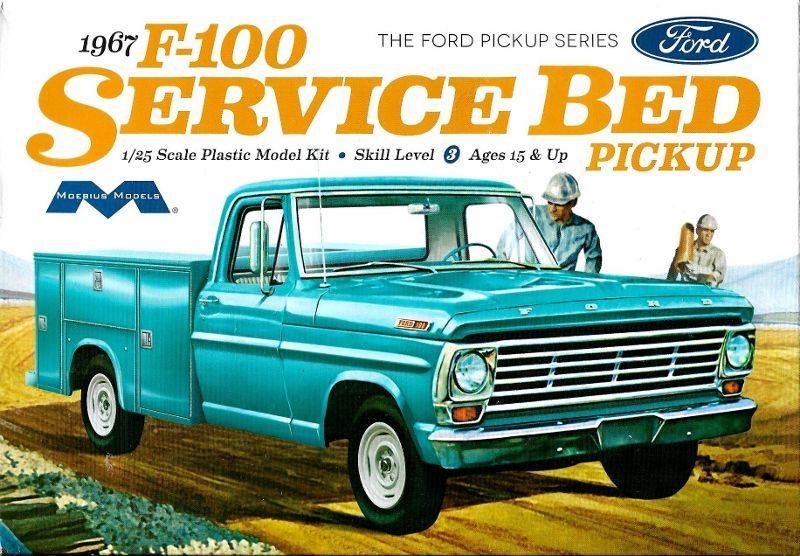
My summary, based on the box art or some I have bought. Please correct me if I made any mistakes! Year Model Bed Length Engine Extras 1965 Custom Cab Styleside 8’ 352 V8 1965 Ford Service Truck 8’ Service Bed 352 V8 1966 Short Bed Styleside 6-1/2’ 352 V8 1966 F-100 Custom Cab 4x4 8’ 352 V8 9 wheels/6 chrome 1966 F-100 Flareside 6-1/2’ Straight 6 5 wheels/4 chrome 1967 F-100 Service Bed 8’ Service Bed 352 V8 8 wheels 1969 F-100 Custom Cab 6-1/2’ Straight 6 5 wheels/4 hubcaps 1970 F-100 Custom 6-1/2’ Straight 6 1970 F-100 Custom Cab 4x4 8’ 360 V8 1971 Ranger XLT 8’ 390 V8 5 wheels/4 chrome/4 discs 1972 Sport Custom 6-1/2’ 302 V8
-
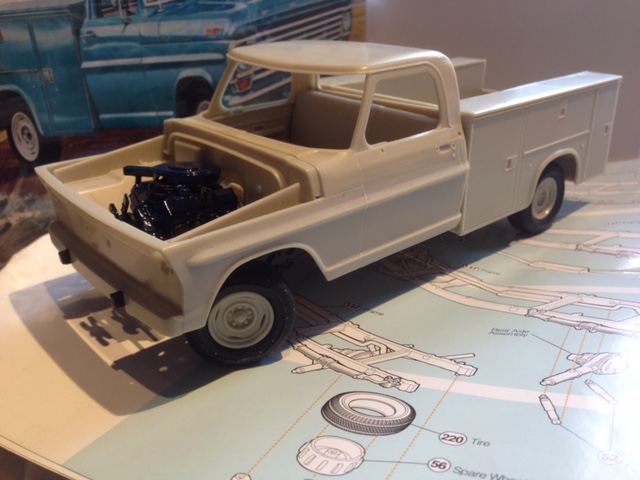
Finally started one of the Moebius Ford pickups that I've been acquiring over the last few years, as I now have 7 of the 11 issued (how did that happen)! May have picked out the wrong one, as the '67 sure looks more like a '68 in everything but the lack of side markers! I was hoping to do a stripped-down basic model, but the dash, door panels etc. all seem to be from the Custom Cab or from the '68! Anyway, soon as I started I had to make the front wheels posable, so off I went making a simple build much more complicated! Pictures show what I did Trimming away part of the hub top and bottom to accept tabs to attach to the spindle After adding the tabs, and little nuts to the pins to give it a more authentic look. More pics to come as I trim down the tabs and clip the pins once I'm happy with the look. Still have to figure out what to do with the tie rod...
-
Moebius 1970 Ford F-250
hct728(Bob) replied to cruz's topic in Model Trucks: Pickups, Vans, SUVs, Light Commercial
My dream build! That Fireball kit sure makes the kit authentic, and you did a great job on the chassis as well as the body! Just started mine, and I hope it turns out half as nice as yours! -
In and Out Burger Peterbilt
hct728(Bob) replied to Dutzie's topic in Model Trucks: Big Rigs and Heavy Equipment
So very neatly done! Love the paint scheme on the tractor, especially the matching rear fenders! Can’t see the rear cab though, I’m interested in how you did the rear wall, it’s always nice to see a day cab conversion! -
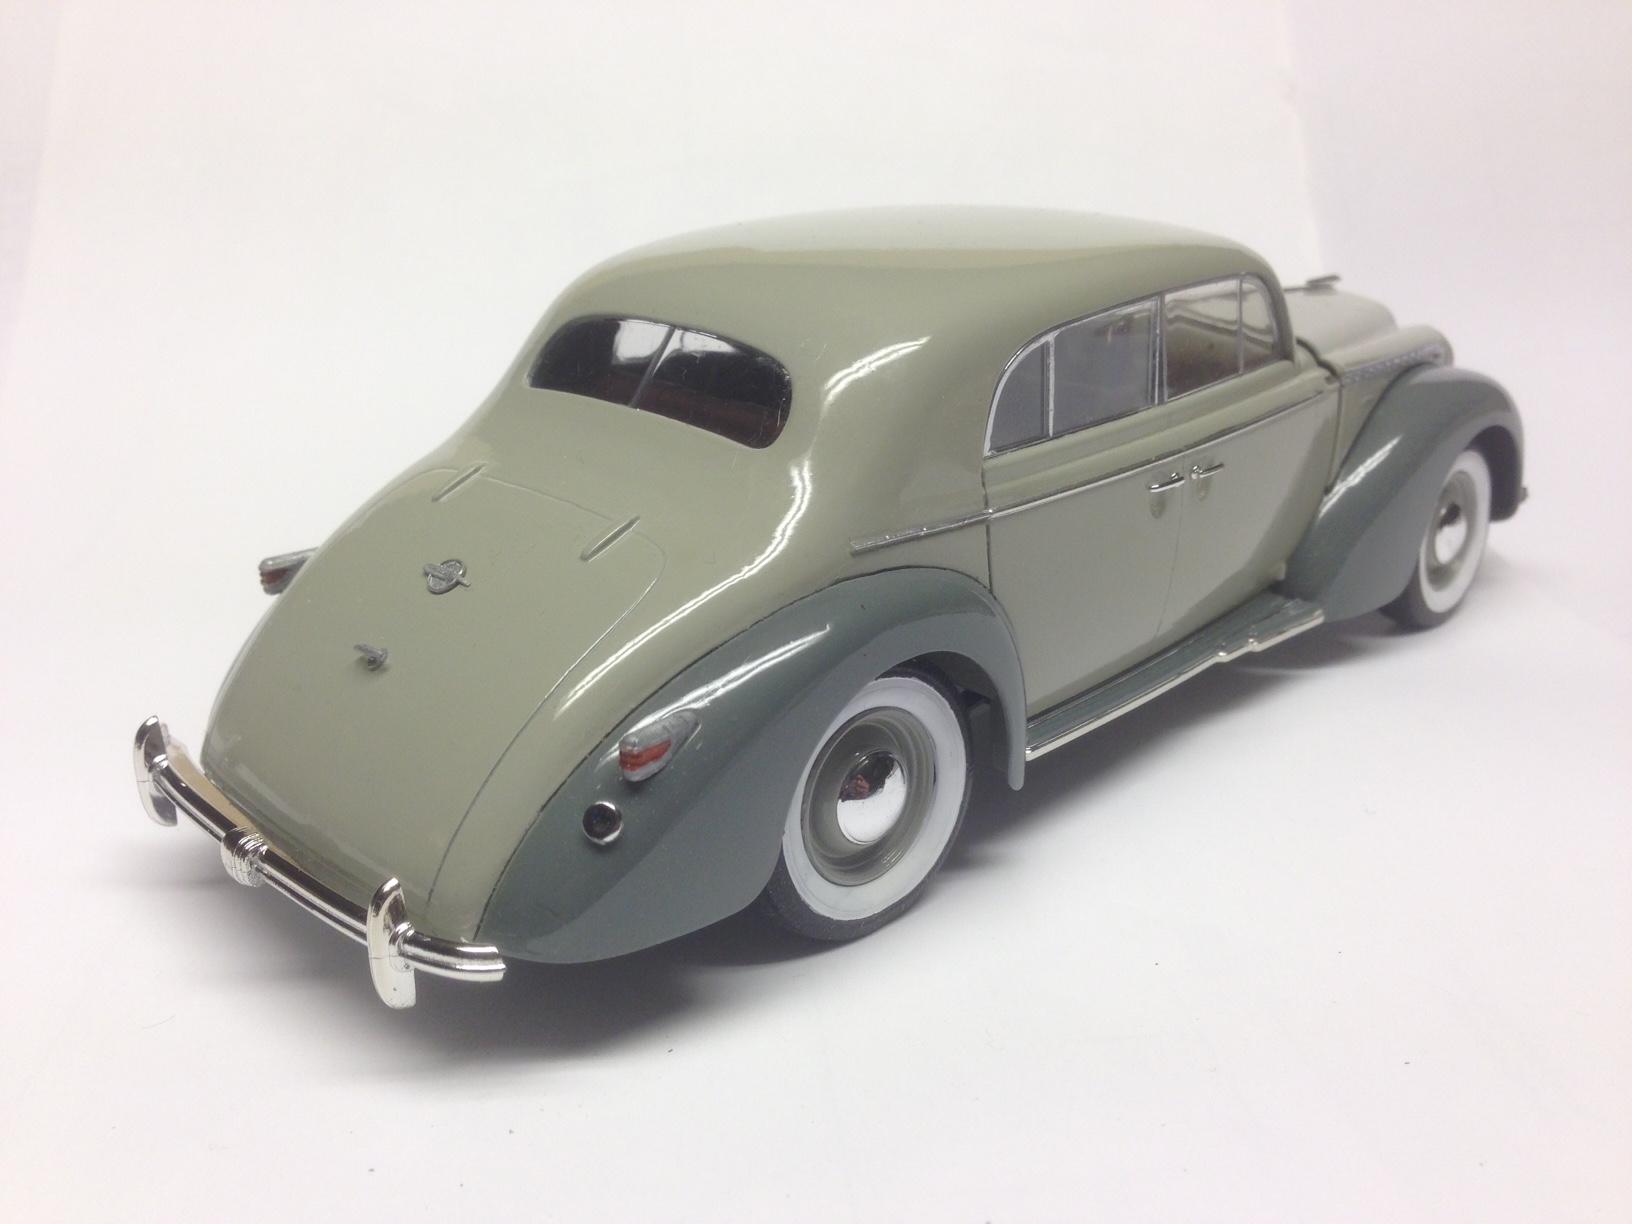
Thanks! To me it’s a knockoff of the 1937 Buick! I guess Opel used the same GM design specs of the time but used the Chevy stovebolt six instead of the Buick straight eight
-
Thanks! Being a multi piece body you have to figure out the easiest assembly sequence for yourself. I figured the interior had to be finished and masked before painting the outside, and then there’s the seam at the base of the roof to be filled in, that’s the hardest part, though not a problem if you build the convertible (the folded top is also in the saloon kit, but not the convertible up-top)Also there’s a dimple on top of the valve cover, no reason for it, so fill it in or put a cap on it like I did. Interesting knee-action independent front suspension too, popular on Chevies of that era
-
Nice to see the two versions together, and so neatly done as well! The display chassis is interesting too, very complete for a model. Now for the third you mentioned, the Hebmuller, a two-door sport model, can't wait to see it!
-
ICM Models 1/24 scale Opel Admiral. Wire trim rings are coming and photos reveal some Molotow touch-ups are needed here and there but essentially finished. Got another one planned as a two-door cabriolet by Hebmuller. If you built one I'd sure like to see it!
-
Beautiful! Lots of added details and enhancements! Nice job on the opening doors, so neatly done, and really needed to see the detailed interior.
-
Fruehauf Trailer- Mcleans
hct728(Bob) replied to The Brush's topic in WIP: Model Trucks: Big Rigs and Heavy Equipment
Amazing detail on that! You say “thin aluminium pressed on a side panel from the 27ft trailer kit, the rivets then added with a dress makers pounce wheel & a compass” now that’s an inventive way of duplicating an improving upon a kit piece! I’ll be trying that myself! Love your authentically weathered Mcleans tractor too, keep up the creativity! -
Thanks for the good advice! I painted a Taurus up as my Sable eons ago, minus the DOUBLE car seats IT had, time to re-do it better as well. I have some spare cases bought on sale, was ‘saving’ them, LOL
-
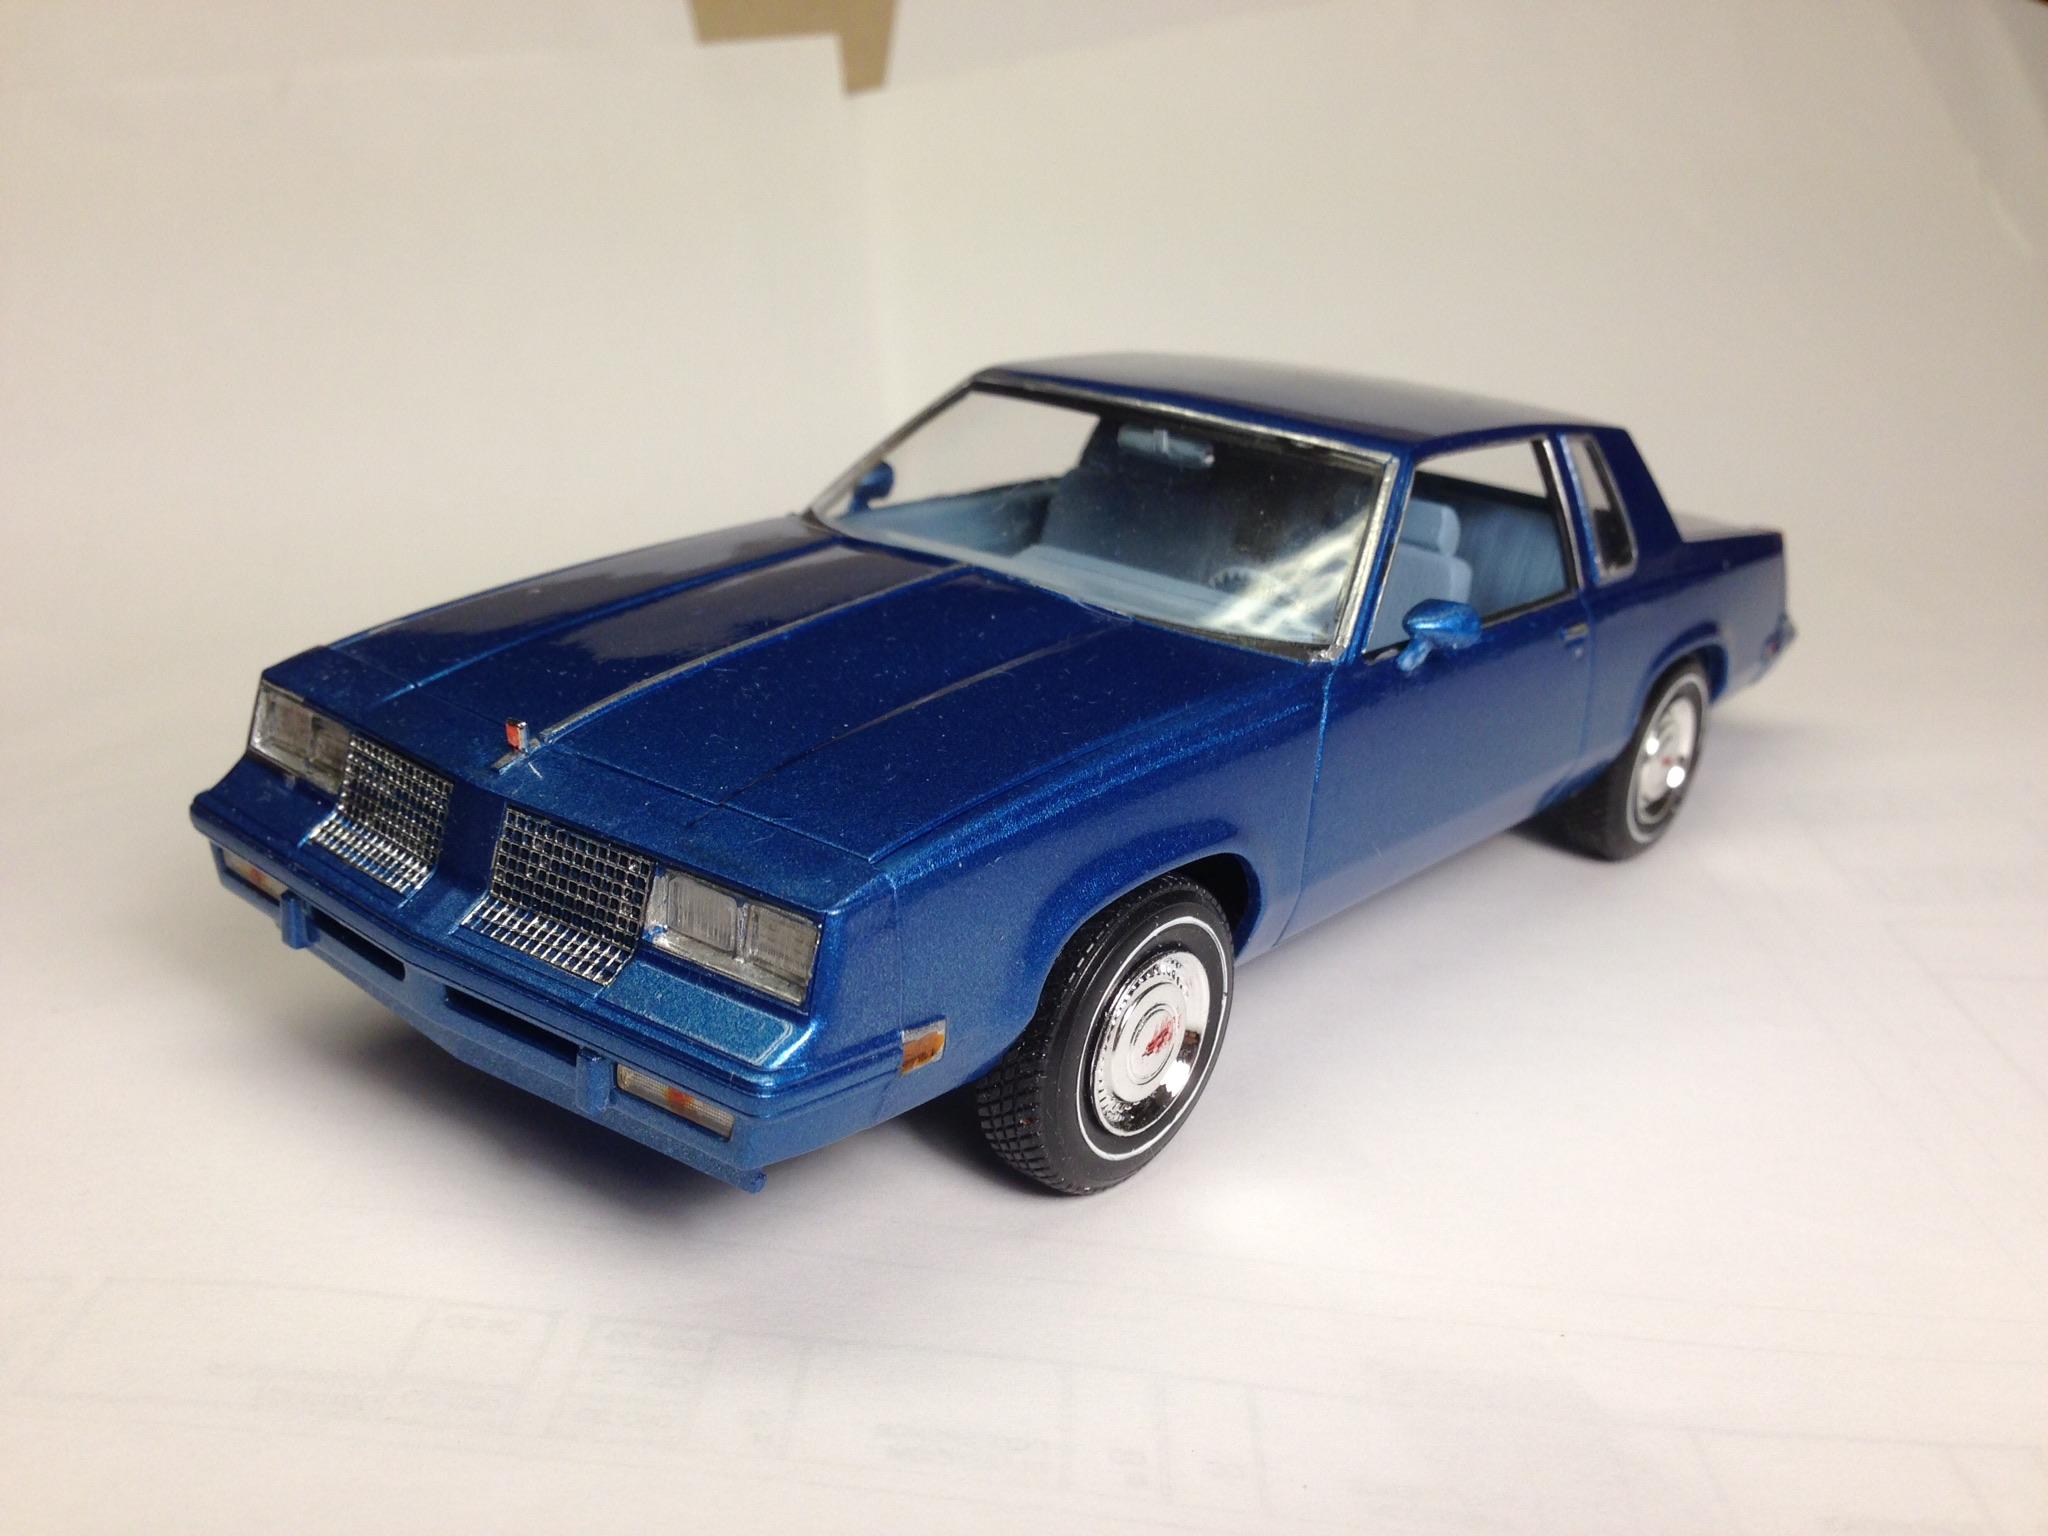
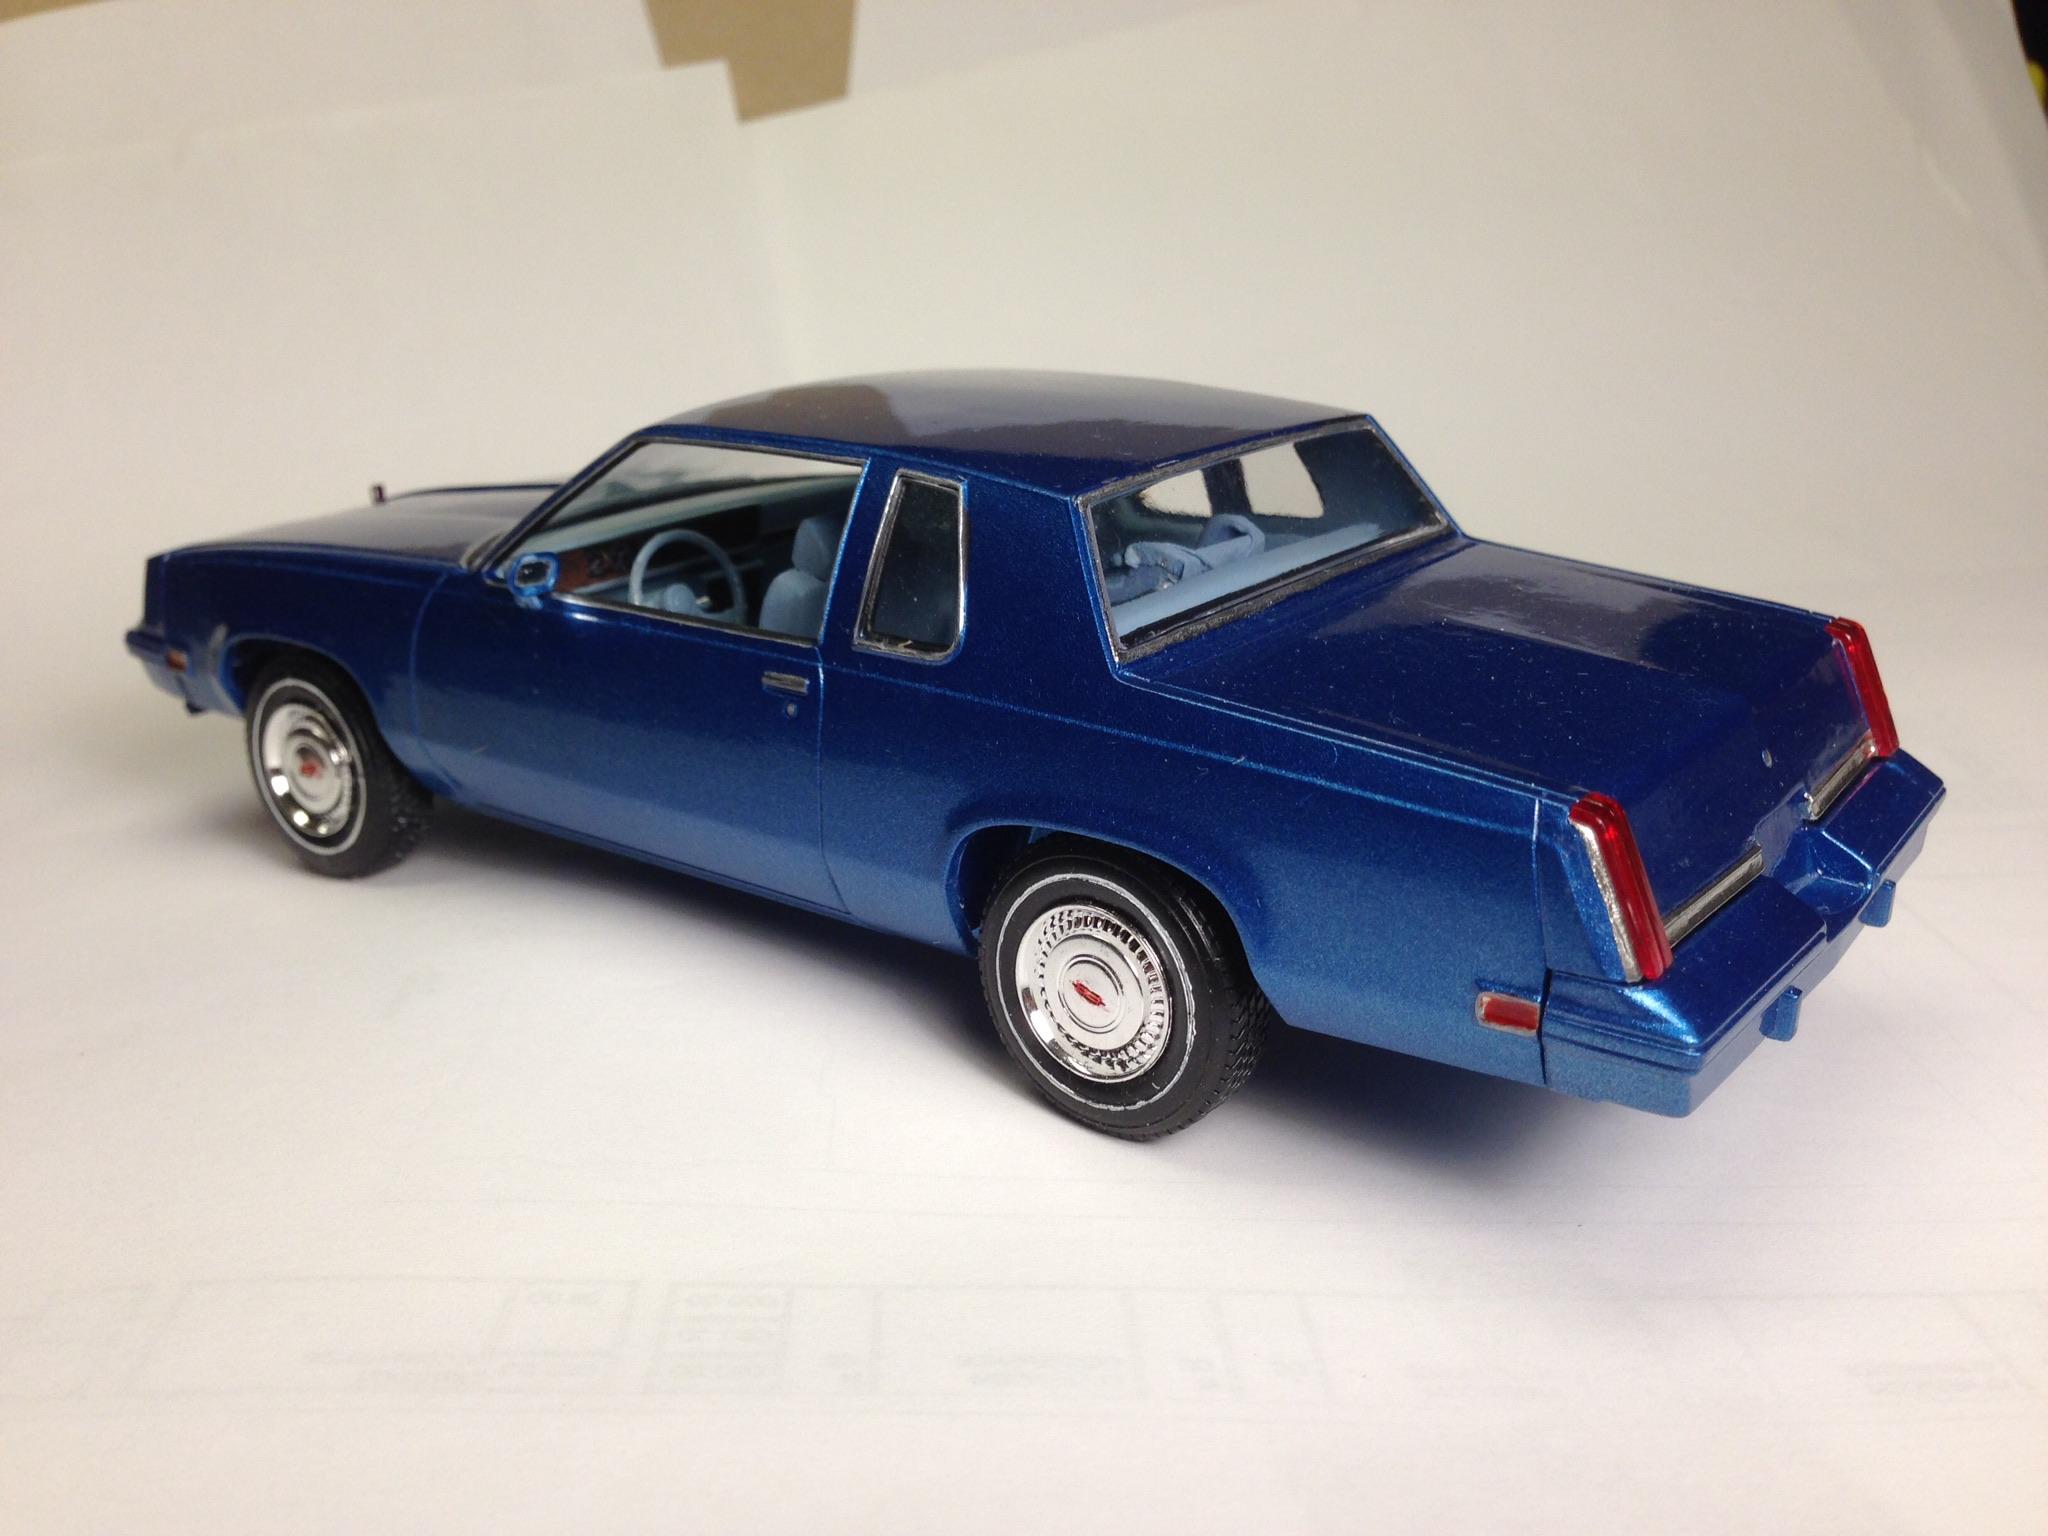
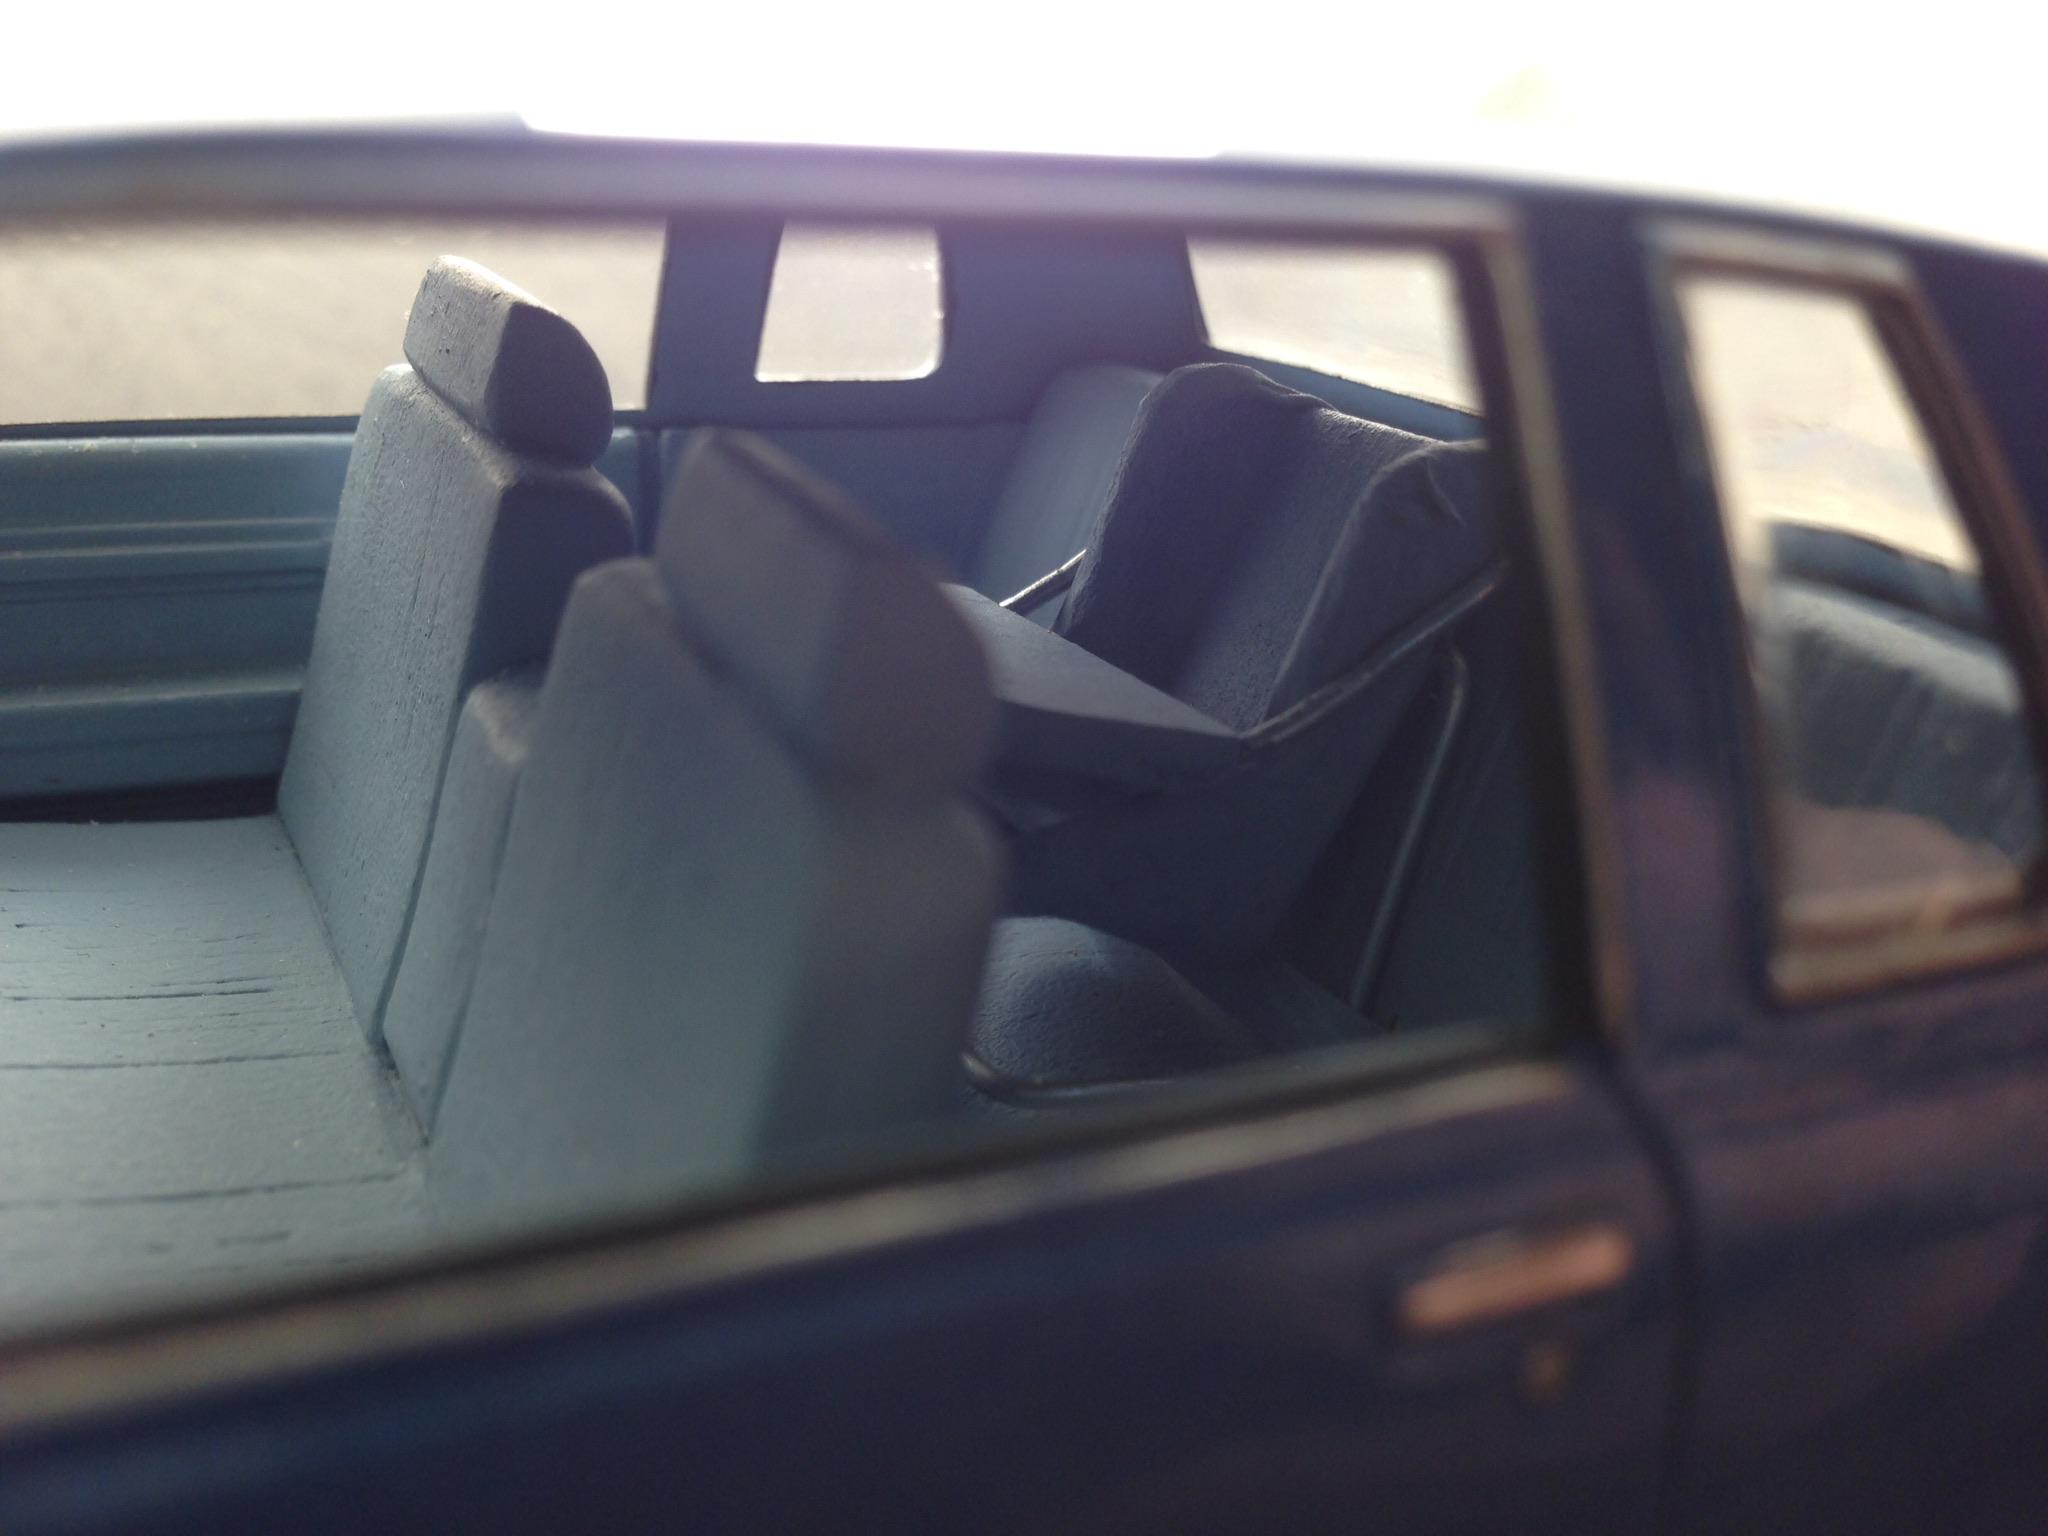
My attempt at my wife’s first car, a 1978 Cutlass Supreme. Had to fill in the hood scoop on the initial issue kit, among other things to backdate and de-tune it. Made a bench seat for it too Couldn’t forget the car seat in the back, seeing our firstborn baking back there (no A/C) led us to trading it in on something more comfortable after 11 years!
-
Mcleans International
hct728(Bob) replied to The Brush's topic in Model Trucks: Big Rigs and Heavy Equipment
So very realistic! You must be very familiar with the subject to go to this level of added features and detail. All replicated and weathered! Amazing how you did the trailer, sections of aluminum foil over plastic to great effect, pretty creative! -
Wow, so very creative! Great use of two neatly done subjects to tell a funny story, with accurate figures added for human interest. I like the guy peering out of the crew compartment, like he was the culprit, afraid to come out, LOL! Well done!
-
Beautiful rig! Amazing how you created the body from scratch, then so thoroughly detailed it with kit and scratchbuilt pieces, and then even loaded it up with weathered hose, all details look spot on! Thank you for taking us along every step of the way in the WIP section of this forum, too!
-
Holmes 750 twin-boom wrecker
hct728(Bob) replied to landman's topic in WIP: Model Trucks: Big Rigs and Heavy Equipment
You can see the two articles from the magazine at https://public.fotki.com/modeltrucks25thscale/model_magazine_articles/car_model/cm-1972-03/