hct728(Bob)
-
Posts
586 -
Joined
-
Last visited
Content Type
Profiles
Forums
Events
Gallery
Everything posted by hct728(Bob)
-
Aftermarket big rig steering wheel
hct728(Bob) replied to shelbrn90's topic in Truck Aftermarket / Resin / 3D Printed
I’ve made my own a time or two. Wrap some Evergreen .040” rod around a screwdriver handle while in hot, not quite boiling, water to make the rim, cut and glue together, then you can cut the spoke shapes out of sheet stock or use strips. I file a v-groove on the end where it attaches to the rim, so it makes a good bond, plus you can dish the spokes a bit. The centre pad is just bits of styrene rod or round spruce. Try it, it’s not so hard. Did it for this Yard Truck interior
-
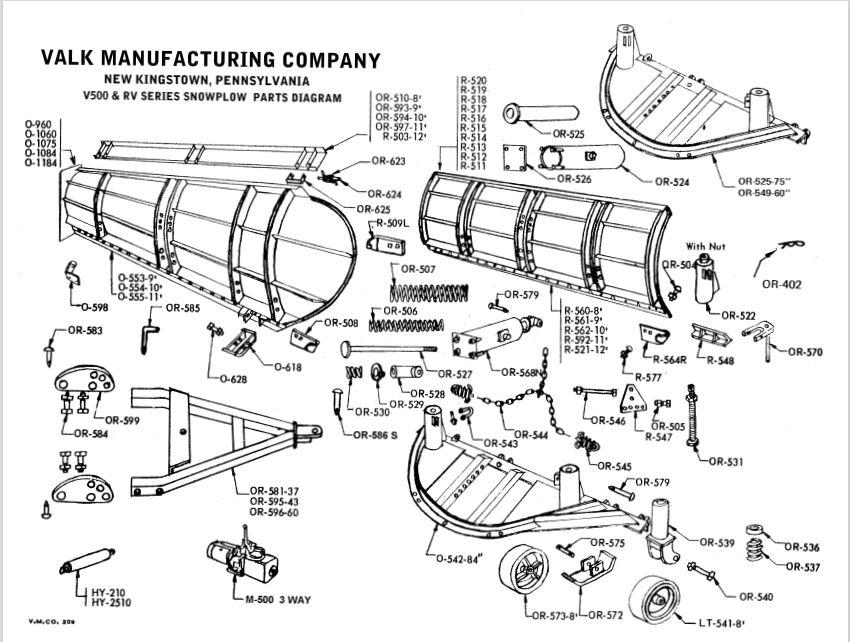
Thanks for the info. I will be adding chains and the vinyl tubing and calling it done. Found a drawing but no real hydraulic cylinders visible, though I have seen them mounted underneath for angling the blade. Don't want to go that far. I see the blade is attached lower than I thought, and I'll have to see if I need to re-attach it lower, though I'm anxious to move on to something else!
-
Revell London Bus
hct728(Bob) replied to Wolfangel's topic in WIP: Model Trucks: Big Rigs and Heavy Equipment
Wow, lookin’ good! Never got that far with my own, got stuck on the seat decaling and put it back in the box. I applaud your persistence! -
Thanks for the offer, but it's just that things don't fit properly, so it's hard to figure out how they are supposed to go together. There are few locating pins so you have to just guess what AMT intended things to look like. It's coming along now, almost done the building phase
-
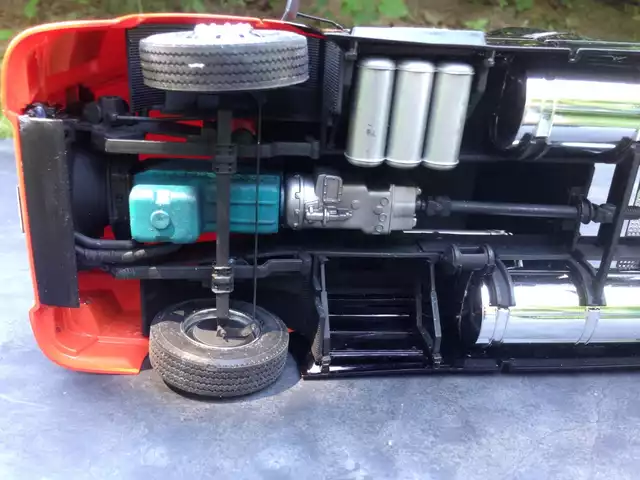
...bought for $10 with parts off the trees, a few parts missing, of course, and no numbers as seen in these instructions from https://public.fotki.com/modeltrucks25thscale. I’m wondering what the vinyl tubing representing hydraulic lines would be for, seems like there should be chains holding up the blade instead. Prototype seems to be a Valk unit, only hydraulics should be on the ‘hitch telescope’, as I see it, the ‘trip cylinder’ would be more like a passive shock absorber
-
Thanks for the underside pictures! Not at all what I expected, being hollow, but it makes a lot of sense. I would have started with a floor pan but such box construction is simpler considering the dropped side compartments. Good idea for a tow truck body too, with similar side compartments
-
Pretty impressive in that striking orange colour! Nice job on the interior and dash, picked out all the details so neatly!
-
RM Mack w snowblower....
hct728(Bob) replied to gotnitro?'s topic in WIP: Model Trucks: Big Rigs and Heavy Equipment
Nice replication! You’re brave for taking it on to start with, but your vision and persistence is really paying off! -
Wow, looks great in colour! I like the trim at the top of the body, finishes off the short vertical panel, a neat touch. Still wondering how you get those doors in and out though, they look to be a tight fit!
-
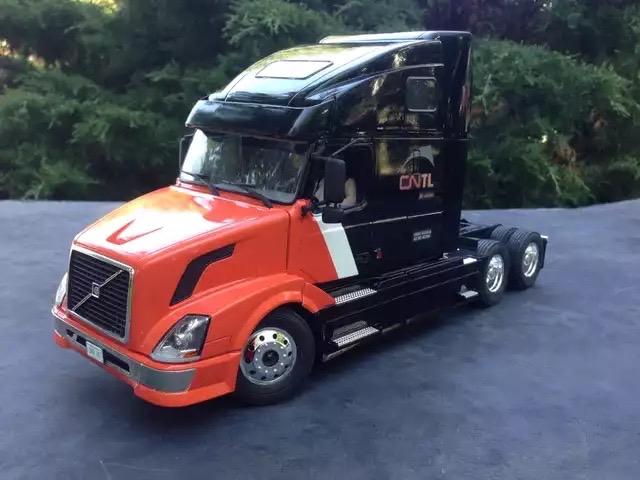
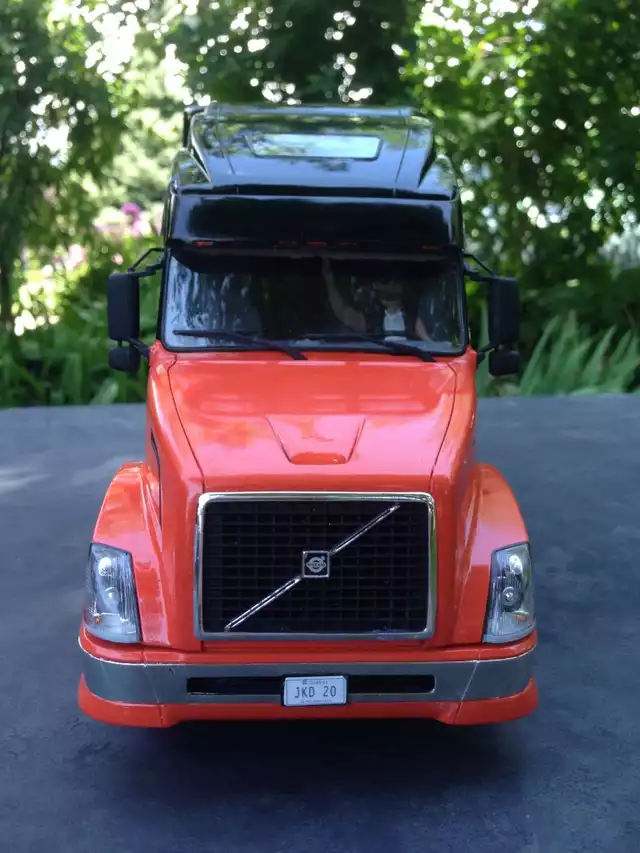
Italeri Volvo VN670 in CNTL livery
hct728(Bob) replied to hct728(Bob)'s topic in Model Trucks: Big Rigs and Heavy Equipment
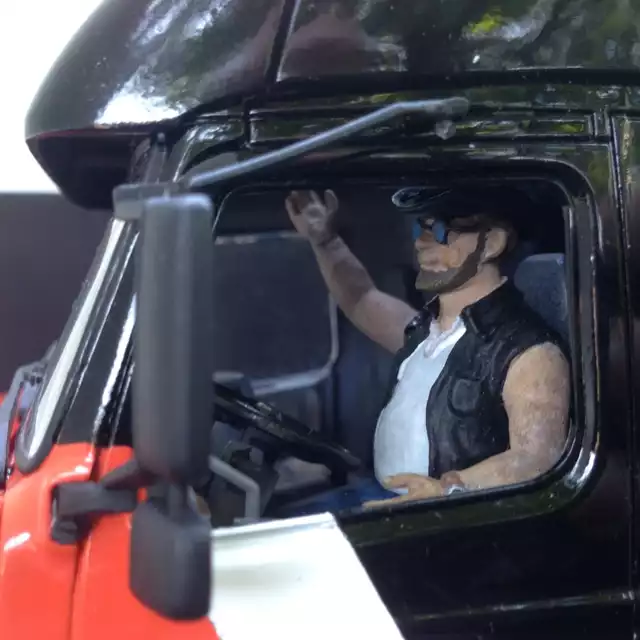
Made them myself, pasted to scale size in MSWord, then laser printed on white decal paper, though I had to touch up the black background
-
AMT Kenworth T600A
hct728(Bob) replied to PierreR89's topic in Model Trucks: Big Rigs and Heavy Equipment
Nice job, and a great addition to the fleet! I have the Canepa version, got it cheap years ago and have been hesitant to build it because of all the bad press, but looking at yours, I see no flaws, all I see is AWESOME! -
Nice progress! Inspiring to see how you are making up the body, what can be done with plain sheet plastic. Nice to see the Miami unit too, beautiful stripes and finish on it!
-
ALF Fire Chief Updated 9/21
hct728(Bob) replied to kilrathy10's topic in WIP: Model Trucks: Big Rigs and Heavy Equipment
Wow, that’s SO nice! Love to see that on my shelf, but you put so much work into it, I don’t think I’d have the stamina! Congratulations, well worth the effort -
Italeri Volvo VN670 in CNTL livery
hct728(Bob) replied to hct728(Bob)'s topic in Model Trucks: Big Rigs and Heavy Equipment
Thanks for the comments, it’s encouraging, as I’m in a slump right now -
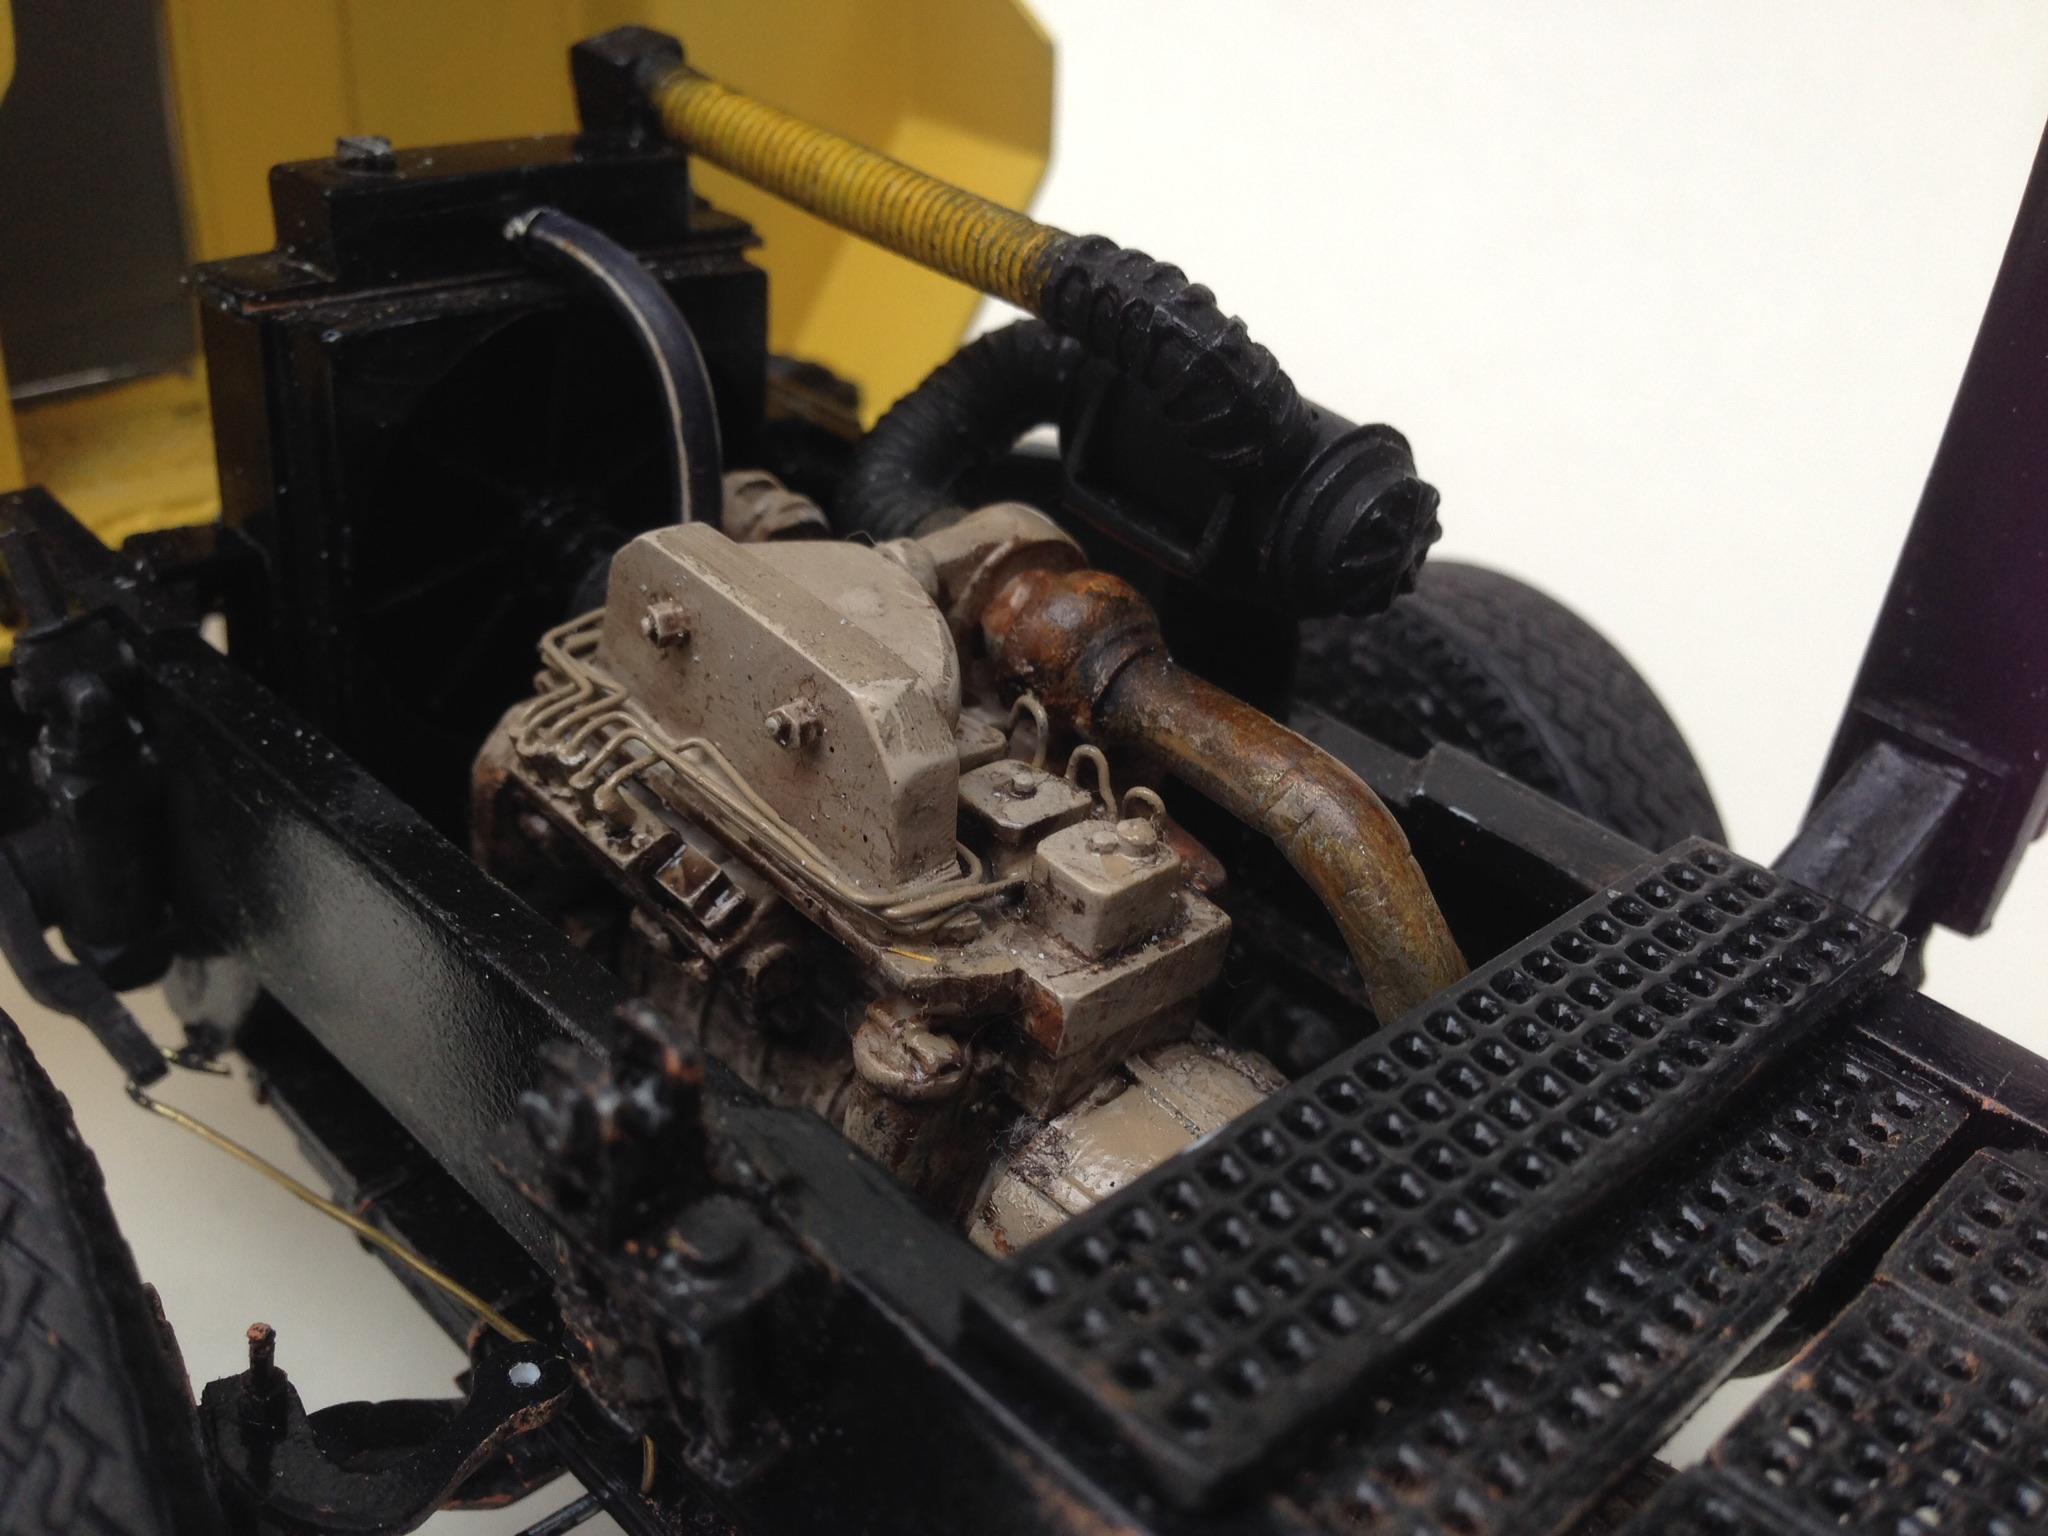
Funny how we don’t see many of these built, but they’re everywhere on the road! Guess the lack of an engine in these kits turns a lot of builders off. I have plans to add one to a bagged parts kit I found at the LHS, but that’s for another time... All Tamiya paint, with silver used to prevent bleed-through from the red kit plastic
-
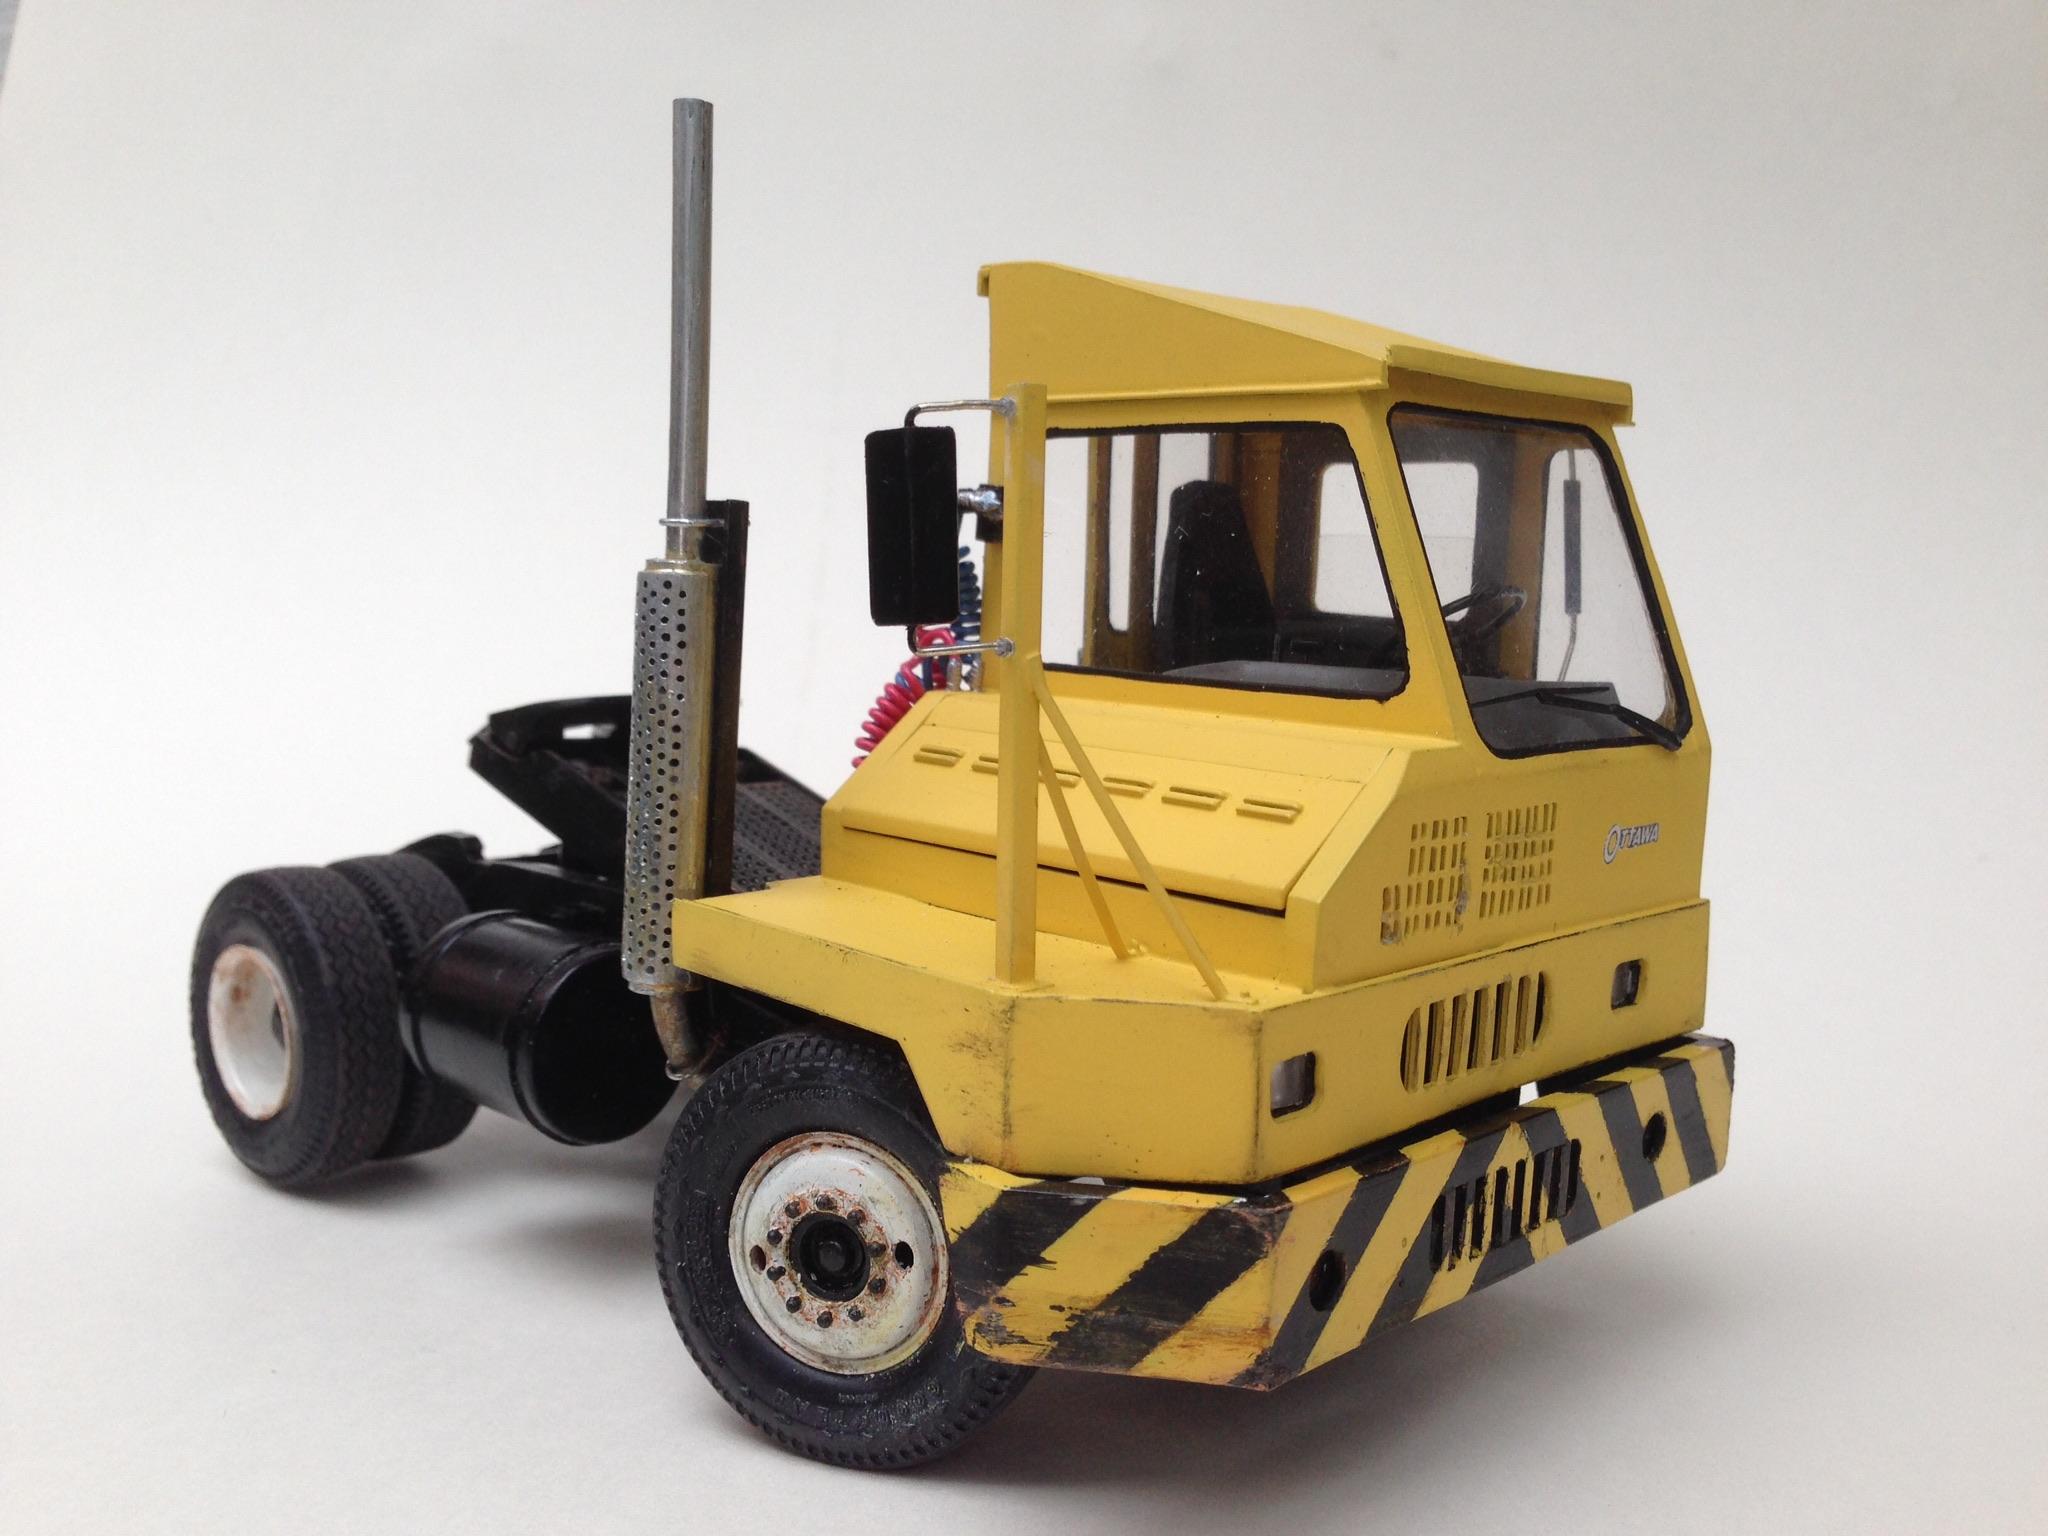
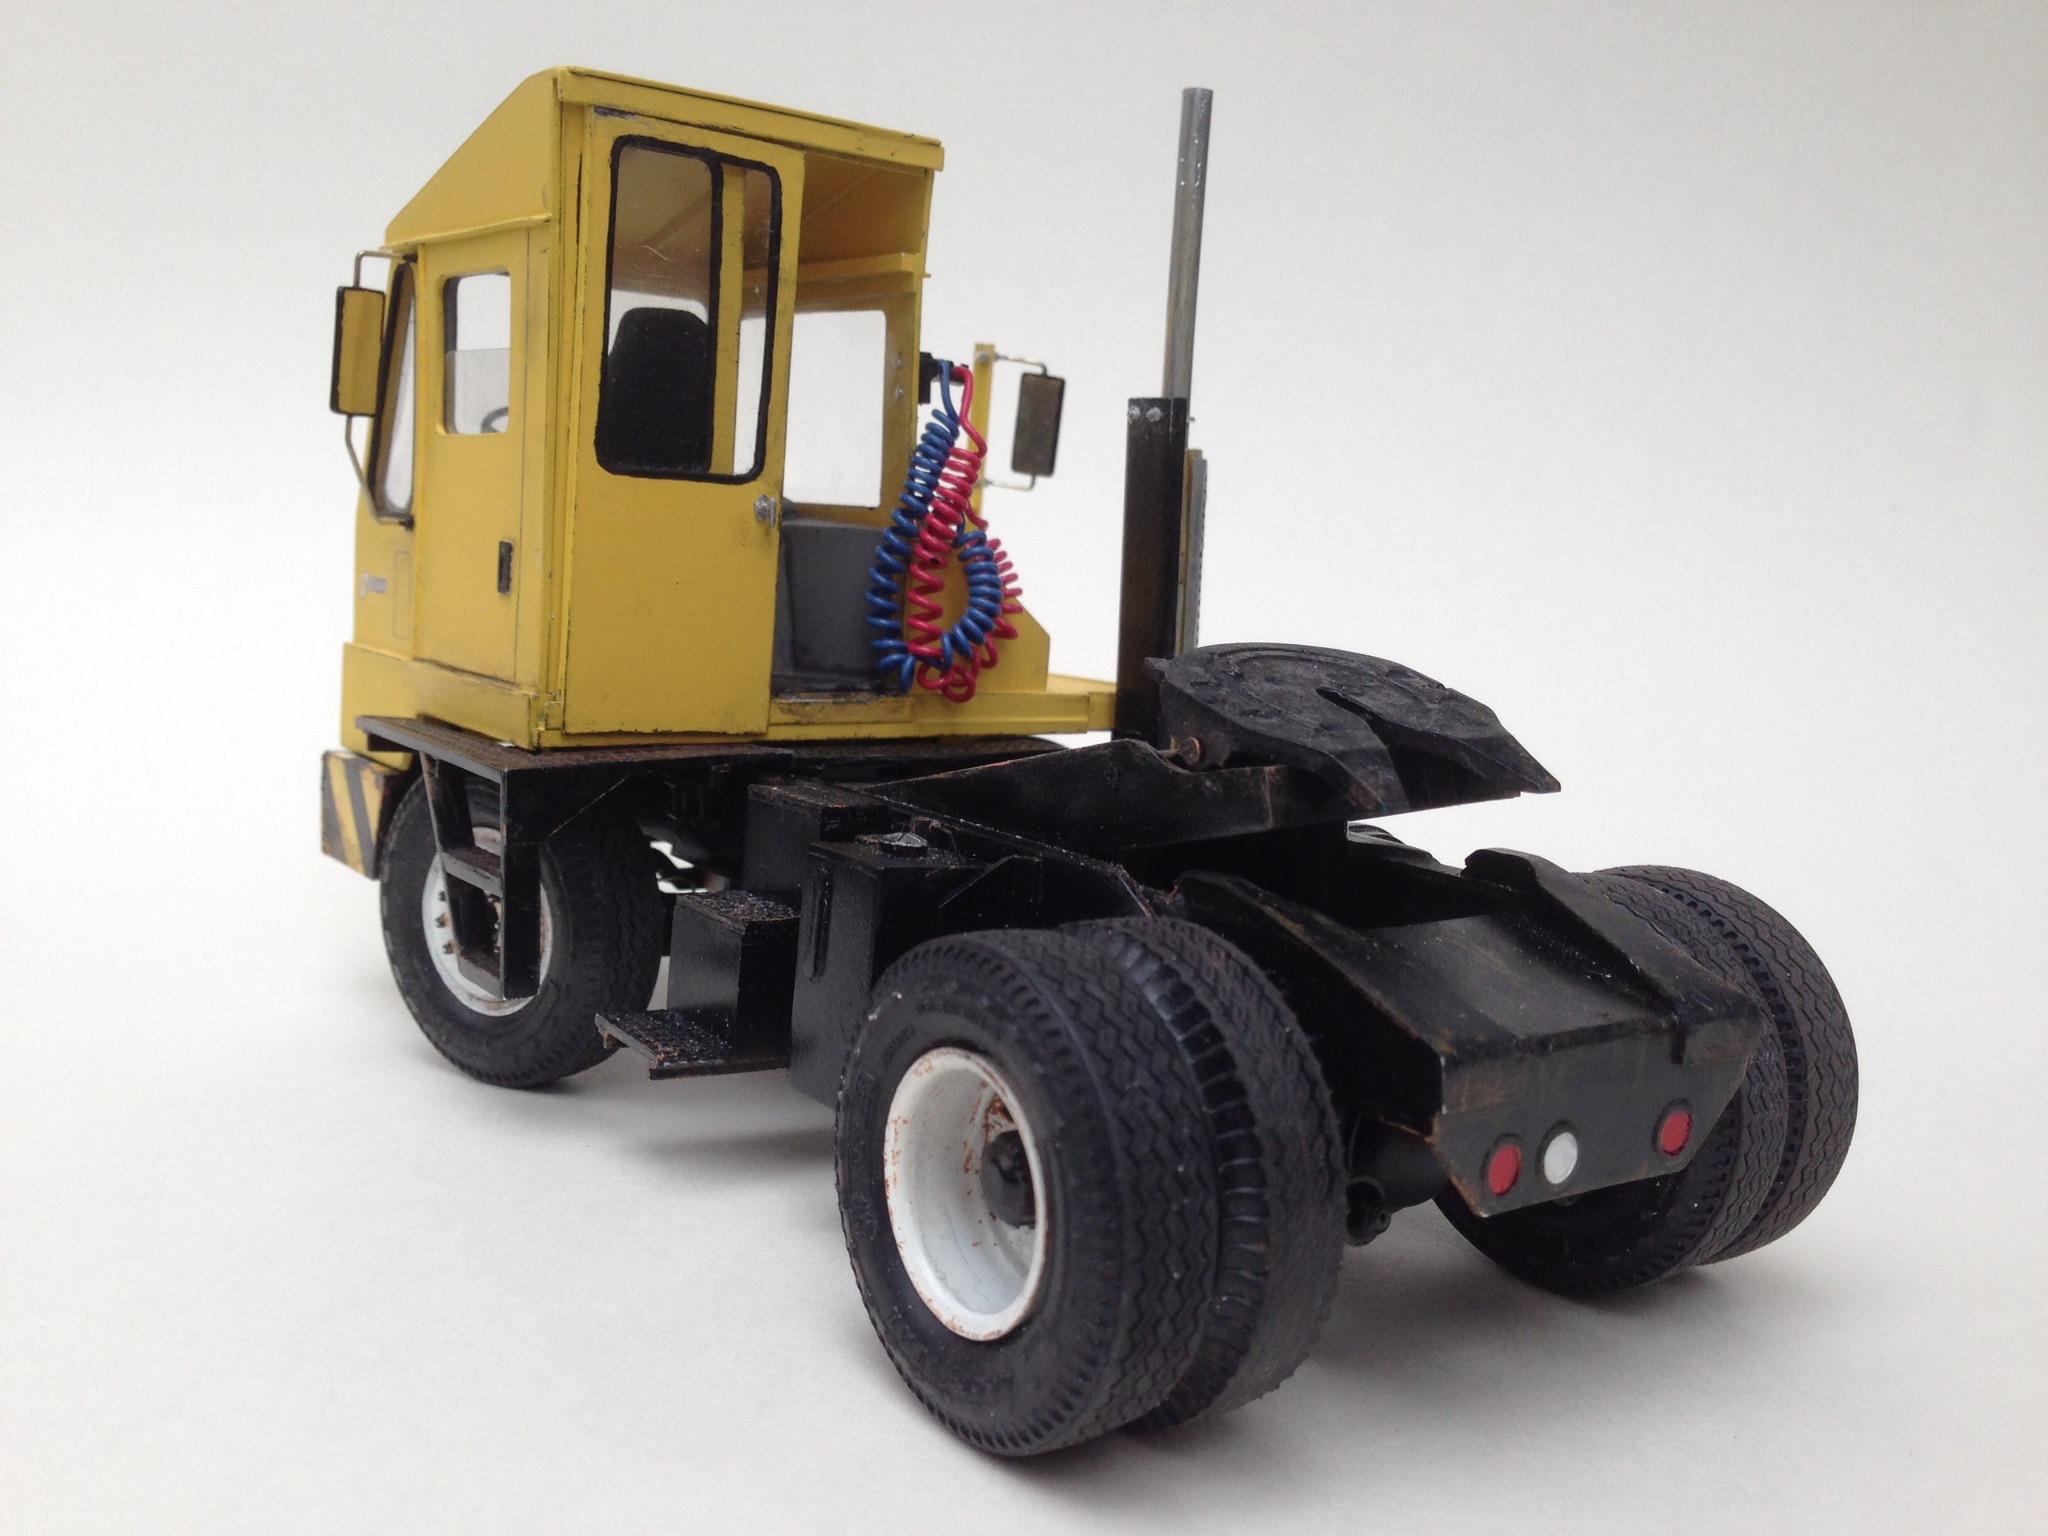
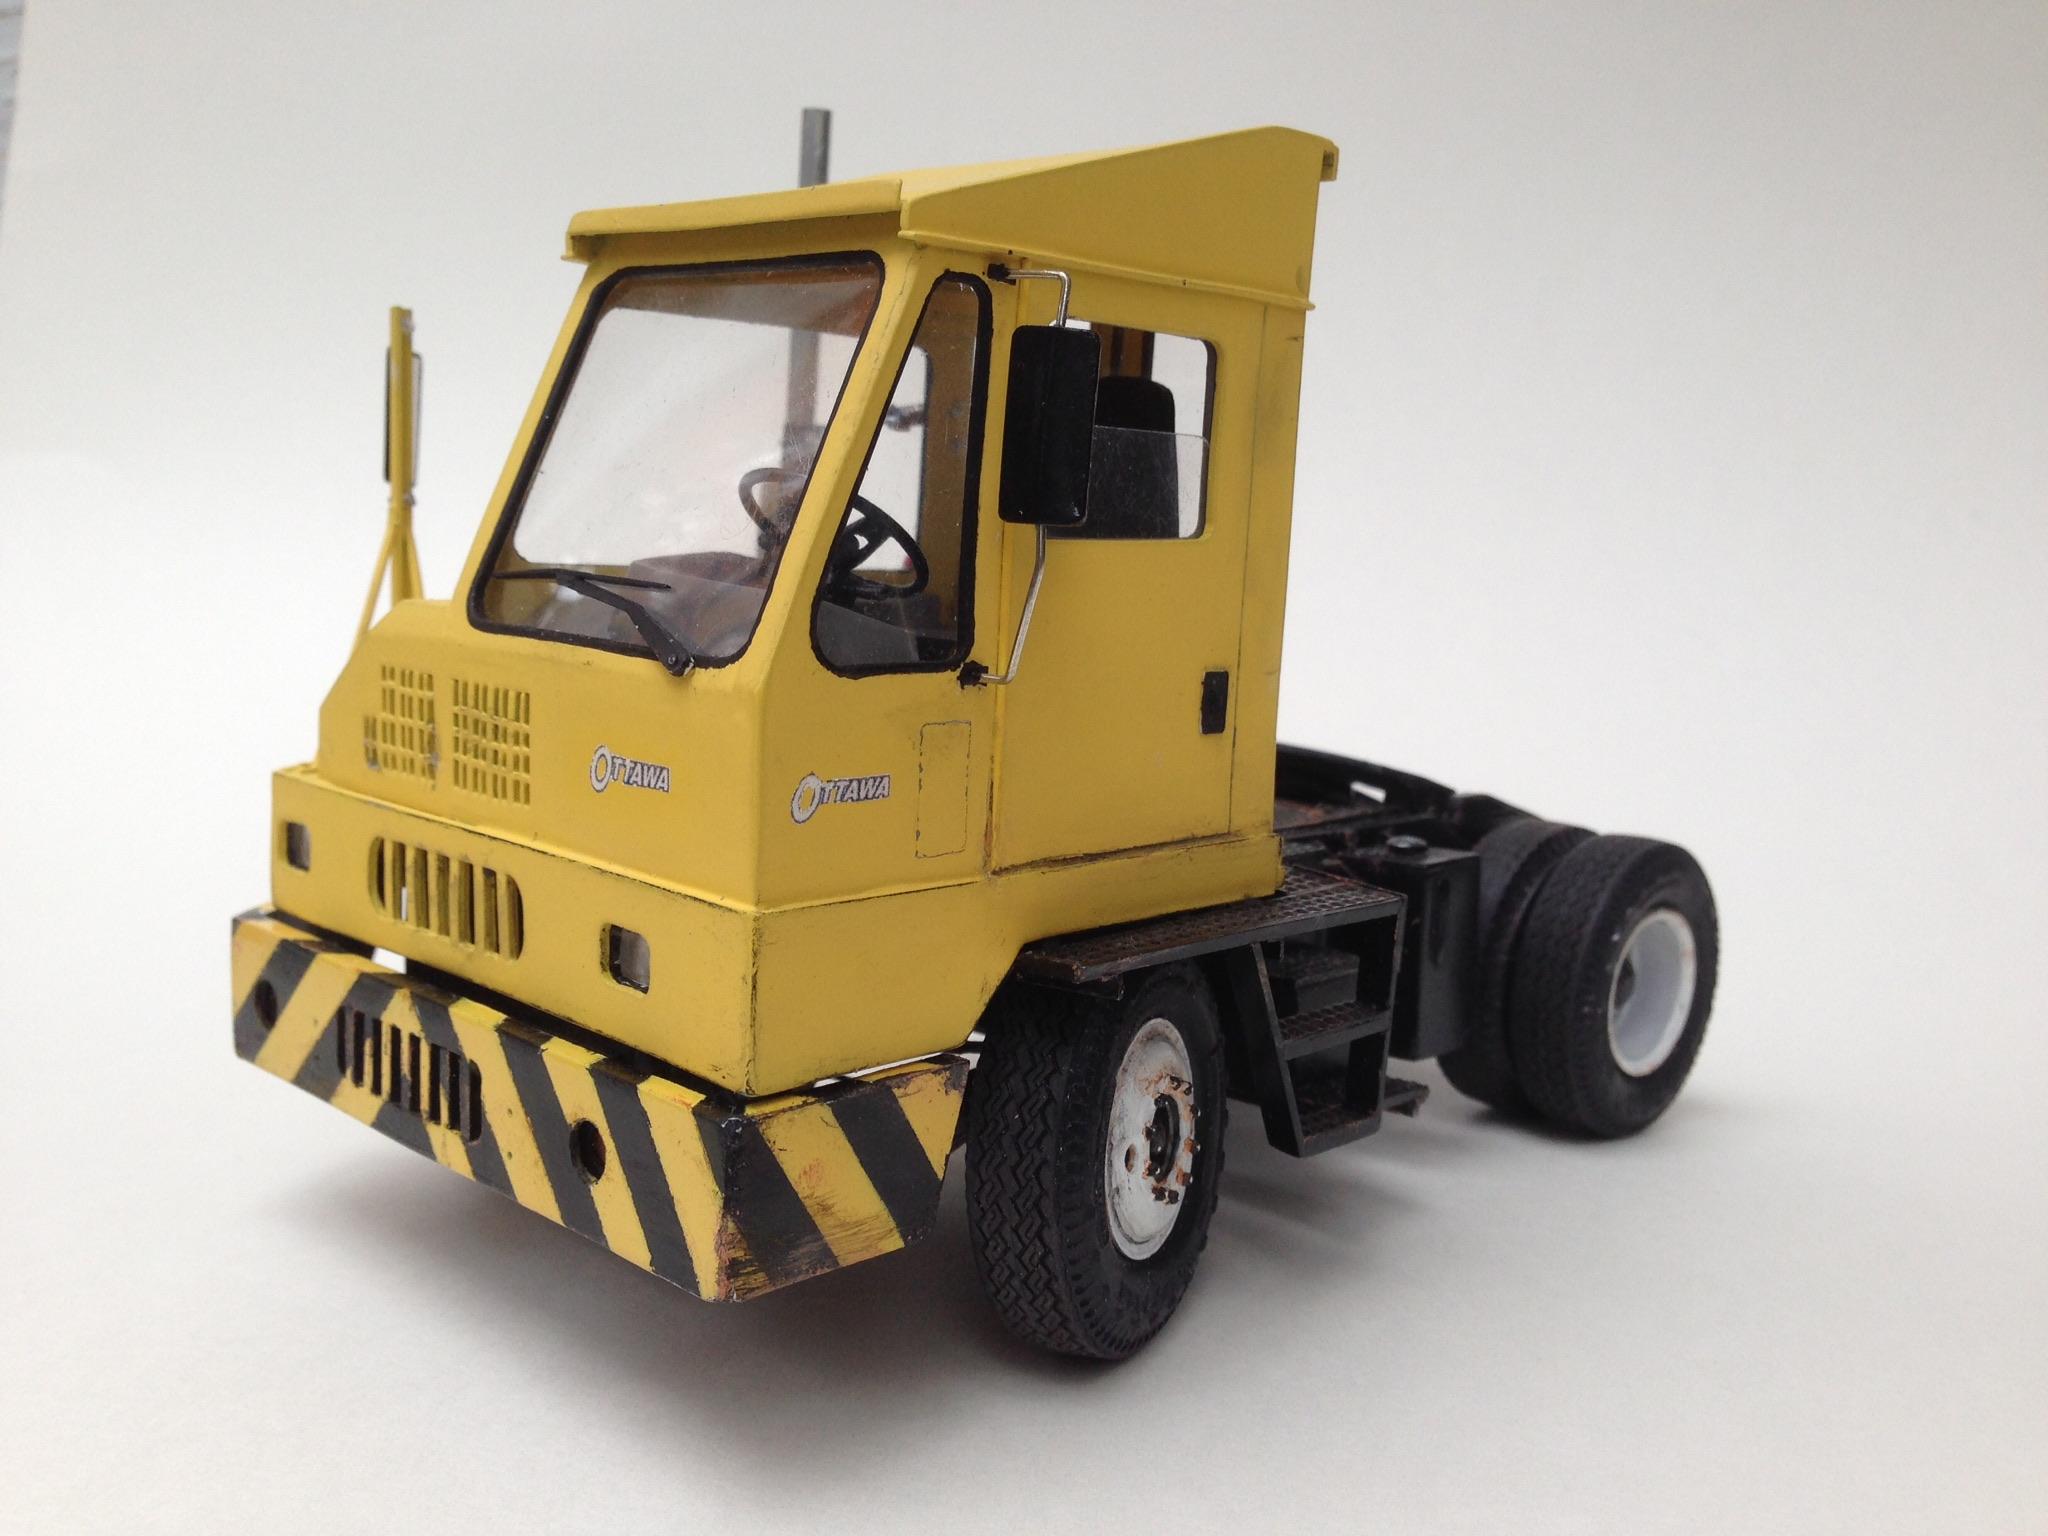
Kalmar Ottawa Yard Tractor
hct728(Bob) replied to hct728(Bob)'s topic in WIP: Model Trucks: Big Rigs and Heavy Equipment
Has it been a year already? It’s done! Painting went very slowly, as I found yellow seems to be very translucent and takes many coats to cover properly, then you go ruin it with the weathering, LOL! The last touch was making up air lines, which I plan to add to my other builds
-
ALF Fire Chief Updated 9/21
hct728(Bob) replied to kilrathy10's topic in WIP: Model Trucks: Big Rigs and Heavy Equipment
Nice work! That’s about as big as they come in scale, and gonna be even bigger and better with the boom! -
Hey, that blueprint is cheating! LOL! Nice work on the castings, very clean, no cleanup required, though drilling the holes straight would challenge me! Thanks for showing us what can be done to add detail, very inspiring!
-
Neatly done! Love the green and black combo, esp. nice looking on the wheels! Nice weathered highlights on the engine too, gives it some life!
-
Food Vendor Truck
hct728(Bob) replied to BIGTRUCK's topic in WIP: Model Trucks: Pickups, Vans, SUVs, Light Commercial
Very neatly done so far! I like the choice of colour, sets off the decals nicely! I have two similar kits, as I buy them whenever I see them, but really want the one with the fish on top(picture courtesy of Scalemates)! Keep up the good work! Bob
-
more 34 ford bus
hct728(Bob) replied to damodelguy az's topic in WIP: Model Trucks: Pickups, Vans, SUVs, Light Commercial
Bump! Now we can see another episode in the continuing story, coming along nice too! -
34 ford school bus
hct728(Bob) replied to damodelguy az's topic in WIP: Model Trucks: Pickups, Vans, SUVs, Light Commercial
Wow. that's awesome! Great design work, neat cutting and i like your idea for the roof interior, 'wood' slats, keep it going! -
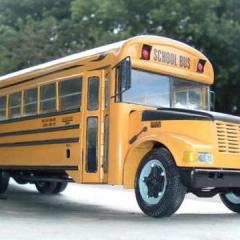
School Bus Anyone??
hct728(Bob) replied to Oldmopars's topic in General Automotive Talk (Trucks and Cars)
Mine...scratchbuilt, hardest part is the curved roof, as the rest is just flat sheets with added Evergreen strips for trim and windows width="1024" height="768" alt="IMG_6732a Good luck with yours, I would love to get my hands on a Bonnet Bus kit or two to make a vintage bus -
I’ve had the AMT Canepa T600 in the stash for years and thought it might be cool to update it to something more modern (and correct, maybe). To covert it to a T660 I see the hood would need to be reshaped, with new lights and grille, but the cab appears to be the same, except for the upward slope of the roof and fairing in the sleeper better, not a problem though. Anyone tried this or similar, or any suggestions?
-
Mashpee Breaker 354
hct728(Bob) replied to Chariots of Fire's topic in WIP: Model Trucks: Big Rigs and Heavy Equipment
Wow, such neat, crisp bodywork! Love the use of tread plate on the sides and especially under the doors, a nice detail! Lots more to come too, awesome