George Bojaciuk
-
Posts
839 -
Joined
-
Last visited
Content Type
Profiles
Forums
Events
Gallery
Everything posted by George Bojaciuk
-

Pontiac Air
George Bojaciuk replied to George Bojaciuk's topic in Car Aftermarket / Resin / 3D Printed
I don't have Jeff's in hand to see, but mine come apart. -
Pontiac Air
George Bojaciuk replied to George Bojaciuk's topic in Car Aftermarket / Resin / 3D Printed
New pic added!!! -
Pontiac Air
George Bojaciuk replied to George Bojaciuk's topic in Car Aftermarket / Resin / 3D Printed
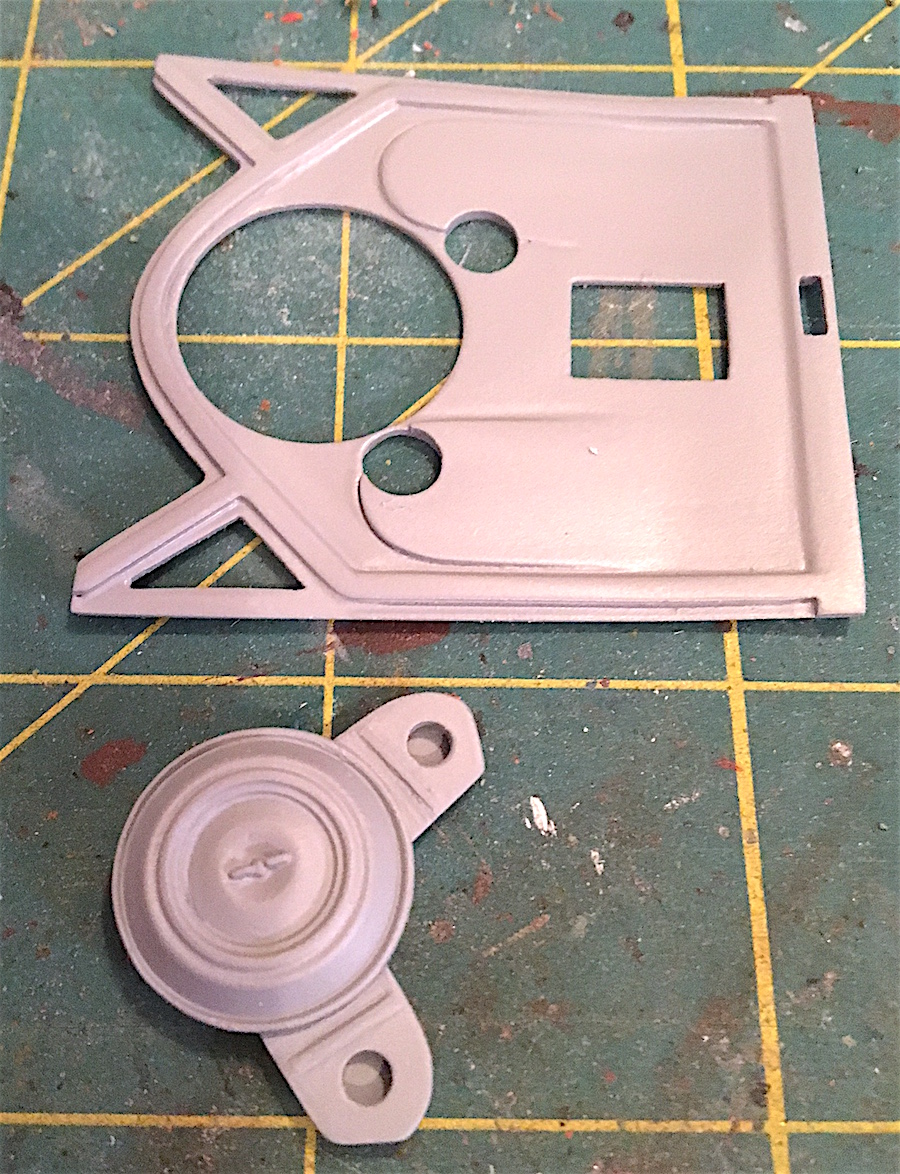
There will be one more added to this group! I posted this on my emails already and just wanted to share it here. Jeff Pierson is doing this outstanding master for the Firebird 400. I'm looking to get Greg Wann to add this to the Ram Air Items, as well.
-
Hobbico - BANKRUPT!
George Bojaciuk replied to niteowl7710's topic in General Automotive Talk (Trucks and Cars)
Voice of reason, Tom. Even tho you didn't know me at NNL East. Even after I bought you beer at Ron's Bar and Grille. No worries... Therapy starts next week.... Rejection is an ugly thing! -
1975 - 1977 Ventura Hood/Shaker
George Bojaciuk replied to George Bojaciuk's topic in Car Aftermarket / Resin / 3D Printed
I’m down to my last one!!! Great reviews so far!!! In talking to Greg Wann, he will offer these when mine are gone! -
After posting pics of my resin graveyard, a guy contacted me looking to “trade” for my Cheesecast Firebird. Turns out that Jeff did the original master before Cheesecast dropped from sight. We conversed some more... now, I’m working with Greg Wann to bring this out thru him! Big thanks to Jeff Pierson for helping to make this happen! Details will follow as this evolves! oh.... this is made to fit the Monogram Trans Am!
-
In my search for parts in my Basement, I came across some parts from a Diecast program in 1:24th. I sized up one unit to a Monogram ‘69 GTO hood... L to R... ‘70 GTO Ram Air set up, ‘71-‘72 Ram Air and the dual snorkel unit. I still need to find the snorkel snout hardware! I’ll be working with Greg Wann on this and will advise on availability!
-
detail Pet peeve of mine!
George Bojaciuk replied to Mercuryman54's topic in General Automotive Talk (Trucks and Cars)
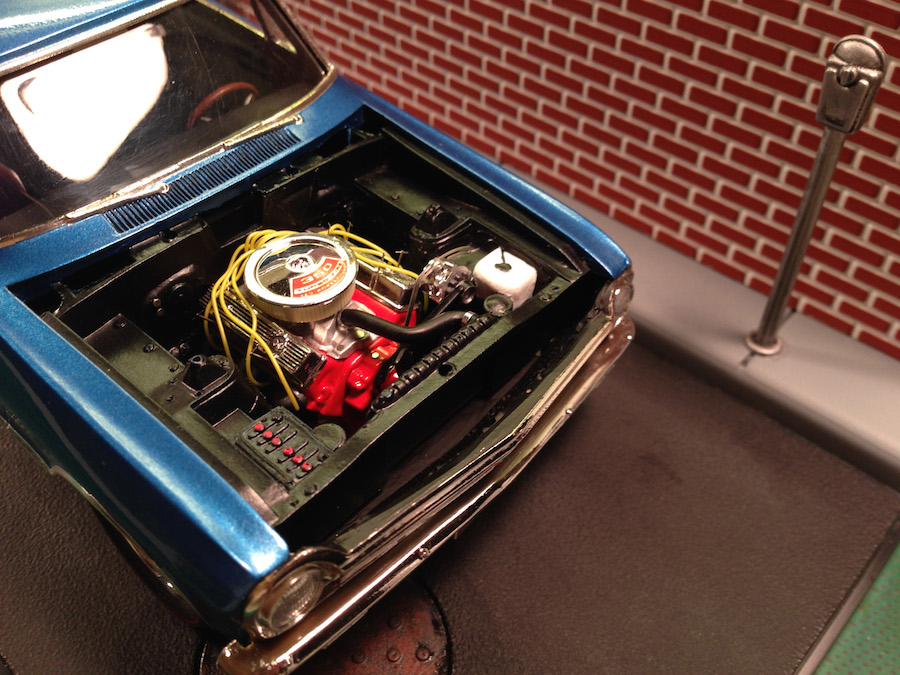
I guess I'll annoy.... Accel was the hot ticket back in the day. I should know as I was in the Performance Parts Industry. I worked at S&W Performance in 1977. My sales rep handed me some wires and I put them on my Vega V-8. Great marketing back then, since yellow, immediately, meant Accel. Later they had a red set (note my coil wire on the Vega engine!). Blue was Moroso for the Blue Max Series. At one point a yellow knock off came out. They were quickly shut down. MSD then had the market for Red. Restorers wanted the HP stuff and many came forward and offered kits in black to satisfy the demand. I've always tried to encourage builders thru my writings, and I will at any instance. Build what you like! By the emails I get, I think I've accomplished that. But to the original point, if you note my parking meter, I did use a black wash. BTW, My Vega engine compartment looked like this, but with hoses. History attached. To anyone reading my post...build what you feel. Point is to build!!!!! ...and enjoy it!!!! Just have fun!
-
A Suggestion to discuss...
George Bojaciuk replied to George Bojaciuk's topic in General Automotive Talk (Trucks and Cars)
My apologies for any inconvenience my post my have caused. -
A Suggestion to discuss...
George Bojaciuk replied to George Bojaciuk's topic in General Automotive Talk (Trucks and Cars)
Casey, Not simplistic but realistic. I’m also not looking for the site to monitor transactions. That’s not realistic or practical. PayPal does offer some security and I’ve used Resolution to my satisfaction. Anything after that is upon the buyer and seller. Just think of the old days of Scale Auto with the Ads in the back. I filled many holes in my collection with that and sold tons of Scale Vanities license plates, when I was involved. Not being my first rodeo, either, I have run a successful private list auction for a number of years without major issues. I currently have a list of 200 trusted people who enjoy quite a few nice deals. Not to mention my articles. My list goes out thru Constant Contact. I’ve only ever had one guy who ran up a large tab. Once he paid, he was poofed. I run it, I decide. Period. I have to honestly say, I could have a beer with anyone on my list! ...and I have! You missed my point entirely. I’m looking at this thru the viewpoint of generating some cash flow to this site and the magazine. This thru sales, which I am no stranger to either. I’m sure selling goes on. However, I think the majority of us would throw some cash back to Greg, especially the usual suspects of the hobby! The other option would be to do a pay to play AD section. No risk to the site, but the income from a percentage would be better. I do appreciate your comments and respect your opinion. Thanks! -
I've read the "Rules" and I'd like to offer a suggestion to a specific topic, buying and selling. I know at one time a link was provided, but that site is dead. I personally do not like eBay and use it only when I have to. I honestly do not see the harm in us, as a community, buying, selling, trading. What I'd like to propose is this be allowed openly. Once a deal has been made, the seller can then set aside 10% and send it to Greg. This could grow as transactions expand. It might help him continue his work here and with the magazine. One of the diecast sites did this in an auction format and used the funds to enhance their website. Let's say I sell a kit to someone here for $50. I'm more than willing to send Greg $5 via PayPal. Not that the site itself, is actively selling, but the site is used as the means to get desired items to the people that want and or need them. In turn, the site gets a reward. After reading the rule enforcement aspect, I now feel guilty for having offered my handful of resin Ventura hoods that I had made up. I had hoped to do more small run projects with a caster and help promote him as well as cover my expenses. Sort of filling needs for multiple people. Honestly, where else were these hoods available? How else to you get the word out here, other than a wink and a nod? Dirty back room dealings, or the like? I know I can do it with my own list, but then that excludes sharing with some good people here! The same for kits. As I get older, I'm realizing my mortality and looking at my kits, I'm envisioning either a large mausoleum or a sizeable dumpster. The latter sends chills through me! I certainly don't need a trade, when I'm looking to cull. For the most part, we know each other from our posts. Bad actors have been exposed. I just think this is an opportunity to "Show the Money" to this site and magazine through a productive venue. I hate seeing opportunity zip by! .....just my two cents worth.
-
1975 - 1977 Ventura Hood/Shaker
George Bojaciuk replied to George Bojaciuk's topic in Car Aftermarket / Resin / 3D Printed
I would have expected nothing less from you Greg! -
1975 - 1977 Ventura Hood/Shaker
George Bojaciuk replied to George Bojaciuk's topic in Car Aftermarket / Resin / 3D Printed
Half are gone! -
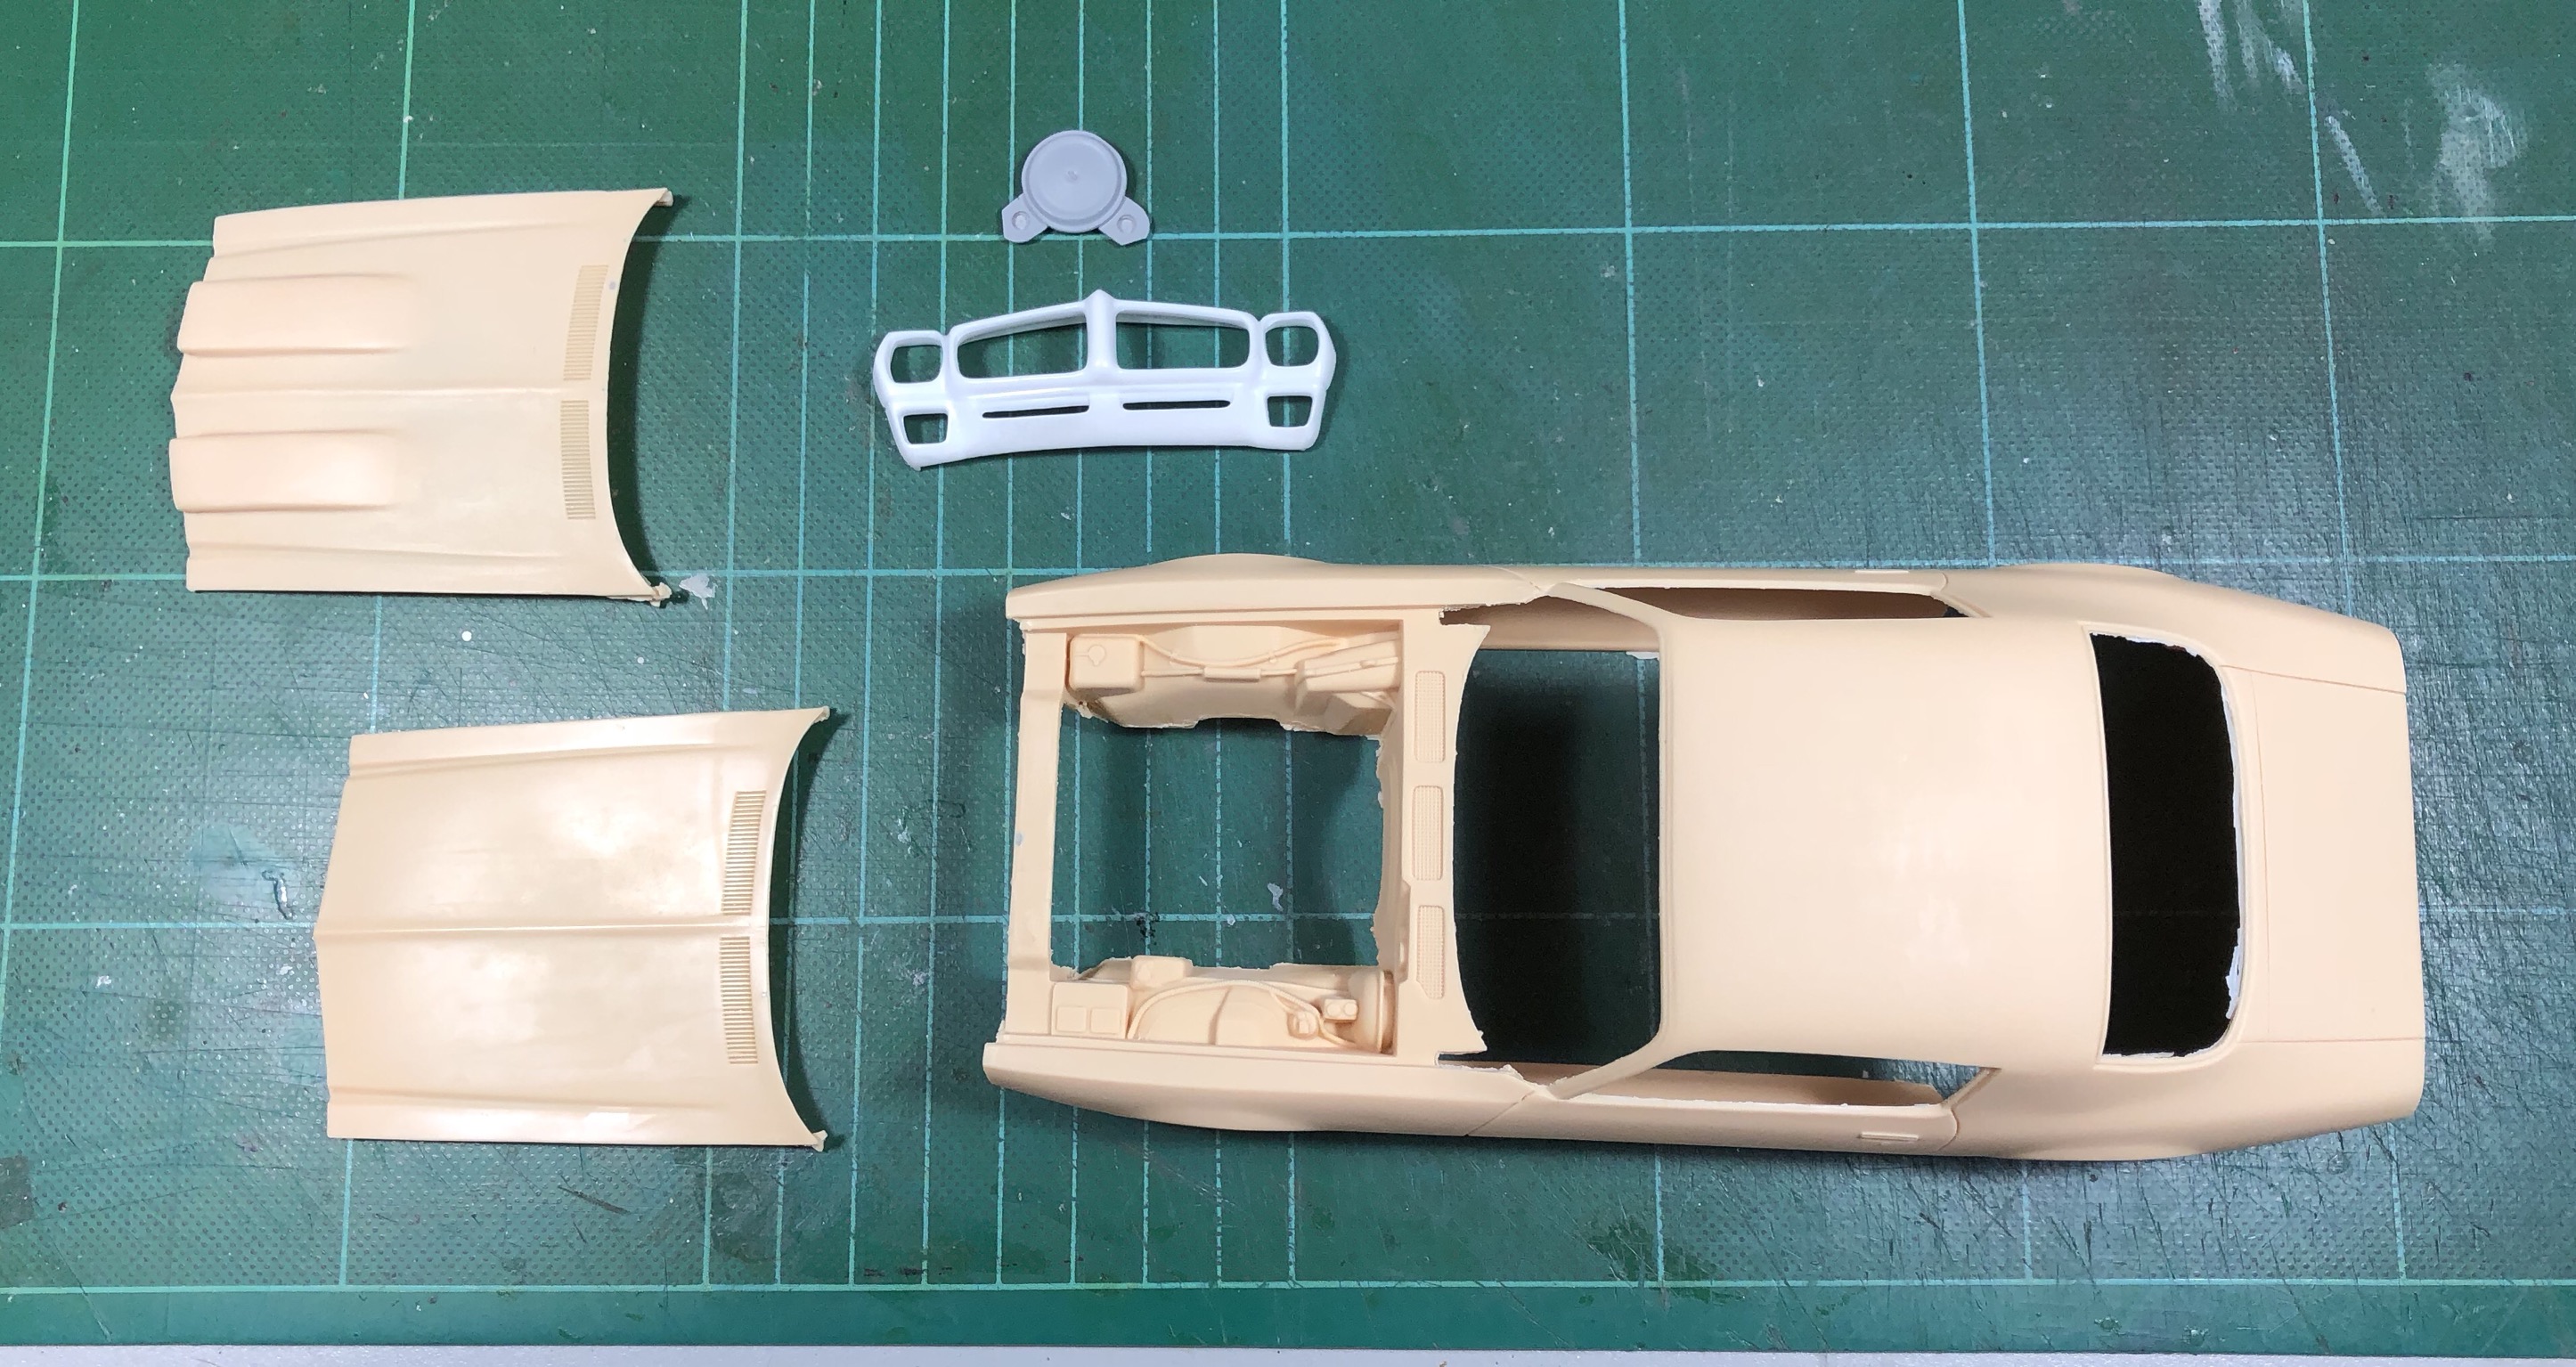
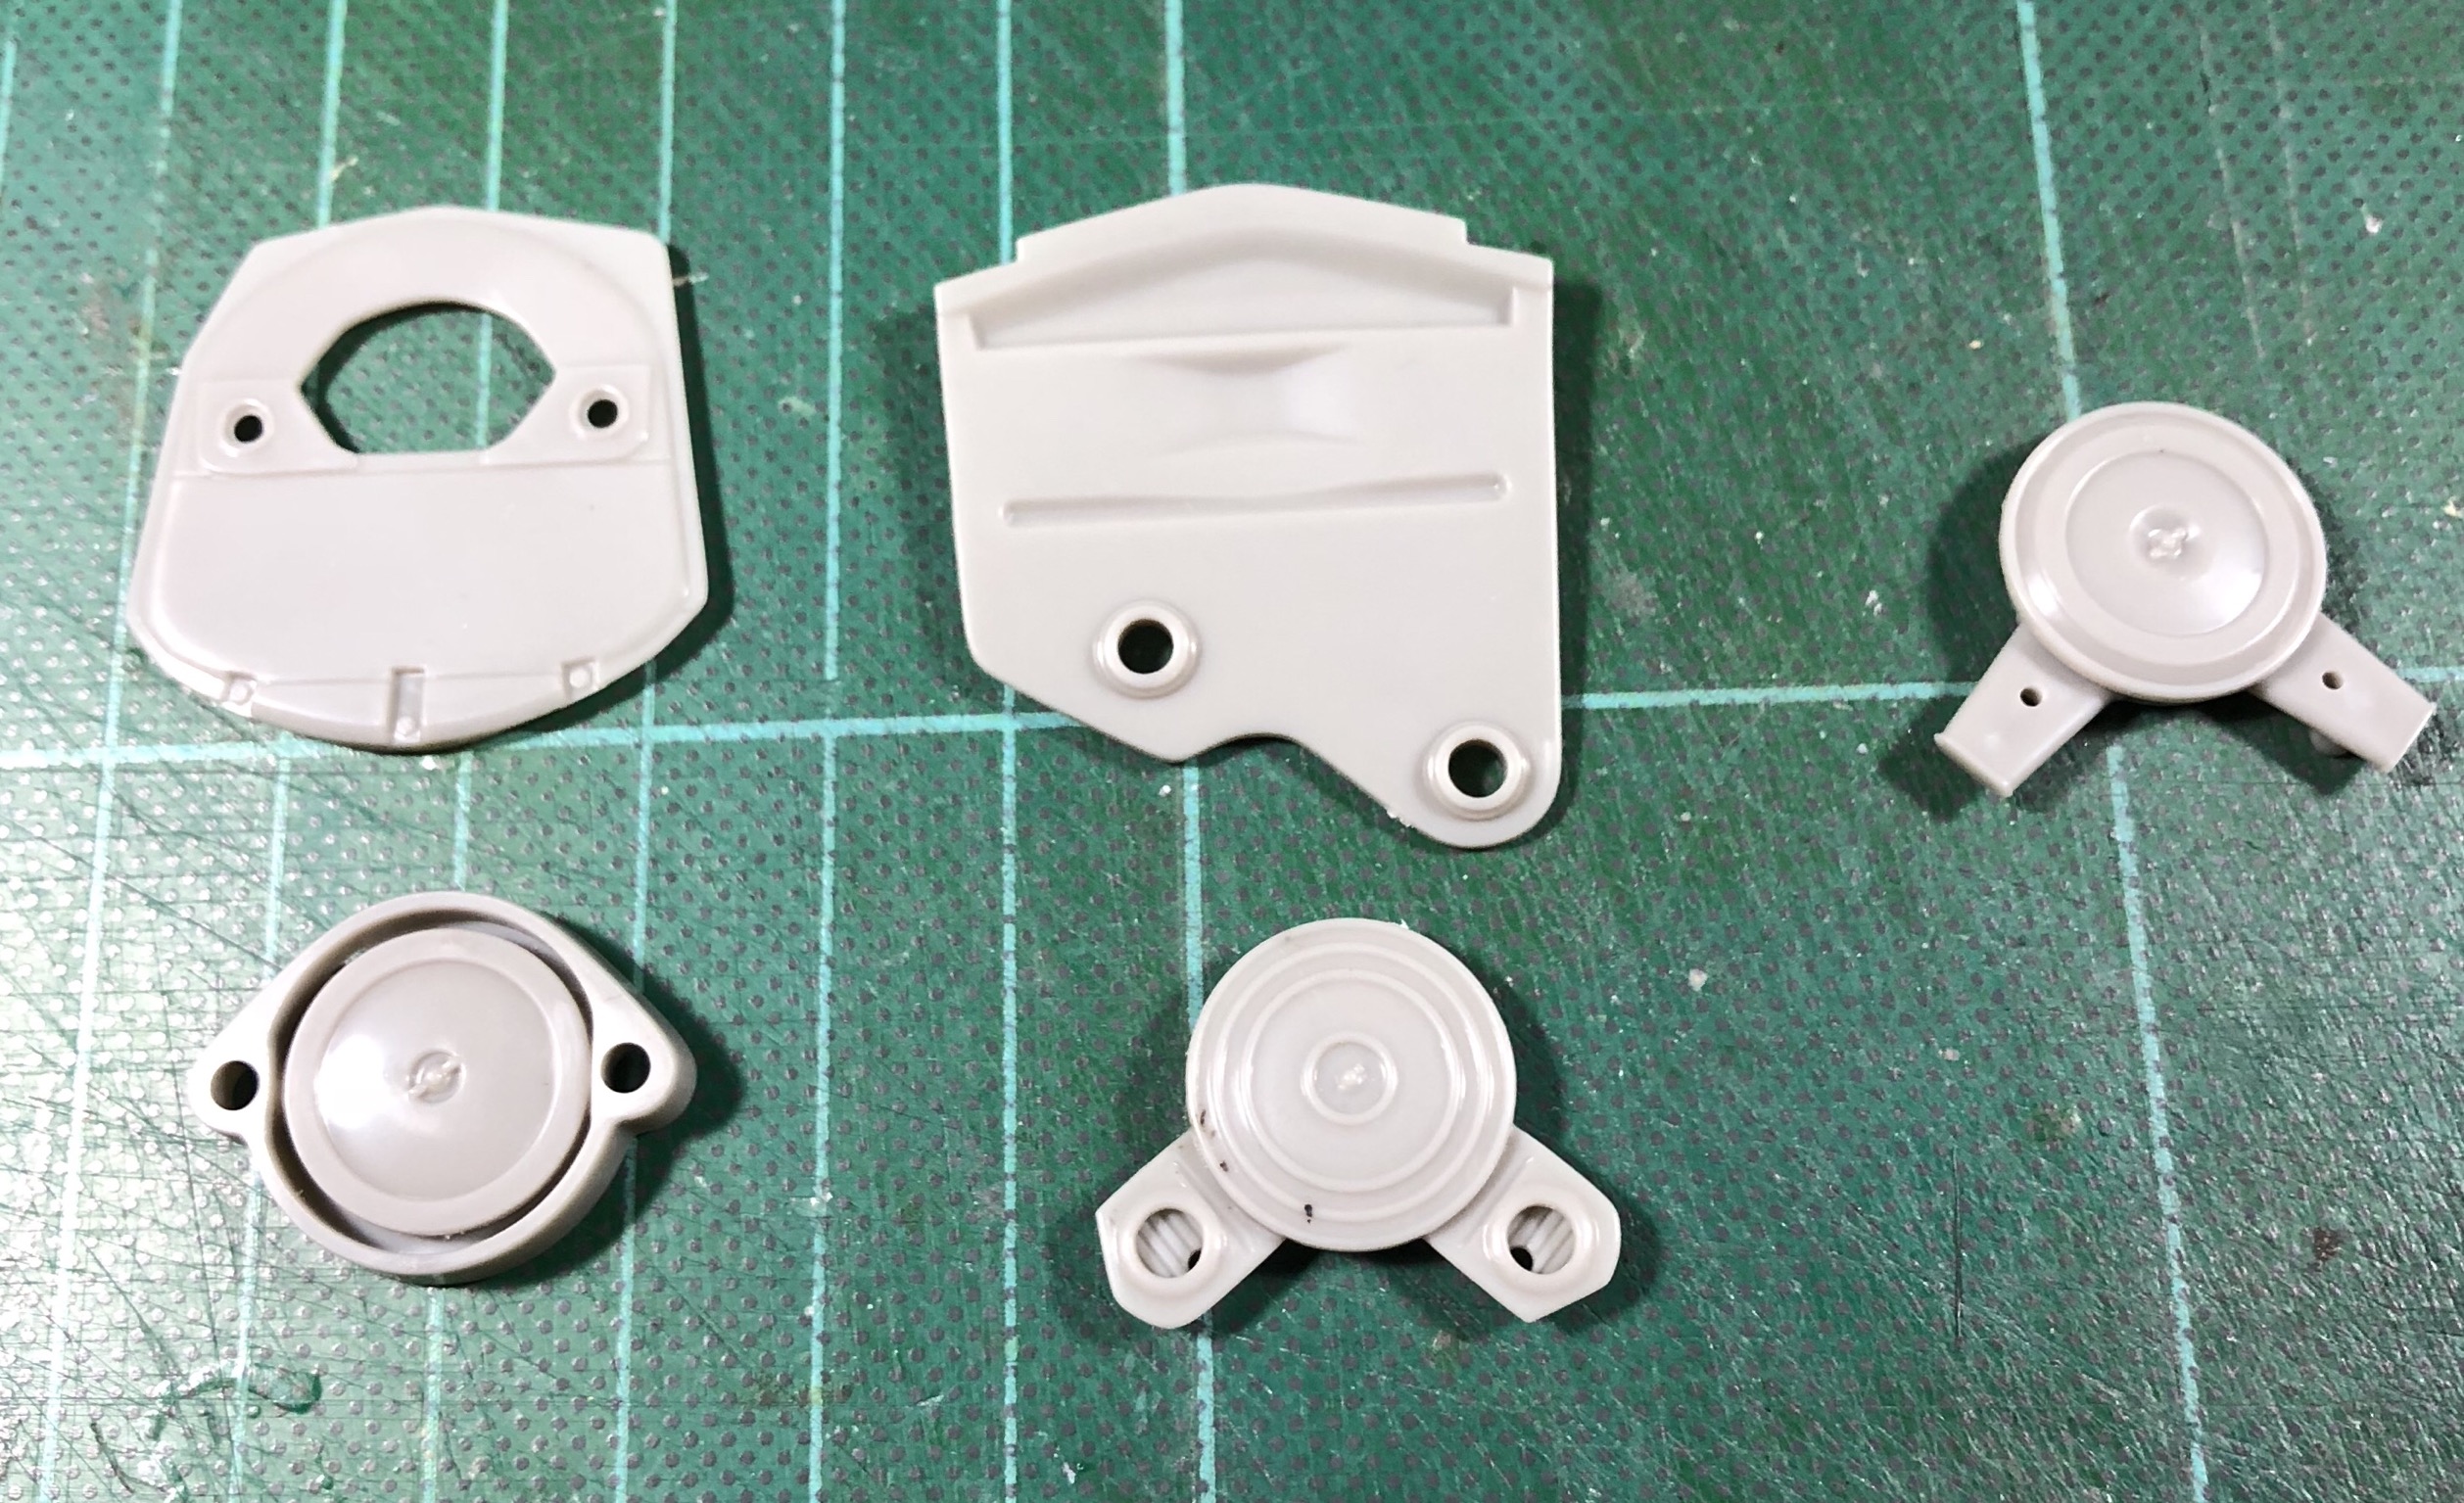
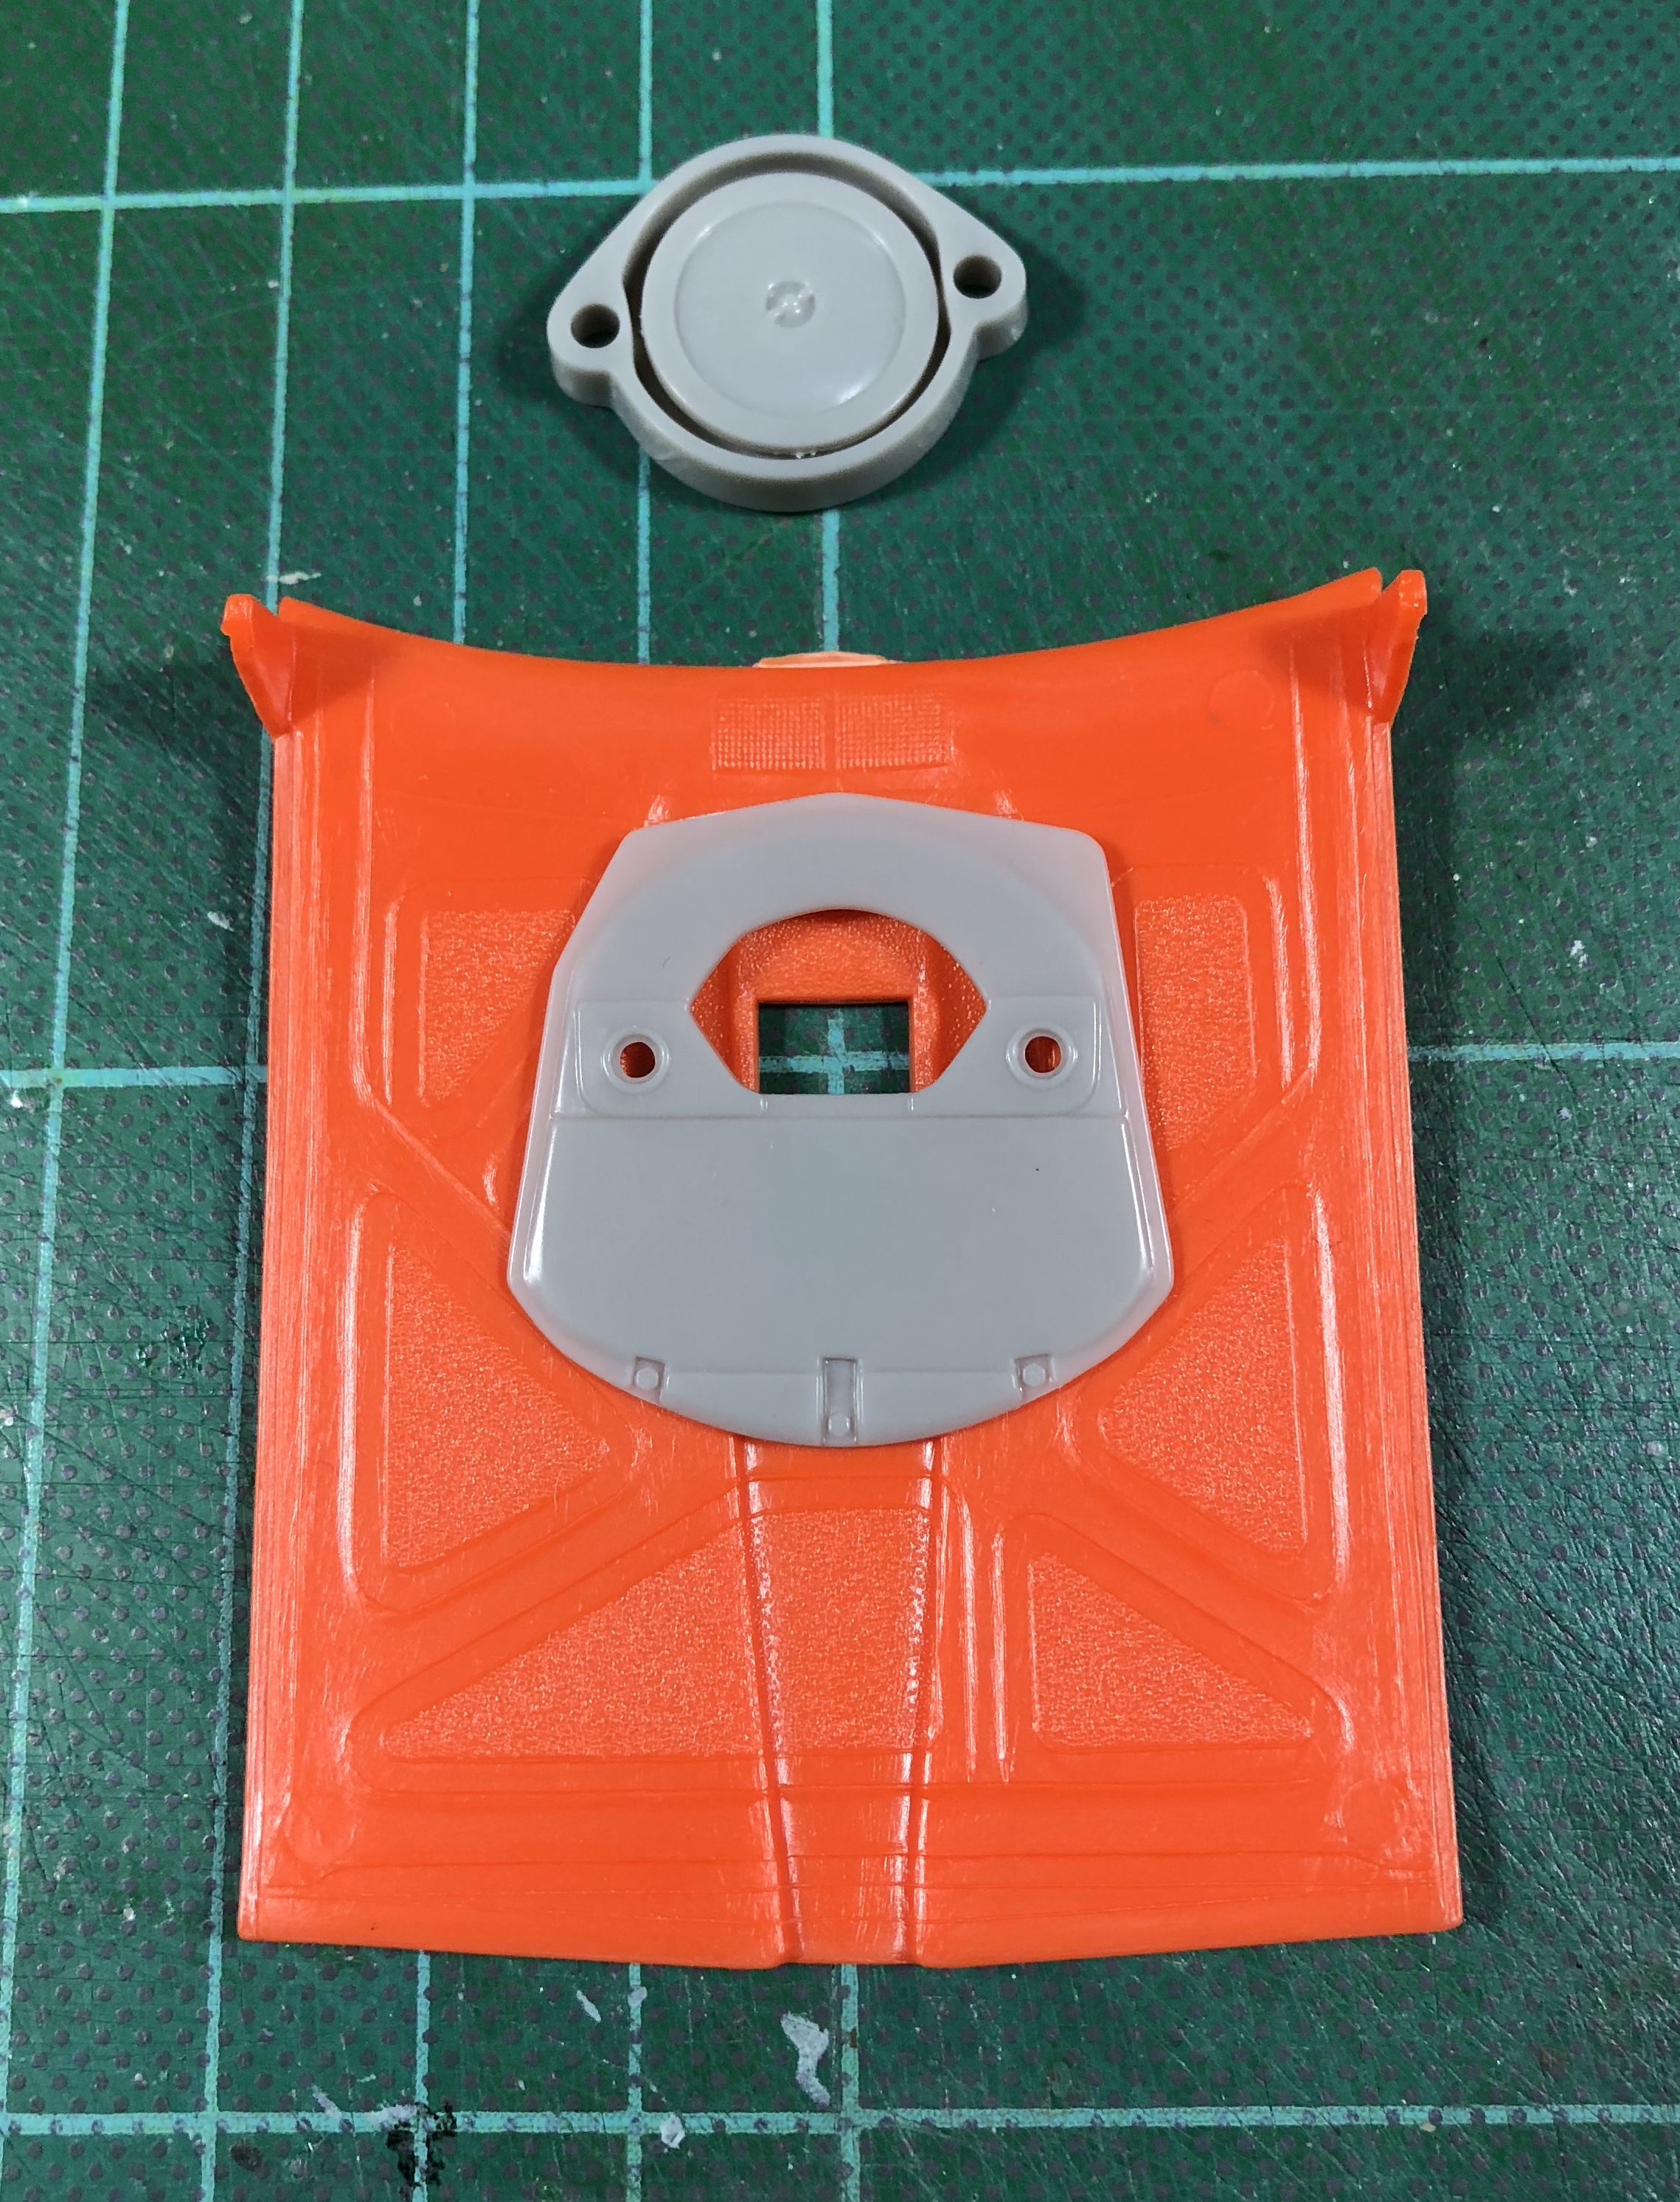
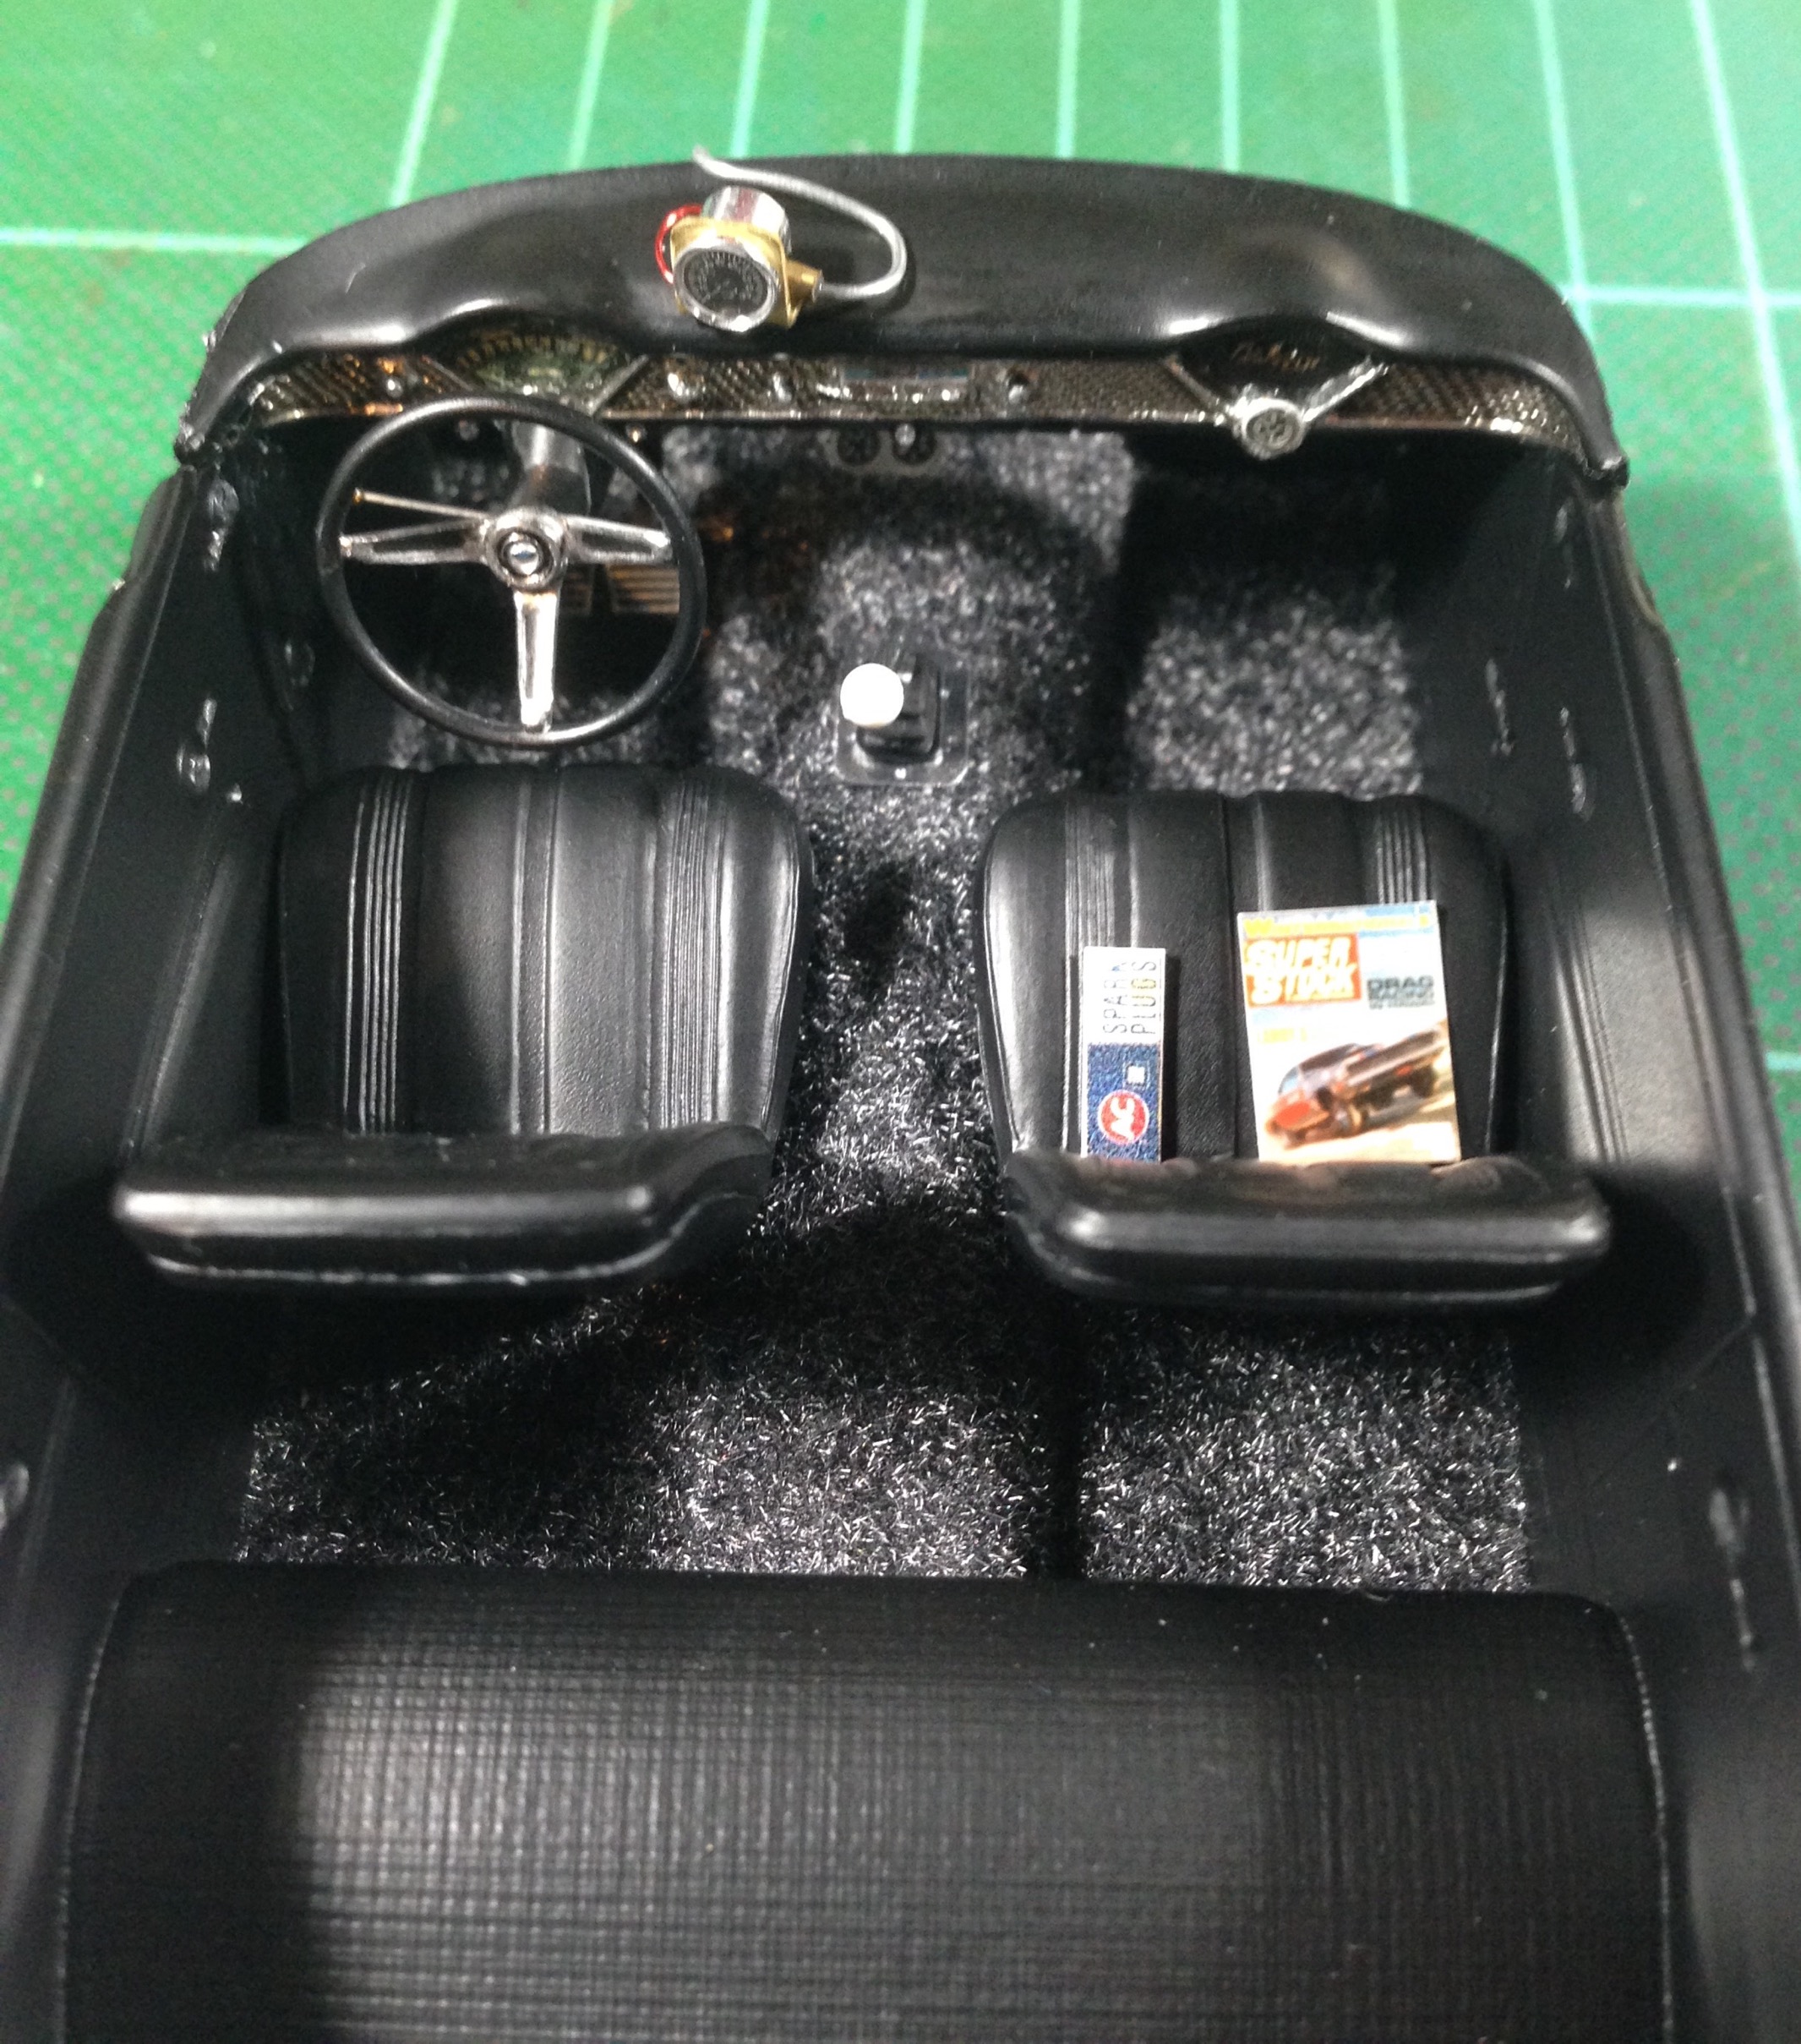
I have 6 hood and scoop assemblies to offer. Please contact me if you would like details. The hood is scribed on the underside so if you opt for the shaker, it's an easy add. You get a hood, shaker and 2pc air cleaner assy.
-
Thanks Al! I had to make good!
-
Paint booth question
George Bojaciuk replied to Ro3bert's topic in General Automotive Talk (Trucks and Cars)
I get a lot from TCP. Like them a lot! Booth is nice. Mine is custom made and made ages ago! Like the slim vent. I would strongly suggest a metal vent tube in any app. Vinyl will break down over time from solvent use. Save yourself from the experience I had where the tube disintegrated during a critical paint job! -
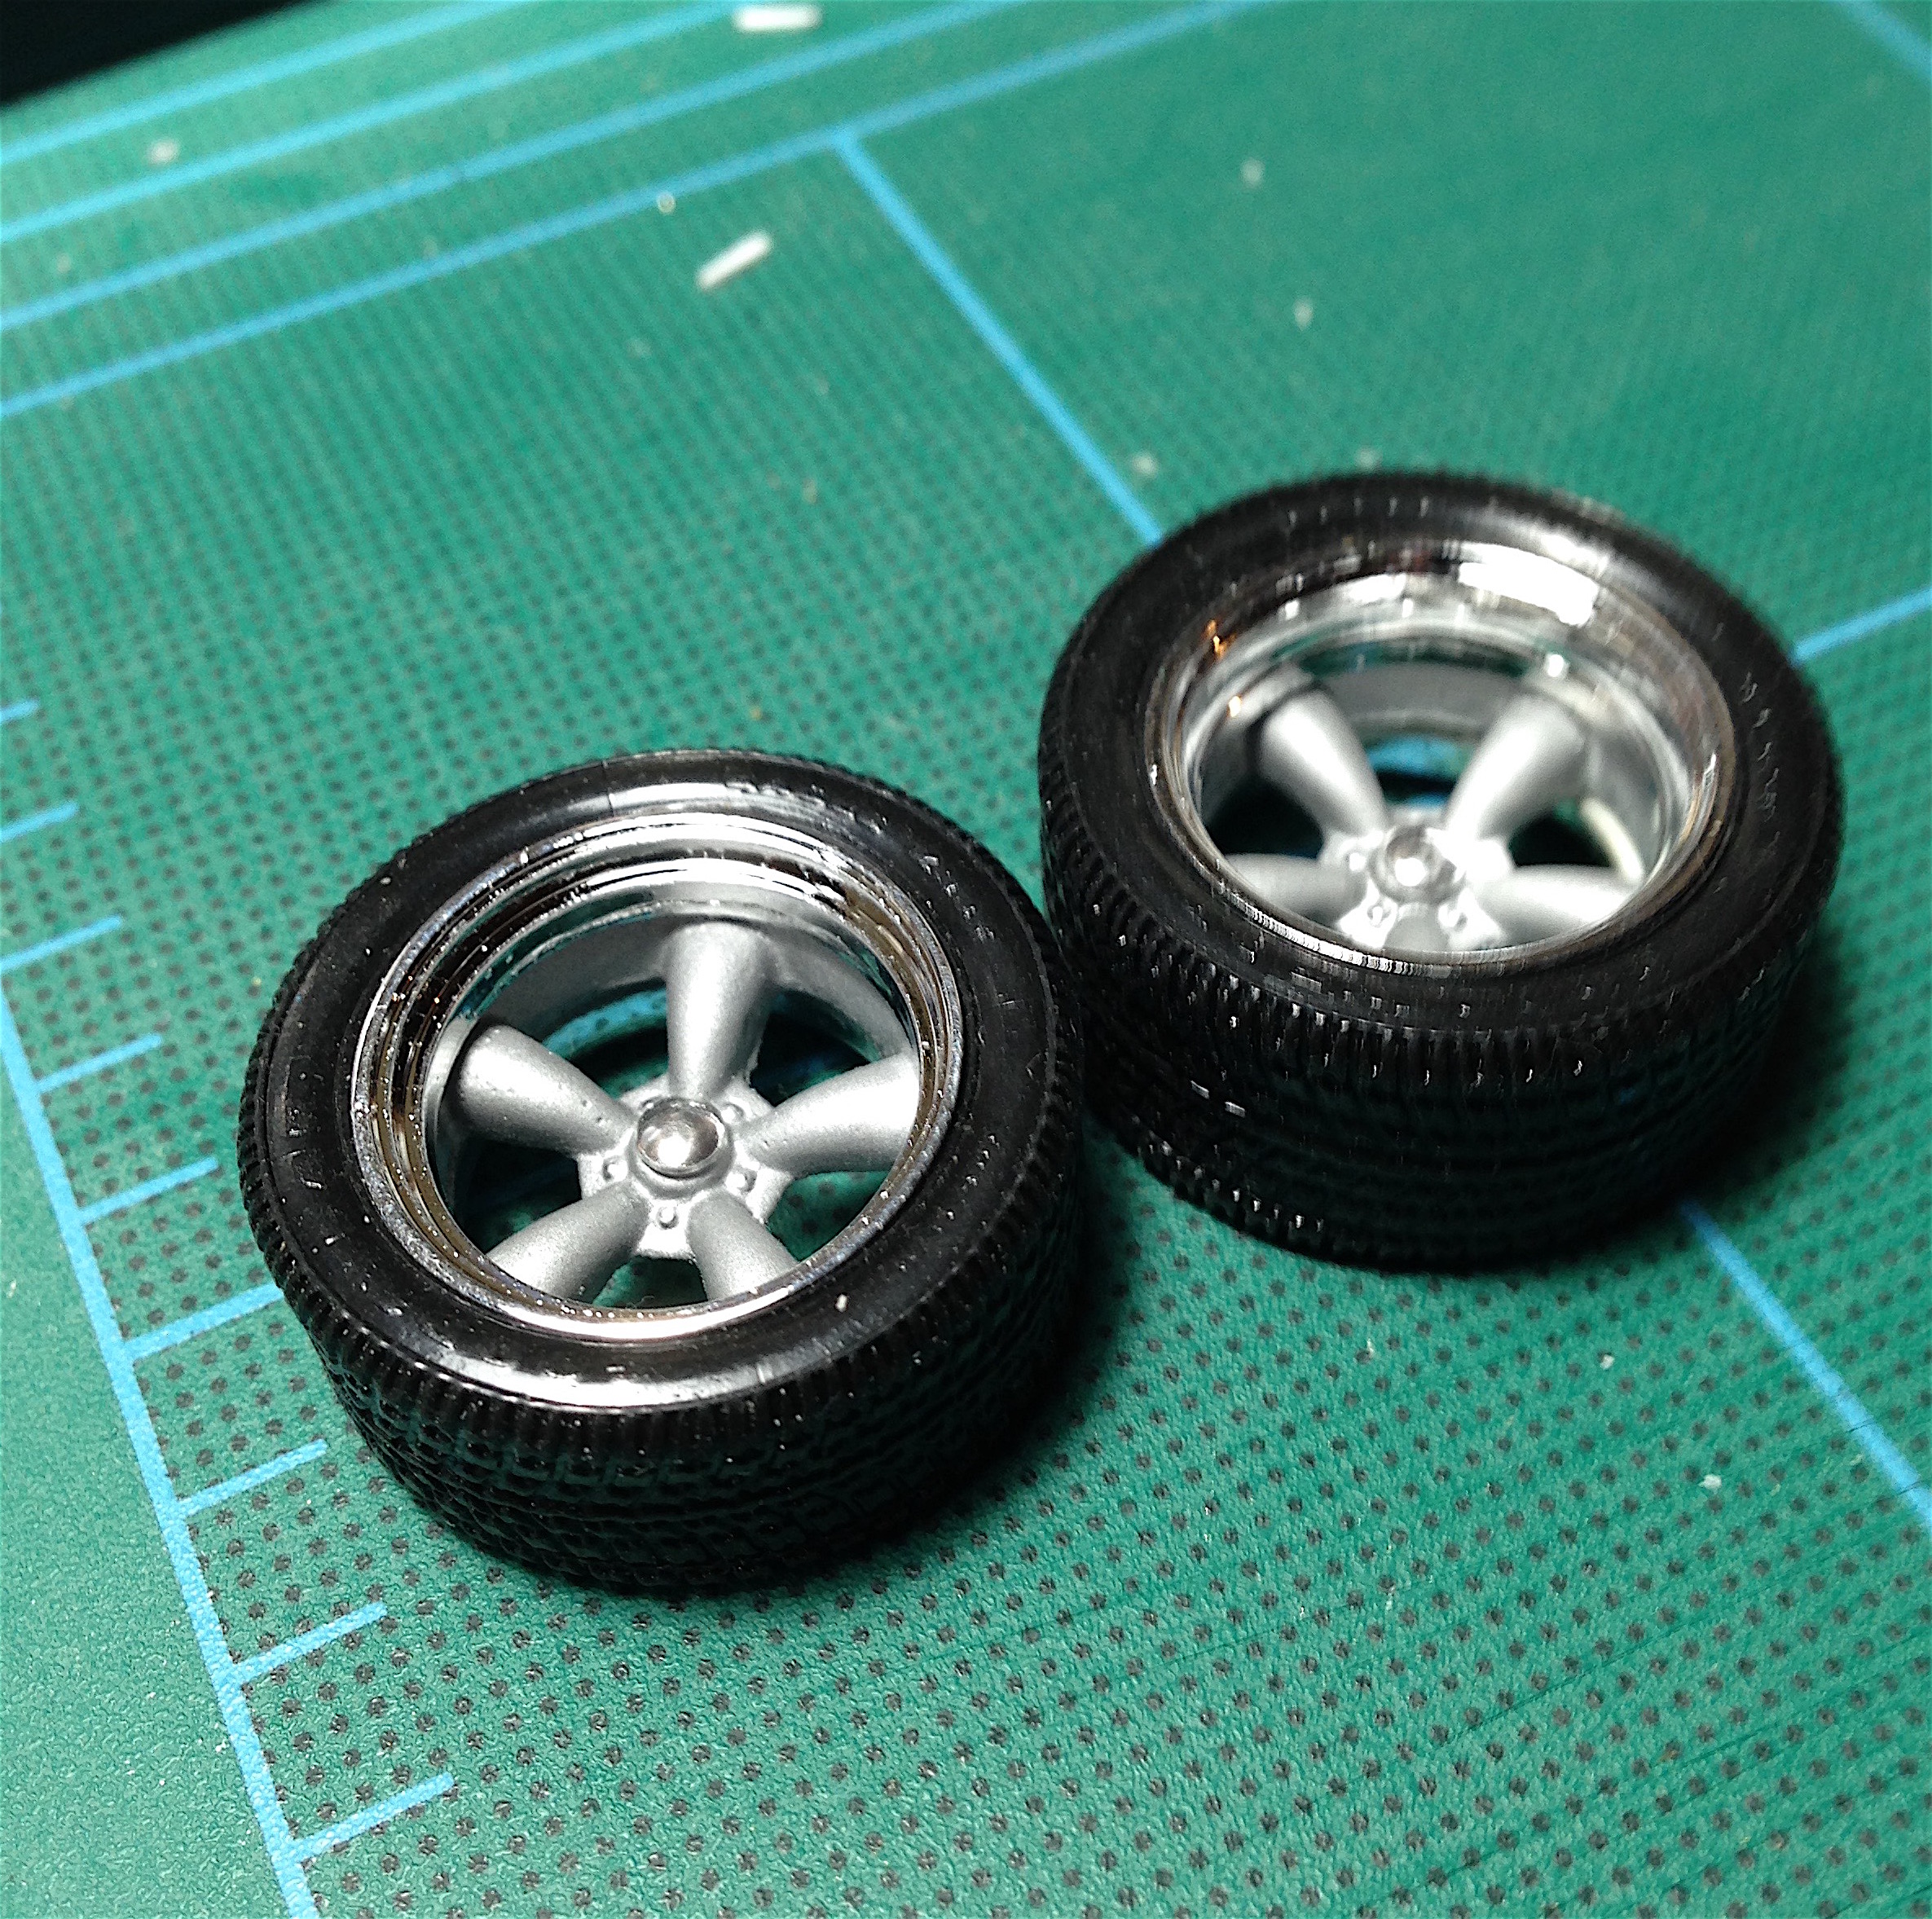
Steve Zimmerman Wheels
George Bojaciuk replied to Psychographic's topic in Car Aftermarket / Resin / 3D Printed
I've reached him thru Messenger and have ordered quite a few wheel sets!!! I prefer his wide and wider tire sets and he has adapted some wheels for me, to fit these. I usually send him pics of what I need. I've rec'd what I wanted and couldn't be happier!
-
In doing any model, if you want to be reasonably accurate, pick up a resto book. Many good references out there. Best are those with RPO numbers and descriptions. Dealer lit is OK. The best are those posters they had with options on the back side. I have a bunch. While at Franklin Mint, I amassed quite a library.... In restoring my real ‘69 Chevelle, I used several references. I like day 2 cars, so Speed Shop experience and vintage catalogs are an amazing resource.
-
GM A bodies with a bench seat
George Bojaciuk replied to junkyardjeff's topic in General Automotive Talk (Trucks and Cars)
‘70 Impala. -
I used a Detail Master with a MCG face.
-
We’re good Tom! That’s the box I used when I did the Vette in Four Barrels, Four Speeds and Horsepower. I think the body is cut out for the ‘69 rear valance. Part should be there in a diff color. I just wanna’ see finished pics! That would be payment enough!
-
That turned out super sweet, Tom!!! Glad I could help!
-
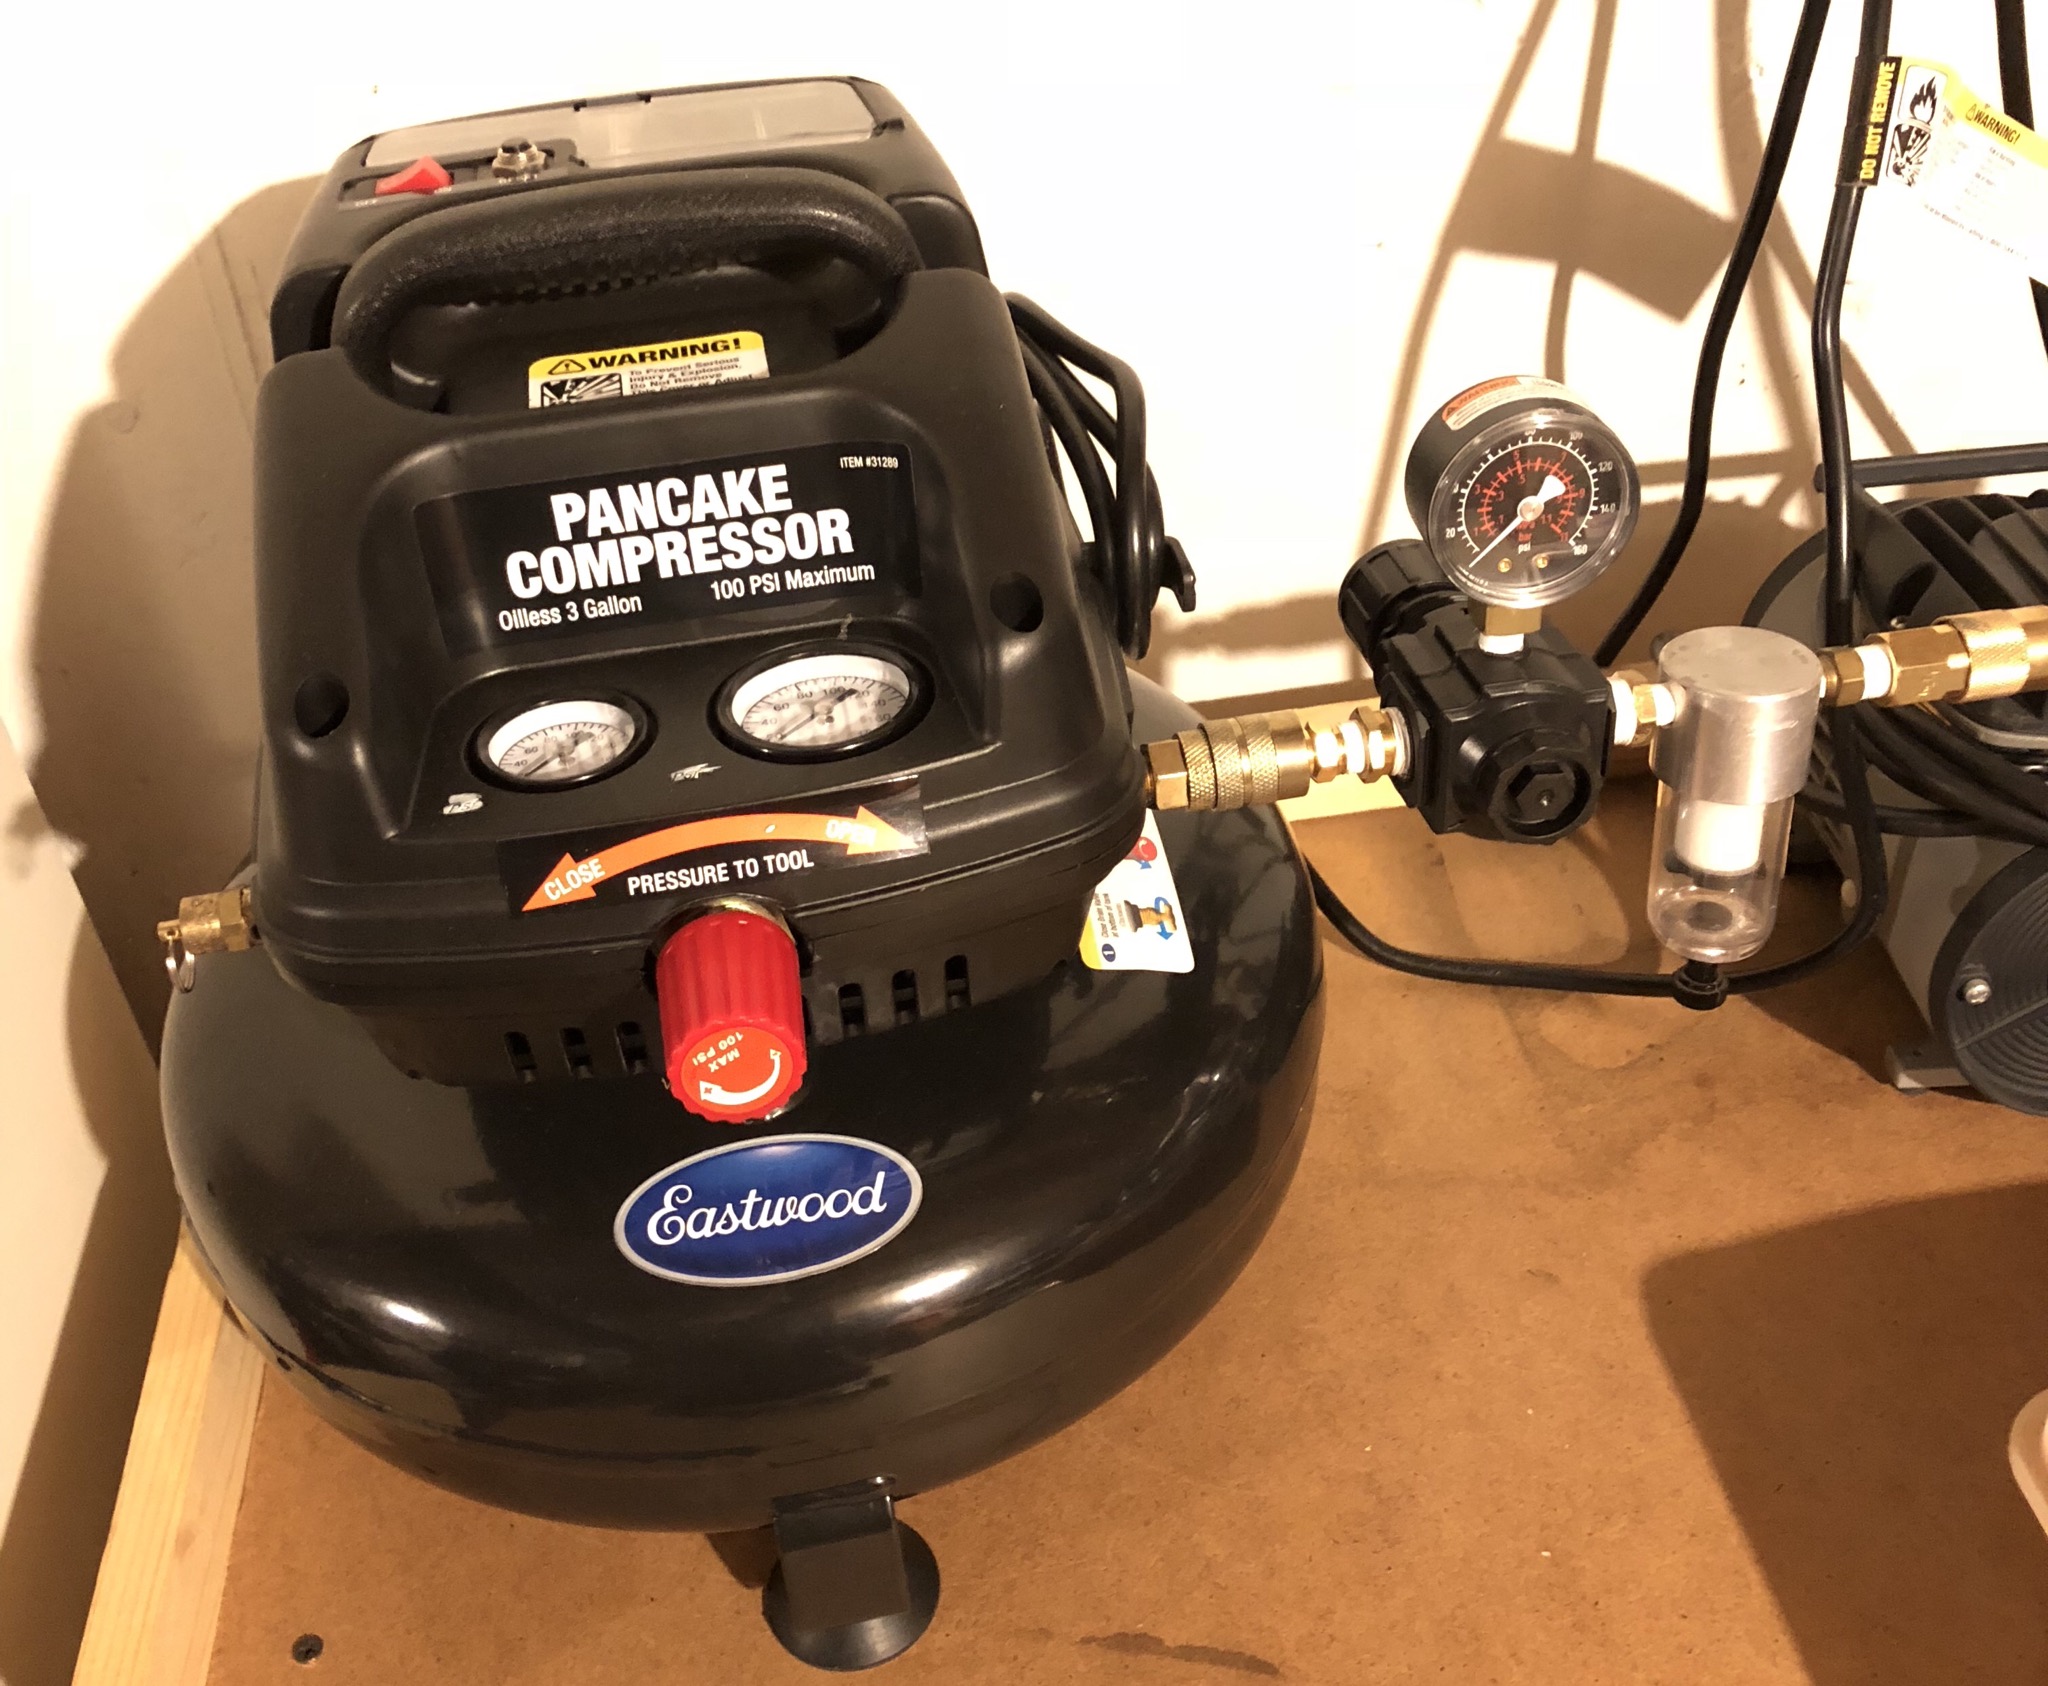
Compressor recommendations
George Bojaciuk replied to Modlbldr's topic in General Automotive Talk (Trucks and Cars)
I will admit that I worked at Eastwood. I picked this up after leaving there, for $35. Didn’t like the internal regulator, so I added my own from my last compressor. Once the tank fills, and it’s pretty quiet, I can spray a lot before it kicks in. With my reg, it’s consistent. With the internal, it’s a hit or miss with pressure. You need to add an external reg. My old Badger compressor was a workhorse. It’s loud and run constantly. It done service over 20 years! A comparable unit to the Eastwood is a Porter-Cable. My contractor had one here at the house. He let me try it! I’ve seen them on sale at Lowe’s for under a C - note.
-
Lol! Flat!!!
-
You might want to read the chapter in my book about redlining tires. I was really apprehensive doing it, but my first few tries were really good! Get yourself a good bow compass sand some Tamiya Falt Red.