Camaro lover
-
Posts
80 -
Joined
-
Last visited
Content Type
Profiles
Forums
Events
Gallery
Everything posted by Camaro lover
-
Nice color choice, looks good.
-
More old paint
Camaro lover replied to junkyardjeff's topic in General Automotive Talk (Trucks and Cars)
I remember as a kid my mother going to the hobby store with me. After I picked out the kit I wanted I told her I needed paint and glue too. She was in shock when the paints and glue were about the same cost as the kit itself. Back then it was 15 cent bottles of paint. I forget what the glue cost. I suppose adjusted for inflation kits and associated supplies are roughly the same percentage wise. -
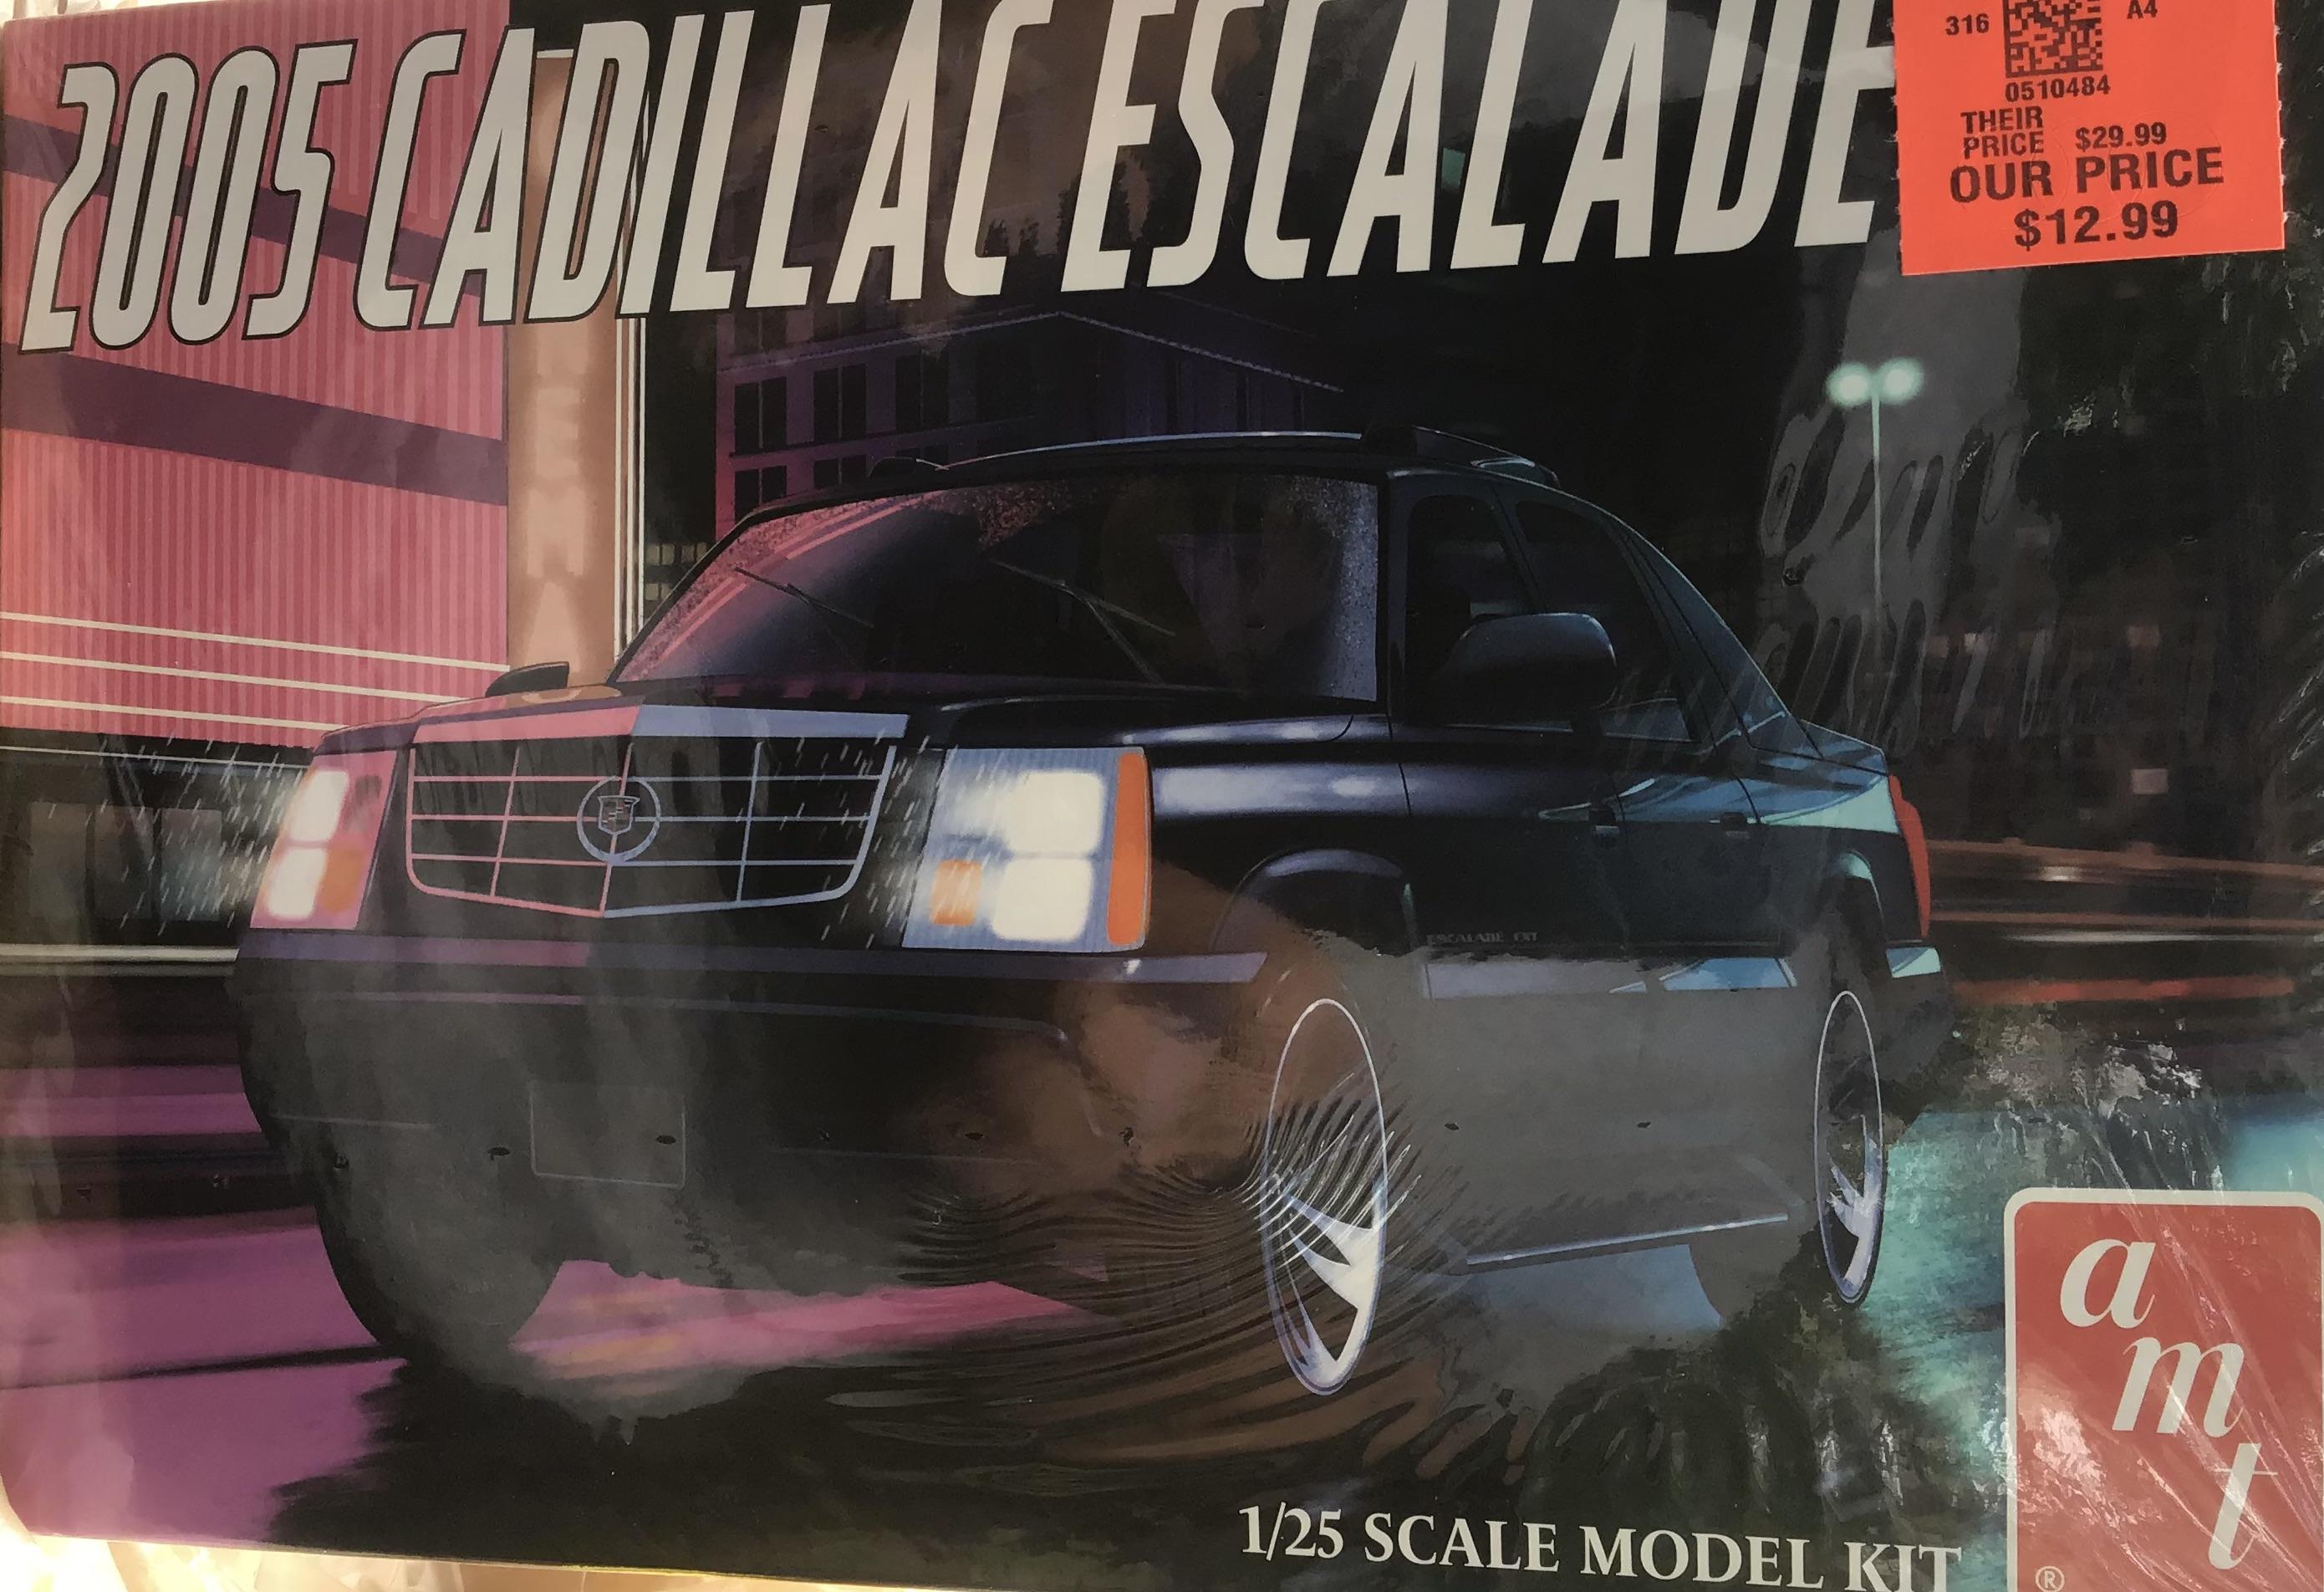
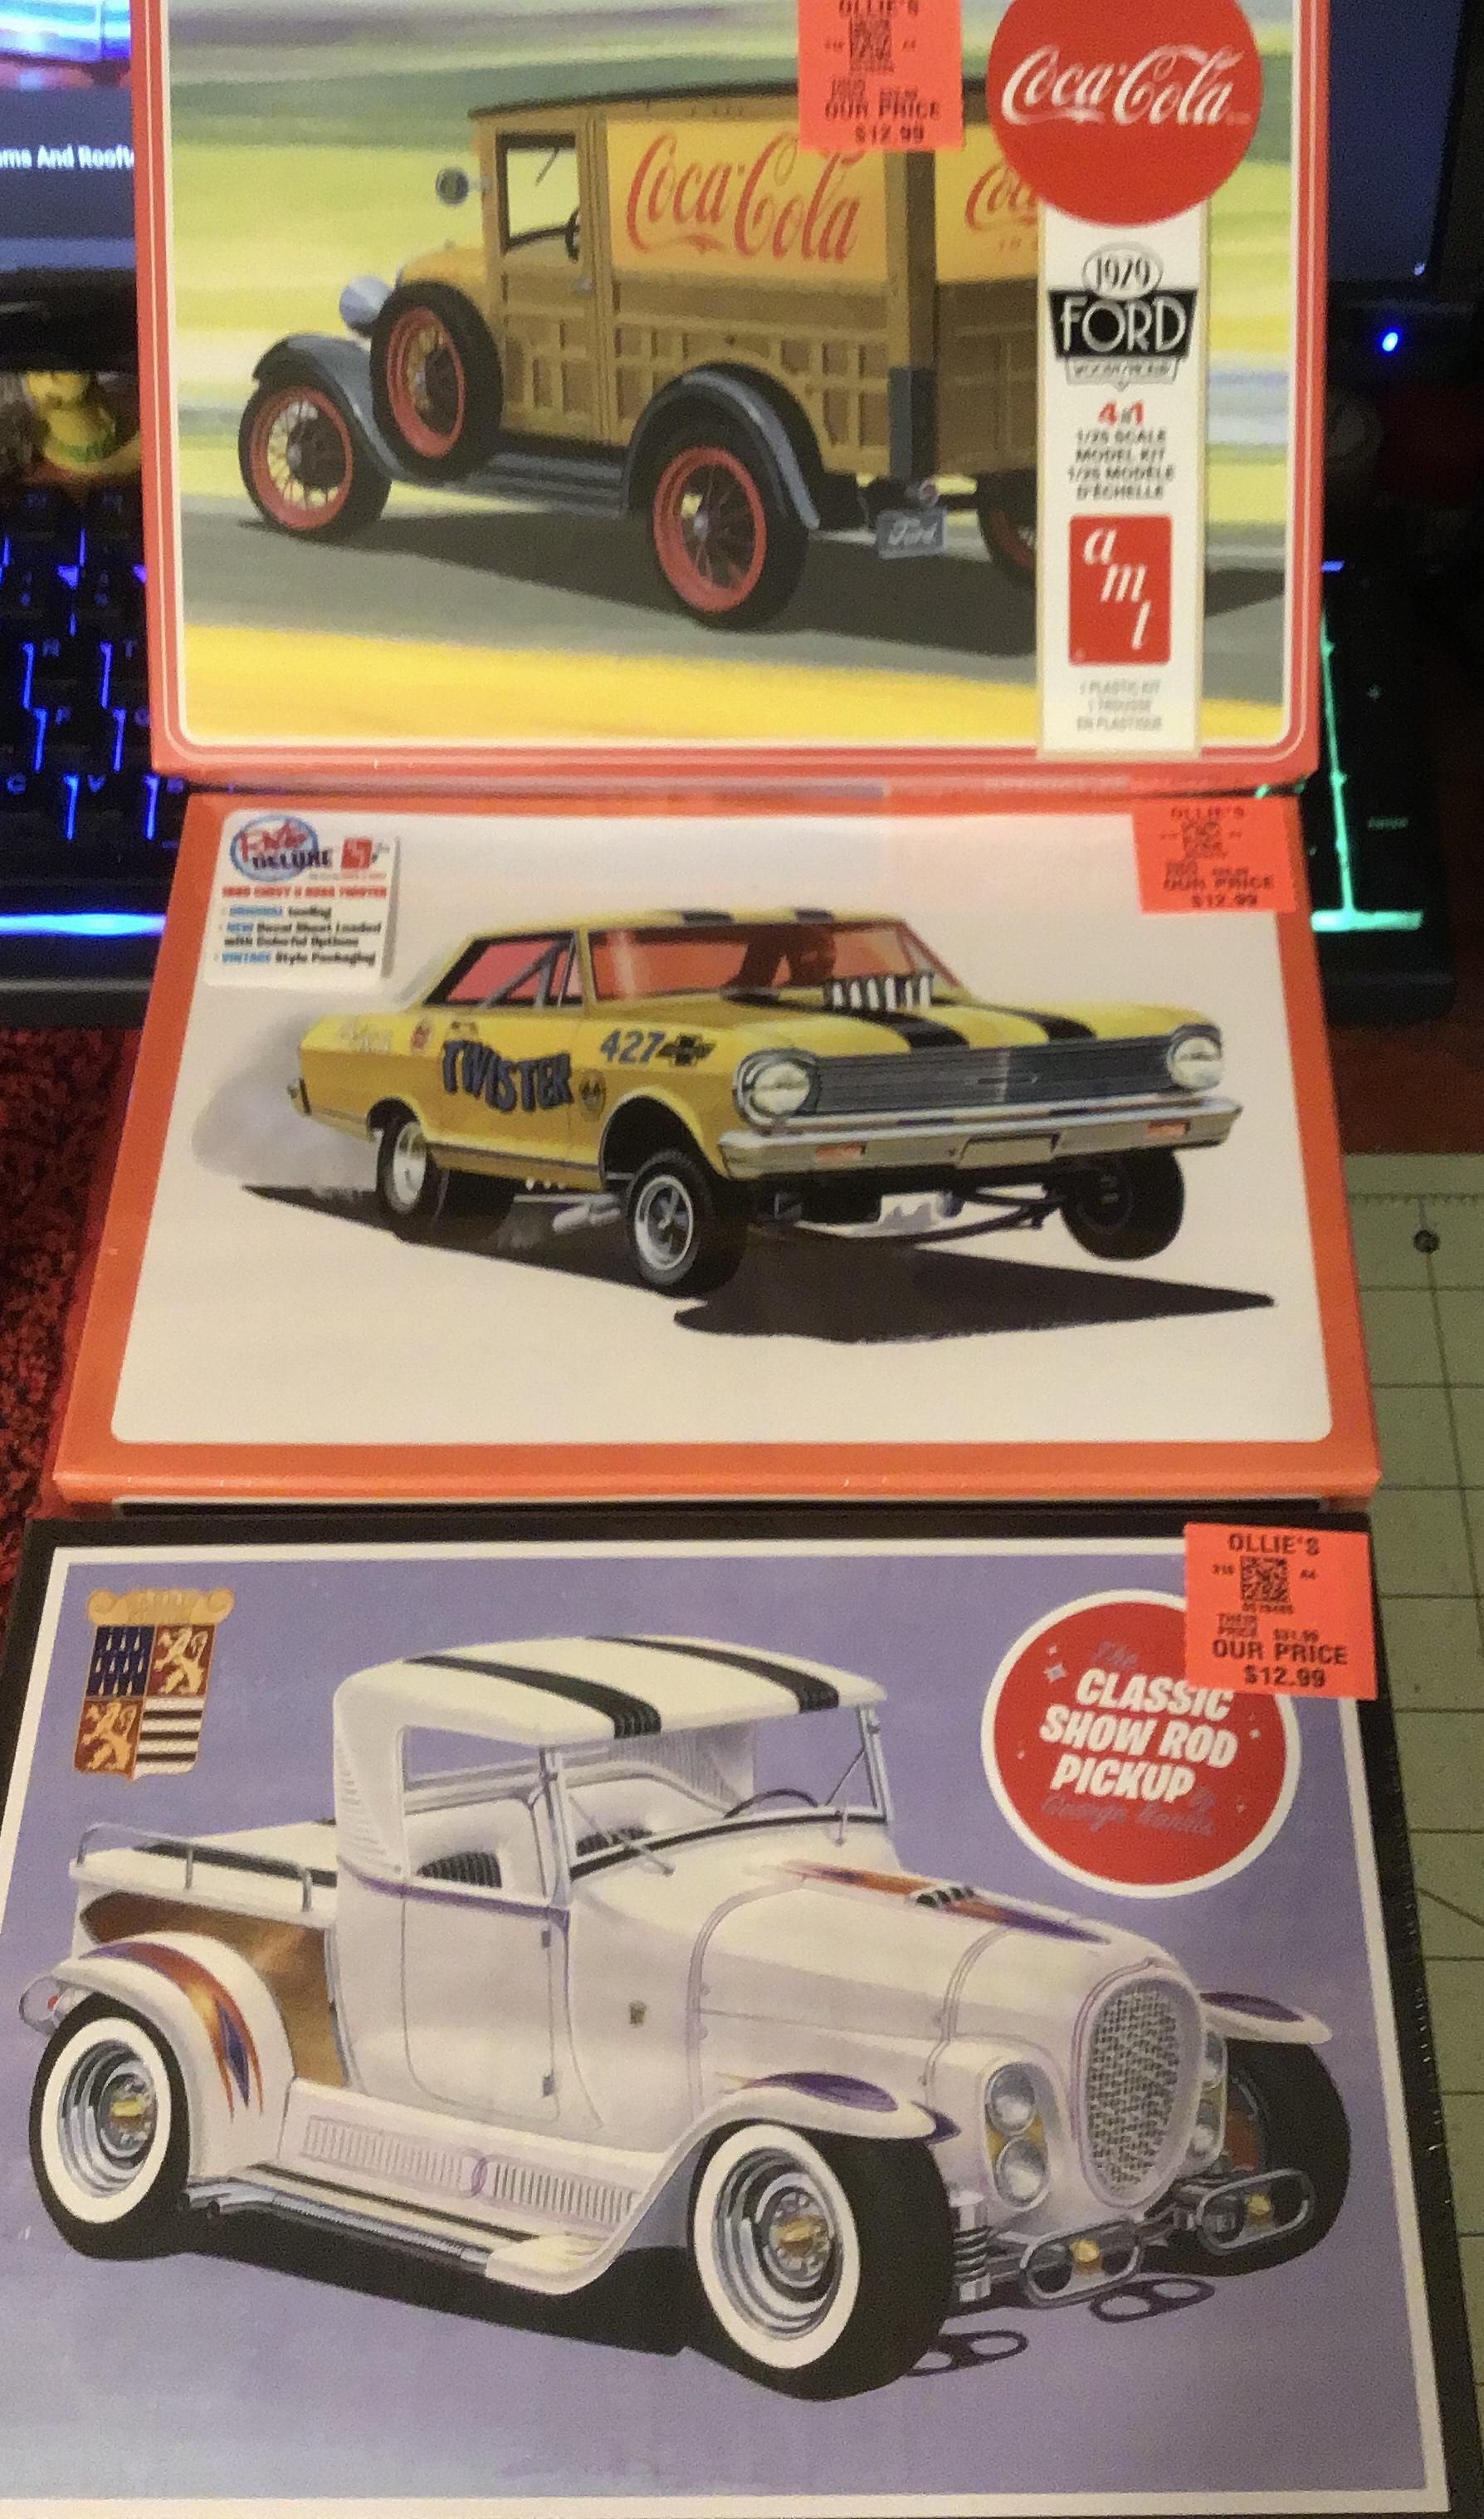
Ollie's strike again
Camaro lover replied to GLMFAA1's topic in General Automotive Talk (Trucks and Cars)
Picked this up at the Scottsboro AL store
-
Very creative and well executed. I think the L88 is my favorite but they all are exceptional.
-
Looks perfect. Love the color.
-
Looking at the engine bay I can almost smell the oil and grease buildup. Very convincing.
-
Bentley Blower 4.5 litre 1930 Les Mans Airfix 1/12 scale
Camaro lover replied to louis Carabott's topic in Model Cars
This has to be the most detailed model I’ve ever seen. Beautiful car sir. -
What was your first model car?
Camaro lover replied to Kit Karson's topic in General Automotive Talk (Trucks and Cars)
My first glue kit was the Monogram green hornet. But I’m fairly certain my first kit overall was a Hubley model A ford. -
Ollie's strike again
Camaro lover replied to GLMFAA1's topic in General Automotive Talk (Trucks and Cars)
Ever since hearing about getting good deals on kits at Ollies I’ve wanted to check them out. Yesterday the wife and I took a road trip and I noticed an Ollie’s on our ride. As soon as I saw the store I told my wife we’ll be stopping there on the ay home. They had a small display on an end cap of a toy aisle. I found 3 kits I decided to buy. I wasn’t necessarily looking to buy anything in particular but the 3 pictured caught my eye. And for 12.99 each I couldn’t resist. So know I know what the hype is all about.
-
Homebuilt Guitar Appreciation thread
Camaro lover replied to iamsuperdan's topic in The Off-Topic Lounge
I built this two years ago. -
This topic is a big help for me. I’m getting ready to convert my 8 x 10 walk in closet into my new hobby room.
-
Looks great to me. I don’t see any issues at all. And that was a cool thing to do for your BIL.
-
2024 Cannonball Run Restomods Build Thread
Camaro lover replied to White Rabbit's topic in Community Builds
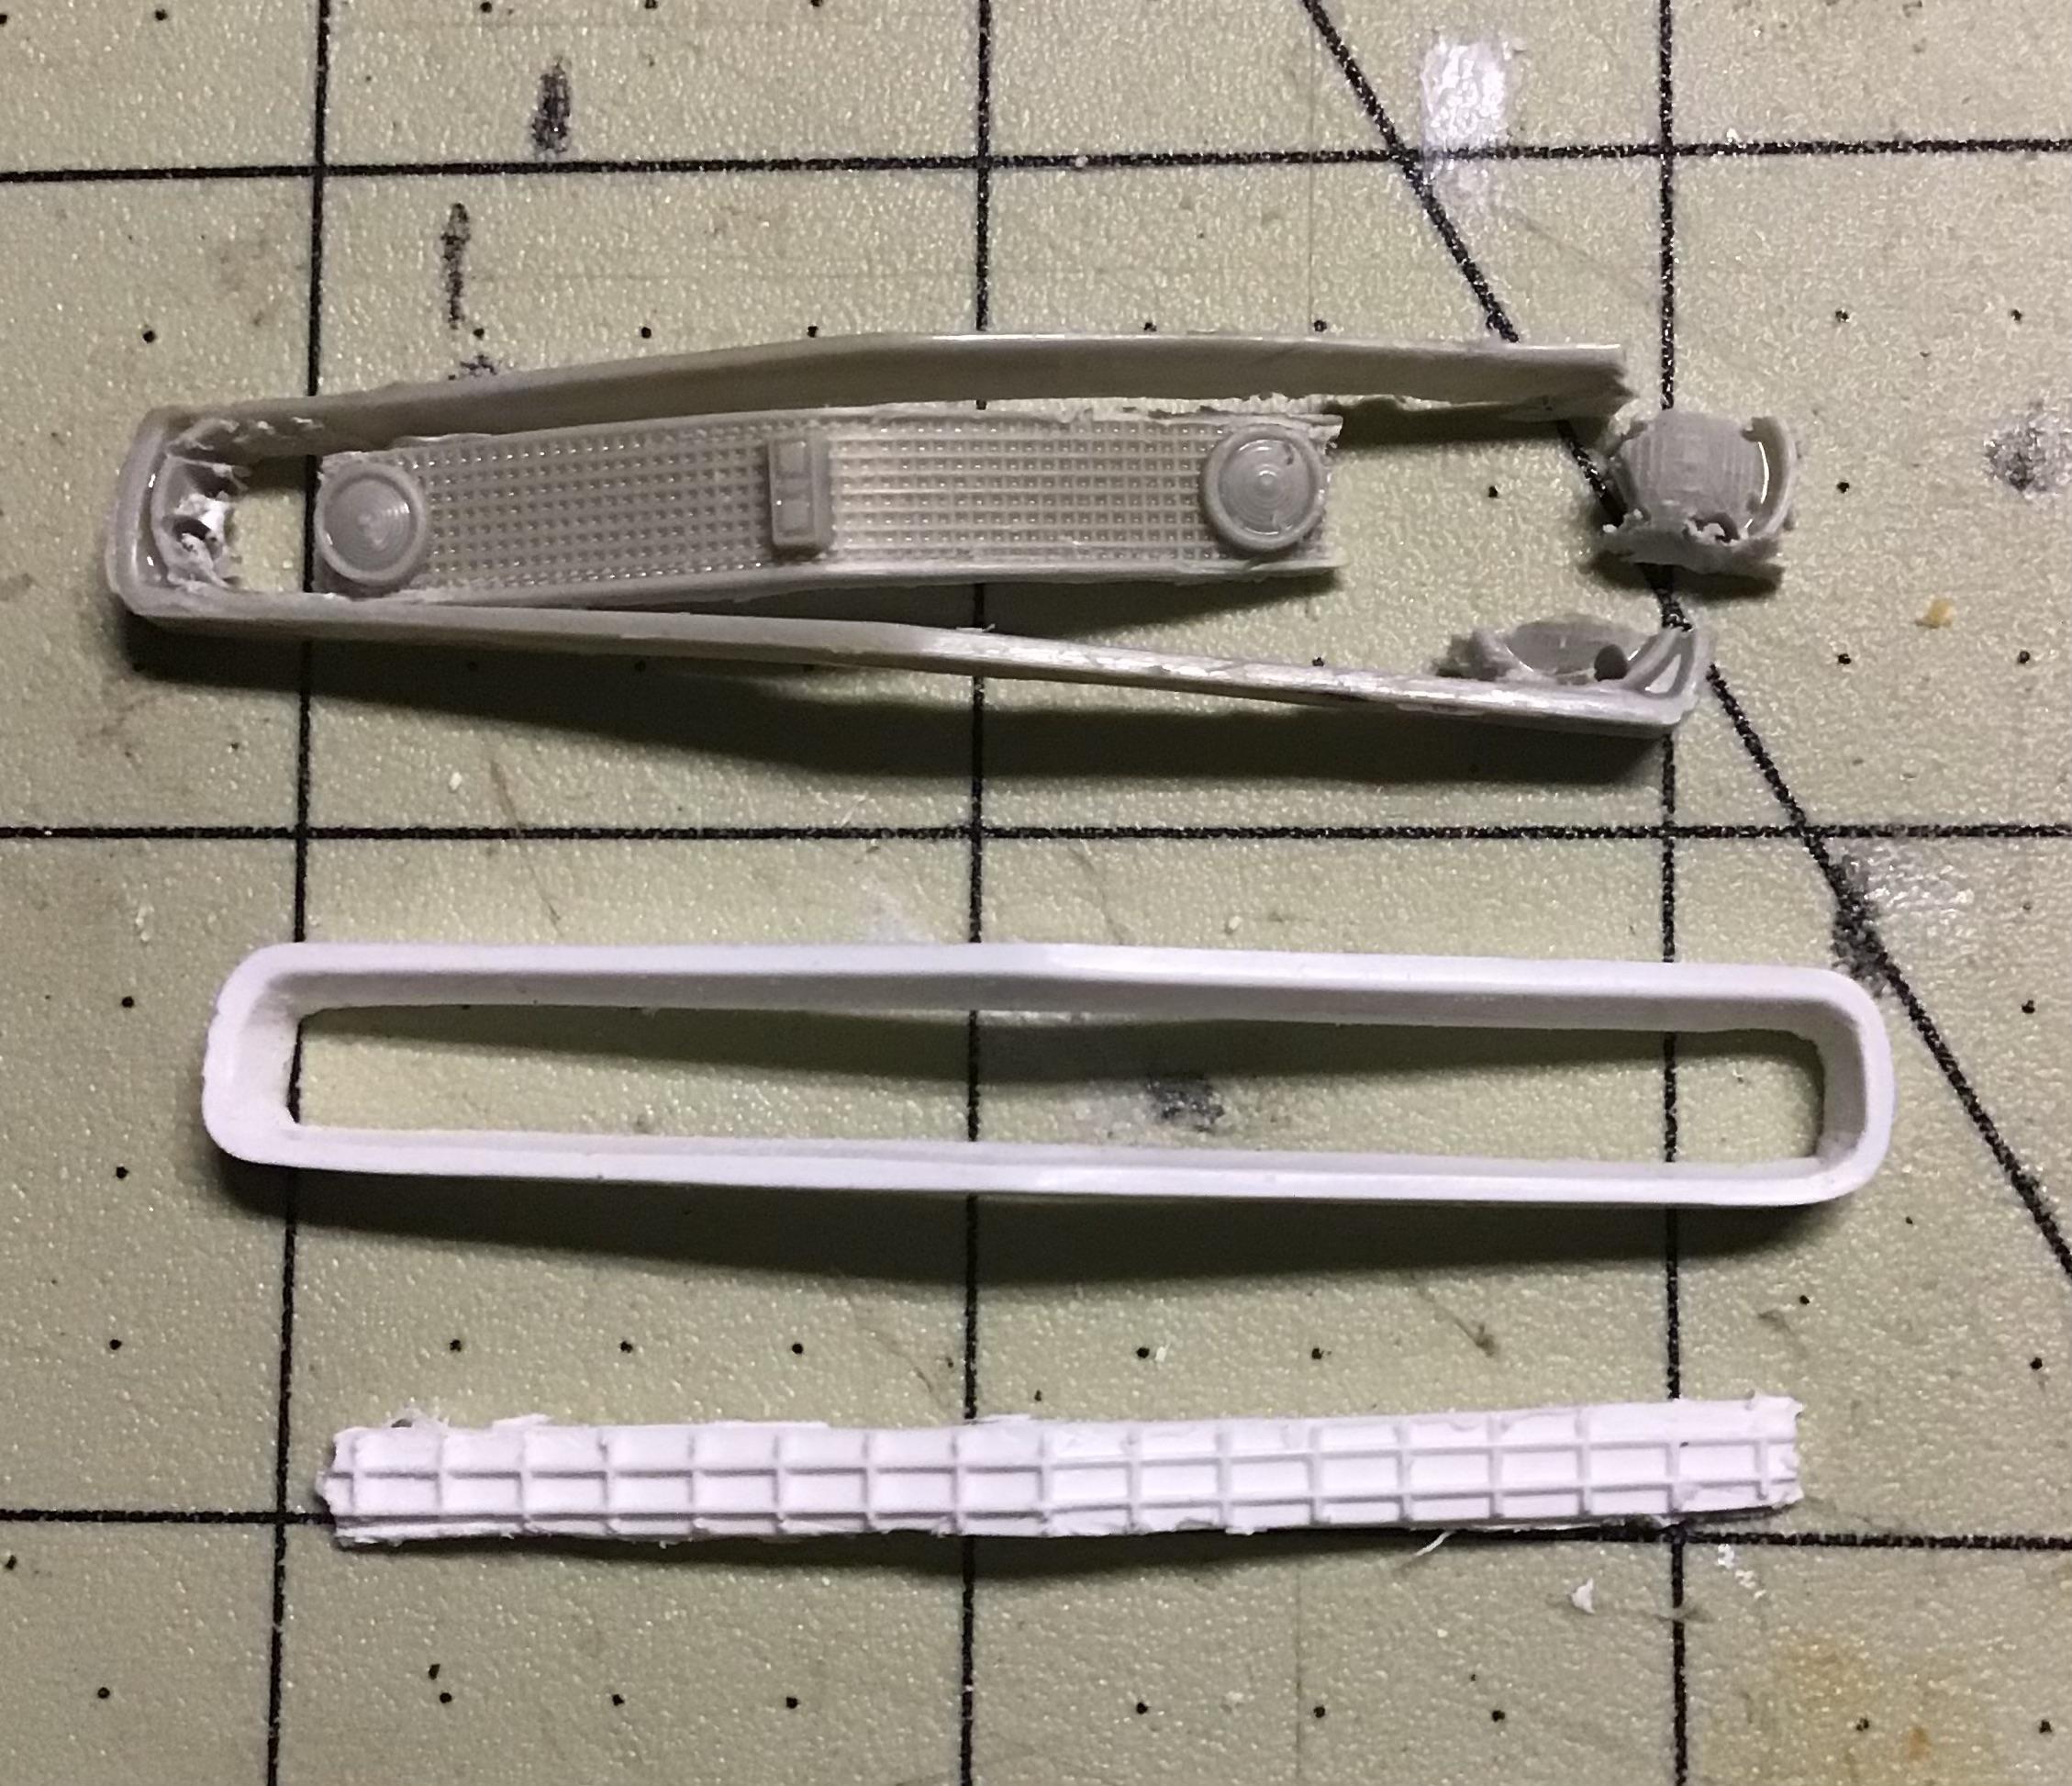
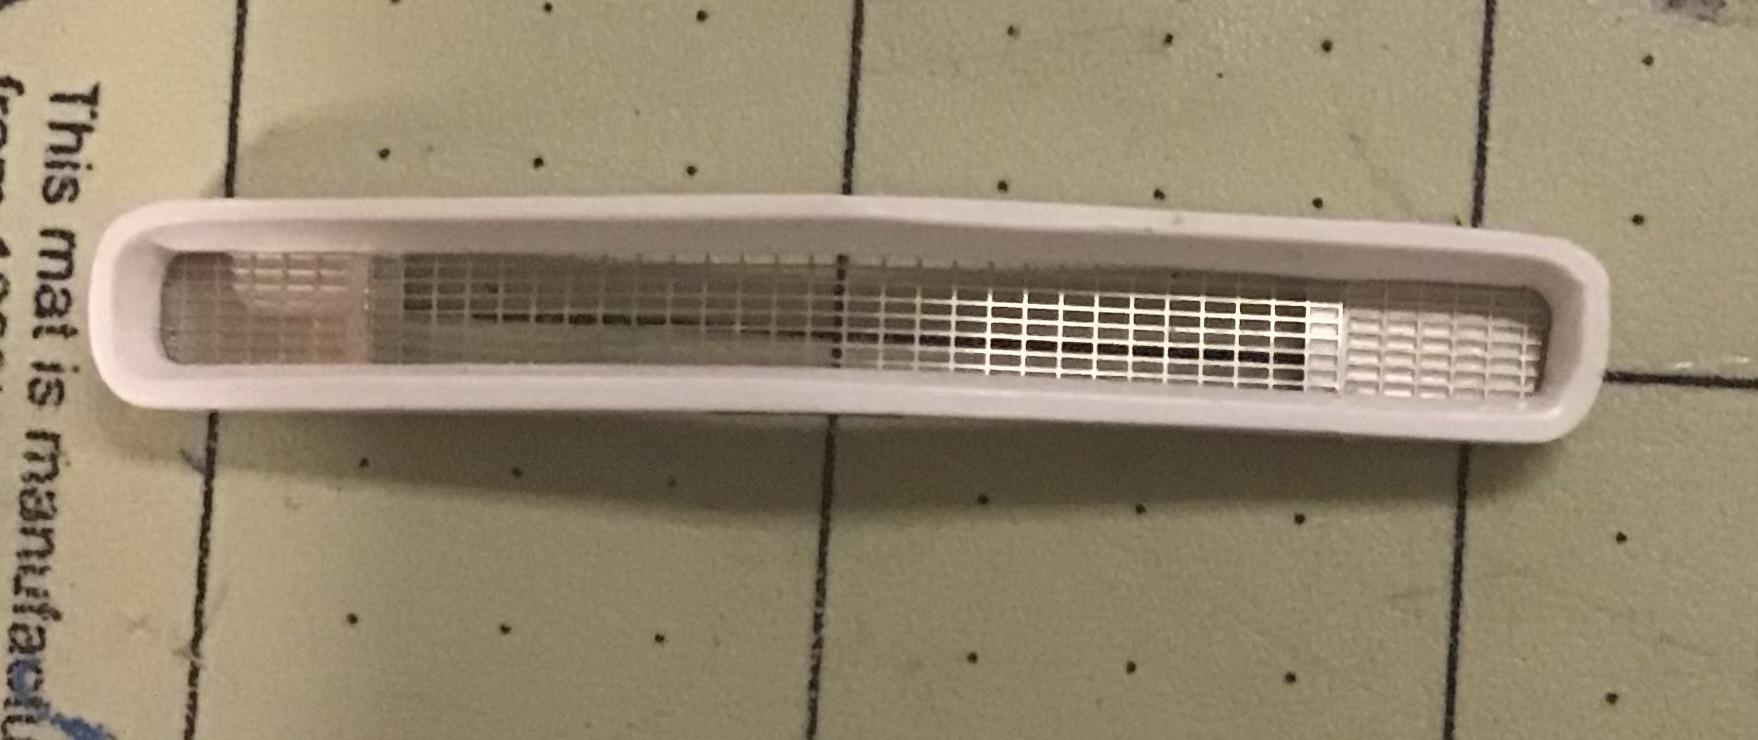
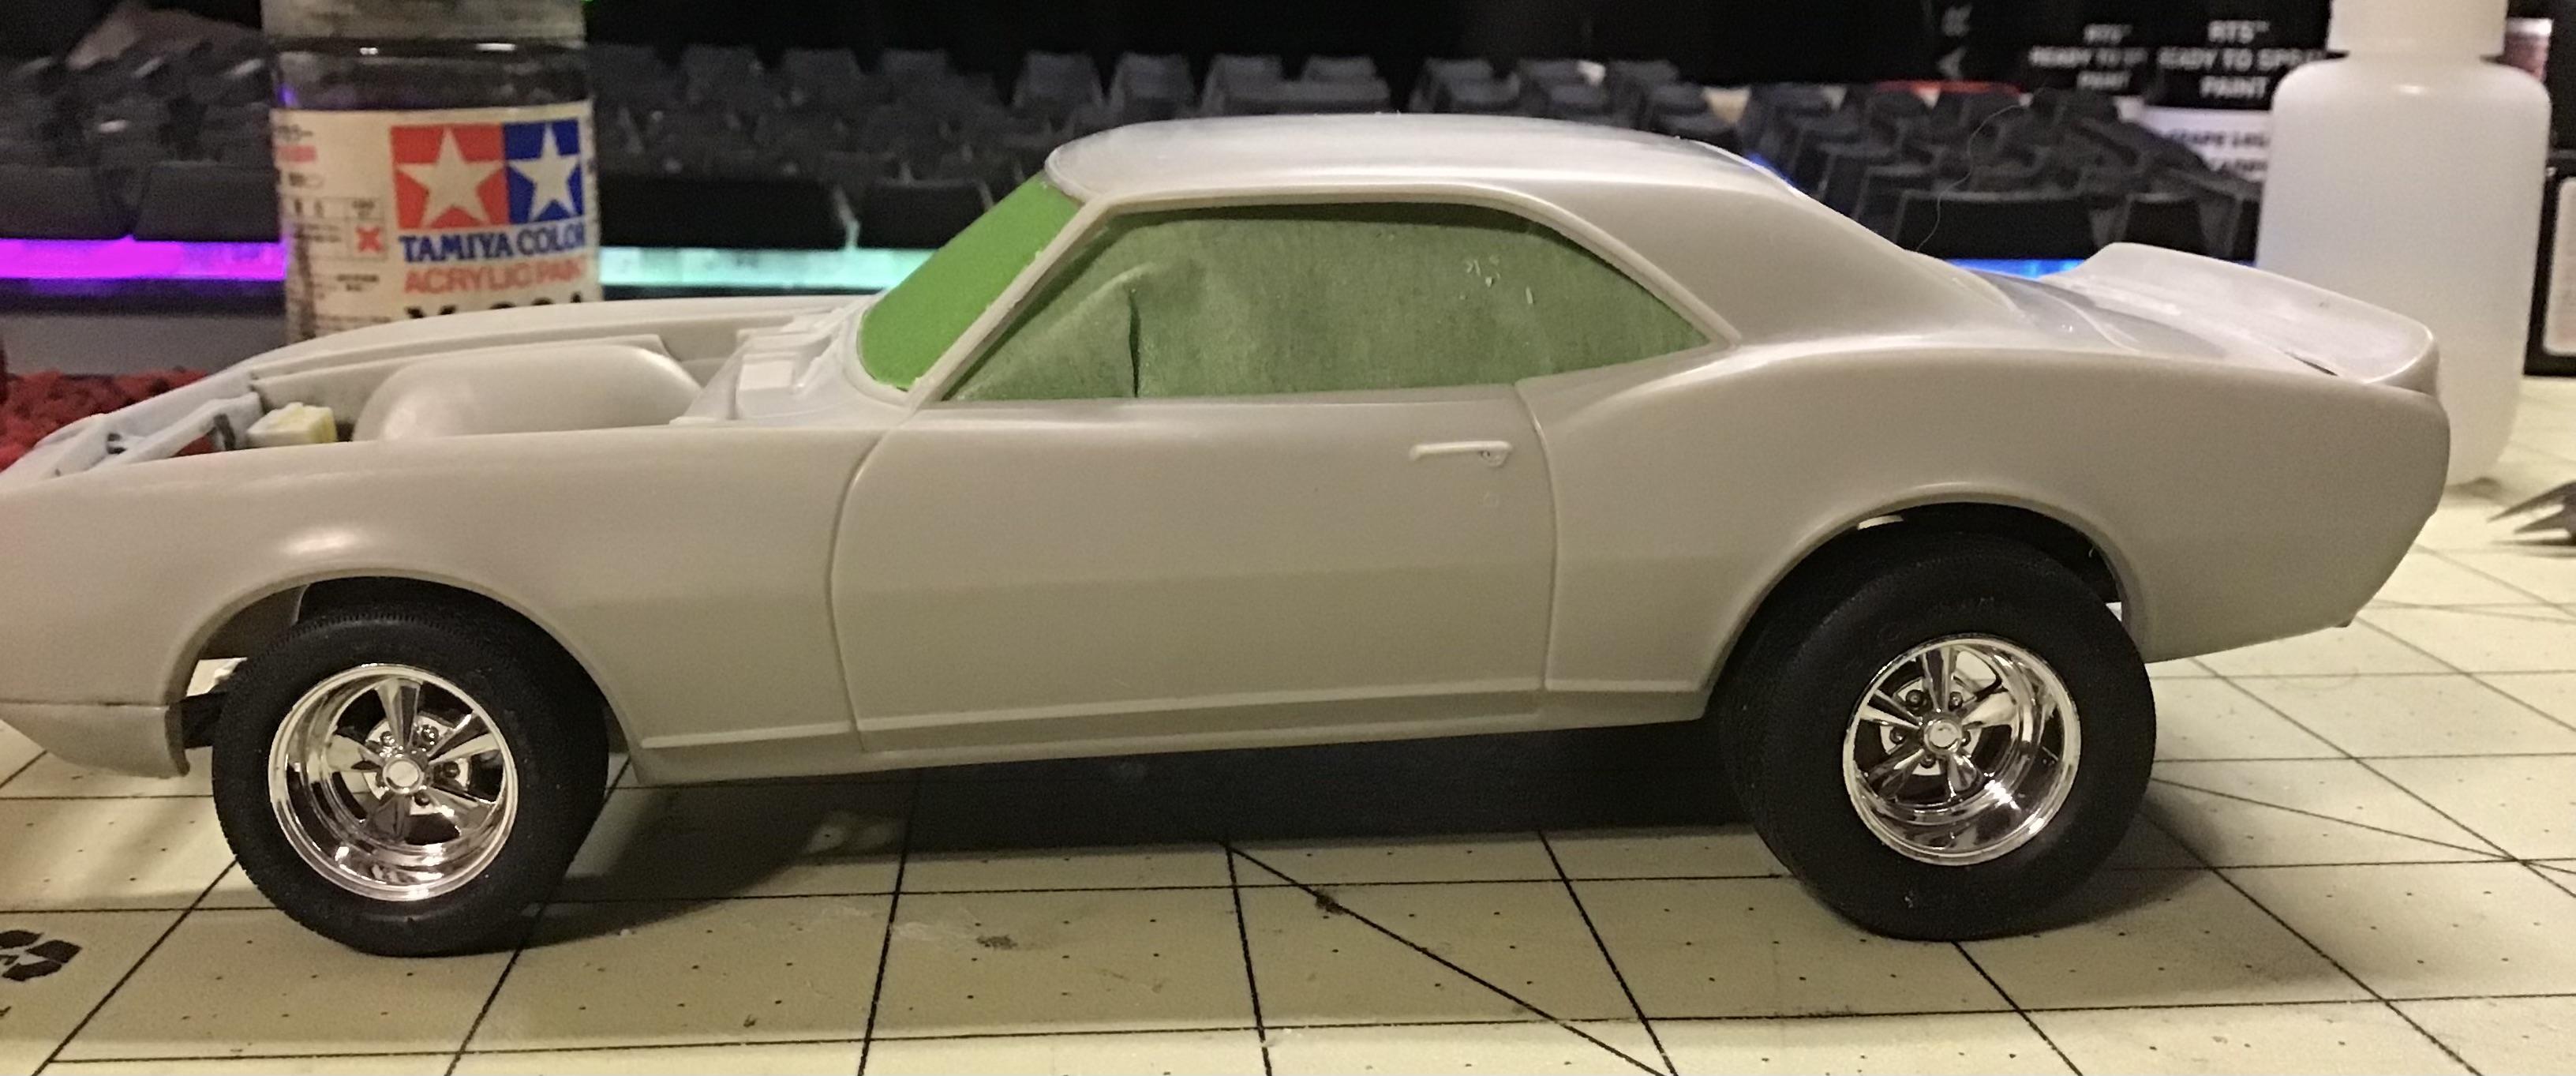
Small update, but a big one out of the way. I’ve been dreading this part of the build. I bought a photo etch set from MCG. The main piece I wanted was an accurate front grill to replace the original one that was with the kit. As you can see I broke the original grill trying to remove the center section. So I went into my 56 year old original Camaro kit and used the custom grill included in that kit. I was a lot more careful with that one and was able to open it up. Got the new grill pieces in place. This is my first time working with photo etch. It was a bit harder than I thought it would be but I’m glad I did it. The grill is recessed more than on the real car, but I like it. I’ll be using some of the other pieces of photoetch but thankfully they won’t involve the type of work I just got out of the way.
-
I use screw on bottle caps and caps from prescription bottles.
-
Thanks for posting this. I’m going to look for those. I need every advantage I can find when using my airbrush.
-
What are the must-build classic kits?
Camaro lover replied to CabDriver's topic in General Automotive Talk (Trucks and Cars)
For me I think of The Red Baron, The Badman Chevy, Ala Kart, Lil Coffin, Any AMT T buckets, 49 Mercury, 57 Fairlane, Orange Crate, any of the C2 corvettes, Dodge Deora and a few more that I can’t think of right now. -
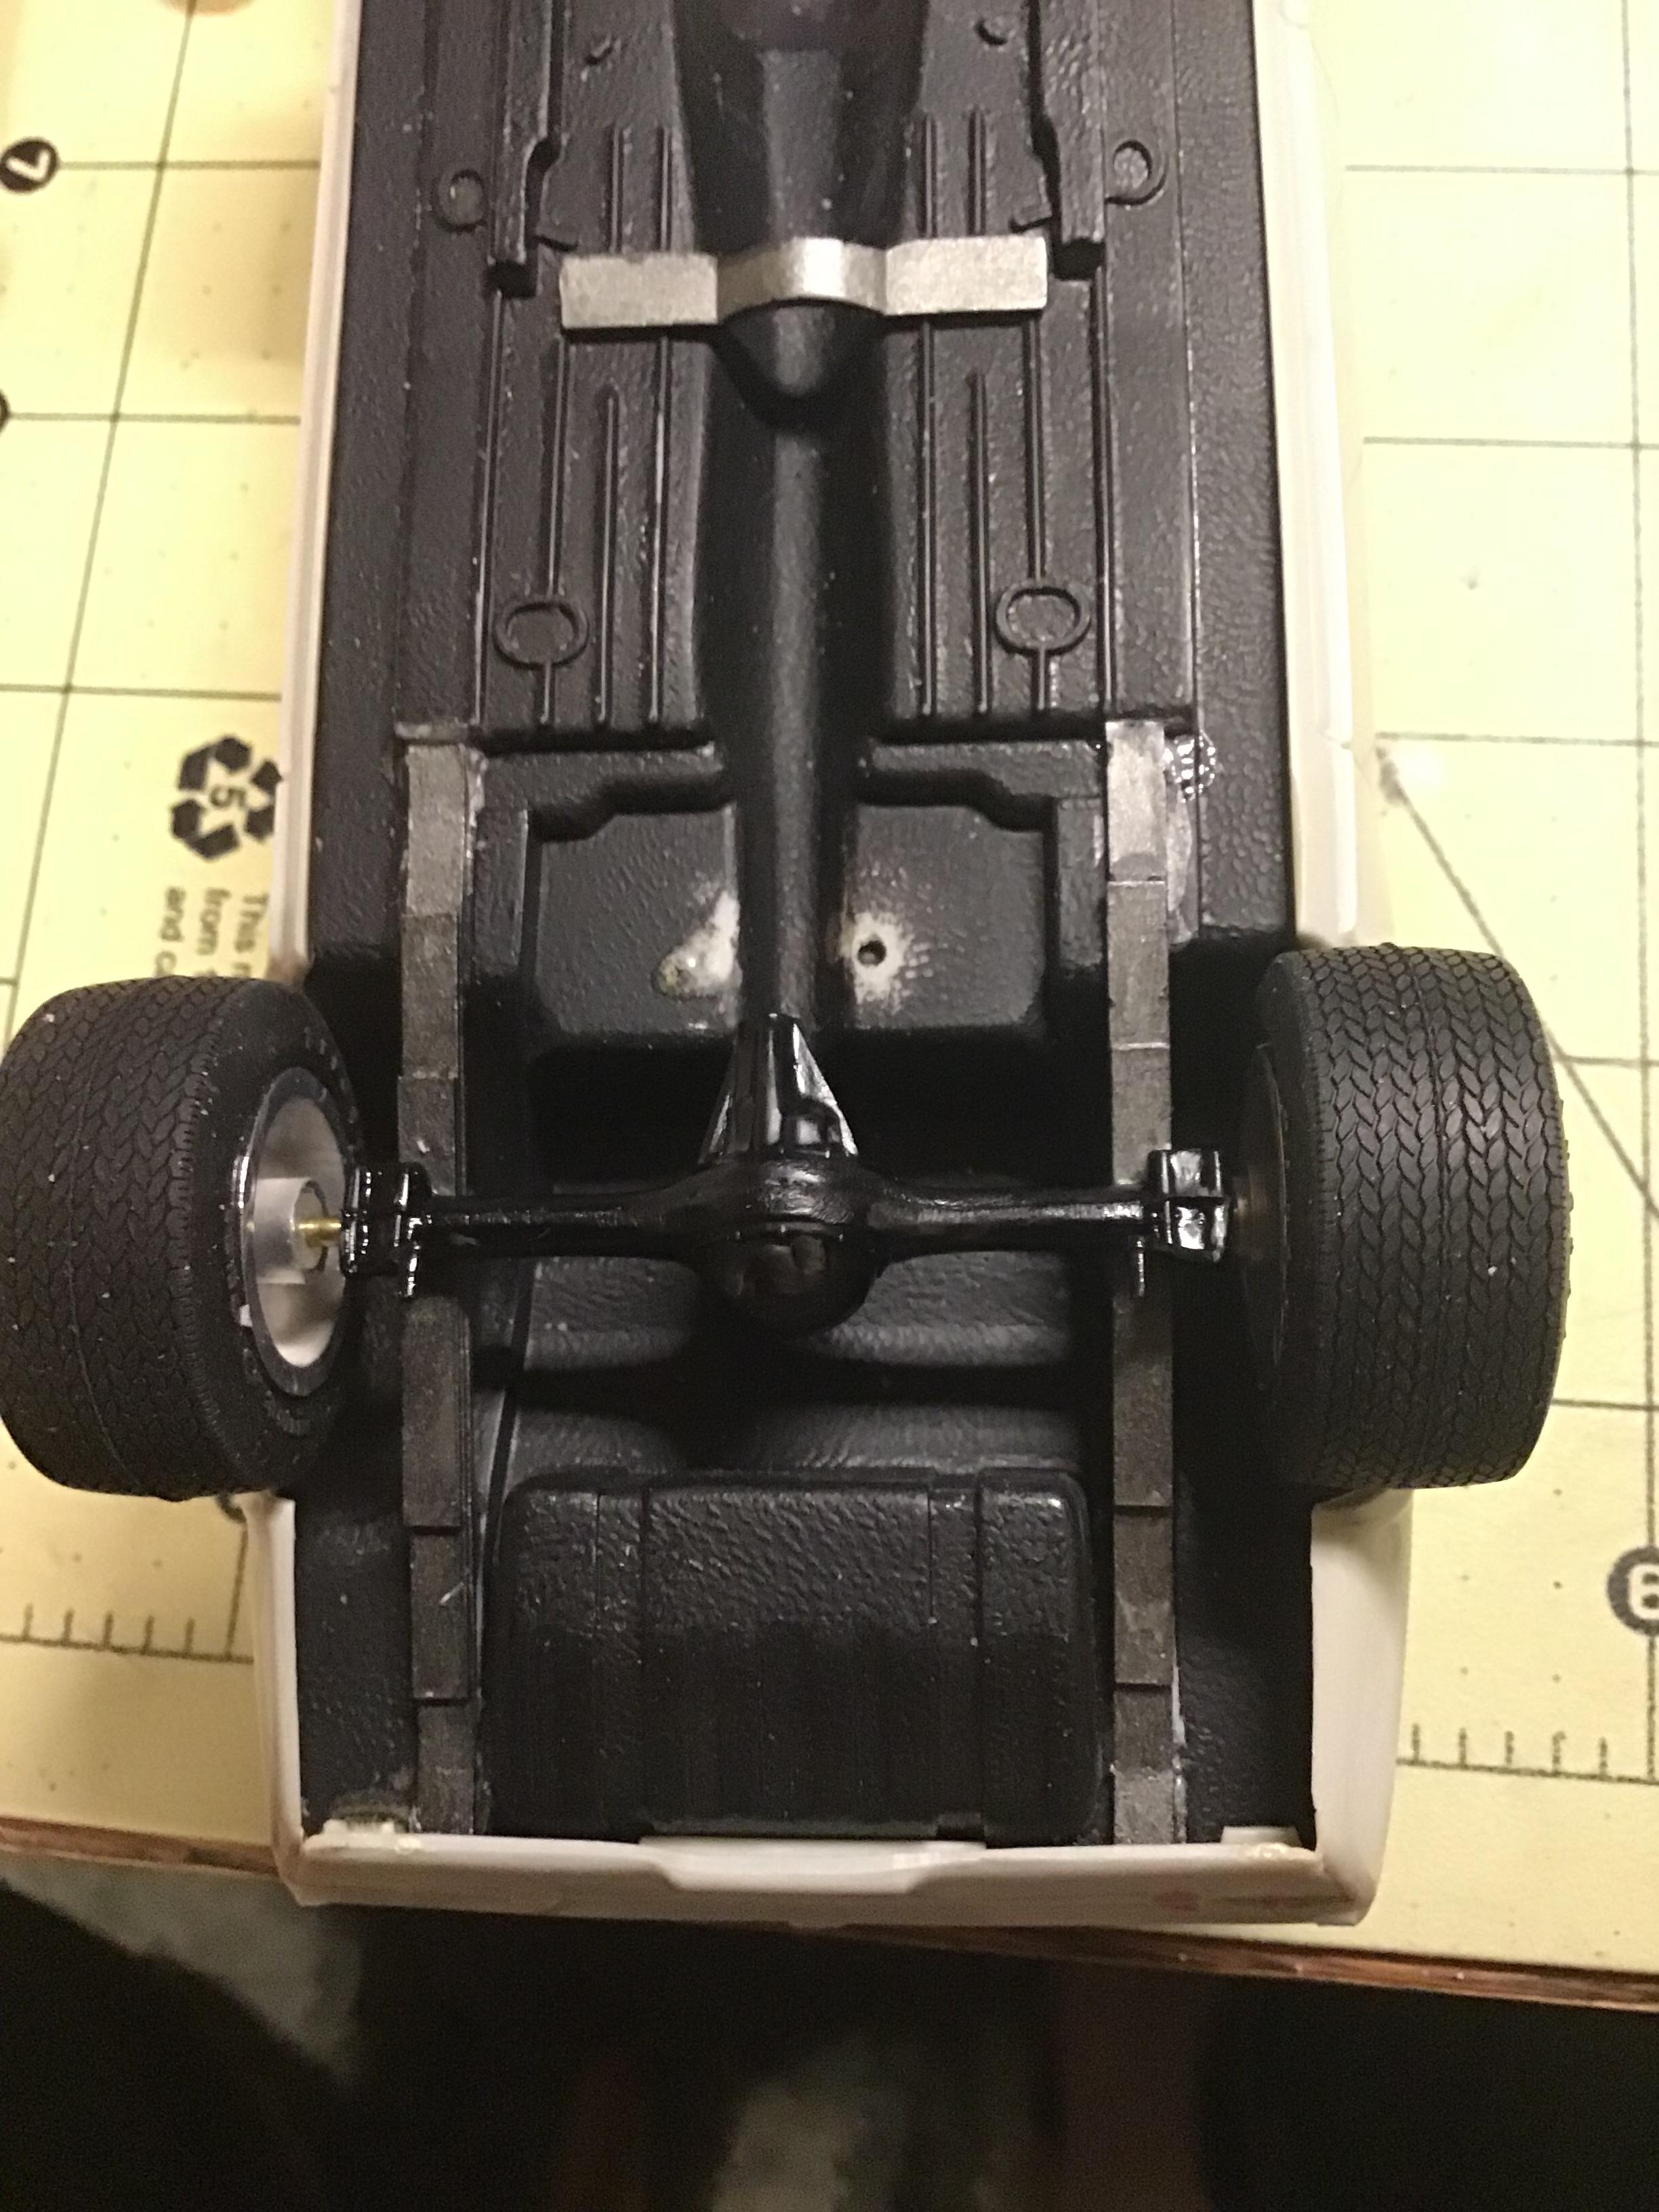
2024 Cannonball Run Restomods Build Thread
Camaro lover replied to White Rabbit's topic in Community Builds
Well it looks like I’m taking one step forward and two steps back. And I’m not very fast at building as it is. Some days I spend more time looking for parts that hit the floor. I finally have the new rear leaf springs and rear axle in place. Just need to mount the shocks. I’ve got the front and rear tires and wheels sorted out. Not quite sure about the stance. The body is stripped of the old paint, scripts and side marker lights sanded off and ready for paint. I had the engine just about done but when I went to do a final fit I found out the headers were hitting the front sub frame and would not sit right. The air intake was hitting the fan shroud and the bell housing is too tight against the fire wall. It’s time to break out the dremel tool and make some adjustments. Once I get the engine mounted I’ll decide which hood I’m going to use. As long as it sits properly I’m leaning towards the stinger hood. I’ve got the new rear back up lights made. My front grill is about half way cut out for the new PE grill. Now for a few pictures I’ve got something sort of unique in mind for the painting of the body. I’ll save the details of that until the end An interesting fun fact I found out was that the first generation Camaros shared the same frame and undercarriage as the Nova. I’m sure glad I’ve got until November to get this done
-
I love the extra details especially the emergency brake cables. Great job
-
Very well done. I wonder how practical the windscreen was in real life.
-
Cheaper alternative to Molotow chrome markers
Camaro lover replied to Monty's topic in Tips, Tricks, and Tutorials
I saw that video a few days ago. The price is certainly attractive. -
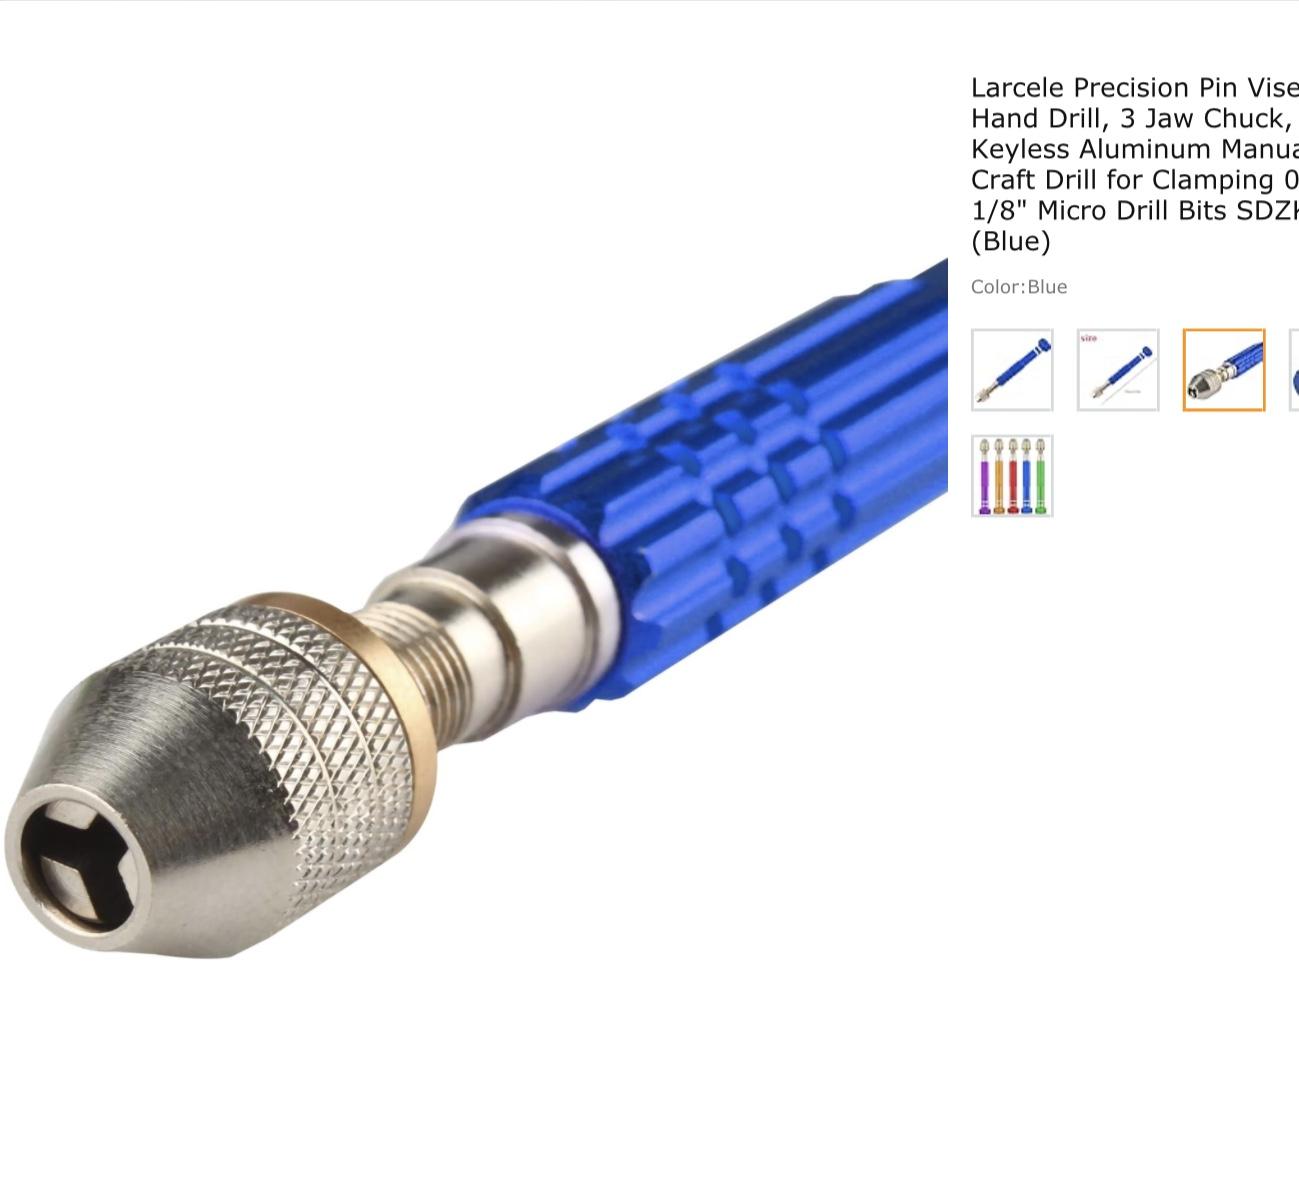
As the title says, it gets annoying that almost every time I need to drill a hole in plastic I need to change out the chuck for a different sized bit. Well I found a 3 jawed chuck pin vise on amazon for $ 10.00 and I’m loving it. No more taking apart the pin vise for different sizes of bits. The 3 jawed chuck goes from zero to 1/8”. Perfect for modeling. This may not be a new thing for some but if anyone out there gets annoyed over the old pin vises like I did, you may want to give it a shot.
-
Now that’s an old kit. Looks good in that color.
-
What would a car modelers Hades be like:
Camaro lover replied to GLMFAA1's topic in The Off-Topic Lounge
My first wife would be there letting the 4 yr old boy she’s babysitting play with my finished models. Yes in my early 20’s I built a model of the Cutty Sark. I spent months doing all the rigging for it. It was at that time the best I ever built. I came home from work to find all 3 masts broken, rigging all pulled out and one side of the hull cracked as if someone stood on it. The few cars with broken wheels didn’t bother me as much as that ship. It sat up on a high shelf so she had to get it down for him to “play” with. I’ve been to hades already. No intention of going back. -
That is spectacular. I love the service sticker on the door. That’s a detail I’ve never seen on a model. So many things done just right.
-
That is just too cool. It’s a nice change to just have fun with it 👍