ColonelKrypton
-
Posts
388 -
Joined
-
Last visited
Content Type
Profiles
Forums
Events
Gallery
Everything posted by ColonelKrypton
-
A different approach to the AMT 41 Plymouth coupe.
ColonelKrypton replied to Alan Barton's topic in WIP: Model Cars
Indeed they are and the old battlewagon is already starting to look more sleek and refined. cheers, Graham -
an interesting build. It will be interesting to see how this one turns out. cheers, Graham
-
My favourite year Corvette. Very nicely done. cheers, Graham
-
Thank you for the kind words. I am still refining my technique - gets better and more refined with every one I make. Of course there is limit, it is nice to try and make something that is as true to the original as possible but size, materials, and time have a moderating effect as does the fact once completed much of the smaller details are hidden or nearly so from sight; still, I know that they are there and that is why I try - the simple pleasure of making. cheers, Graham
-
First time resin casting question
ColonelKrypton replied to Sledsel's topic in Model Building Questions and Answers
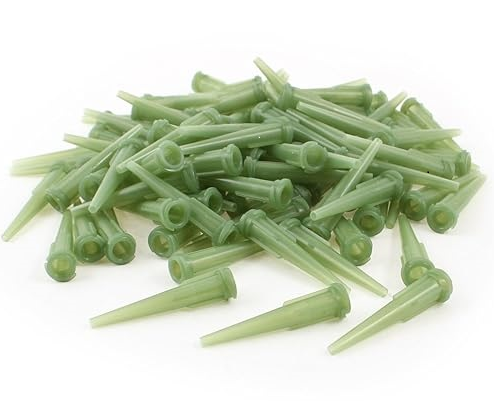
I cast some small parts from time to time and do not use pressure casting. I have been using a syringe ( 5ml size is large enough for anything I do i.e engine blocks ) and use a 14g tip like these: https://www.amazon.ca/gp/product/B00G9IUVN8/ to "inject" the resin into the mold. You can point the tip into the bottom recesses and the mold will fill from bottom to top and you can move the tip around a bit to insure that the mold is filled. Before using the syringe I would often get bubbles in about half of my castings, since using the syringe my success rate is much better. Like everything, it took a bit of practice to get the feel for it. The syringes can be re-used several times. The cured resin will or should just peel off the plastic syringe . After injecting I "pump" the syringe several times to remove as much of the resin as possible and then remove the plunger and wipe of what resin I can from the rubber bit. I frequently get a half dozen +/- uses from each syringe. and tip. You could try a larger tip ( i.e. 12g ) or smaller tip ( ie. 16g ) but I found the 14g about right for my use. As for making molds for something like the wheels in your photo, I found that if I attach a smaller piece to the back side ( i.e. a disc a bit smaller in diameter than the part ), this will provide a nice defining line for that edge of the cast part. It will make for a small undercut but as @Aaronw noted, the silicon rubber is flexible enough that removing the part from the mold is not an issue. There is another benefit to this as well, if you slightly underfill the mold ( i.e.not quite to the top ) then a combination of surface tension and whatever shrinkage there is in the resin curing will leave a slight curved indentation in the center portion of the cast part leaving much less resin to remove and making it easier to clean up and make a nice level surface. Again, takes some practice to get a feel for it. I make my mold boxes from bits of 0.040 or 0.060 polystyrene sized to suit my piece. Easy to glue together and take apart and the silicon won't stick to the plastic and the plastic is reusable. If you have not already seen Robert Tolone's videos on youtube, you should have a look. Lots ( and lots ) of good advice and technique: https://www.youtube.com/@RobertTolone cheers, Graham
-
That is interesting. A quick look at my local sources and I couldn't find this particular product. I will have to keep looking cheers, Graham
-
Stumbled across puddled people of youTube which led to another video about this gentleman cheers, Graham
-
What non-auto model did you get today?
ColonelKrypton replied to chunkypeanutbutter's topic in The Off-Topic Lounge
Learn something new every day. Several things today in fact which seems to be a normal day to day affair. cheers, Graham -
Very nice. cheers, Graham
-
Dodge charger R/T AMT. Best car I've ever made
ColonelKrypton replied to lucaame03's topic in Model Cars
Very nice. cheers, Graham -
Very nice. One of my favourite shows. cheers, Graham
-
Nicely done. What's not to like of a '55 Chevy cheers, Graham
-
Very nicely done. cheers, Graham
-
I have both and use same. Always a case of one "size" not fitting all applications All solvent cements in fact. I think we can all be a bit impatient at times Good advice all round. The National Model Railway Association has a good reference document on adhesives. Published quite some time ago but still relevant: https://www.nmra.org/sites/default/files/d1n.pdf cheers, Graham
-
That is always the struggle. I know of gentleman who builds fabulous scratch built 1/144 scale Great War and early era aeroplanes;. They are real tiny gems. He uses polystyrene but also uses acrylic especially for carving out the wings for these tiny models. I have only dabbled with a bit but now having broached the idea in this topic I think it is about I time I did some experimenting and testing. Feeling newly invigorated with a fresh idea in my big rattling head, I am off to the workshop to have a play. ( and a search online for some small size acrylic rods and what not and will have another look around the Dollar store later today when I am out and about ) cheers, Graham
-
That is one of my concerns with using polystyrene or ABS hence my fall back to using something like brass or aluminum. Perhaps I should be exploring a more hybrid approach of mixing plastic and metal more often. Polystyrene and ABS is soft and easy to work with but leaves me worrying about the strength of small glued joints. Perhaps I worry too much. Acrylic is much harder but more difficult to work with few choices in raw materials other than sheets and small rods and doesn't always play well gluing to polystyrene or ABS Brass is strong, perhaps too strong for some tasks, easy to work, can be soldered. It is not easy to break old habits and break away from old comfortable ways of doing something. I will make it a point of using more plastic tiny bits - nothing ventured, nothing gained and perhaps I will find a new comfortable place with a more hybrid approach. cheers, Graham
-
I will have to look more closely at the train bits and pieces. Train stores around here ( Canada in general ) are not as well stocked of such detailing parts as they once were. I use K&S brass and Albion Alloys in thick and thin wall types and in imperial and metric sizes.. Albion Alloys is UK based and not as common in North America but if you look you can find a few suppliers, for example https://flex-i-file.com/en-ca/products/brass-rod I see the imperial and metric sizes as complimentary. 1mm, 1.5mm, 1/16" ( 1.6mm ), 2.0mm, 3/32" (2.38mm), 2.5mm, 3mm, 1/8 (3.12mm) and so on. You can mix and match so you don't end up with everything the same size and you can get some subtle differences. Tie rod ends I have been making from a 1mm slice of 1/16" or 1.5mm tube soldered on the end of a suitable size tie tube ( i.e. 1mm for approx a 1" tie rod ). I drill a 0.020" hole in the side of the 1mm slice of tube and use a 0.020" rod in the tube and into that hole to align and hold together for soldering. The slice of tube is then cleaned out for a rod end needing a hole or I will have already soldered a short length of rod in hole ( if you follow my ramblings ). King pins are made in a similar manner with a short length of rod having a slice of tube soldered on the end and then filed to size. There are examples in the photos I posted earlier. Lots of different ways to make similar items. Lots of interesting and suitable bits and pieces to found in jewellery findings as has already been suggested.
-
Very nice. cheers, Graham
-
Very nice indeed. cheers, Graham
-
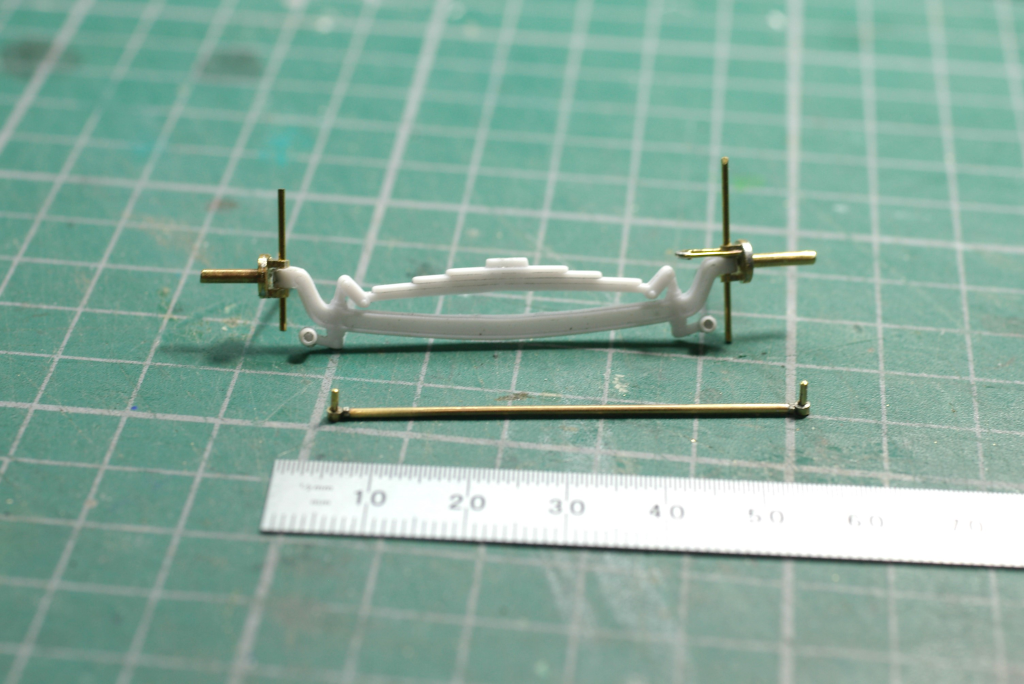
I am a fan of many of Bill's @Ace-Garageguy postings, particularly all of the many containing how-to's. It is always good to be able to see how someone else has done something as there is always something more to learn or how to improve upon something that you already do. I recently started a topic on wire gauge number drills and commented that I like to use brass in my builds. My current build is a Revell '29 Ford roadster for which I have made a poseable front using some of Bill's ideas but made primarily from brass. The dropped forged I beam axles is the one from from the kit were the spindles, steering arms, tie rod, king pins - just to name a few of the bits - have been rendered in brass. The steering arms still need to be bent to shape, trimmed to size, and have their ends soldered in place plus there is still a bit of clean up to do before paint; all in good time. I thought I would share a few pictures: Made using 1mm and 1/16 brass tube, 0.020" and 1/32 brass rod, soft soldered with Stay Brite silver bearing solder. Something I have found very useful for making small bits is my make do watchmakers lathe. Nothing more than a Foredom #30 handpiece mounted in rifle hardware to mount a tactical flashlight holder which coincidentally had a diameter of 1" ( same as the Foredom ) mounted on a chunk of ( 3/4" ? ) aluminum. I use hand gravers and a number of small blocks of wood as tool rests to turn brass, plastic, and aluminum. I will leave it there for fear of hi-jacking Bill's topic and skewing it off in another direction. Was there ever a part 2 ( or 3 or ? )? cheers, Graham
-
Just to put a period and end of chapter on this topic, I did some work in the shop today and made a couple more pieces for the poseable front end of my recent Revell '29 roadster build. I took the liberty of posting a few pictures to one of Bill's @Ace-Garageguy old topics on the the subject of poseable front ends. I noted that topic was titled as part 1 - was there ever a part 2? In any case, I took a chance on some 0.55mm and 0.85mm HSS drill bits found on Amazon CoCud was the seller which have after measuring with my micrometer, close inspection with a loupe and drilling a few holes have proven to be decent bits and are good substitutes size wise for #75 and #66 wire gauge bits which were two of the sizes that headed me down this bunny hole. In the short term I am all sorted for now. As @Bugatti Fan suggested earlier There are indeed close matches but sometimes you need to look a bit harder. I knew that there were metric drills in 0.01mm increments but failed to remember to look that closely. Surprising I found several such listings on Amazon and eBay would as well. Of course your well stocked local industrial supplier would or at least should have as well. Cheers everyone, thank you for your input. Graham
-
Indeed, close but sometimes close isn't close enough. I like to work a lot with brass usually soft soldered usually with Stay Brite silver bearing solder and occasionally hard soldered ( or brazed if you prefer ). Brass is a nice material to work with BUT the cutting tools geometry, for best results, is different from that for ferrous materials and even the likes of polystyrene. https://handycrowd.medium.com/drilling-brass-the-easy-and-safe-way-f1494d449d3a https://kdmfab.com/brass-drilling/ https://www.watchrepairtalk.com/topic/18286-drilling-brass-not-as-easy-as-youd-think/ I have a drill set of 1/16" through 1/2" drills in 1/64" steps that I use exclusively for brass and each bit has been modified like that shown in the first link above. I have not had much luck modifying bits smaller than 1/16" in a similar manner hence the reason I occasionally break these smaller size bits when working brass. My compromise is to use decent quality HSS bits. Those very nice, sharp, and brittle carbide PCB bits tend to break far to easily so it's a good thing they are inexpensive and work in a pinch - they are too sharp and grab too easily in brass. Interestingly, carbon steel bits, at least good quality ones, are less expensive, harder ( hence more brittle) and sharper than HSS types but carbon steel bits are subject to work annealing if used heavily and allowed to overheat whereas HSS are not. There are even drill bits having tip geometry for softer materials like aluminum and plastics. They have tip geometry with a smaller included angle ( i.e. pointier ) https://www.fine-tools.com/aluminiumbohrer.html But for our use the compromise is to use the more common types and in that they work just fine. cheers, Graham
-
I searched this forum using it's own search feature and using Google but failed to stumble on either of the two topics you noted. Thank you for posting, I will have a read. cheers, Graham
-
I think the same thing when I see the name Gyros. Apparently, at least according to their web site https://gyrostools.com/index.php/ Gyros Quality Miniature Tools and Accessories has been round since 1921. cheers, Graham
-
Good news indeed. cheers, Graham