johnyrotten
-
Posts
2,247 -
Joined
-
Last visited
Content Type
Profiles
Forums
Events
Gallery
Everything posted by johnyrotten
-

Paasche flow pencil
johnyrotten replied to johnyrotten's topic in Model Building Questions and Answers
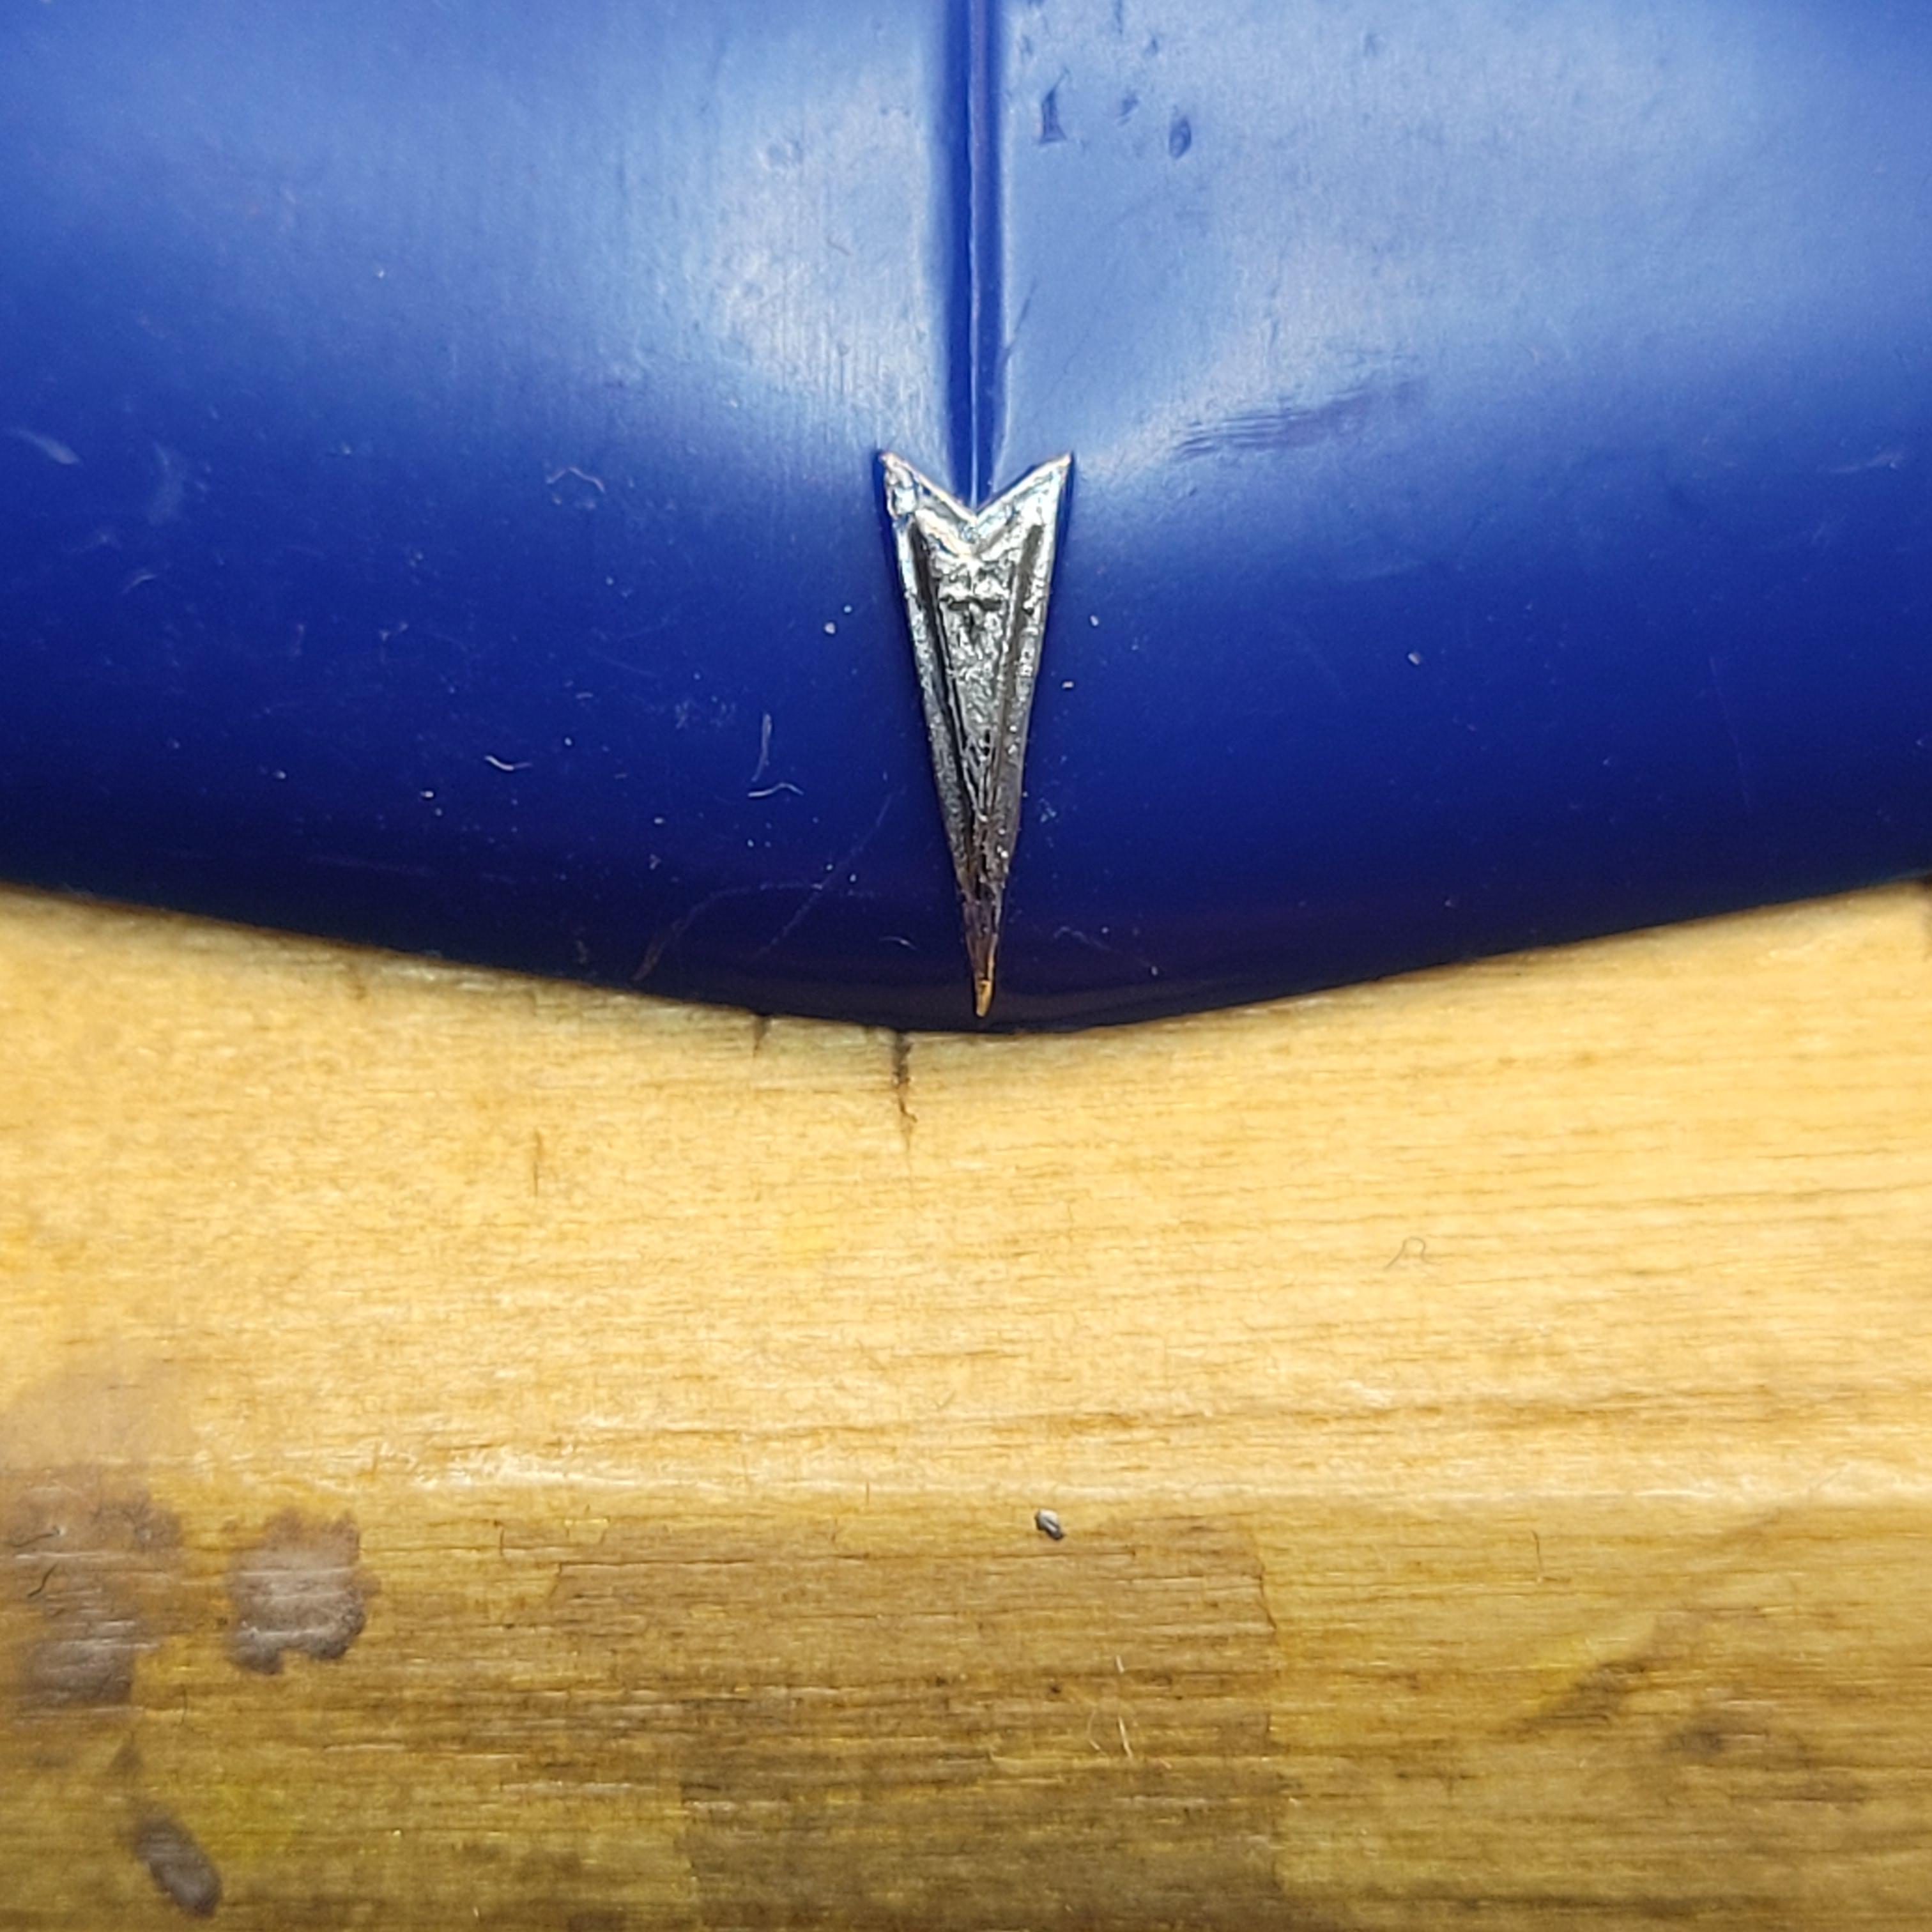
So here's what I've found after an hour. It's sensitive to the paint thickness, big time. And touchy to adjust. This ornament was after an hour of playing around, straight testors enamel silver. It's good for pronounced details, anything shallow, a brush would be better IMHO. The pen is barely open in order to control the paint flow, and I'm "reloading" the nib, not holding the valve open all the time. I'll continue to mess with this, but im starting to think there's better tools/techniques than this tool.
-
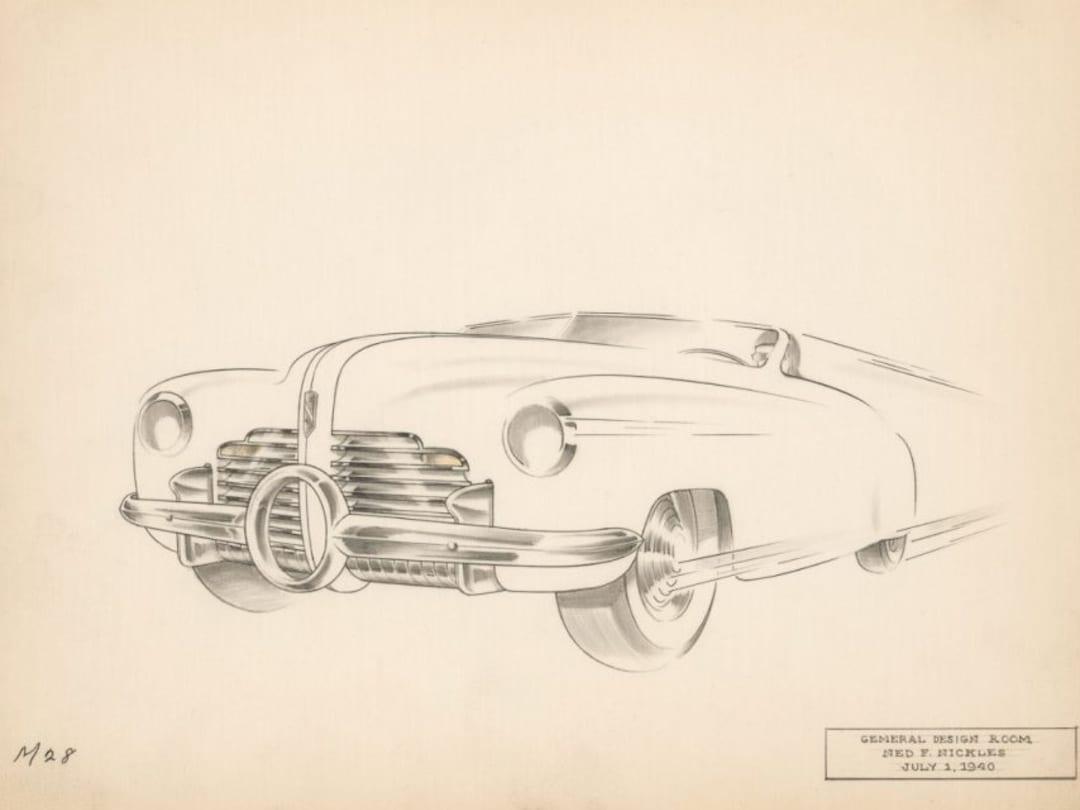
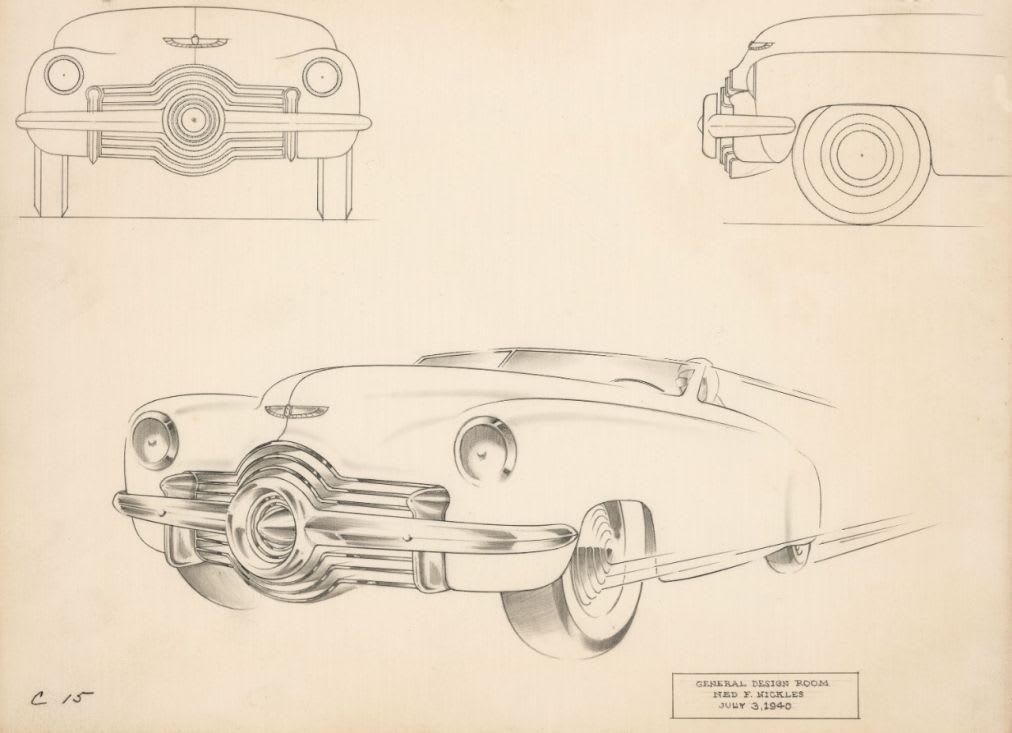
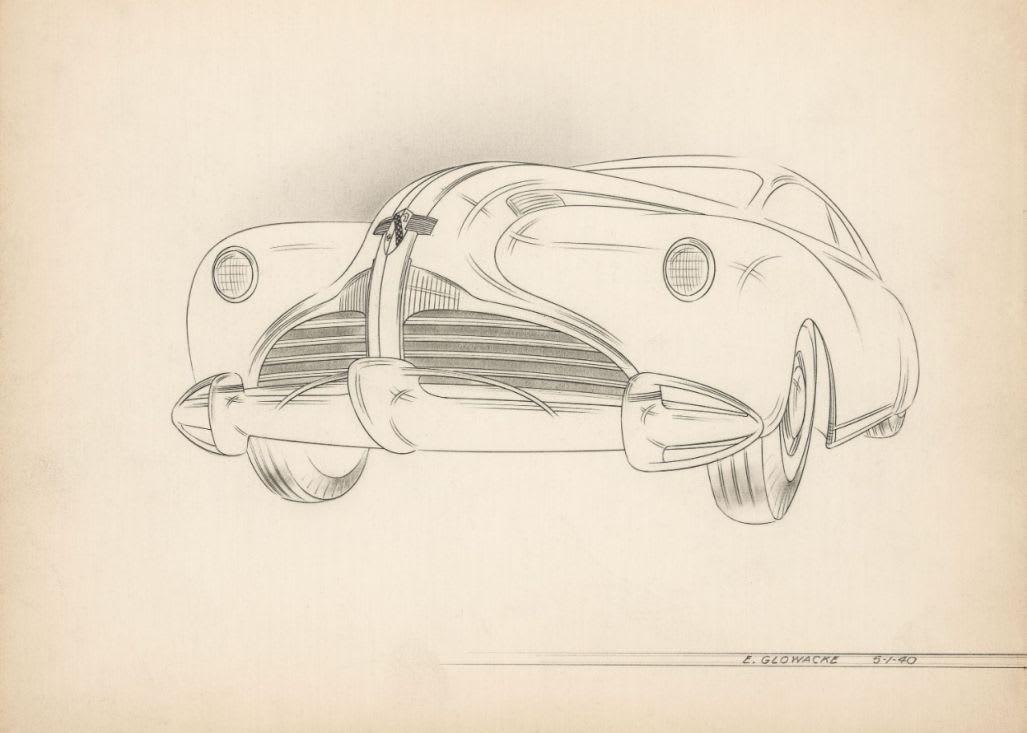
Found this article on lunch, I've included the pictures and a link to the article. Not a ton of information, I'd like to see the rest of those drawings. https://www.autoblog.com/news/mystery-surrounds-piece-of-gm-design-history-found-in-ny-barn
-
Paasche flow pencil
johnyrotten replied to johnyrotten's topic in Model Building Questions and Answers
I plan on testing this thing out when I get out of work. If anyone's interested I could post up what I find, so far I've read some reviews of people having control issues with the amount of paint, paint thickness required and things like that. I chalk that up to the operator, not the device,like most cases when someone dives head first into something. -
What Did You See In Your Yard Today?
johnyrotten replied to Tim W. SoCal's topic in The Off-Topic Lounge
I've got a pair that live somewhere on the property, we get to watch and hear them all the time. Kinda interesting watching them hunt. -
What Did You See In Your Yard Today?
johnyrotten replied to Tim W. SoCal's topic in The Off-Topic Lounge
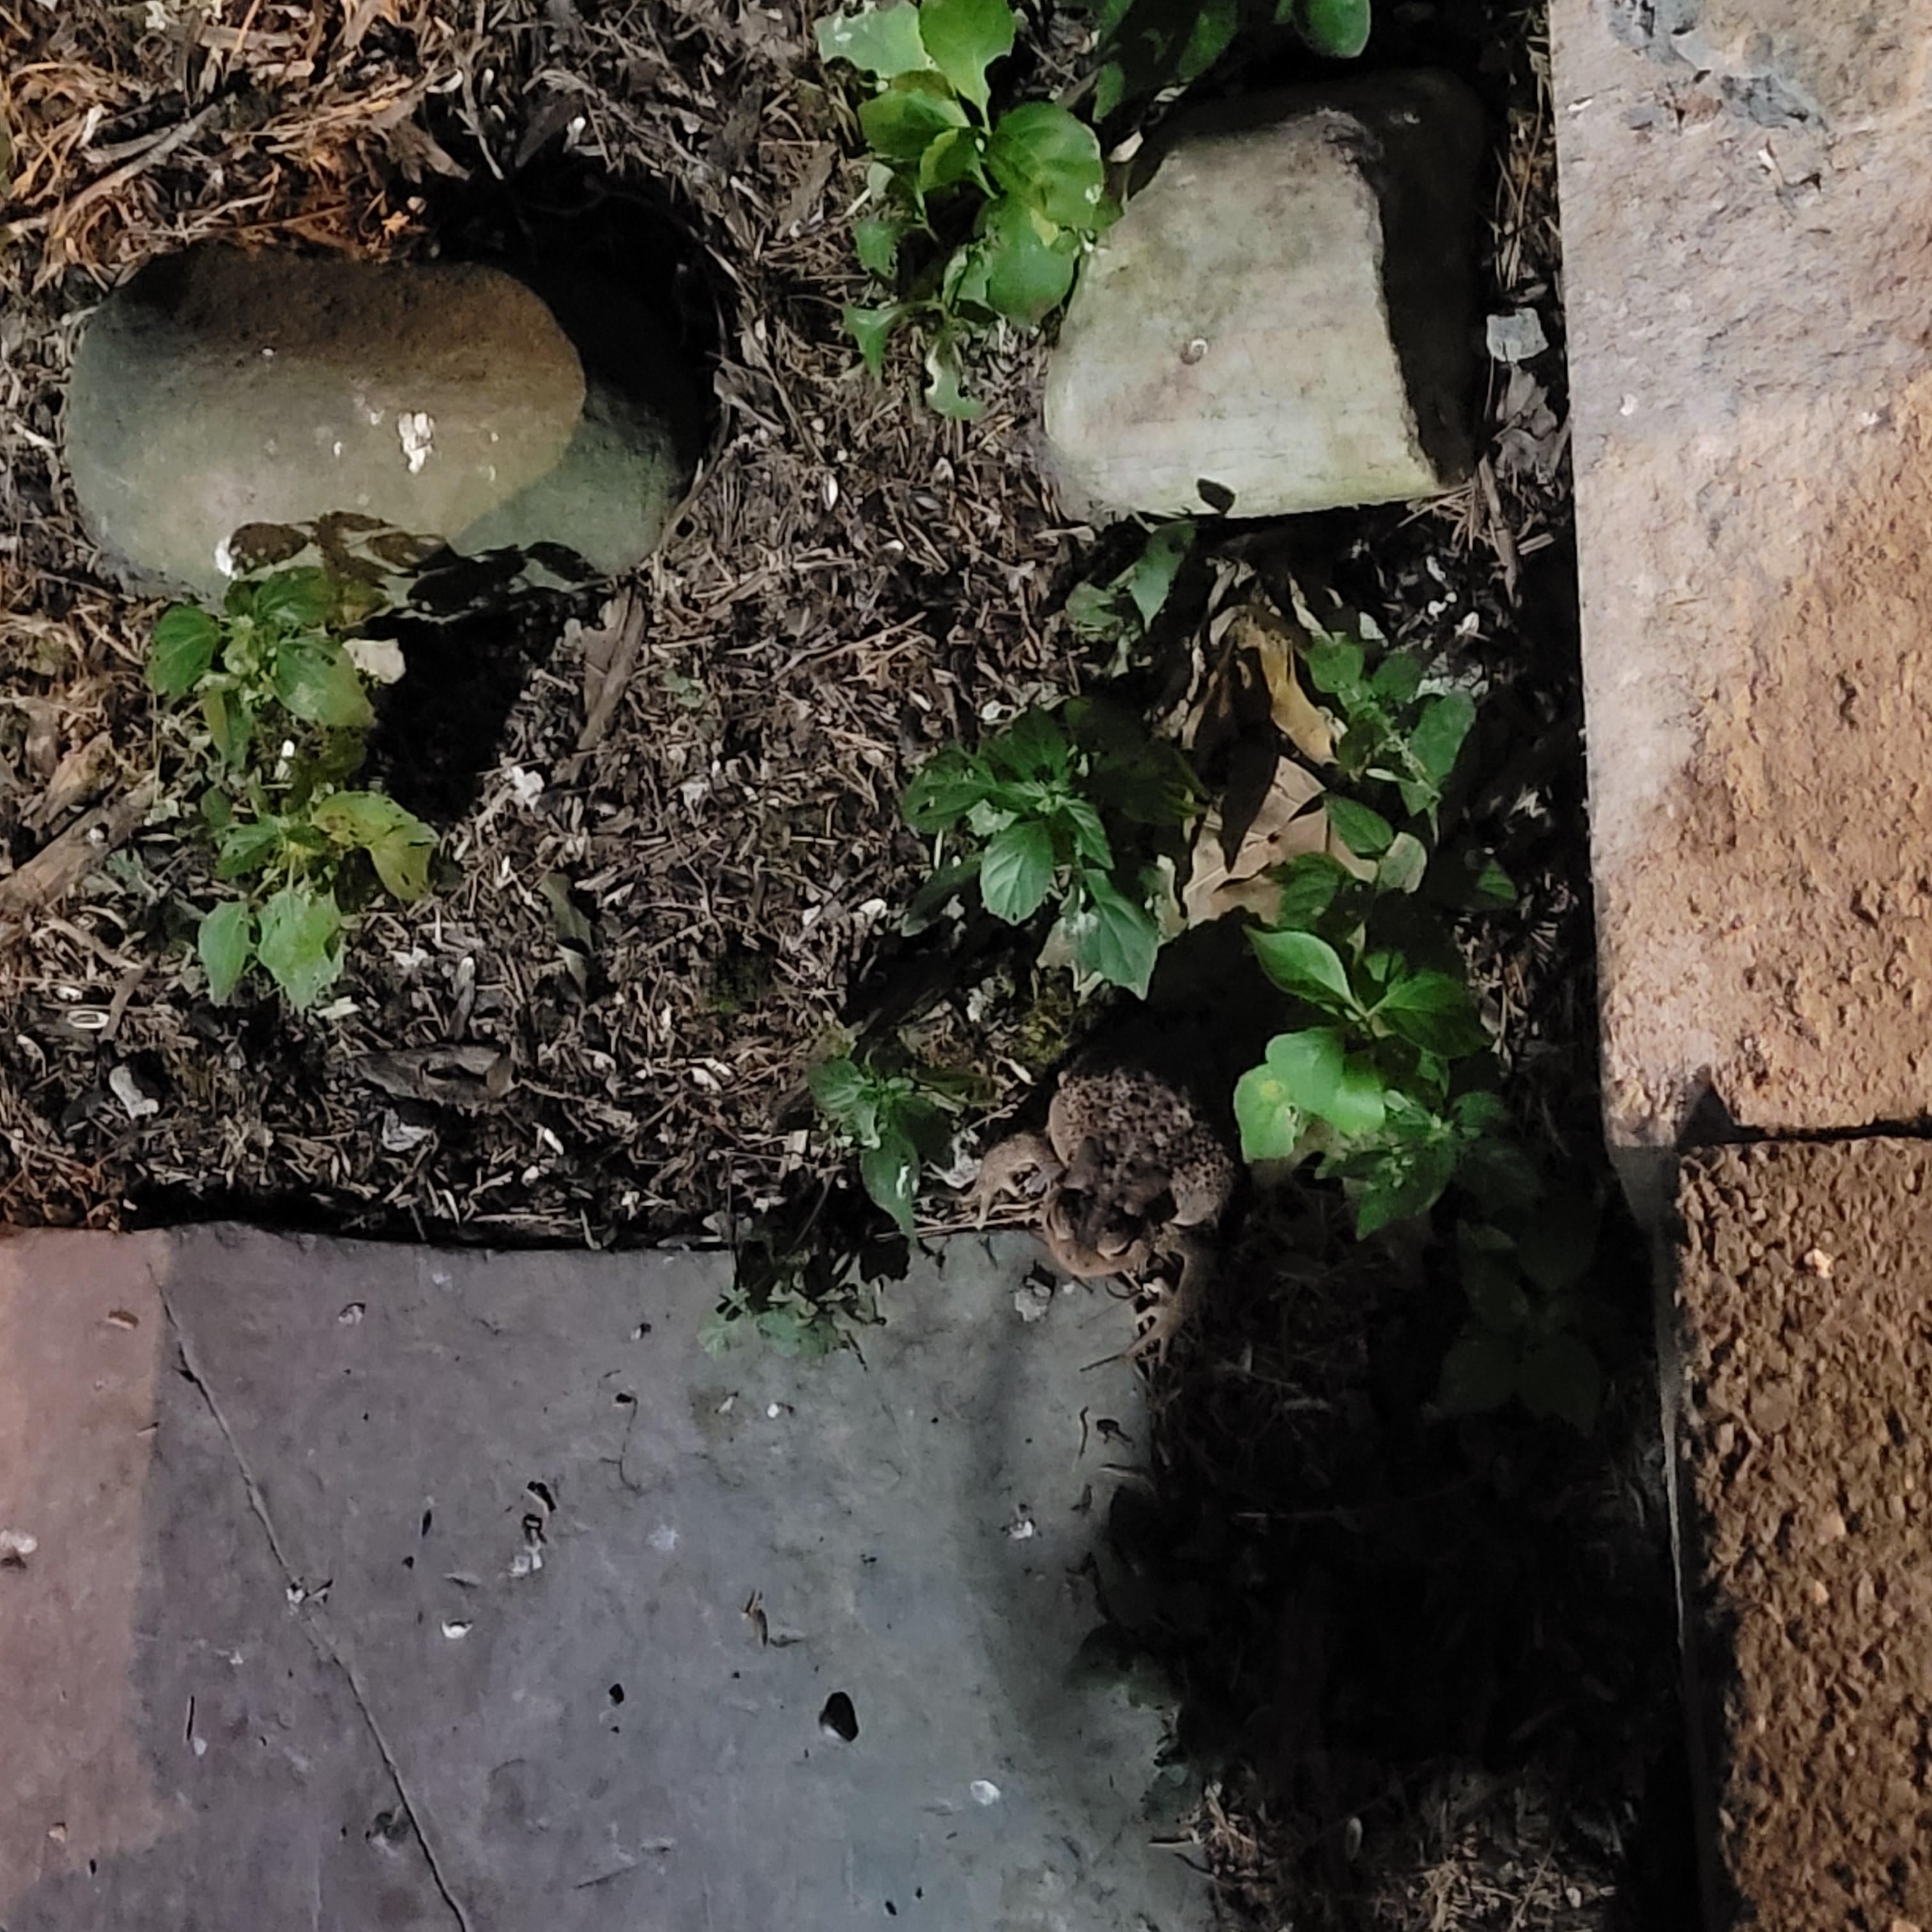
Almost stepped on this dude on my way out the door. This guy's well fed from the looks of it.
-
Paasche flow pencil
johnyrotten replied to johnyrotten's topic in Model Building Questions and Answers
This has me wondering if the size of the "nib" might be too large for the scale I build, Or at least limit what use it has. Only one way to find out,right. -
Paasche flow pencil
johnyrotten replied to johnyrotten's topic in Model Building Questions and Answers
From what I've seen they are still available, they seem to be marketed towards hobbyist, cake decorating, pinstriping ect. -
Paasche flow pencil
johnyrotten replied to johnyrotten's topic in Model Building Questions and Answers
So my understanding is this works similar to a quill pen. I've found some mixed reviews on other site's, like most everything, some love it some hate it. For what I paid for the whole lot, I'll experiment with it and see how it goes. Seems to me that, just like an airbrush, the thickness of the paint is most important for good results. -
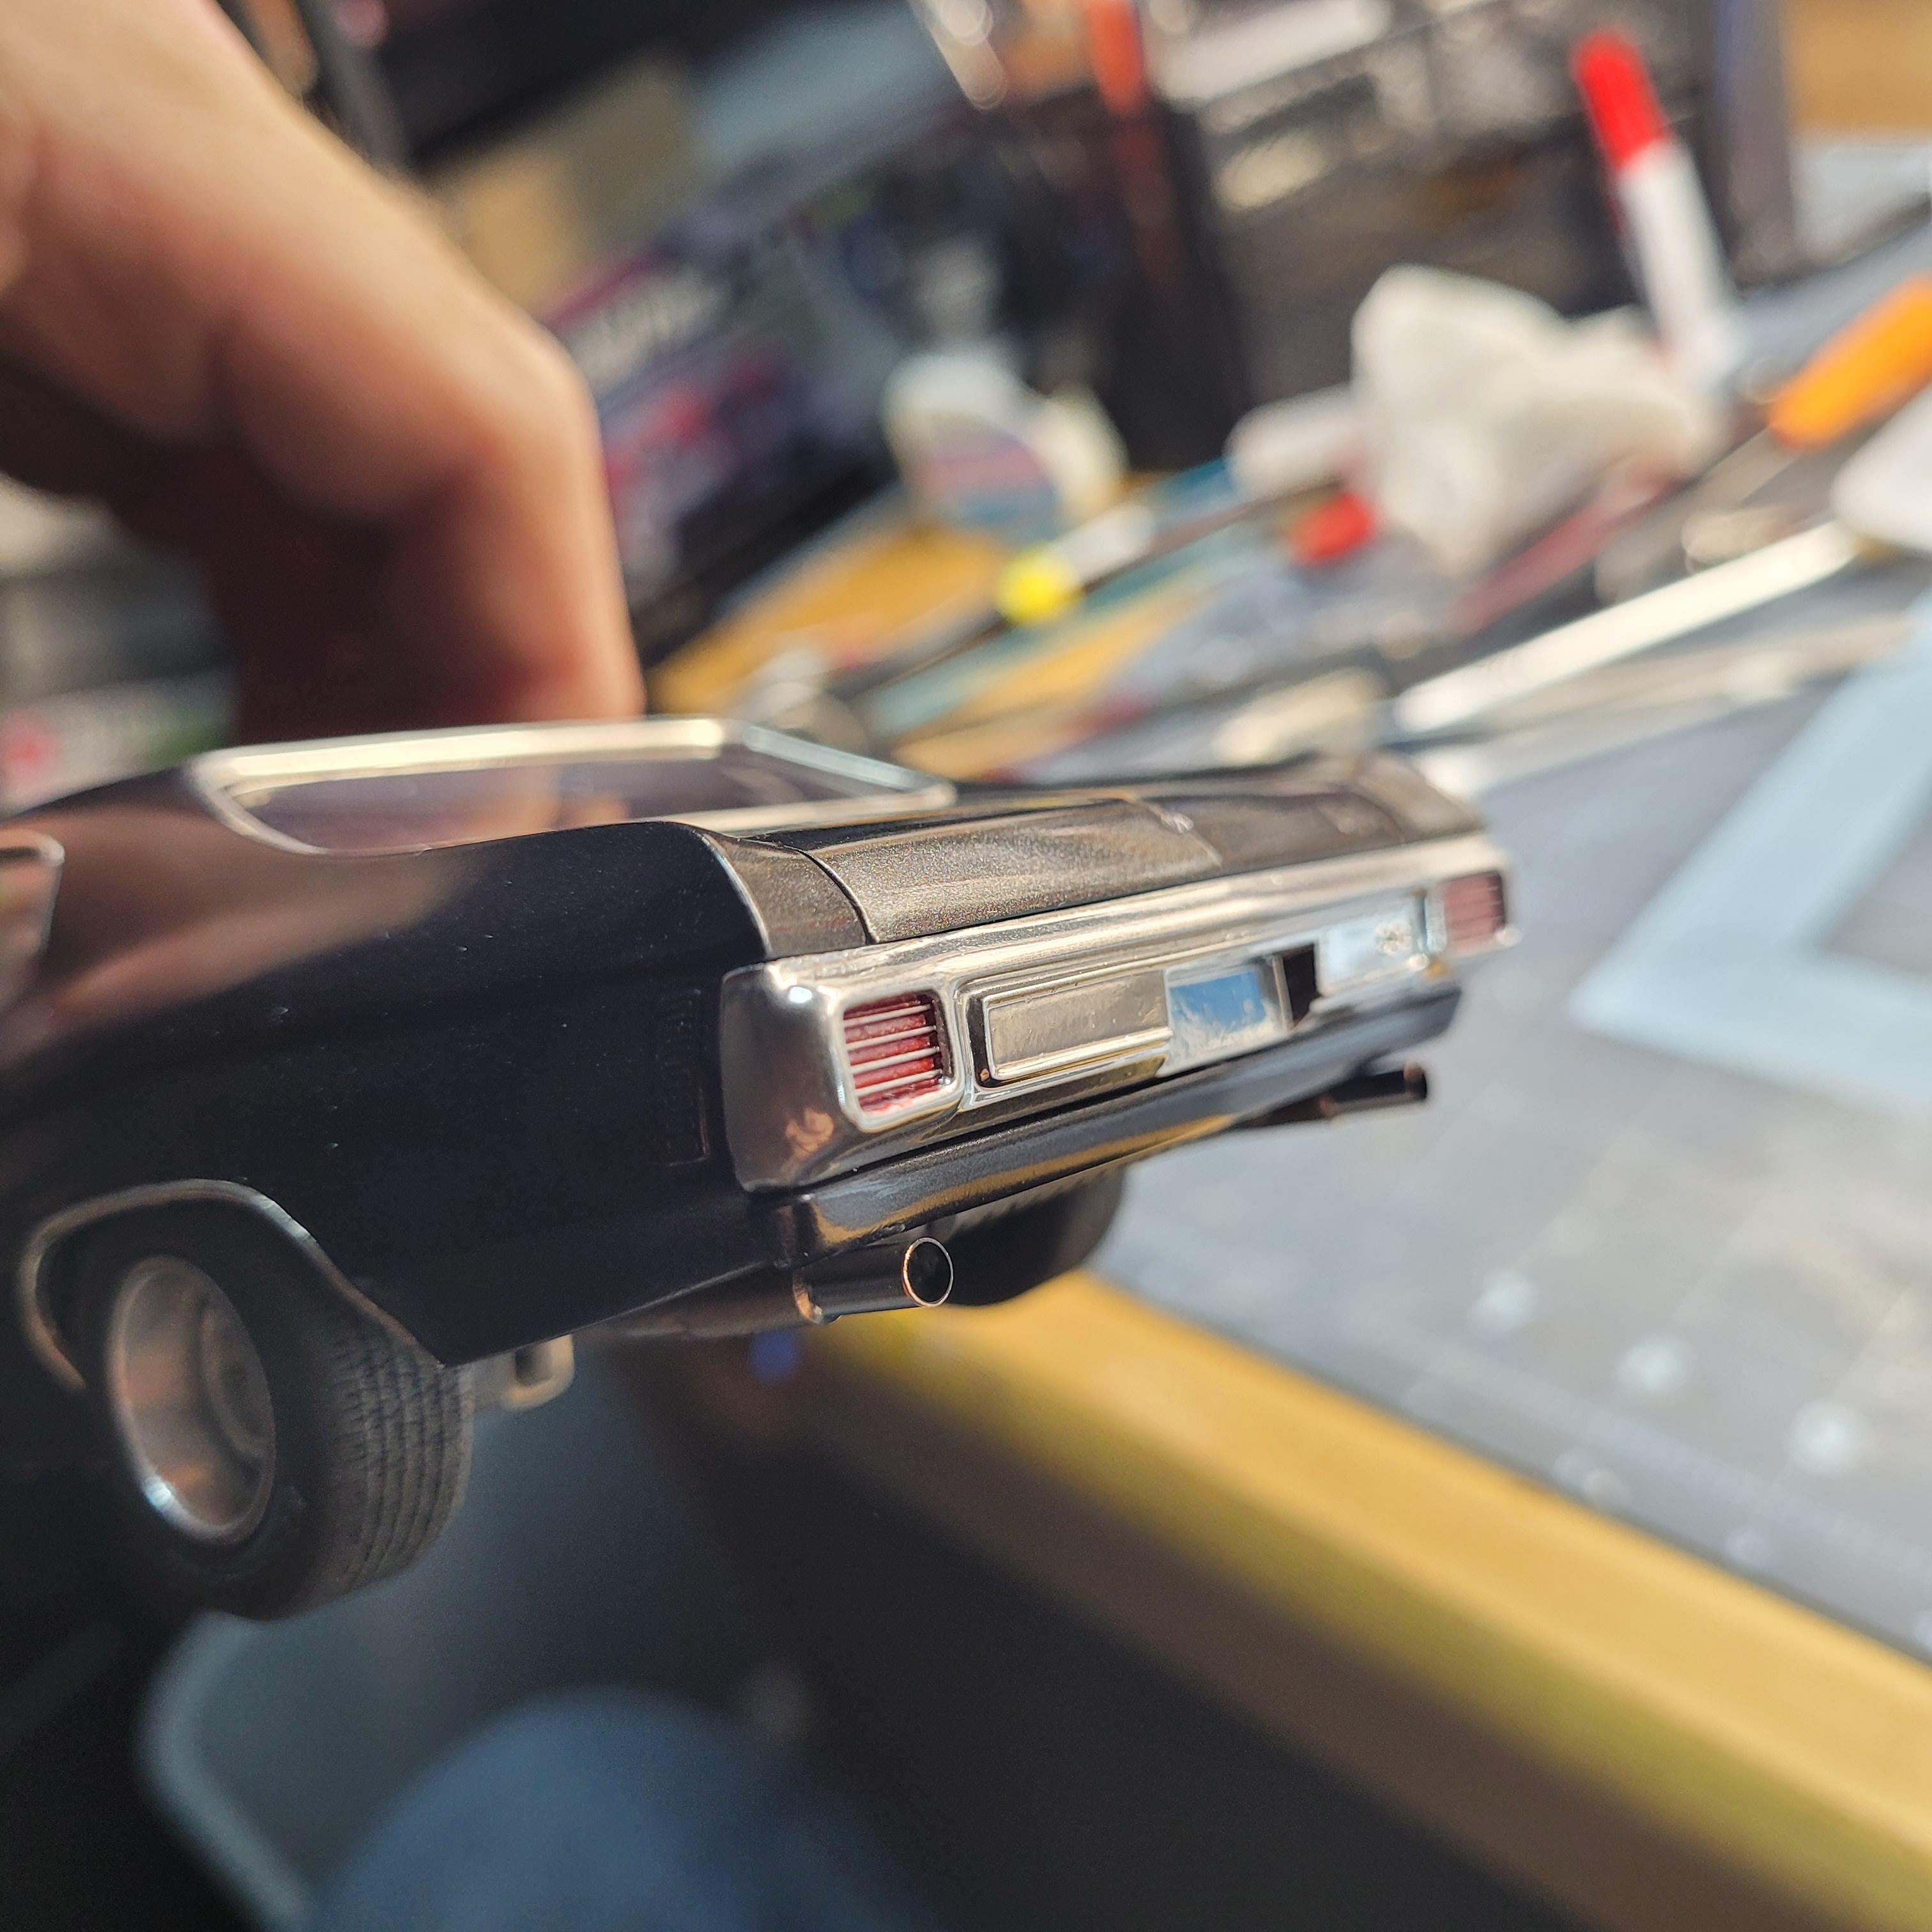
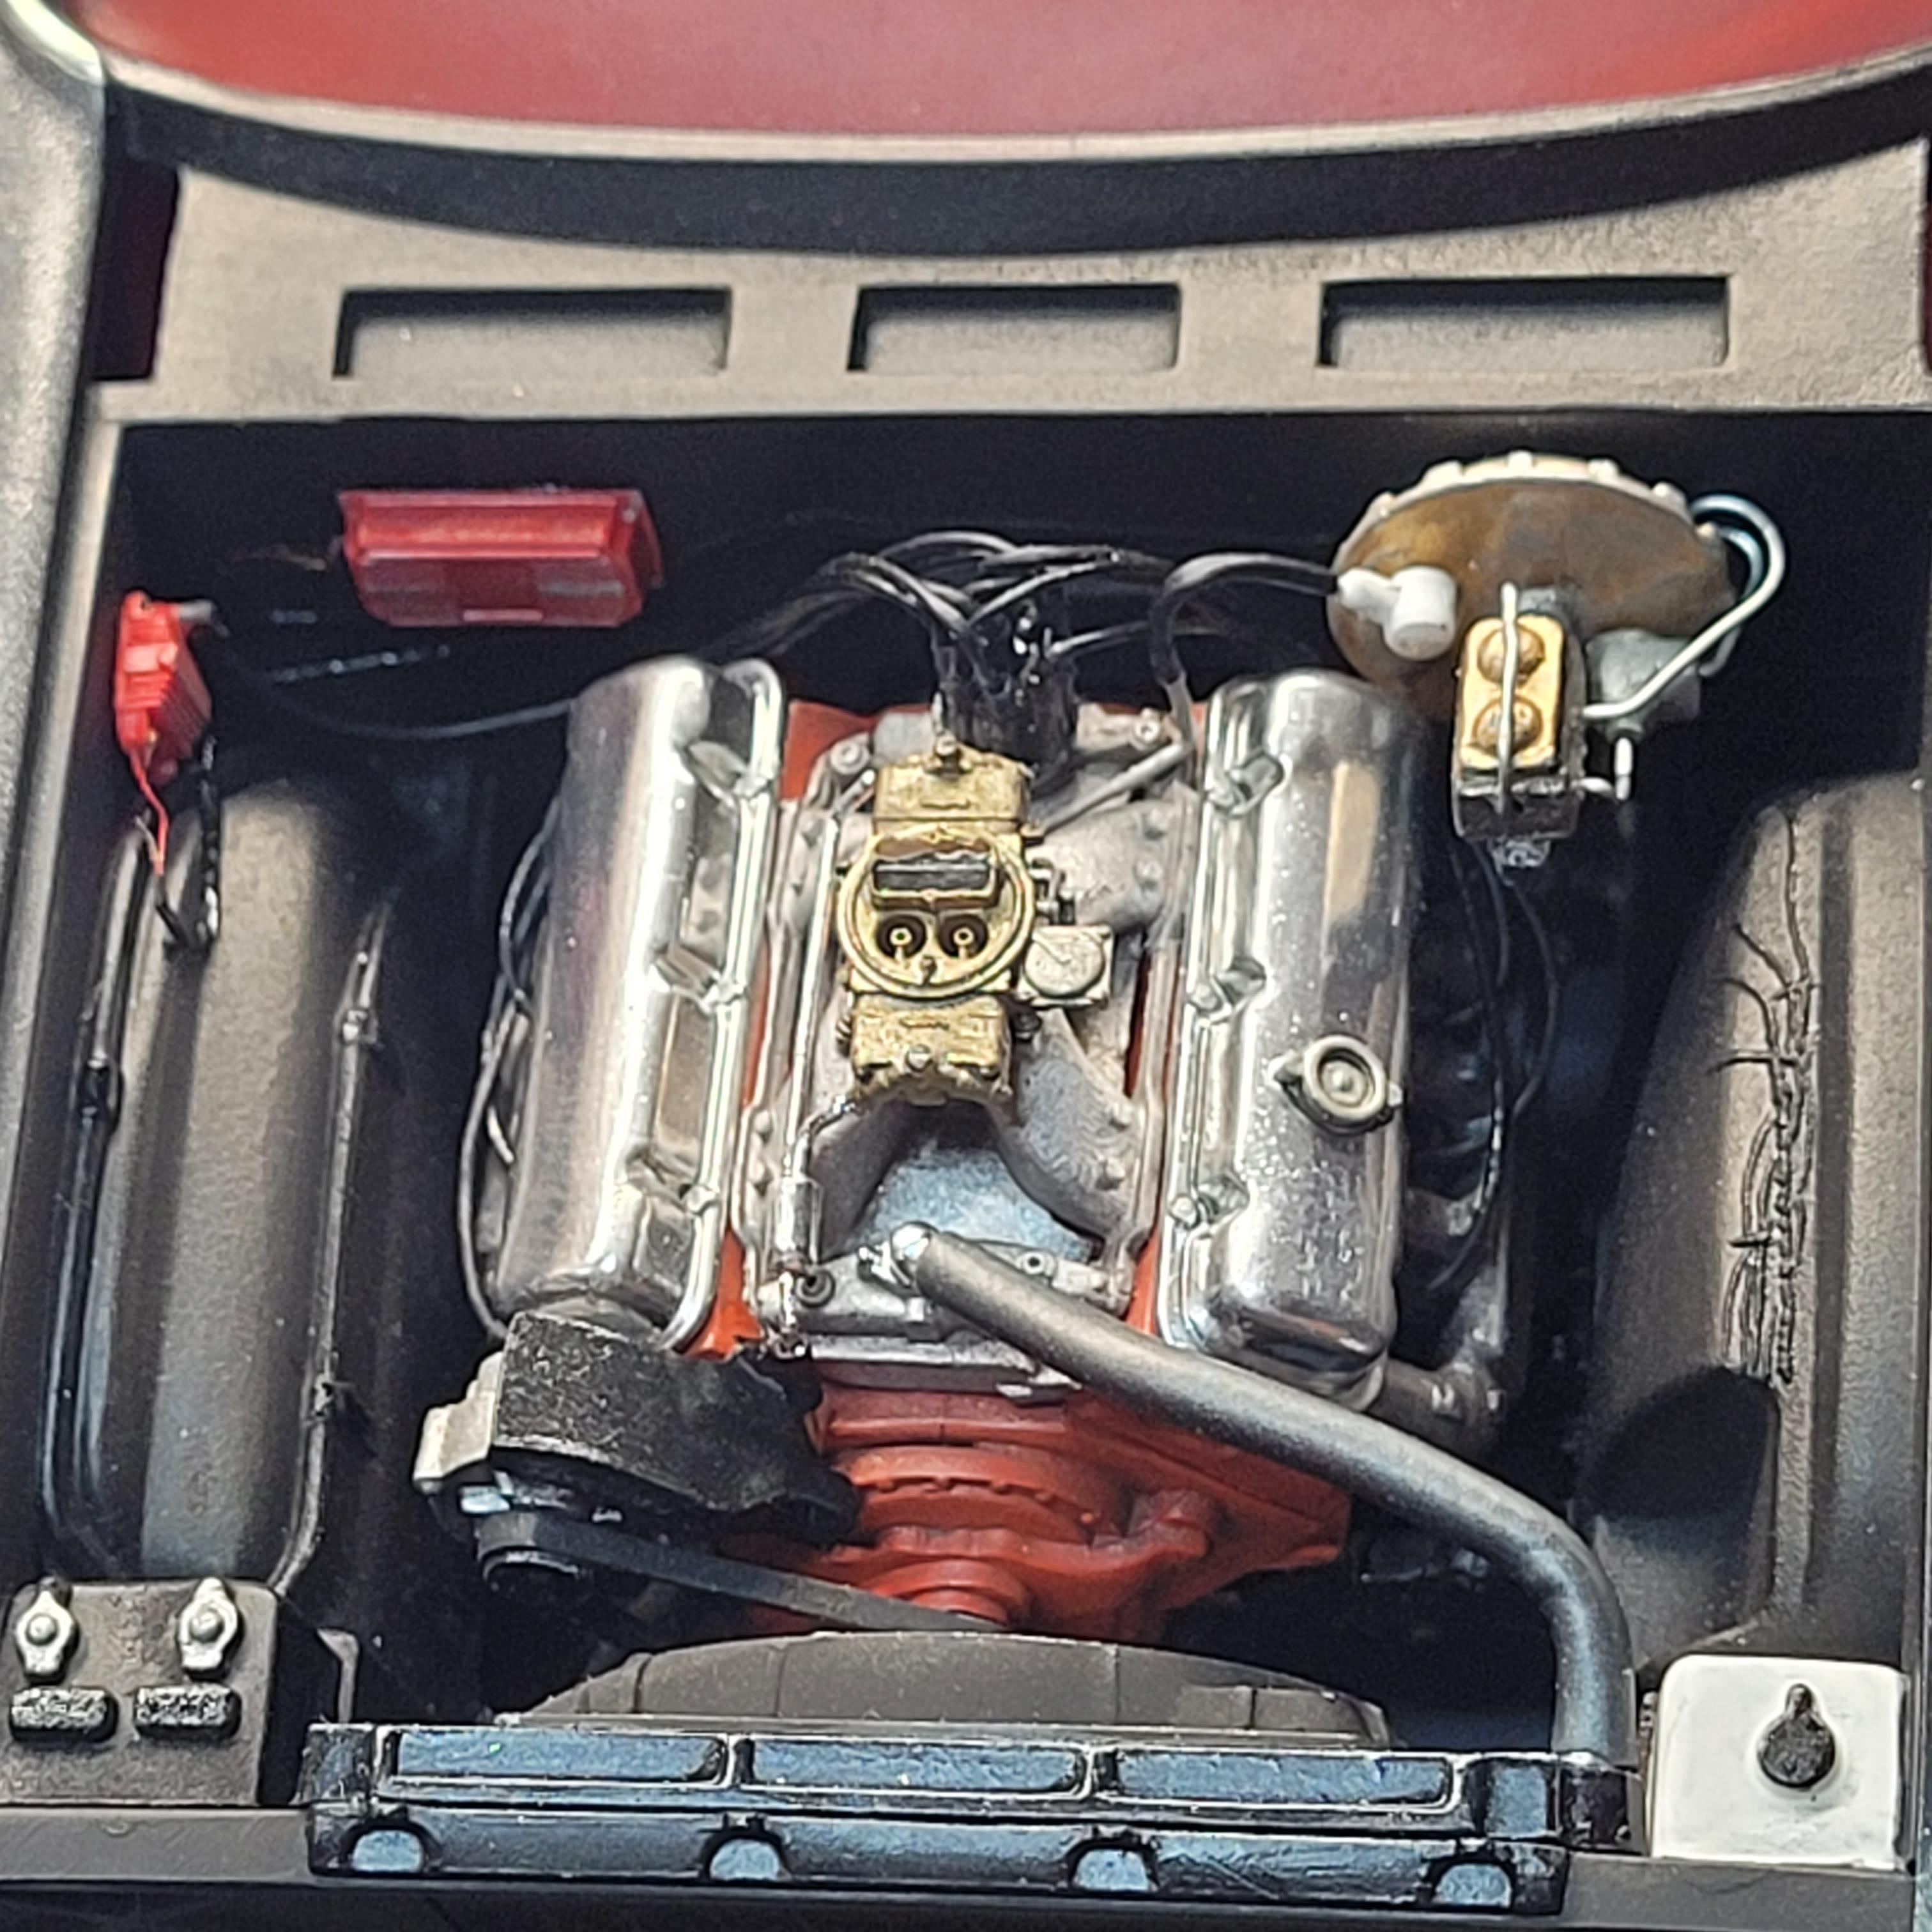
Finished the under hood detail and made some tips for the exhaust, trying to wrap this one up. Think I need to make a radiator cap, it's bugging me
-
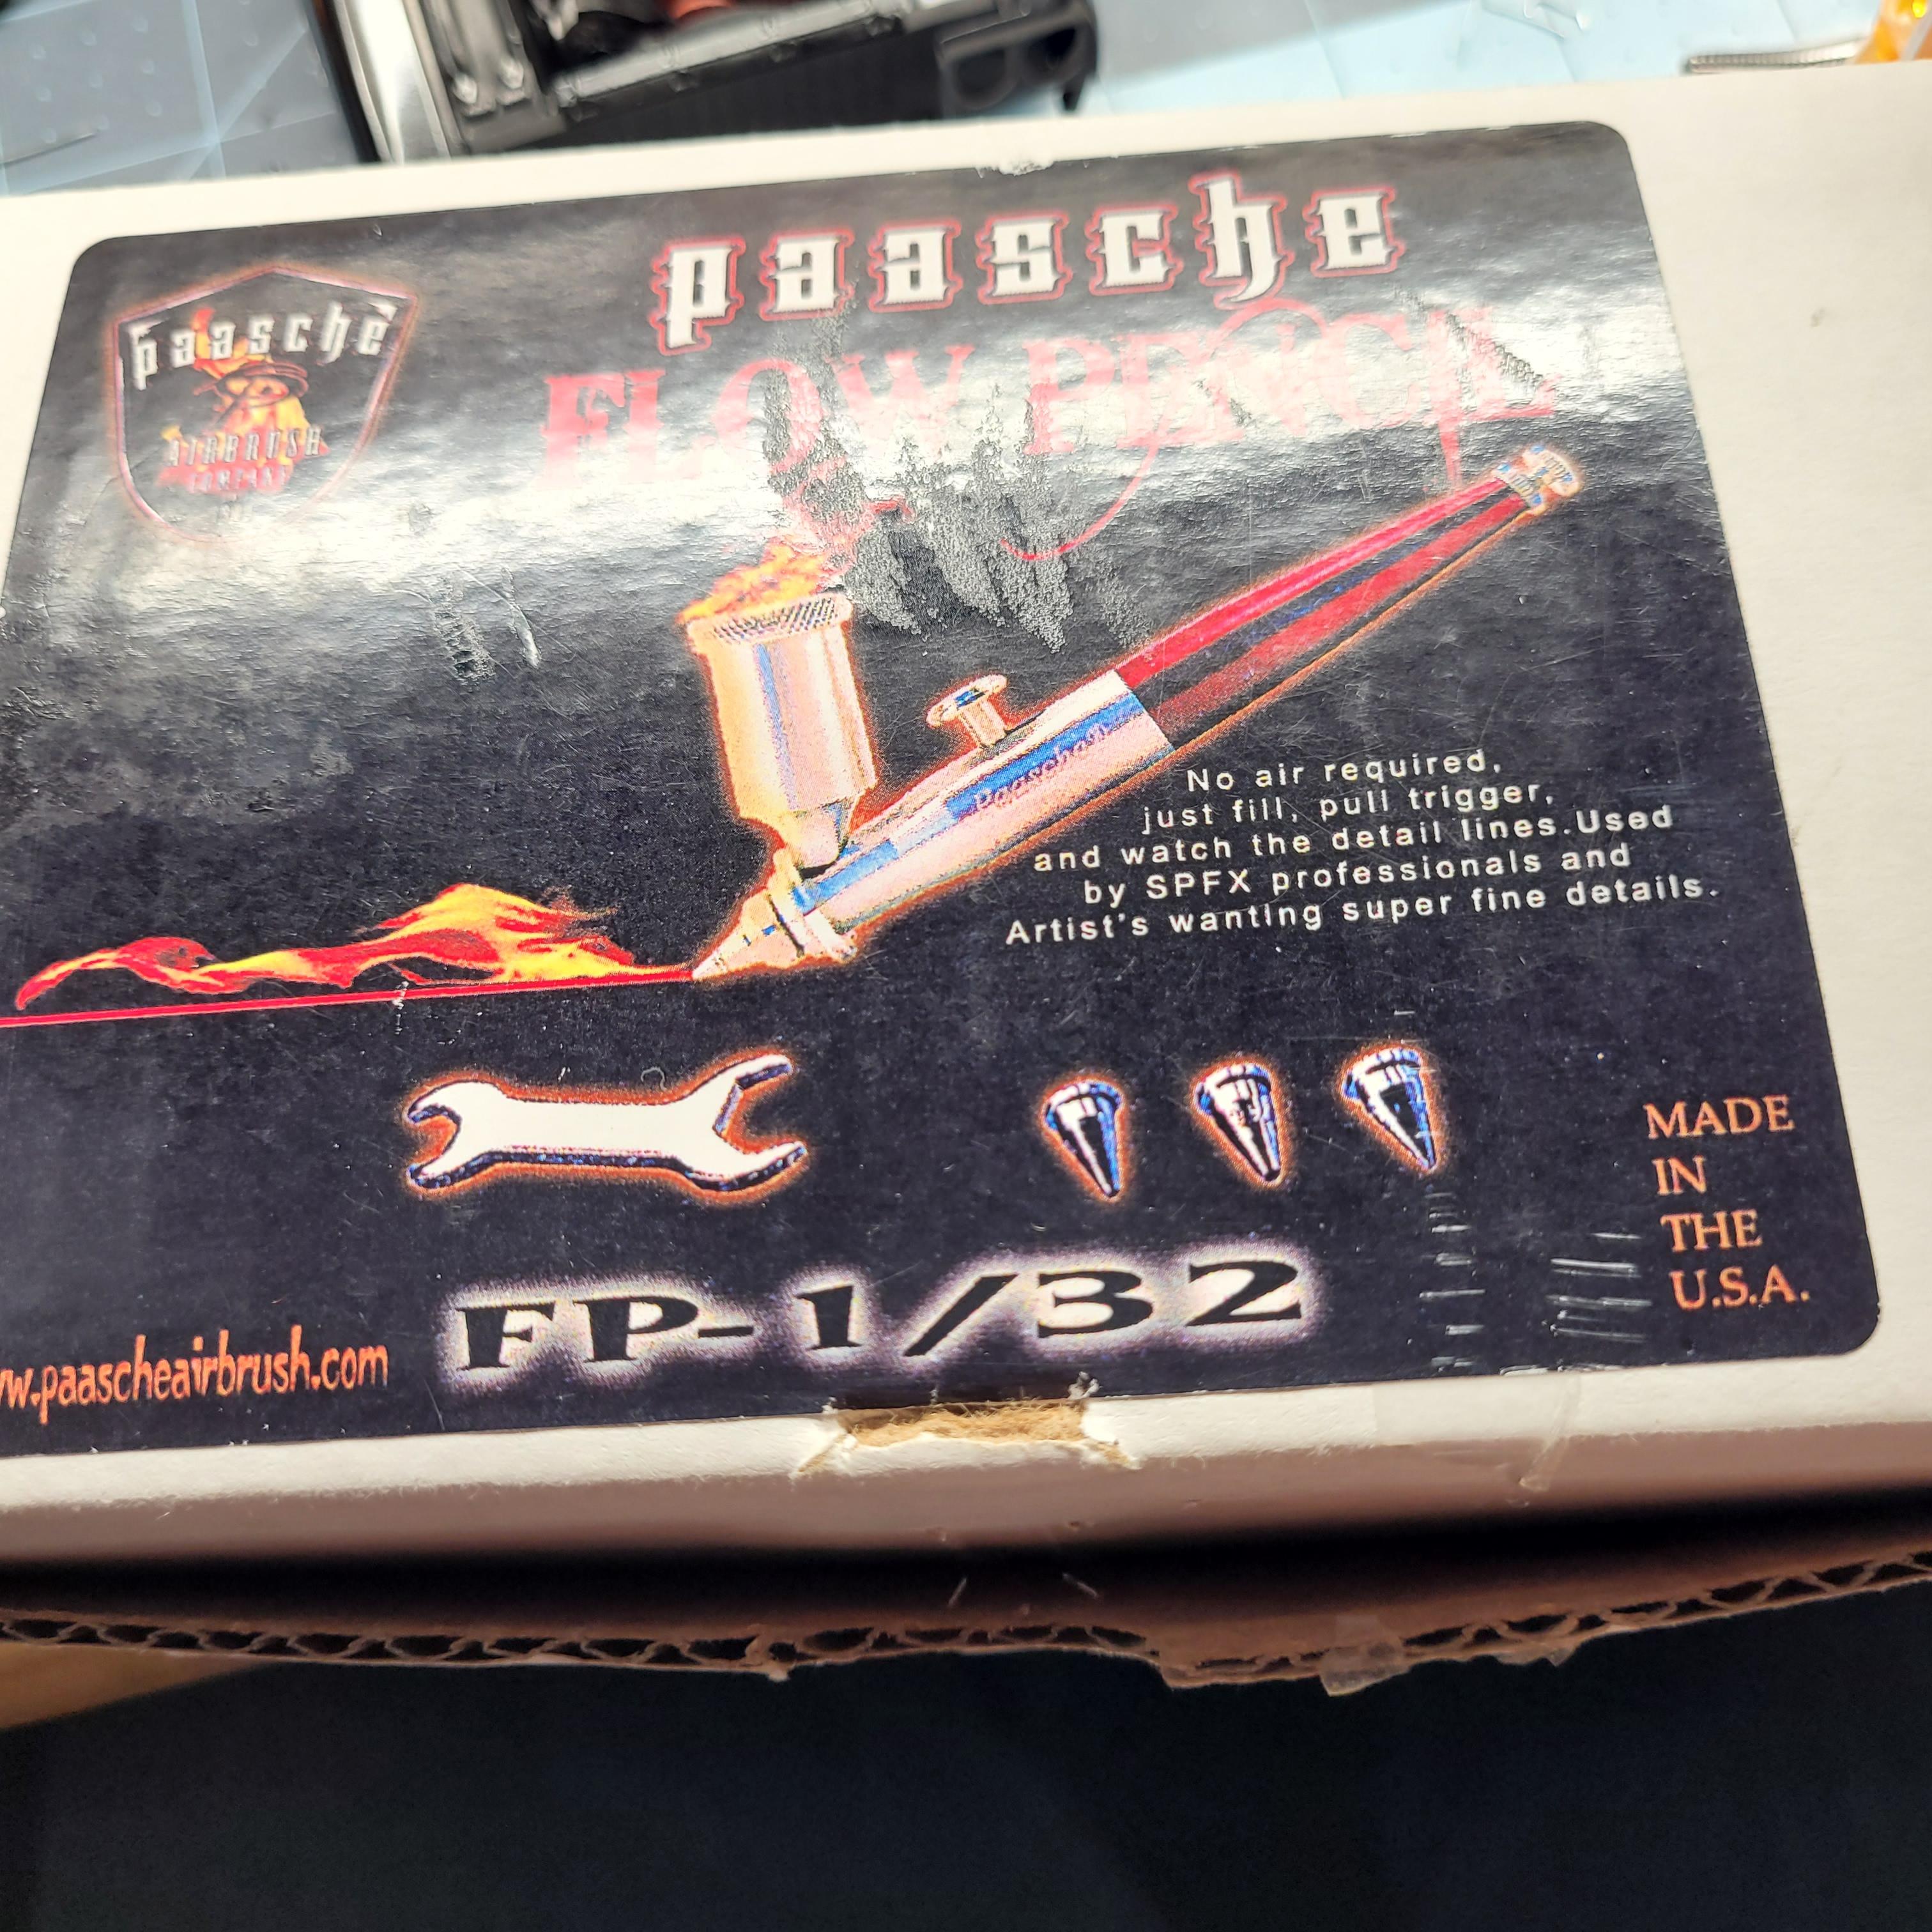
I picked this up CHEAP at a flea market, brand new. I'm thinking it may be useful for small details like trim or dash work. It says no air source needed, so basically a reusable paint pen. Anyone ever use one of these? Thoughts on them? Gripes,blanks, complaints?
-
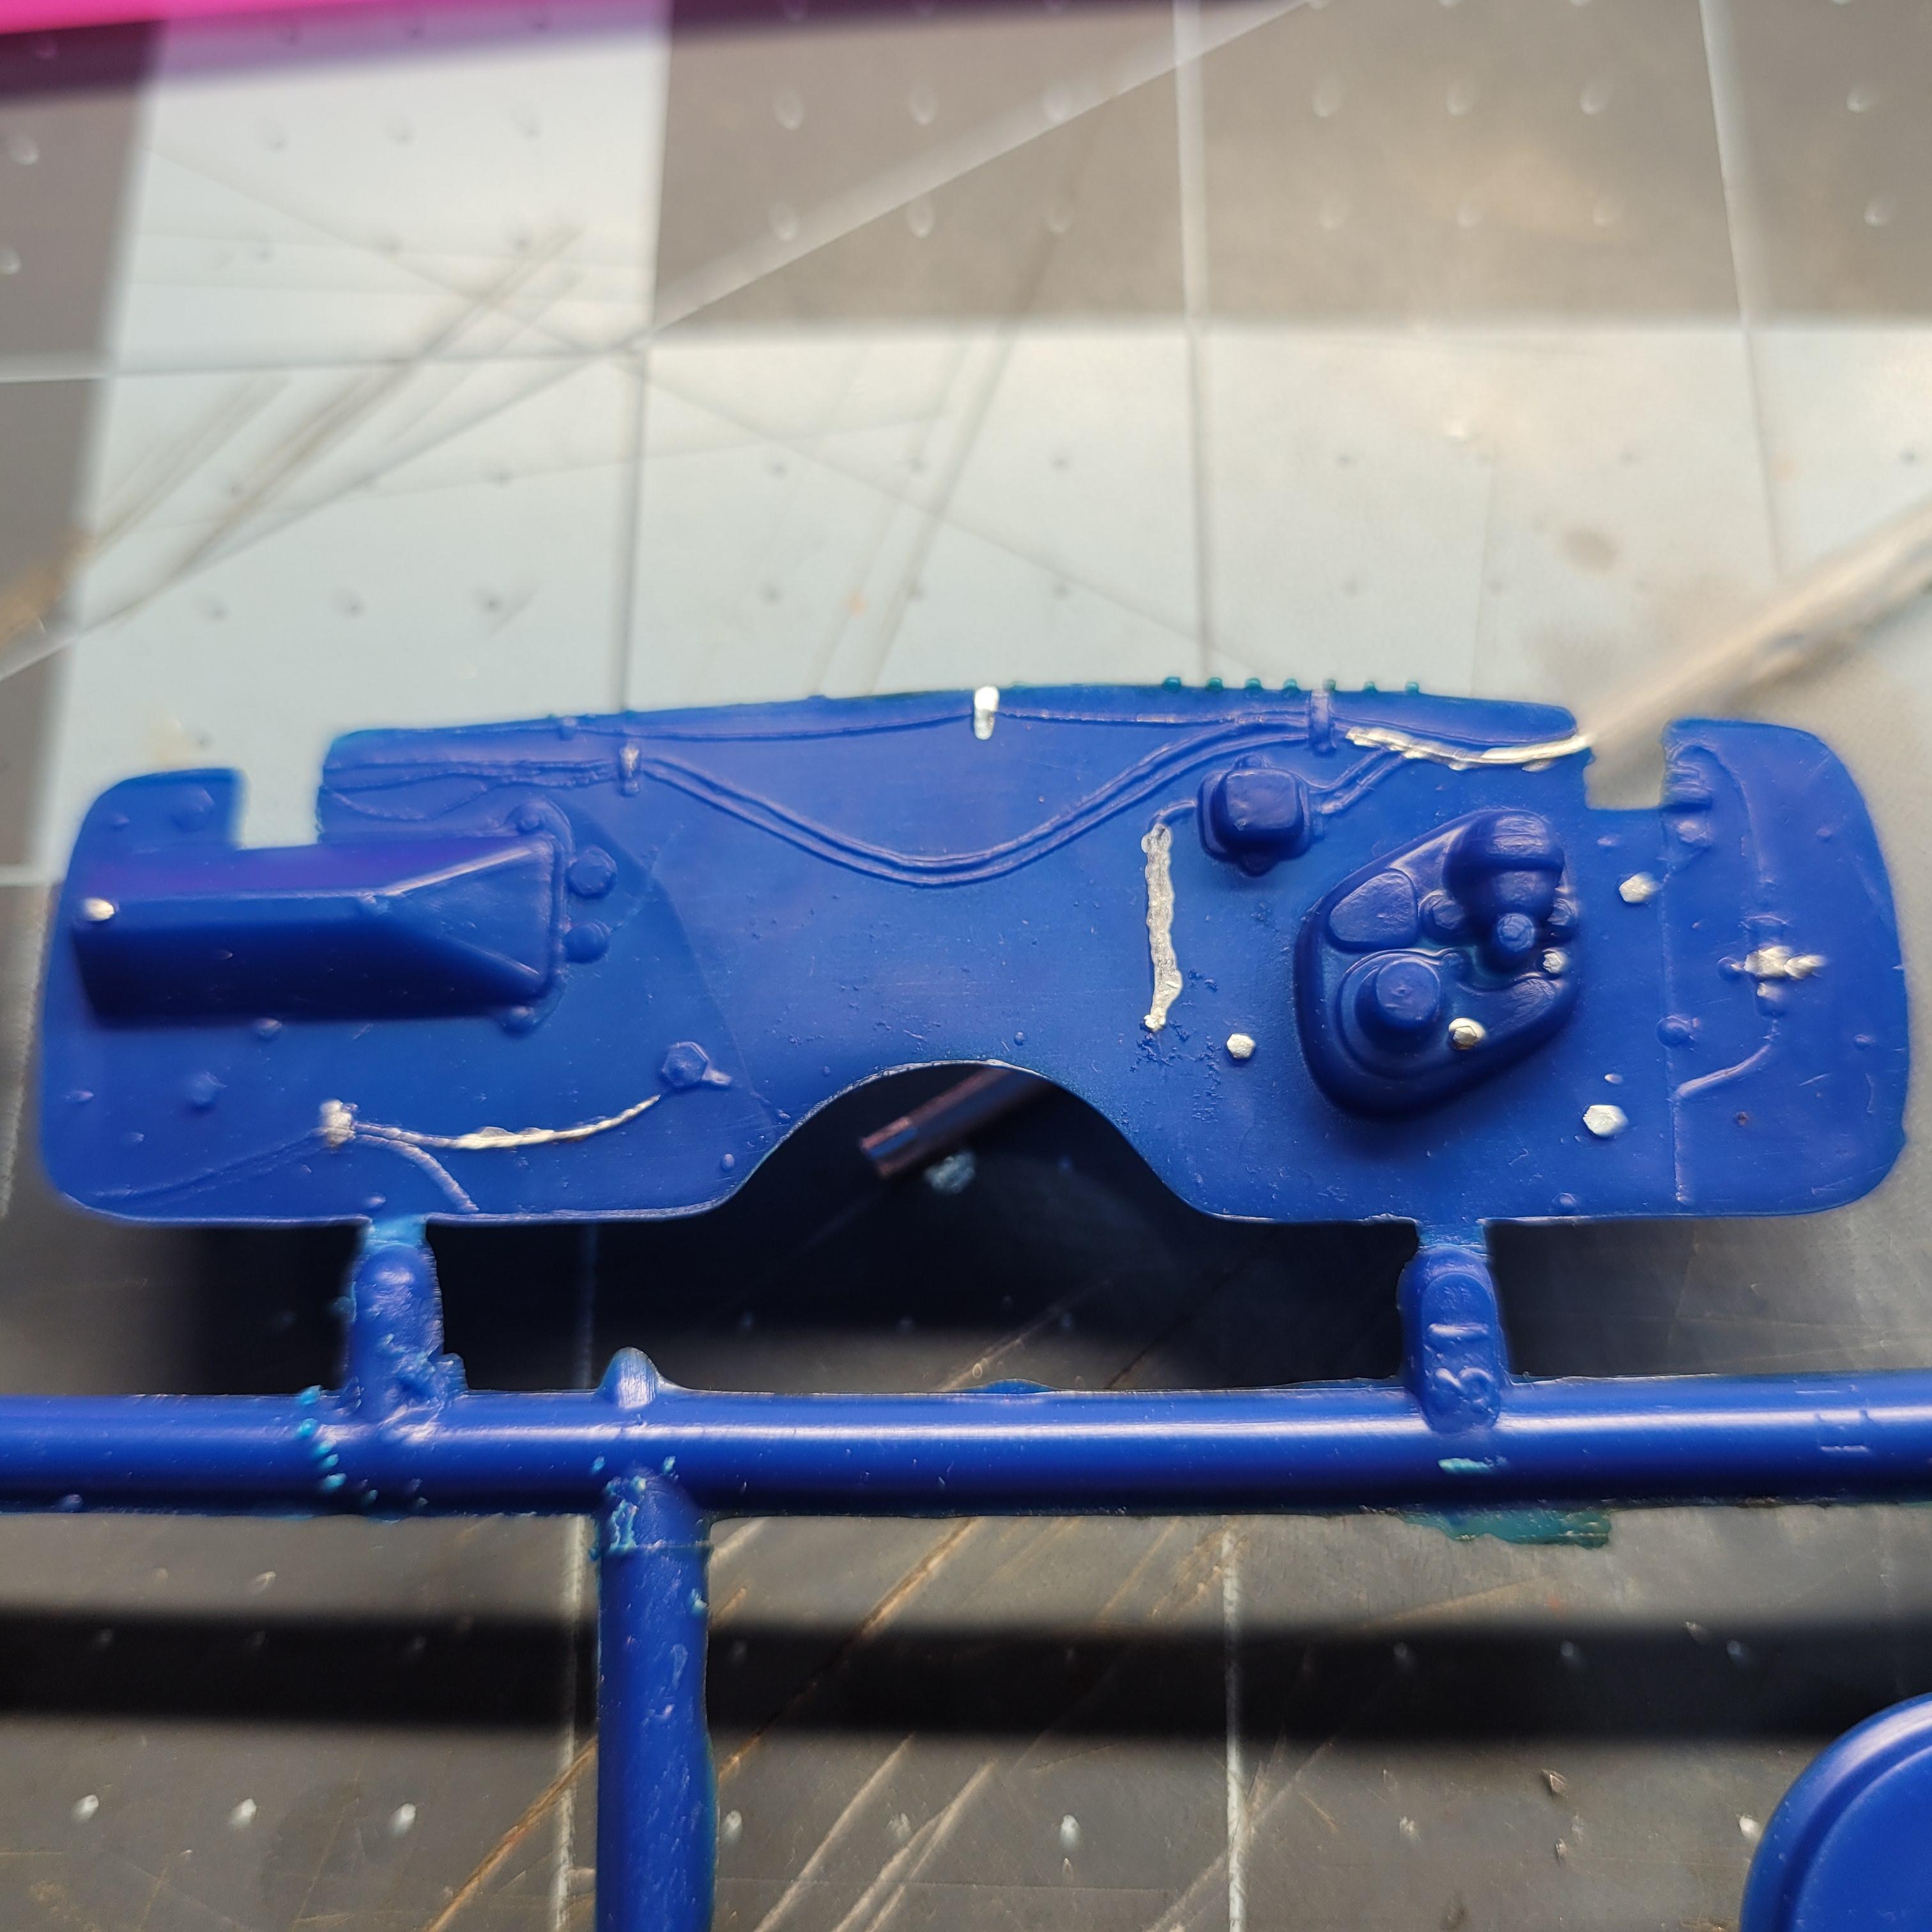
No, I didn't use the varnish with this one. I had varnished it once before, and had applied it too heavily, didn't like the results. That picture is the 3rd attempt at that bumper,just to be straightforward with everything and everybody. I'm still on the learning curve. One thing I want to add ,just too be clear, is even though I thinned the paint to a wash,I applied it very carefully to the grille like a panel liner. A dab in each slot.
-
"Words are hard" is a phrase I've used poking fun at someone.
-
Beautiful Charger,funny about the motor chain, my father's 68 dart had the same. Old school trick. It's a shame it was totaled on you, judging by your recreation. Fantastic underhood details. 👍👍
-
Wires for hoses and lines and stuff...
johnyrotten replied to Lionel's topic in Model Building Questions and Answers
There is, depending on what the material is and the application of the wire, txl vs gxl. Pvc vs silicone ect. Part of the reason why scrounged wire is always hit or miss. -
Marty's got them
-
Sharp looking Charger. 👍👍
-
Call Doc Brown
-
Awesome mock up, I'd go with the padded seats, or add a chamfer to the holes to better resemble dimple die holes,that's just me. Looking forward to the progress on this one.
-
Hanley's personal stash
-
1970 Plymouth Roadrunner and occasional Ford Torino
johnyrotten replied to ĆĄŢŜandBĄTŠ's topic in WIP: Model Cars
Hahaha, I've got the attitude, now if I only had the talent...- 6 replies
-
- 1
-

-
- plymouth
- roadrunner
- (and 2 more)
-
Johan turbine kits
-
Release the hounds!
-
Rubber padded room
-
1970 Plymouth Roadrunner and occasional Ford Torino
johnyrotten replied to ĆĄŢŜandBĄTŠ's topic in WIP: Model Cars
Nice work with the weathering, funny you mentioned the eye shadow. I've actually used that to add a metallic sheen on Mufflers and other parts,a suggestion from my wife. Thinking outside of the box sometimes goes a long way.- 6 replies
-
- 2
-
-
- plymouth
- roadrunner
- (and 2 more)
-
Next you'll use a micrometer as a precision c clamp.