OldNYJim
-
Posts
252 -
Joined
-
Last visited
Content Type
Profiles
Forums
Events
Gallery
Everything posted by OldNYJim
-

What did you see on the road today?
OldNYJim replied to Harry P.'s topic in General Automotive Talk (Trucks and Cars)
That’s what the little truck is for ? -
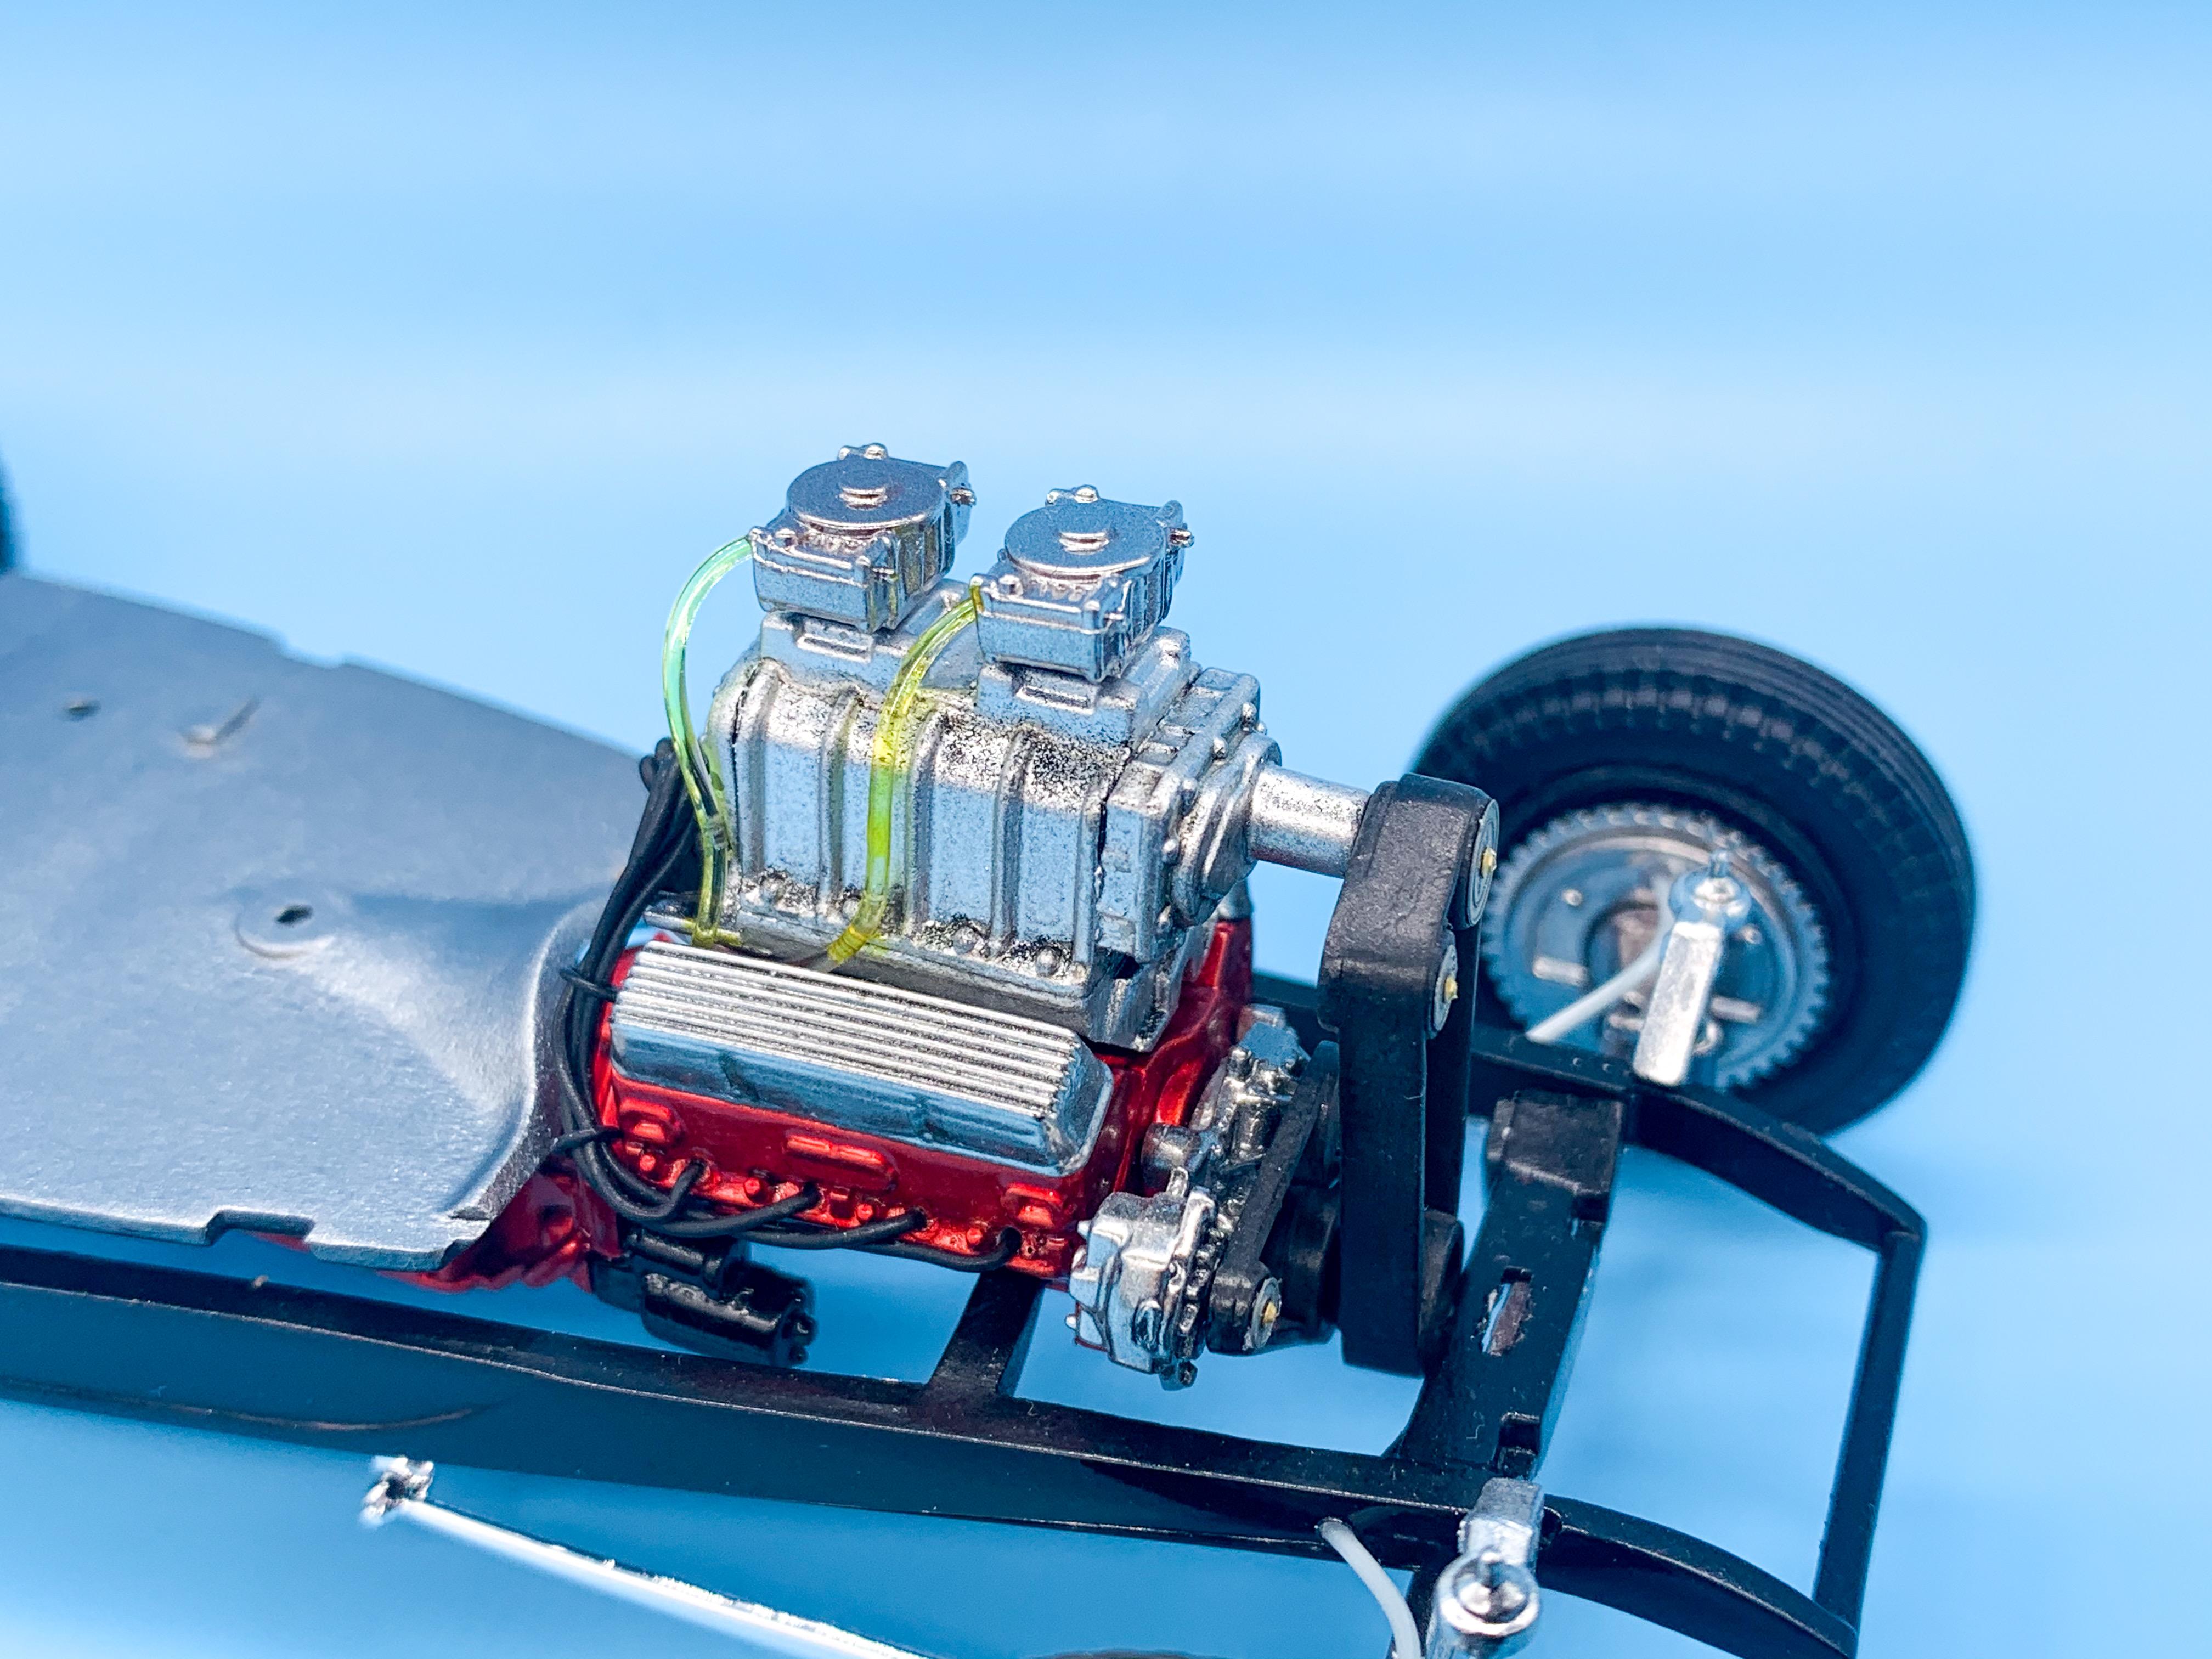
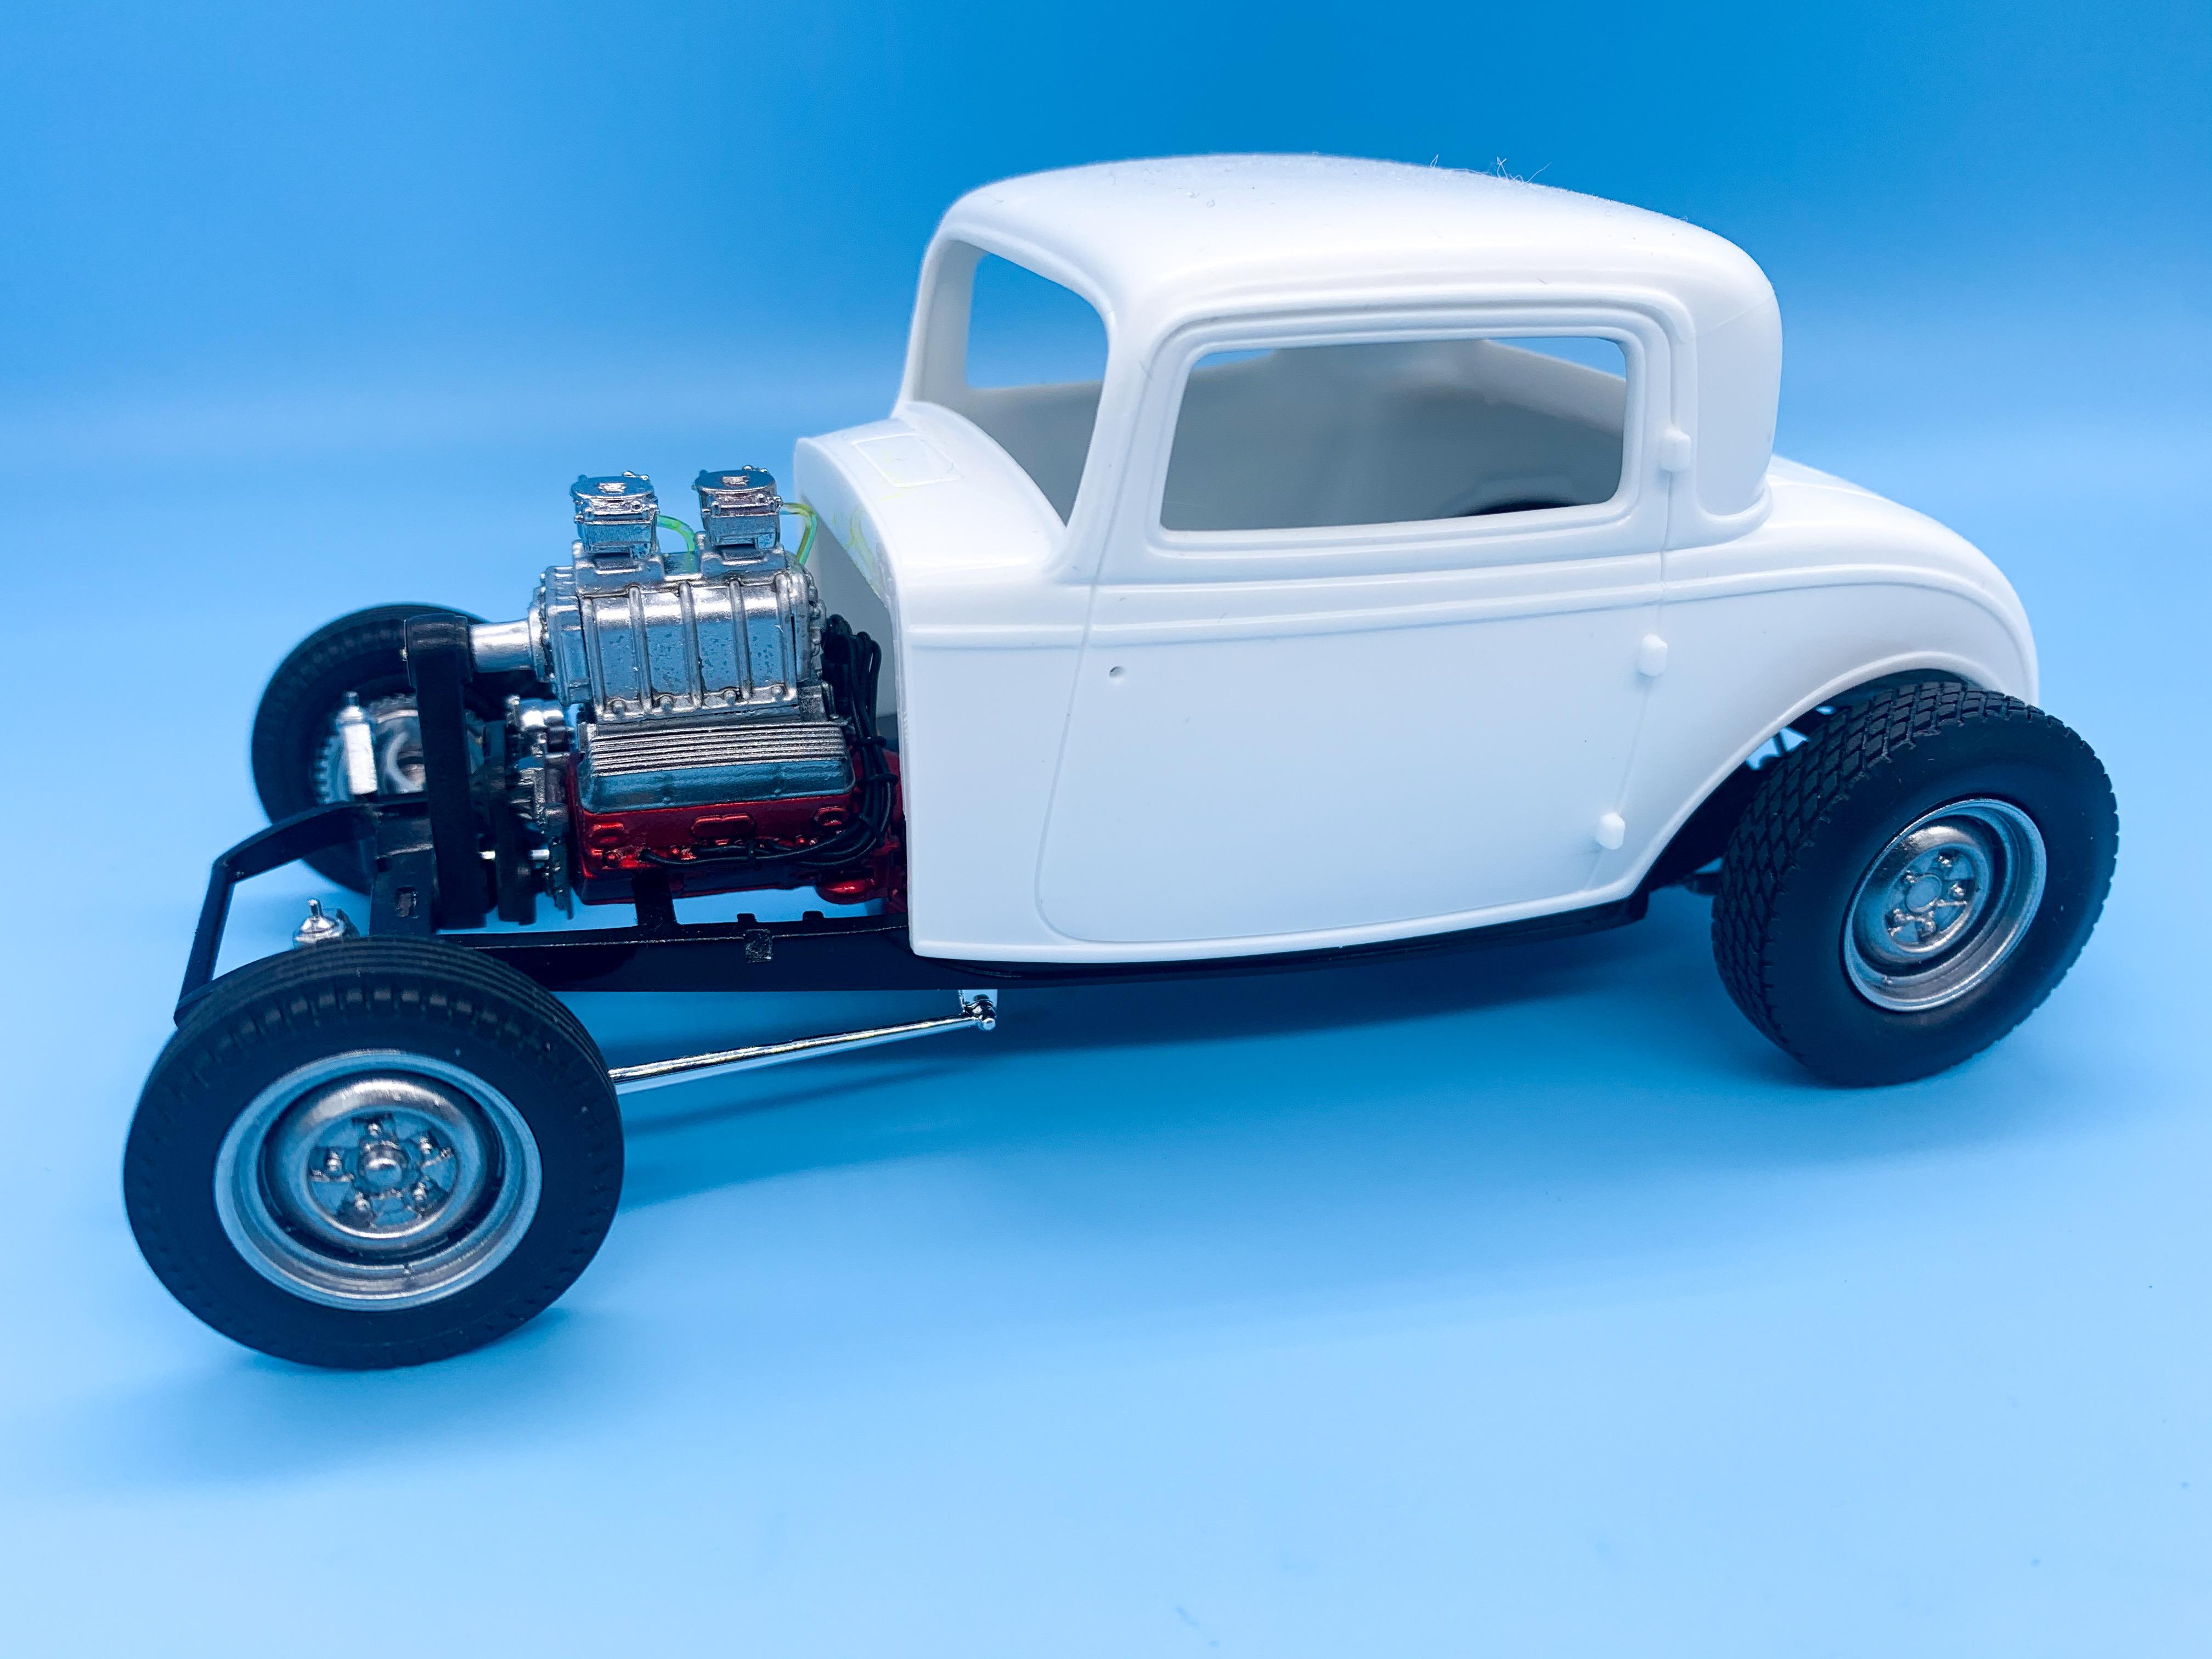
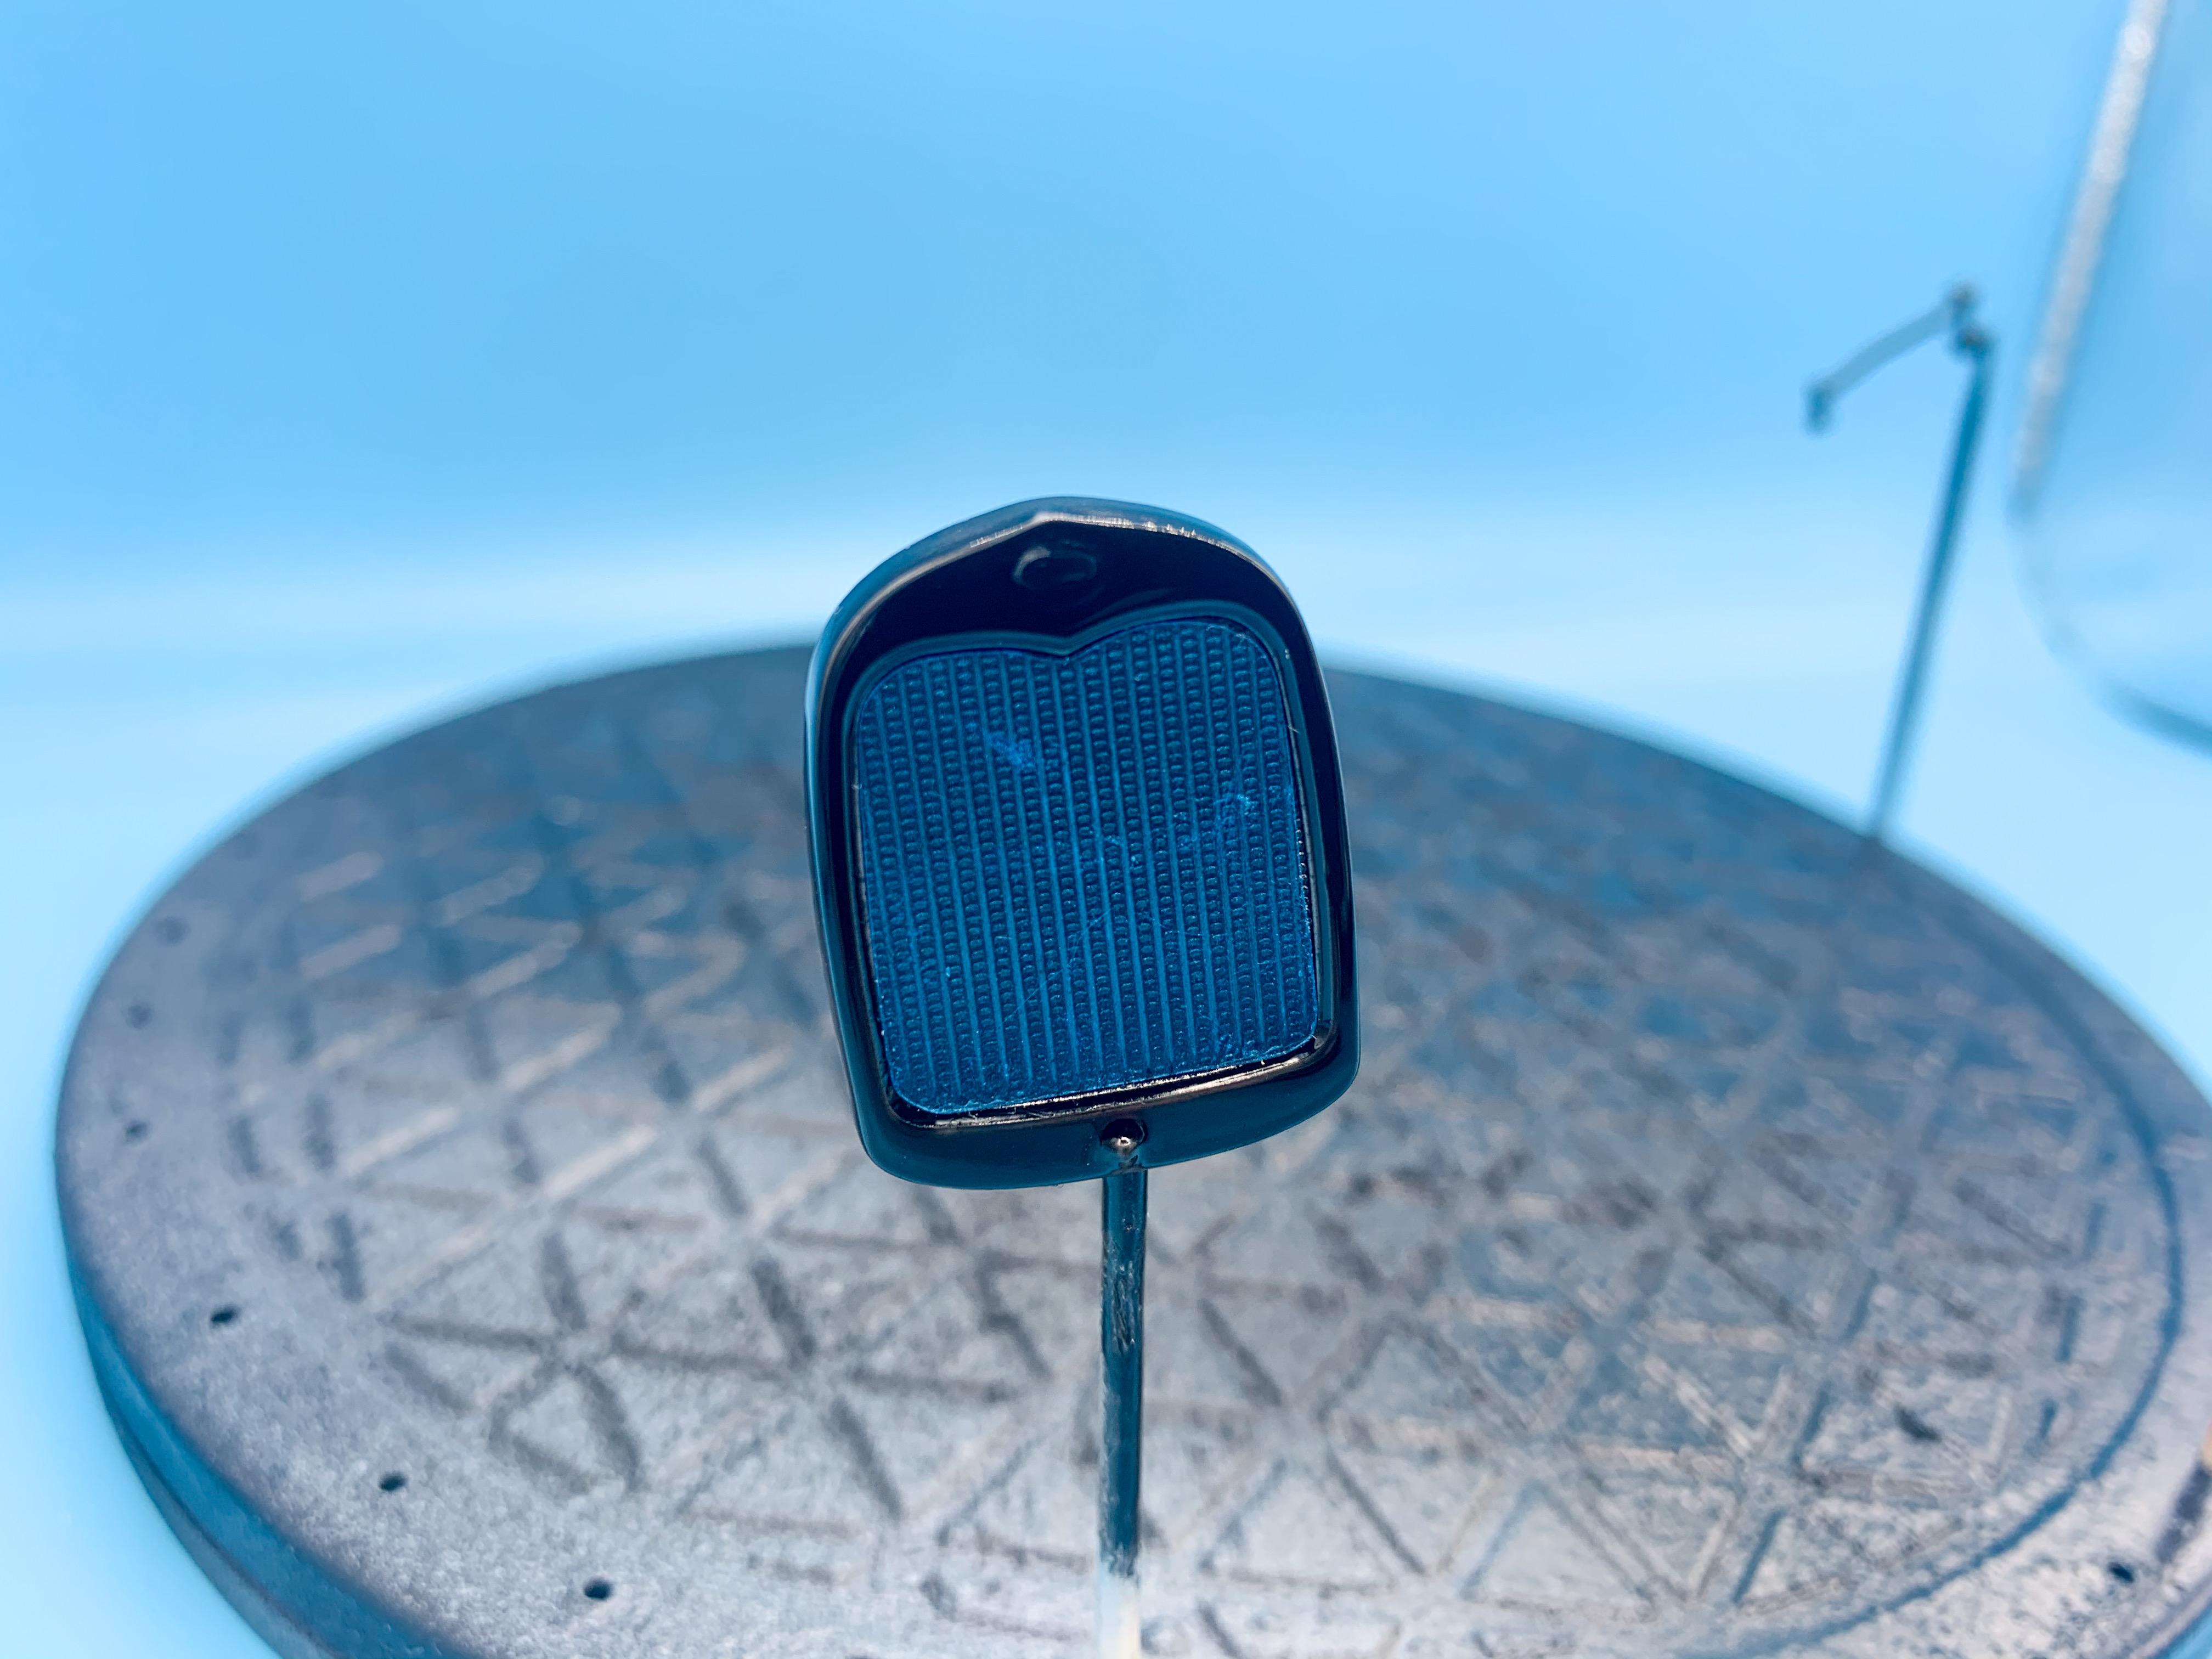
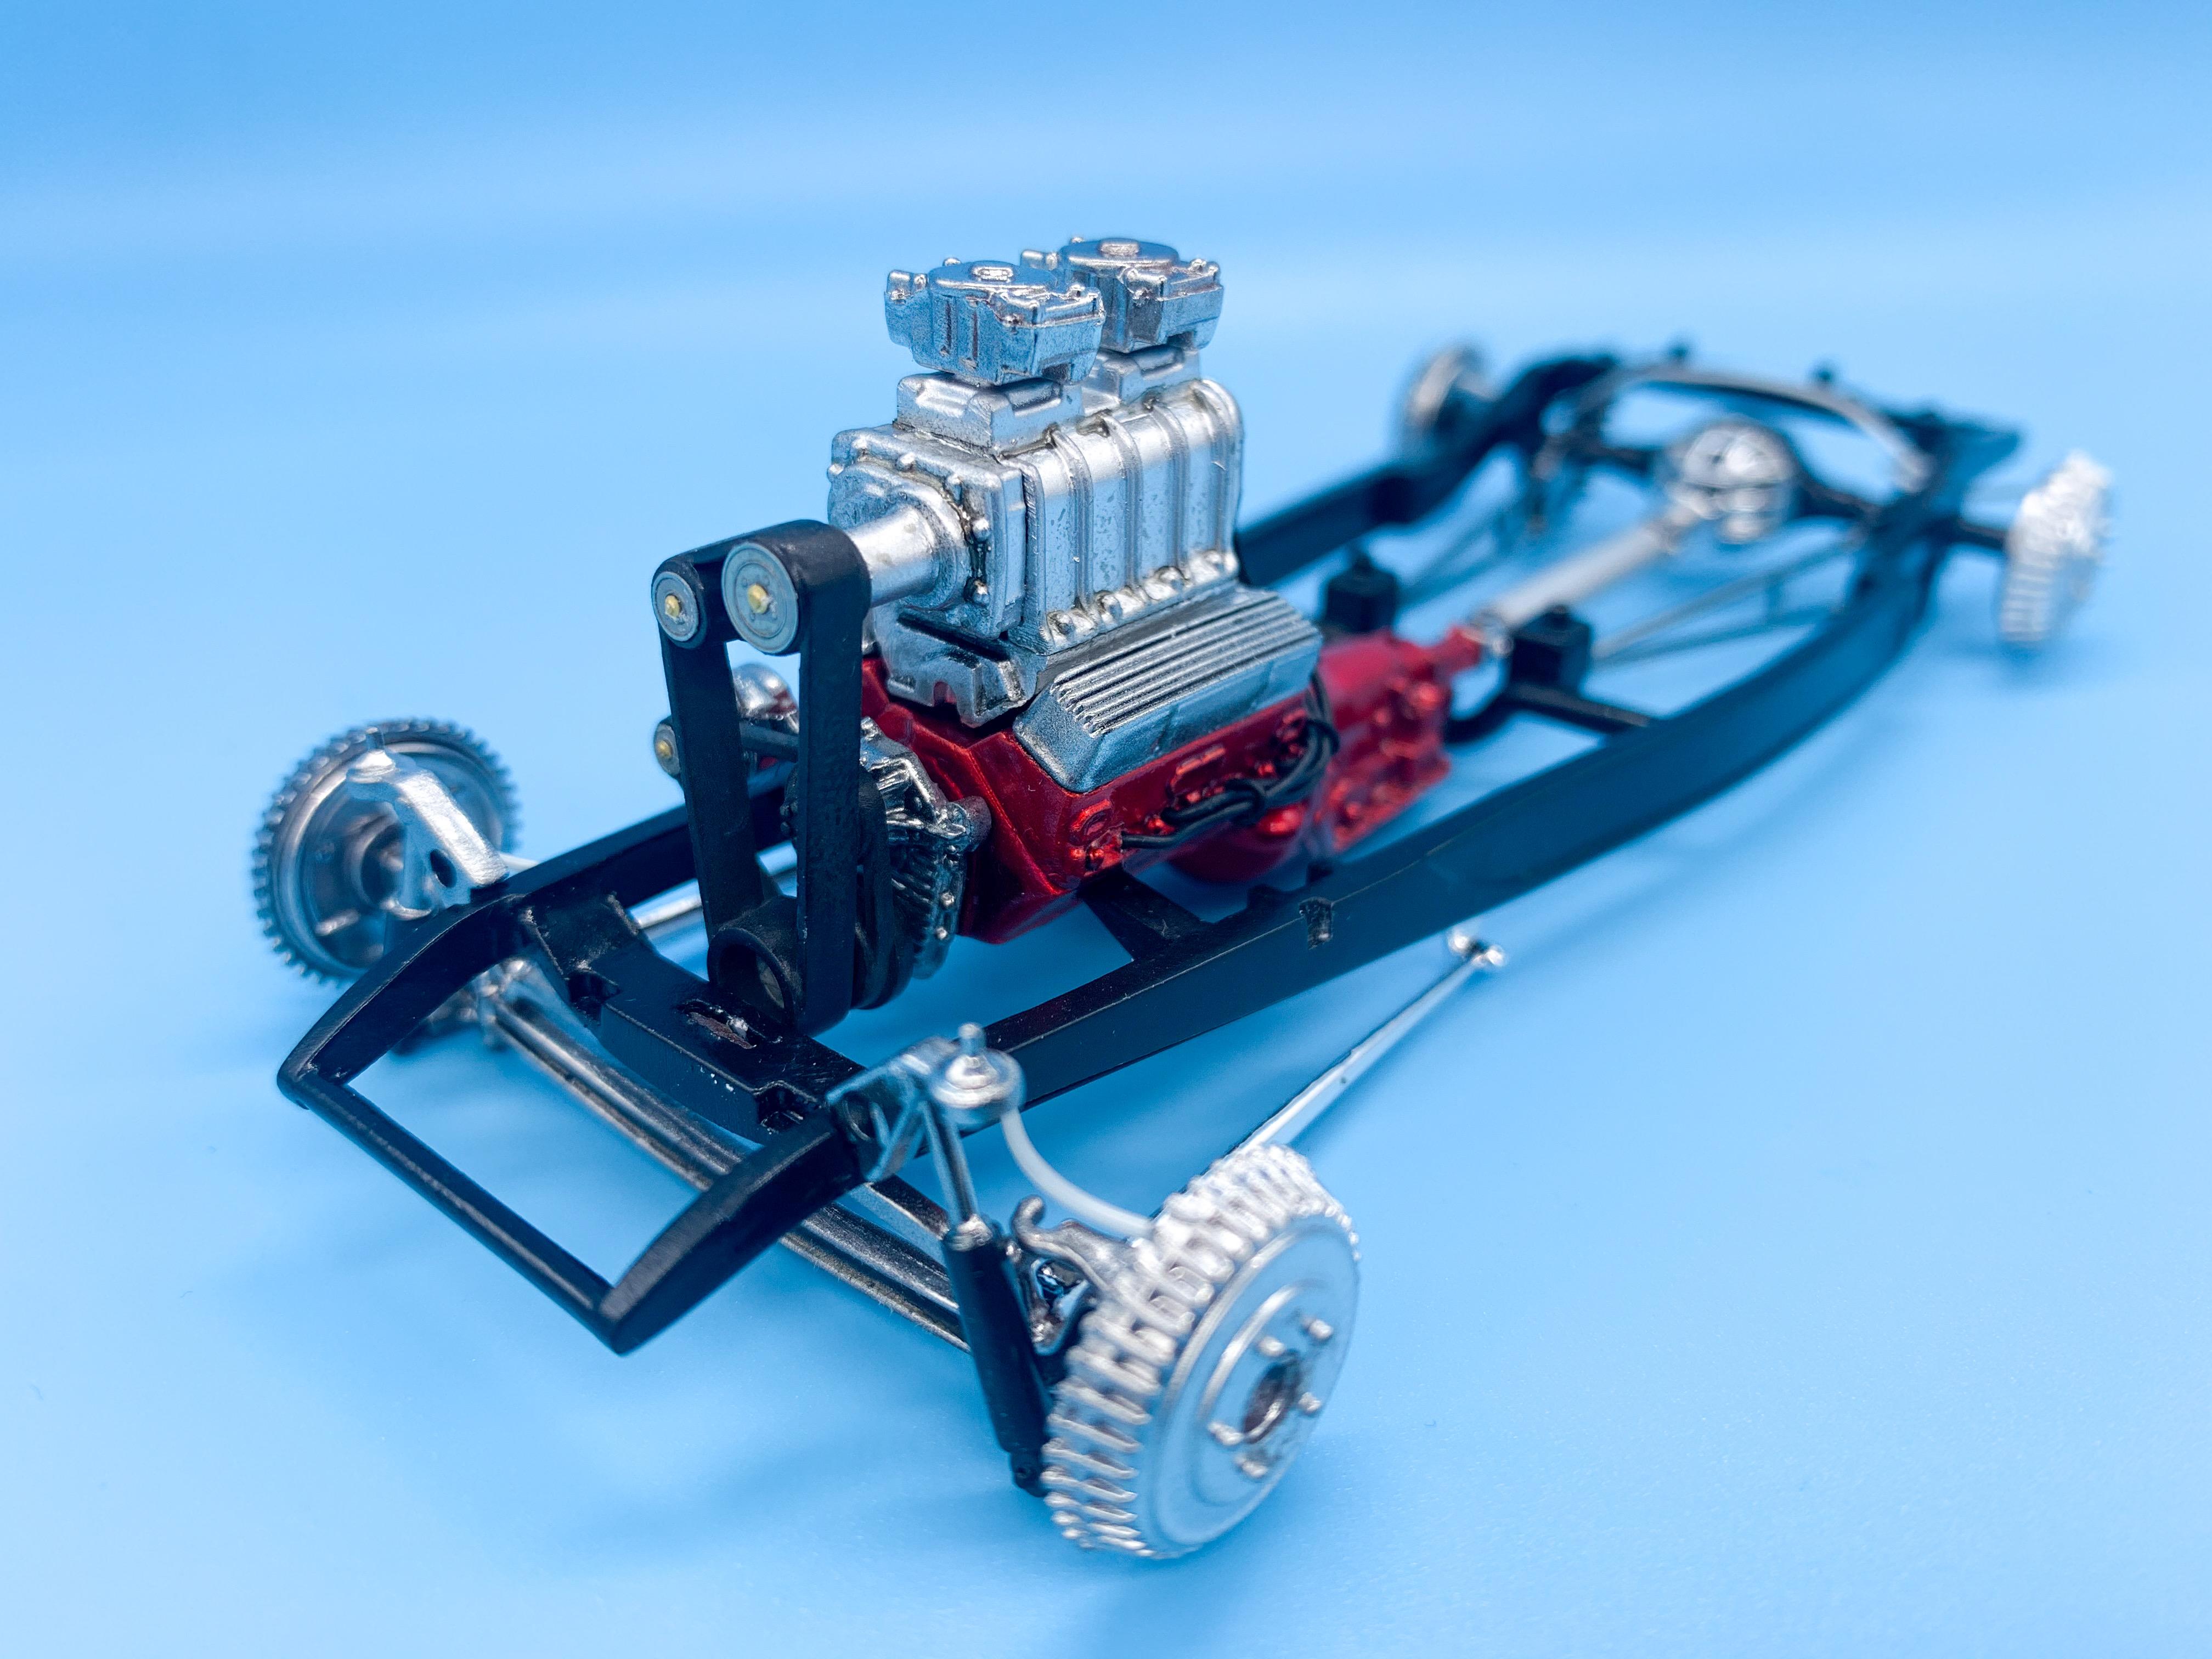
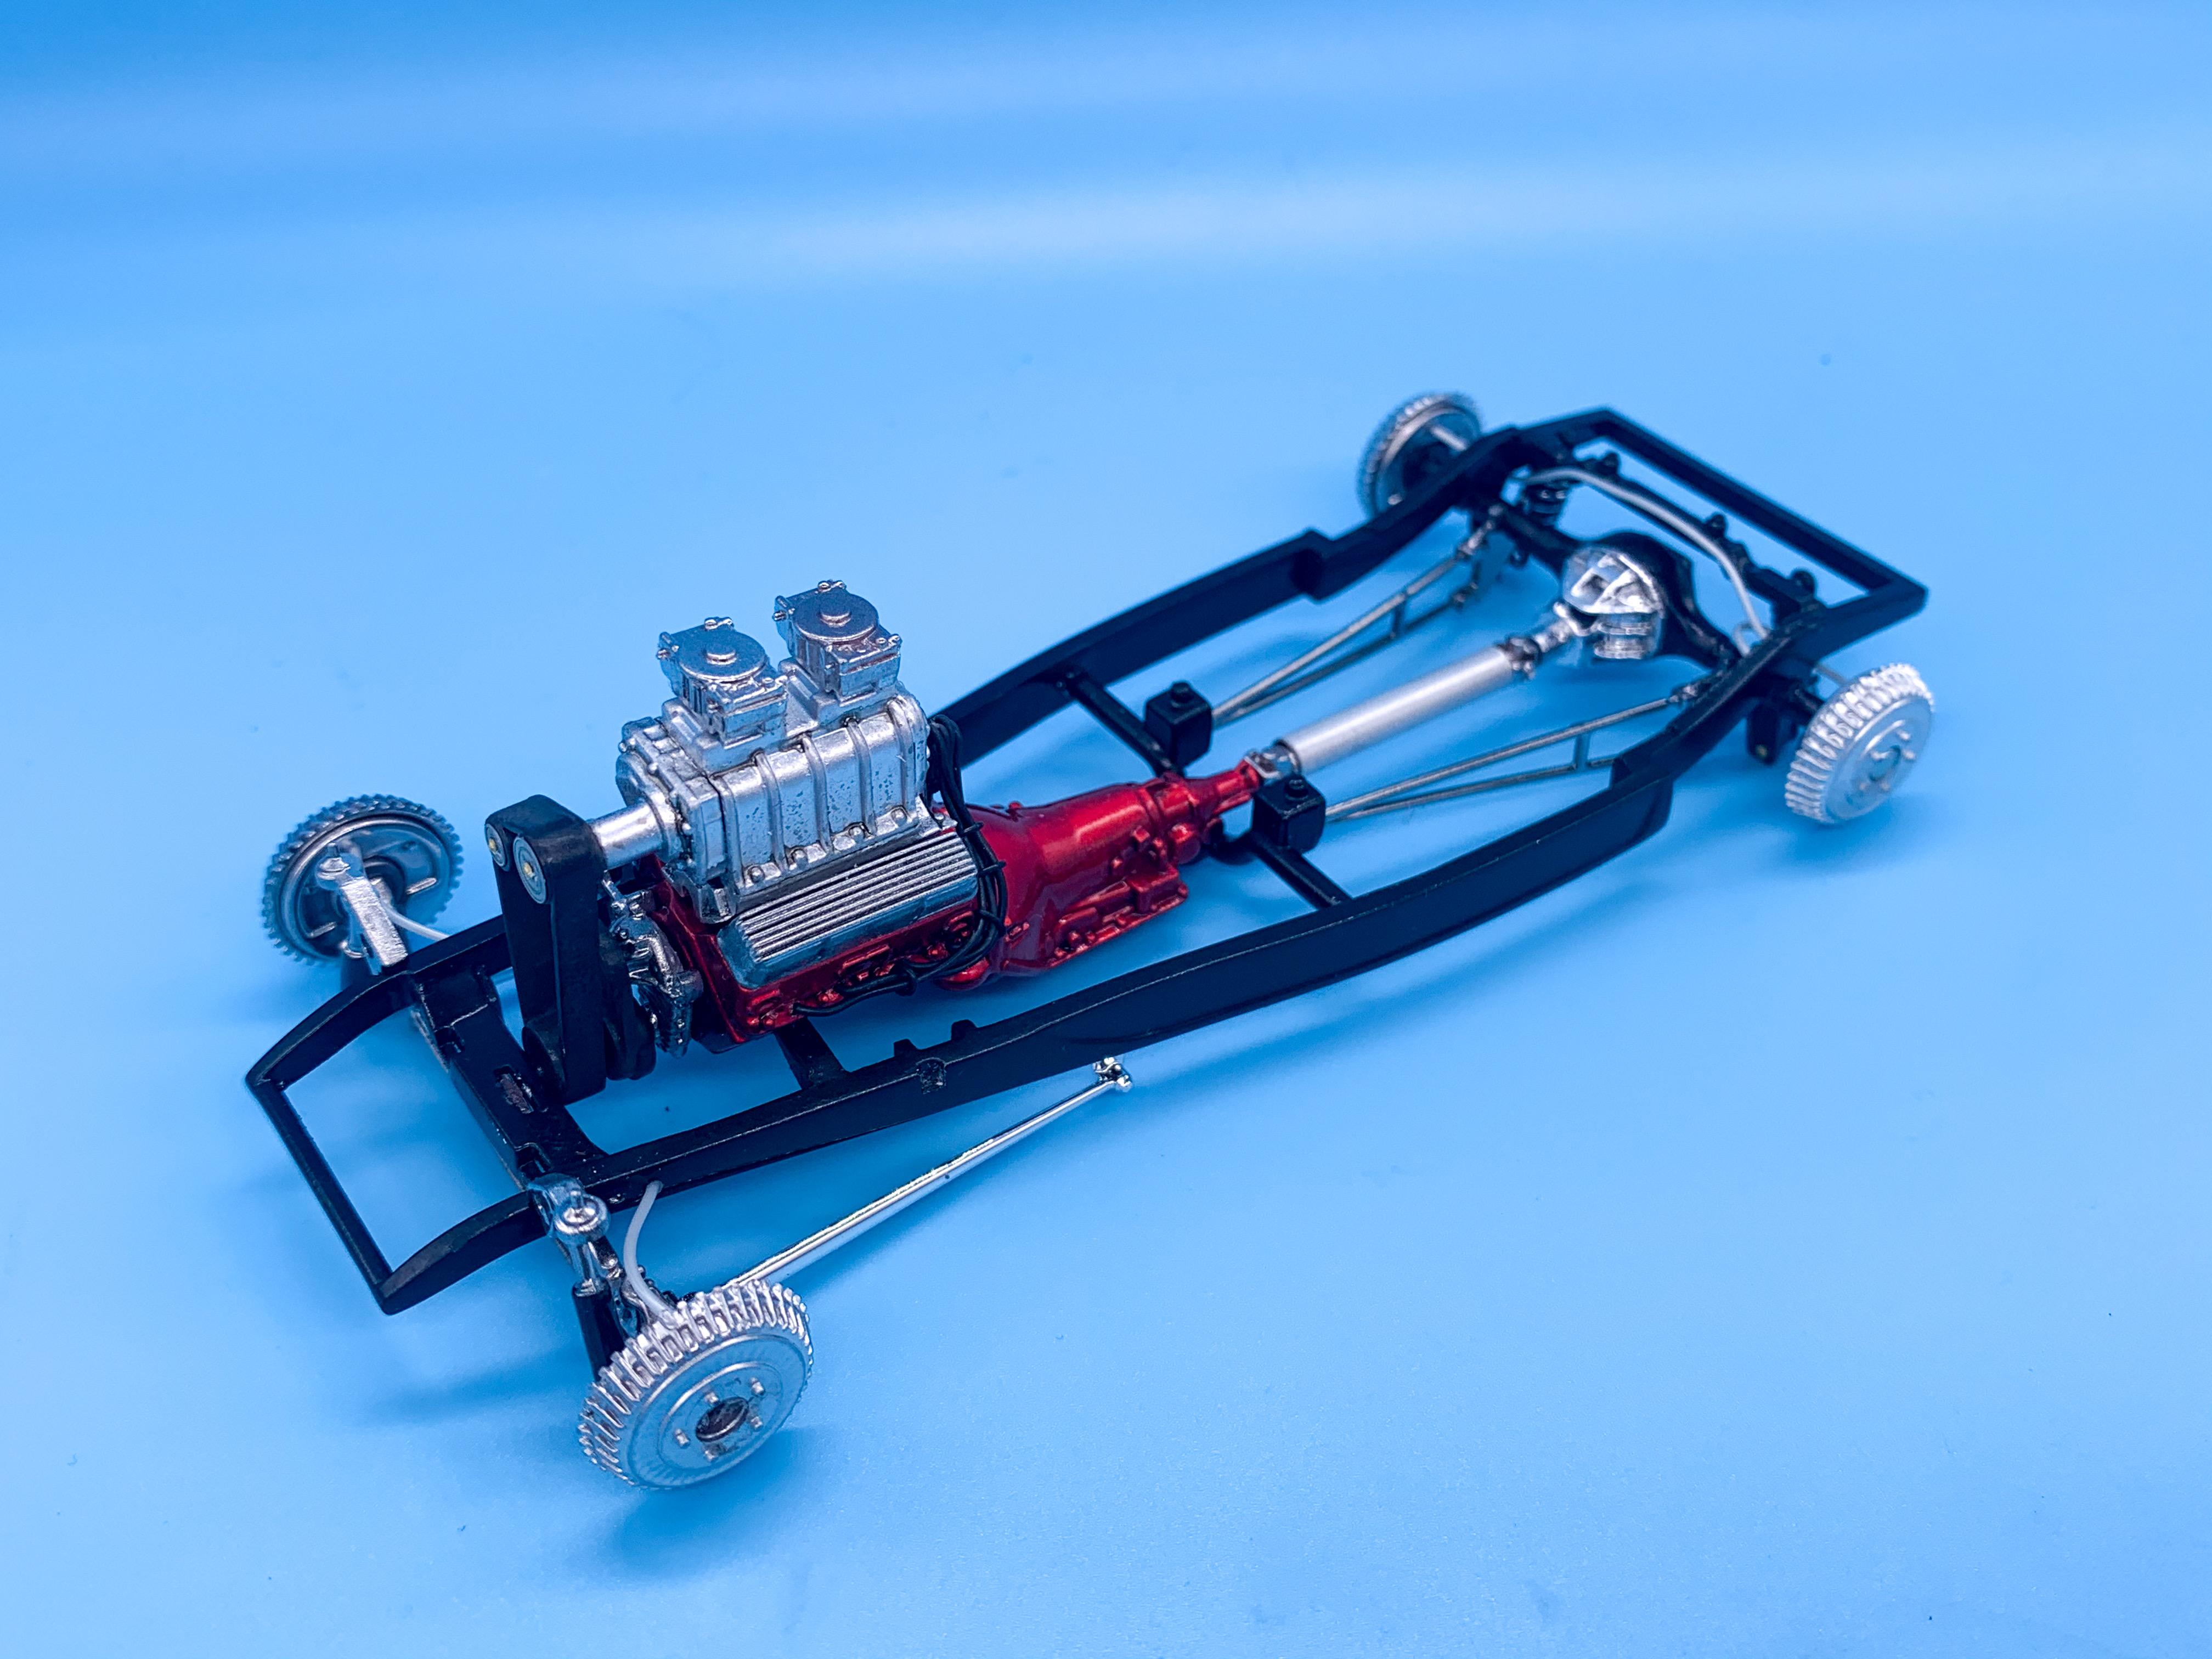
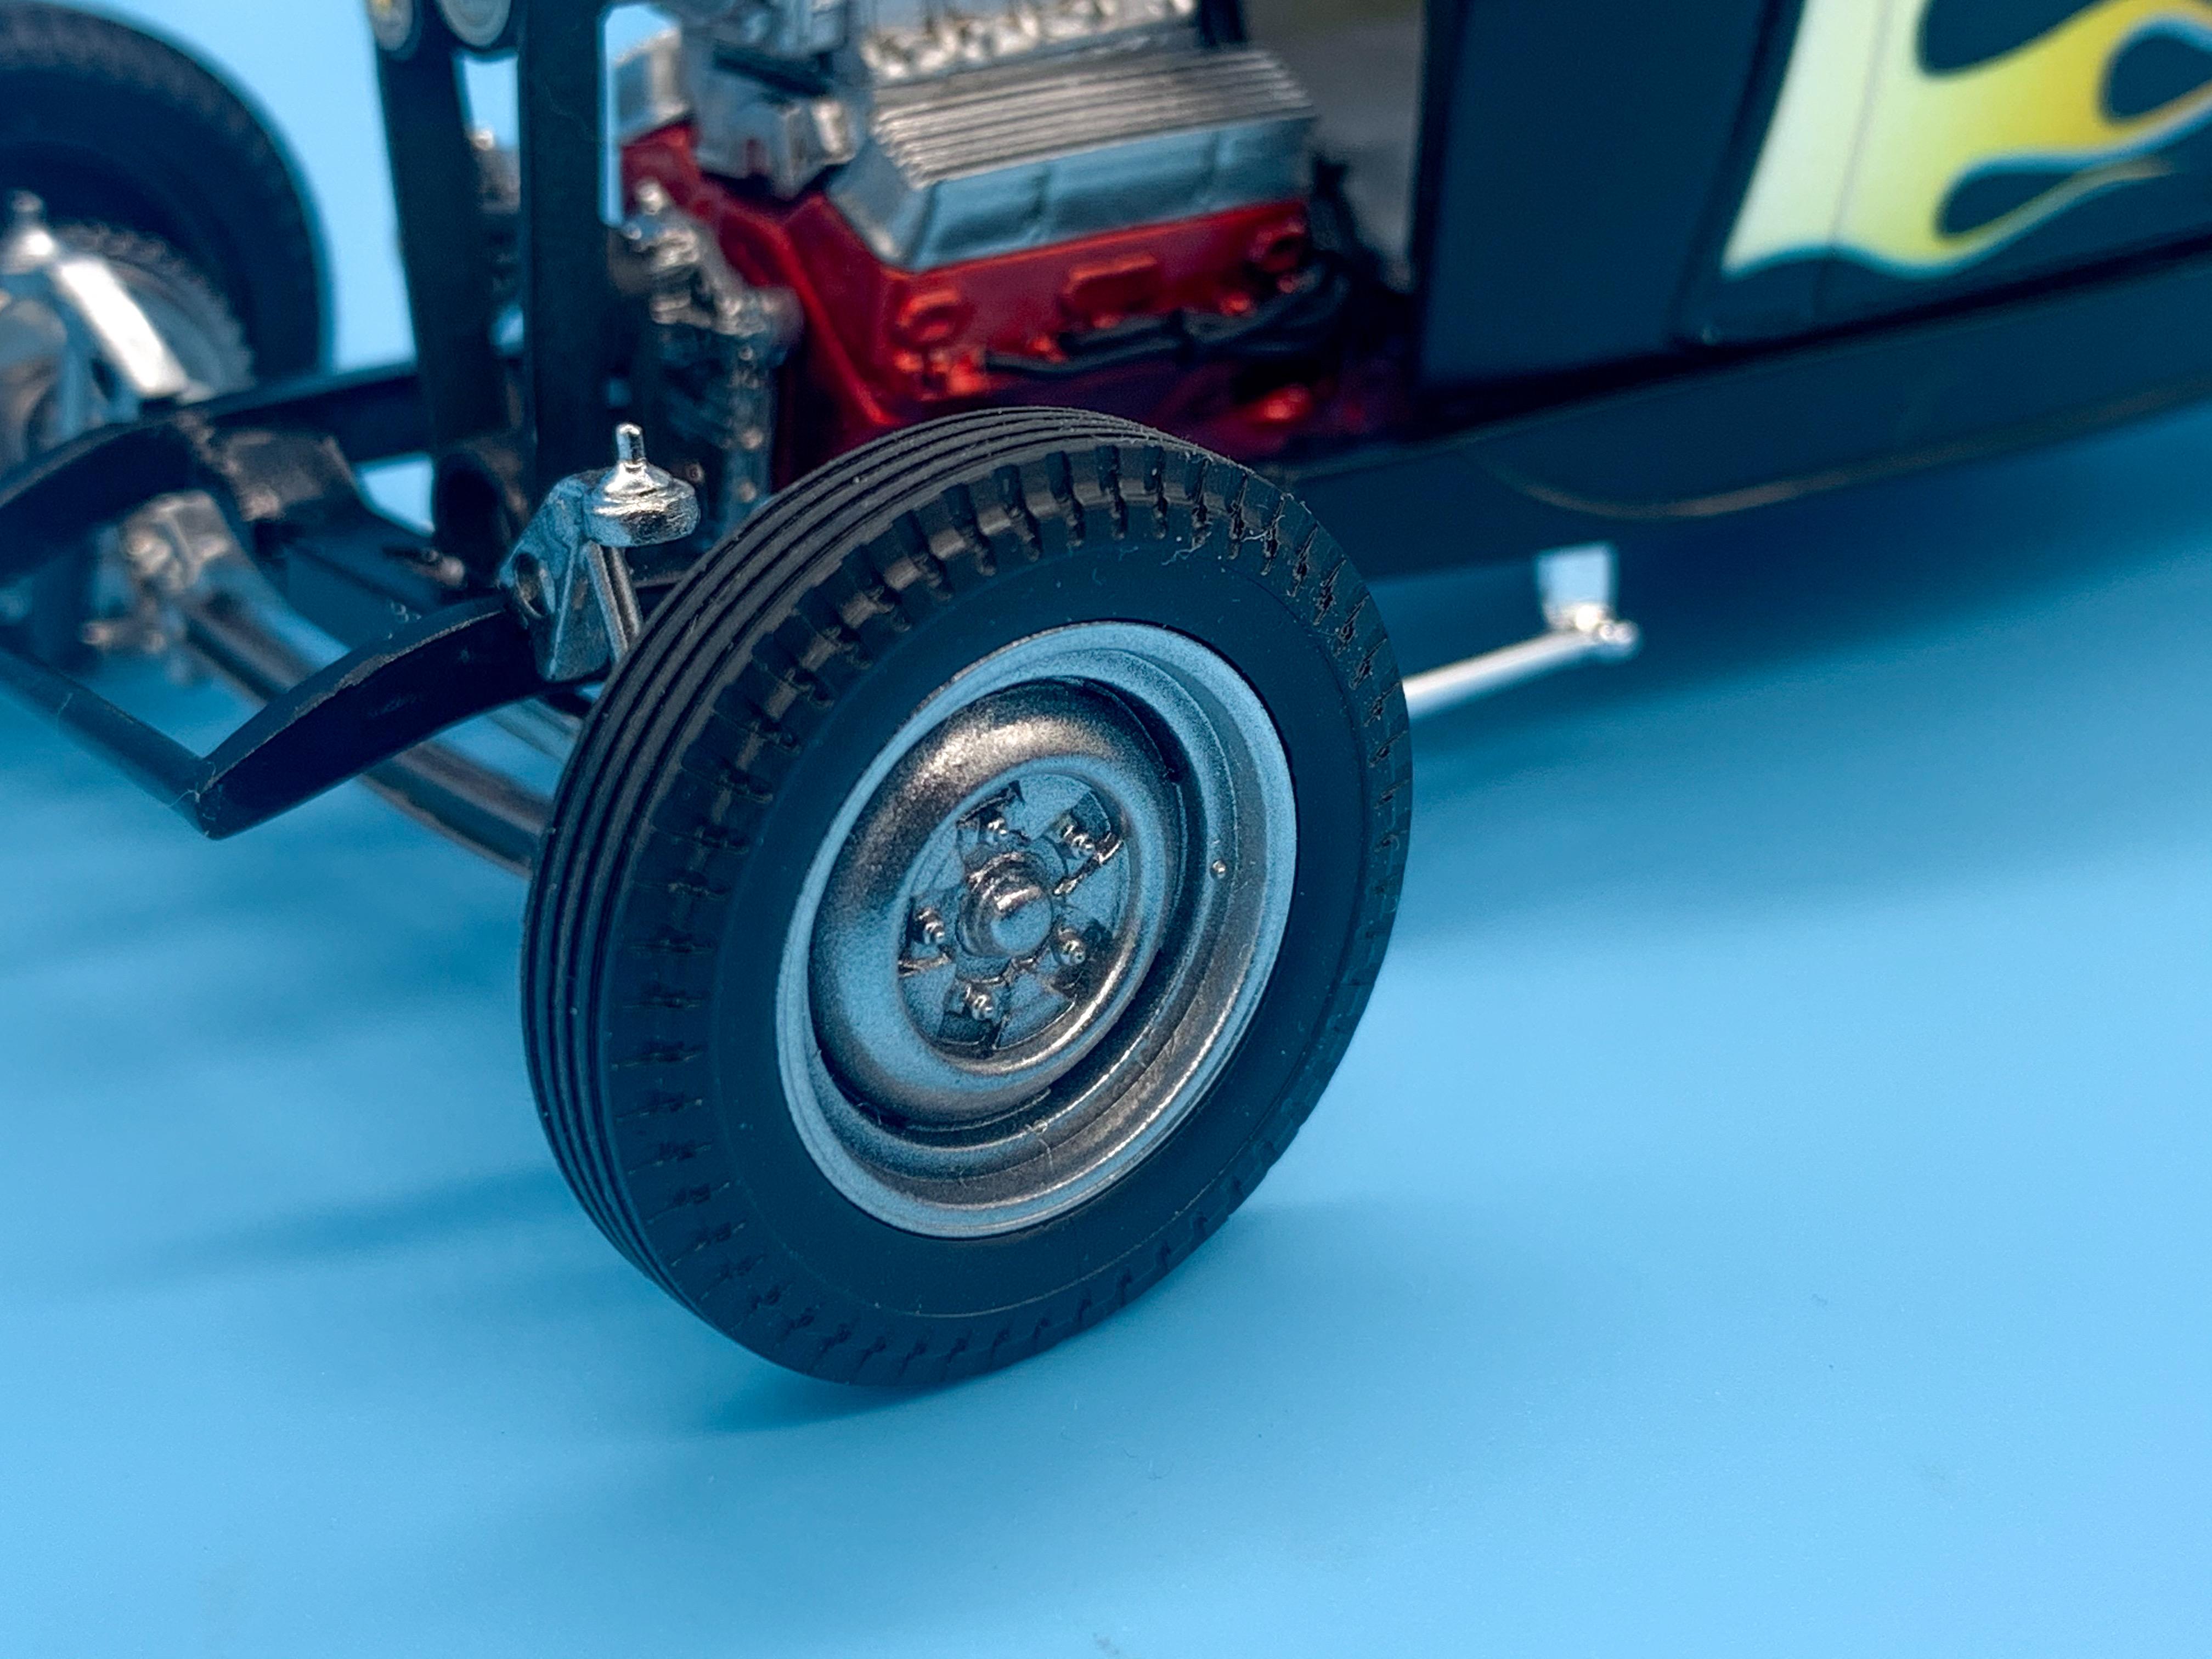
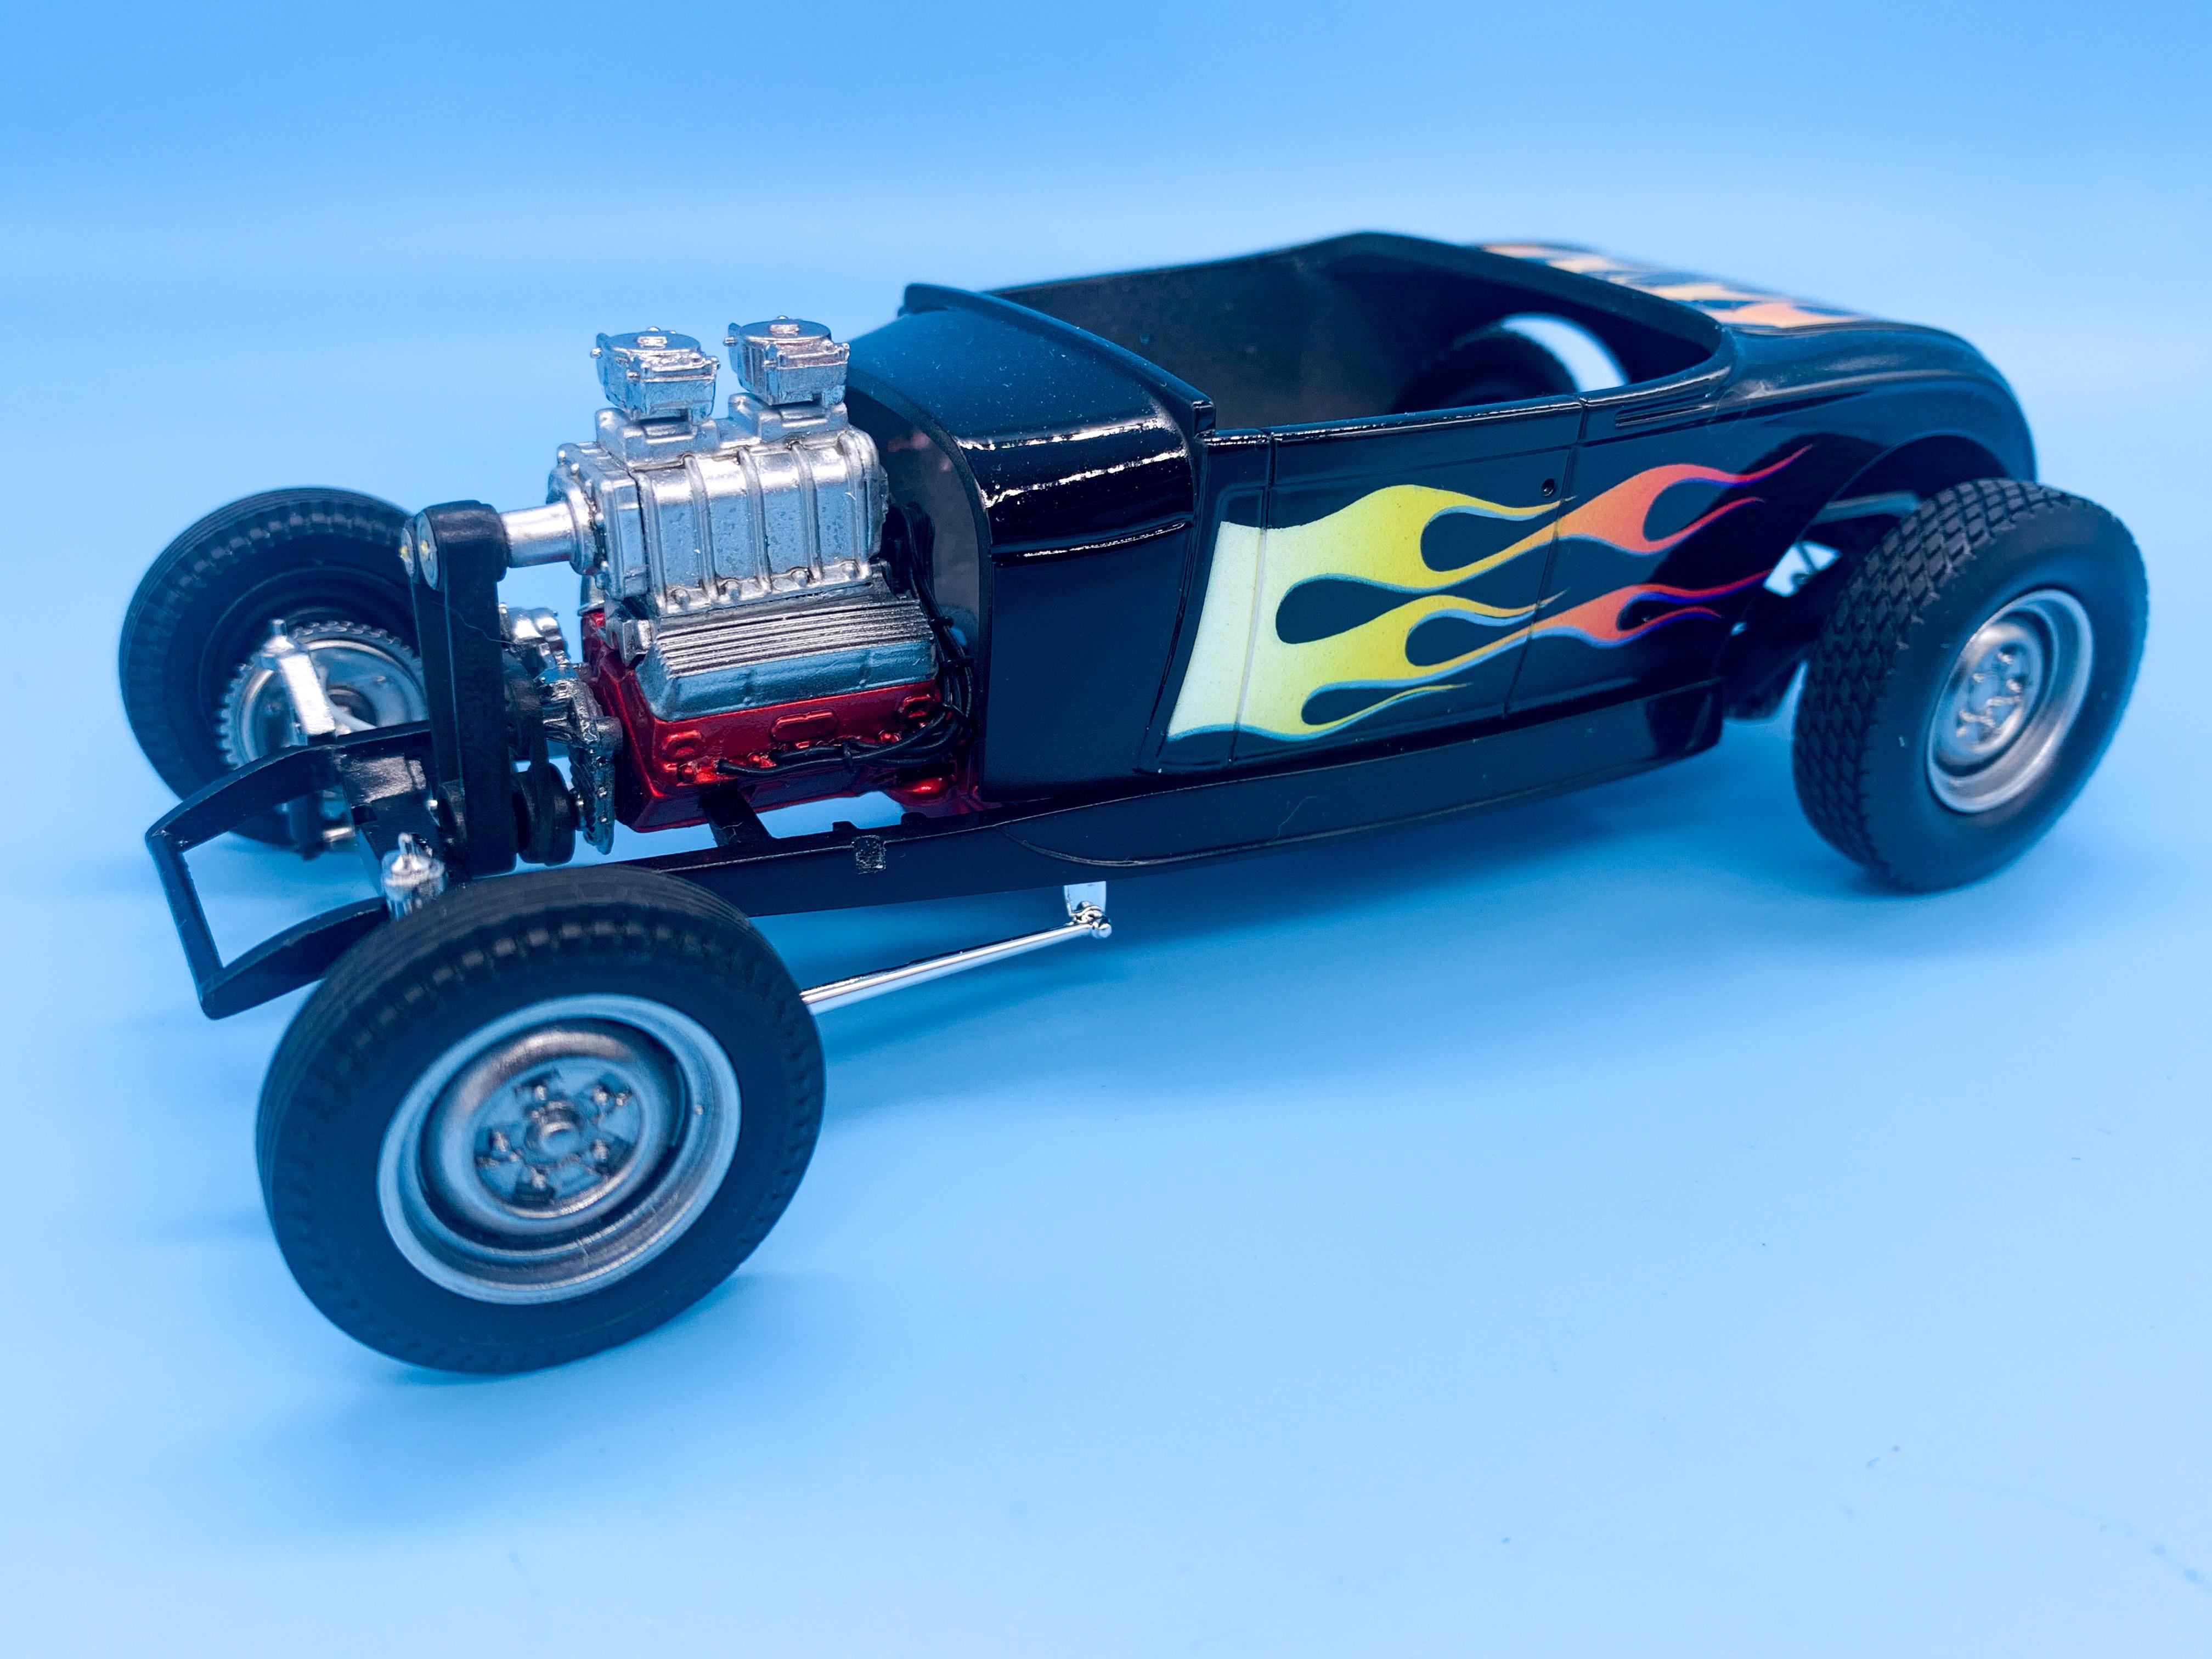
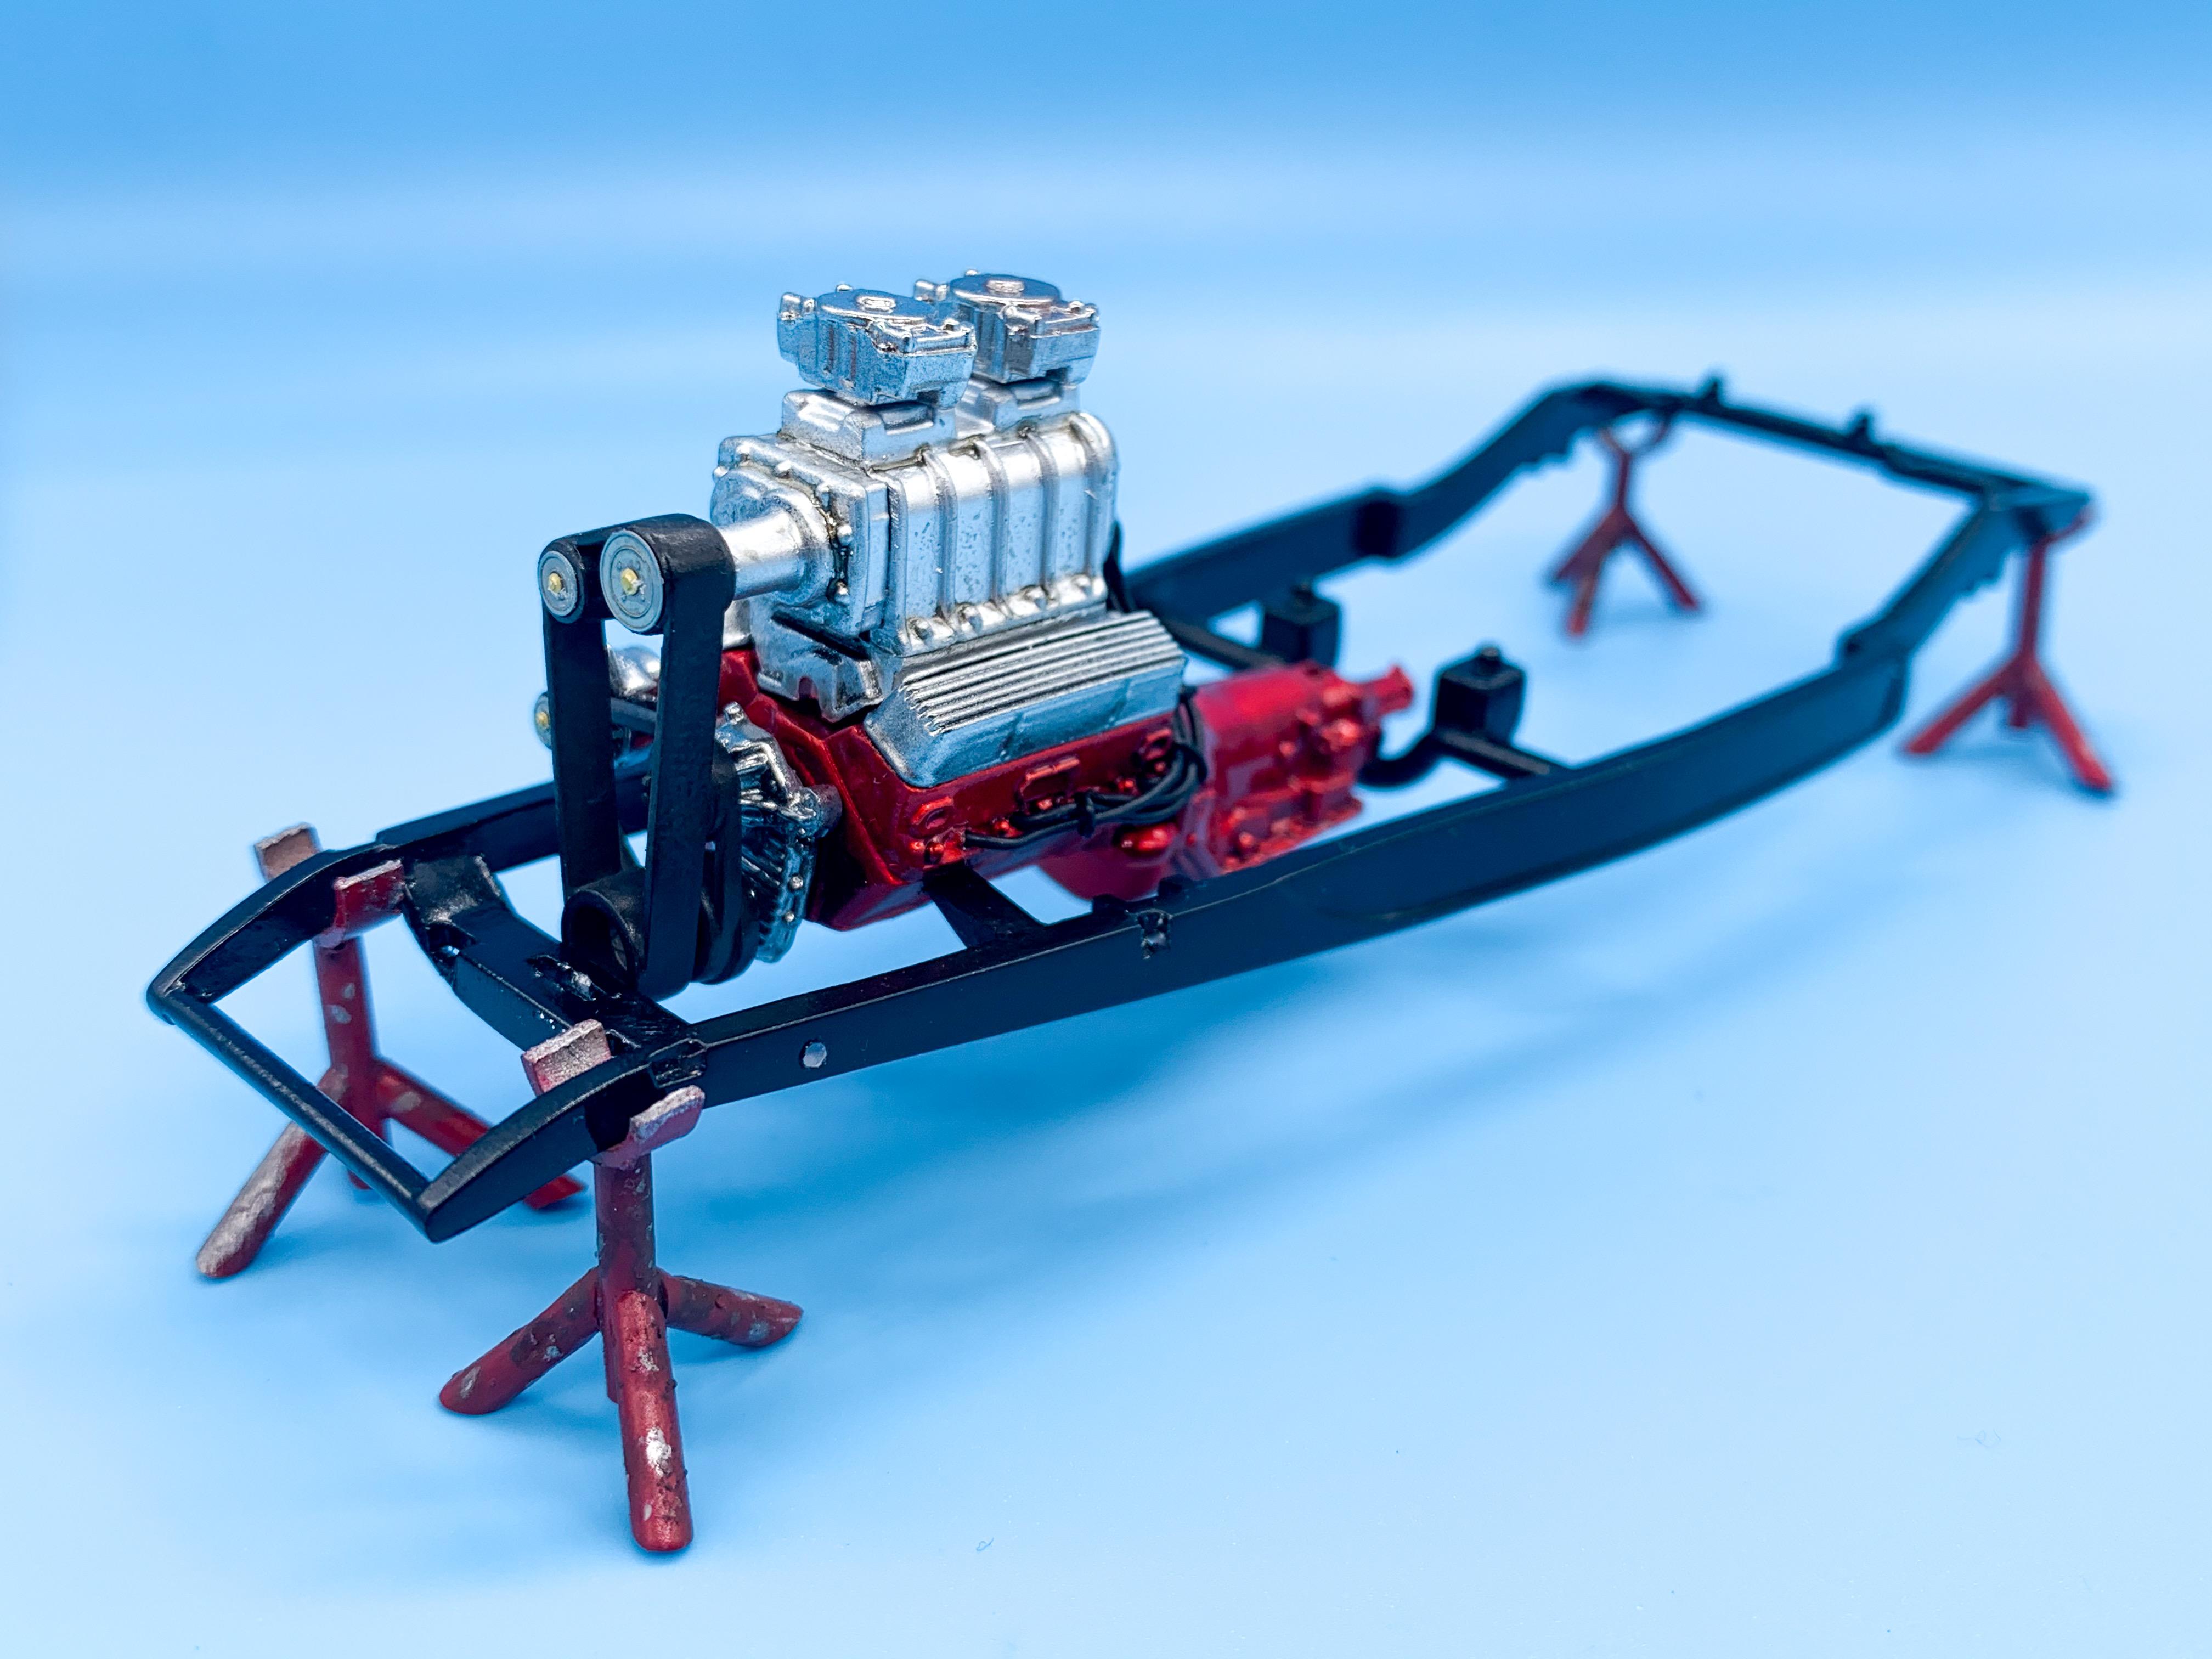
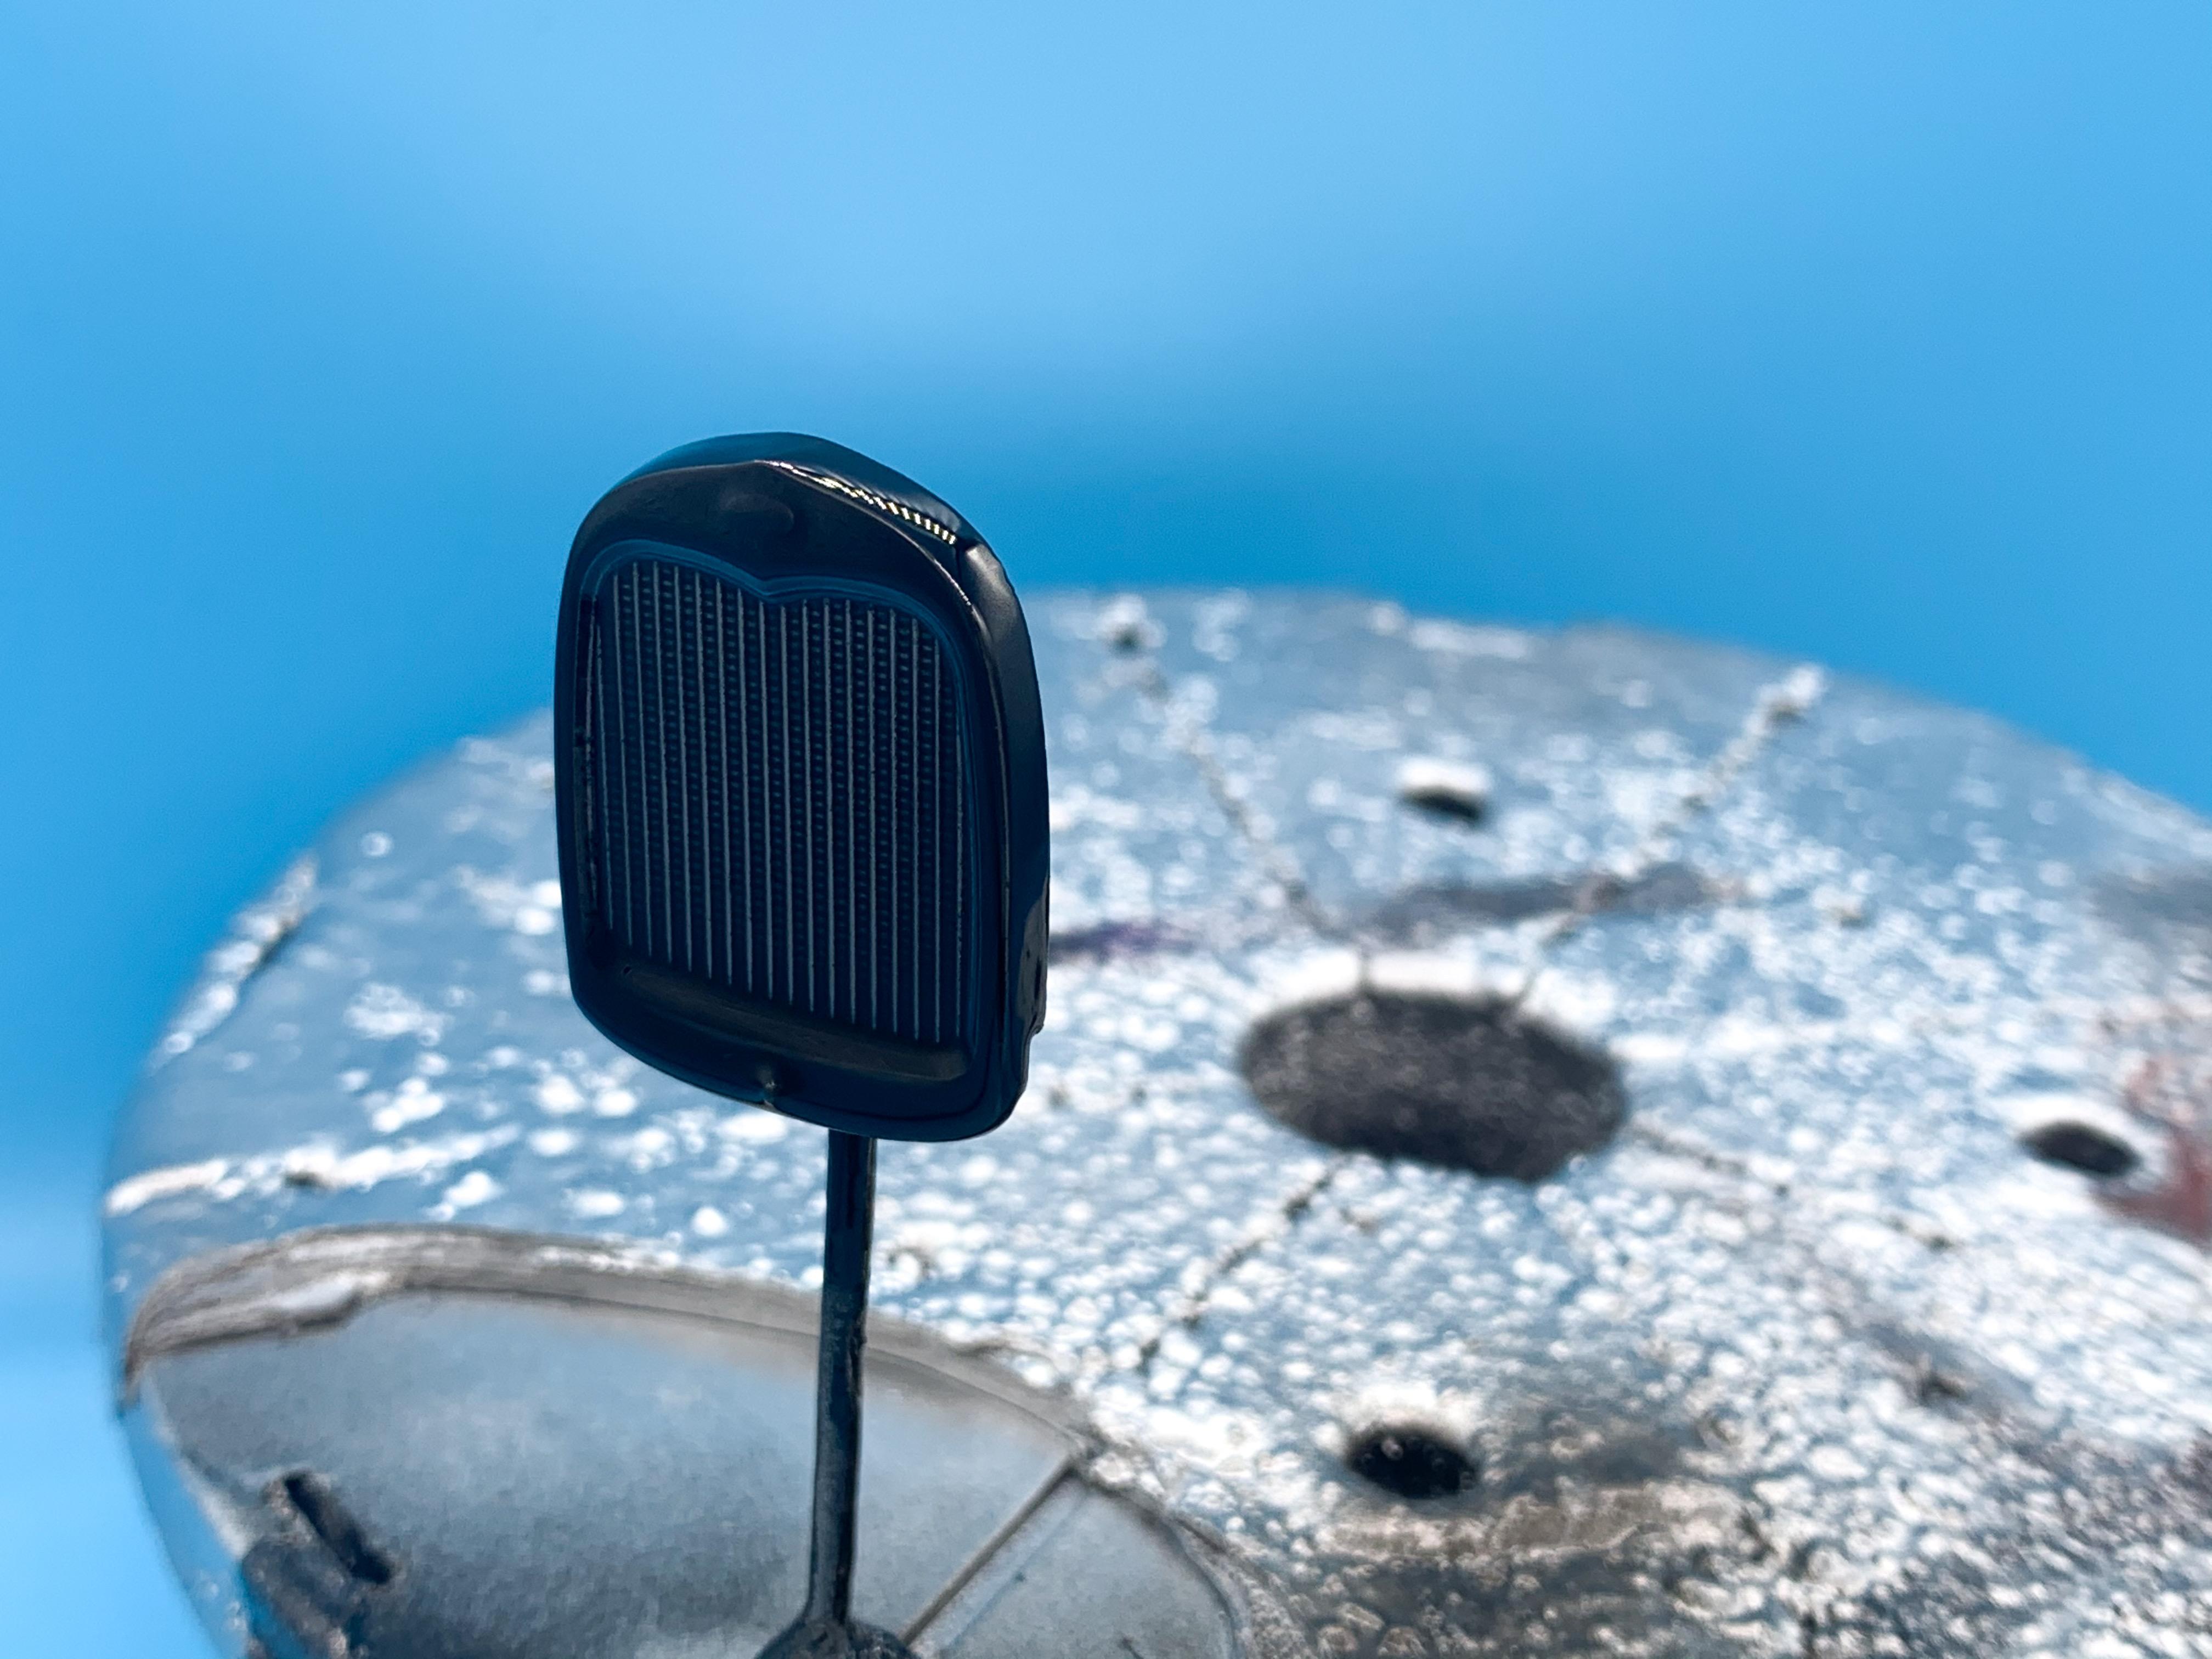
A little more on this one. Added some fuel lines - I’m trying to build this thing box-stock but I can’t help adding a few lines and wires here and there to add to it a little: And a little clear yellow to simulate some fuel in the lines: Floor on (and another line run back to where the tank lives) And a brief intermission to see how well a Revell 32 body fits on this frame (answer: very well!) Then, shot the grill with some black enamel and cut a mask so I can Alclad it and leave the mesh black: A little Alclad chrome: And finally, shot the interior pieces with my new favorite interior-black (Michael’s 49 cent craft paint) I’ve about run out of parts to paint, aside from the dash - can’t wait for the body to be ready to polish so I can get it put together!

-
A few supplies from Michael’s, now they’re open again by us: They’re not doing their usual 40% off right now, but I like those cords and wires for detailing and they’re not super expensive so no big loss. Plus I wanted to try the Testor’s enamels - and they finally had some embossing powder that was actually in a useful color for me to use as carpet...most of what they stock is some crazy glittery concoction so I was pleased to see some plain-old black ??
-
Often when I’m working on a project I try and think of how chrome would fit in with the backstory of the car. Say, I’m doing a bare bones hot rod built in some guy’s garage, shot with primer and mismatched panels and stuff - would that guy bother having his front axle chromed? Probably not. Similarly, if I’m trying to build a million-dollar-looking showcar, seems likely it would have more chrome on it. Other times I think “I have this part with perfectly good chrome on - if this was a beautifully chromed brand-new 1:1 part, would be painting this thing a different color?”. That’s when it’s sometimes a blessing to have a hard-to-hide/fix flaw in the playing so that you can say “pfftt, whatever, may as well strip it, looks like junk now anyway” ??♂️ I guess I say all that to day - nice build Dennis! ??. I’ve been following and I’m looking forward to more!
-
1953 Ford F100 Hot Rod
OldNYJim replied to Dennis Lacy's topic in WIP: Model Trucks: Pickups, Vans, SUVs, Light Commercial
Oh yeah, that totally sounds like me, and I know I follow you on Instagram too - that shows how long I’ve been thinking about this build of yours and wanting to do my own take on it! ? Will get to the getting here shortly! ? -
What did you see on the road today?
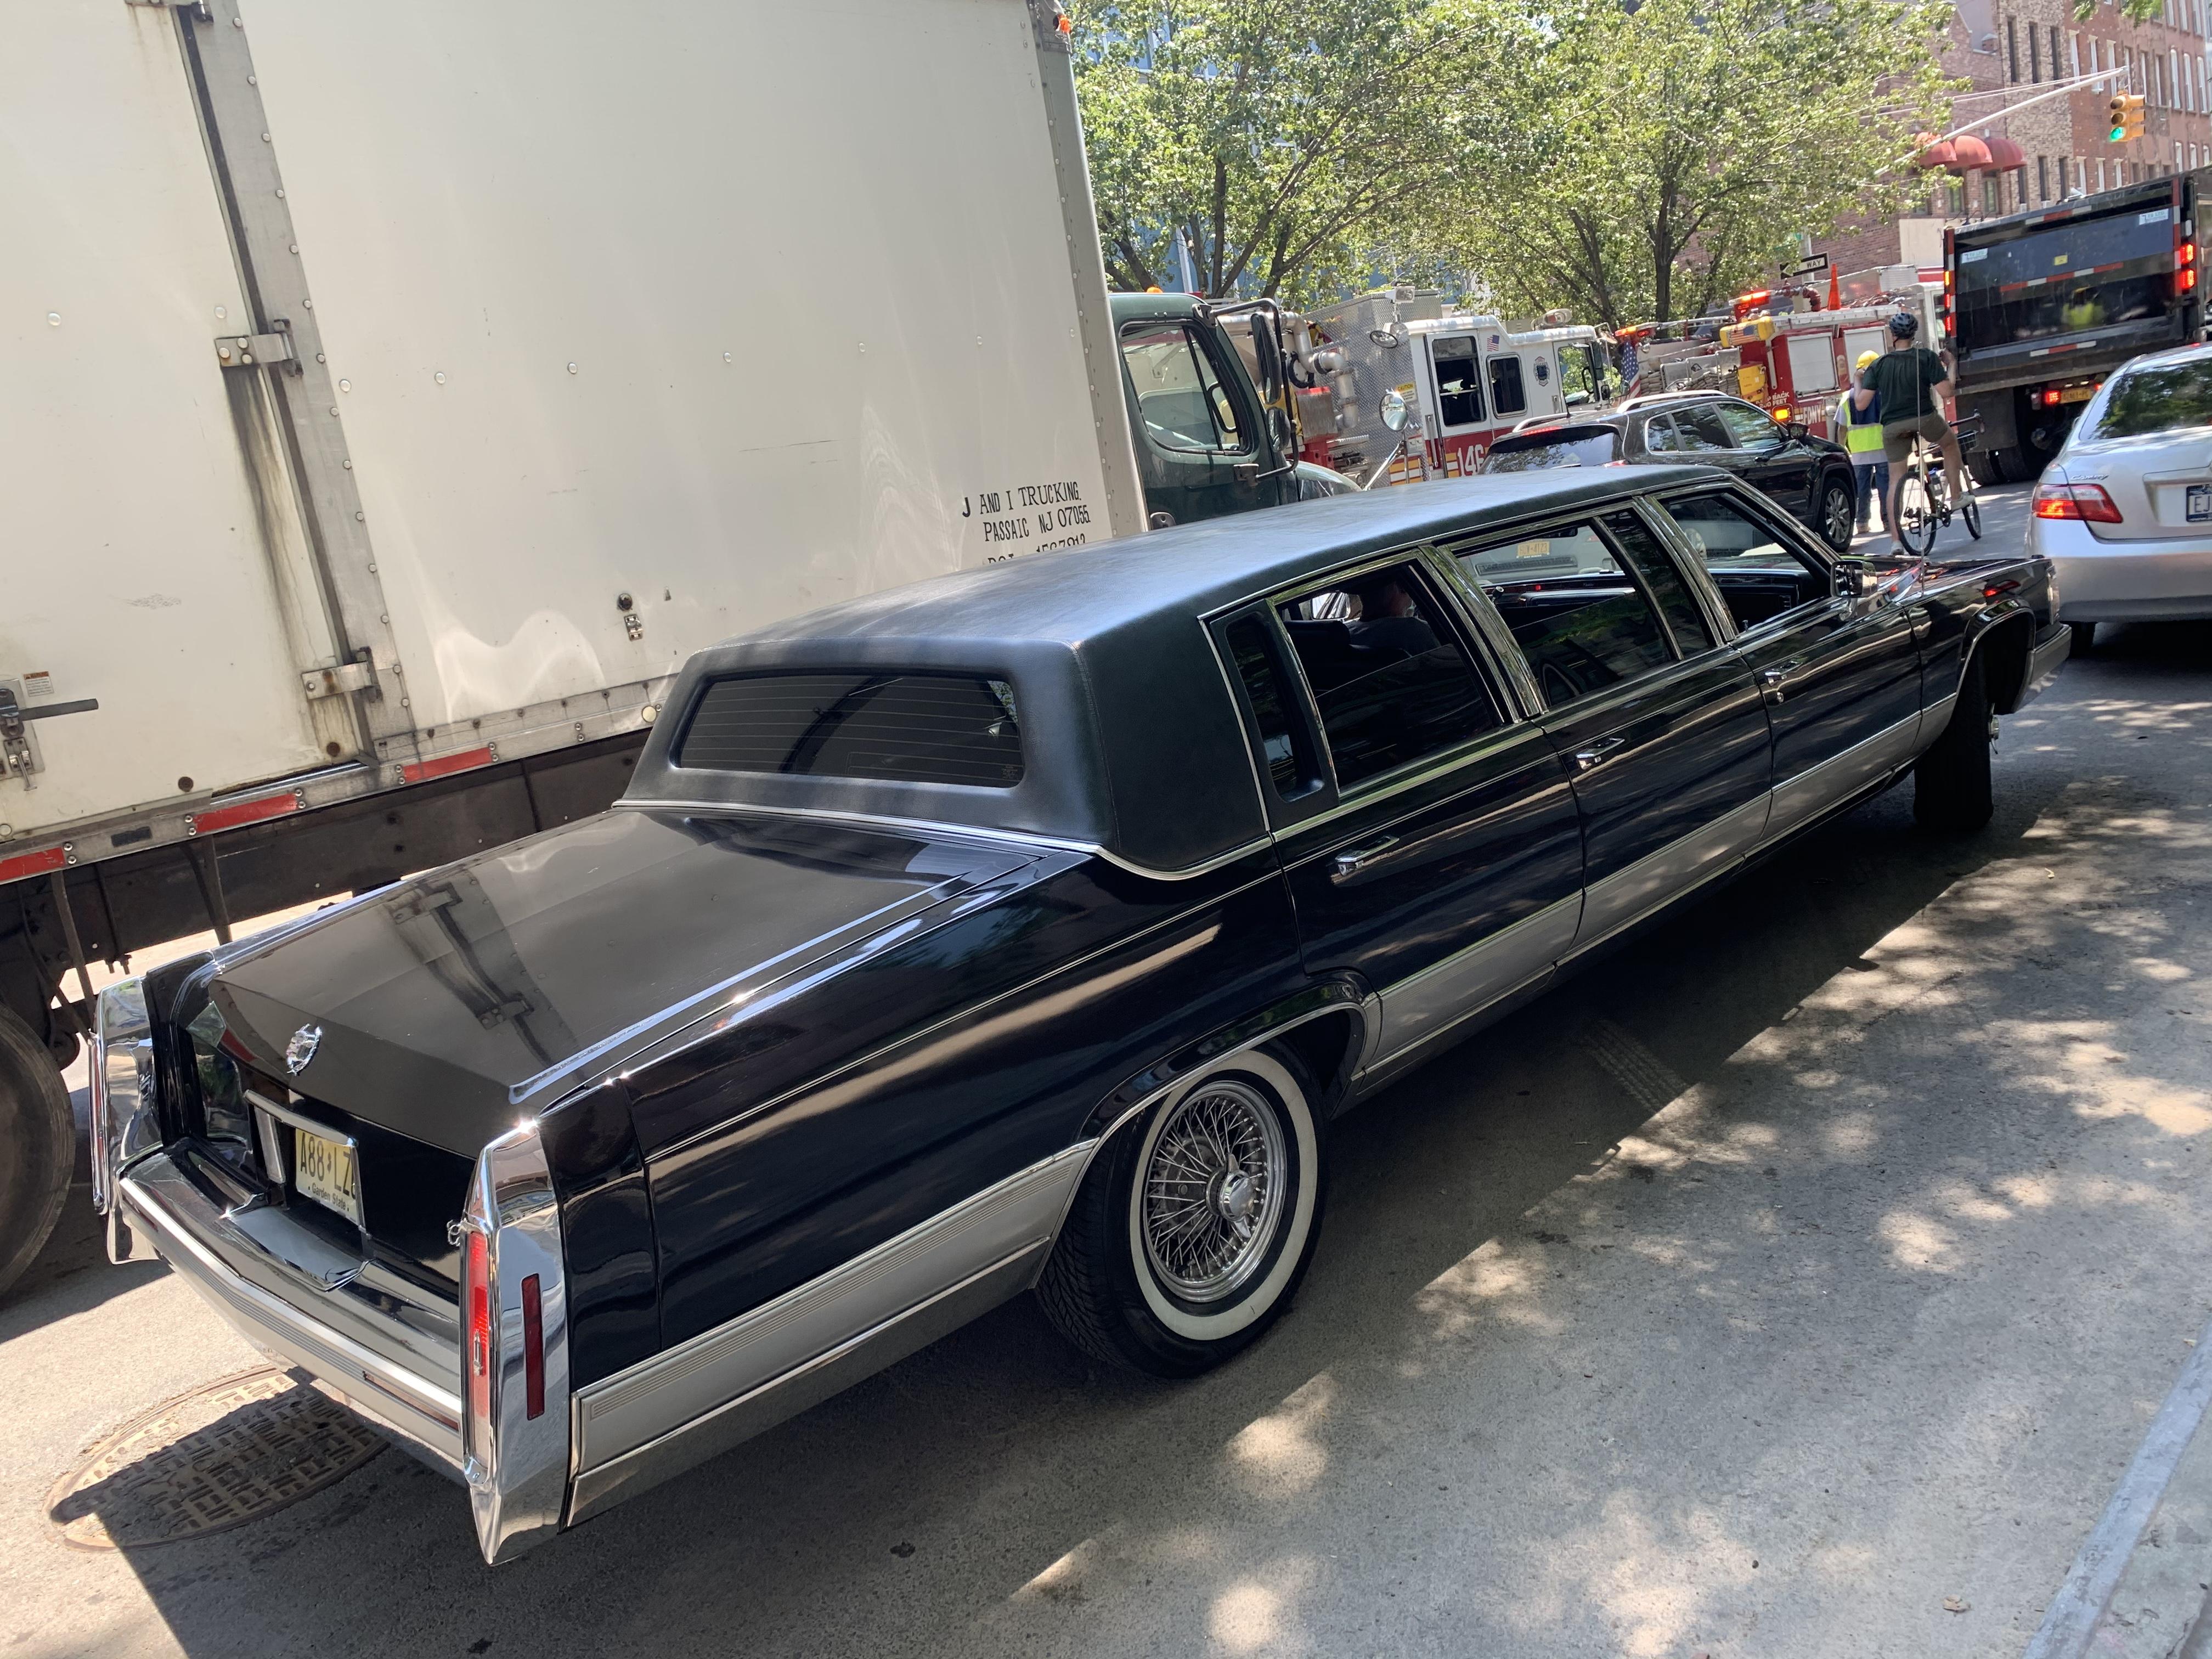
OldNYJim replied to Harry P.'s topic in General Automotive Talk (Trucks and Cars)
That Hudson is AWESOME! ?. I want it! On a slightly different note, today’s sighting from uptown Brooklyn was certainly ‘different’ Nice 6-door too - although I hope it had air con or the driver has probably cooked to death after the temperatures here today
-
Glued some wheels on (success) and tried a new (to me) clearcoat on a dash to see if I could get the finish I wanted (partial success)
-
What a wonderful, well written post Mike - I really enjoyed reading your take on this topic! Thank you for sharing!
-
Great news Jay! Sounds like you’ve got many happy miles of Miata-ing ahead!
-
Ohh, yeah, I need to get back on this ? I need to find a couple of parts, or scratchbuild them, and I’ve been meaning to pick up some Rub n Buff for the ornamental lamps (?) that go on the roof. Didn’t realise I’d been so slow in picking that stuff up though ????
-
I’m envious!! I’ve owned two Miatas now - an NA and and NB, and I’m looking for another NA. How’s the automatic trans on that thing? I never drove an auto version. If you’re not familiar, whilst you’re checking things over it’s worth making sure the drain holes under the doors aren’t bunged up with crud and gunk - that seems like its one of the most common reasons that these start to rust underneath. Enjoy your Miata-ing!!
-
Interesting - thanks for the info buddy! Appreciate you taking the time!
-
T.V. car/truck goofs. Mistakes Ect....
OldNYJim replied to ranma's topic in General Automotive Talk (Trucks and Cars)
I don’t think they make a V8 Camry tho Mind you, Kyle Busch has one... -
1953 Ford F100 Hot Rod
OldNYJim replied to Dennis Lacy's topic in WIP: Model Trucks: Pickups, Vans, SUVs, Light Commercial
I really liked these shots of it without the rear fenders on - it made me think “huh, with a little more rear tire and something interesting detail-wise on those outer bedsides that’s actually a really cool look!” Maybe run the exhausts up behind the side of the cab and along the side of the bed somehow? Never saw a F100 without the rear fenders before - it would need some work to look like it’s almost MEANT to look that way, but I’ve been bouncing that idea around in my head for months now! I’ve got the kit here - just haven’t found the perfect wheel/tire combination for it just yet - but you definitely inadvertently inspired me with those in-progress shots! -
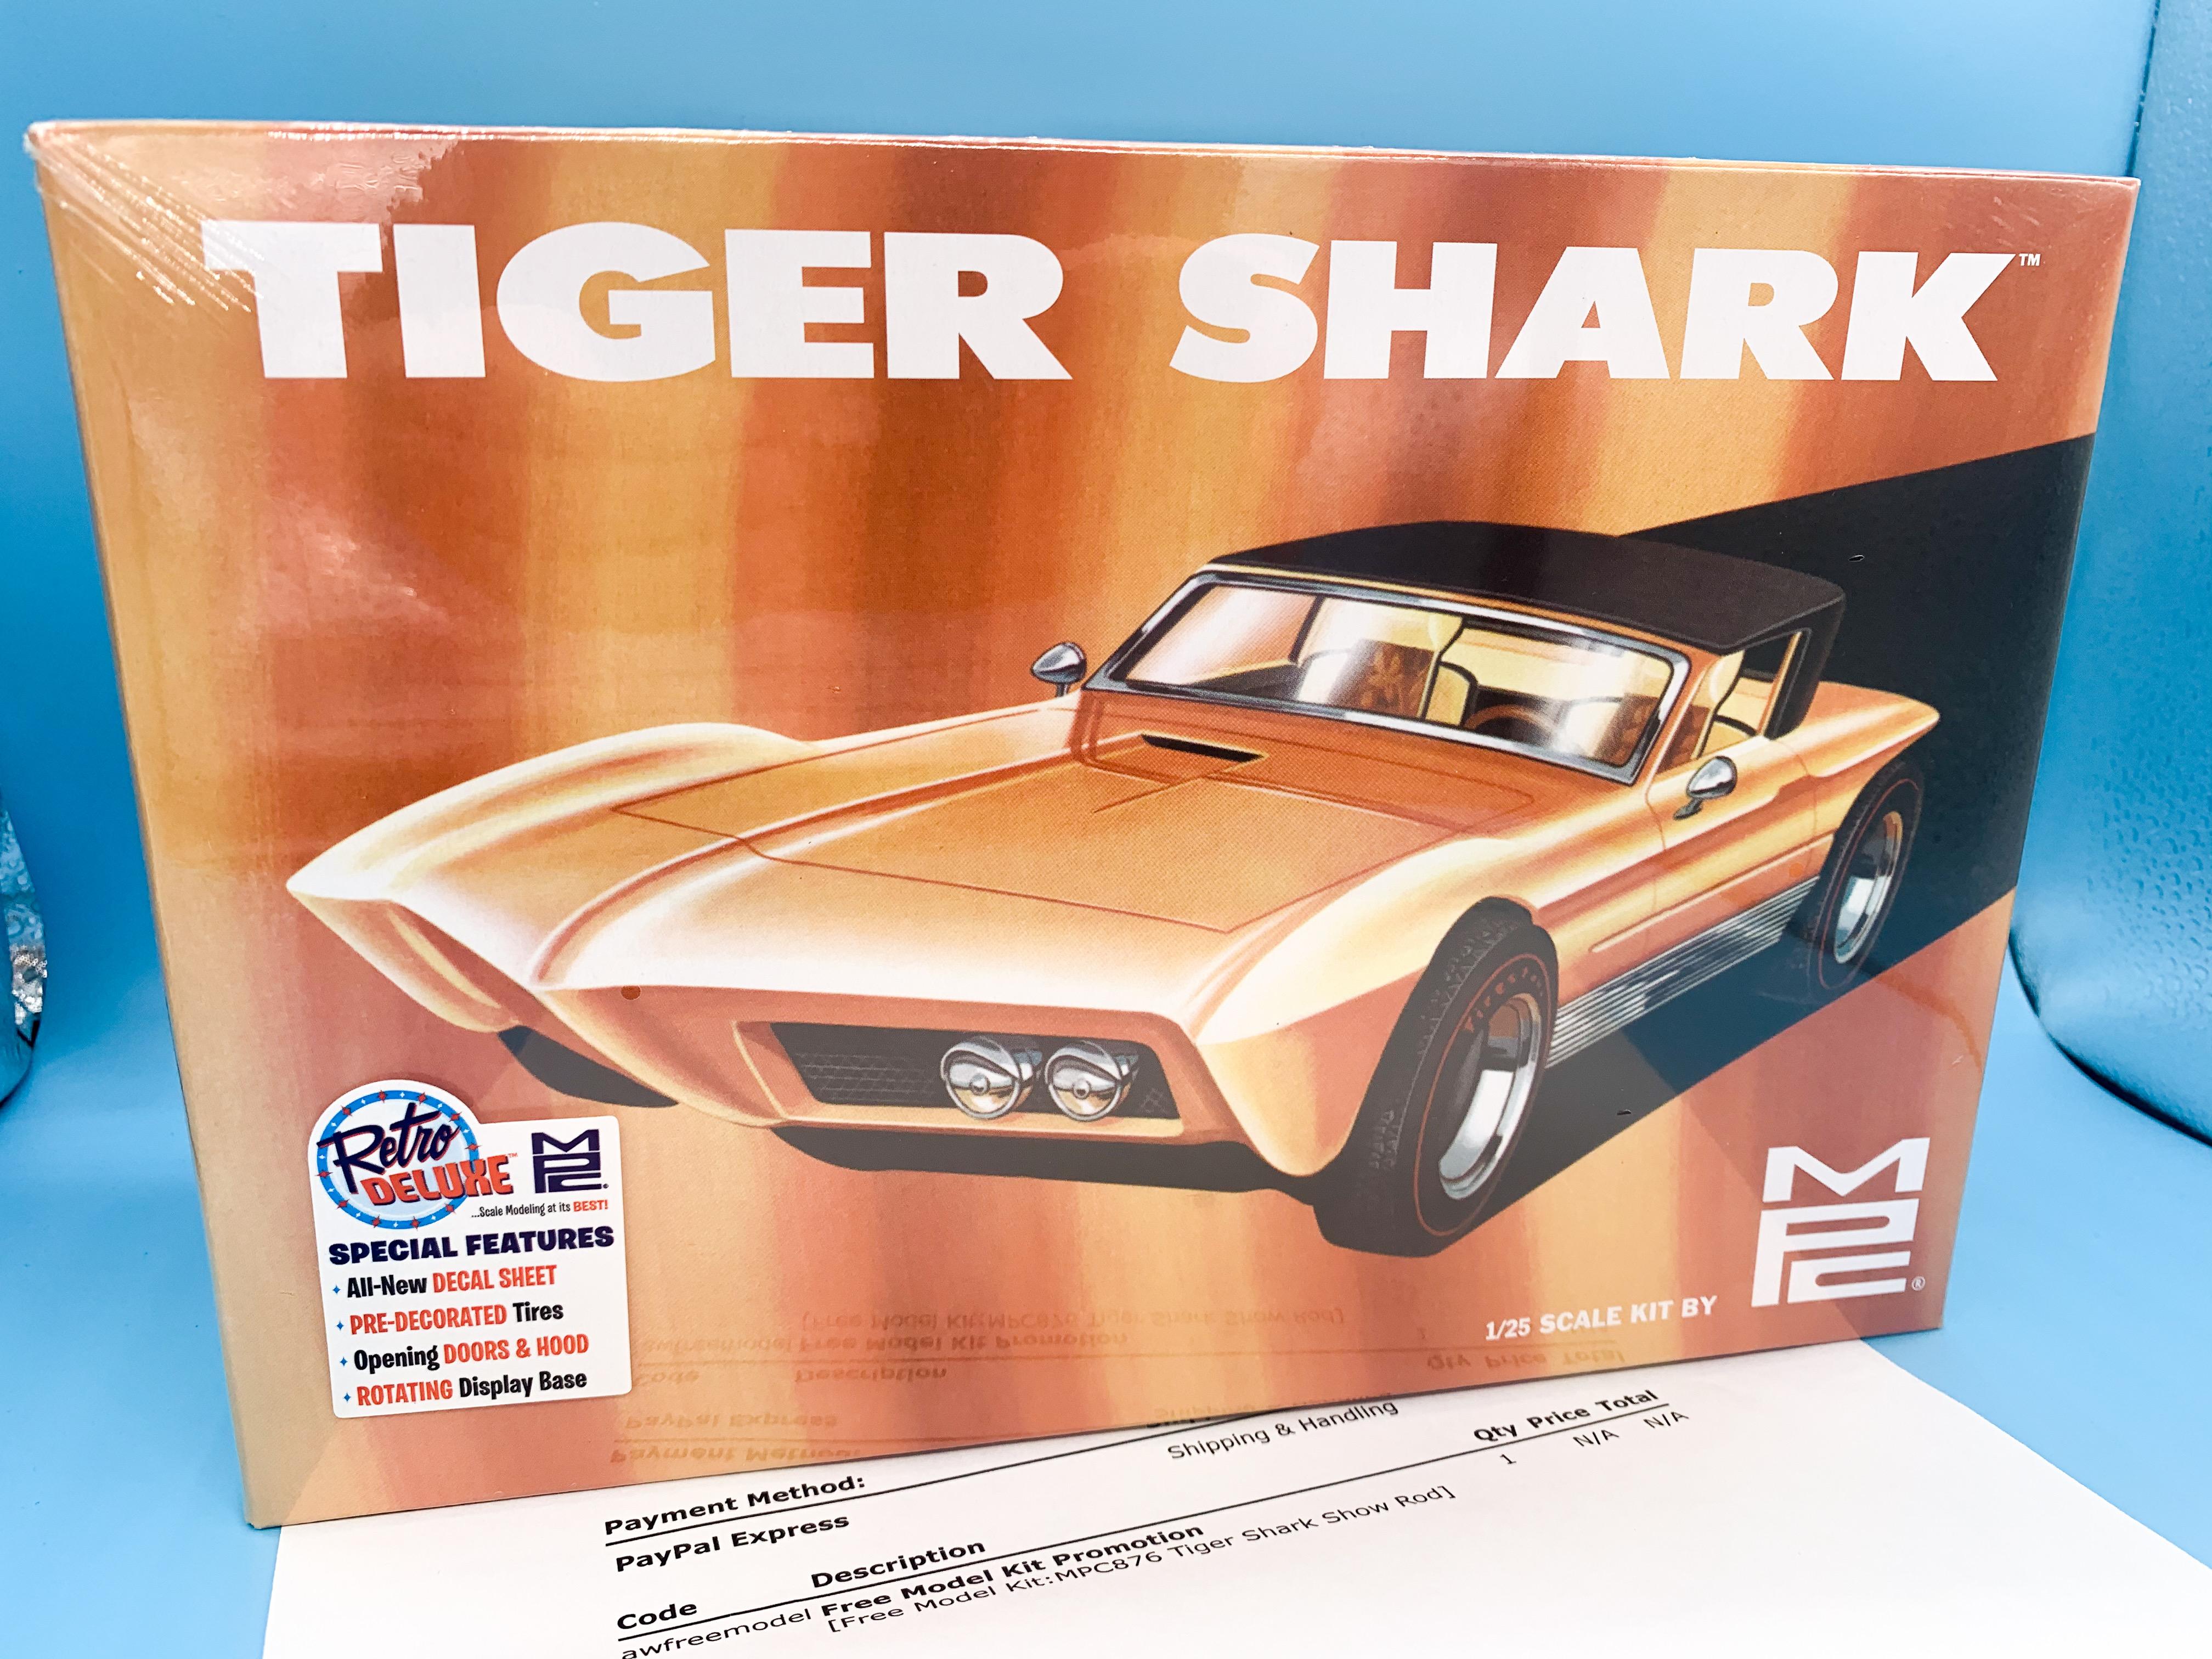
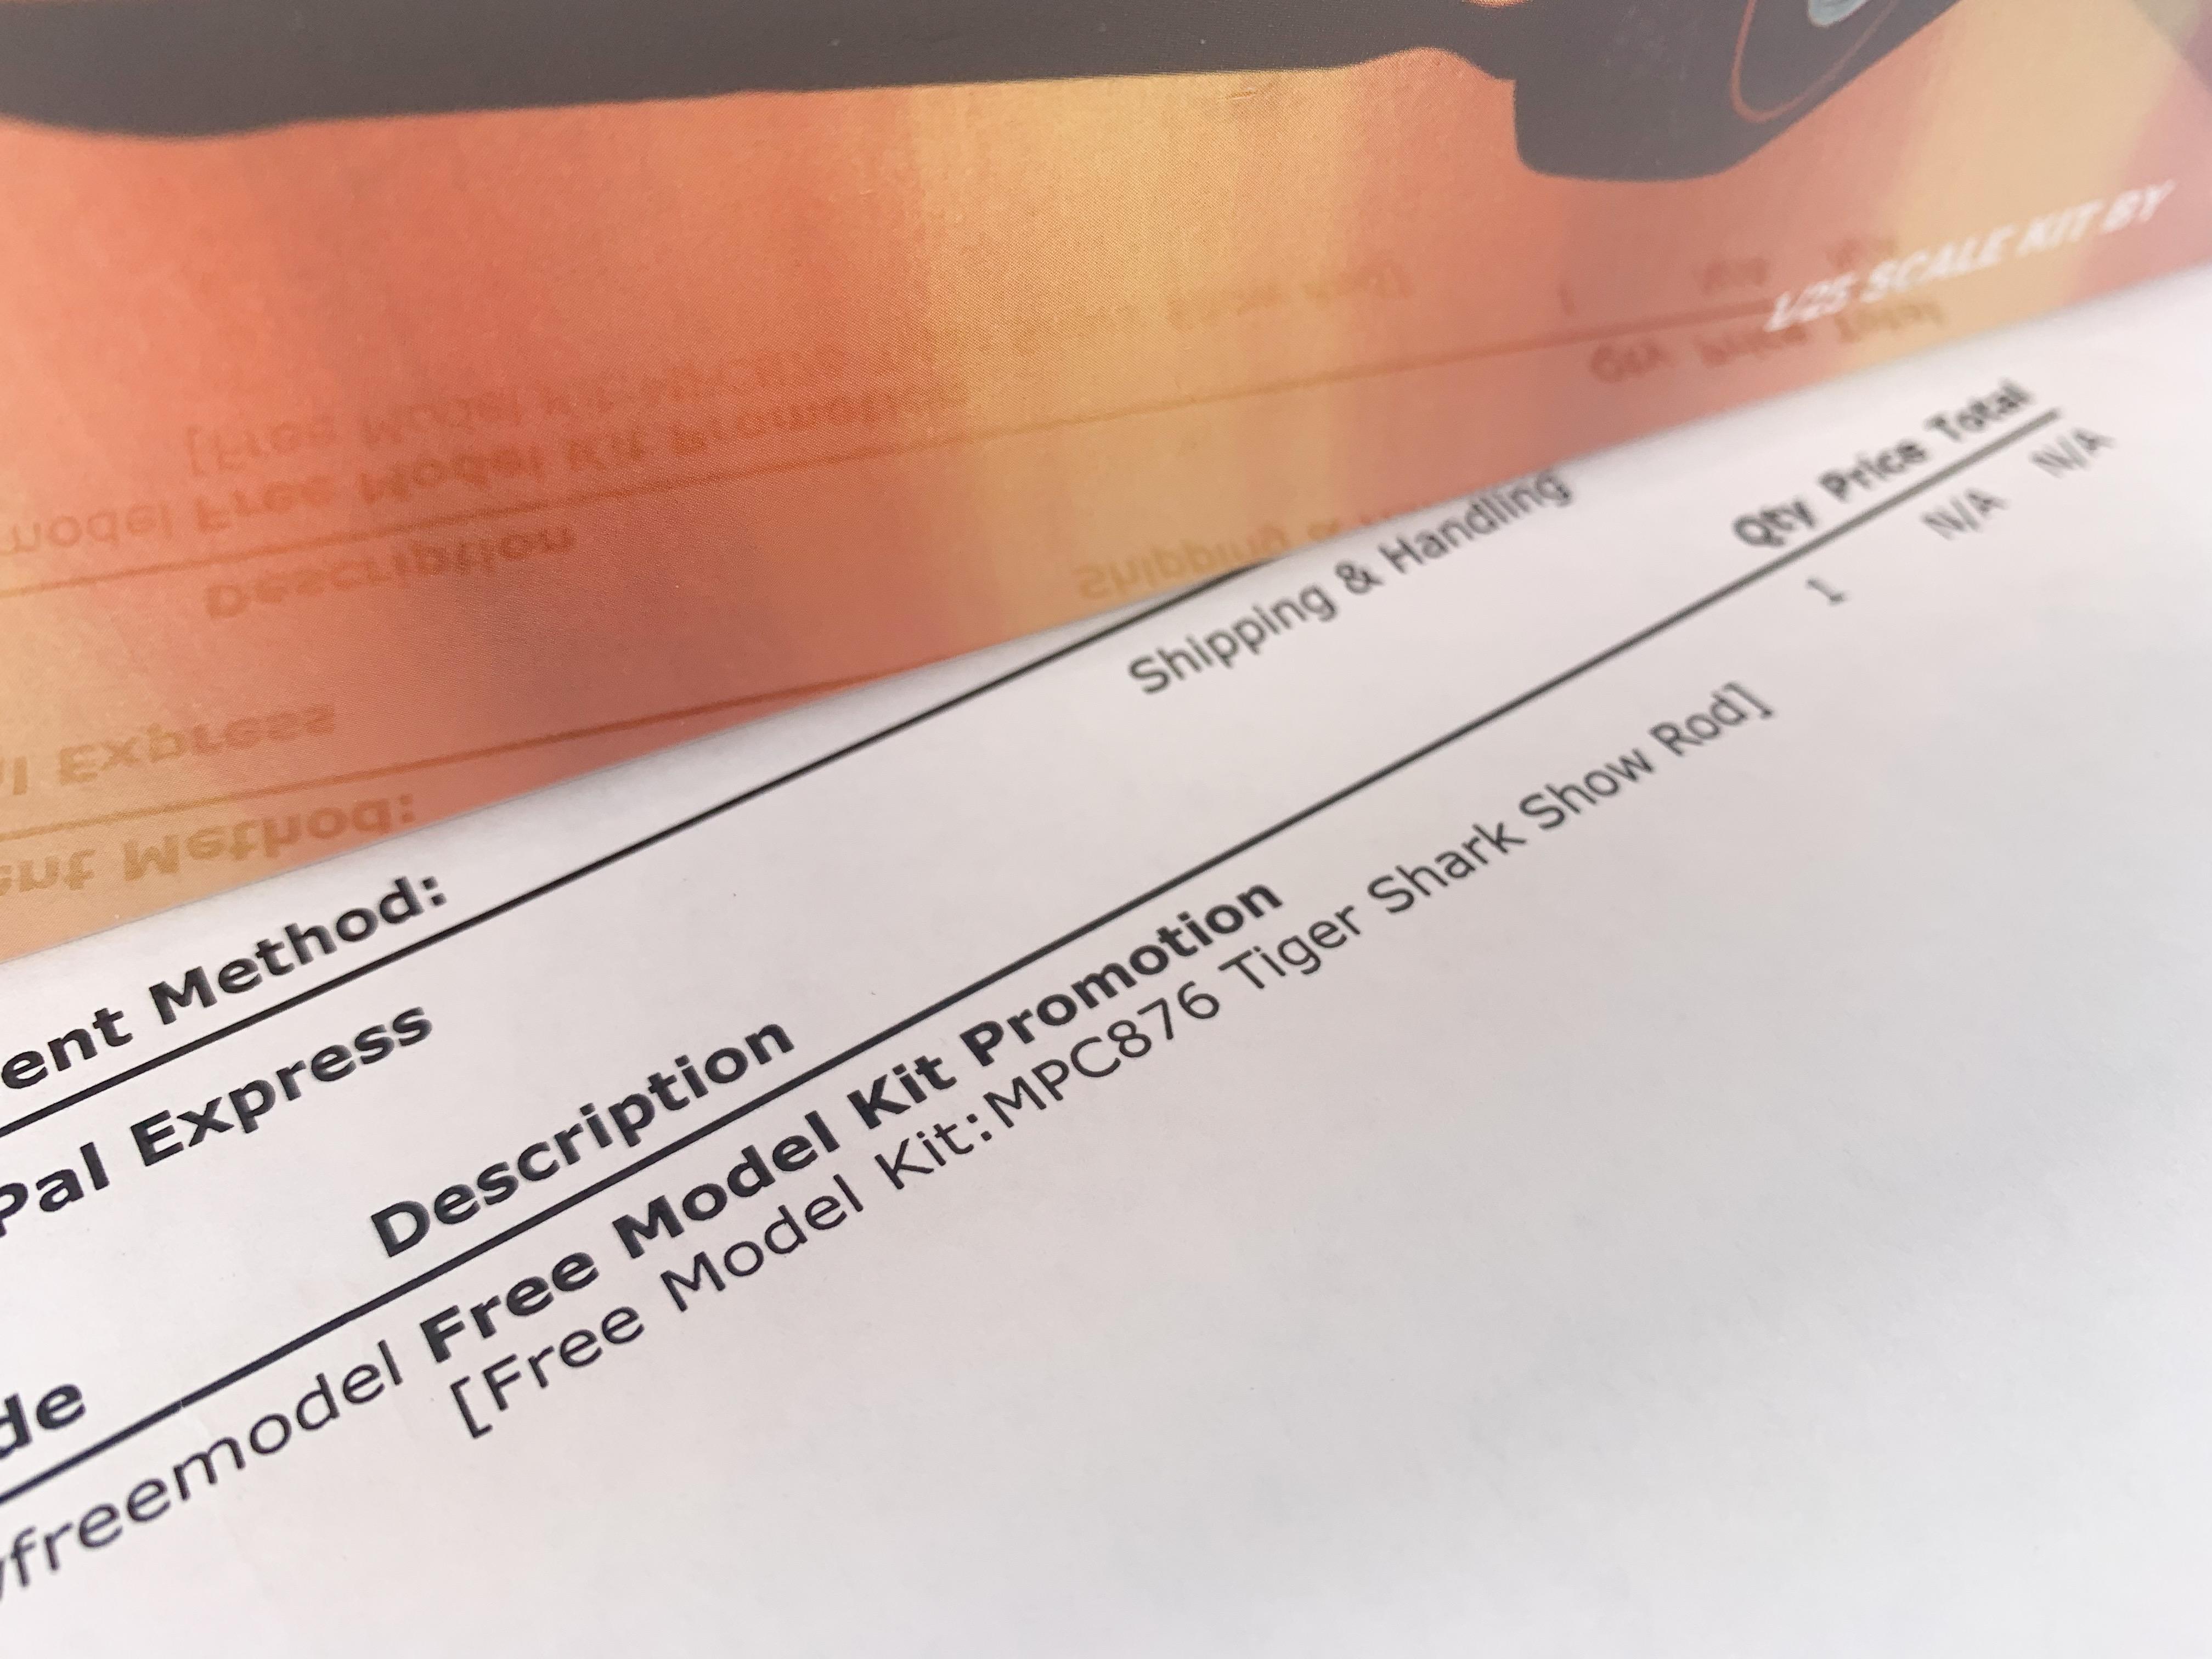
My free kit came from Autoworld! I’d been wanting to build one of these - now I have no excuse! ?
-
Huh! That’s really cool! Is it injection moulded plastic?
-
Looks amazing!! Great job on that!
-
1953 Ford F100 Hot Rod
OldNYJim replied to Dennis Lacy's topic in WIP: Model Trucks: Pickups, Vans, SUVs, Light Commercial
I love this build so much Dennis - right before I go to sleep I usually end up daydreaming about future builds I’d like to do as I nod off, and this F100 has been front and center in my thoughts for months now! You did a beautiful job on it, and one of your in-progress photos gave me an idea that I haven’t seen done before. Say all that to say - thanks! Really enjoyed seeing this come together! -
I’d been wondering about that BSI thick glue Tom - how long do you find it takes to set up? I’ve been wondering about trying that instead of 5 minute epoxy for wheel-gluing chores
-
Oh man, those rainbow flakes in the paint! ?. What is that?!
-
Aww man, this is really cool. Nice job in going beyond what’s in the box with this kit and really putting your own spin on it. GREAT work!
-
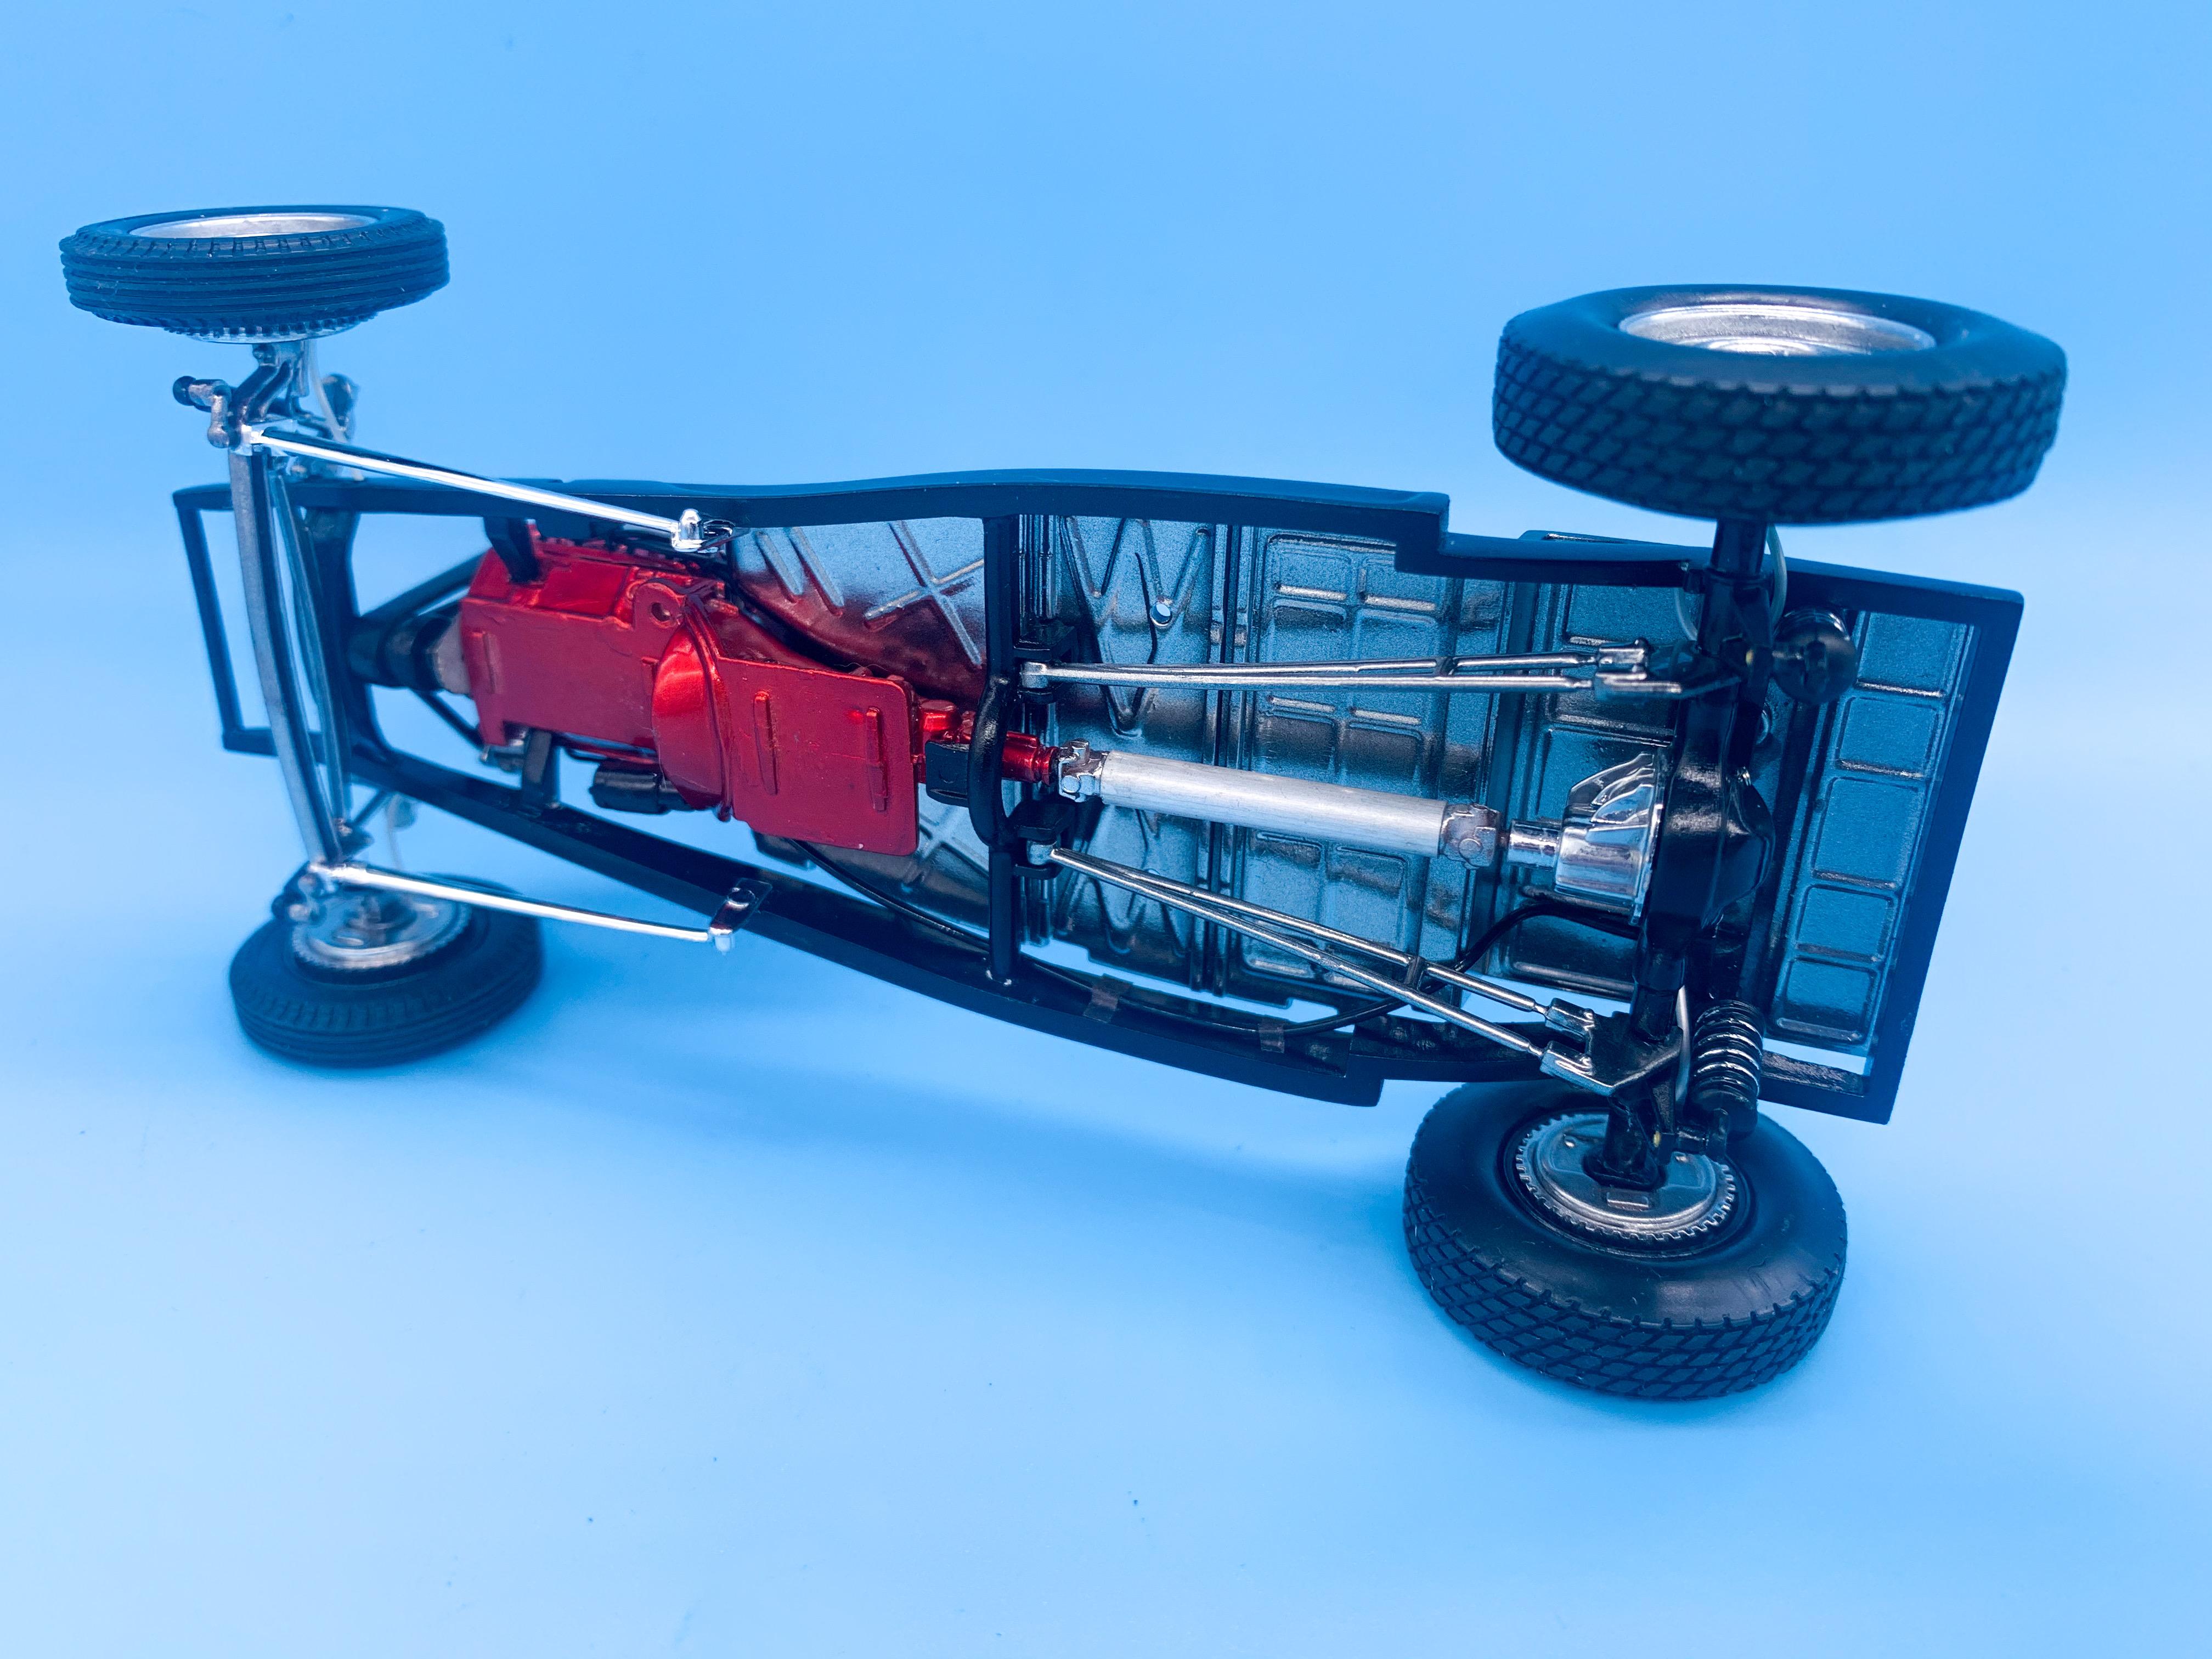
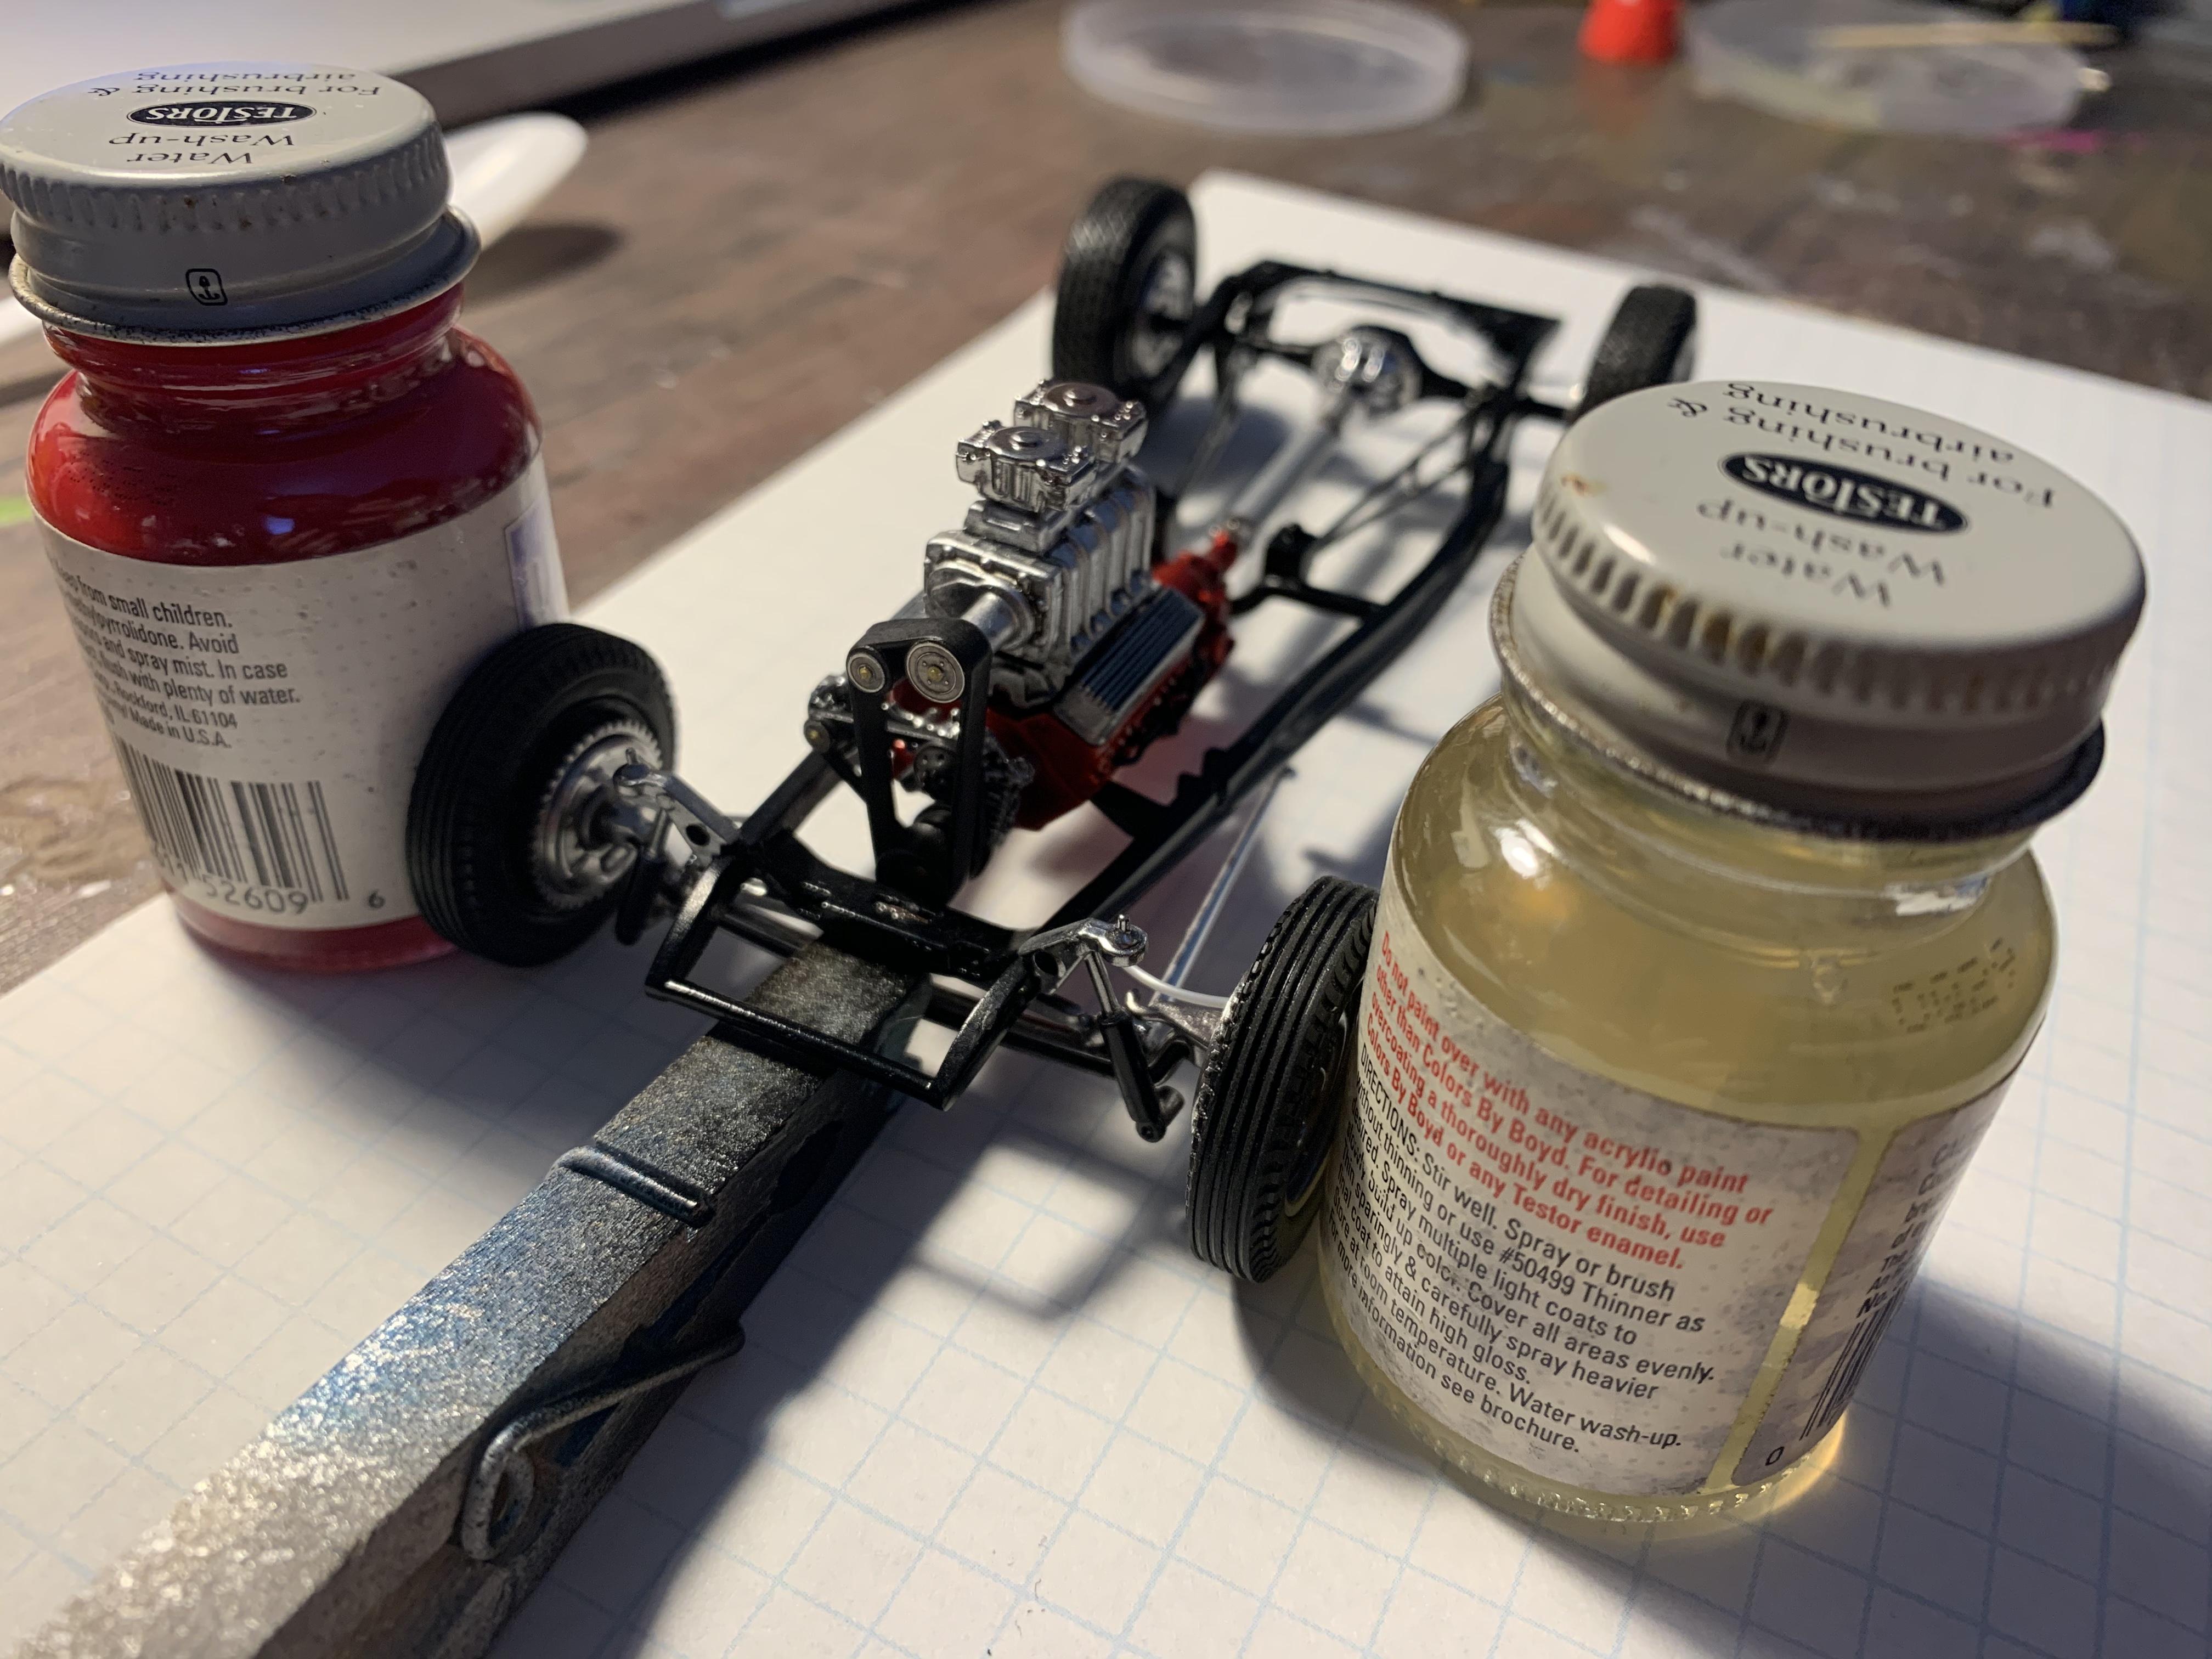
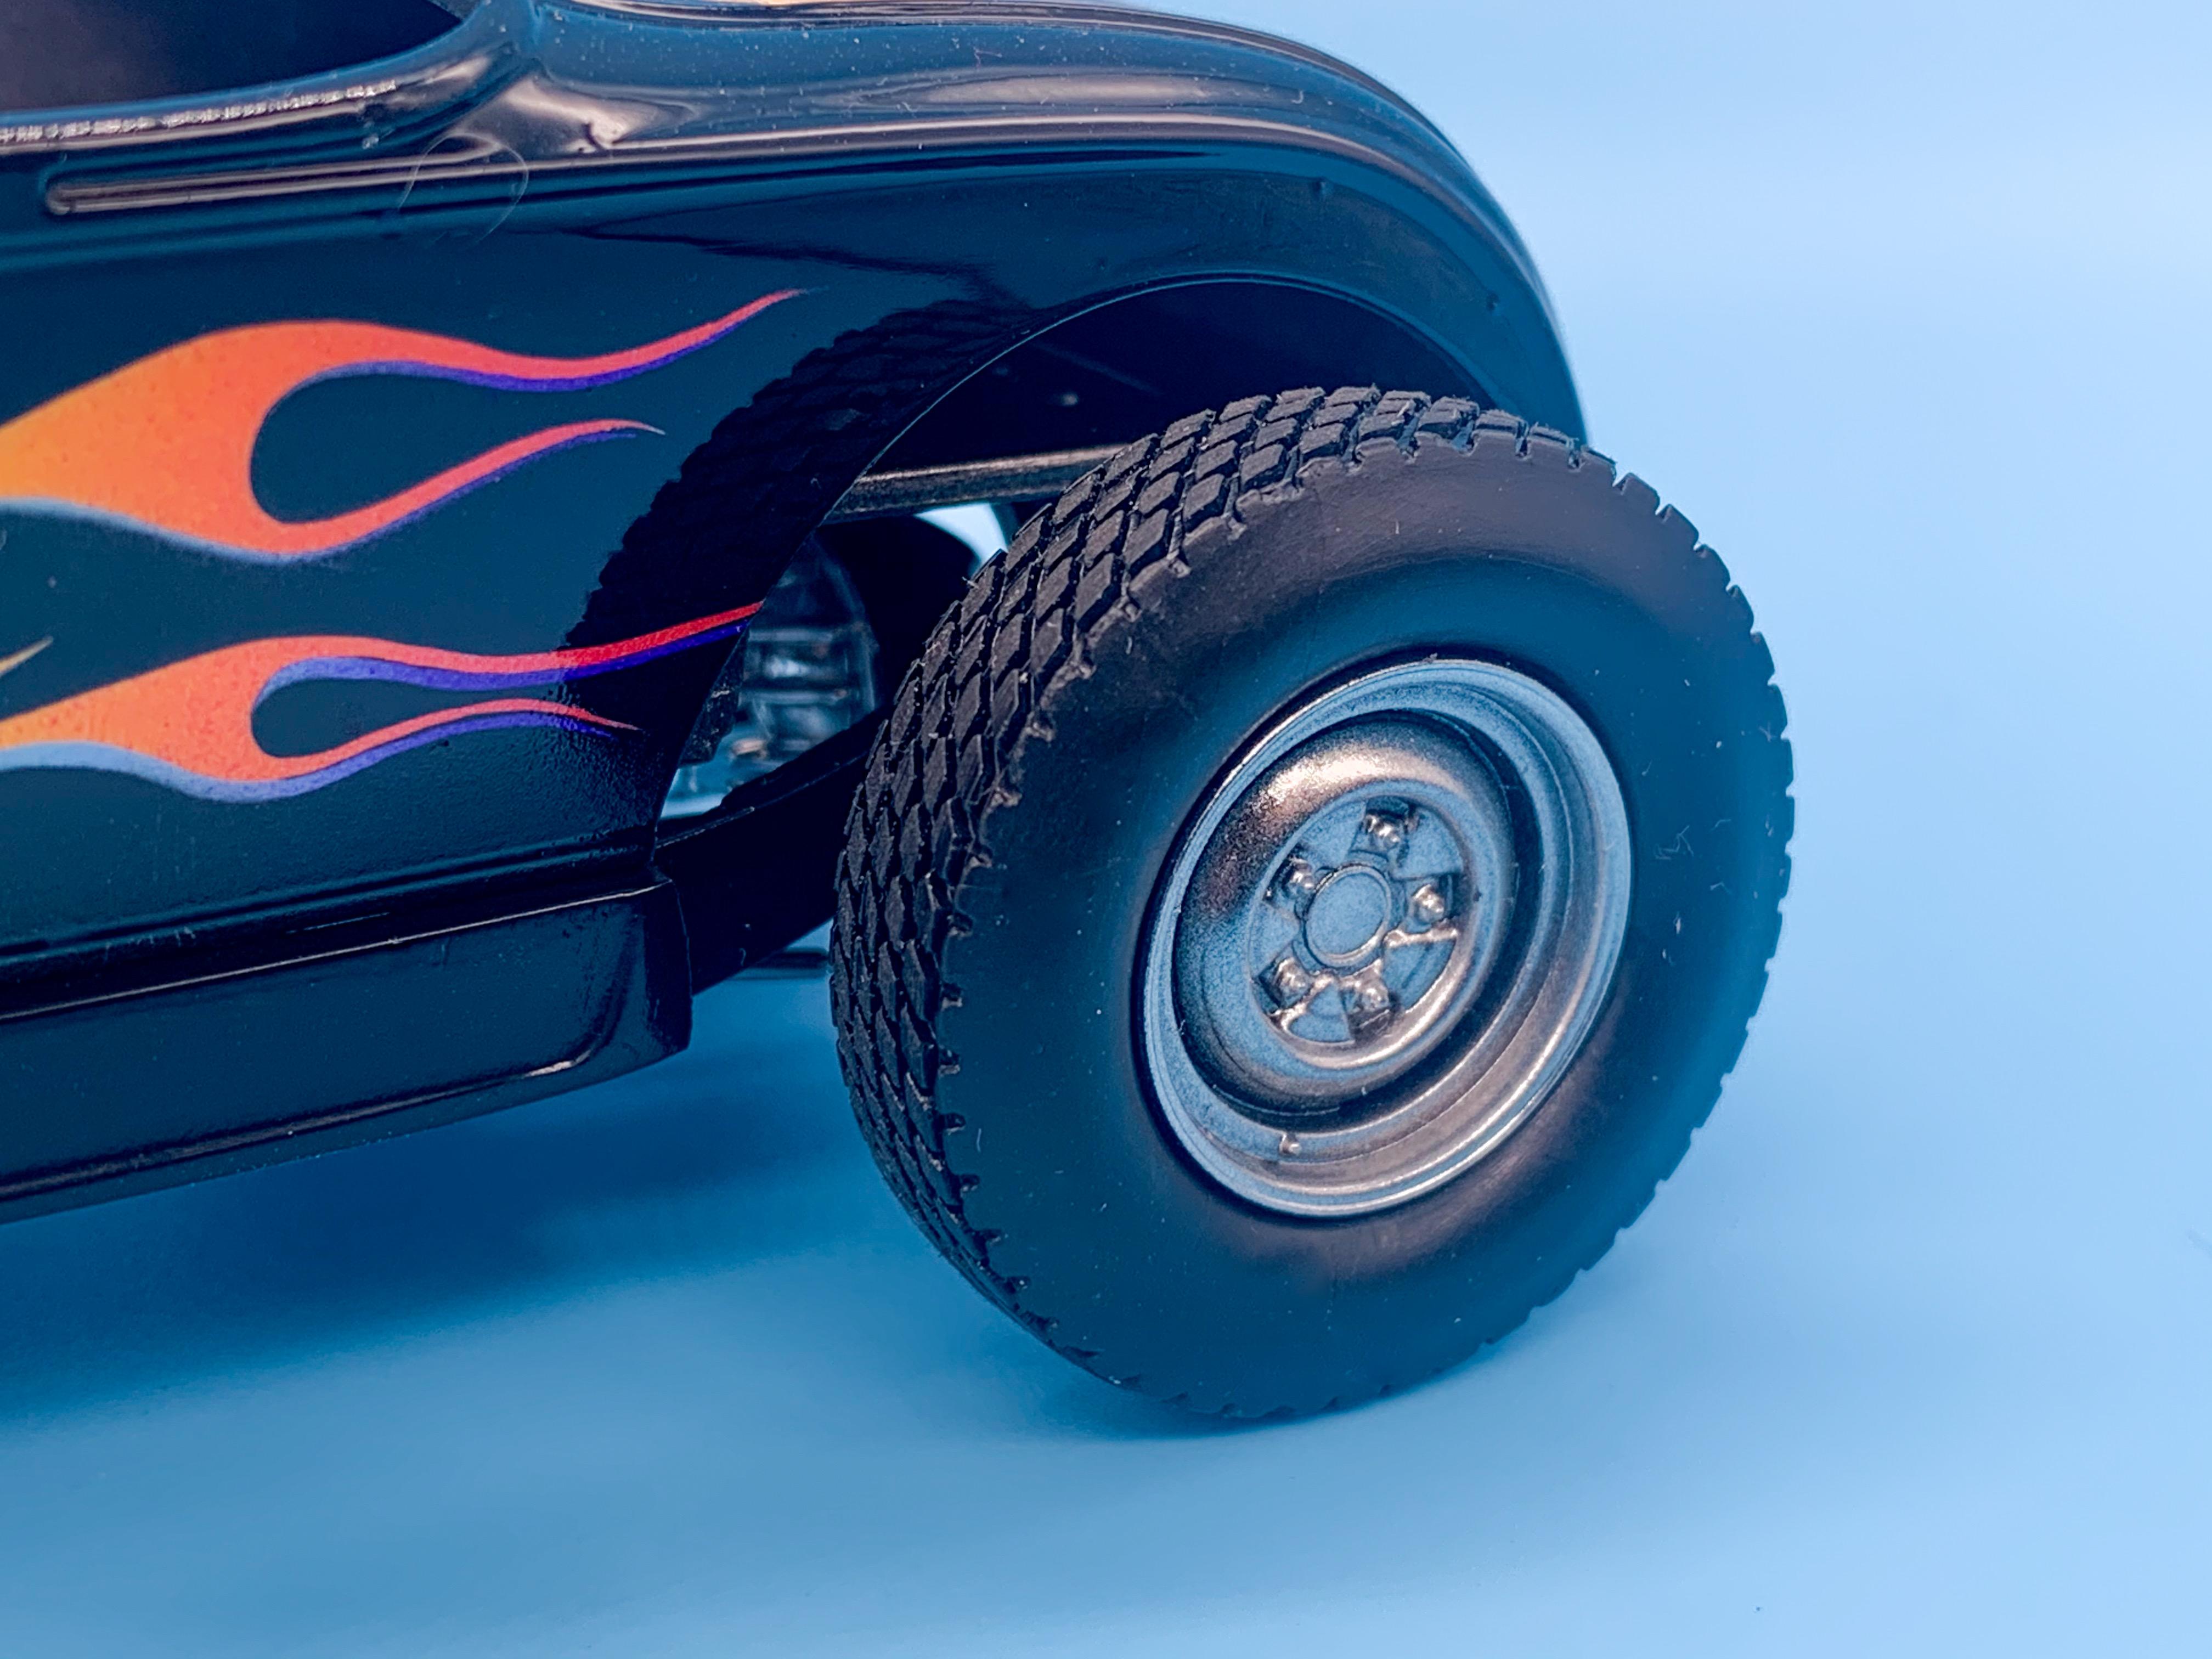
Happy 4th everyone! Hope you’re all having a happy and safe day! In between eating hot dogs and watching the fireworks, got a little more done here... Front end Alcladed and installed: Ditto the rear: Added some brake lines - the routing is probably a little funky but I was trying to hide those receivers in the chassis that hold the rear axle: I’ll run one up to the master cylinder once the floor is on - I figure if you can’t see the master cylinder it must be hidden up in behind the dash somewhere, so I’ll route another line accordingly from the rear and pretend the front ones are run through the frame and up behind the firewall. Shot the wheels with black enamel from a rattle can and gave them a light mist of 50% Alclad chrome and 50% Alclad aluminum to give them a shiny-but-not-too-shiny finish with some nice depth: And a quick mock-up with the body on so I could see if it’s heading in the right direction - I think it’s gonna be a cool little hot rod! More soon!
-
Good deal! I actually managed to snag a free one in the Autoworld kit give away but I can see me wanting extras for some of the cool parts! Thanks for the heads up! I’d like to try and build some kind of hotrod with that frame under it, I think!
-
more 34 ford bus
OldNYJim replied to damodelguy az's topic in WIP: Model Trucks: Pickups, Vans, SUVs, Light Commercial
I’m really enjoying this build - never saw one of these before! -
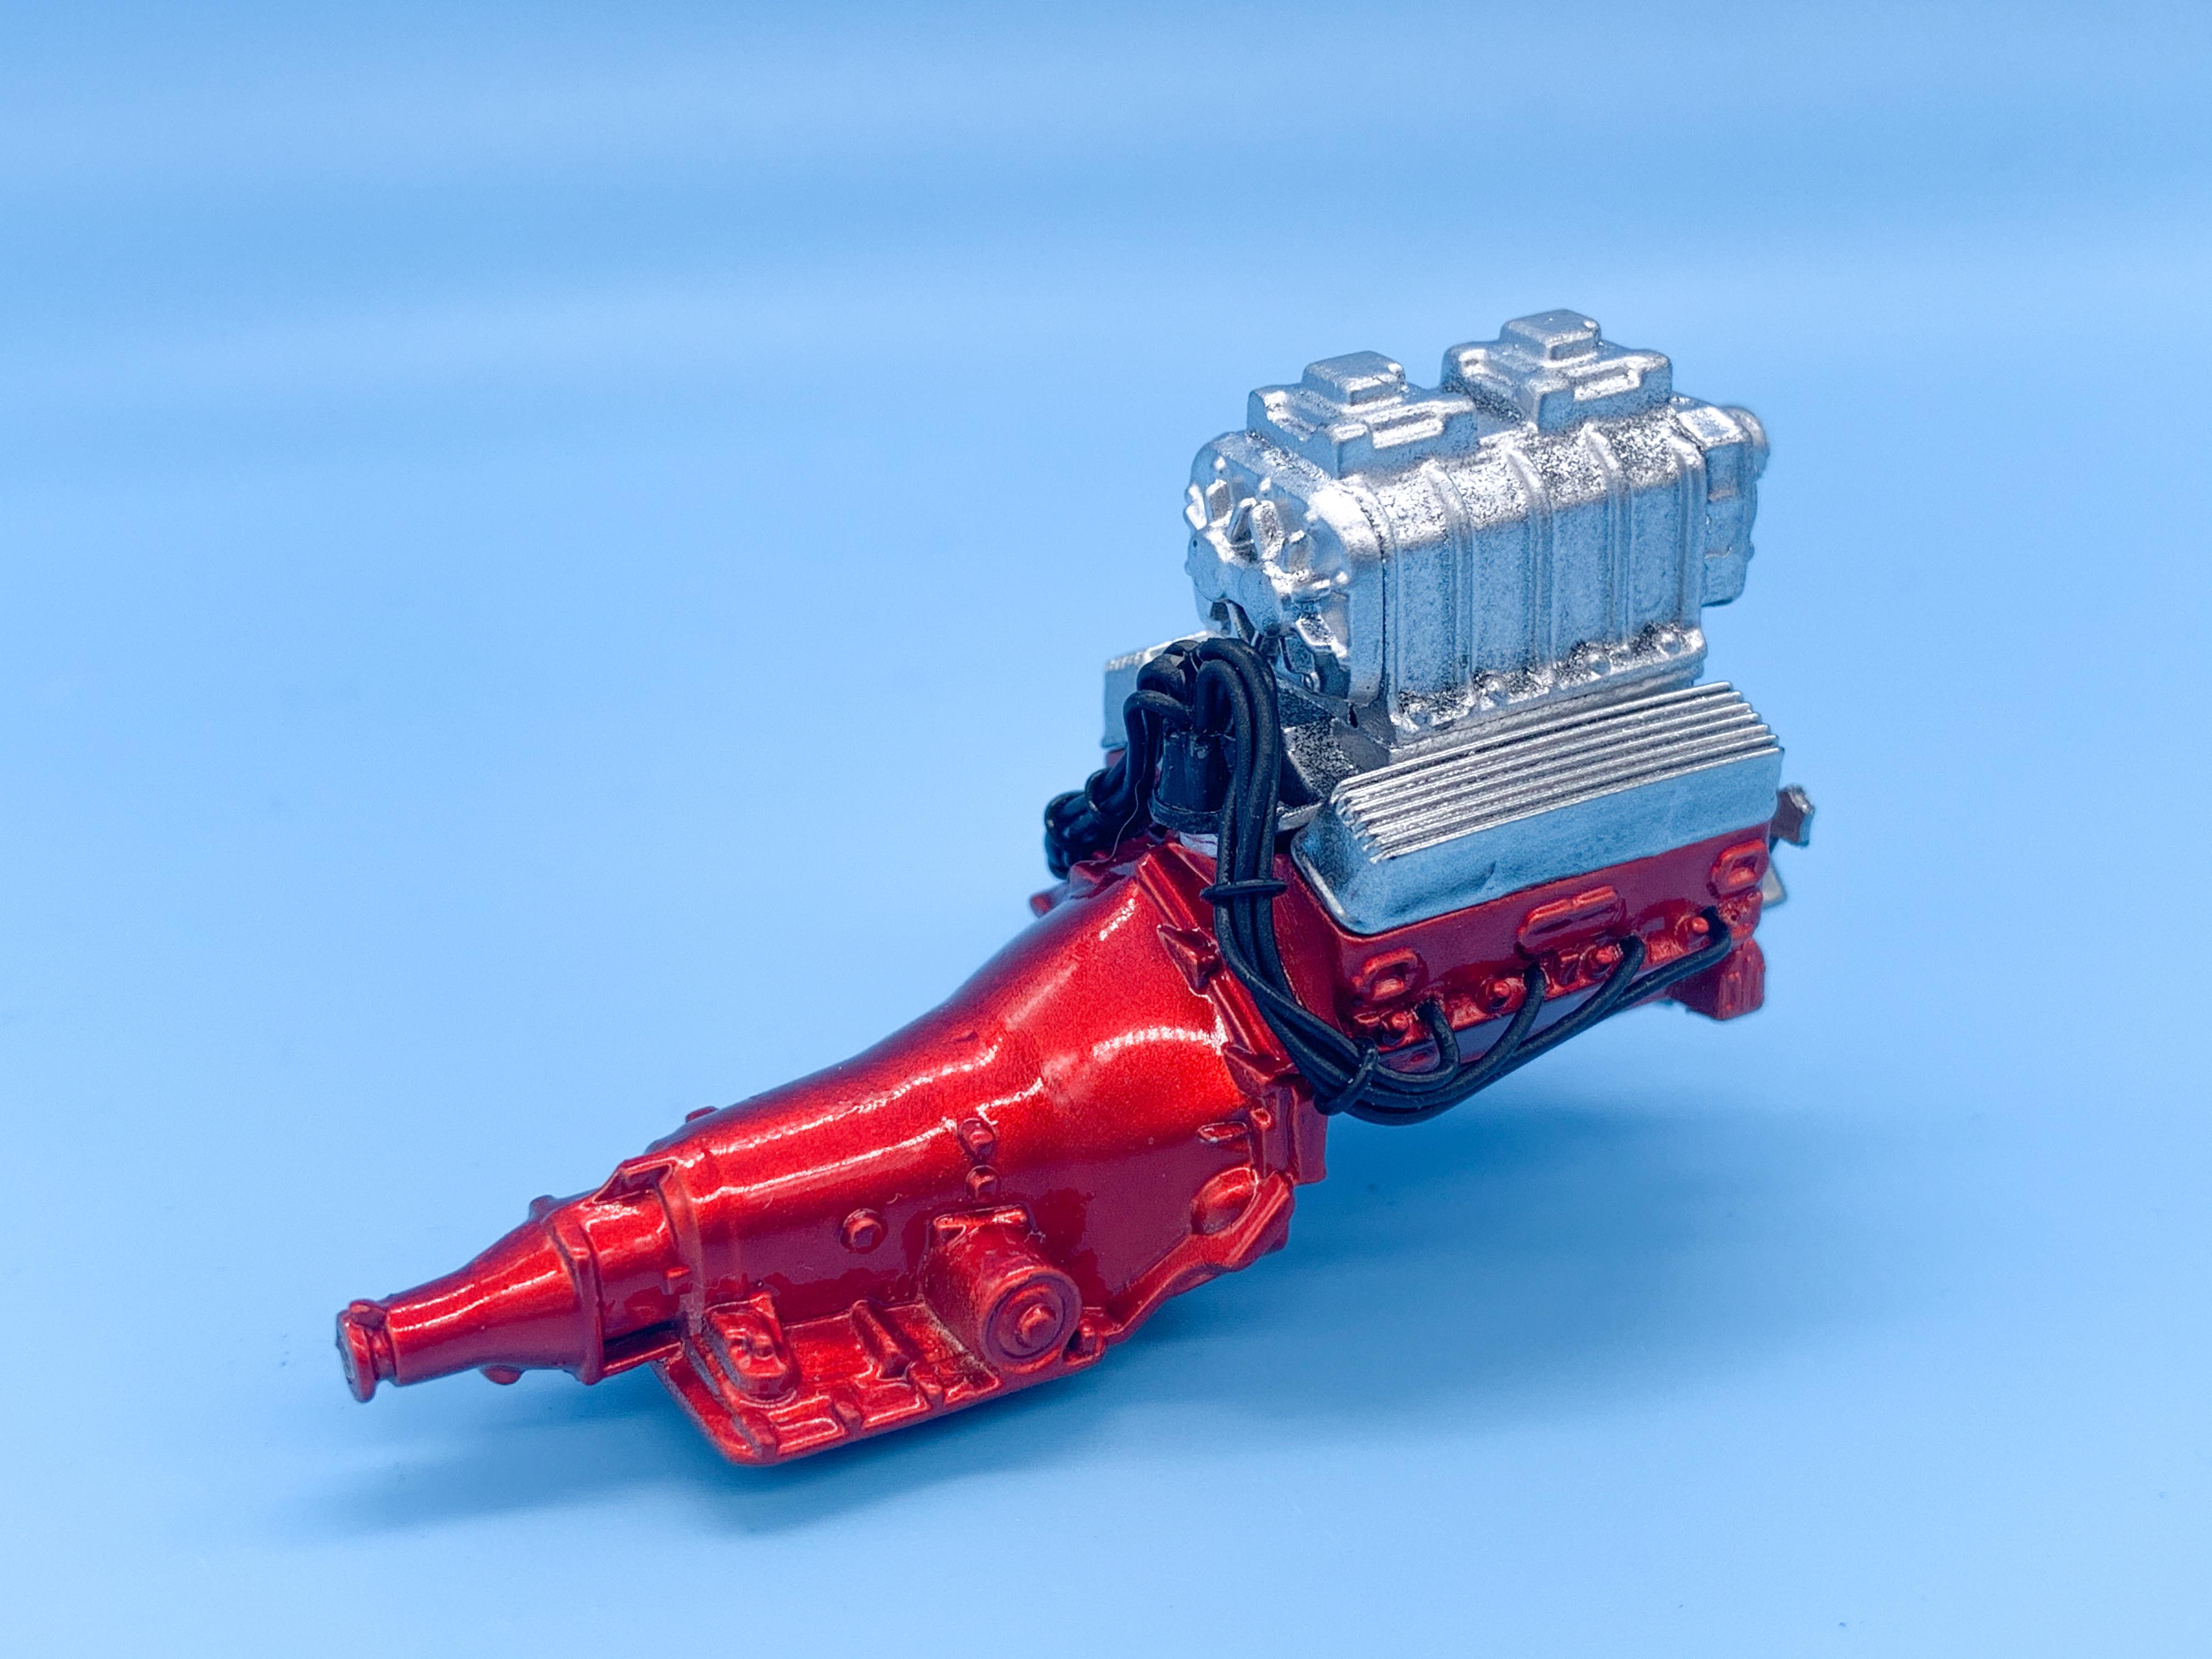
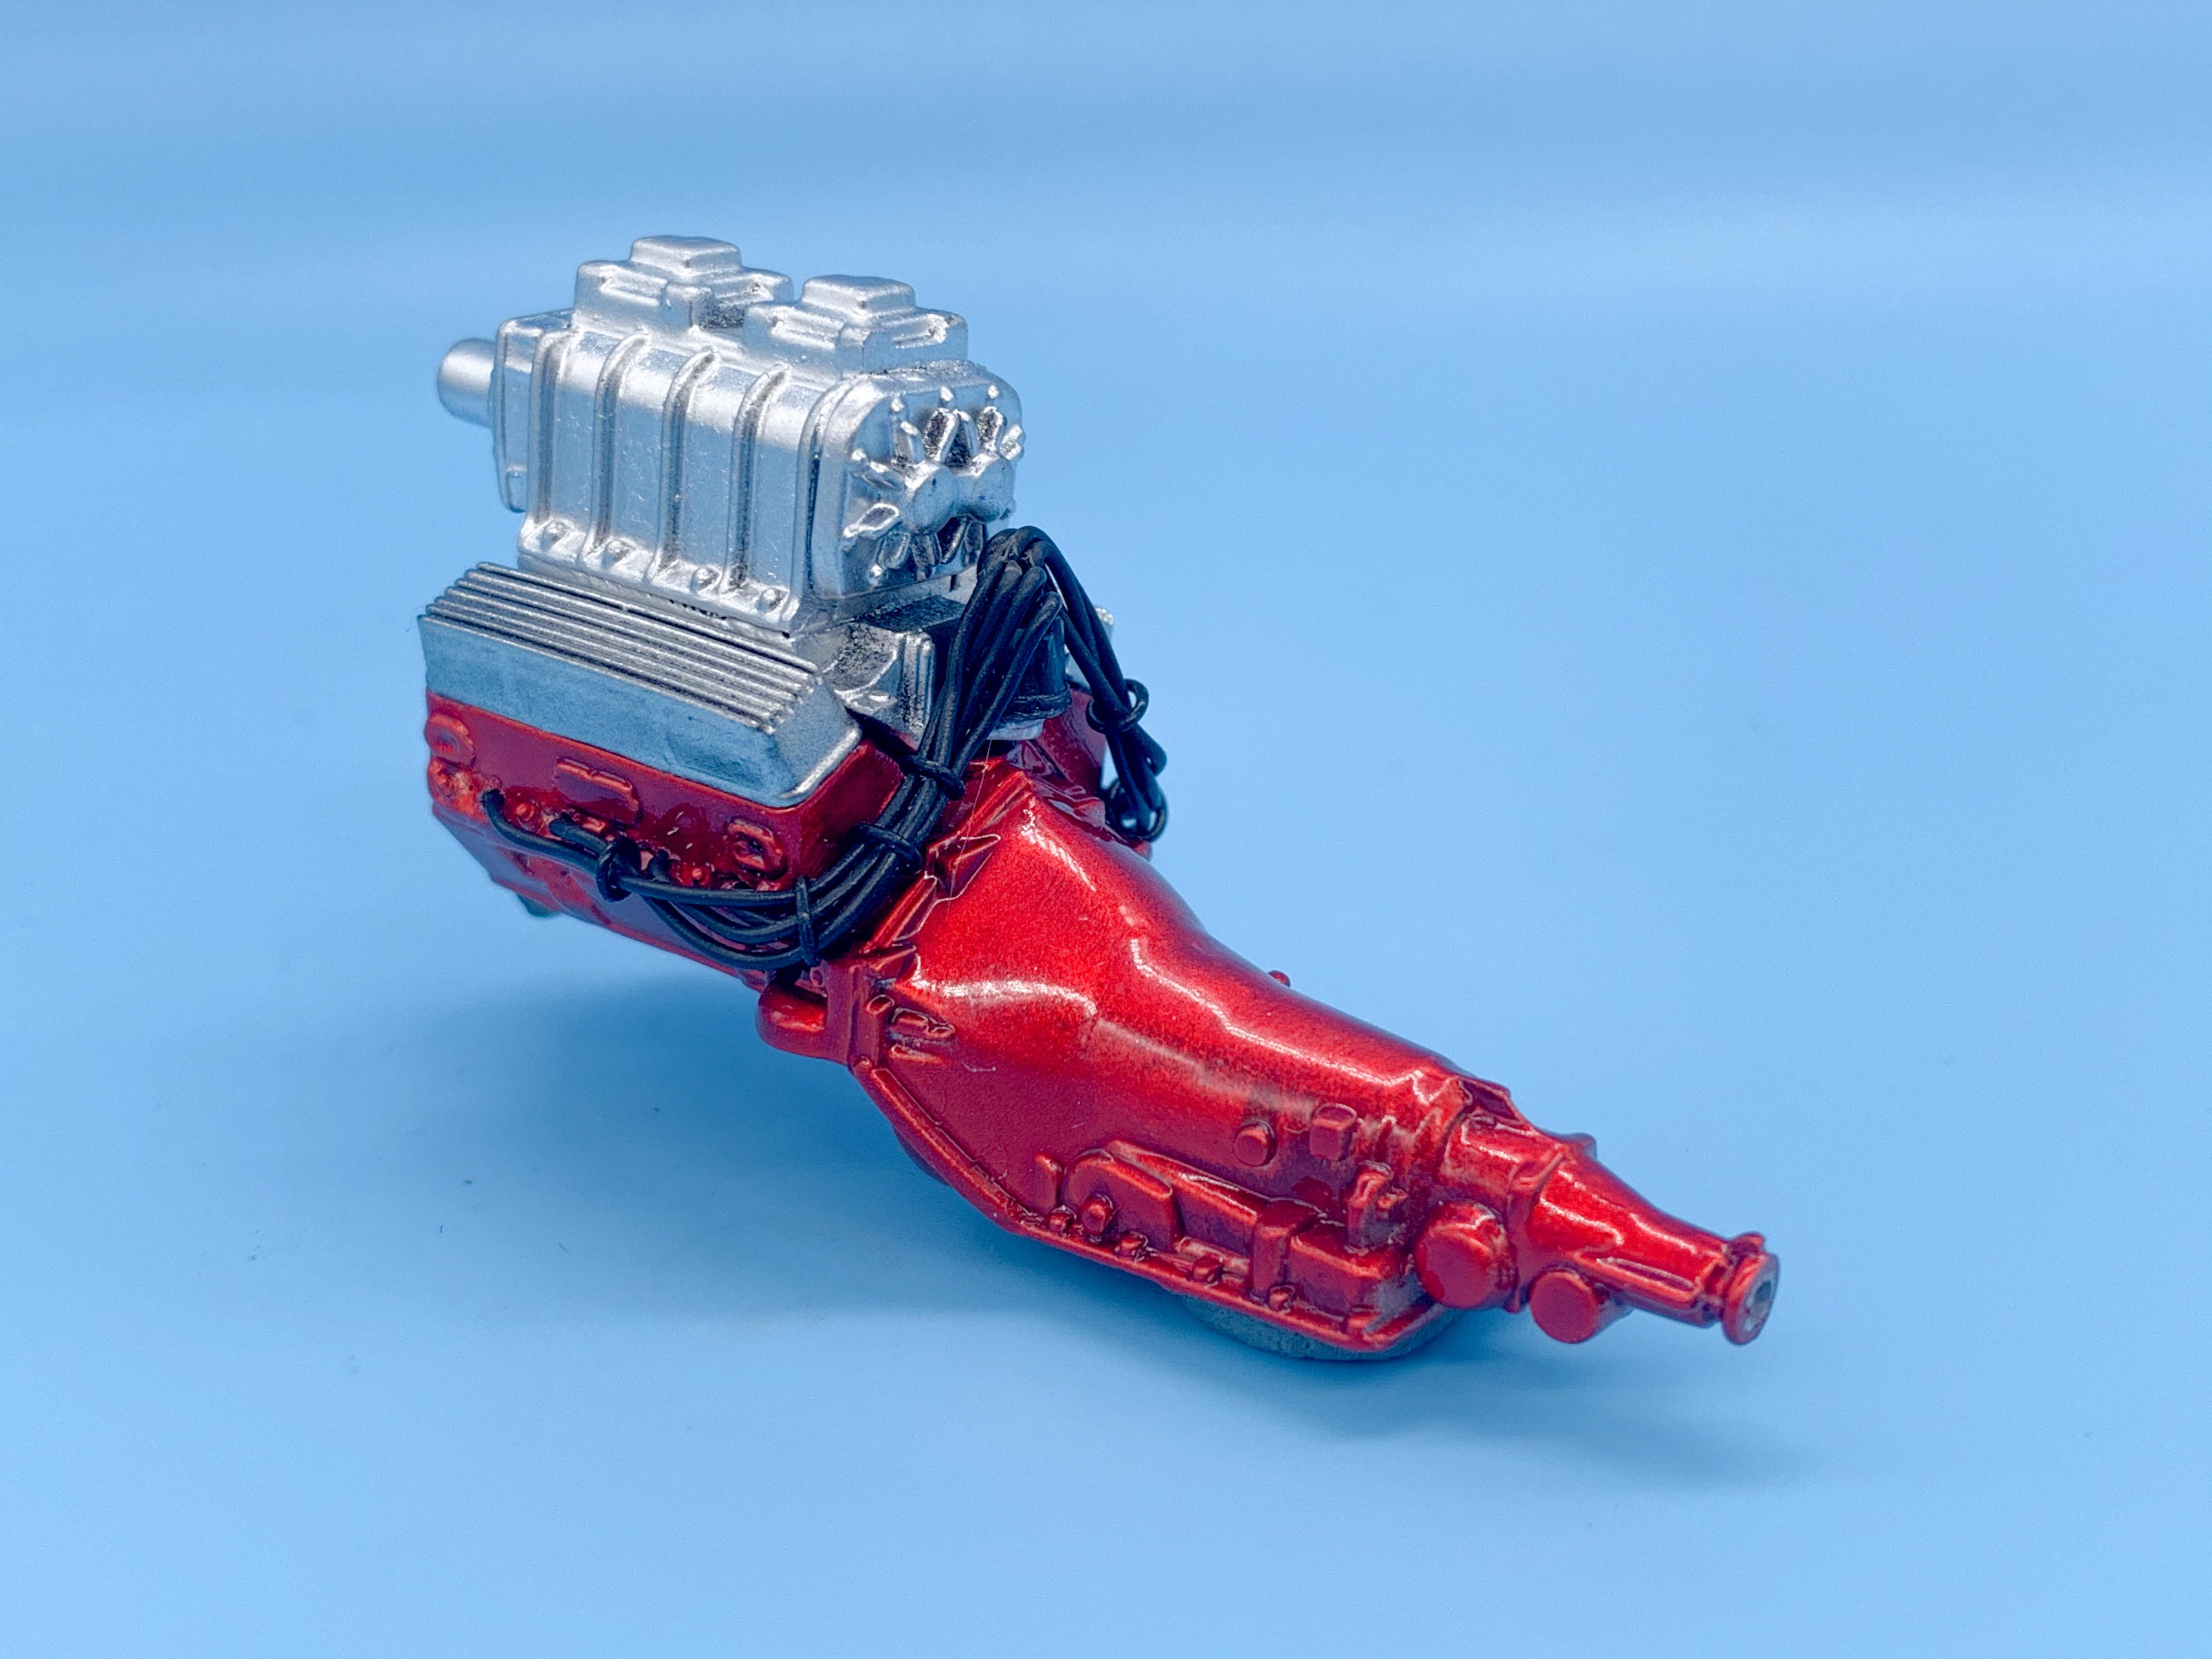
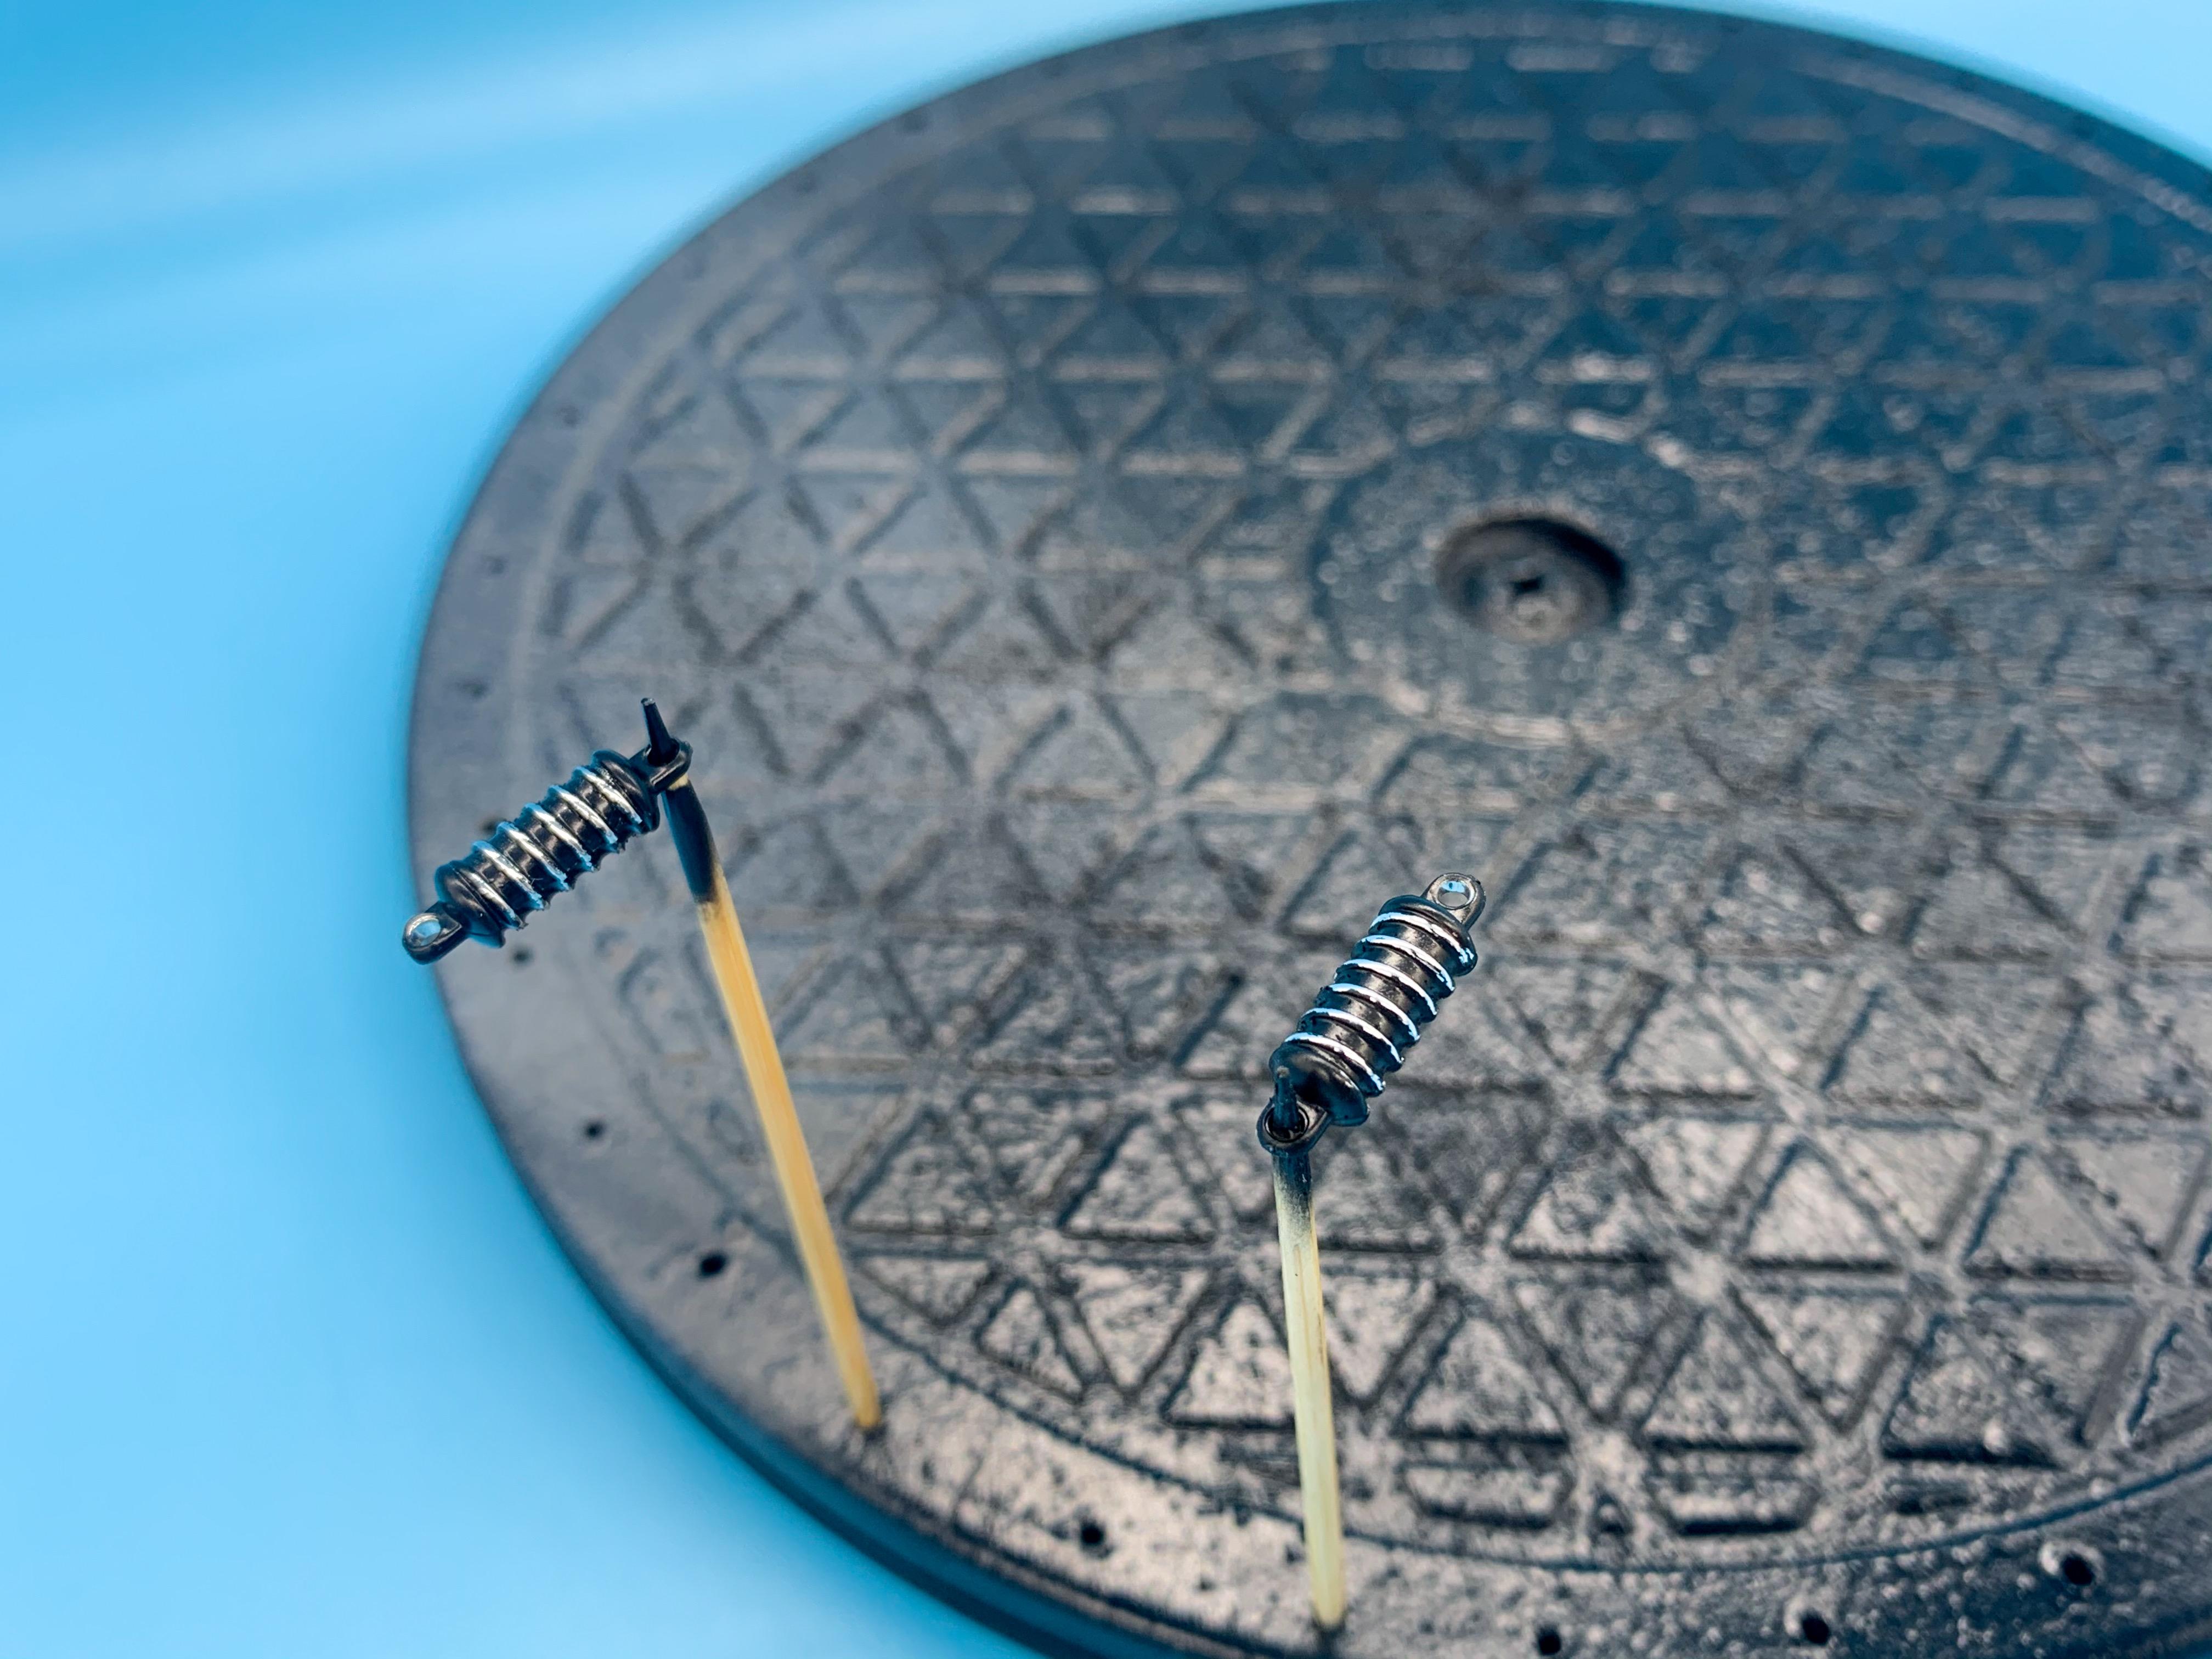
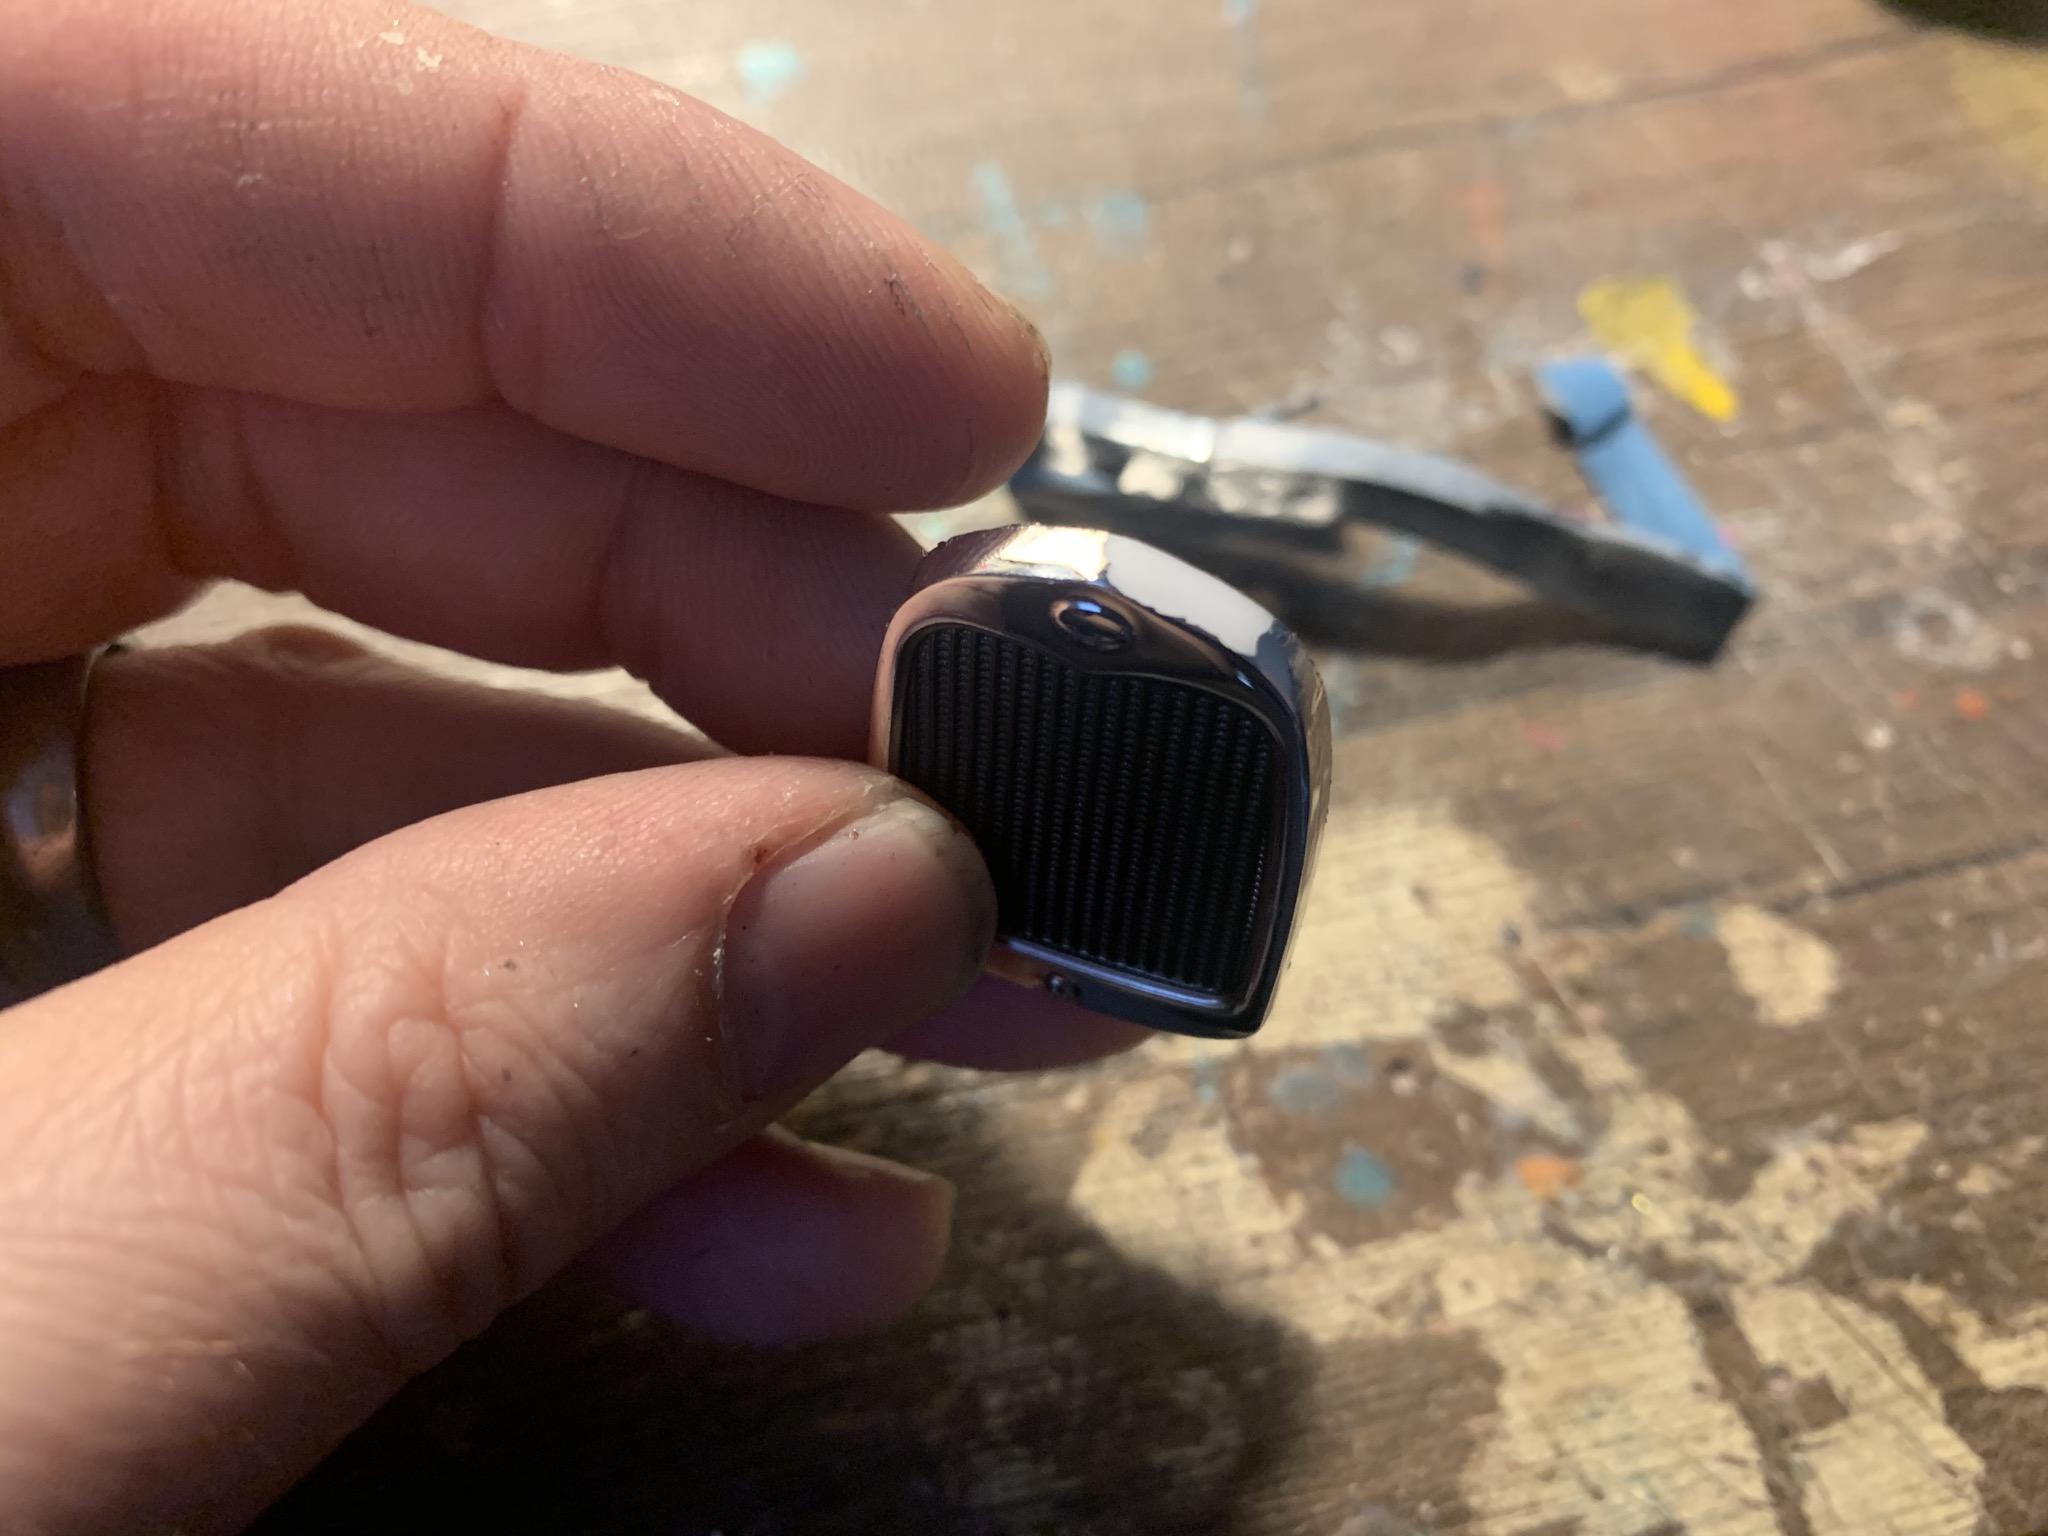
Most of the trick with this Testors enamel clear seems to be shooting it when the humidity’s low - if you’re around 45% (which is low for NY) and you lay it down right it’ll go down like glass! It’ll still get a thorough polish anyway before I’m happy, but it does lay down pretty nice! Just a tiny update, as I’m still working through painting and prepping parts here - got the engine wired and a couple of the Alclad’d bits in place... To avoid touching and marring the rest of the Alclad’d parts I’ll mount the engine in the frame now and add the pans and blower scoop further down the line: I wanted to (mostly) build this box-stock, so where I’d normally scratchbuild a pair of shocks with separate springs I decided to hit the kit chrome parts with some flat black and then buff a little paint off to give the illusion of springs as long as you don’t look too close: Then I masked up and shot the grille mesh: ...and peeled off the Washi tape and pulled a chunk of the kit chrome off without even trying: So, one step forward and two back, guess I’ll be shooting Alclad on that too ? More soon!