OldNYJim
-
Posts
250 -
Joined
-
Last visited
Content Type
Profiles
Forums
Events
Gallery
Everything posted by OldNYJim
-
(Do you see what I did there? ???)
-
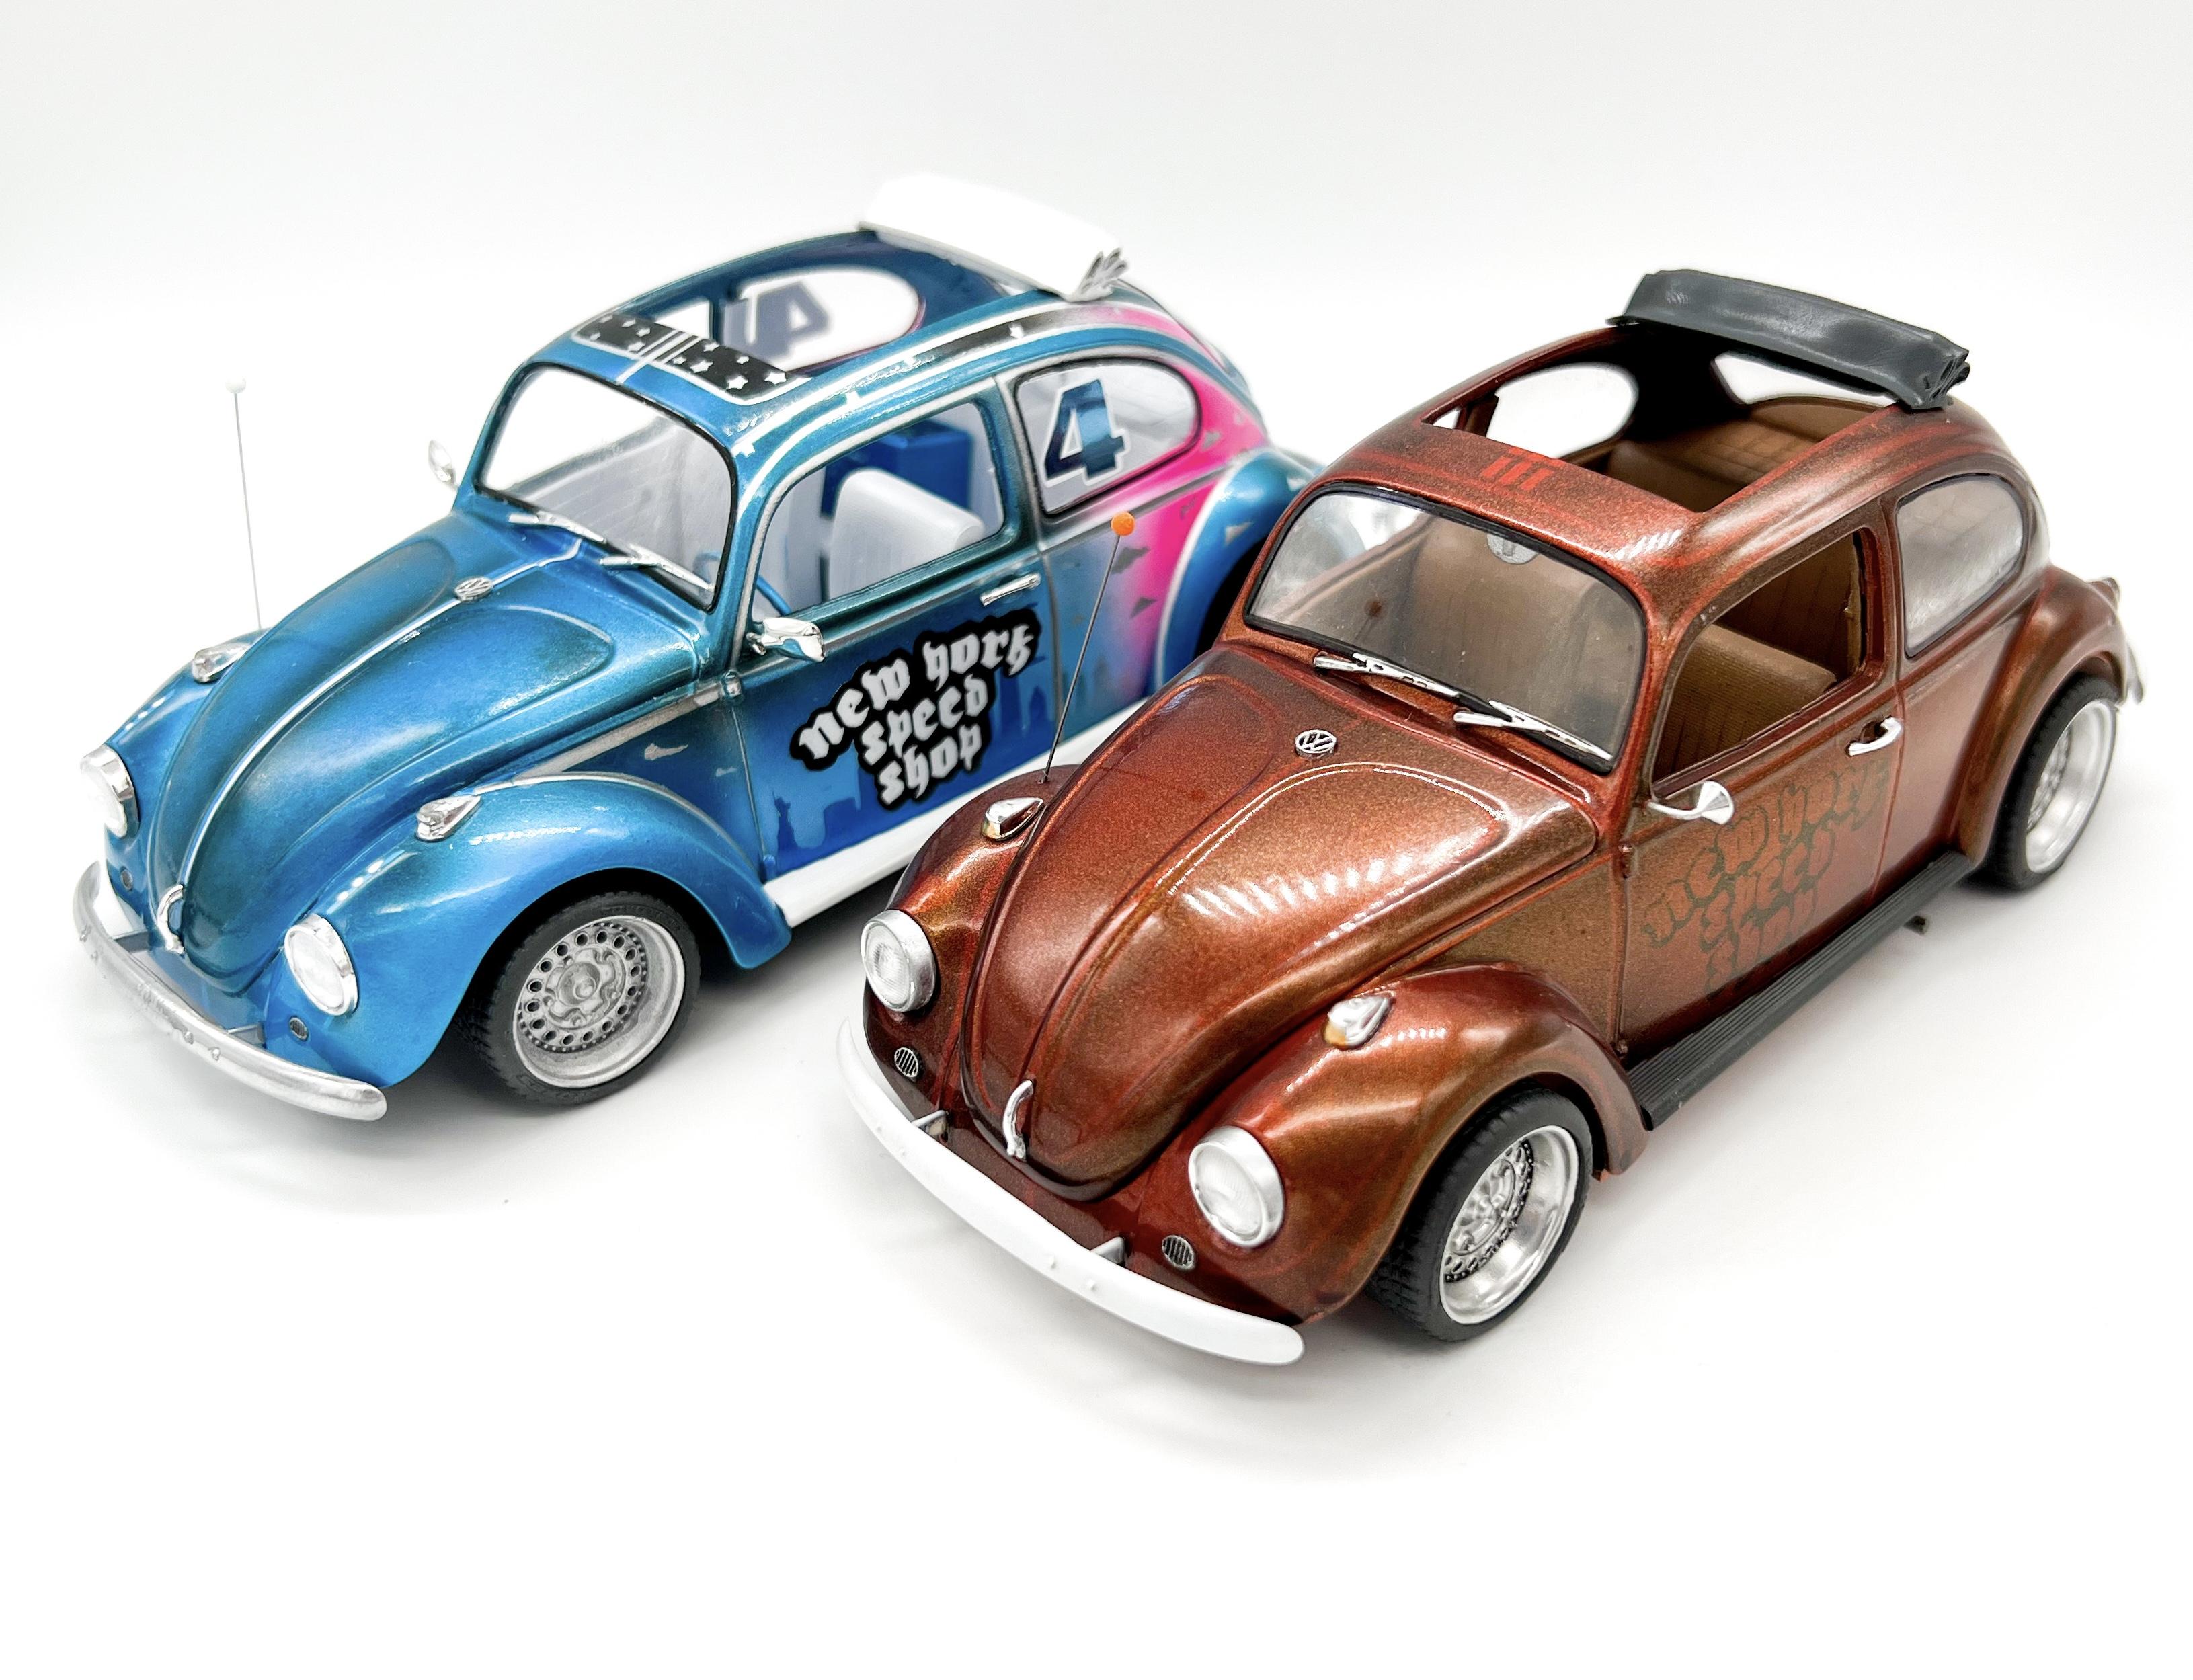
Welcome Jürgen! Here's a couple of Beetles I built

-

Atlantis Models has bought another lot of tooling/molds.....
OldNYJim replied to Dave Van's topic in Car Kit News & Reviews
Awesome - thank you! I like the figure holding his ears ? -
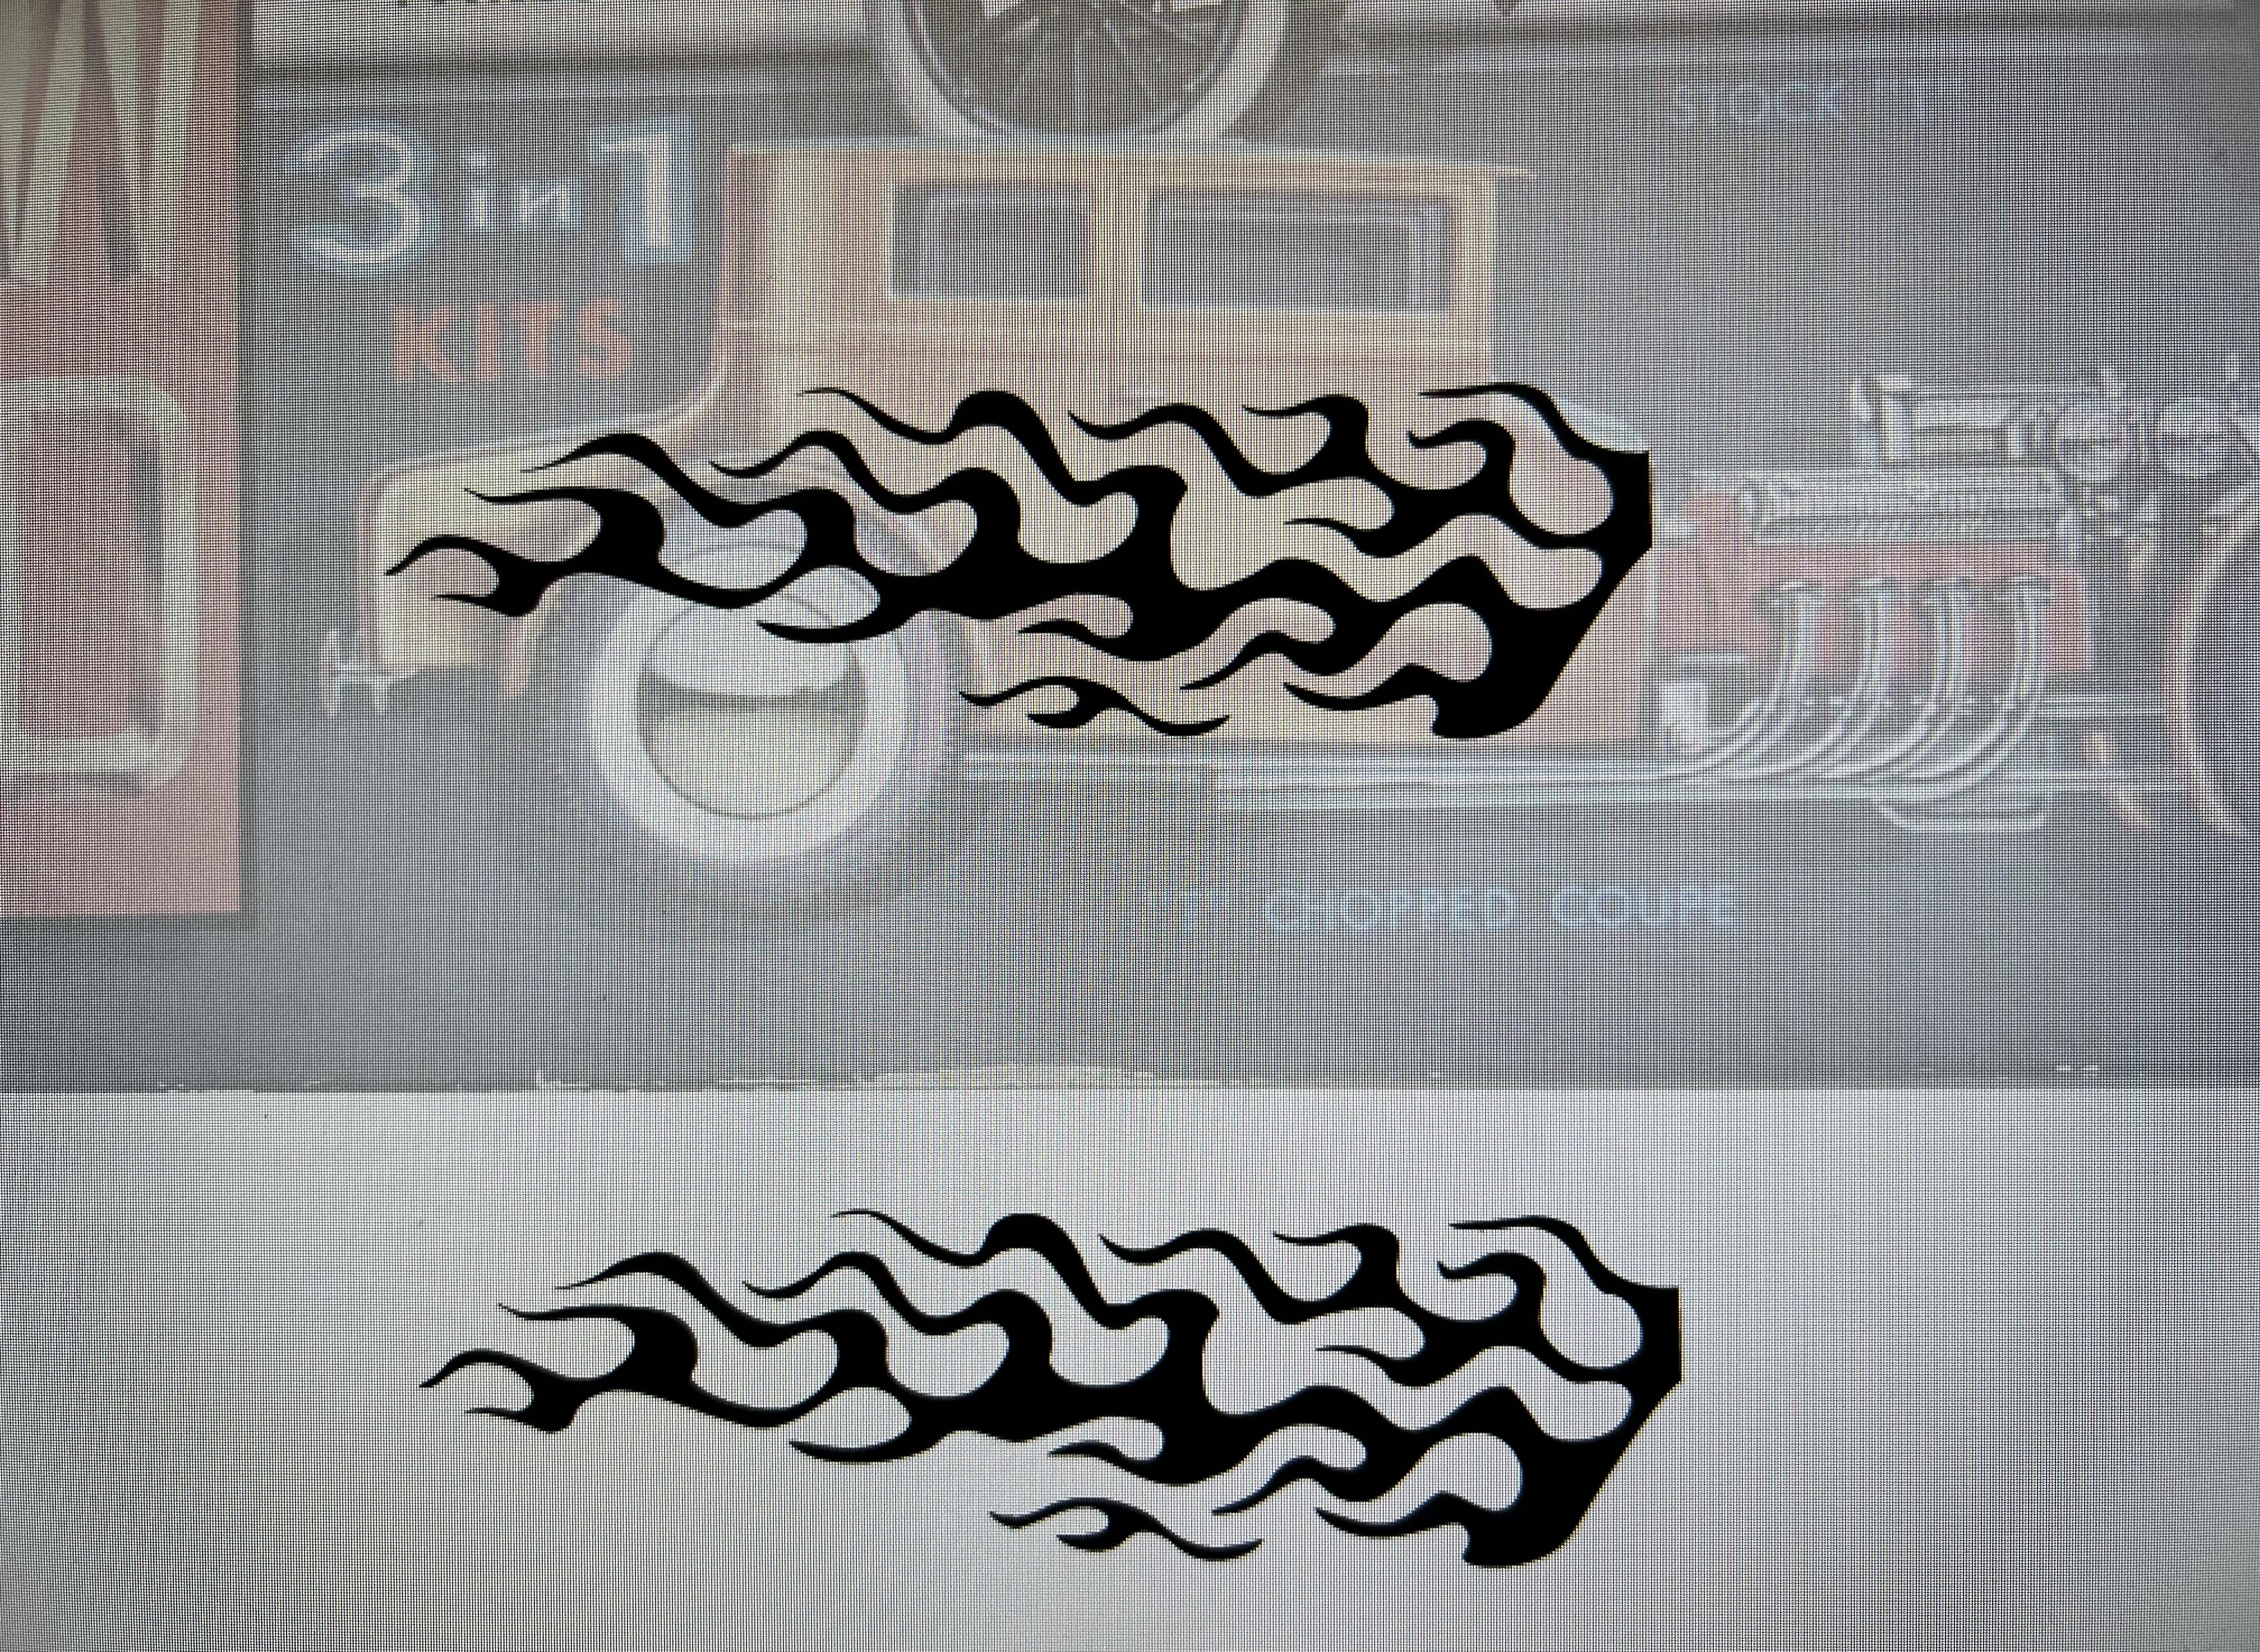
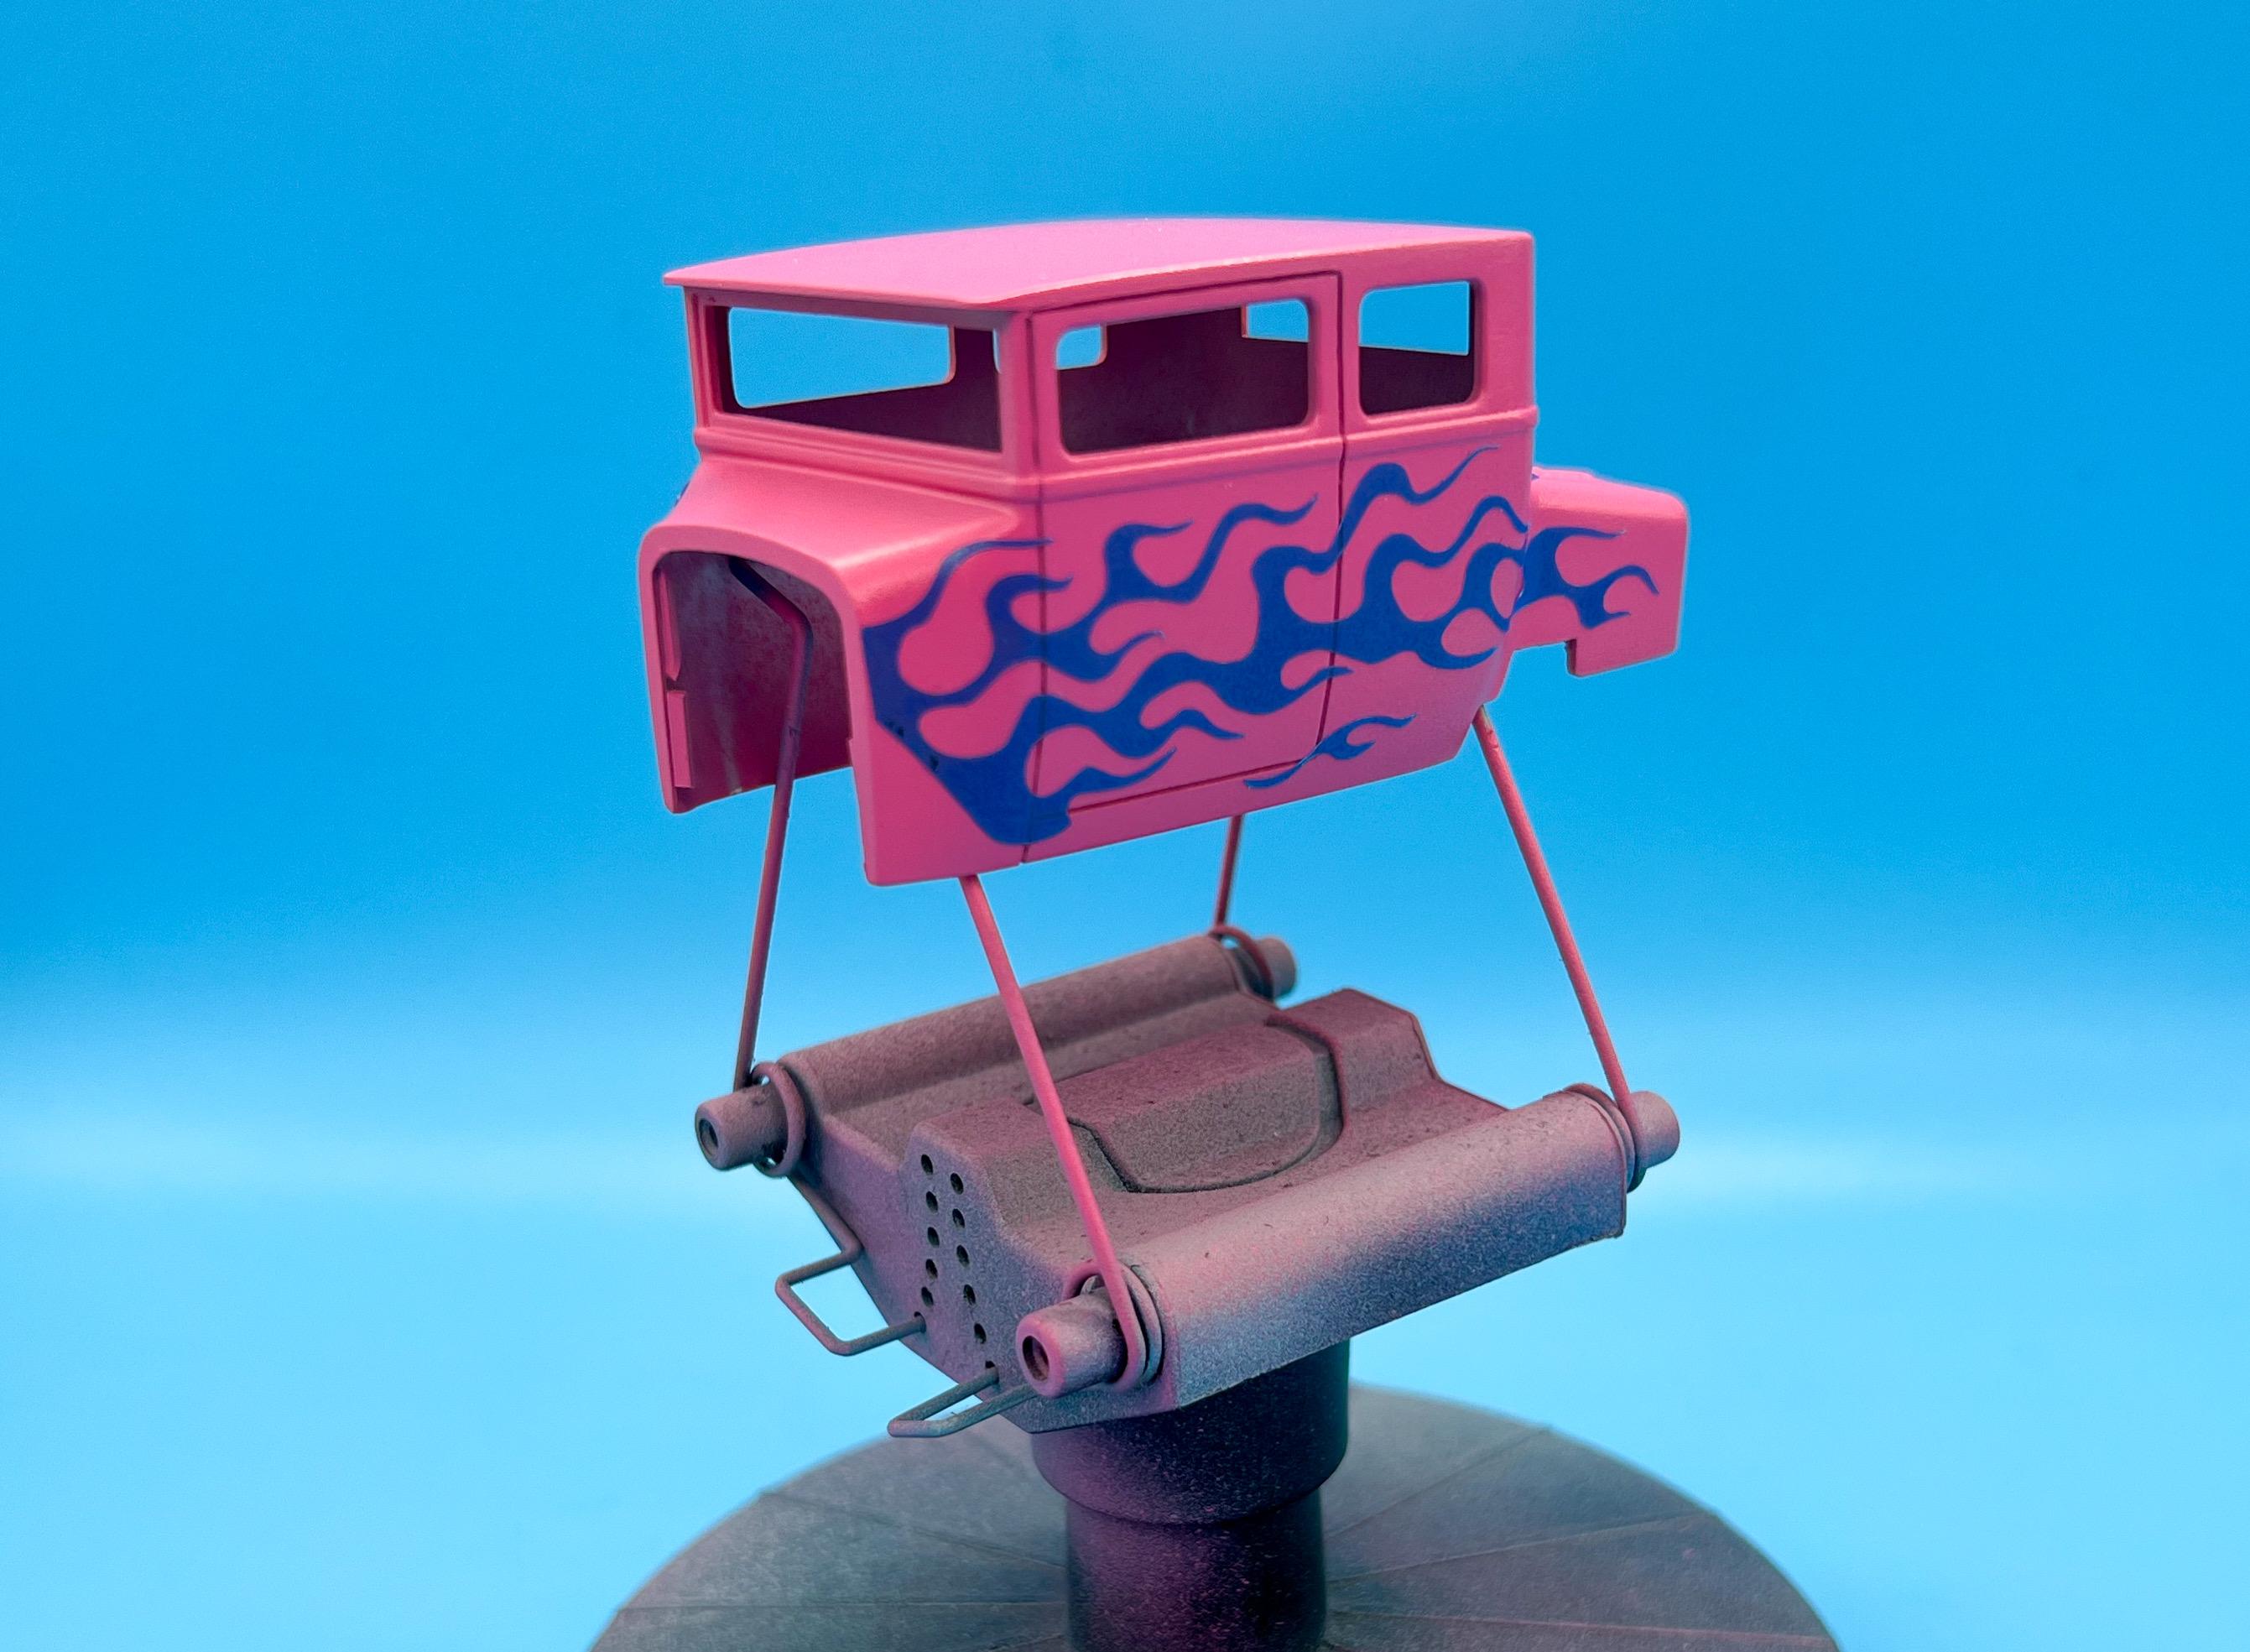
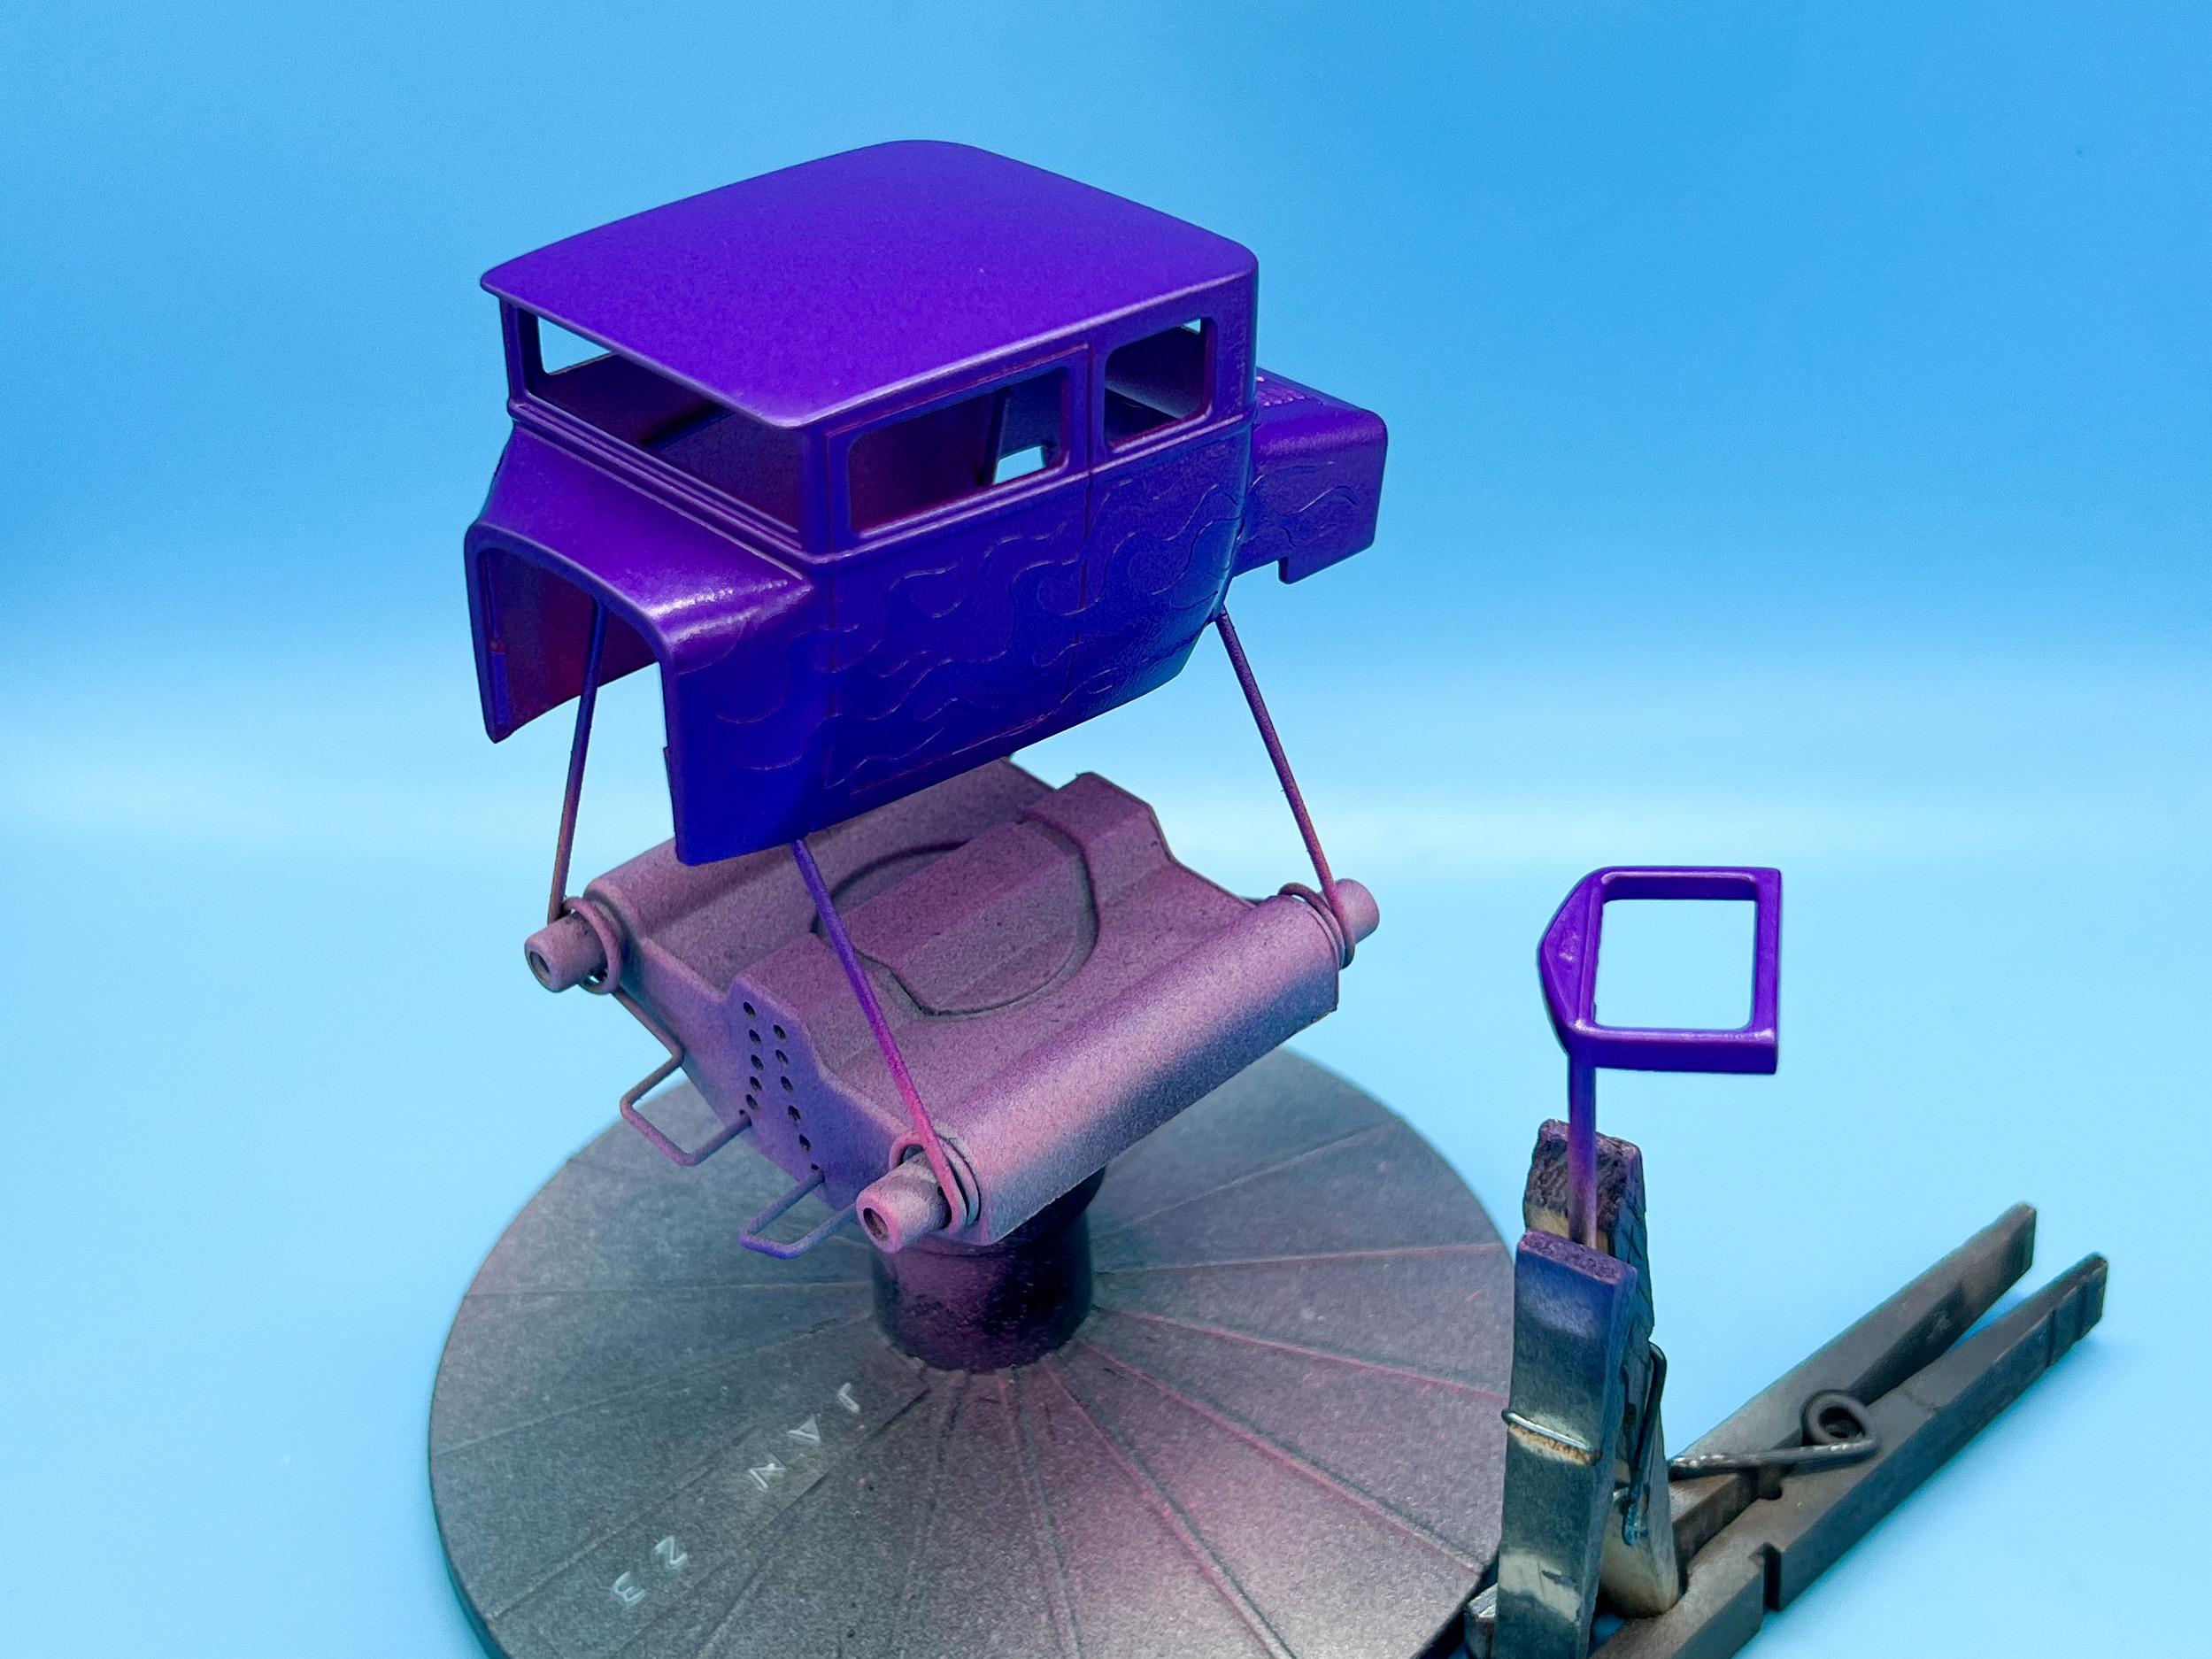
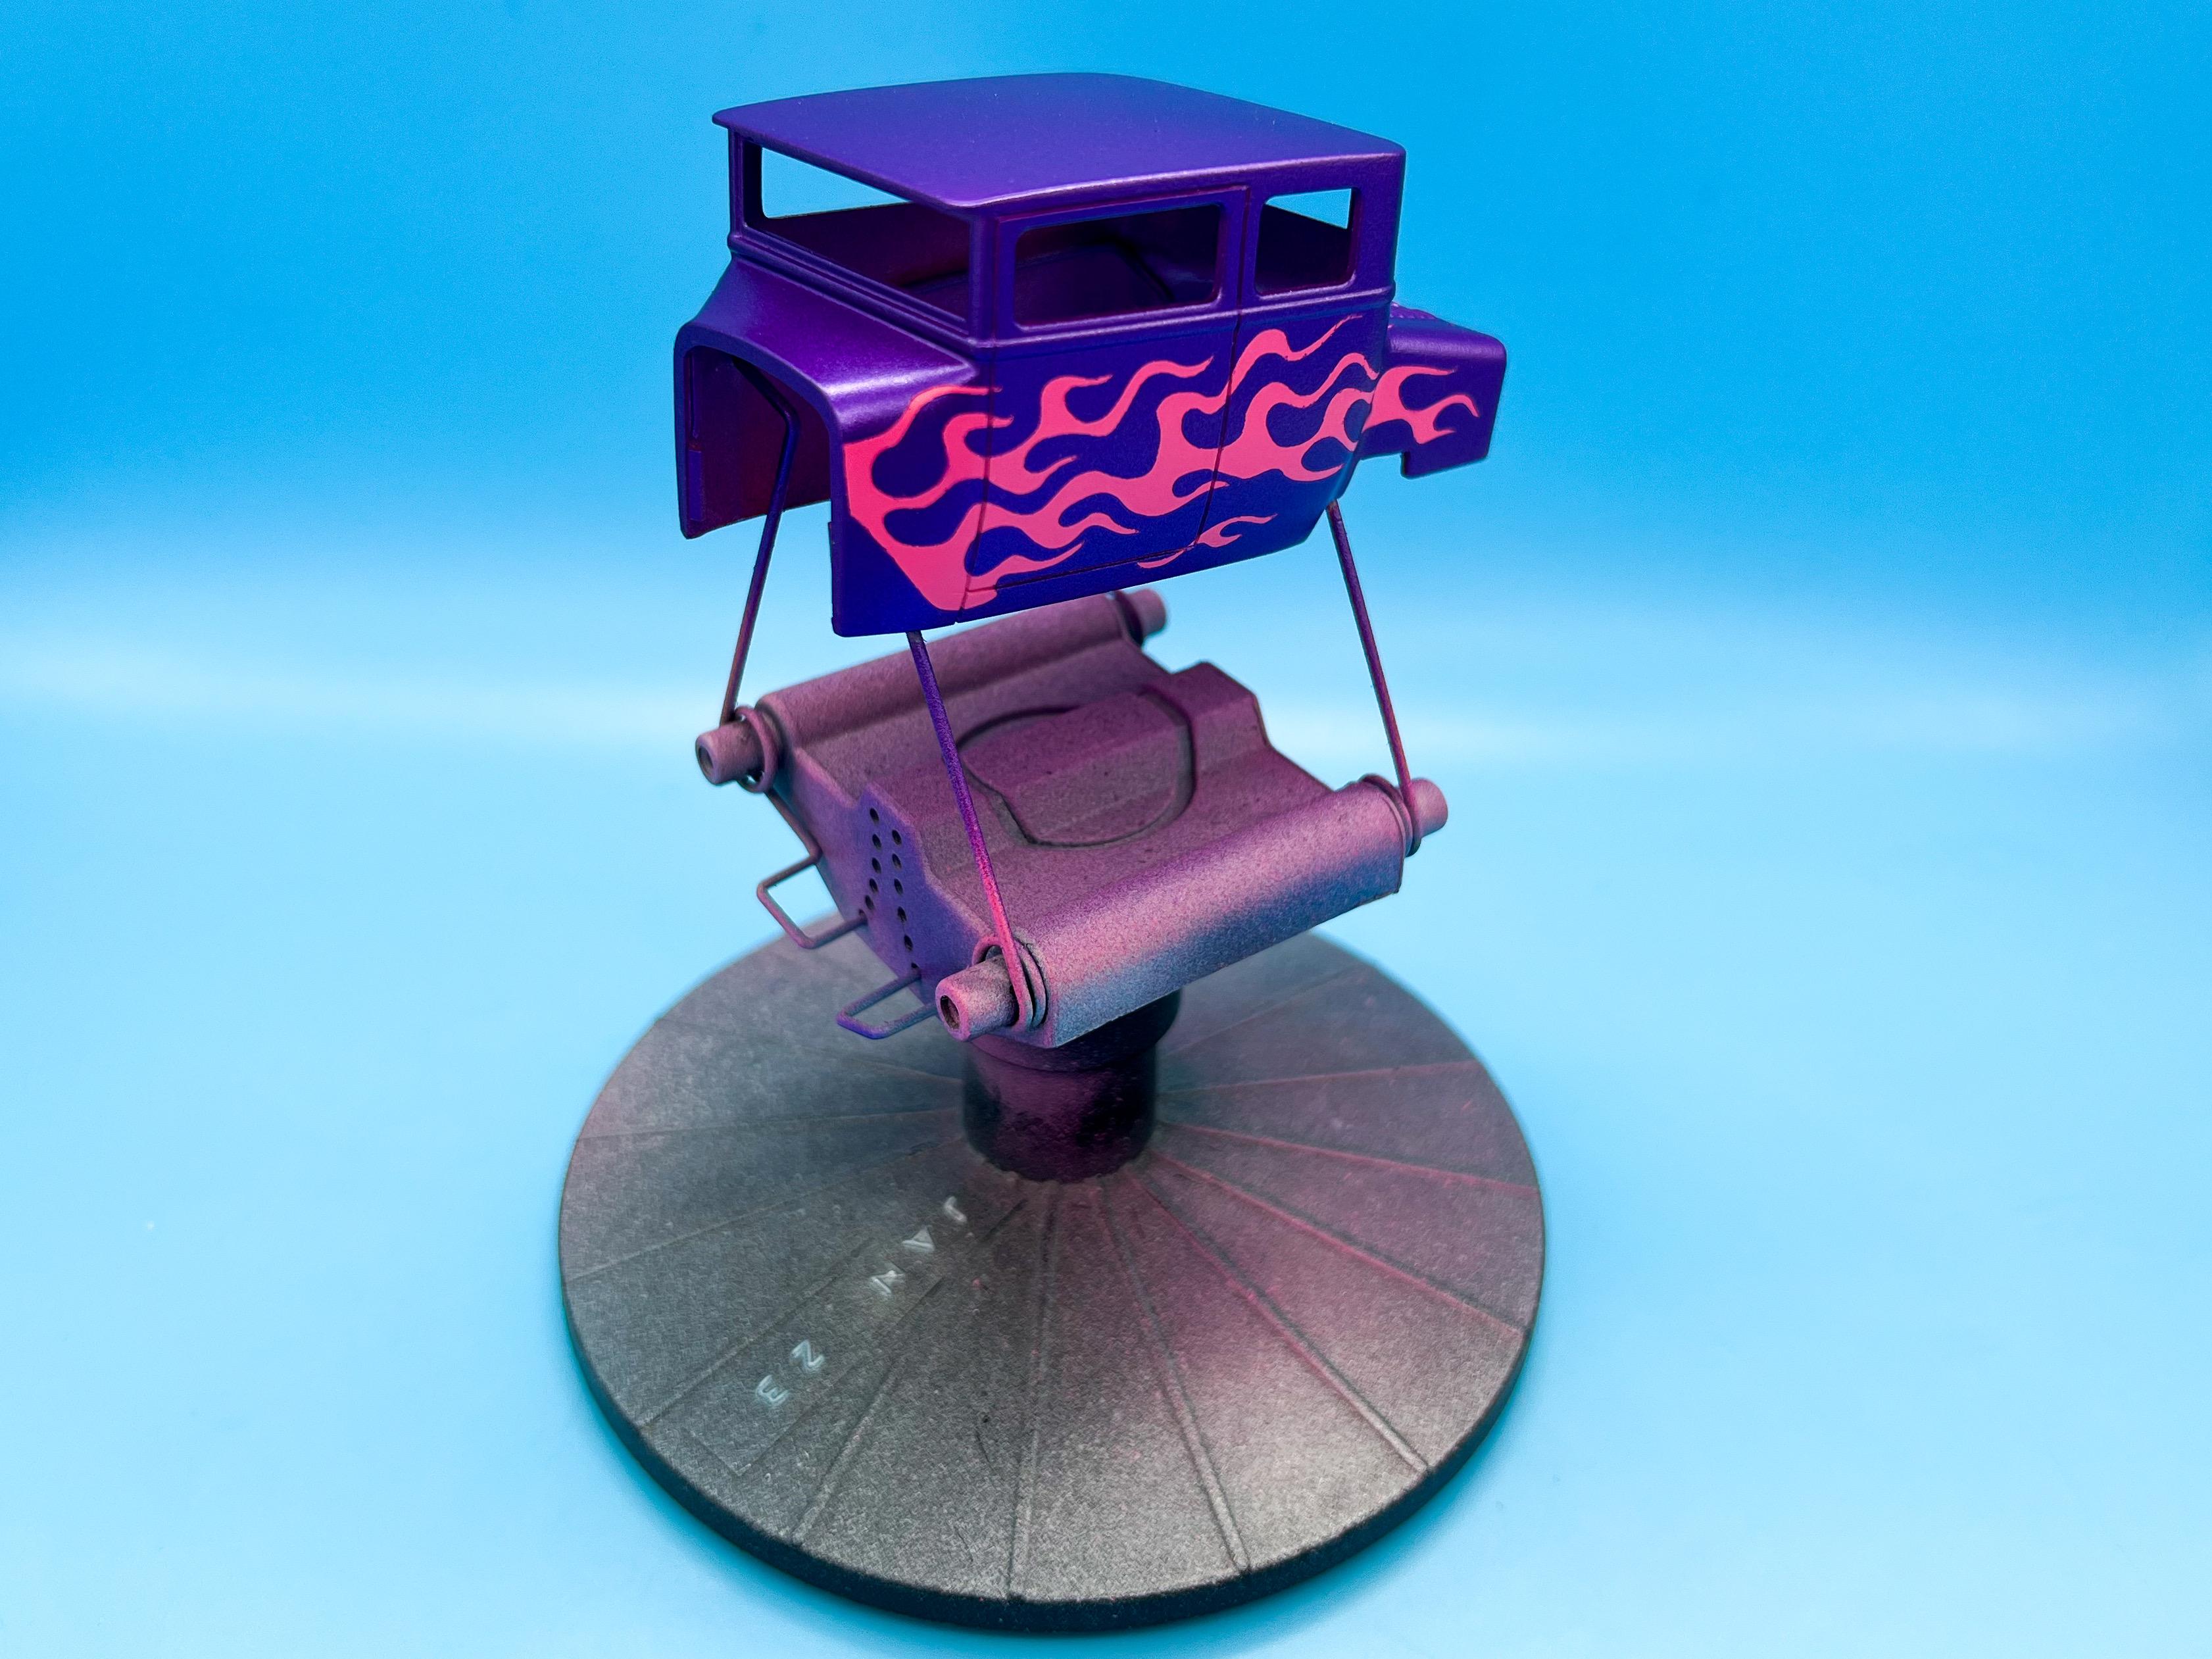
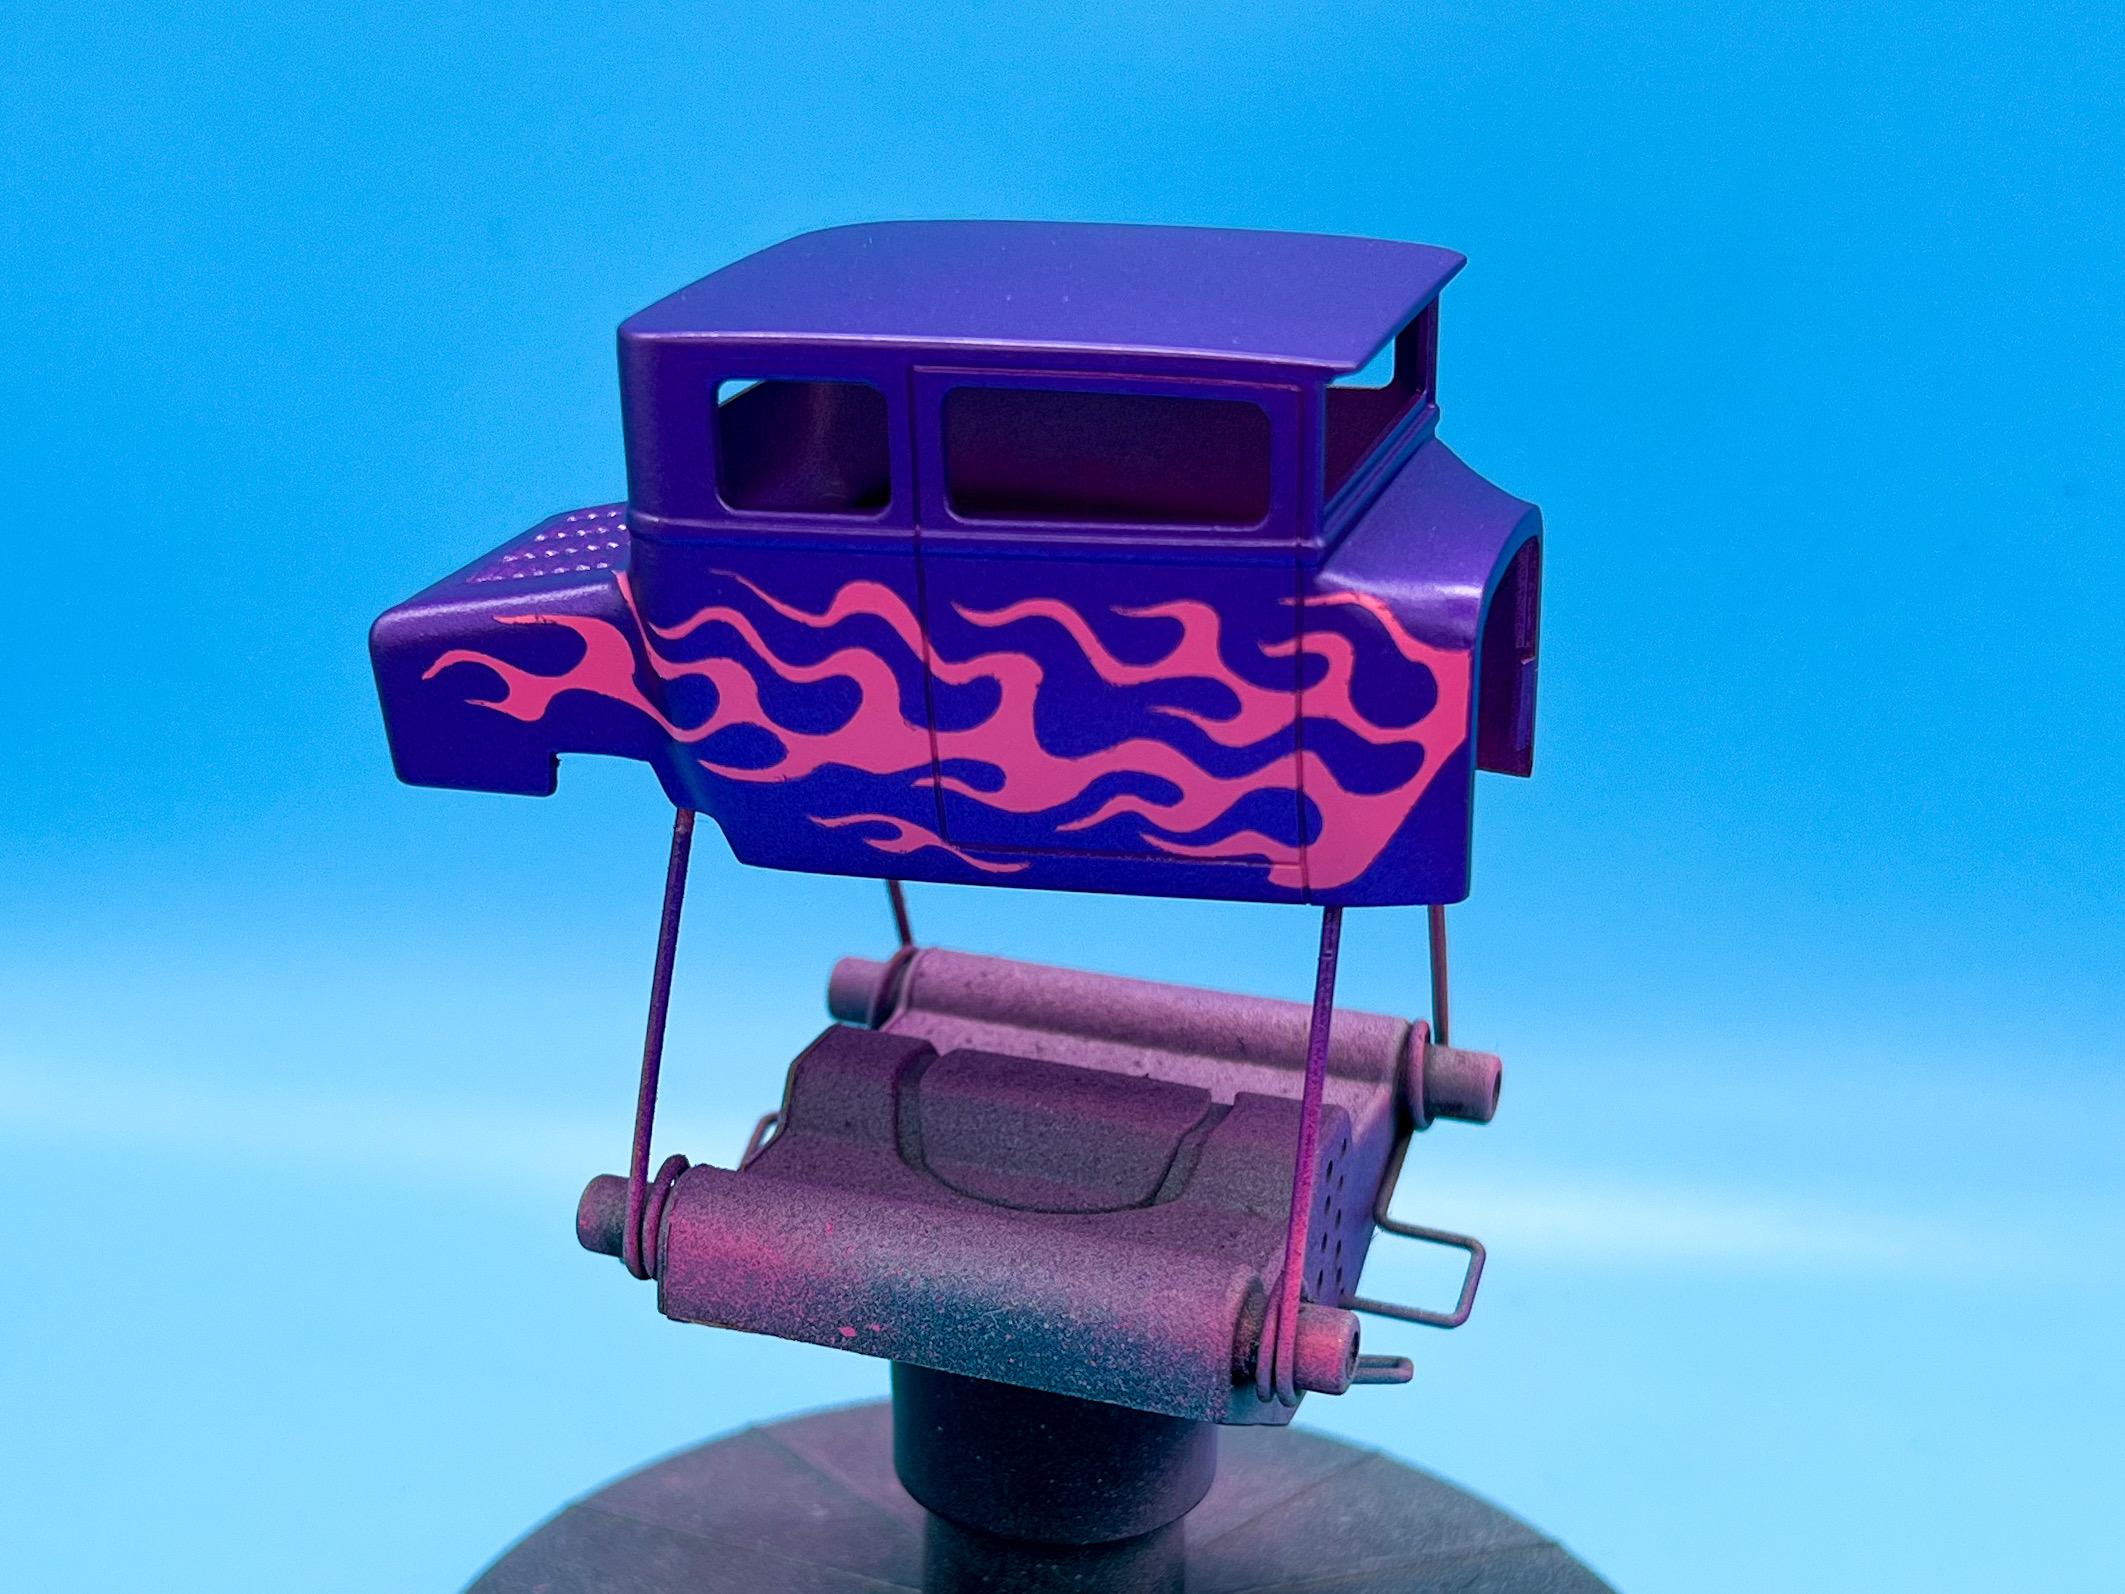
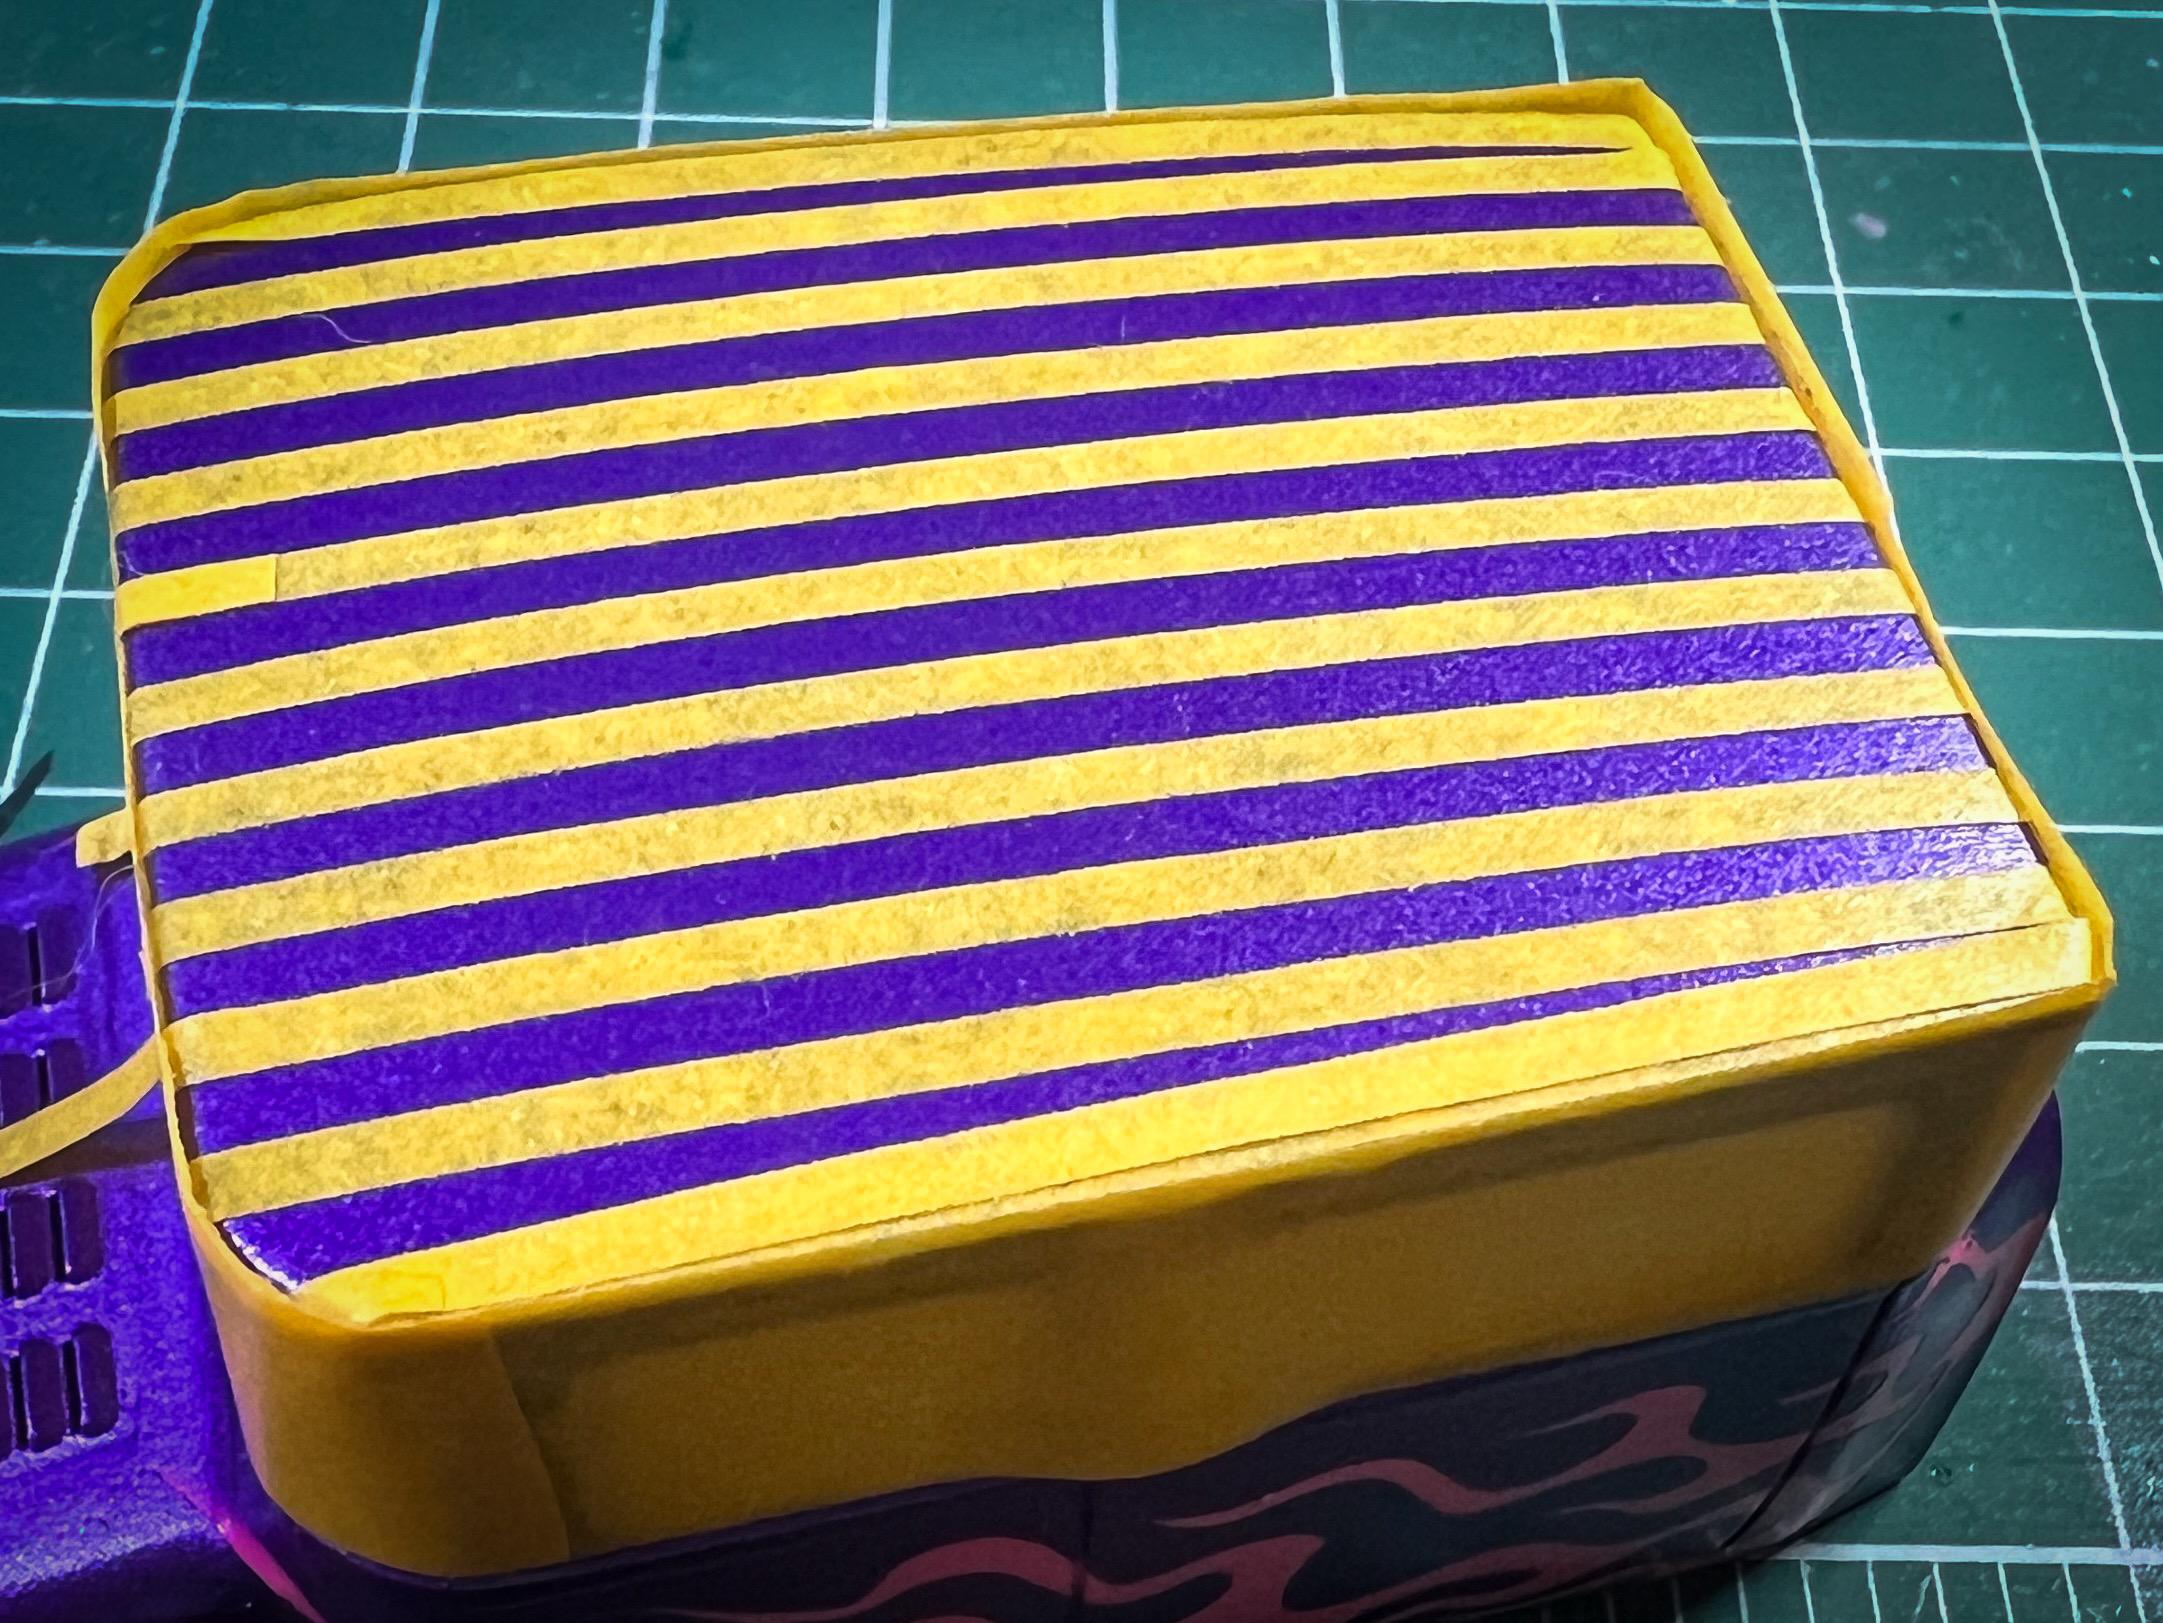
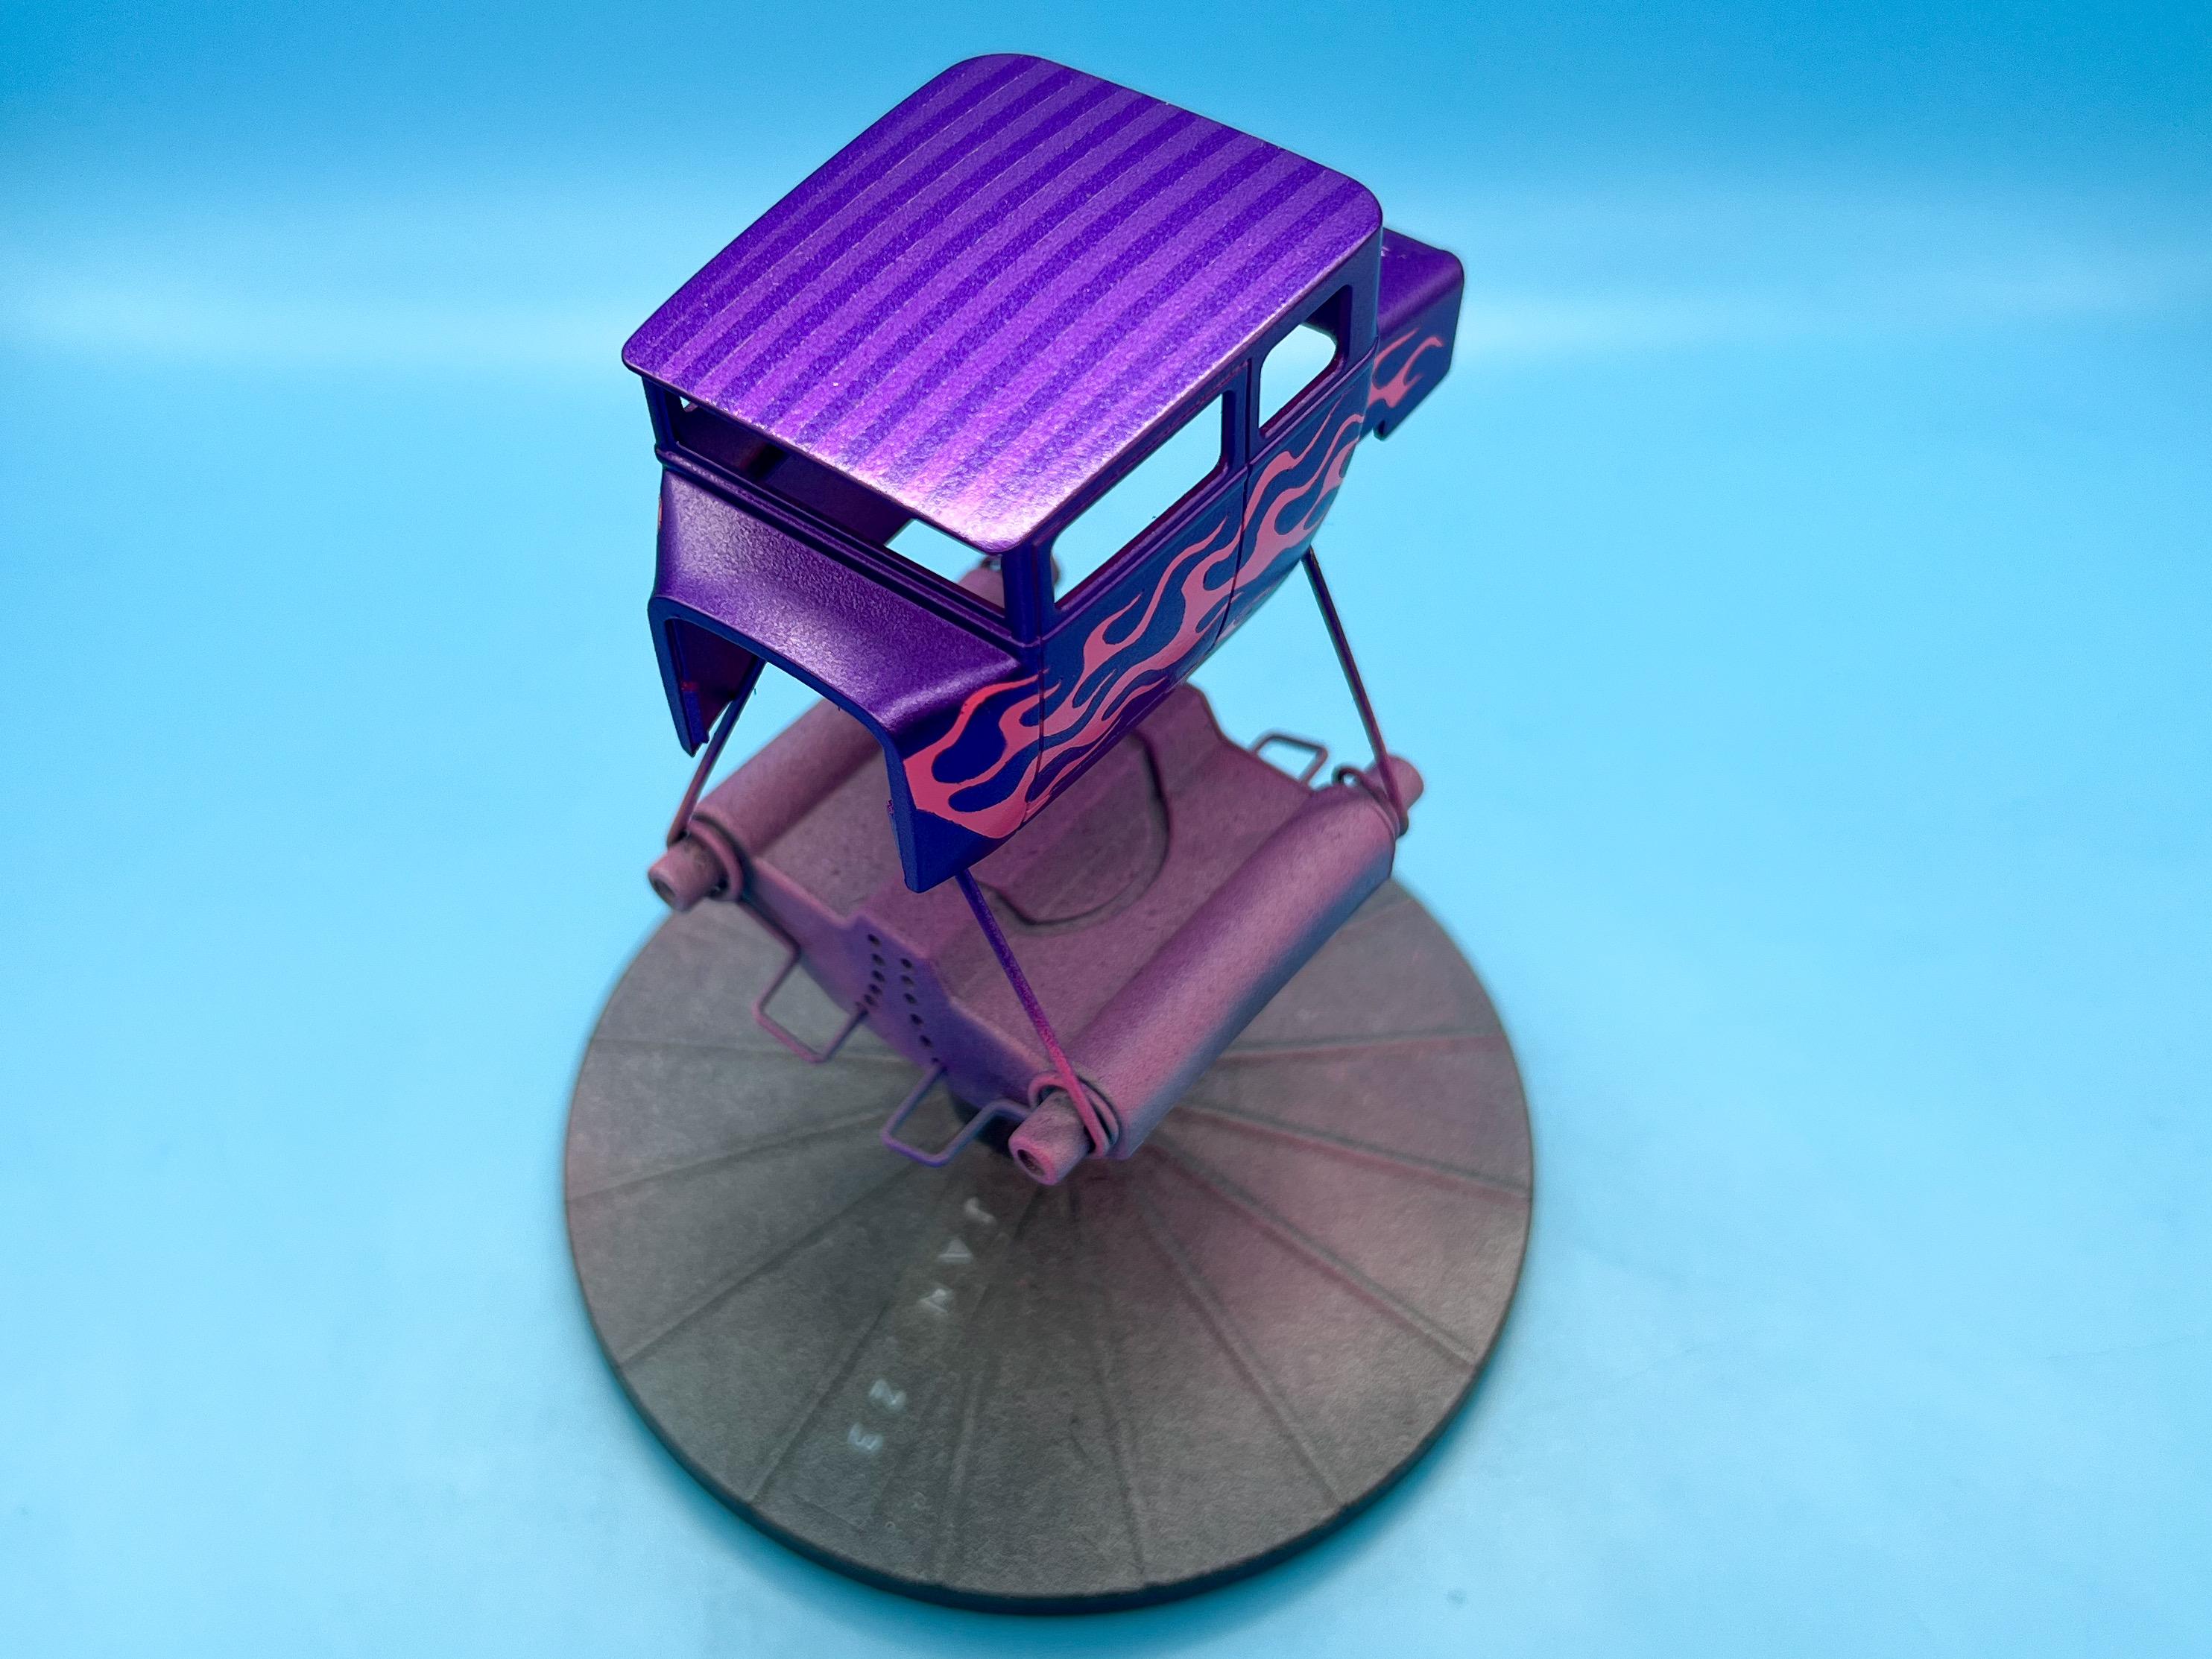
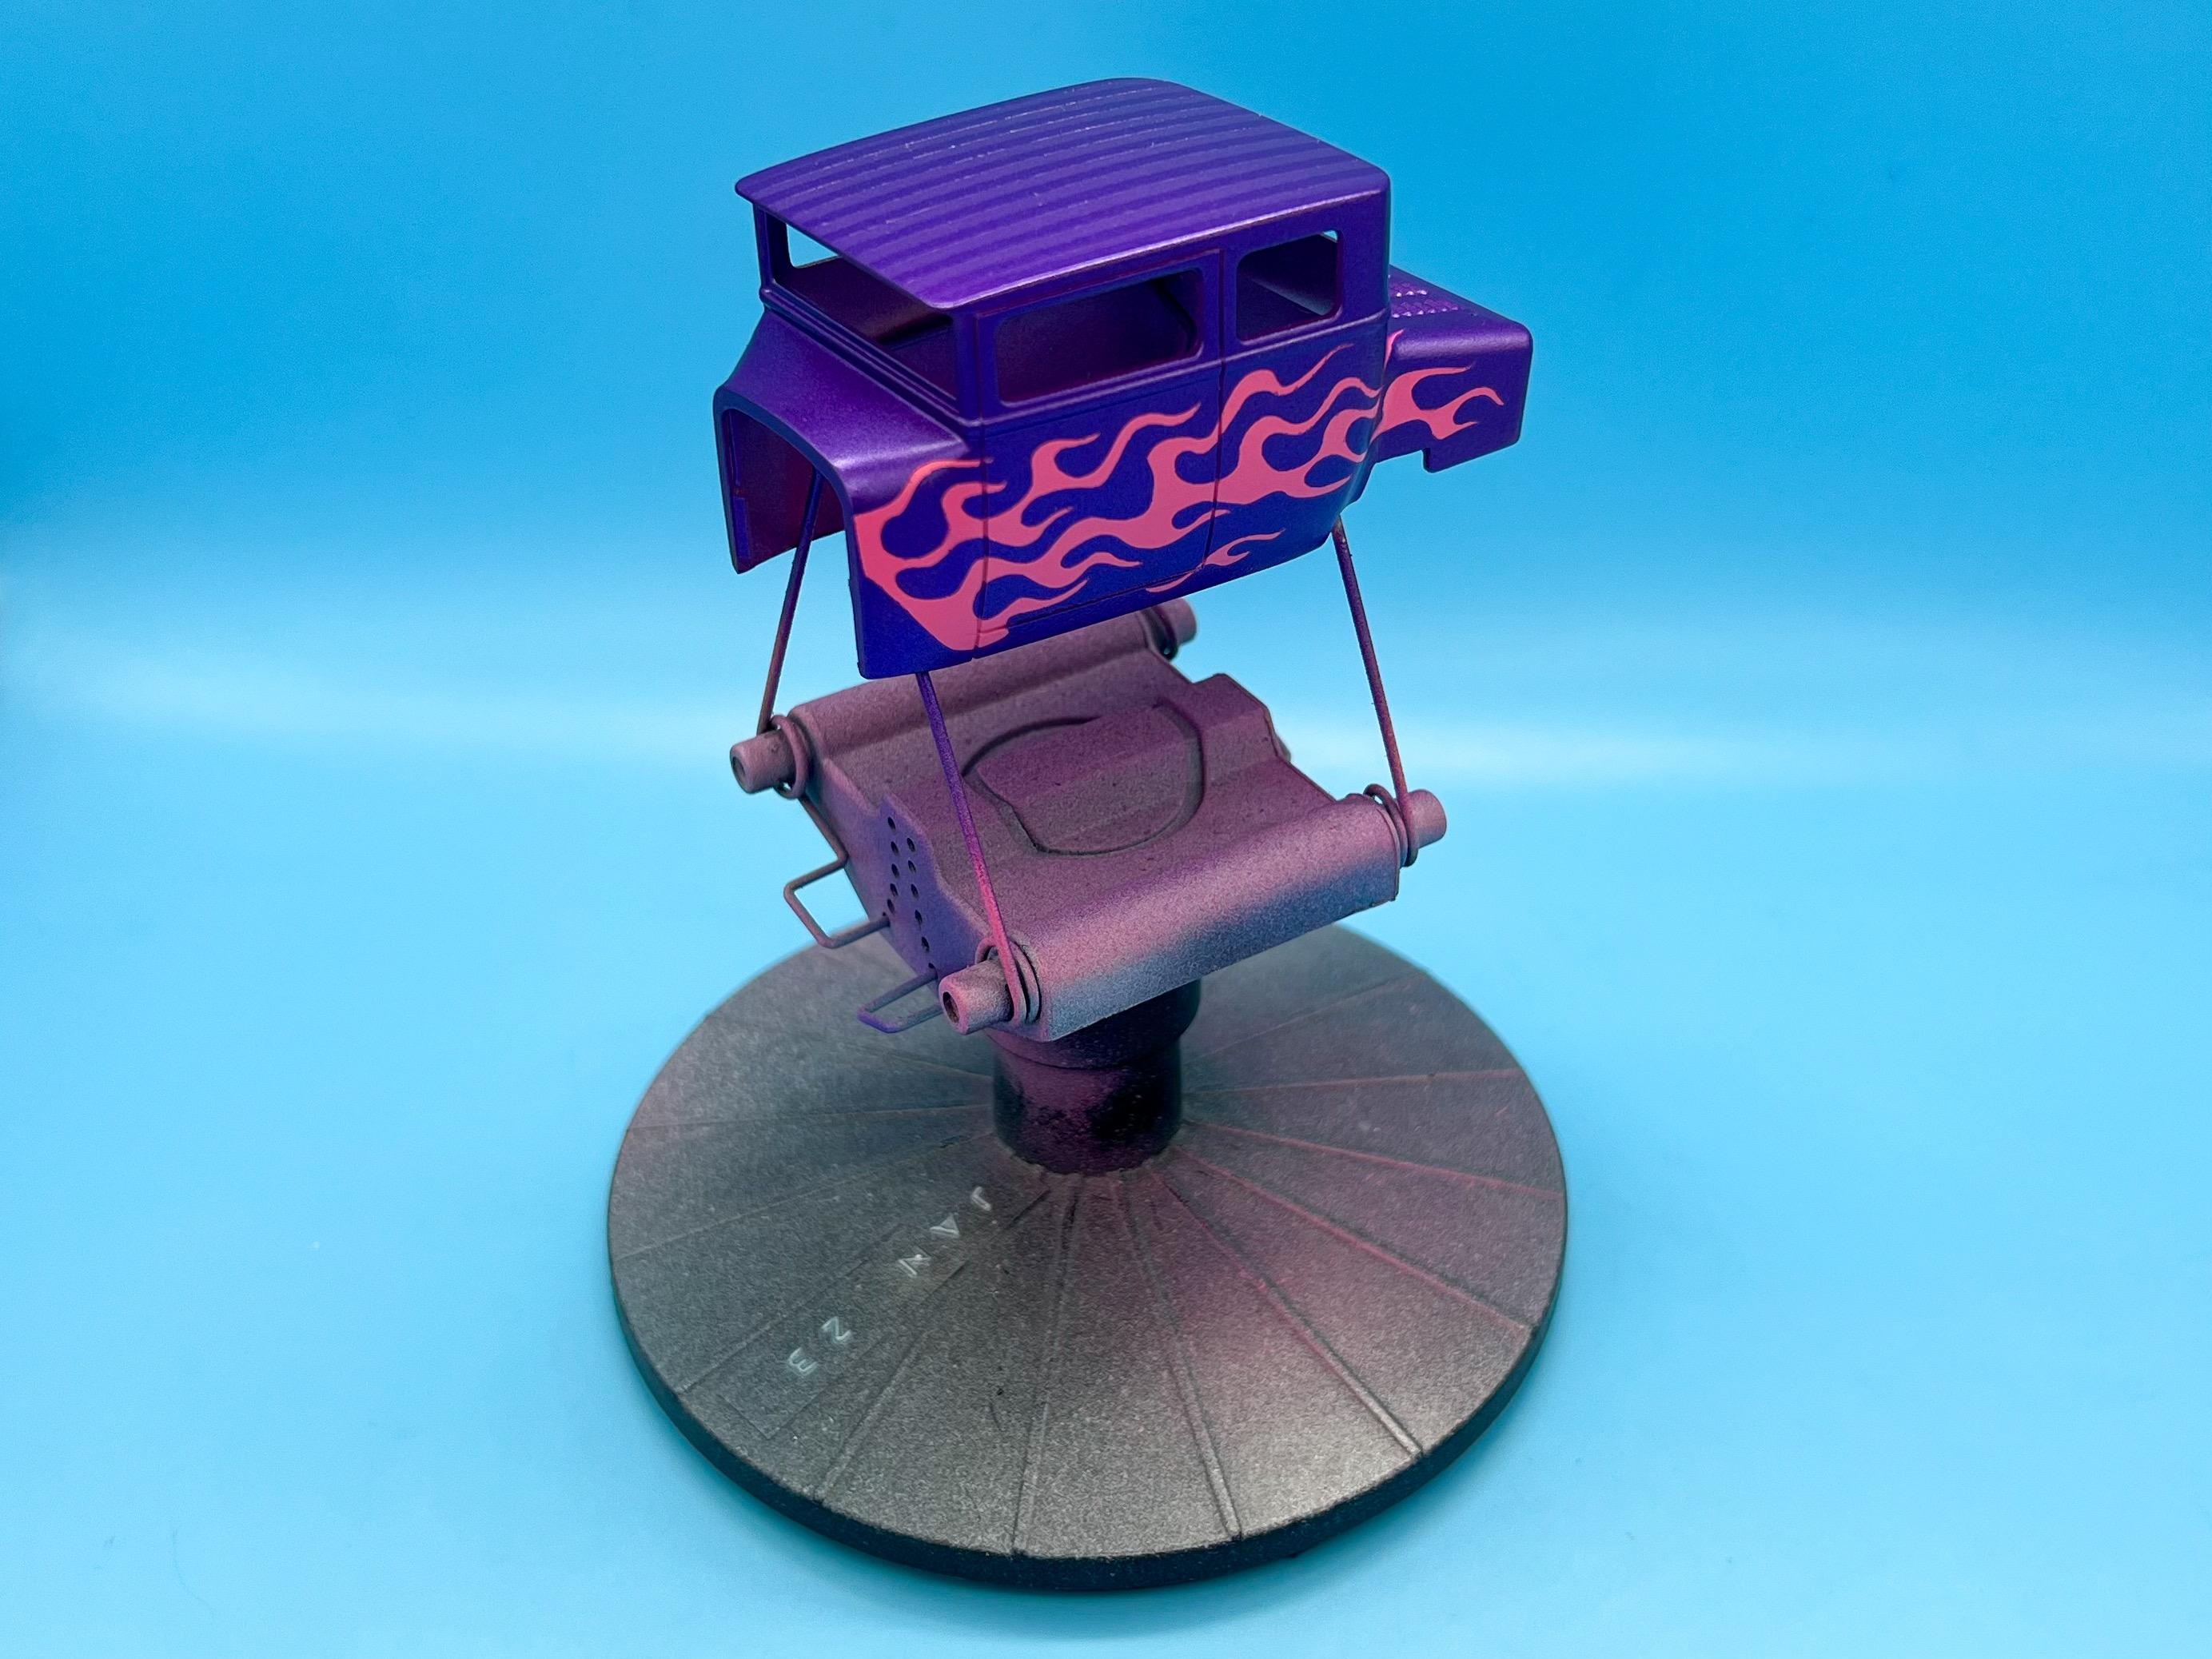
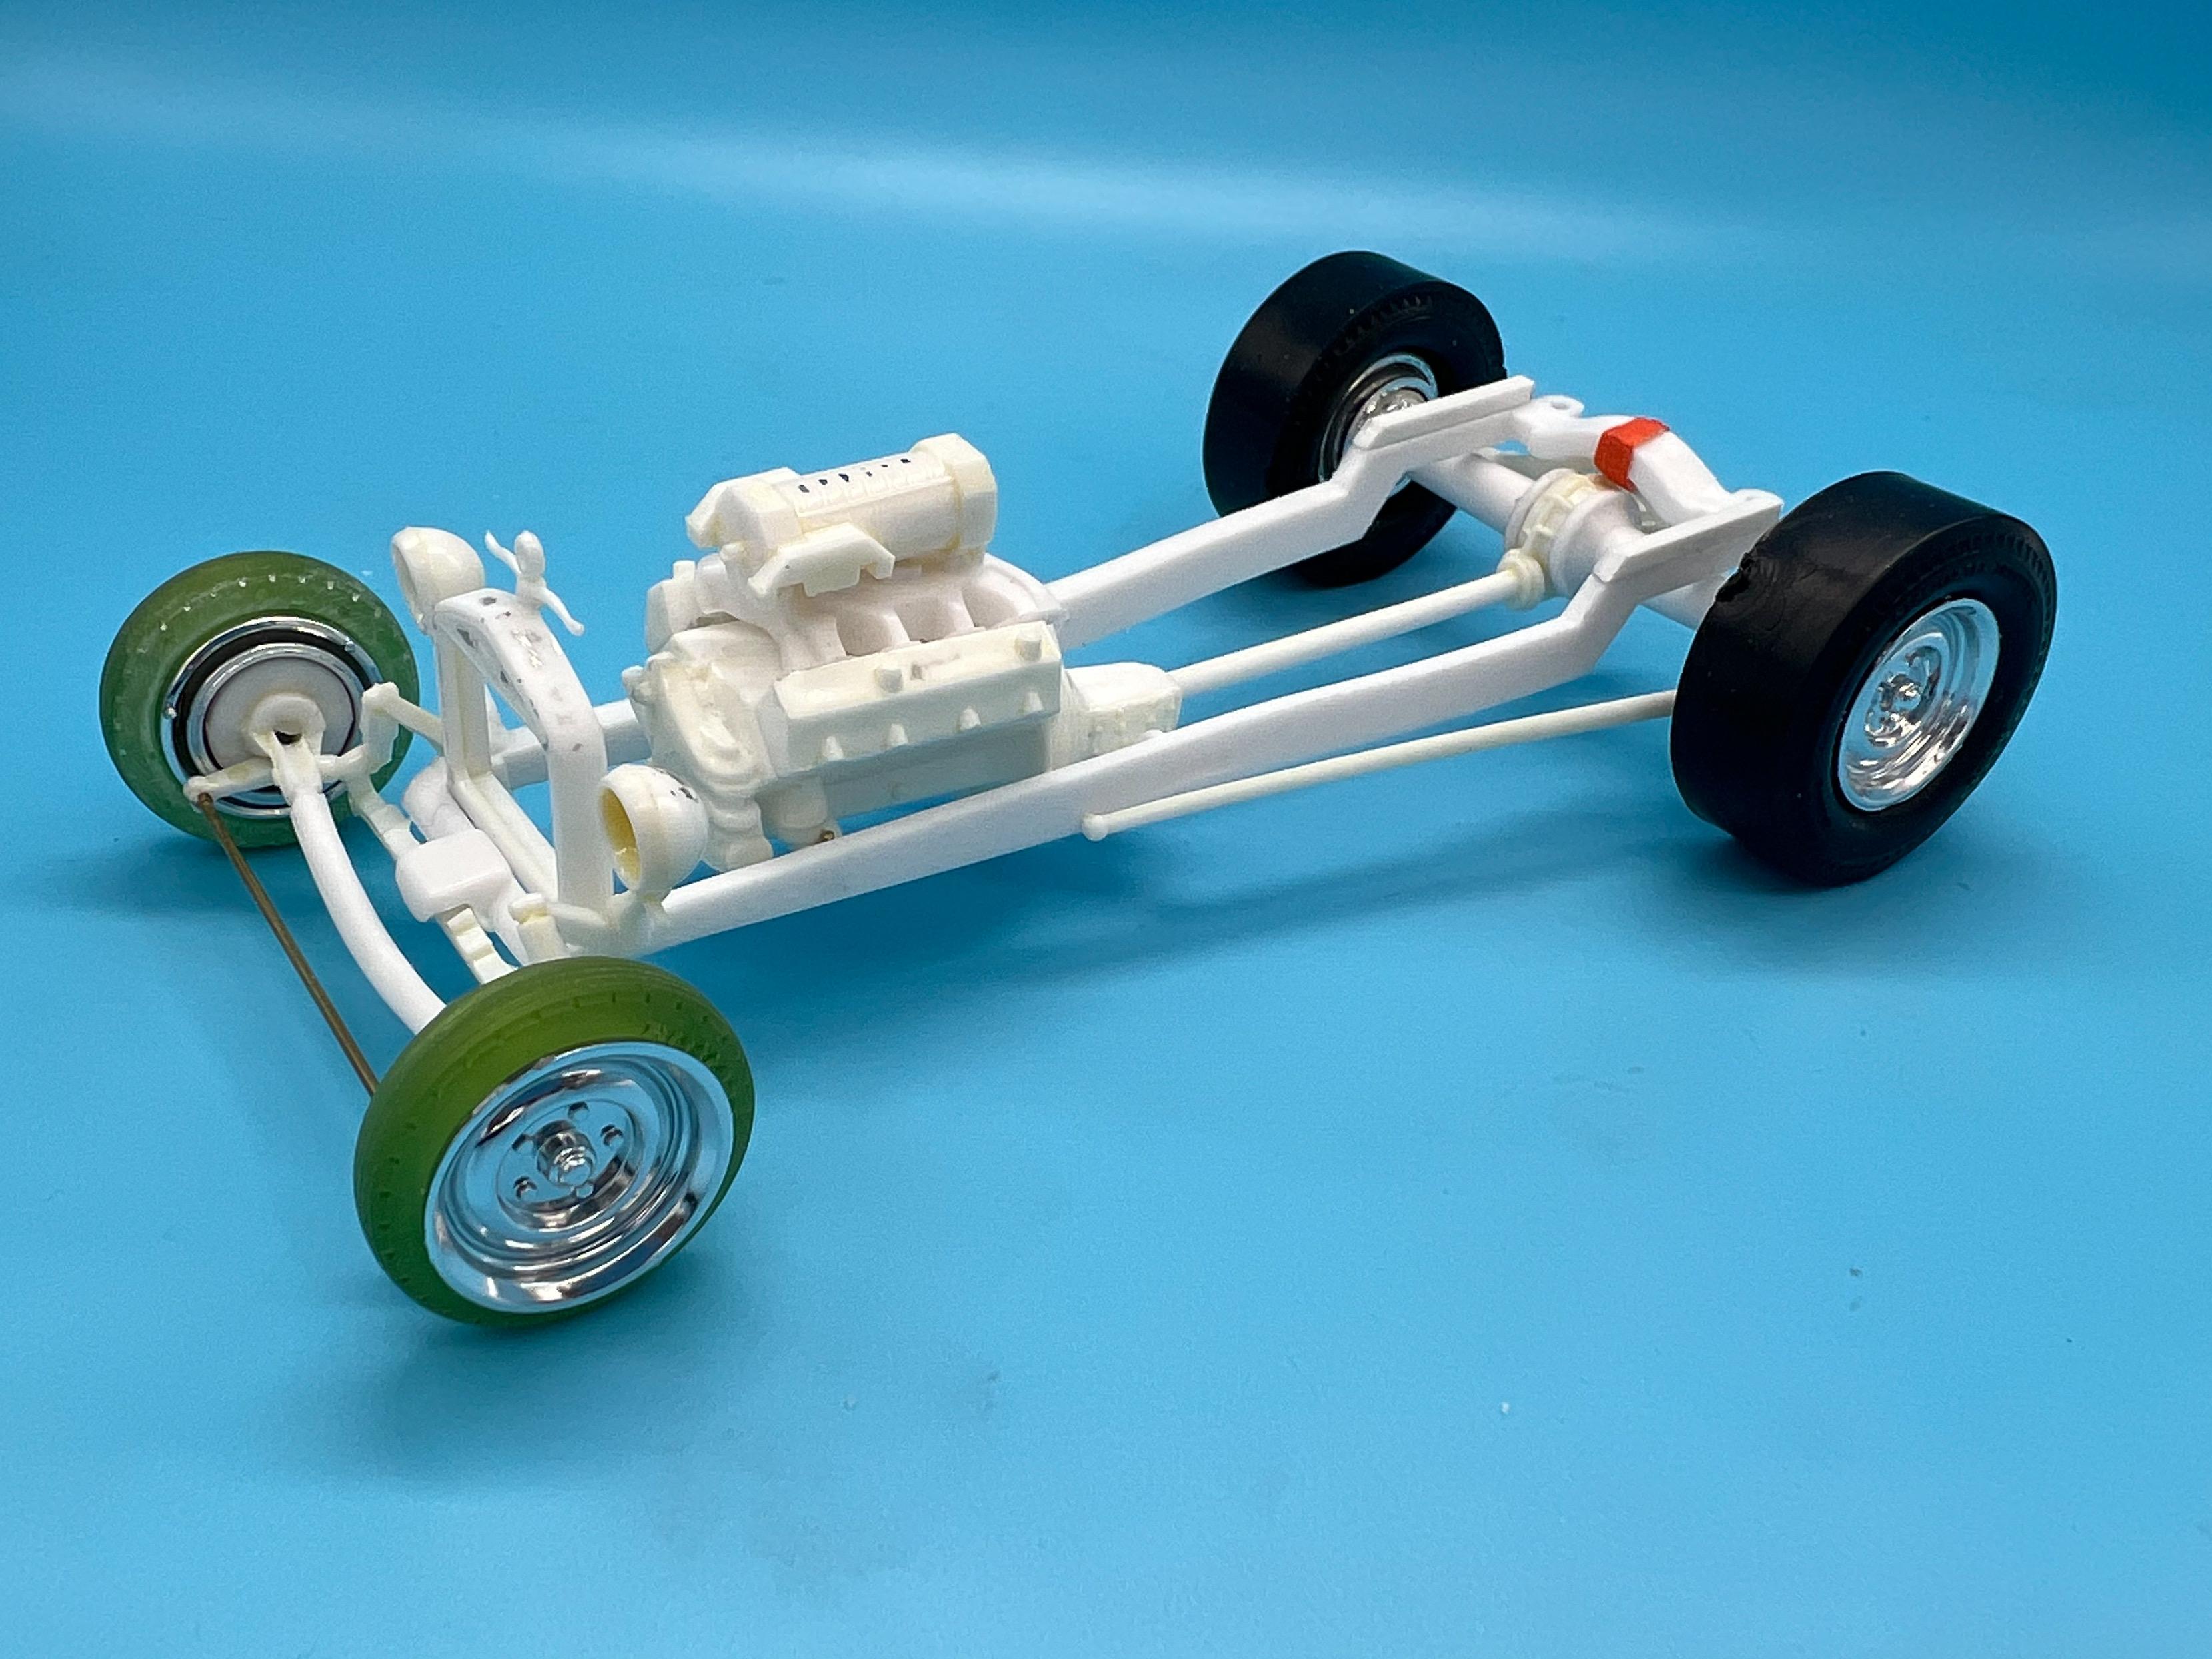
A little more progress this weekend… I’m trying to get everything far enough along to start the paint but I had a few little jobs to do first - including figuring out pulley placement on the engine to make sure I won’t have any surprises further down the line…I used the pulley assembly from the 390 engine but separated them so I can add a more in-scale belt later. They’re a little (lot) not straight in this pic because it’s all held together with poster tack… As you can see in the pic above I’ve figured out the steering linkages too, swapped out the blobby kit steering wheel for a similar one from the parts box and smoothed out the kit firewall so I can add my own detail later. Next, after a couple of rounds of filler and priming, I’m ready to shoot some color on this thing. First up, I mixed up some Pepto Bismal pink: I wanted some real loose 60s seaweed flames for this one, so I laid some out in Adobe Illustrator: The kit box art made for a useful template in this case, but a photo or scan of the body works well too, usually… Cut some masks: Next up, pearl plumb purple: And some careful unmasking later… Couldn’t resist dropping it on the body to see how it’s going to look, a little: Next up, breaking up that big flat roof a little with some stripes: These will be a LOT more subtle than the contrast between the main color and the flames…going for just a little color variation here, so I mixed up some clear with a pink pearl powder and some Createx Interference, which flips between white and blue: Some more careful de-masking… Looks really pretty as the light catches it at different angles… Not done with the paint yet, but needed to seal in what I had finished already so I can do more this coming week…more soon, soon as I’ve done more!
-
Atlantis Models has bought another lot of tooling/molds.....
OldNYJim replied to Dave Van's topic in Car Kit News & Reviews
I’m curious Tim - what makes it so good? -
I’m excited for the twin-pack Fiat dragster kit:
-
Atlantis Models has bought another lot of tooling/molds.....
OldNYJim replied to Dave Van's topic in Car Kit News & Reviews
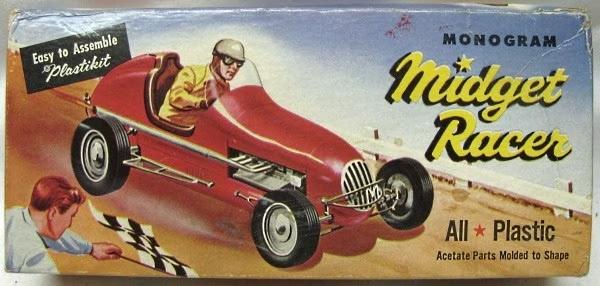
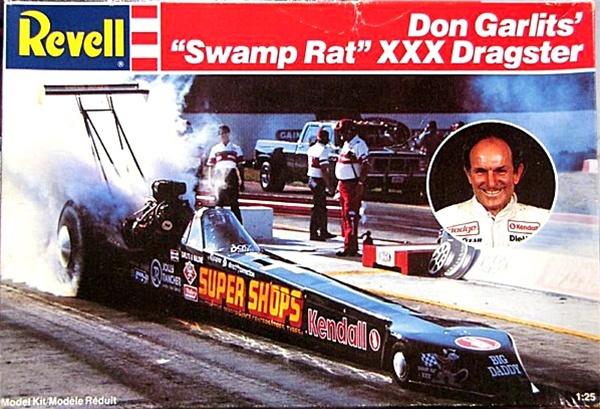
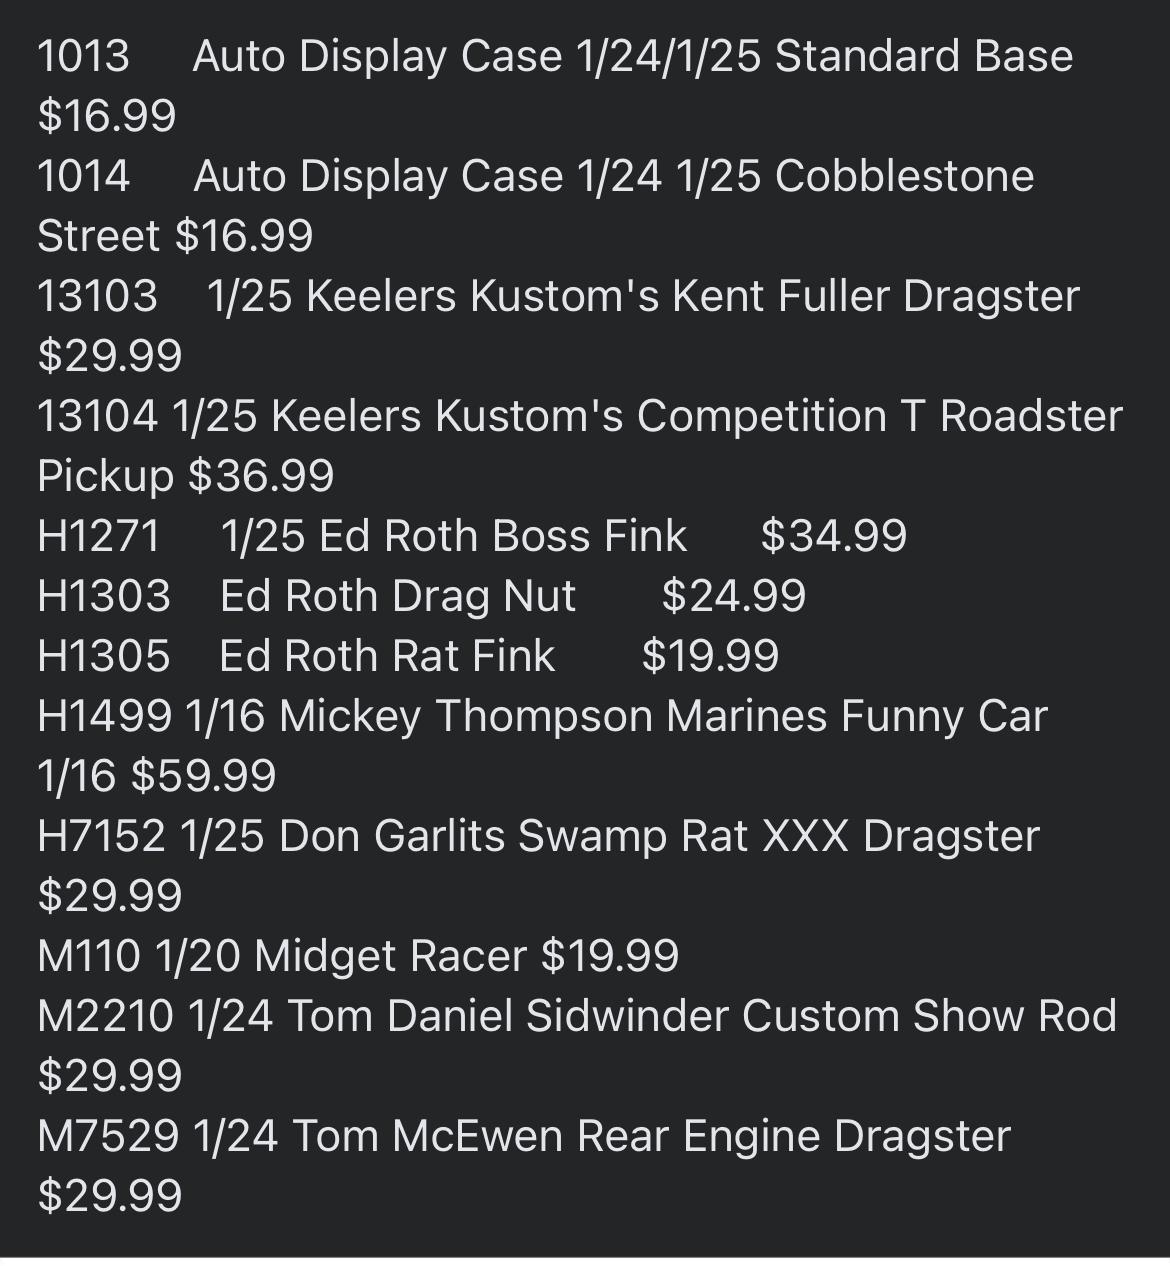
I’m particularly excited about the Midget racer, although I know they’re not super detailed kits: And the Swamp Rat is presumably this: I wonder what the Fuller dragster is? The silver car that came boxed with the little T dragster as a twin kit at one point?
-
Atlantis Models has bought another lot of tooling/molds.....
OldNYJim replied to Dave Van's topic in Car Kit News & Reviews
Another bunch of releases announced this evening!
-
I have reason to suspect that Atlantis might have that tooling (although I don't know for sure, and have no insider info). I would like one of those too!
-
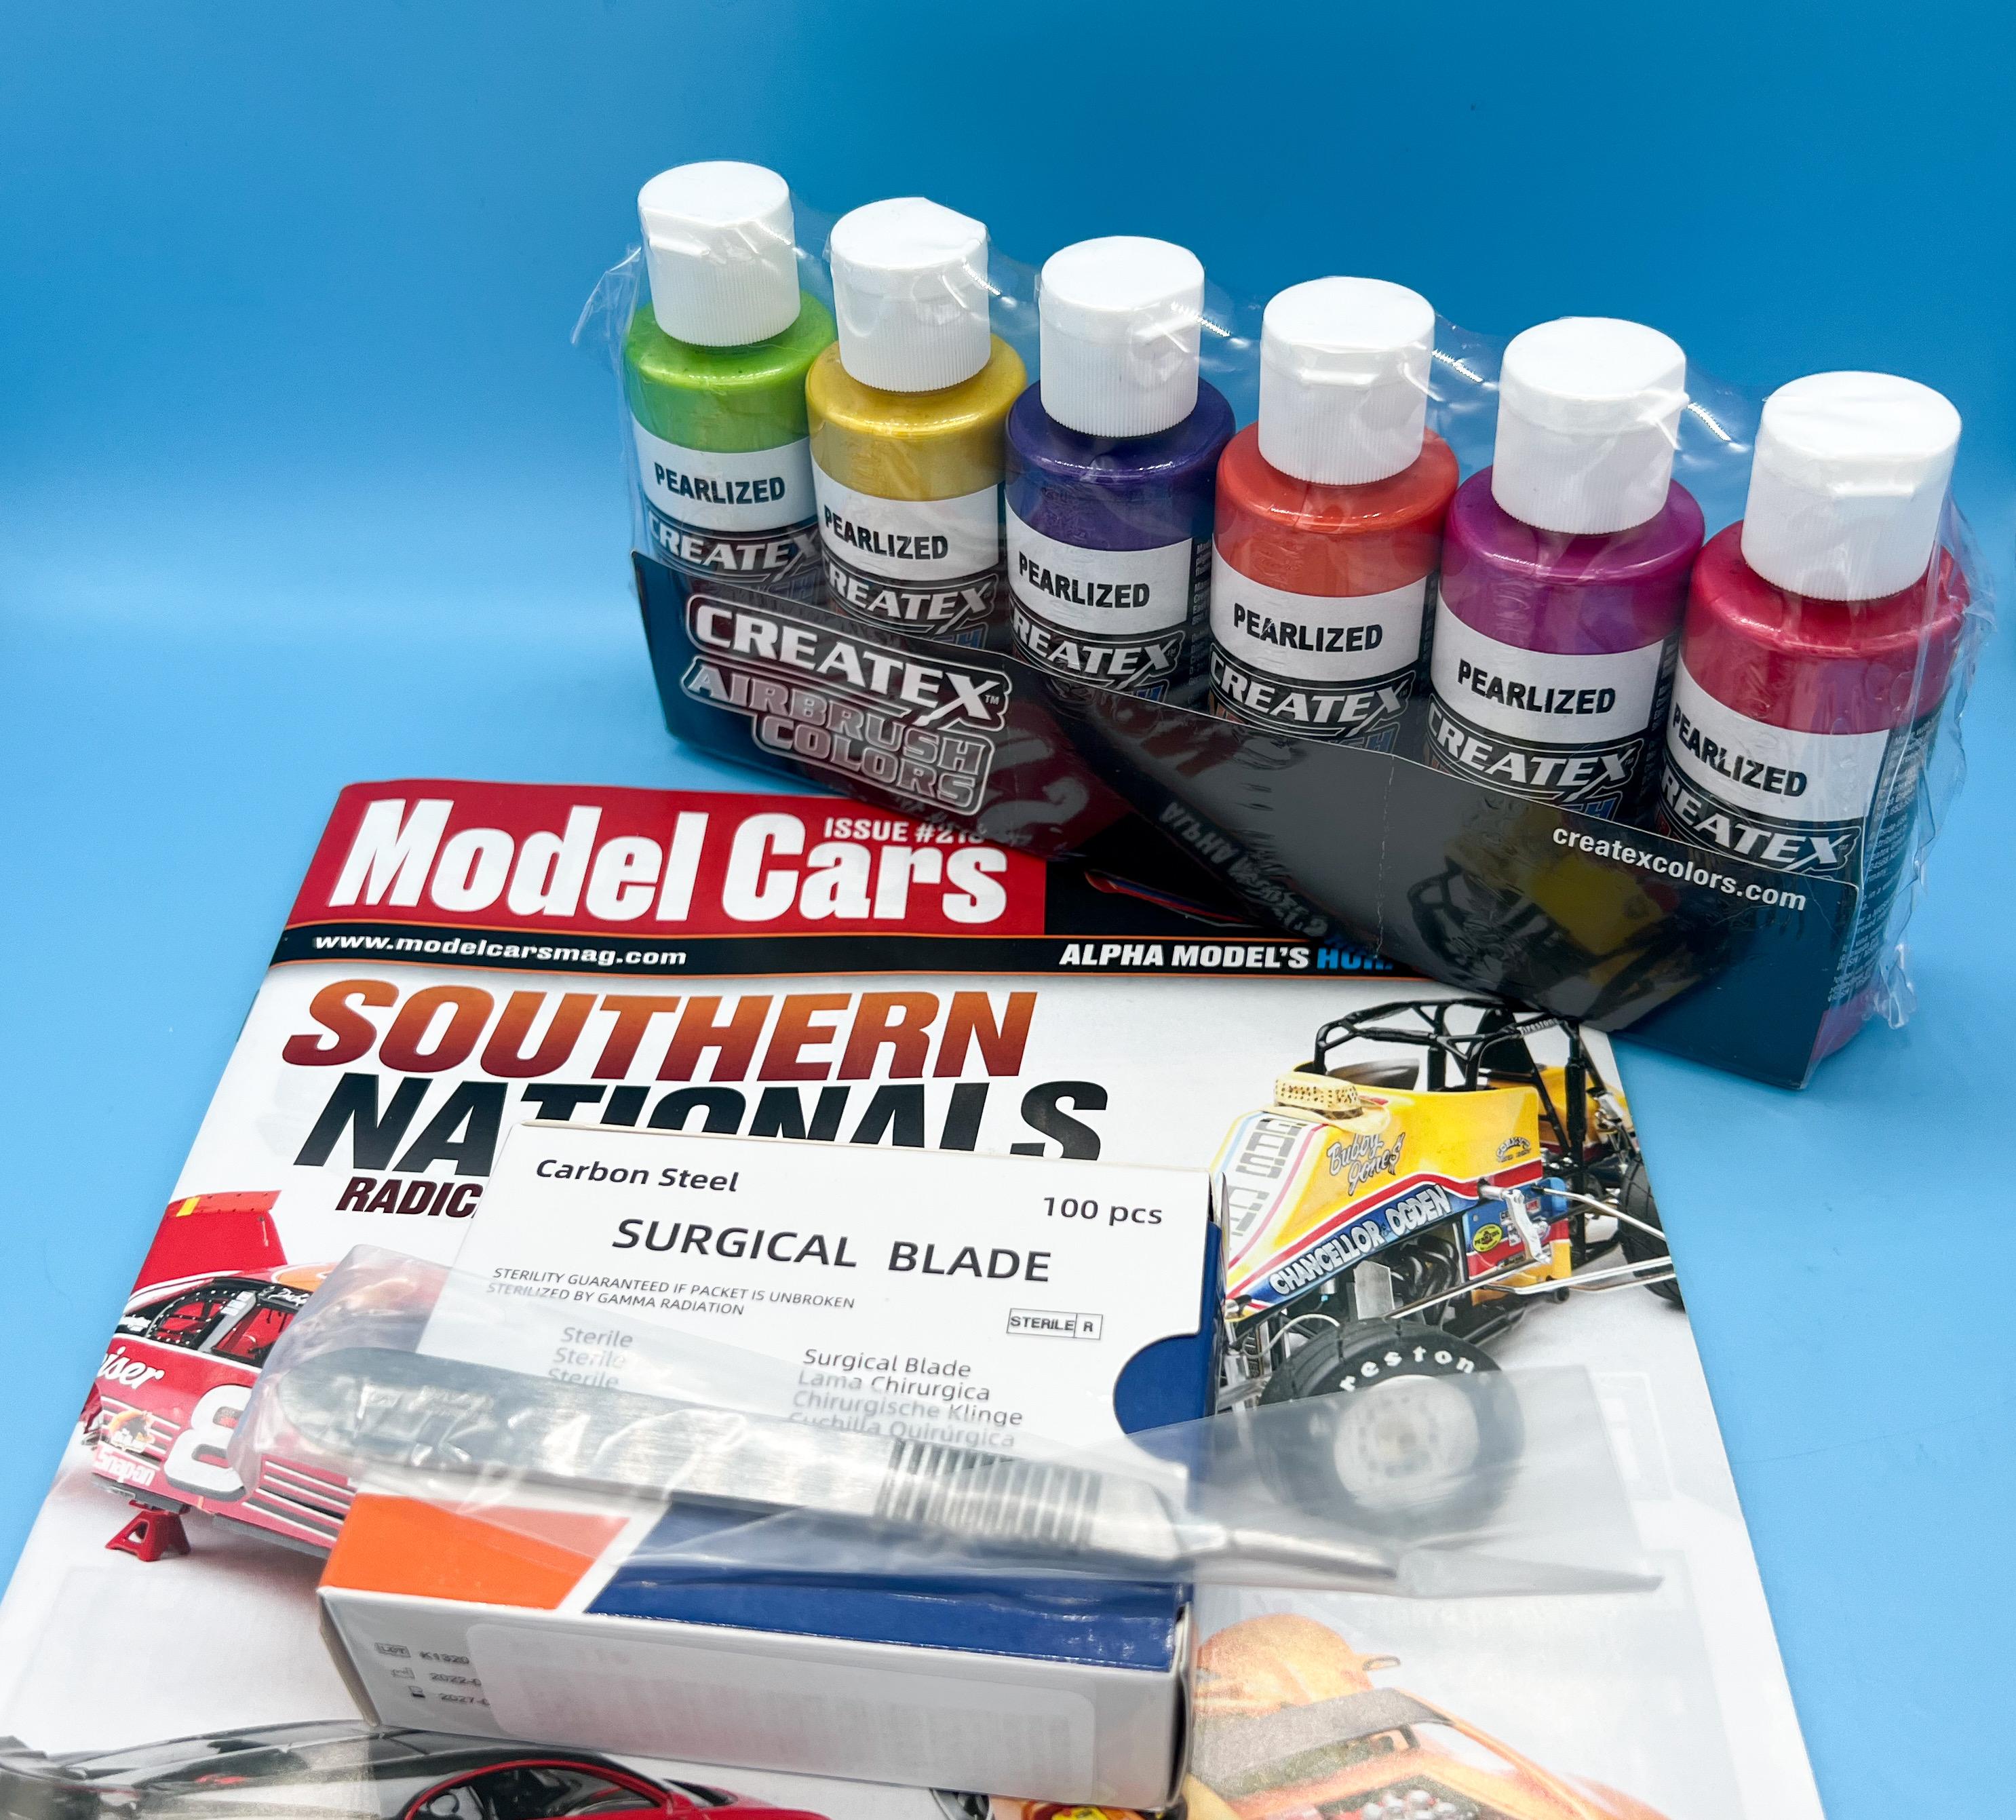
I too got Issue 218 in the mail this week - looks like another great issue! Plus, this set of Createx paints is $20-odd on Amazon right now which is a great deal…plus I did my bi-annual order of scalpel blades whilst I was ordering anyway
-
Good start! It looks really cool with the clear body, I think!
-
Ebbro/Tamiya 1:12 1968 Matra MS11 F1
OldNYJim replied to Nacho Z's topic in WIP: Other Racing: Road Racing, Land Speed Racers
I read through this entire thread tonight and really enjoyed it - great masterful building of an interesting subject! Love the extra little details you’re adding! -
Atlantis Models has bought another lot of tooling/molds.....
OldNYJim replied to Dave Van's topic in Car Kit News & Reviews
I kinda feel the same - glad to have it back, but I'll be building mine (and the other TD re-releases) like the original kit. Would be cool to see them reissue these kits in the original colors - not sure if Revell would let them get away with using the original names and decals though (but the aftermarket has that covered, at least...) Still - no complaints - wasn't expecting to EVER see this one back, so if I gotta lay down some primer and strip some copper plate, so be it ?♂️ -
Rattler’s coming back soon (with a color, decal and name change…)
-
Looks great! Are the polishing pads/cloths you used Gravity Colors ones too?
-
That’s a smart way to do that - looks great so far! Wood looks good! ?
-
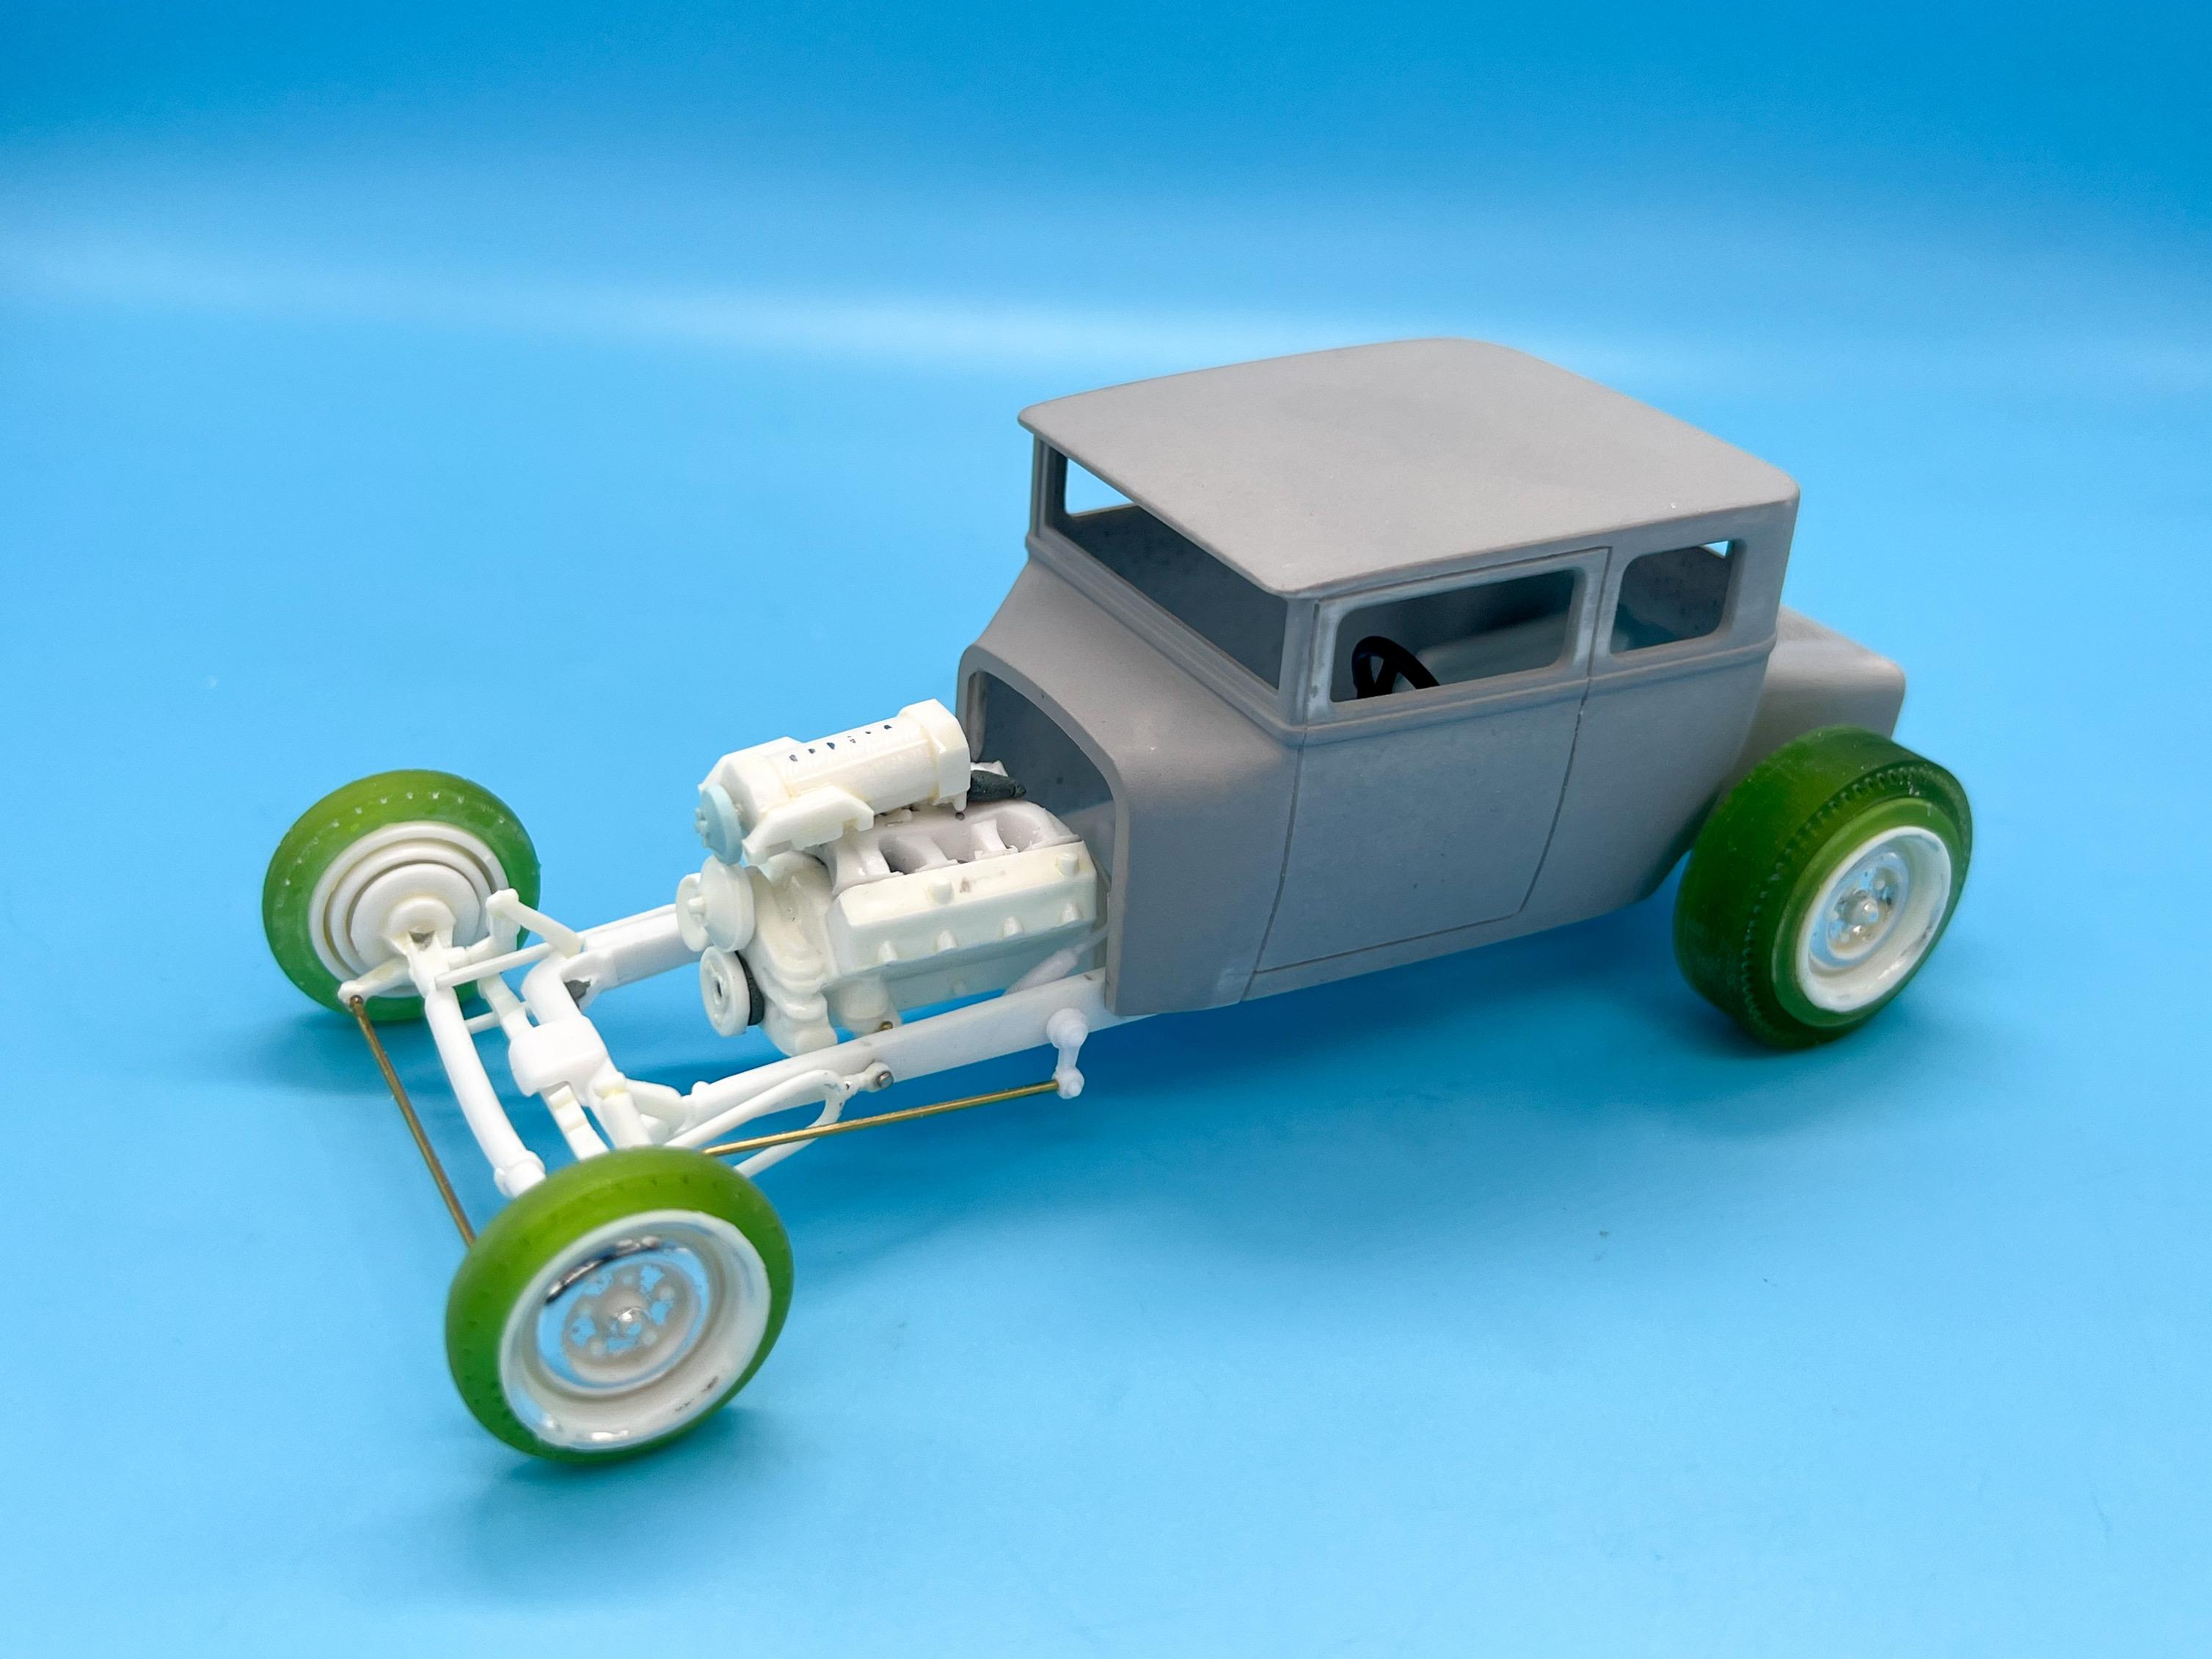
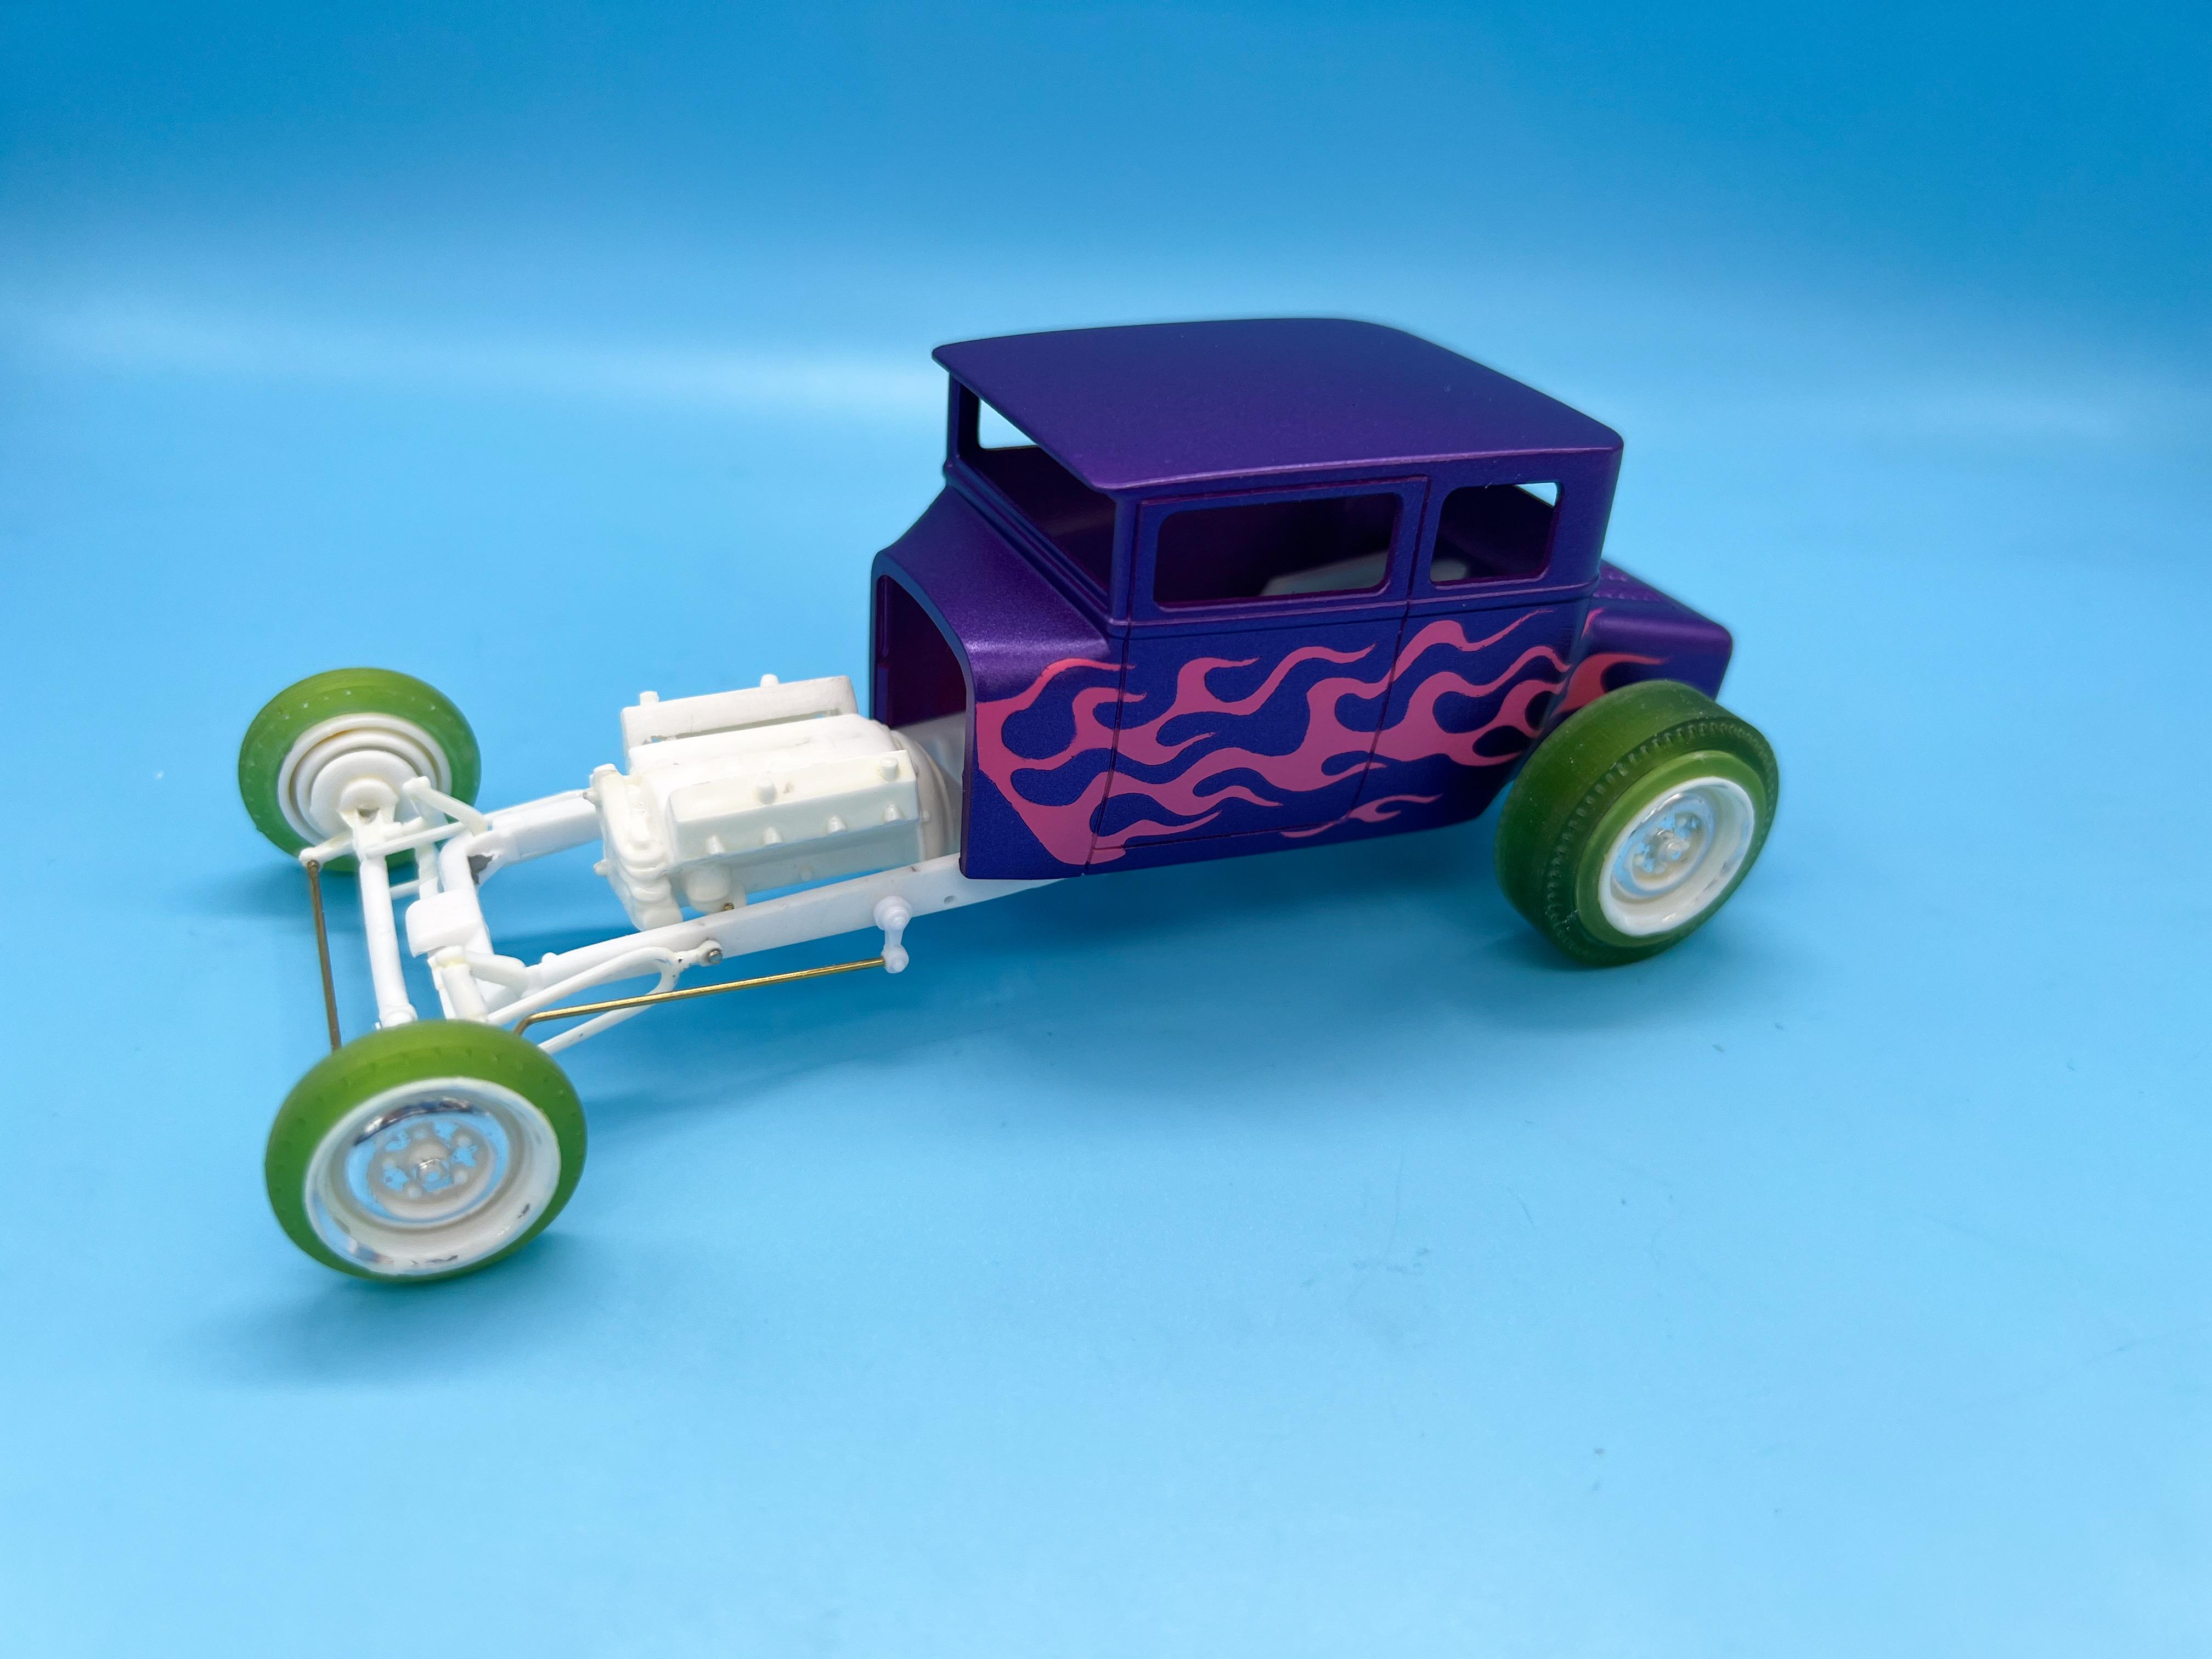
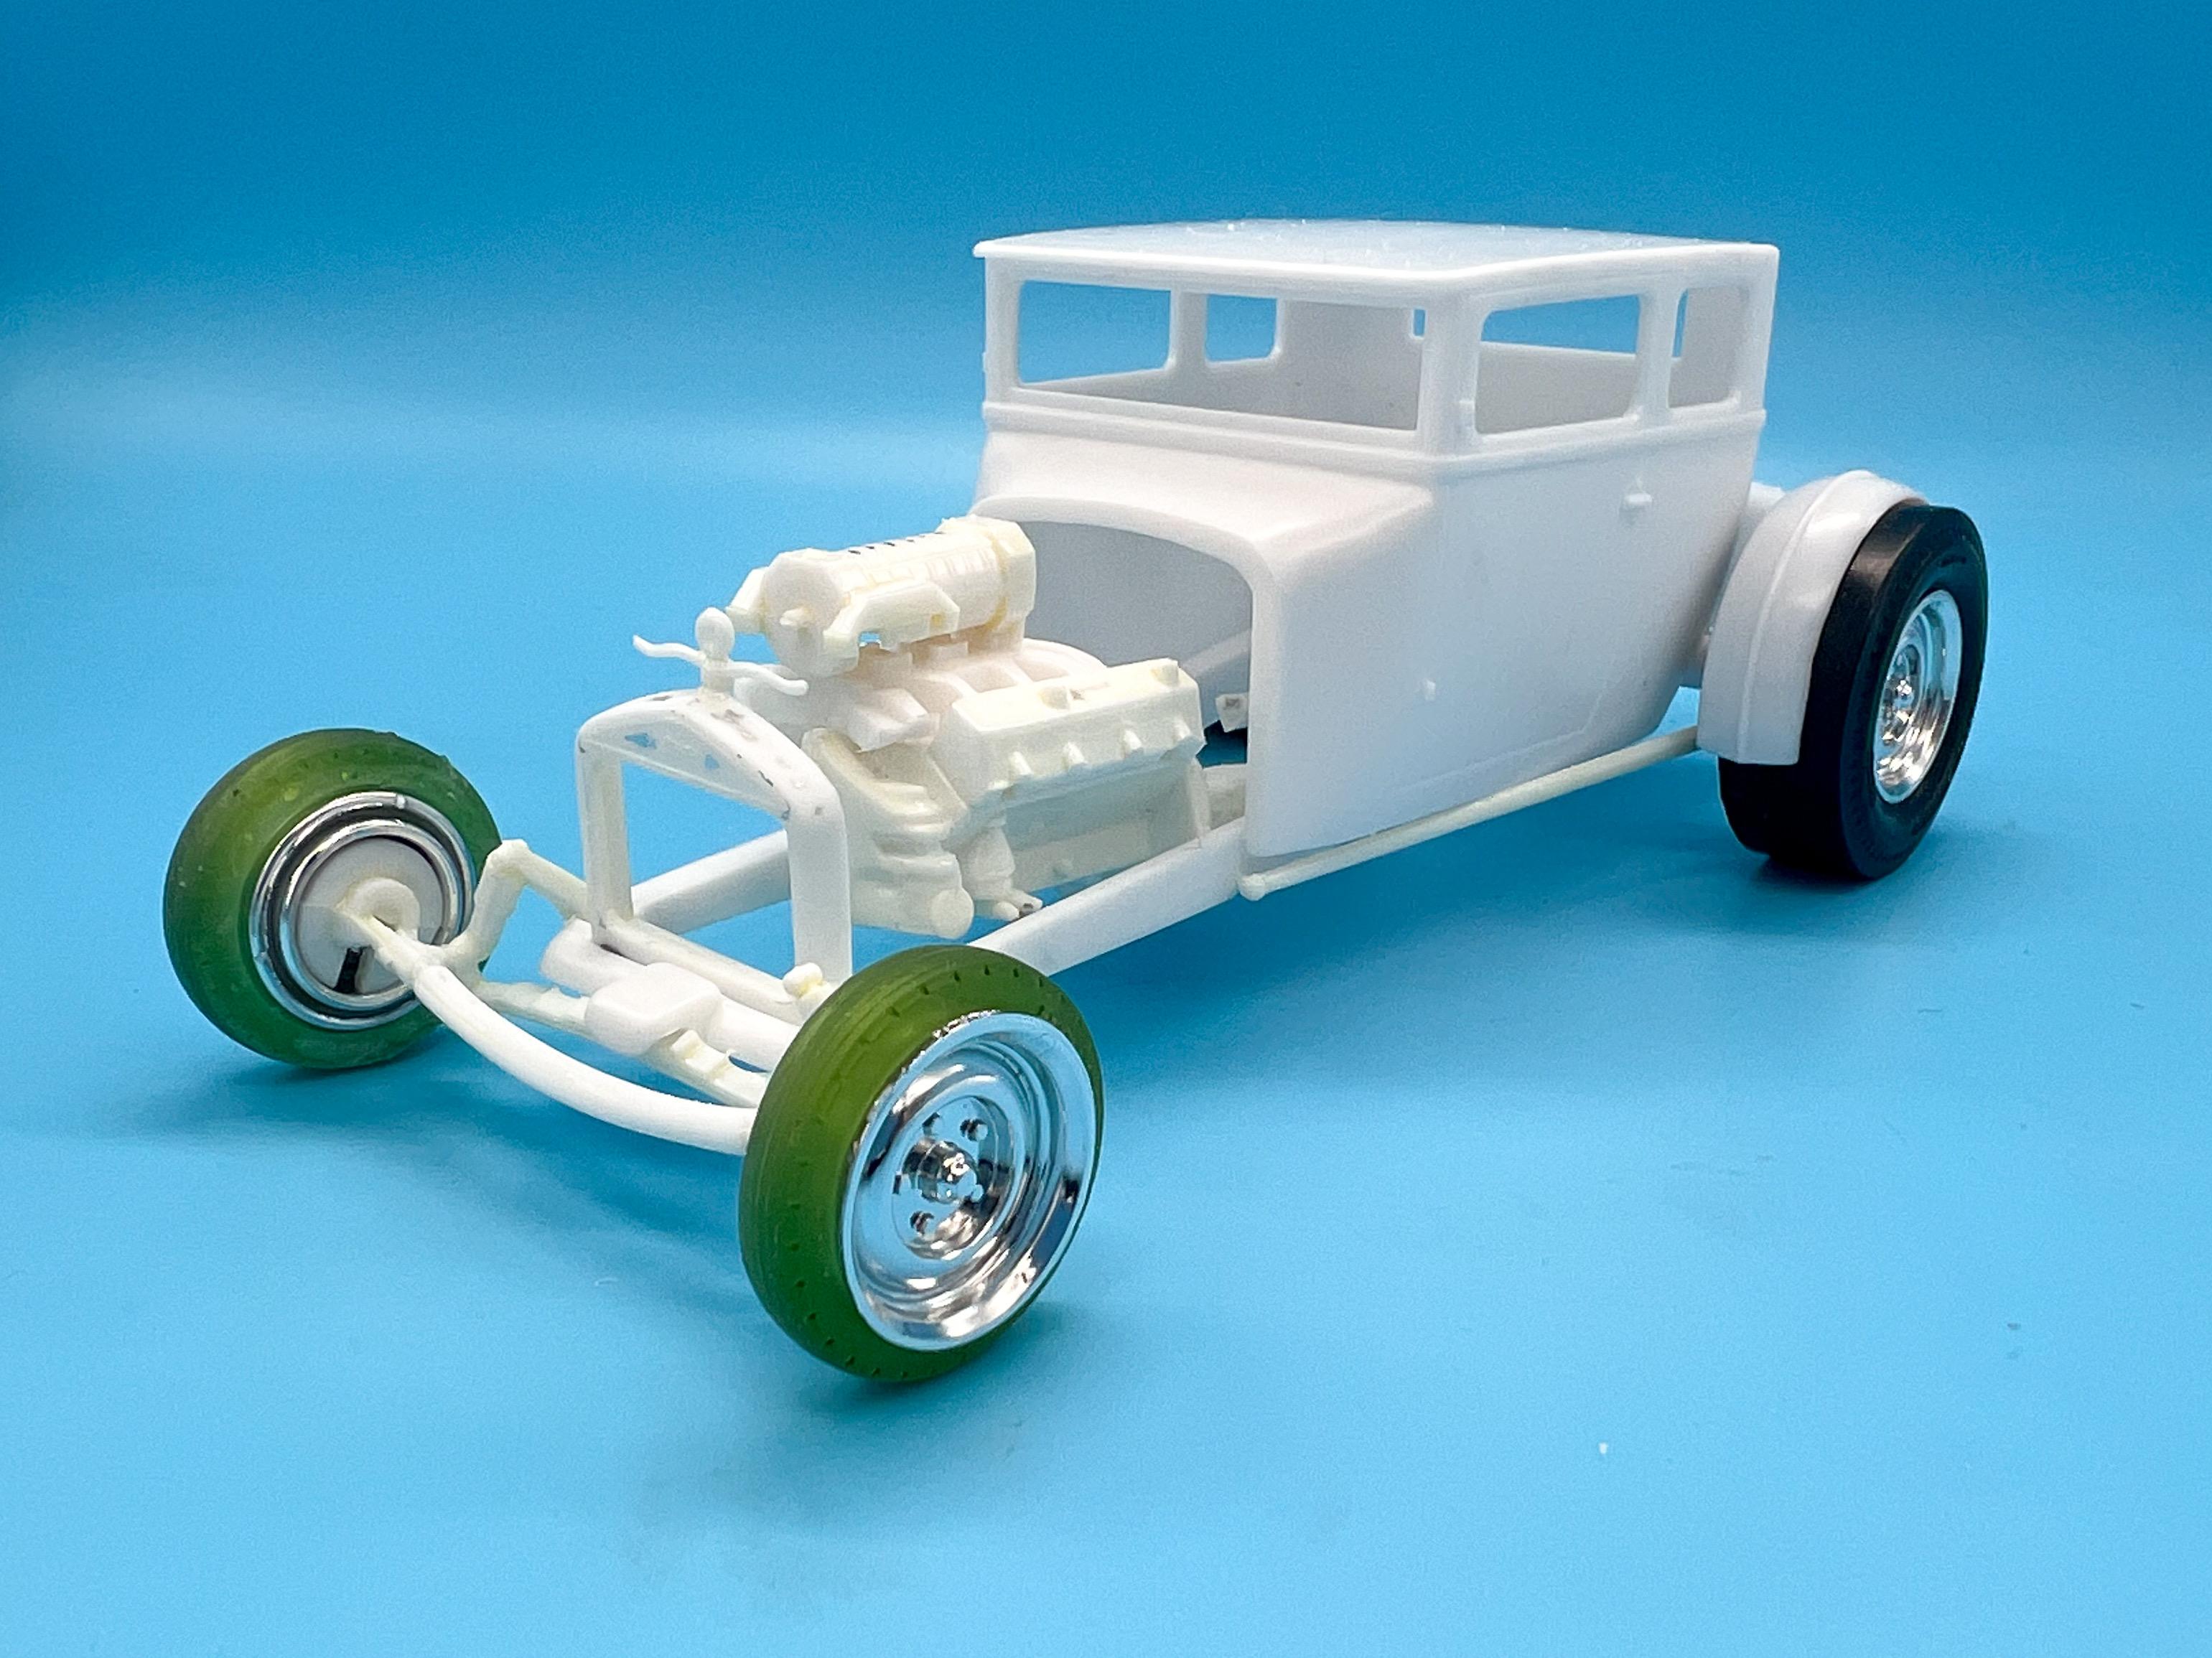
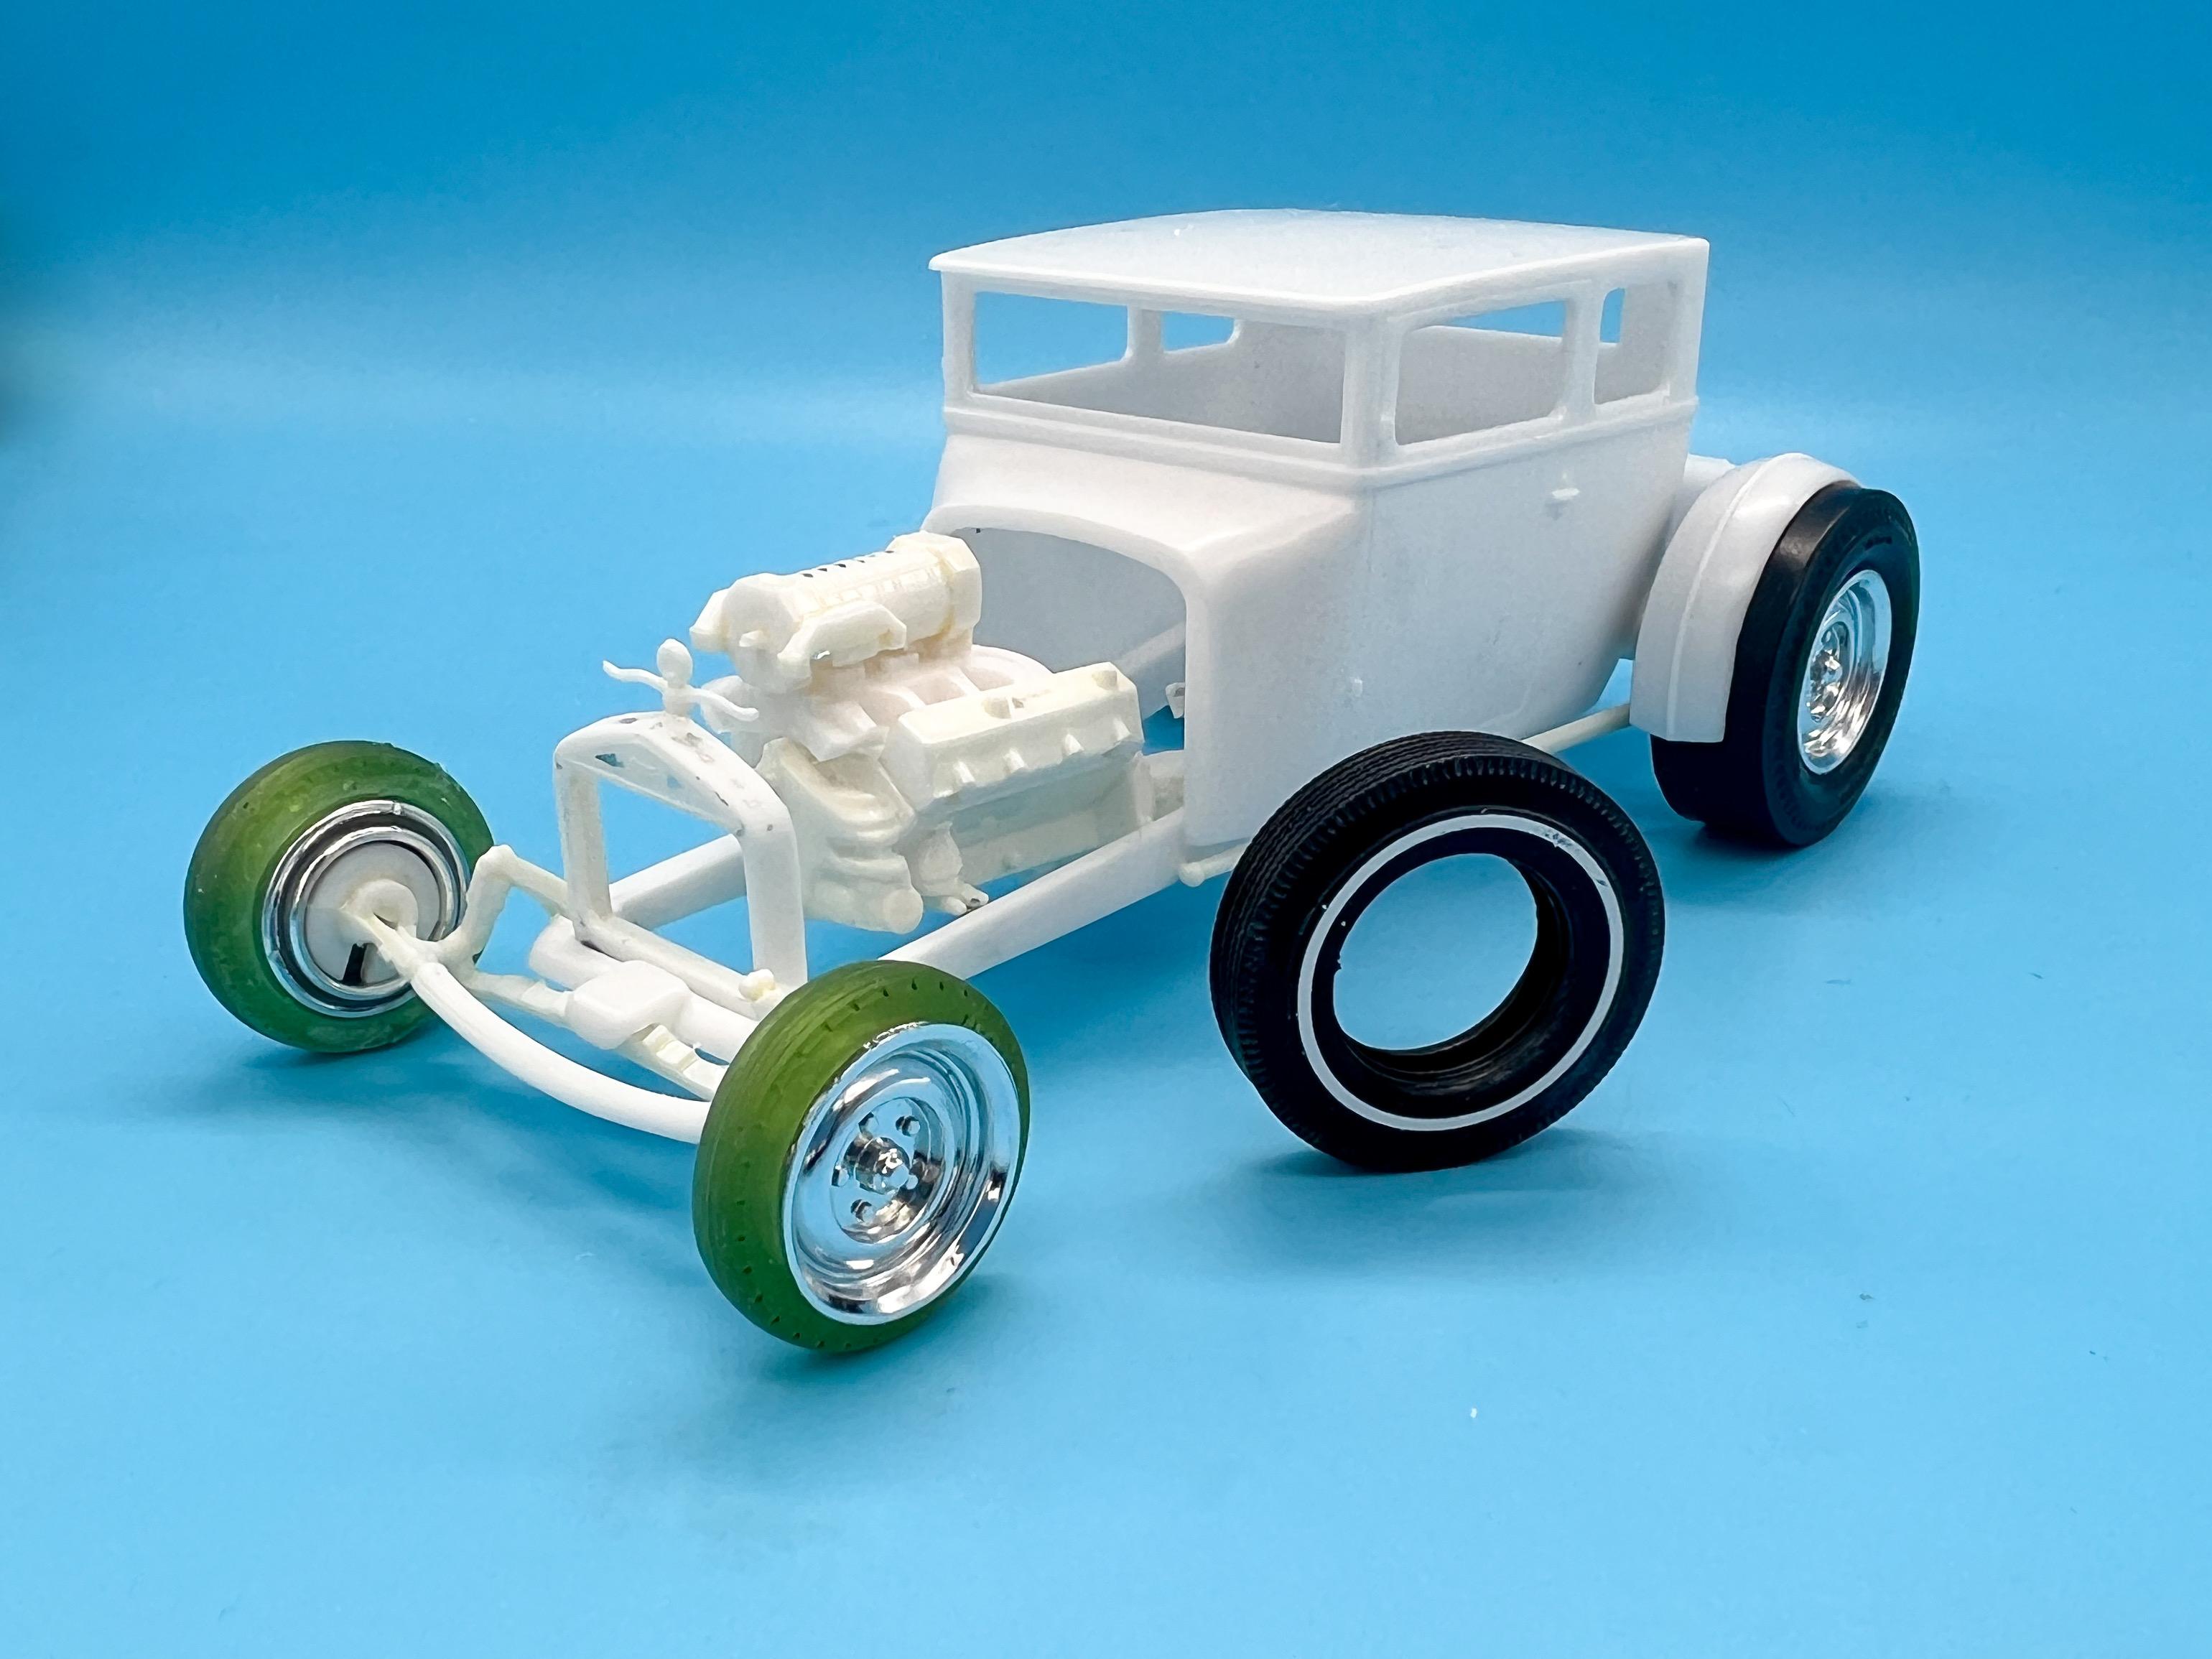
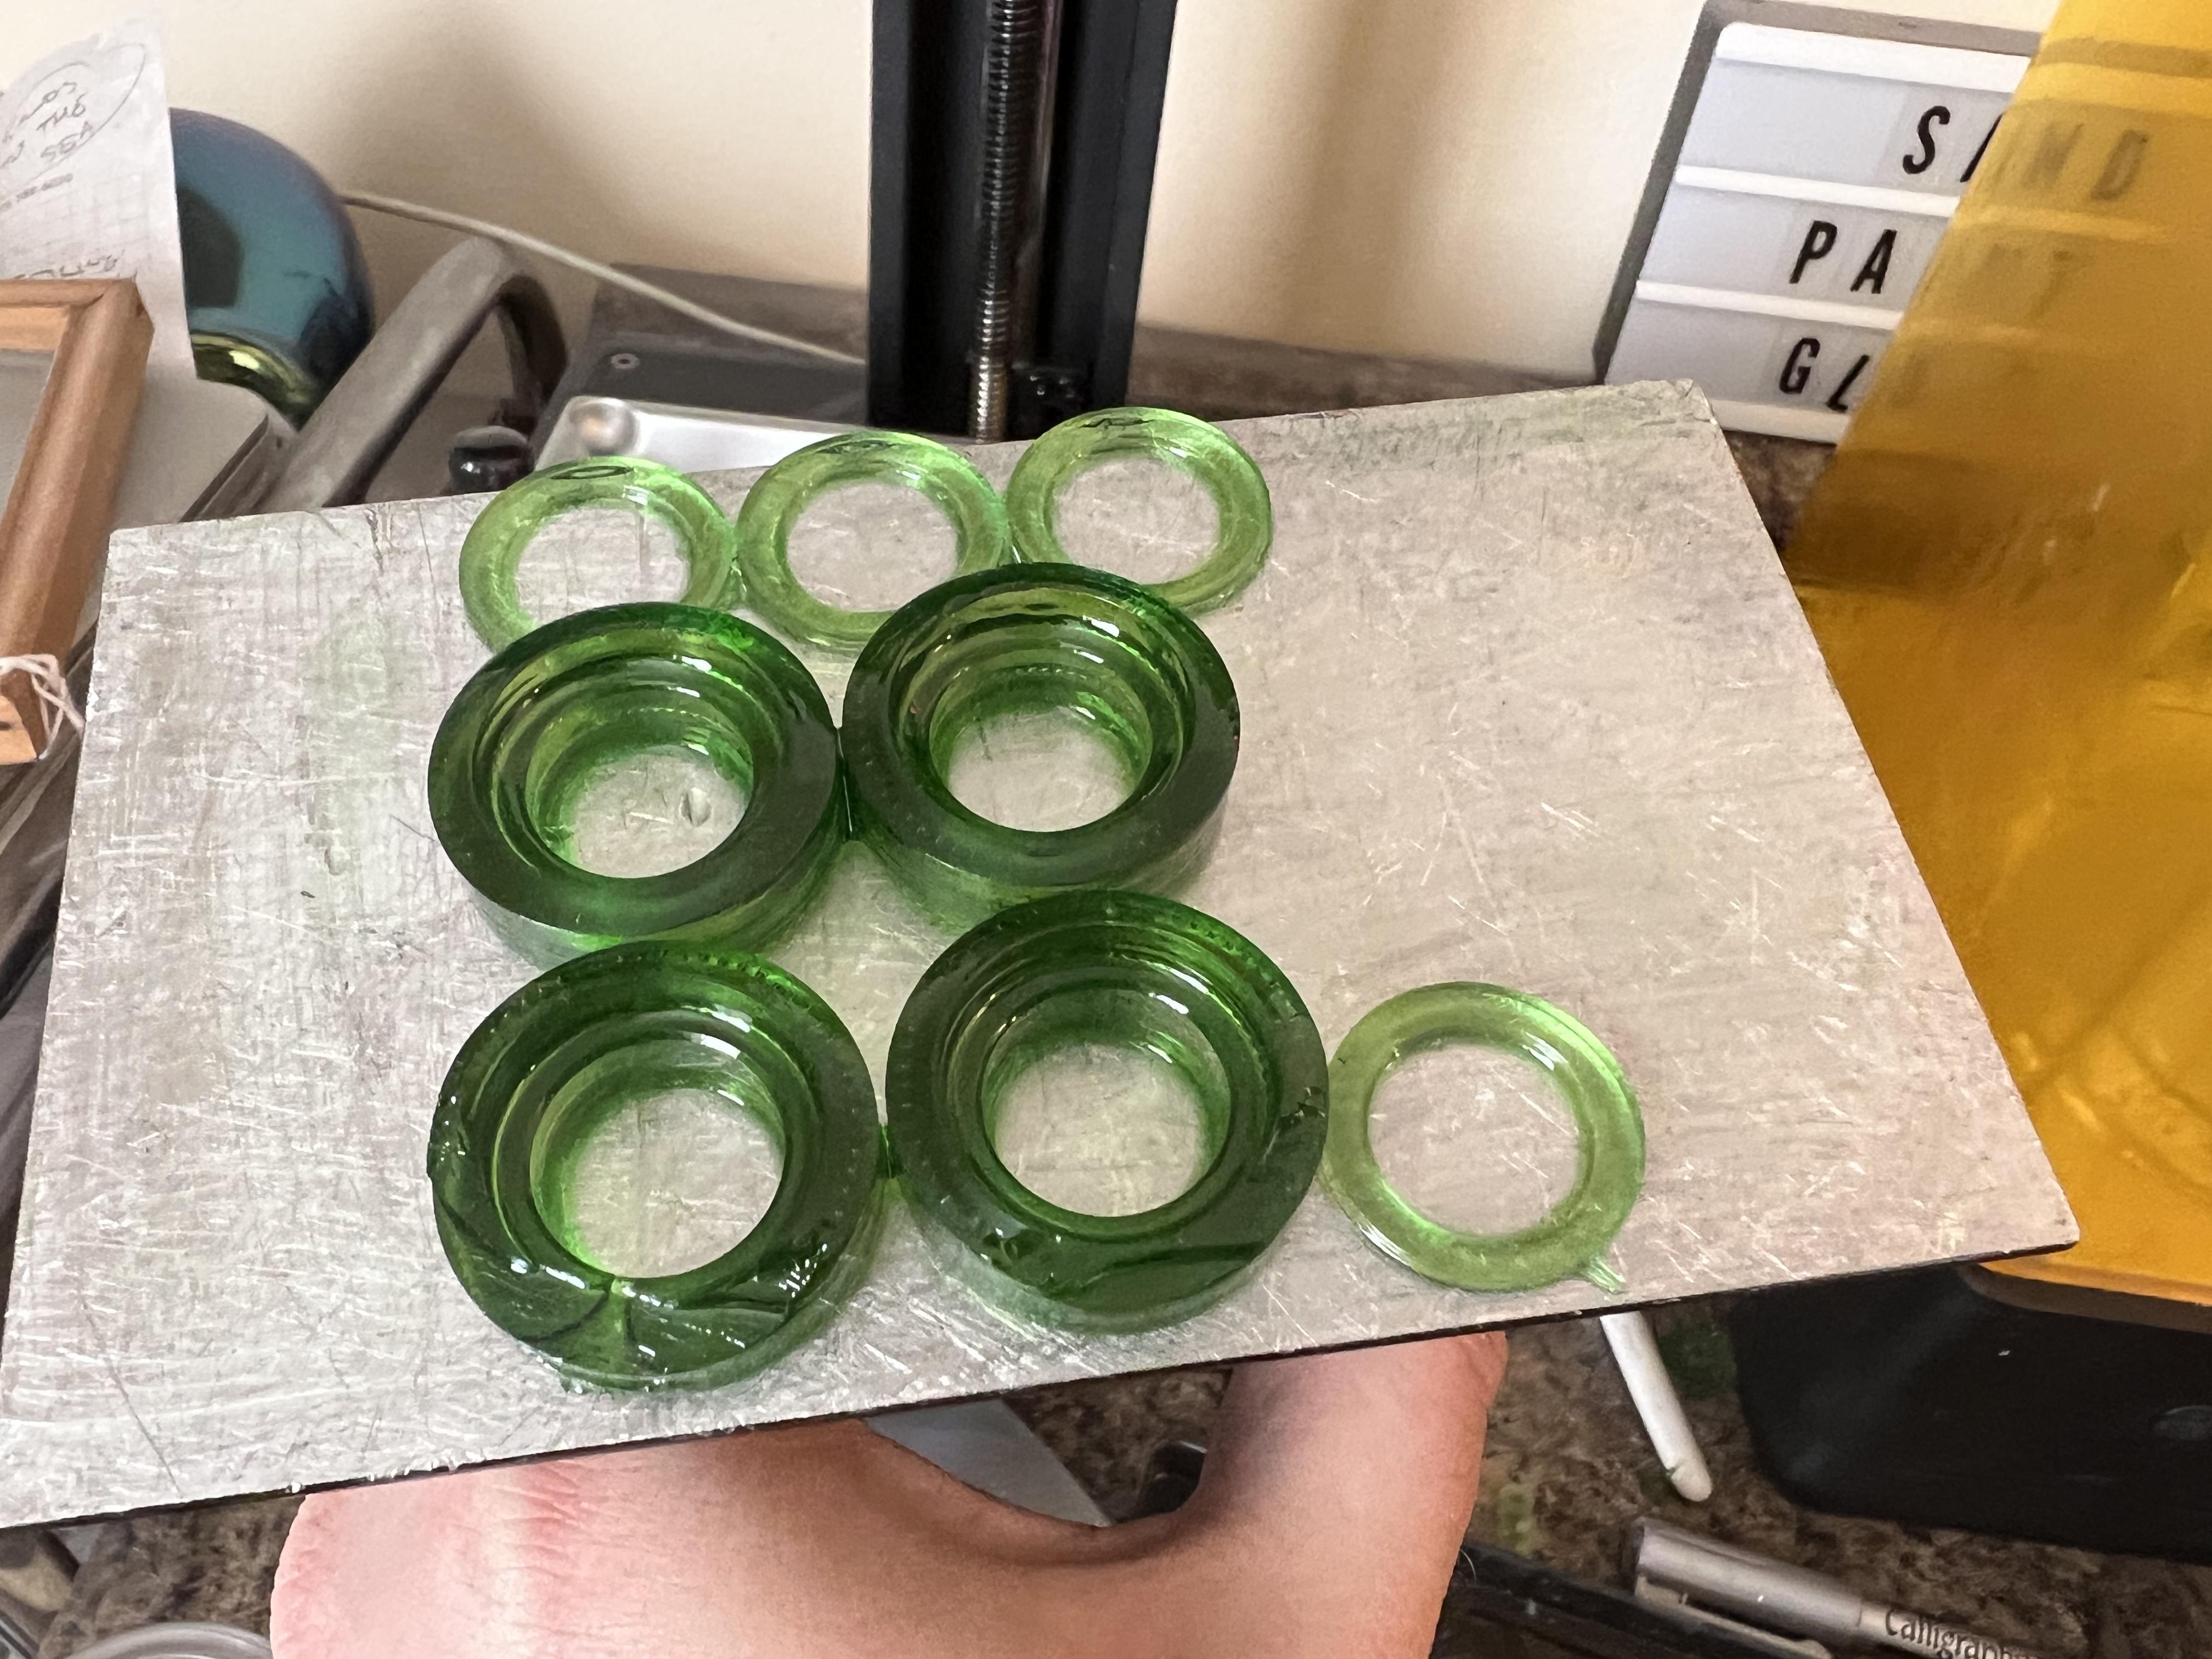
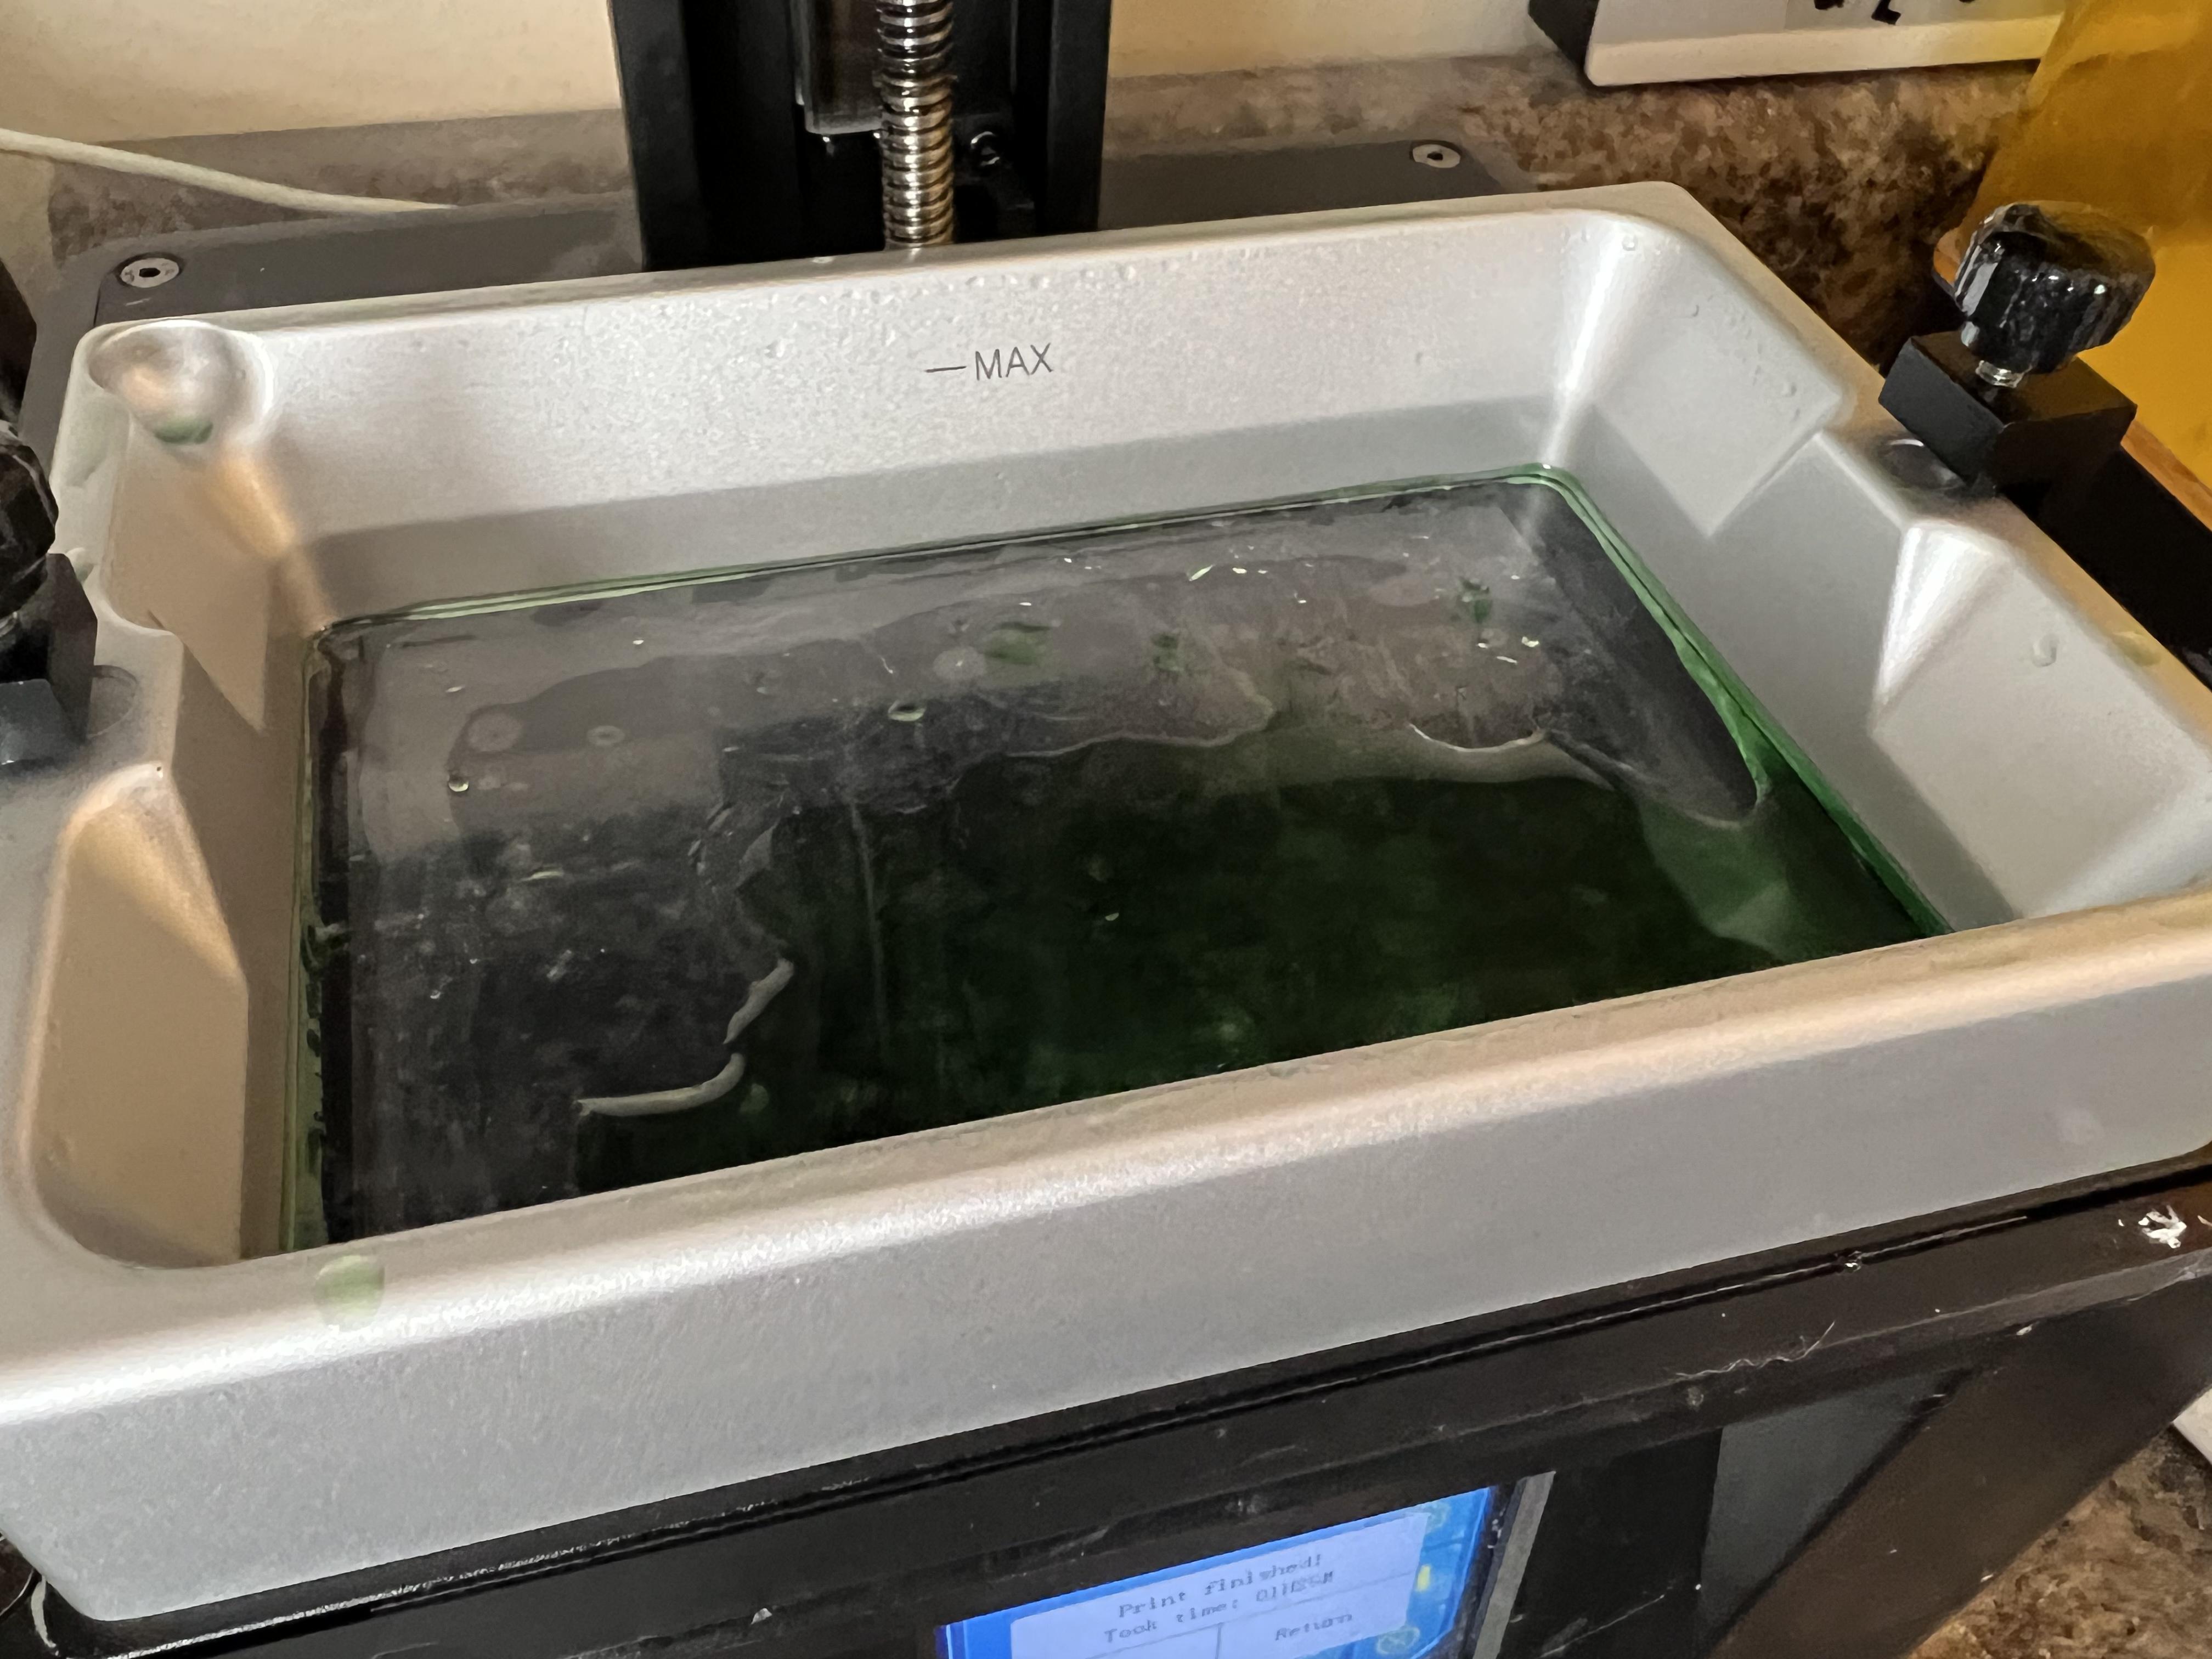
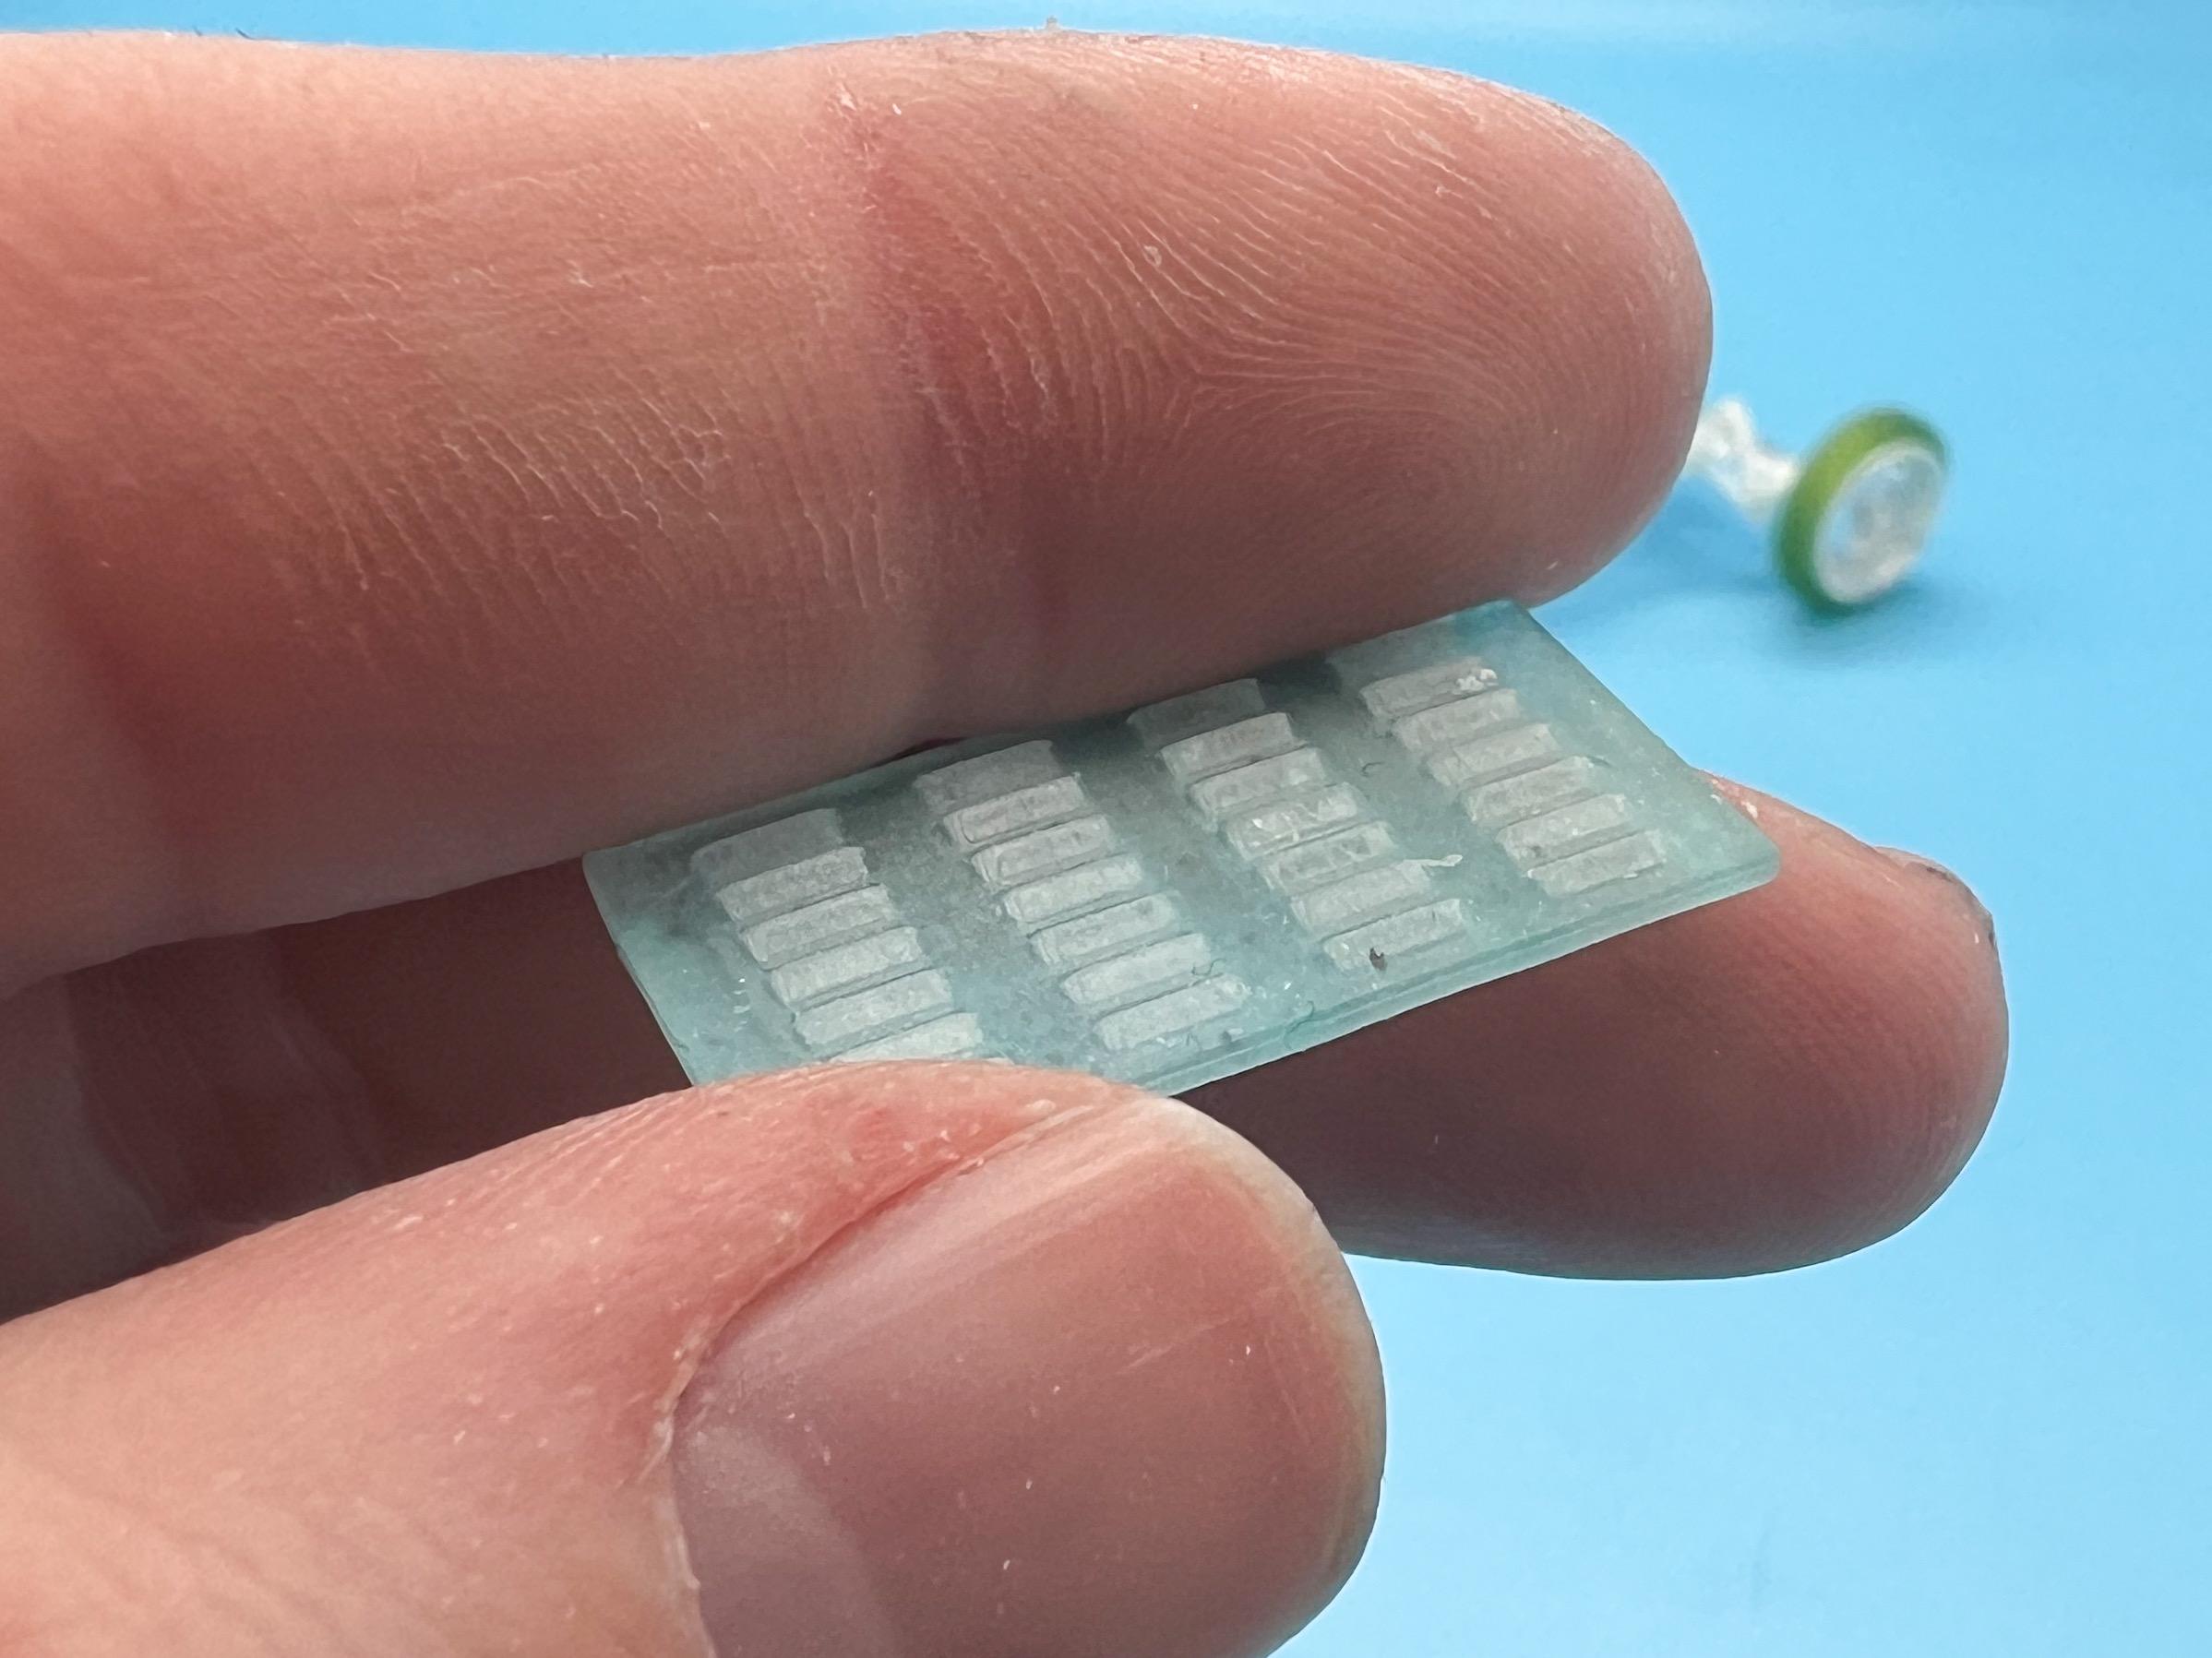
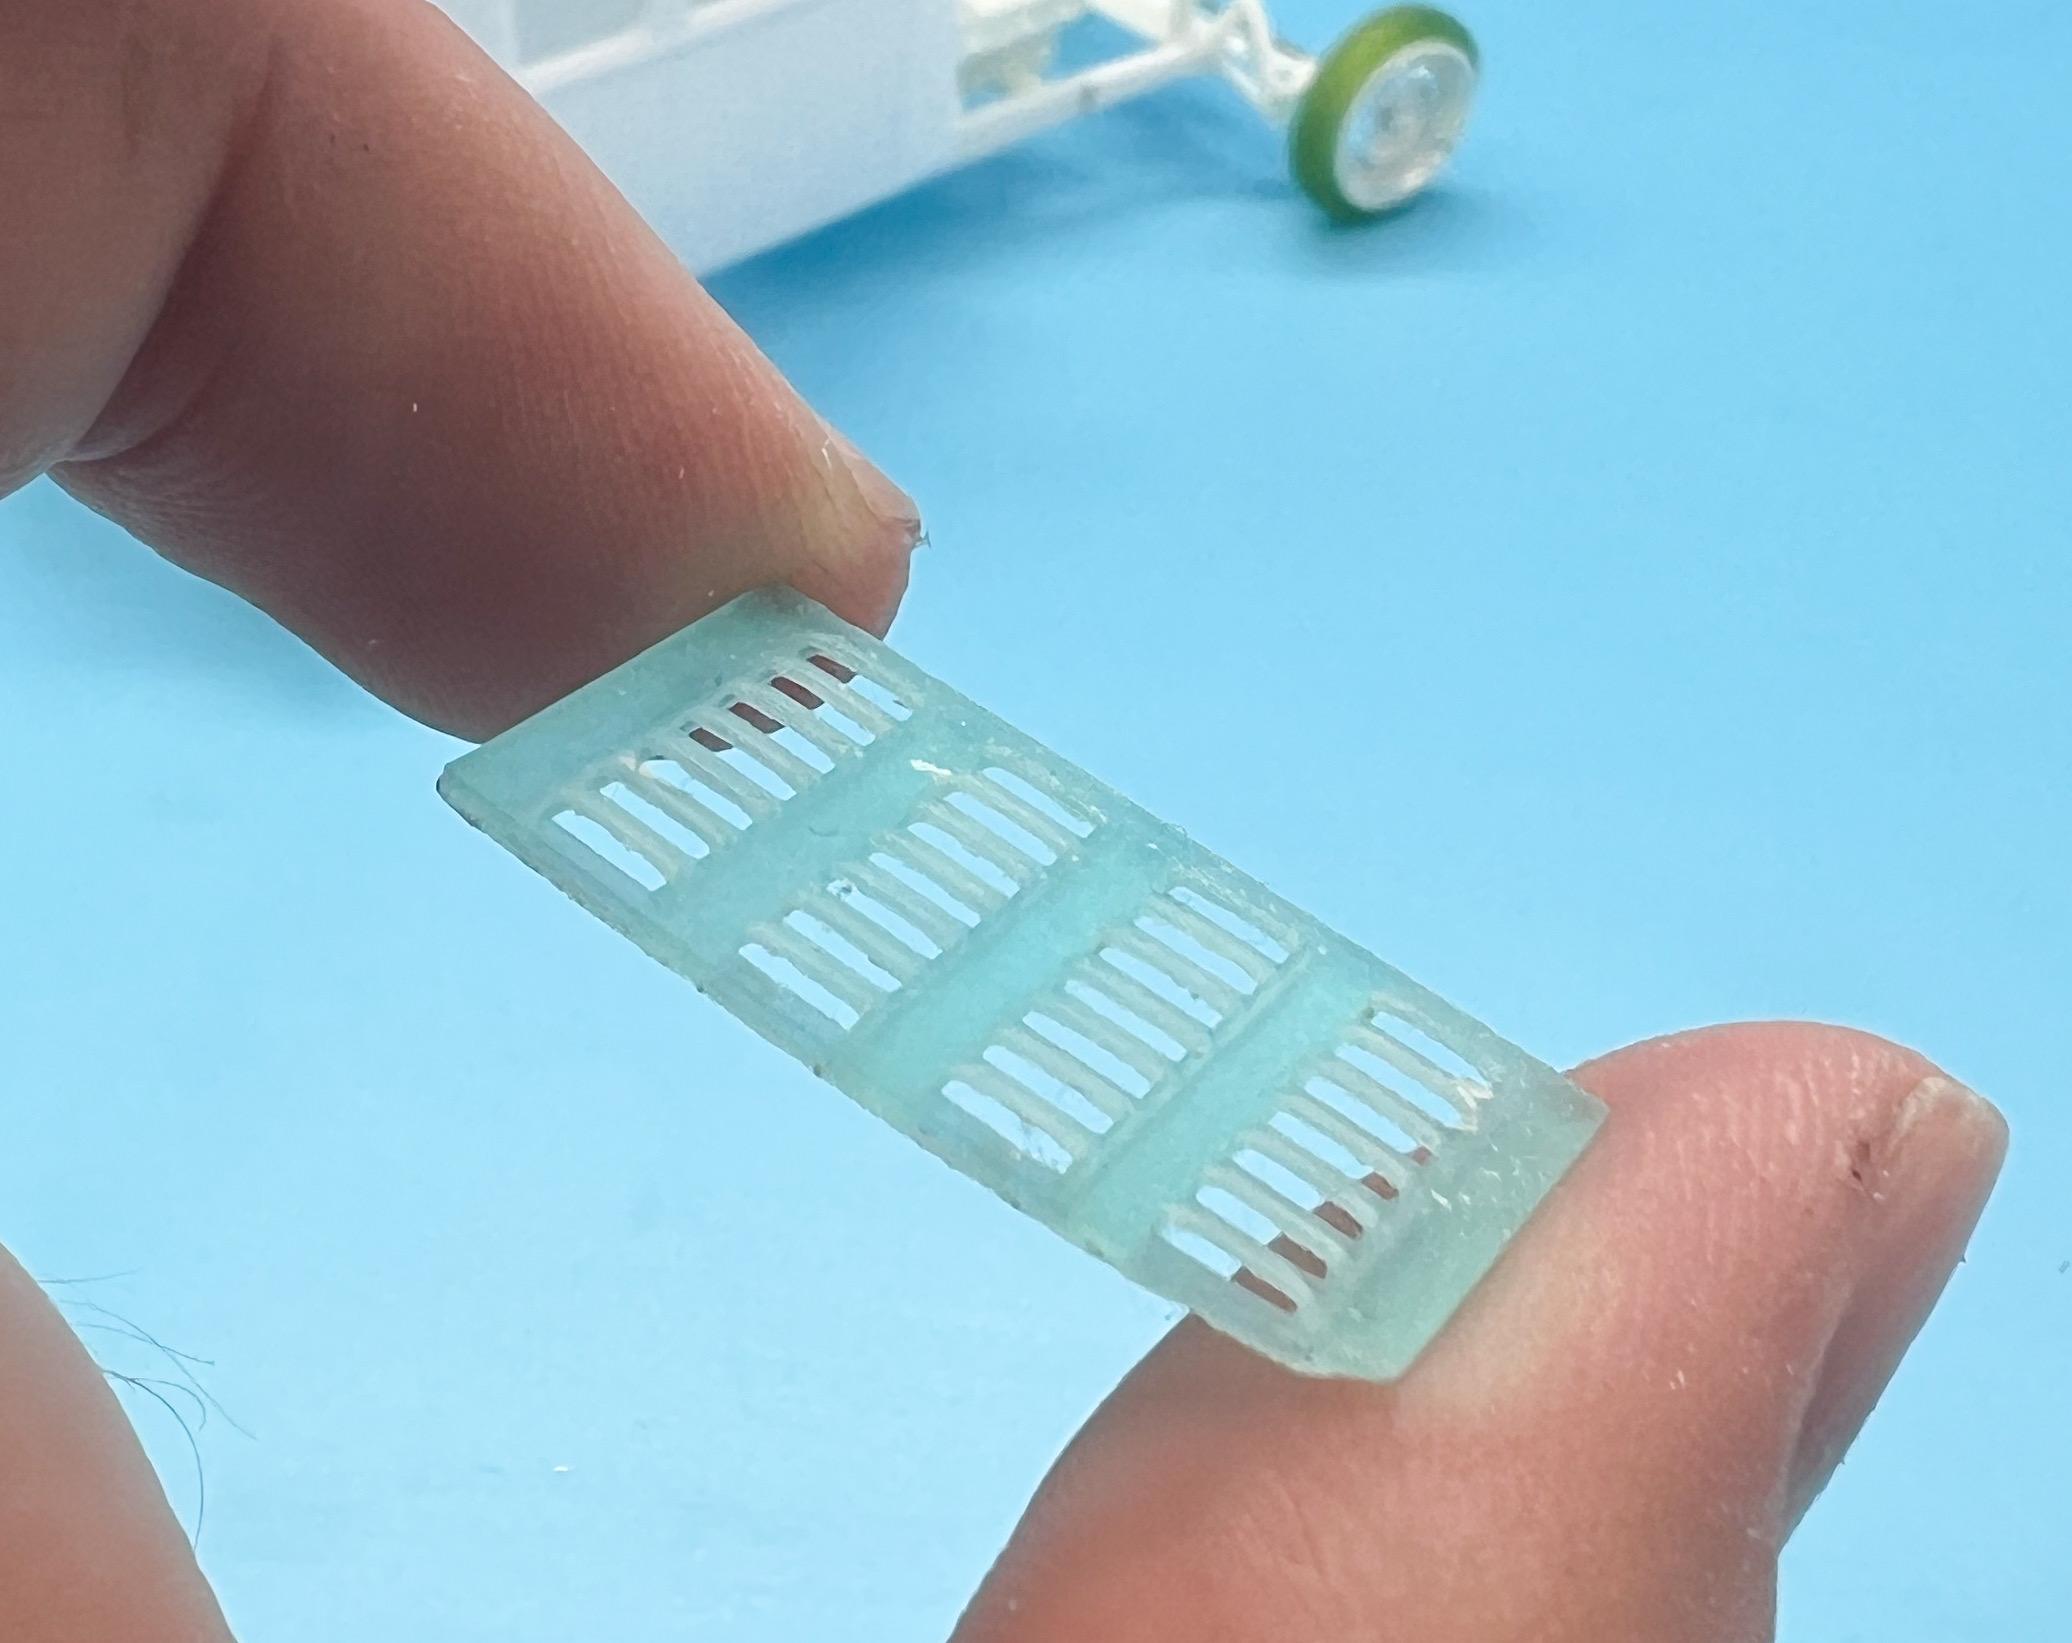
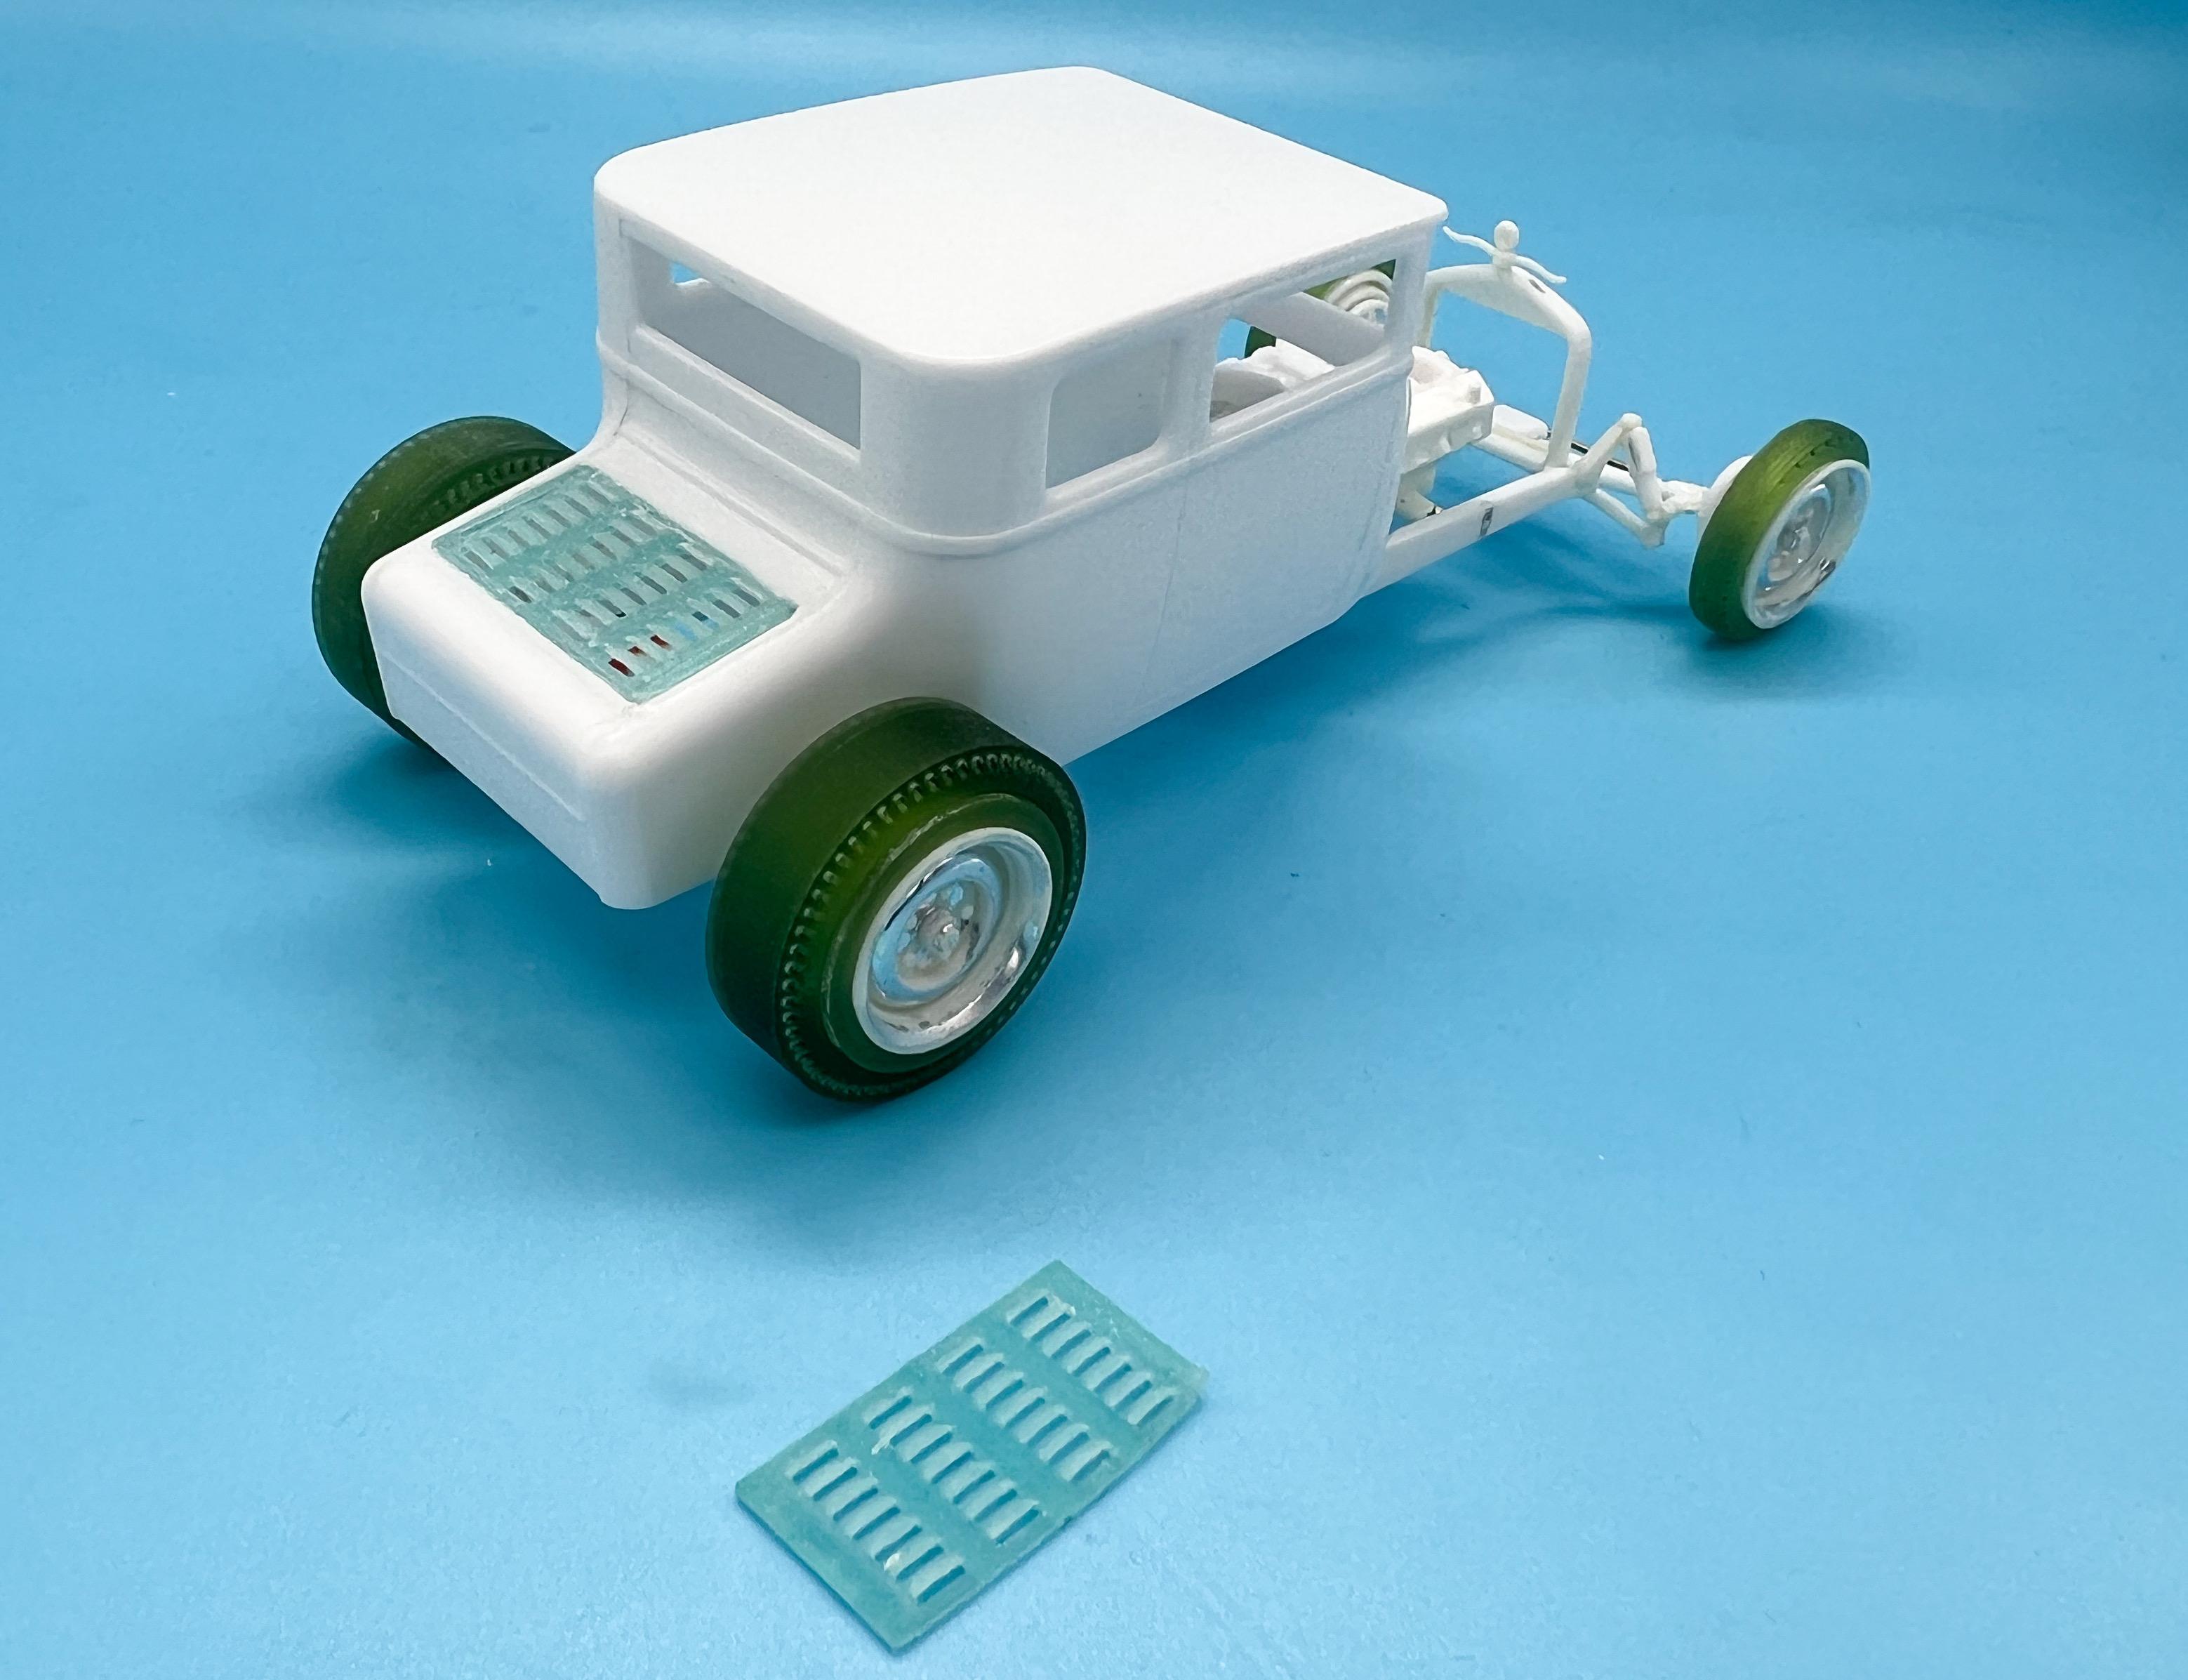
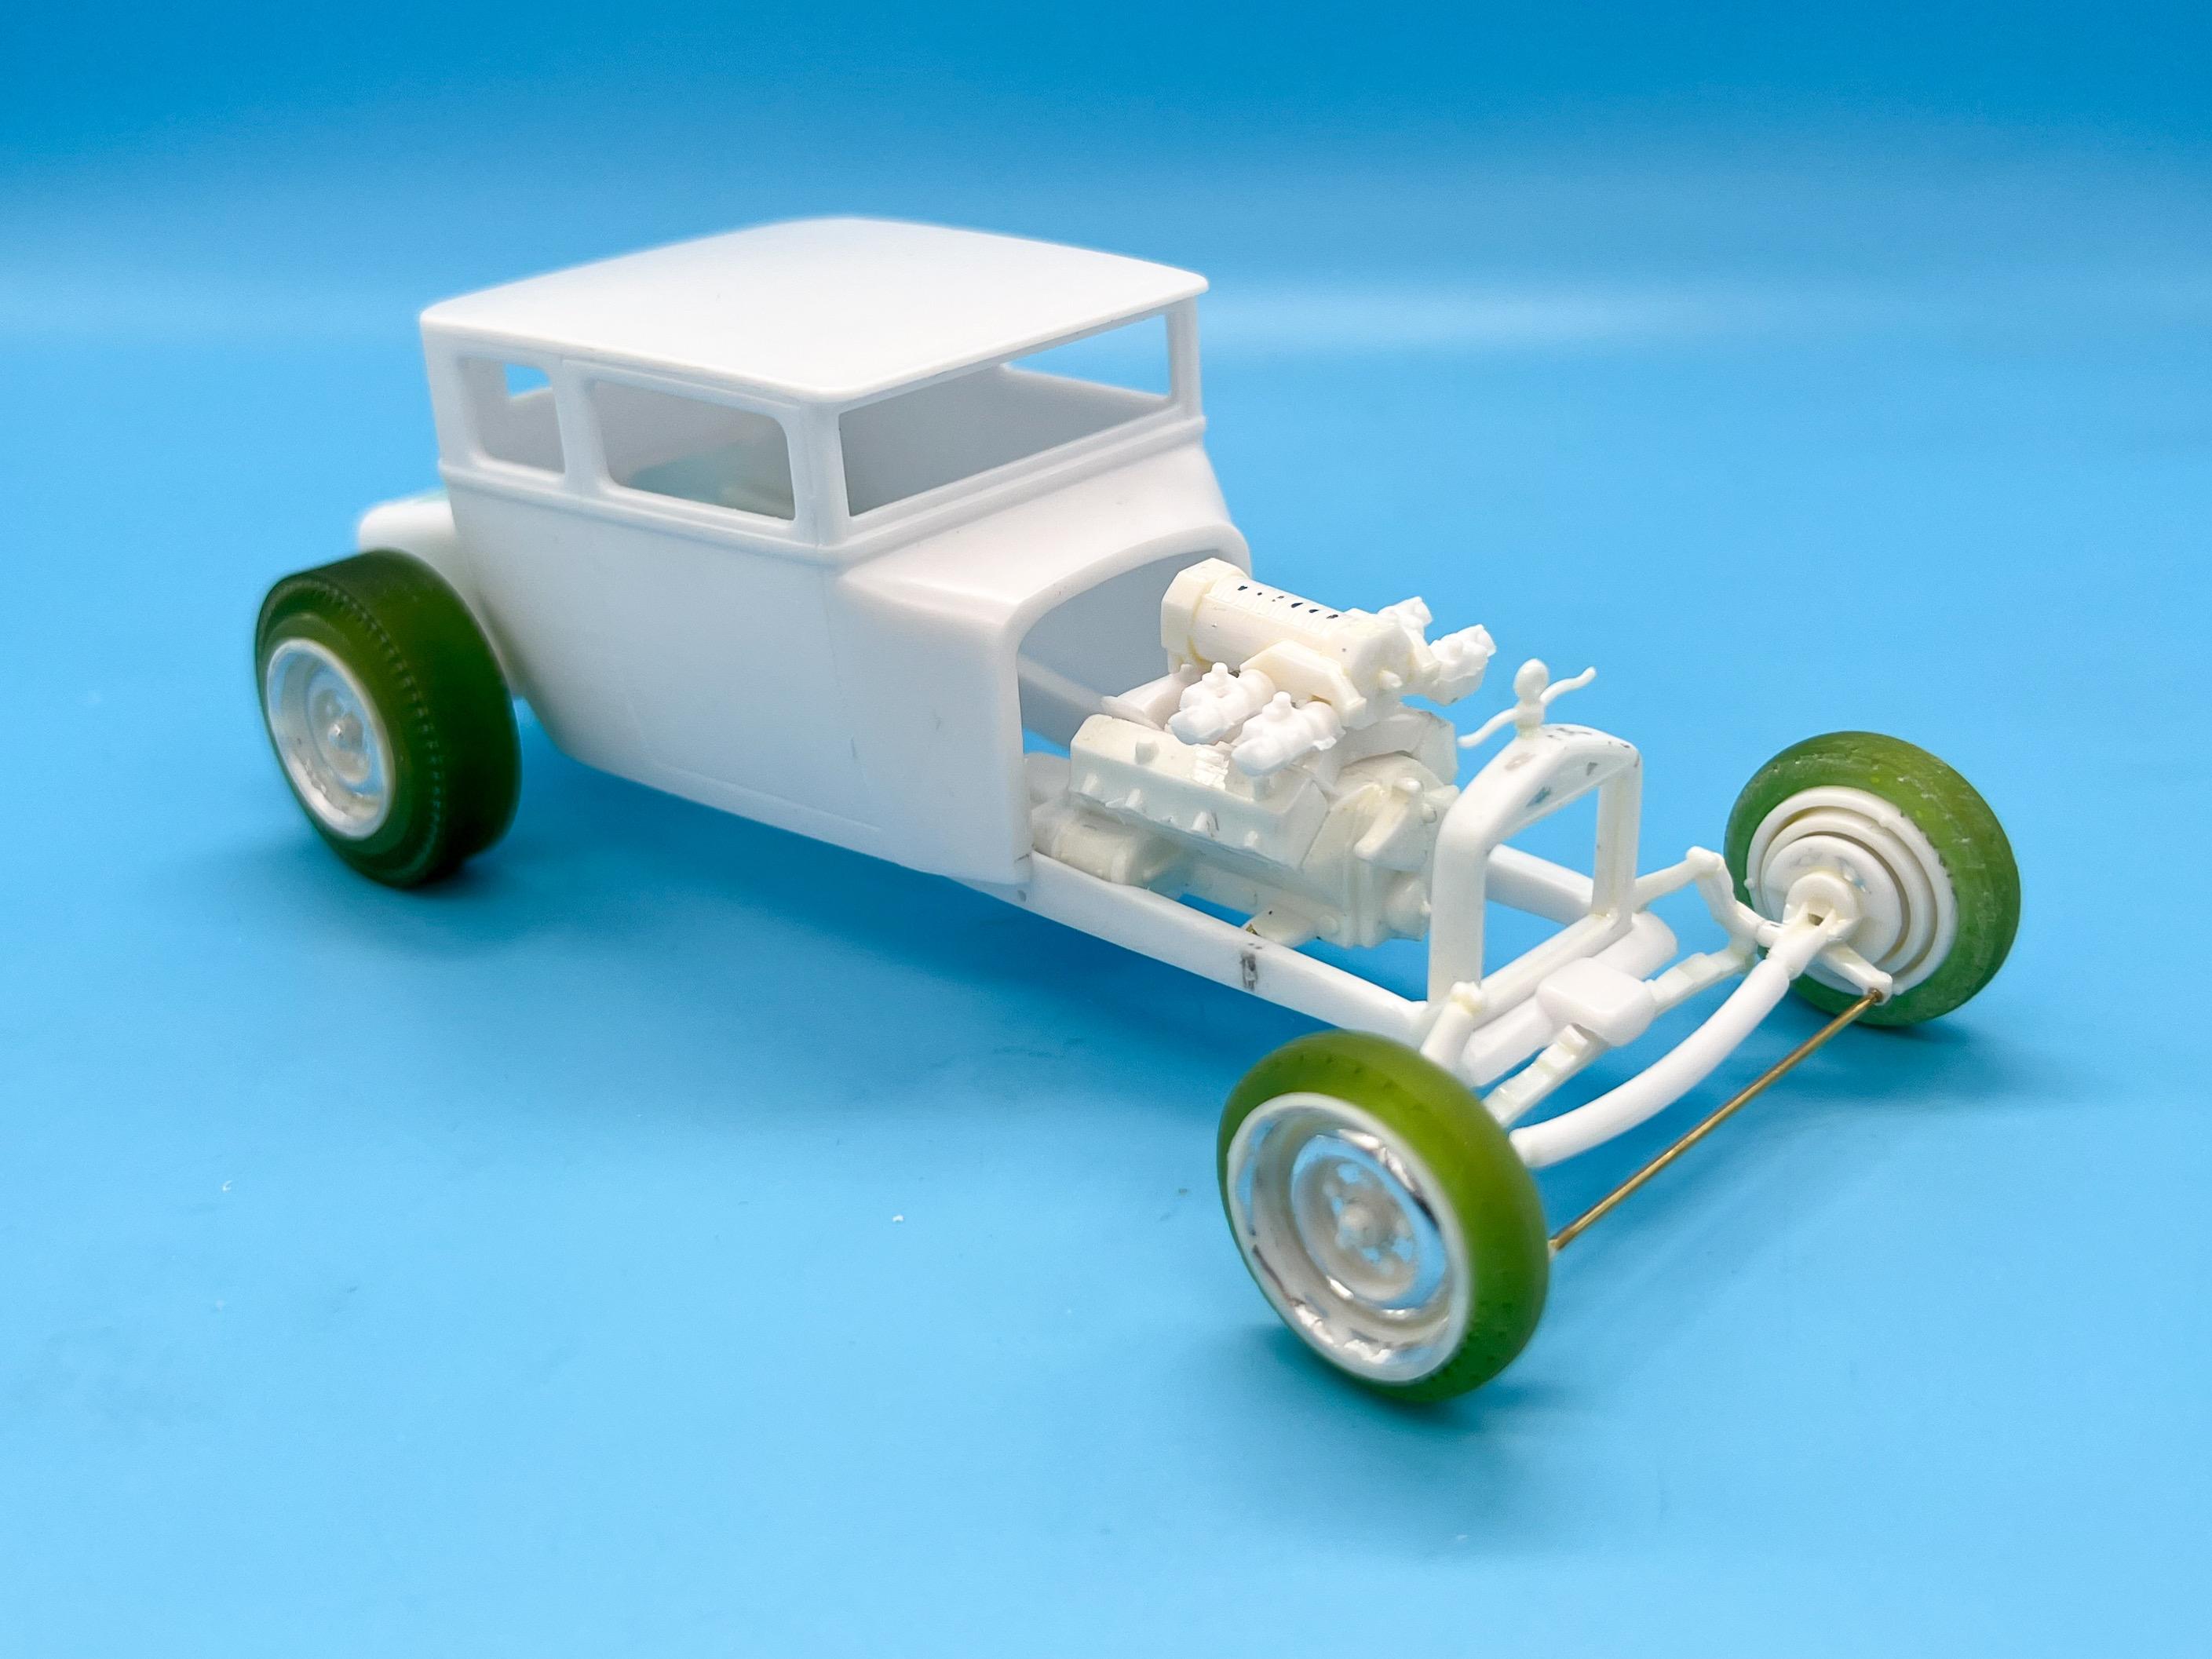
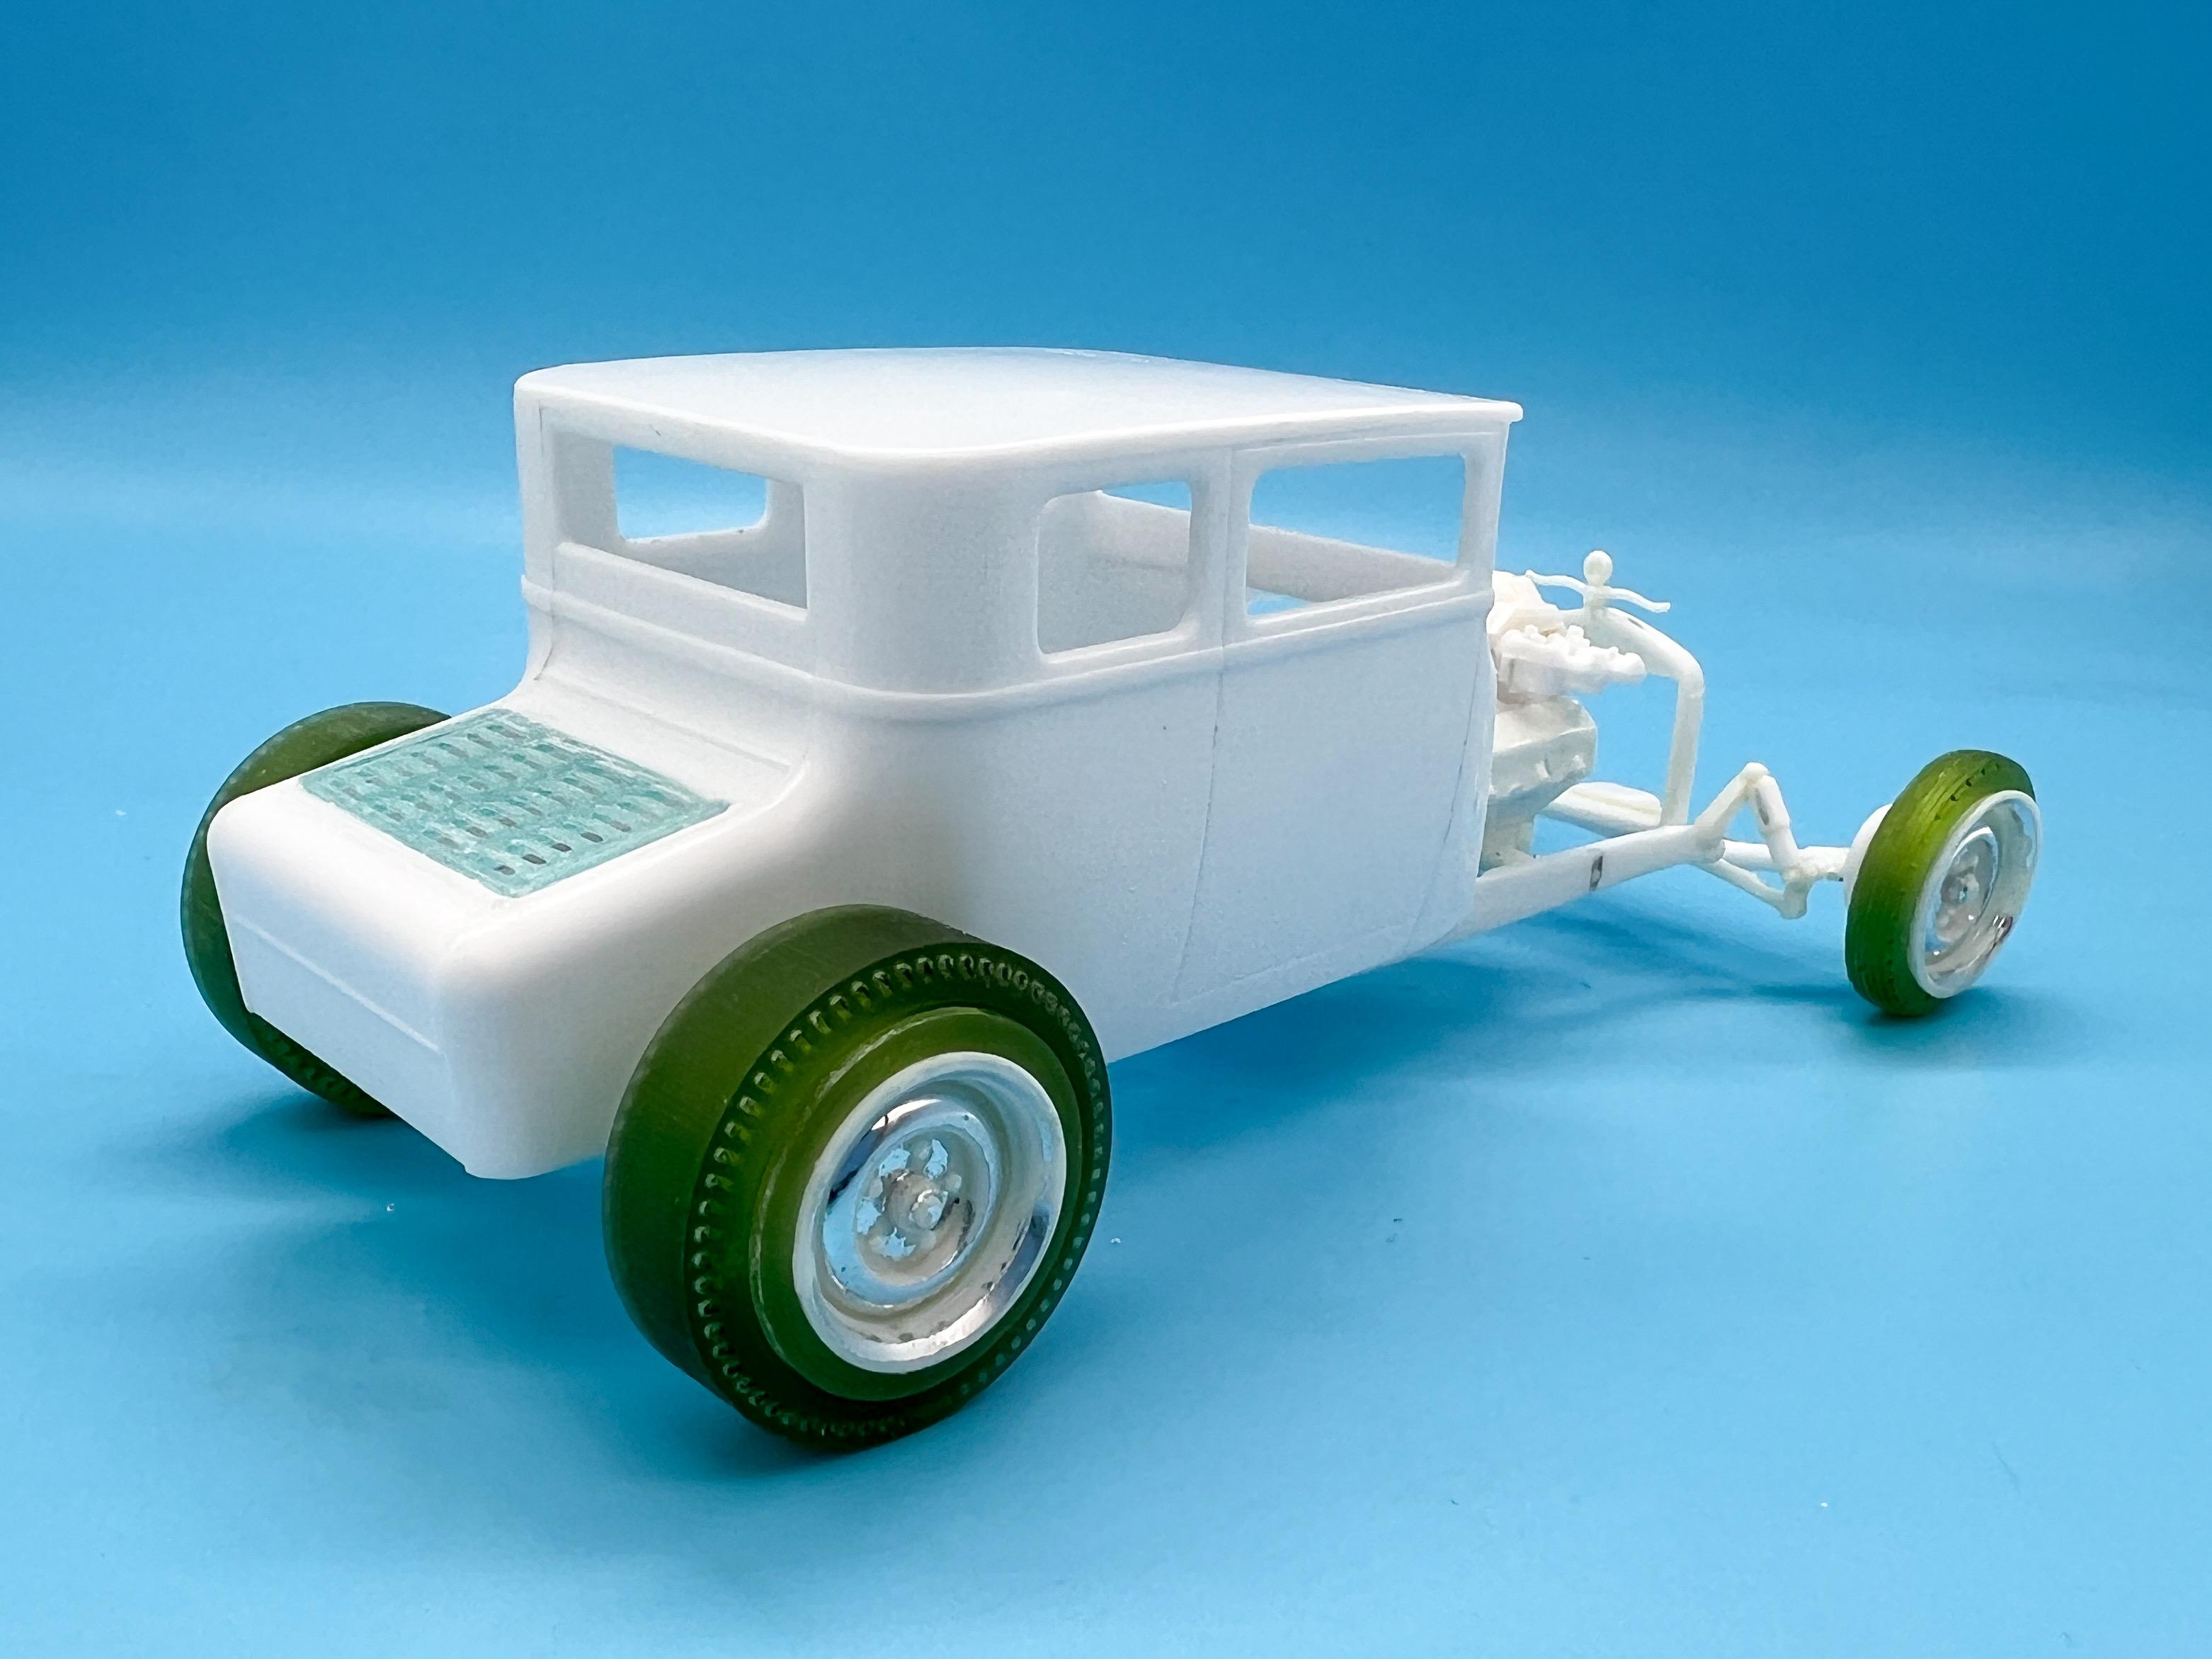
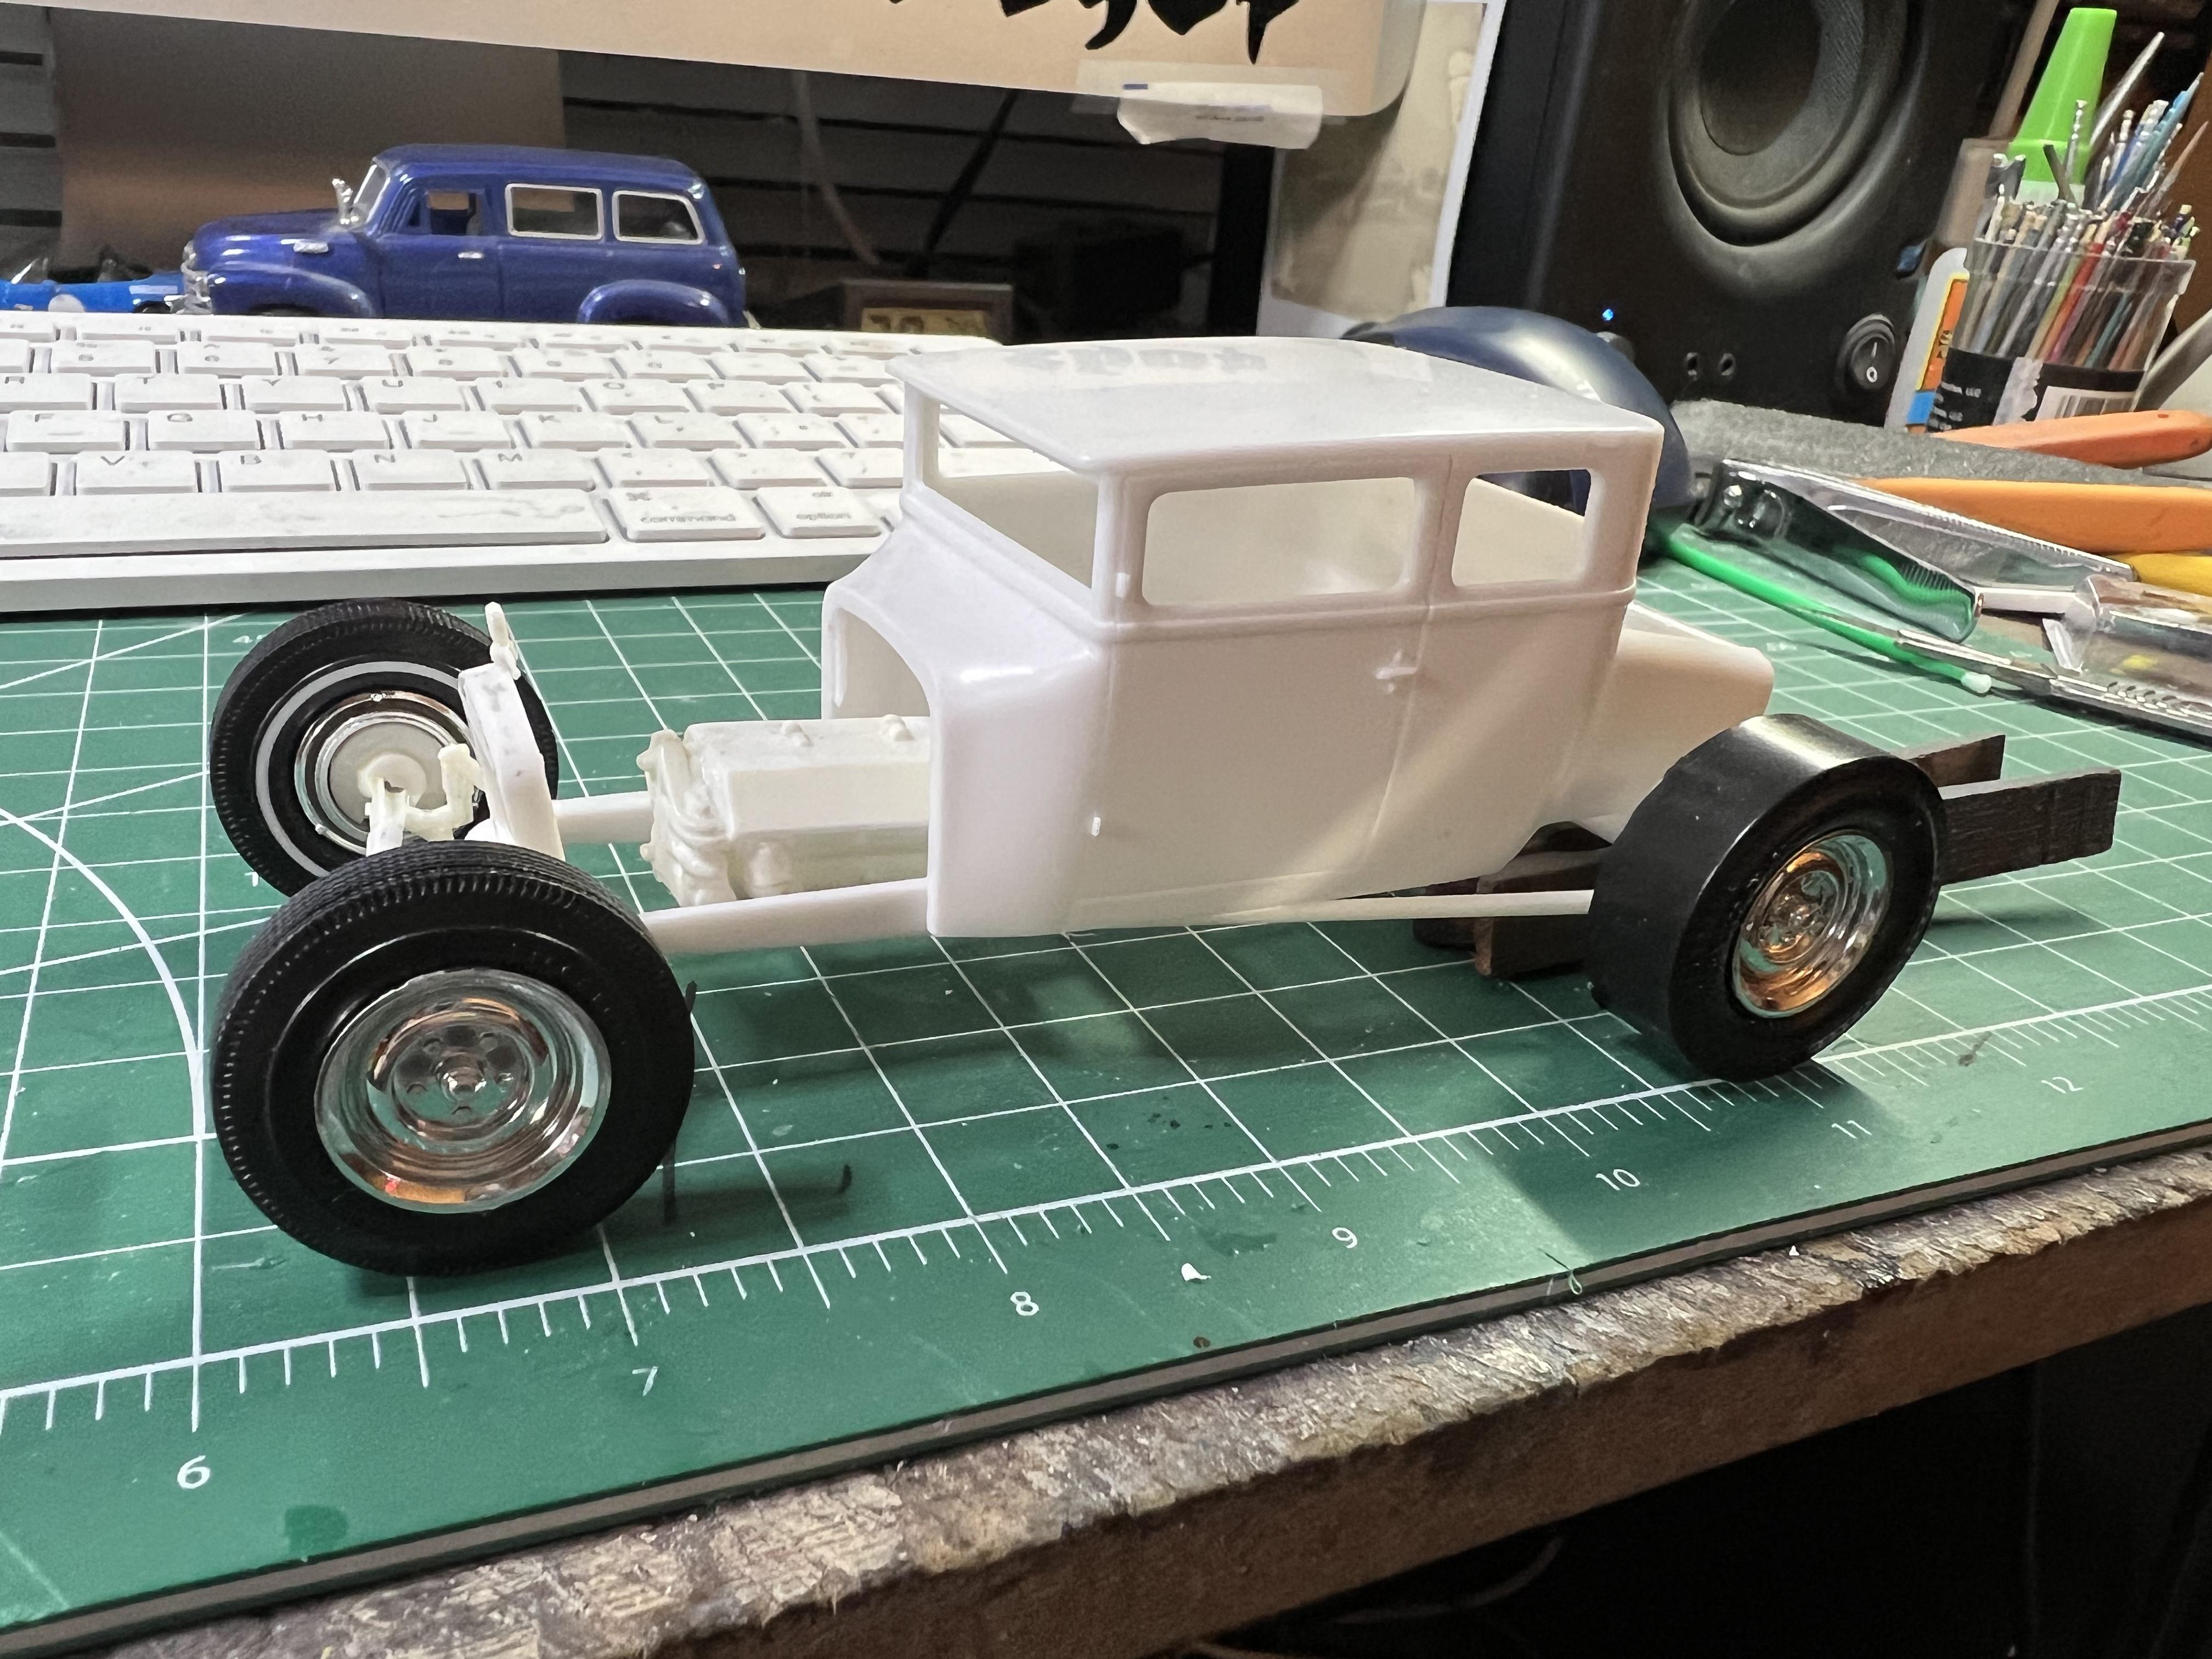
Thanks fellas! Got to put in some bench time this weekend on this one - a surprising amount of bench time considering how little progress I made ? First up, I wanted to run a much smaller tire out front - more like you would see on a little T-bucket. I’m trying to reduce how squashed the body looks with the high sides and the low roof somewhat, so I’m gonna try and trick the eye a little by decreasing that front tire height significantly: Already helped some, I think! I’m starting to like it already! I’m running the kit wheels right now so I can retain the option of using the nice chrome Moon disks, but they might not make it - we’ll see… Comparison between kit tire and mine: I was casually considering messing with the front spring mount on the frame, but I kinda like how it’s sitting now…I added a couple of little strips of styrene to the rear of the rails to make it easier to mockup and have the body sit itself in the same spot everytime… Next up, I wanted to print some piecrust slicks to see if I could get crisper detail than normal kit tires come with…I had a spoonful of resin left and took a shot that I’d have enough to print at least a coupla sets…JUST managed to get two fully printed before I ran out: (I’m trying a different brand next so I didn’t wanna just mix in from a new bottle…) Took a scale two inches out of the new ones, to lower the car an inch - I think these will work and look nice and sharp: Next job was laying out a new decklid with some louvres and printing a few at different thicknesses - they look cool from this angle… …but even cooler from behind: These parts are somewhat tricky to print and you need to do super-careful clean-up but the effect is cool I think! Scribed out the kit trunk lid and installed the new piece as soon as it was printed and cured…thin resin like this can warp and bend and distort so I wanted to get it locked down before it had too long to consider changing shape: Those little gaps seem to attract styrene dust, so I’ll need to keep cleaning them up until I get this thing to the primer stage I’m sure… And that’s about how it looks so far - quick end-of-weekend mock-up: Plenty to do, but I’m starting to like it! Thanks for looking!
-
Atlantis Models has bought another lot of tooling/molds.....
OldNYJim replied to Dave Van's topic in Car Kit News & Reviews
I am SUPER excited about that one - great news!!! -
There was a funny letter in one issue of SA complaining that the magazine had completely butchered a builder's name in one issue, and then butchered it a different way in a correction they printed in the next issue...they got it right by the third try though, luckily ?
-
Johan ‘70 Cadillac ElDorado pro touring (low and aggressive)
OldNYJim replied to Steve H's topic in WIP: Model Cars
I love that low-low ride height of your inspiration in the first post, the wheel choice is great and your bodywork is masterful! Enjoying watching this one come together! -
Excellent info - thanks for sharing Steve! I wonder if the version in the spray can, being a little thicker than the average, might be useful as a base for Alclad? Something that self levels well and doesn’t show every tiny flaw and imperfection on a part would be a real asset for prepping parts for a nice smooth chrome finish
-
1964 Pontiac Bonneville Convertible.
OldNYJim replied to StevenGuthmiller's topic in WIP: Model Cars
Fan looks a hundred times better - and the detail on those carbs is great! -
Thank you! Thank you too Steve! I was actually a little out of my depth on this one - one of my more complex paint jobs for sure but a LONG way off what the guys who build lowriders, for example, do. Got a long way to go and a lot of learning to do - but at least it’s fun! ??
-
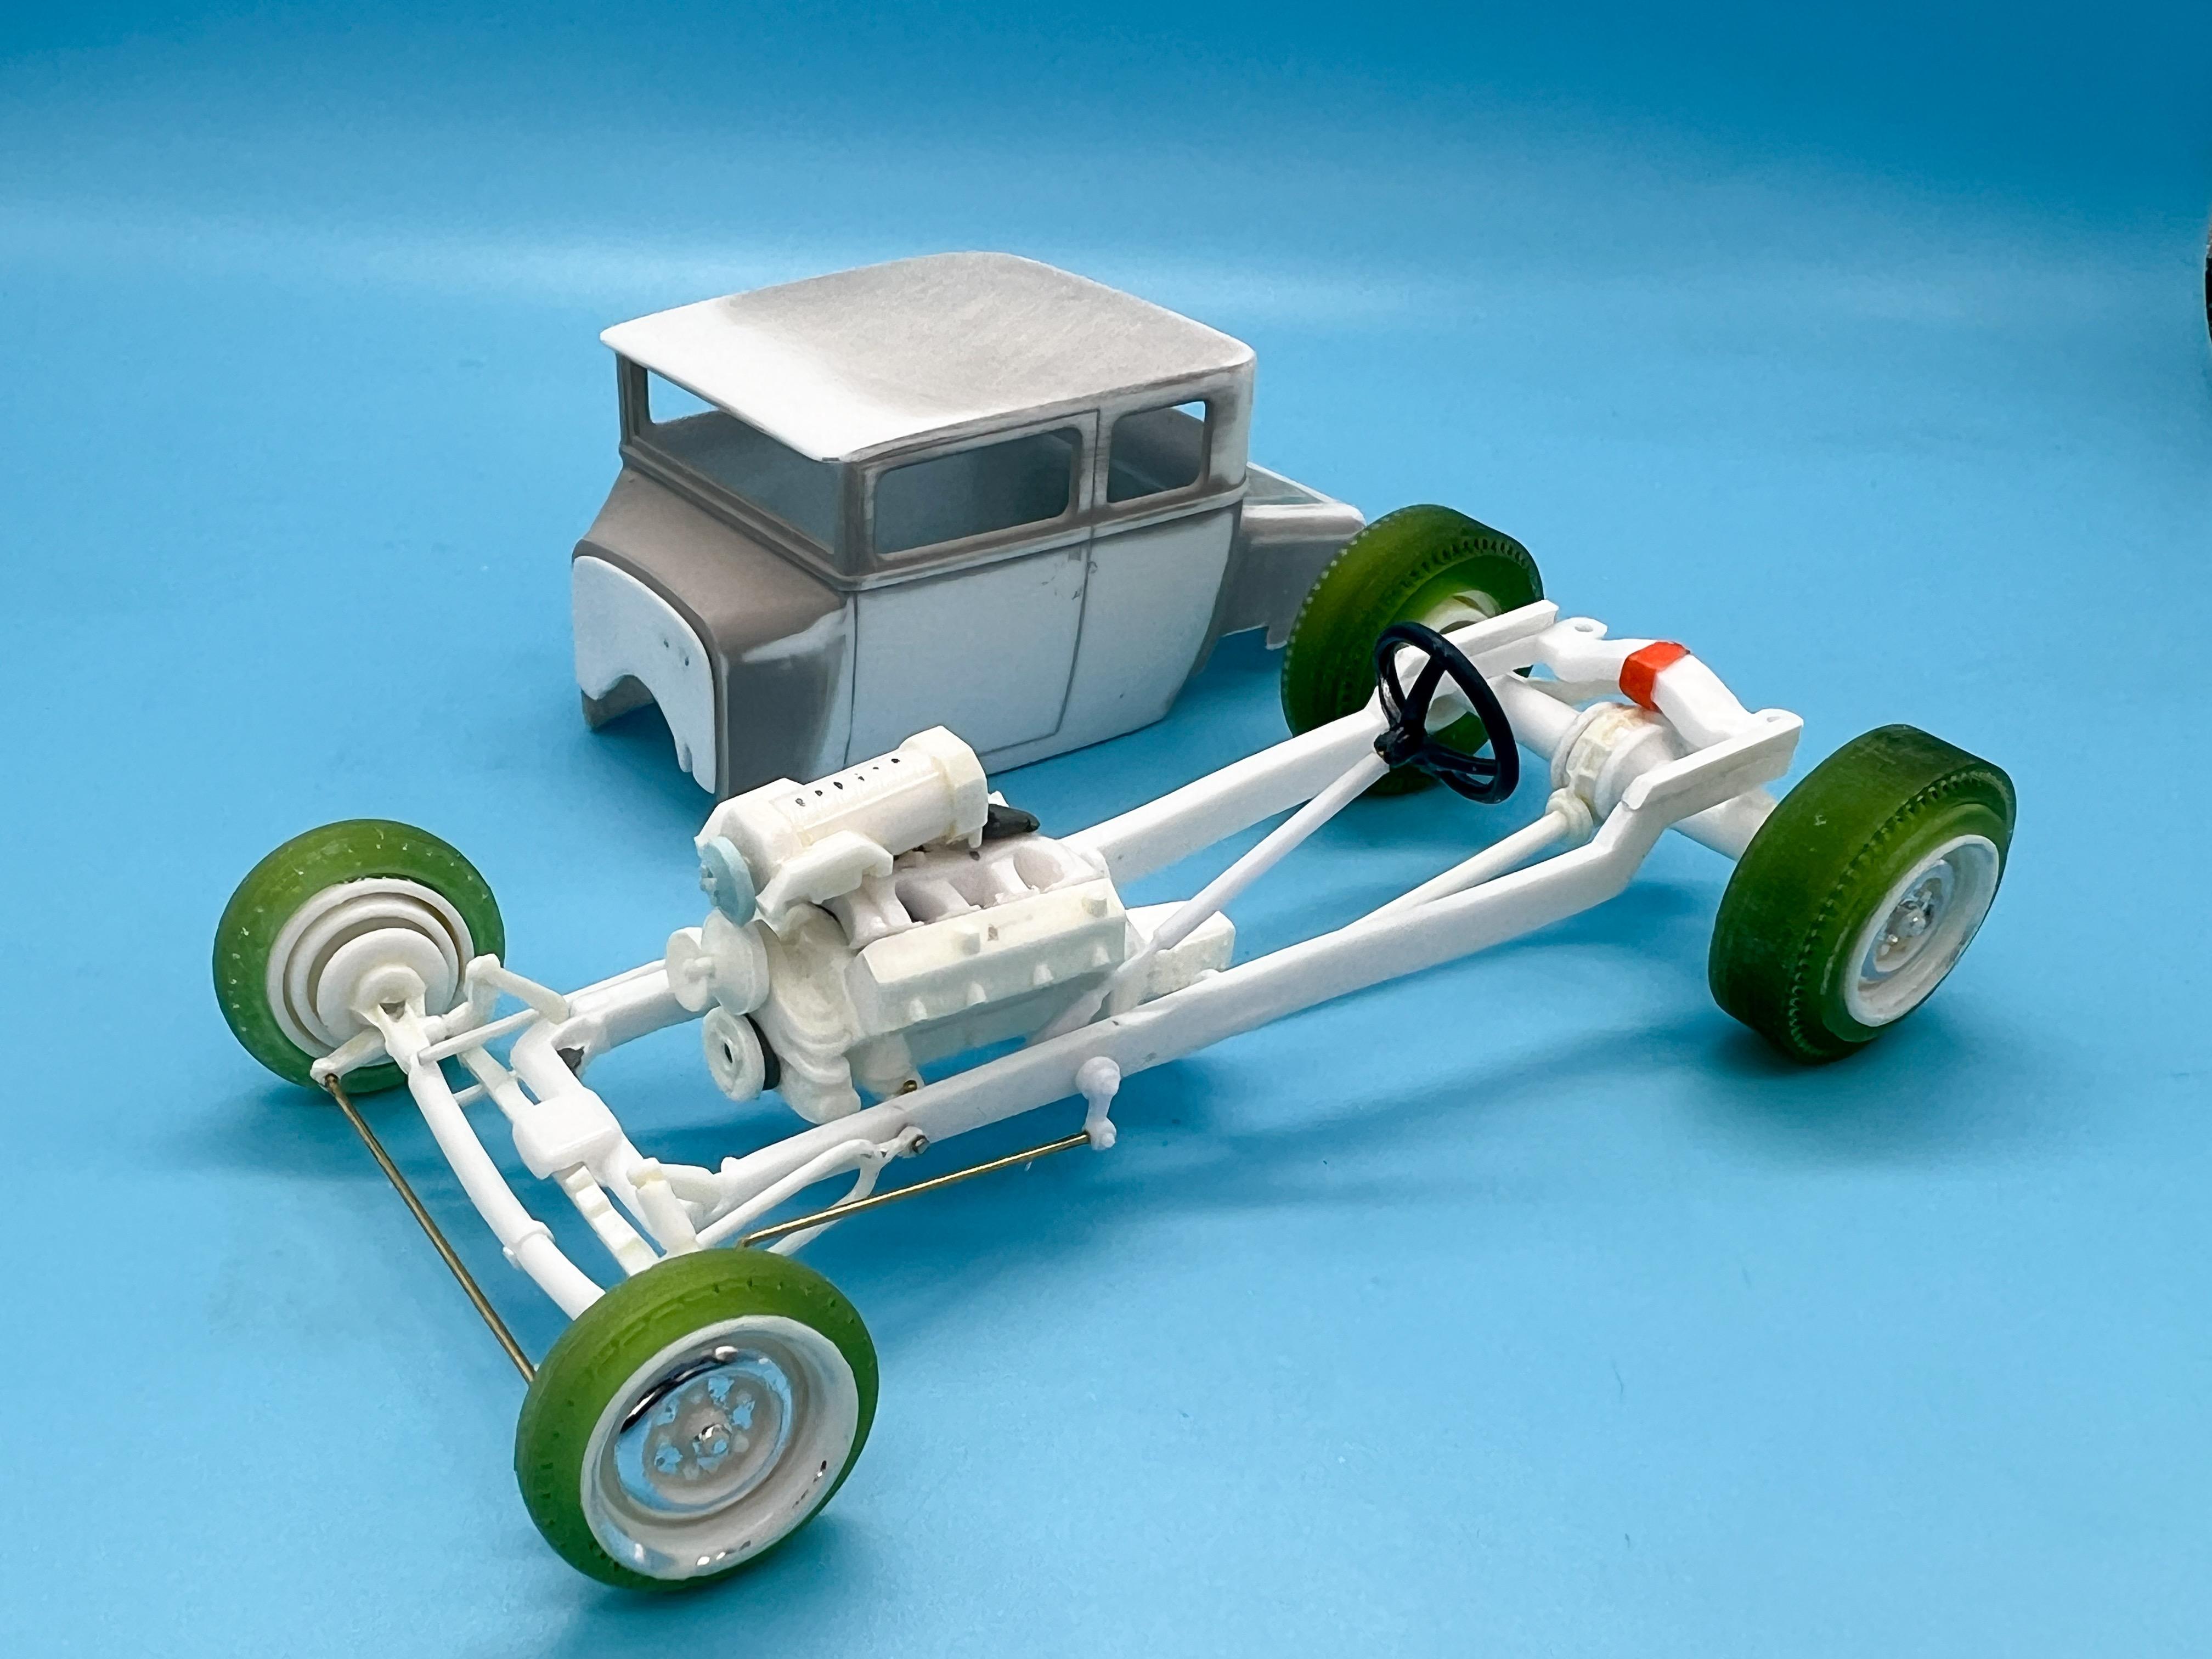
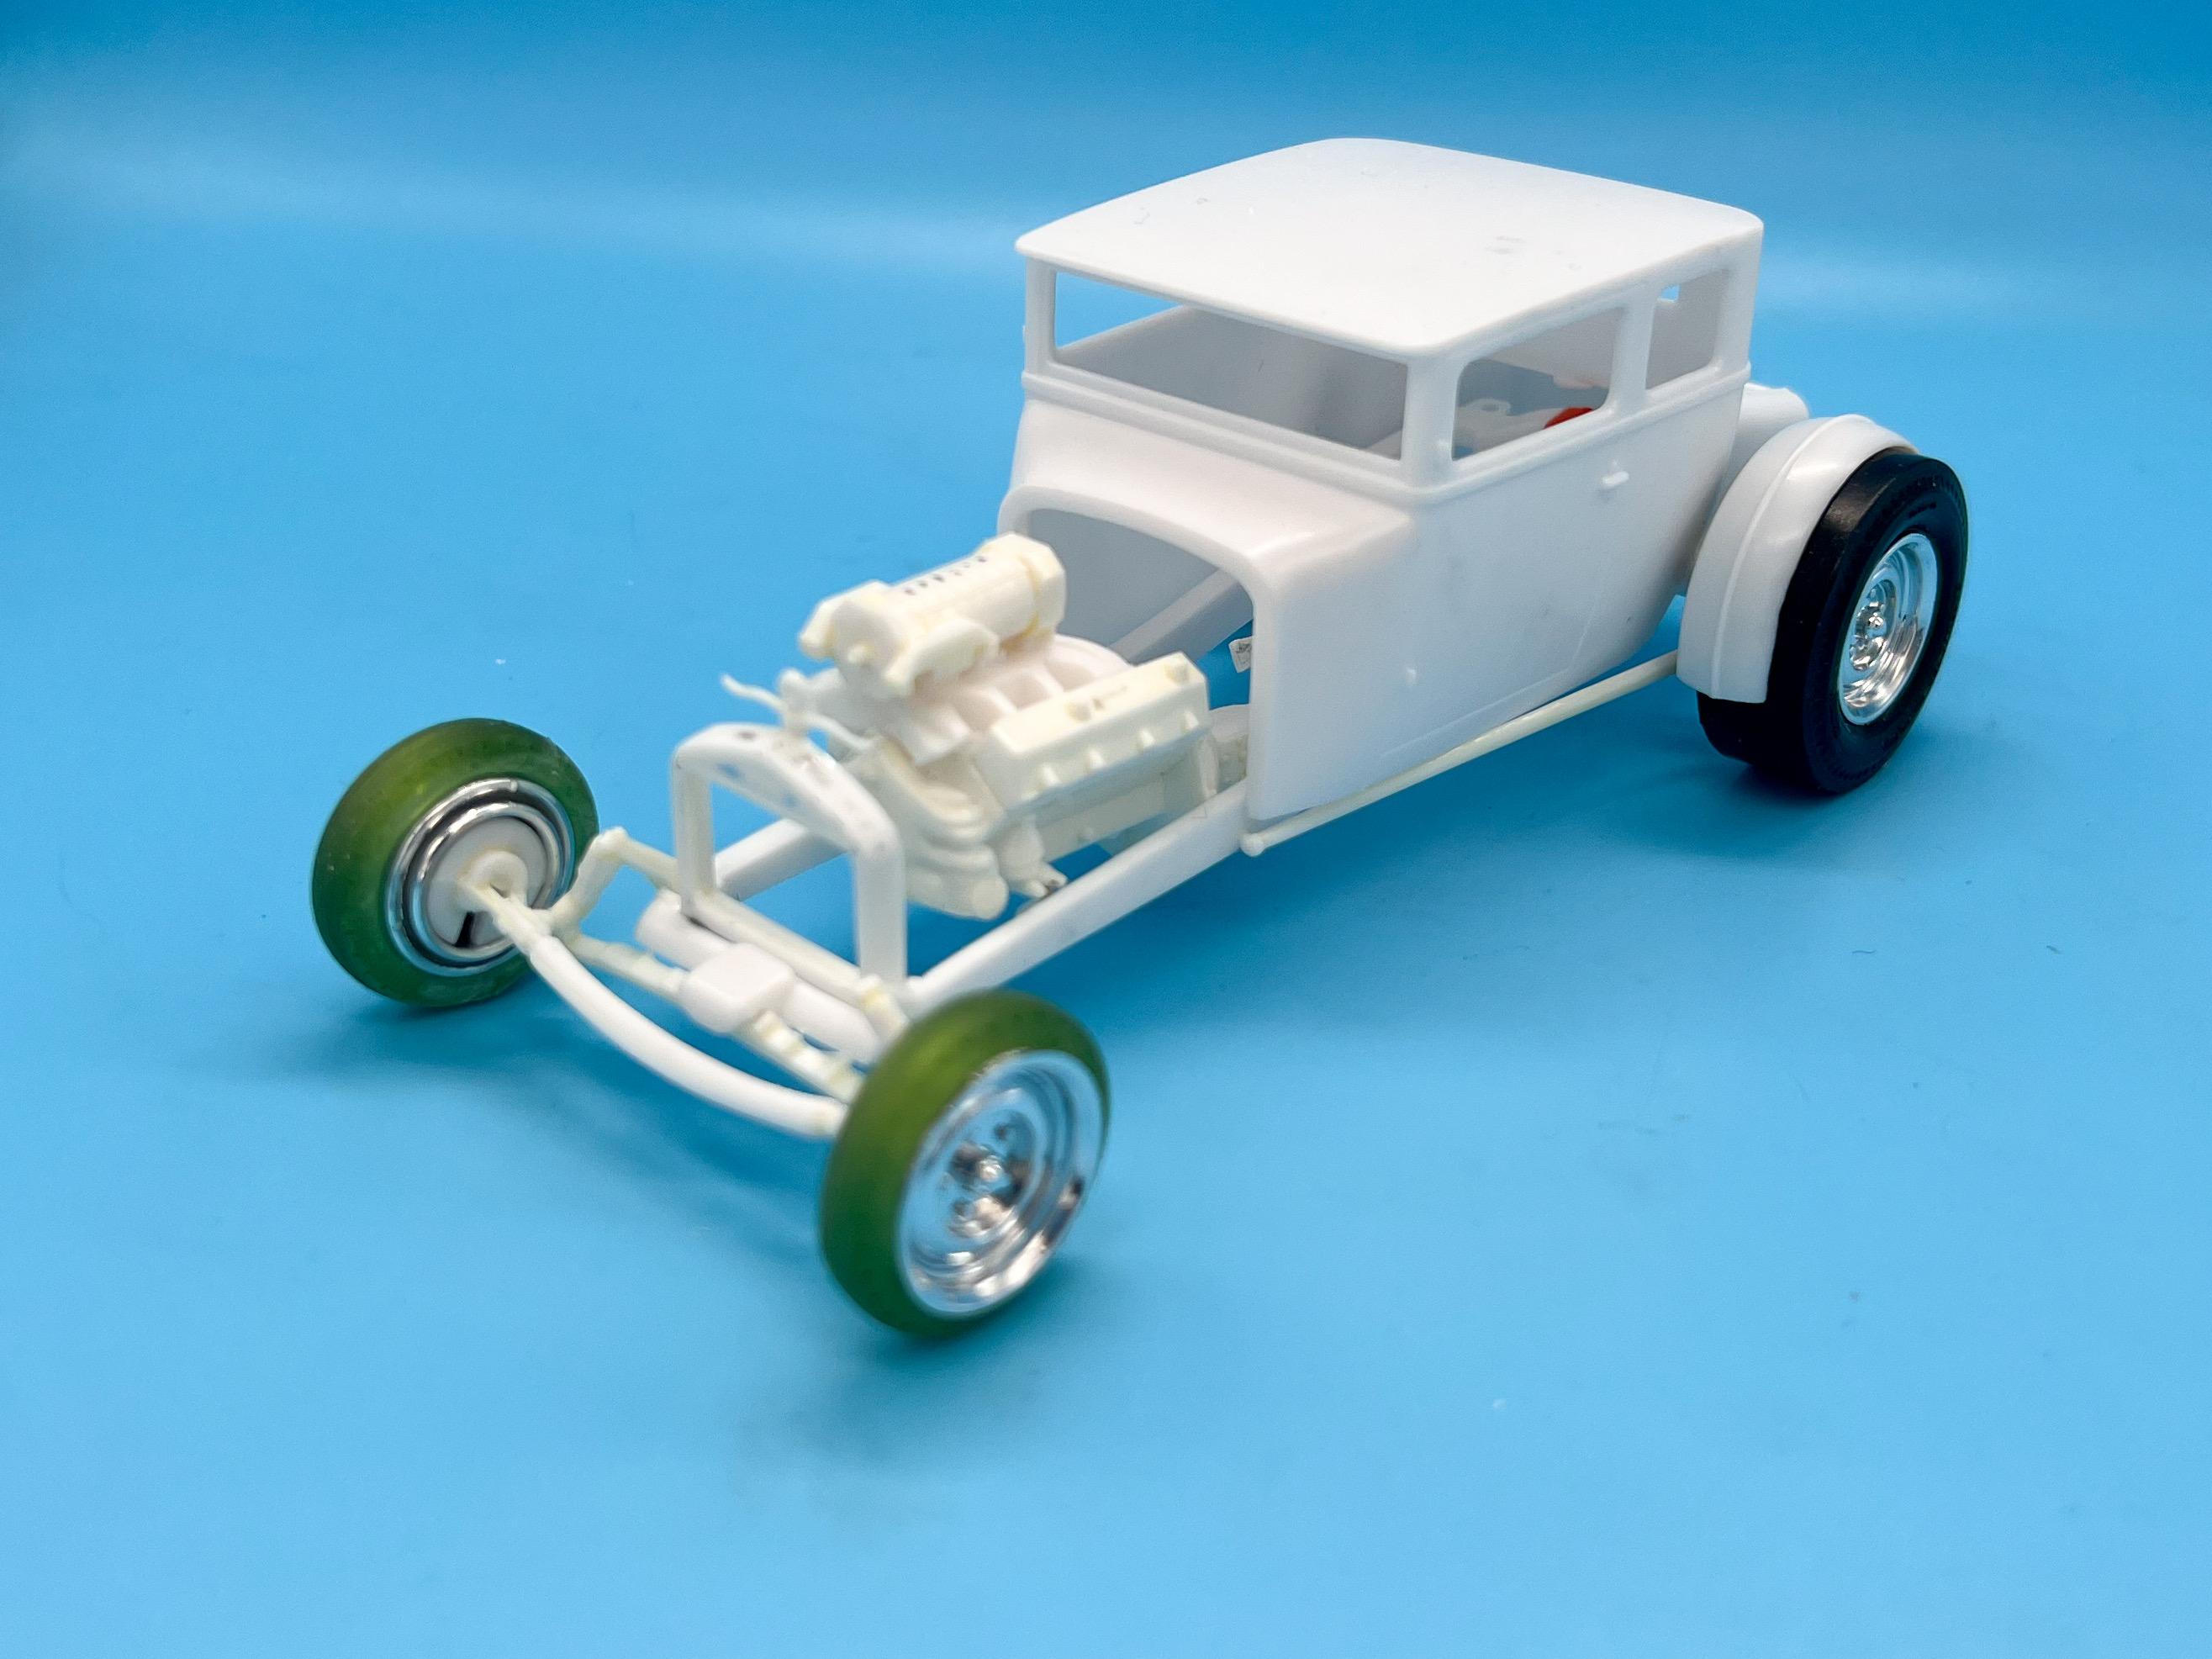
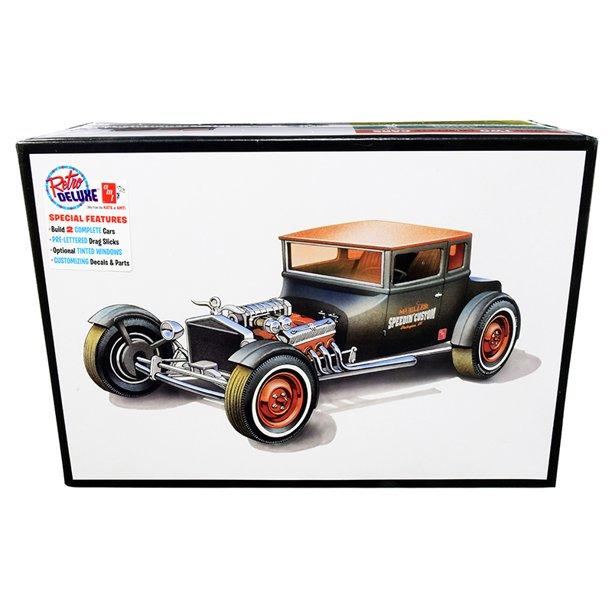
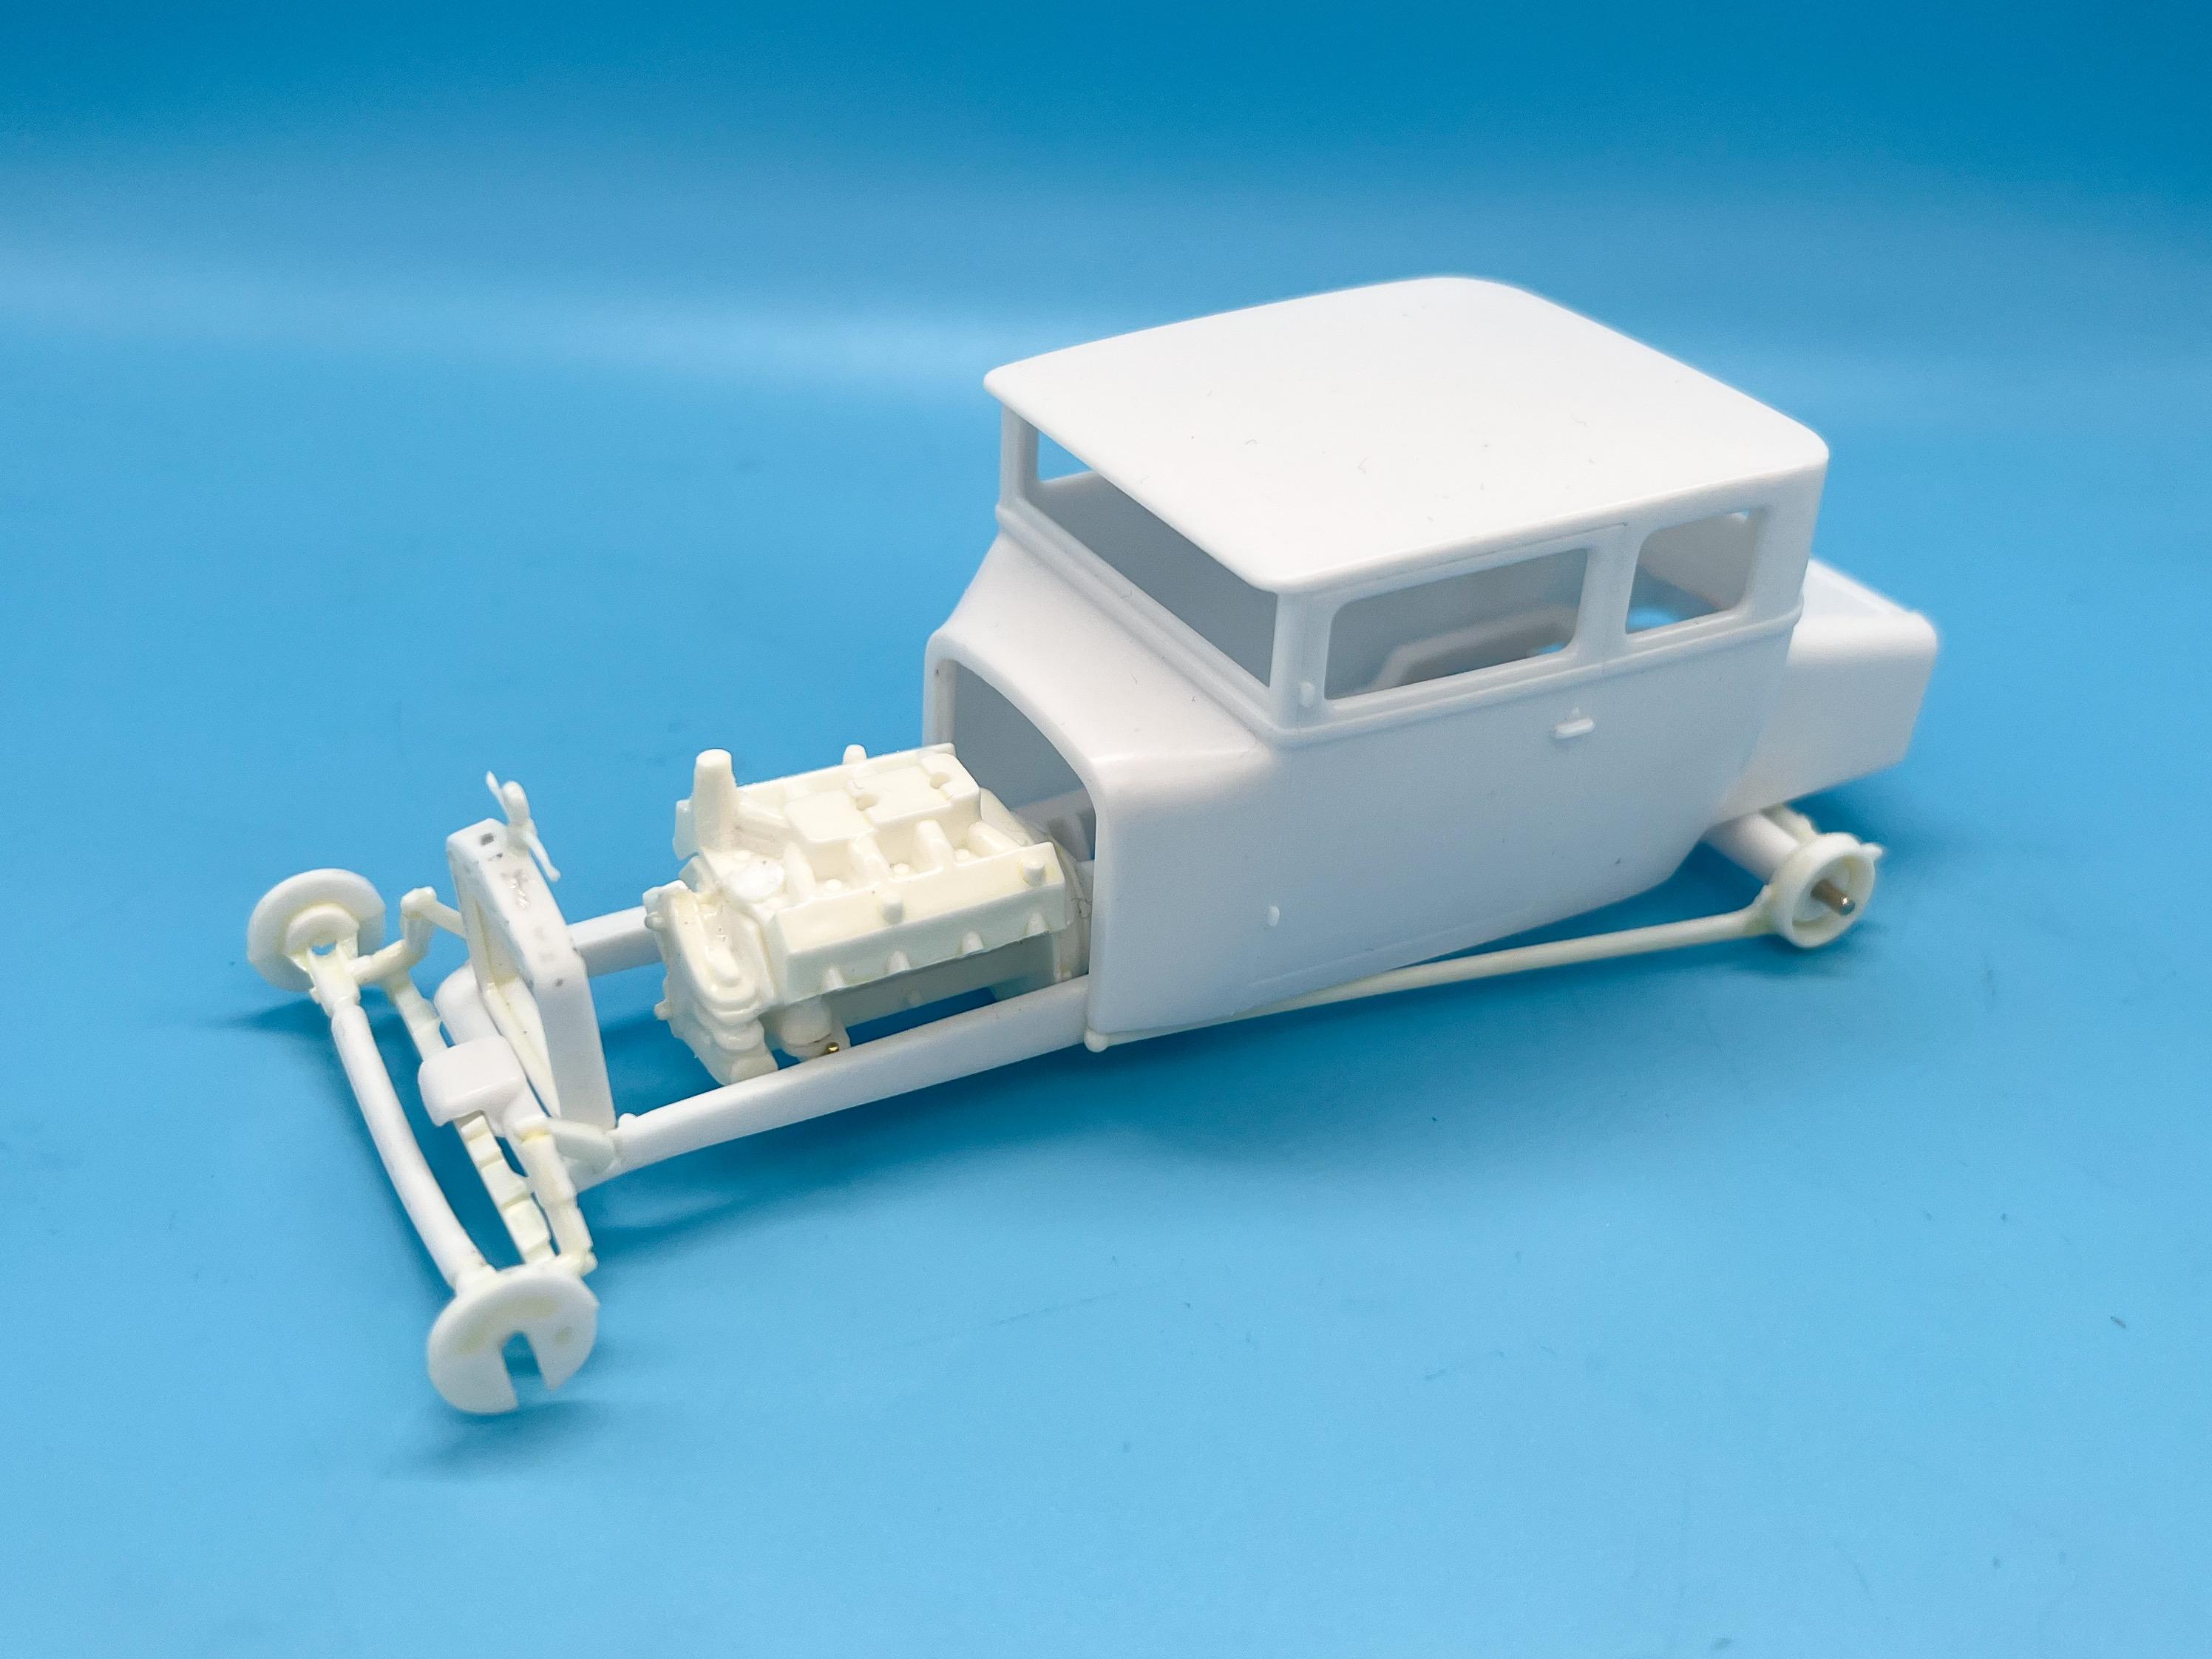
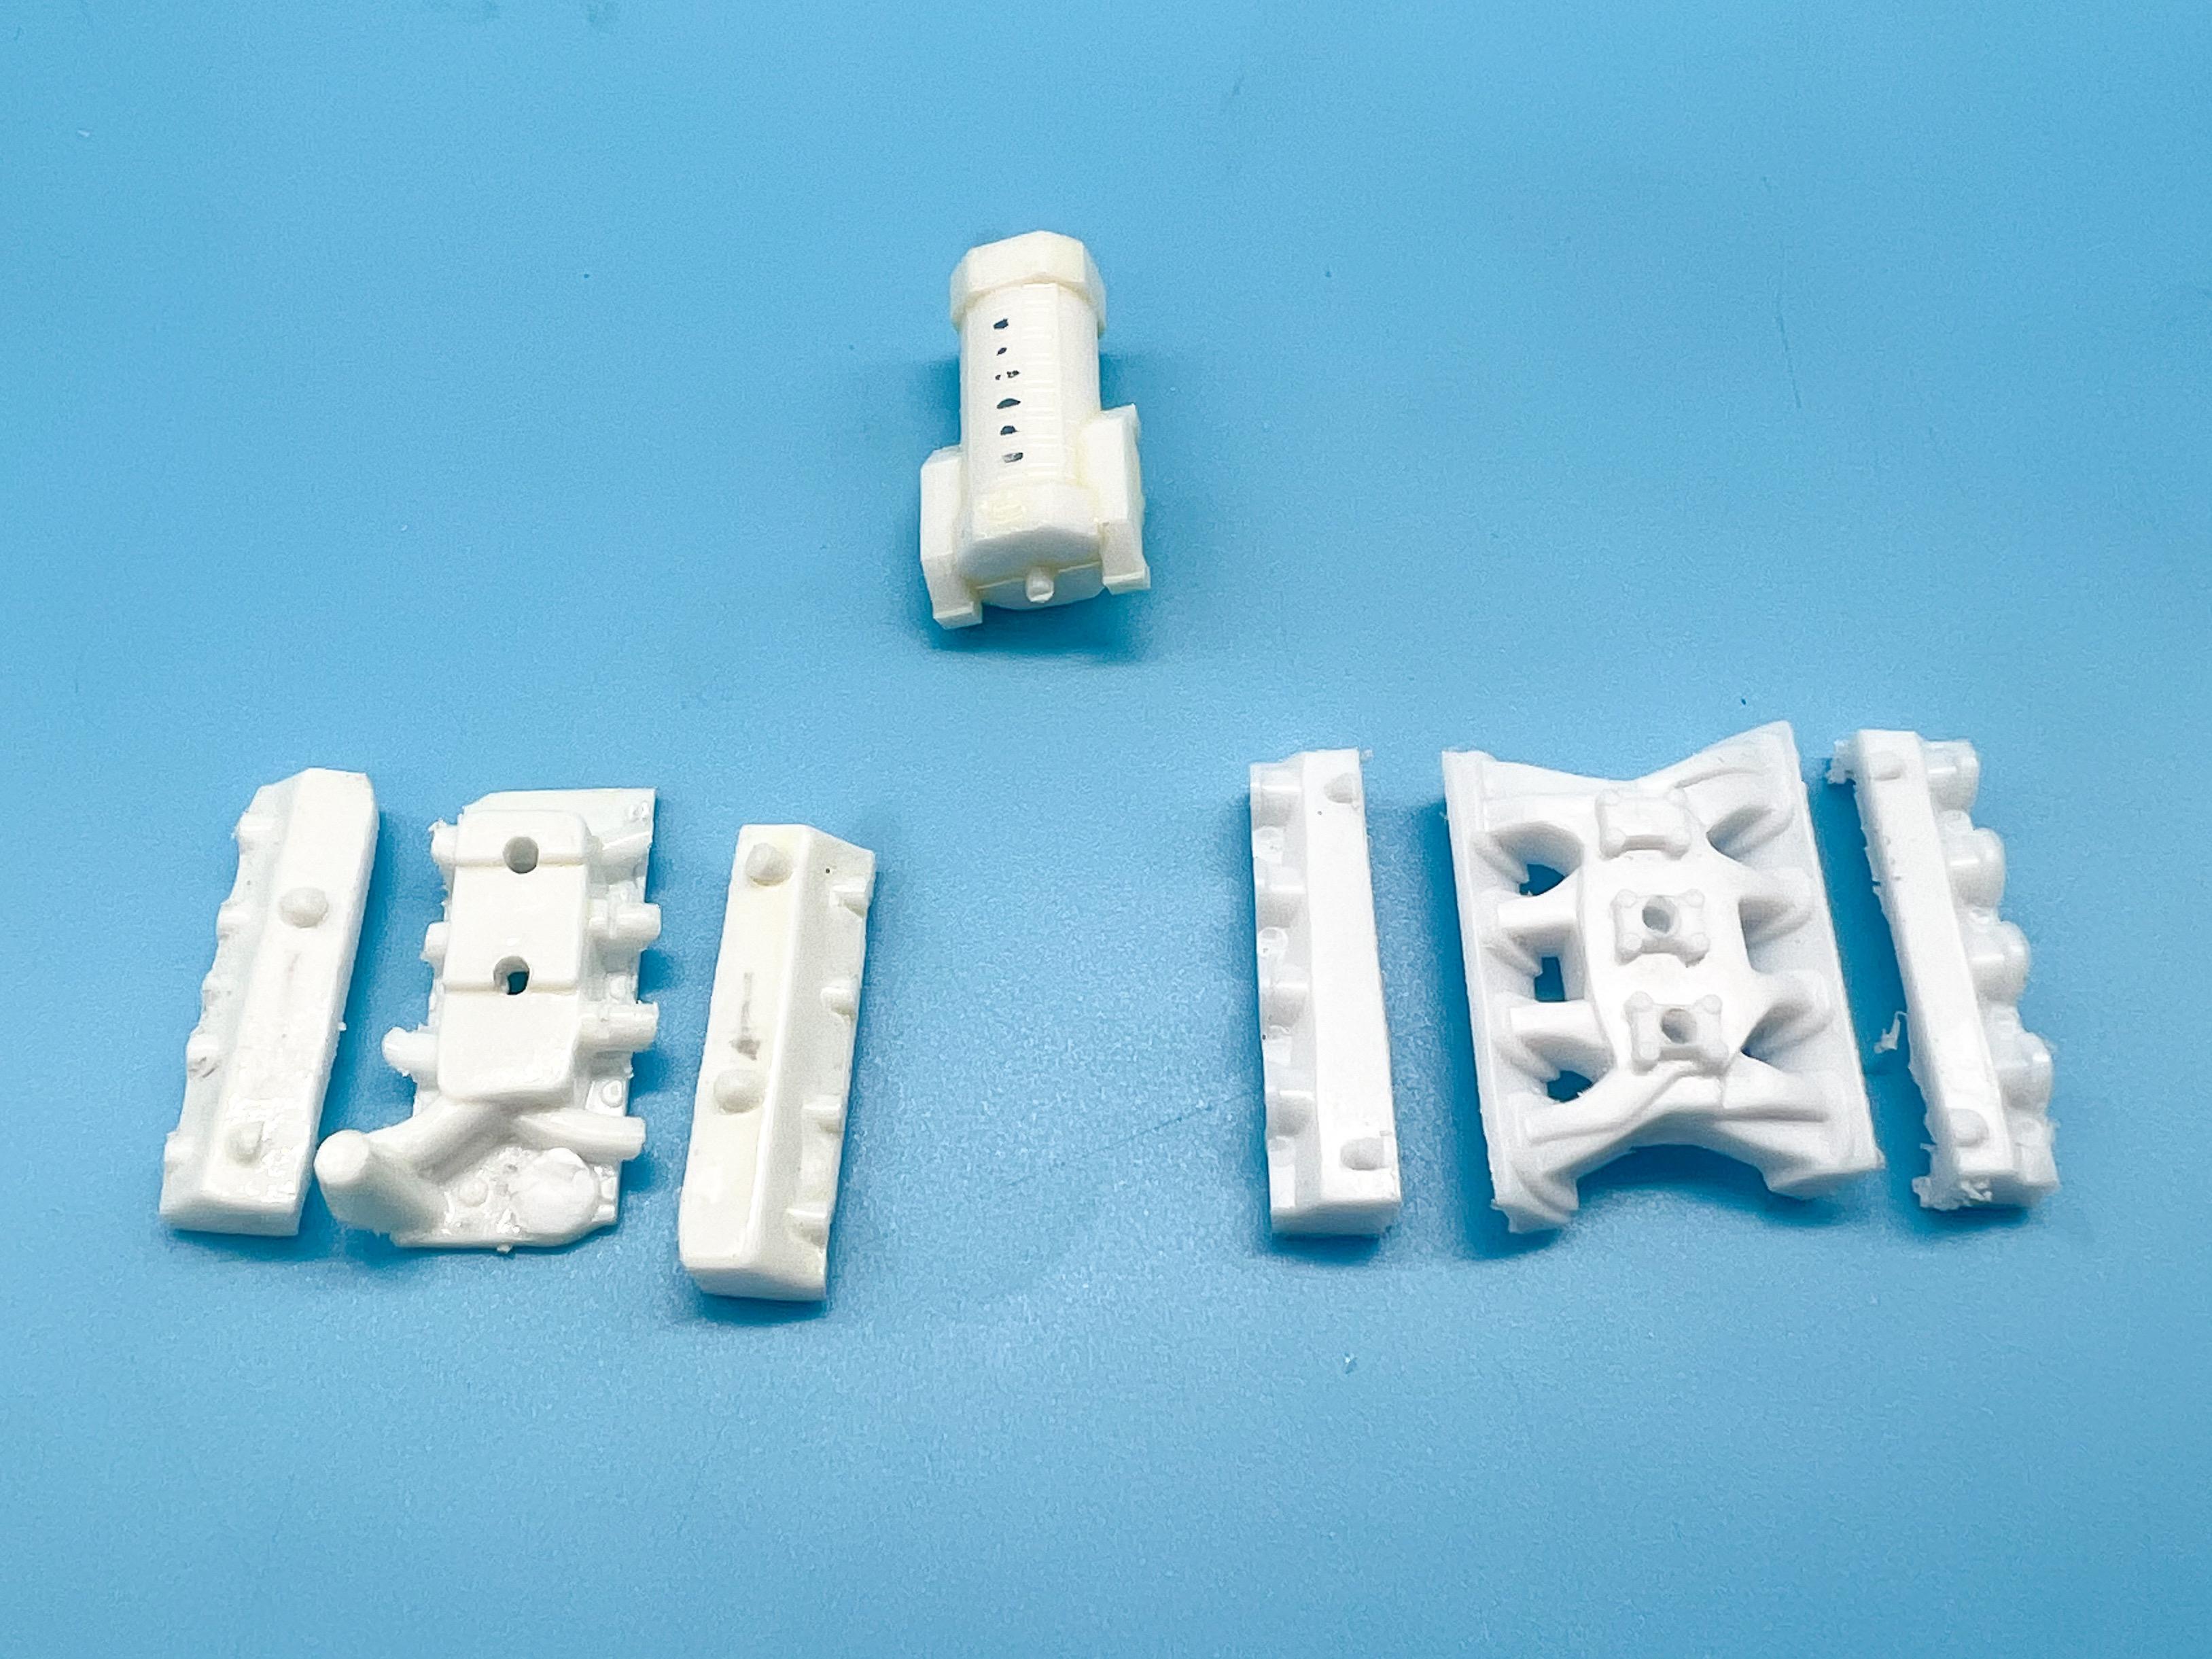
I picked up a few of these kits back when my local Hobby Lobby had them in stock regularly, and of the three or four hot-rod build options the chopped coupe was probably the one that interested me the least. It’s hard to chop a T coupe by so much and not have it look squashed, to me - I’d rather see a much more subtle chop. So, to overcome my dislike of this particular body style in what actually is a really cool kit, I’m gonna build one and see if I learn to like it. Here’s the current issue of the kit which most of you are probably familiar with… I’m actually more interested in building something that looks more like the ORIGINAL 60s box art - Moon disks, whitewalls and all… Quick mock-up on the bench to see how it sits: Right off the bat I’d like to drop that front end down a little and find some smaller front tires - these cars are so small that I think a big tire like that really dominates the look if you’re not careful. I’m not TOO dissatisfied with the rear ride height, but letting the body channel itself over the frame in my mock-up here has helped with that somewhat too. Will need to notch out some material in the trunk sides to allow clearance for the rear axle and leaf spring, which we’ll get to further down the line: Something I do want to address early with this kit is the engine; the kit part is pretending to be Lincoln Y-Block, and it’s not doing a very good job of it. I toyed with switching in one of the really nice AMT Parts Pack Small Block Chevies, but I’d rather go with a Ford something… After some parts box digging and various test fits (Offie T anyone?) I settled on the T-Bird engine from the evergreen AMT 34 Ford truck kit as being close in dimensions to the Y-Block, somewhat more accurate and about of the right period…and it ALMOST does drop right in there, aside from having to tweak the pins on the frame’s engine mounts. Thing is though, I wanted to use that cool Latham blower from the T kit too but it’s nowhere close to a drop-on fit. Problem is, the one-piece intake manifold/heads on both engines are different in size, and I’d want to keep the 390’s heads anyway. So, this evening’s half-project was separating the heads from the 390 so I could reuse them, and the (pretty accurate looking) manifold from the Y-block so I can make this work. 390 parts on the left, Y-block on the right, blower in the background: With that done, I attached the heads to the block so it builds up like a more conventional modern kit engine, and the manifold will sit between them just fine and dandy and allow a realistic setup AND a more realistic looking block (whilst hopefully keeping the same general look as that old box art I’m being inspired by…) Very early into the project, but it’s a start…next few days will be getting everything ‘roughed in’ and pointed the right direction…thanks for looking - more soon!
-
PERSONALLY, I would leave it a week. You probably could do it sooner, especially if you have a dehydrator, but a week is my standard safe-bet for all types of lacquer. Can you shoot over it the next day? Almost certainly, but I give it a few anyway. Also personally, I wouldn't bother sanding the black except to fix any flaws, dust or other lumps in the paint. Not that you asked, but here's a technique I like to use for paintjobs like that - not useful for this project if you've shot the black already, but maybe useful for future projects... Also bear in mind that the purple will almost certainly be darkened up a LOT by being applied to a black base. If you're looking for bright vibrant purple flames, you MIGHT not get that. I'd test on a spoon first and see how it looks and make sure it'll meet your expectations. The Tamiya airbrushable acrylics are pretty opaque, but you might struggle with a rattle can a little more to get good coverage...