Bainford
-
Posts
5,369 -
Joined
-
Last visited
Content Type
Profiles
Forums
Events
Gallery
Everything posted by Bainford
-
Nice work, Daniel. The front suspension work is very cool. Worth all the effort with the recalcitrant strut.
-
Welcome to the forum, Beckham. It's great to see some young blood around here. Have a good look around and feel free to ask any questions, no matter how small. Cheers.
-
 Sharp looking colour on the Goat. That's going to be cool.
 -
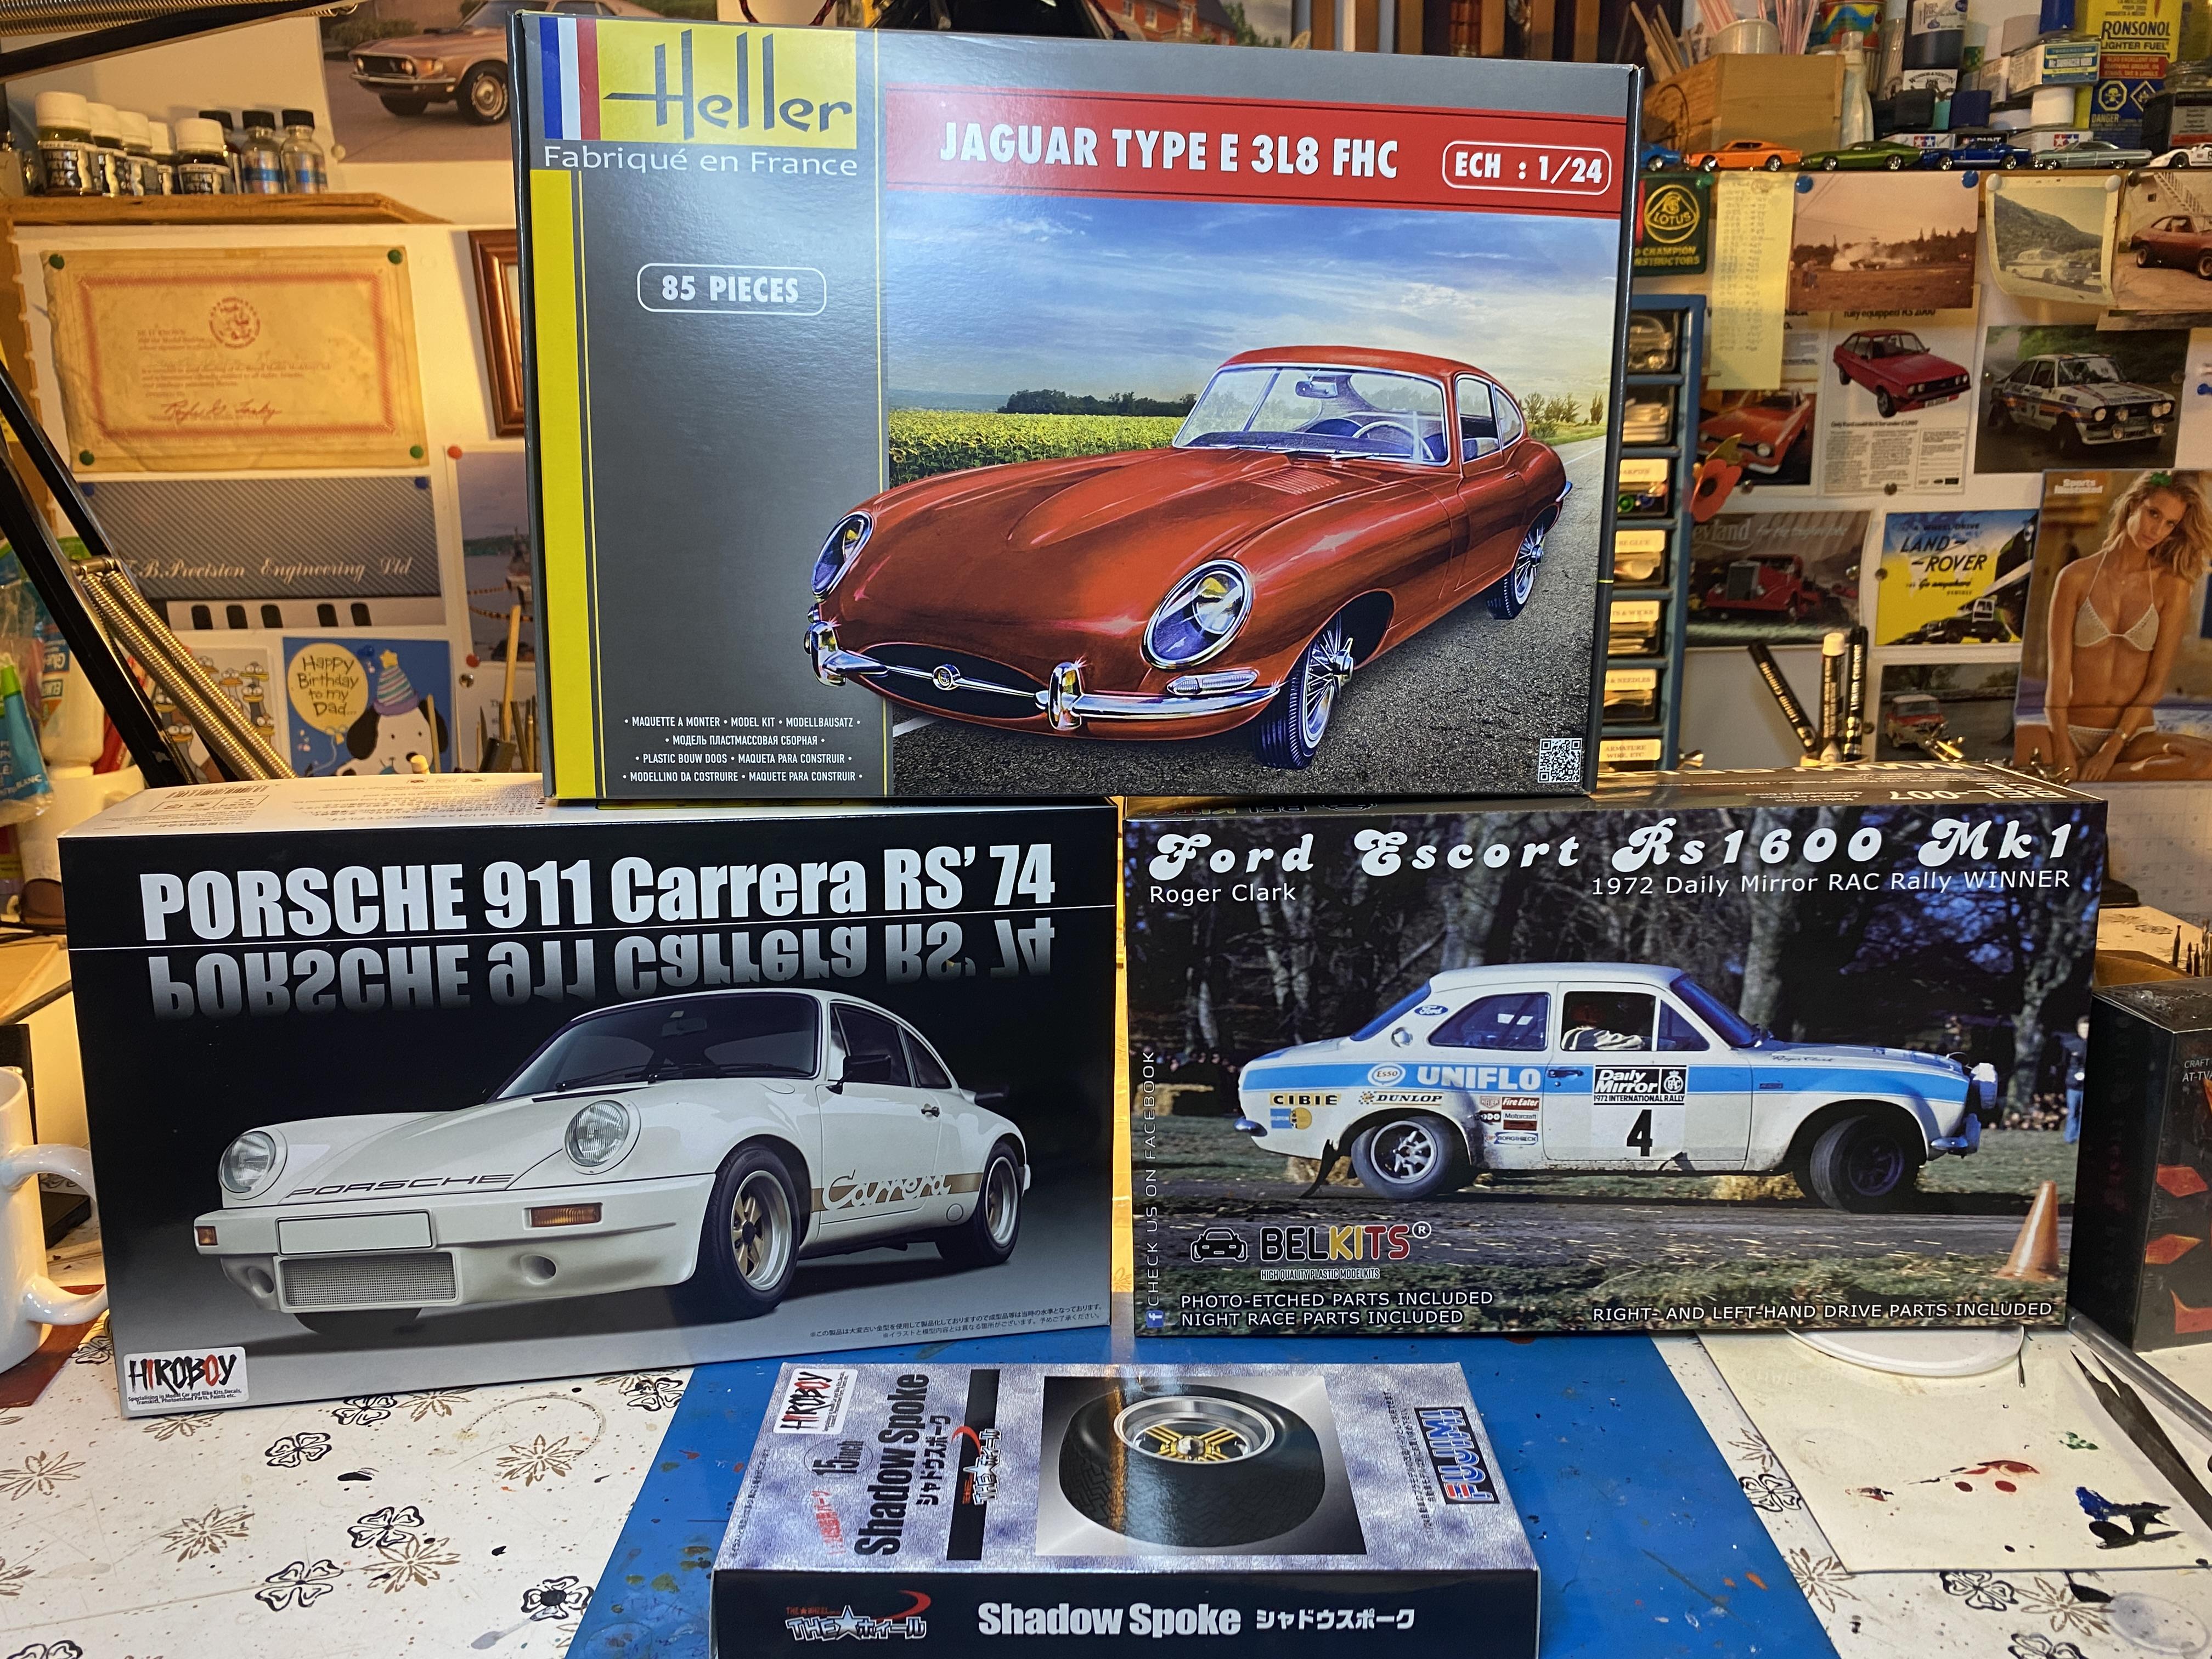
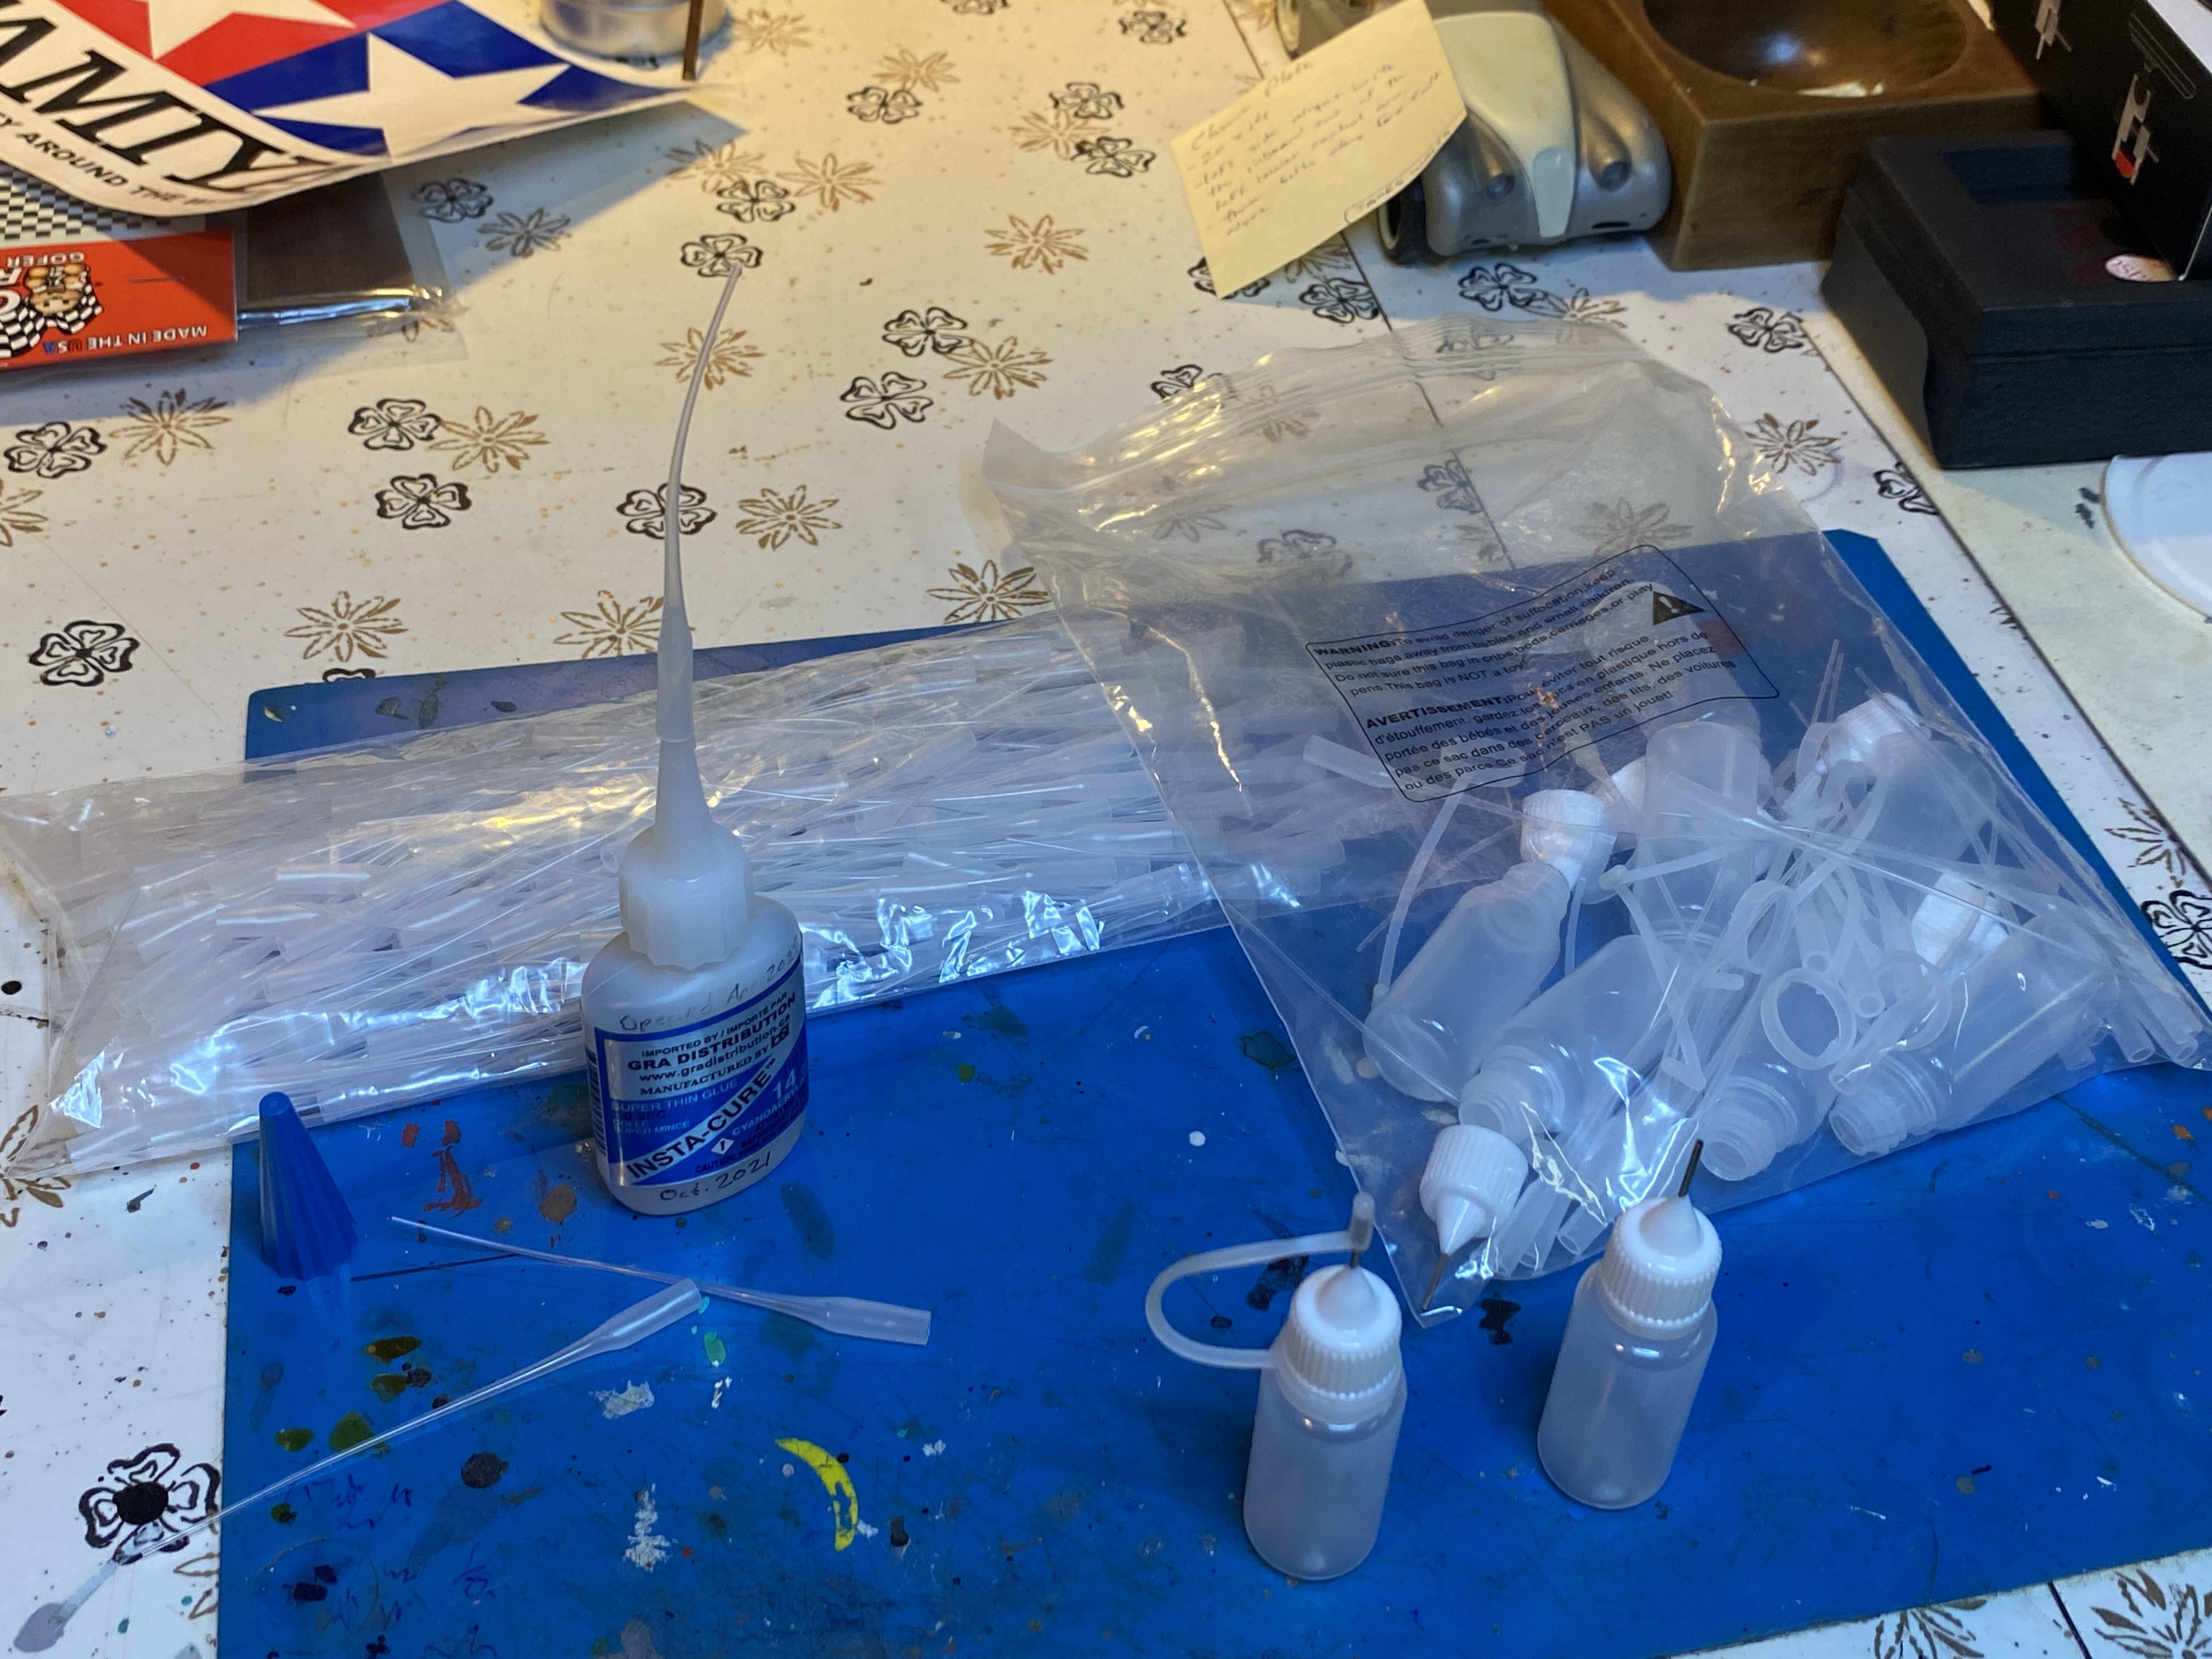
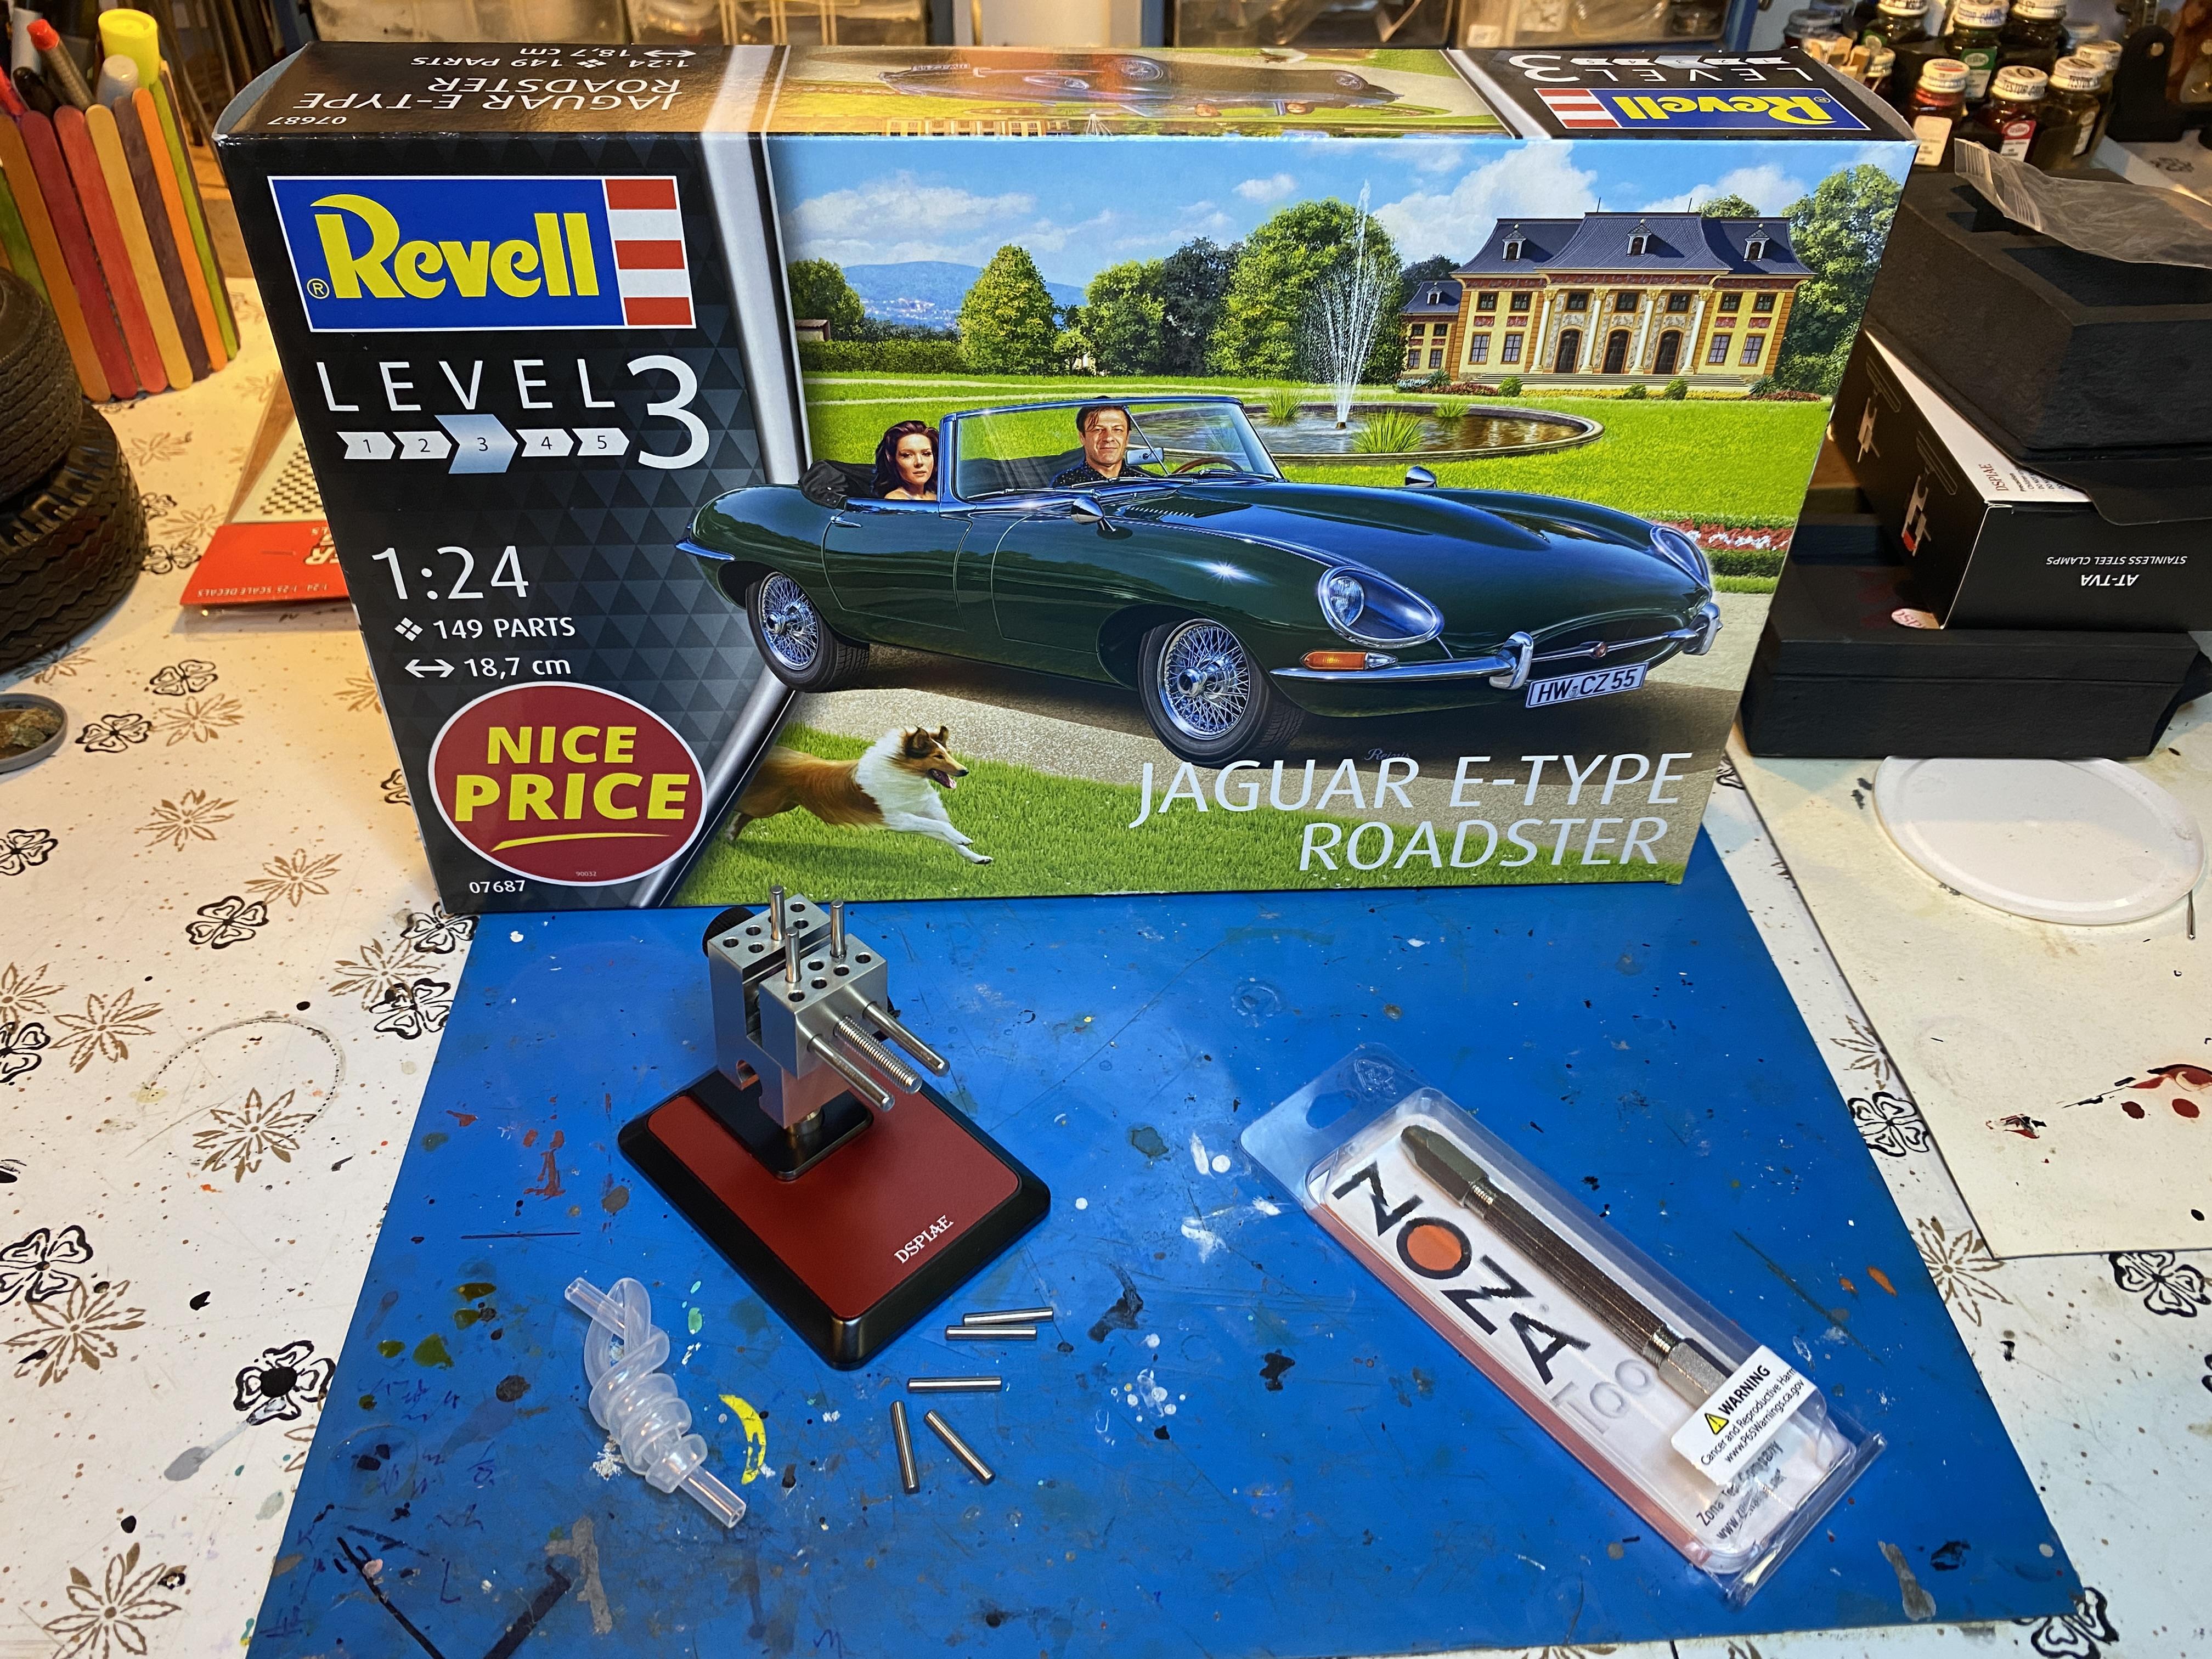
Just arrived from Hiroboy. Great place to buy from. Very glad to finally get the much coveted Mk1 Escort. Heller Jag purchased for its roof. Recent LHS sweep. Nice little Dspiae vice. Another pin vise because you can never have too many. A friend recently ordered a great quantity of CA precision applicator nozzles, and nice little applicator bottles with a metal tip, and gave me a bag of each. Very useful stuff.

- 39,272 replies
-
- 4
-

-
- johan
- glue bombs
- (and 1 more)
-
Fusion Firm Chrome Silver
Bainford replied to martsky's topic in Model Building Questions and Answers
Lots of good discussion here -
Thoughts and ideas that hold forever true..........
Bainford replied to JollySipper's topic in The Off-Topic Lounge
Geezer's paradox; Being older does not make you cooler. However, the older we get, the less we care about being cool, which is the ultimate in cool. -
Ordering From Overseas Still?
Bainford replied to oldcarfan's topic in General Automotive Talk (Trucks and Cars)
Because of its potential political bent, or because of perceived negativity? I do think this is a valid topic. It is an international issue that discusses significant problems that effects almost everyone on this board, whether we are in the US and ordering from abroad, or we are from anywhere else ordering from the US. This problem may be politically generated, but personally, I have no interest in political discussion. I do, however, have a great interest in discussion on this topic as it is having a huge effect on our community, trying to figure out how and where we will obtain our kits and supplies. Politics aside, this topic, and its impact, is foremost in the minds of very many on this forum. The discussion does not have to include any politics, just the reality that we are all living with at this time. I do hope you will allow this discussion to continue. I also hope that this reply will not push it over the top. -
Good looking Camaro. I love the clean, tough look, and the colour is perfect. The Chevelle wheel covers really work with this build. Nicely done.
-
Good looking Camaro, Shawn. Nice and clean, and the colour looks a great match for the factory colour. Nice work.
-
Good looking Lincoln. The subtle changes work well. Cool cruiser.
-
The Matador makes a cool beater. Nice weathering.
-
Hey new to the forum but not new to modeling
Bainford replied to Daytonablue03z's topic in Welcome! Introduce Yourself
Welcome aboard, Casey. -
inkjet printed cloth interior...test on 1955 Mercedes Benz 300SL Gull Wing
Bainford replied to VanGoGo's topic in Model Cars
This is fantastic. Lots of possibilities. Thanks for sharing. -
Things are looking great. I love the natural patina of the original paint, and other bright surfaces, too.
-
Sure, but in the fullness of time that is not sustainable. The LHS may shoulder our tariff burden for a while, and the weaker ones will follow suit to remain competitive, and milk their existence for as long as they can, and some of them will eventually lose. If we pay $6 tariff on a kit, that means the LHS has to cough up $12 per kit, and that has to come from the profit of that kit. Actually, it may not be quite that bad, as the LHS will pay a tariff on wholesale cost, while we pay a tariff on retail cost. But lets say that cuts the LHS share of the burden down to $6 (an optimistic guess, I think), that must still leave a pretty thin profit margin on a model kit sale. Ultimately, the consumer is going to have to eat the full cost. Unfortunately, it is still going to happen at the cost of a few LHS. I realise my take on this is rather simplified, but nonetheless, the math doesn't work.
-
There are many reasons to not open a kit, but never let one of them be monetary value. It's pointless in the end.
-
Remembered my login.
Bainford replied to James Maynard's topic in Model Building Questions and Answers
If you use that decal, you will need to clear coat it with something first, or it will fall to pieces as soon as it hits the water. Micro Scale makes a product just for this, and others do too, and some people give them a couple light coats of Tamiya clear though I've not tried it. A fresh decal is clearly your best bet. I wouldn't be surprised if there was already a large Bud decal out there, somewhere. -
Welcome to the forum, Patrick. It's a great place to get back into the hobby.
-
To introduce myself.............( old fogey )
Bainford replied to old fogey's topic in Welcome! Introduce Yourself
Welcome to the forum, James. -
Additionally, those LHS will also have to deal with the same tariff system when they purchase stock, and pass the fees along to the consumer accordingly.
- 39,272 replies
-
- 2
-
-
- johan
- glue bombs
- (and 1 more)
-
When Mr. Carson showed up in the pits that day with the first parachute fastened to a drag car, there must have been some serious head shaking from his contemporaries. But, it must have been a cool sight from the stands when that first parachute popped at the end of the strip.
-
AMT 60 Ranchero non lump frame
Bainford replied to ManiacModeler's topic in Model Building Questions and Answers
Excellent! I'm changing my answer to this. -
When teenagers ruled the hobby …
Bainford replied to absmiami's topic in General Automotive Talk (Trucks and Cars)
I just spent a good hour or so pouring through the restoration. I admire your maintaining as much original plastic as possible. Much more difficult than recreating from scratch, I'm sure. My favourite part was chapter 3; it was like an archeological dig as the paint layers disappeared and the original body work was revealed. Cool stuff. And the restoration looks awesome. The whole story is very cool, and I must say; some very innovative work for a 14 year old. Very impressive. By the way, I dig the bright green magneto and starter motor. -
AMT 60 Ranchero non lump frame
Bainford replied to ManiacModeler's topic in Model Building Questions and Answers
You say you don't want to butcher a Mustang frame, but I can't think of a better place to start. If I was building a Falcon Ranchero, the AMT 67 Mustang is the first place I would look for a donor chassis. I don't know how much fitting will be required, or if the wheelbase aligns. There will be some need to modify things, but the chassis is prototypically correct ( more or less) and has decent detail. -
Is it AI? I'm on my phone and didn't notice. I never would have posted it if I realised that.