gman
-
Posts
995 -
Joined
-
Last visited
Content Type
Profiles
Forums
Events
Gallery
Everything posted by gman
-

-
That came out awesome. Great job on your build.
-
I get most of my new kit and re-issued kit news here: https://www.modelcarsmag.com/forums/forum/19-car-kit-news-reviews/ There are usually running threads about what Round 2 (AMT/MPC branded kits) and Revell are brewing up. Sometimes other manufacturers and niche producers as well. I am lucky to have three good brick & mortar hobby shops within an hour of me, and there are occasional surprises on the shelves I didn't see here first but for the most part I know what is coming.
-
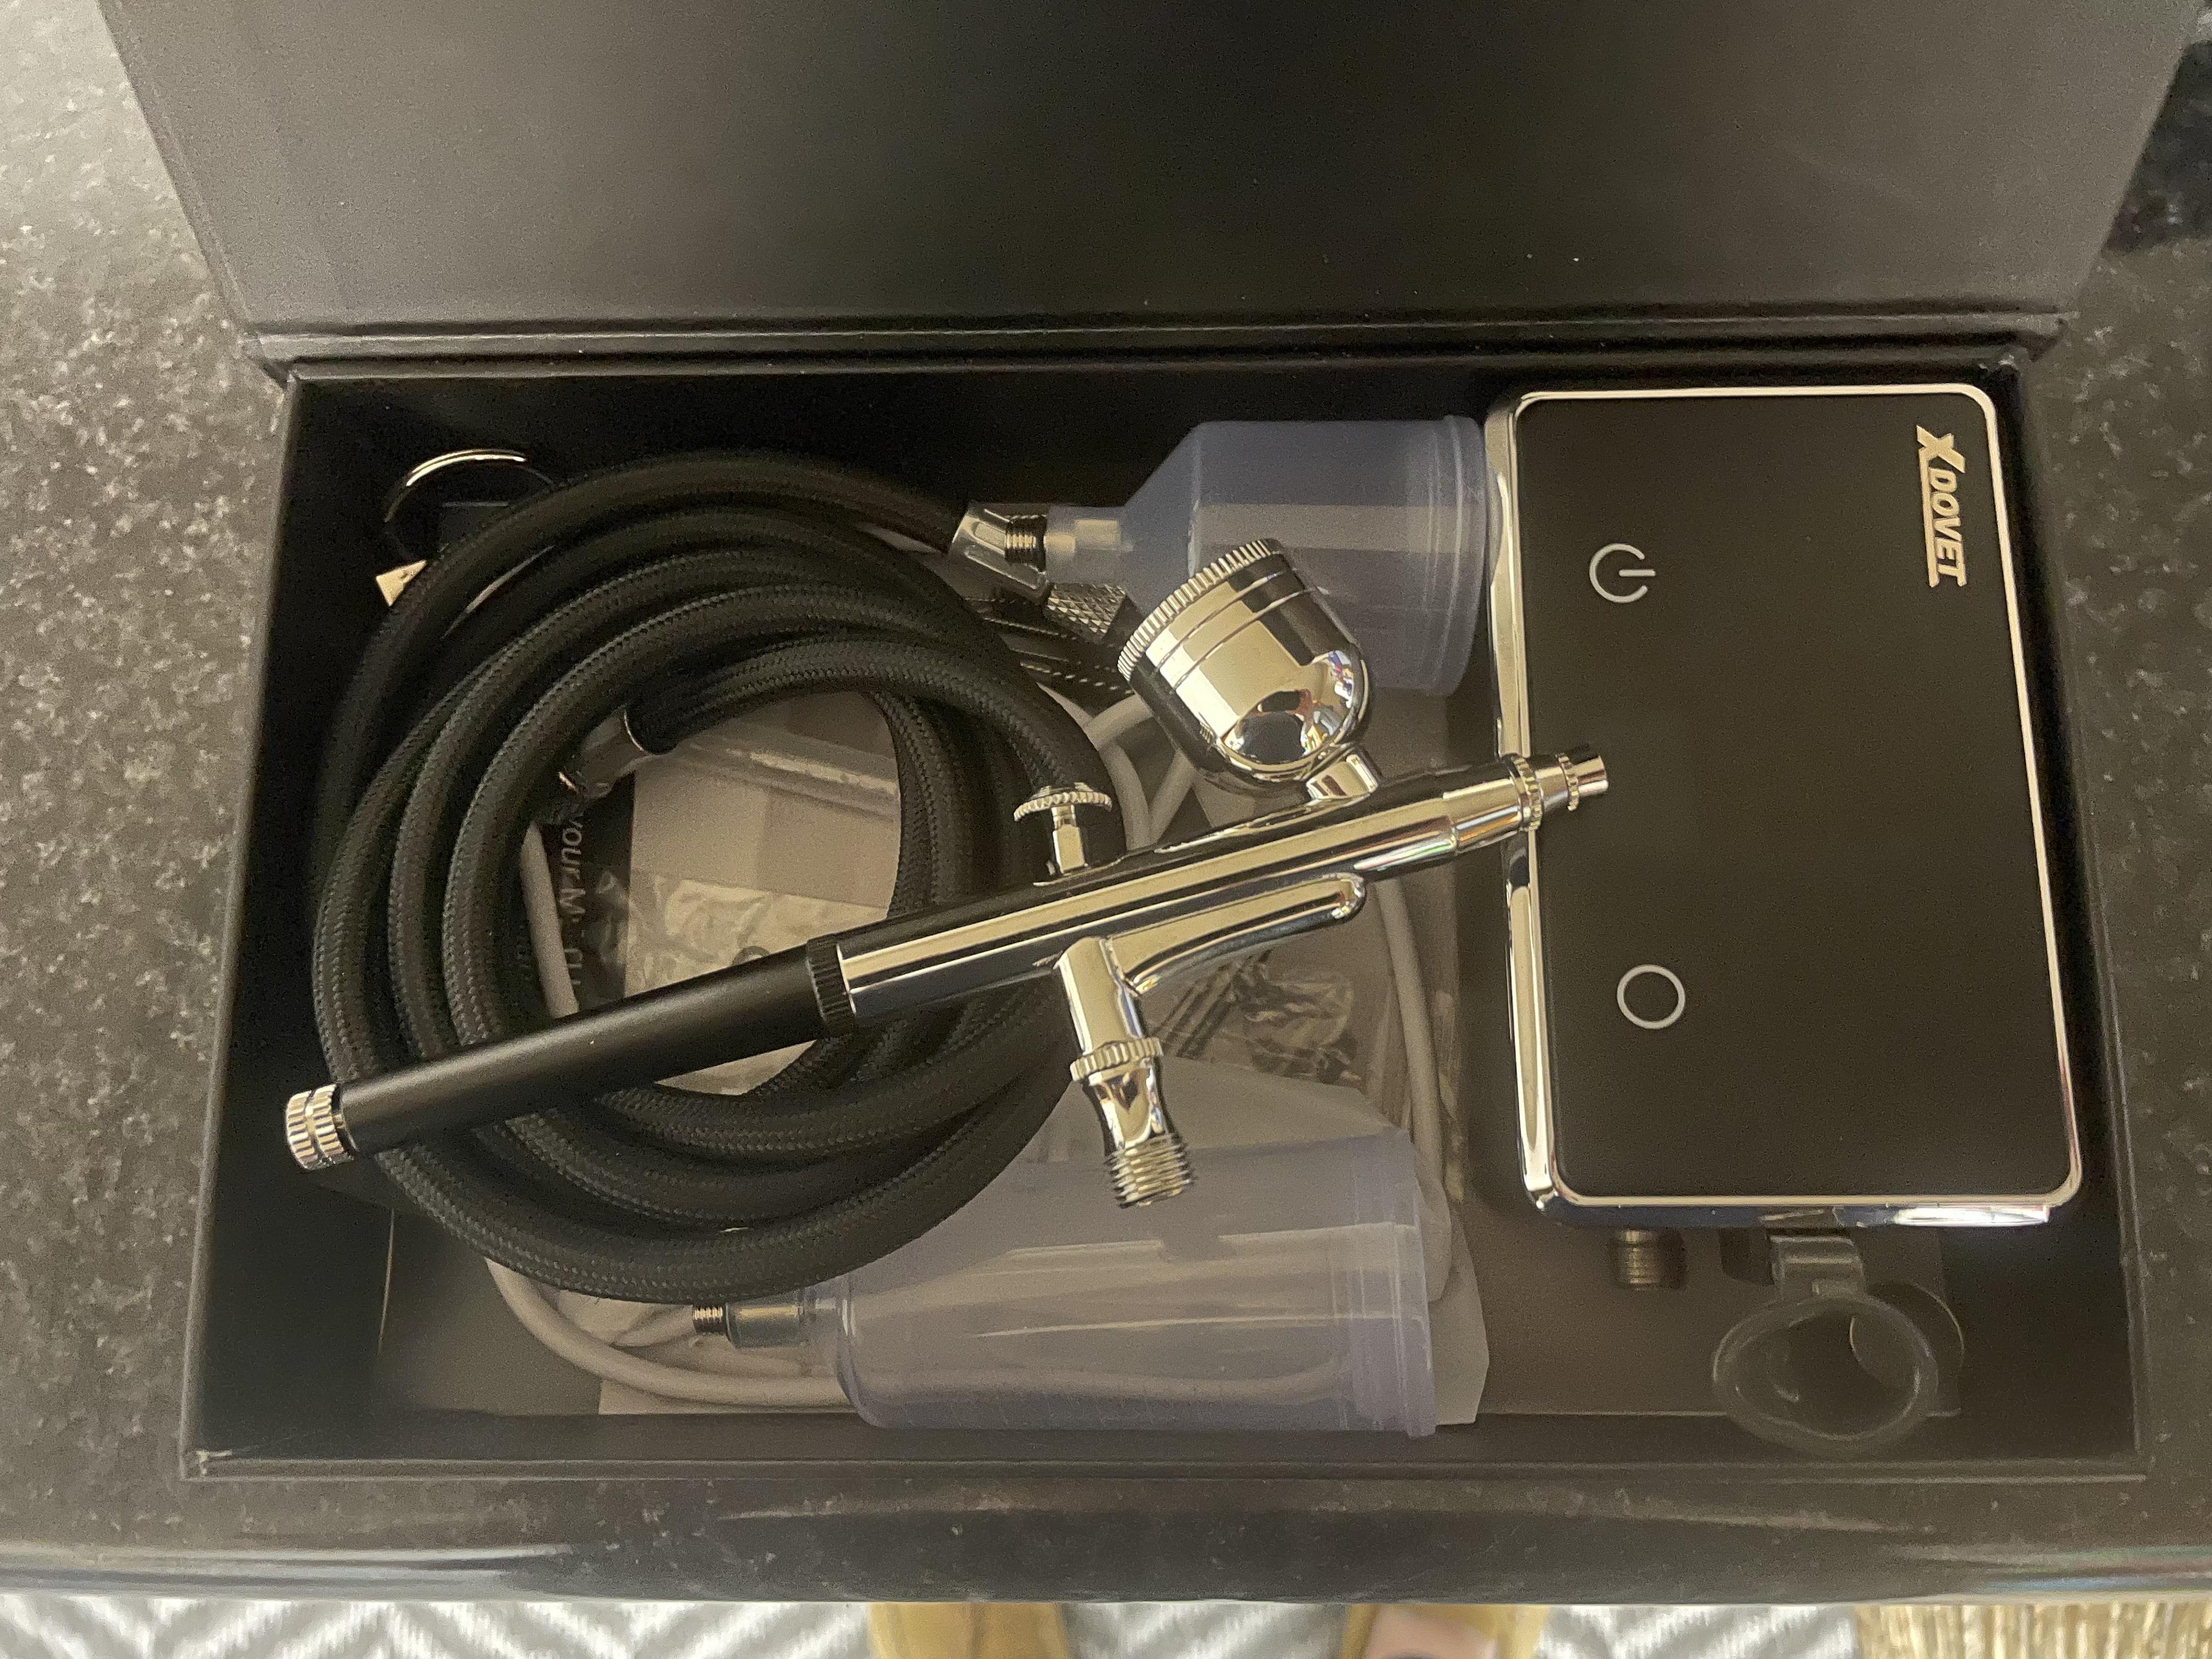
Rechargable air compressors?
gman replied to Valvefloat's topic in Model Building Questions and Answers
I bought something similar on Amazon late last year (but with a hose between USB chargeable "compressor" and airbrush body), for the Mrs. to spray thinned gel food colouring on cookies through stencils. I think it was about $70. I was tasked with doing the spraying. It worked for that purpose, but there was considerable pulsing in the air supply. I would still be looking at a traditional airbrush and compressor for anything more involved than shooting a few small parts. I have a proper airbrush and hobby compressor I use with lacquers, and while the Amazon piece did the trick, I wouldn't really trust it to spray something like a car body.
-
Wow. That paint looks awesome.
-
new windshield options for AMT 1959 Galaxie
gman replied to gtx6970's topic in Model Building Questions and Answers
You can pack the back of the glass with modelling clay to support it if you need to apply some pressure to the windshield in wet sanding/polishing. I figured that out after snapping a few windshields -
Mr Hobby and Mr Color Spray paint
gman replied to Valvefloat's topic in Model Building Questions and Answers
The Mr. Color clear coat looks very interesting to me, have to add that to my "must try" list of products too. Long before Tamiya launched their LP line in bottles, Mr. Color offered lacquers in bottles. For those that want variety and care to mix their own shades for airbrushing, the bottled options are attractive. -
Mr Hobby and Mr Color Spray paint
gman replied to Valvefloat's topic in Model Building Questions and Answers
The Mr. Color paints are on my "must try" list after seeing a few builds using them on the forum. I've already used the Mr. Color Leveling thinner (worked well with decanted Testors and Tamiya lacquers), and I have a few spray cans of their 1500 primer yet to try. The labelling on the bottles I have seen in person doesn't have a lot of English on them, so it doesn't really help when eyeing them up on the paint rack in the hobby shop. Based on a conversation with the owner of the hobby shop, they come in aqueous acrylic and acrylic lacquer, much like Tamiya paints. The retailer (online or brick & mortar) you choose will hopefully be able to break down what is what. -
I have one of those- handy with thin styrene when you need to punch out some holes, or make some round styrene disks.
-
I used an HDPE cutting board with home made punches.
-
The toolmaker grade punch set would probably be the best option. If you are a DIY type of person, some aluminum or brass tubing with an appropriate inside diameter could probably be sharpened to make your own punch. It could be used against a soft backing. The main concern is having your punched-out decals get stuck inside the tubing and having to get them out gracefully without damaging them.
-
I bought my Paasche VL in the early 80's and it still works today. It was my second airbrush, the first being a plastic bodied Badger external mix that really wasn't very good. The Paasche has been in my tool kit for more than 40 years. It is good to have a variety of tools in the tool kit. I have considered adding a Paasche H external mix to the inventory for certain tasks, as those show up pretty inexpensively and are likely to have similar build quality to my old trusty VL. While there are other airbrushes I would like to try (like the Iwata and fan tip Procon Boy, both gravity feed), the attraction for gravity feed airbrushes comes from not having to play around with siphon tube bottles and open colour cups- less variables affecting spray pattern. As for double action vs single action, I often set my Paasche VL double action up by moving the needle "out" inside the body so that it acts as a single action when that is desired. It takes a few test sprays to dial it in, but it works pretty well in that capacity. I imagine that can be done with other brands also
-
De-laminating windshield ideas needed
gman replied to johnyrotten's topic in Model Building Questions and Answers
Agreed. I had the dreaded delaminating layers on a 1:1 windshield in my '76 Mini, and the first two capture that look better than the third. Mine started in the corners and crept in a radius from there. -
De-laminating windshield ideas needed
gman replied to johnyrotten's topic in Model Building Questions and Answers
I tried two different browsers, photos not showing for me. -
No matter what, it will be good to have these kits back in circulation. If they want to continue offering variations one day, all the better.
-
That coupe means business. I love your build, great job. The patina'd bare metal finish looks great.
-
Ford 1948 Convertible / Revell-Monogram ProModeler 1:25
gman replied to Greasefinger's topic in Model Cars
Agree with all of the comments so far. That paint job looks great, very appropriate colour. -
D'oh! Didn't see until "add to cart"
-
If you are airbrushing and need more: https://www.modelroundup.com/product-p/b-705.htm
-
Looking for ET Crosswire wheels
gman replied to fyreline's topic in Car Aftermarket / Resin / 3D Printed
Post up some wheel pics for OP? -
Agreed- excellent looking chop.
-
Over the years I have tried a number of techniques to hold small parts for painting ranging from putting parts on doubled over masking tape or securing them with dabs of hot glue to popsicle sticks, tongue depressors, but that can be sloppy depending on the amount of paint you intend to spray on the parts as it can build up on the back side where the parts are secured. It also doesn't get the paint on the back side of your parts if it is likely to show. If you have a supply of old #11 X-Acto blades that still have a sharp tip, they can be poked into the unseen area on small parts. You can insert the part plus blade into the X-Acto handle for painting, or if you have a number of small parts lined up for painting you can cut slits in a piece of cardboard, insert the blades lined up as it suits you and then paint them against the cardboard as a lot. Remove the part/blade when dry, pull the tip of the blade out leaving tiny hole in an unseen area. I have also drilled holes into small parts, inserted a piece of Evergreen styrene rod in an unseen area (secured with liquid glue like Tenax) to act as handles for the parts for painting in a similar fashion. You can line up a number of parts again by poking holes in a piece of cardboard to secure them for painting and letting them dry. Rather than leaving a hole in the part, you trim off the excess rod when you are done and clean up with a hobby blade. Both of these techniques work well when you have to paint all surfaces on a small part. If painting and detailing a larger assembly (like an engine/transmission you are in the middle of detailing), I'll stick a round toothpick or a pair of flat ones deep in the end of the transmission where the driveshaft mounts and secure it in a hobby vise to minimize handling on painted parts. A hobby vise is a valuable tool for detail painting and for holding attachments to small parts while they dry- I have a few of the plastic ones with suction cup bottoms from the local hobby shop that stick nicely to a table top or piece of glass. If I was rich & famous, there are metal-bodied versions of those vices available that work in a similar way but hold better.
-
Looking for ET Crosswire wheels
gman replied to fyreline's topic in Car Aftermarket / Resin / 3D Printed
https://www.modelroundup.com/1980-Class-Action-Chevy-Monte-Carlo-p/mpc-r2-967.htm The box art on the original issue shows the wheels closer to what they actually look like out of the box. -
Impressive shine over top of an impressive base coat.
-
De-laminating windshield ideas needed
gman replied to johnyrotten's topic in Model Building Questions and Answers
You could mask off the areas to show the delamination, then shoot some flat clear lacquer with a little white lacquer mixed in.