randyc
-
Posts
2,961 -
Joined
-
Last visited
Content Type
Profiles
Forums
Events
Gallery
Everything posted by randyc
-
I have that one and like it because that was such an odd color. I do remember real ones in a shade pretty close to that. Seemed like most around here were red.
-
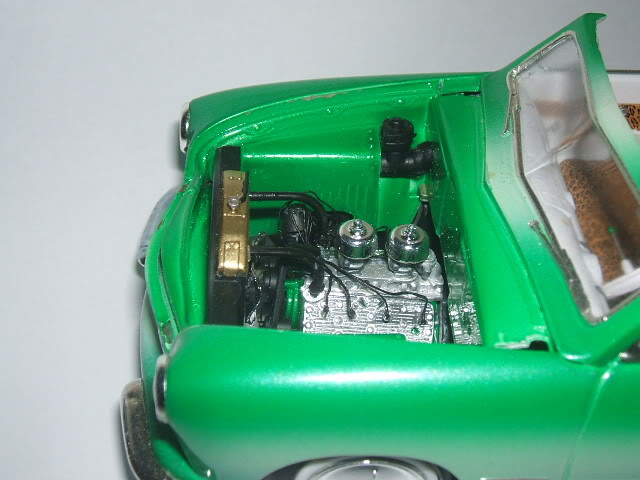
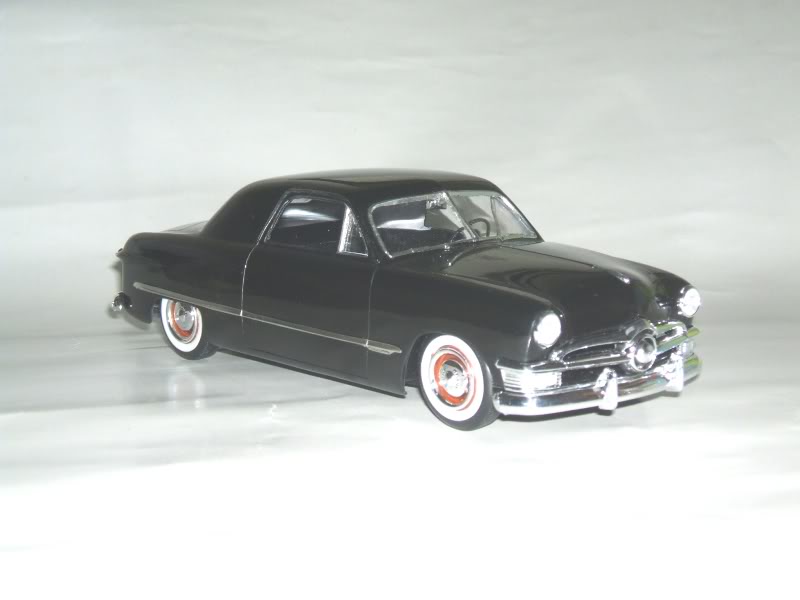
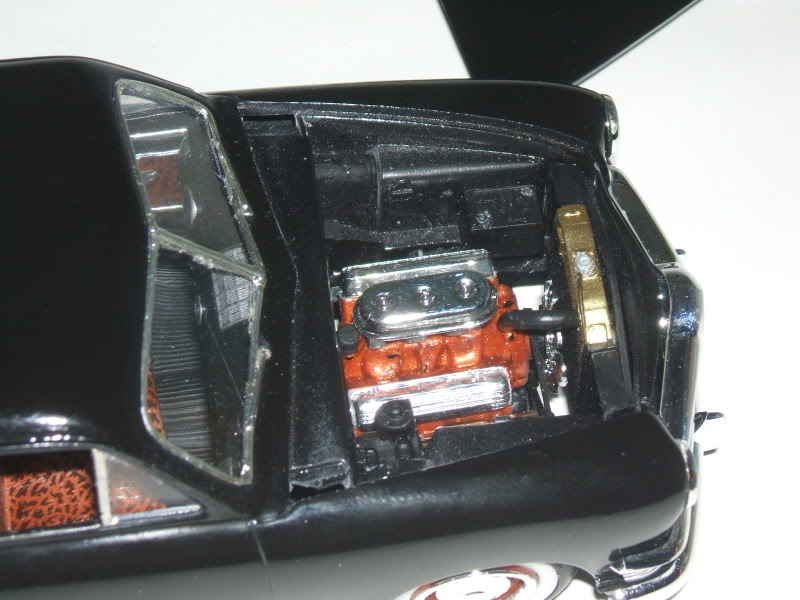
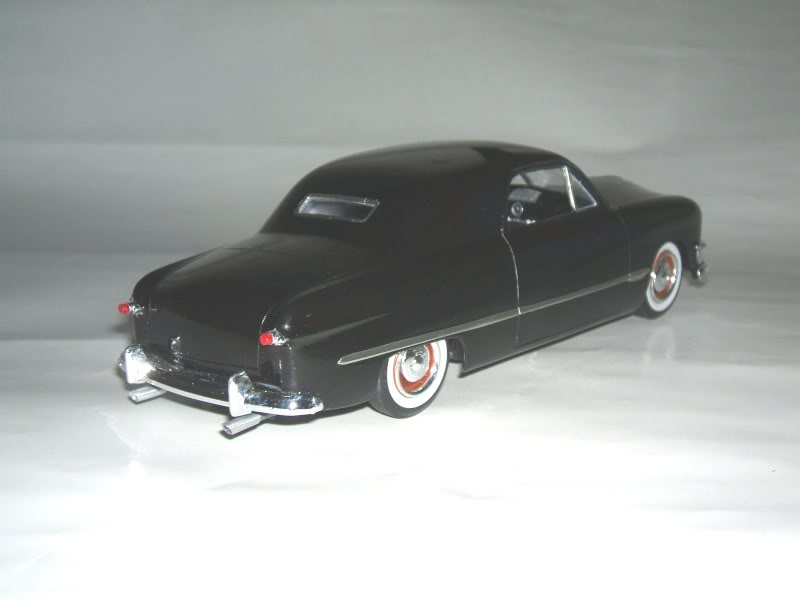
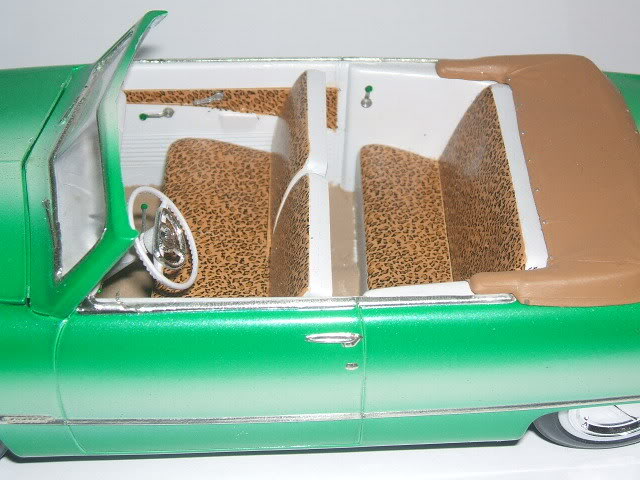
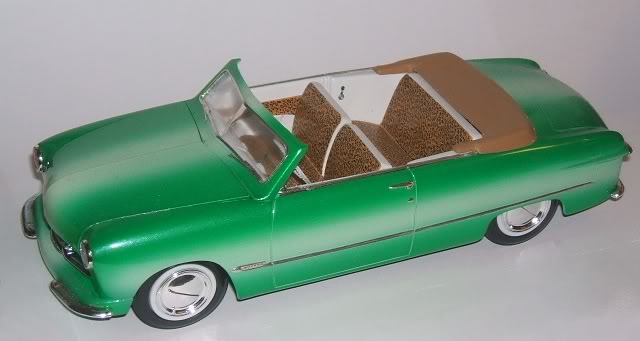
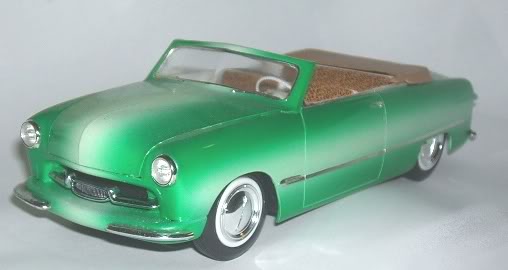
Here's my version of each. And yes, the black one is supposed to look like Billy Gibbons' Copperhead. Not sure where the engines came from - may not be kit pieces. They are about what you should expect from the original date of manufacture. And I think I did something like mentioned above on the black car.

-
I have one of these started somewhere. Found some Pactra glitter flakes that were small enough to mix with paint and sprayed mine - looks pretty close to the sparkly gel coat from back in the day. Of course, I have no idea where it is, after a divorce and 2 moves... : ) Some day it will turn back up.
-
I am starting on this kit. Not very impressive. Going to just do a box stock version since it's so far removed from the real car. It is a shame that the mfrs don't step up and do some nice (new kit tech) Trans Am racers. Not a lot of net pics of this car either to use for reference. A few but not a lot. Enough to show that the kit is no where near the real car.
-
Very nice!
-
NICE!
-
One of my all time favorite bands. Now back to modeling...
-
I may try to get this one next time it comes around. Or if I run across one somewhere. Nice looking build.
-
What do you want from life? I had to go check just to make sure someone made that reference.
-

Engine assembly and painting
randyc replied to kmc3420's topic in Model Building Questions and Answers
Yup. Pre assemble all you can. Remove as many parting lines as possible before gluing. File or sand flat the mating surfaces so they fit tightly. AFTER you do all that, BEFORE you paint, go back and inspect the block/trans or whatever parts (seats, differentials come to mind as well) and sand/file the seam between the pieces. You can also thin out the flanges on oil pans and valve covers to a more realistic thickness. As molded, usually way too thick. When applying glue to things after paint, use a slim metal pick or similar. I use a set of dental picks or an old airbrush needle. If I'm using CA, I have a piece of masking tape on workbench for paint or glue blobs. Put a drop of CA on that, pick up a bit of glue with the metal pick, apply carefully to surfaces being mated. I use the metal devices because they are metal, sharp, and long. After the glue/paint dries, I can scrape them clean and they are new again. Toothpicks never work well for me. I have an aversion to wood for some reason. When the tape gets too messy, I peel it up, throw away, and put down a new piece. The best modeling is done slowly and carefully. You can put some parts together quickly, but you still have to slow down and clean up the parts. I will usually spend at least an hour with a new kit just scraping parting lines when I first start working on it. Or do that while waiting for paint to dry on another kit. Attached is my currnet build and I'm not as good as many on here, but you can see the top of trans is sanded to look smooth. I assembled everything except intake and painted red at one time. Then painted bottom of intake, glued on, and painted the top and adjacent areas to make sure it all matched up. Tried to get all the parting lines off exhaust manifolds as well. The engine block was probably glued up a couple years ago in a slow moment.
-
You might be able to scrape some material away from the area outside of the trim with an x acto knife to define it a little better. Remove a little and rescribe the edge. Then some foil if you use foil.
-
These are an orange pearl. So not helpful really. But I painted whole car with a few coats. Applied the flame masks. Applied more paint. removed masks. clear. IF I were doing this with solids or opaque colors, I would apply the solid/opaque first, then a negative mask, spray the ghost color, remove masks and clear to smooth. I do have a satin black car I want to eventually put metallic or pearl red ghosts on. Maybe. I don't have access to the sign equipment that I use when I did the vette. Have to go light for hte ghosts. I would like for the vette flames to be a little more pronounced, but can't change it now.
-
AB needle size, whats too small?
randyc replied to aurfalien's topic in Model Building Questions and Answers
I've been using a Paasche VLS for 16 years now. I use the "Medium" everything. -
NICE! ALL OF IT! EVEN THE BUSTED CADDY!
-
Round2 Kat's Kollection - New Series
randyc replied to Casey's topic in General Automotive Talk (Trucks and Cars)
I would expect it would be hard to reach 12 - 20 year old and get them interested in model building. HOWEVER, if they do try, the cars need to be cars in racing video games like Real Racing or Forza. Even HotWheels has released a Forza set recently. My son bought me a GT4 Ford GT Hot Wheels. And that can be old tools. I bought the HotWheels Forza AMX last week. Just because I don't have a Javelin in my collection. I am a toy car guy. That's my life-long hobby. I have seen and built most every issue and reissue that interests me. A lot of the old stuff I've built and don't want to again, or might build it if I really like it. I mean right now I'm working on a reissue of hte AMT 56 Ford, and it's an older reissue I bought when it was current. Not sure if the youger generation can be brought into the hobby, unfortunately. My 10 y/o son has put together the "Slammers" I found in my stash. My 17 y/o started with a 69 GTX conv and never finished. Just not their thing. Slot car racing? Very limited appeal, because of hte video games where they can sit in teh the car and drive it on real or fictional courses. We built cars to be able to imagine the thrill. The younger folks have the ability to "drive" them through their games. So it will be unusual for the younger folks to get in the hobby and remain interested. And it may be the JDM kits that get their attention. Or the supercars. Things that the domestic folks don't produce much. At this point, in my life, I have a house hobby too and that takes dollars. With my stash of unbuilts and the cost of new kits, I may not buy but 1 - 4 kits per year. But I still build right much. I've finished 5 or 6 cars this year and may get a couple more. So at this rate, I'll never finish my unbuilts. I guess after typing all this, the market is pretty good to me right now. Of course I buy a LOT of 1/64s. Bought 9 last night for abou thte same price as one plastic kit. I can detail paint those as needed to look better and some of the high dollar ($6) cars are pretty much right on as they are. Keep building and buying. -
I think I have one of those built somewhere, too. I loved the IMSA kits. Nice!
-
Headlights are becoming an especially important part to making a model look like a miniature replica. If you study the photos, you see where you can improve the kit headlights. Most all sealed beam lights have a retainer ring around them. THe AMT Datsun 280 zx turbo has the BEST headlight lenses in this regard. they actually have the ring molded - then they ruin it with a mounting post. But there is the black gap in there as well, plus the recessing of the lens. If you worked out to fix these issues, it would greatly improve the overall realism. How to do that? I don't know right off, but these are the things we have to study and correct when we're building. With that said, the model in the pics is a beautiful build. I'm not knocking anyone's builds by any means. Just I have been studying things I can do (I'm no Mr Obsessive) to improve my building with what is provided in the box. I don't buy aftermarket stuff much anymore and don;t want to take the time to put the wires in anymore. But I do want my model to look as real as possible sitting on the shelf.
-
Hobby Paint Shaker For Under $10, How To Make Your Own
randyc replied to hpiguy's topic in Tips, Tricks, and Tutorials
Bought a reciprocating saw over the weekend. Can't find my little sliding clamp. So in the interest of trying to shake up some separated paint and play with a new tool, I did a ghetto version. I wrapped masking tape around a blade and the bottles and cans. This is where it can get dicey. it takes a LIGHT TOUCH on the trigger. I kept the speed to where I could hear the ball rattling in the can. Too fast and the ball seemed to stop rattling. Go slow and it works. I am using up an OLD roll of tape that has too much tack to use on anything else. You could seriously injure yourself with this method, so I can't really recommend it. But in a pinch, it does work. Some of my paints haven't been shaken in years. And I'd never have patience to shake or stir them properly. Remember, LIGHT TOUCH. I didn't do this, but could easily see flinging a paint bottle into space. Or something expensive that belongs to wife. -
Now get a lazy susan and put pins/bolts up thru the bottom. Make them fit the pattern of the flanges and you can secure the flange with nuts or gravity to a rotating stand. Just a thought.... I use a lazy susan with coat hangers screwed to the bottom. The hangers are bent over at the top to sorta fit any car body. I llike to rotate the body as I'm painting and don't have to pick it up or touch anything except the edge of the lazy susan.
-
A couple of basic tips/ideas for anyone interested
randyc replied to DanR's topic in Tips, Tricks, and Tutorials
I save cream cheese and dip containers after we finish with them. They will hold about all the smaller parts and subassemblies as well. Put parts in there, drop that in the box, and the small parts are saved from being lost. Also use the square gallon ice cream containers to hold whole kits and stuff that may go with the kits. Of course, I may consume more ice cream than some, but we save the containers. I also made my purple pond out of one. I keep extra tires organized in dip containers. Slicks, new, old, etc. My workbench is in the storage building out back. So in the winter, I can put my liquids that don;t need to be frozen in an ice cream bucket and store in house all in one place. Or make a quick "to go" setup to take things to house to be able to detail paint or whatever when it's too cold to work in building. I use the short salsa jars to hold lacquer thinner on airbrush table. I use it to clean the airbush. that's my handful of tips... things that you probably already have. -
I remember getting the original kit as a kid. Probably no paint since it was molded in color. Love it that someone has that original scheme.
-
I may be nuts,but...
randyc replied to shoopdog's topic in General Automotive Talk (Trucks and Cars)
I cut the nubs off and make long straight pieces and put them in a storage drawer. Use them as paint stirrers or to stretch or whatever. I admit I do not save every bit of sprue from a kit though. But I do save probably half of it. I use the parts bags as paint palettes as well. Lay on workbench and mix paint or dab from a pool or whatever. Keeps from globbing up the tops and tops of bottles. -
It's only taken me 40 years to get to where I can do it reasonably. I do appreciate the compliment. Dashboards are probably one of most complicated parts of a car - so much going on there. I try to capture it as best I can. I get lucky a lot on them too.
-
History of Revell Cadillac Brougham kit
randyc replied to Vietnam Vet67's topic in Car Kit News & Reviews
HotRod Bunny is Brad Leisure's site, I think. So he's "one of us" Lots of model related articles if you explore the site. I looked at it a lot after reading the first article. -
Ride height on AMT '58 Impala
randyc replied to smhardesty's topic in Model Building Questions and Answers
I haven't built it, but have it in my stash of things to get to. Have been thru the box a bunch just to marvel at the plastic.