
Scott Colmer
-
Posts
1,665 -
Joined
-
Last visited
Content Type
Profiles
Forums
Events
Gallery
Everything posted by Scott Colmer
-
 I really liked the whole Pro Street thing. They were the customs of the 80s. I think I have all the pro street kits that were 1:1 cars or variations of the J-2000.. They used to be cheap so long ago. I've always wanted to take a shot at the J-2000 armed with a lot of Alclad. That second link is loaded with great pics. The original Baretta had great box art. The kits were pretty pricy, so I got the reissue and a set of the decals.
 -
It's a bit above my price range. I've always liked the builder's work. https://www.ebay.com/itm/Jocko-Johnson-Sonic-Wind-Streamliner-Prototype-Wind-Tunnel-Model-Chet-Vetter/293549103653?_trkparms=aid%3D111001%26algo%3DREC.SEED%26ao%3D1%26asc%3D20160908131621%26meid%3D9d856007068b4e6c92fc4ab038388f67%26pid%3D100678%26rk%3D5%26rkt%3D15%26mehot%3Dnone%26sd%3D274320898422%26itm%3D293549103653%26pmt%3D0%26noa%3D1%26pg%3D2380057&_trksid=p2380057.c100678.m3607&_trkparms=pageci%3Acf3d6e44-8759-11ea-bbaa-9a0bdbe6f68d|parentrq%3Ab4032ac31710a4e869f92107ffca6d96|iid%3A1
-
Wing or foil shaped styrene rod
Scott Colmer replied to Scott Colmer's topic in Model Building Questions and Answers
Hey Gerry - PM sent with your name misspelled. (Sorry) -
Wing or foil shaped styrene rod
Scott Colmer replied to Scott Colmer's topic in Model Building Questions and Answers
Wow, you guys are great. I guess one of the best parts of this hobby is problem solving. Gary, according to my research, those are gold. They come from Contrail, which is long out of business. What they said in the Airplane chat is that when those are offered up on Ebay, they start a bidding war. With that said, if you want to part with them, or some of them. let me know. I can buy or trade. Rob, Flattening some aluminum stock might work. Remember, these are on 1/16" tall at the cross section, but it's worth a try. I might try to get the more of a wing that an oval, but let's see. And if it's aluminum, I can polish it! Quick update - I just did a rough sample and this one may work. It got pretty close.I need to play with the "dies" to set the angle of the roller. Peter, when you said I needed a series of scrapers, it made me realize why mine seemed to work but did not. Idid try to keep the scraper as level as possible and did slow draws as the stock was secured to the bench with double sided tape. The first side looked pretty good and had a definite wing shape. But after doing the other side, but the final shape came out wrong. After your follow up post, I figured out the since I was using square stock, the fist side was stable on a flat surface. When I flipped it over the second side was unstable because of the wing surface was now resting on the bench and it rocked to a different angle. Ah ha! My next try will have a masking tape support to level the stock for the second scrape. I'll try again. There is no finished product to reference. This is for a 1:1 truck that is still being built. The best PIC of where I am headed is in this thread. It shows the grill shell with one hand carved bar laying on it. I want to get this project done and off my bench. My patron has been waiting several years. I finally caught up to his progress, so now he tells me what he is going to do on the 1:1 truck and I do that then show him in scale. You can check out the thread in the big rig section in this forum. I'll let you all know what happens. Thanks for all the great input and ideas! Scott -
Wing or foil shaped styrene rod
Scott Colmer replied to Scott Colmer's topic in Model Building Questions and Answers
You guys had a lot of great input! I thought of the 1/2 round plus triangle idea. Greg, your sample looks pretty good. I wonder if I can get an order shipped. In the mean time I tried putting two #11 blades in a V in a vice and drawing some stock through. Via knife sharpener. That didn't really work. Then I tried carving a half wing shape in a piece of brass sheet and drawing it over square rod stuck to the bench with two sided tape. Looked like it was working but it didn't. Now taking square rod and coloring it with sharpie and shaving it with an exacto using the sharpie coloring as a guide. I'm getting the best result with this. I'll post pics later. Thanks everyone! -
Wing or foil shaped styrene rod
Scott Colmer replied to Scott Colmer's topic in Model Building Questions and Answers
That was a good try Bill. The smallest K&S goes is 1/4" I'm not sure about shapeways. I have not tried making a print file for anything. Looks like Ill be making a brass draw to shape some rod. Thanks for the input, guys : ) -
Wing or foil shaped styrene rod
Scott Colmer replied to Scott Colmer's topic in Model Building Questions and Answers
Here is a pic to show what I am looking for. On the left is a drawing of the shape in need. Below that is the radiator shell that is going to get a grill made from 14 "aero shaped" bars. If you look close, you can see a sample rod I shaved down. It is 1/16" high. I want to be able to see through the grill to the PE radiation mesh. The issue with shaving square rod down as I did is that it distorts the rod and consistency is difficult. So if some place make the rod I need (from any material), I'll get it. Otherwise, my next option is figuring a way to consistently shave the rod by hand. Thanks for the scraper idea, Karl. -
I'm looking for a source for wing shaped rod like used for aero struts. I need it to be 1/16" high. Evergreen and Plastruct don't have it. (At least that I could find on their sites.) I did some research and there were a couple companies in Europe that made it, but they are gone. I am making radiator grill bars for a Peterbuilt. Before I start trying to shave down square rod to a consistent shape I was hoping to buy some. Thanks in advance to anyone who can point me in the right direction. Scott
-
Thanks Tom. It's good to going on this one. I just talked to Louie and got a lot of information to keep me moving forward. He said the real one is still being worked on. Scott
-
Made some progress on the interior. I made the dash by specs taken from a picture. When I put it in place it hung down so low that there was little room for pedals and feet. I took some height out of it but it was still too low. I finally undid about 1/8" of the channel on the body and that did the trick. It looks closer to the photos that way. I'm not sure why I channeled it so much to begin with. The dash is held in place with plastic pins that go through a support bracket glued to the body. I also made filler floor sills near the doors. Finally, I repaired the roll cage because our new dog who is only a foot tall at best somehow got on the bench and knocked the model down and broke it. That is the second model that fell to a dog. Never had one destroyed by a cat. The center windshield post finally broke off. The real thing Next is Interior panels and controls. I need more input from Louie. I also need too raise the front of the roll cage.
-
This is my side of the garage. It's seen little action for the last few years. However, the recent Easter break and lockdown situation has allowed me more time to get out there. I got it cleaned up for the pic. The truck has been under construction for at least 5 years. I'm still plugging away.
-
I've been picking up the Boyd Coddington models as they come up for a decent price. I have the Quickbuilders, but wanted the full detail. The Chezoom was the hardest to find at a decent price. The detail is a little soft, but I think they will pass with good paint. I remember seeing a show with the next owner of the Chezoom. He changed the seats to something kinda Barrisy. I was not a fan. I could see changing out the rims though. Same with the Alumna Coupe. A couple of the Zimmerman rims shown above would be good candidates. There is still the Boyd Hauler that I do not have, but I'm not sure I'll go for that one. Scott
-
Spring Break is on so I've had time to work on this project. When a friend pointed out that he could tell I widened the kit tires because of the seam, I went hunting for a better set. The results were a wash. One set was too big and the other was too small. I'll have to work the ones I made a little more. Thanks to the truck builders here who identified the Allison Tranny. I was able to find one at Shapeways. It could use some additional detailing, but I am glad I found it. Here you see it attached to the back of the block with a length of rod running through all the parts. This is the begining of the process of getting the drivetrain securely mounted before building the headers, It turned out to be a pretty big PIA. I pinned as many parts as I could including the heads. I've been trying the get the cowl the engine height right. The engine seems too high. I raised the body on the mounts by 1/16" and then added that much to the bottom of the body. Then the body was firmly secured in place. Ready the make headers. Here are the headers. I have printouts Louie gave me of the headers in place on the rolling chassis. I've never seen the finished exhaust system, but I do have a copy of Youngbloods drawing of the car. I had to study the pics to learn that the headers kick out at the back to clear the steering box and line up with the wedge shape of the cap. First step was to bend the first primary. This is styrene tube with an aluminum tube insert and some silver wire in that. If I had the right size solder I would have used that. Anyway, the filler keeps the styrene tube from collapsing and keeps the bend in place. After the first one was bent, I made a simple bend checker from silly putty. On the receiving end we have the side pipe glued to the body in the correct position. Once the headers are done, I'll use debonder to detach the temporary supports, cleaned things up then make proper mounts once I learn what the final exhaust system is like. And they are done. The front primary got a tweak after this pic. The drivers side is not as good. It will require some clean up. Now, on to the interior while I wait for Louie to tell me how he mounted the grill shell and ran the balance of the exhaust system. Scott
-
Mine usually change after I've acquired one. These days I'm looking for a Monogram Terra-Jet wood car and a Testors Chezoom full detail A couple I have never been able to pony up for are the AMT Stude rear engine funny can and the Edsel funny car. I have the pieces to recreate both, but an original in the box is still outside my budget.
-
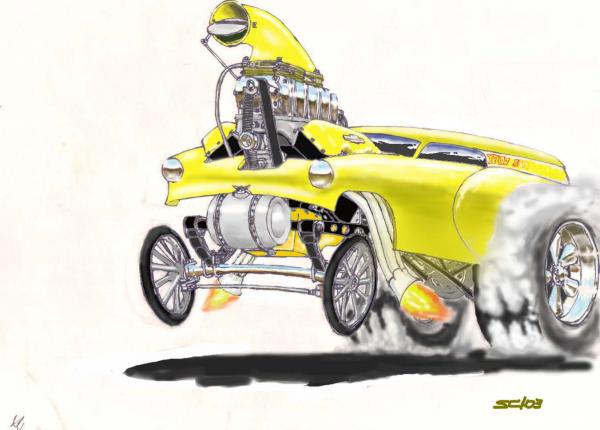
Oh my god. That dry sump pump is amazing! I'm super impressed.
-
What did you see on the road today?
Scott Colmer replied to Harry P.'s topic in General Automotive Talk (Trucks and Cars)
Caught this bad boy when I was going for a walk this morning. Got a big thumbs up from the driver. It sounded real nice as it roared up Van Buren Blvd. -
Hooray...sort of. I needed this Piping Hot kit to complete the set. I was watching a collection of 1/32 kits that had this kit but missed the bid.The whole collection went for 25.00. I was way bummed! I kept searching and in about a week the one kit I wanted form the collection showed up with a Buy it Now for 20.00. Listed as "complete, except for decals." Hooray! I even wrote the seller to thank him for listing it. It didn't have decals, but I can wait for them or try to find copies. Then I was doing an inventory. Partially built, brush painted. Not horrible. Wait a minute...two of the injector stacks were missing from the tree. I went back to the first listing and checked the pics. All eight were there. I just wrote the seller. It's a store. Hopefully, they find who snagged the stacks. I could probably use similar stacks, but that is annoying. I also did a little styrene archaeology. Putting pieces here and there. I think I figured out why this one went back in the box unfinished. If you build it via the instructions and supplied parts, there is no way to attach the rear drag slicks tires to the car. They are way oversized for the space left by the fender. The blurry pic here has the tire squeezed into the fender and it is still way off. Makes me wonder if anyone actually tried to build this kit before they sent it out.
-
For driving to work..I'll take a self driving car. Sit in the back and get a head start on my work. But I can see once in a while taking the fun car to work or shopping as long as it can be parked without worry. No real in-laws. I get your point...Sometimes it's fun to be the shark in a fish bowl. As far as uber...not bad but sometimes the drivers can be intrusive and even dangerous. (Loud music, u-turns in front of oncoming traffic, smells)
-
On the idea of self driving cars...I'm for it. I might have a misplaced trust in technology, but I like the idea of entering a request into my phone and have a car show up to take me where I need to go, especially if that is a ride home with the misses after a fun night somewhere. One less car to own, repair, fuel and insure. Opportunities for ride sharing to work as well. Now with that said, I still want to keep my hot rod (I dream of) and drive it when and where I want. Ohh... even though I do like the sound of a loping cam V8, my hot rod would be electric cause the torque makes for a great city plaything.
-
Now, THIS is a Car!!!!!
Scott Colmer replied to stavanzer's topic in General Automotive Talk (Trucks and Cars)
That is a pretty bumpy interpretation. I've been dreaming of building a body to fit a 1/12 Tyrell. Should look something like this... -
I've been accumulating these odd balls for a while . I had the Darracq when I was a kid. I think it did not go together well. Getting nostalgic, I found it at the NNL swap meet for only 10 bucks. The rest came from e-bay. I was hoping to finish the set tonight with a bid on a set of several 1/32 cars that included the Piping Hot bid, but I forgot and went for a walk (During which, some girl in a lexus almost hit me while she was texting!). Someone snagged the set for a good price. (If it's anyone here and they want to sell the Piping Hot for a reasonable price, I'll buy) Otherwise I'll keep looking for ones that are reasonably priced. I think these would make fun slump busters. Scott
-
Can we see your model stash?
Scott Colmer replied to Fifer's topic in General Automotive Talk (Trucks and Cars)
That is a PRIME collection, Steve. -
Over the top! Very cool.
-
I agree with everyone else. Amazing modeling for the time and at 15! Wow. I think I was just getting the hang of rattle can painting at 15. I only have 3 survivors left, but they are not near a pretty as yours. Thanks for posting the pics, the link, and the great story. Scott
-
No pictures yet. Shimmed up the body on a Hot Rod Peterbuilt. Got the driveline pinned up too. Almost ready to finalize the motor and trans mounts.