
Scott Colmer
-
Posts
1,665 -
Joined
-
Last visited
Content Type
Profiles
Forums
Events
Gallery
Everything posted by Scott Colmer
-
Marcos, this is a great start to what promises to be an excellent build. Laying out the chassis on lined paper is simple genius! I can't believe I have not seen that before, but I will be stealing that idea for my next chassis build up. I'll be watching! Scott
-
 I finished up the gas pedal. The first one disappeared off my bench. I found a larger one with the correct tread pattern, shaped it, and added the rest of the hardware. Now it's time to send some Below are interior design proposals for Louie. The first two are Louie's door designs. The drawings below are my proposals. I wanted to tie the carbon fiber dash (wrapped) in with the doors and back wall of the cab. I tried to blend Louie's design with the carbon fiber feature. I also drew the black seats with red piping and a center console as verbally described by Louie. If I can wrap the interior up in the next couple weeks, all that is left is the engine. Then it's finishing time. Prime, fill, sand, repeat. Thanks for looking.
 -
Hey Gregg and Jim, Thanks for the profs. The latch is 1/25. The rims look great! Scott
-
I generated a prototype door latching system for a truck I've been working on for several years. The doors should snap shut and stay that way until the a pull on the handle release latch pin.
-
A couple of smalls tonight. First, the seat mounts. Nothing special. Just trying to add interest. Next is the prototype of a latch mechanism. This, I'm pretty proud of this design because it took a good amount of thinking. This prototype tells me what I need to do to have a smooth working final product. After I finalize the latch system, the next thing is to finish the gas pedal and shifter.
-
This is one I actually did not buy on eBay before it was reissued. Now I just need the Cobra Trike to complete the set. Great box art! Here are the decals:
-
I built the Ranchero in about 78. I don't remember any serious issues. The boot Hill Express gave me problems with the toe board. Sorry no pics. The one that was so hard it never got finished was the AMT Scorpion. I took another shot at it as an adult. It came out much better. What a difference waiting for glue to dry makes.
-
That looks great, Marty. Super clean! I am hoping you got to see the GAS resurrection of the real thing. Good show. My favorite line: "I don't think they used a straight edge on one piece." Early showrods - so by the seat of your pants.
-
Wow, it's been almost a month since my last progress report. This is one of the 3 steps back scenarios. I was really struggling with the interaction of the roll cage and the dash and the steering components. Here is the steering column. I never got to see it final placement in the car, but there were clues. It was not mounted as shown here. More on that in the next pic. Here is the steering transfer case in place and you can see that the shaft is cut into the lower roll cage brace and almost lined up with the brake pedal. Ah ha! So that tells me where the steering column goes. But there is ANOTHER issue as seen in the next pic. After sending some pics and question about the intended location of the dash, Louie finally found this test fit pic of the dash in place. Eureka! The roll bar is behind the dash! It is also high enough that there is plenty of clearance for the foot controls. But that led to other problems. The roll cage had to be remade from the main hoop forward, as did the dash. Ugh. The cage was a major pain because it had to interact with the doors and still be straight in certain areas to cradle the dash. It took several nights to get that done and a few more to tweak it for good fit. I also had to make sure everything we pinned and locked down. The dash was a lot easier. I did manage to take one step forward in making the steering column. Here is the transfer case linked up the the column. I added a short carrier tube to the roll cage brace to hold the rod on place that connects the column and the transfer case. There is still some tweaking to do. The transfer case need to be a tad wider and it's support needs to be a tad longer. I might also shrink the steering column a bit. Does it look over size in reference to the photos? The dash and roll cage need some final fitting as well. Here is what you would obviously see. The transfer case would be barely visible, and the chain on the back almost impossible to see. But I know they are there. Up next is the shifter and seat mounts, Thanks for looking Scott
-
THANKS Gregg and Dennis. You get two screens that are 2" x 1 7/8". Hopes this helps.
-
Goldenrod Completed
Scott Colmer replied to Straightliner59's topic in Other Racing: Road Racing, Salt Flat Racers
Awesome job, Daniel! One of my favorite resins! Great call on upgrading the exhaust. I actually finished one of these many years ago. Yours came out better. (And..I can use it for home defense if I need to. ; ) Scott -
Good story on that Hornet, Bill. It's what we will do.
-
One more because the story is good. The Surf Woody... Became the Horse Hide Hauler. According to the Showrods site, the name sake to this odd rod, Denny, McLain, was a baseball star who ran afoul of the law with racketeering and drug charges, obviously after the kit was released.
-
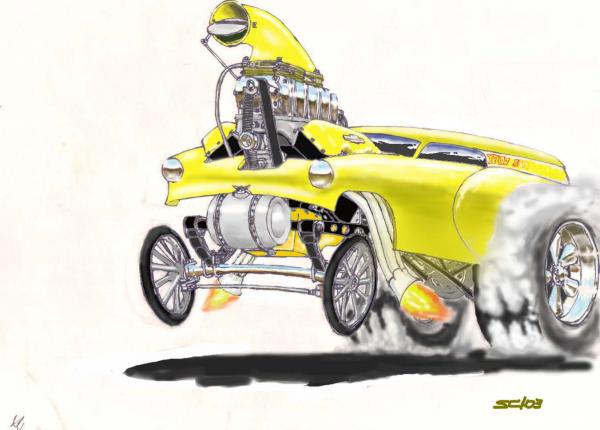
Great thread, Casey! I want to play too. Since I like showrods, I have a few makeovers in my stash. I might be wrong about these next two. These next few are not in order, but it is easy to sort them out. I'm not sure if the Yellowjacket is part of the 32 roadster's origins Sorry for the blur That's all for now.
-
Wow, there are some great tutorials here. This is the 1/25 scale solution I came up with. The tanks are stryrene strip notched with a file. The side are styrene channel. The radiator face is from Model Car garage part number MCG-2302. Under the the PE face is a flat piece of styrene that I scored with an exacto razor saw that I drug evenly across the surface until I got the depth I was looking for. The idea is to give the illusion of depth beneath the PE face.
-
Bring Out Your Dead... Long Stalled Models
Scott Colmer replied to Tom Geiger's topic in WIP: Model Cars
Thanks for the kind words, Mark. Unfortunately, I'm not considering a trade. I really want to finish these (There is a gull wing Vicky street rod project I missed on eBay, that I would consider.) Until then, I am trying to finish up a client project that's been dogging me for years. Got outbid for this one eBay. Thanks for the profs, brother. Scott -
I've always liked this kit. You did an excellent job with it! Box stock and looking great!
-
64 Dodge D100 Pickup Pro Street
Scott Colmer replied to AmericanMuscleFan's topic in WIP: Drag Racing Models
My goodness that is some tight work, Francis. Love the cigarette lighter, but the gauge panel is beyond words! Scott -
Hi Francis, Glad you liked the chain. That's a high compliment coming from you! Your truck is a school in fabrication. Onward, No new parts made. Instead lots of time spent cleaning up old stuff. Not pictured, I cut the front off of the truck and shortened the cowl to match the 1:1. I am thinking Louie used a later model cab than the kit version I had. After that was all back in place, I knew I would have to remake the front of the roll cage for a tighter fit to the body. Louie also let me know that the dash rests on the lower front bar of the roll cage. So it became time to make sure the body was true in order for the cage to fit right and leave room for all the interior components. Step one was to true up the doors. This graph paper is handy stuff. You can see the bottom and front edges of this door are not square. My solution is to add strips of styrene to build up an area then sand and file it true. Once the doors were square and matching, the body came next. In the pic below there are a couple things to look for: The piano hinge and the chrome trim the goes around the door edge which is attach the the body. First come the trim. The key is to make the opening match the door with just enough room to the trim. For the trim, I used thin, styrene strip, leaving a bit extra so it can be sanded down to the correct height. It will get BMF after paint. That gap in the corner is because I was truing up the rounded edge with out checking to the door and over cut it. So in goes a patch of styrene. It got filed down correctly and the trim patch went in well. I'm a bit of a hack. The finished doors fit tight. They will get edge sanded to leave room for paint. Next up is finishing the mounting for the piano hinges. These are PE items that the truckers here told me about. I figured out the door mount side would be a slide-in system. I was originally going to just epoxy the body side during final assembly, but one thing I learned from all this scratchbuilding is to pin as many components as you can. Here is the body side bracket pinned in place with styrene dowels that run right through the body so the can be glued in place. No worries, final body work will clean up any shadow effects. The hinge was CA glued to the body side bracket with the door in place. Tiny drops were used so not to make the hinge inoperable. Then bracket and hinge was taken off the door and given a more generous application. Here is the bracket and hinge setting partially in the sleeve of the door. The door is thinned on the hinge edge to make sure the hinge protrudes sufficiently to be visible on the outside of the body. Now to match the other side. I'll get a pic of the doors in place and operating. Thanks for looking. Scott
-
Indy-ish Monogram Midget
Scott Colmer replied to Straightliner59's topic in Other Racing: Road Racing, Salt Flat Racers
Daniel! The finished product is wonderful. I really enjoyed attaching you solve all the challenges with creating the bits and pieces. So much good stuff, cleanly done. I thought the louvers were may favorite, but now I'm really liking the hood straps. But the best part... it was going to be a quickie restart of a dead project that just kept getting better. That's building for yourself! Excellent work! Scott -
About a year ago I bought 3 fairly large bottle of different types of CS glue about the size of a shot glass. Two of the bottles have no nozzle now because it kept clogging or sticking to the cap. I usually pour a dab of glue on a pallet, but without a nozzle the flow can be way too much even to transfer to a pallet. Any ideas? Scott
-
Radical Bonneville Salt Flats Coupe
Scott Colmer replied to tim boyd's topic in Other Racing: Road Racing, Salt Flat Racers
All done, Tim. I've always liked this one. You got the wheelbase and stance dead on, which can be tricky with a 36. Scott -
Dealer List is now Available
Scott Colmer replied to Dave Ambrose's topic in Model Cars Magazine News and Discussions
The Ebay listing above is sold out. Boooo. -
Dealer List is now Available
Scott Colmer replied to Dave Ambrose's topic in Model Cars Magazine News and Discussions
FYI - I just called Pegasus Hobbies in So Cal. Looks like they have not received any copies yet. -
I've got one tucked away too! It's a child reclamation as well. See it there in the corner? I'll be watching! Scott