Art Anderson
-
Posts
5,052 -
Joined
-
Last visited
Content Type
Profiles
Forums
Events
Gallery
Everything posted by Art Anderson
-
what paasche H spray head size to use??
Art Anderson replied to foxbat426's topic in Model Building Questions and Answers
I use the #3 material control & needle for EVERYTHING. Art -
Or for that matter, the beading wire found in any Michael's or Hobby Lobby! Fine copper wire, for mere fractions of a penny per sparkplug lead--cut to length, install, and paint it the color you want! I've been doing that for decades now. Art
-
Here's my go-t chart for wire sizes: American Wire Gauge (AWG) chart. http://www.rapidtables.com/calc/wire/wire-gauge-chart.htm Note that this chart has not only the wire gauges listed, but their diamerters in thousandths of n inch. I refer to this pretty regularly. And, as Bill Engwer said--GET a Digital Caliper--WELL worth the inexpensive price! Art
-
1960s Chevy 6s should be...
Art Anderson replied to charlie8575's topic in Model Building Questions and Answers
Charlie, the 6-cyl used in full-sized Chevrolet passenger cars through the 1962 model year was the old standby 235 Blue Flame 6, and was still painted Chevrolet Engine Blue through that year. Beginning In 1963, full-sized Chevies got the new 230 cid 6 which was based on the engine developed for Chevy II, and those were painted Chevrolet engine orange. Chevy light truck 6's through 1962 were painted dark grey, just like they'd been in the 50's (Modelmaster US Navy Engine Grey--used on the crankcases of USN radial aircraft engines). After 1962, Chevy light truck engines also went to Chevrolet Engine Orange. Art -
Revell Visit to November GTR meeting test shots
Art Anderson replied to Exotics_Builder's topic in Car Kit News & Reviews
In short, the lines of the roof, and its overhang at the front, would have to have been compromised in order to make it one-piece with the rest of the body shell--that's very obvious if one REALLY studies any SMP or AMT 1960-66 Chevrolet pickup kit or promo. Art -
To be a bit more accurate, this T is what was called a "Chemical Car" (it is a Model T Ford car--Ford didn't introduce the TT truck until several years later). It's just the standard Model T Runabout (or roadster), with the turtle-deck trunk omitted, and a pair of chemical (as in Soda-Acid) tanks installed, and carrying a small, single story ladder. Those were pretty much "First Responder" fire apparatus. Art
-
AMT 1949 Mercury Club Coupe Interior
Art Anderson replied to Jim B's topic in Model Building Questions and Answers
Yes, vinyl was well-known by 1949--having been invented in the early 1890's. Art -
And, when first released, back in 1960, SMP's (now AMT) '60 Corvette had perhaps the only really accurate hardtop--that was molded in clear plastic, with all the correct window moldings, etc. In addition, it fit to the body like a glove as well! Art
-
Revell Visit to November GTR meeting test shots
Art Anderson replied to Exotics_Builder's topic in Car Kit News & Reviews
Eagerly awaiting the Suburban! (might just have to convert it to a panel delivery, though Art -
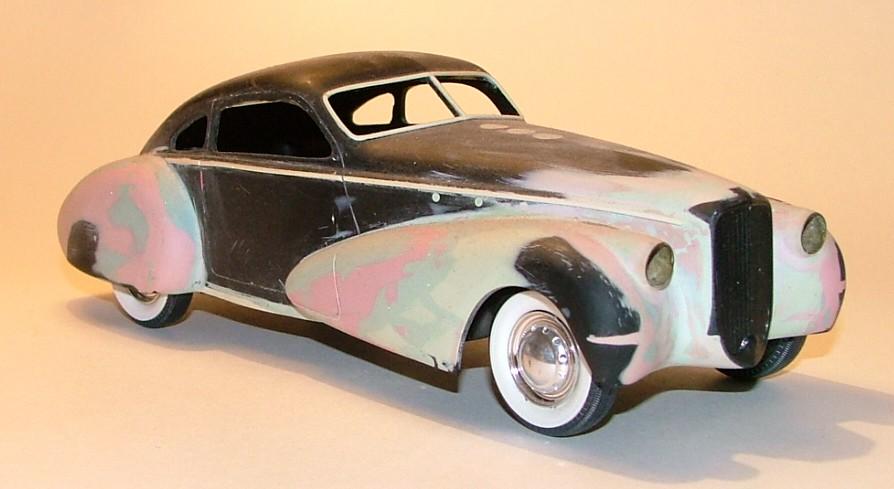
Actually, those early tires were NEVER pure white. Prior to WW-II, virtually all rubber items, including automobile tires, were made from natural latex rubber, as synthetic rubber wasn't developed until the Second World War cut off the supply of natural rubber from the tropics to Europe and North America. Natural latex rubber isn't at all white, but very slightly creamy in color, and once vulcanized, becomes a buff, or yellowish light tan in color (remember those buff-colored sidewalls on classic early 10-speed bike tires--that was natural rubber). By late 1913, and into 1914, tire companies hit on the idea of adding carbon black to latex rubber, in the interest of getting more strength into the robber, which turned that buff colored rubber into a charcoal grey color--not pure black, but very dark grey. On my ICM 1913 T, I used a pair of artist's shading markers to color the starkly white kit tires,,a yellowish tan marker overall, with a dark grey marker for the tread areas--these are translucent, not solid color ink. Unfortunately, the college bookstore where I got mine a couple of years back no longer carries that line of markers anymore. I'm not sure what I will try on the tires for the '14 Fire Car when I get it (Squadron lists it as available now), yet, but probably an acrylic paint. Art
-
Working with Resin models question.
Art Anderson replied to Geno's topic in Model Building Questions and Answers
According to American Excellence, that is a BoS model, and in looking at BoS's website, they do not list any models as being cast in resin--only diecast. Art Anderson -
Putty for custom bodykit?
Art Anderson replied to Suzier's topic in Model Building Questions and Answers
I've used 2-part polyester body putty many times over the years to create shapes, even a complete body shell on occasion. I've never had any problem with the heat coming from the curing process--even though as Bill and others have said, the more catalyst used the more heat is generated as the putty cures. This is a still-stalled restyling project, using the OOP AMT/Ertl "Black Force" custom car snap kit from the late 1990's/early 2000's. Called a "1941 Duesenberg Model J, all the bodywork you see was done with USC Icing, the same product Bill mentions above. I tend to over-catalyze the stuff a bit, as I needed it to begin setting up fairly quickly--probably used about double the recommended proportion of catalyst to putty--yes, those fender extensions did get warm, but not nearly enough to even be uncomfortably hot to the touch. To ensure absolute adhesion of the putty to the styrene plastic, I drilled a number of small holes in the styrene plastic surfaces onto which I was going to apply the putty--those holes, once filled with the putty, act like built-in rivets--this in addition to roughing up the surface of the plastic as well. You will note that the Icing has a bit of a mottled look--that's because I used two different colors of catalyst, red and blue. This was so that as I shaped the raw puttywork, I could see where more putty was needed, so a contrasting color of putty helped me in that regard as well. Once I get back on this project, wnen I have the polyester putty work as smooth as I can get it, I'll shoot some red oxide primer on it, then lightly sand that, to find any surface imperfections, which will get filled with ordinary lacquer-based spot & glaze putty. This is a system for bodywork that I've used, off and on, since about 1969-70--it's never failed me yet! Art
-
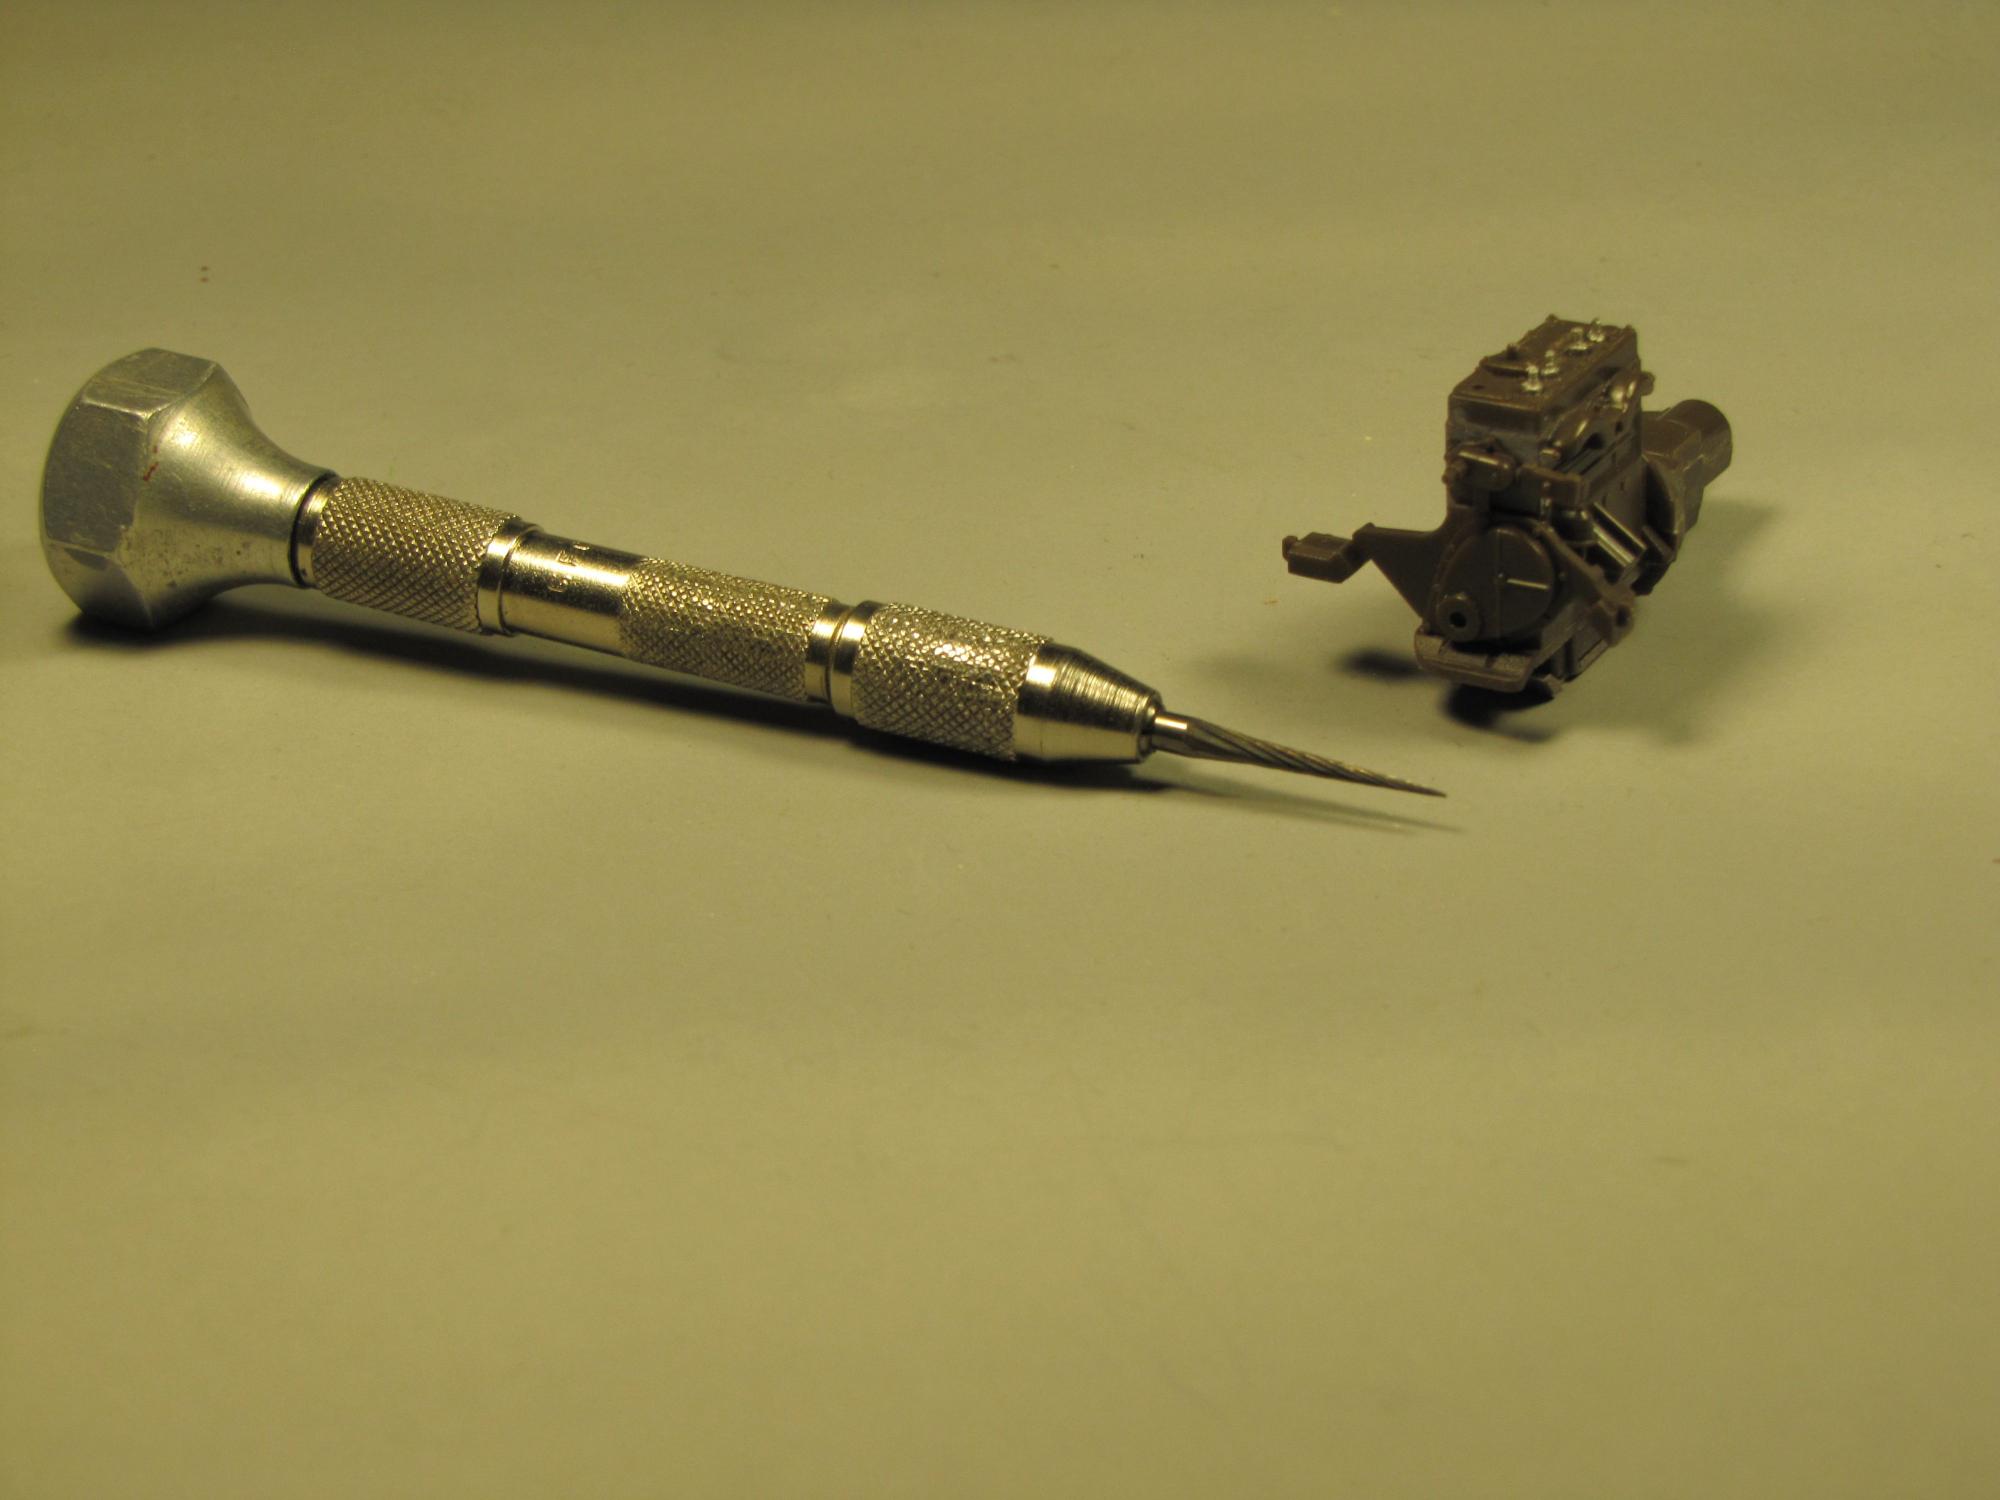
I found the tapered cutter at a tool vendor's booth at the Auburn Auction Grounds (Auburn IN) about 7-8 years ago--wish I'd bought more than one!). It's essentially useless in a Dremel, due to it's shape and length, but I have used it in my Sherline Mill, to get a slanted edge on a block of aluminum that I occasionally use for block-sanding. It was, however, VERY handy for the little job I put it to on the Jeep engine! Art
-
It's the Hasegawa kit. Asuka made the Bantam BRC kit.
-
A set of Etzel's Speed Classics Champ Car wheels & tires (resin) would be perfect for this car! Those are Halibrand magnesium wheels with Firestone Deluxe Champion racing tires, the same casings as used at Indianapolis from about 1949 through 1963 (the year of the GREAT tire controversy!). For the salt flats, Firestone simply buffed off the "shoulders" of the tread on those tires, then cut simple concentric tread grooves in them. 18" rears, 16" fronts. Some Bonneville racers used spun aluminum discs on the wheels, and some did not. Art
-
Auto ID #228 **FINISHED**
Art Anderson replied to Matt Bacon's topic in Real or Model? / Auto ID Quiz
Ahhh, powered by the "V8-60" as that small 144cid flathead V8 was known here in the US 1937-1940! Art -
Well, so much for the vaunted accuracy of a Hasegawa kit! While this model kit is pretty amazing in most all of its details, they did miss molding sparkplugs into the cylinder head! When researching Jeep engines for both paint colors and detailing, I had come across a picture of a freshly restored rebuild, that had yet to have plugs installed--rather the rebuilder had inserted orange plastic seals into the sparkplug holes to keep dirt and debris out--Hasegawa must have seen the same picture, as THAT's what they tooled into the cylinder head. No problem, as I have a pretty fair stock of OOP R&D Unique white metal spark plugs. Only trouble is, a #61 drill bit is too small for the size of the shank on the bottom of these plugs--thankfullly I have this long, 1/8" shank tapered HS steel cutter, which when fitted into a pin-vise allowed me to gently enlarge the drilled holes:
-
No civilian vehicles were produced in 1944--not with WW-II at its crescendo, but this one does qualify as a car in my book, even though the US Army classified it as a "Truck, 4-wheel drive, 1/4 ton". If you haven't guessed, that would be a Jeep! Pretty much, everyone thinks of the Jeep as having originated with Willys-Overland, but that would be wrong: The Jeep, as it came to be produced, actually began life as the Bantam Reconnaisance Car (BRC) which was the design accepted by the US Army over prototypes submitted by both Willys and Ford. American Bantam produced 1,500 BRC's in 1940 for the Army, but that company's small size and rather shakey financial condition prompted the Army to award further production to Willys-Overland of Toledo Ohio. Willys produced several thousand Jeeps in 1941, but again, the small size and capacity of that company meant they could not begin to meet the demand with the aftermath of Pearl Harbor--so Ford was given a contract to produce the very same vehicle under liicense from Willys. While Ford produced the vast majority of Jeeps in WW-II (some 670,000 were built), most people (and historians) tend to think only of the Willys MB, not the Ford GPW--which is readily identifiable if one knows where to look for the difference: While Willys provided first, raw Jeep chassis to Ford, the latter company's engineers figured they could speed up production with a design change--Willys (like Bantam before them) used a tubular front crossmember in the frame, which apparently Ford saw as a bit of a bottleneck, so Ford's designers substituted a pressed-steel channel front crossmember, which is readily visible, both from underneath, and through the 7-slot stamped grille (which was developed at Ford to replace the welded steel slat grille used by Bantam and carried forward by Willys for the earliest Jeeps. Willys-Overland provided all the engines for Jeep production, the Willys"Go-Devil" flathead 4, which had been created for the 1927 Willys Whippet, and then used in the 1933-36 Willys Model 77's and 1937-41 Willys Americar both of Gasser drag racing fame. American Central Manufacturing of Connersville IN (formerly Auburn Central Mfg--who produced the sheet metal stampings for Auburns and Cords) stamped and assembled the bodies for both Willys & Ford.. OK, enough ado about the history--on to my project:
-
chrome removal
Art Anderson replied to Lizard Racing's topic in Model Building Questions and Answers
On my ICM 1/24 scale 1913 Model T, the gold-tone plating had to be stripped from the windshield frame, as Ford discontinued brass windshield frames in late 1912. Using Easy-Off (yellow label), the transparent yellow top coat came off, as did the plating itself, but the basecoating (some sort of transparent brown lacquer or varnish) never did soften, even after several days in the Easy-Off--I had to CAREFULLY scrape and peel hat stuff off! Art -
Actually, while this is true, in so many cases, the paint formulae of decades ago often used tinting pigments that are no longer available, and in a lot of cases, even the original mixing formula no longer exists. About 20 years aoo or so, the late Lee Baker and I worked with Dave Dodge (then the owner of MCW Automotive Finishes) to get a range of factory colors for the 1936-37 Cord 810/812. The results are excellent for what they are, VERY close approximations based on color chips, but even Auburn Automobile Company, who produced the Cord automobiles, didn't have a truly consistent paint formula for each color--so those cars differed in shade with each passing couple of months. Art
-
chrome removal
Art Anderson replied to Lizard Racing's topic in Model Building Questions and Answers
I realize that this link is very informative, but it's also a very long thread, so I'll cut to the chase here: Vacuum-metalizing (which is what model car kit "chorme" really is, consists of three steps: 1) A precoating of non-penetrating lacquer (today, almost universally clear--but years ago, it tended to be light transparent yellow, even light brown in shade), which both makes for a very shiny aurface and gives adhesion to the very thin layer of aluminum which is the "chrome" you see on model parts. 2) The trees of parts to be plated are then loaded into a large vacuum chamber, which has all air pumped out of it, to a mechanically perfect vacuum, after which thin strips of pure aluminum are instantly vaporized by a charge of high-voltage electricity--which vaporized aluminum adheres almost instantly to everything inside of the vacuum chamber. 3) Upon removal from the vacuum chamber, the trees of parts are coated once again with a very thin clear non-penetrating lacquer, which seals the aluminum coating (which is only a few molecules thick) which prevents the aluminum from simply oxidizing away, or even being worn away by being touched. Most paint strippers found in hardware/paint/home improvement stores contain sodium hydroxide, which dissolves aluminum rapidly, but also contain other solvents which will destroy styrene plastic almost instantaneously as well. Sodium Hydroxide is a water-soluble chemical also commonly known as lye. While lye is no longer commonly available in crystal or powdered form due to it's status as a chemical hazard, particularly to human skin and mucus membranes, it's still available in common household products such as Easy-Off Oven Cleaner in the can with the yellow cap, as well as in most drain openers. Concentrated lye solutions will soften and strip the lacquer coating over the aluminum plating, dissolve the aluminum quite rapidly, and given sufficient time, will soften virtually every type of pre-coating ever used on model car parts, in my experience, although it may take some persuasion, as Bill and others have noted, with say, a stiff toothbrush. PPE, or Personal Protective Equipment is essential when using Easy-Off or lye based drain cleaners, by that I mean protective gloves--such as the nitrile gloves which can be found in just about every pharmacy, and protective eyewear, as even the tiniest droplet of lye solution can and will damage your eyes irreversibly. The leftover lye can simply be flushed down your toilet, or poured down the sink drain (just follow with running water for a minute or so, which will weaken the lye solution to the point of making it harmless to brass or copper drain pipes. I've stripped far more plated model car parts than I can count over my decades of building model cars, and can attest to the effectiveness of lye solutions. Art -
Old-Time ('60s) Paint Question
Art Anderson replied to Snake45's topic in General Automotive Talk (Trucks and Cars)
From your description of the painted surface, it sure sounds like AMT lacquer to me--that stuff was so very much like today's Tamiya and Modelmaster spray lacquers; in that it laid down in very thin coats that weren't all that prone to either orange-peel or runs & sags, unlike the enamels from Pactra or Testors. Art -
WoooooHoooo! How About a '66 SUBURBAN !?!?!!!
Art Anderson replied to Danno's topic in Truck Kit News & Reviews
All standard Suburbans, at least up through 1966, were built on the shorter, 1/2 ton pickup chassis. GM TRuck & Coach DID offer longer, 3/4 ton panel deliveries, however, beginning at least with the newly designed postwar 1948 truck line, and those were on the longer 3/4 ton pickup chassis. Art -
Inside of a Tamiya rattle can(photo)
Art Anderson replied to Pete J.'s topic in Tips, Tricks, and Tutorials
Nope, in all my 57 years of using hobby rattle can spray paint on models, I have NEVER felt the need to store spray cans upside down. As for the heavier solids of the paint settling into the bottom end of the spray delivery tube--RULE OF THUMB: ALWAYS shake the can vigorously before even touching the spray nozzle--problem solved (again, based on experience dating all the way back to 1959, and the first cans of model spray paint from Pactra. Art -
However, if you truly look at any tire in use on the street, the tread surfaces will be darker than the grooves, etc. of the tread design. That's simply due to the tread surface being constantly "worn" against the pavement (regardless of the type of pavement, it's all abrasive!) , while the recessed tread pattern (grooves, etc.), not being in direct contact with the road surface, will be at the bare minimum, dusty--hence lighter in color than the surface of the tread. Also, the older the tire, the lighter in color a blackwall tire will be, due to it's weathering, be even with fairly new tires, the rubber surface is at least minutely porous, leading to dust and dirt adhering to the rubber surface. Even the color of the soil in whatever region the car is driven will affect even the slightest weathering. Art