Paul Payne
-
Posts
2,128 -
Joined
-
Last visited
Content Type
Profiles
Forums
Events
Gallery
Everything posted by Paul Payne
-
Progress! Beginning final assembly, mainly have to finish the bed sides and fenders and a few other details.

-
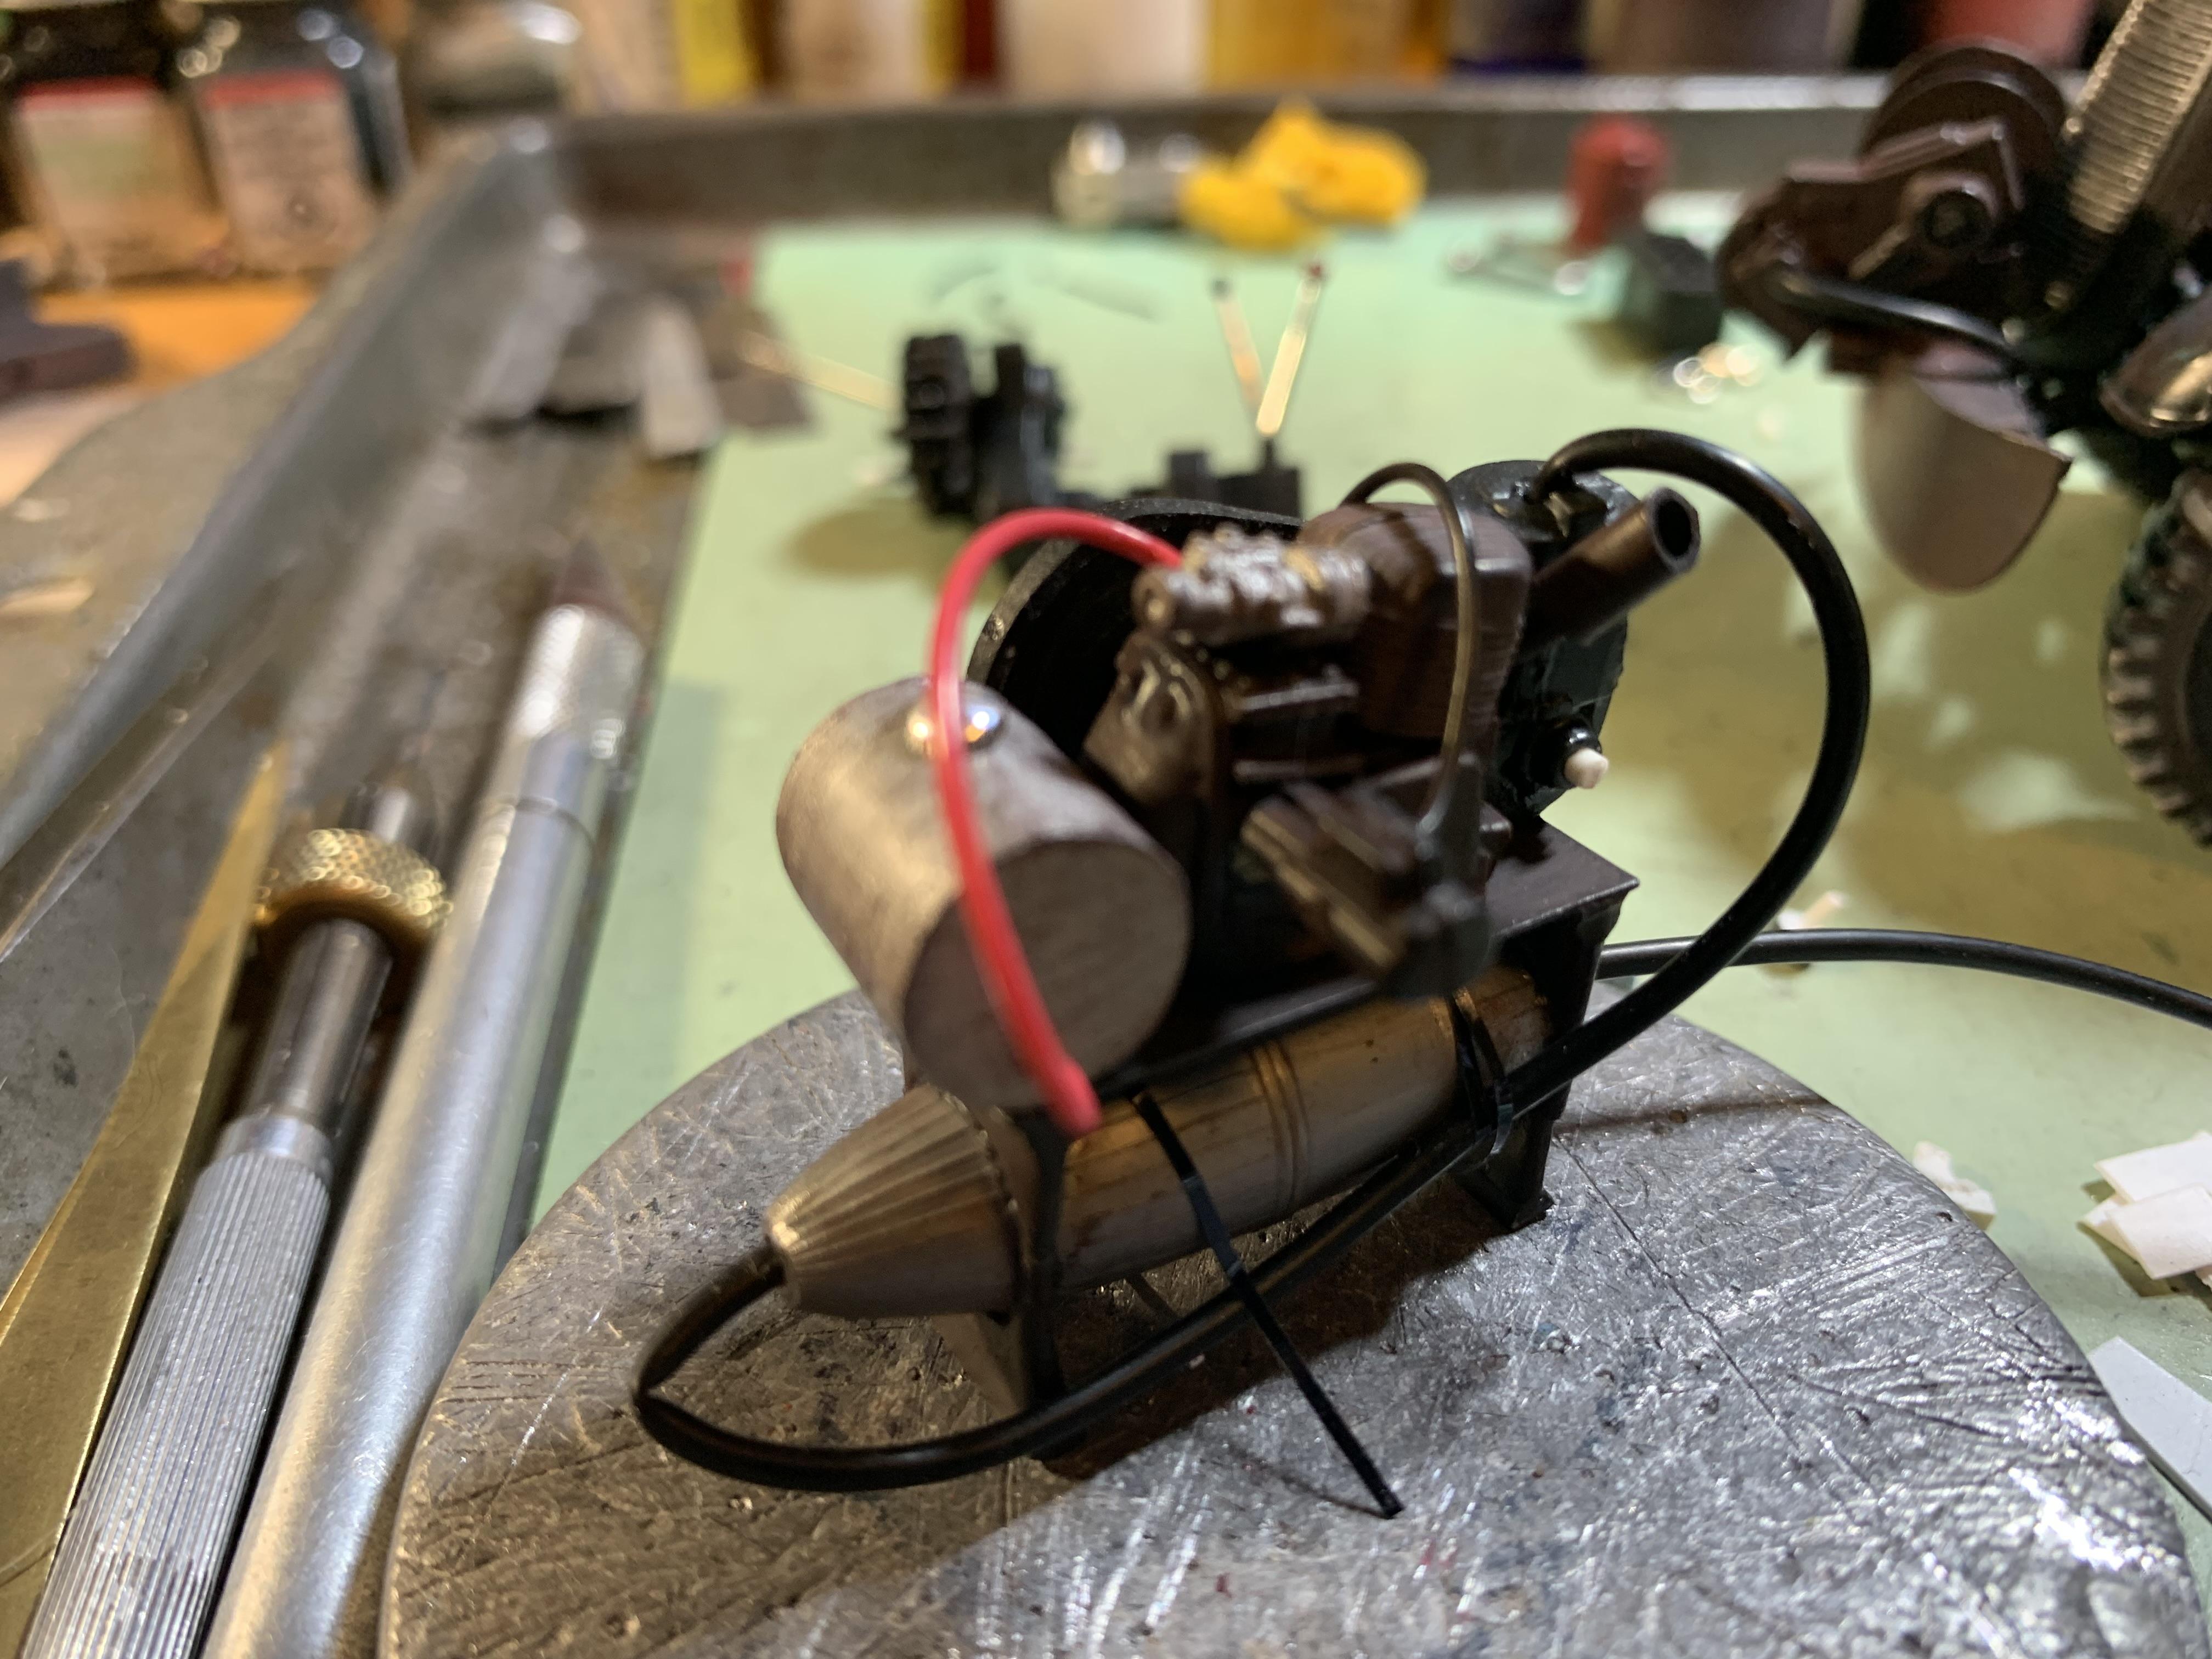
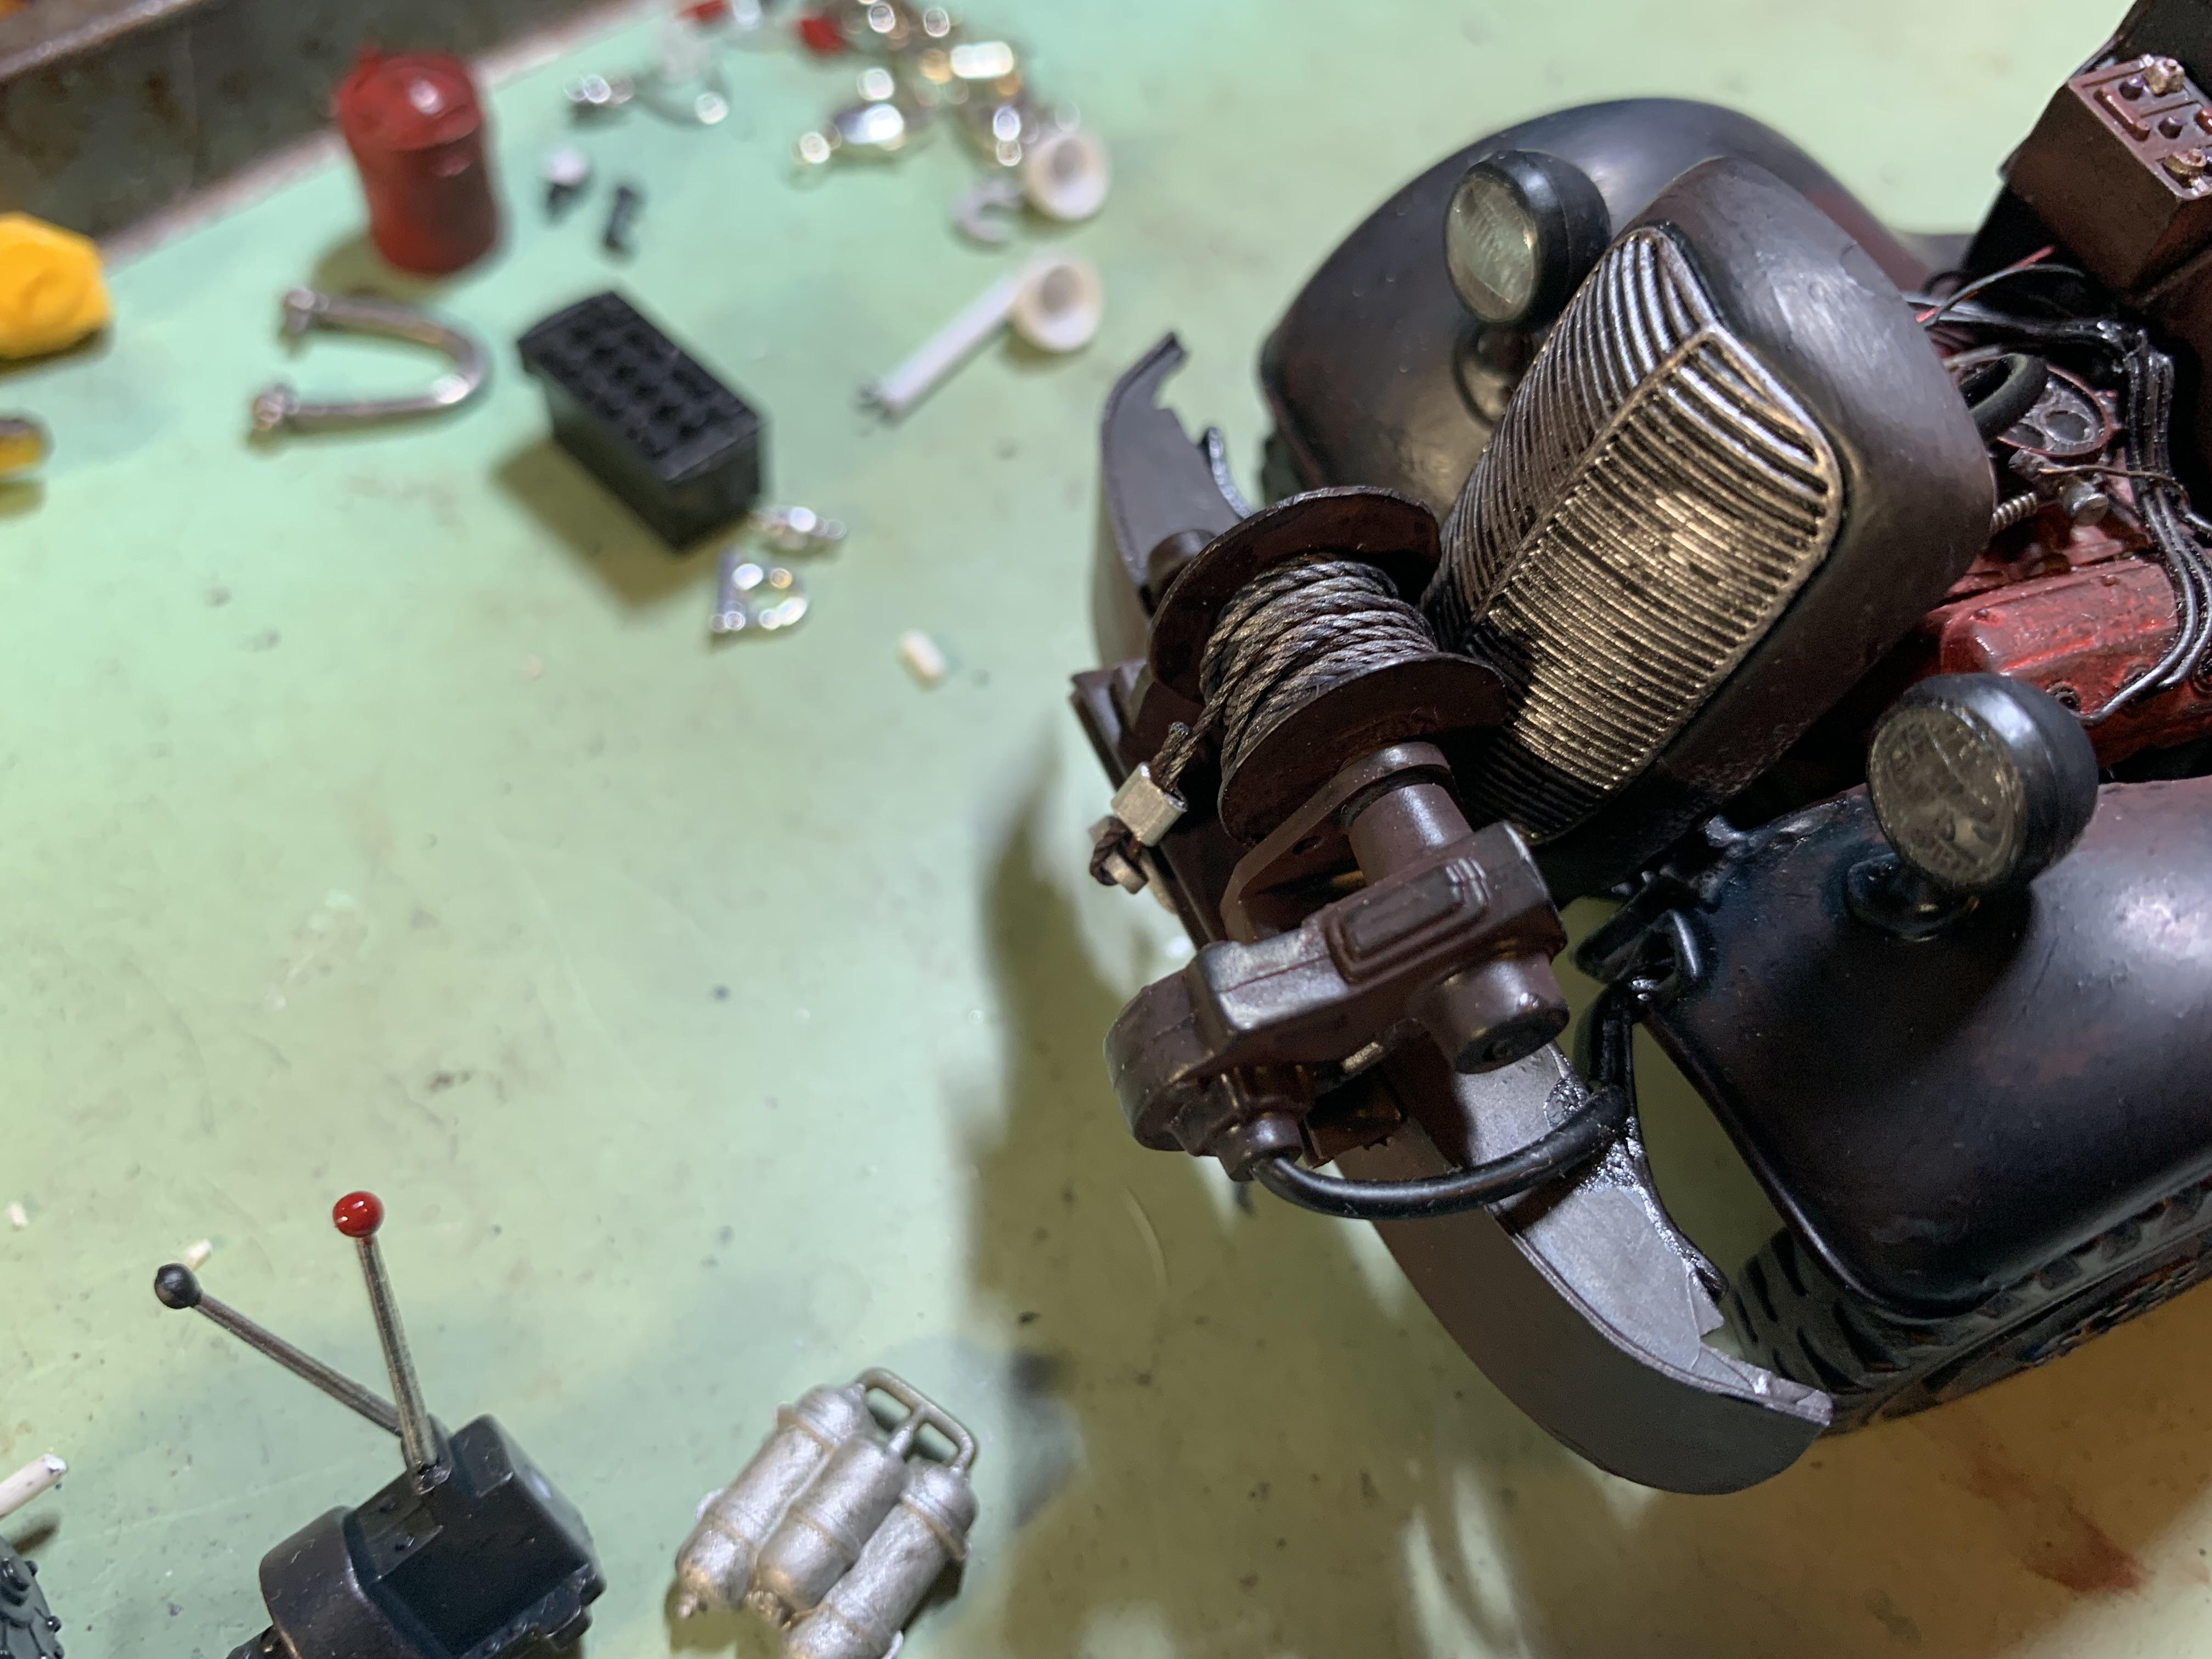
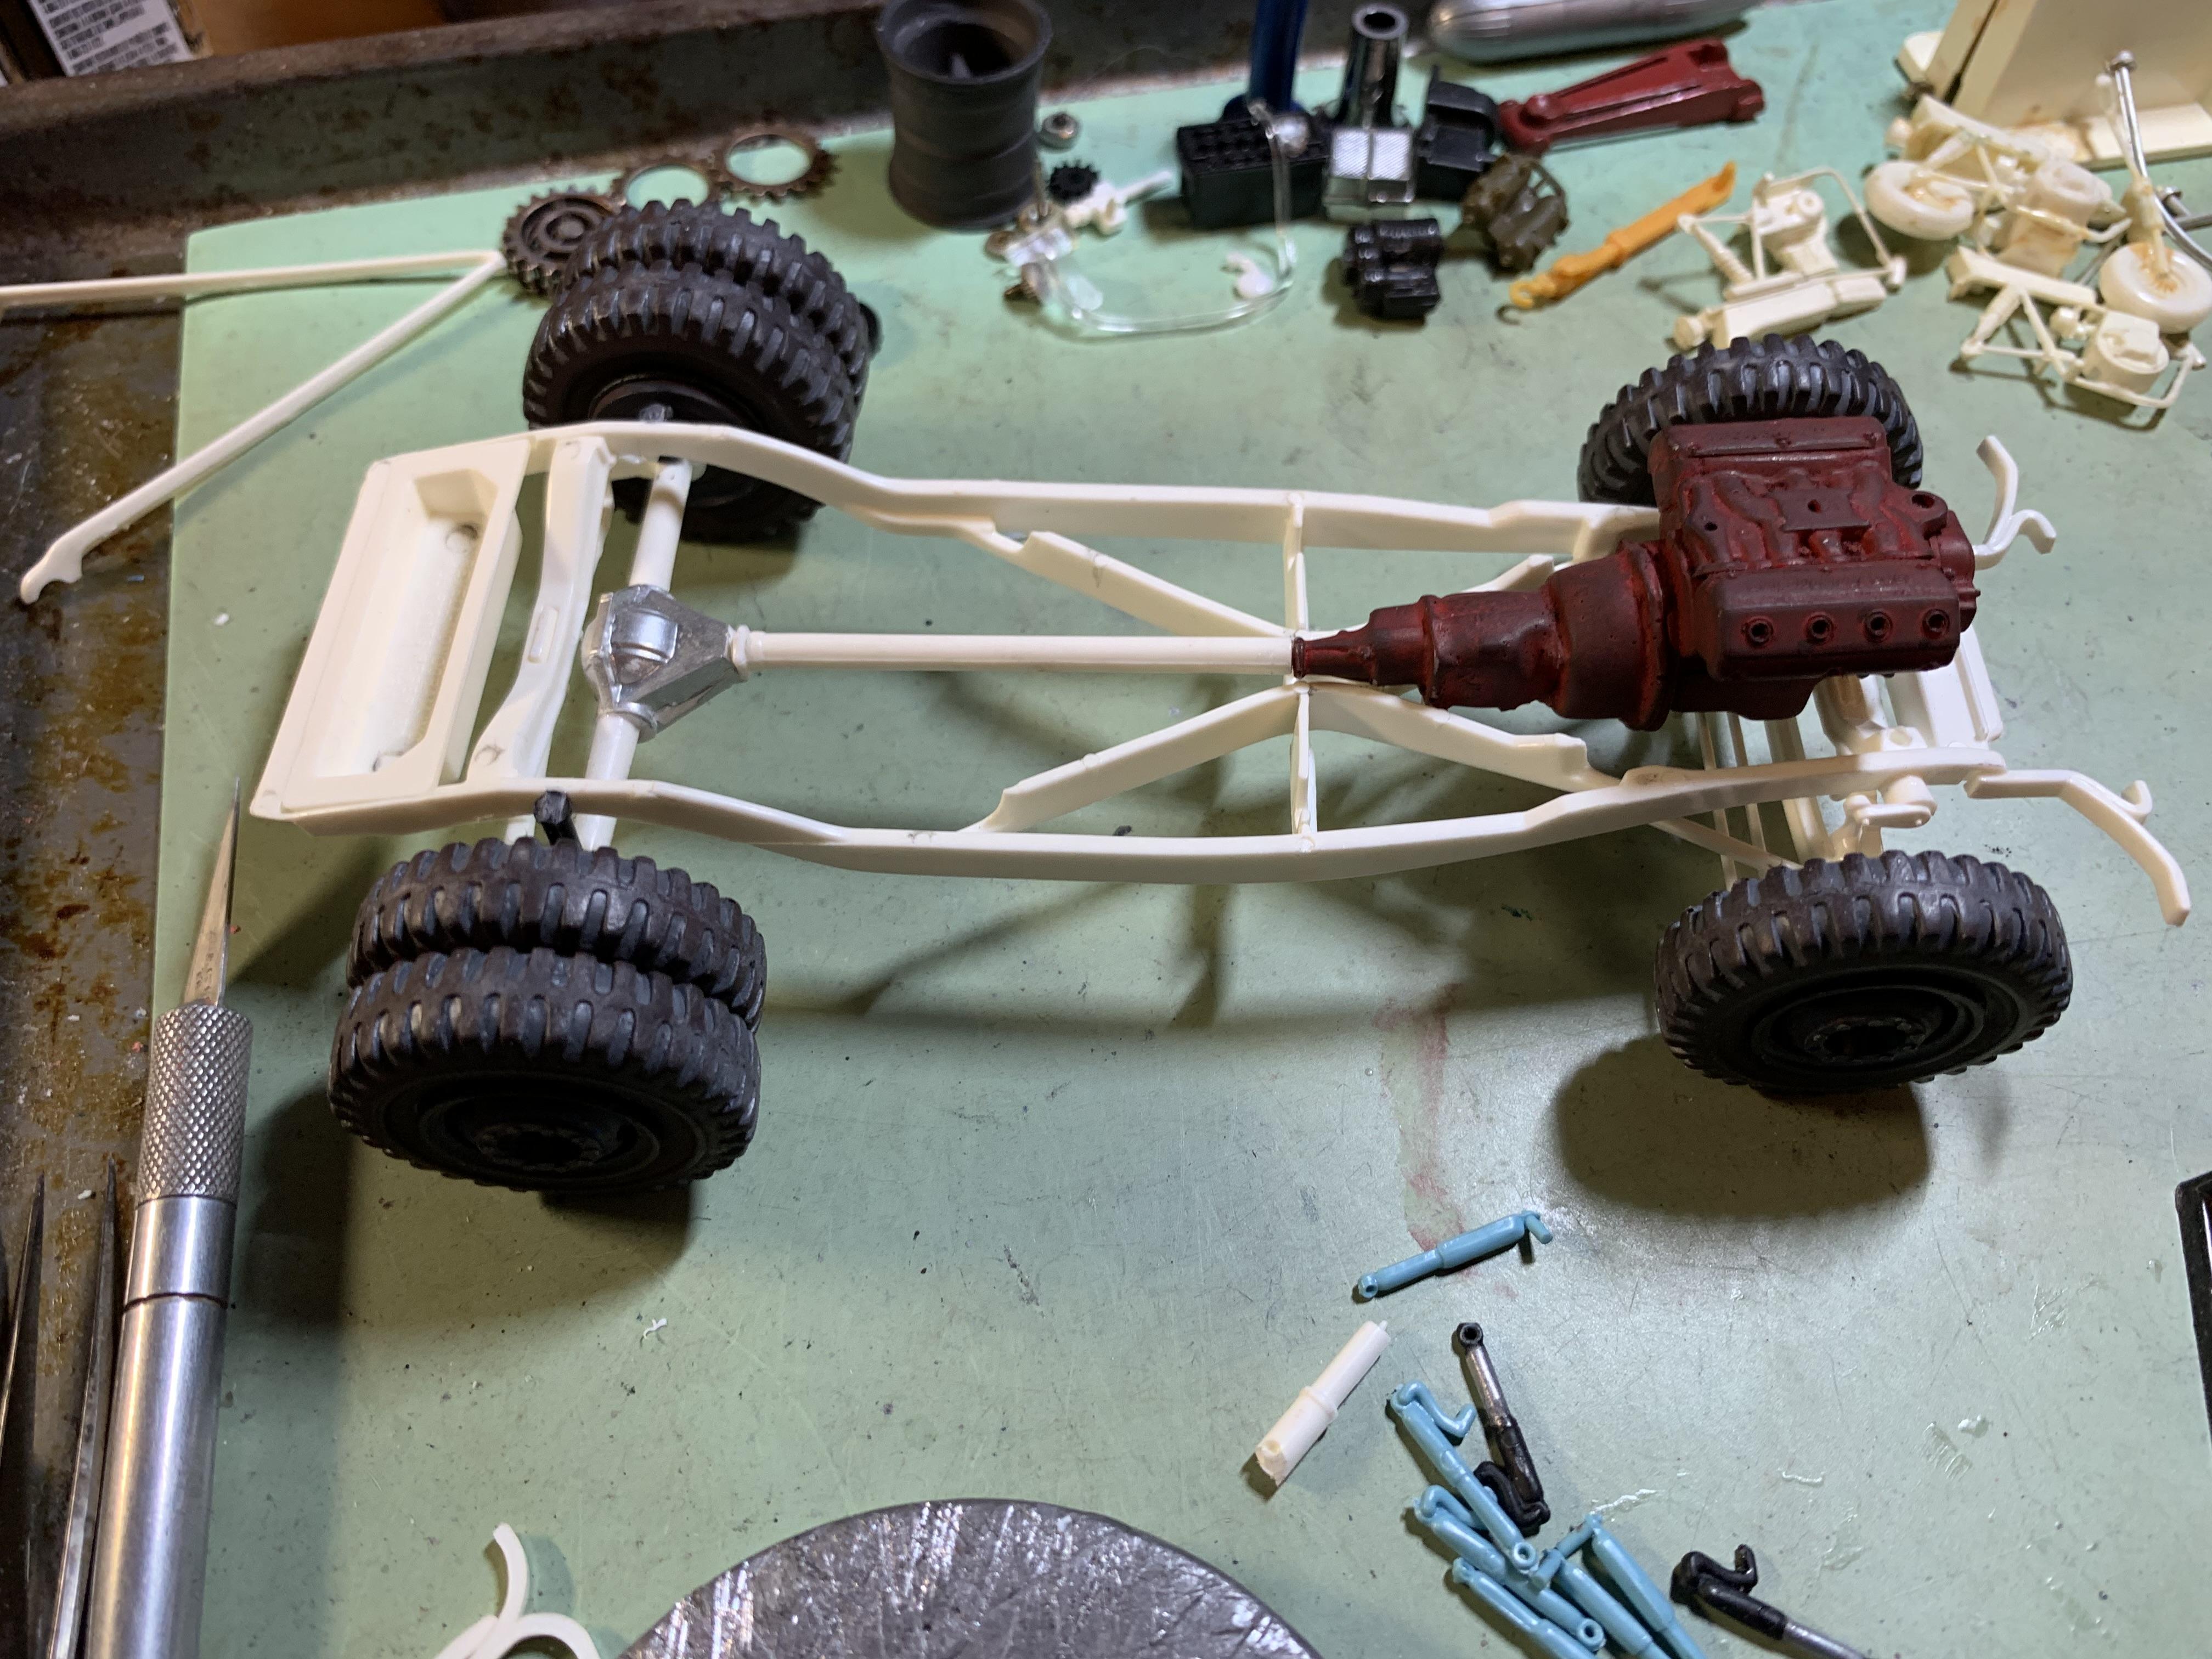
Air compressor, engine compartment, main winch drive, head ache rack, and exhausts.
-
Thanks, everyone, pix of the air compressor that will power the air motor driving the main winch, as well as the air motor and gear drive, coming soon!
-
More progress- have done a lot of weathering, still more to go- now it looks like a tasty junk yard! Completed the front bumper and winch with a scratch built tow hook, working on the exhaust system, created a headache rack from part of a roll cage and some wire, beginning to put together components for the air compressor from bits and pieces from the stash- unknown parts, a pull start engine, an air tank from a smaller scale belly tank, a section removed from that and turned into a fuel tank- a lot of creative fun with junk!
-
Words fail.
-
Been watching this one- came out great- you had a vision and made it happen!
-
Thanks, Alan!
-
Great hot rod, and room for friends!
-
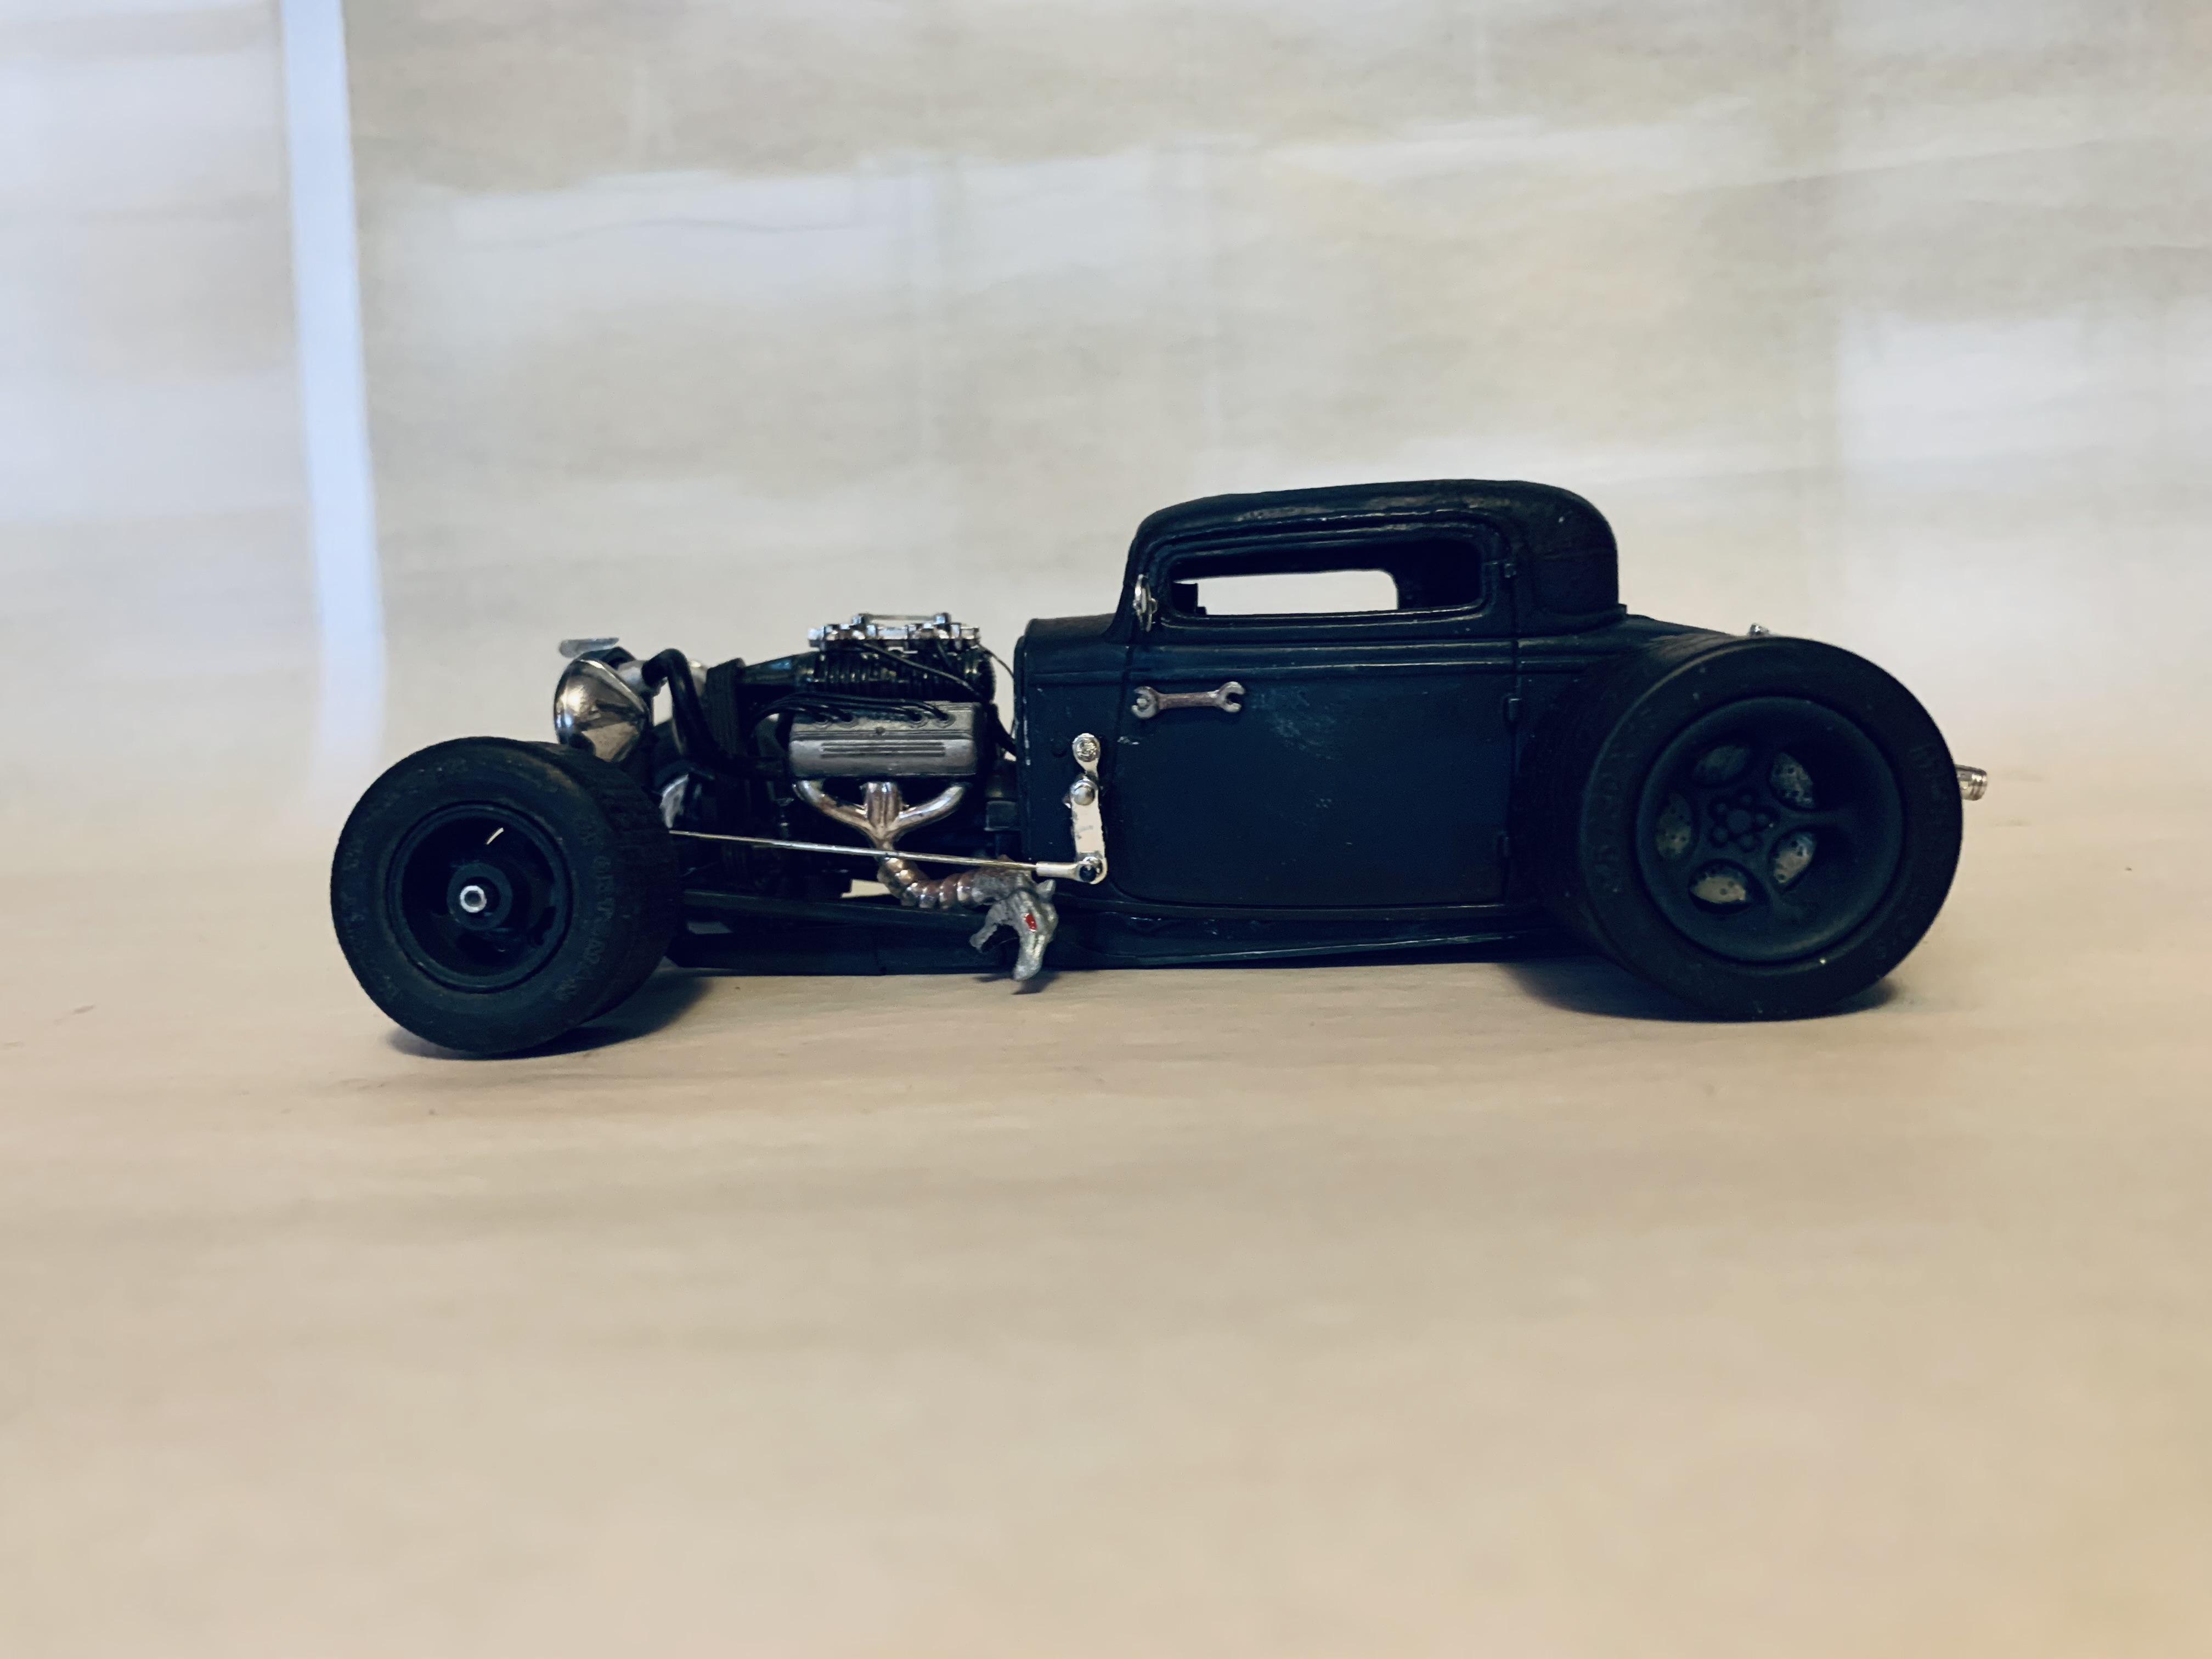
Fantastic replica right down to the windshield stickers! Need a few pix next to the full size one! Your friend is a lucky guy to have 2 nice 32 roadsters!
-
AMT 1934 Ford Pickup
Paul Payne replied to shoopdog's topic in Model Trucks: Pickups, Vans, SUVs, Light Commercial
Great build of an old classic kit. Love the paint and lettering. -
LouverWorks resin parts
Paul Payne replied to 68shortfleet's topic in Car Aftermarket / Resin / 3D Printed
Jason, do you have a web aite yet, or other way to contact you? -
Tim, well worth the effort- a beautiful job!
-
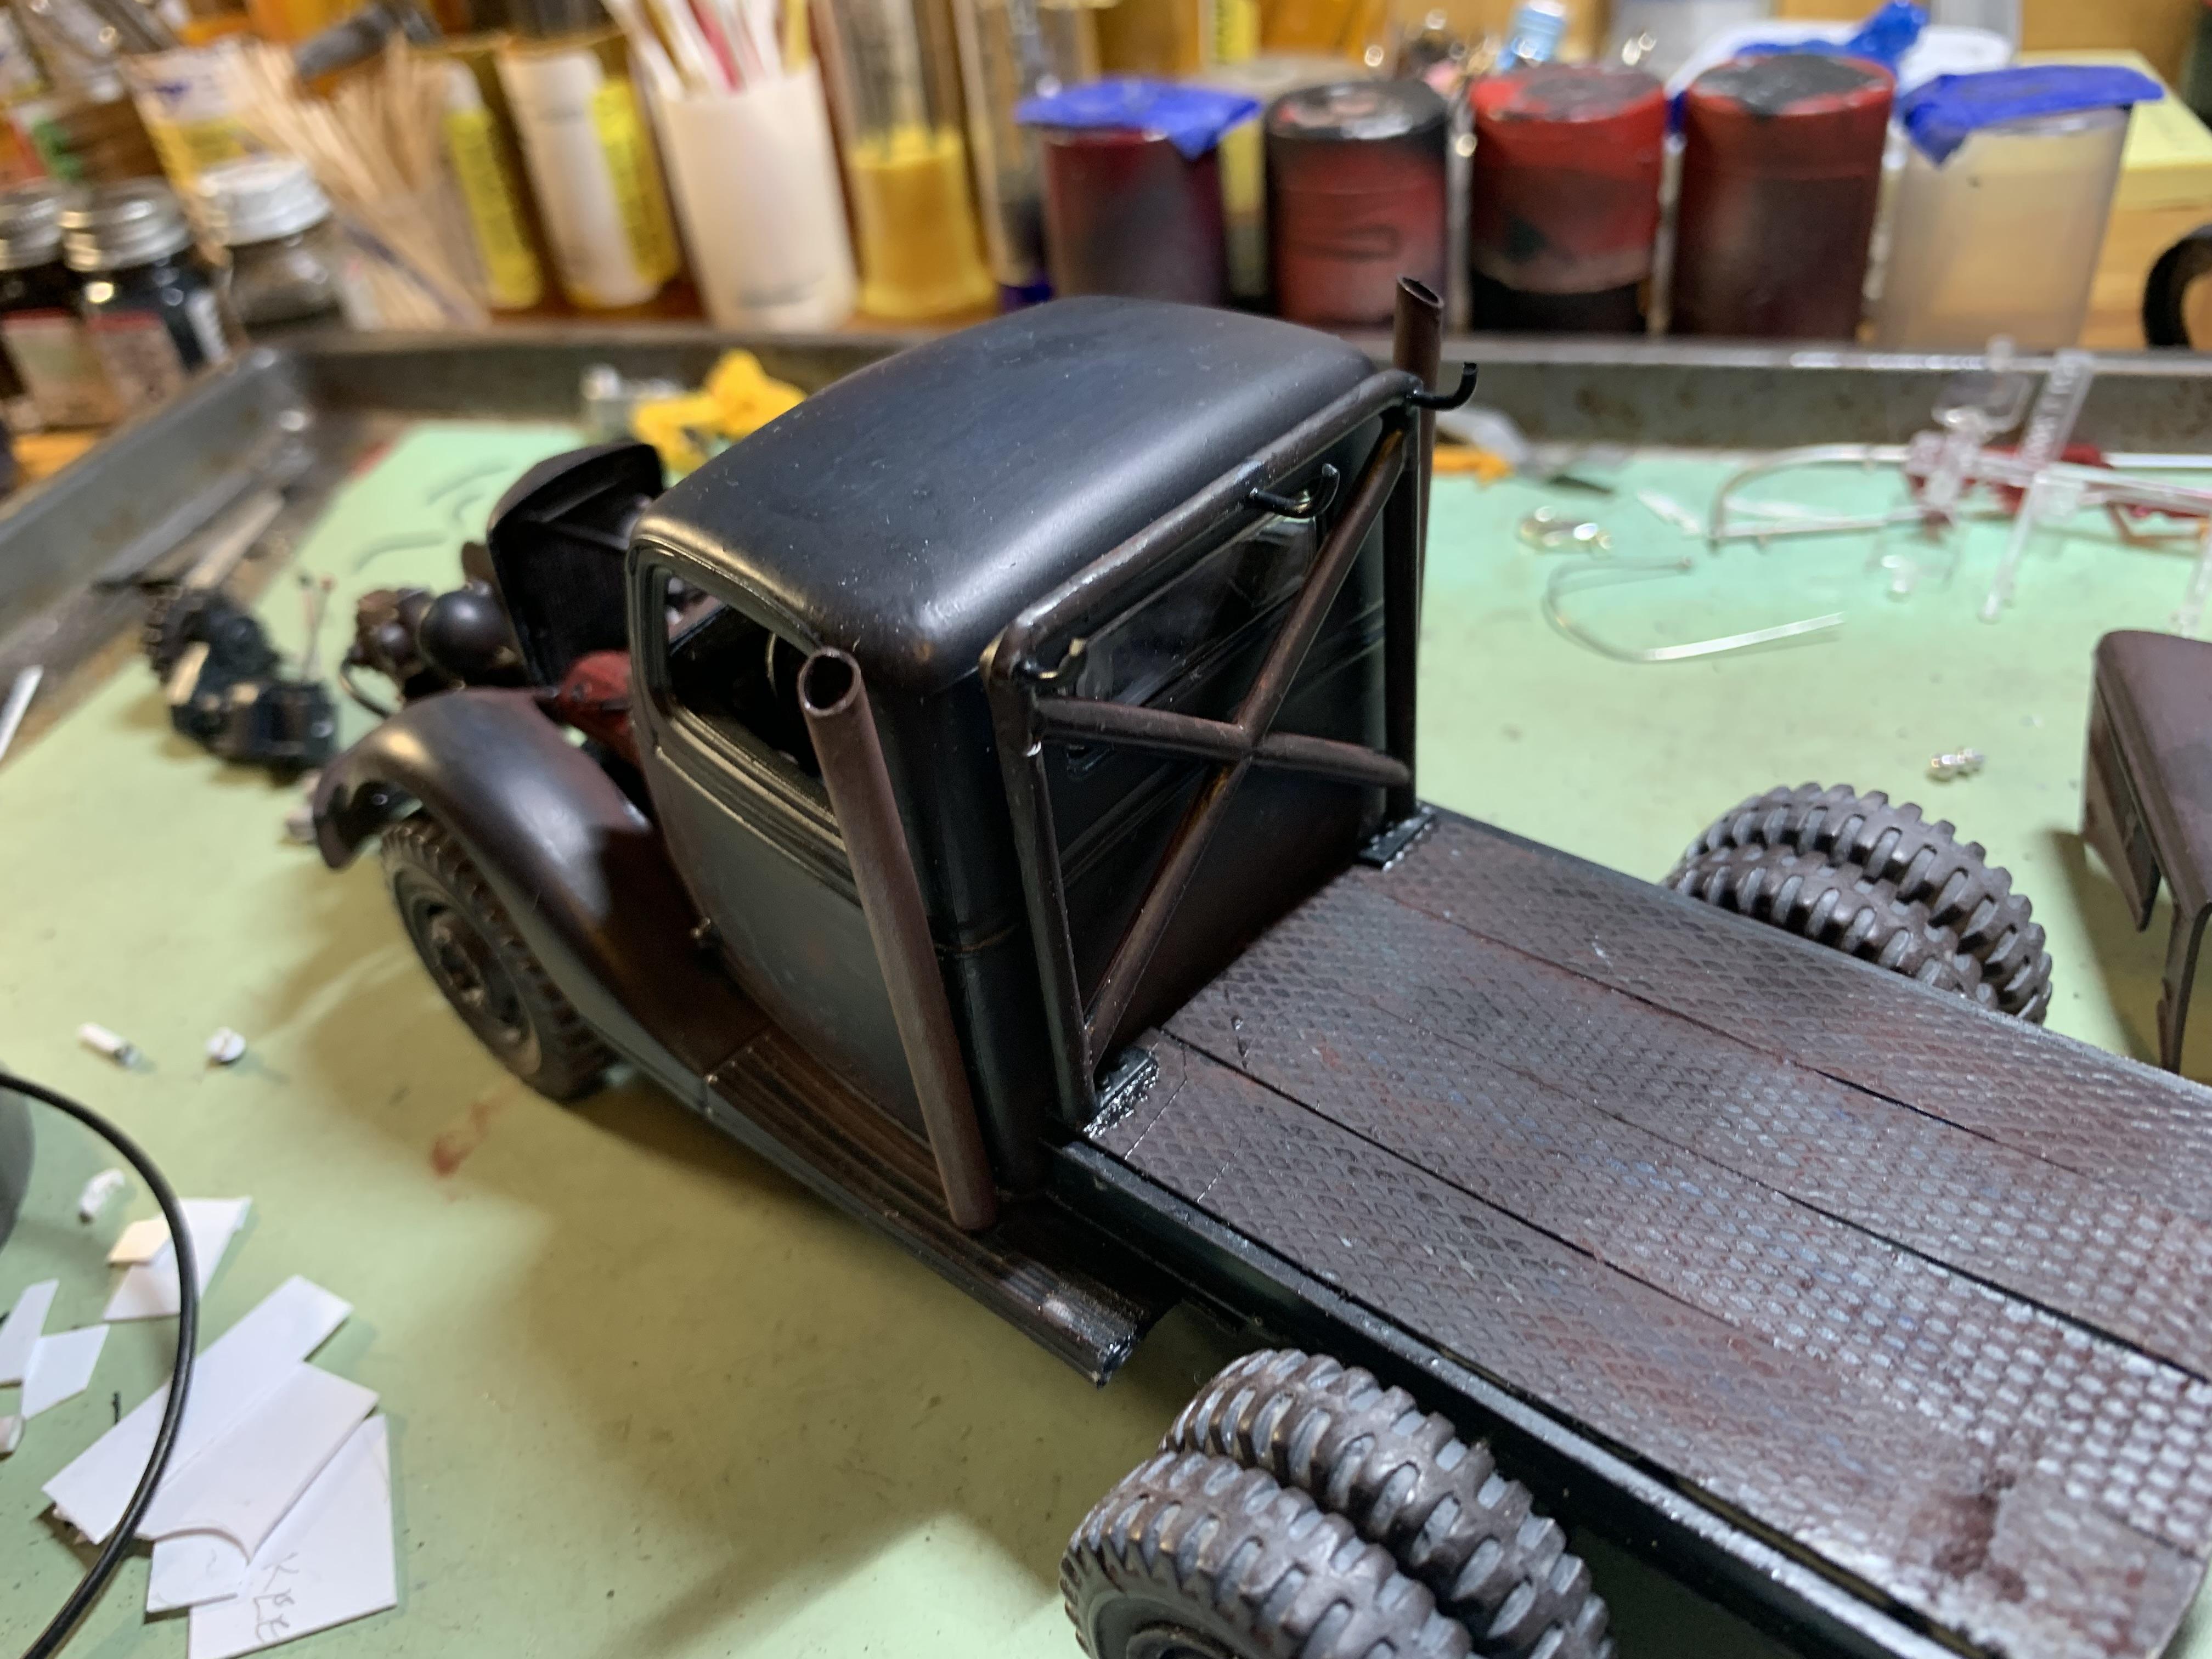
Been wrestling styrene into submission- or at least bending it to my will! I removed the molded fenders on the bed sides and replaced them with styrene sheet. Used some plastic strapping from work as diamond tread plate for the bed. Added a towing hitch to the rear of the bed. Created nuts by slicing hex rod, drilling a hole, and gluing in rod stock for the bolt. These will be used to simulate how the boom mounting frame will attach to the bed. Added grease cups to all the bearing blocks and also created the chain roller. The front bumper was created using a 49 Ford front gravel pan and a strip of styrene, This will end up attached to the existing dumb irons and will have a winch attached. The winch spool was made from a tube and styrene discs and is supported by what were once tow hitches. The drive mechanism has yet to be constructed but will be air powered as will the towing winch. More to come when I get more done!
-
Thanks for all the positive comments. It's coming along better than I thought it might.
-
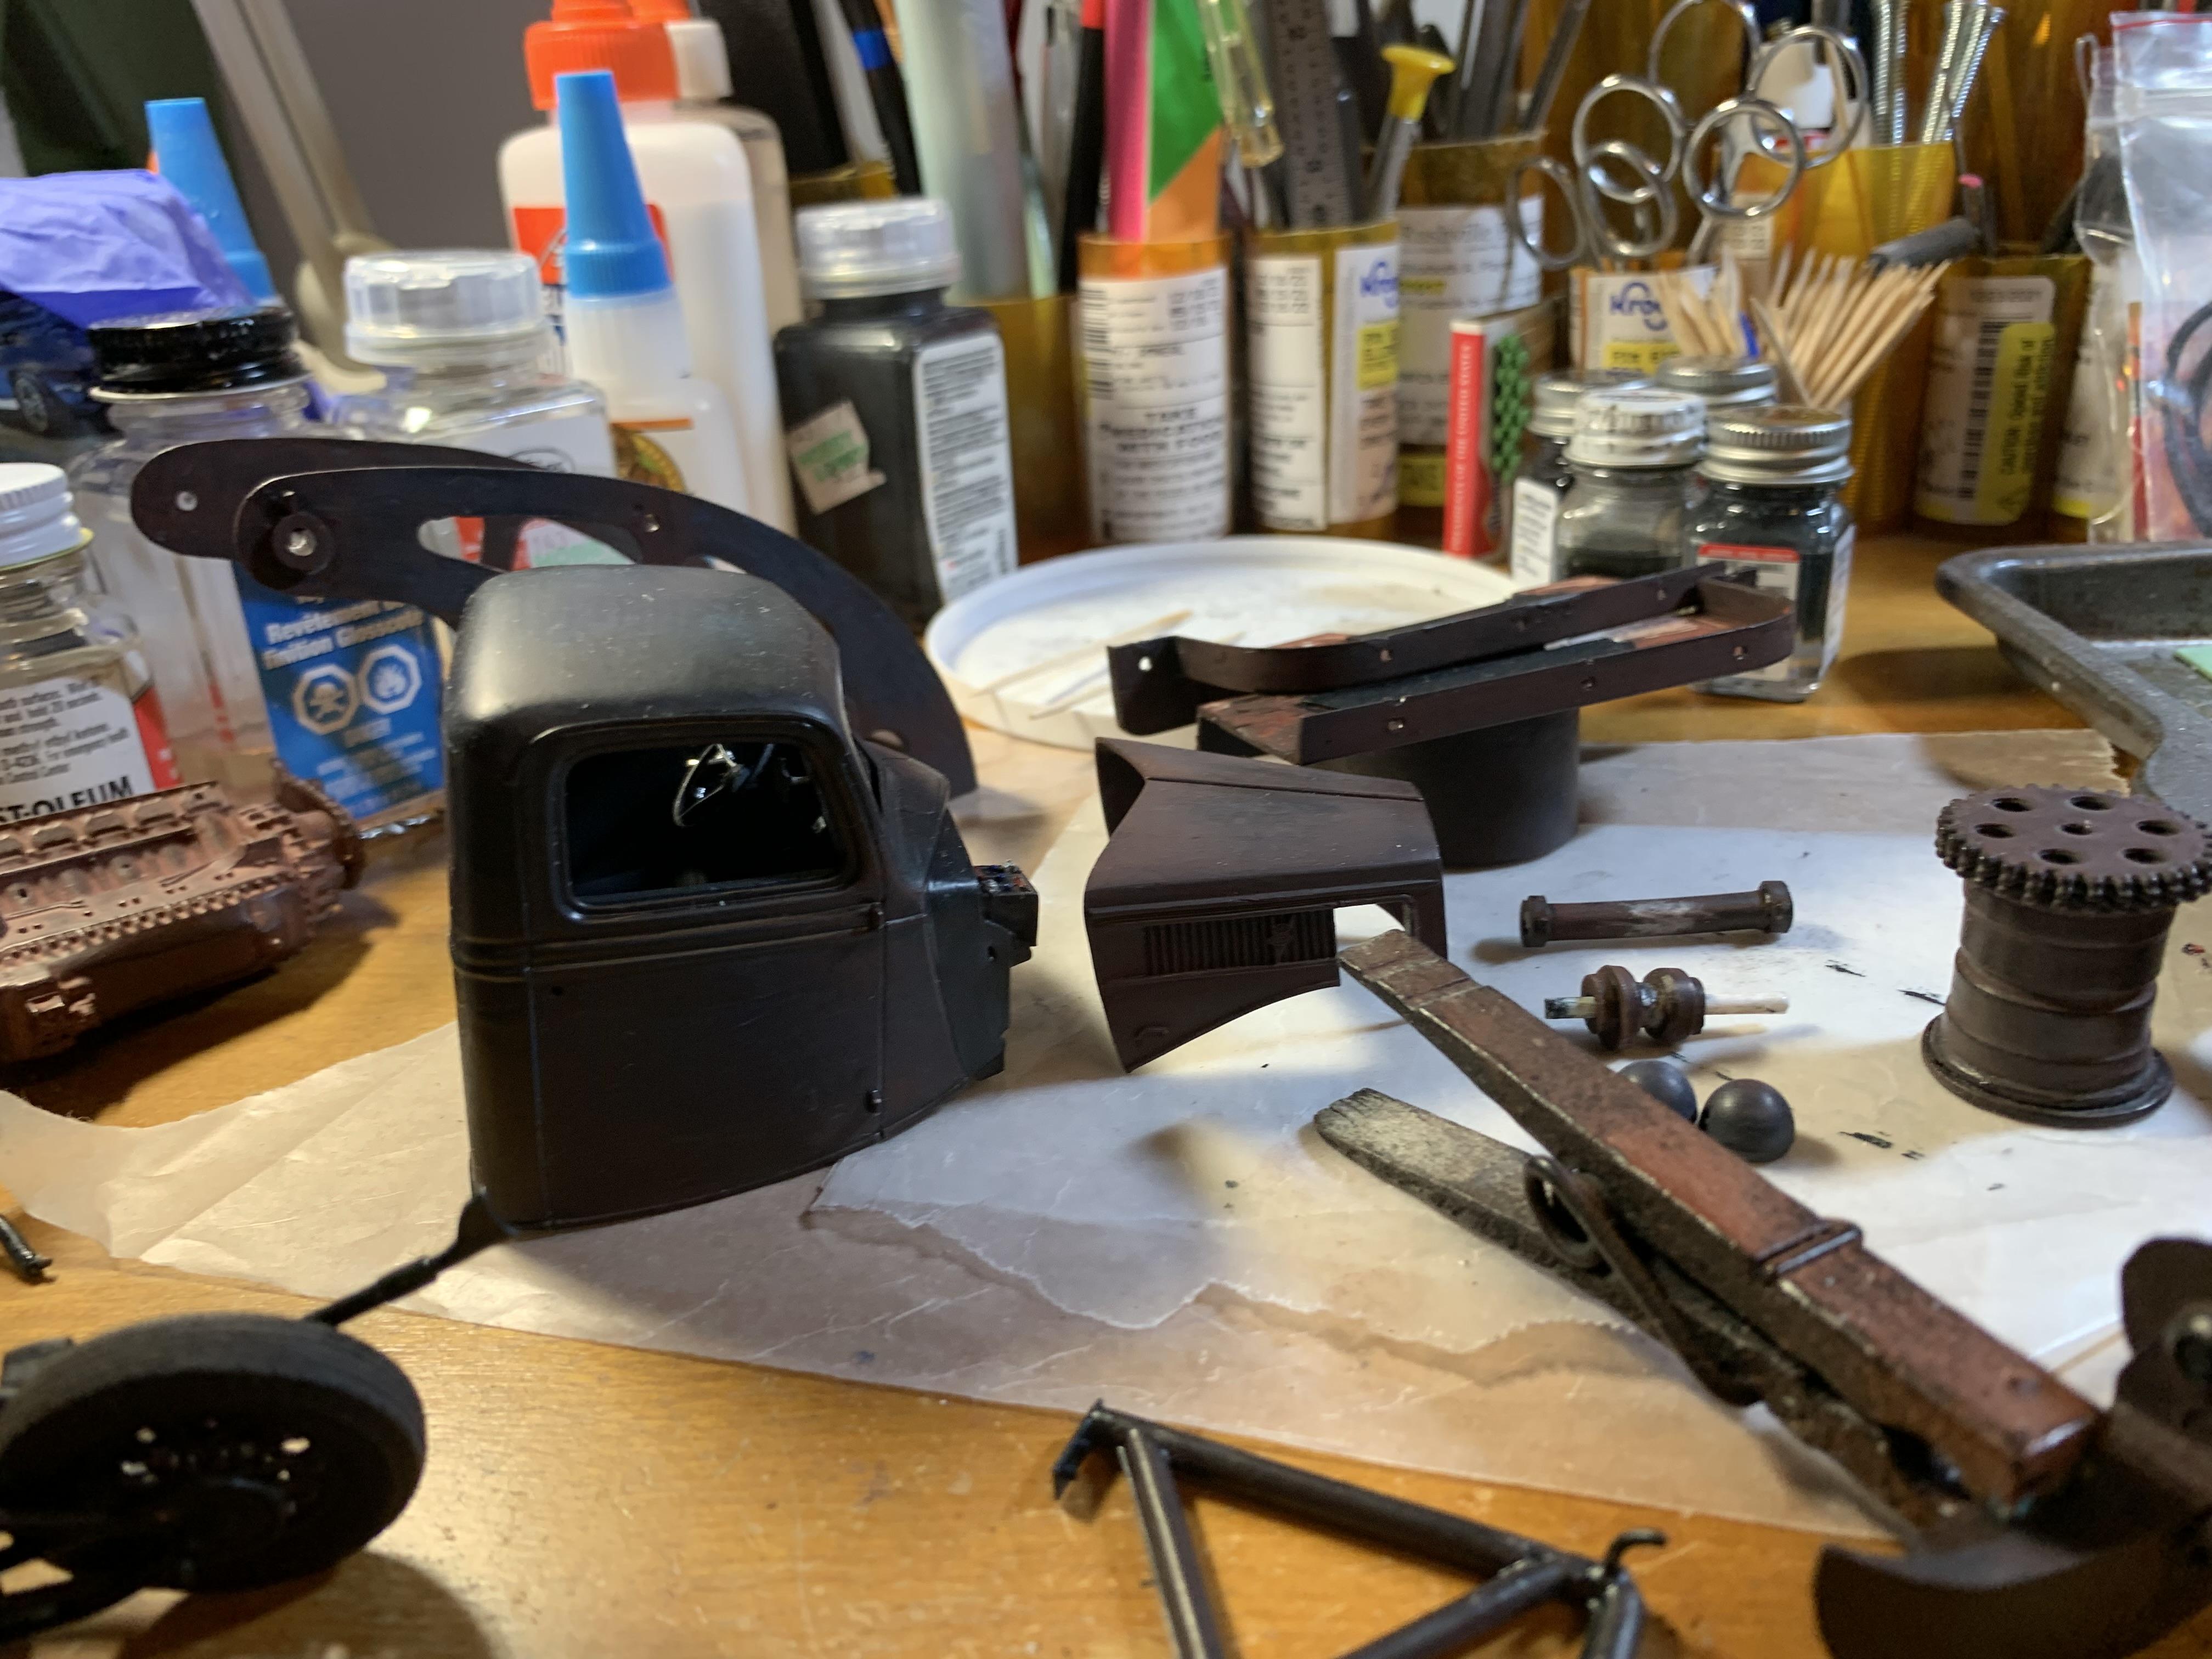
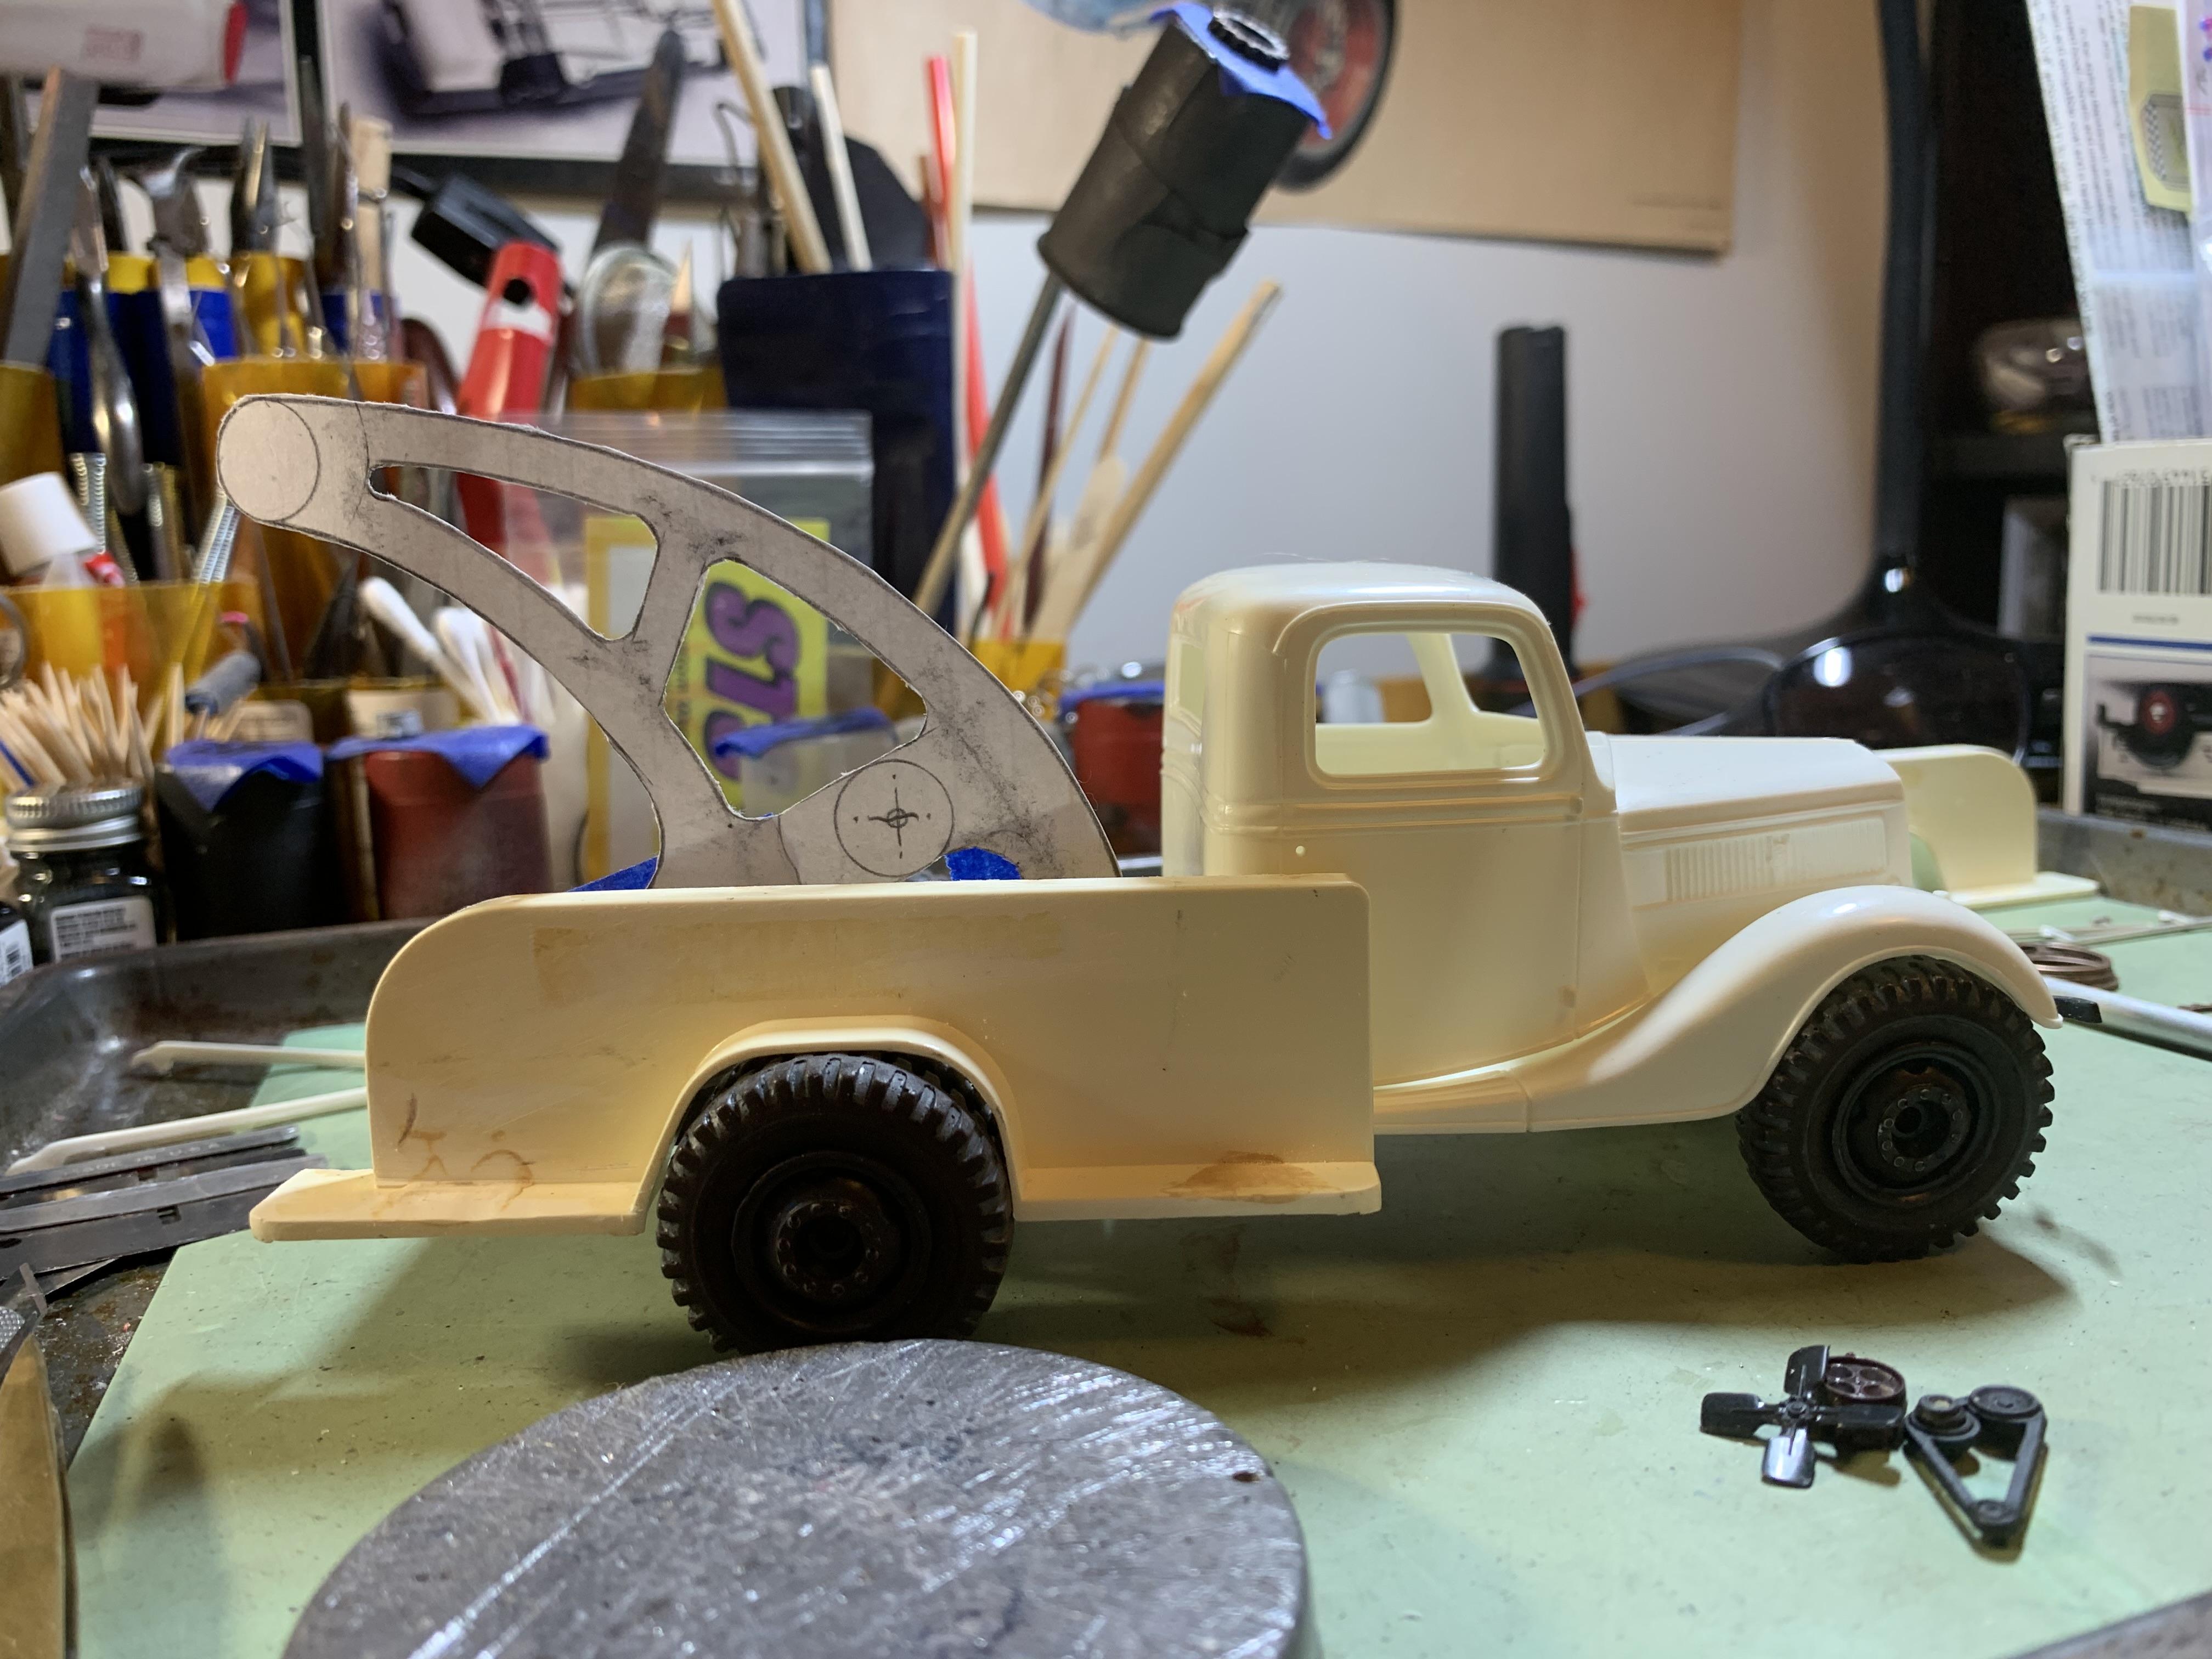
Pix of the wrecking boom mounting frame in beginning stages.
-
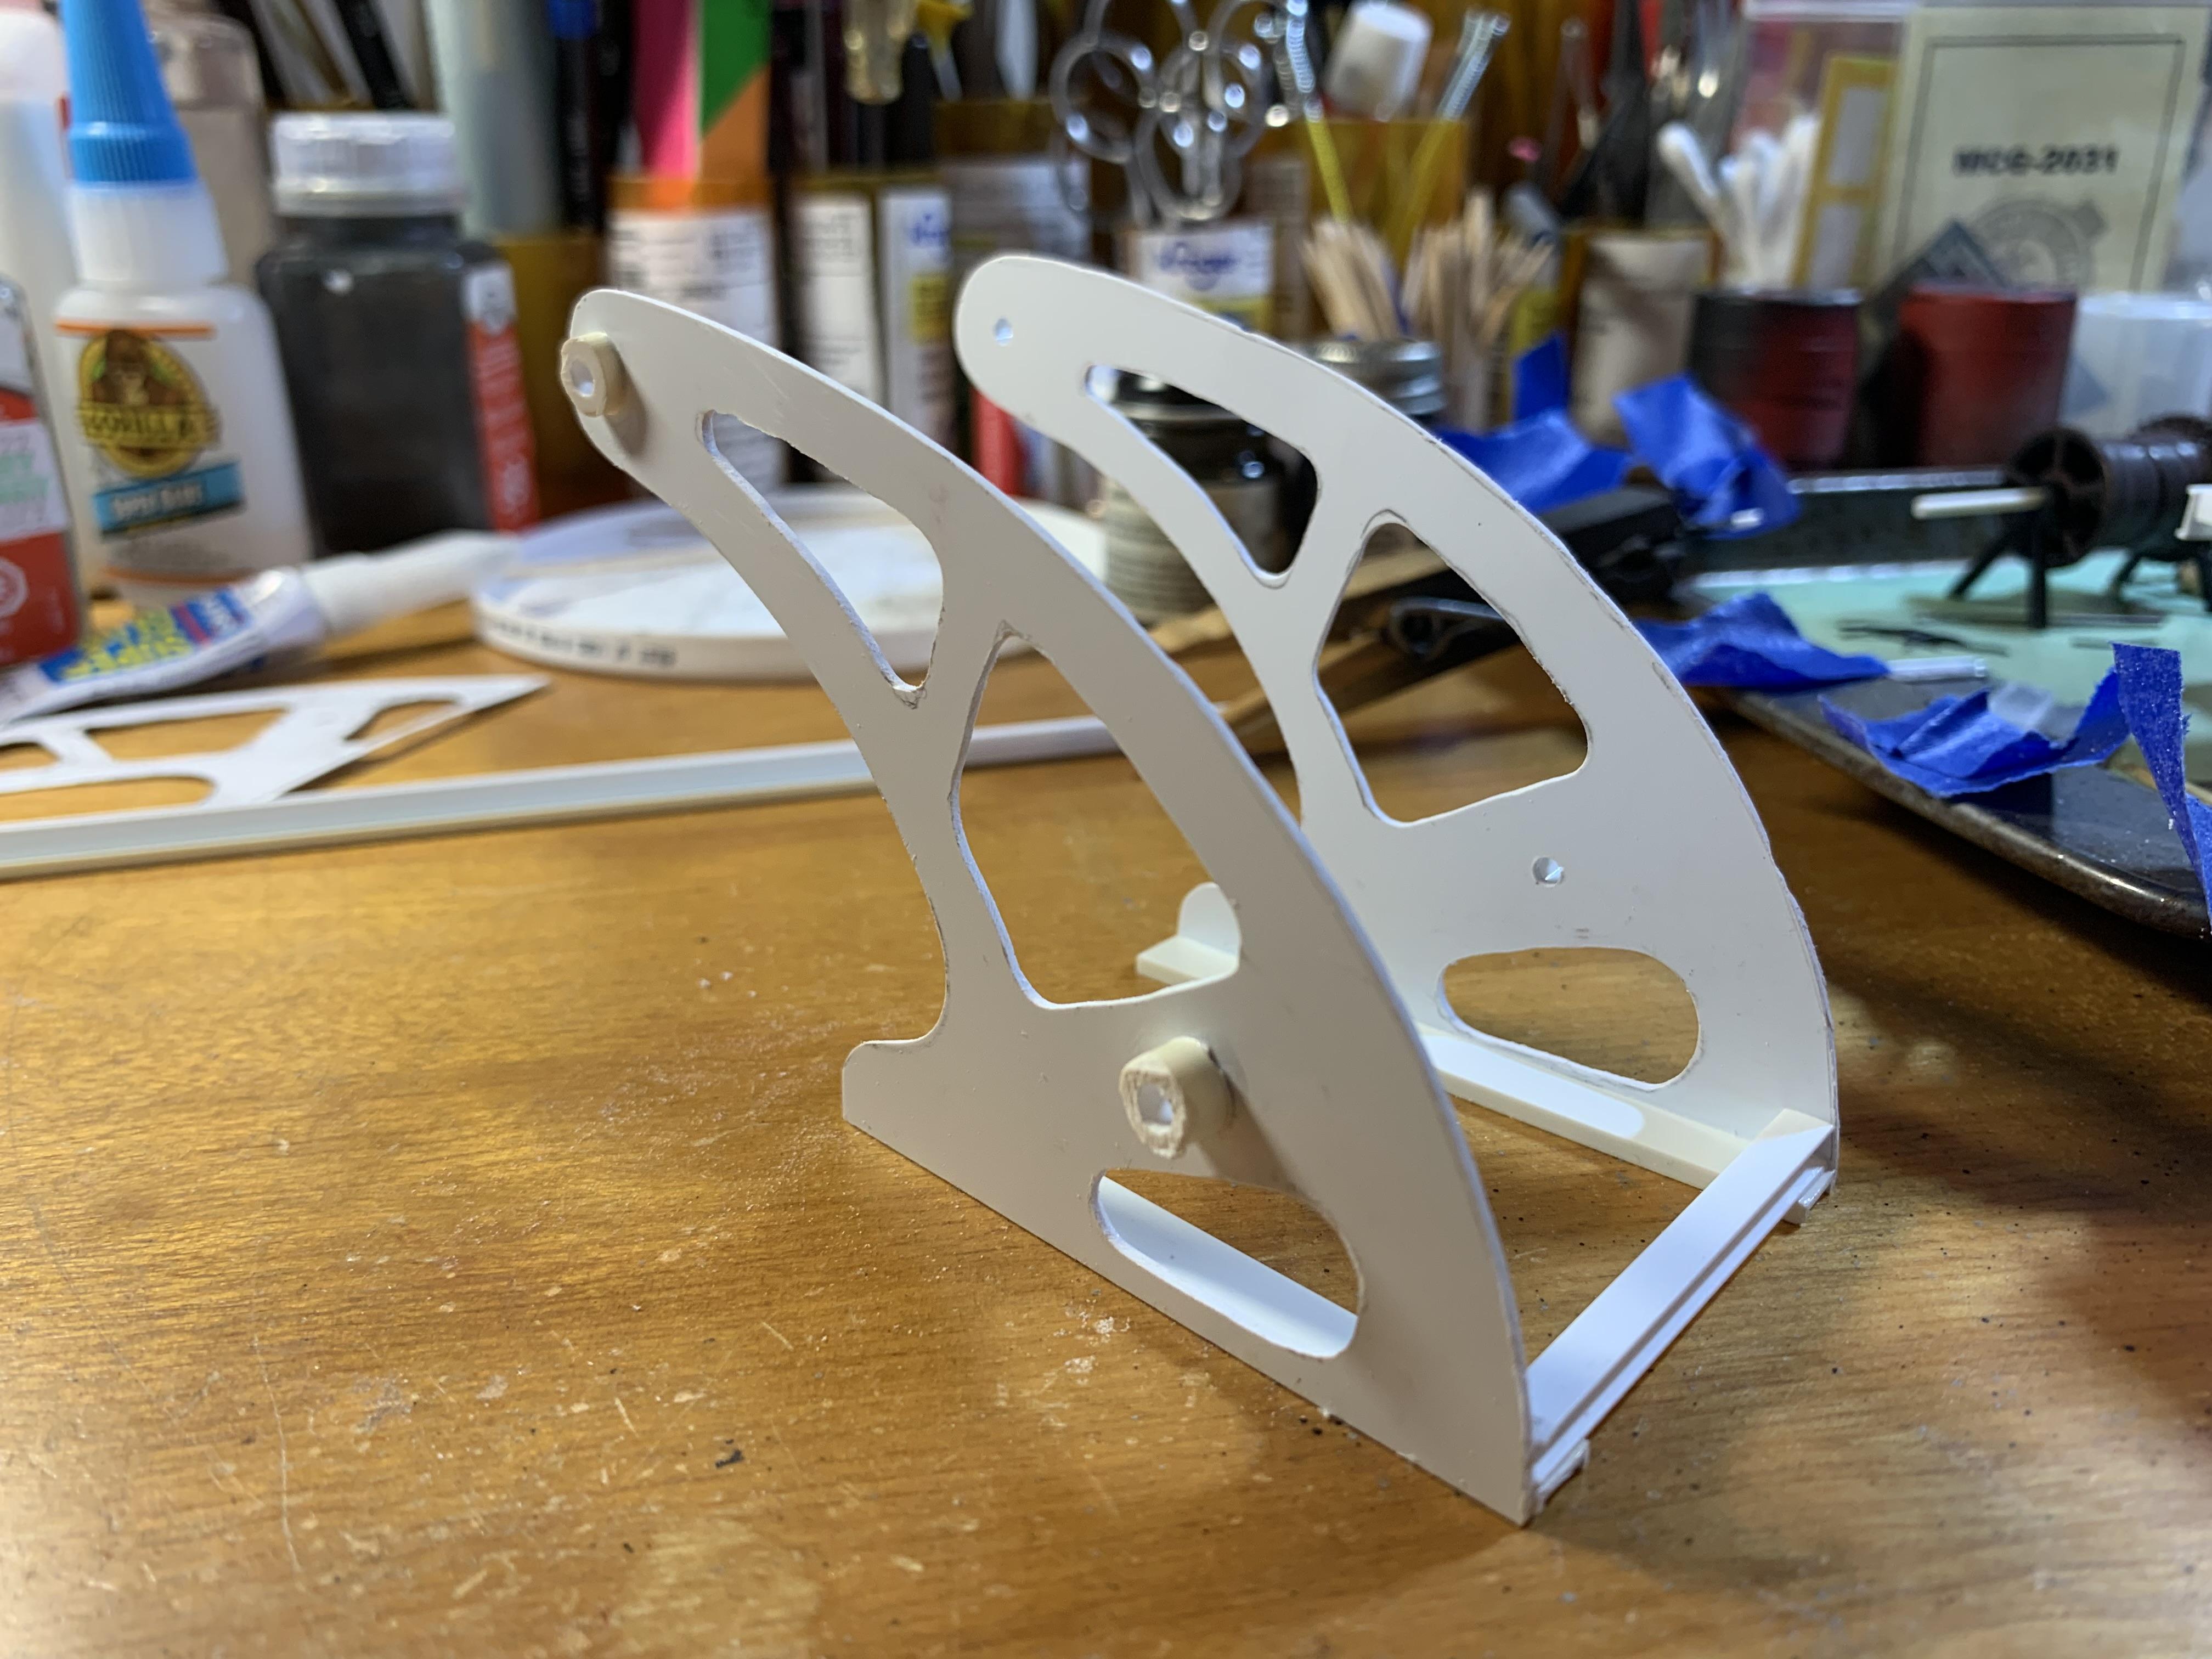
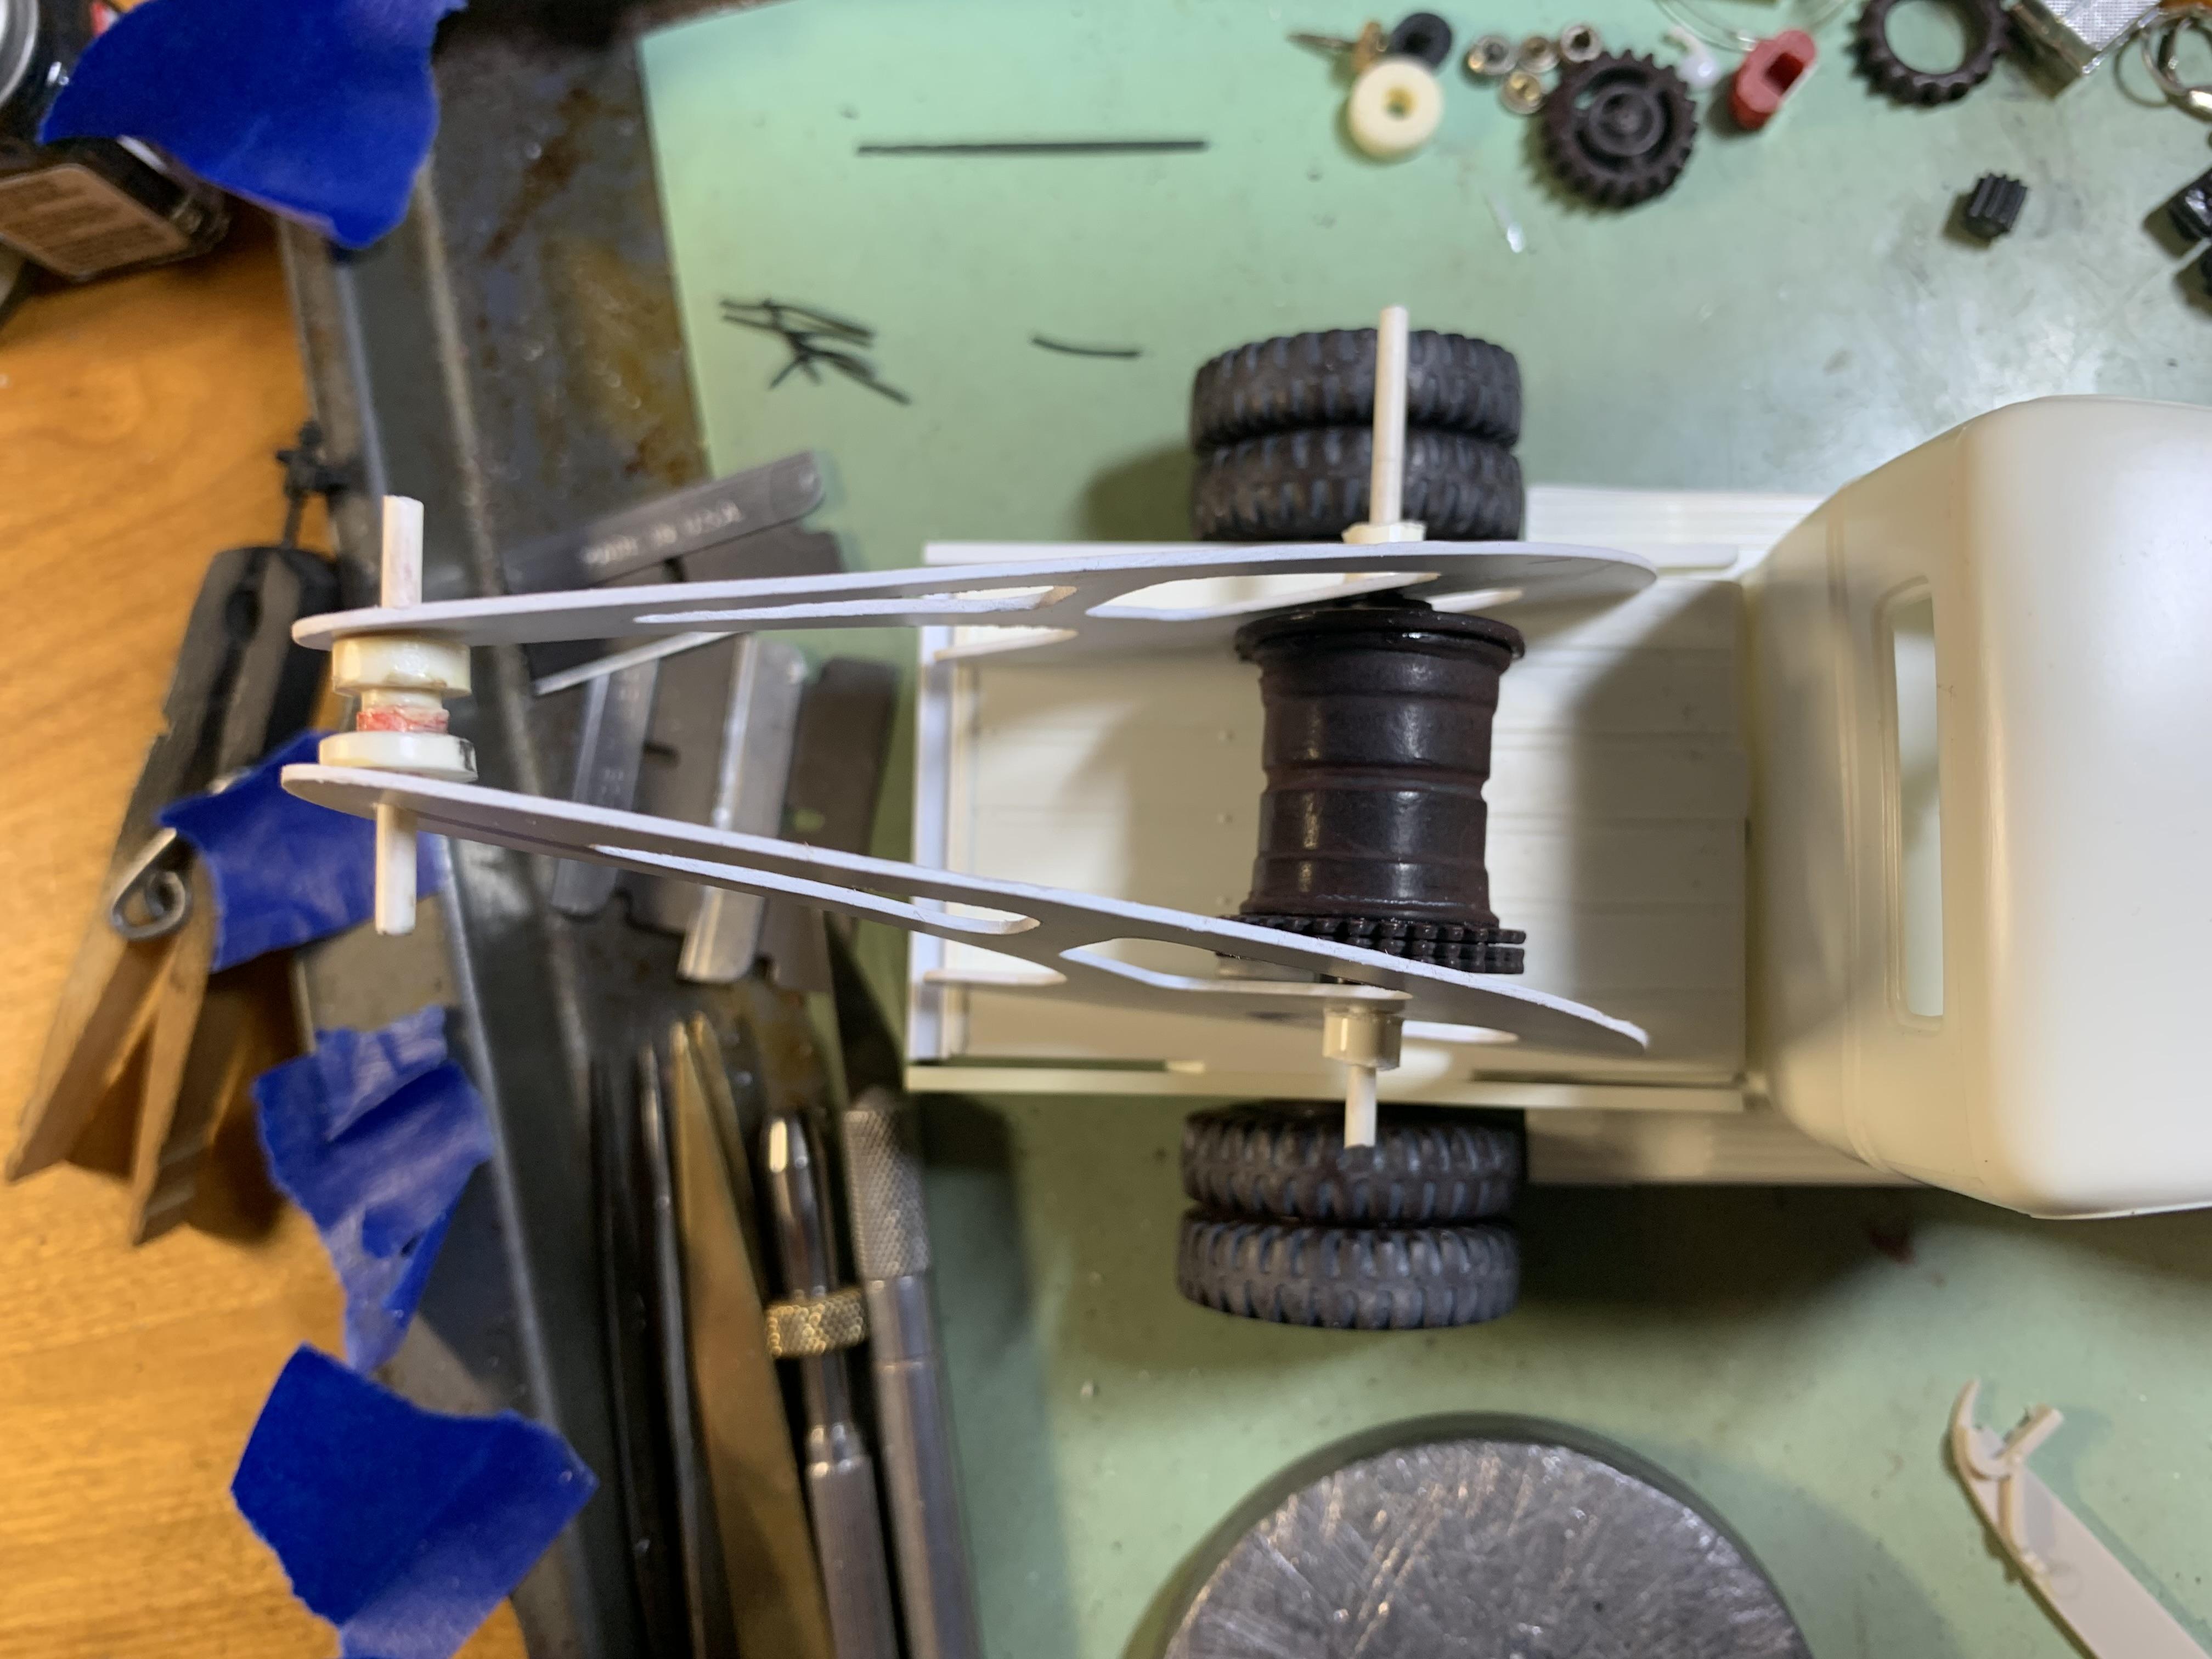
Got the towing boom sides finished up and mocked them up with the winch drum. Working now on the support frame and bearing blocks.
-
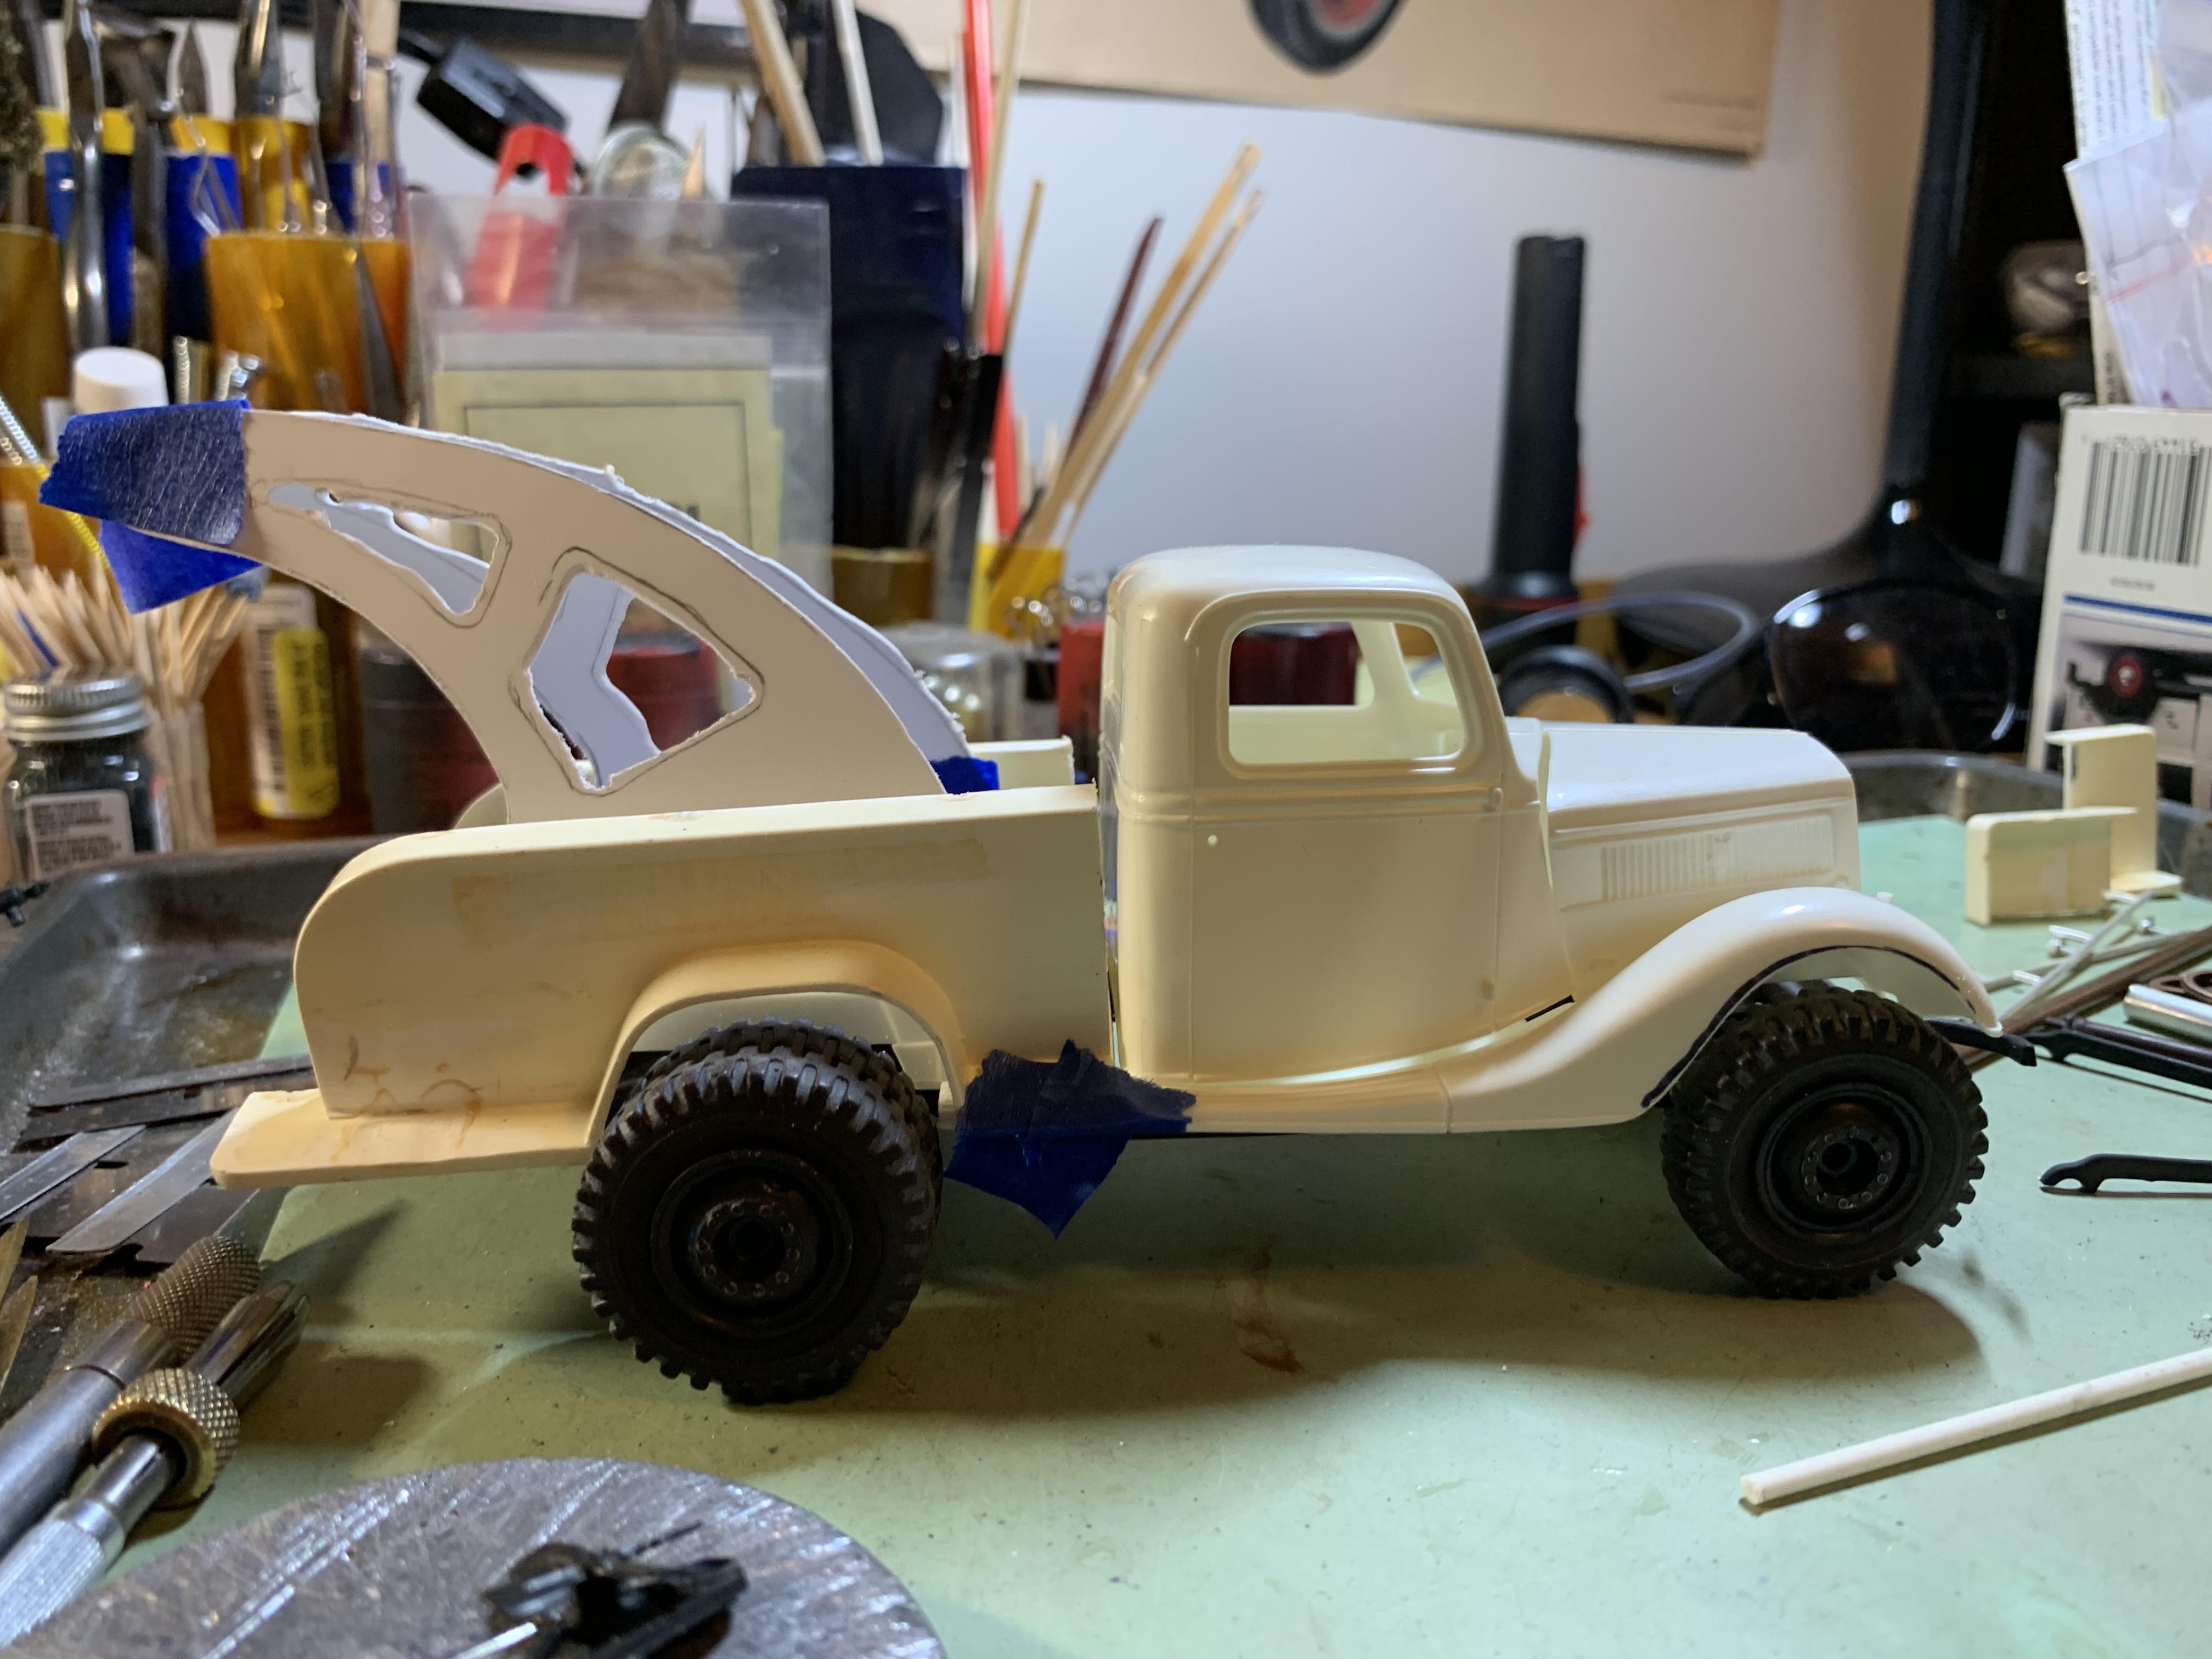
More progress- front fender radii enlarged to clear the tires, rear sides trimmed, and boom sides have been cut out and the right side nearly finished. Also weathered the chassis, and the wheels and tires are permanently mounted.
-
Nice start, Bob! Looking forward to more!
-
Thanks for sharing- seriously kool cars!
-
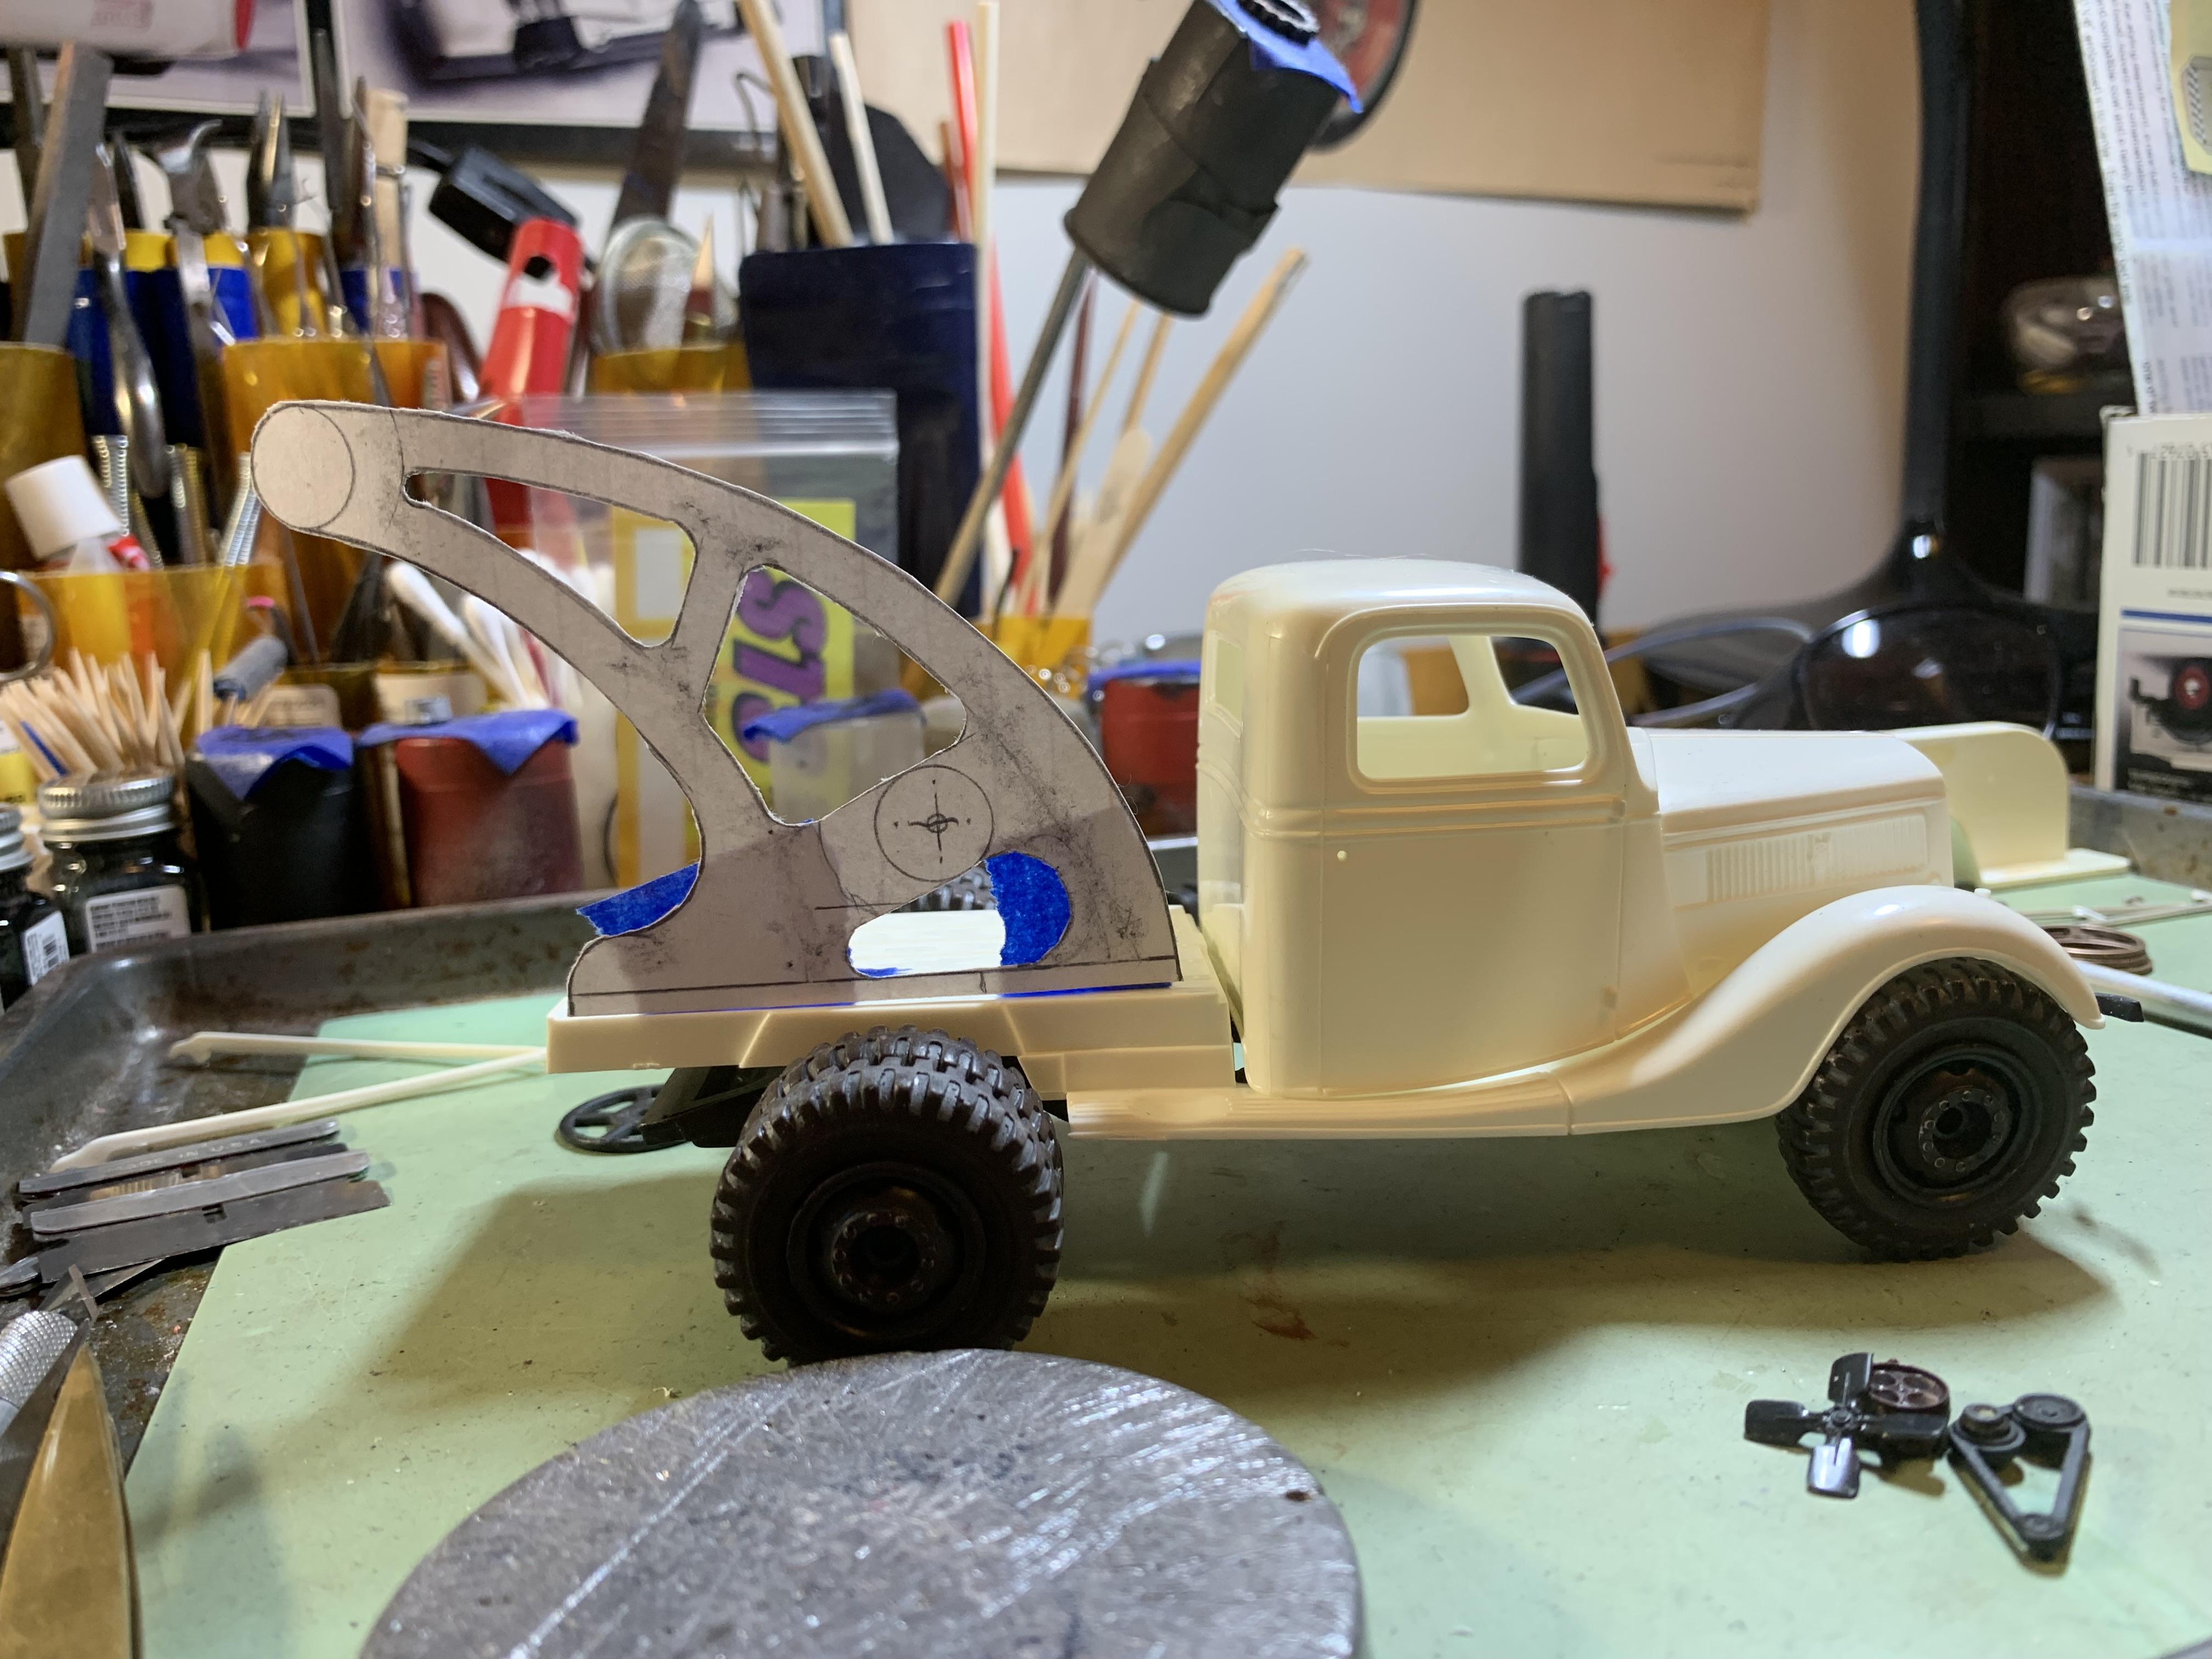
Got more done, so here are more pix! Chassis is now painted but not yet weathered. Drew up a better proportioned and more accurate sketch of the tow boom and included where the winch drum will be in relation to it. Pics include the tow boom sketch only, and also with the rear sides in place. However, the sides should come up to the running boards of the fender and bed piece and should not rest on the tires. Also, the sides will be shortened to end just behind the cab.
-
how to blacken chain?
Paul Payne replied to Paul Payne's topic in Model Building Questions and Answers
Thanks, all! -
I am building a 1930's tow truck and the winch will use chain. The chain I have is silver, and I would like to blacken it or at least darken it. Paint simply chips away. Any ideas?
-
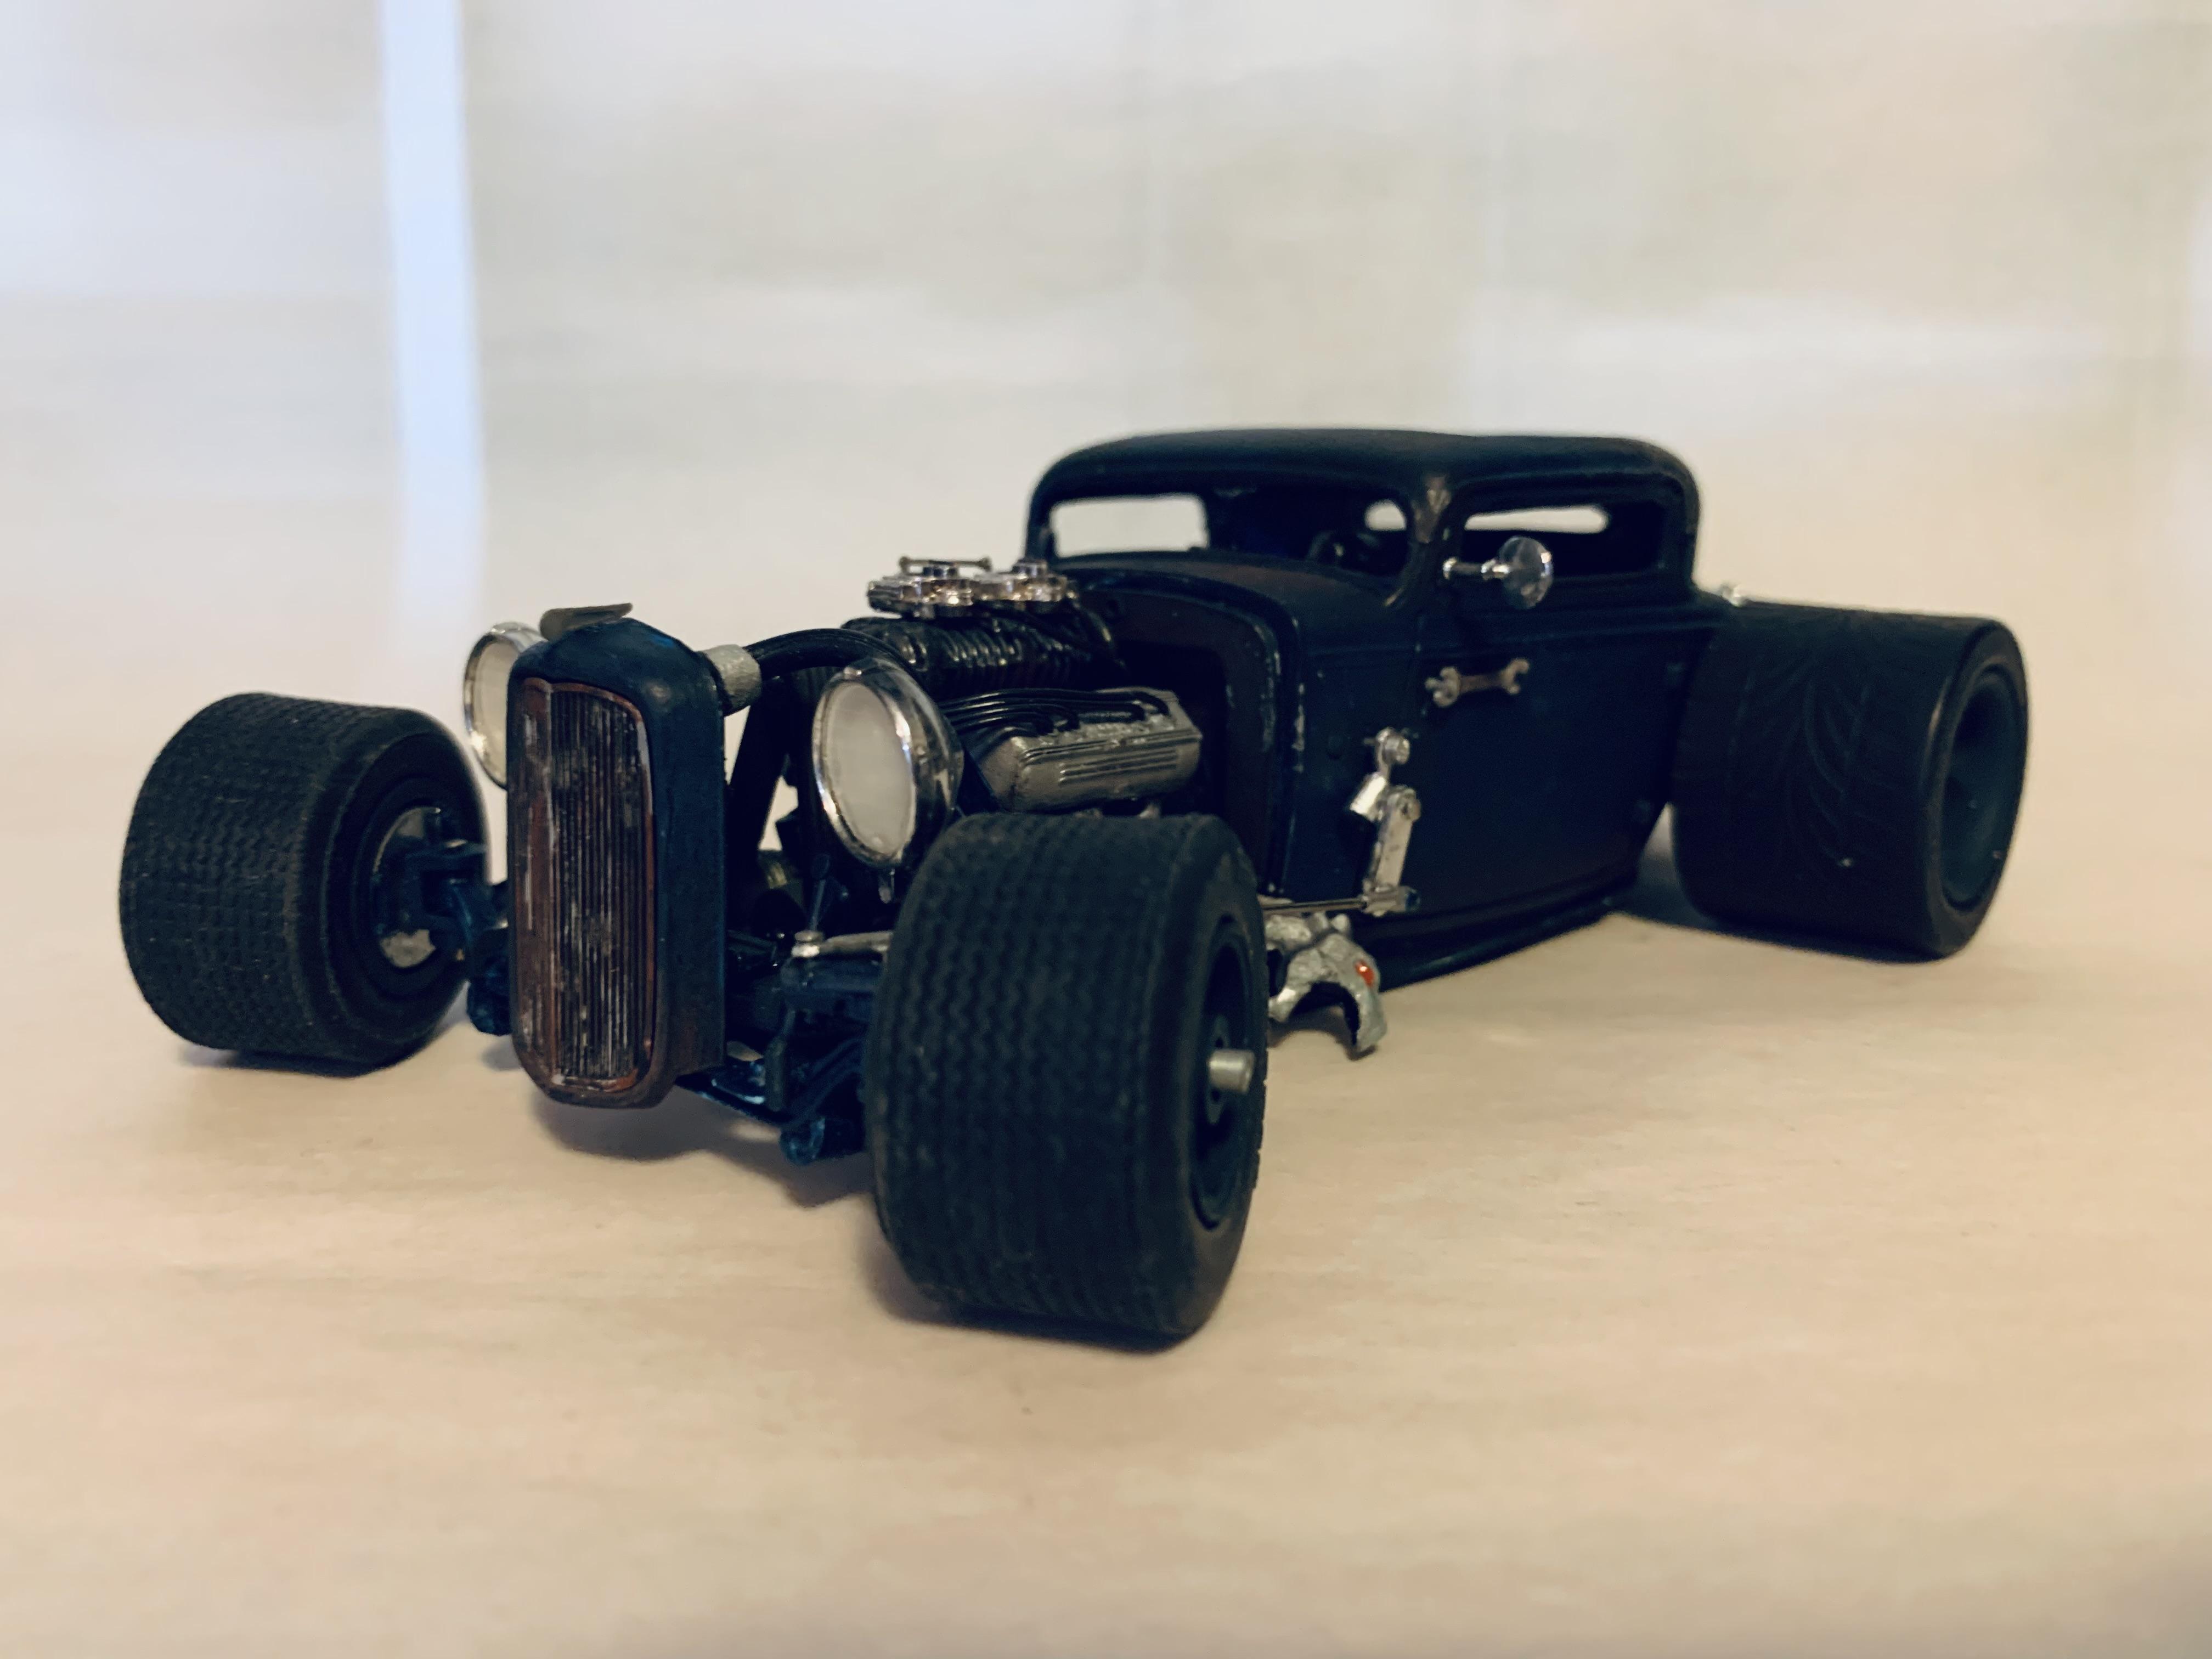
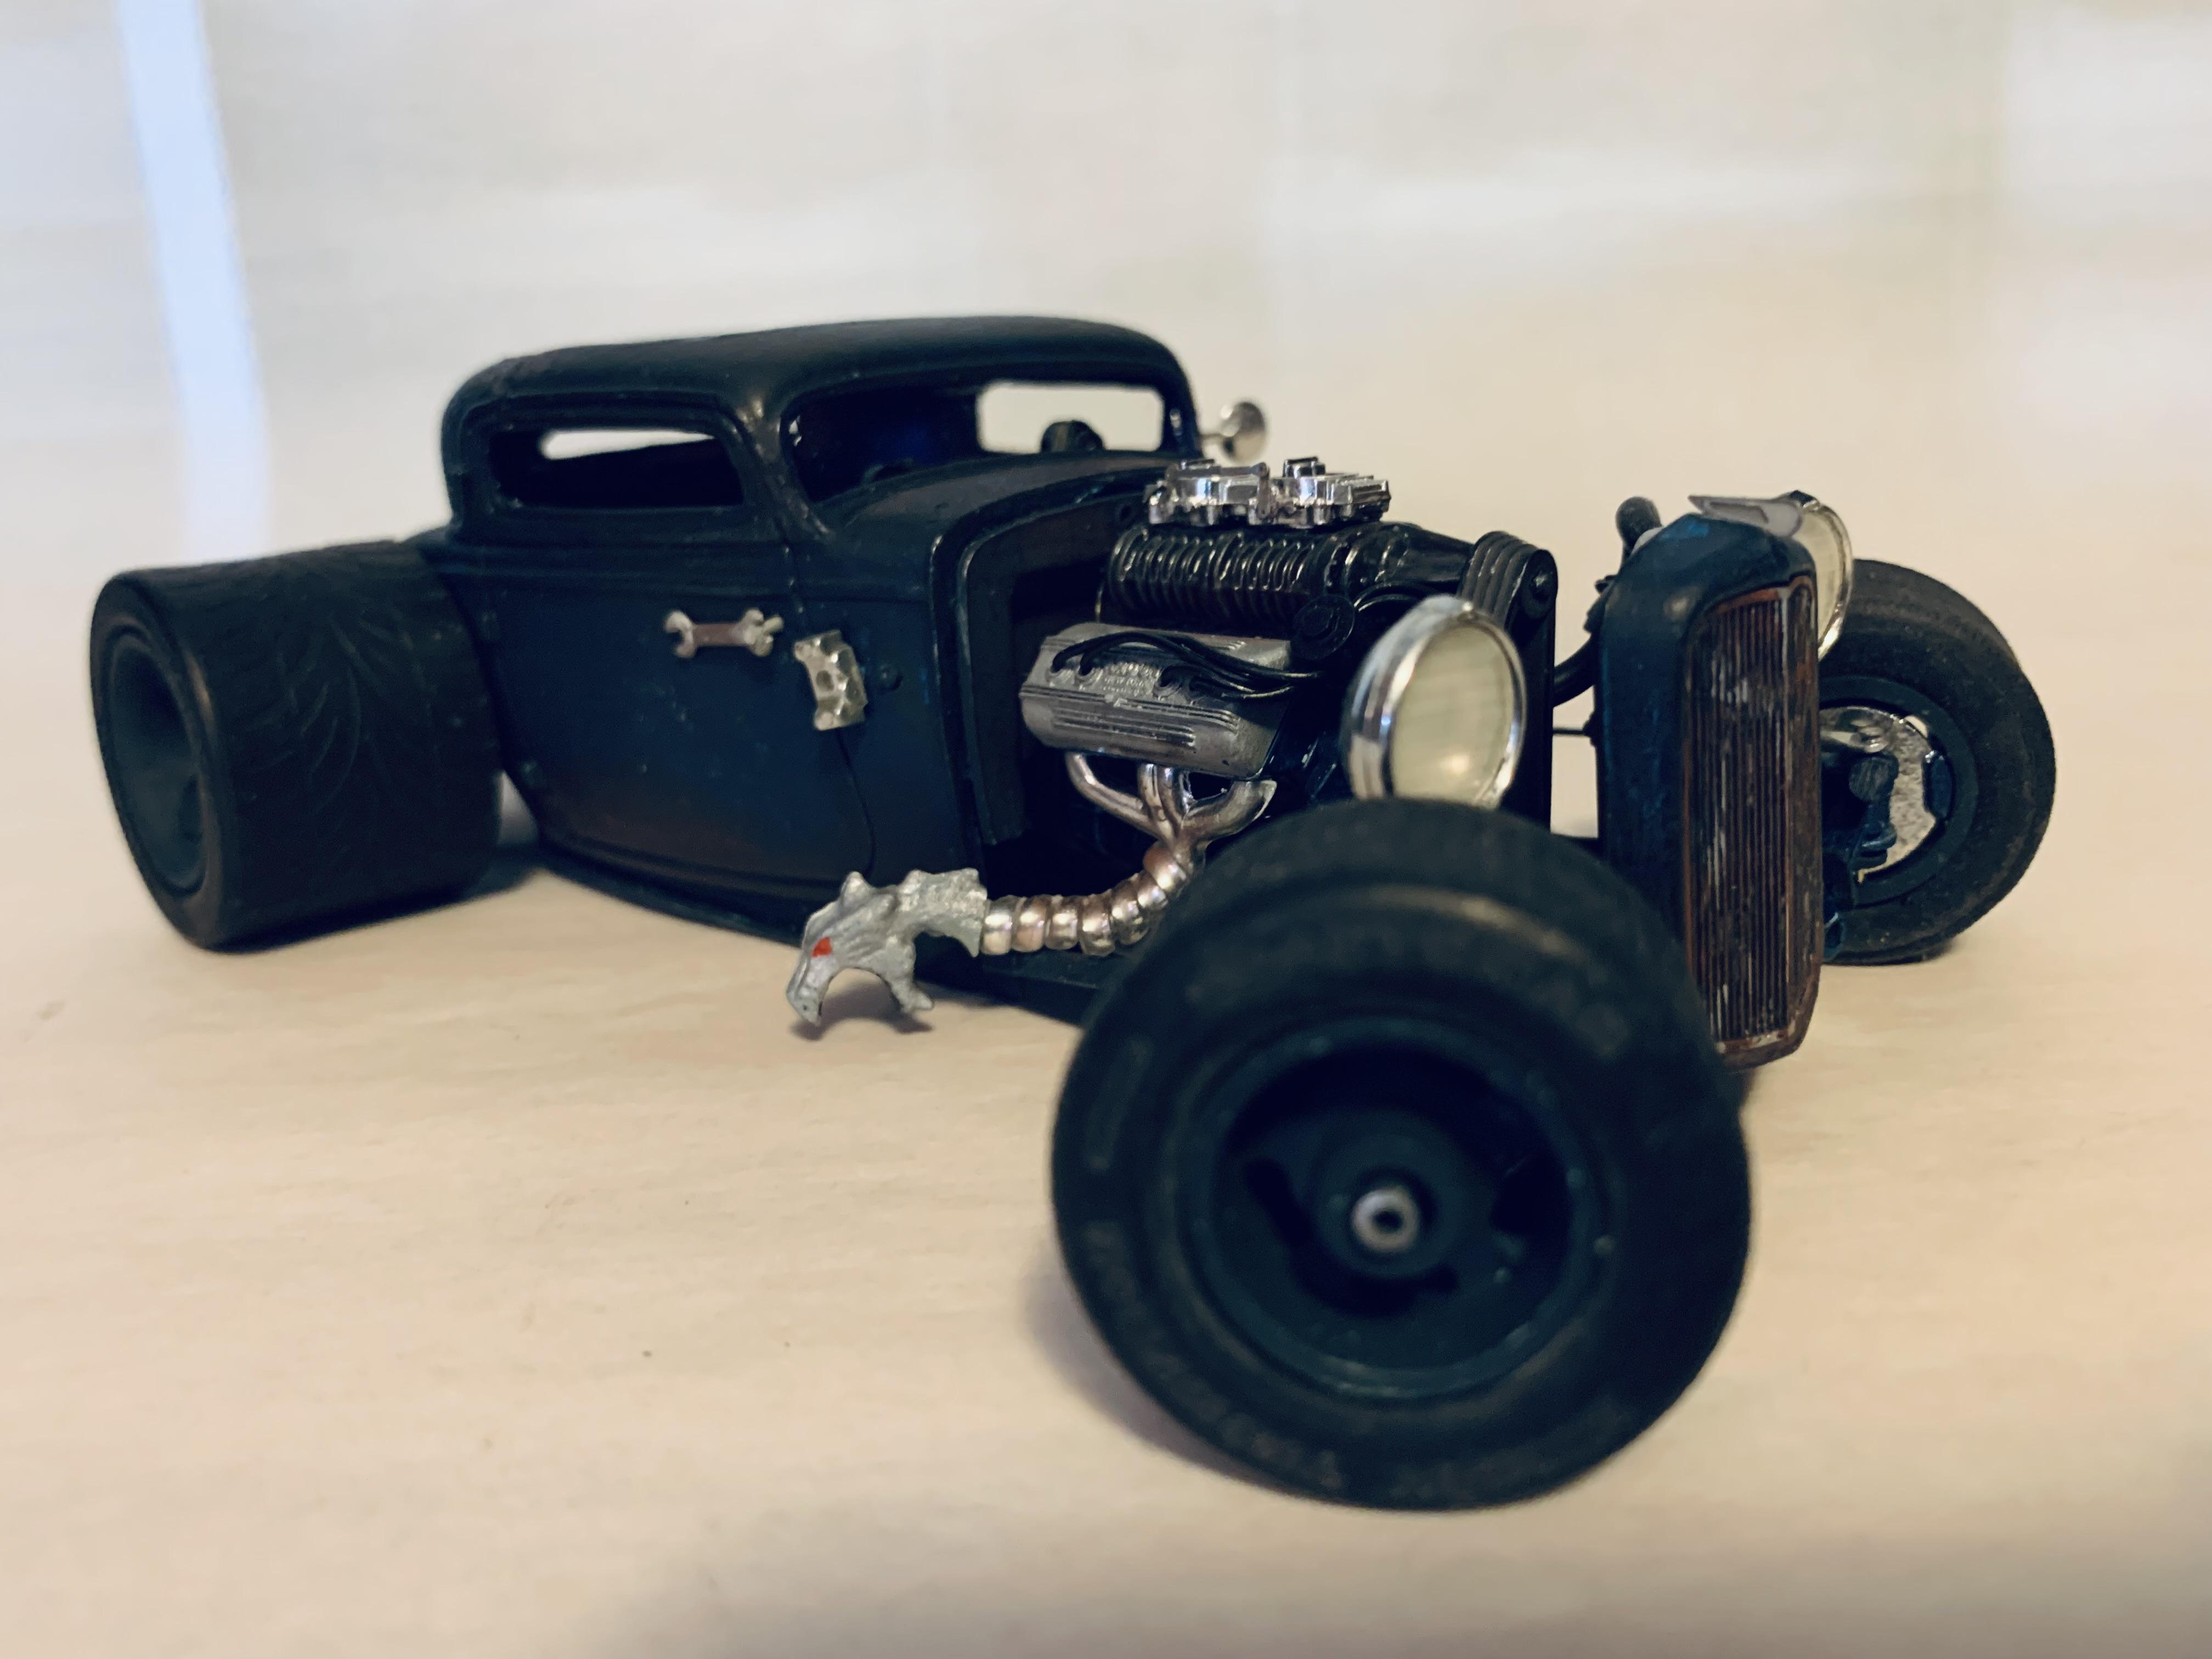
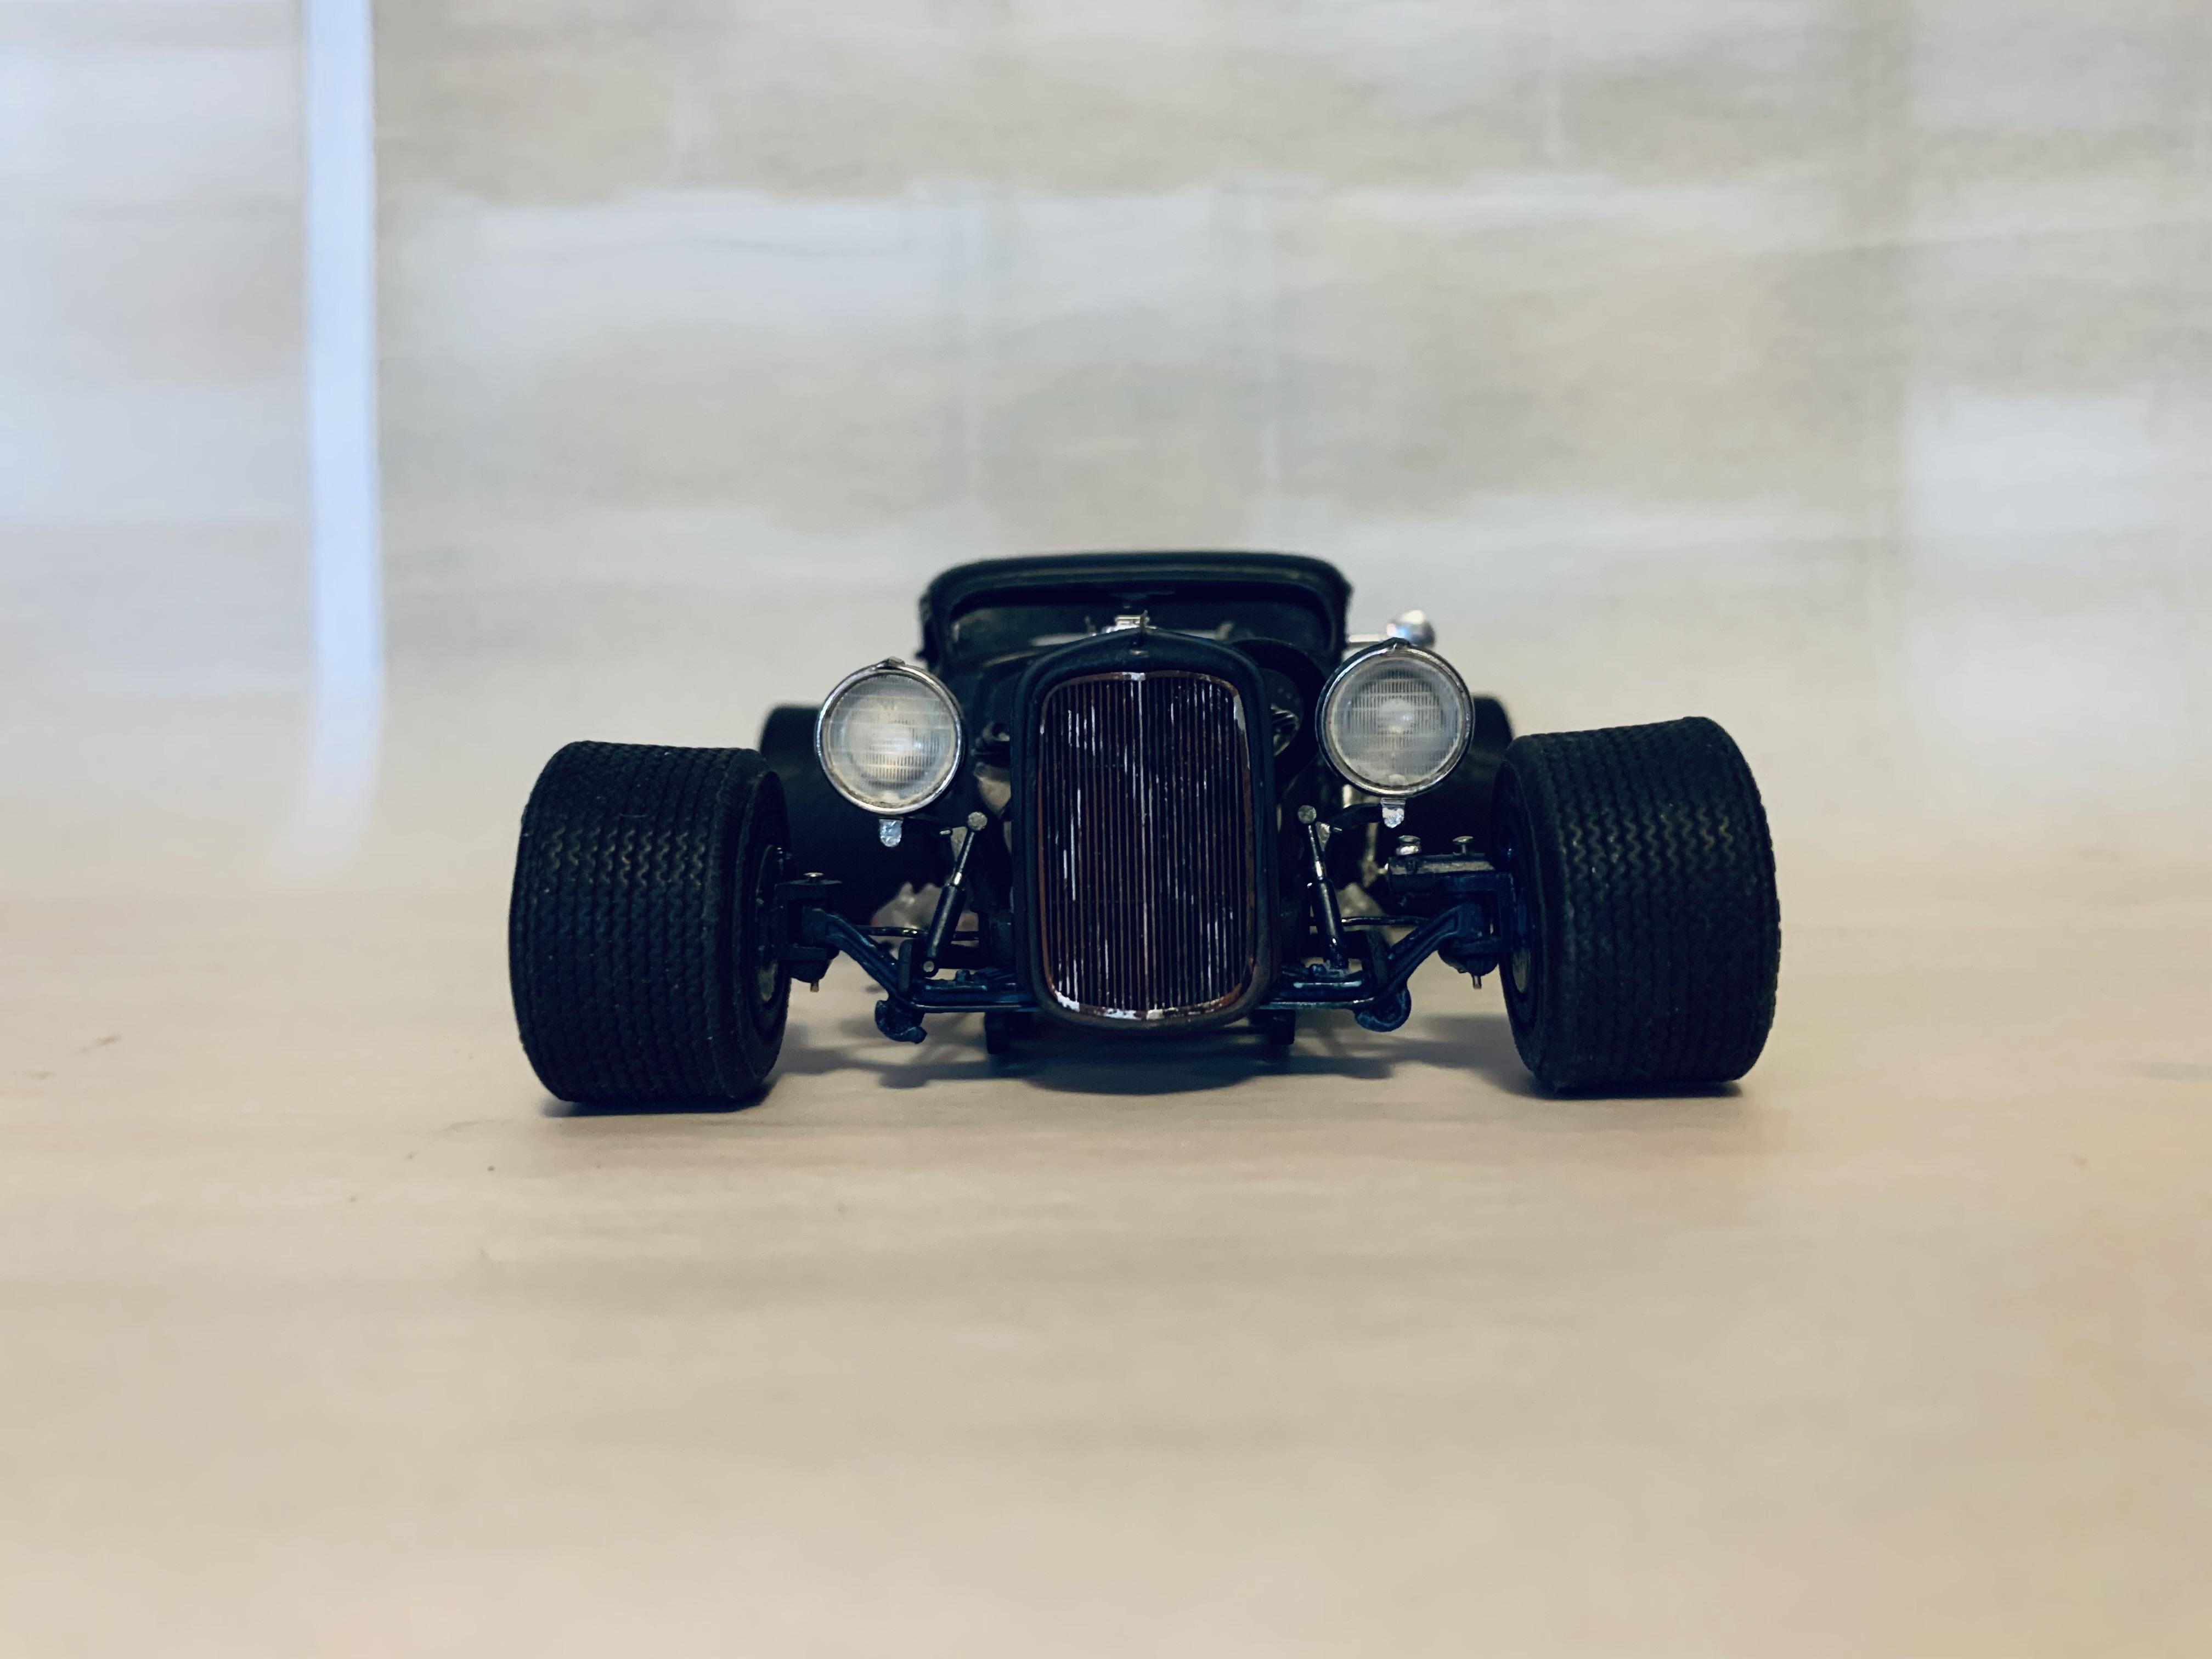
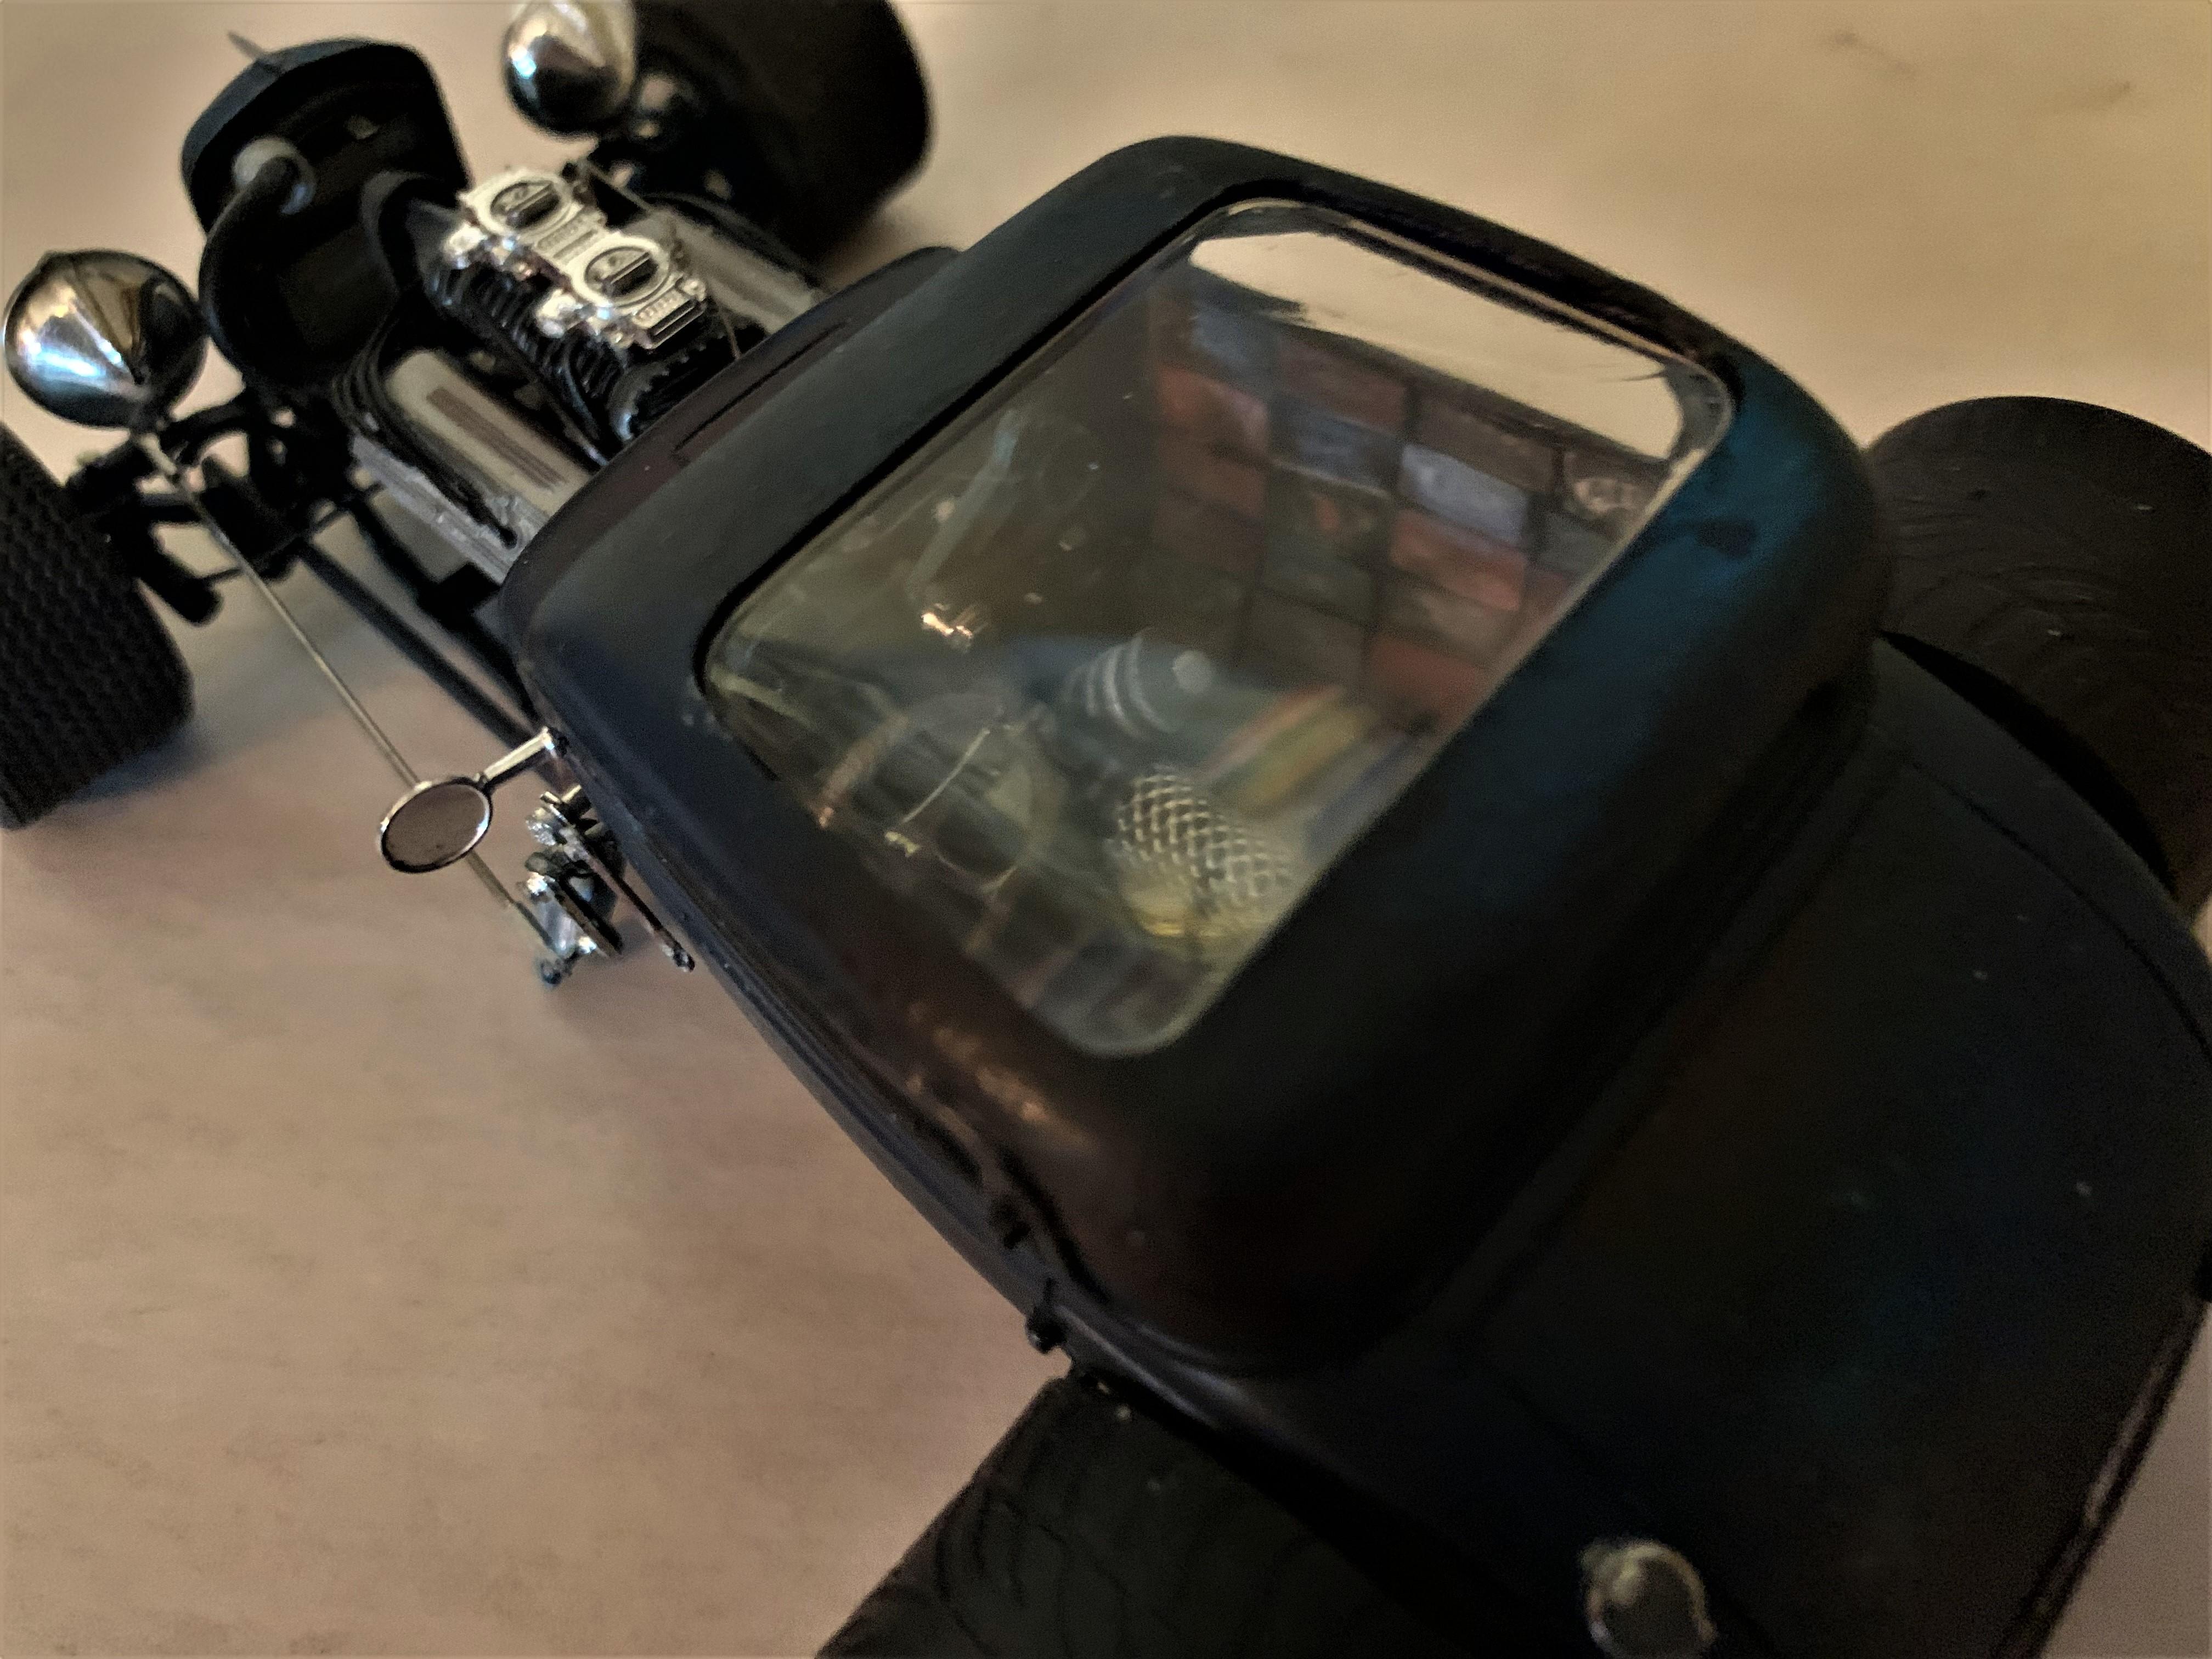
Rat style. Dragon head exhausts.
-
Wheels and tires weathered, and chassis up on all six- no glue, just test fitting and positioning, also engine weathered and positioned.
-
I agree- the material between the outer edges and the holes will probably be thinned down.