Kit Karson
-
Posts
1,543 -
Joined
-
Last visited
Content Type
Profiles
Forums
Events
Gallery
Everything posted by Kit Karson
-
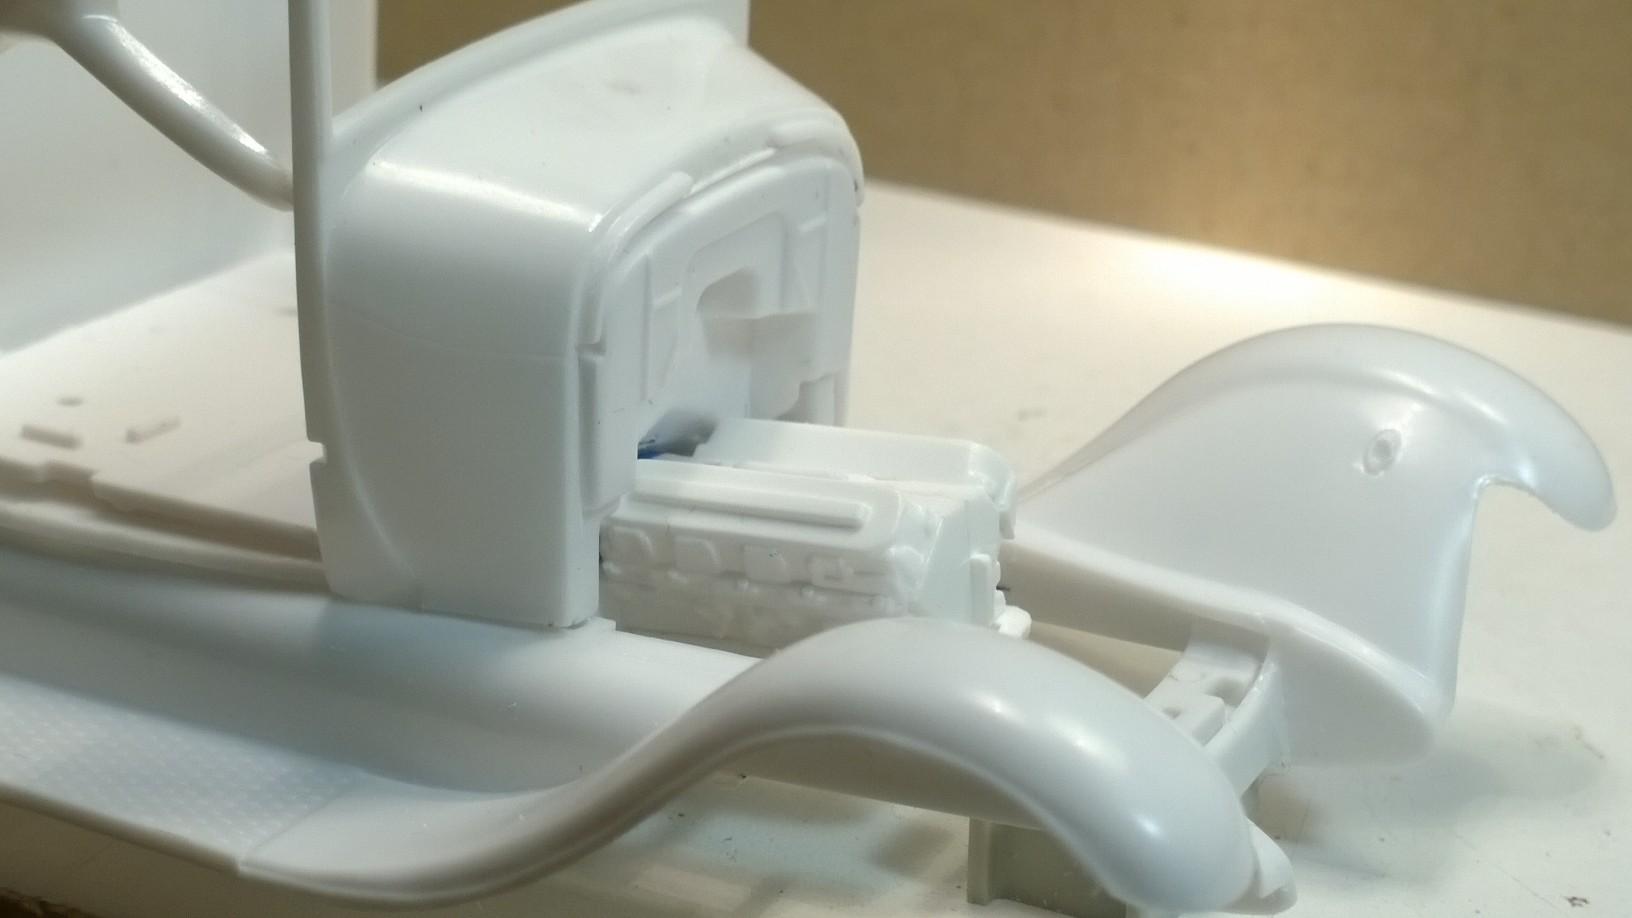
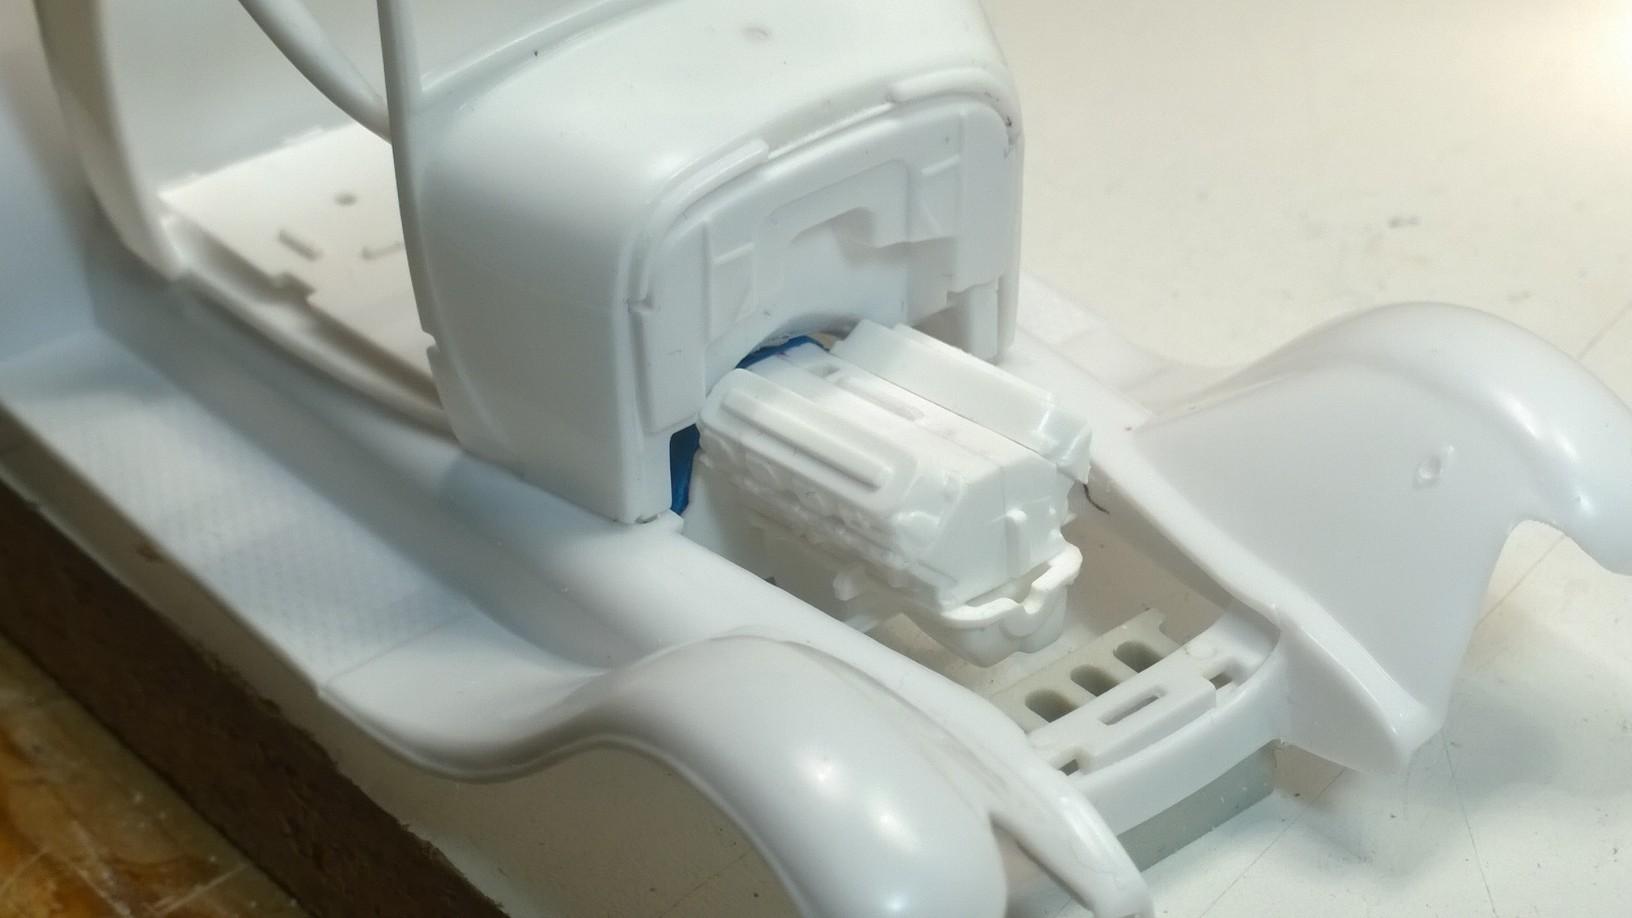
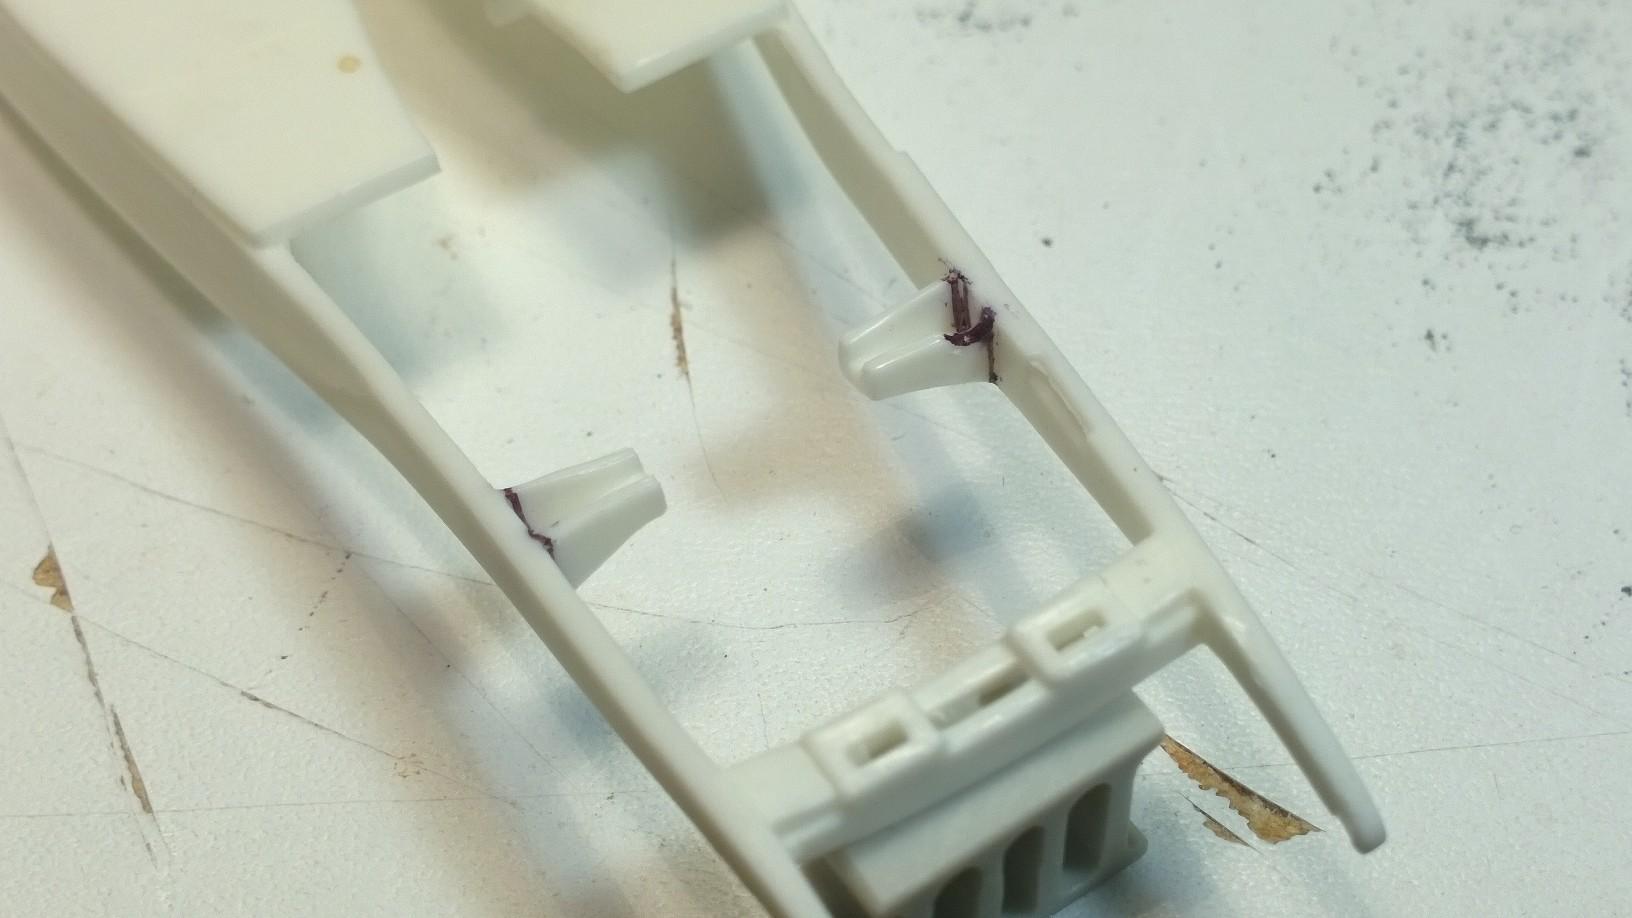
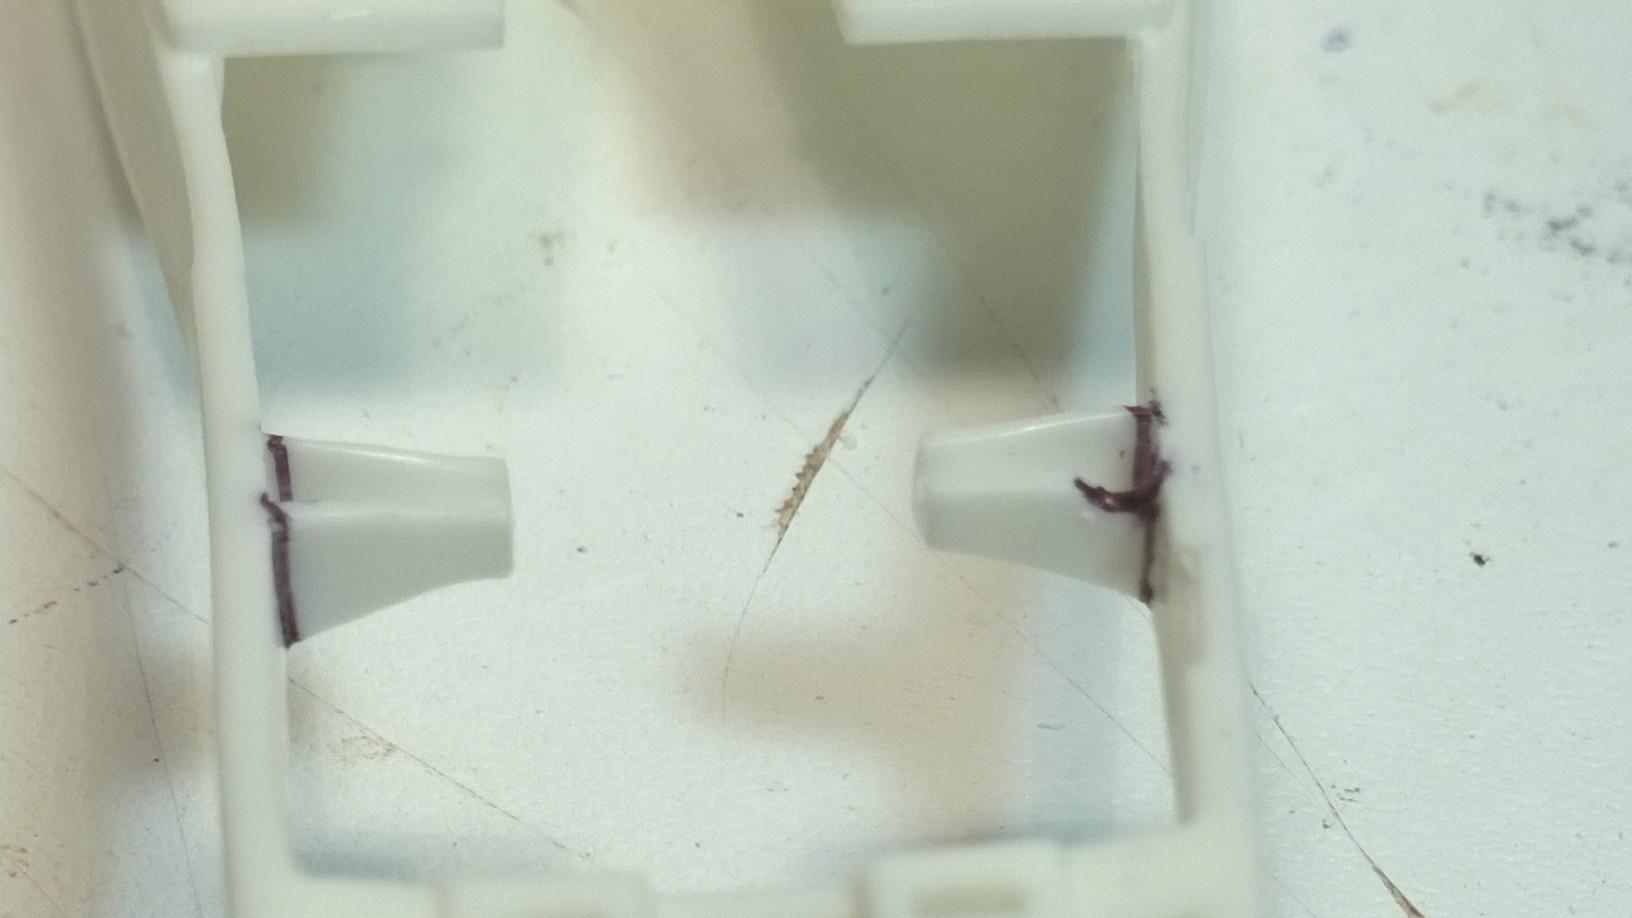
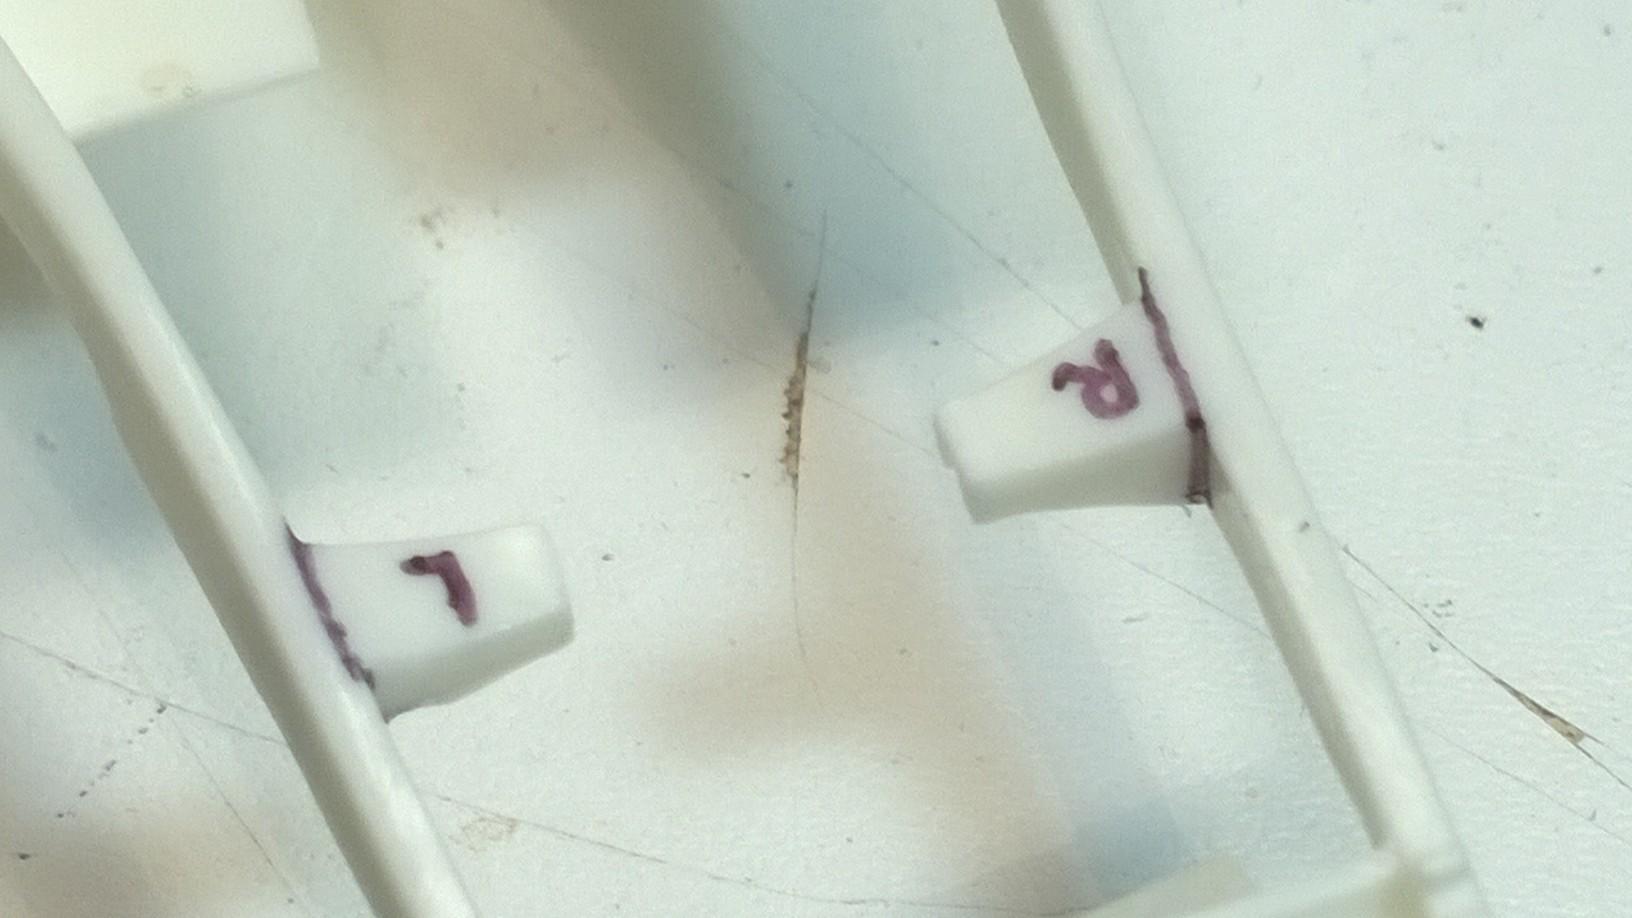
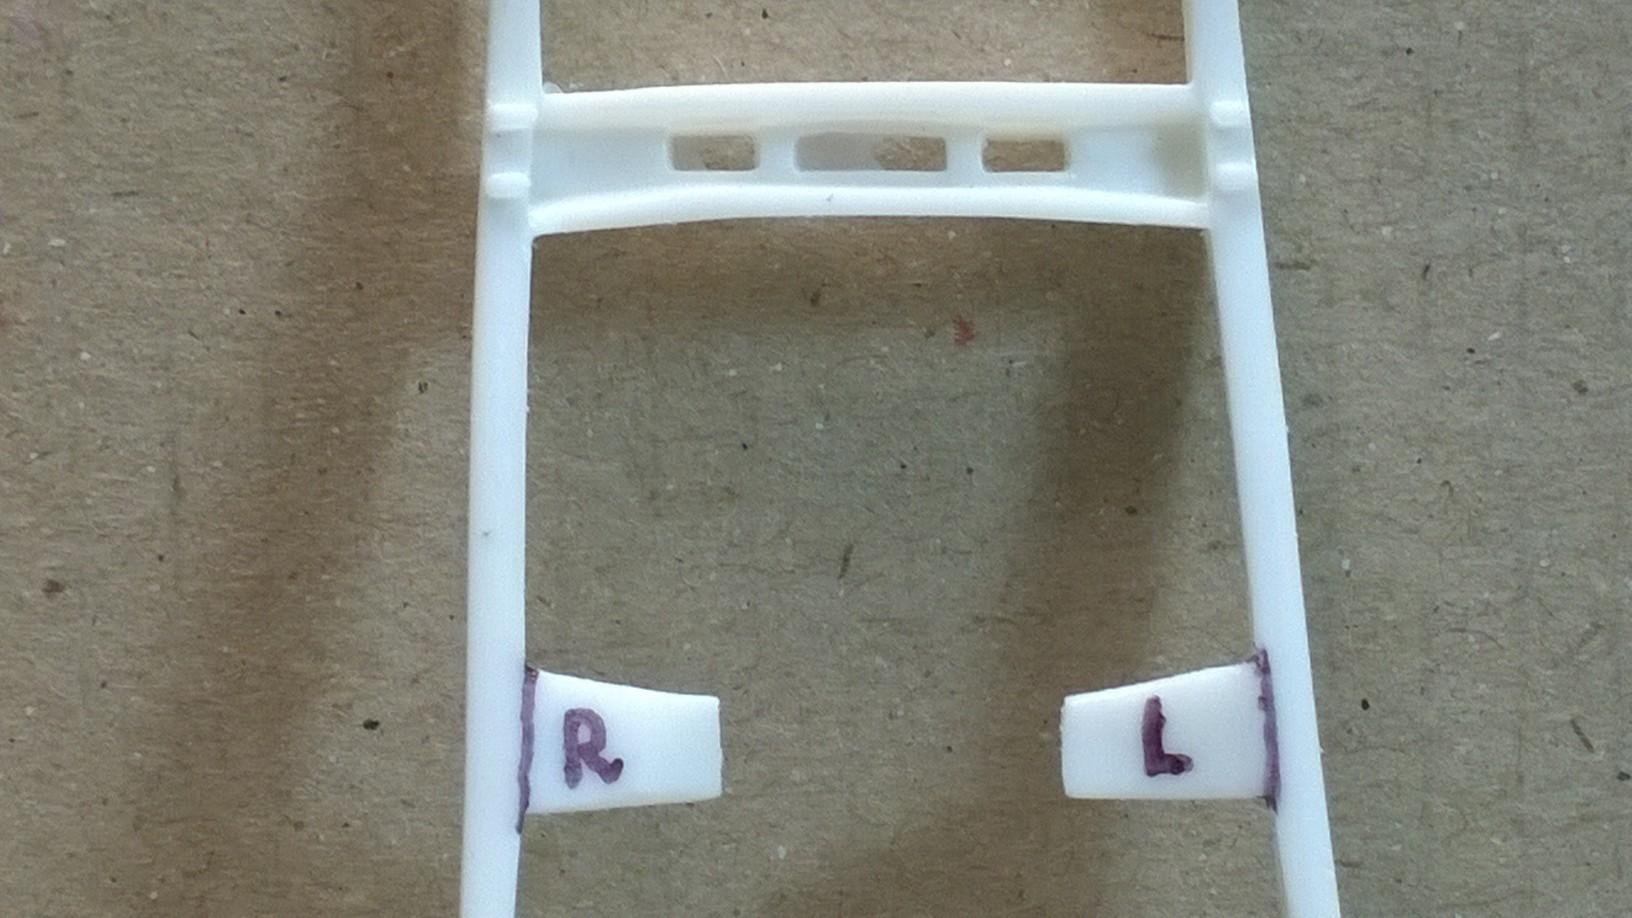
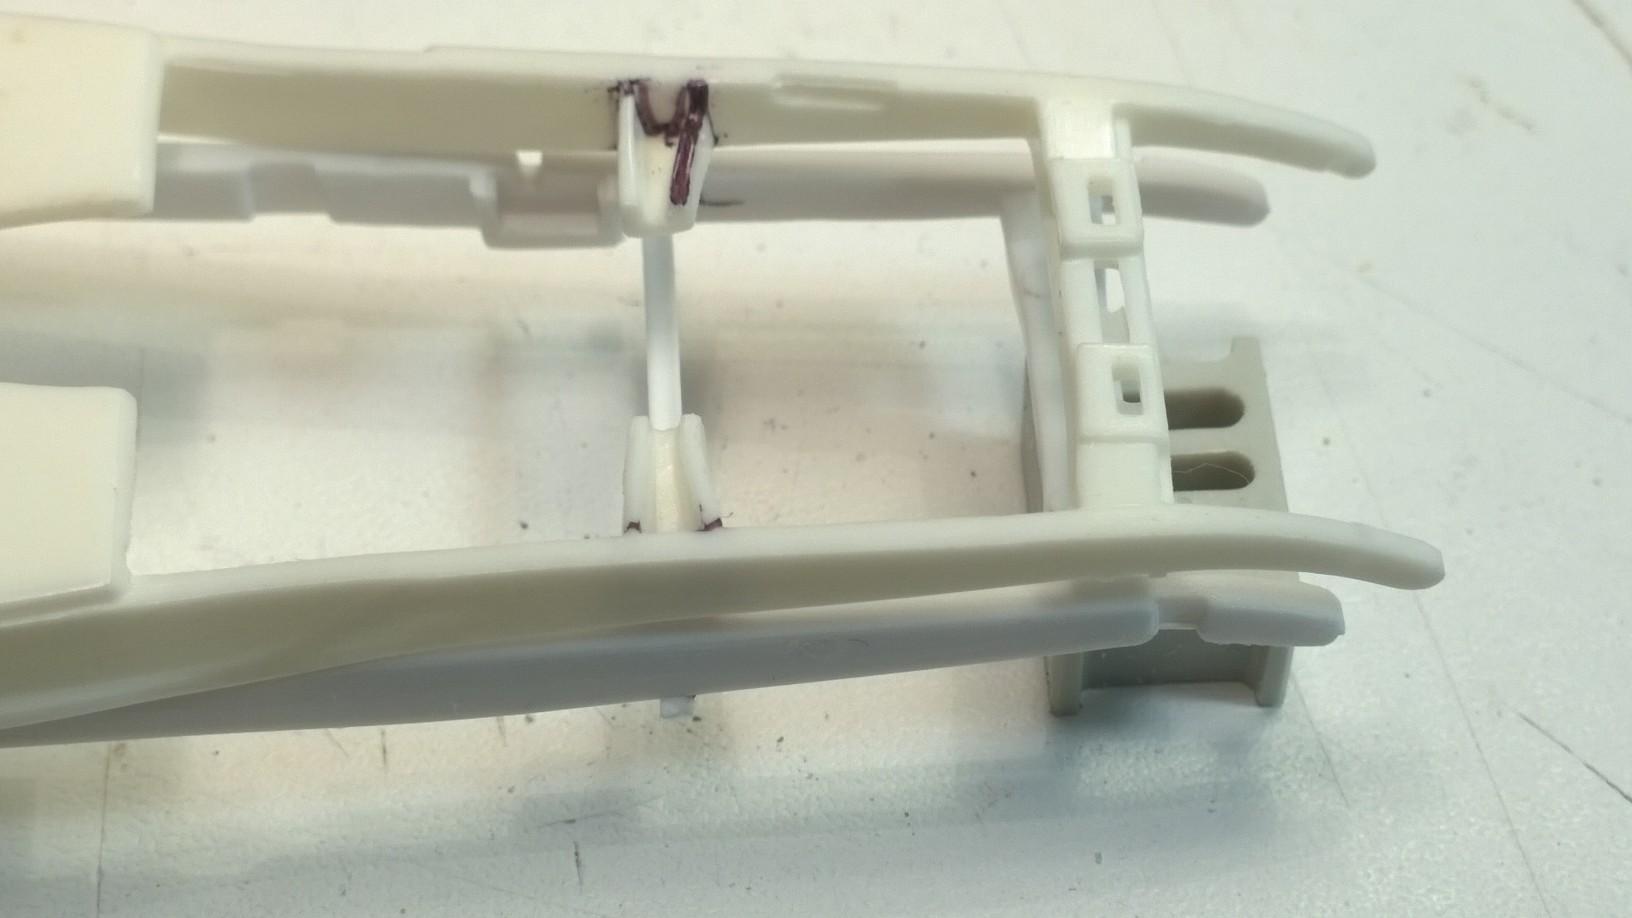
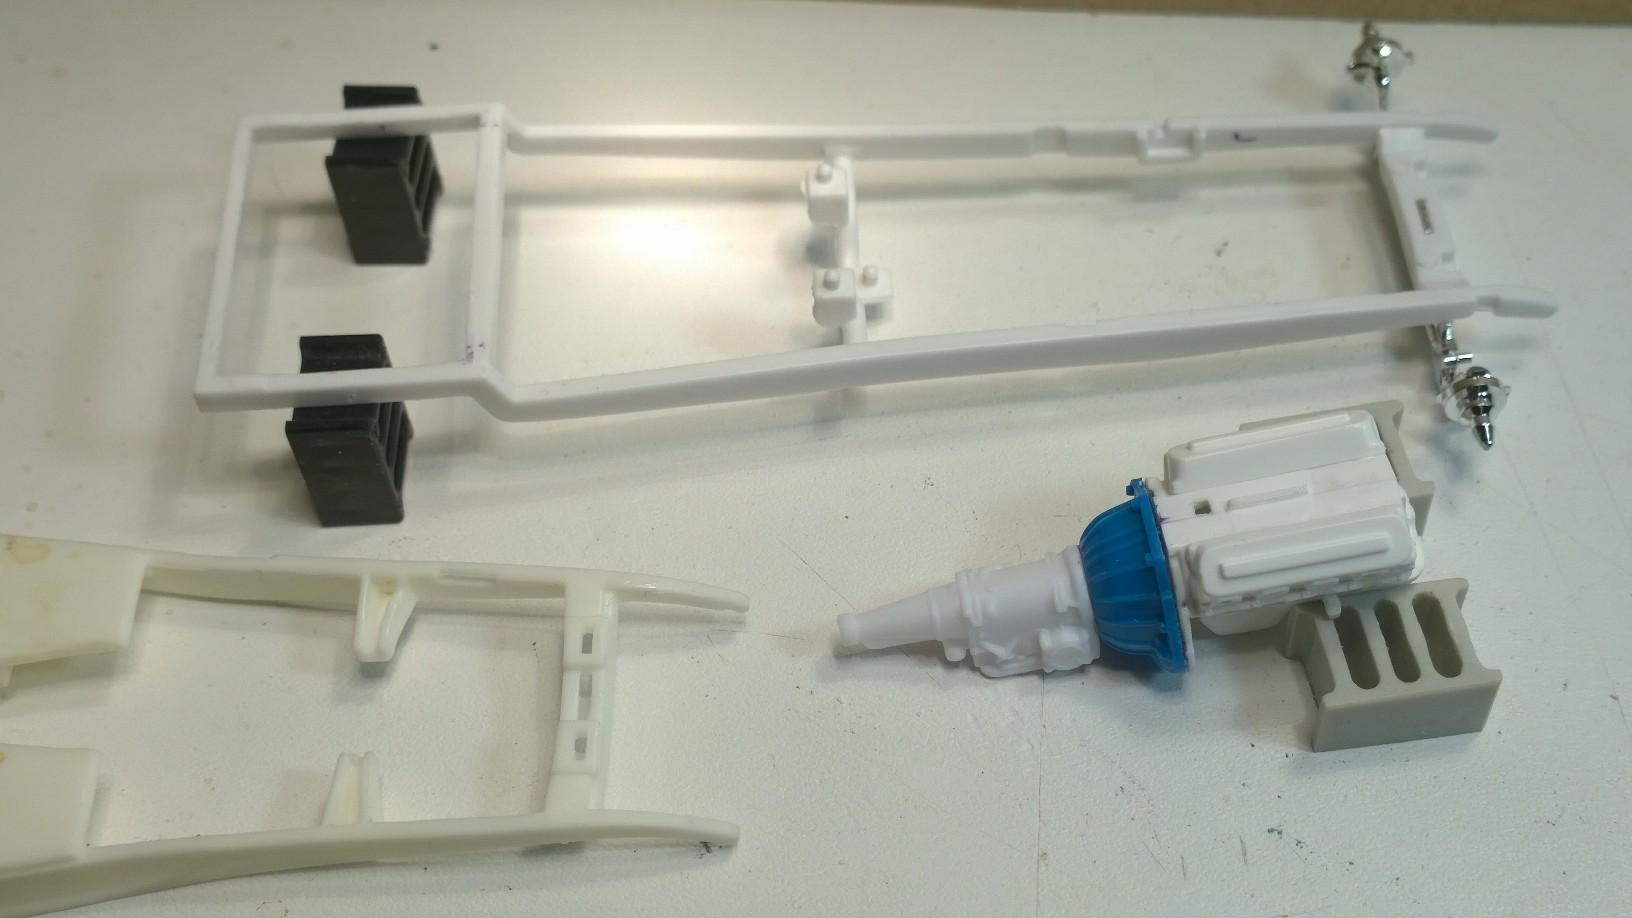
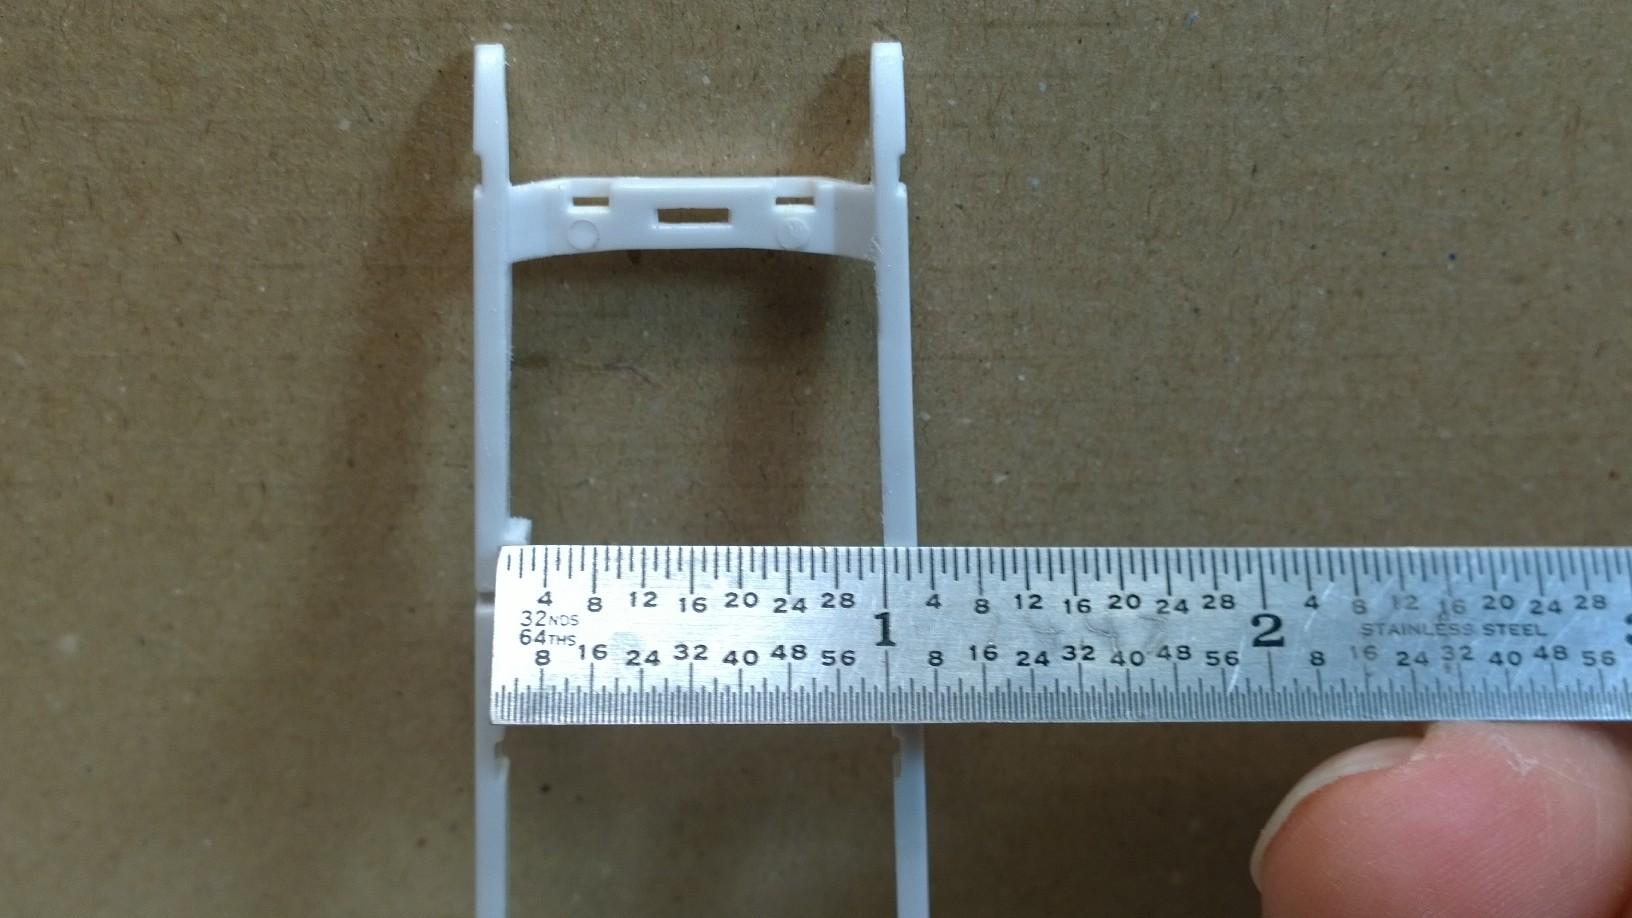
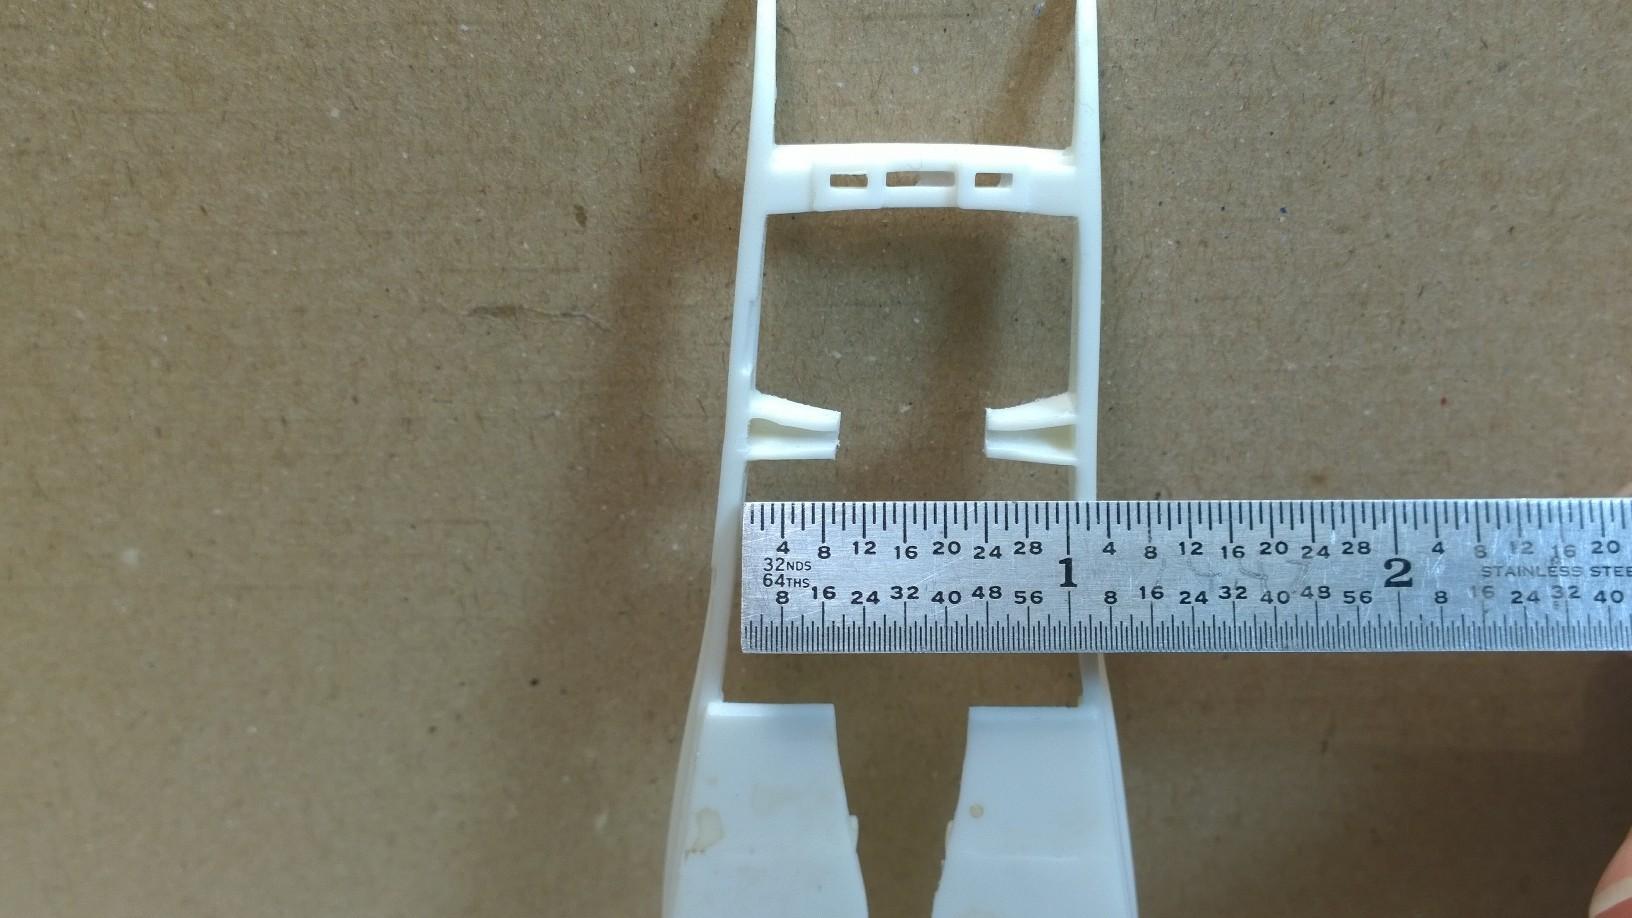
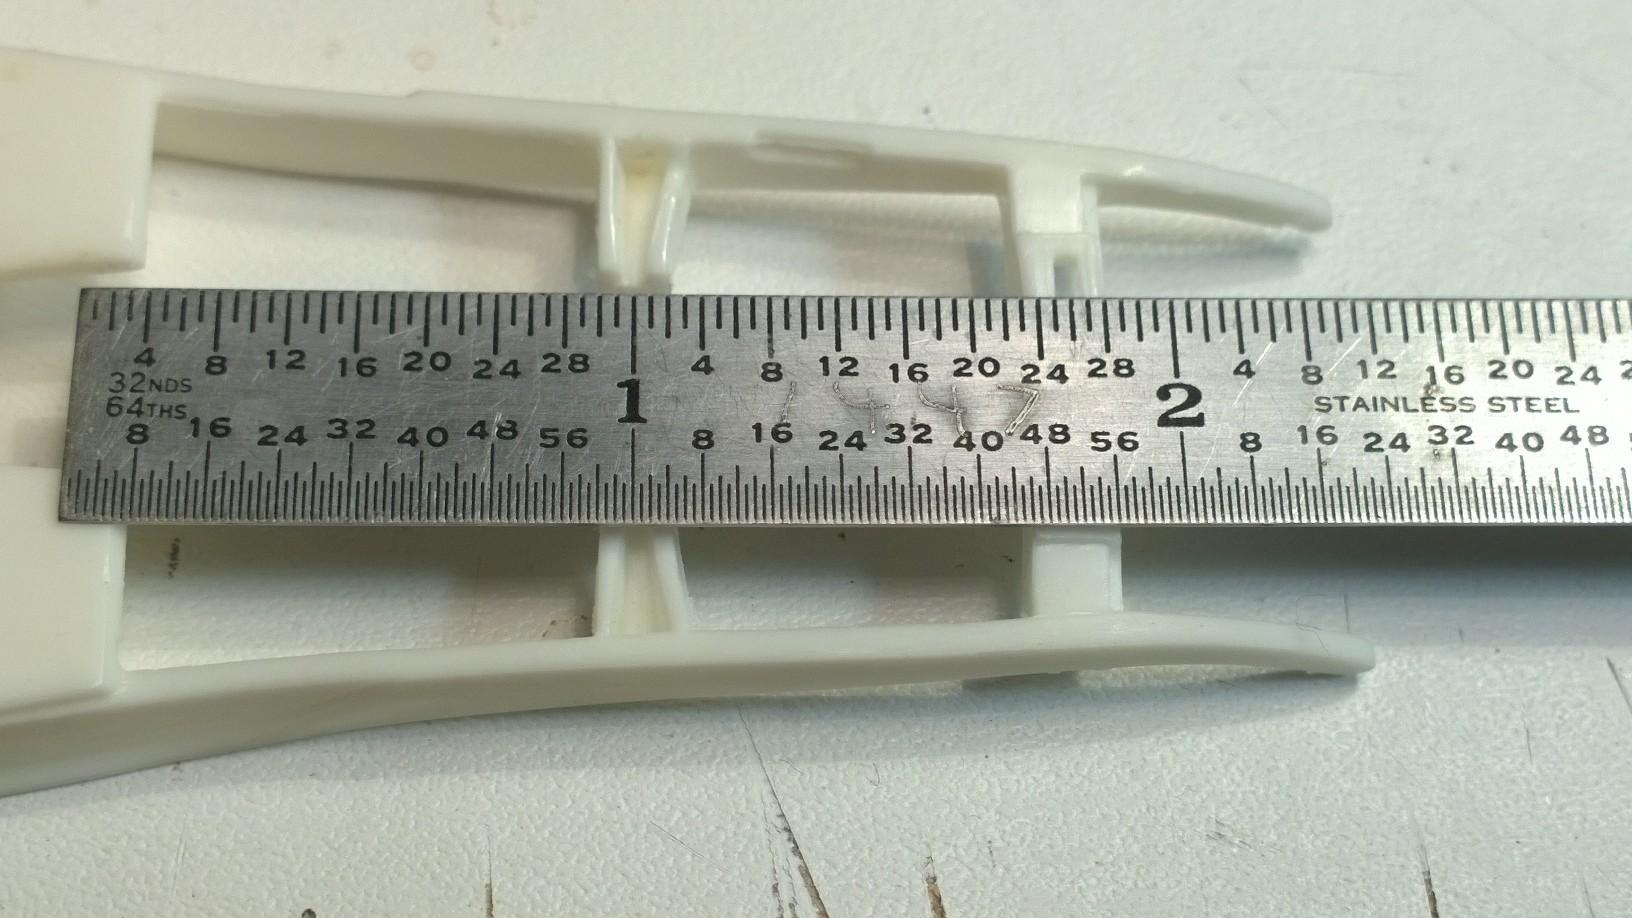
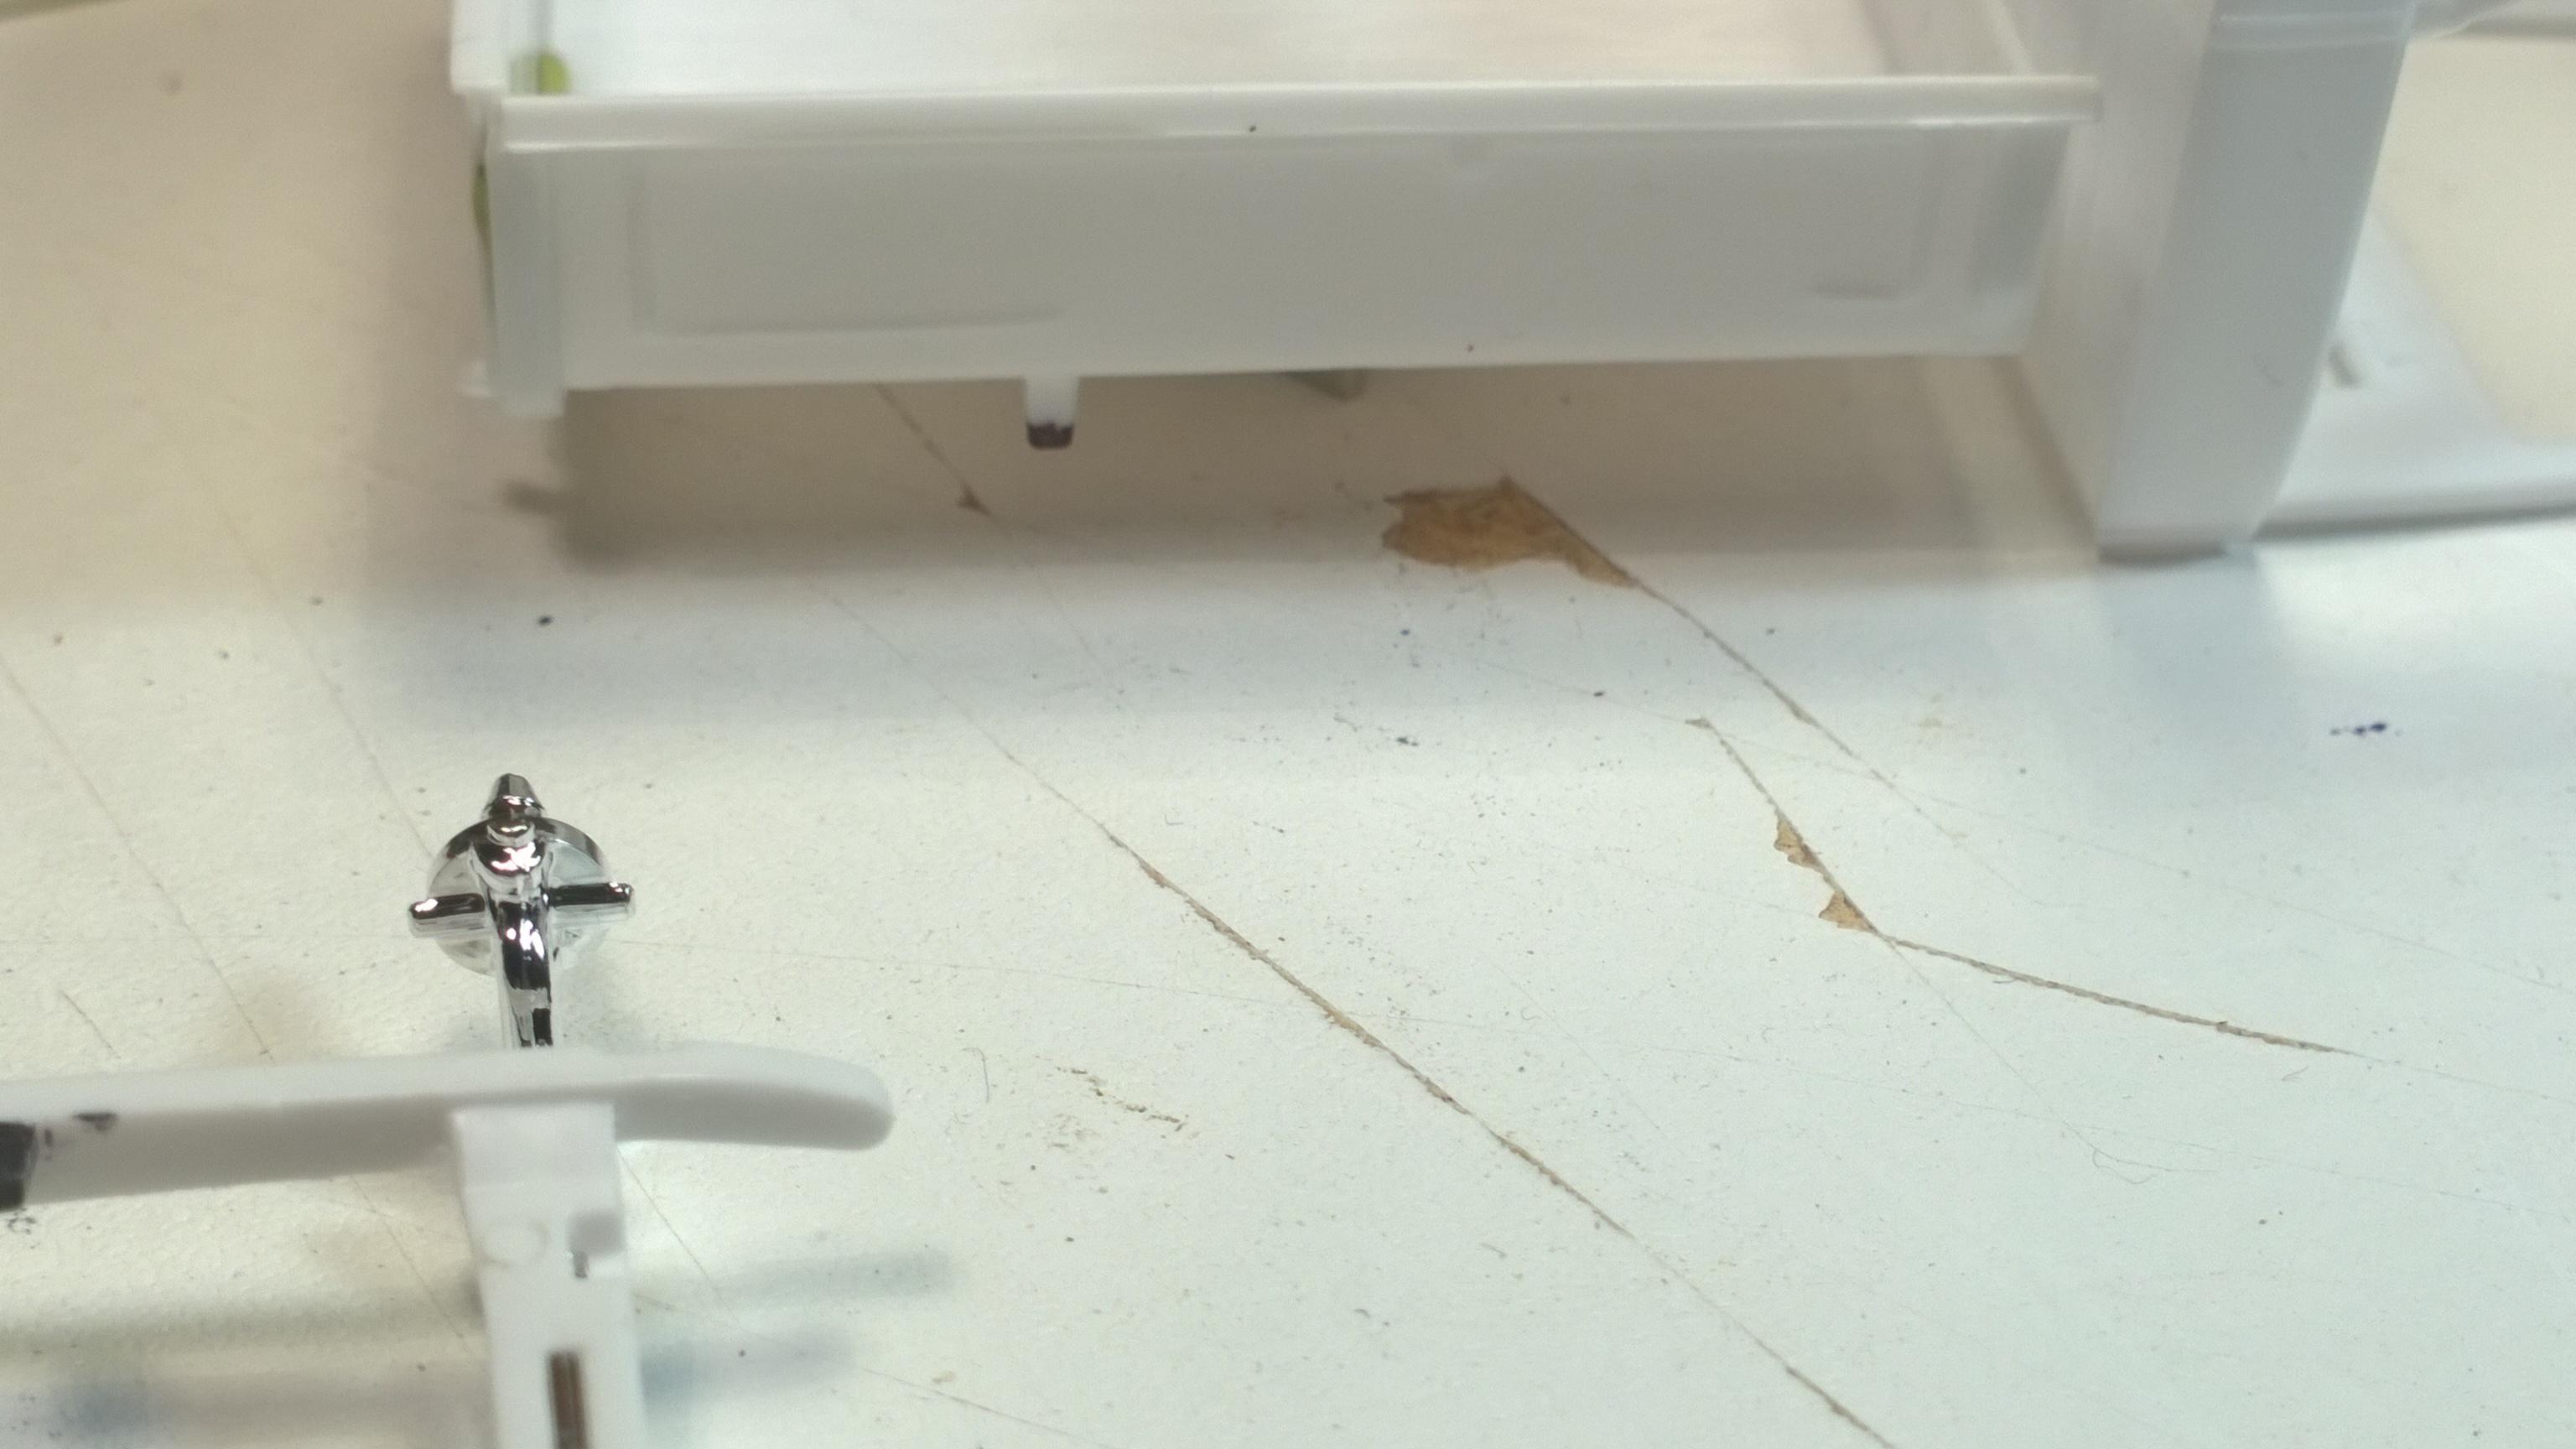
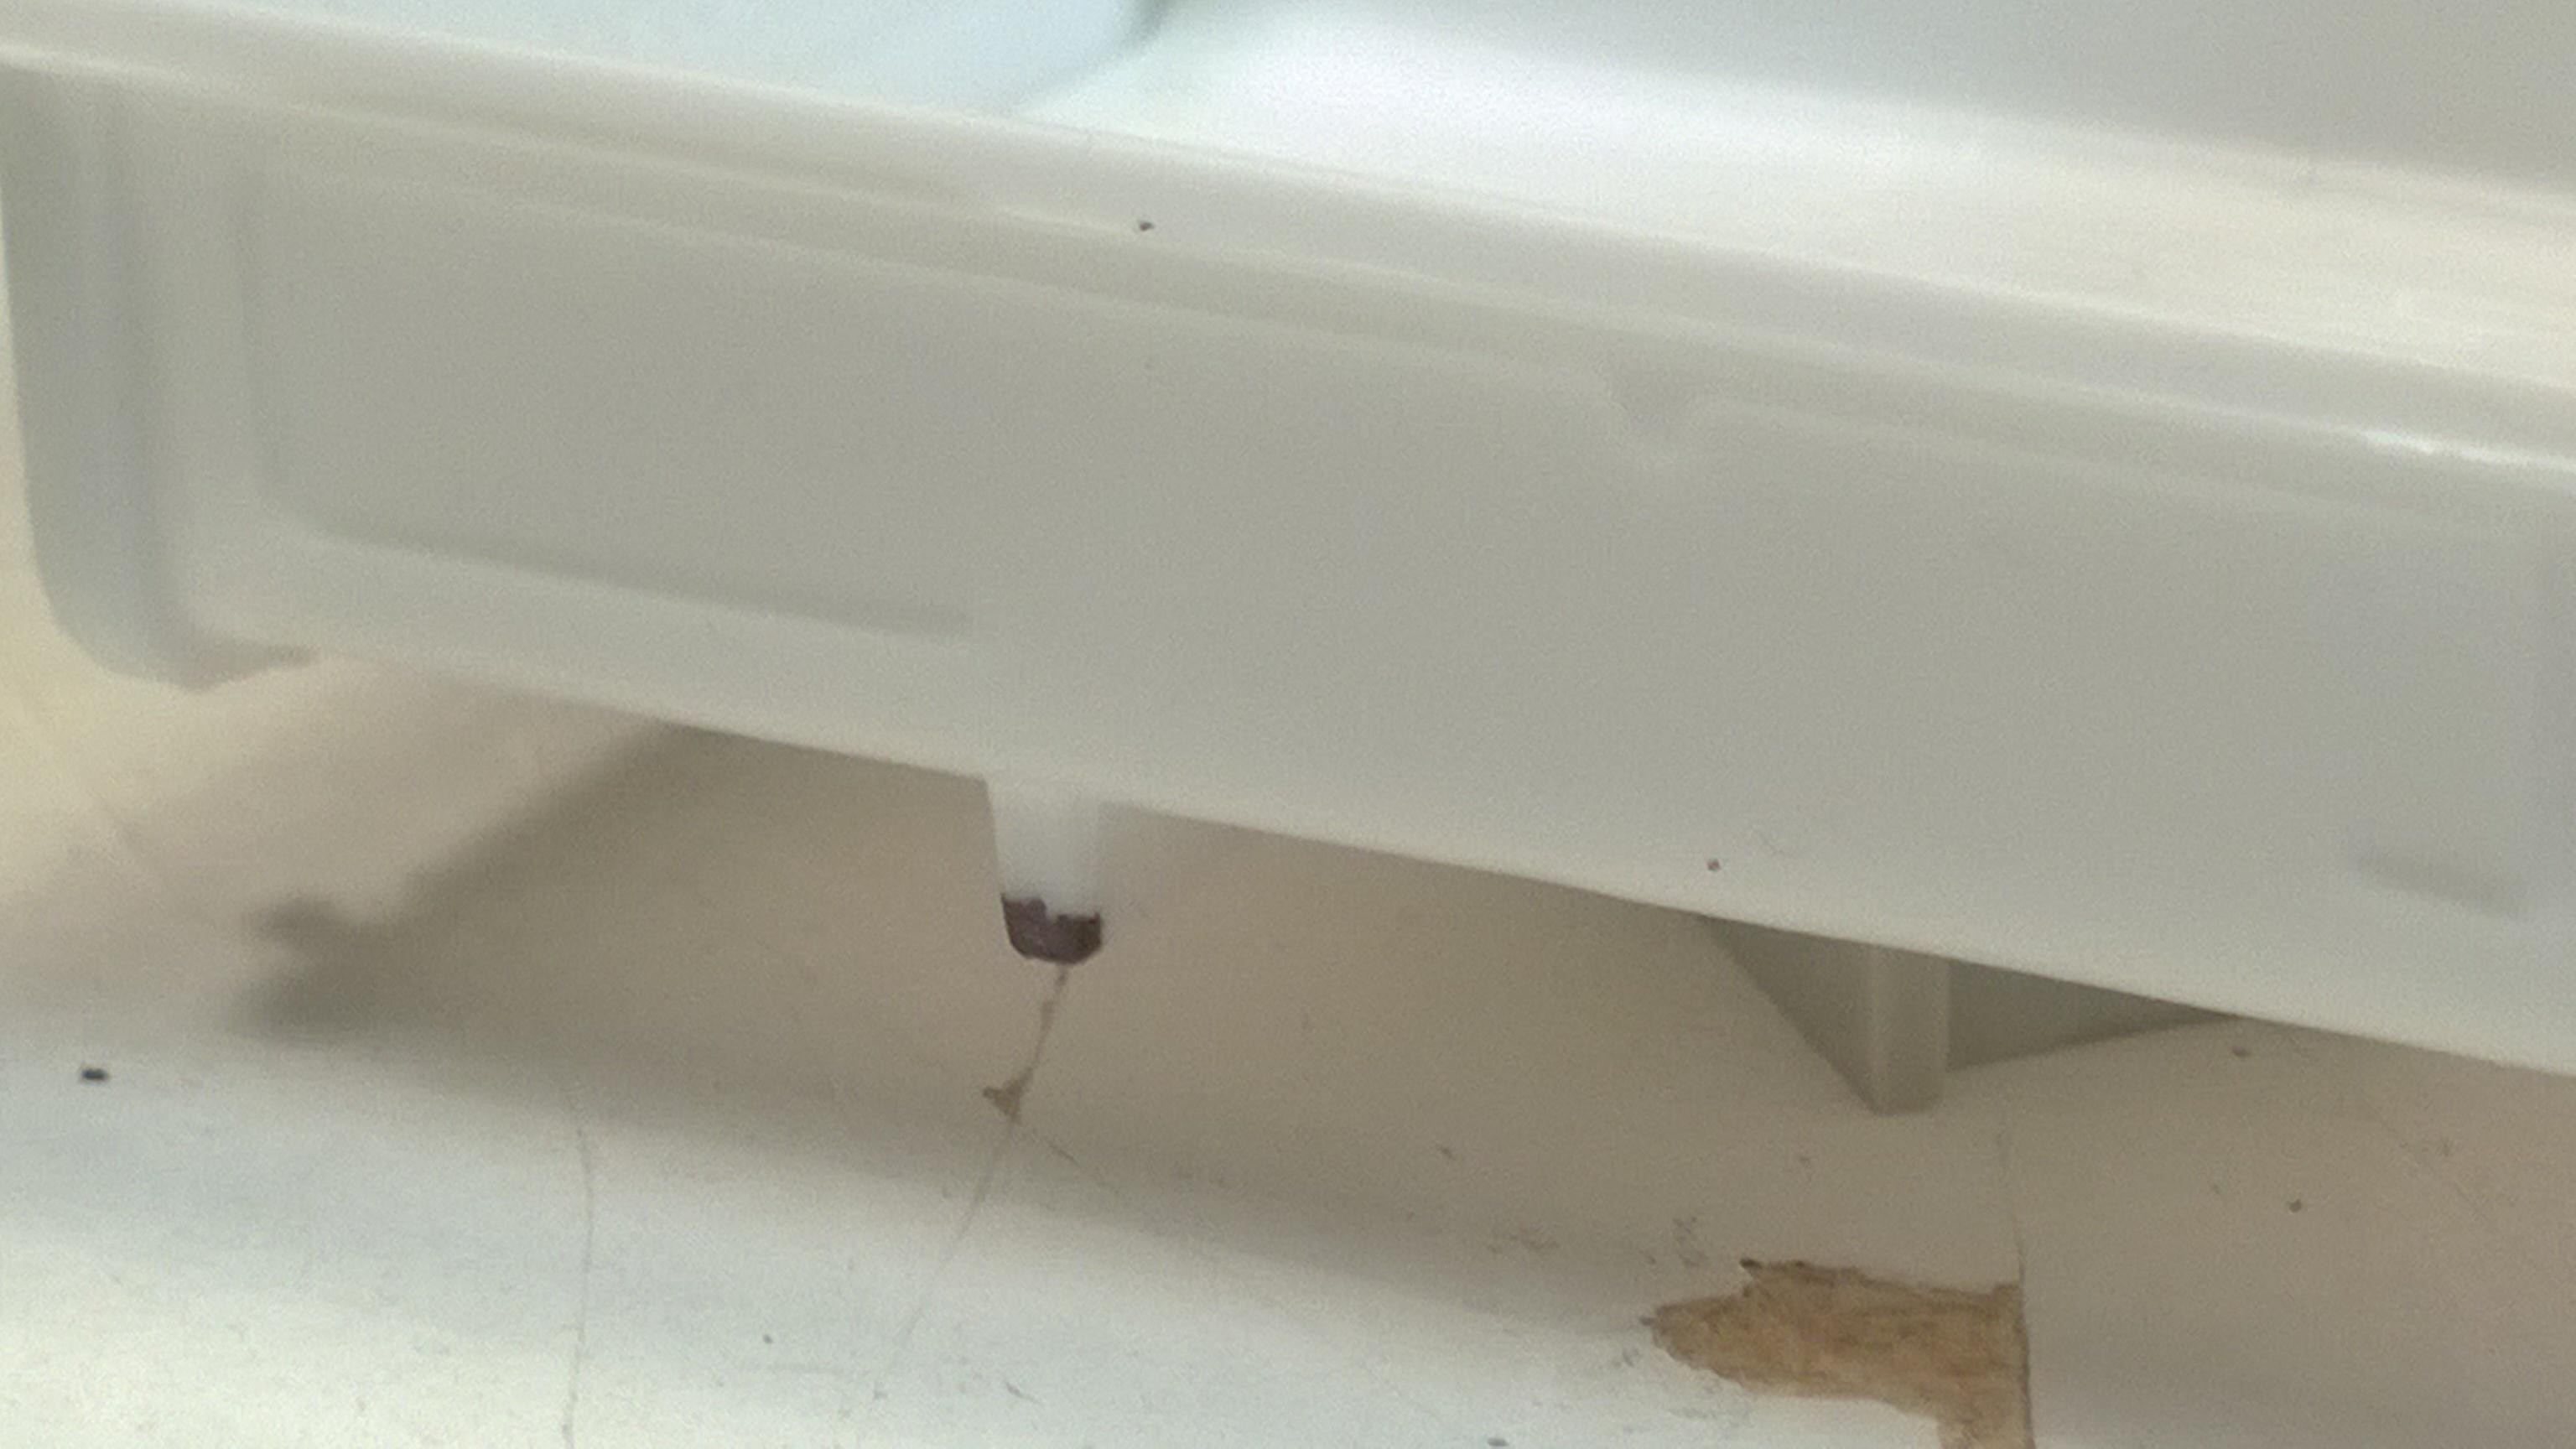
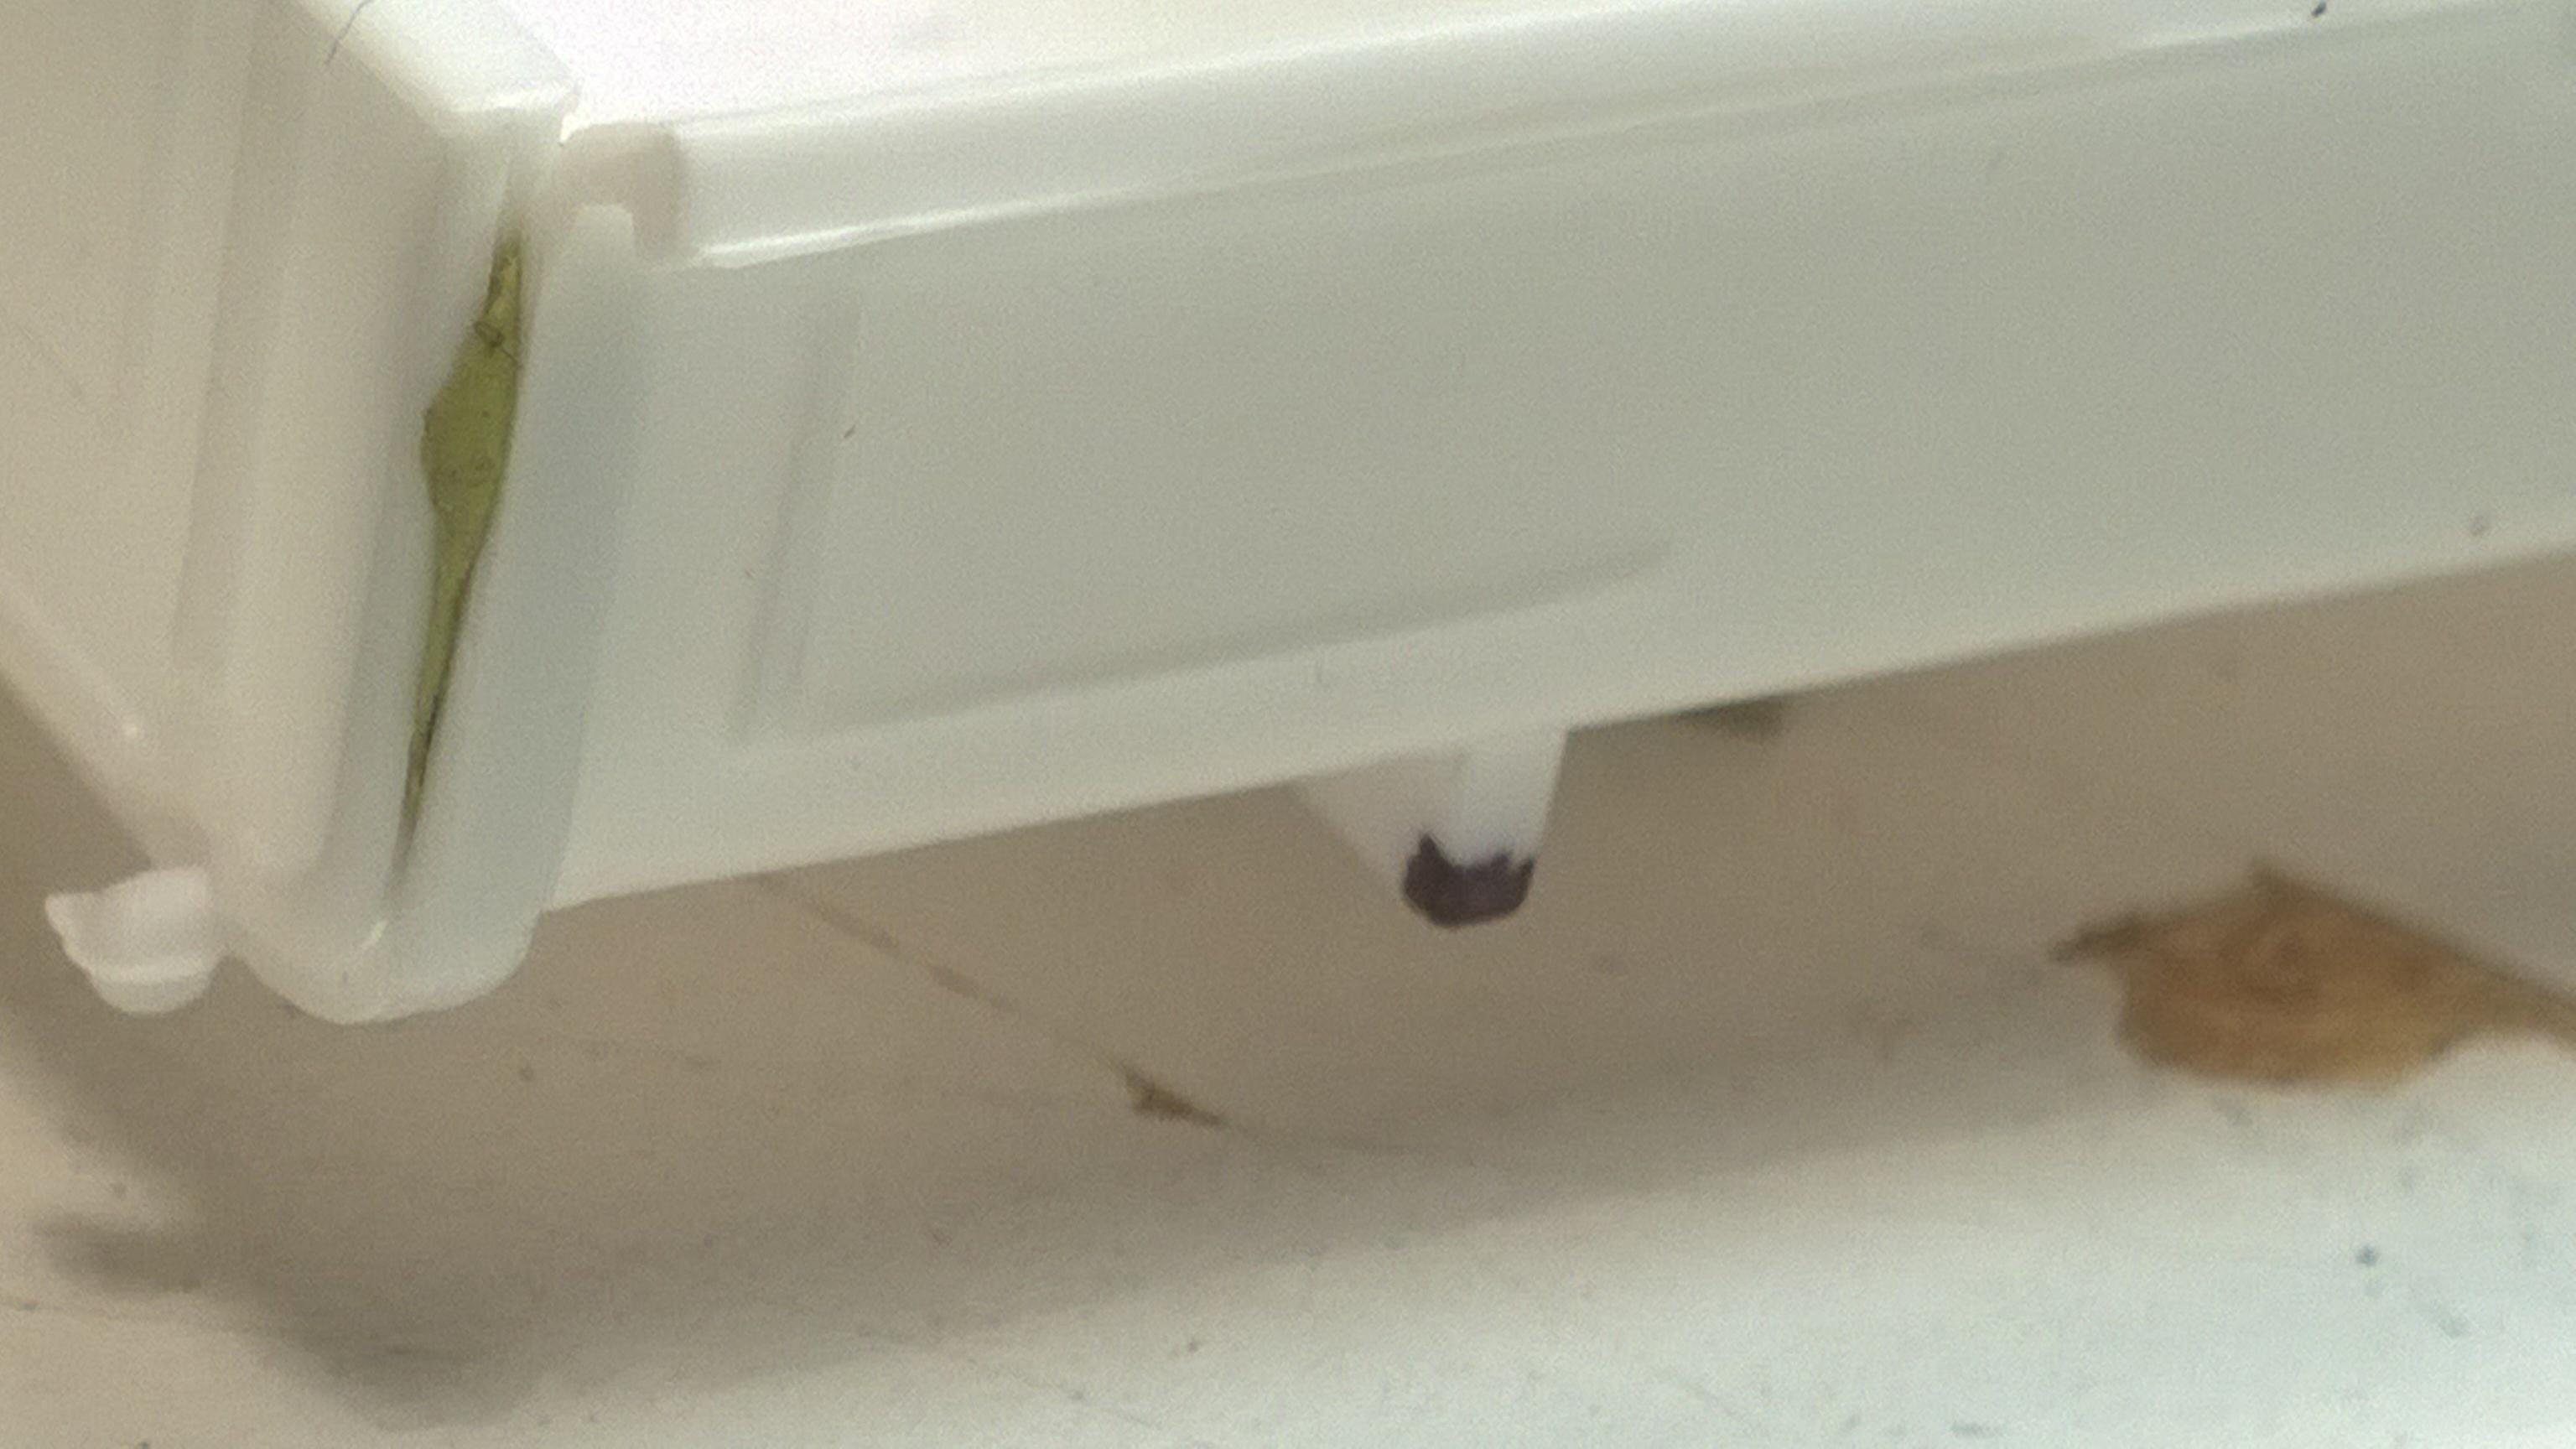
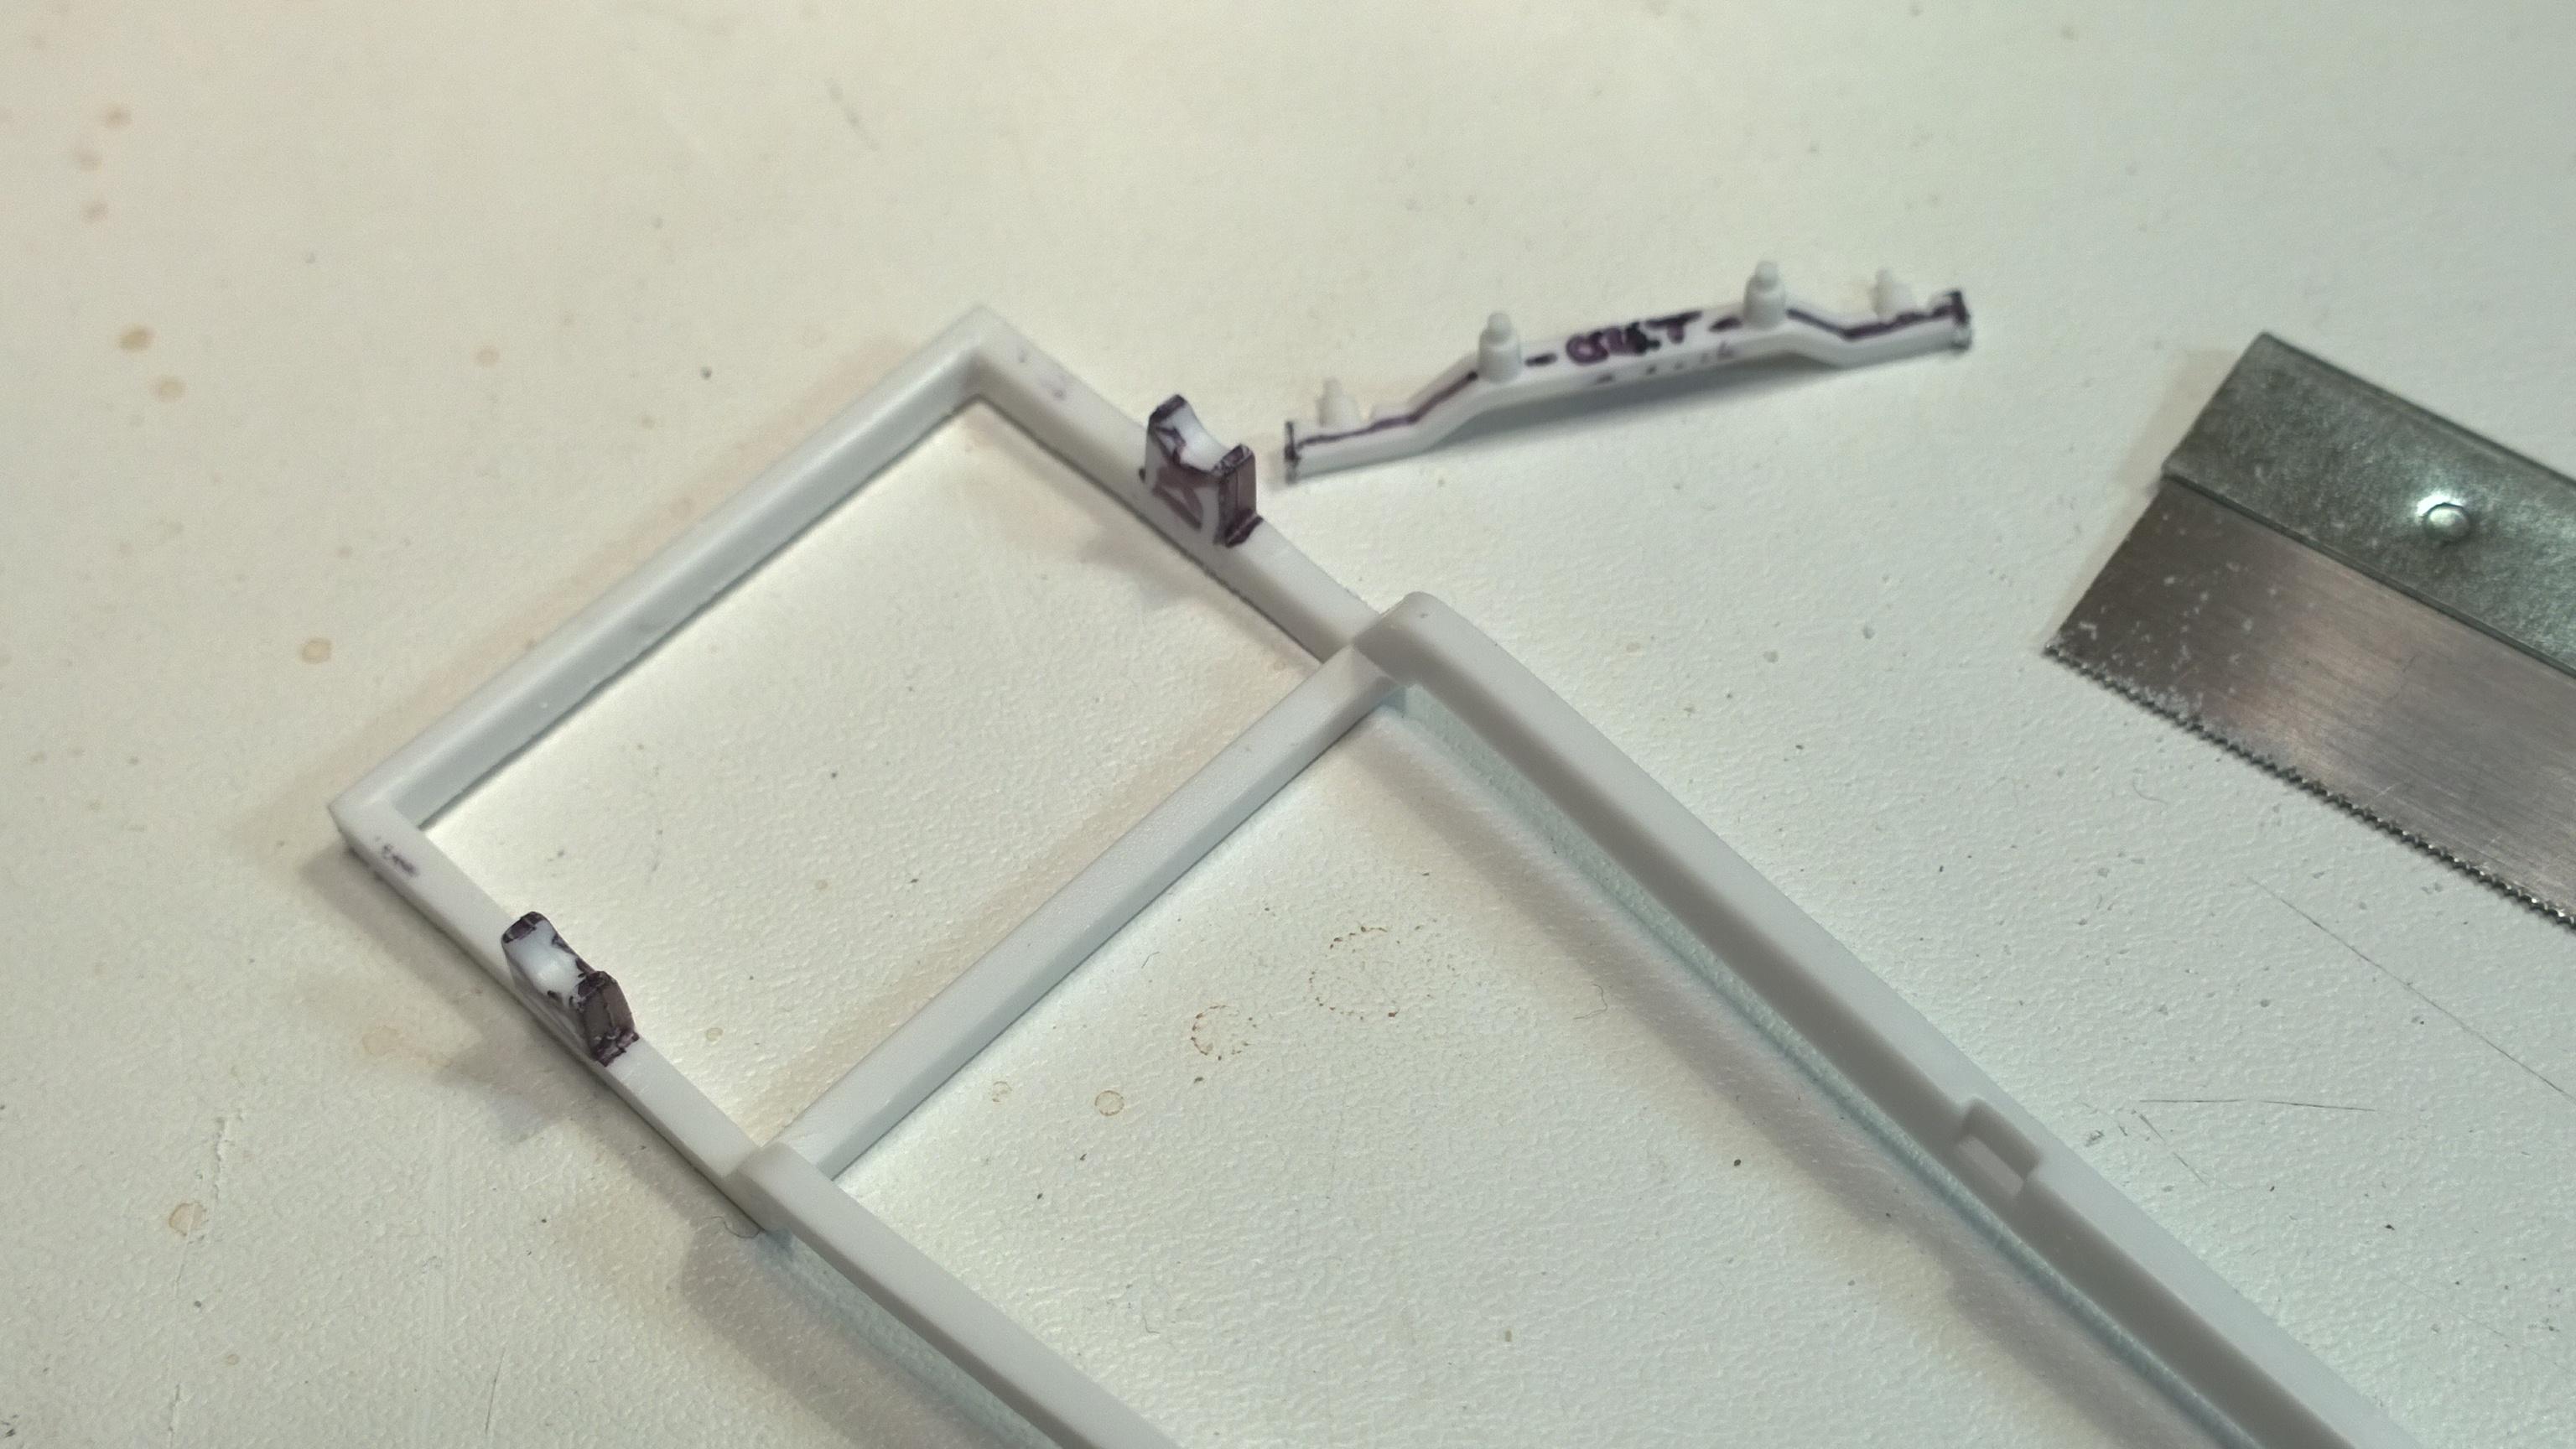
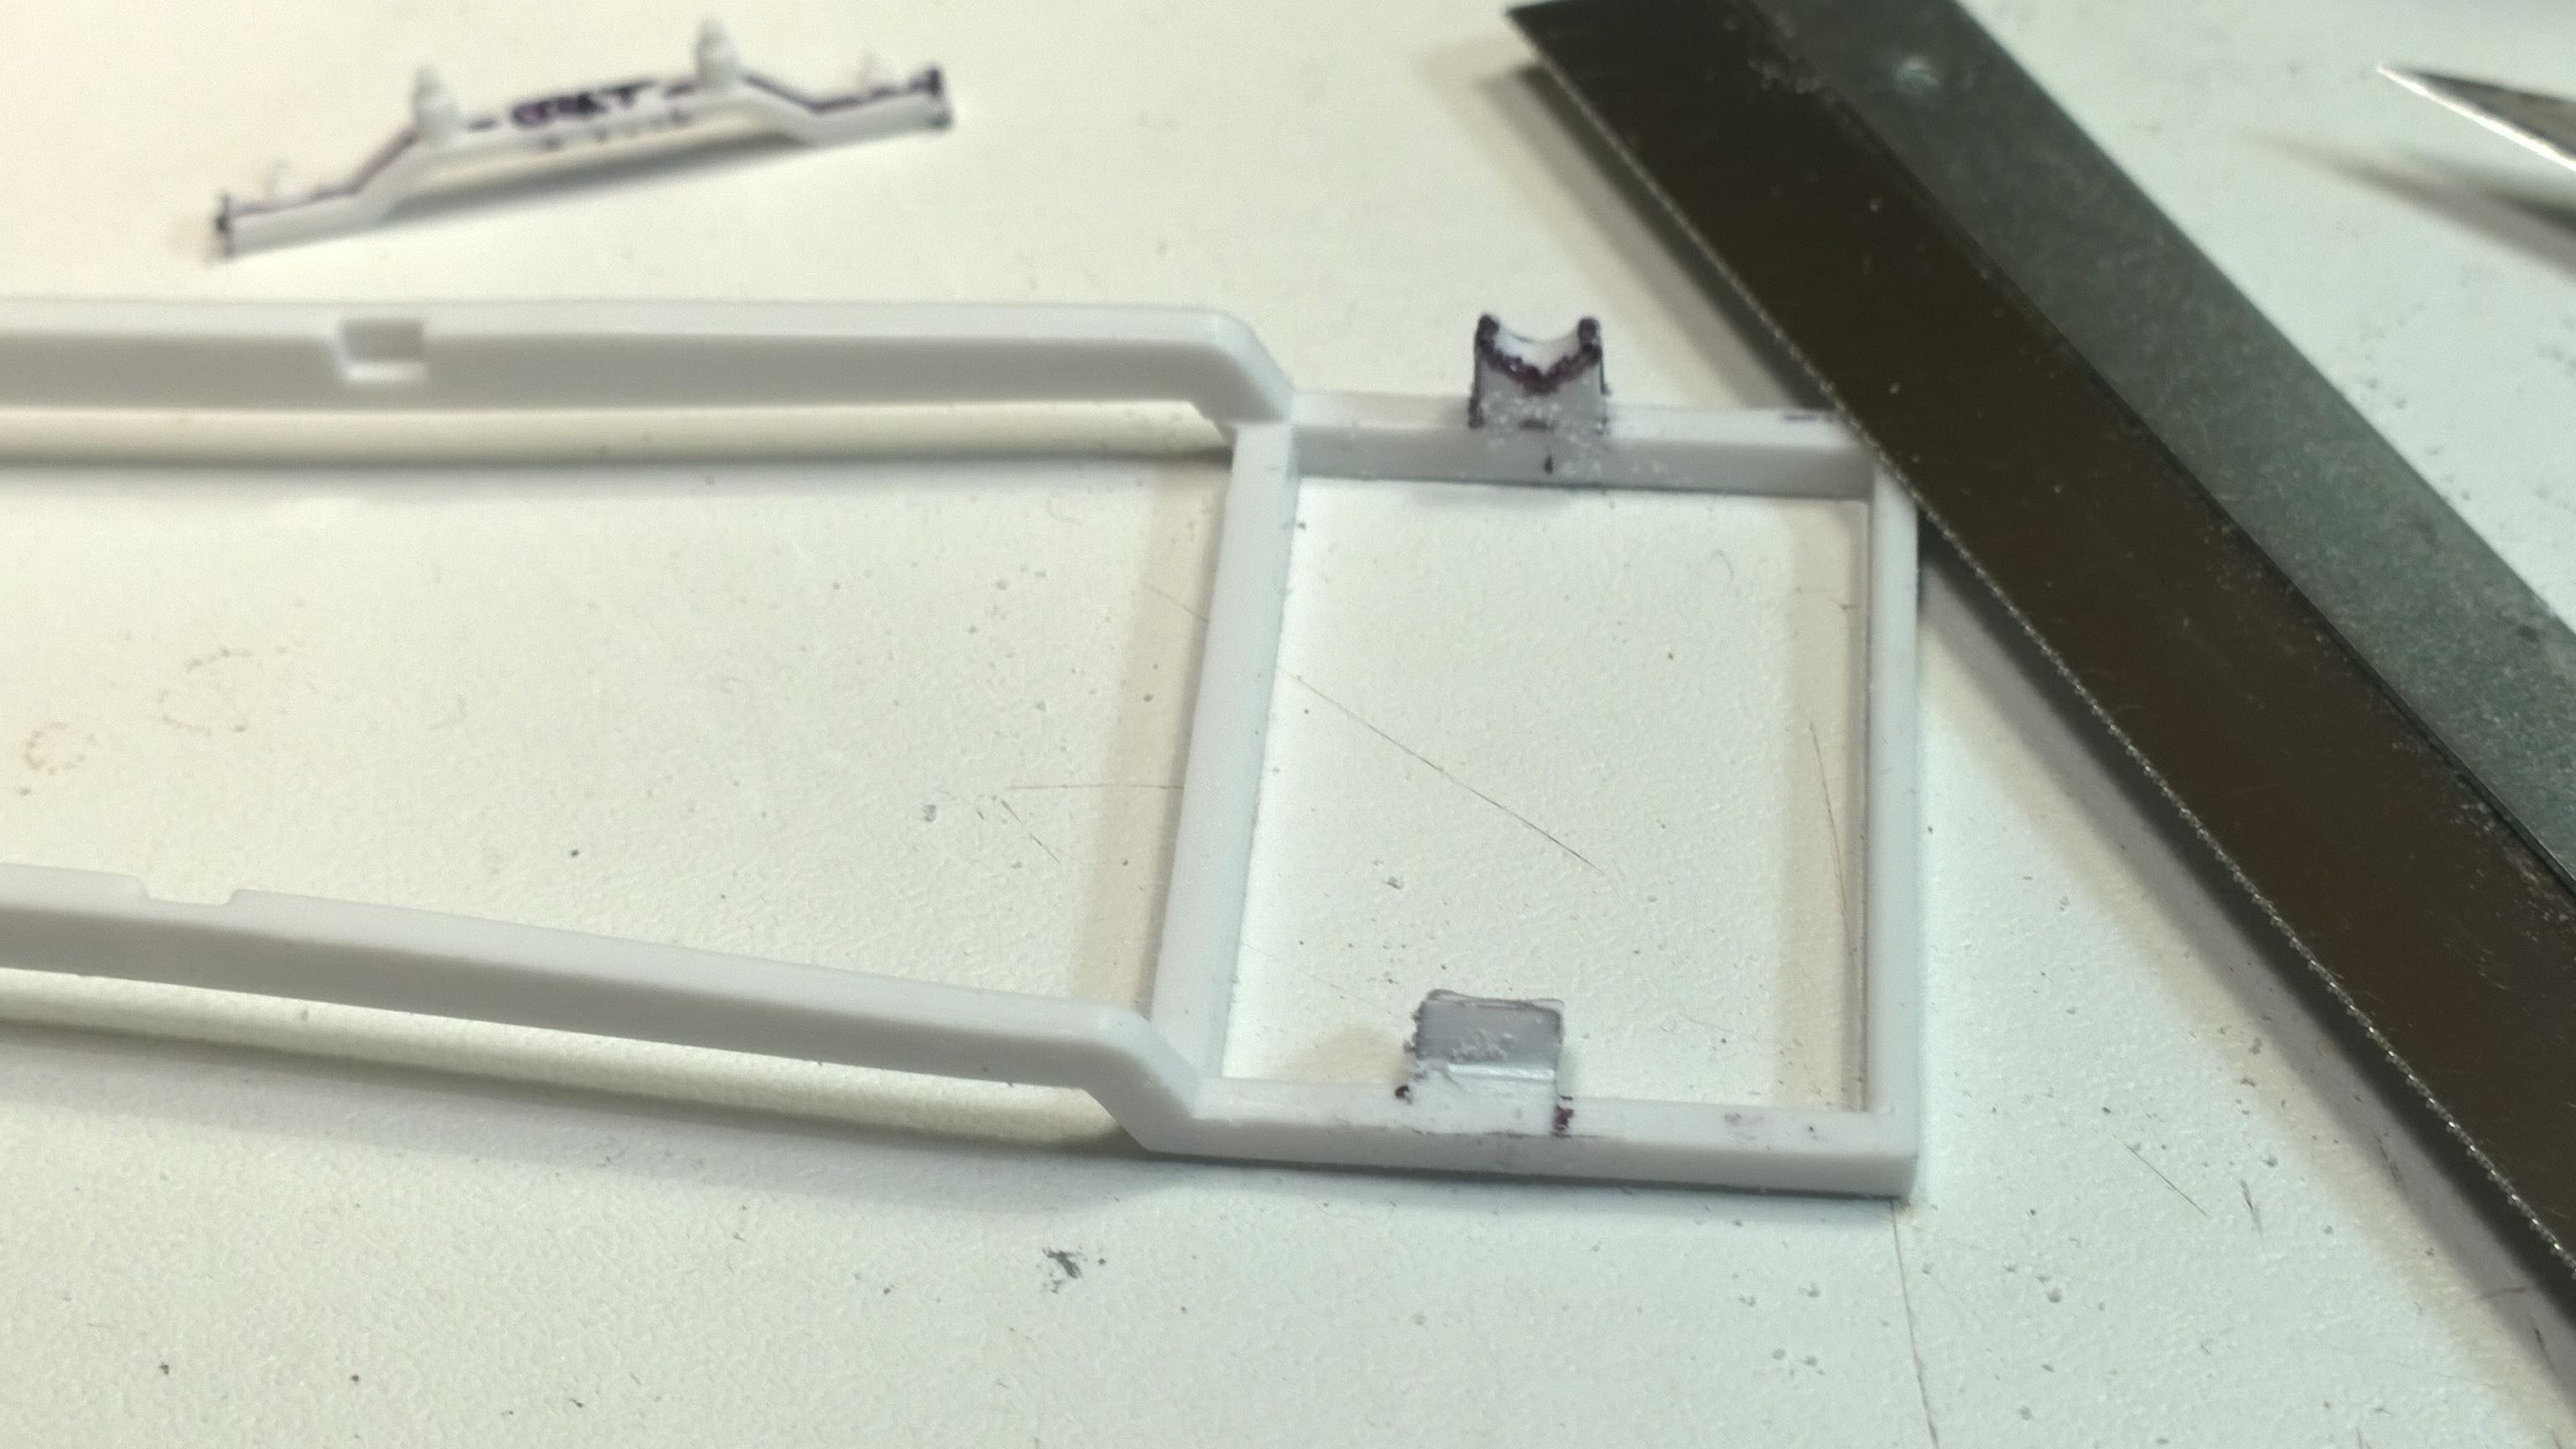
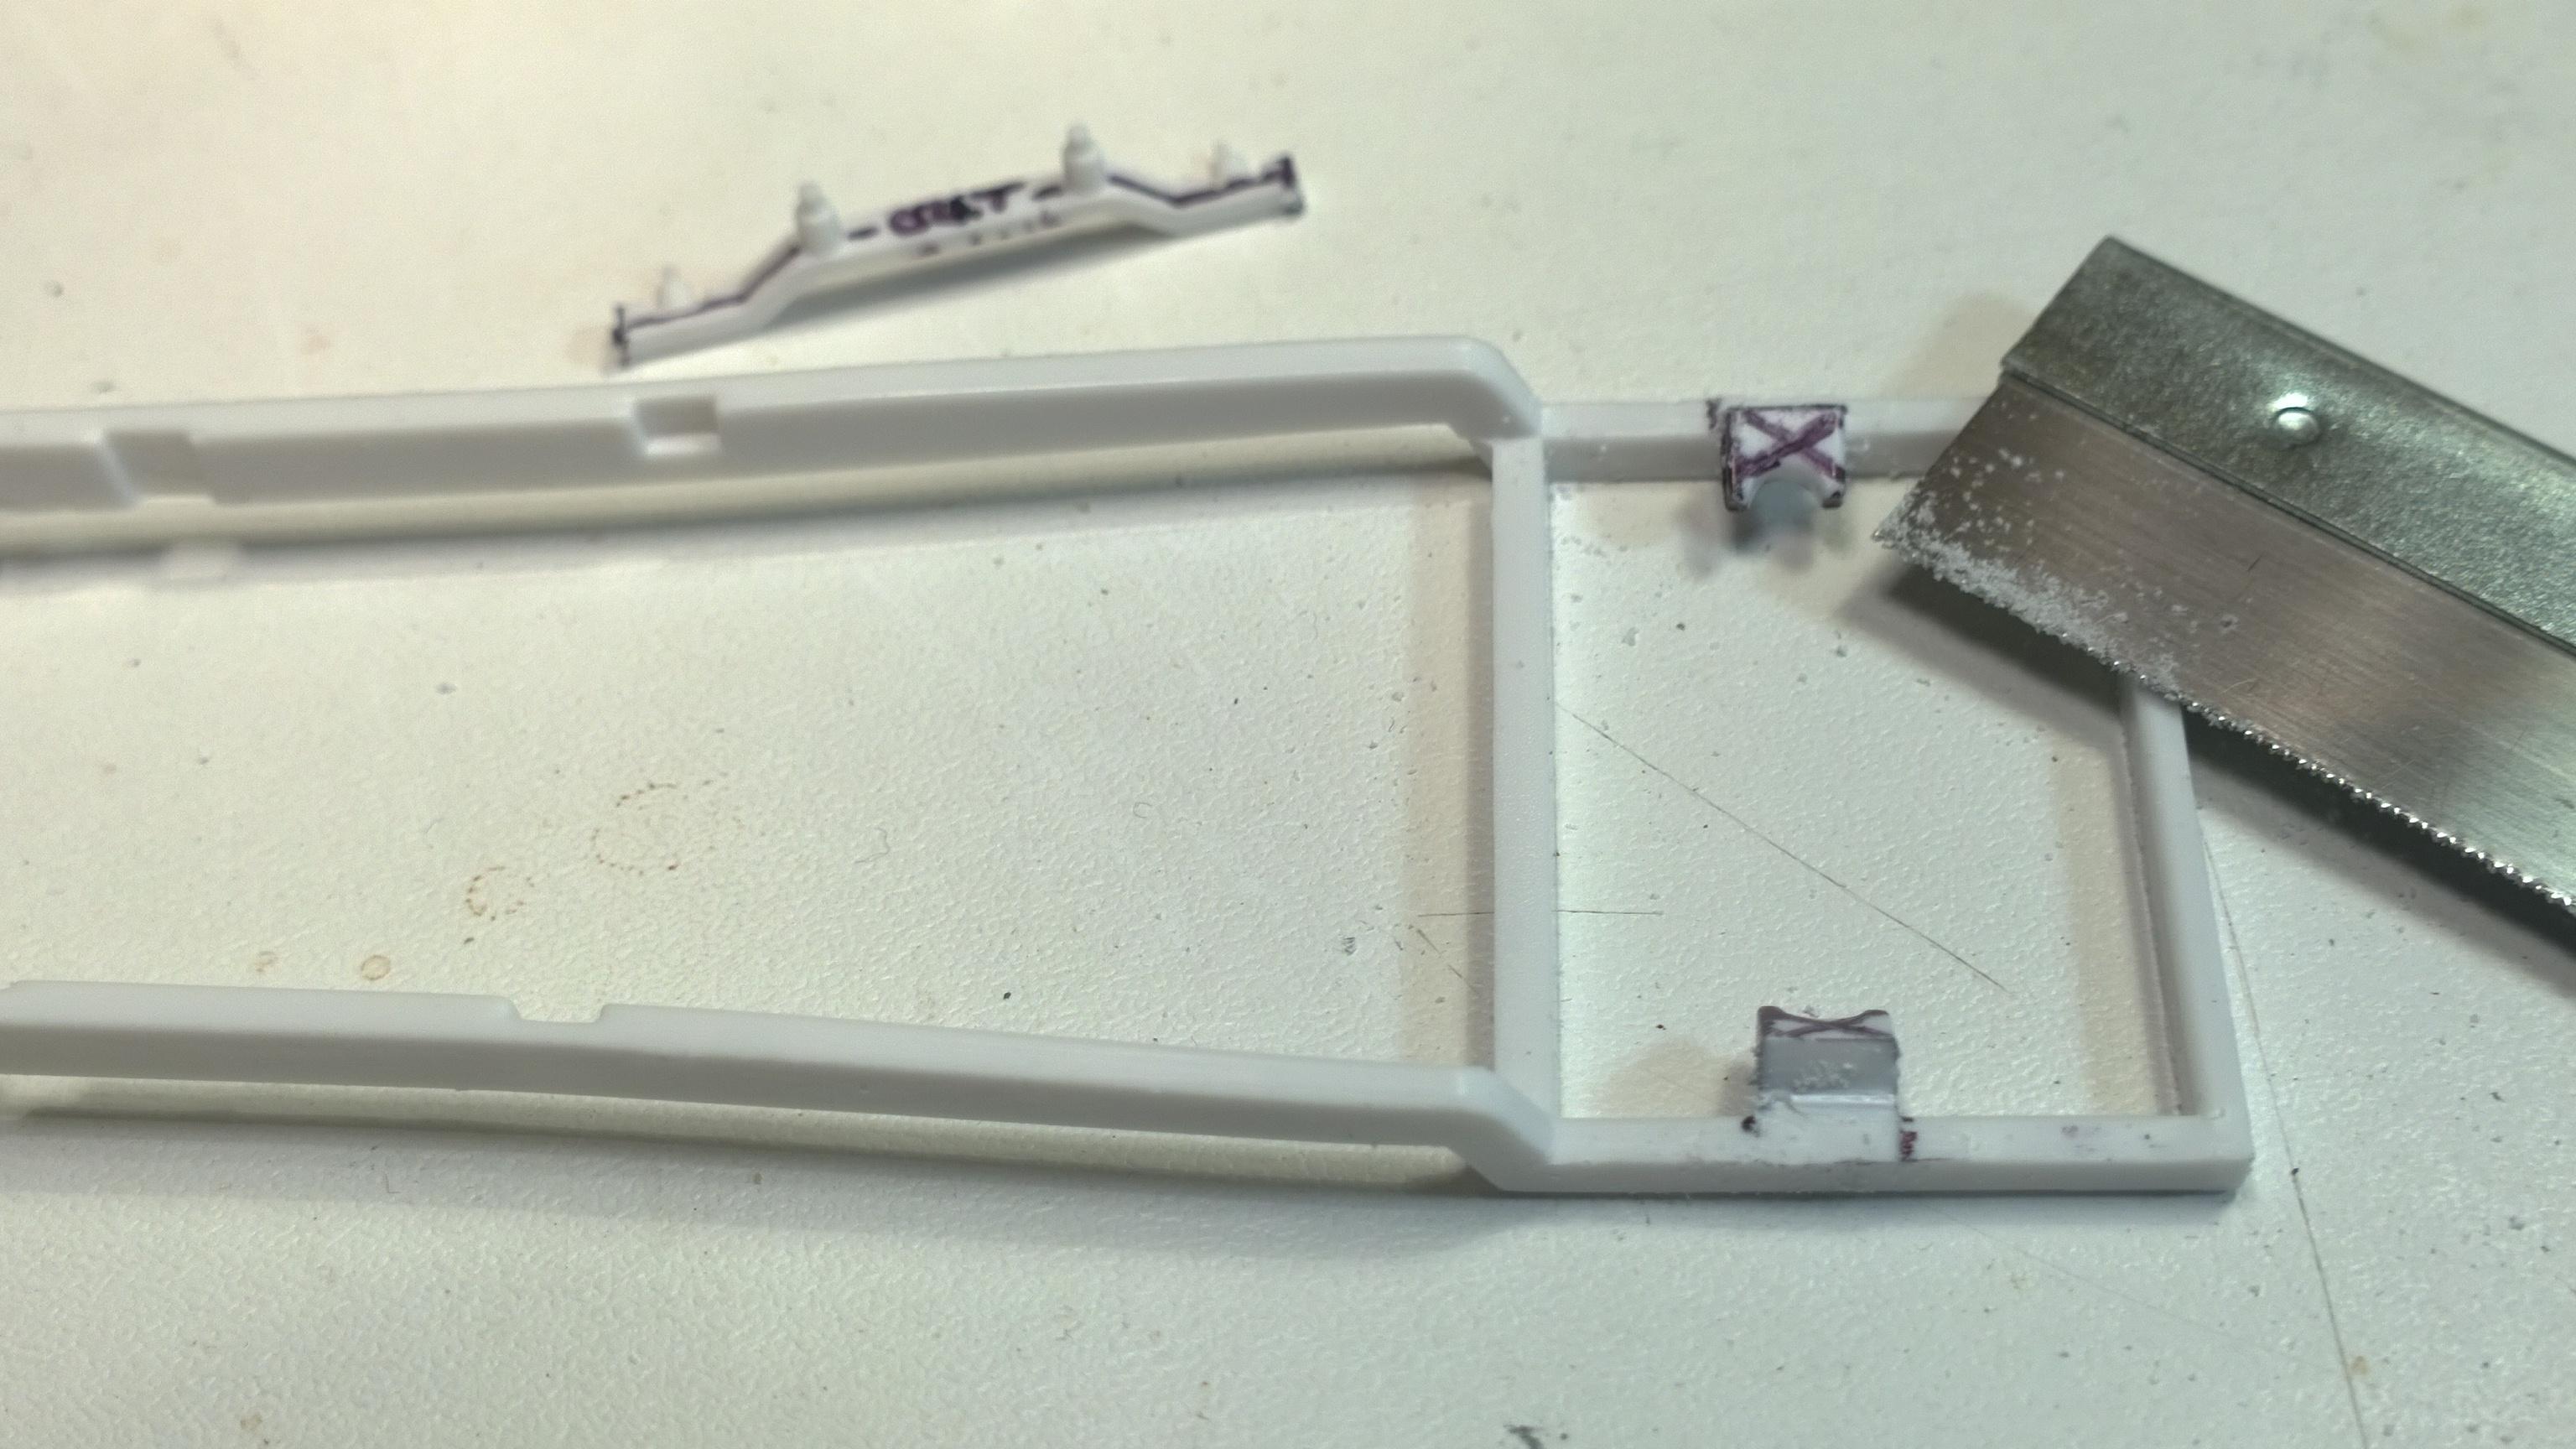
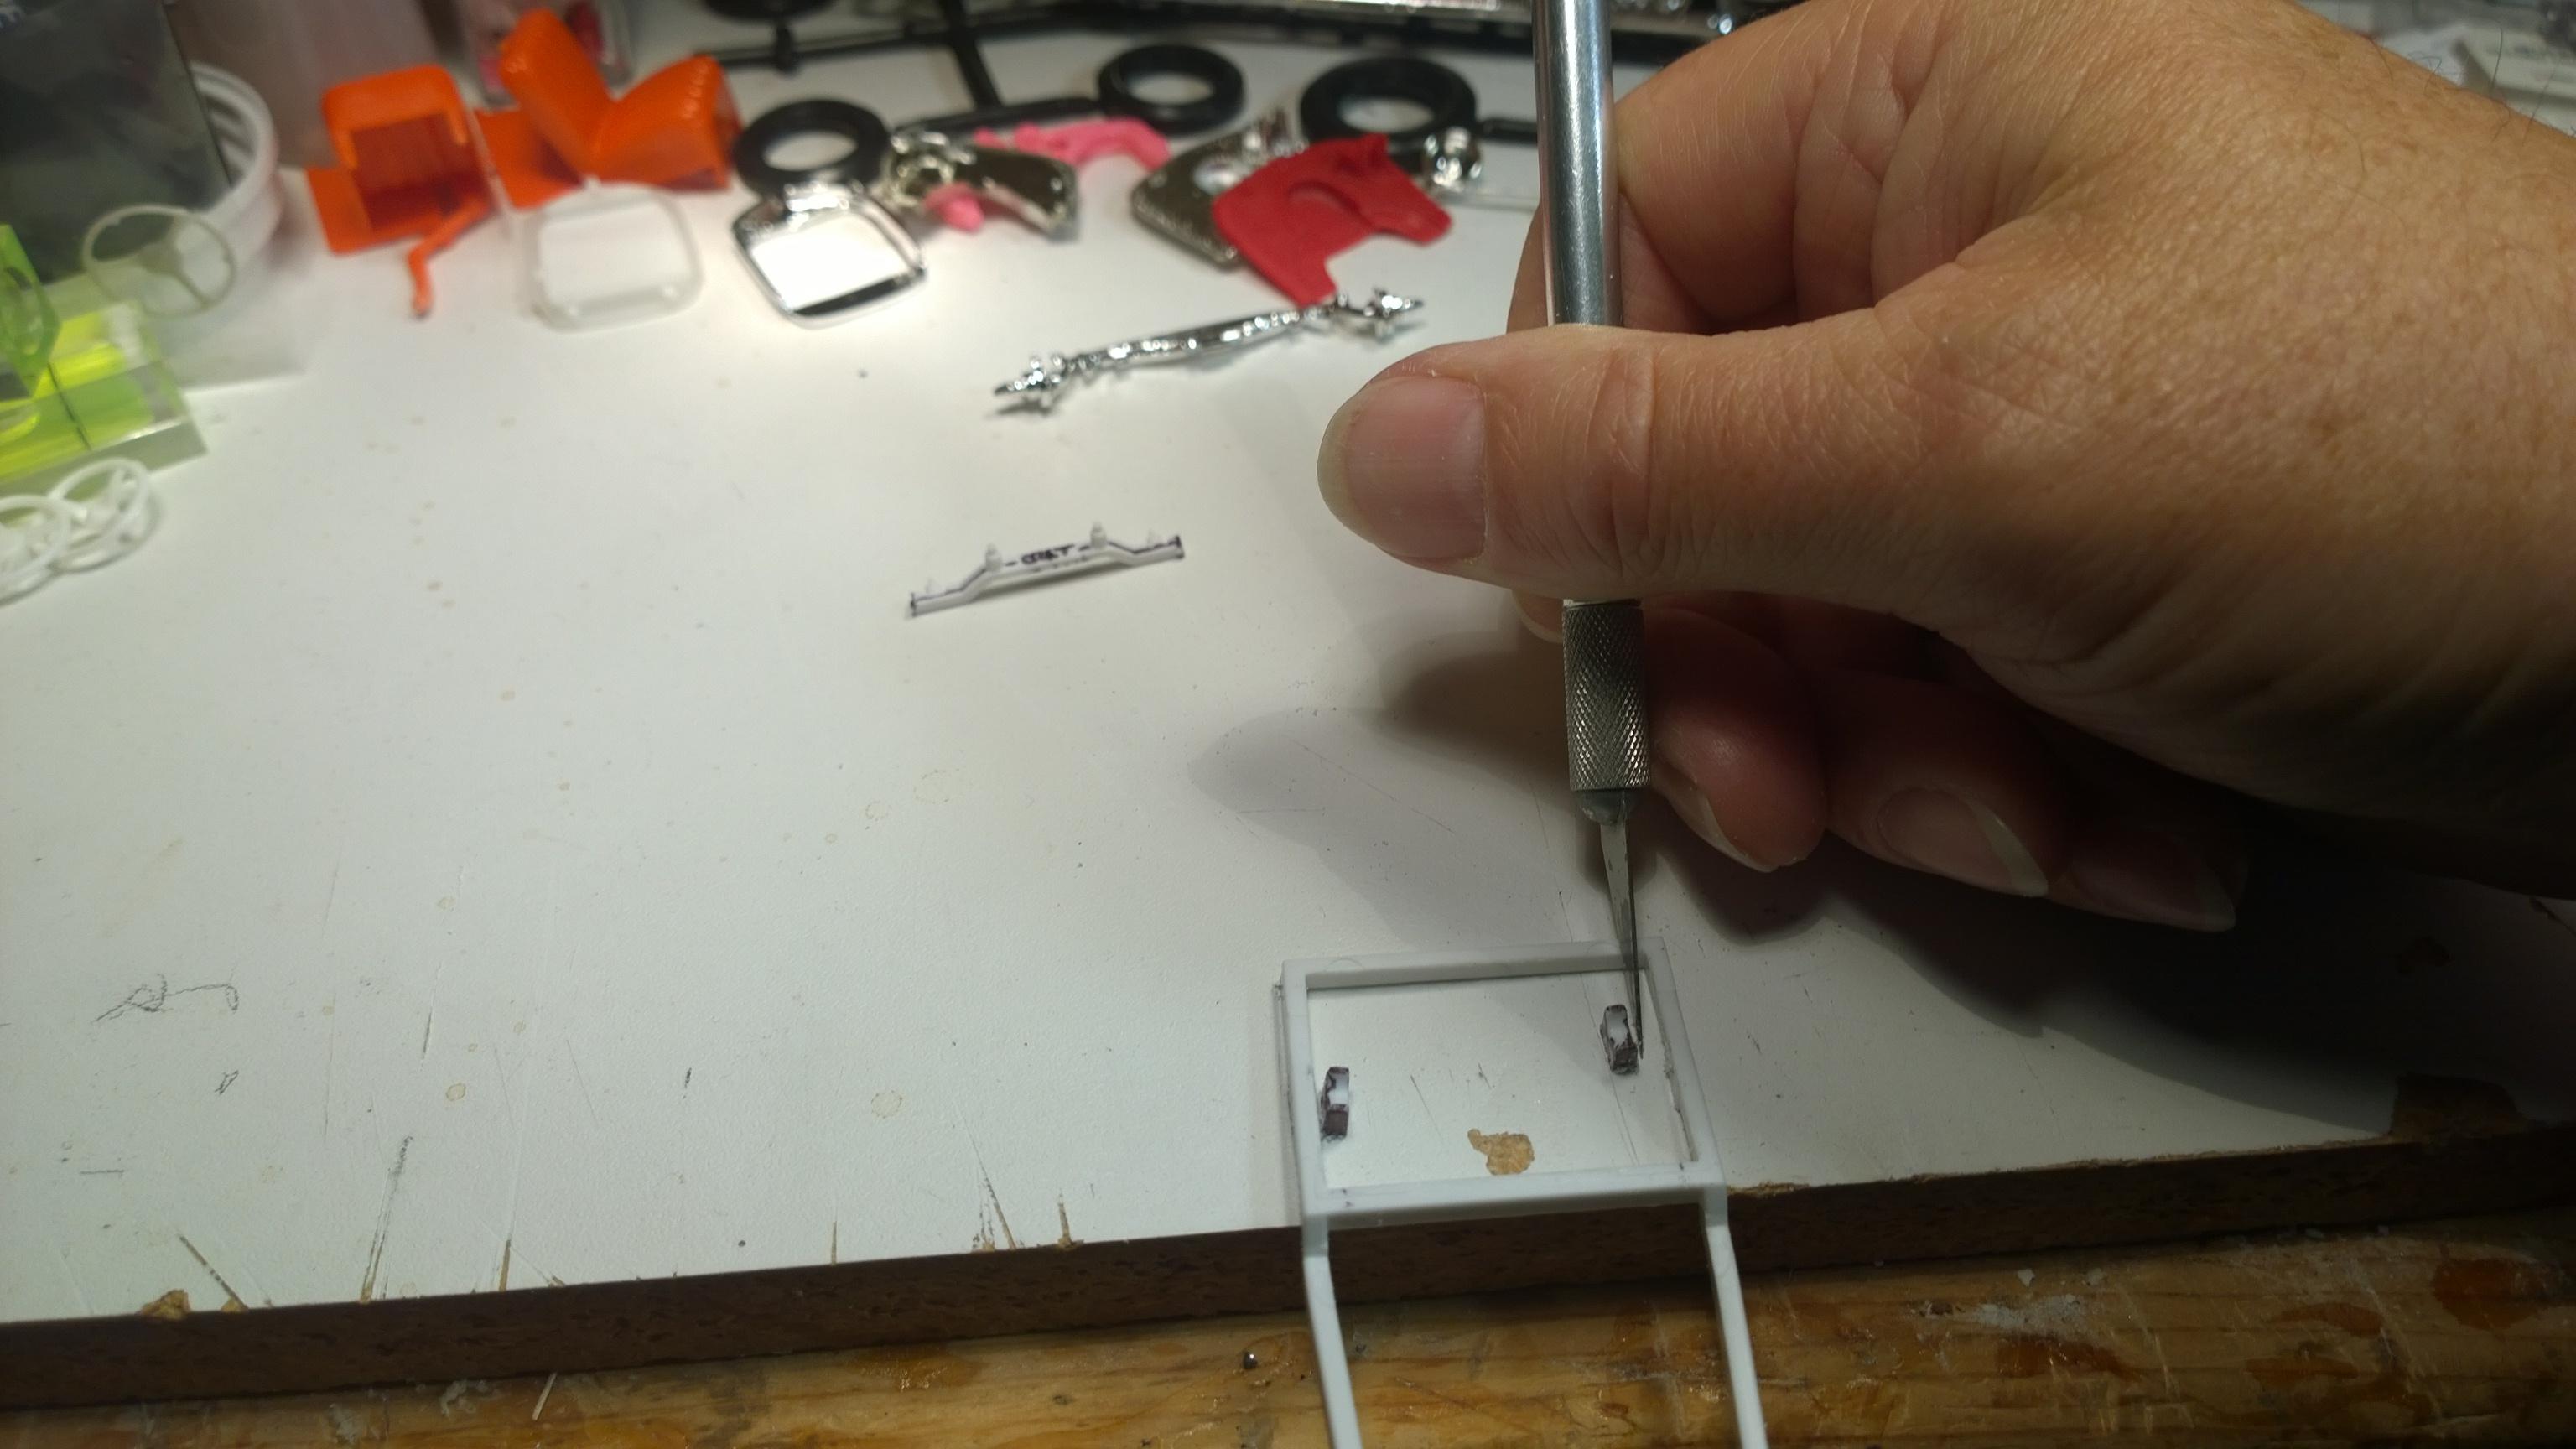
 Here's the next step: the Deuce motor mounts need to be grafted into the '29 Roadster frame... Lining up the engine and transmission over the guide bar... With the fenders are mounted the powerplant sits about right! A closer look at the tranny mount on the bottom of the transmission tail shaft shows a space between the crossmember mount and the tranny mount. We'll come back and make an adapter to cover the gap. The deuce motor mounting tabs located on the pan sides line up with the guide bar! Checking the fit with the cab... everything looks like the it fits... Now it's time to collect the Deuce motor mounts and get them attached to the Model A Frame. Make the cut lines... All four sides... And, Left & Right Laying Deuce frame on top of the Model A frame to see how the mounts line up with the guide bar... Looks like the Deuce motor mount will work... Cutting the Deuce motor mounts from the donor frame is pretty straight forward... First one side... And, then the other... Here we are taking the line with the cut. Pushing the file over the edges to clean off the flash left behind from the saw blade. Pushing not dragging the file is important... the cutting groves/teeth on the file run one way. Push and lift to return to cut/file again, one cut at a time, checking your progress often. Using a file can remove an awful lot of material very carefully. Lining up the Deuce motor mount next to the Model A frame... White glue allows setting the Deuce motor mount onto the Model A rails while lining each of them up with the guide bar. Noting the placement above the guide bar... Both directions, make sure that they are ready to set with a couple of drops of CA glue. Next up, we'll get back to make an adapter to cover the gap between the crossmember and the transmission mount on the bottom of the tail shaft. -KK
-
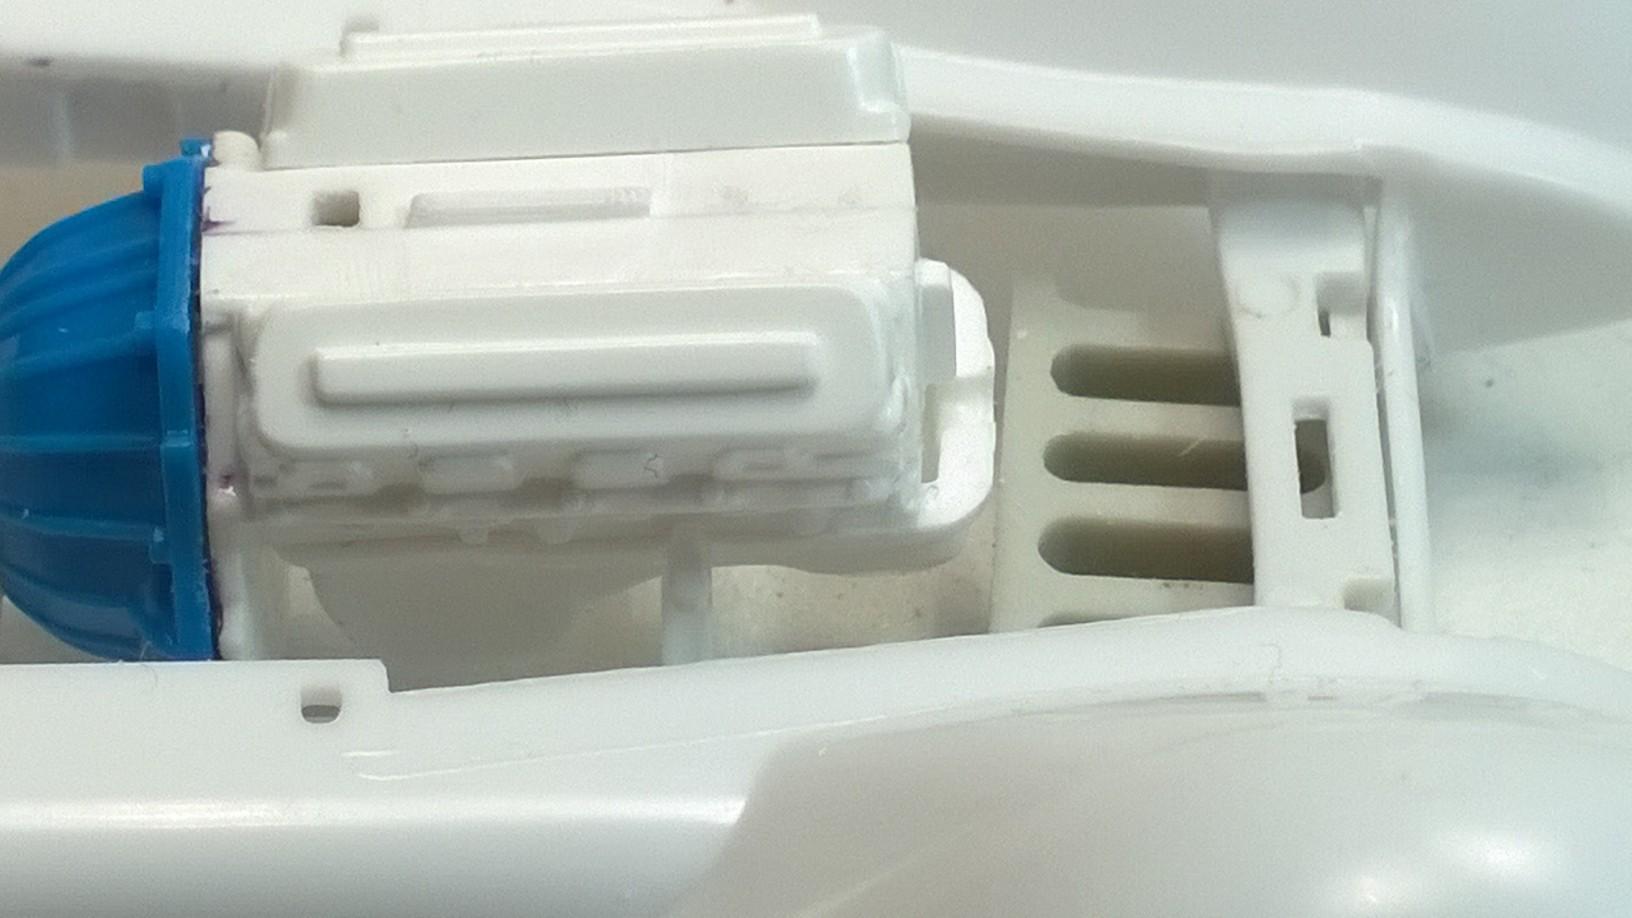
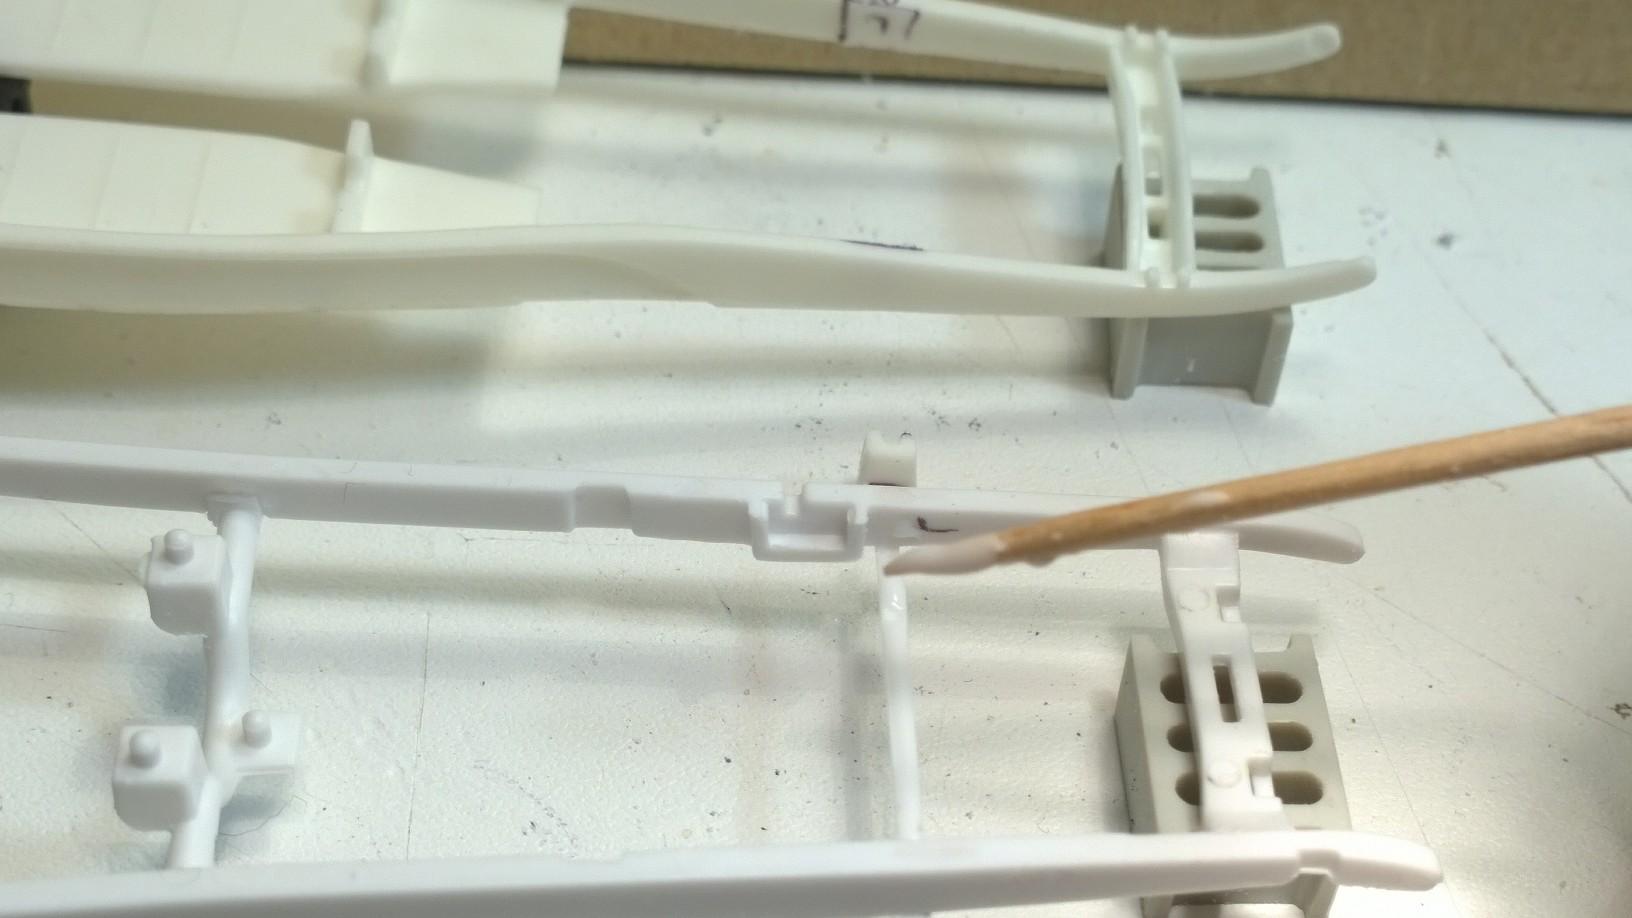
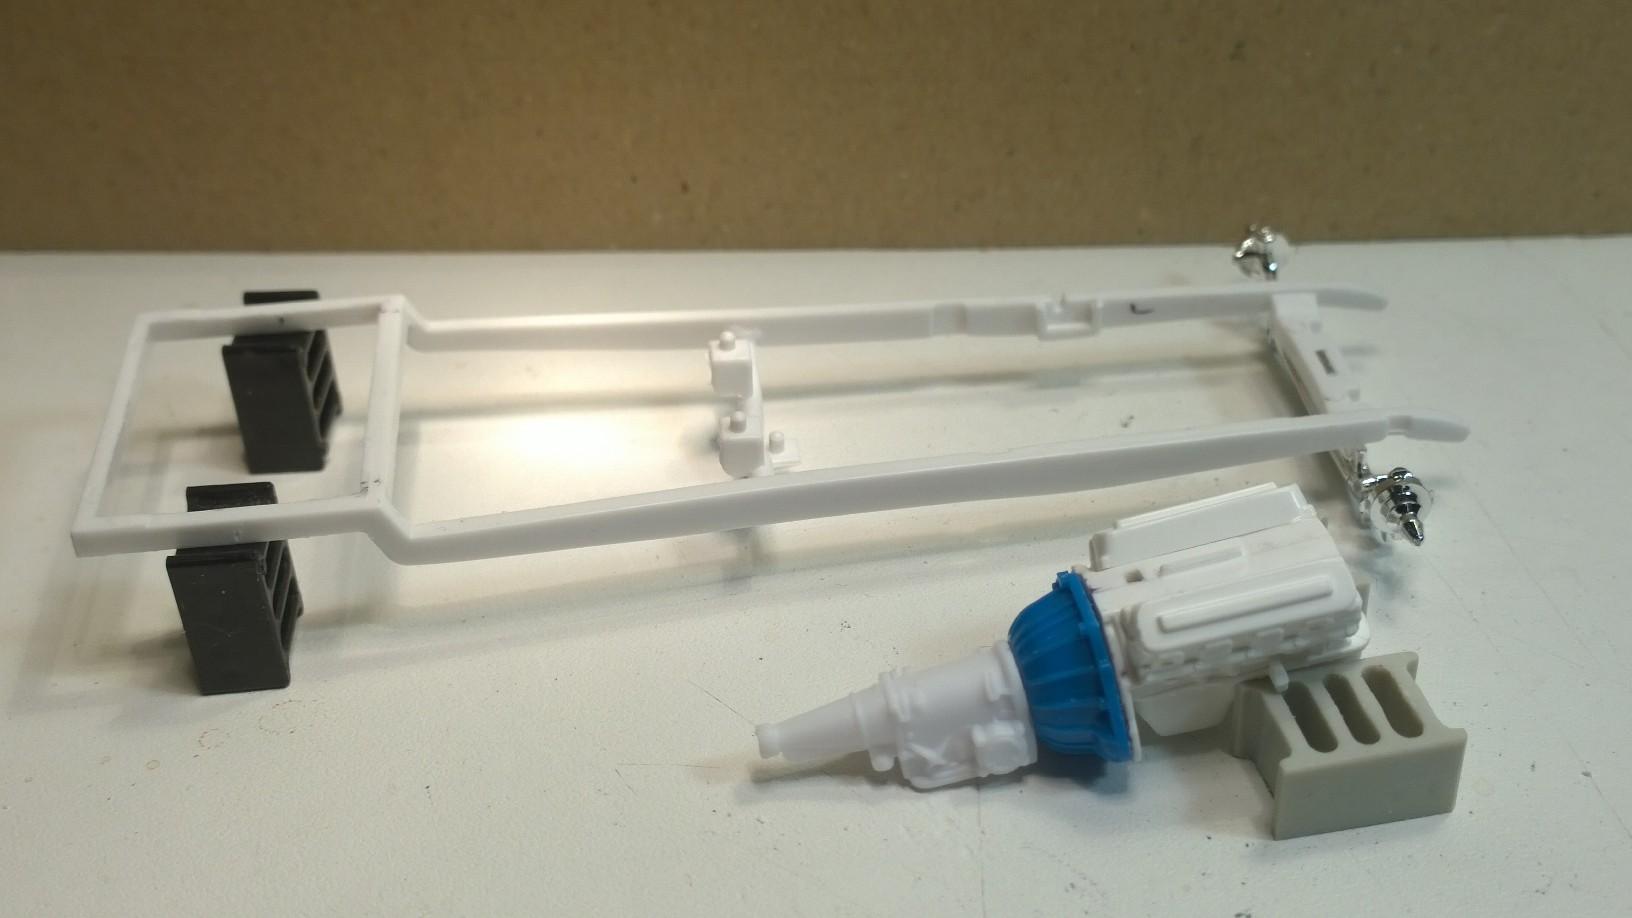
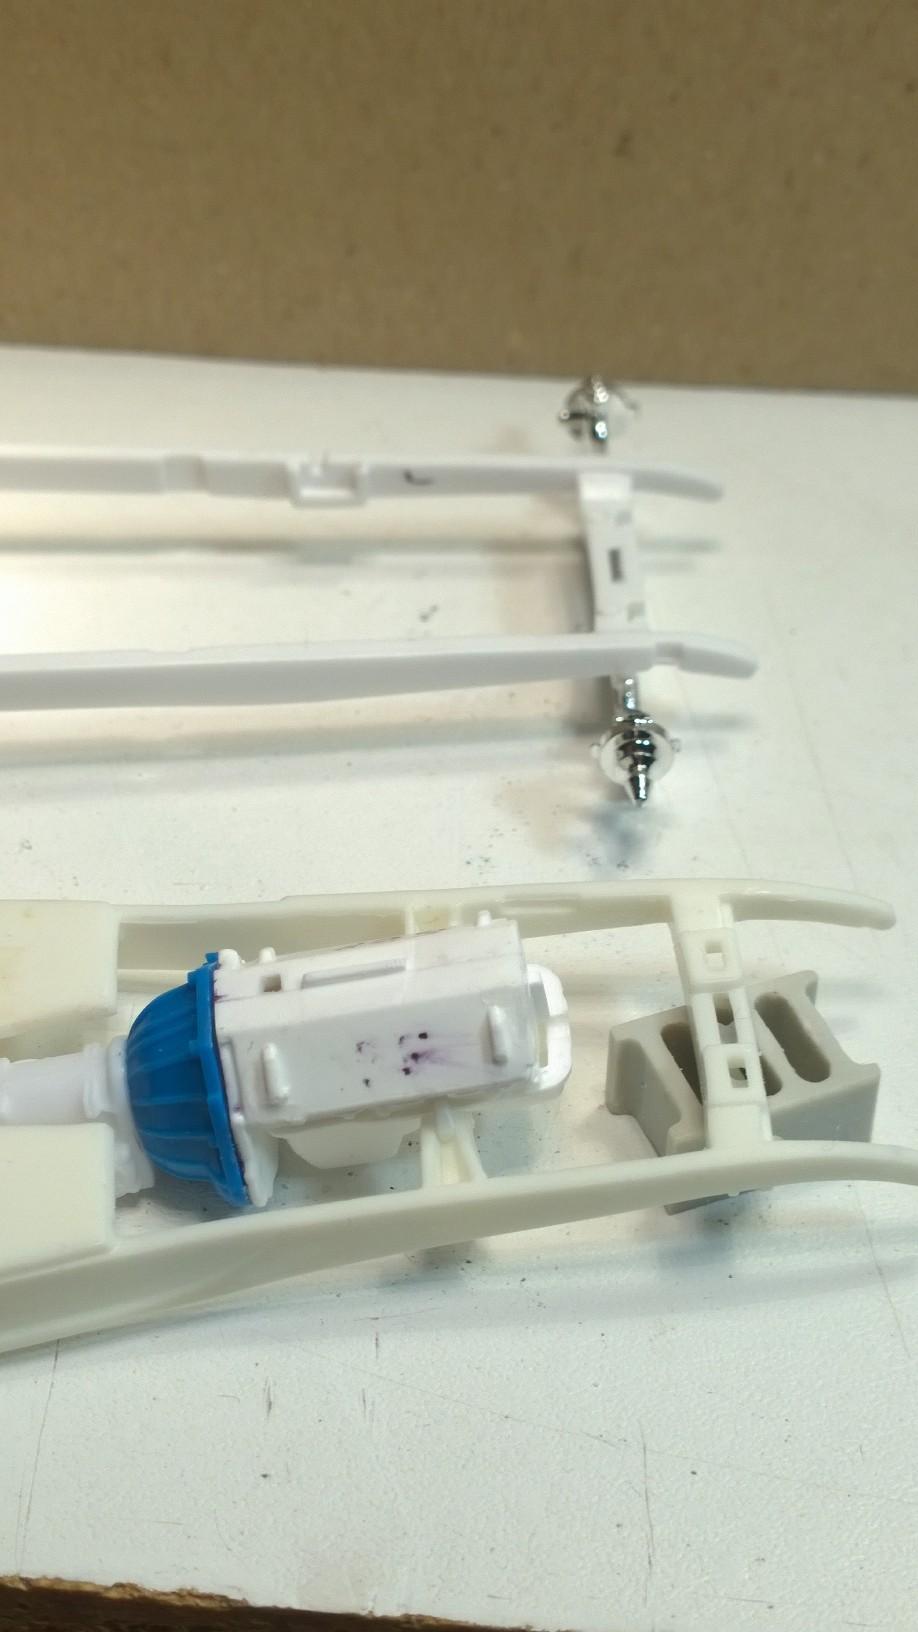
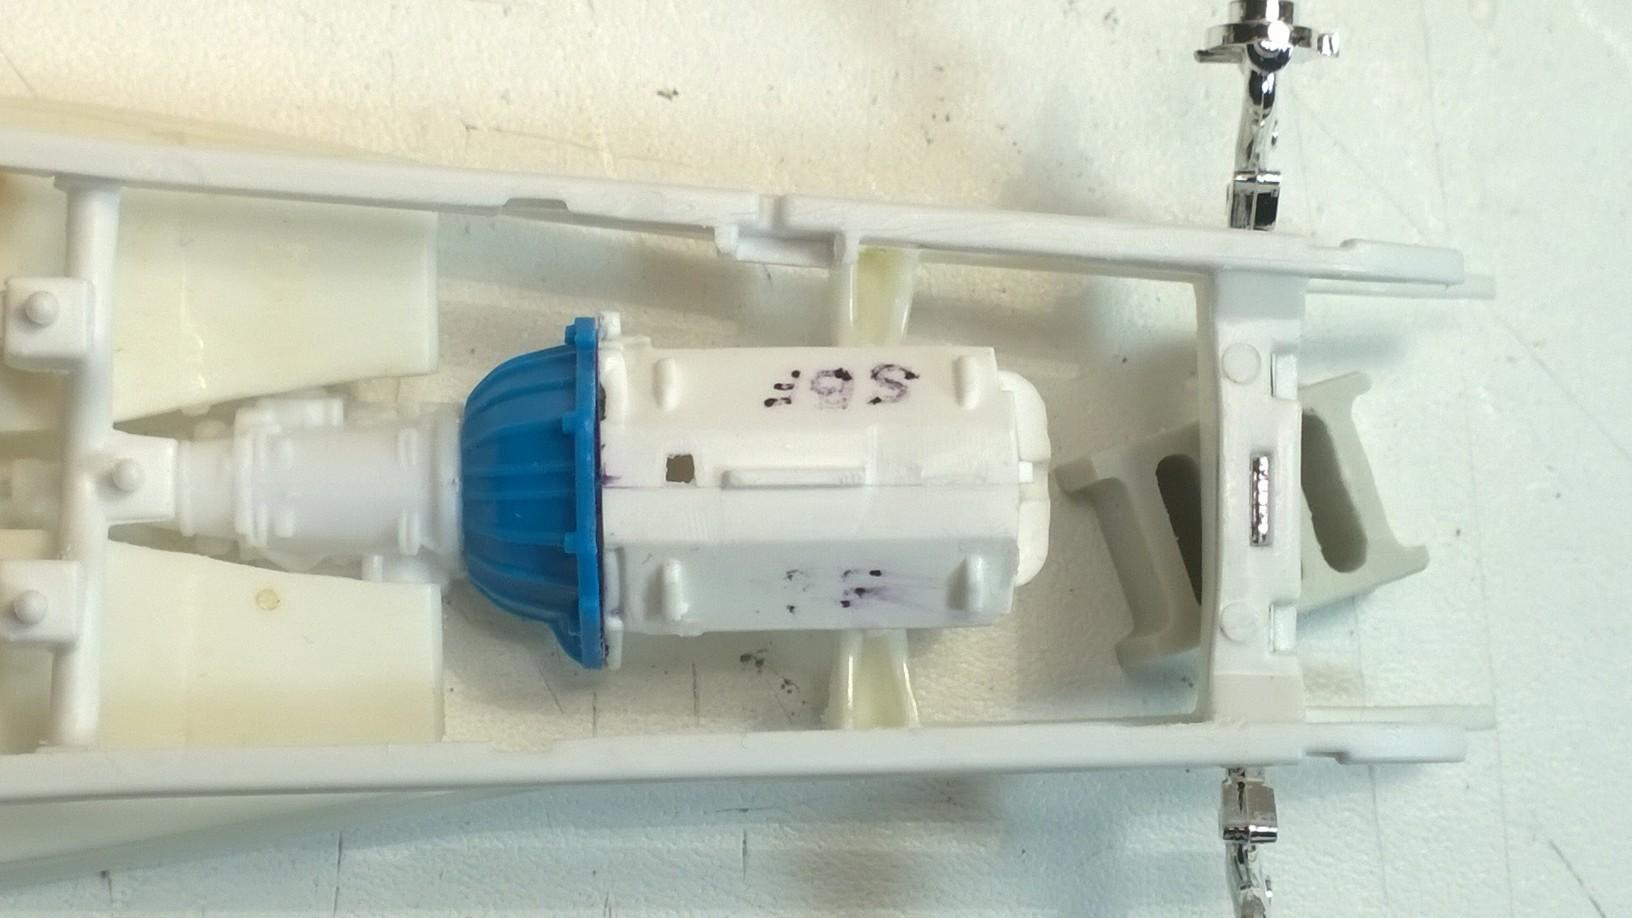
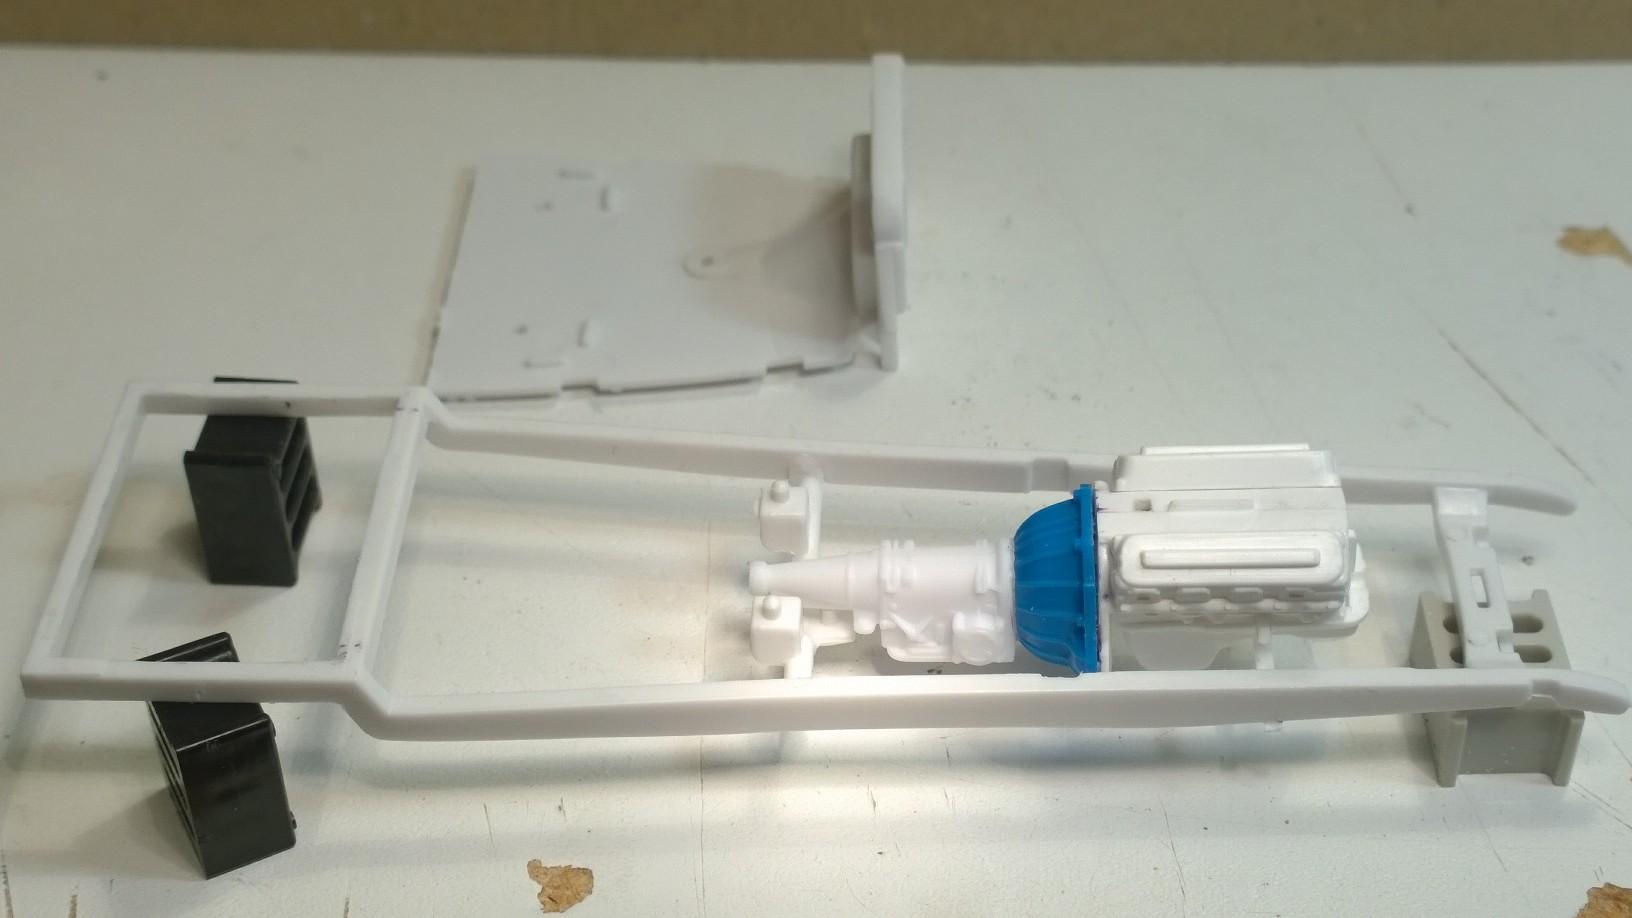
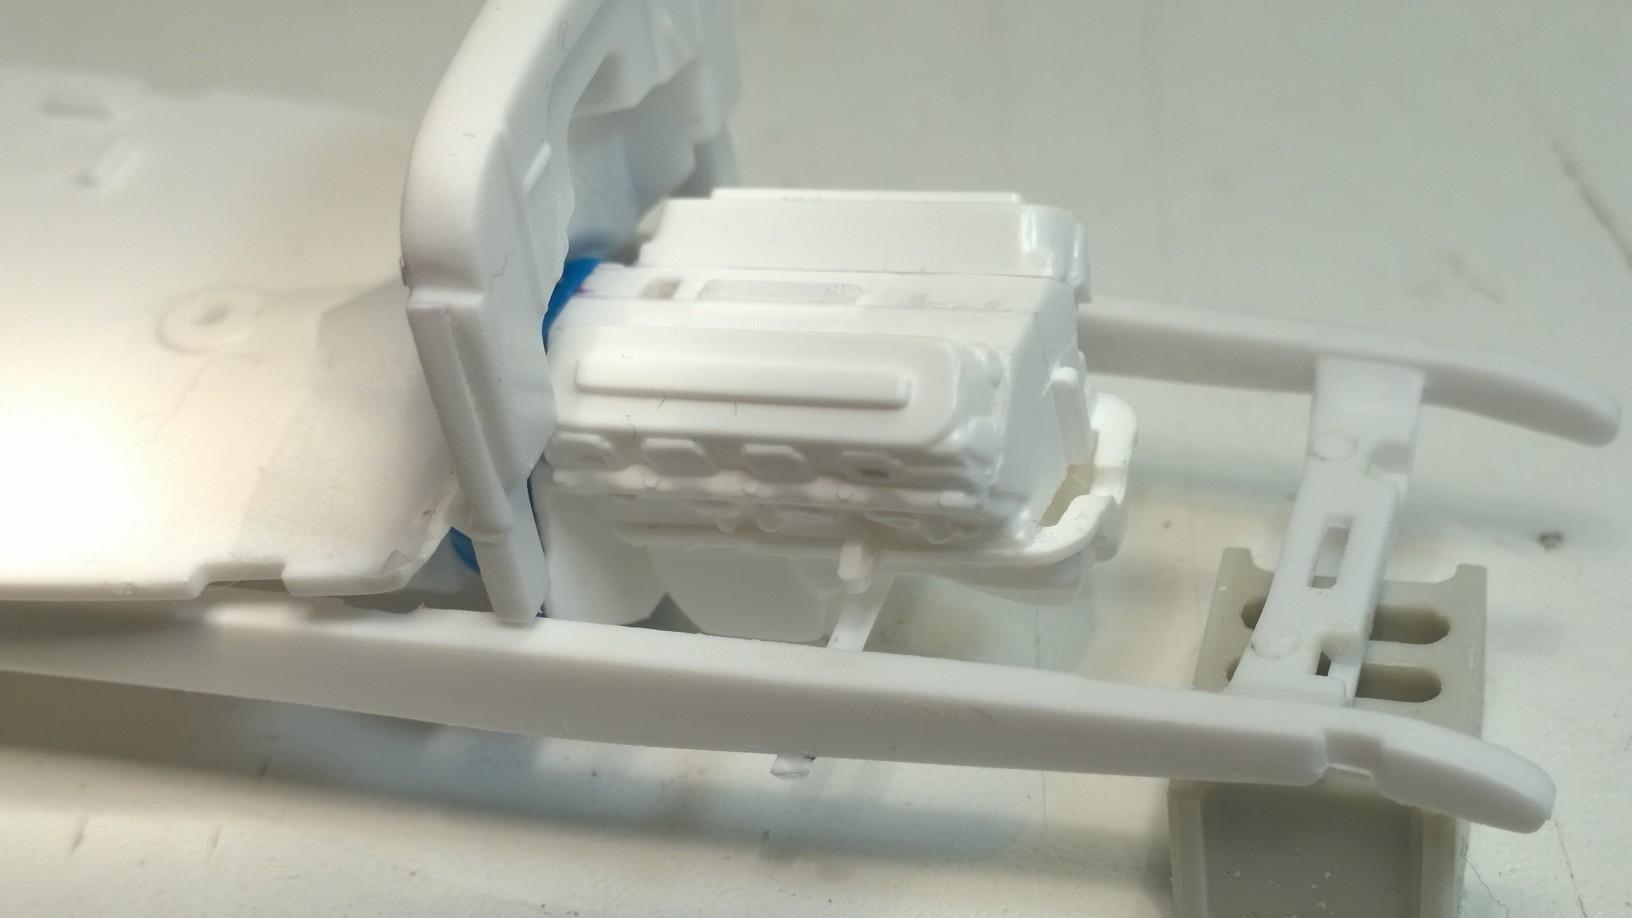
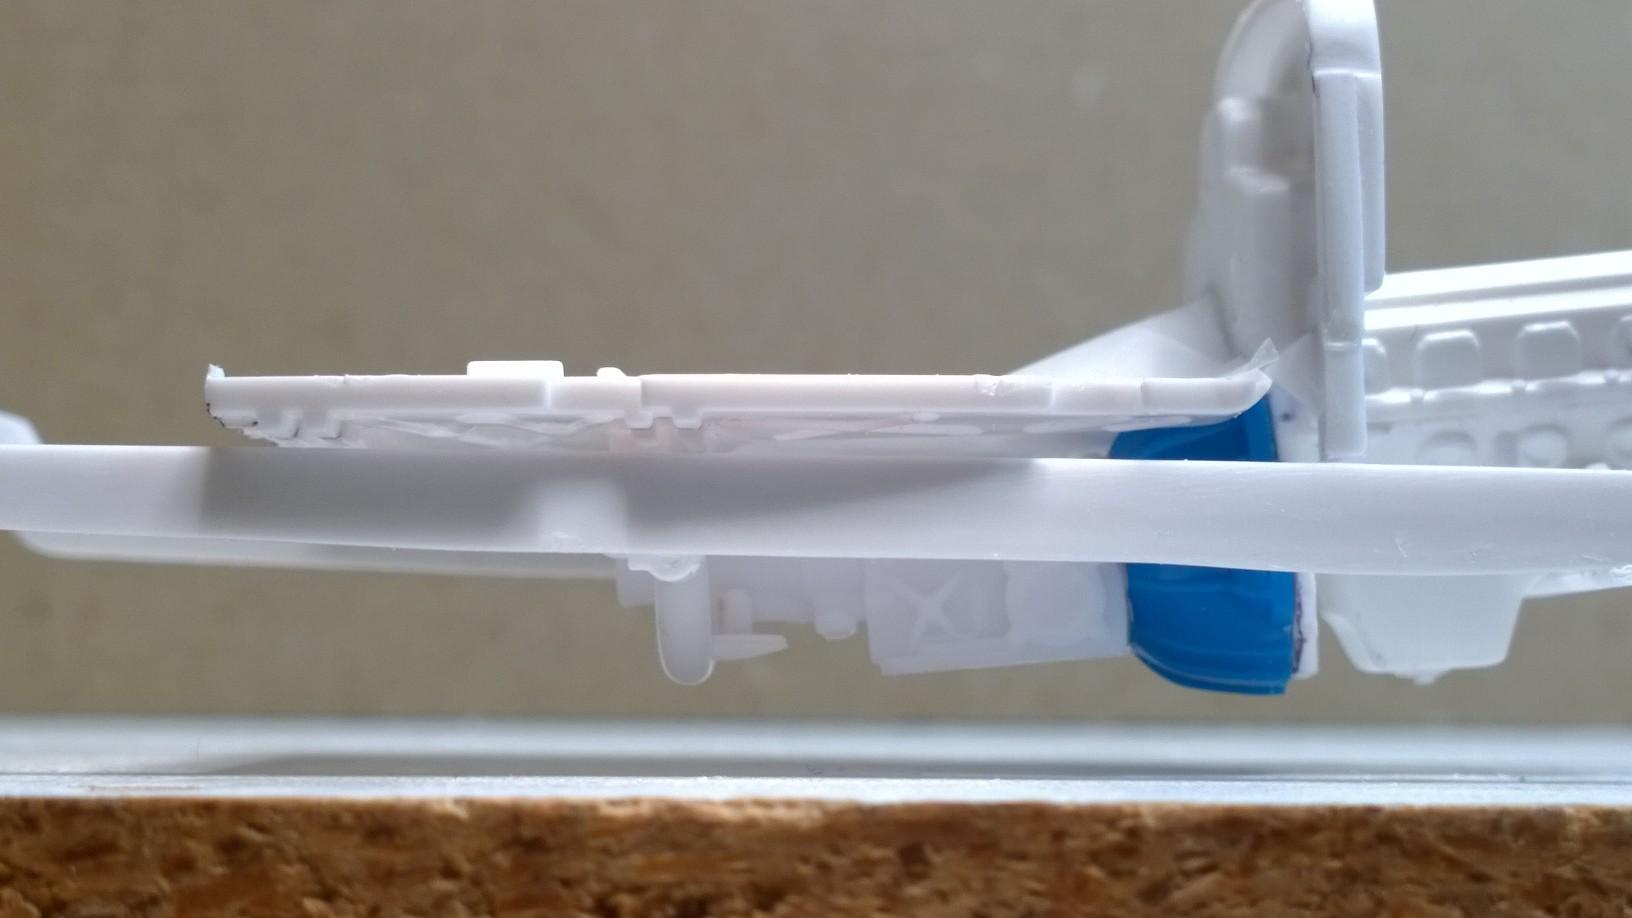
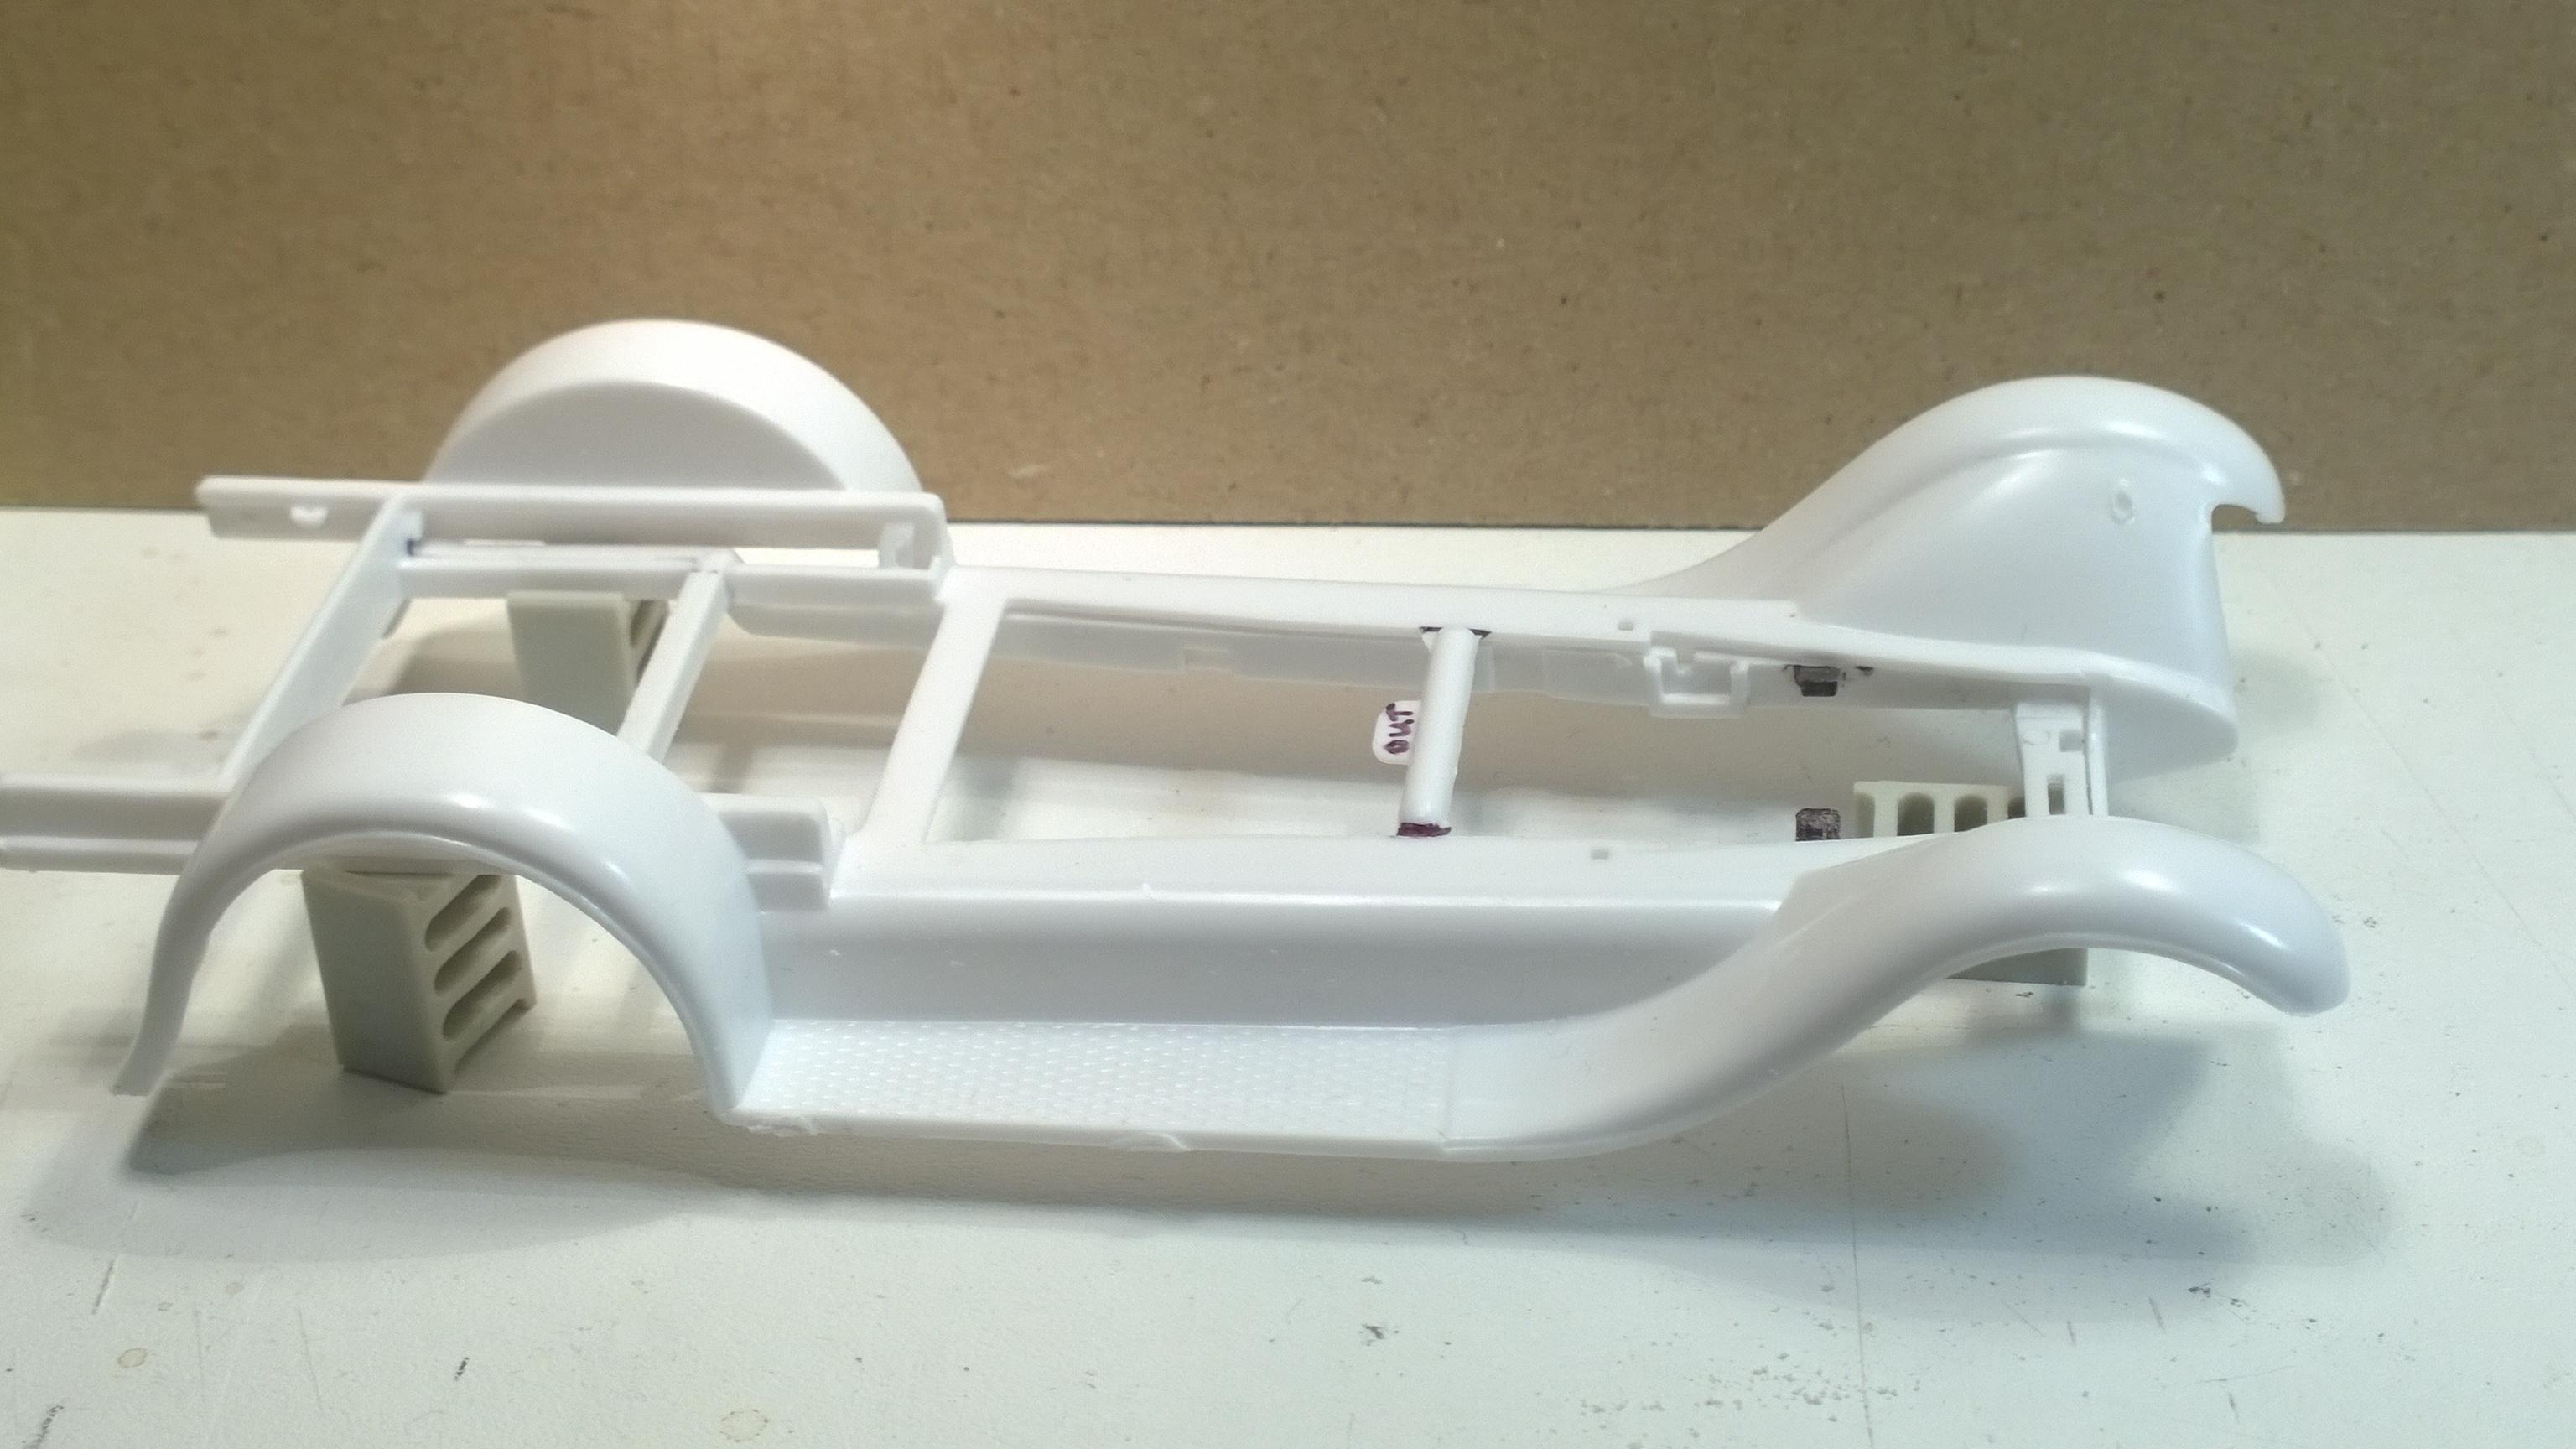
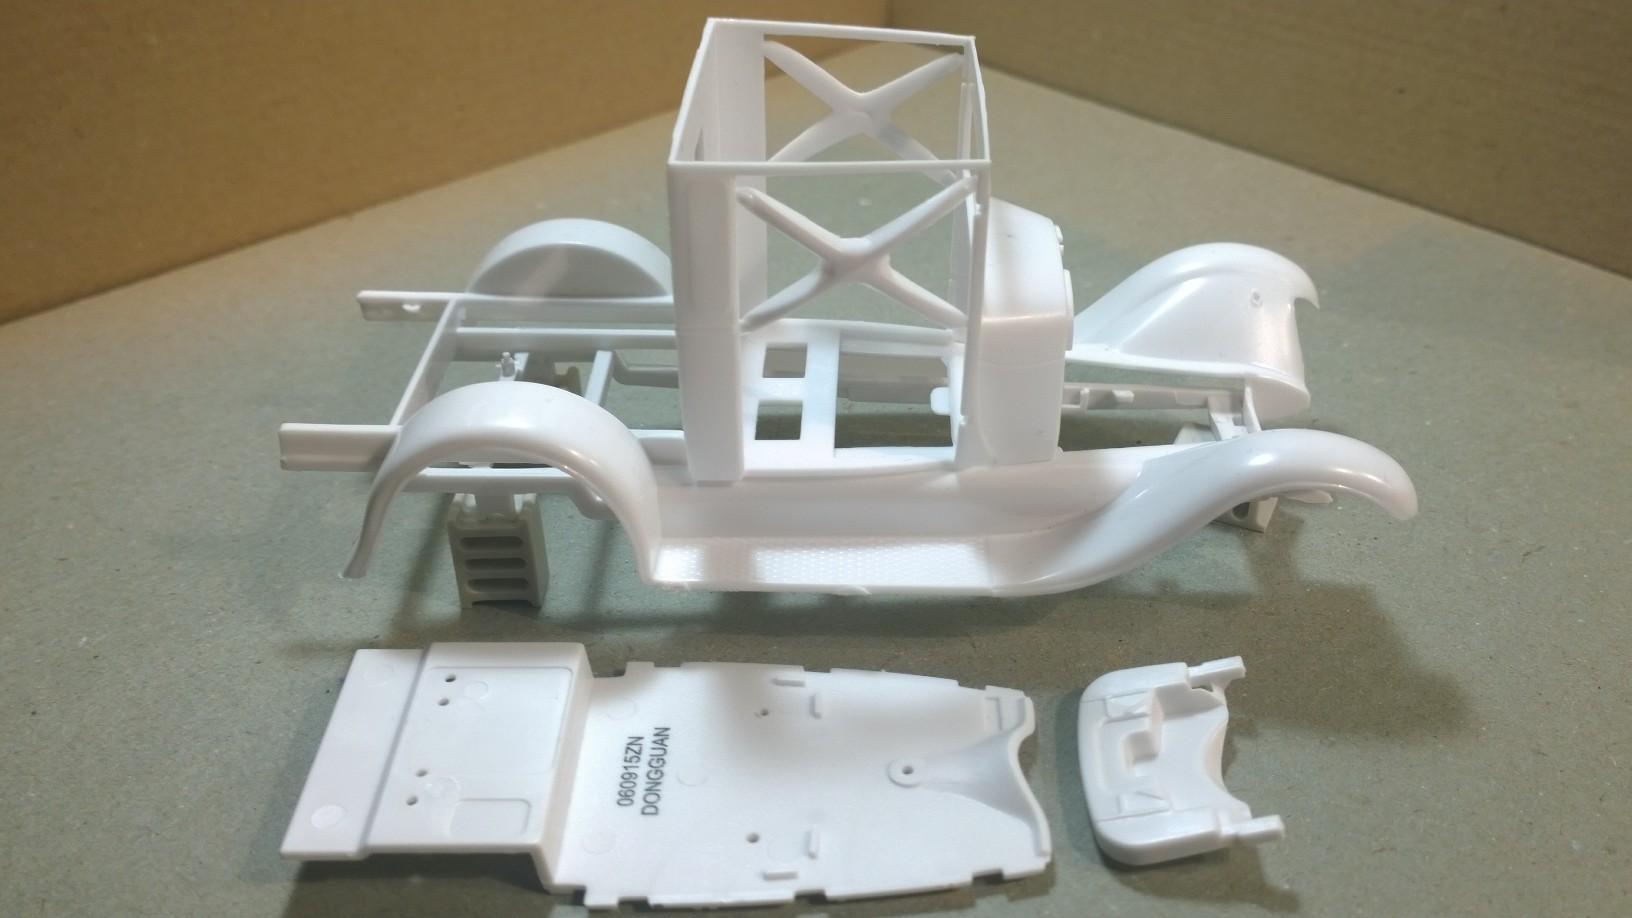
There's going to be a little cross-pollination going on in the next step of mating the cross-bread engine and transmission to the '29 Roadster frame. There are a couple of ways to attack this and staying with retaining as much of the box stock assembly, locating the '29 Roadster 140 Cross Member in the notched locator slots in the '29 Roadster frame, is where we'll start. With a little dab of white glue... placed the cross member inside of the frame rails. Sizing up the location of the engine & transmission relative to the '29 Roadster frame... (Note: the original '29 Roadster motor mounts have been removed, earlier) Because the block and oil pan came from the Revell Deuce kit, Deuce motor mounts will be transferred to our Model A hot rod frame! Here's the Deuce oil pan mounted the the box stock mounts. (If you go back in this thread, you'll see @Rocking Rodney Rat scratched built his motor mounts.) Setting the engine and transmission into the box stock donor frame shows us where the engine will need to be placed into the Model A hot rod frame. Setting the hot rod frame on top of the Deuce frame, gives us an overhead view of where the engine will be placed. A quick measure of the frame widths, shows that the Deuce motor mounts will crossover to the hot rod frame... '29 Roadster frame Deuce frame One more look at where the engine needs to set relative to the frame & firewall... Now, the distance that the Deuce motor mounts need to be placed bac from the front cross member. Here is where we need to establish a guide for placing the Deuce motor mounts in the right place within the hot rod rails. A piece of half-round rod is temporally glued across the bottom of the rails at the center point of the Deuce engine mounts. Again, eye-balling the location of the main parts, once again... Flipping over the frame... ...and, placing the engine & transmission on the temporary cross-bar... we can see where the tranny mount will need to be relative to the engine mounts. The engine & transmission sit right where they ought to be... Looks like the firewall will fit, sorta! But, there's a lot more to be done to make this all come together! -KK
-
@alan barton Say WHAT!?. Brother, I'm right there with you! In keeping with identifying the Revell parts being used in this build, (although I found a pair of Monogram parts, yesterday... that might be added later) modifying many of them will come later while doing the body work, e.g. Filling in the hinges on the body, doors & box and tailgate. Not wanting to miss the opportunity to polish this '29A Closed Cab Pickup into an '80s/'90s style hot rod as this build progresses, has left several pieces in their original box stock condition during the initial steps they are presented. Sooo, to that end... smoothing the swag out of the ol' '30/'31 Ford firewall is already on my story board. @alan barton, I'm sure that @tim boyd, @Dennis Lacy & @Rocking Rodney Rat wouldn't mind seeing the parts you pulled together! I know I would!! Thanks, for following along! This is what sharing this hobby is all about!! -KK
-
Won't be able to hide this under a hood! Shinny distraction draws the eye to the chrome backed by an ample amount of Oval Blue!! Excellent presentation, Brother!!! -KK
-
Thanks, guys! I'll get on with it!! -KK
-
Alright, I've been waiting to see something up here from someone other than me. I got a text from my good friend John asking for an update on the Tribute builds. I told him that I had made a bunch of progress on my build and @Rocking Rodney Rat had thrown some paint on his build and @Dennis Lacy had some primer on his build. I mentioned that I really didn't want to hi-jack ADL's thread and I'd rather wait until they added something on their builds. So here the question: You want to see a picture of where my build is right now, instead of the step-by-step updates on how I got here? -KK
-
@denis speed shop This is a very interesting project! Any update? -KK
-
'32 Roadster Interior and a bit of work... and, scratch tuck-n-roll is a challenge, too! -KK B-32 Tubster http://public.fotki.com/jferren/kit-karsons-32-tubster/
-
This is coming together wonderfully! Creating the right interior for a roadster is tough, right @tim boyd? I modified the interior so that it would wrap around the tub body in my Oldster: https://public.fotki.com/jferren/kit-karsons-oldster/
-
truck, boat, and trailer
Kit Karson replied to Paul Payne's topic in WIP: Model Trucks: Pickups, Vans, SUVs, Light Commercial
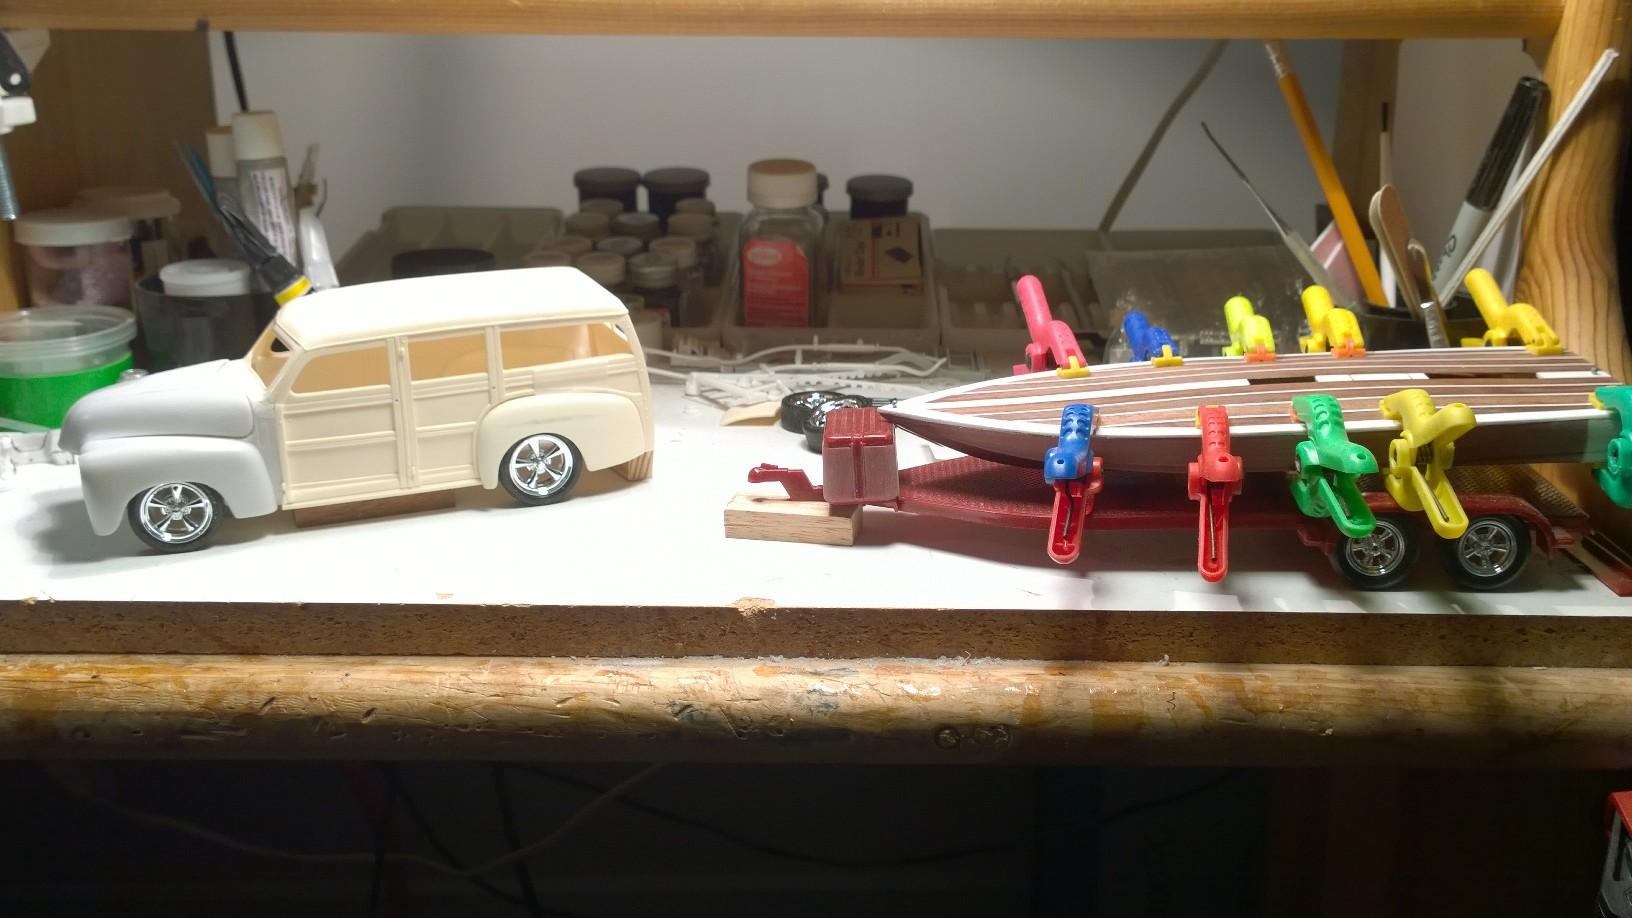
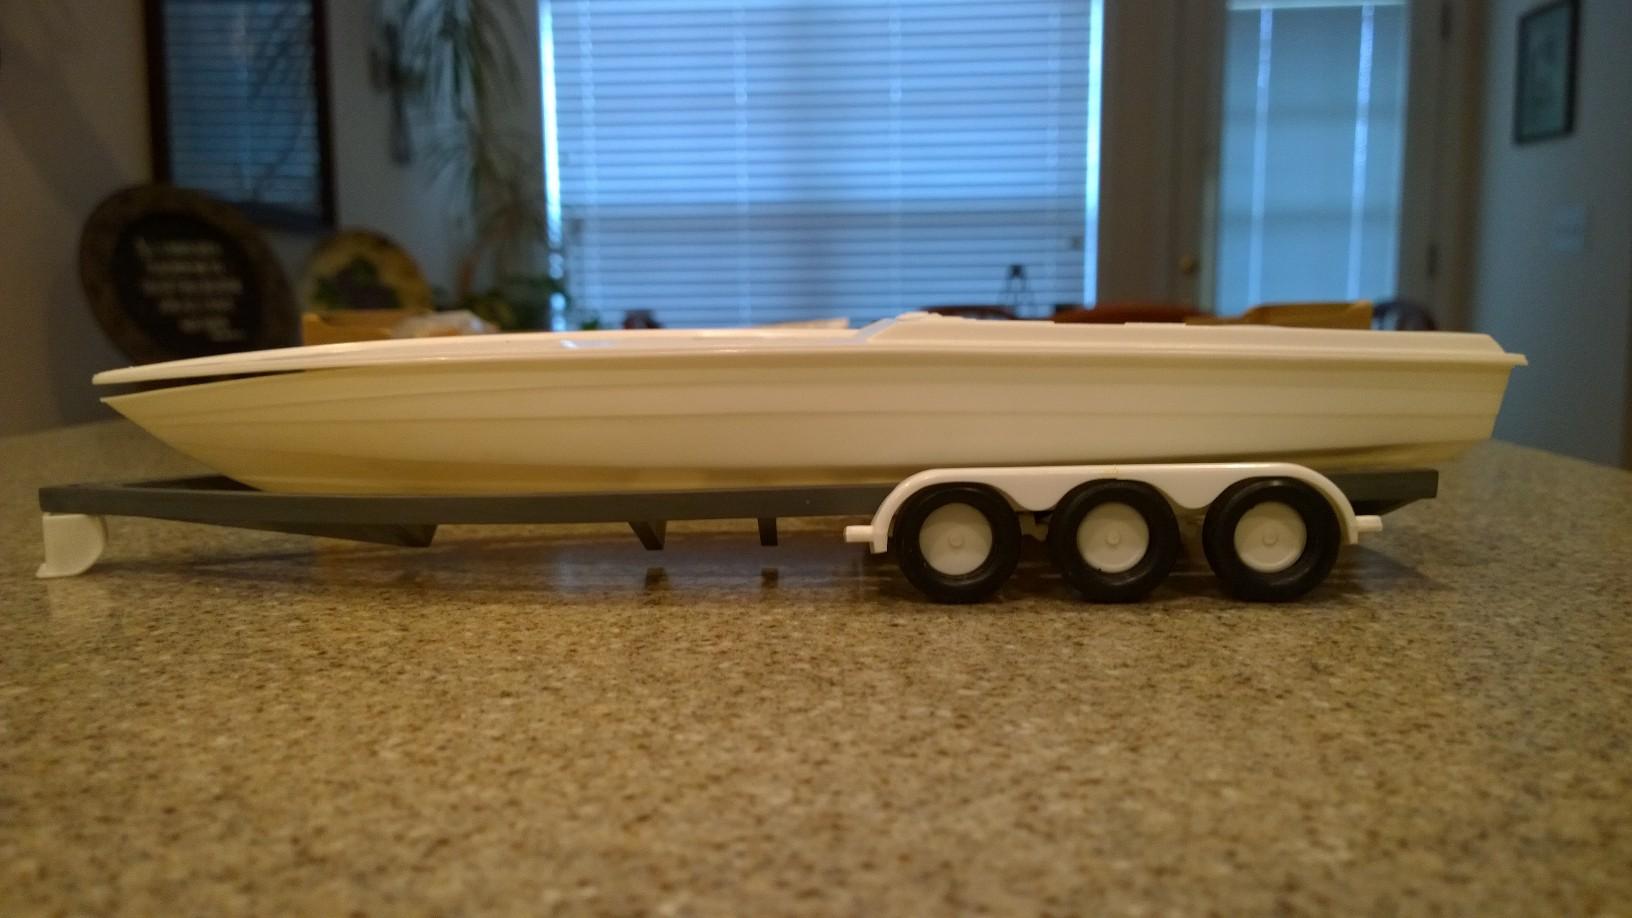
Love Wooden Boats! '49 Chevy 3100 Suburban Woody & Woodpecker Speed Boat And, it's not that difficult to scratch build a boat trailer! Offshore Rescale Cigarette Build on a scratch built trailer. Made a jig pattern and used Plastruct channel to make a boxed frame. I'll be following your build, @Paul Payne! -KK
-
Hindsight is always 20-20! Insight is forgiving. Foresight is priceless! -KK
-
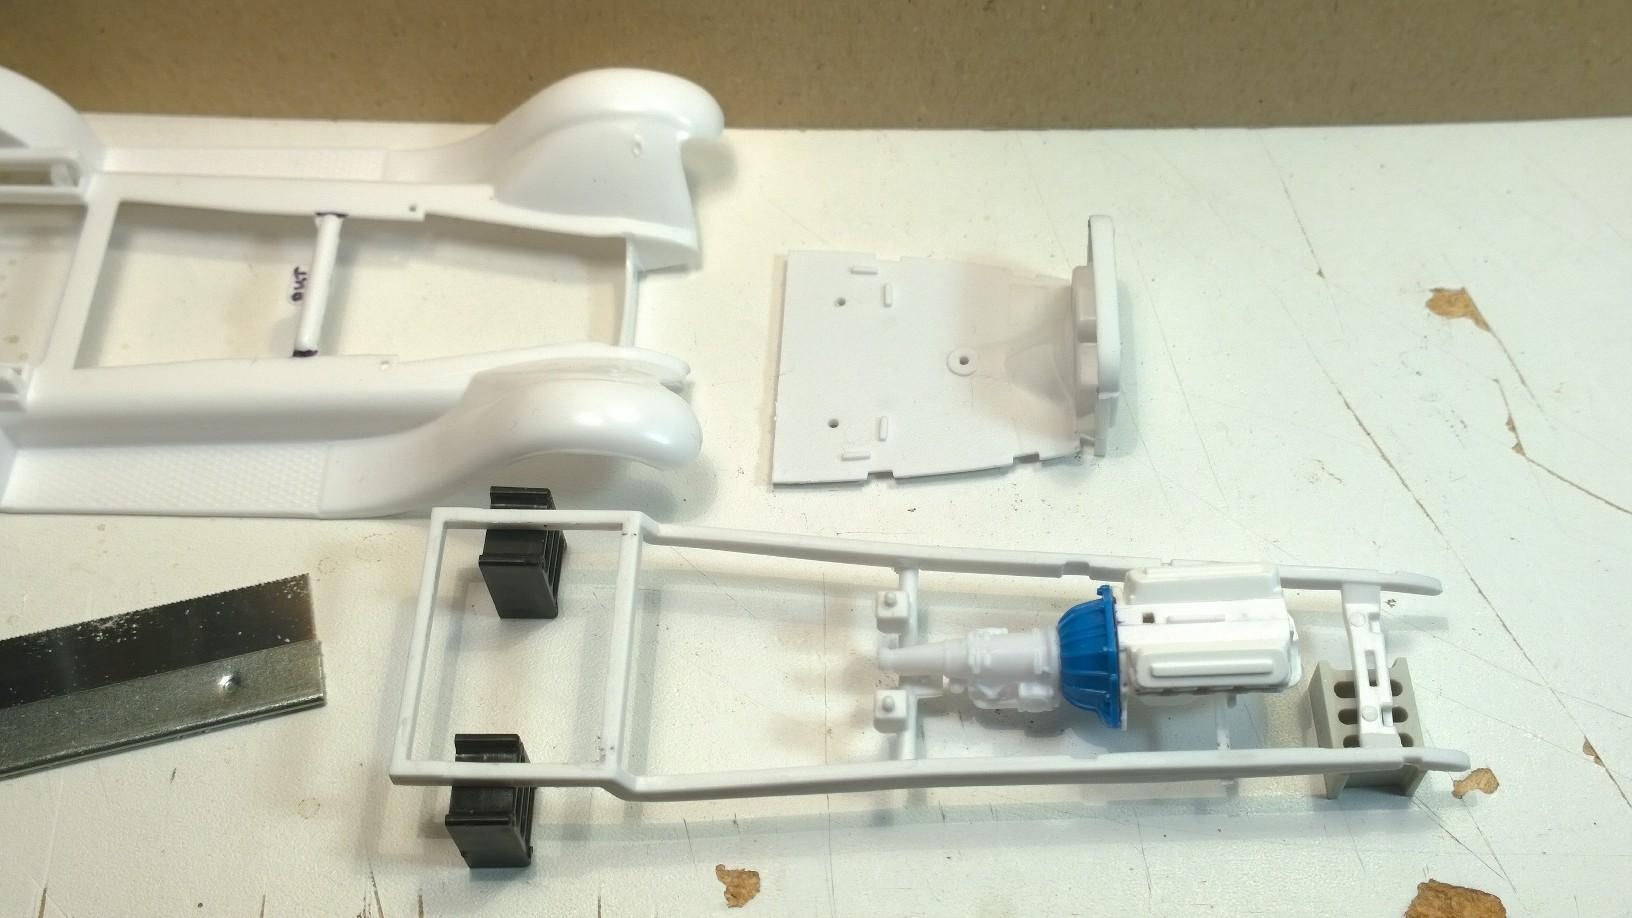
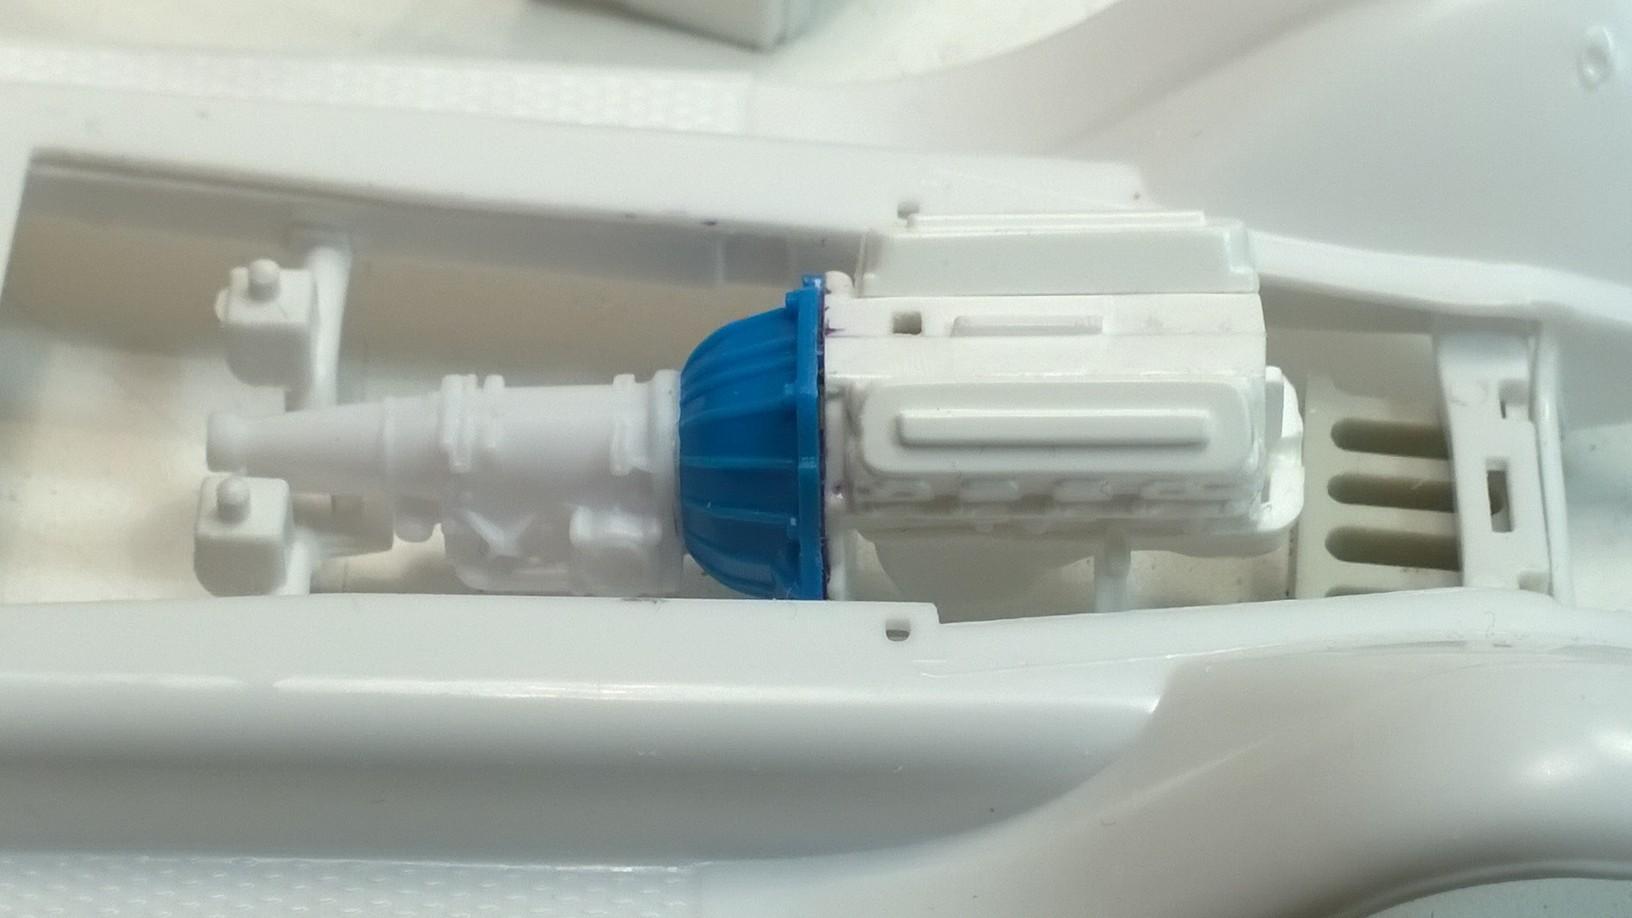
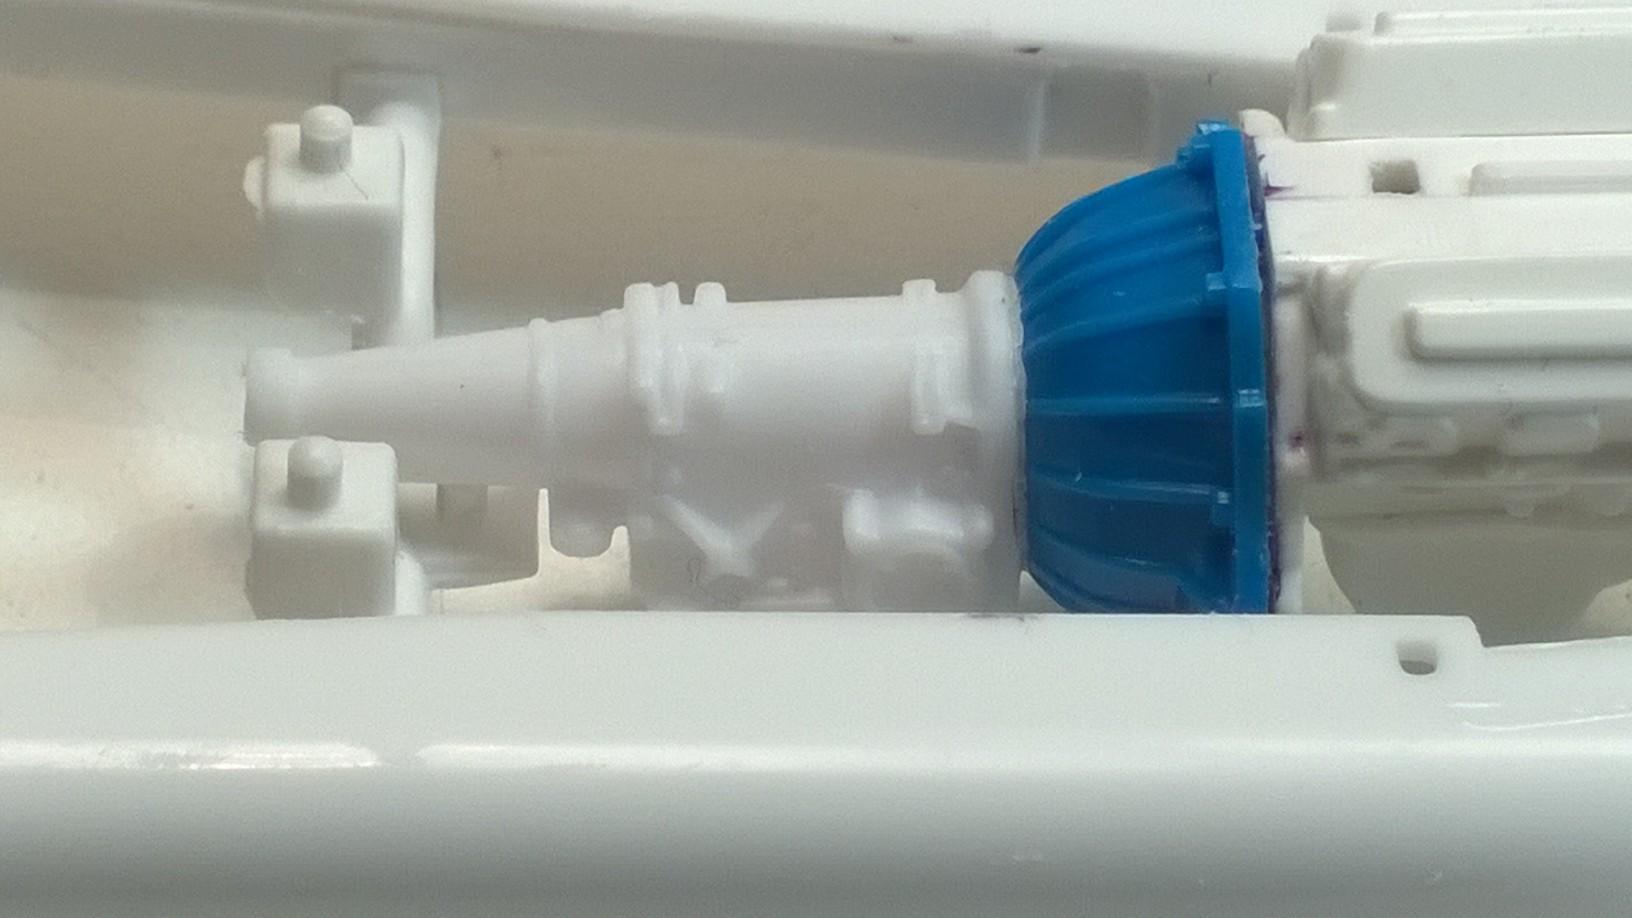
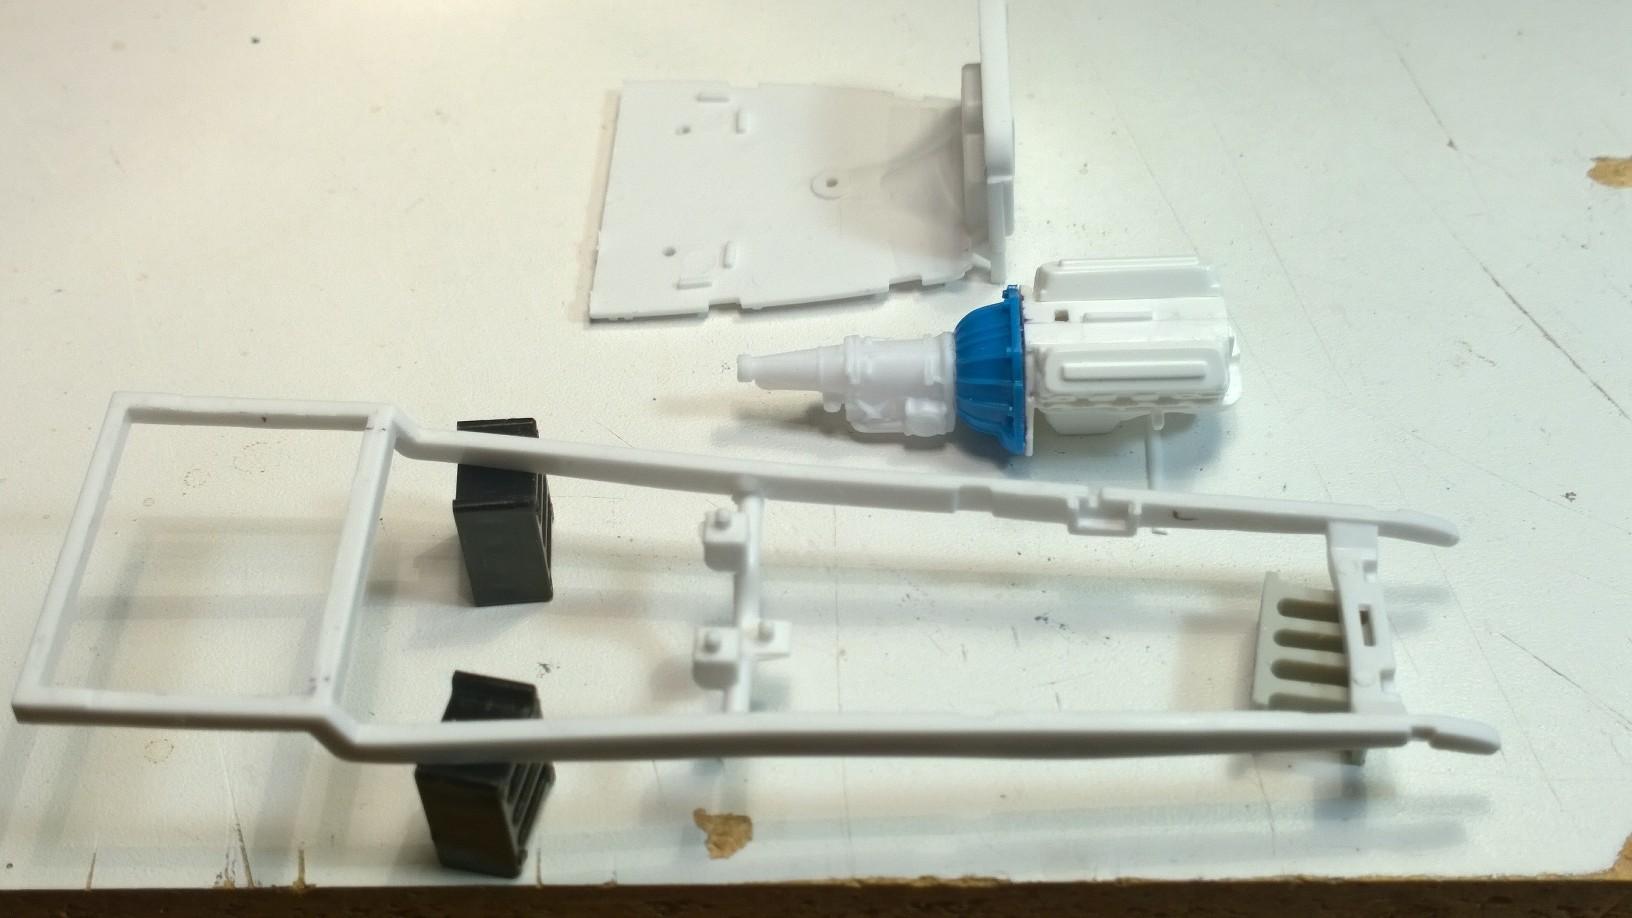
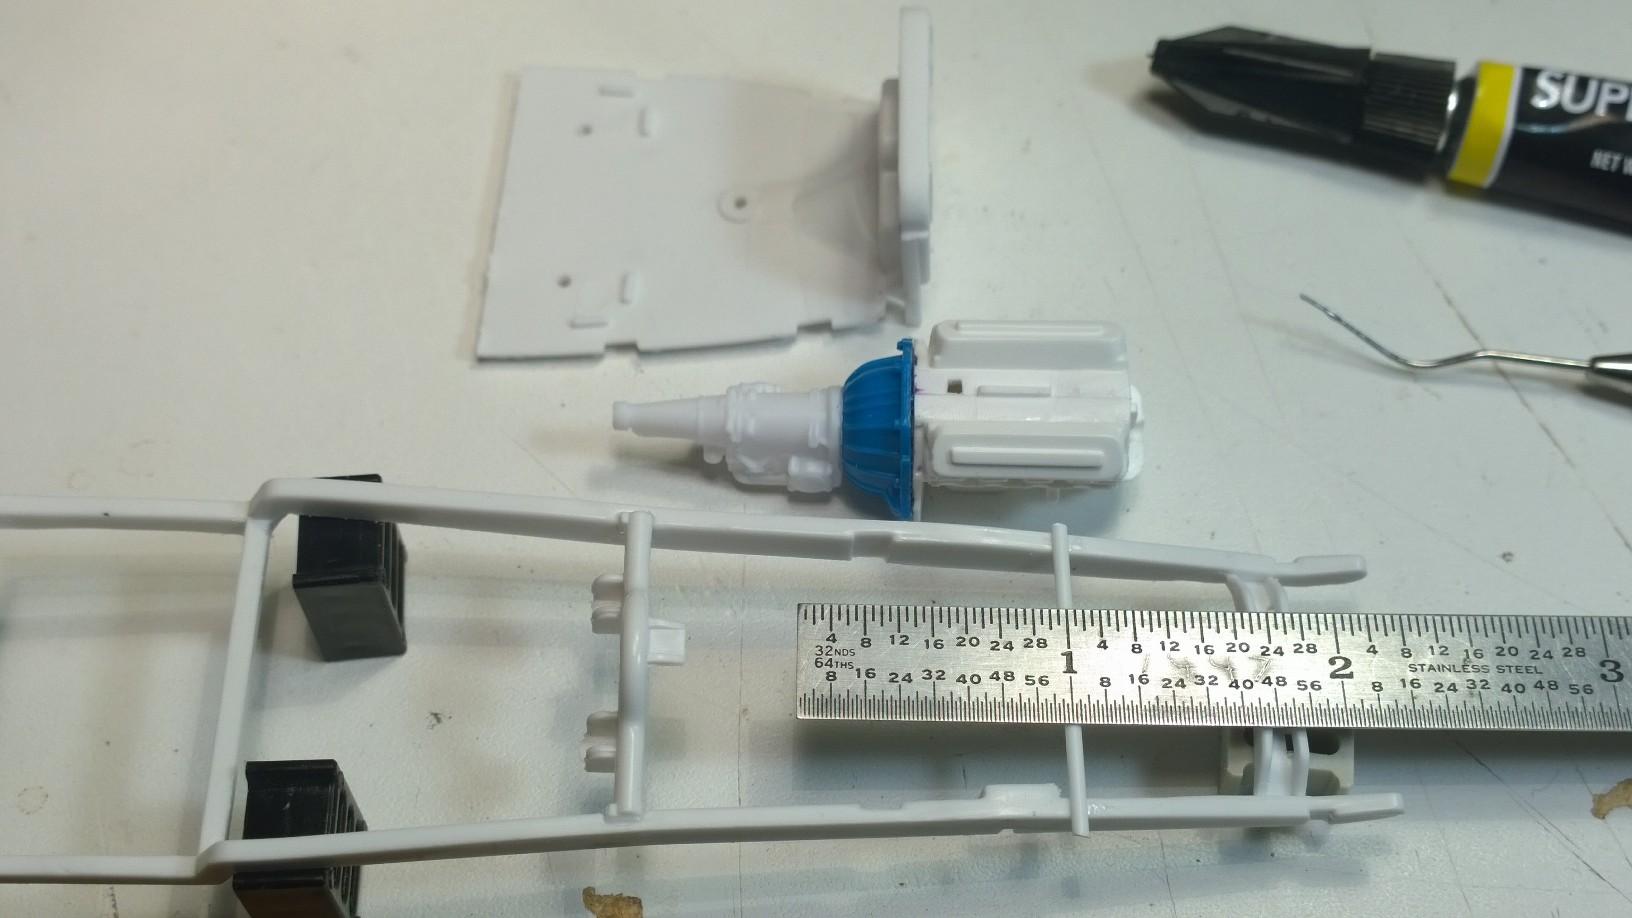
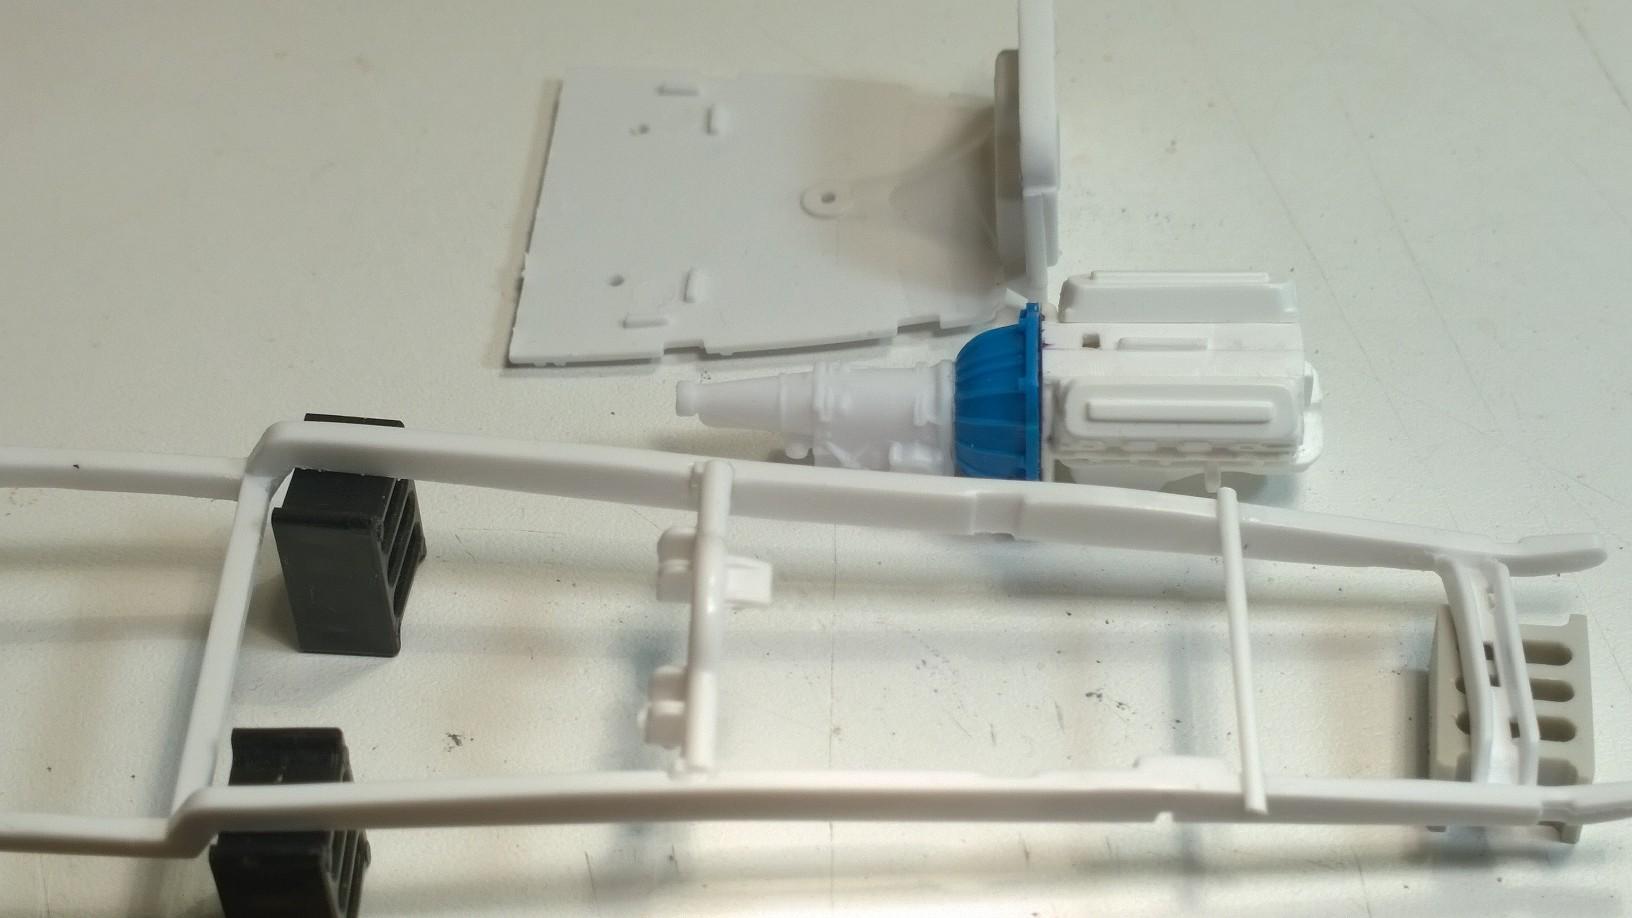
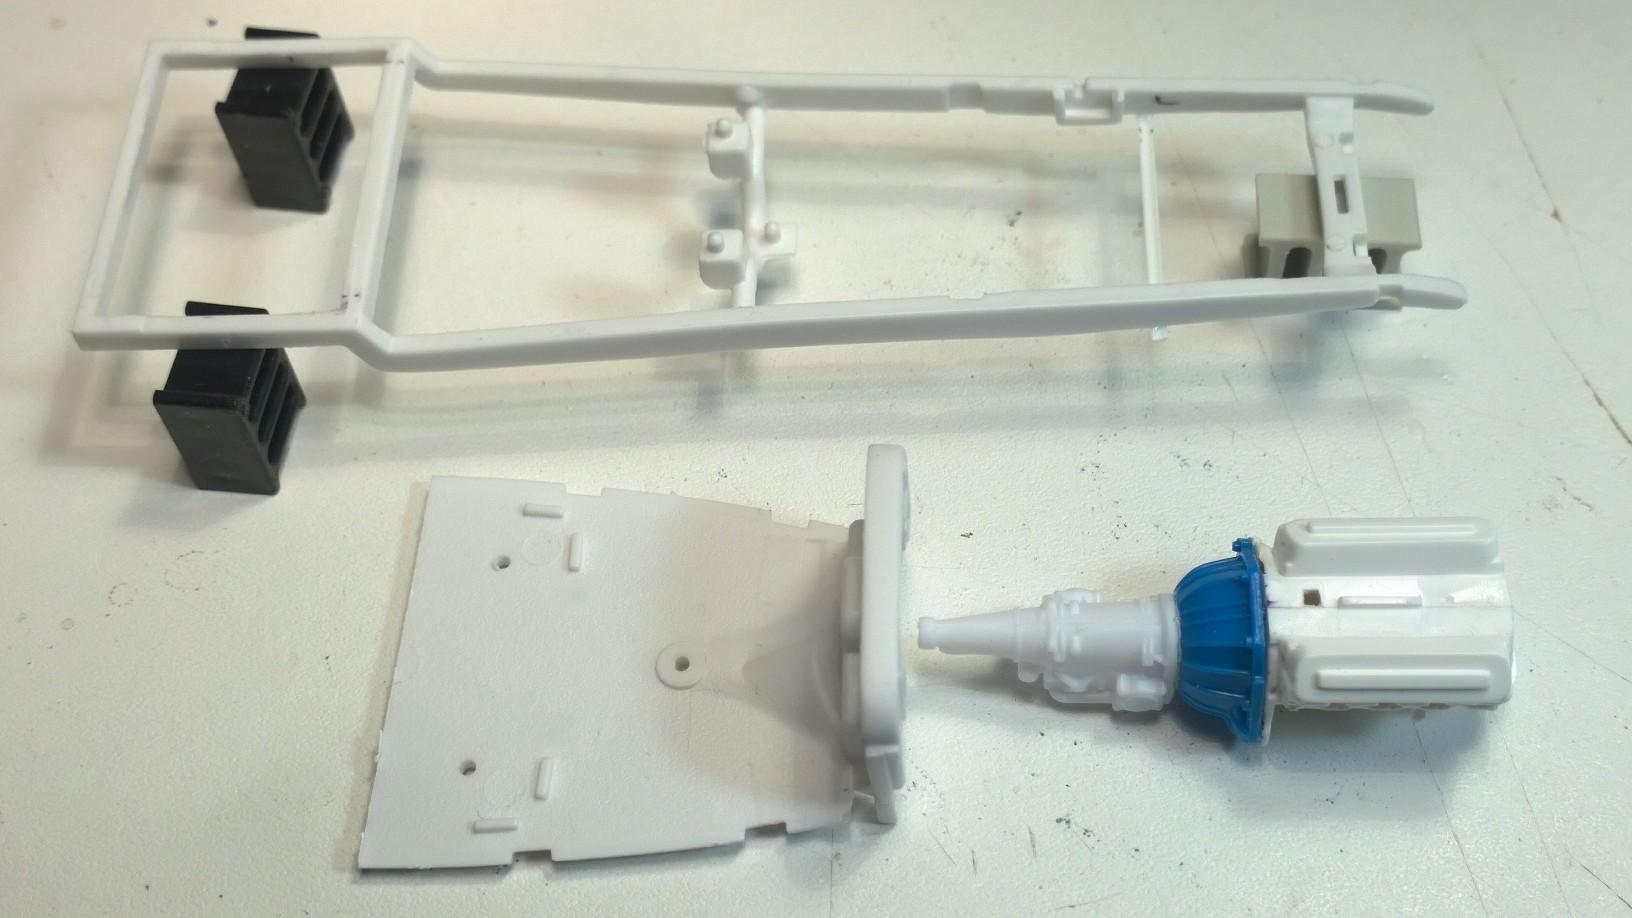
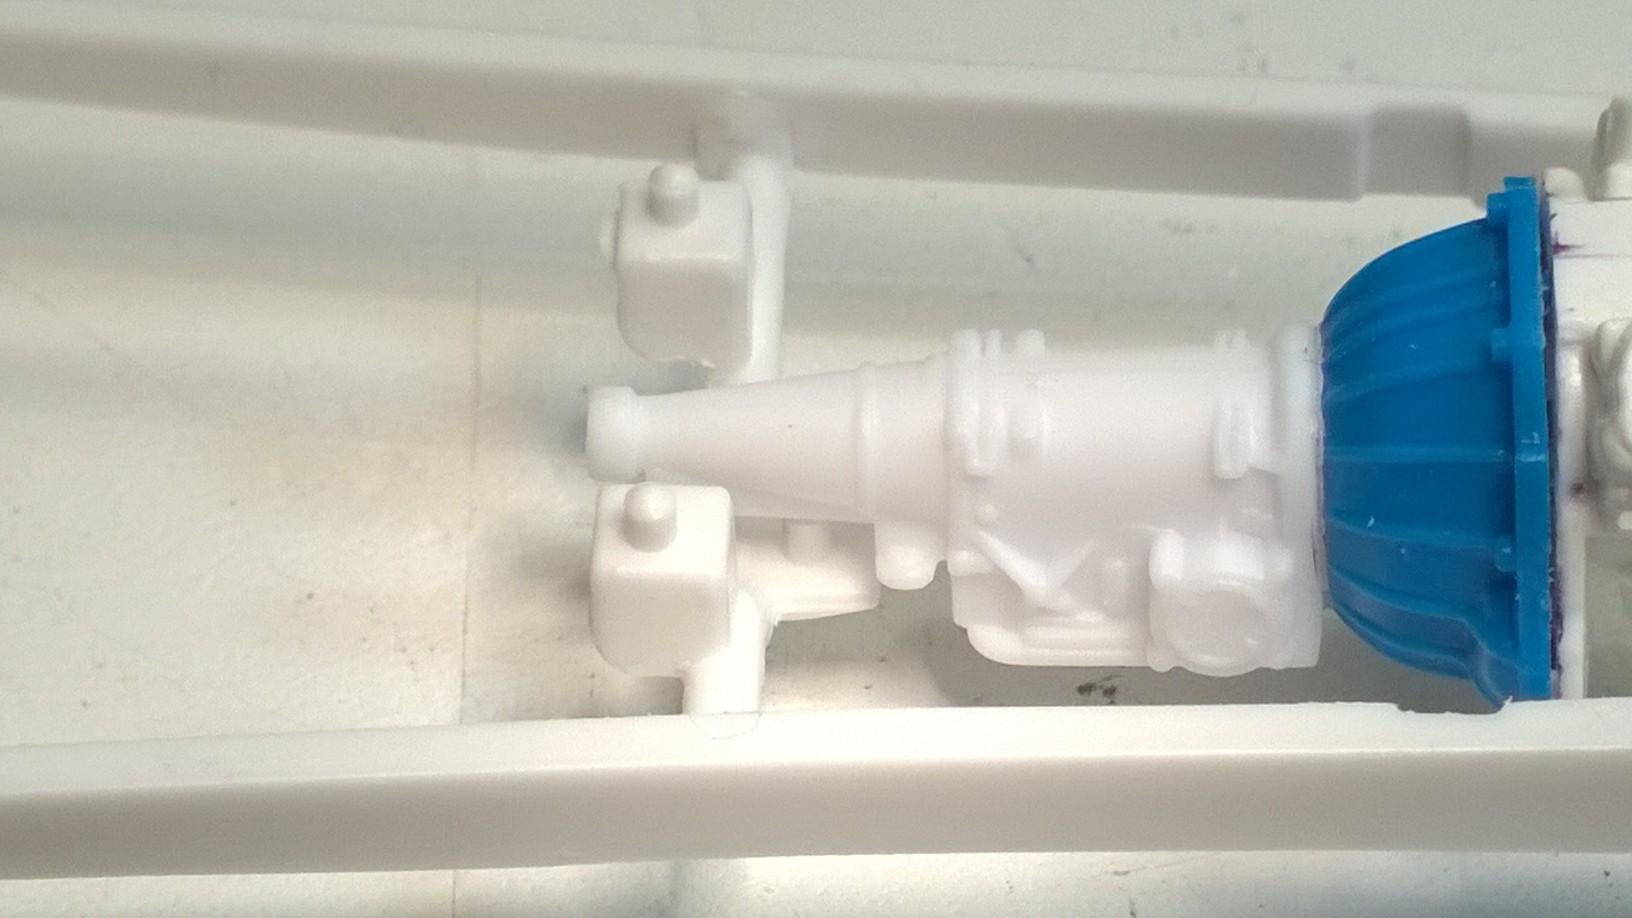
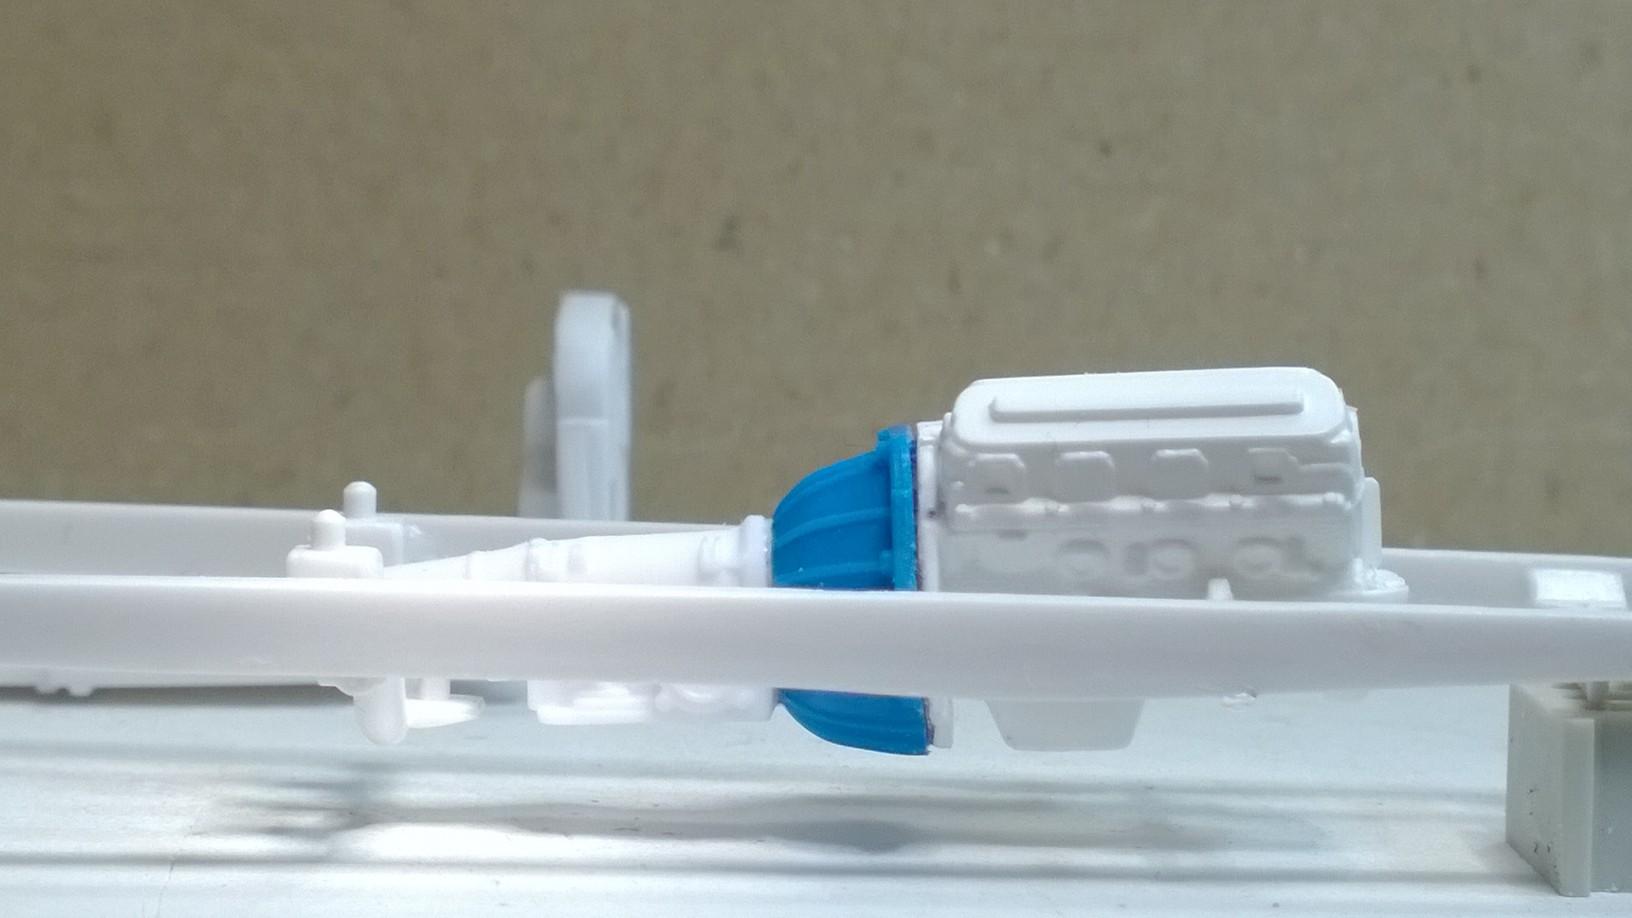
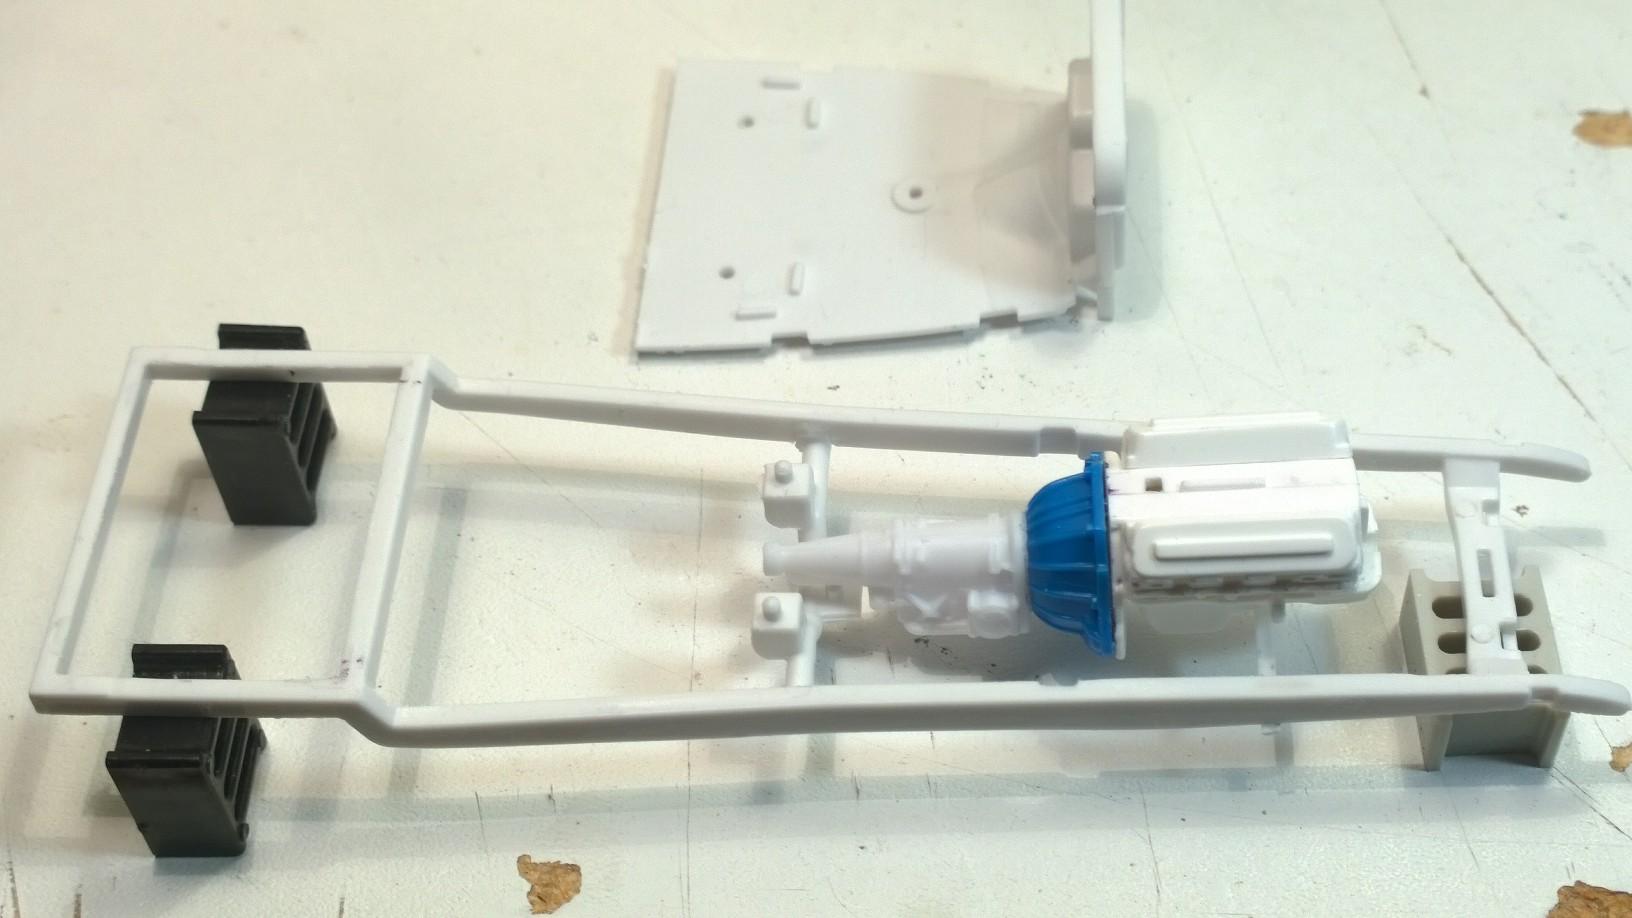
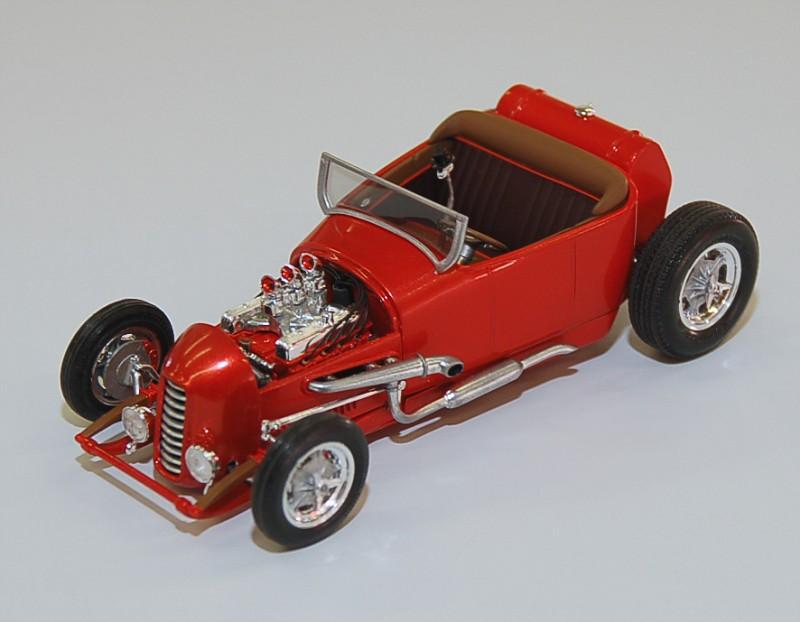
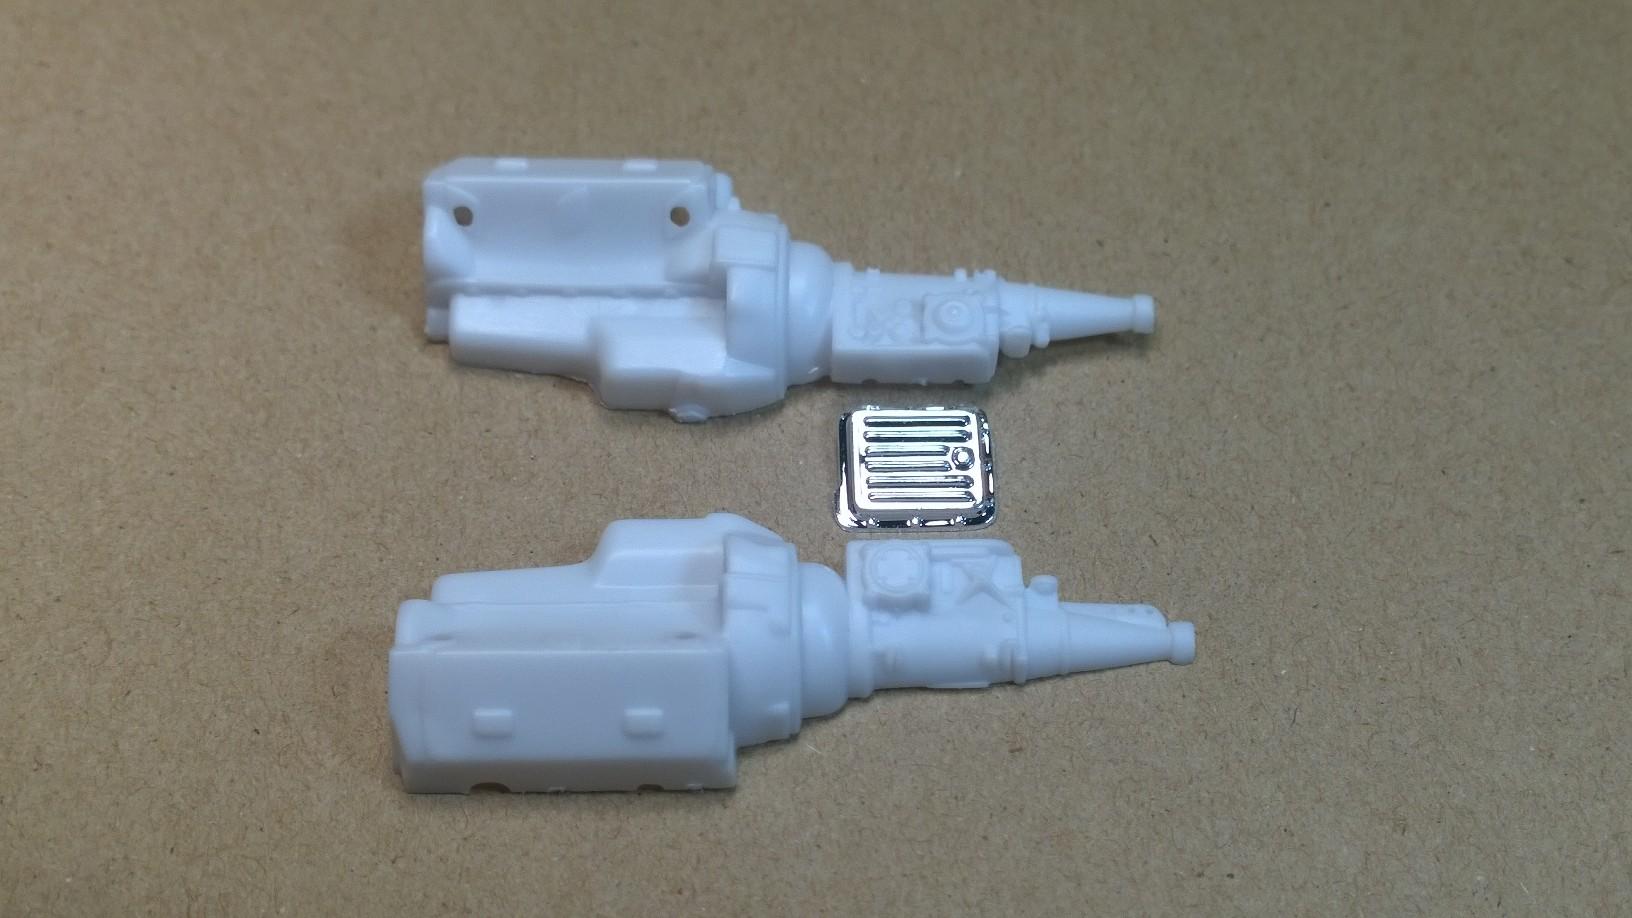
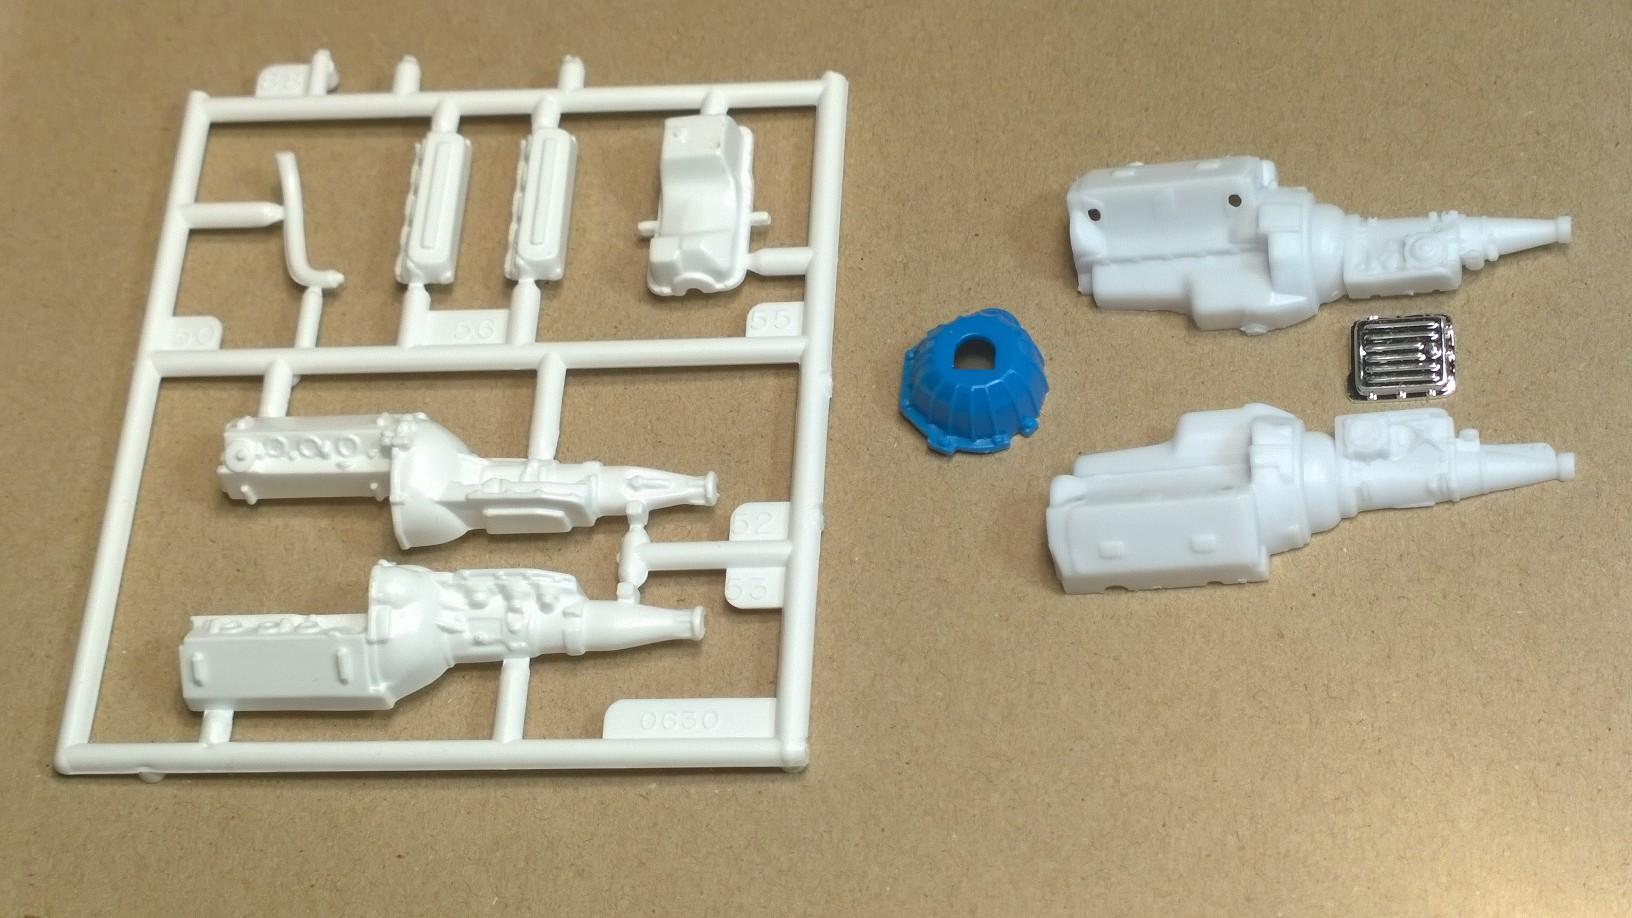
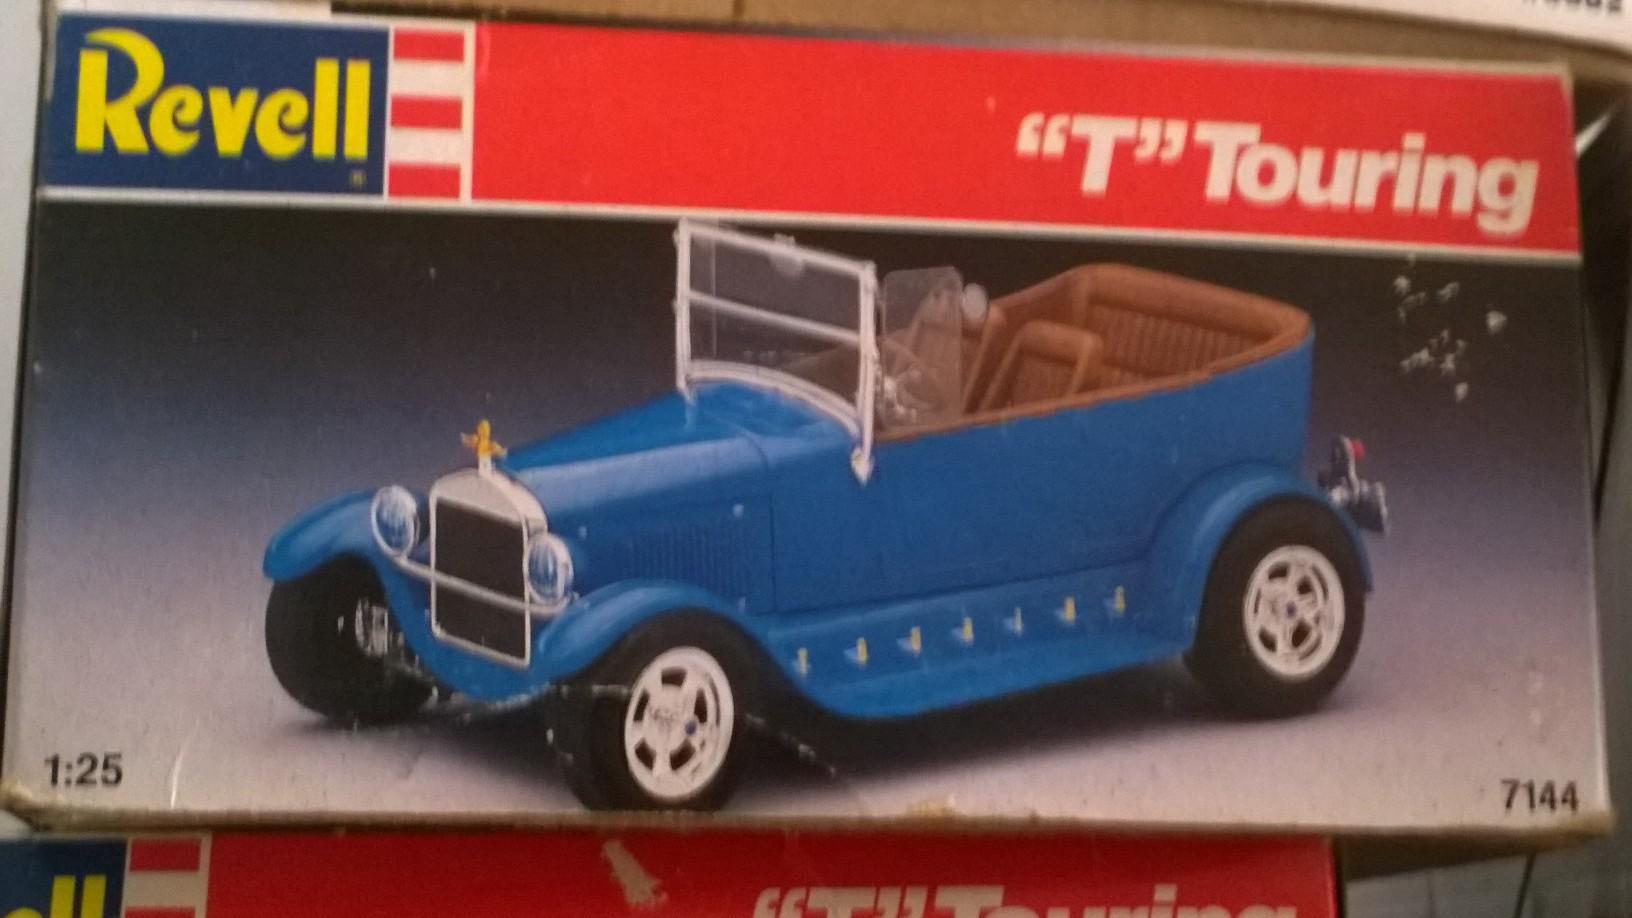
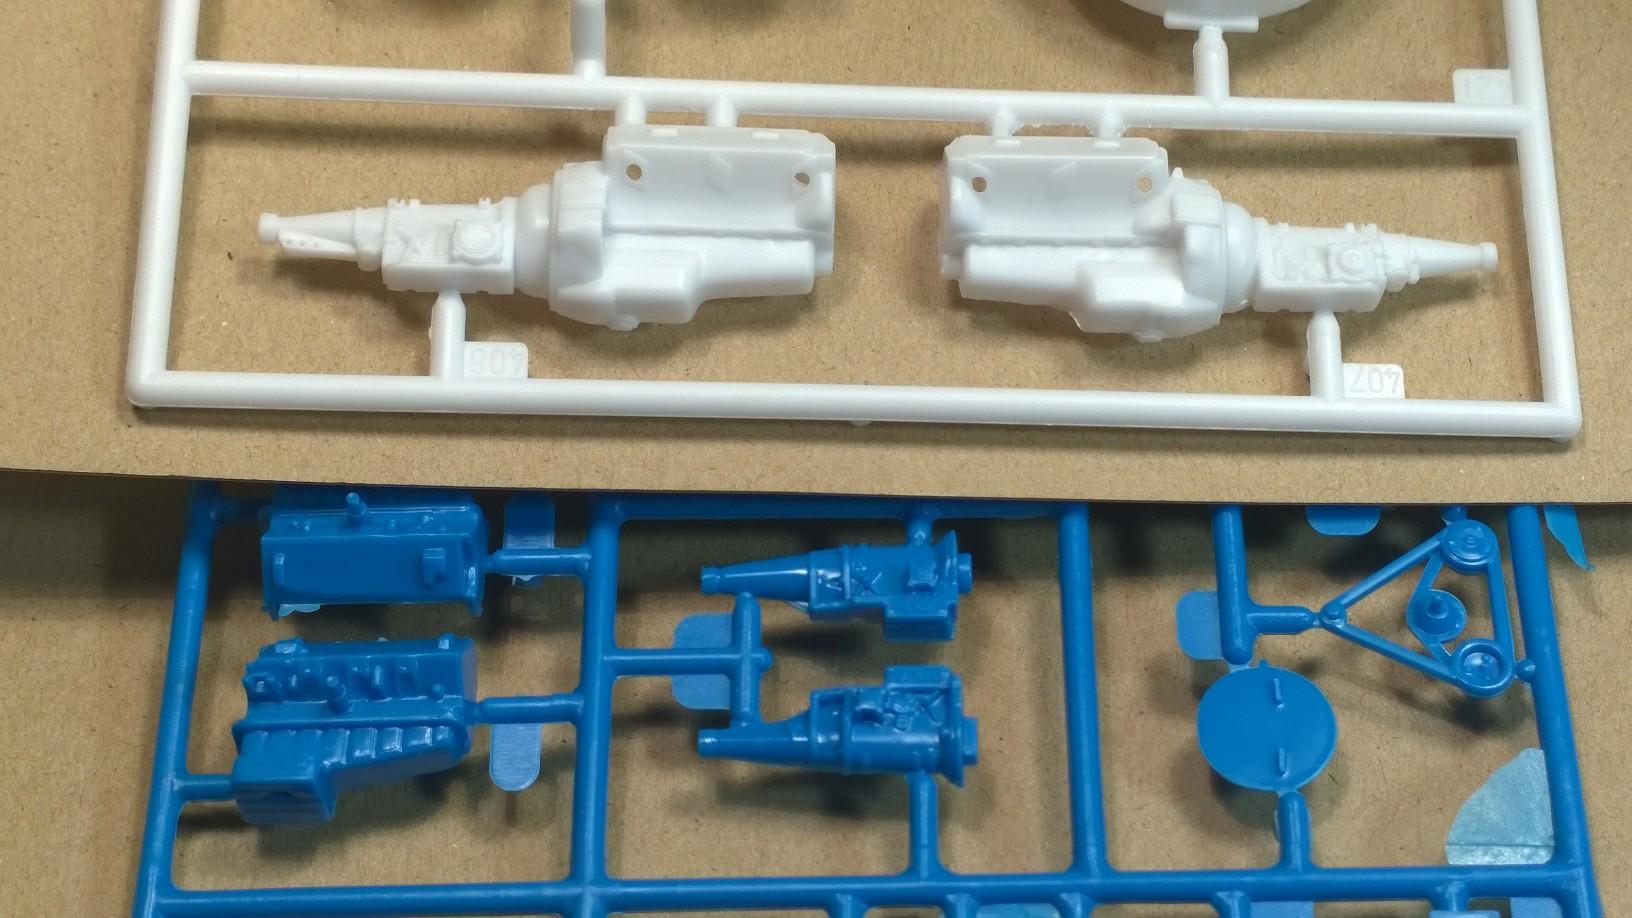
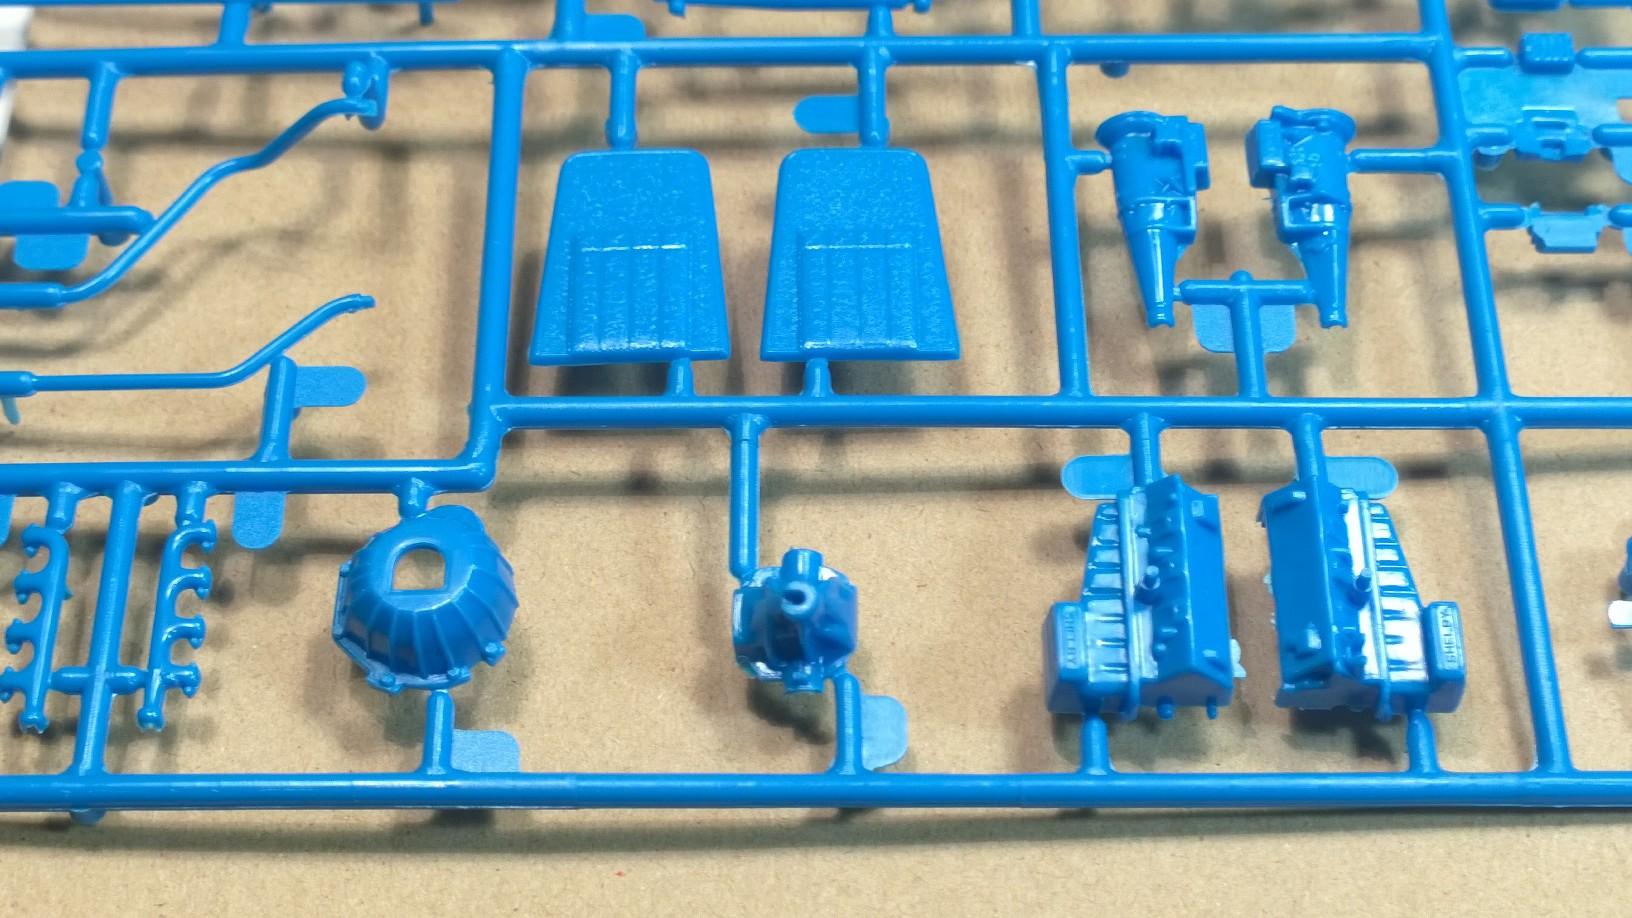
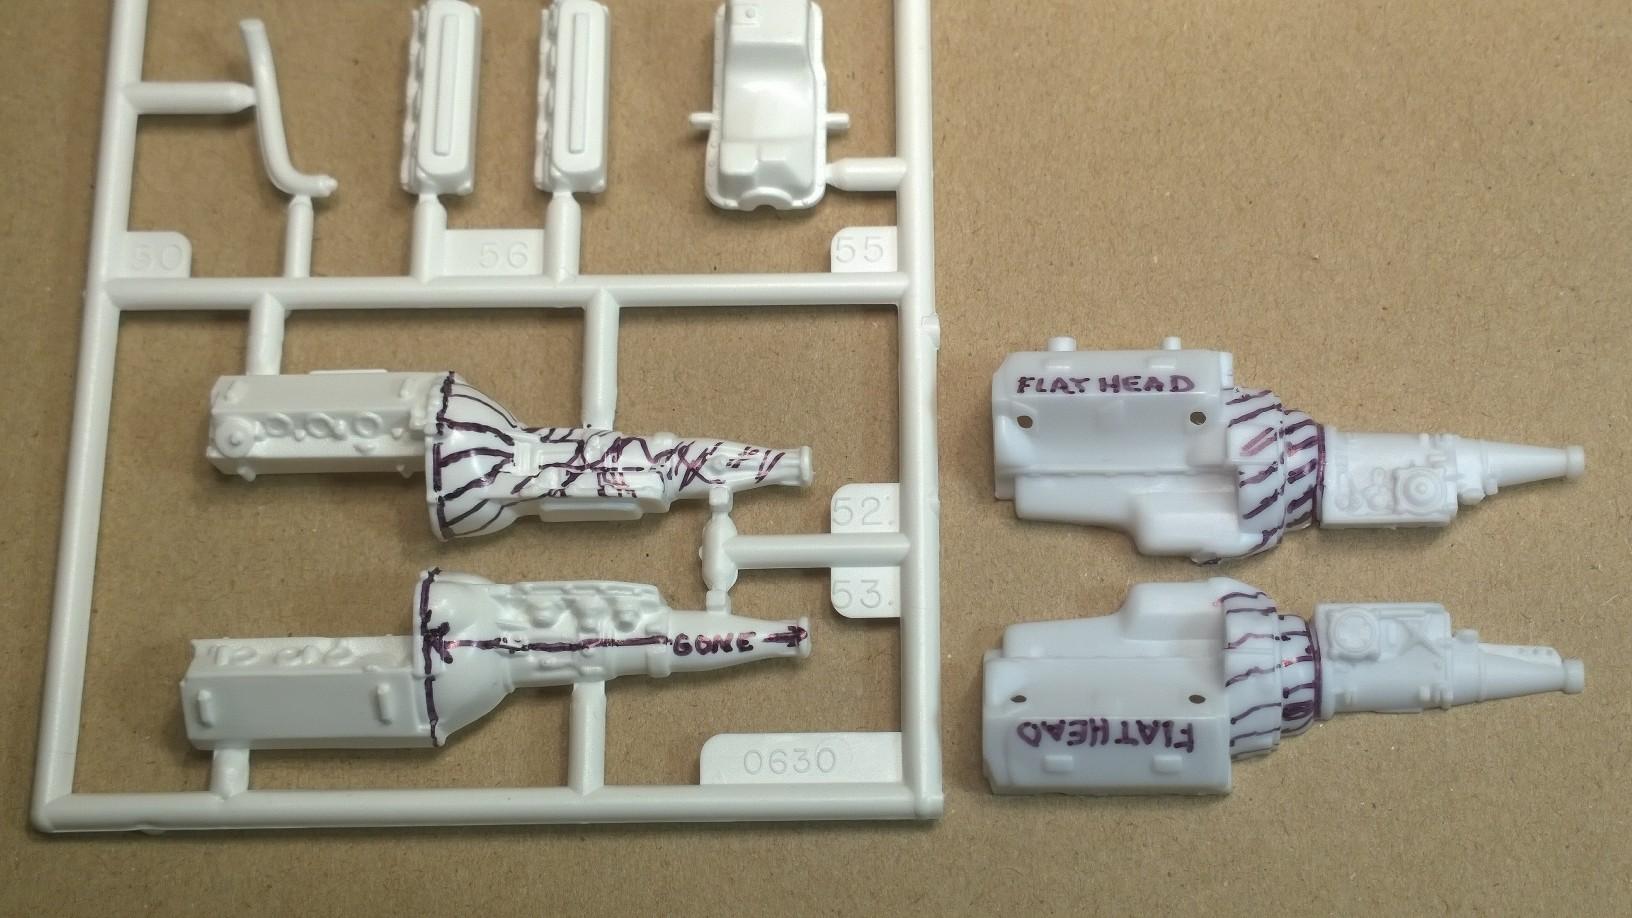
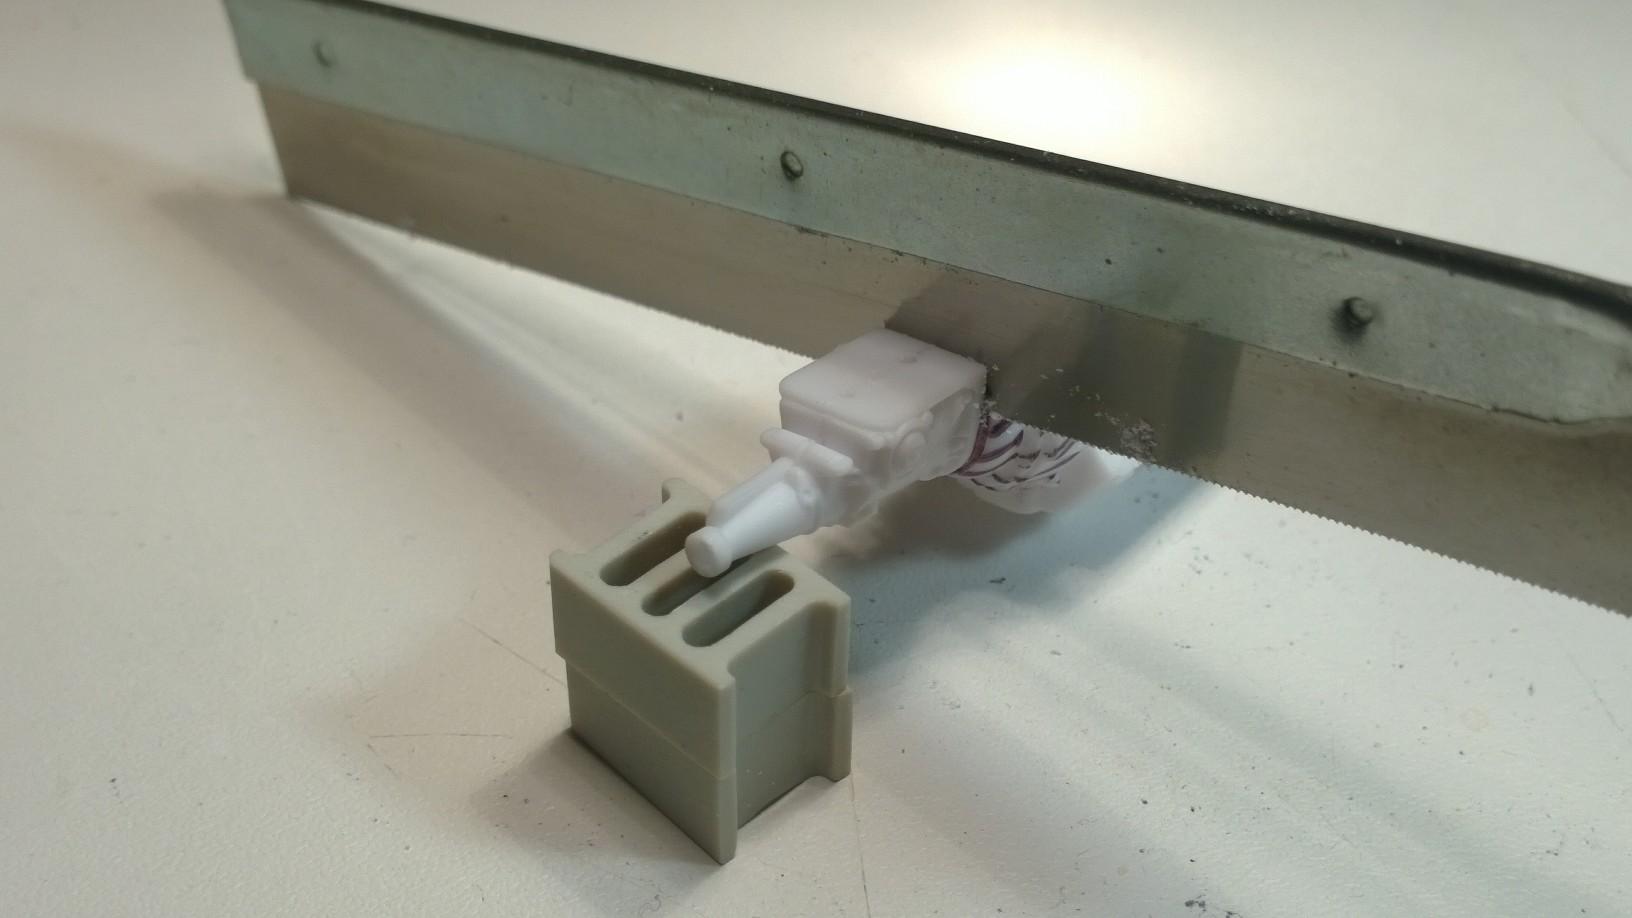
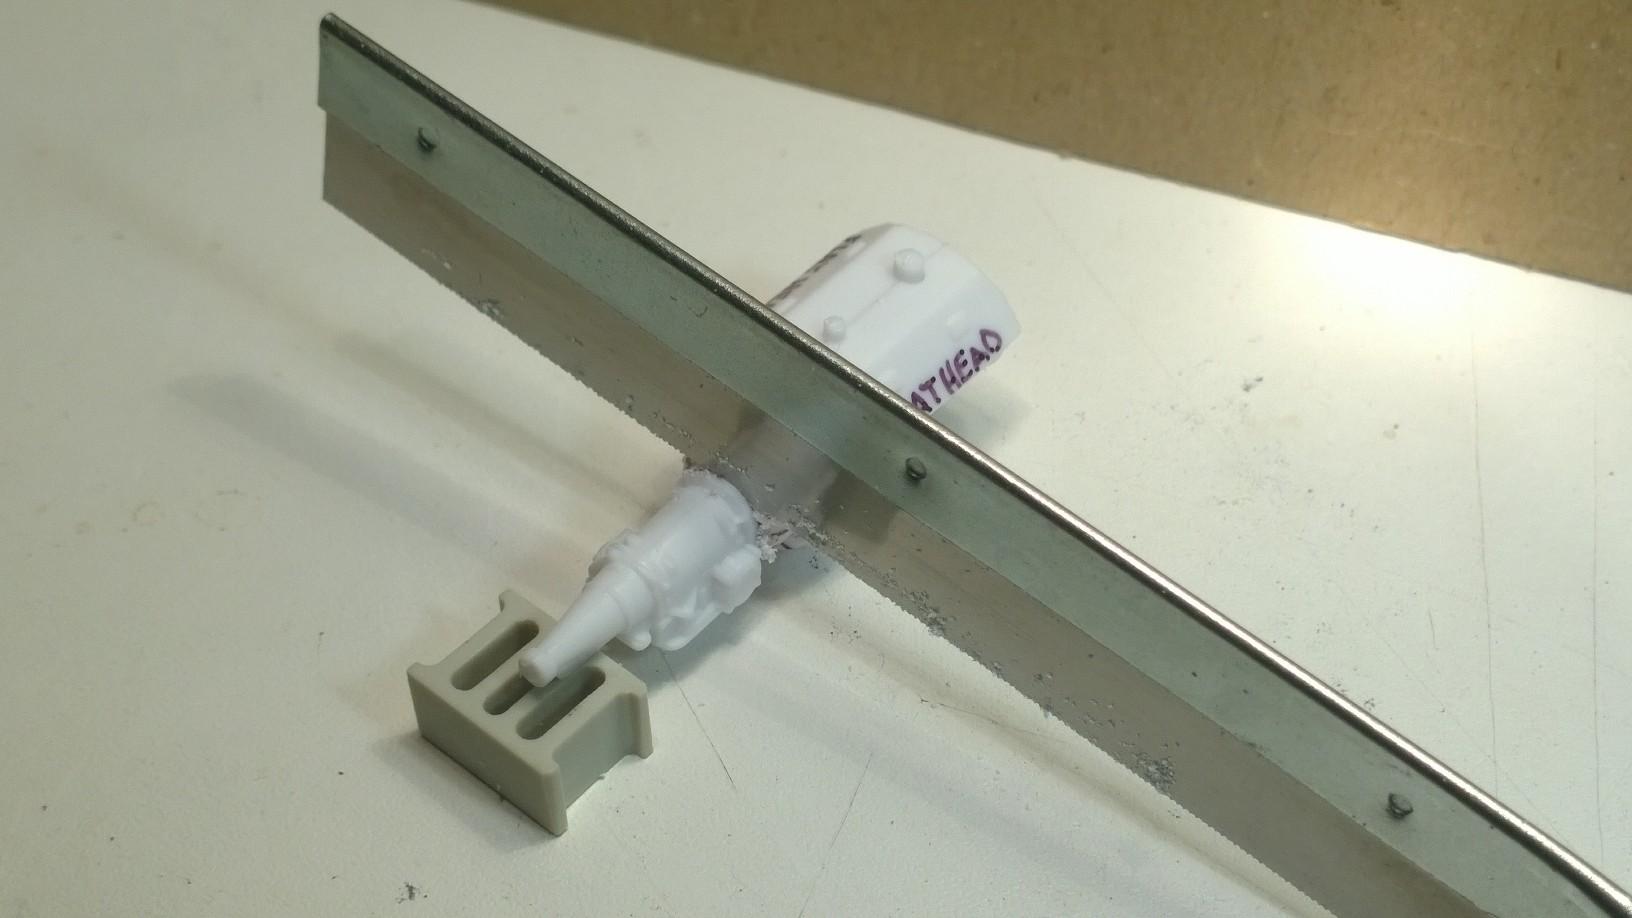
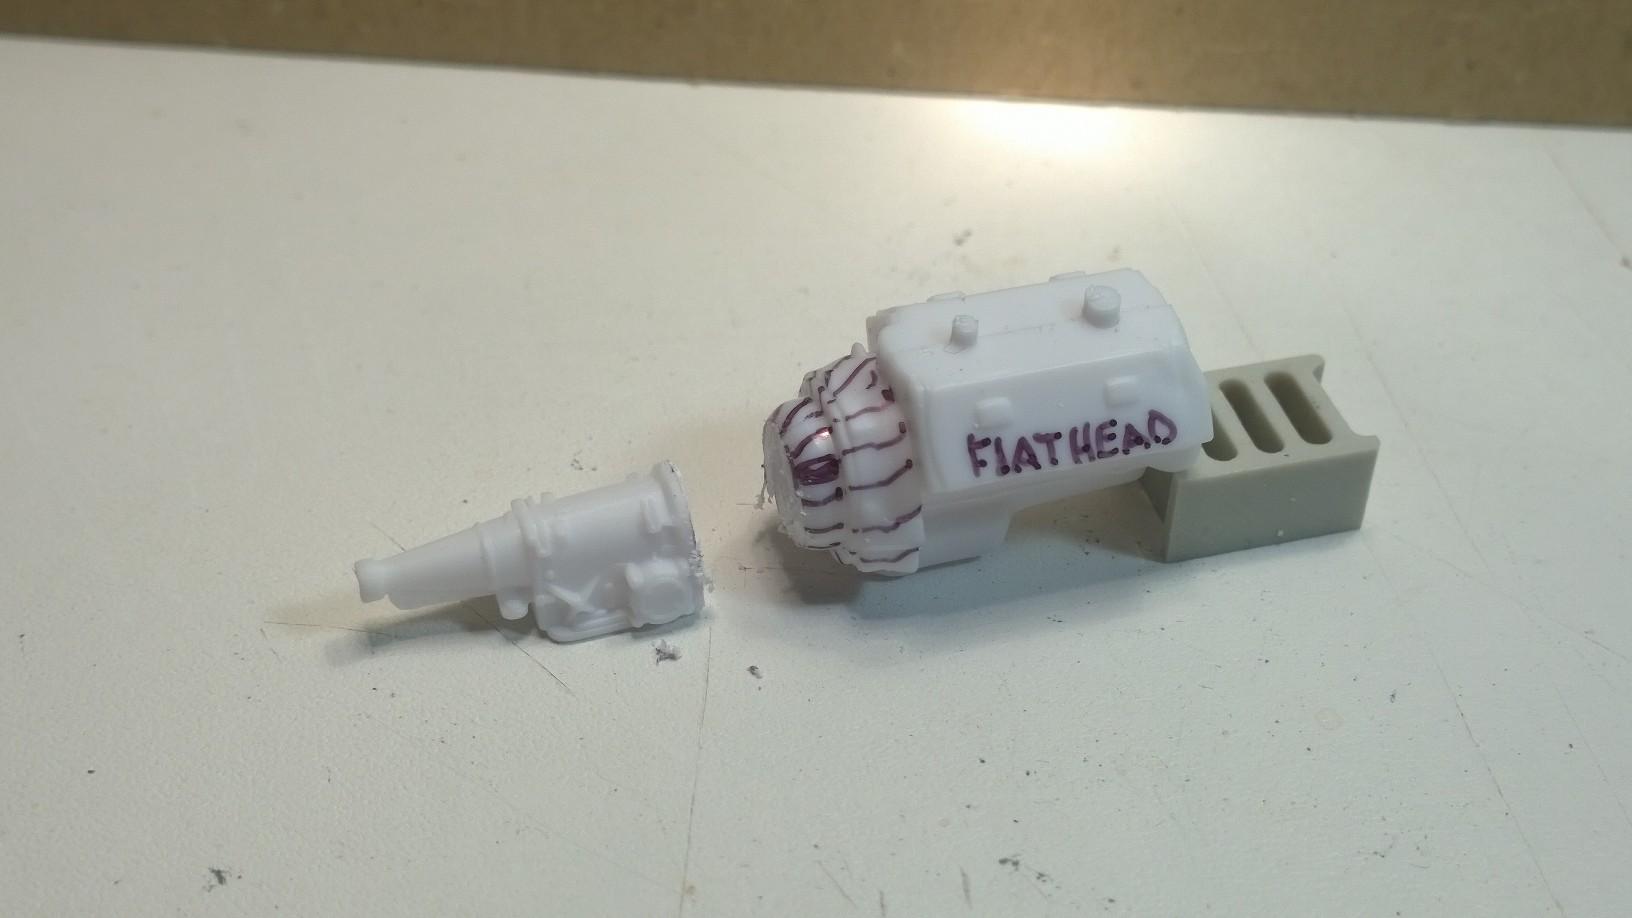
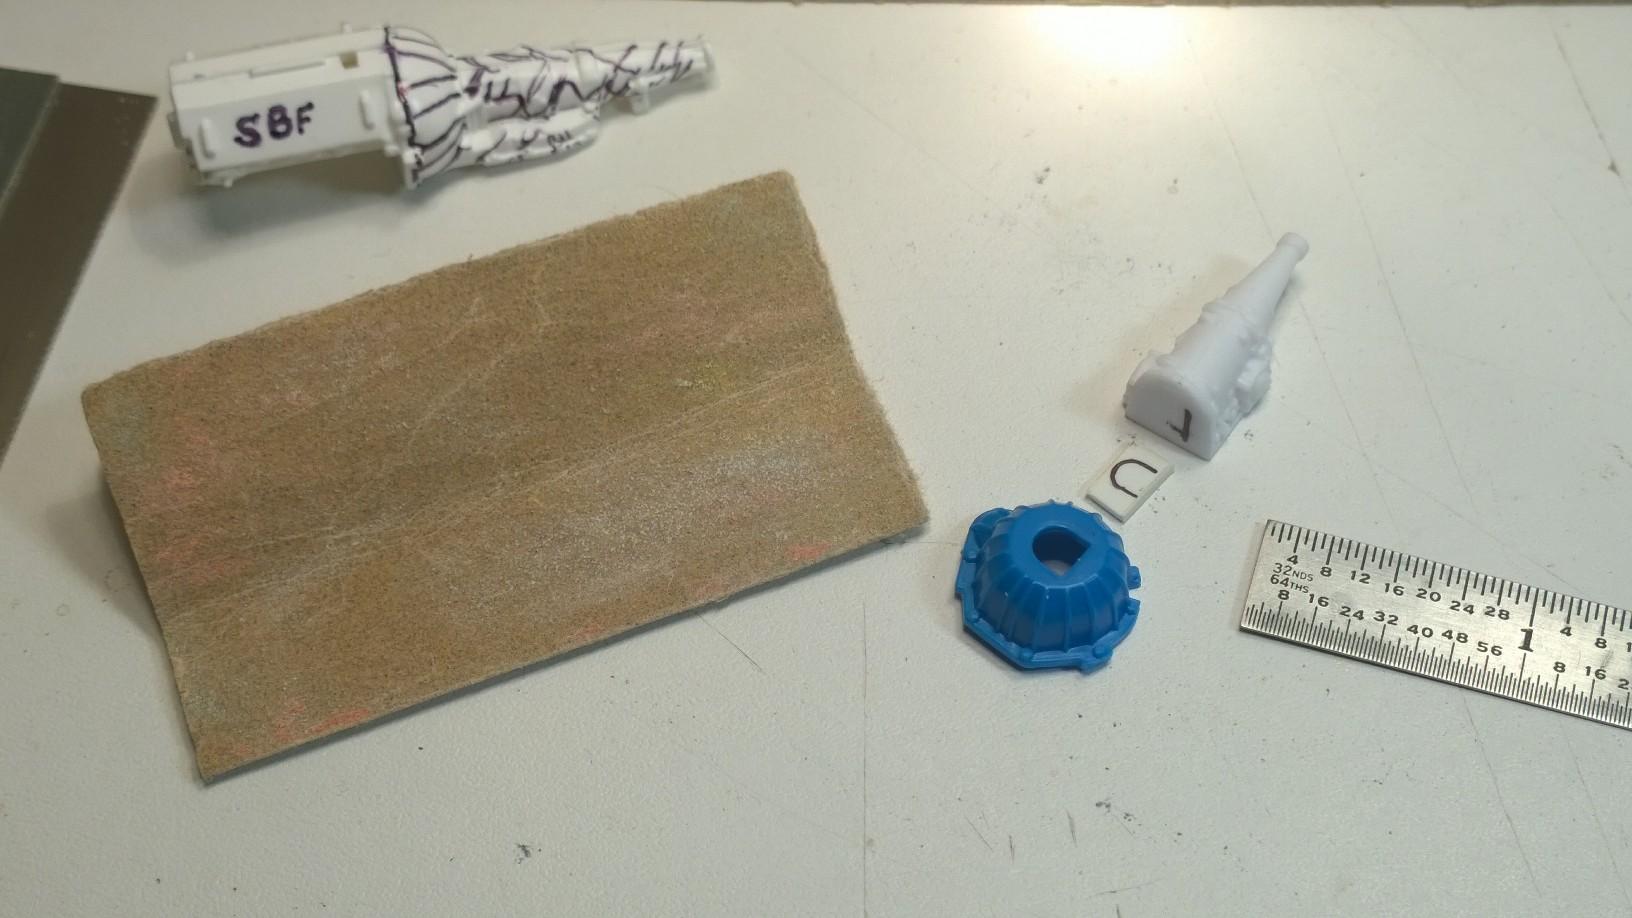
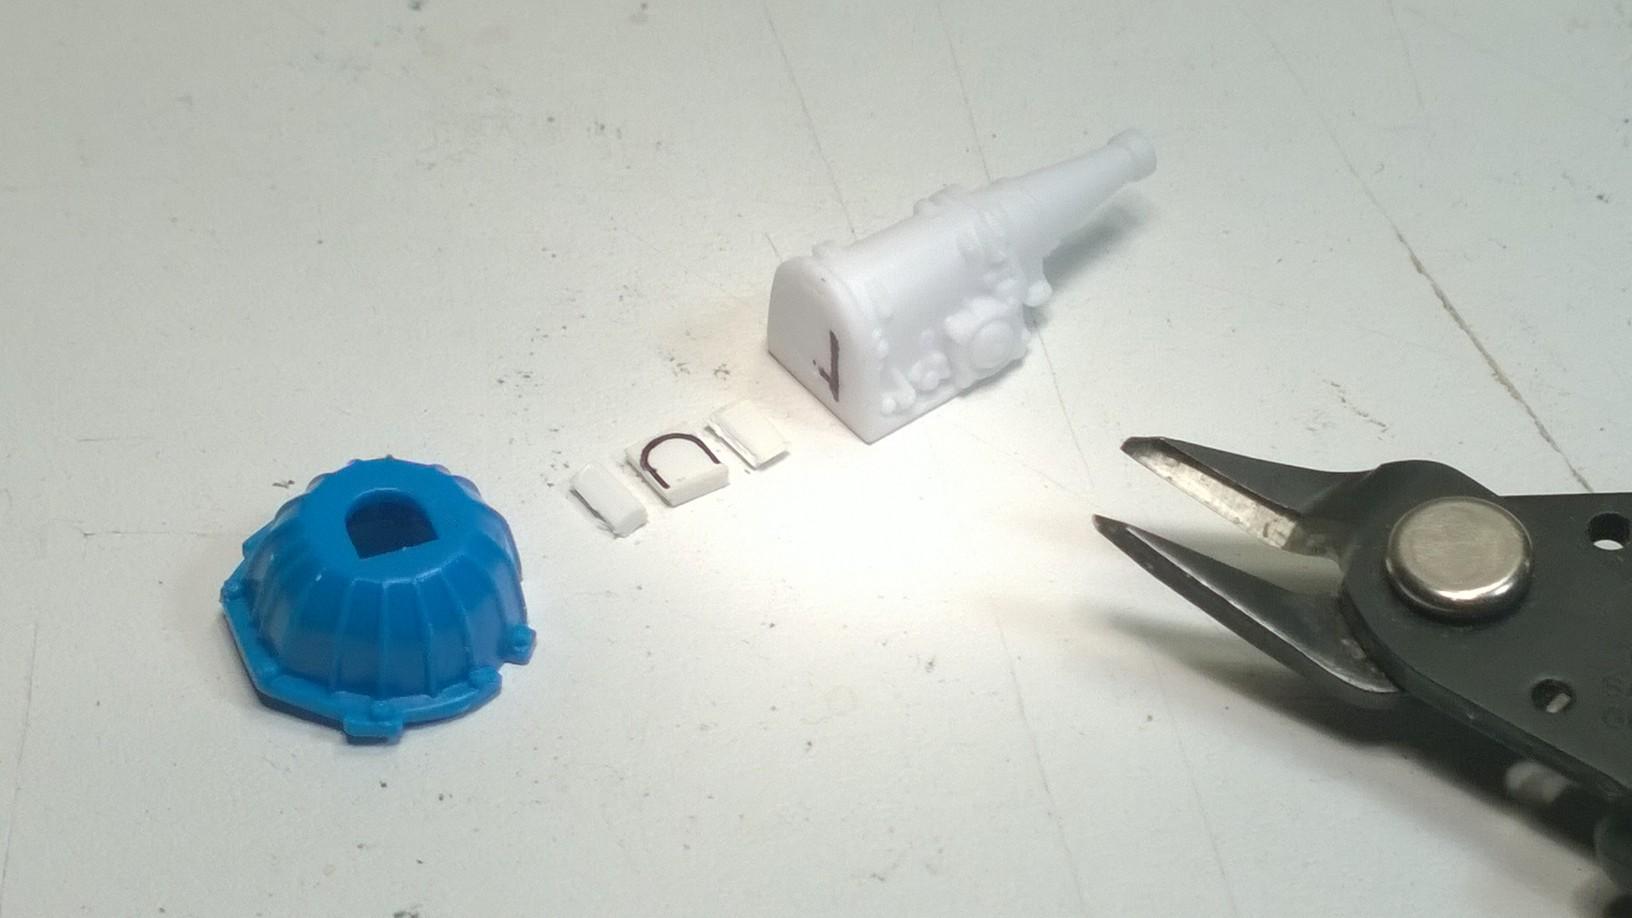
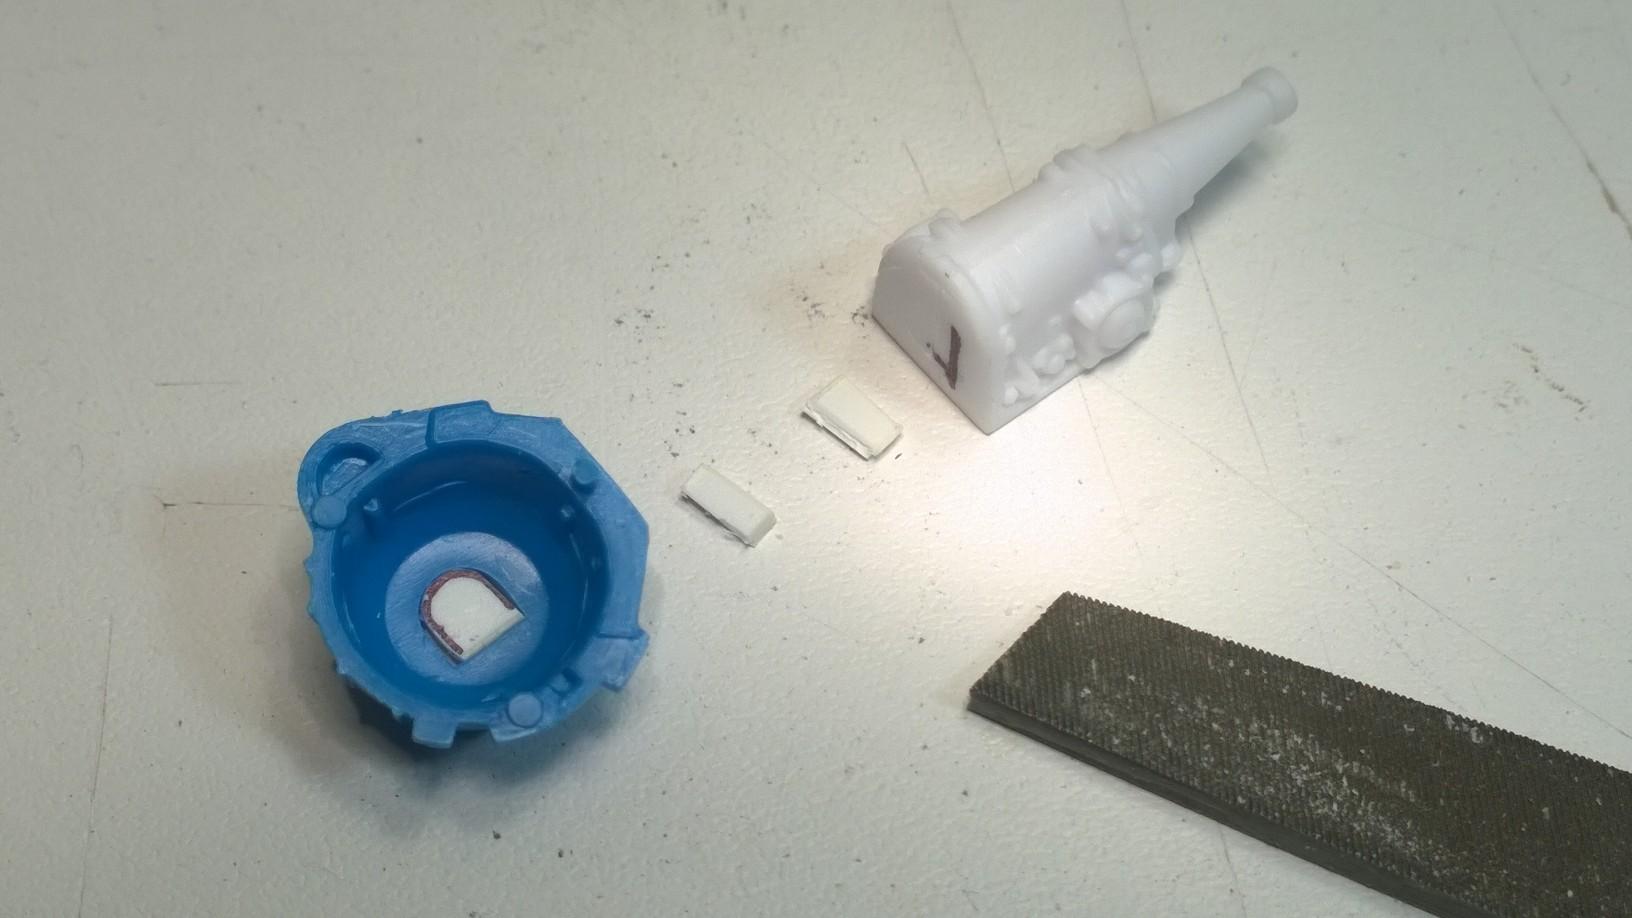
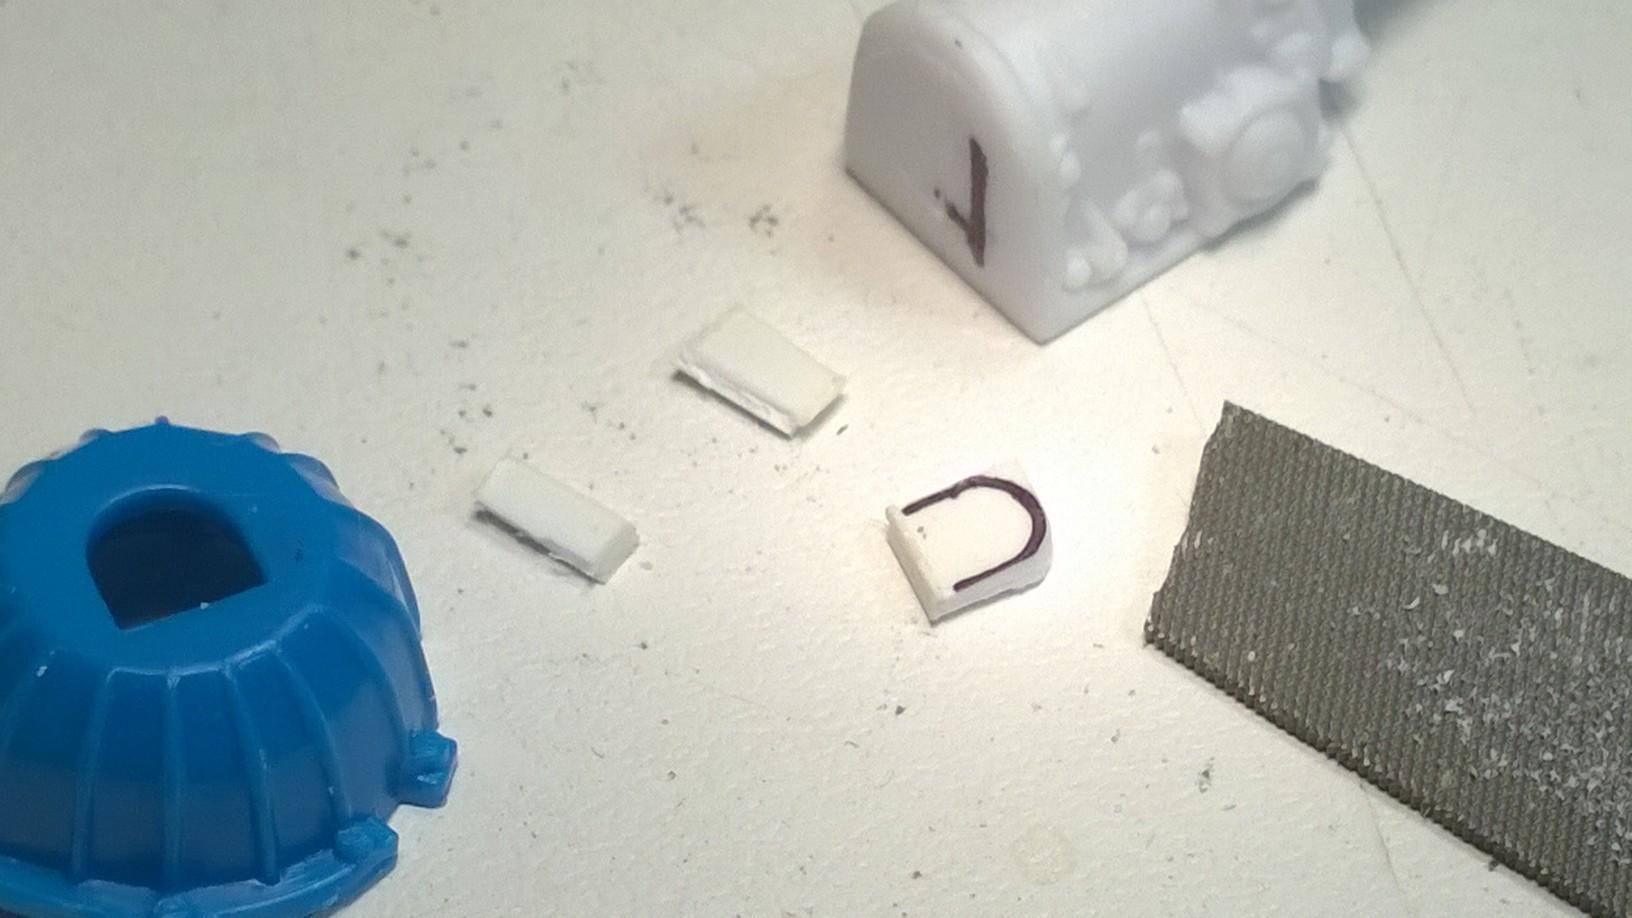
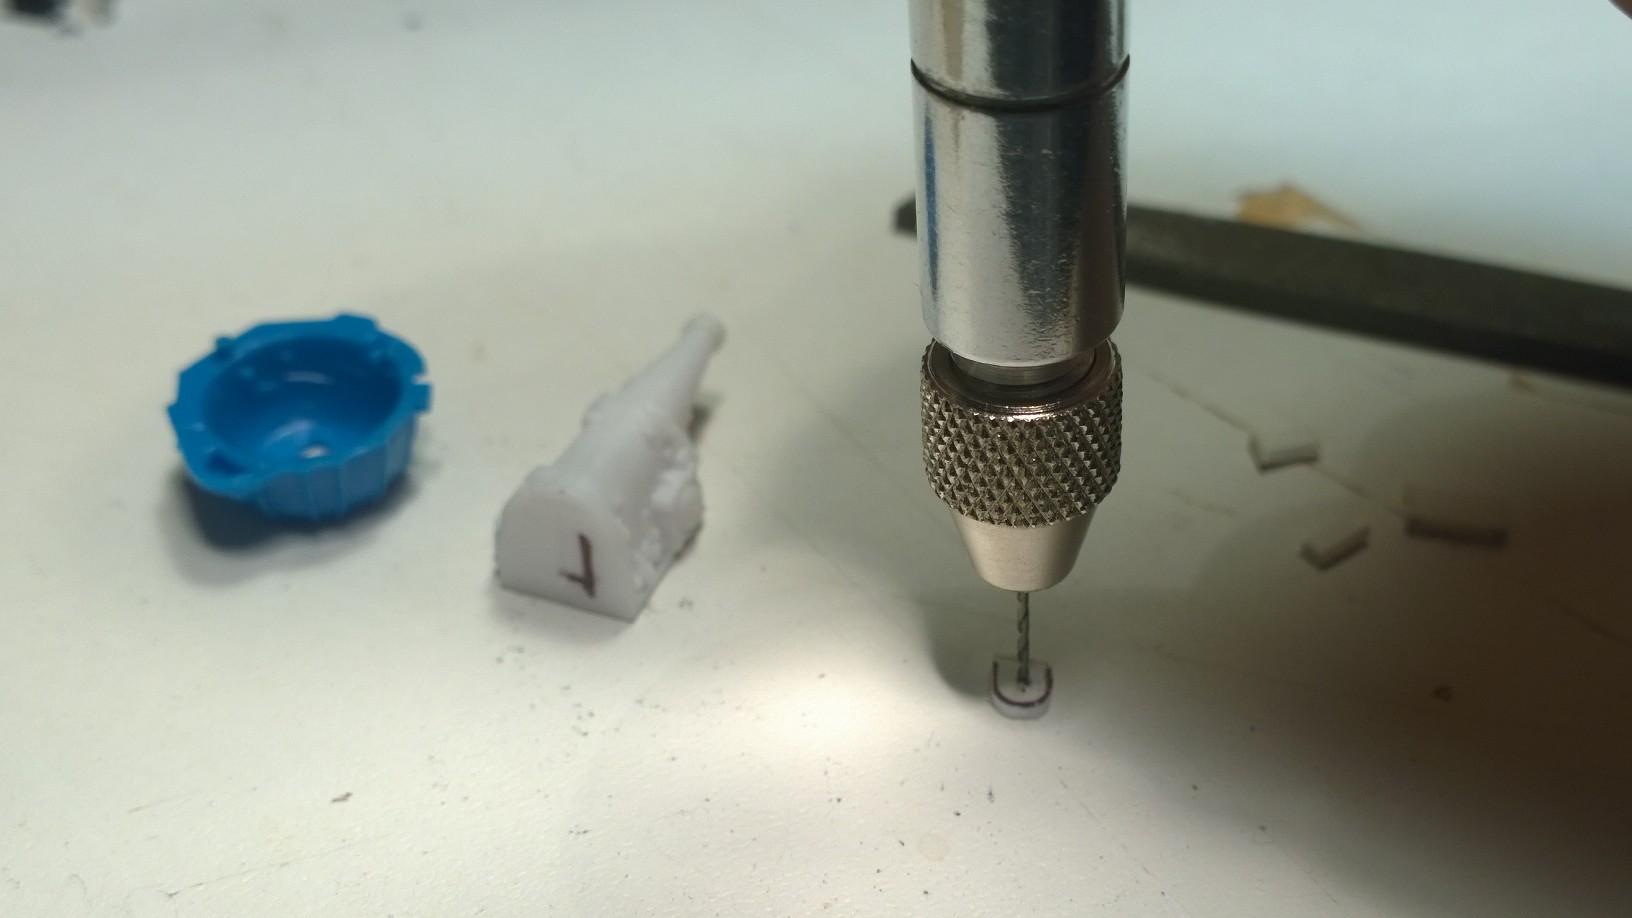
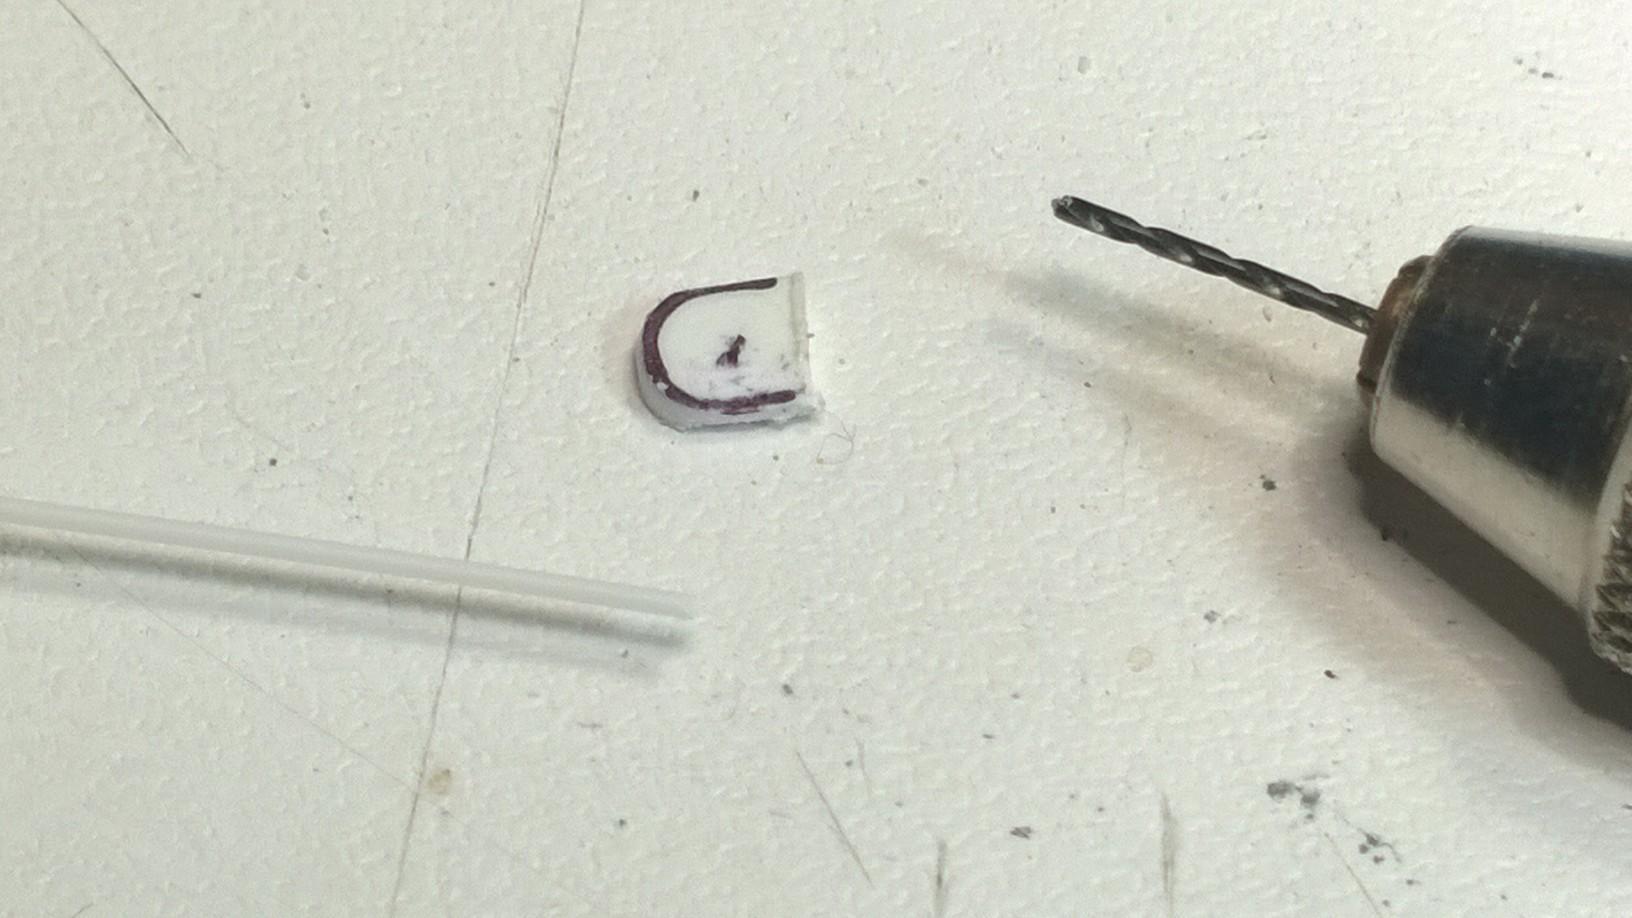
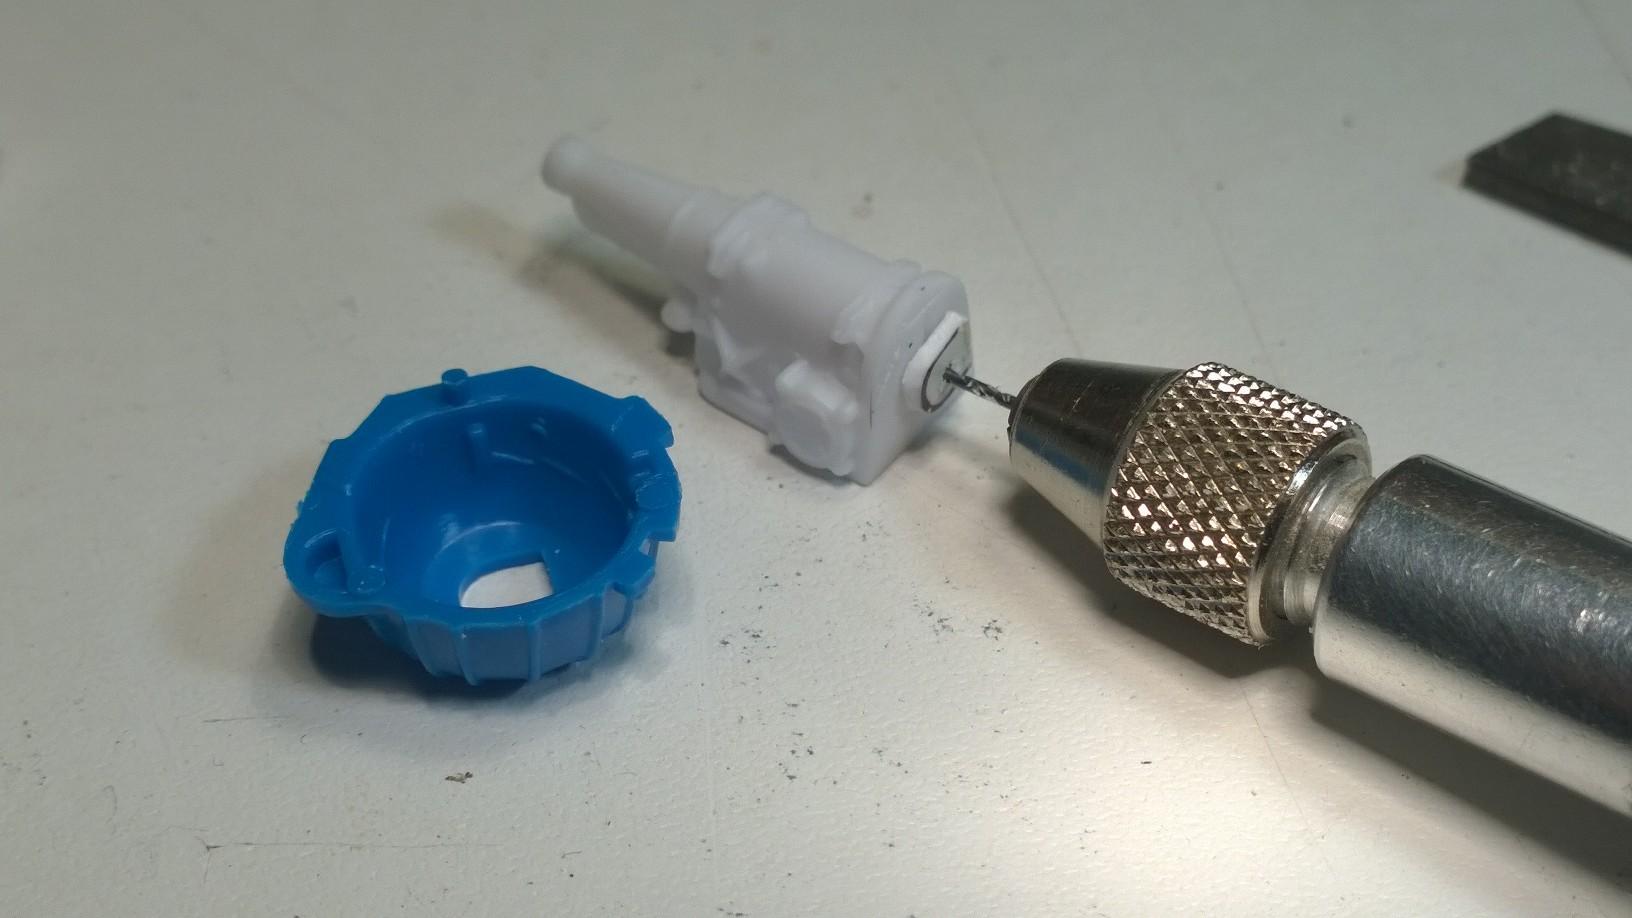
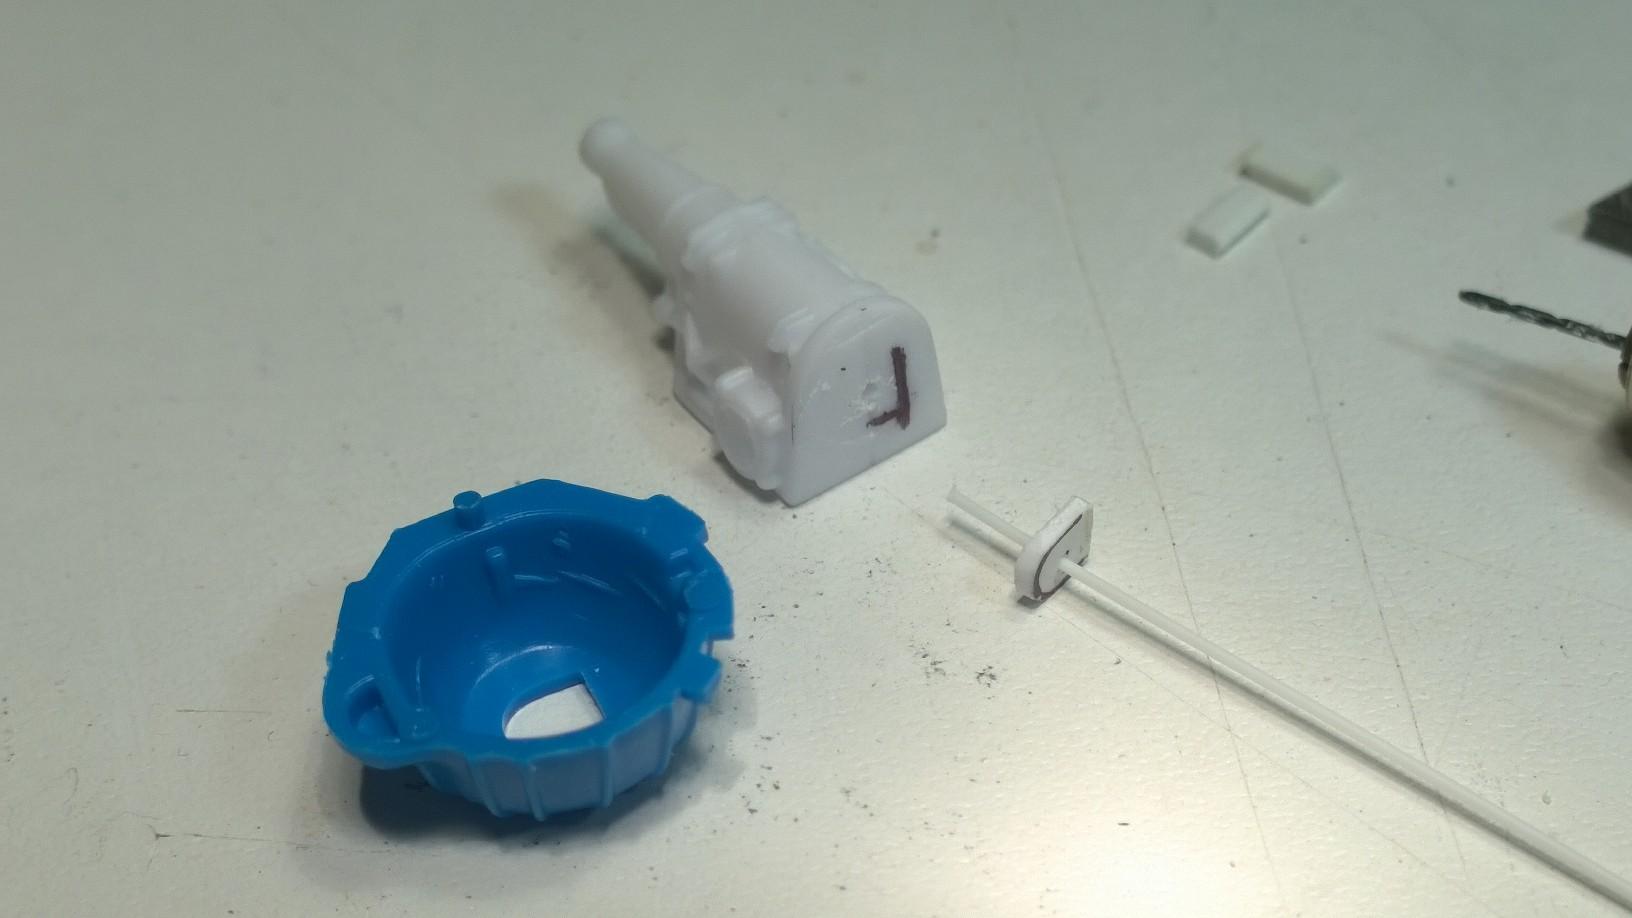
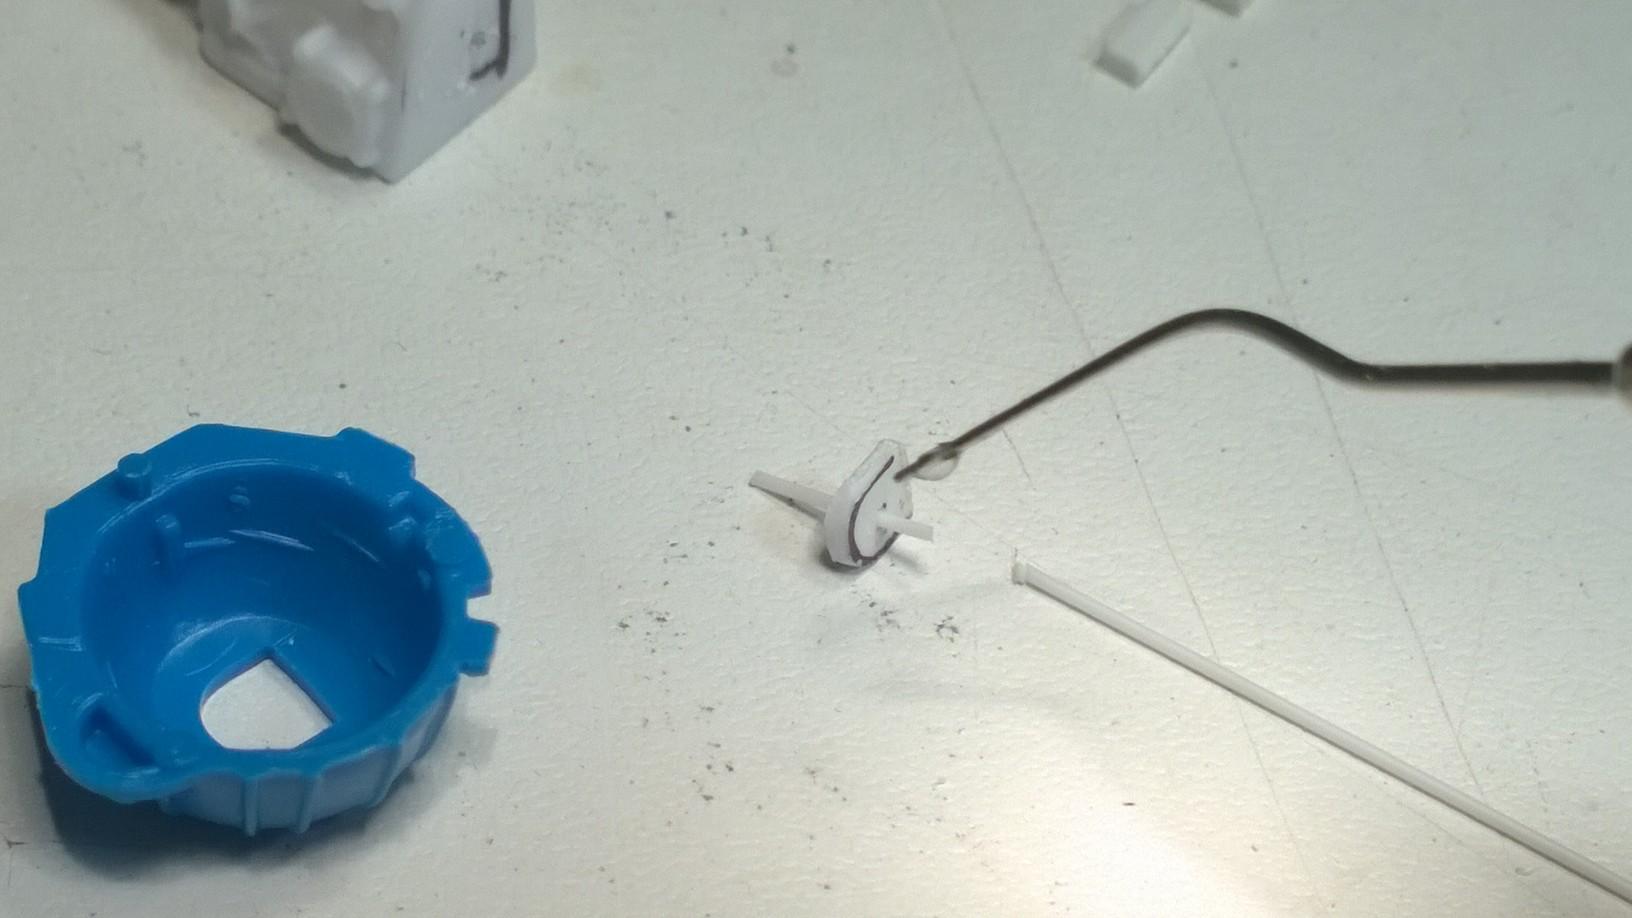
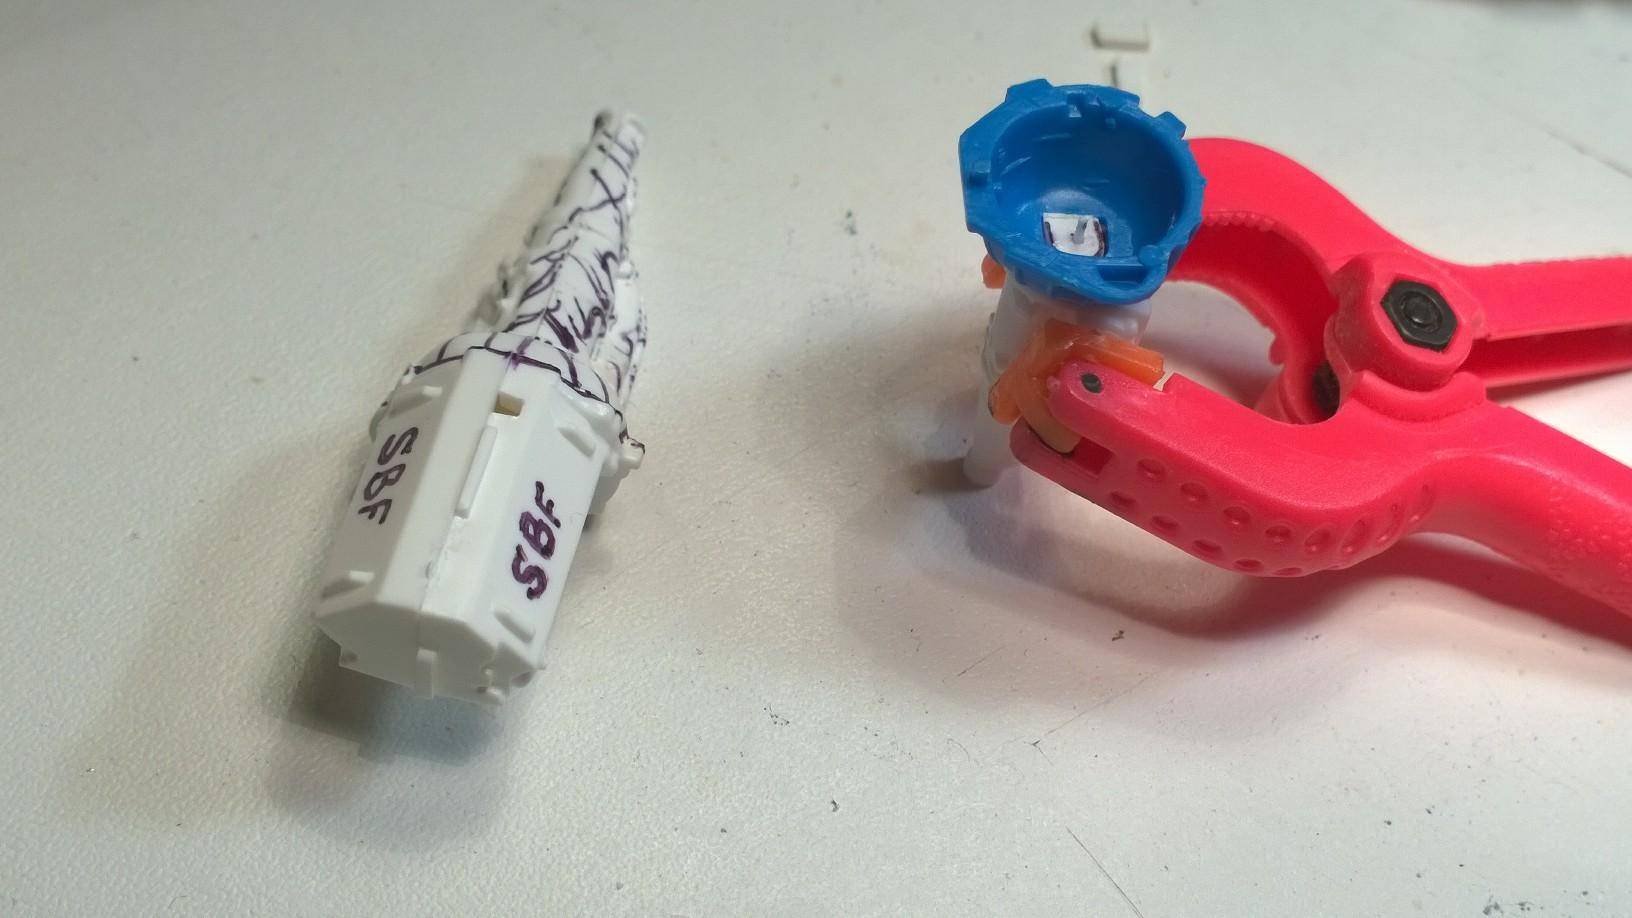
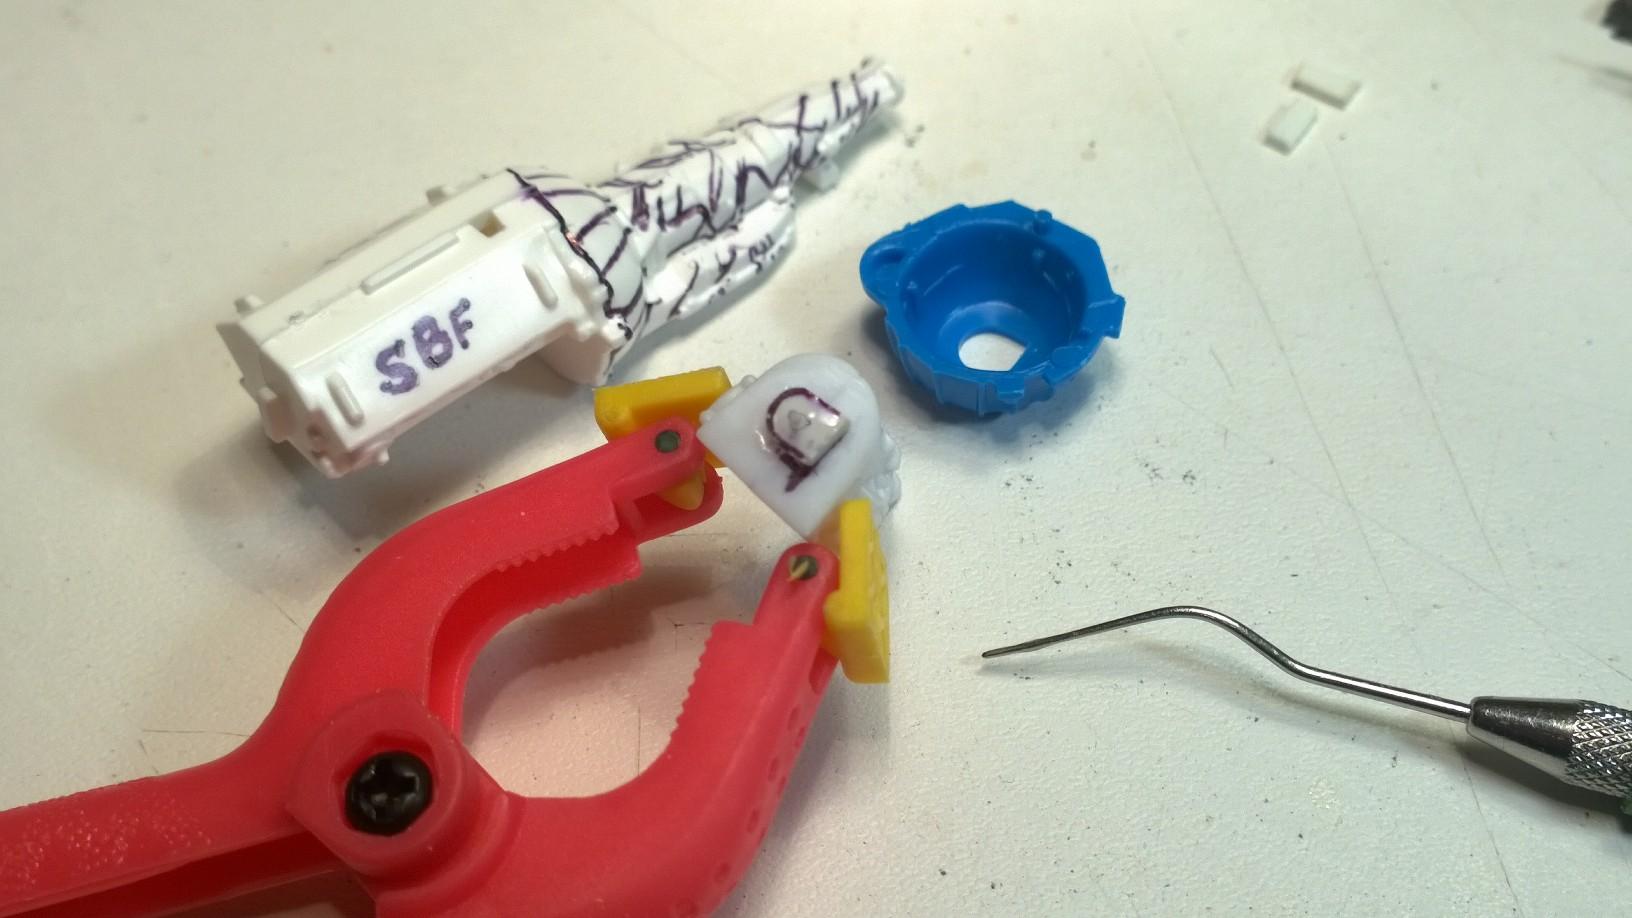
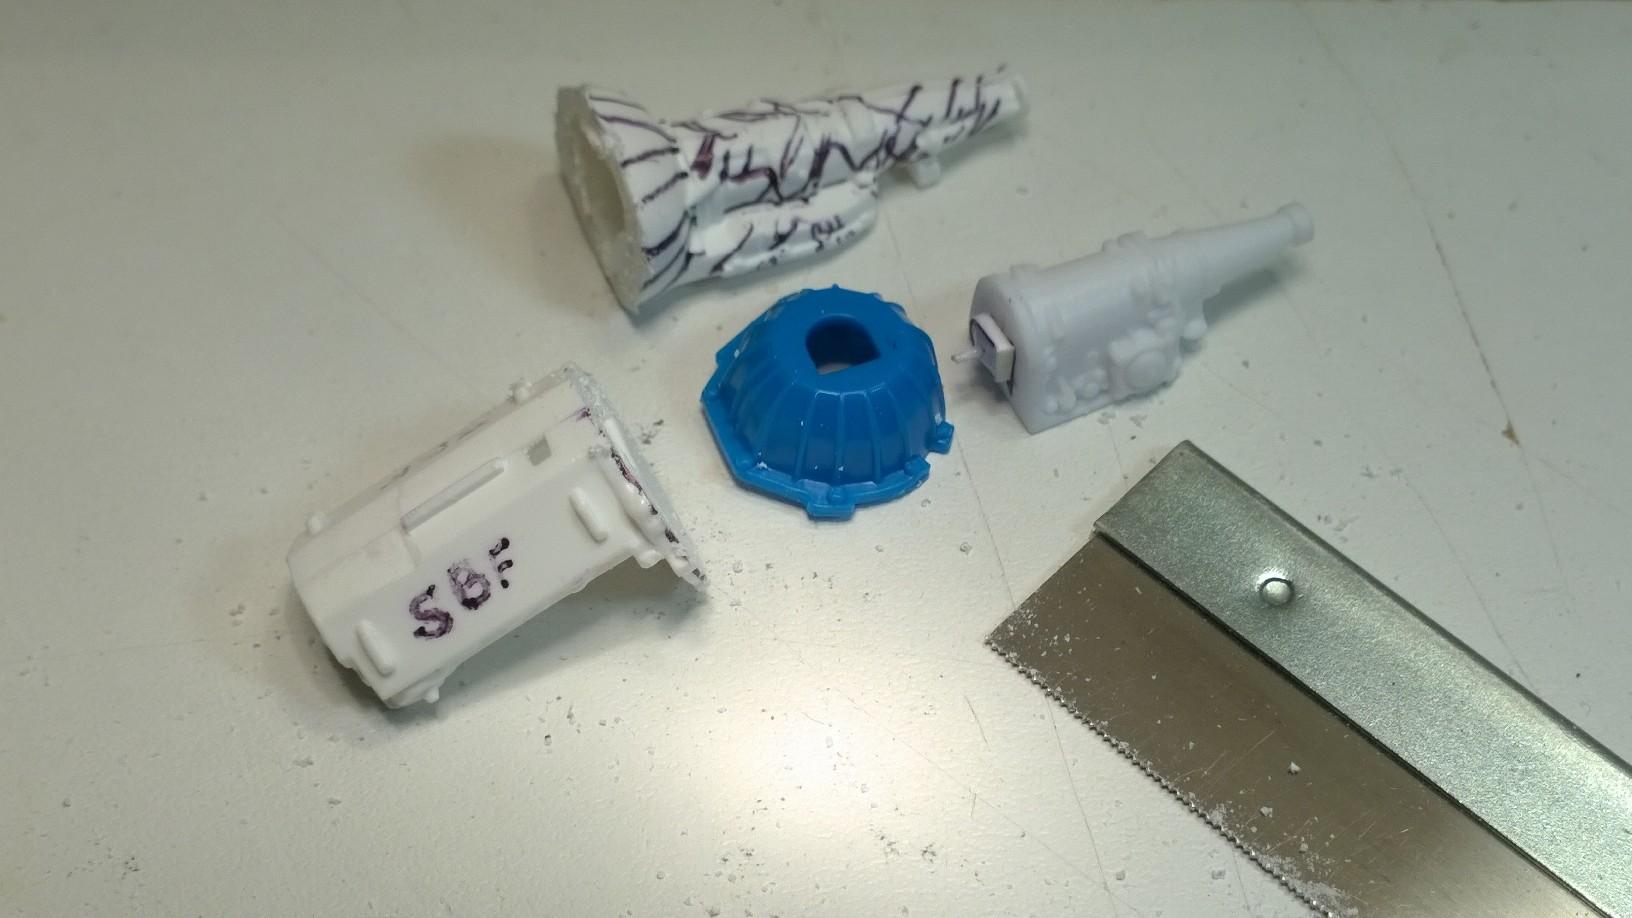
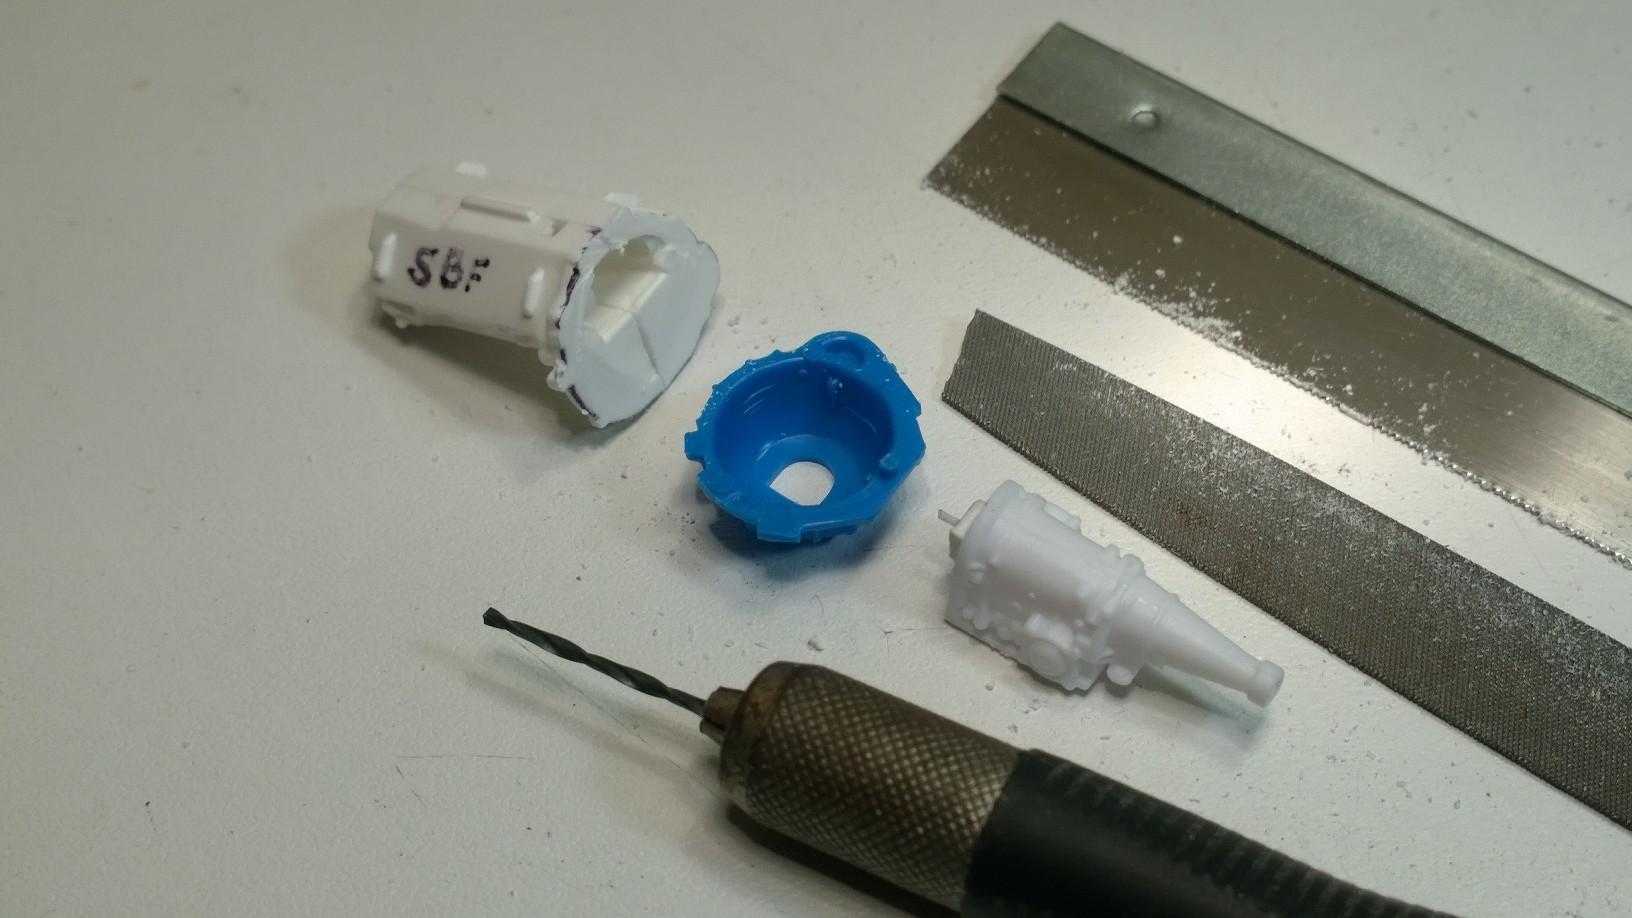
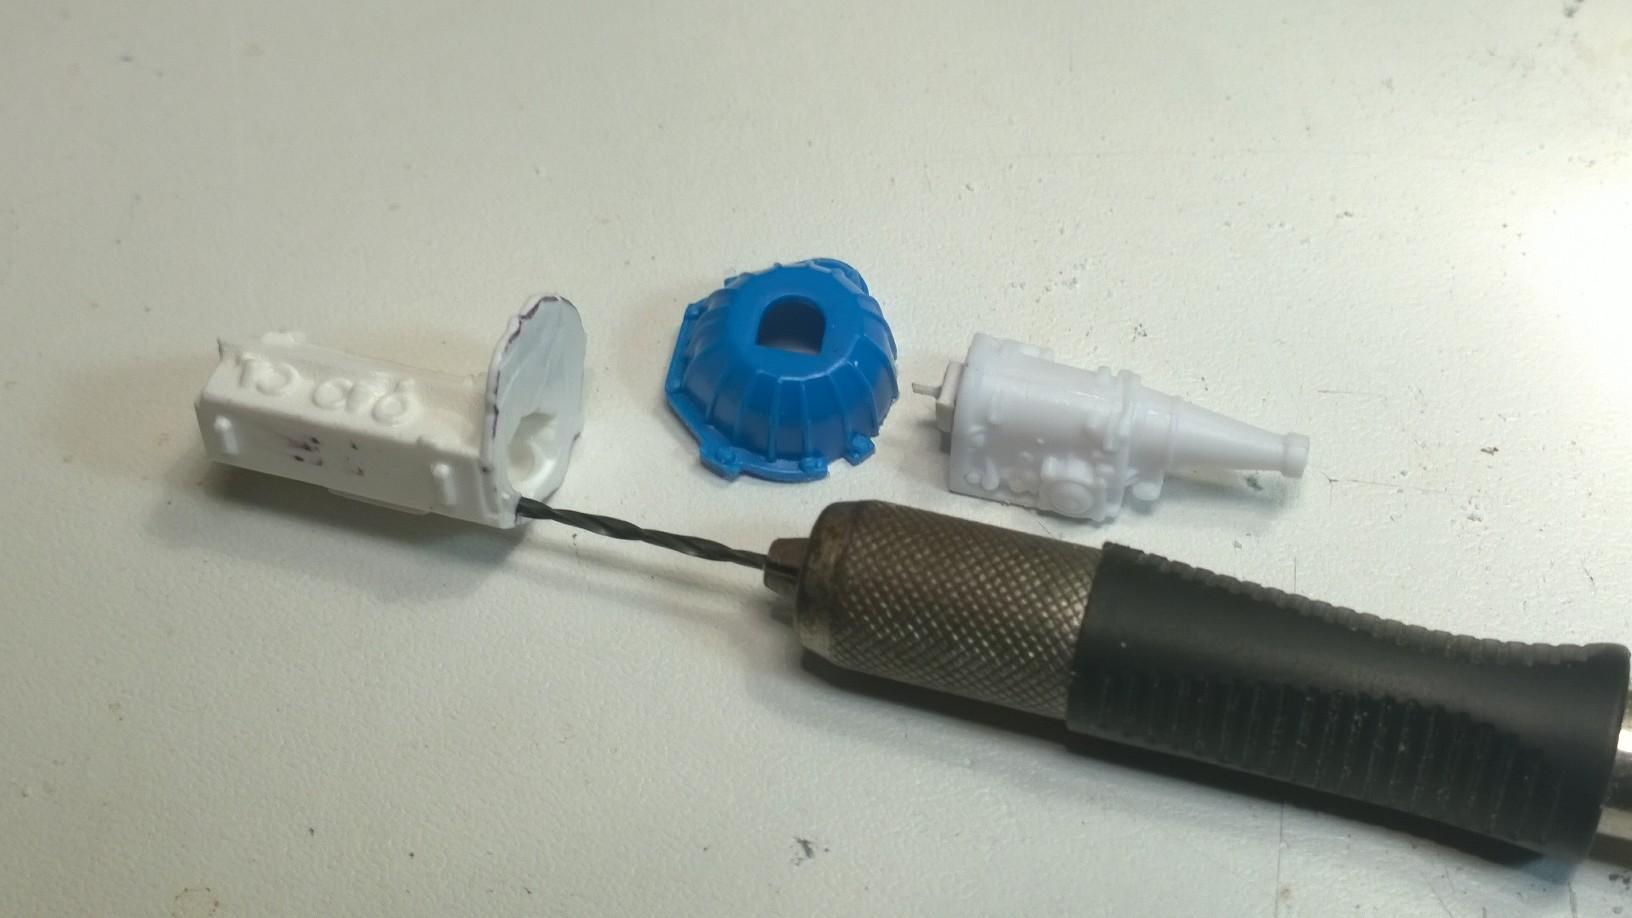
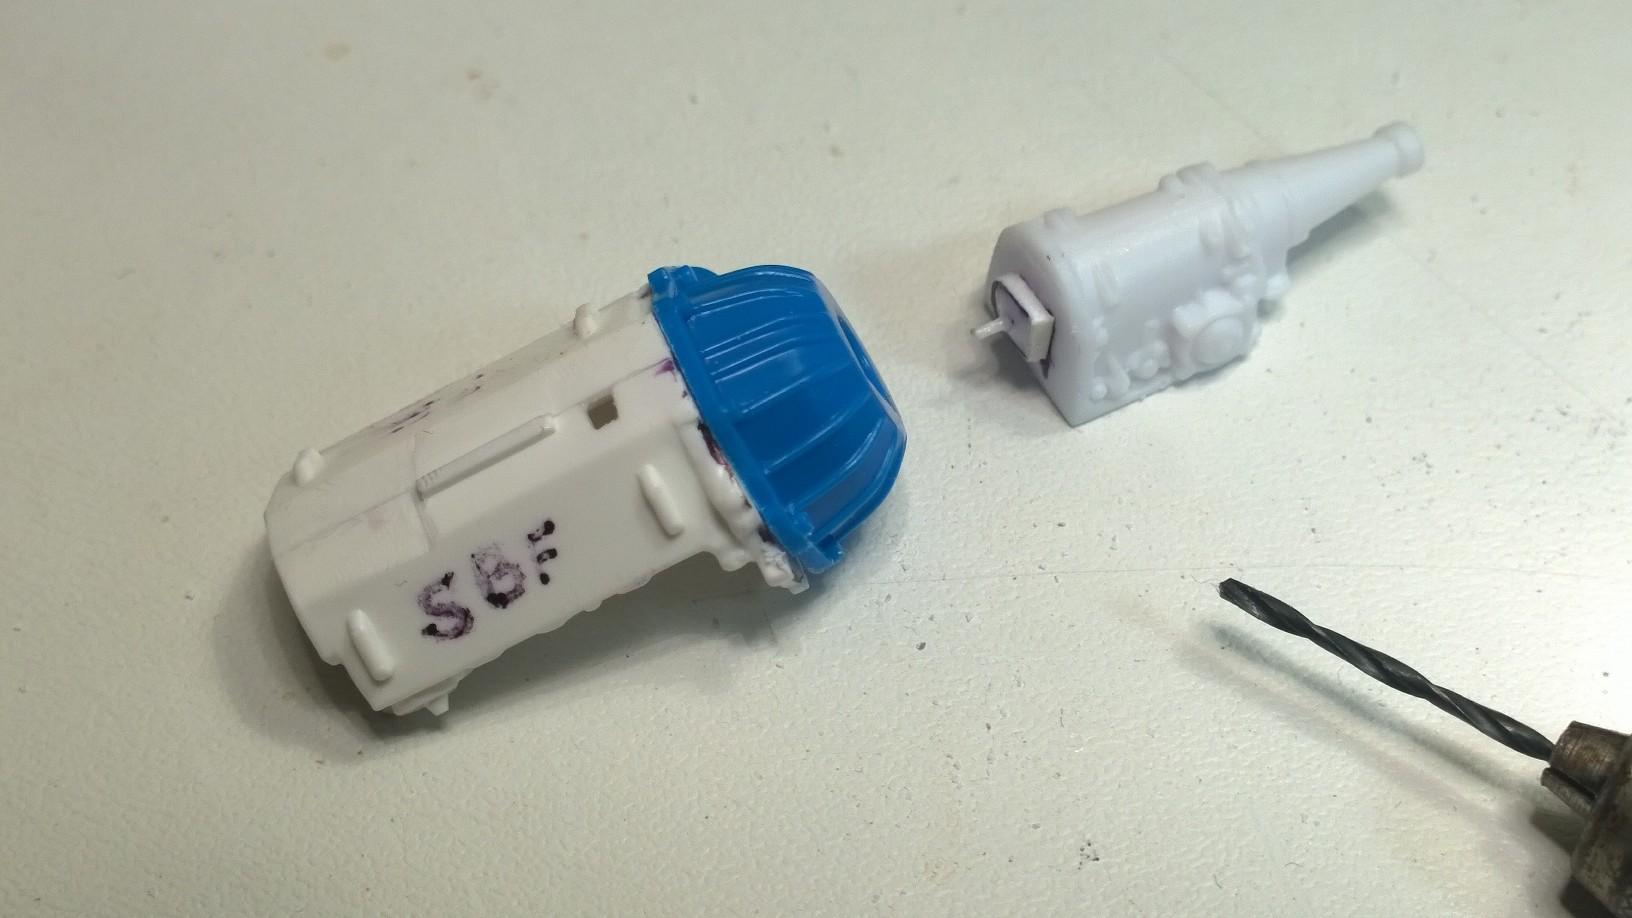
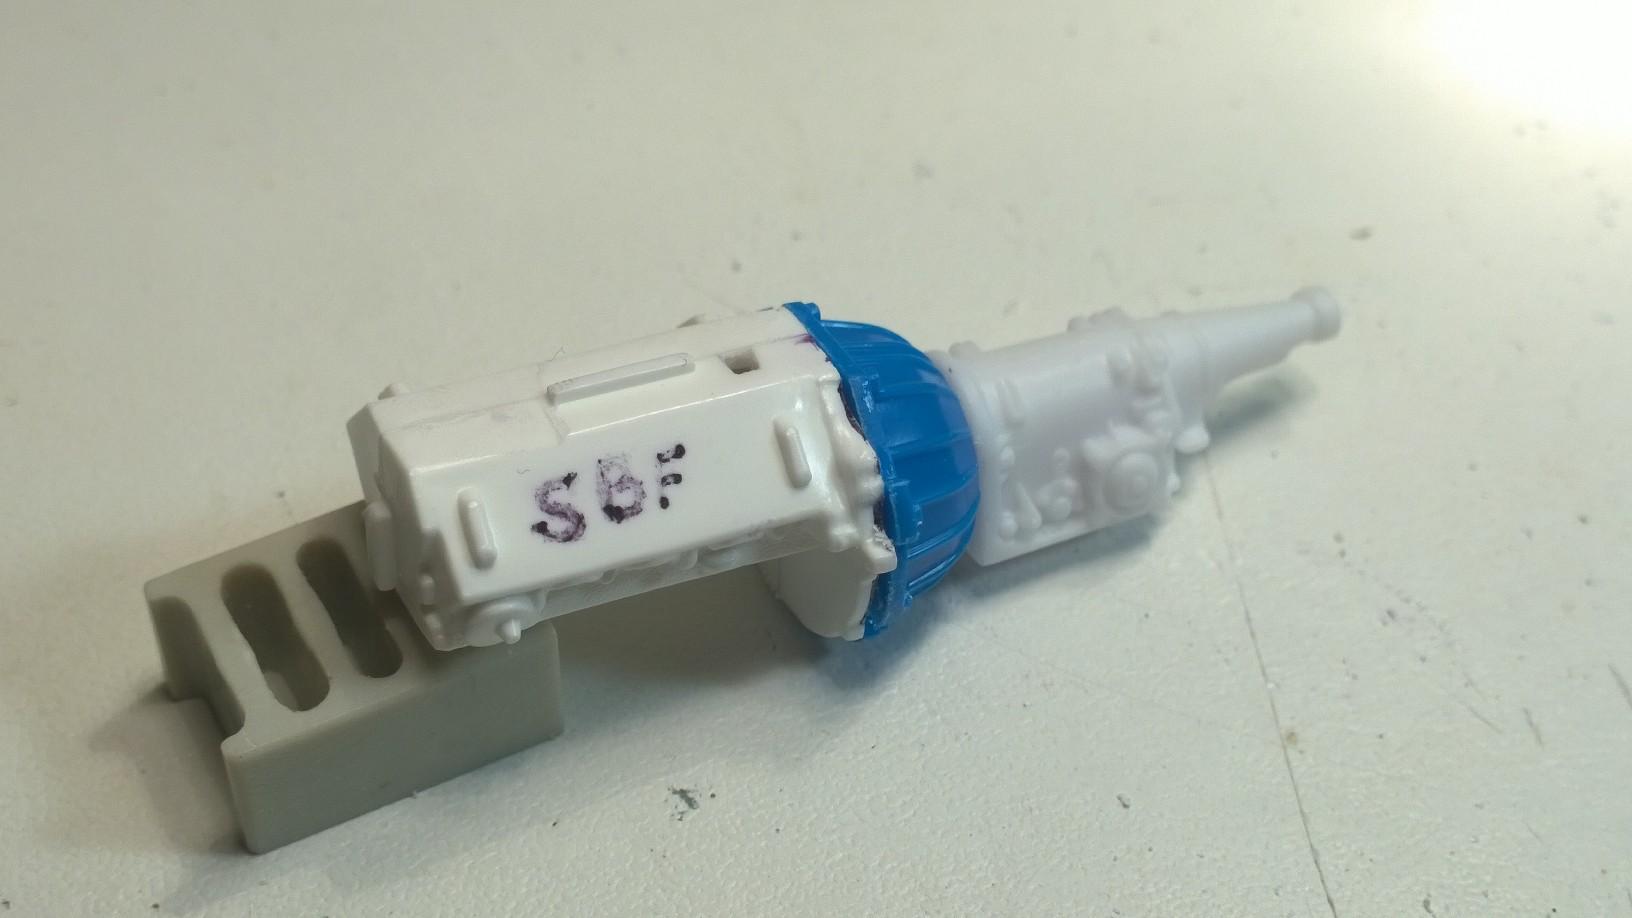
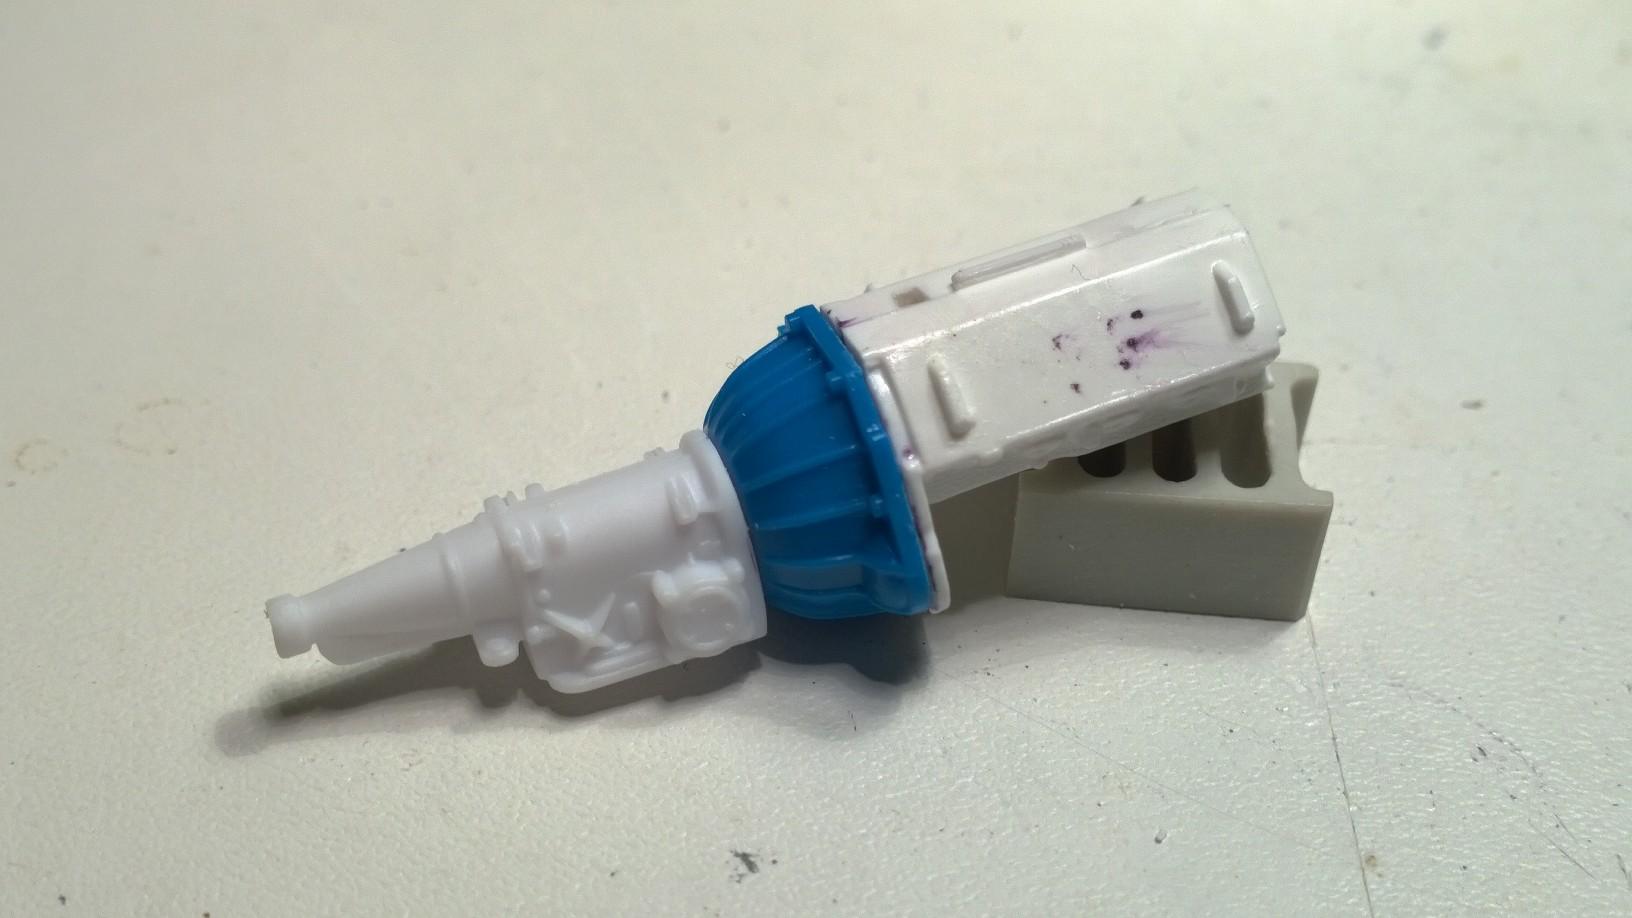
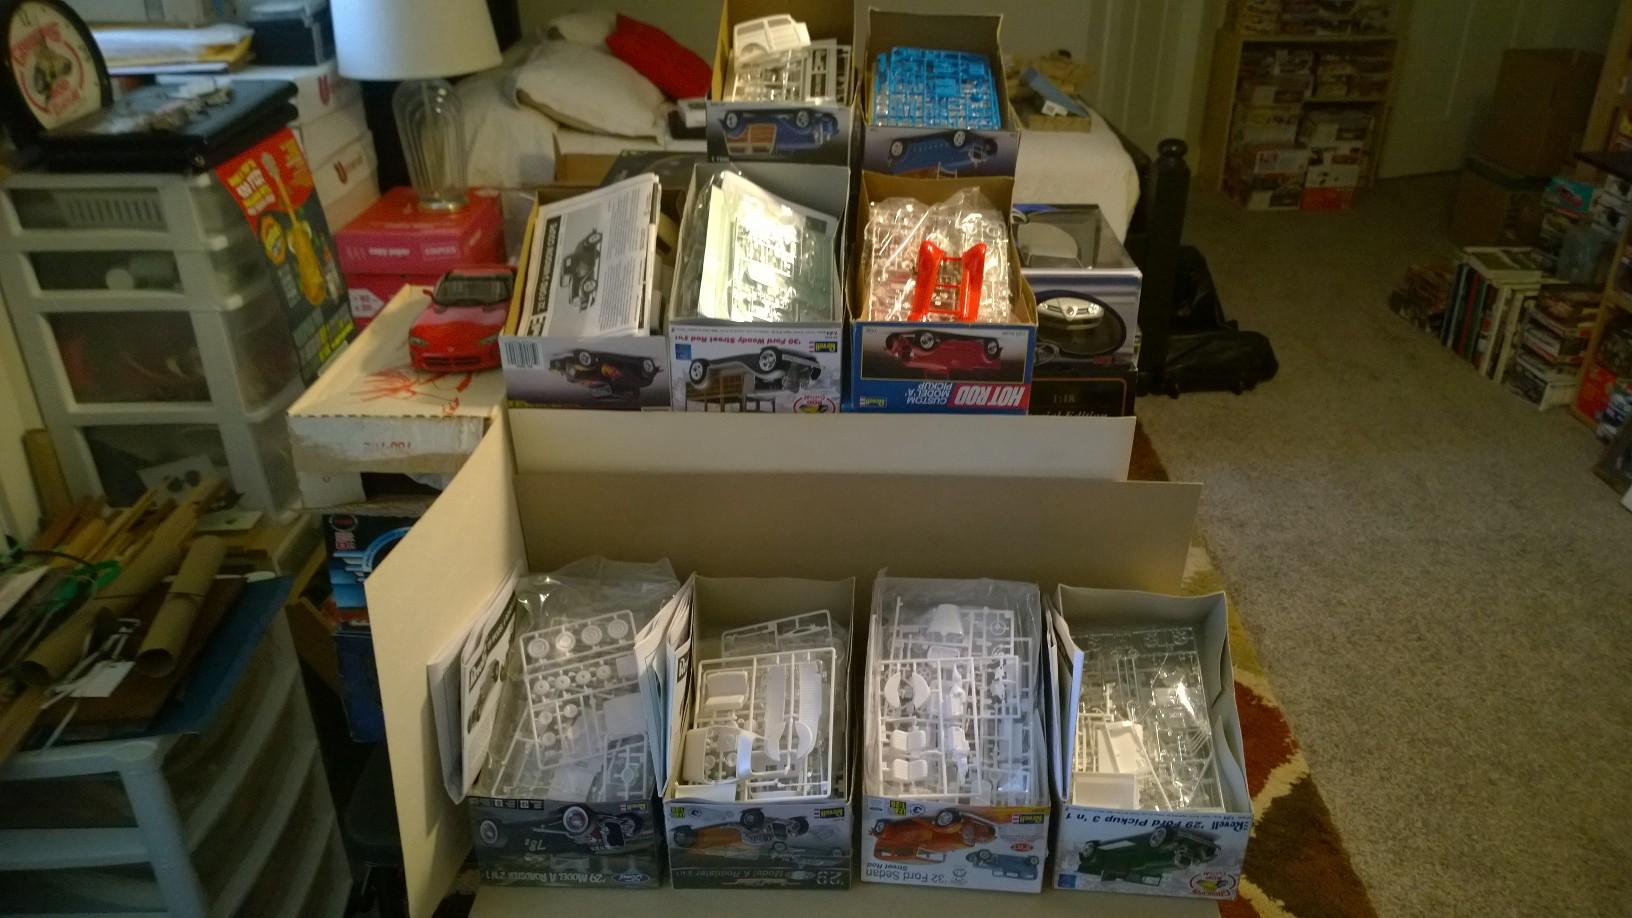
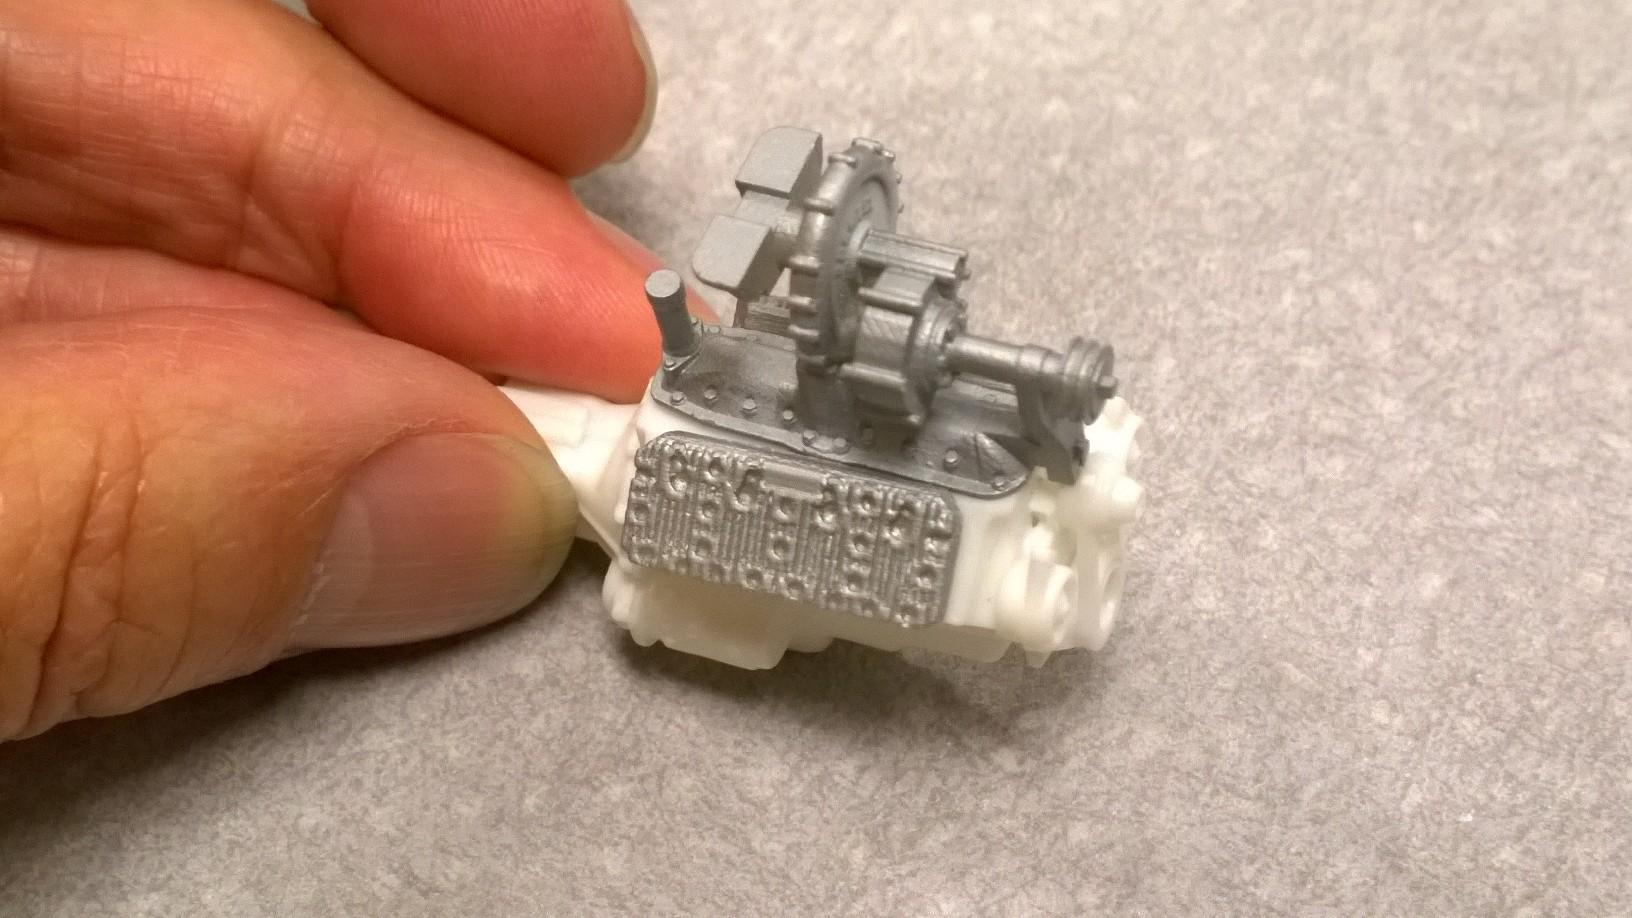
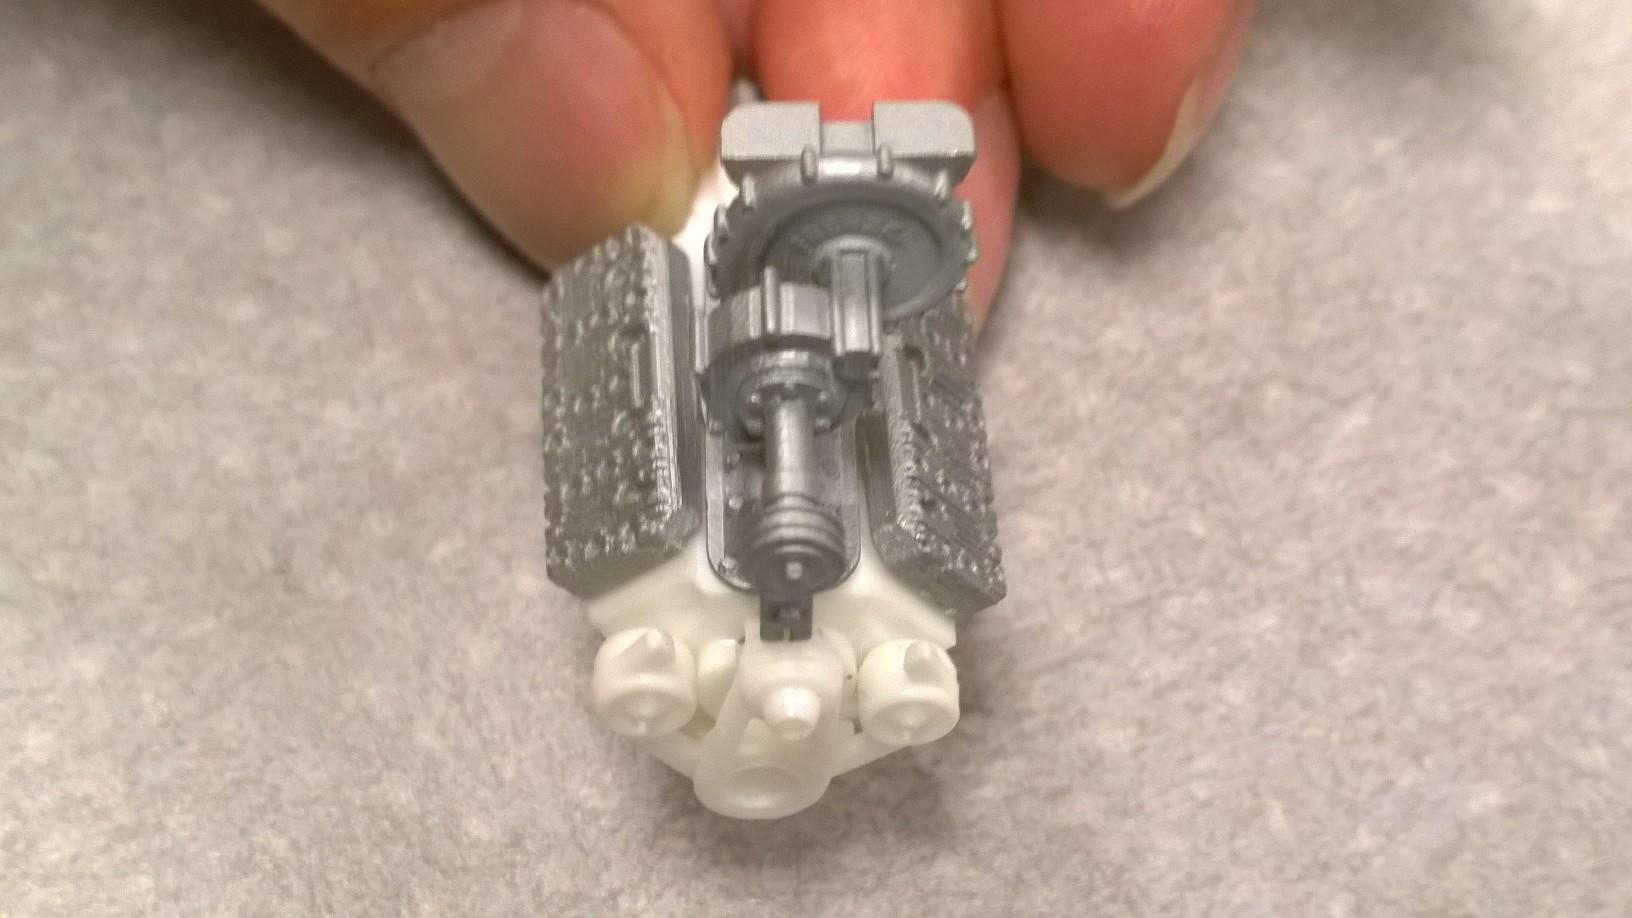
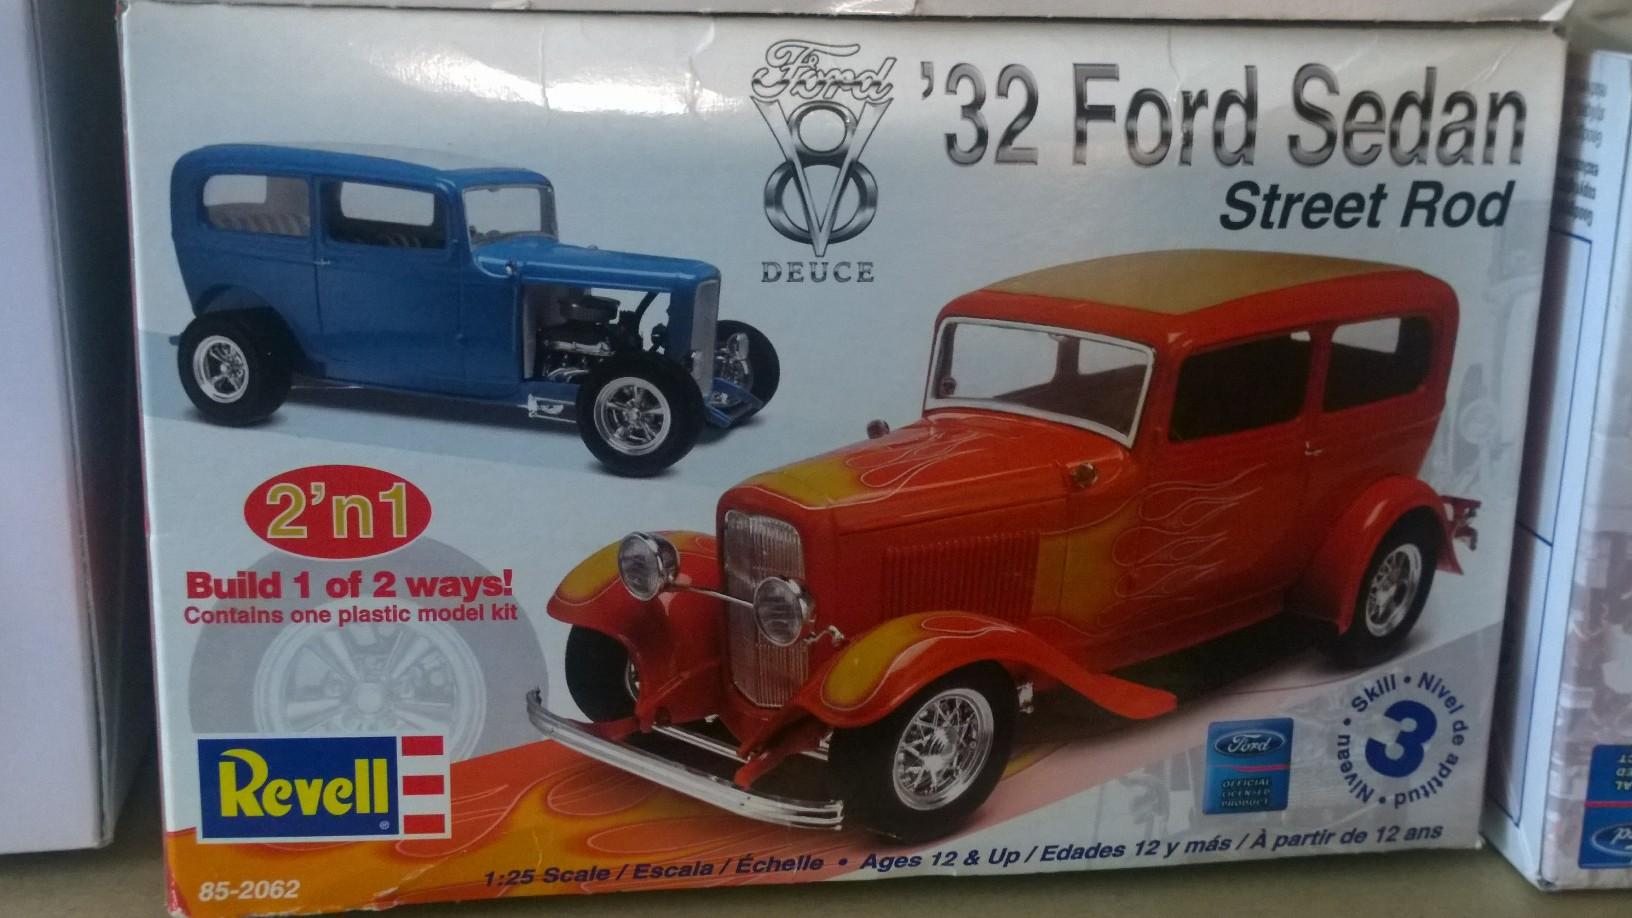
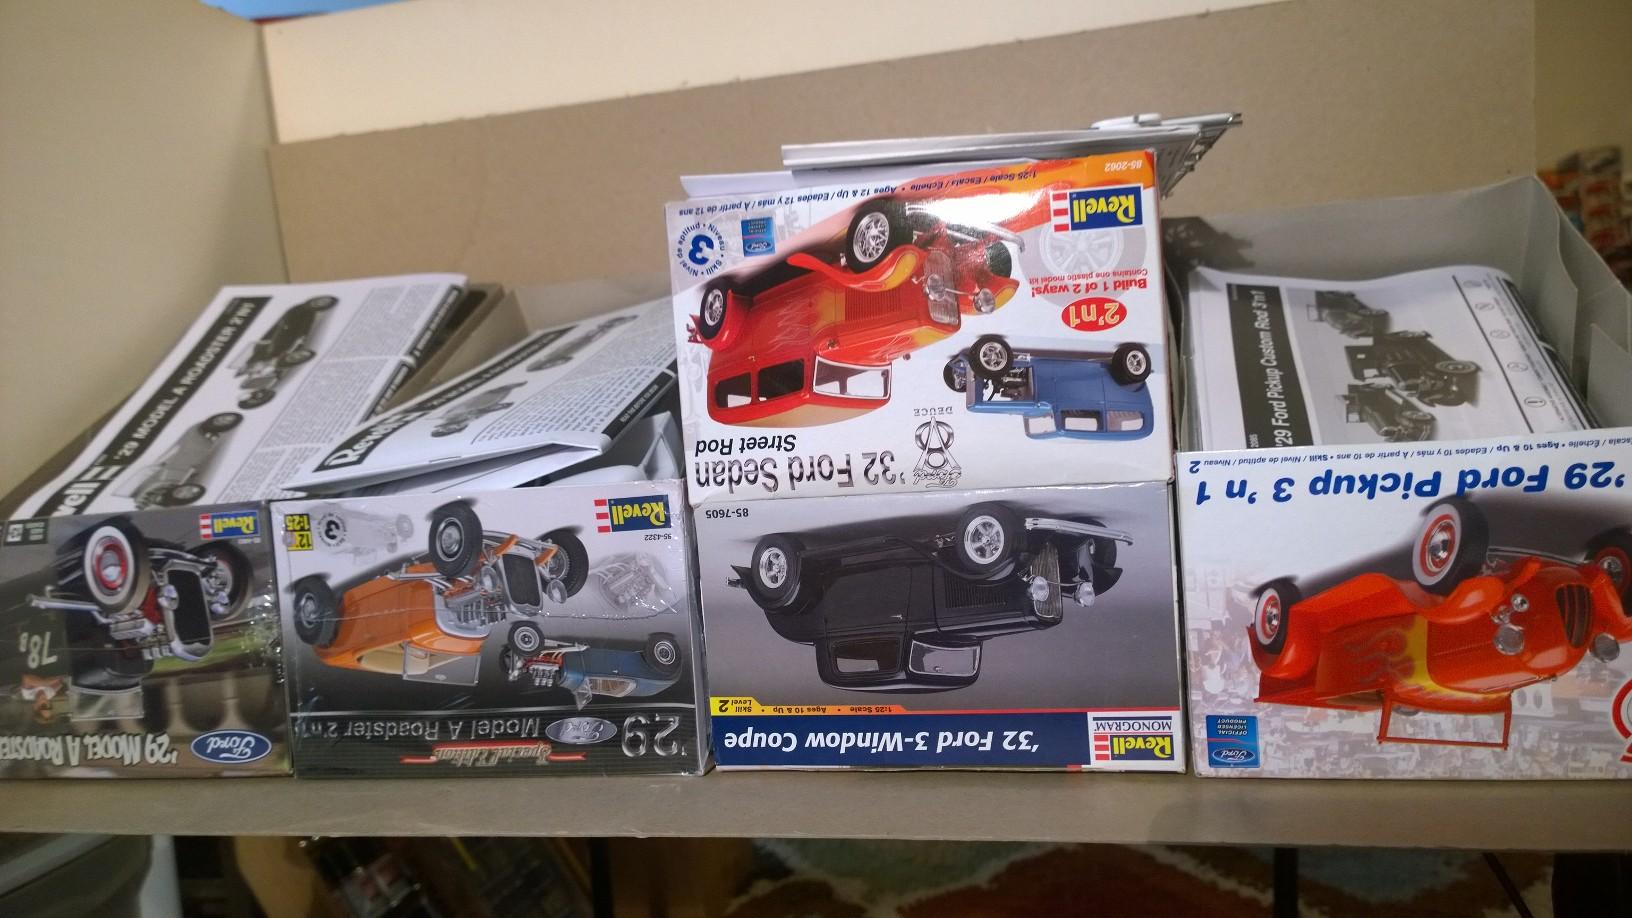
'29 Donor List Engine & Tranny Revell '32 Ford Sedan Kit 85-2062 Street Rod Parts #: 407-408 Engine Halves (2) Flathead 439 Transmission Pan C4 Revell '27 Touring Kit 7144 Street Rod Parts #: 12 Bellhousing (BLUE) Revell Dan Fink's '32 Ford Speedwagon Kit 85-7606 Parts #: 52-53 Engine Block Halves 55 Engine Oil Pan 65 Cylinder Head (2) Both the Revell '27 Touring Street Rod kit and the Revell '32 Ford Sedan Street Rod kit have C4 Transmissions: Between the two, the C4 behind the Flathead block and Bell Housing will be mated via the '27 Bell Housing to the Deuce Small Block Ford. Here are the engines and transmissions marked for cutting: Here we "Take" the line... rotating, instead of just cutting straight through. To align the C4 and the Bell Housing a pattern of the Bell Housing opening is traced on a scrap piece of flat stock. Trim it down "Leaving" the line... File it... until it fits in the Bell Housing opening. Locate the center; a short piece of rod will pin the guide to the transmission. Ready for a drop of CA... Test fit looks good! Add a drop of CA to set the guide and transmission together: And, on to relieving the SBF from it's kit transmission... File the back of the block and prepare to drill the pilot hole... Test fit mates the '27 Bell Housing and the Deuce Small Block Ford Engine together. Add the C4 from the Sedan kit There is the '80s/'90s Ford in a Ford powerplant for our Tribute build. -KK
-
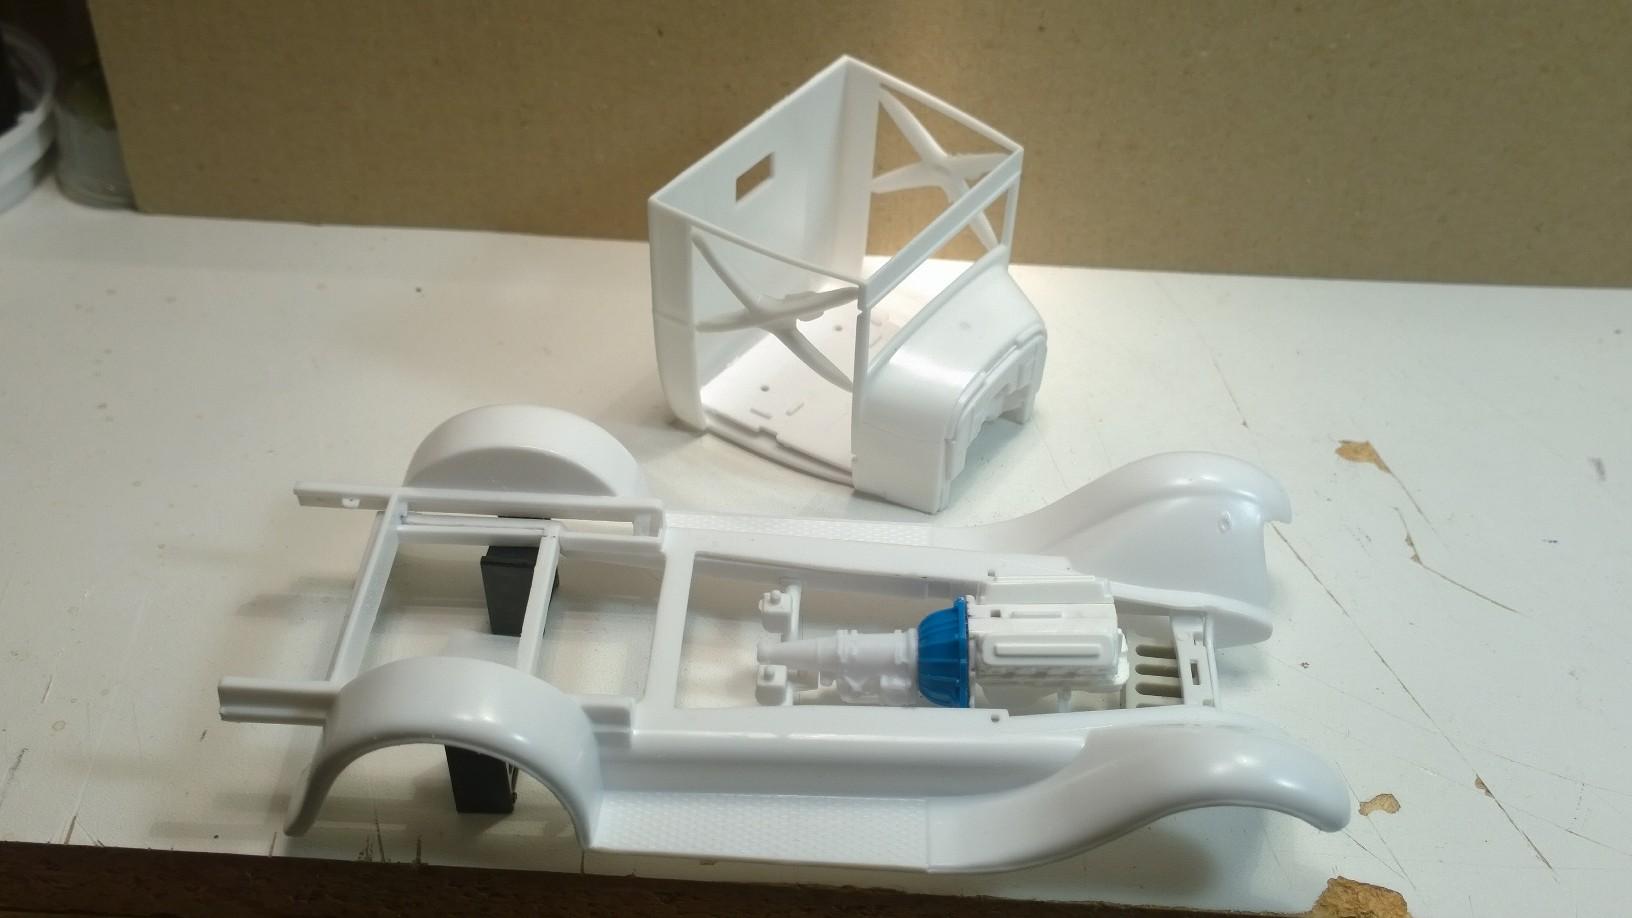
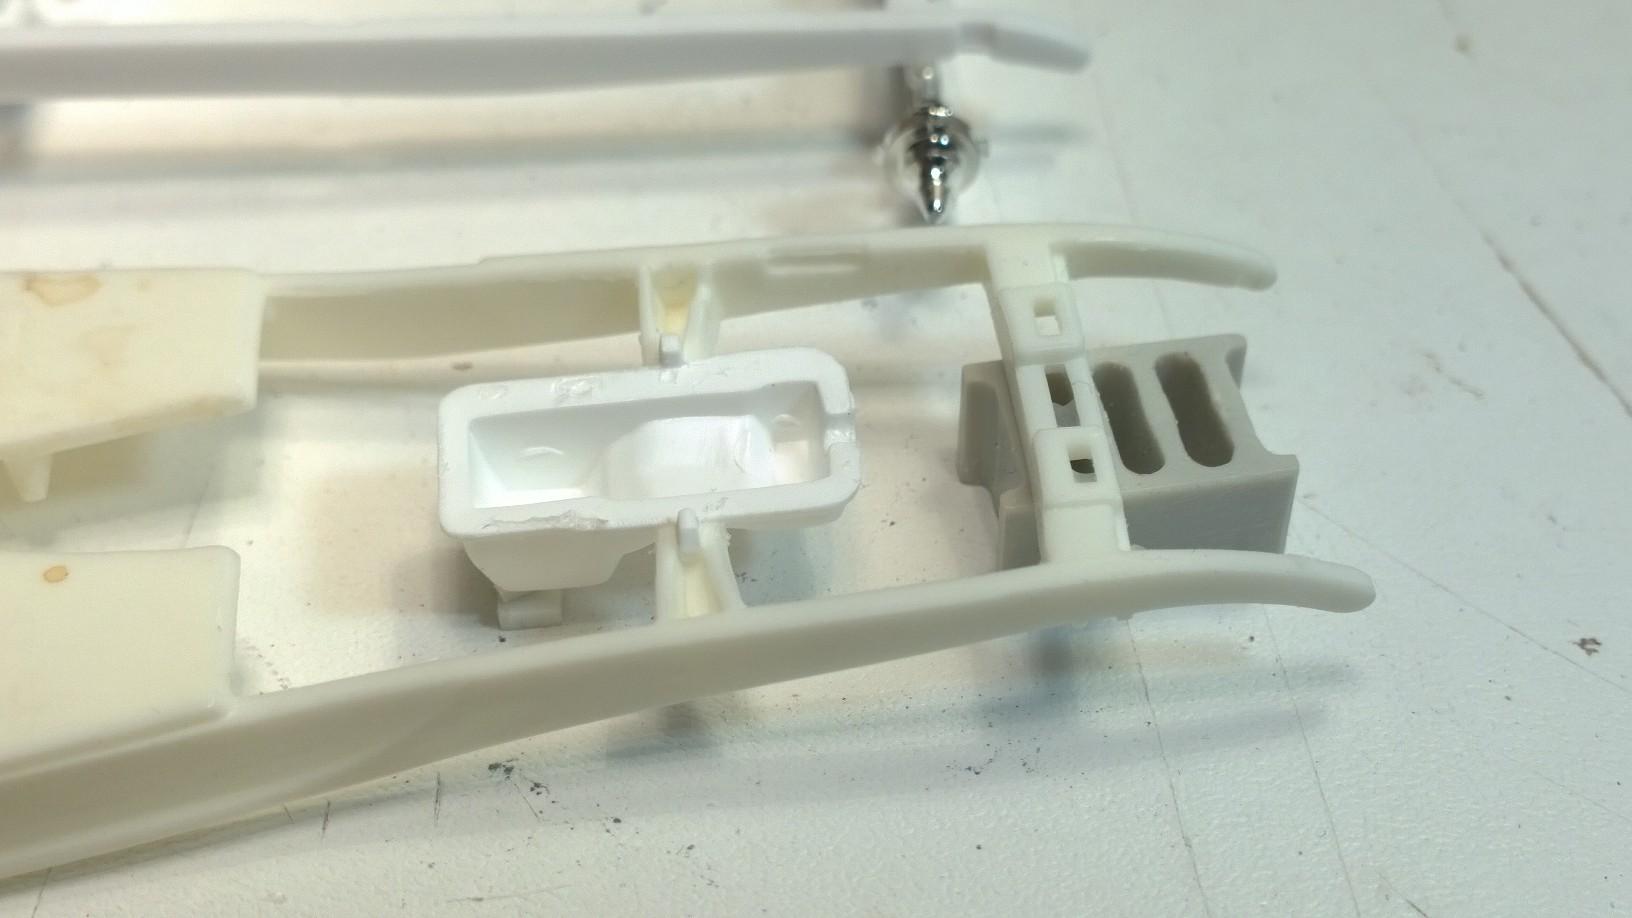
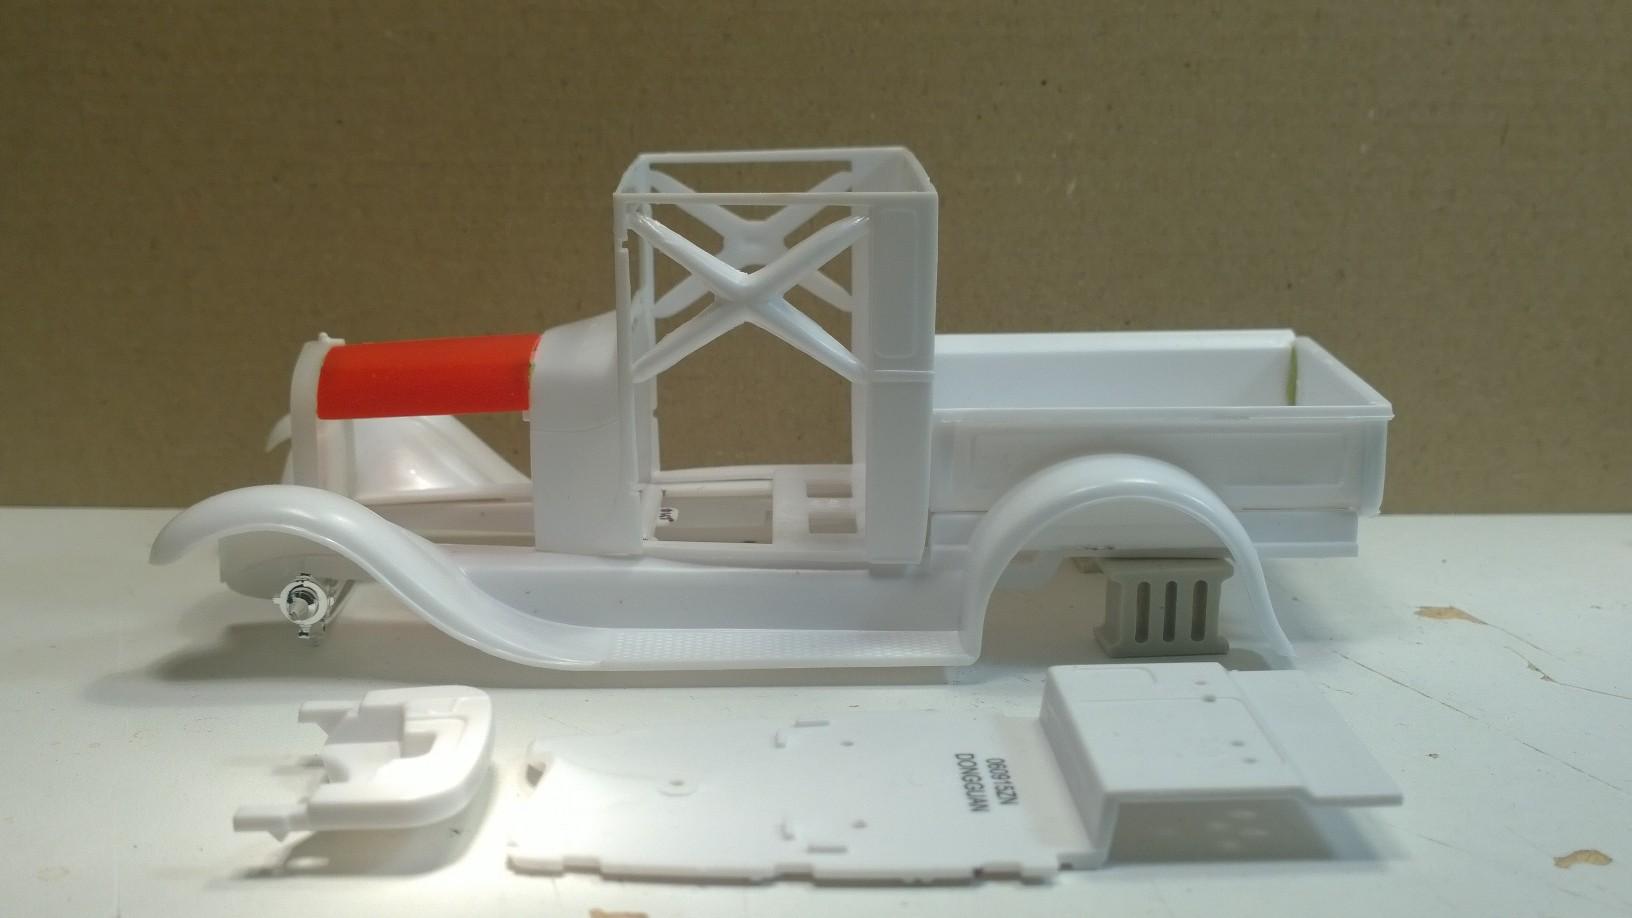
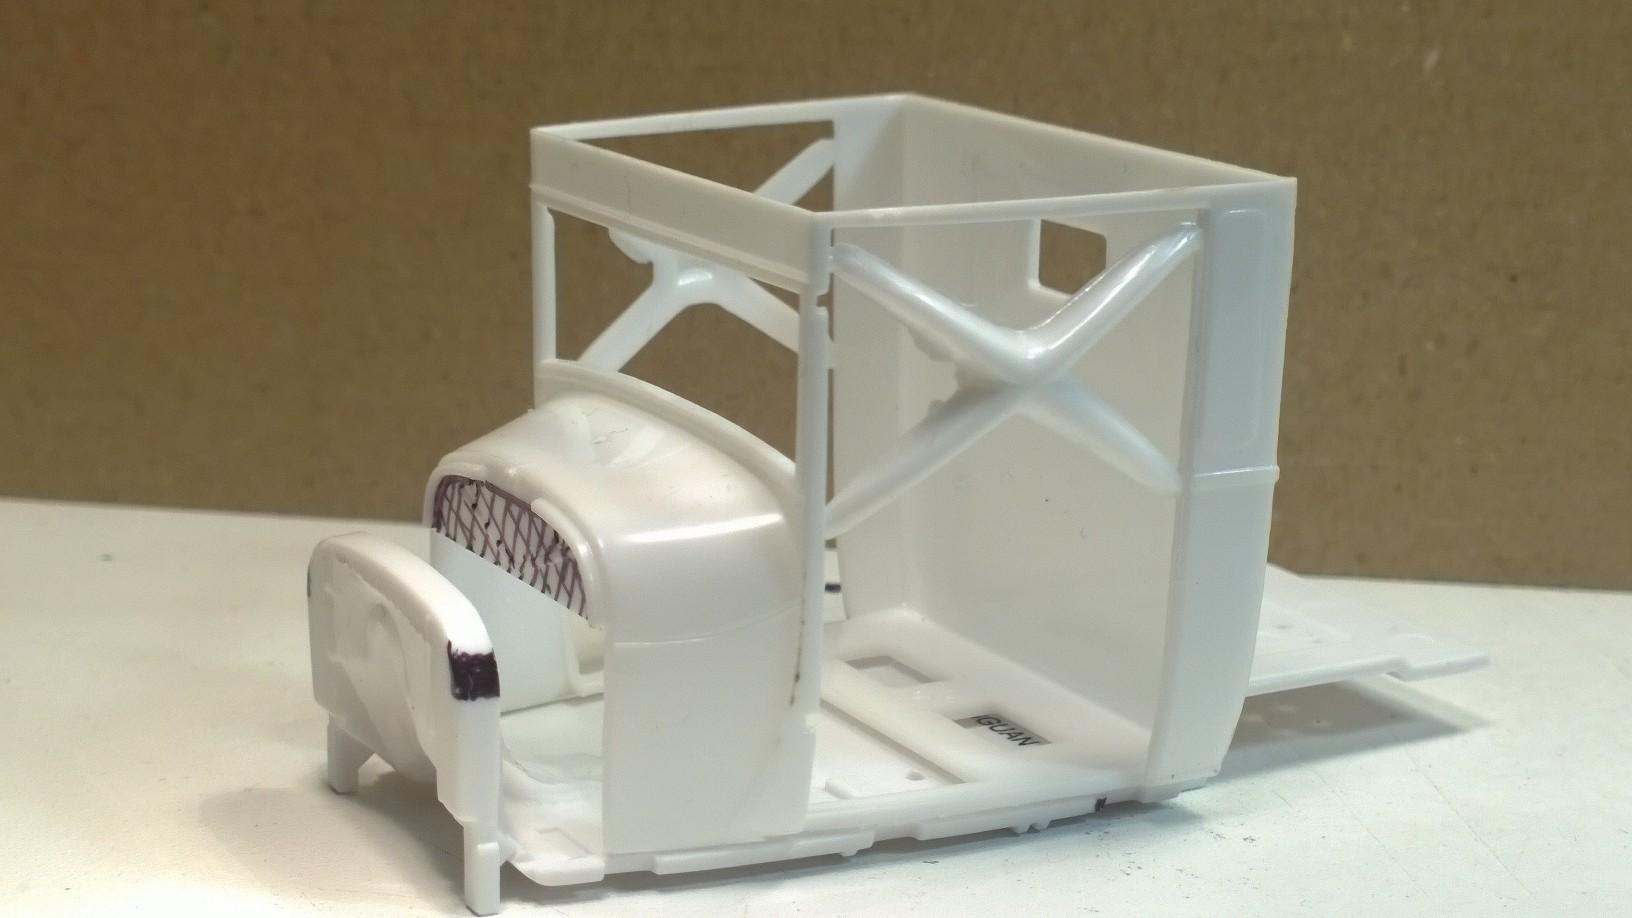
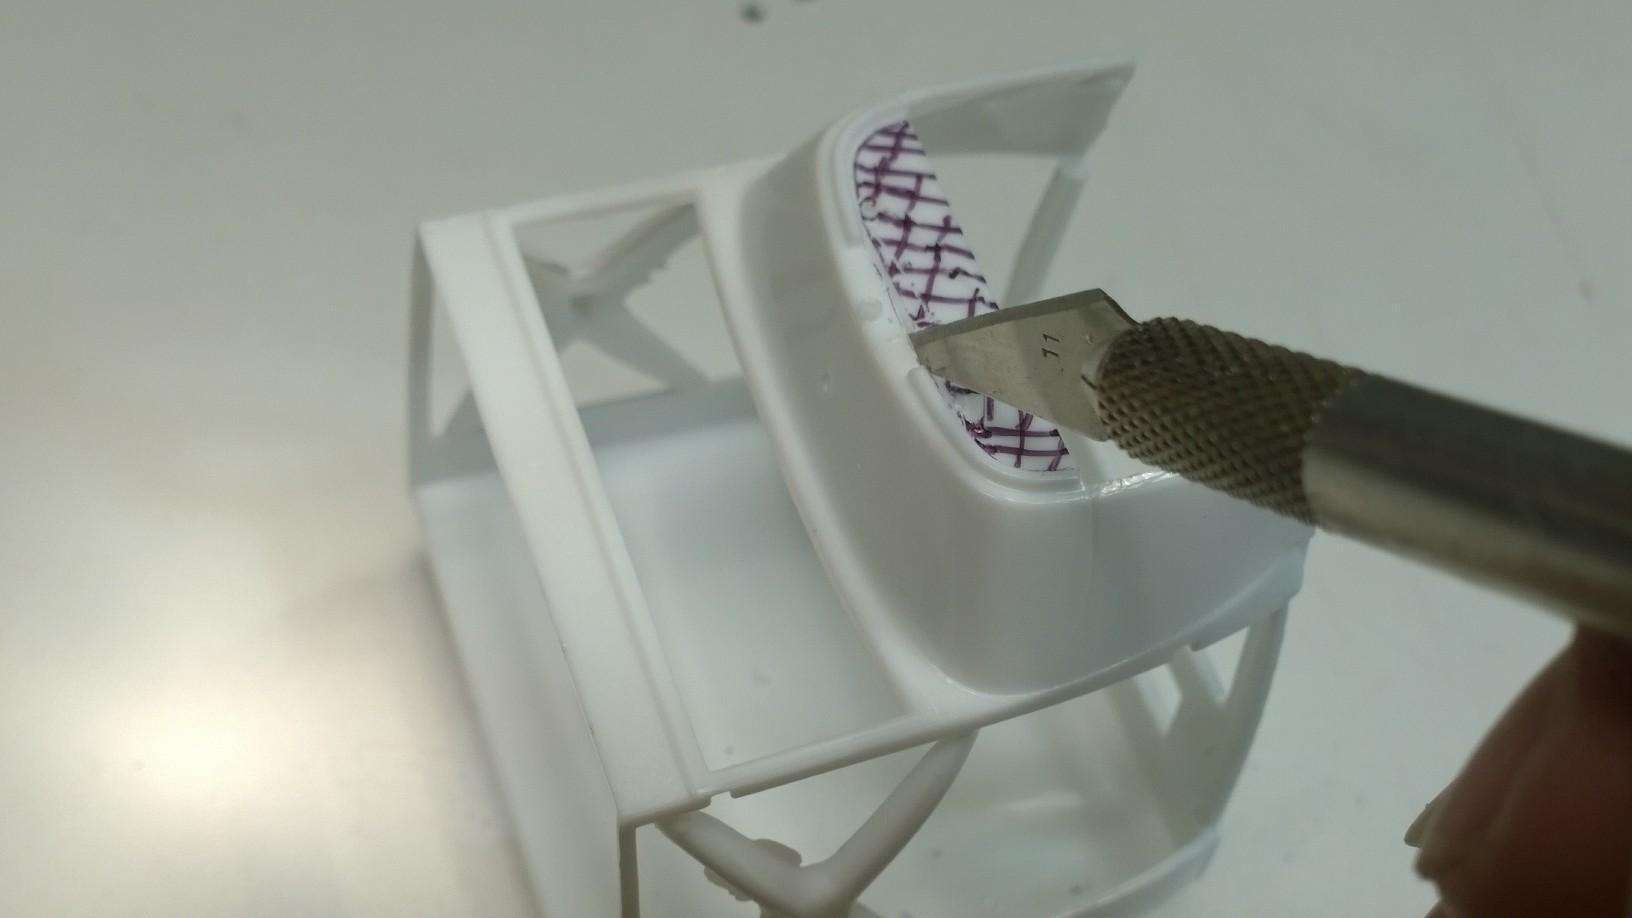
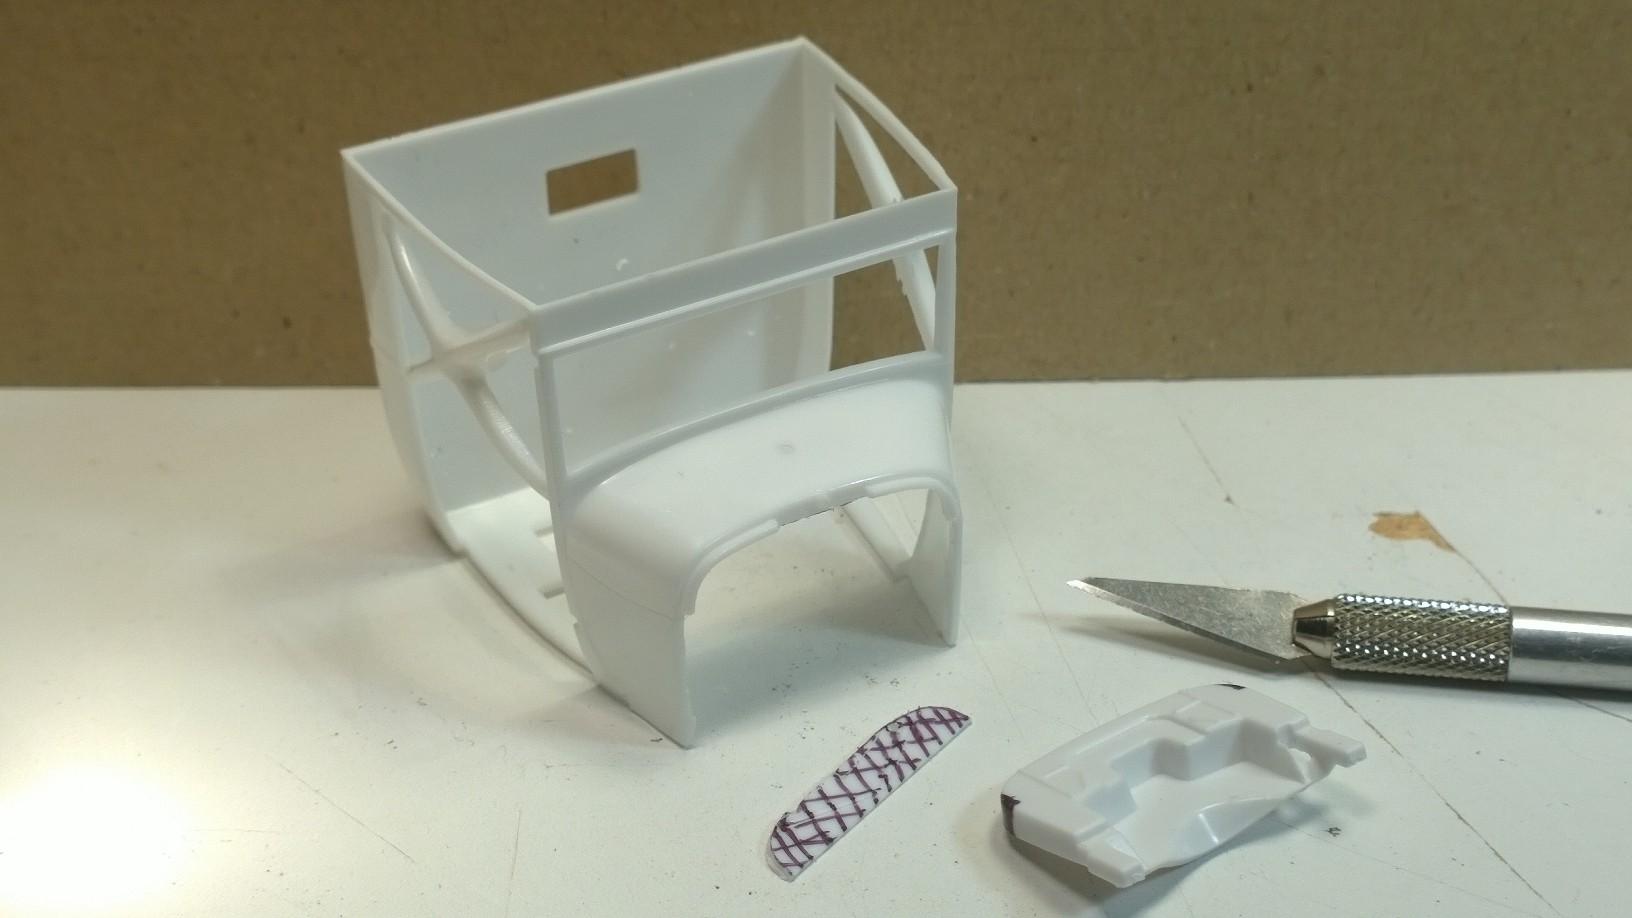
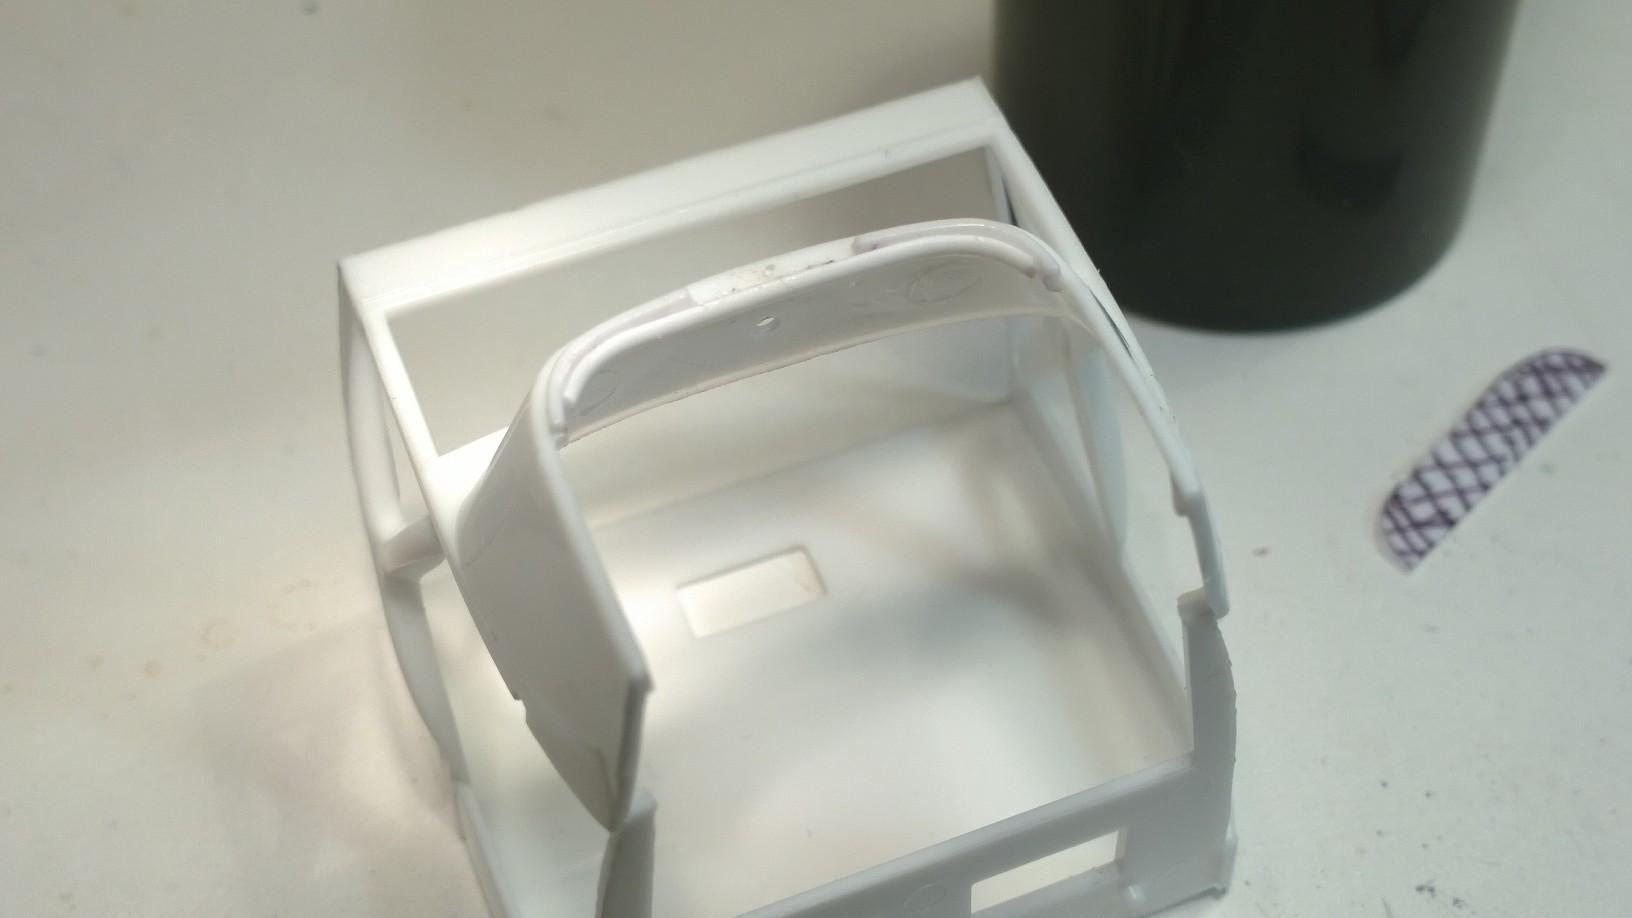
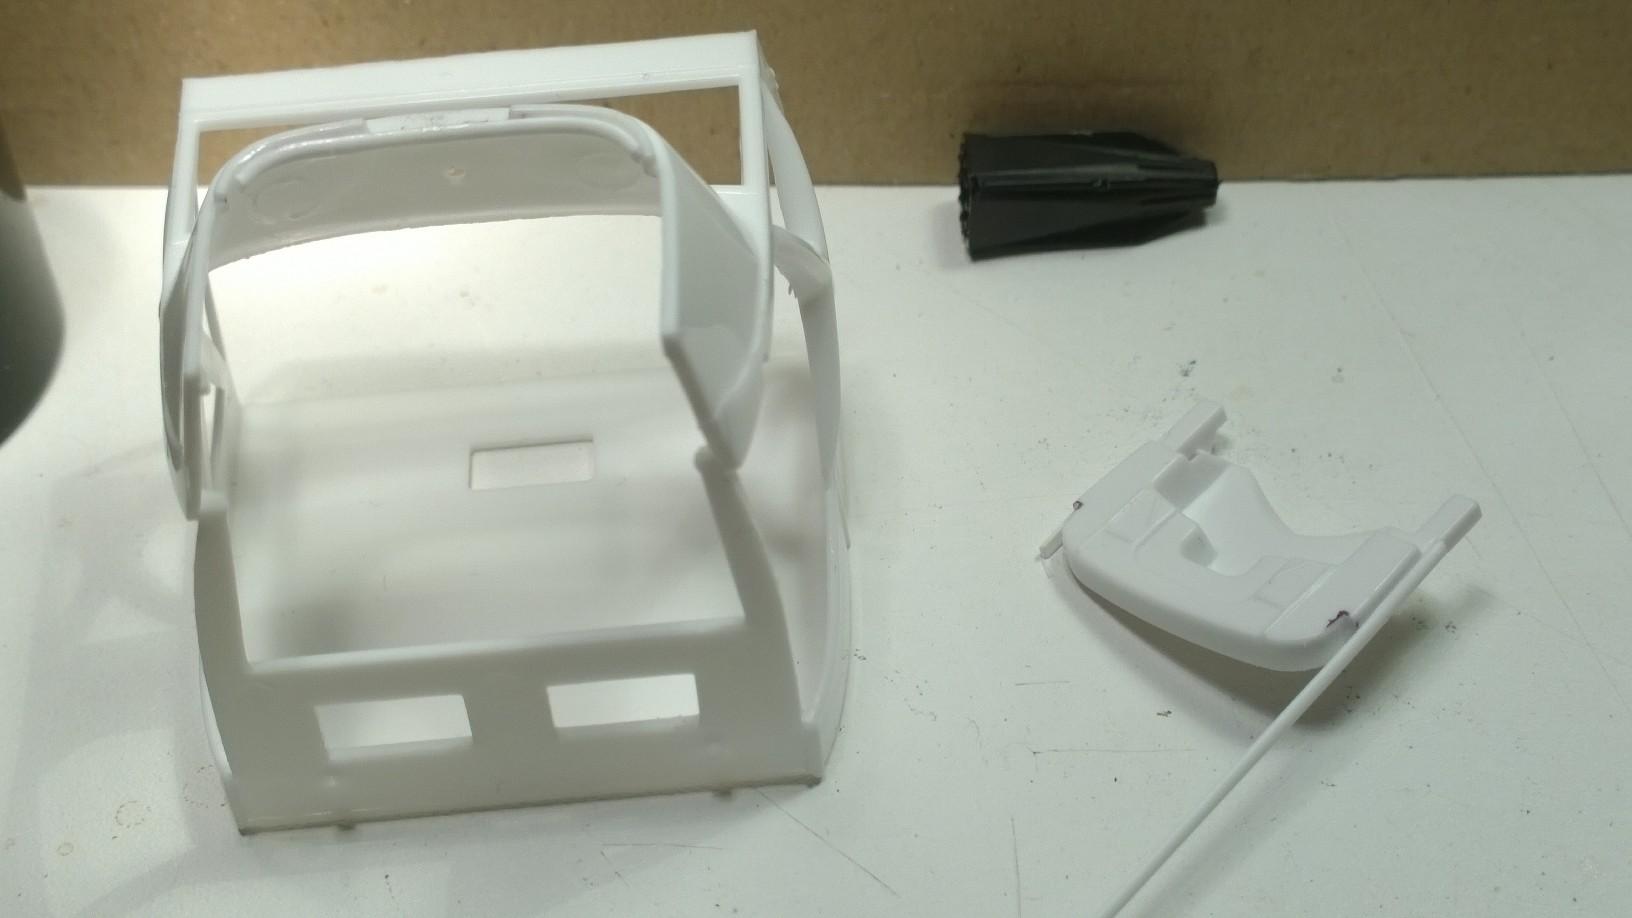
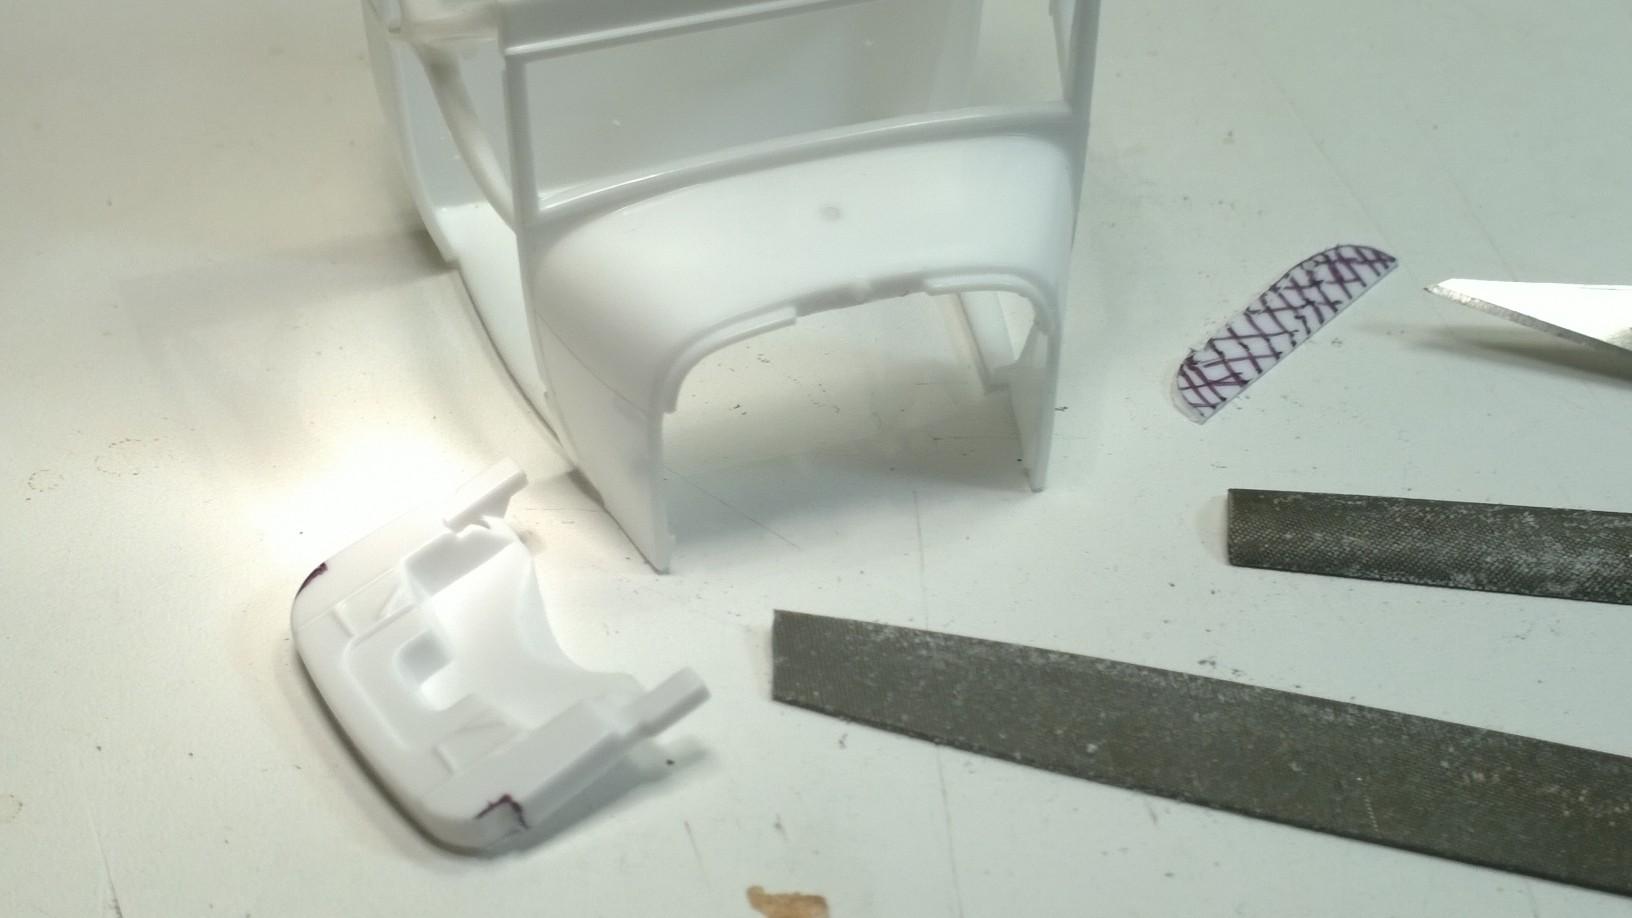
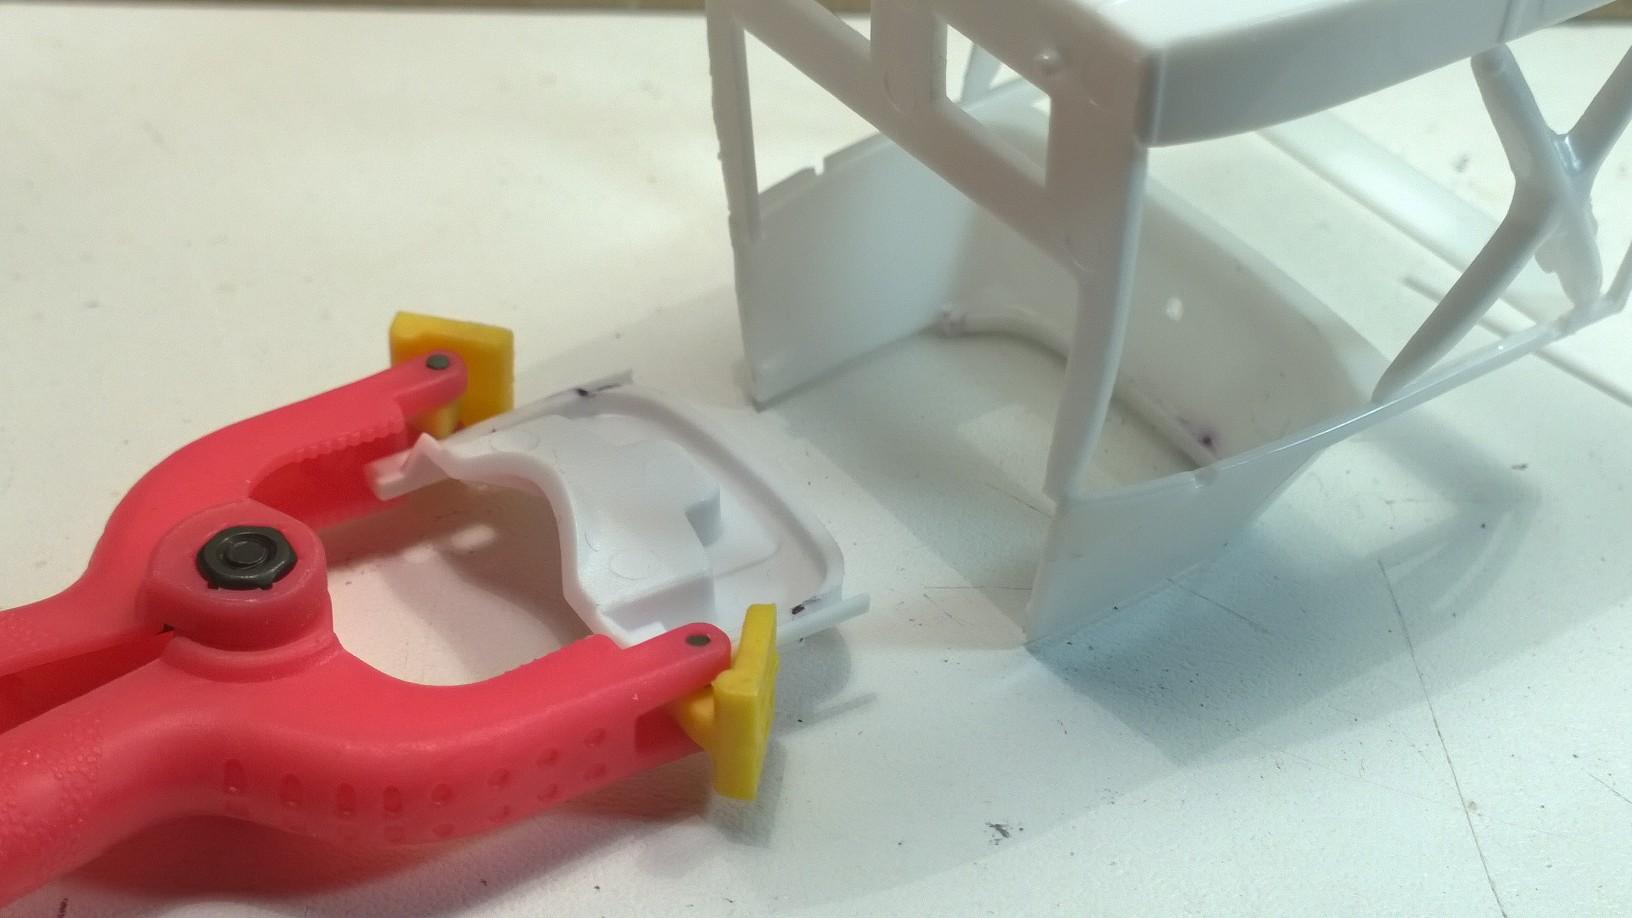
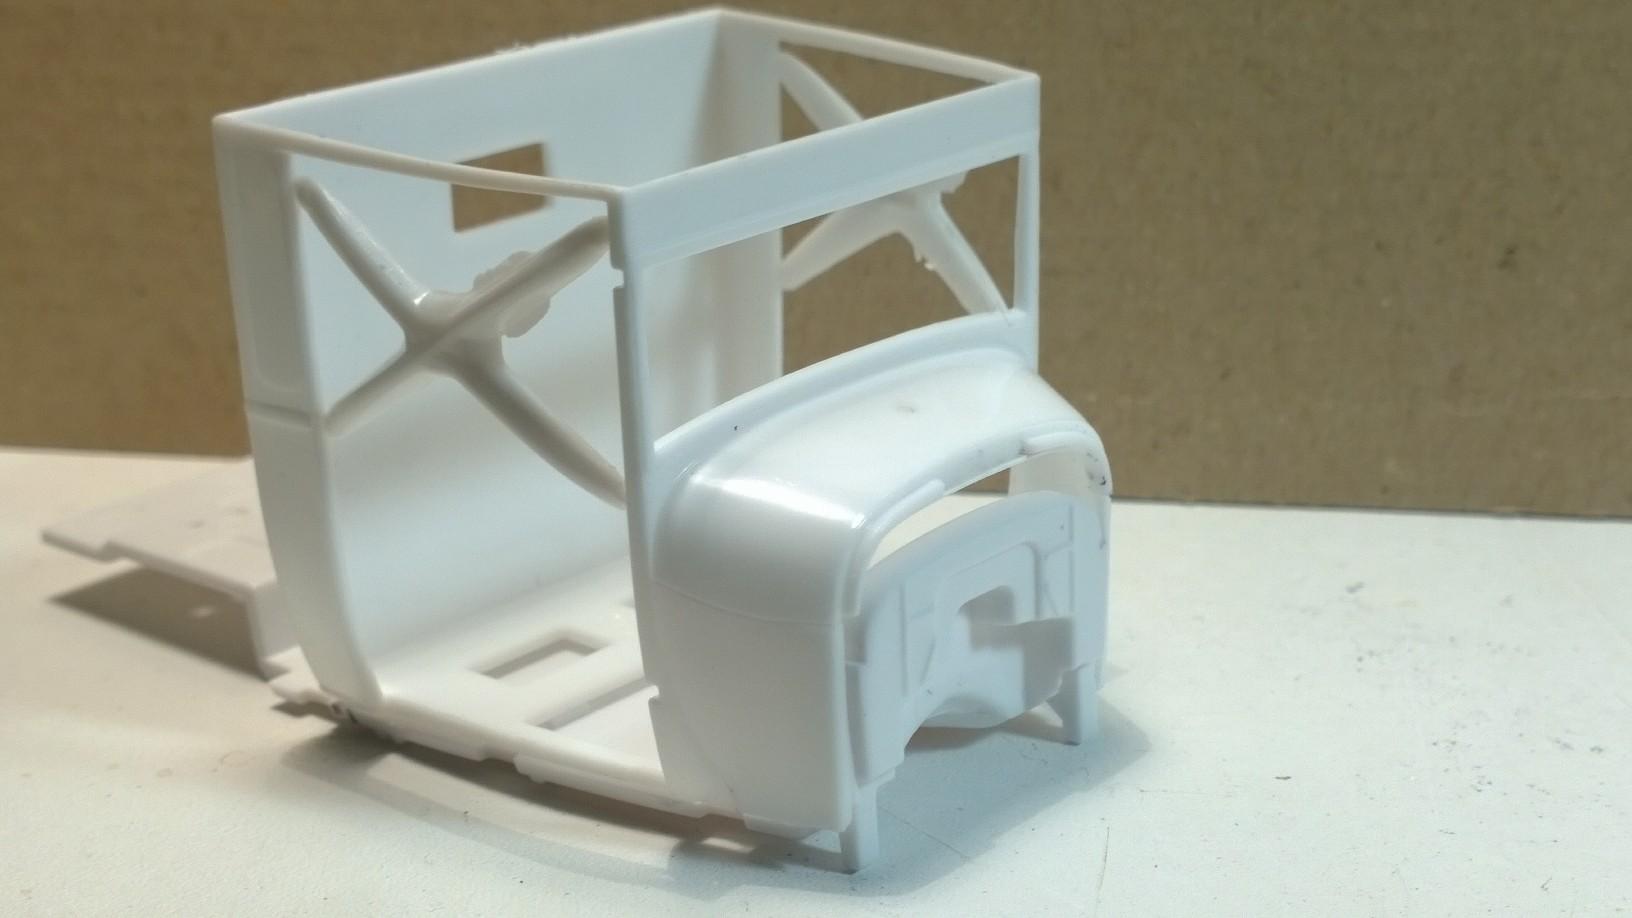
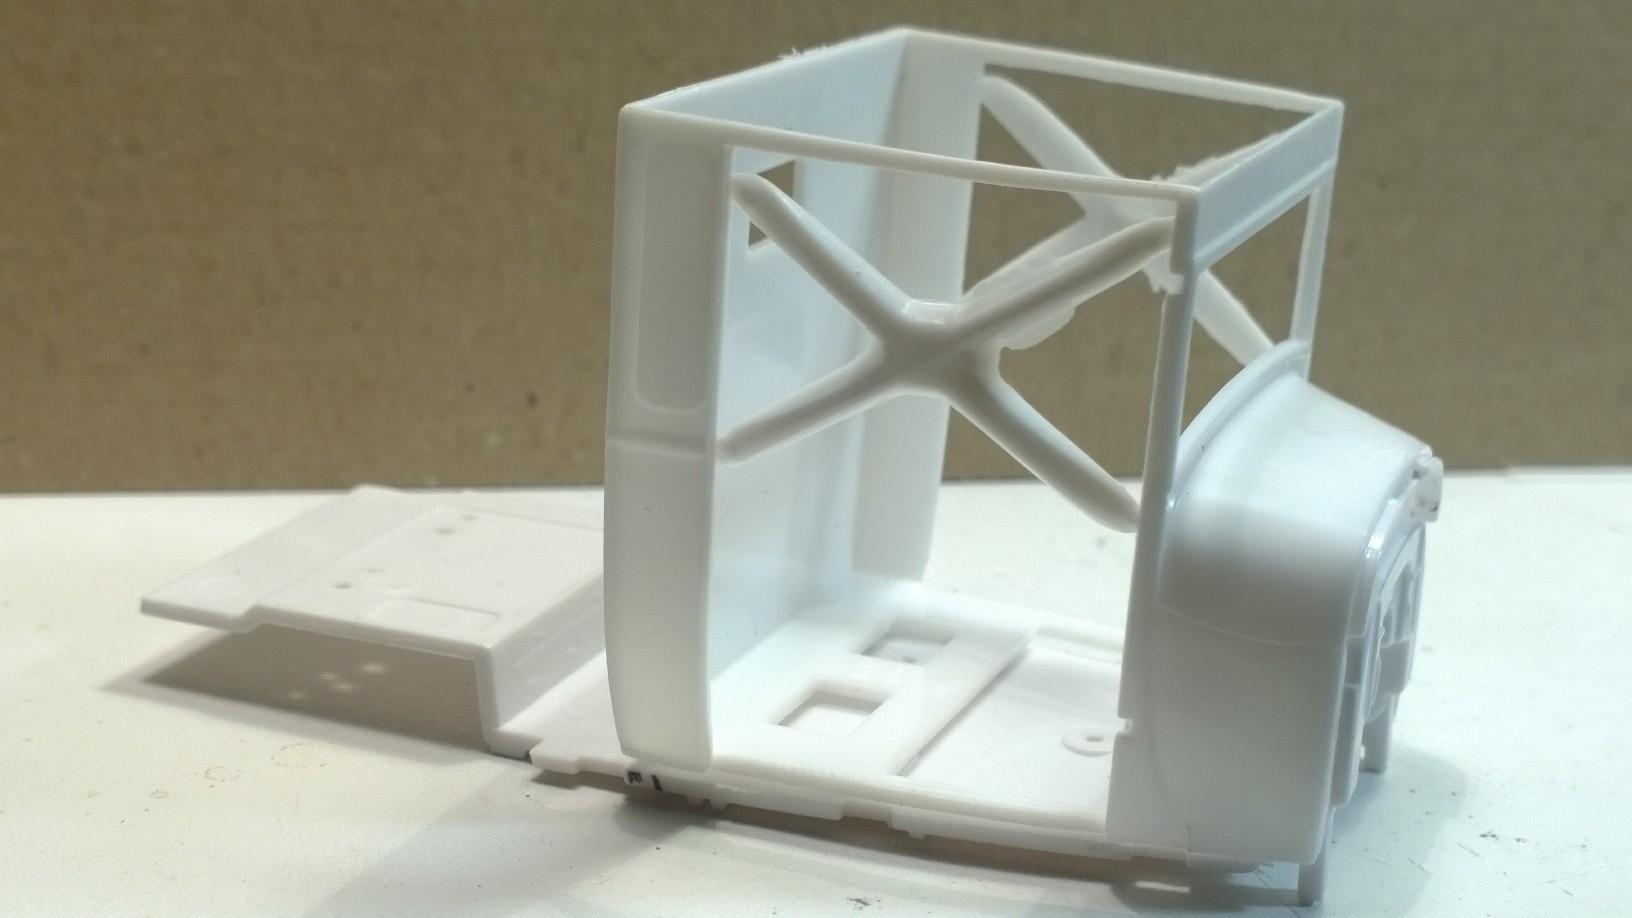
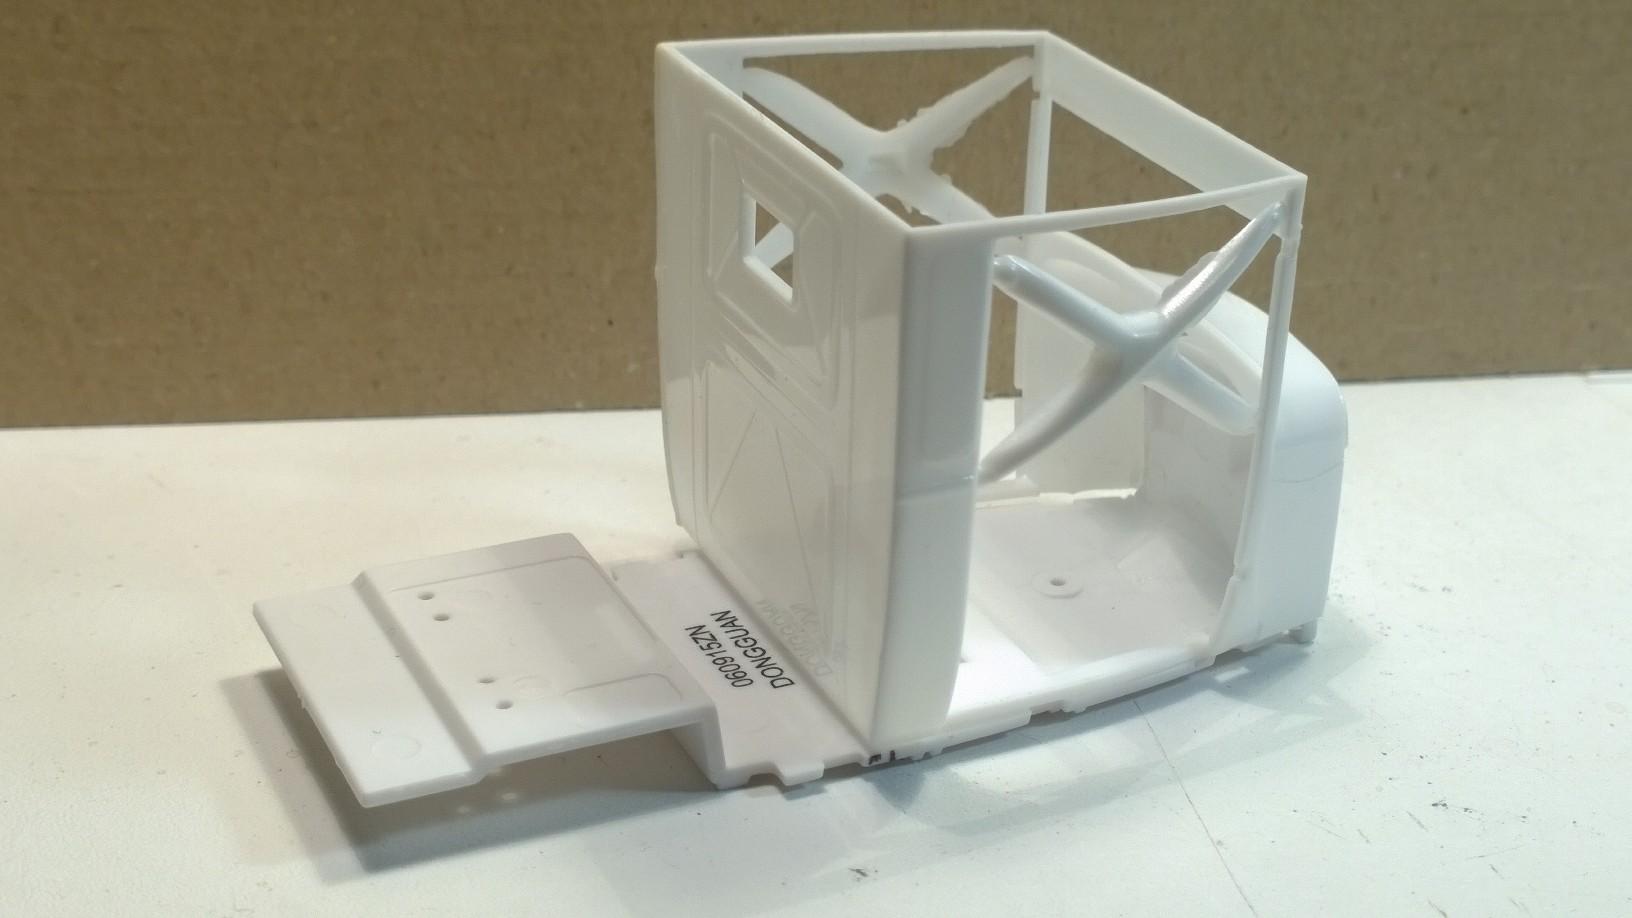
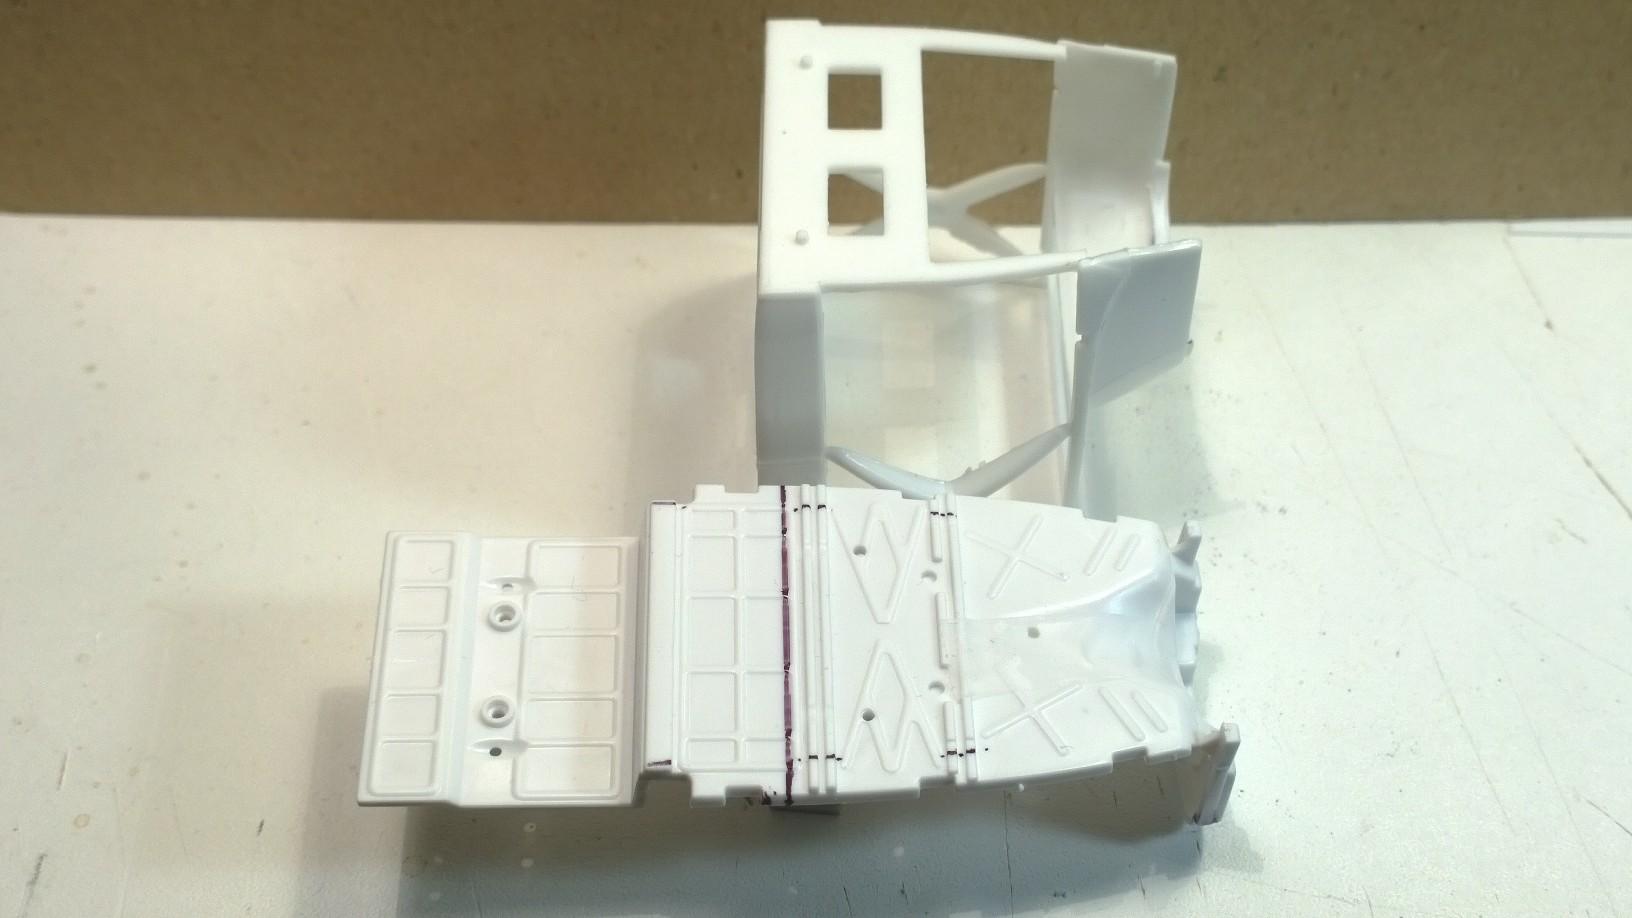
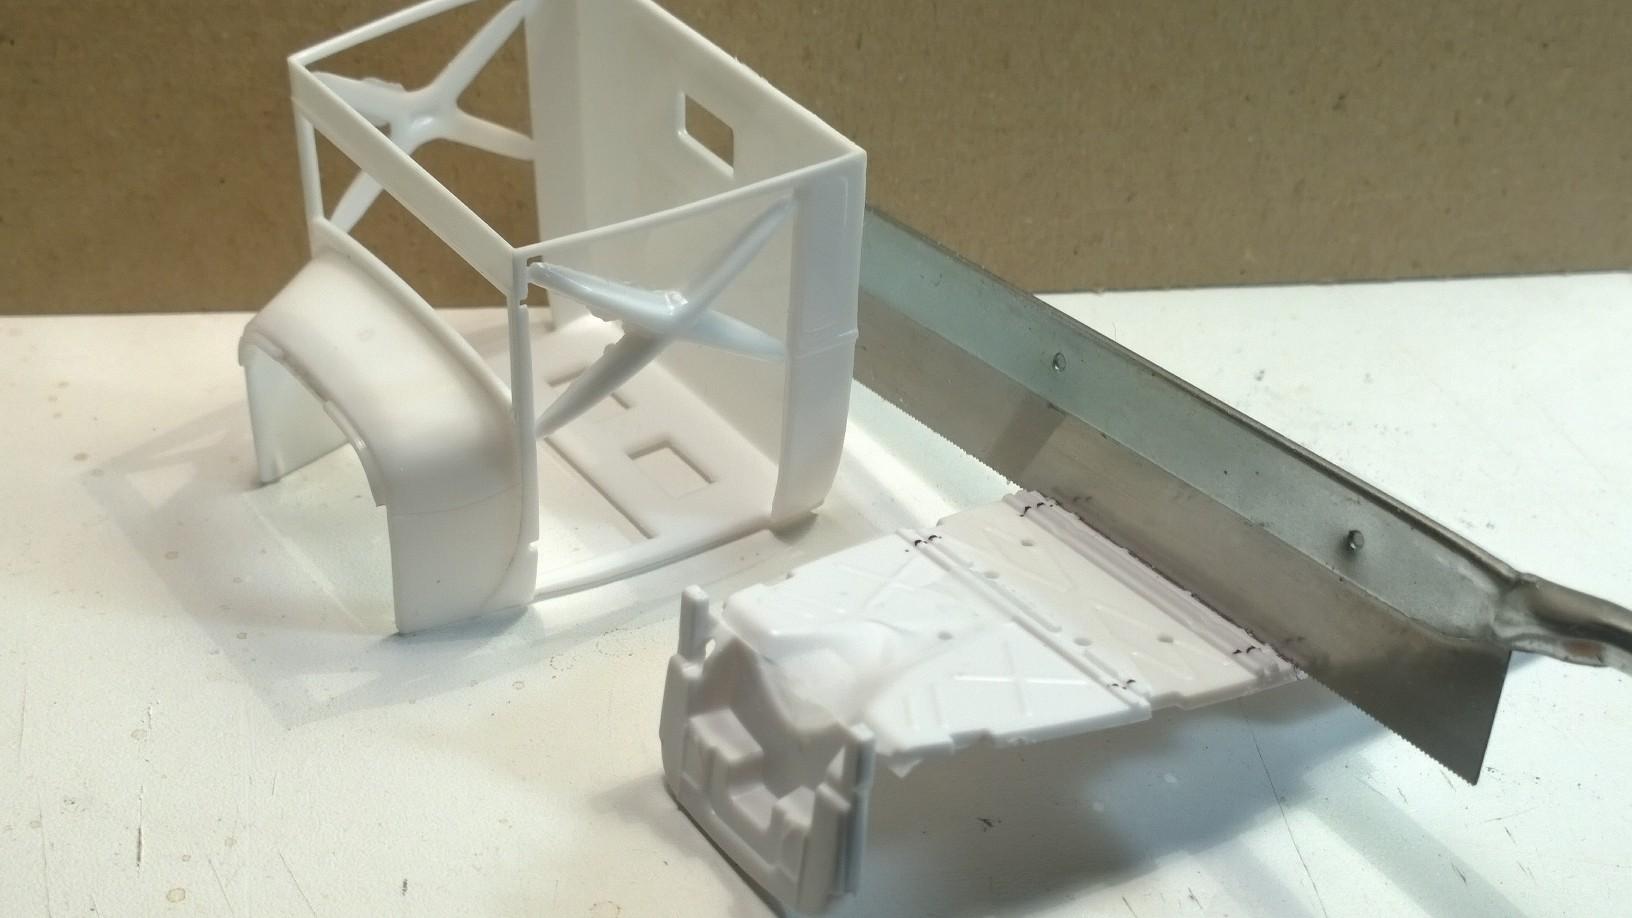
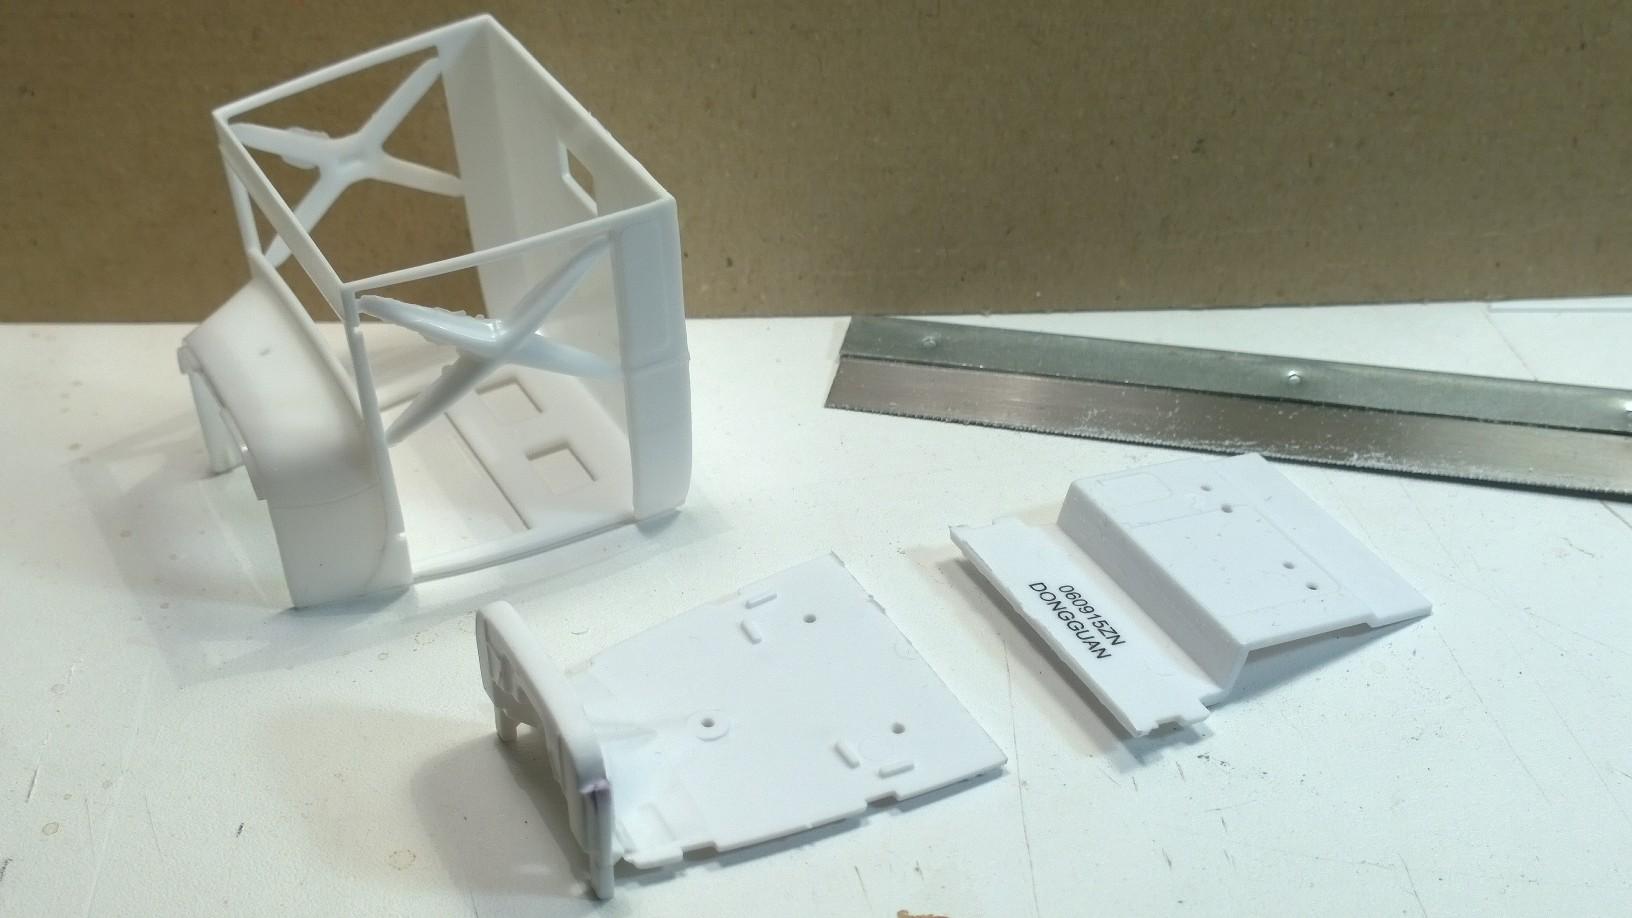
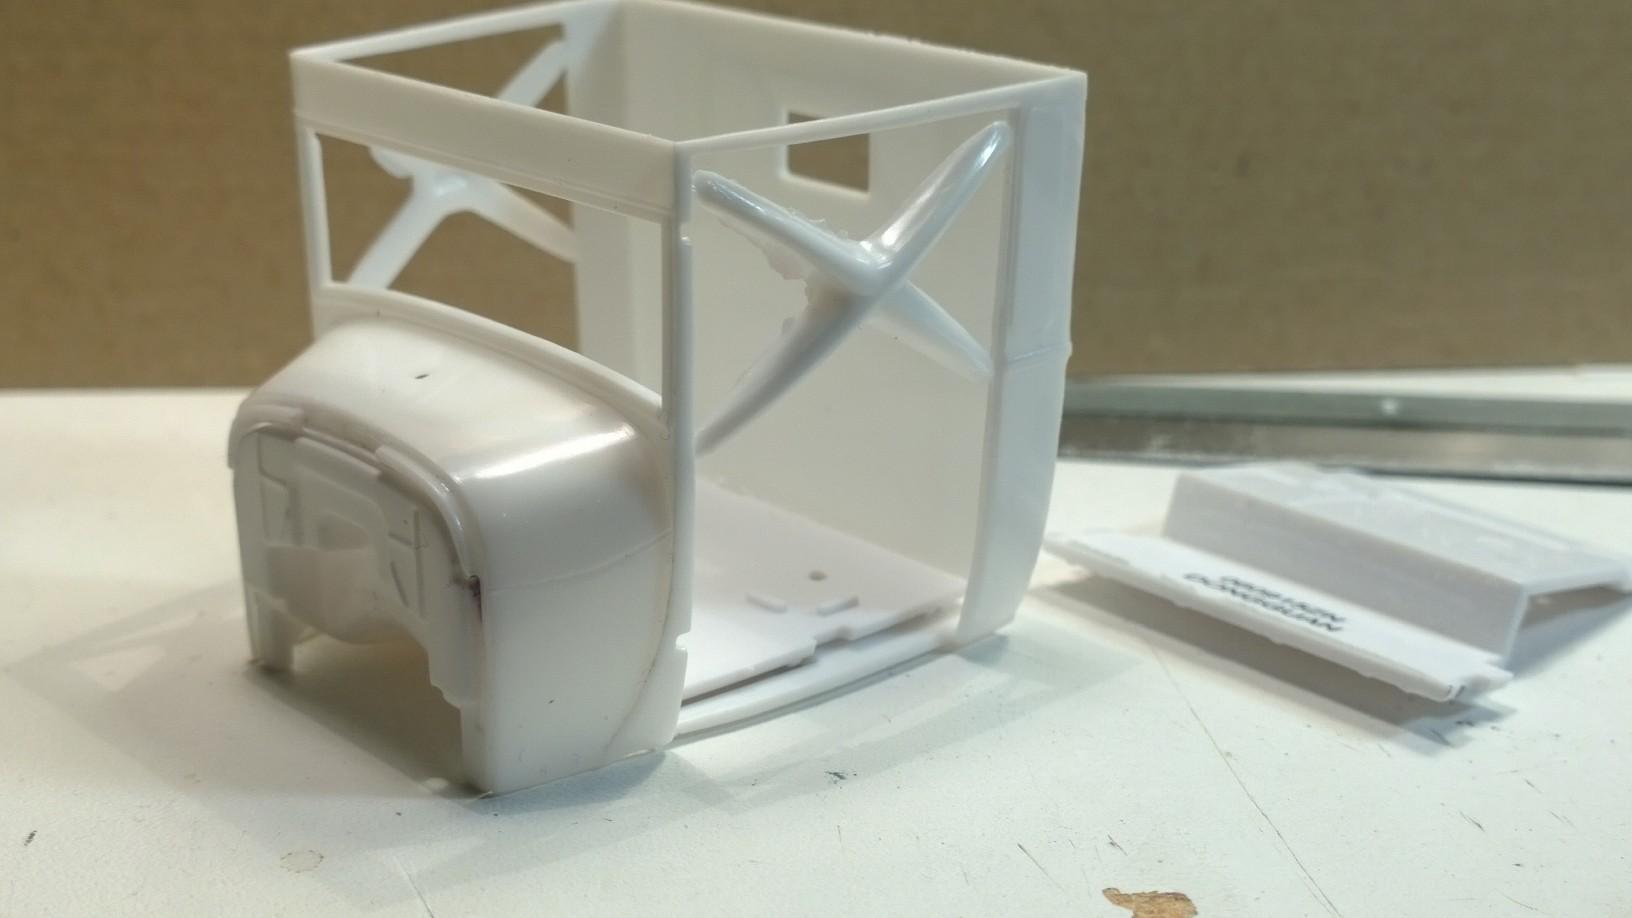
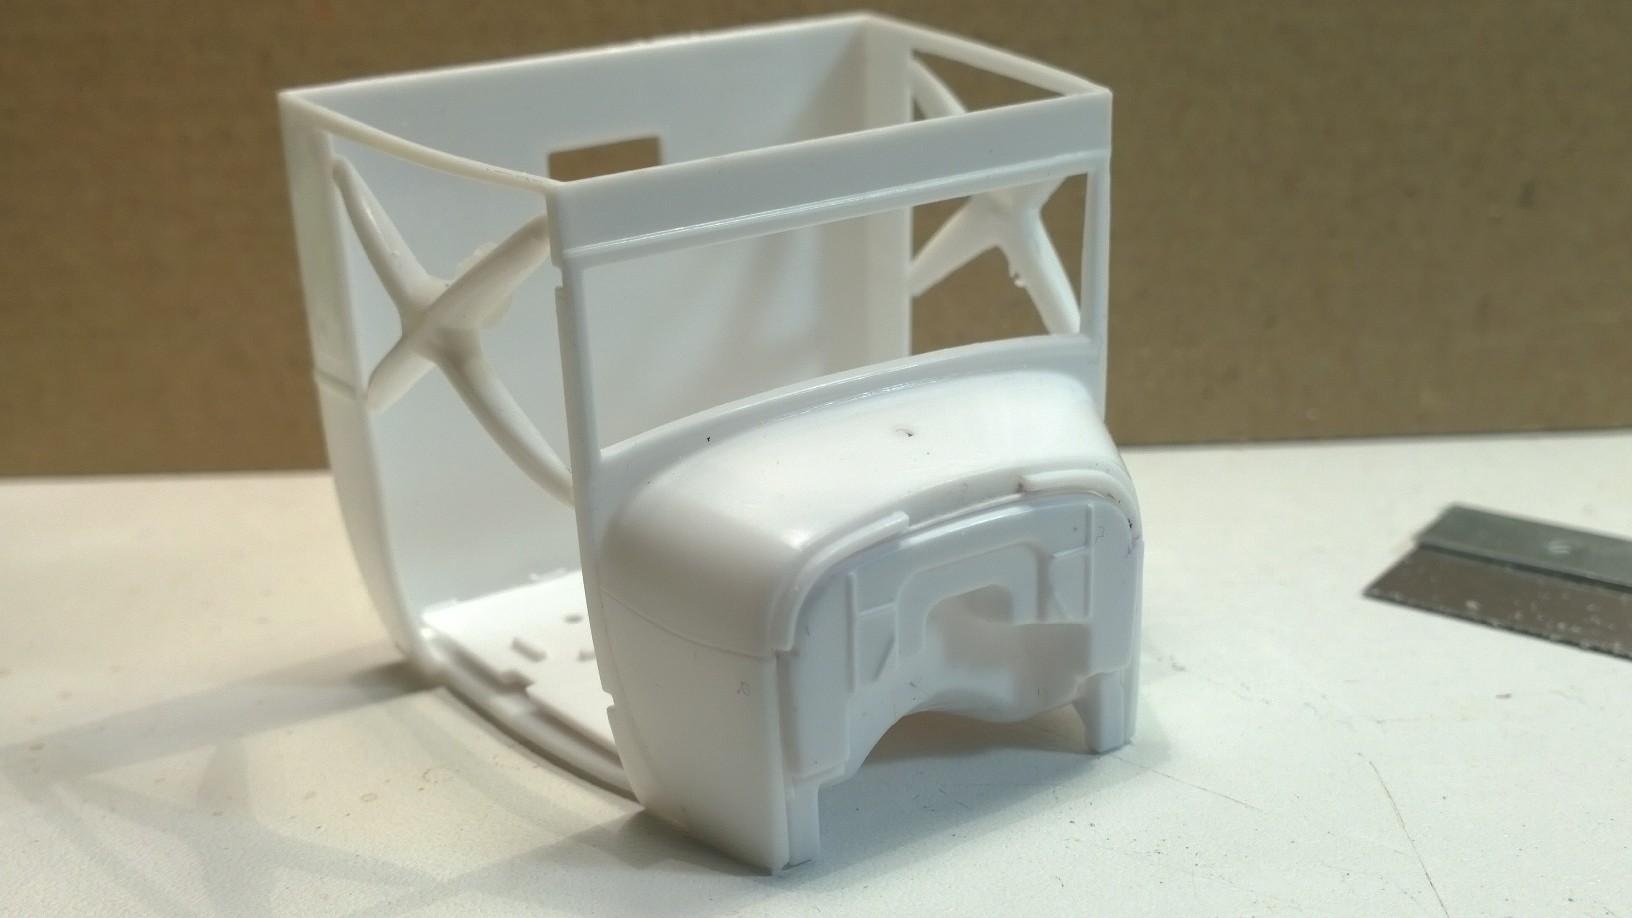
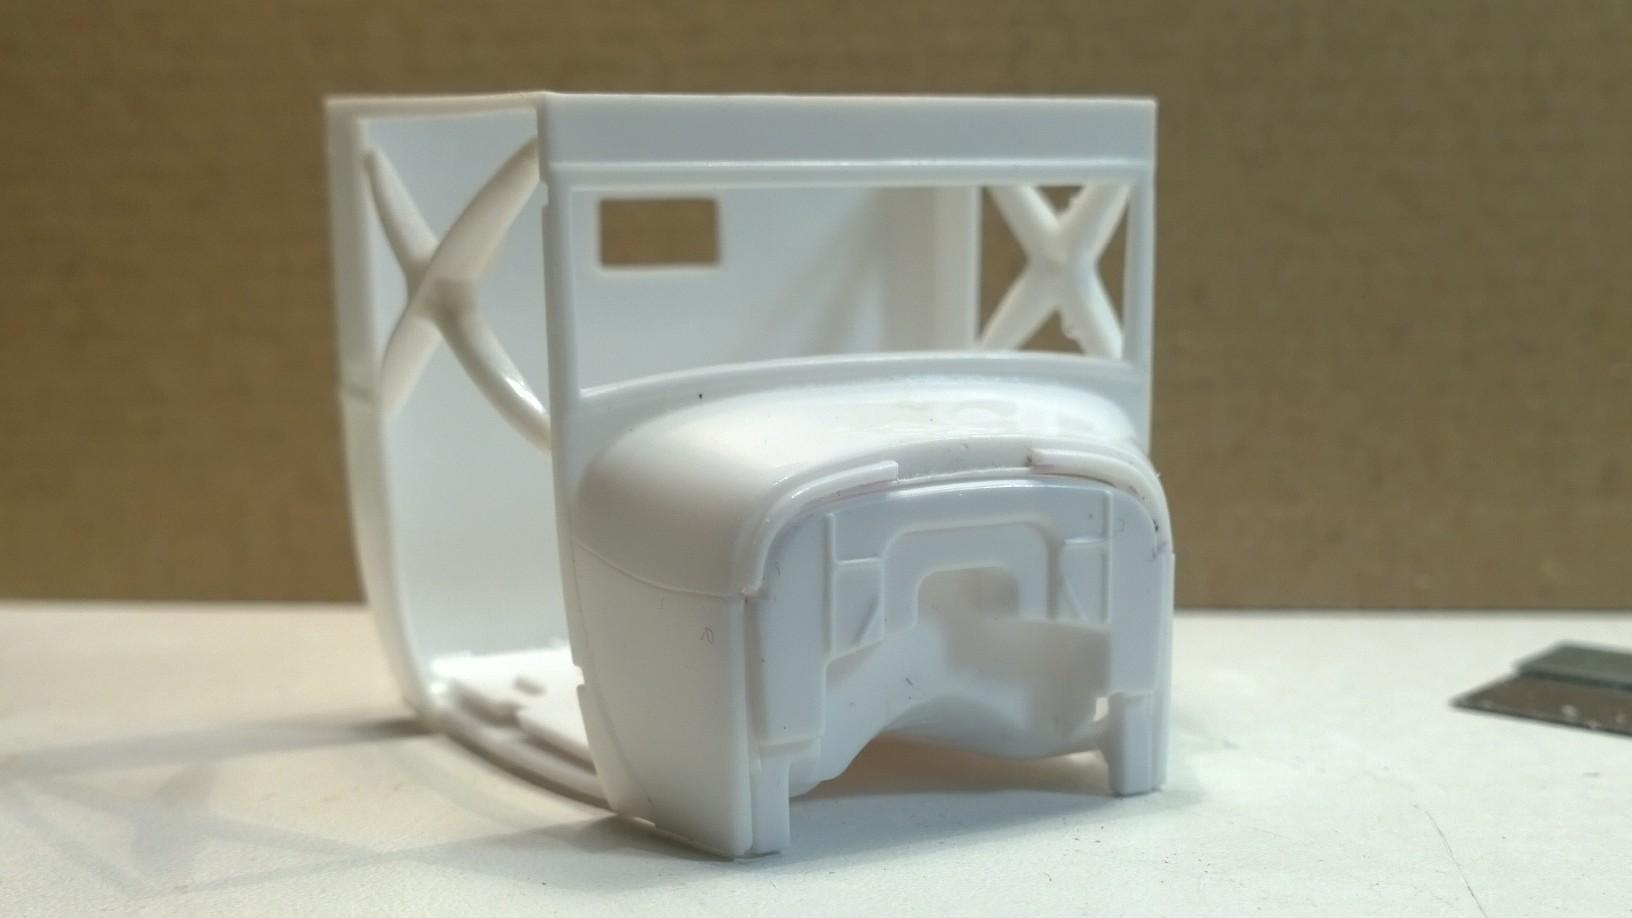
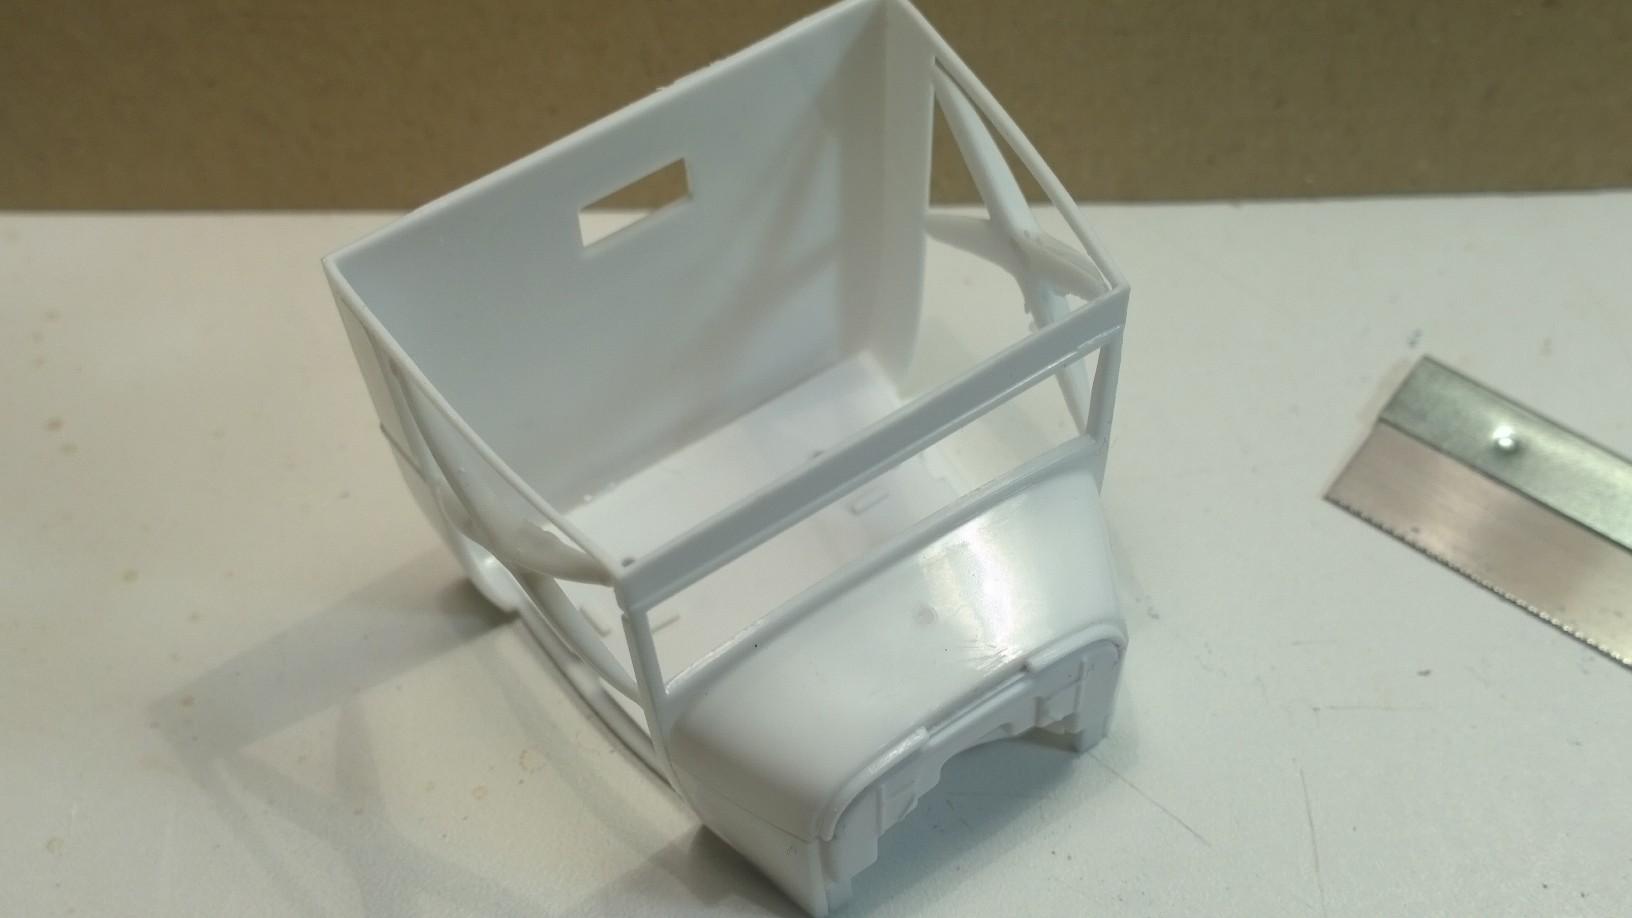
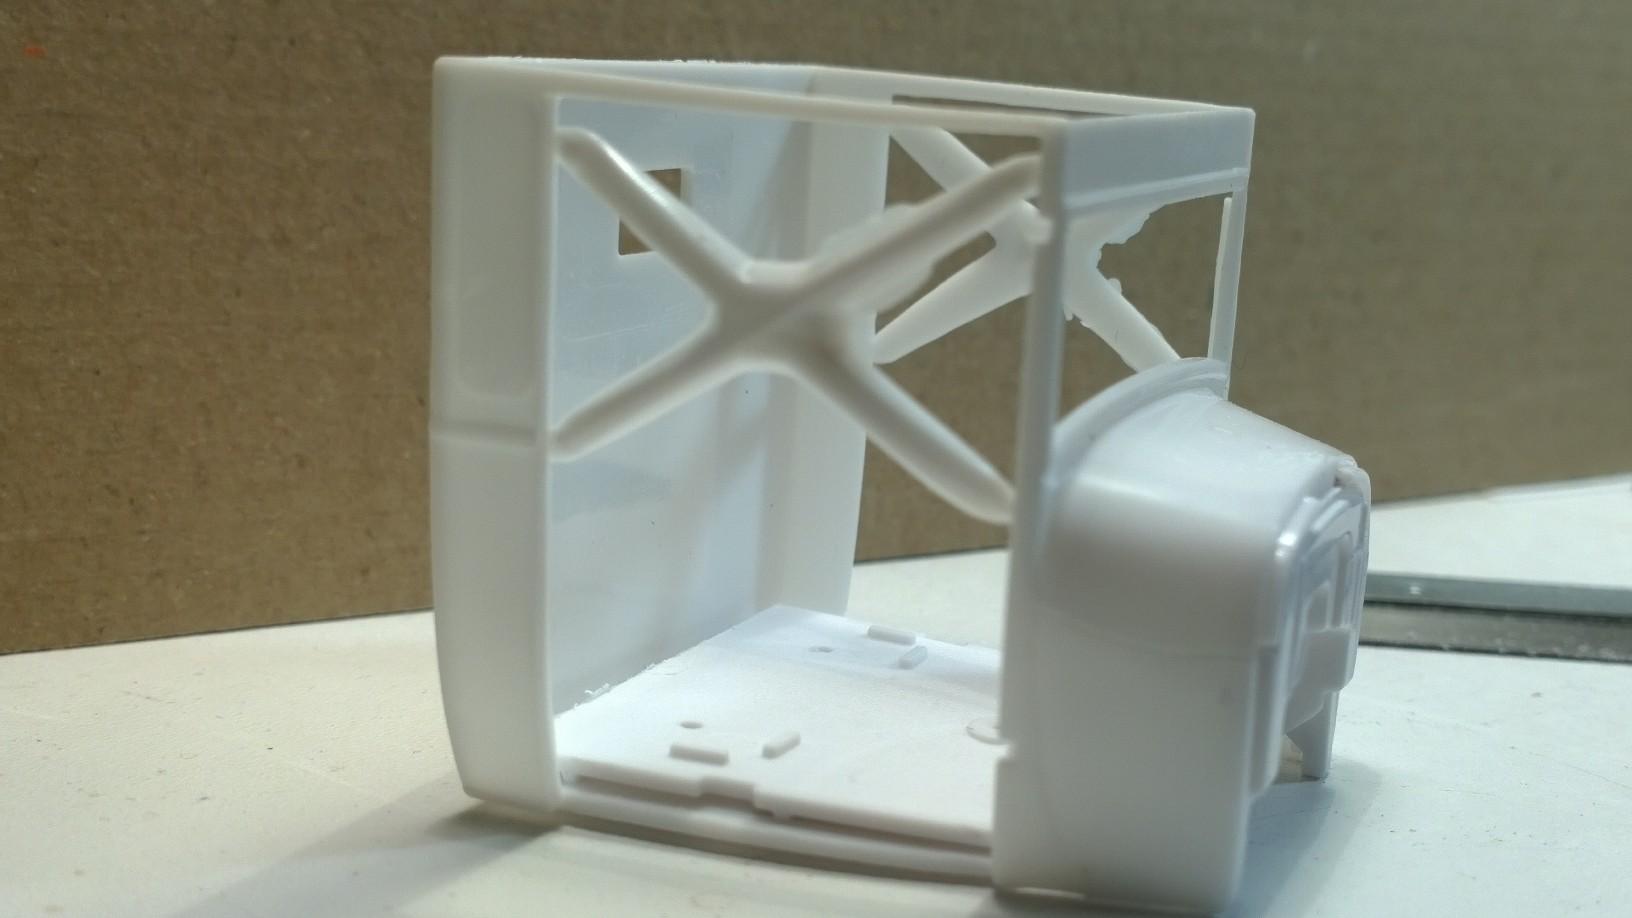
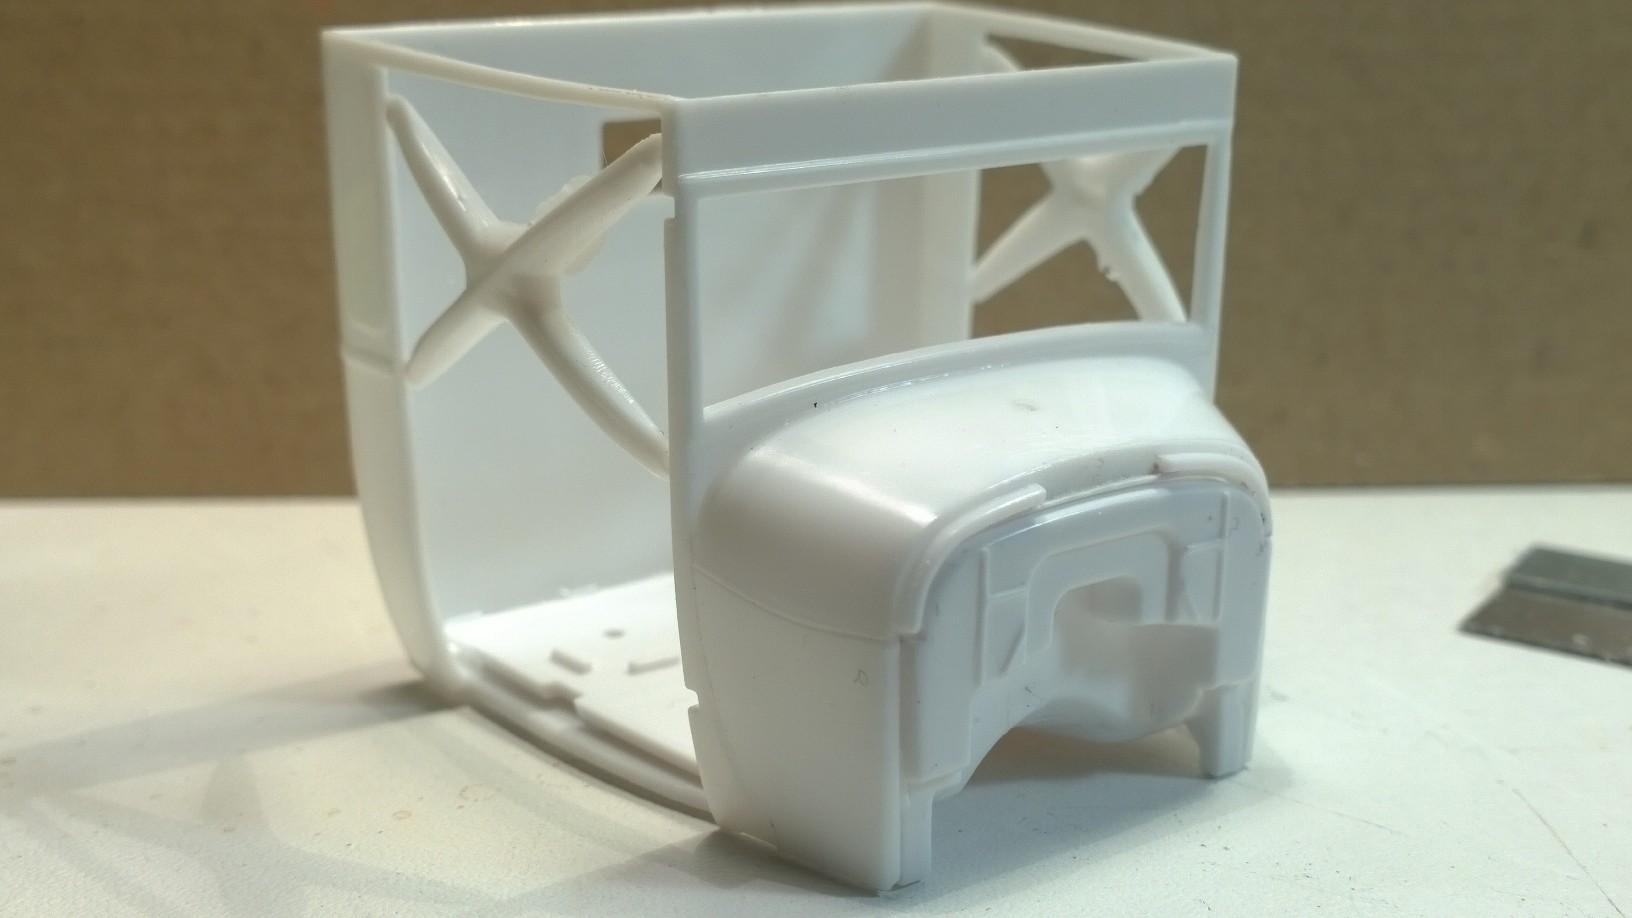
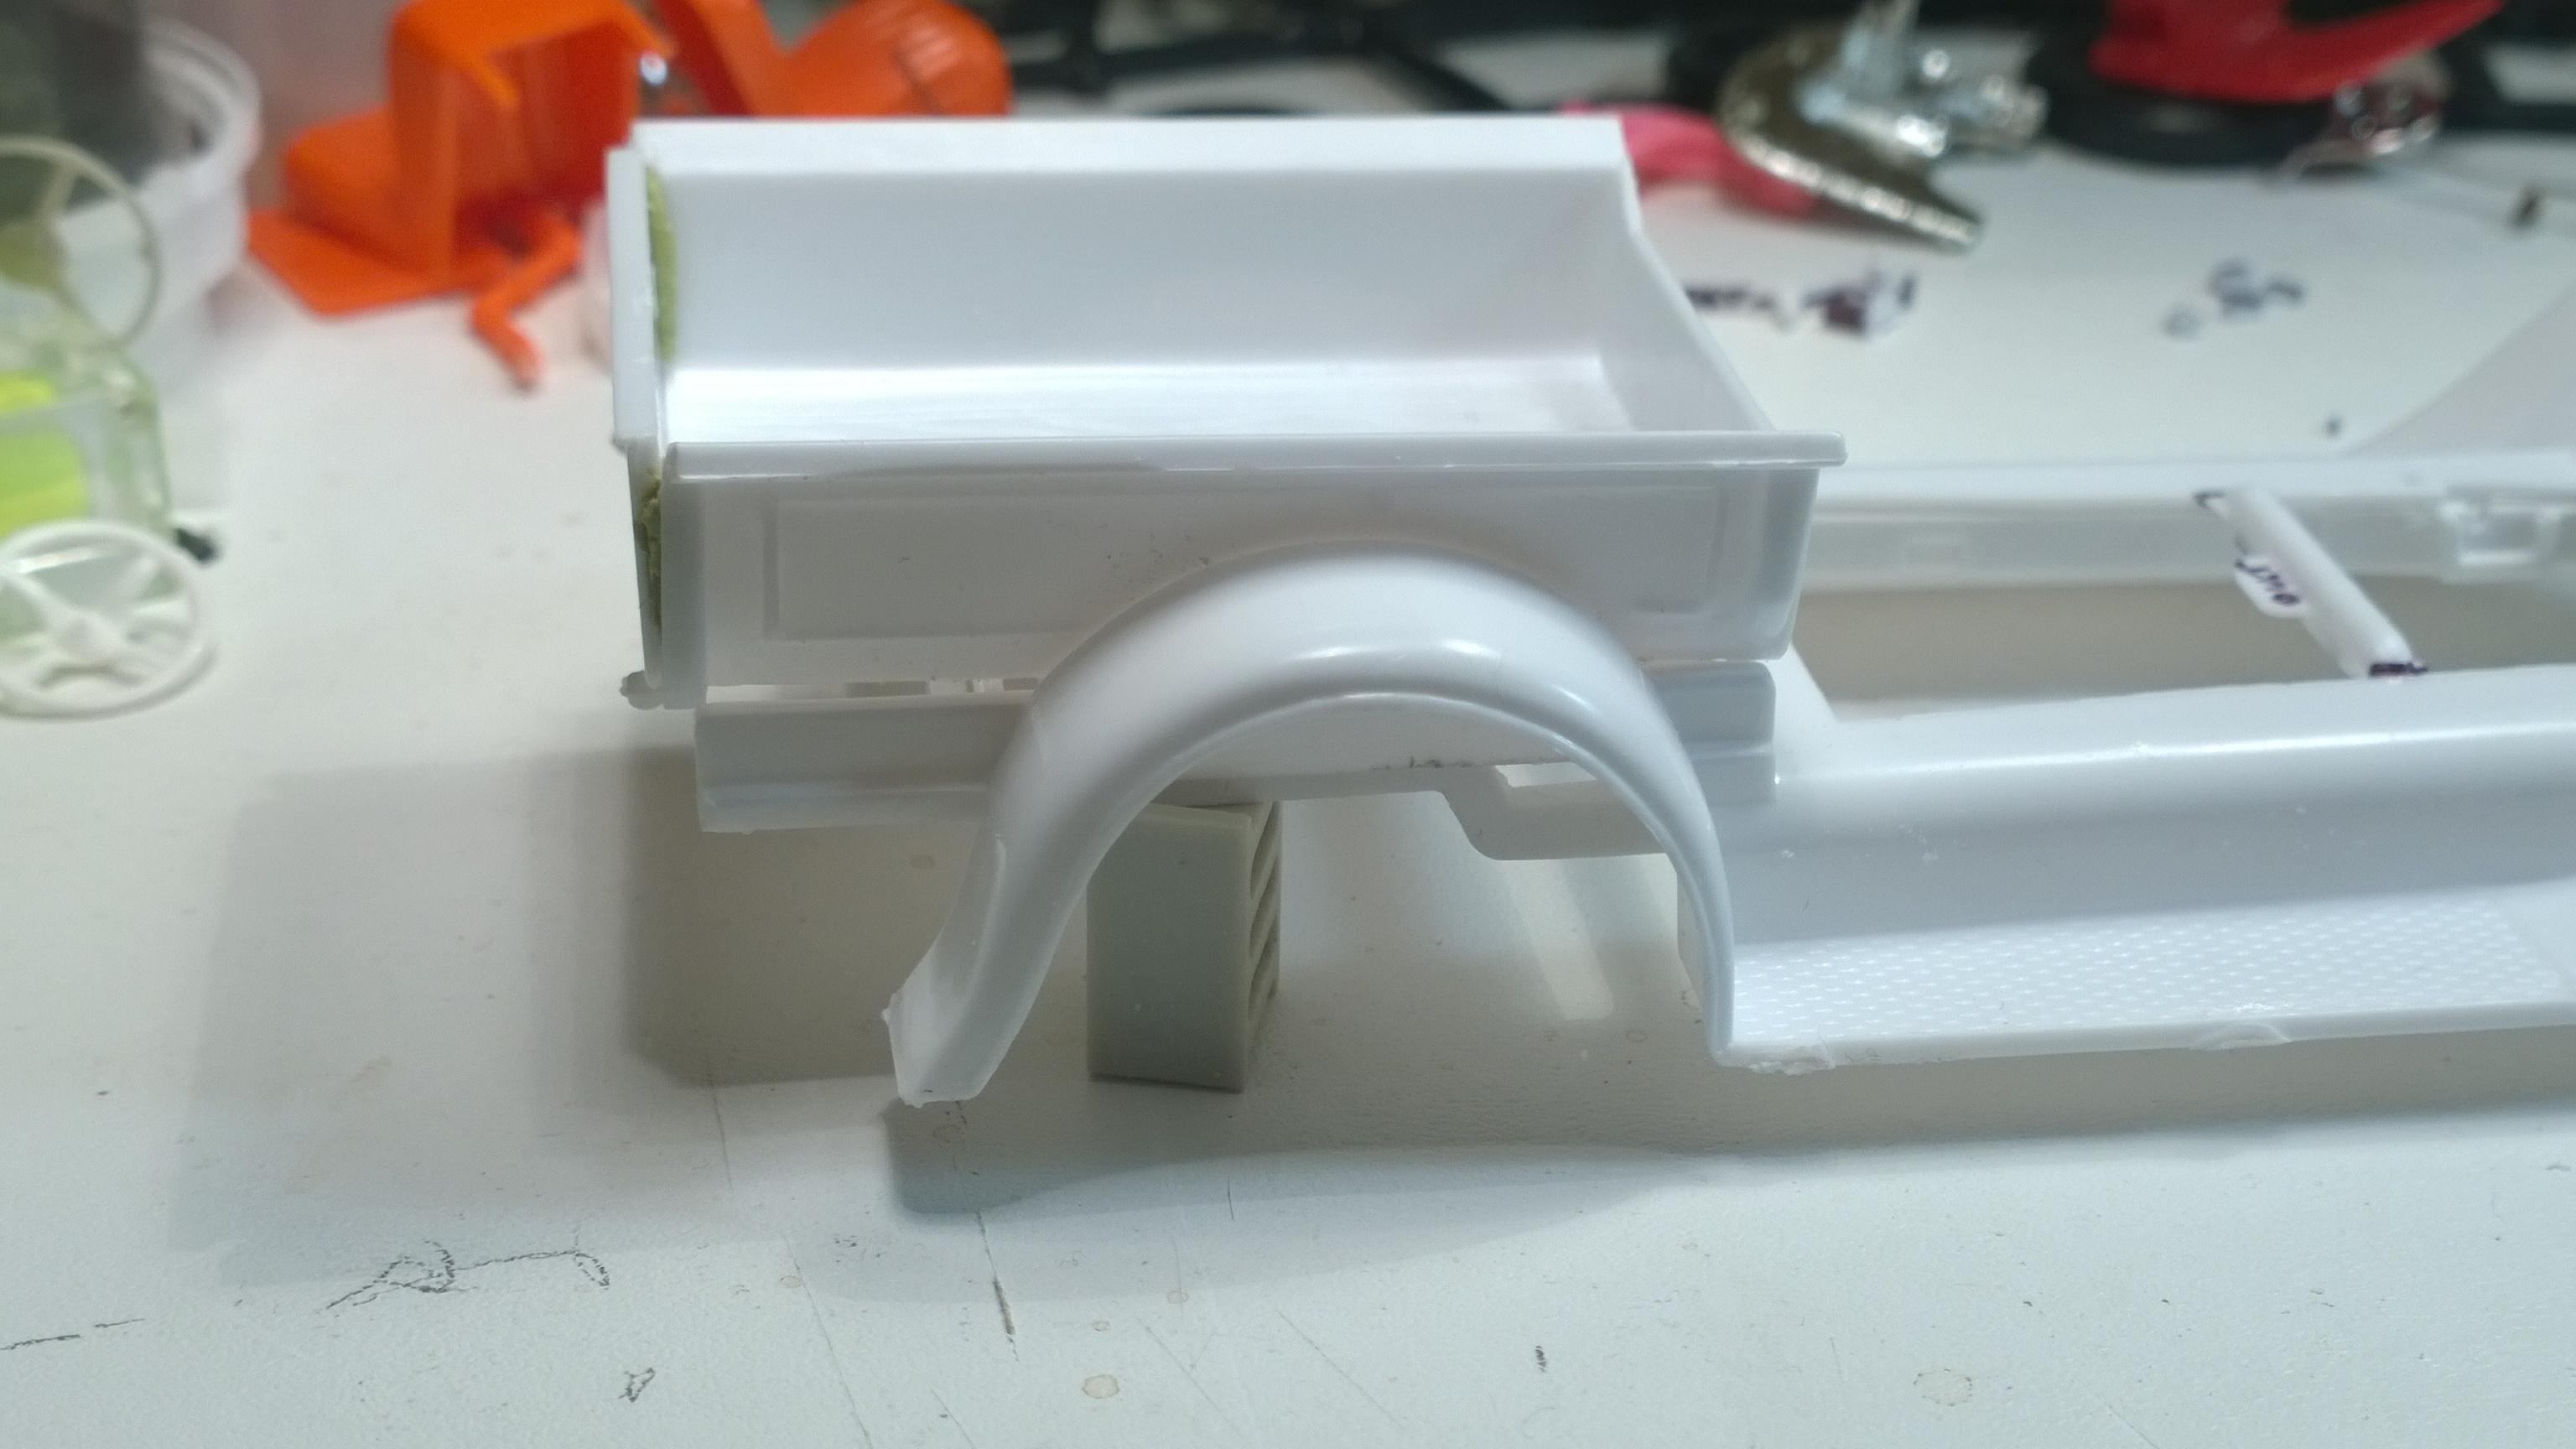
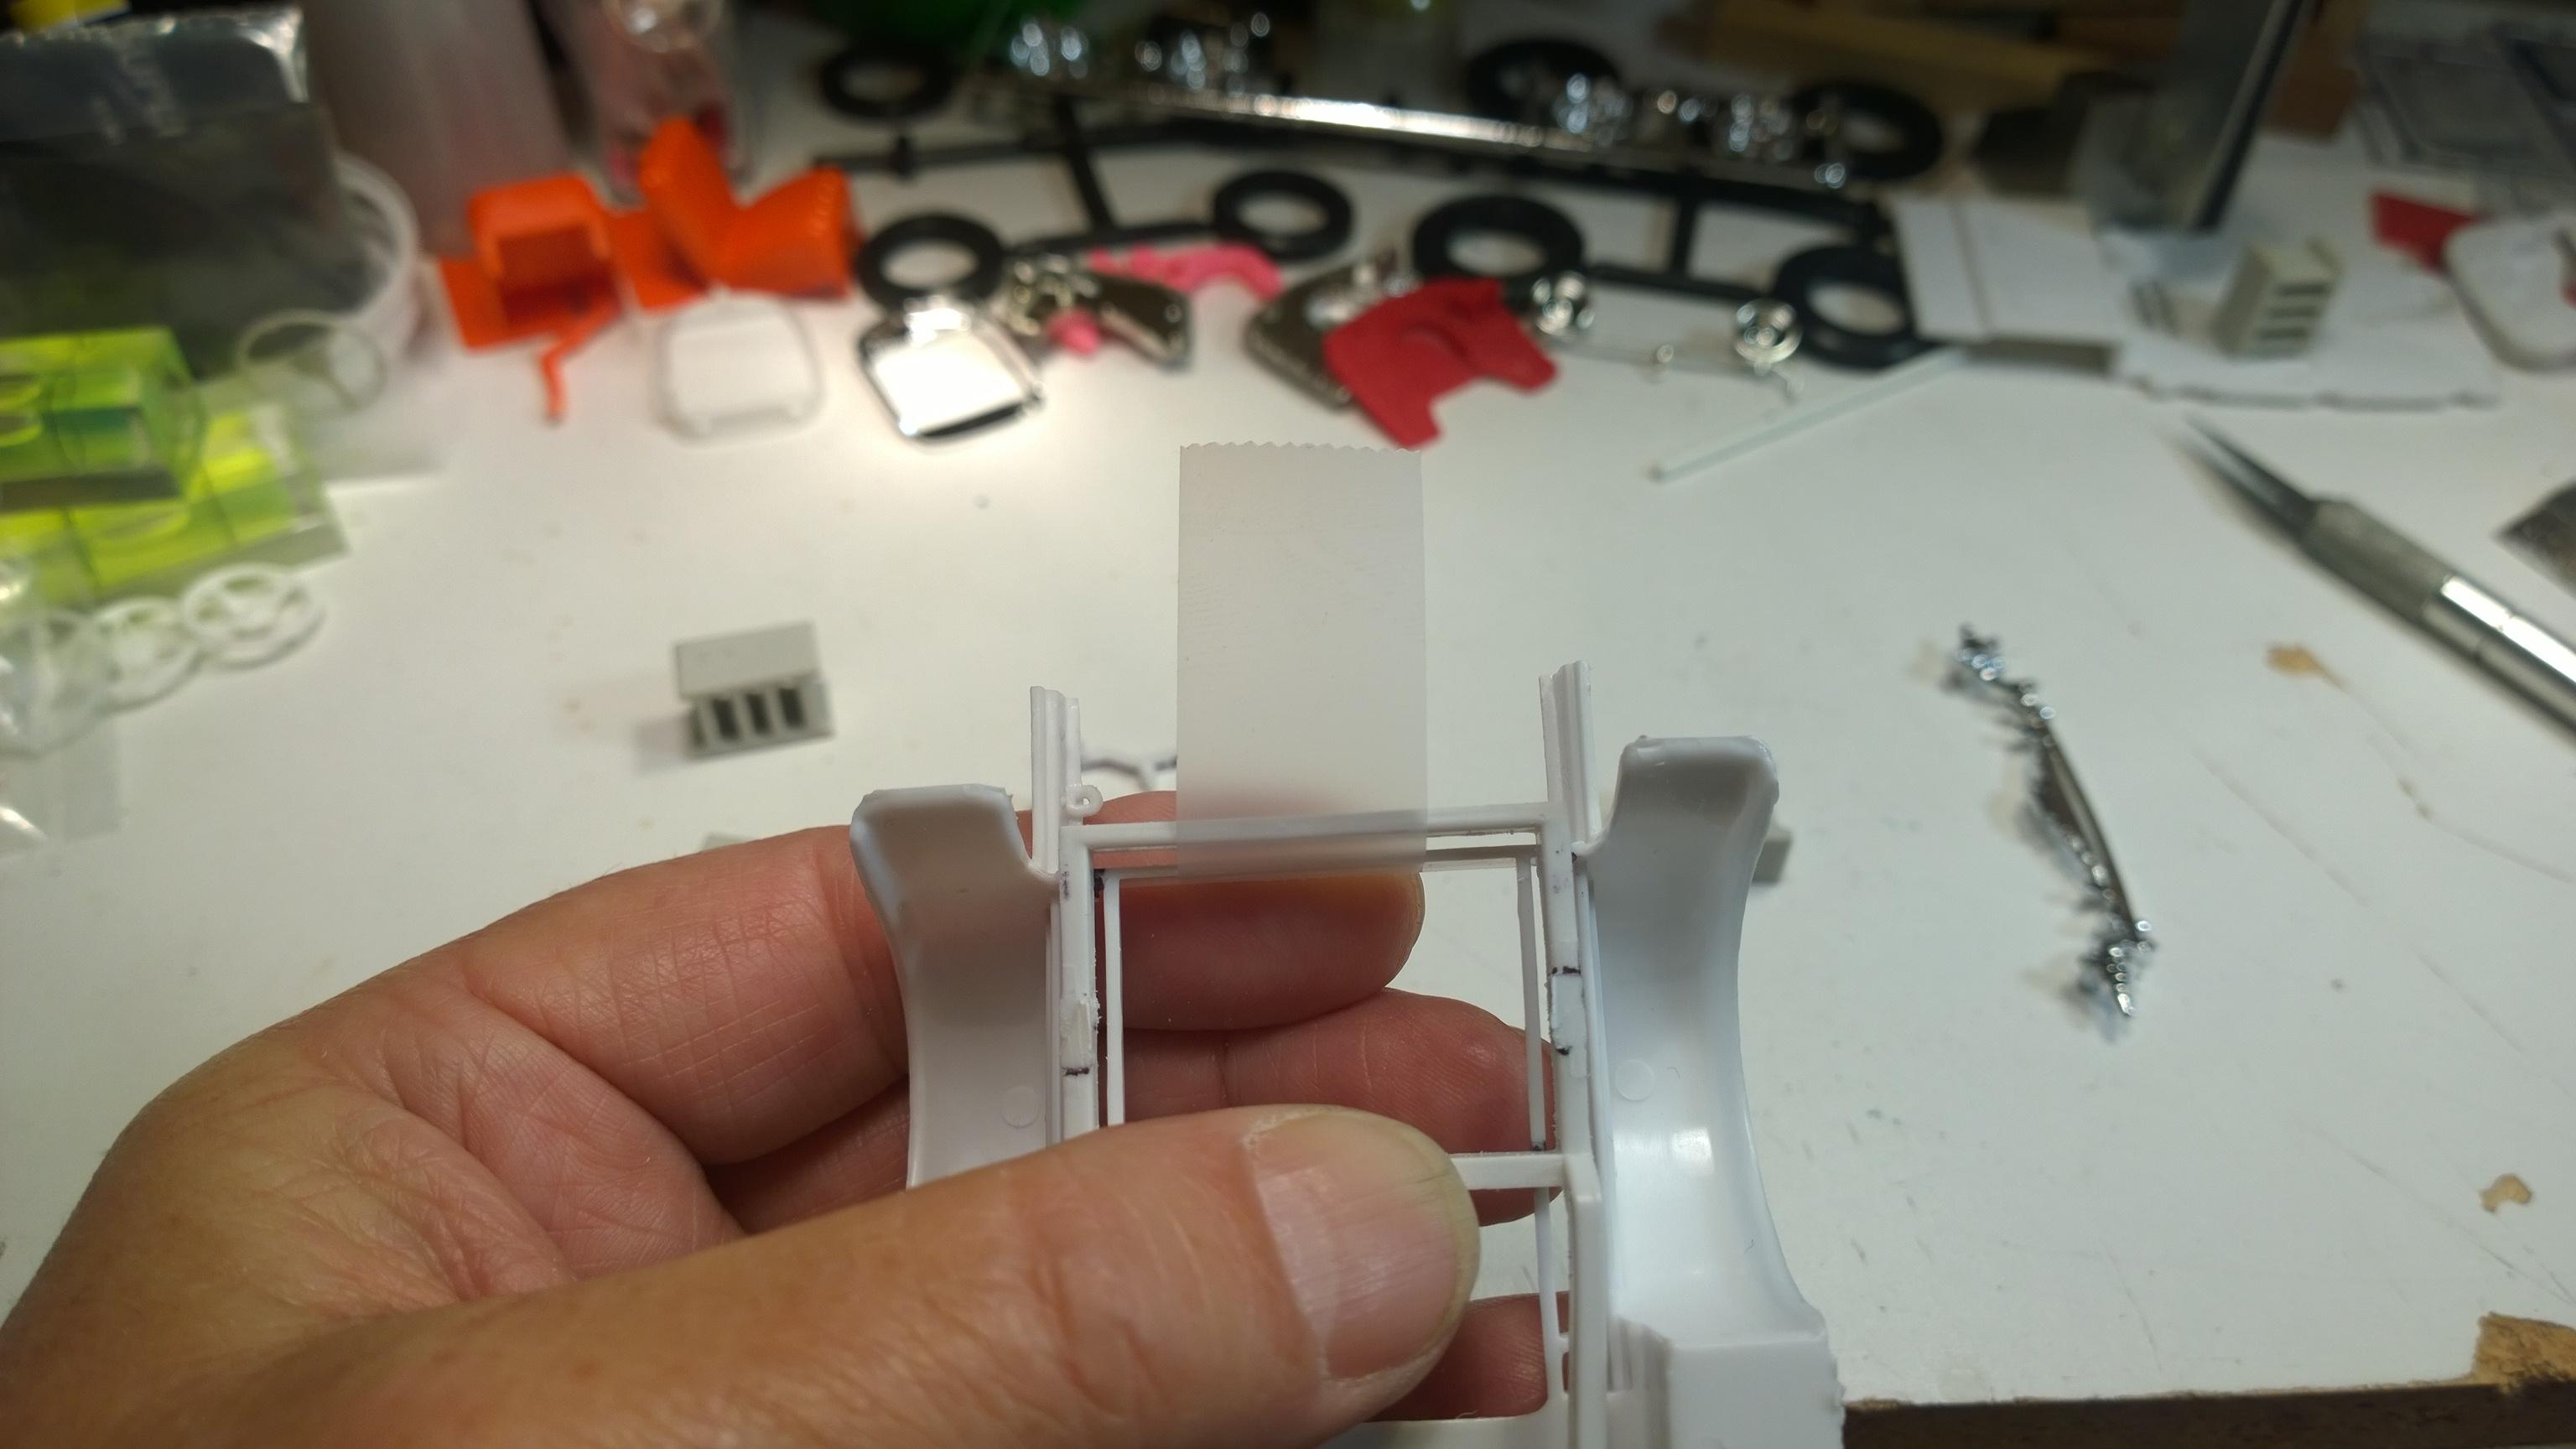
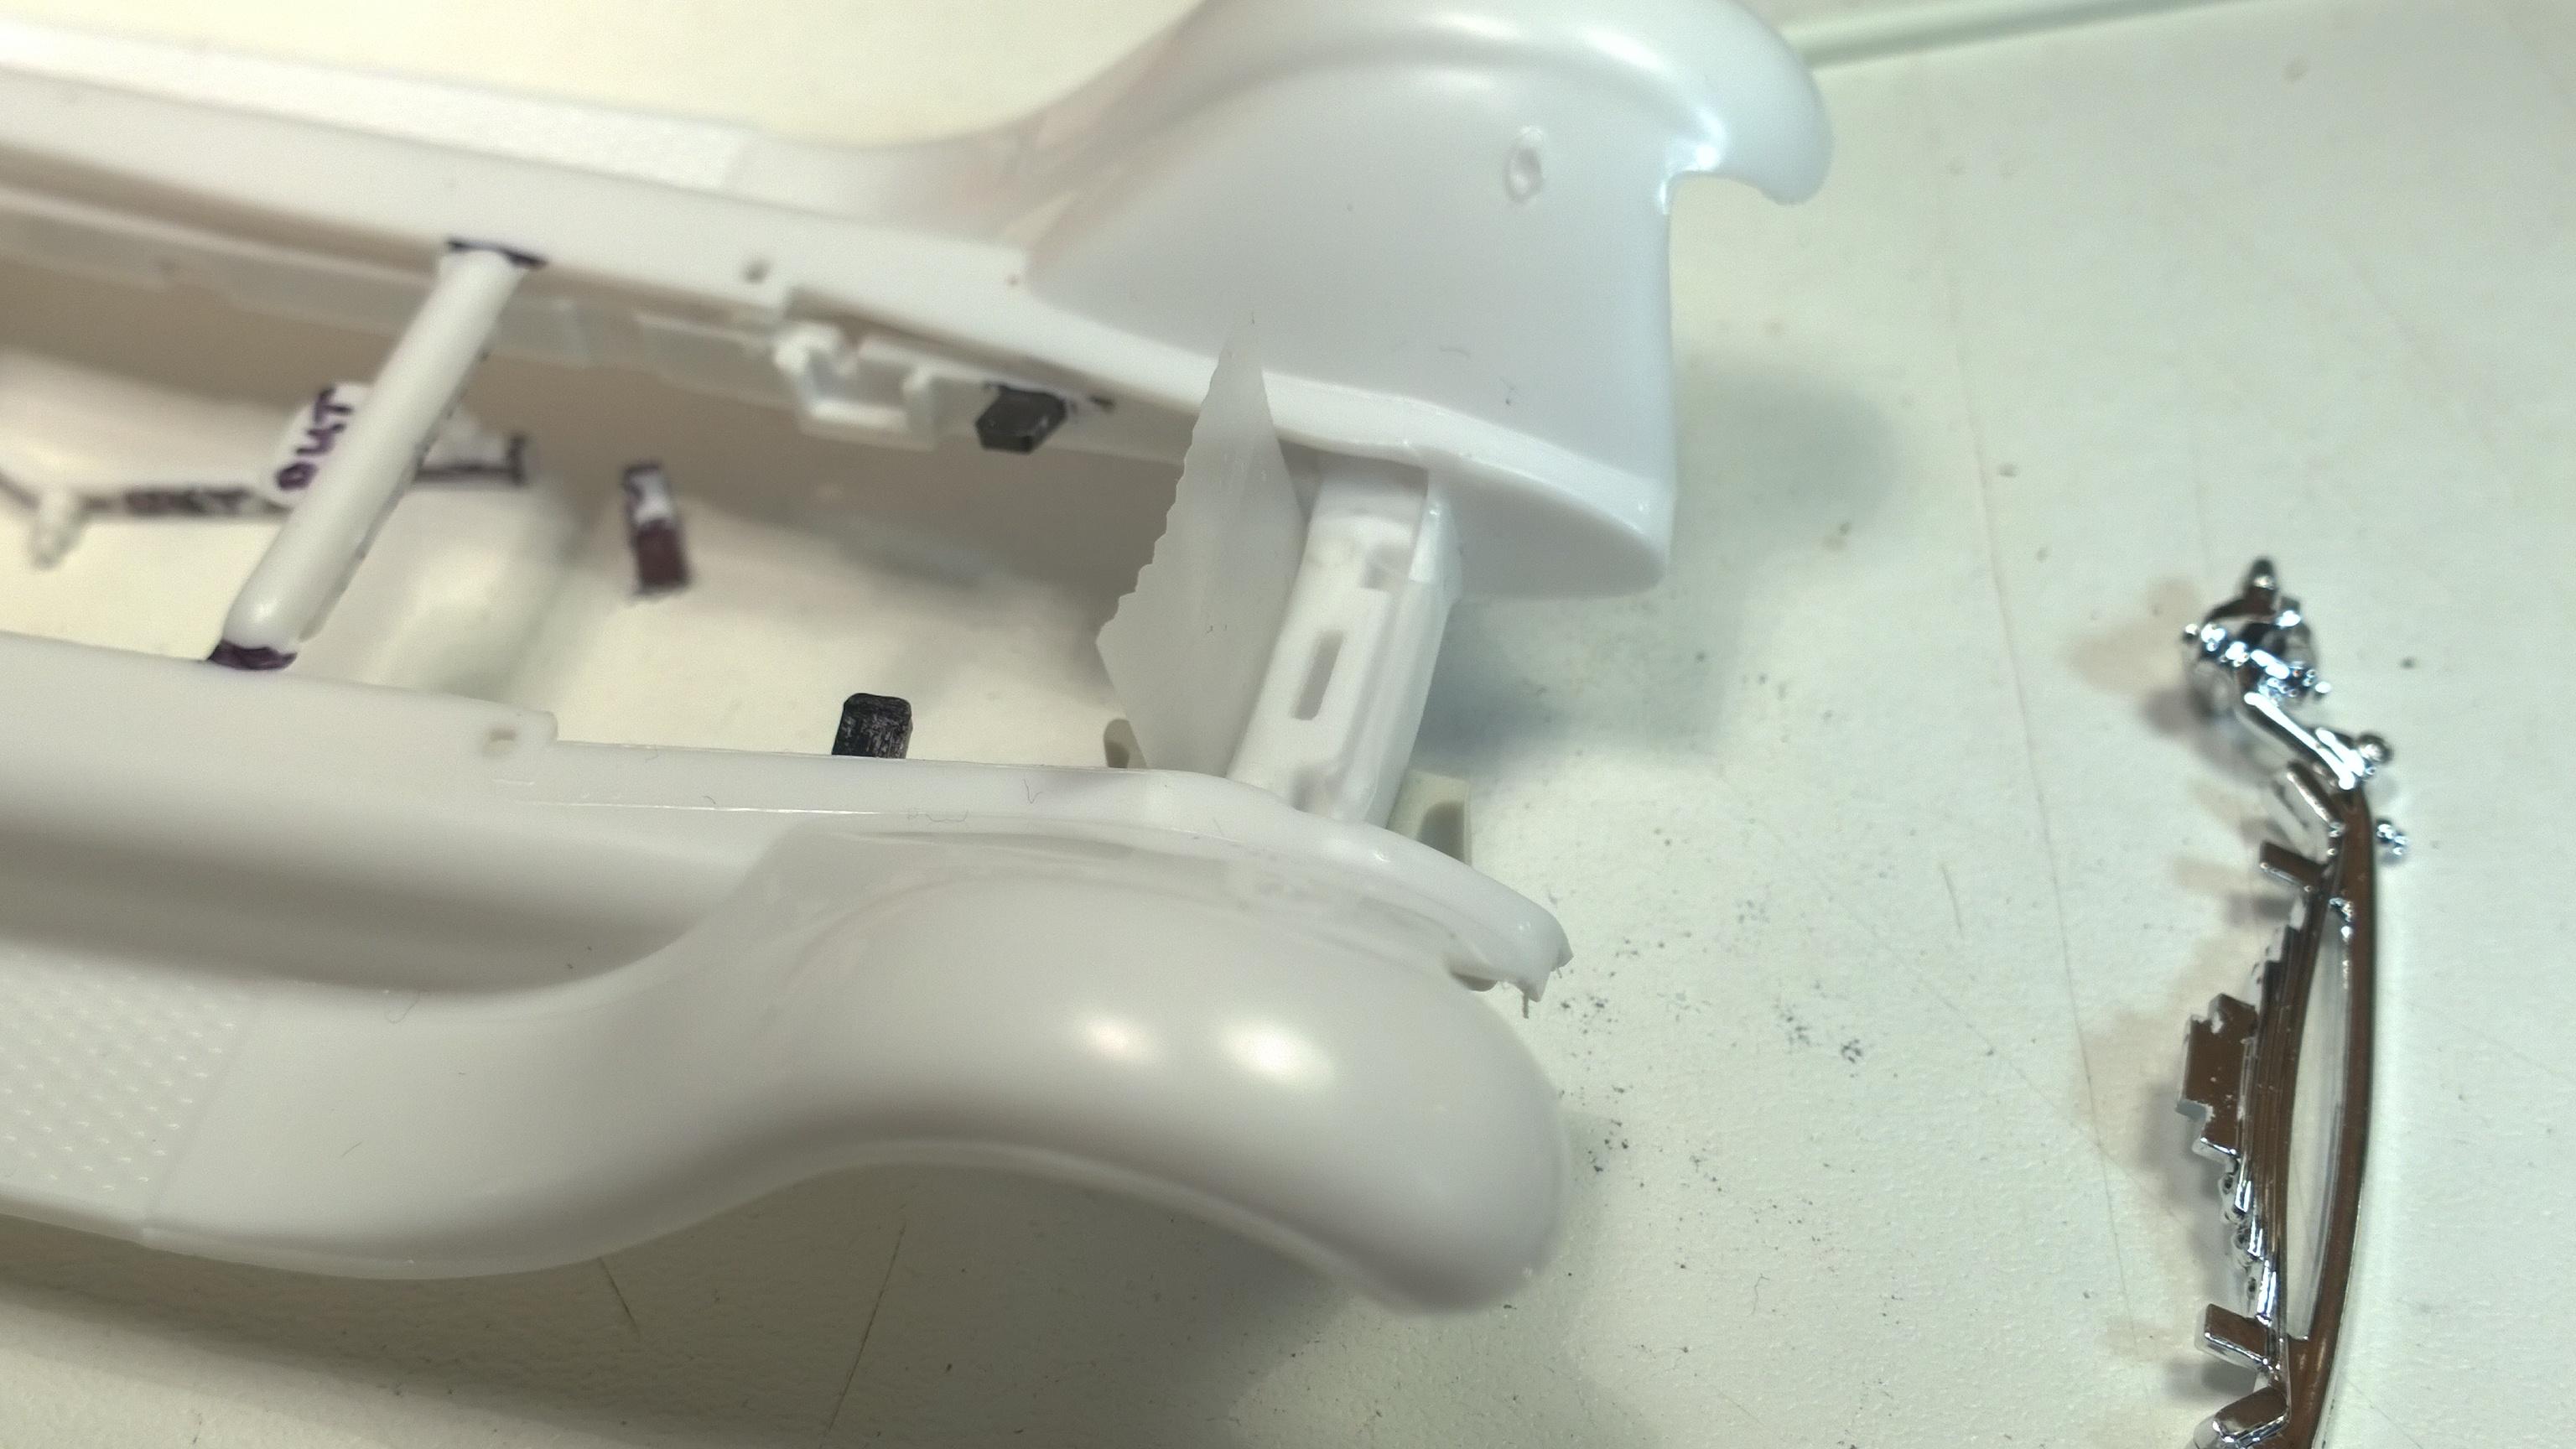
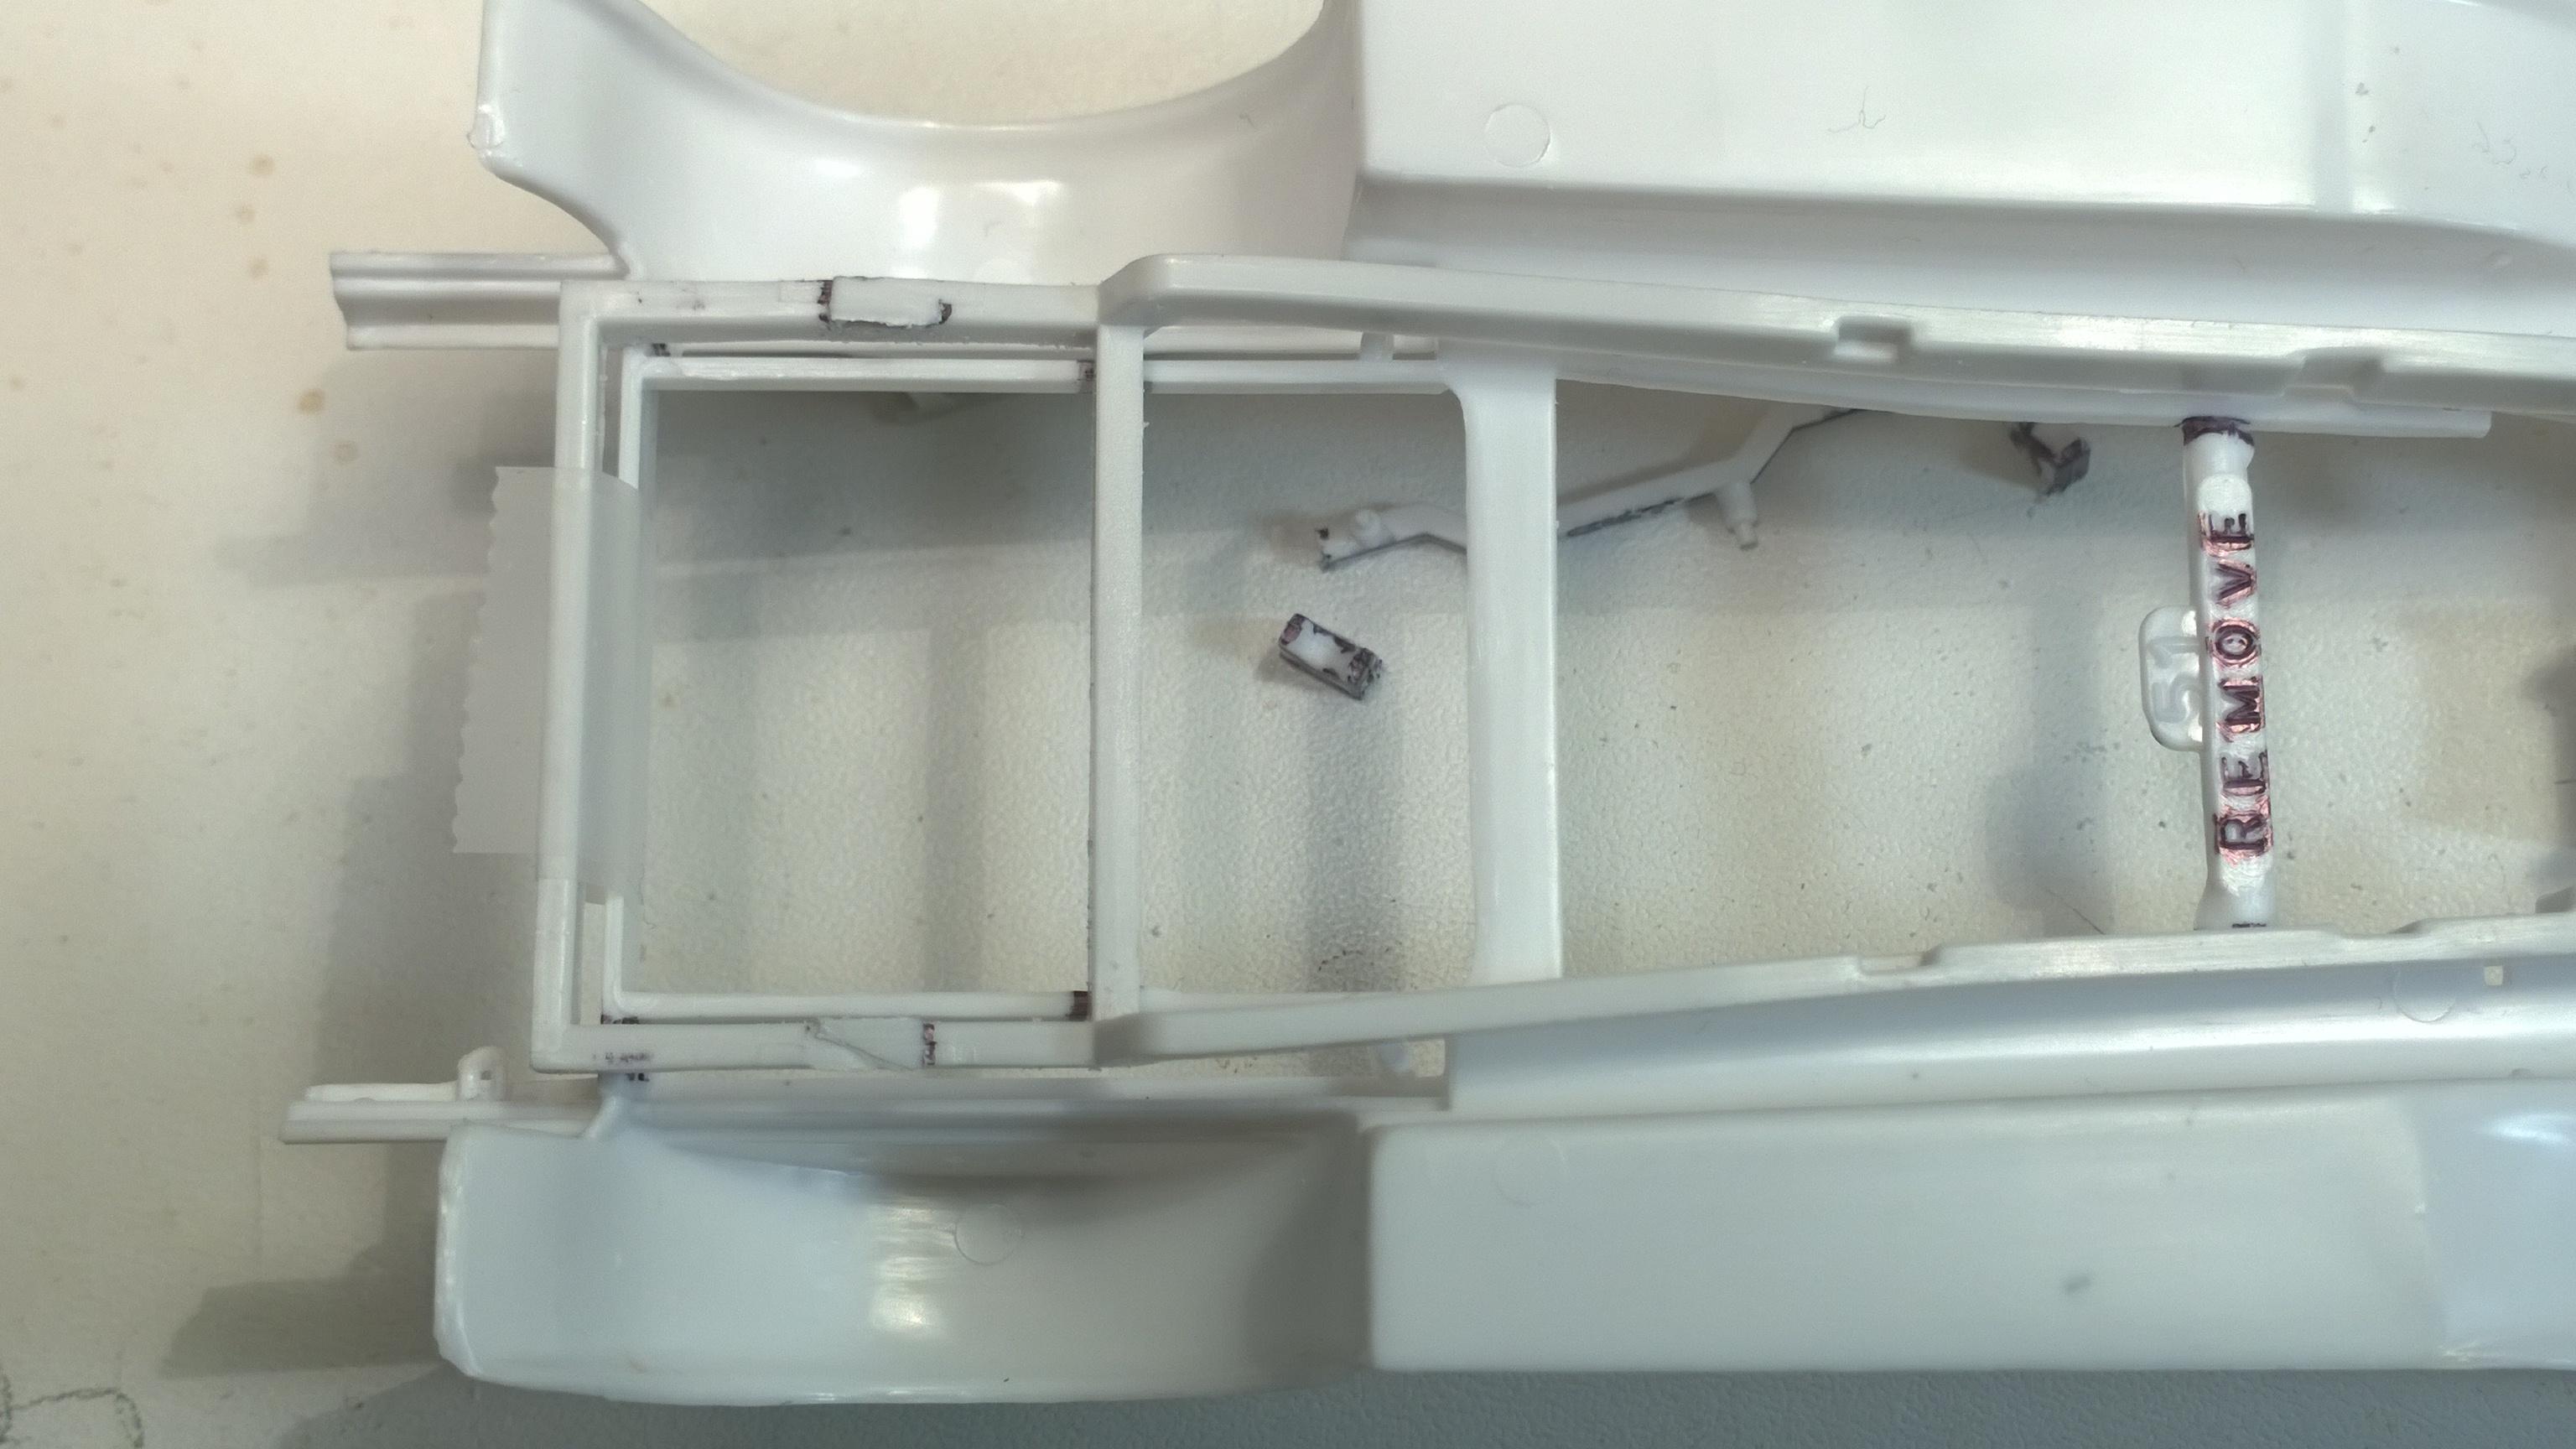
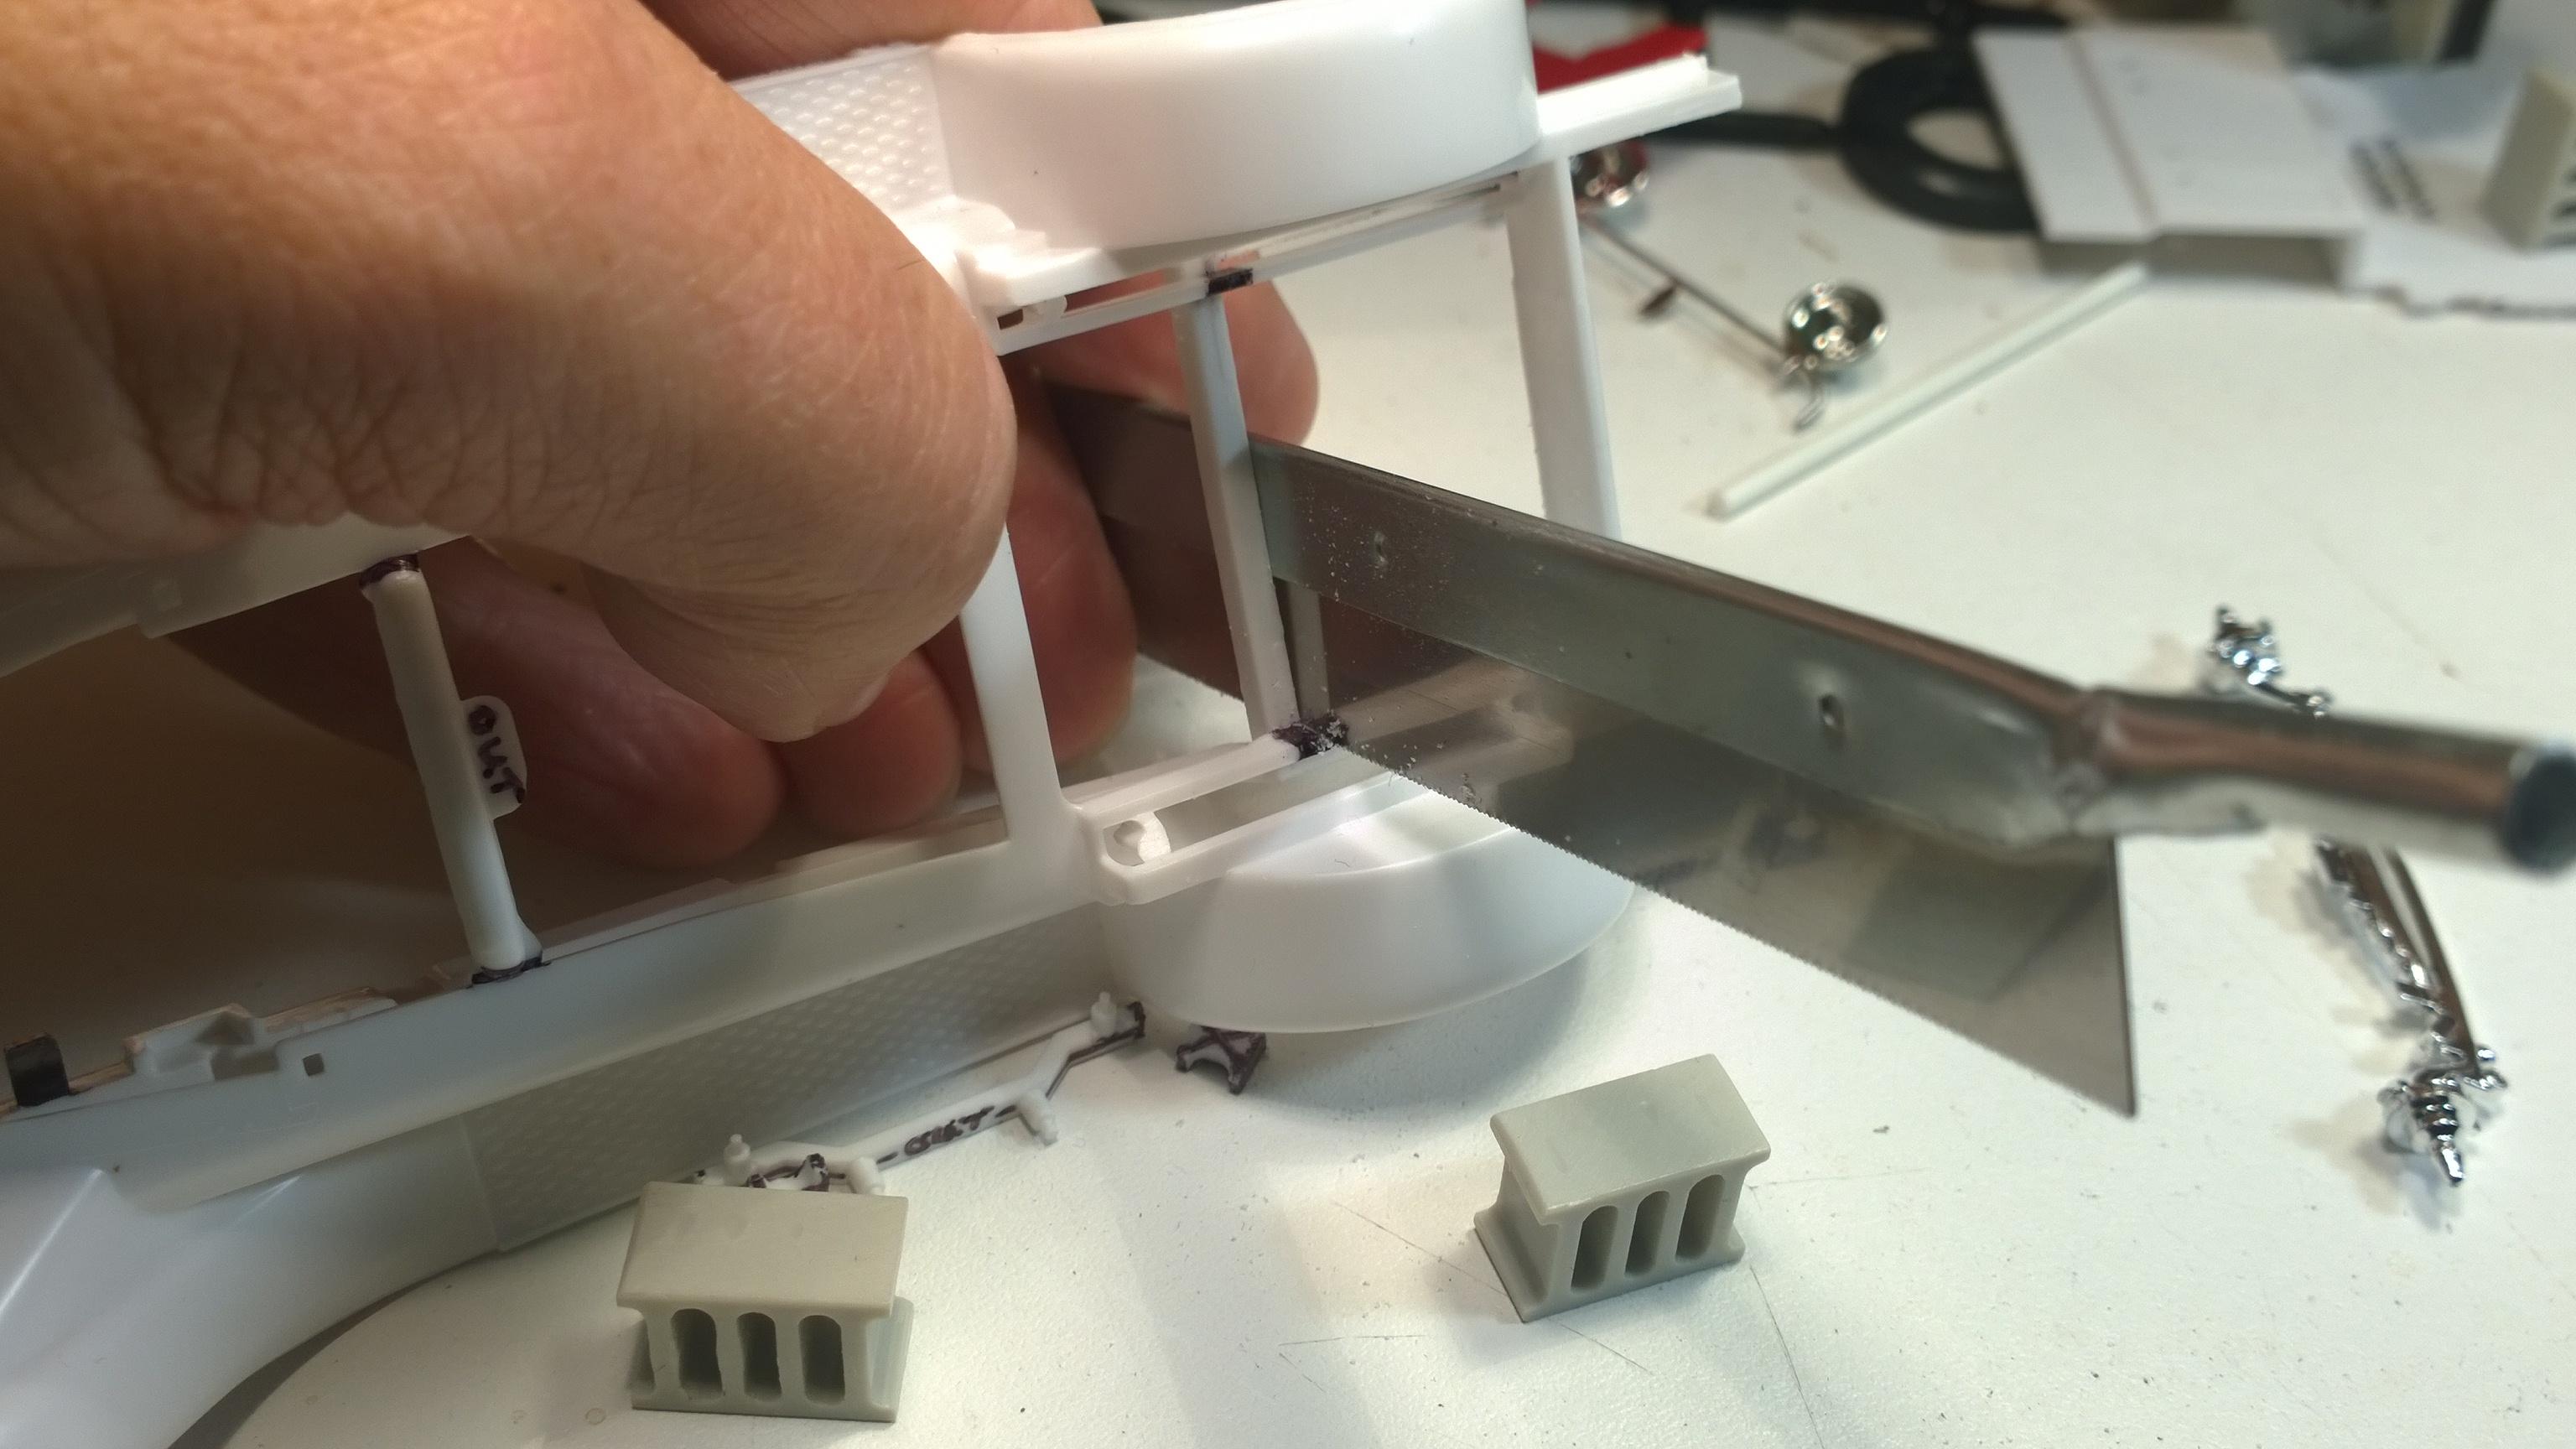
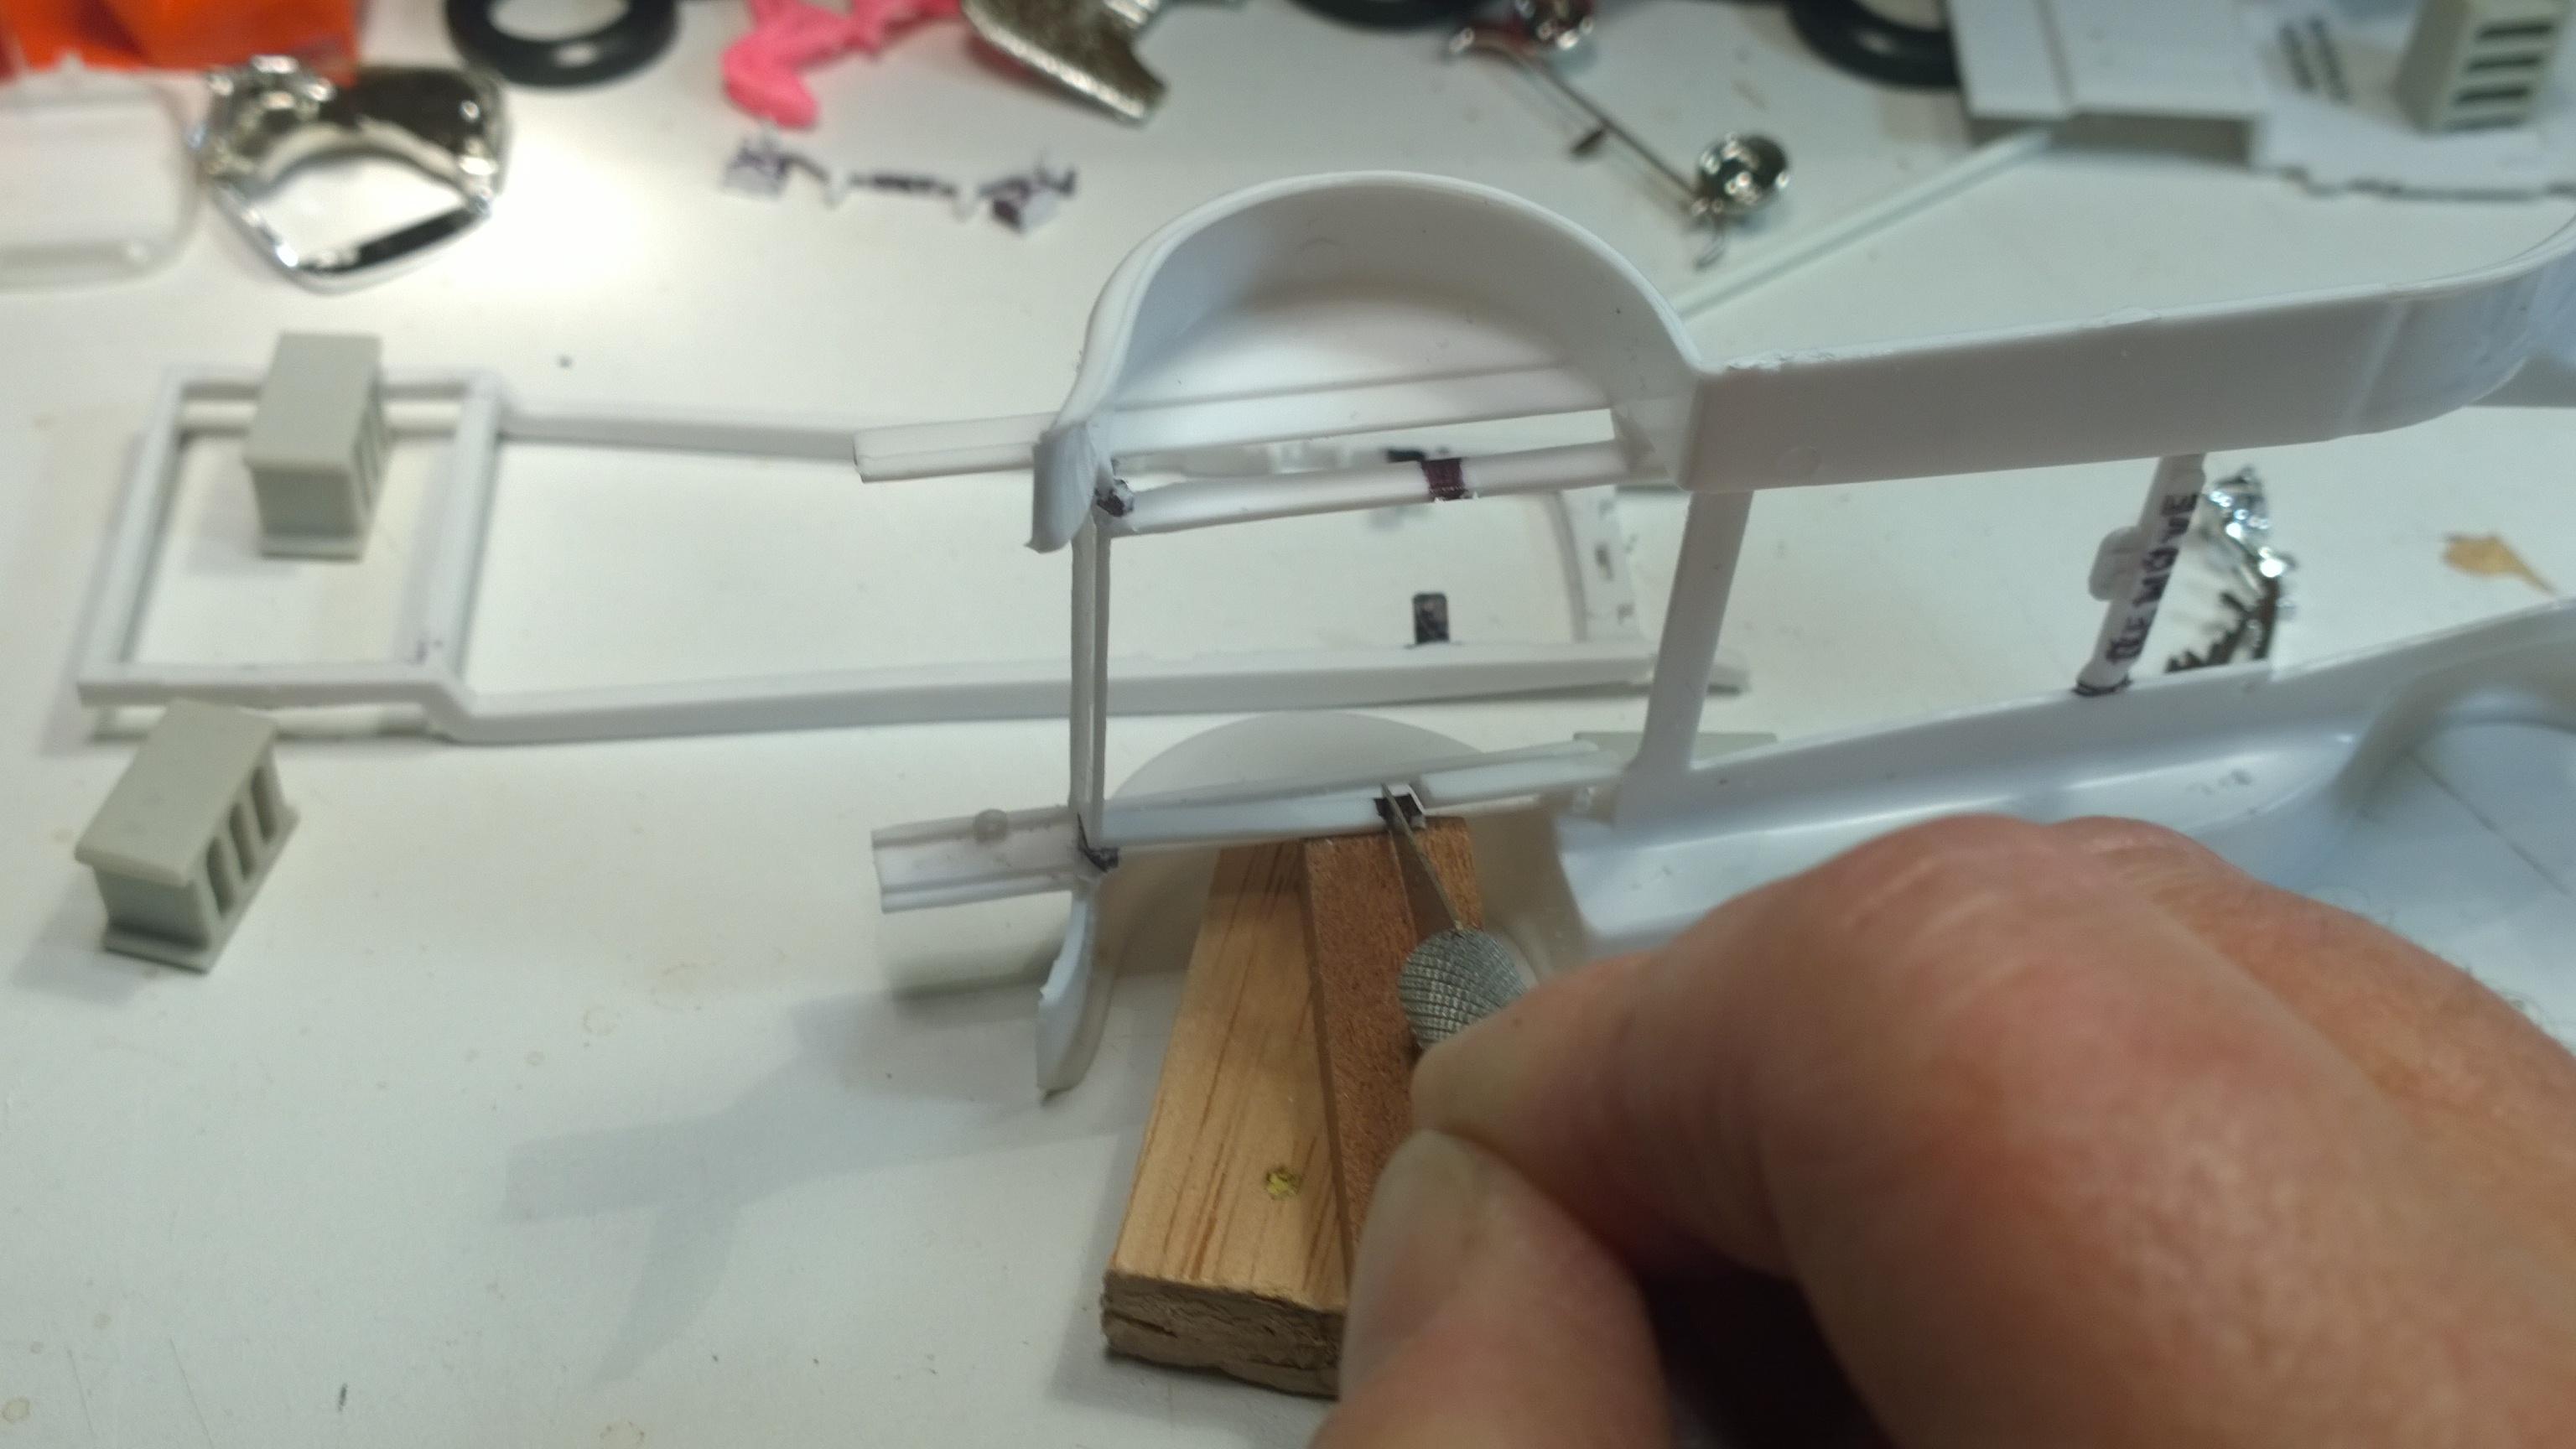
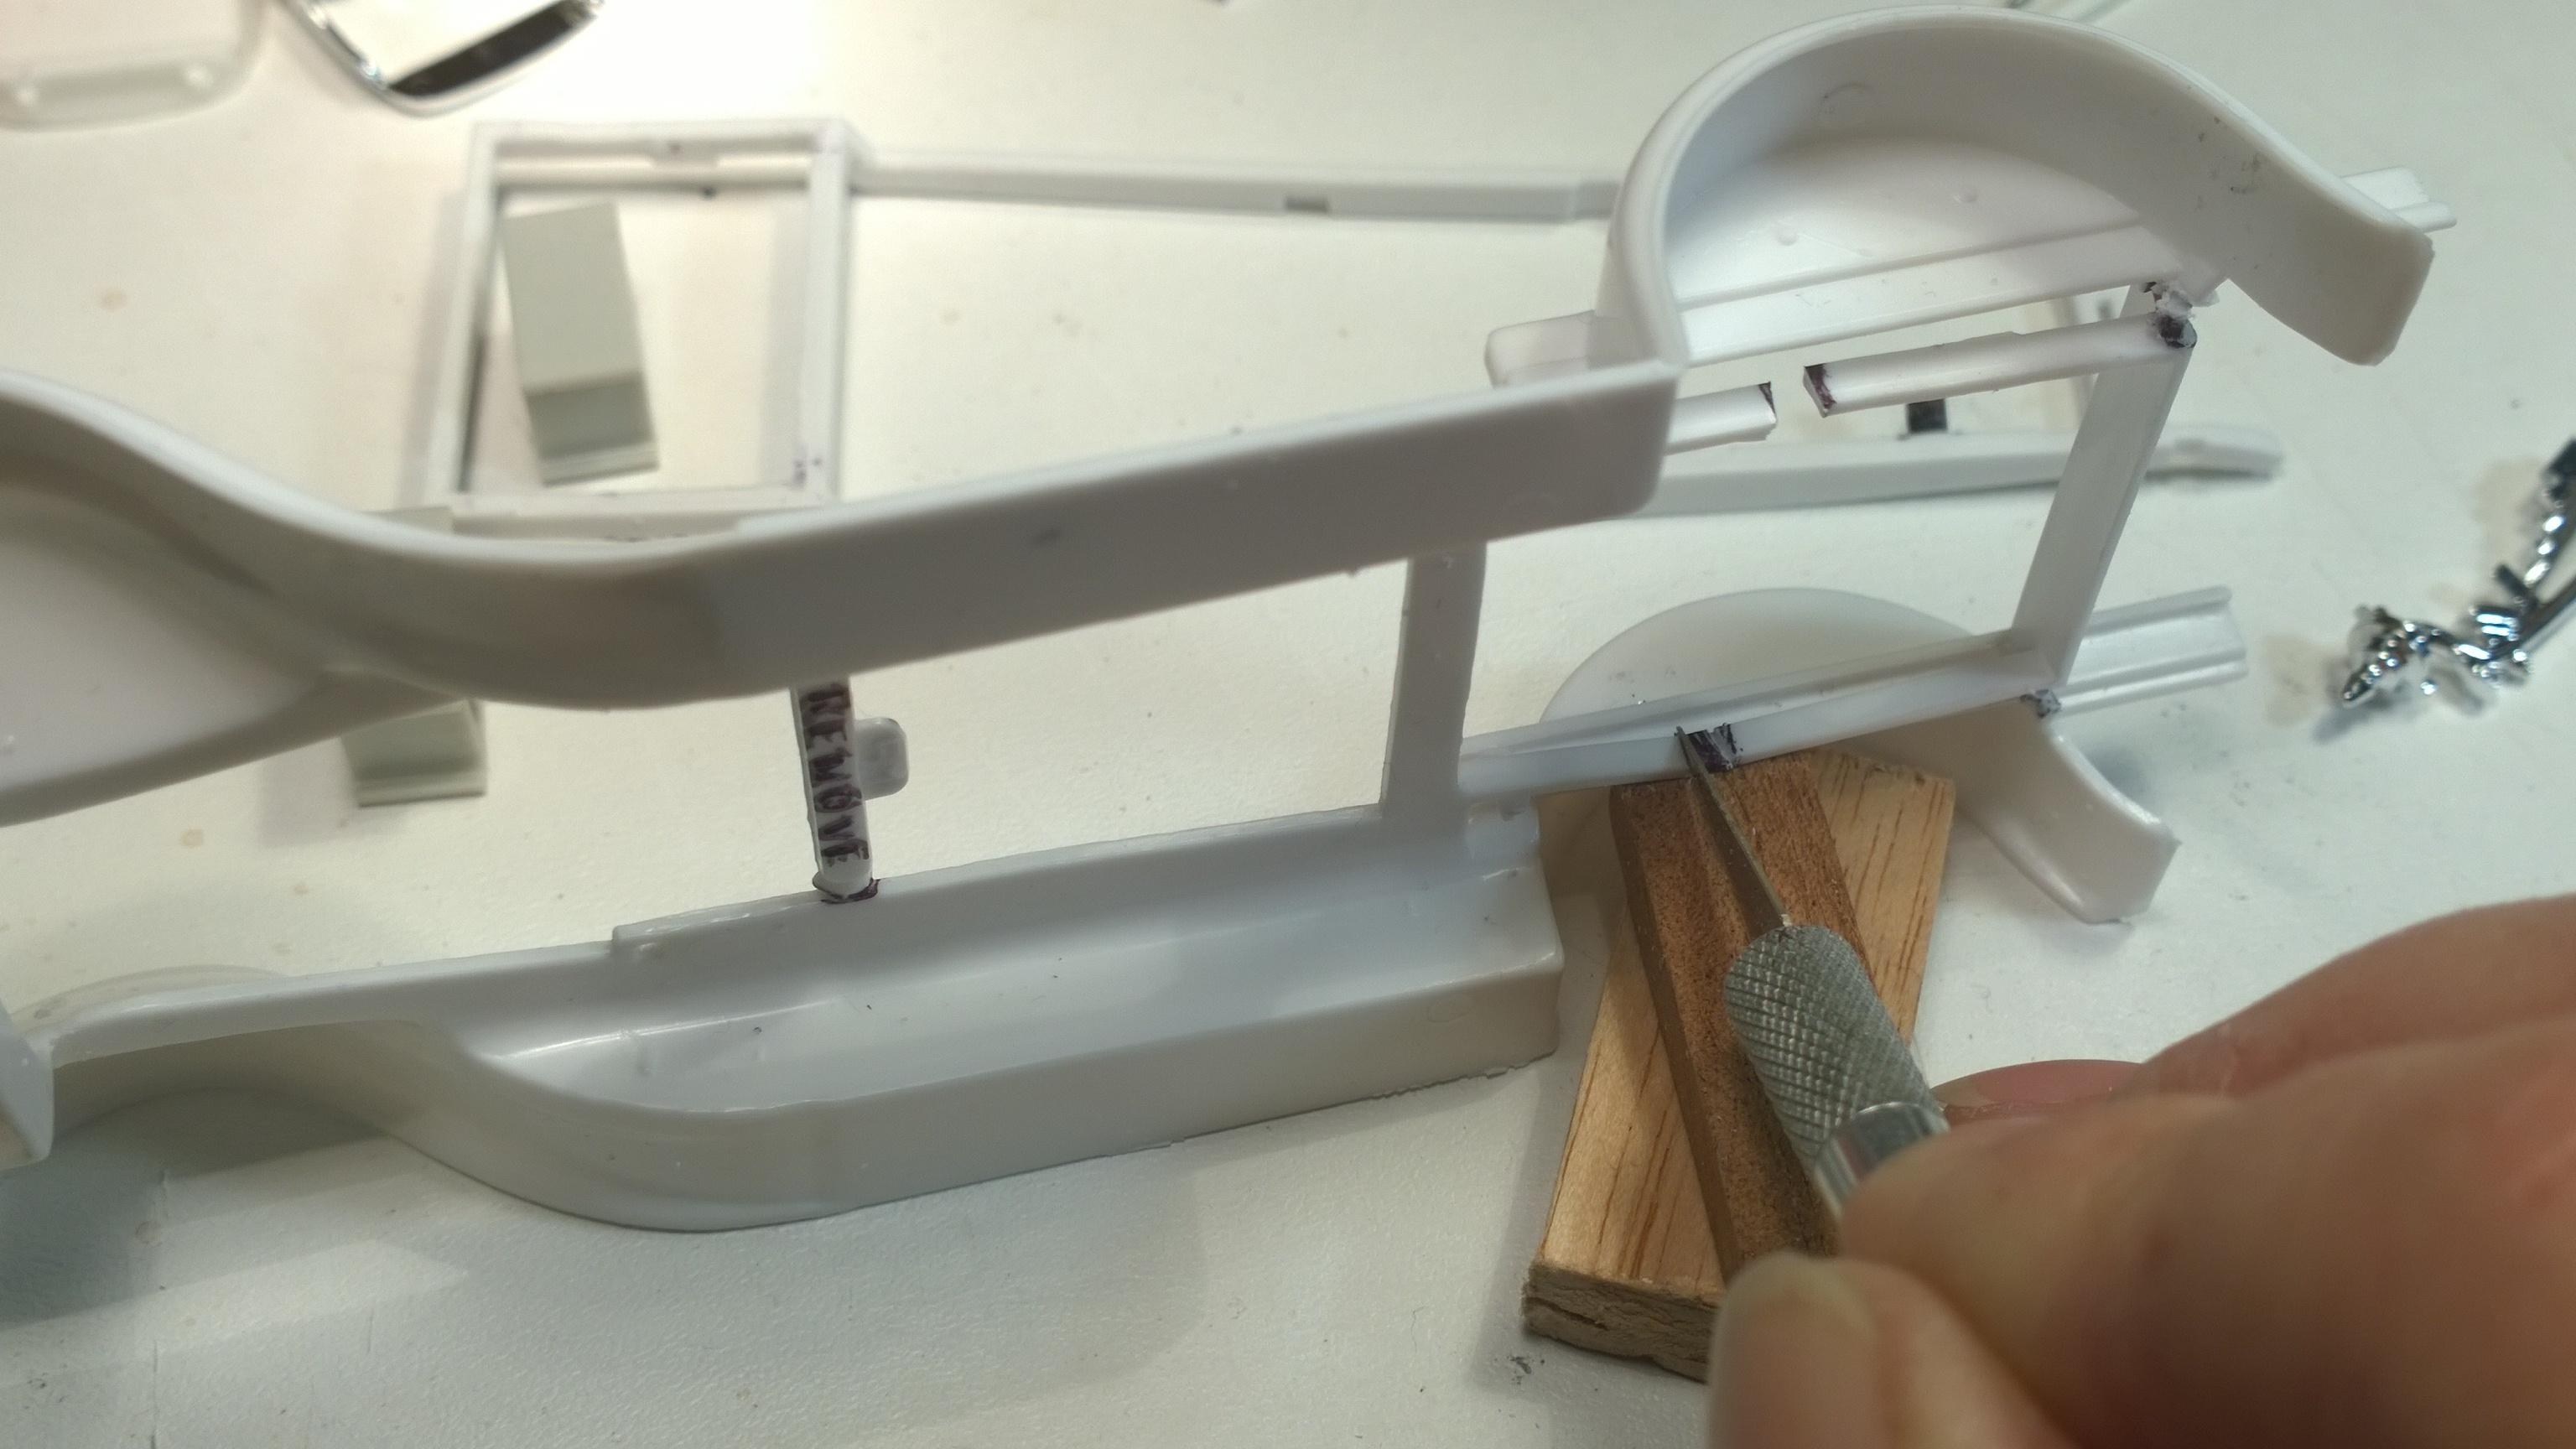
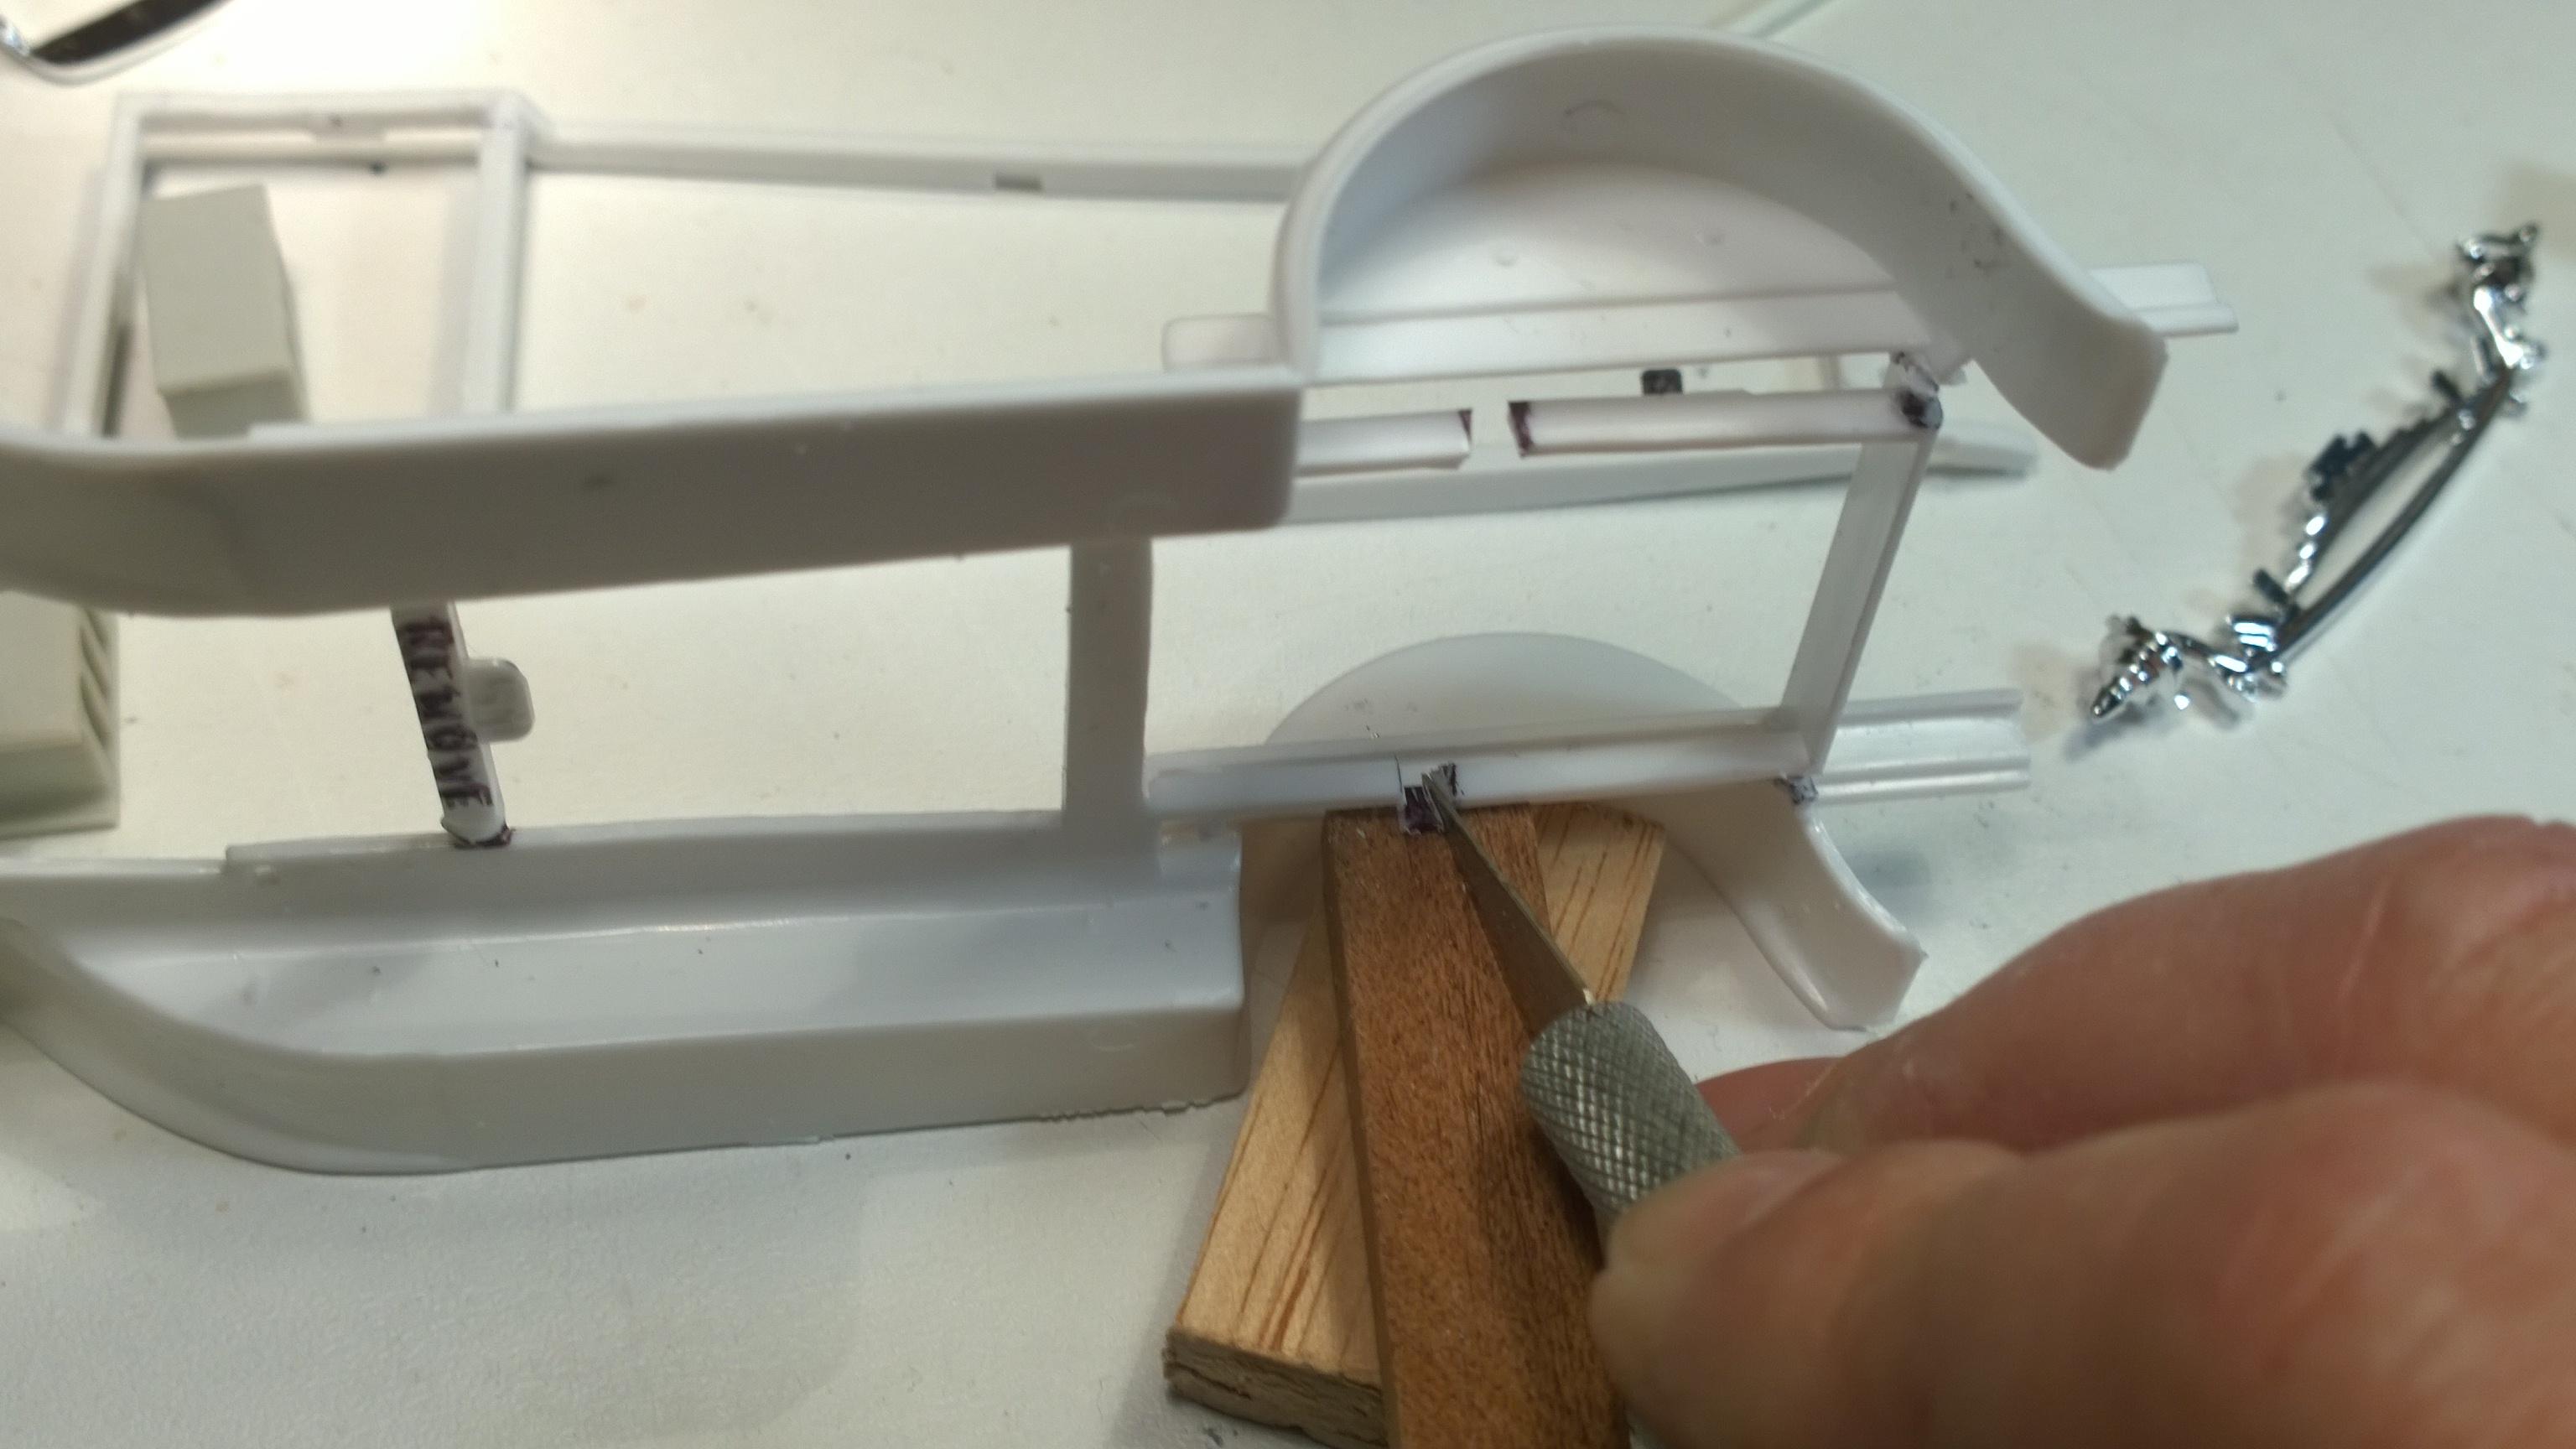
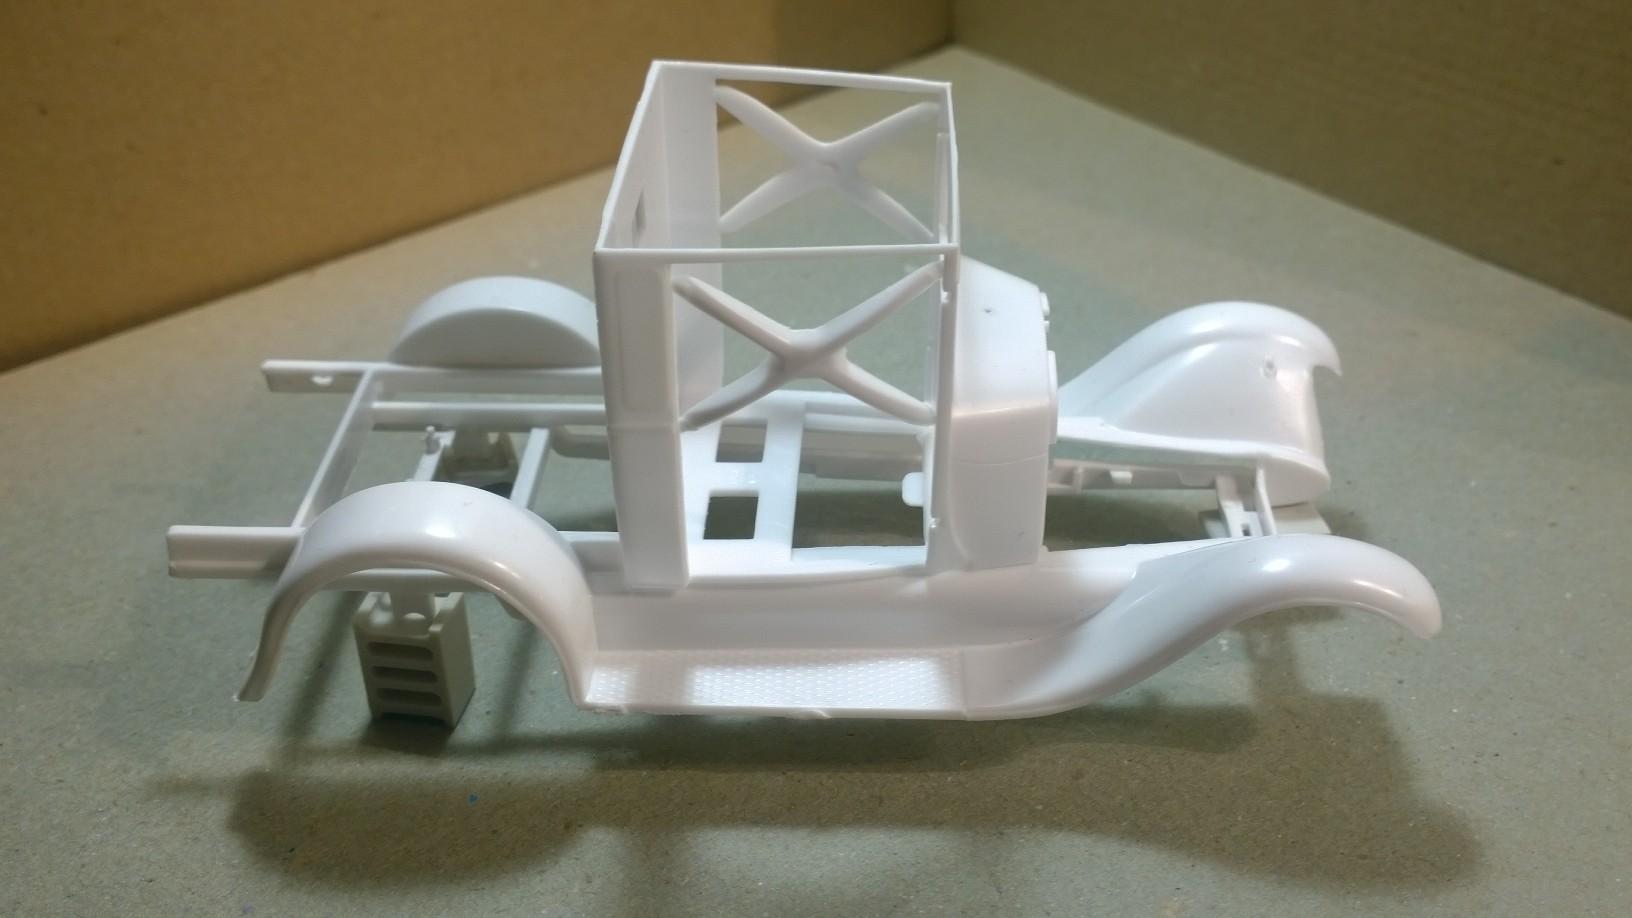
@Bullybeef; @tim boyd; @Dennis Lacy; @Rocking Rodney Rat Here's where we tie everything together... The new roadster is going to contribute it's floorboard and firewall to our "29A Closed Cab Pickup build! We'll remove the top part of the '29A PU's Firewall; notch out the corner's of the '29 Roadster's Firewall while attached to the '29 Roadster Floorboard with scotch tape. Dragging the #11 blade chisels a fine line removing material about as wide as a fine marker ink line. Until the upper portion is removed... Had to add back a little material to make the roadster firewall fit... Now to add a little material to the '29 roadster firewall so that it'll fit the '29 PU body... after filing the notches on both sides of the '29 roadster's firewall. Had to clamp the material while the CA glue sets up... Once the cab & roadster firewall fit; it's on to the ''29 roadster's floorboard. and, how they fit together... Remember when I mentioned that this build was going to be different than @Dennis Lacy's build, in that it will not have hinged opening doors. To that end, the roadster floorboard will be installed inside the '29A's cab. With the perfection, as if the parts somehow were meant to go together! From all angles, the fit of the '29 roadster firewall and the '29A cab is everything needed to proceed to the next step! Remember, the difference in the depth of the floor and the bottom of the cab will not be seen, once the doors are fit to the cab! Next up we pull parts for the engine: You'll be surprised where the '80's/'90's powerplant will come from! Here's where I'm going to dig into a couple of older Revell kits for the engine and transmission parts. Stay tuned boys and girls! -KK
-
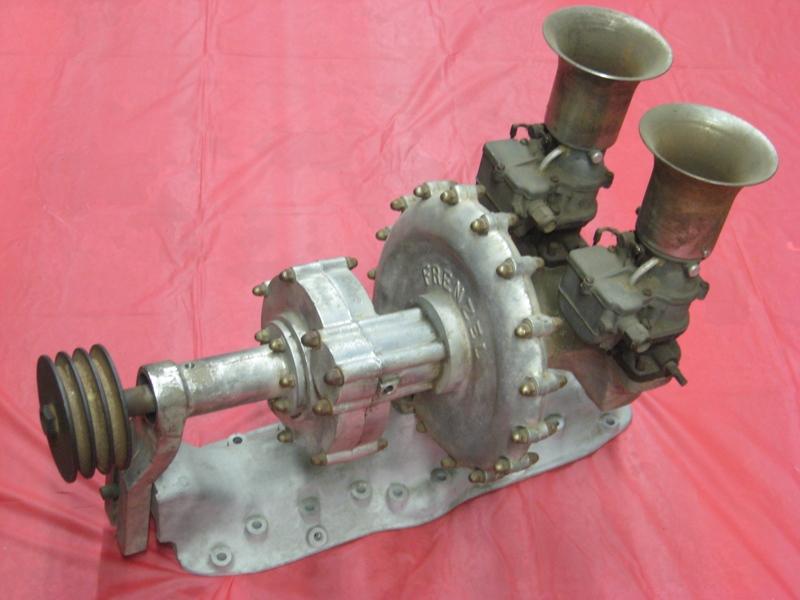
Jim, I have just the perfect hot rod flat head equipment you'll ever want! PM me with an address & I'll put it in the mail! FRENZEL SUPERCHARGER FLATHEAD FORD A close friend of mine, Pico Elgin created a 3D Frenzel Blower All you'll have to add are the carbs. @CabDriver let me know, OK? -KK
-
Nice build & neat engine! -KK
-
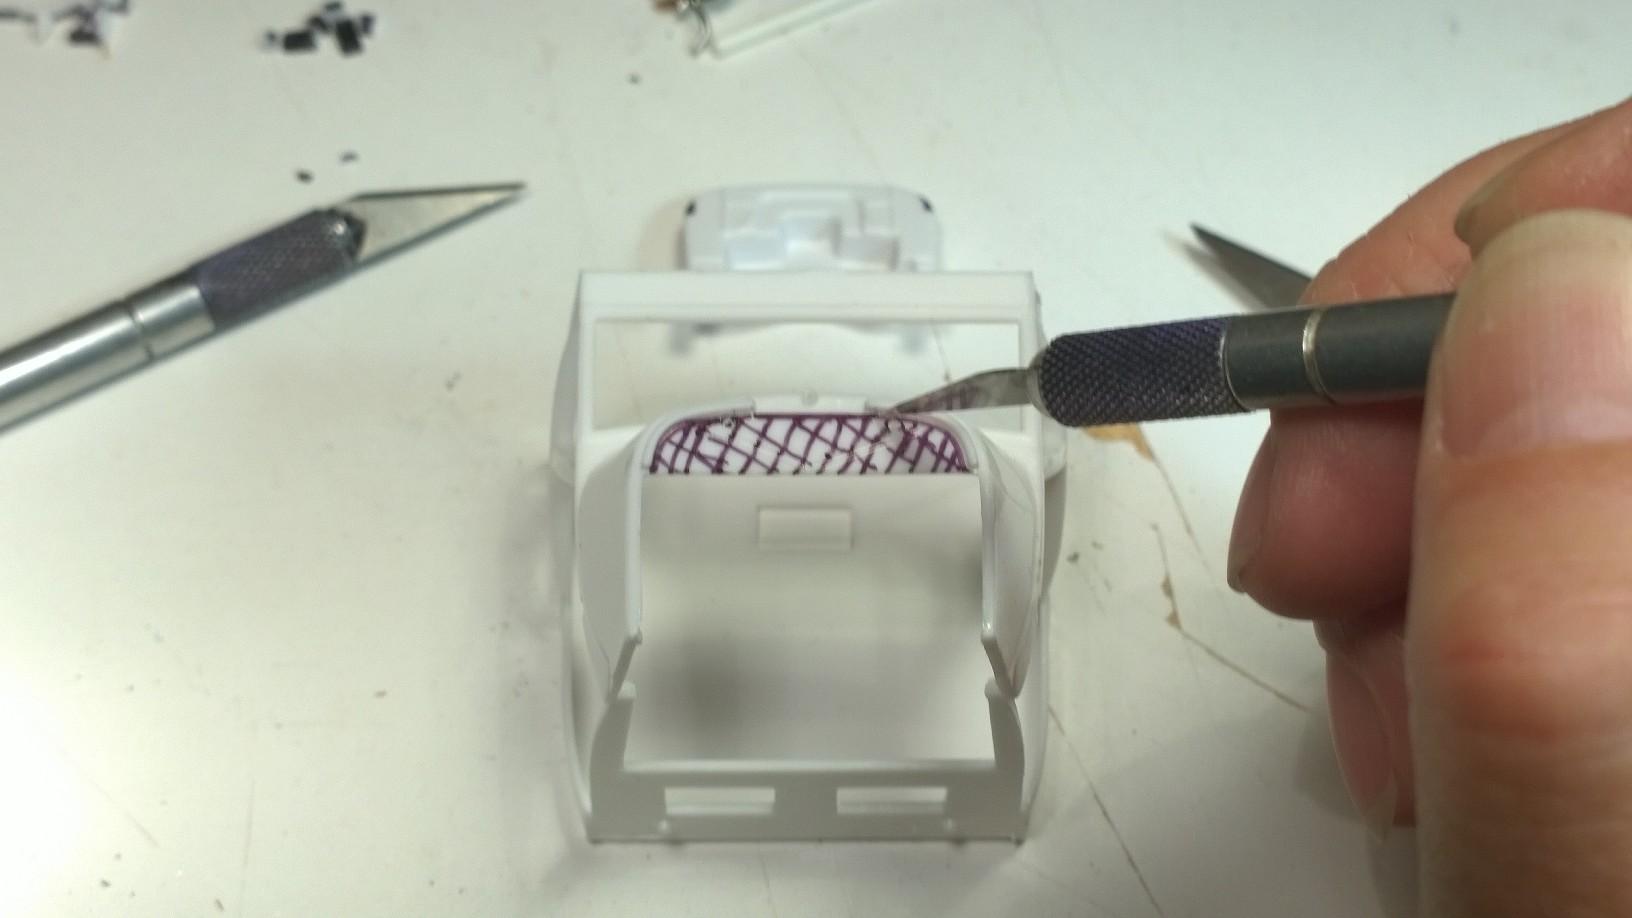
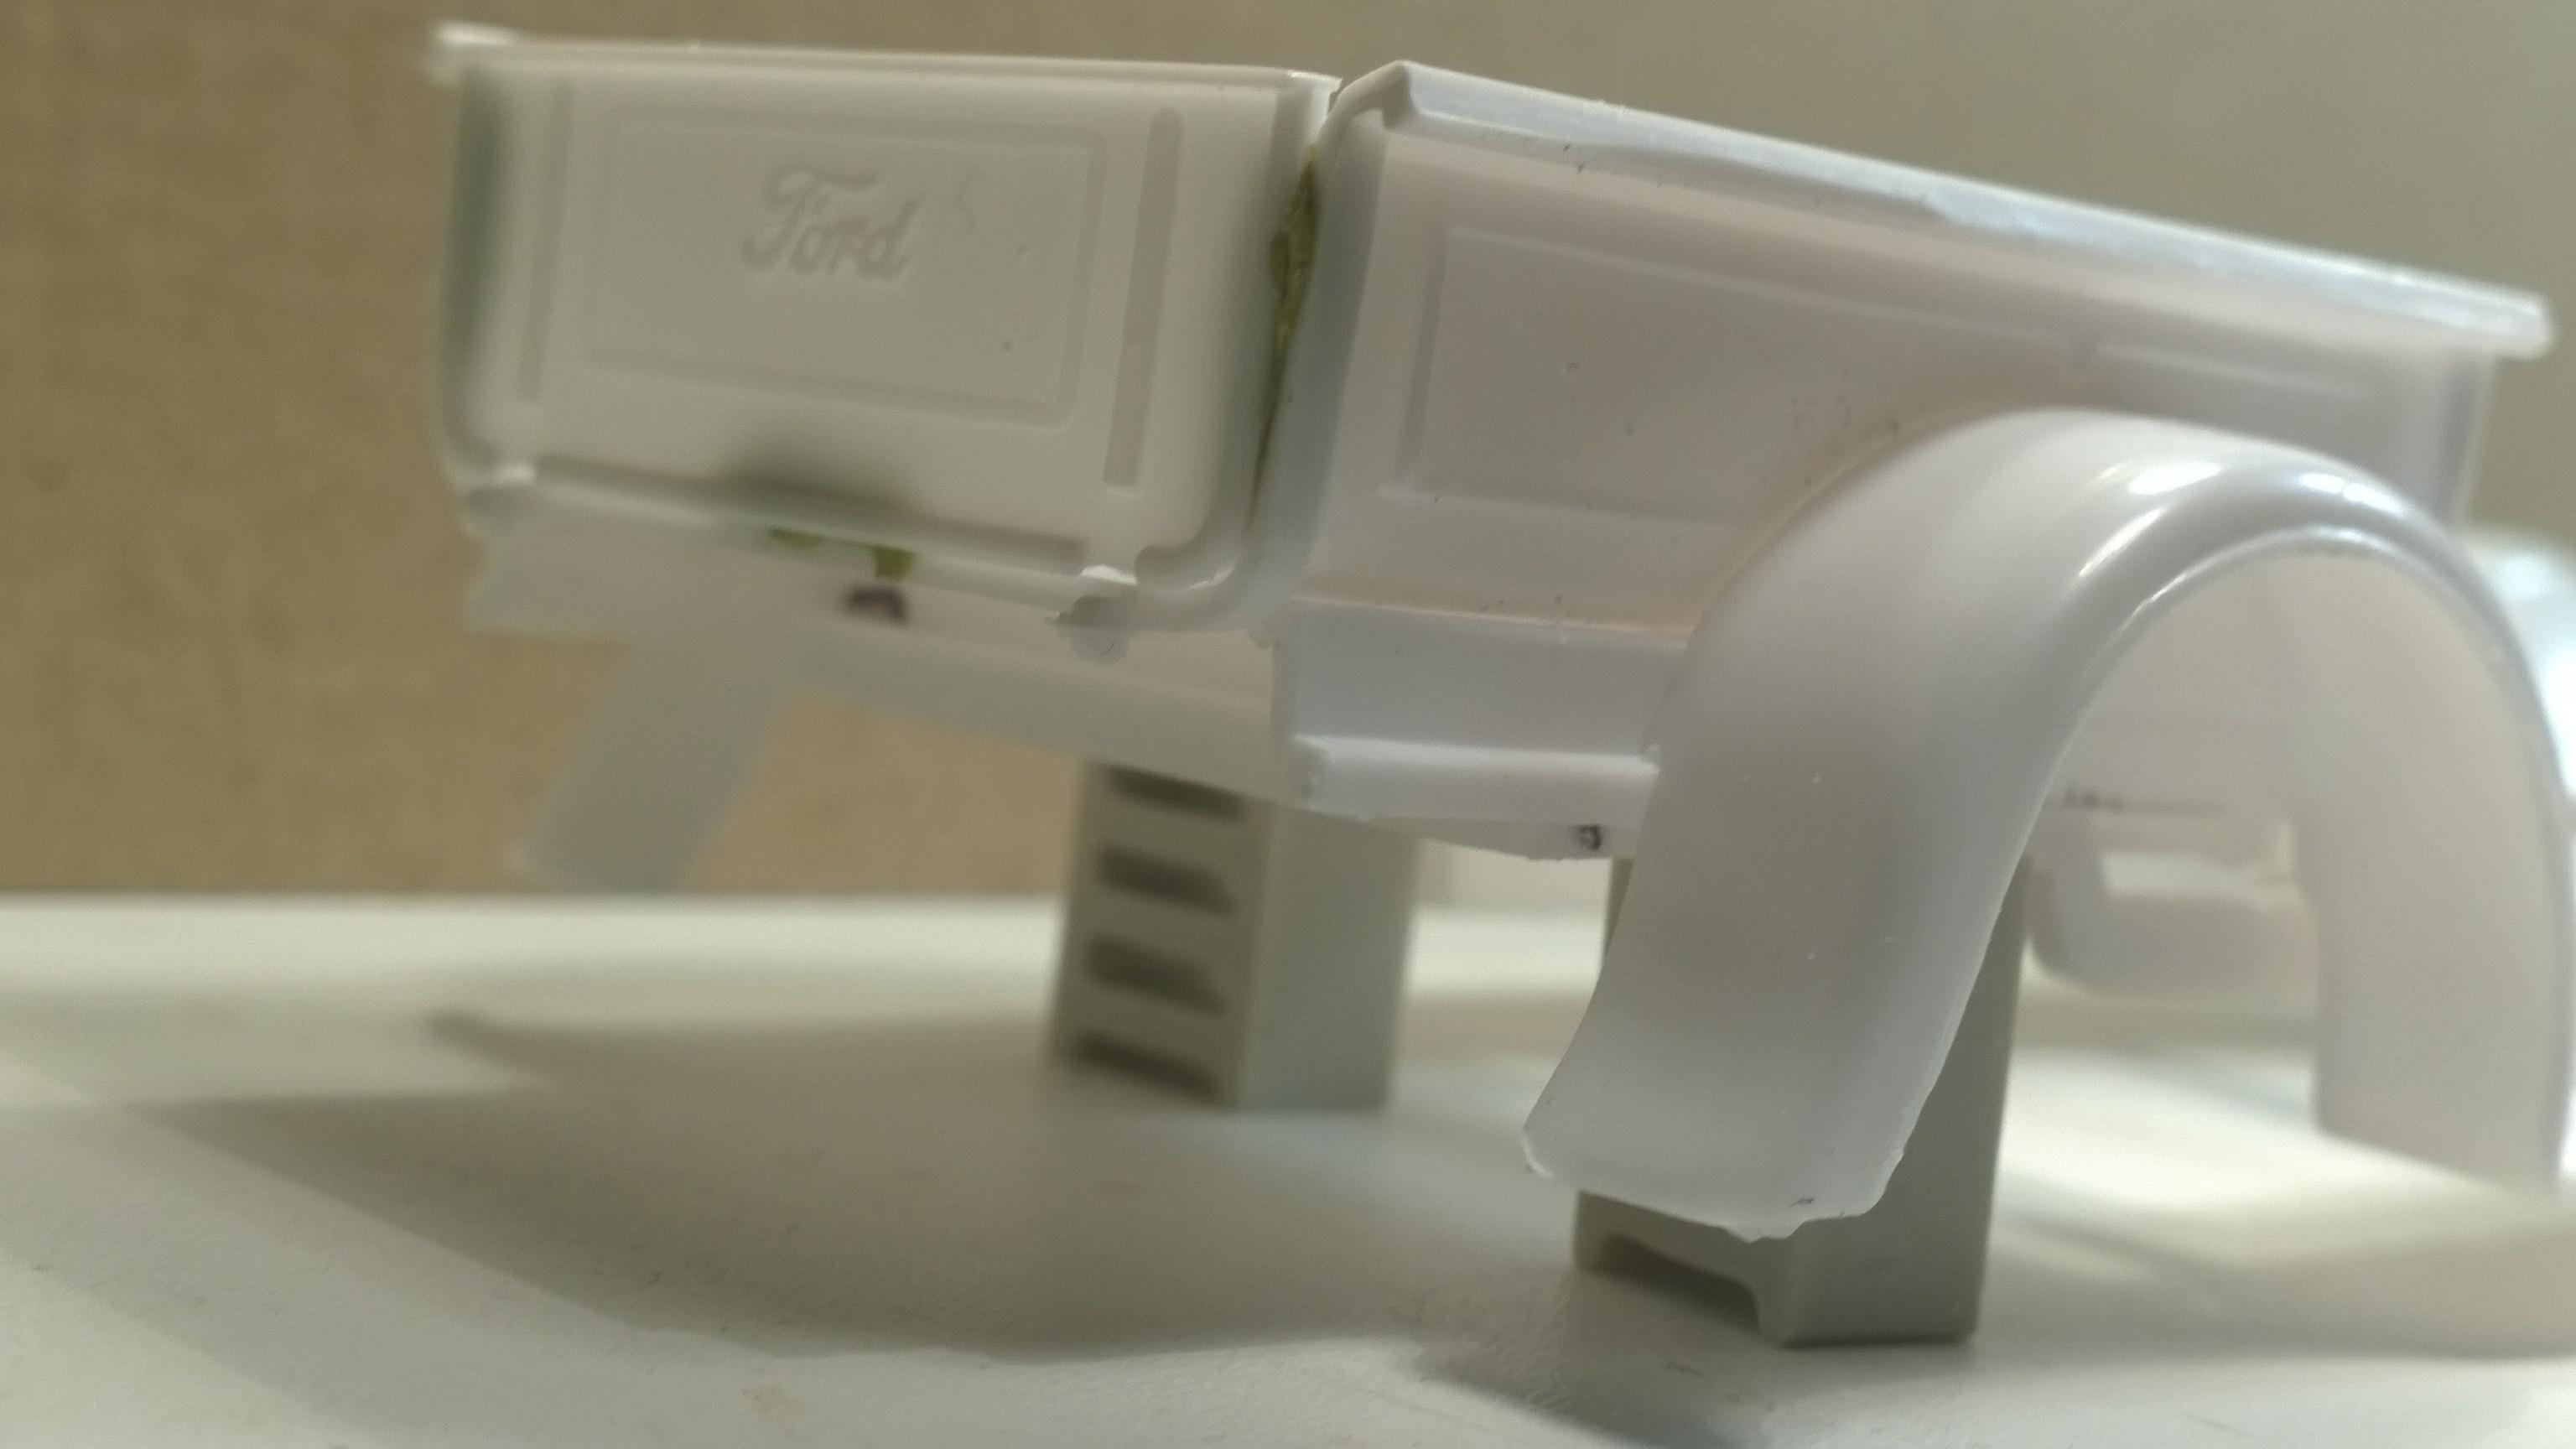
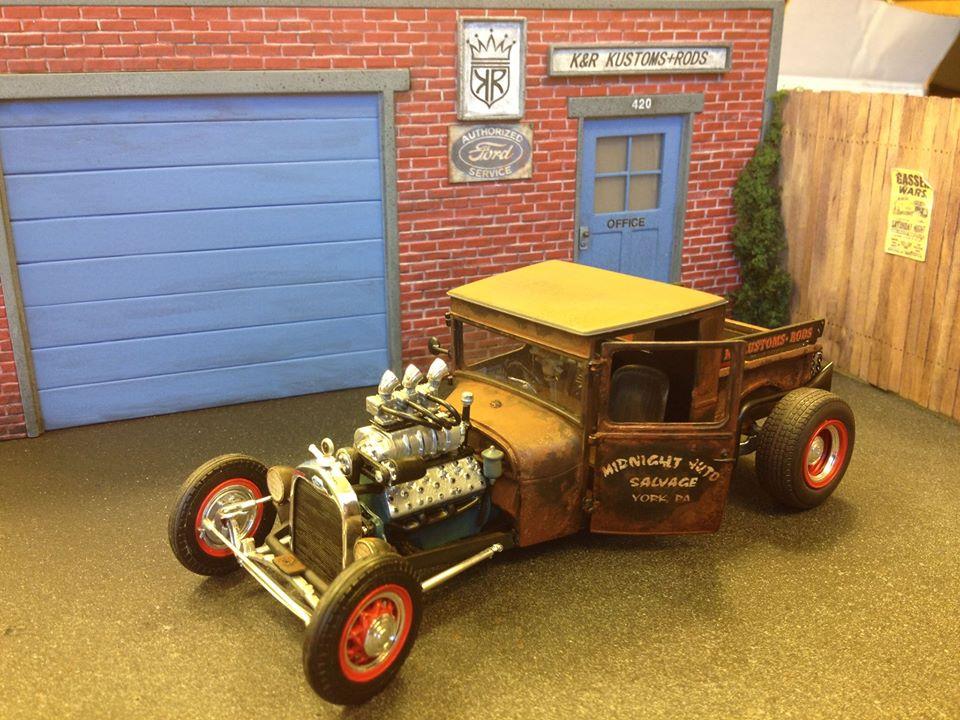
Here's an easy fix, the bar on the bottom of Revell '29 PU part# 53 Pickup Bed is a tad bit too wide. That little BLACK MARK has to go! Same amount on both ends! Here we "TAKE" the line! Both directions. Notches cut! Needs a little filing... Now it fits! Moving on, there are a couple of assumptions that I will be working under: Doors will be fixed (NOT a big fan of the hinges on the swinging doors) Although, I did get them to work on the '29 PU V-12 Midnight Auto Salvage K&R Kustoms+Rods Parts Truck And, the next step will take a little extra modifications to make the parts fit together. So far the mods have been pretty straight forward. -KK
-
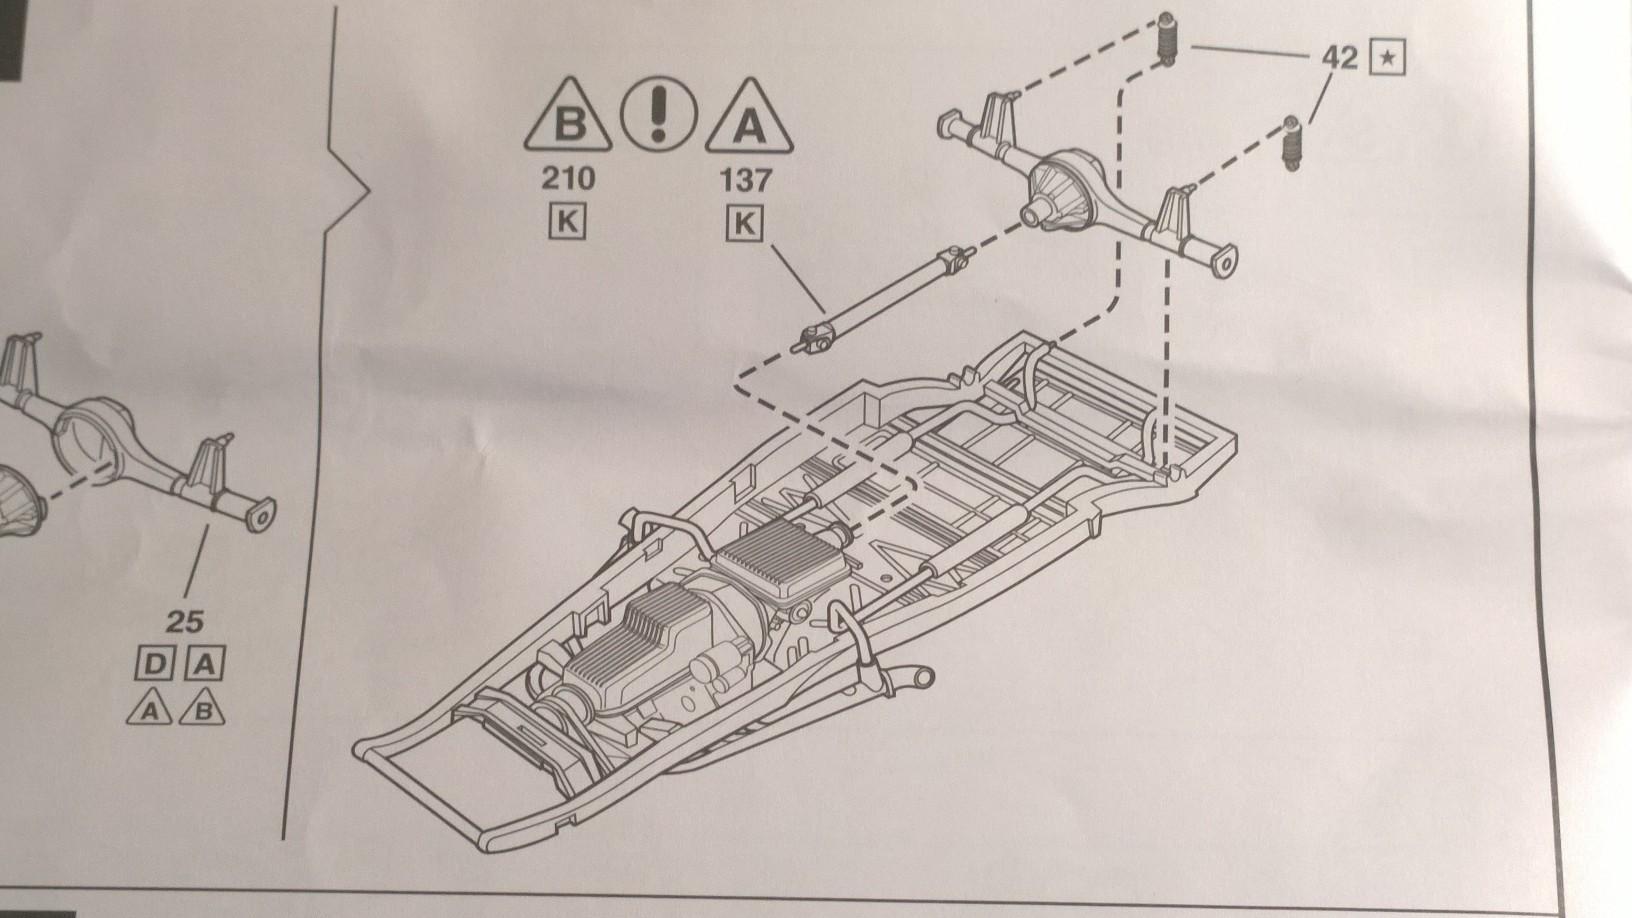
And, be aware of misleading instructions: Attaching the coil-over spring (Part #42) to the tip of the exhaust pipe is NOT how it works! -KK
-
Chevy Pickup 41 - Revell
Kit Karson replied to Zoltan's topic in WIP: Model Trucks: Pickups, Vans, SUVs, Light Commercial
When a good idea turns into a great concept and meets with a competent builder... awesome things happen! -KK
-
Nice project! -KK
-
40 ford pickup
Kit Karson replied to 5.0nut's topic in WIP: Model Trucks: Pickups, Vans, SUVs, Light Commercial
This is awesome! -KK -
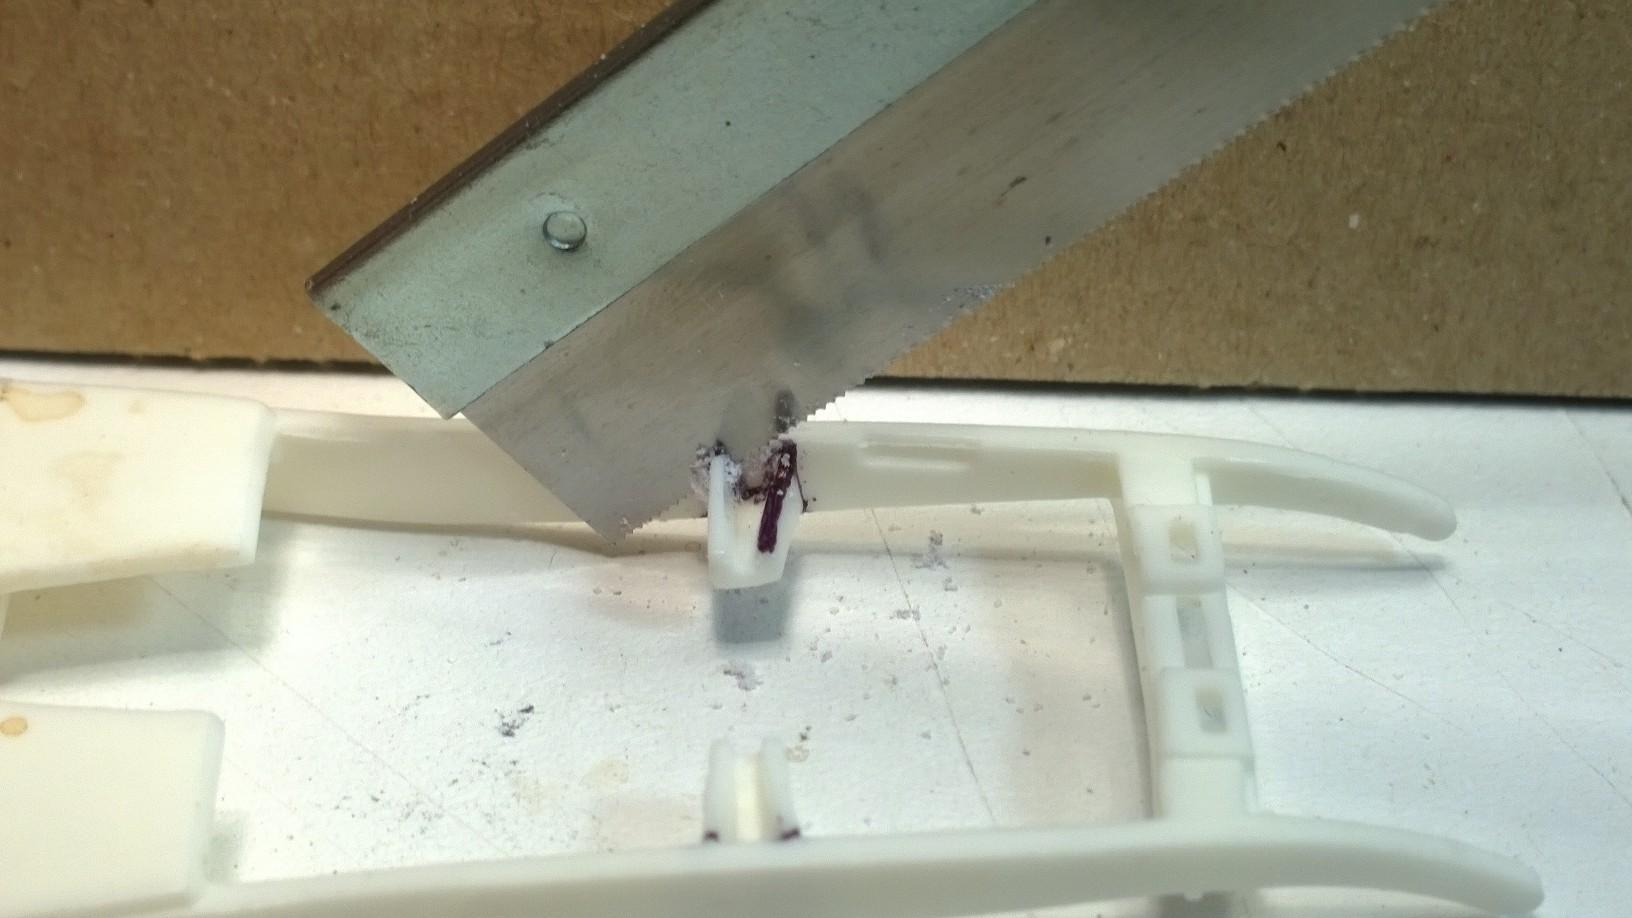
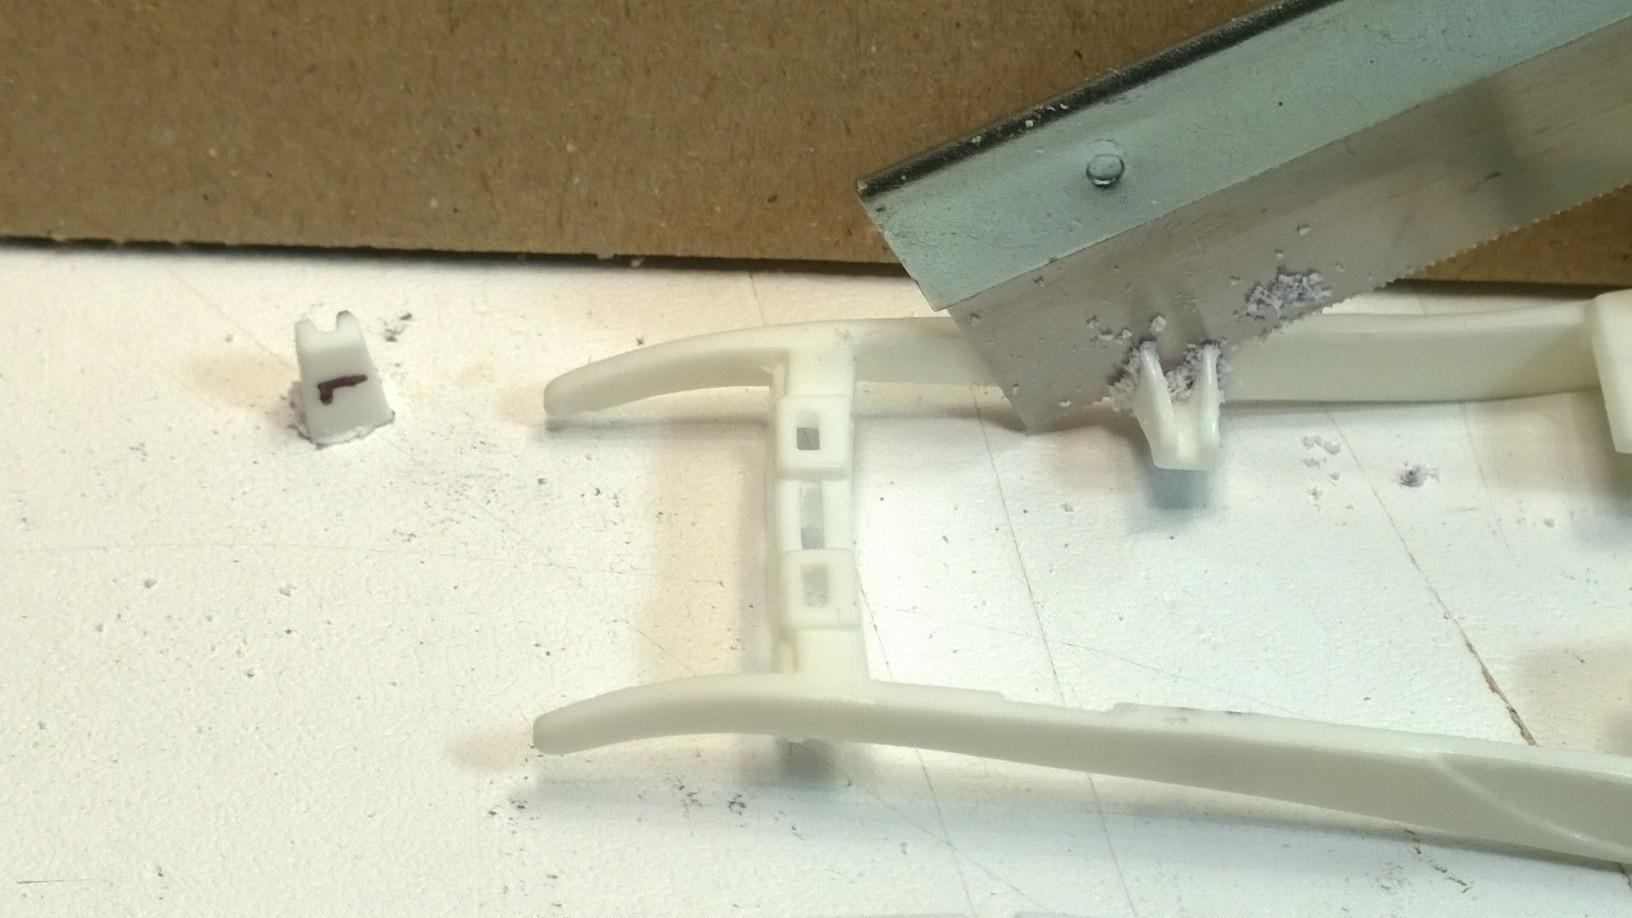
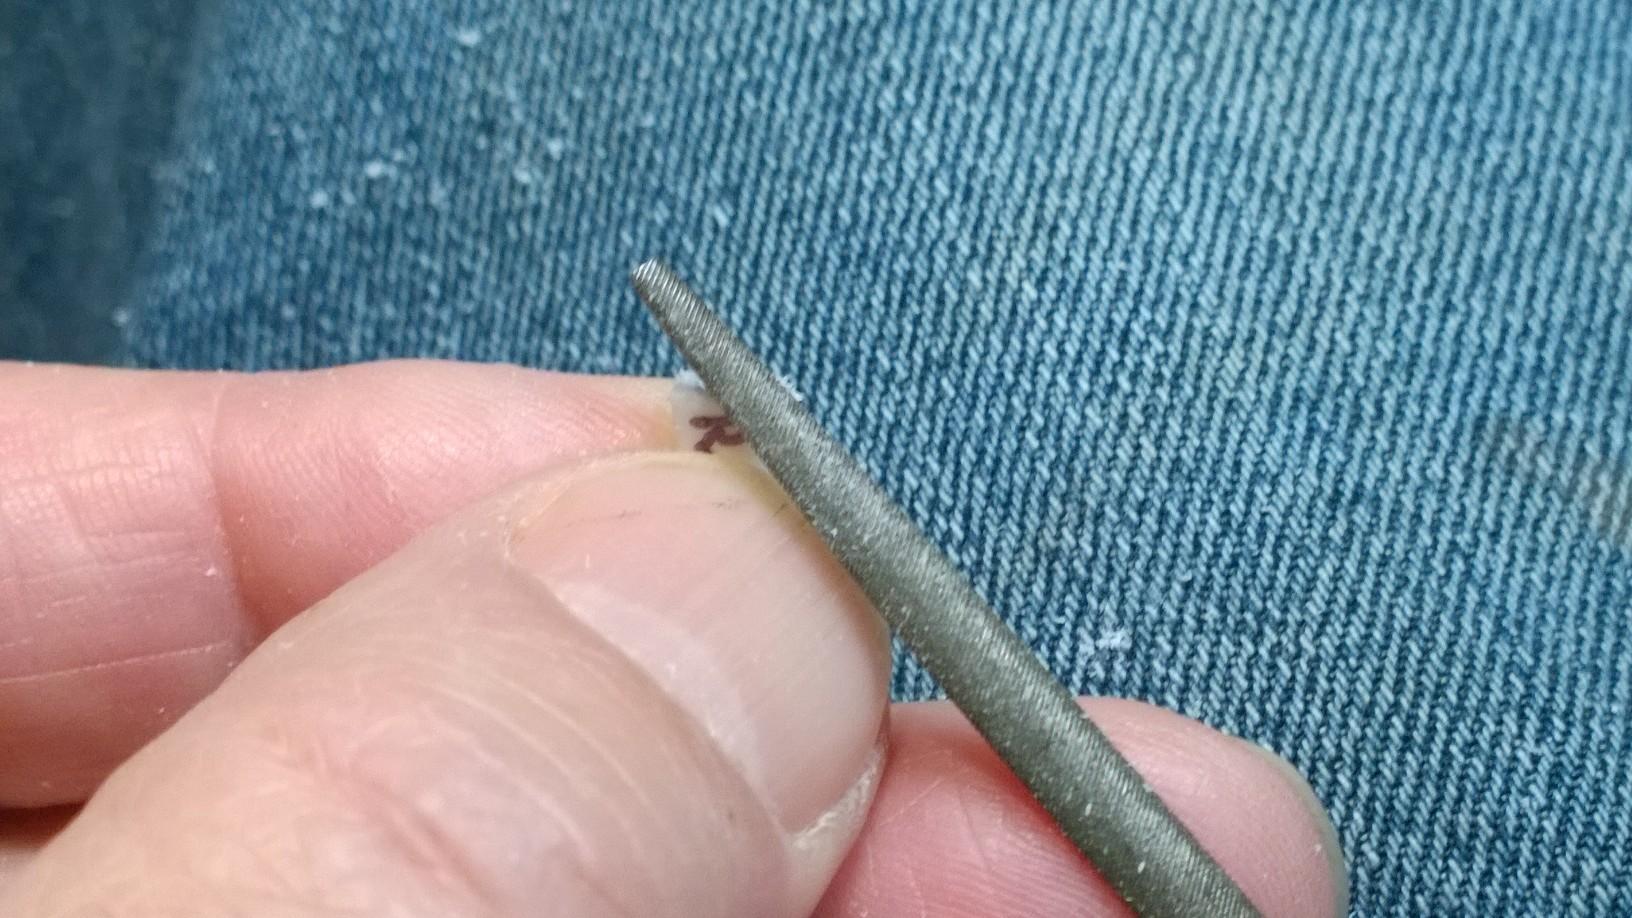
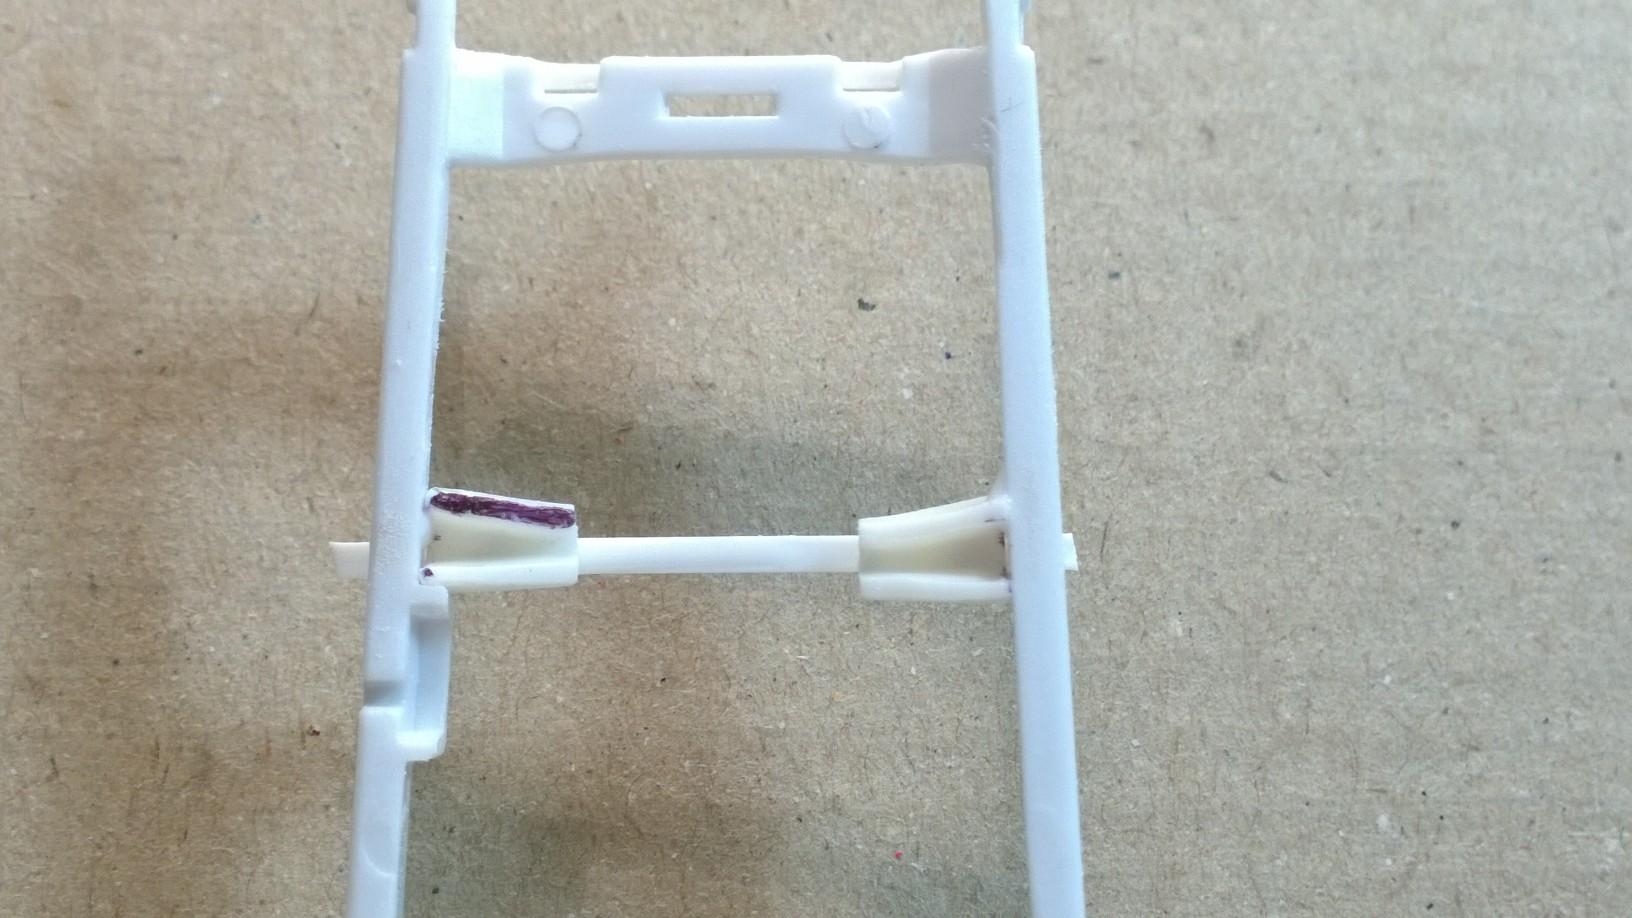
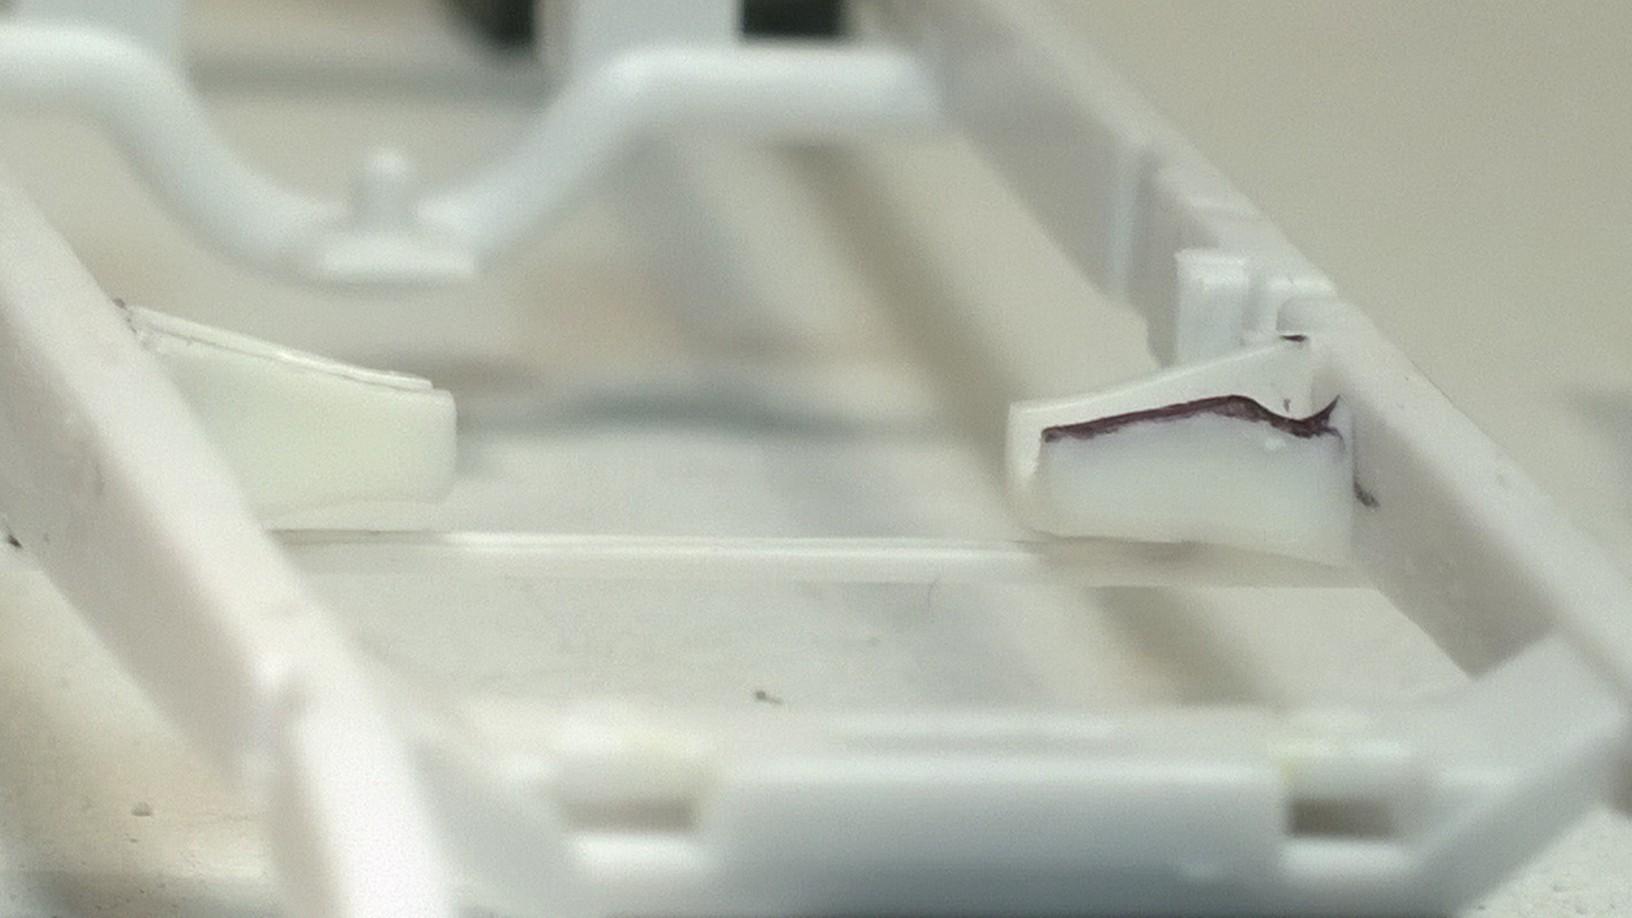
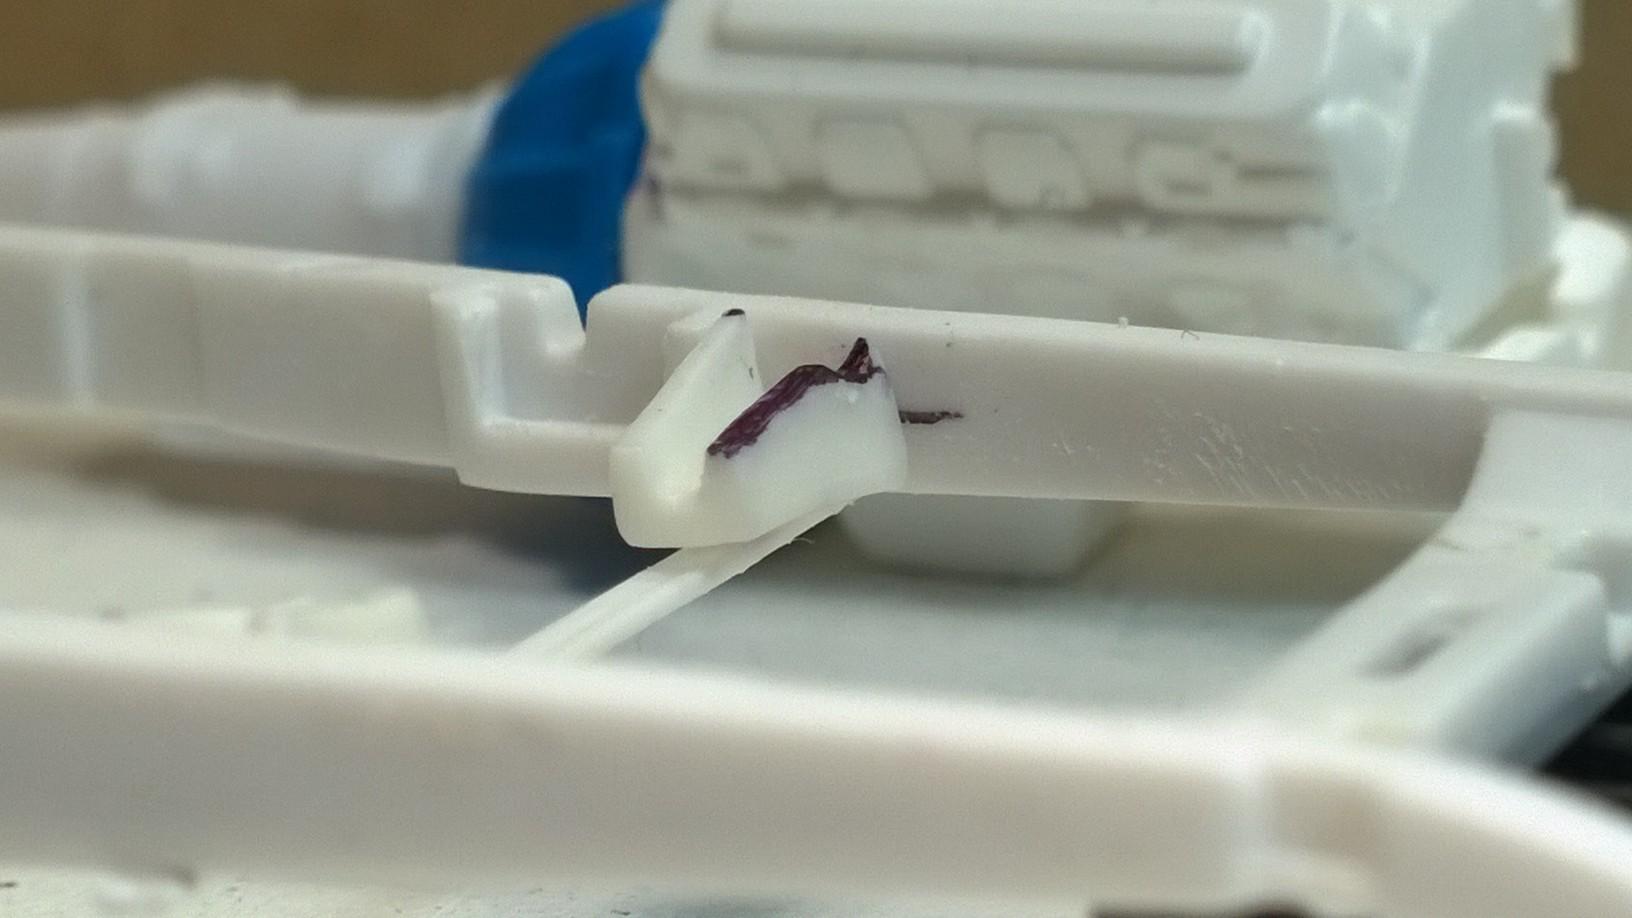
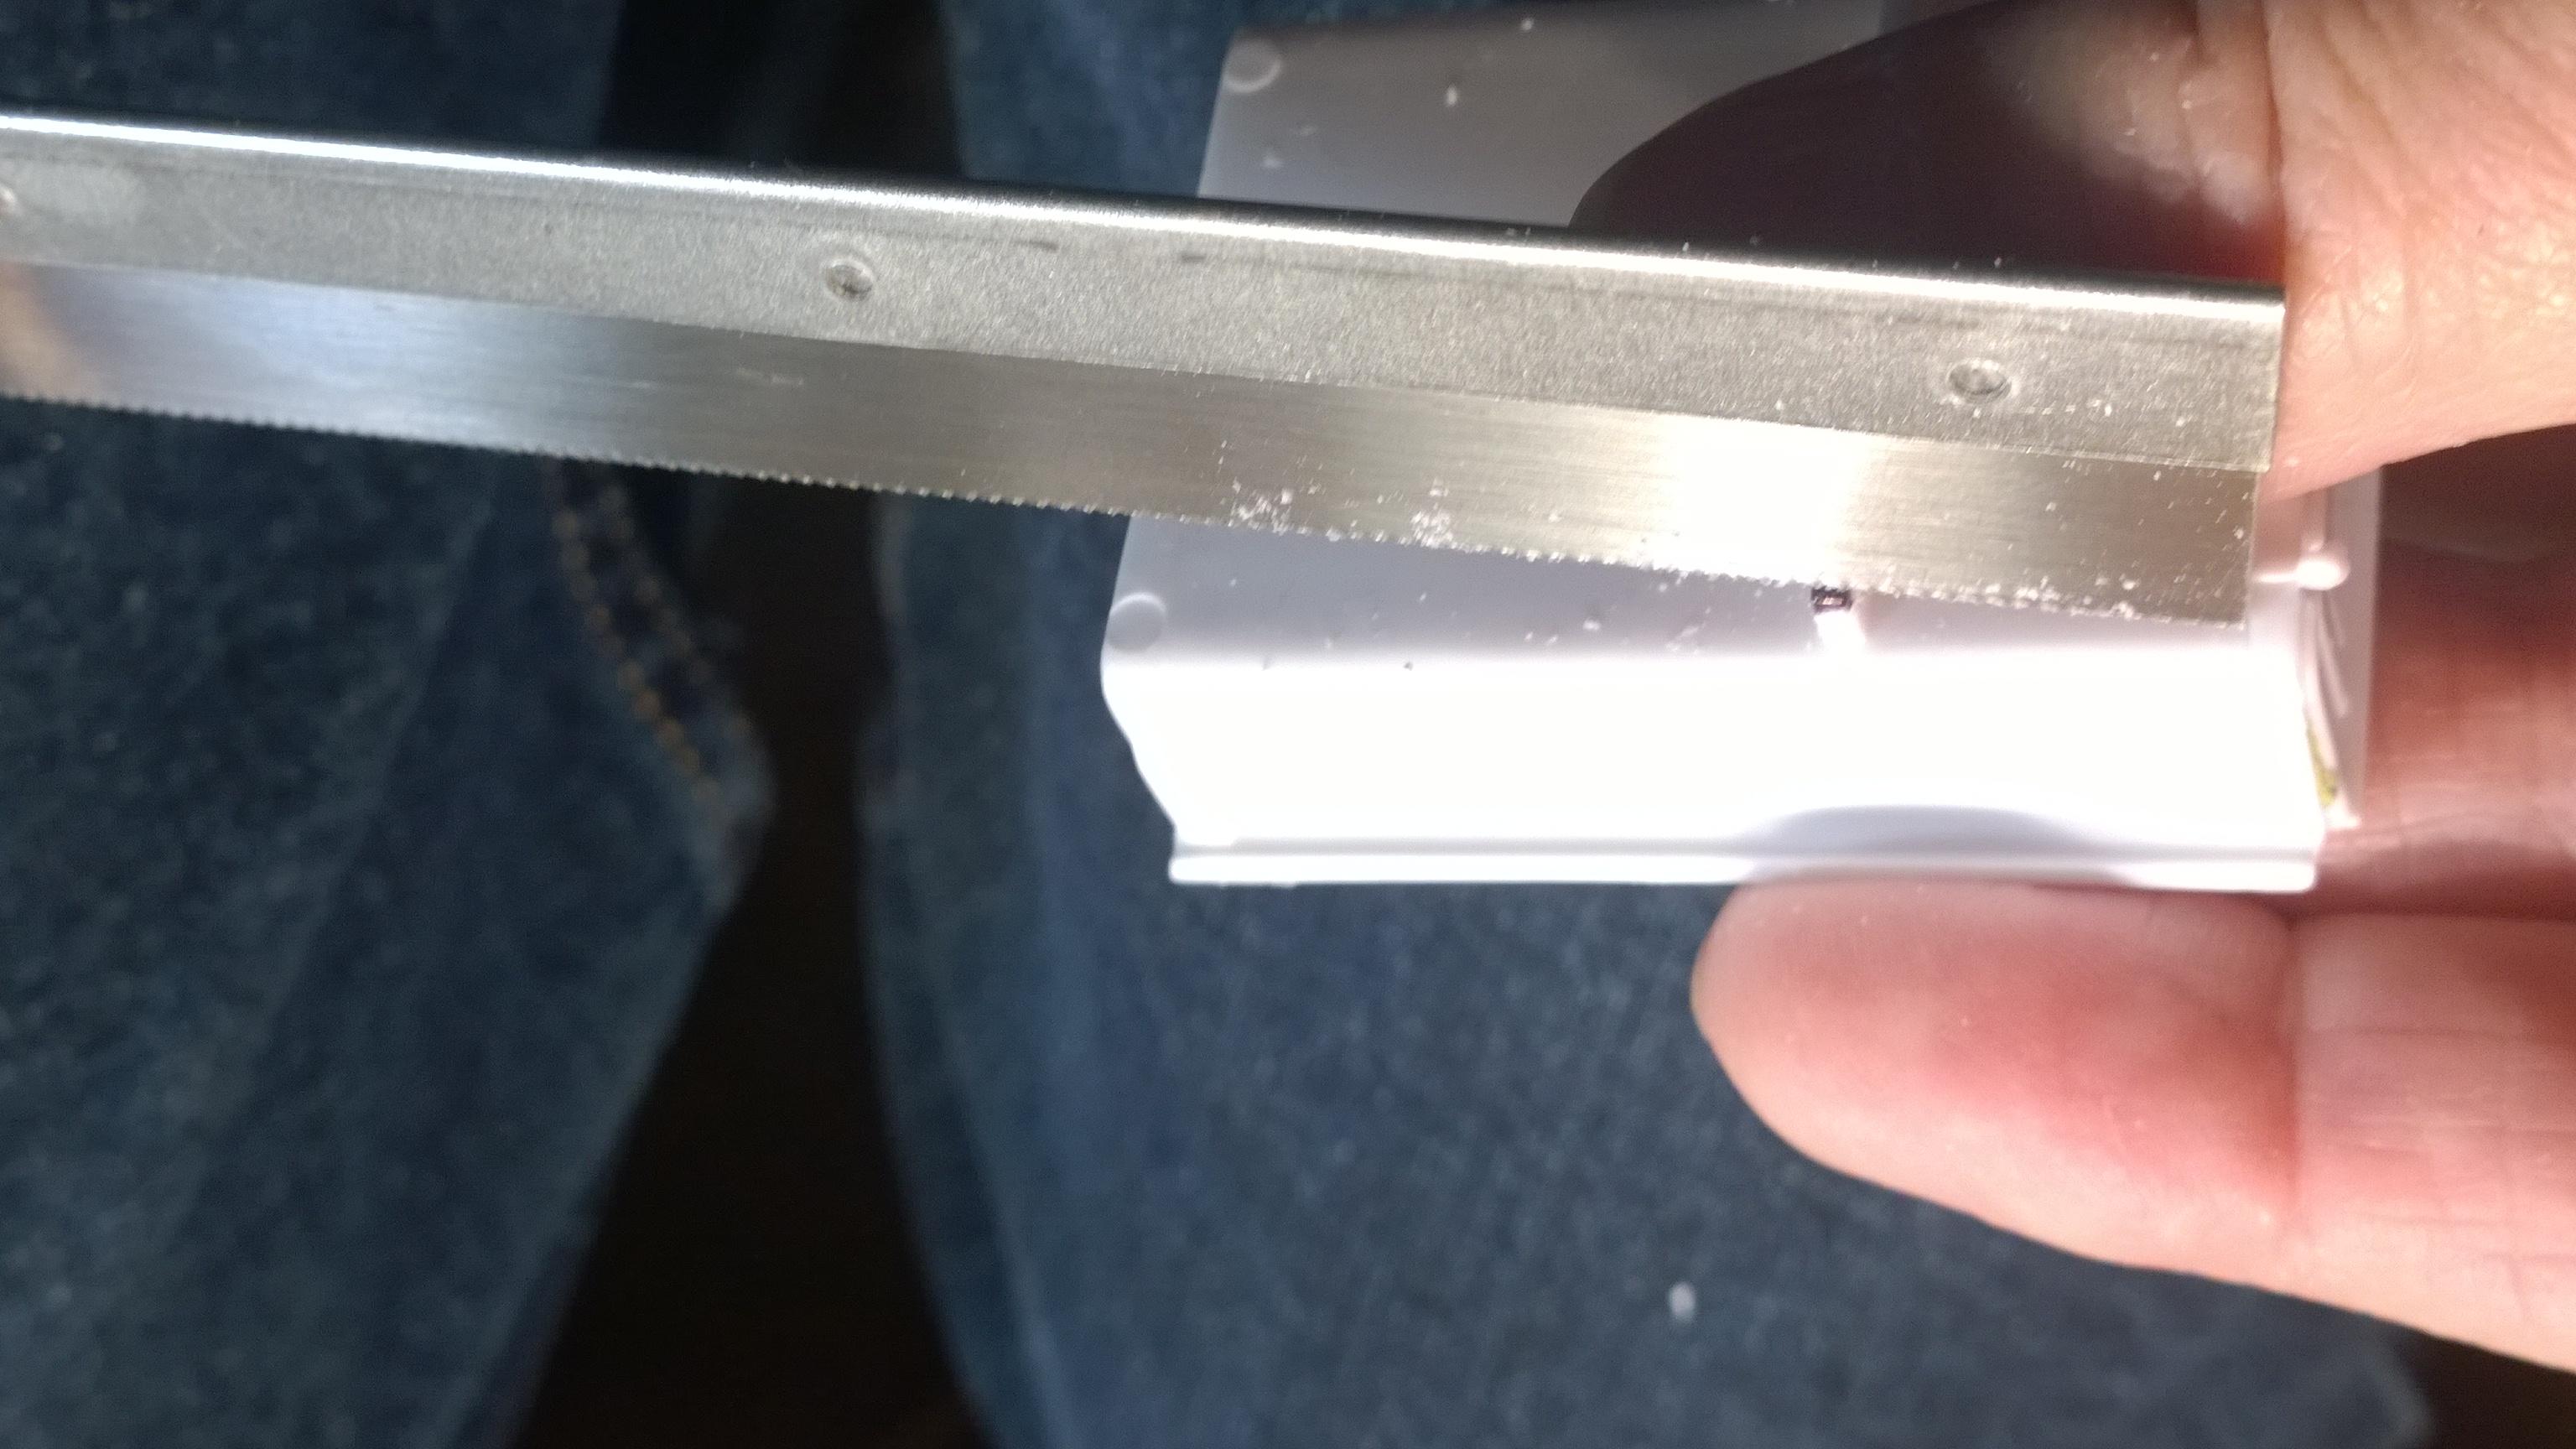
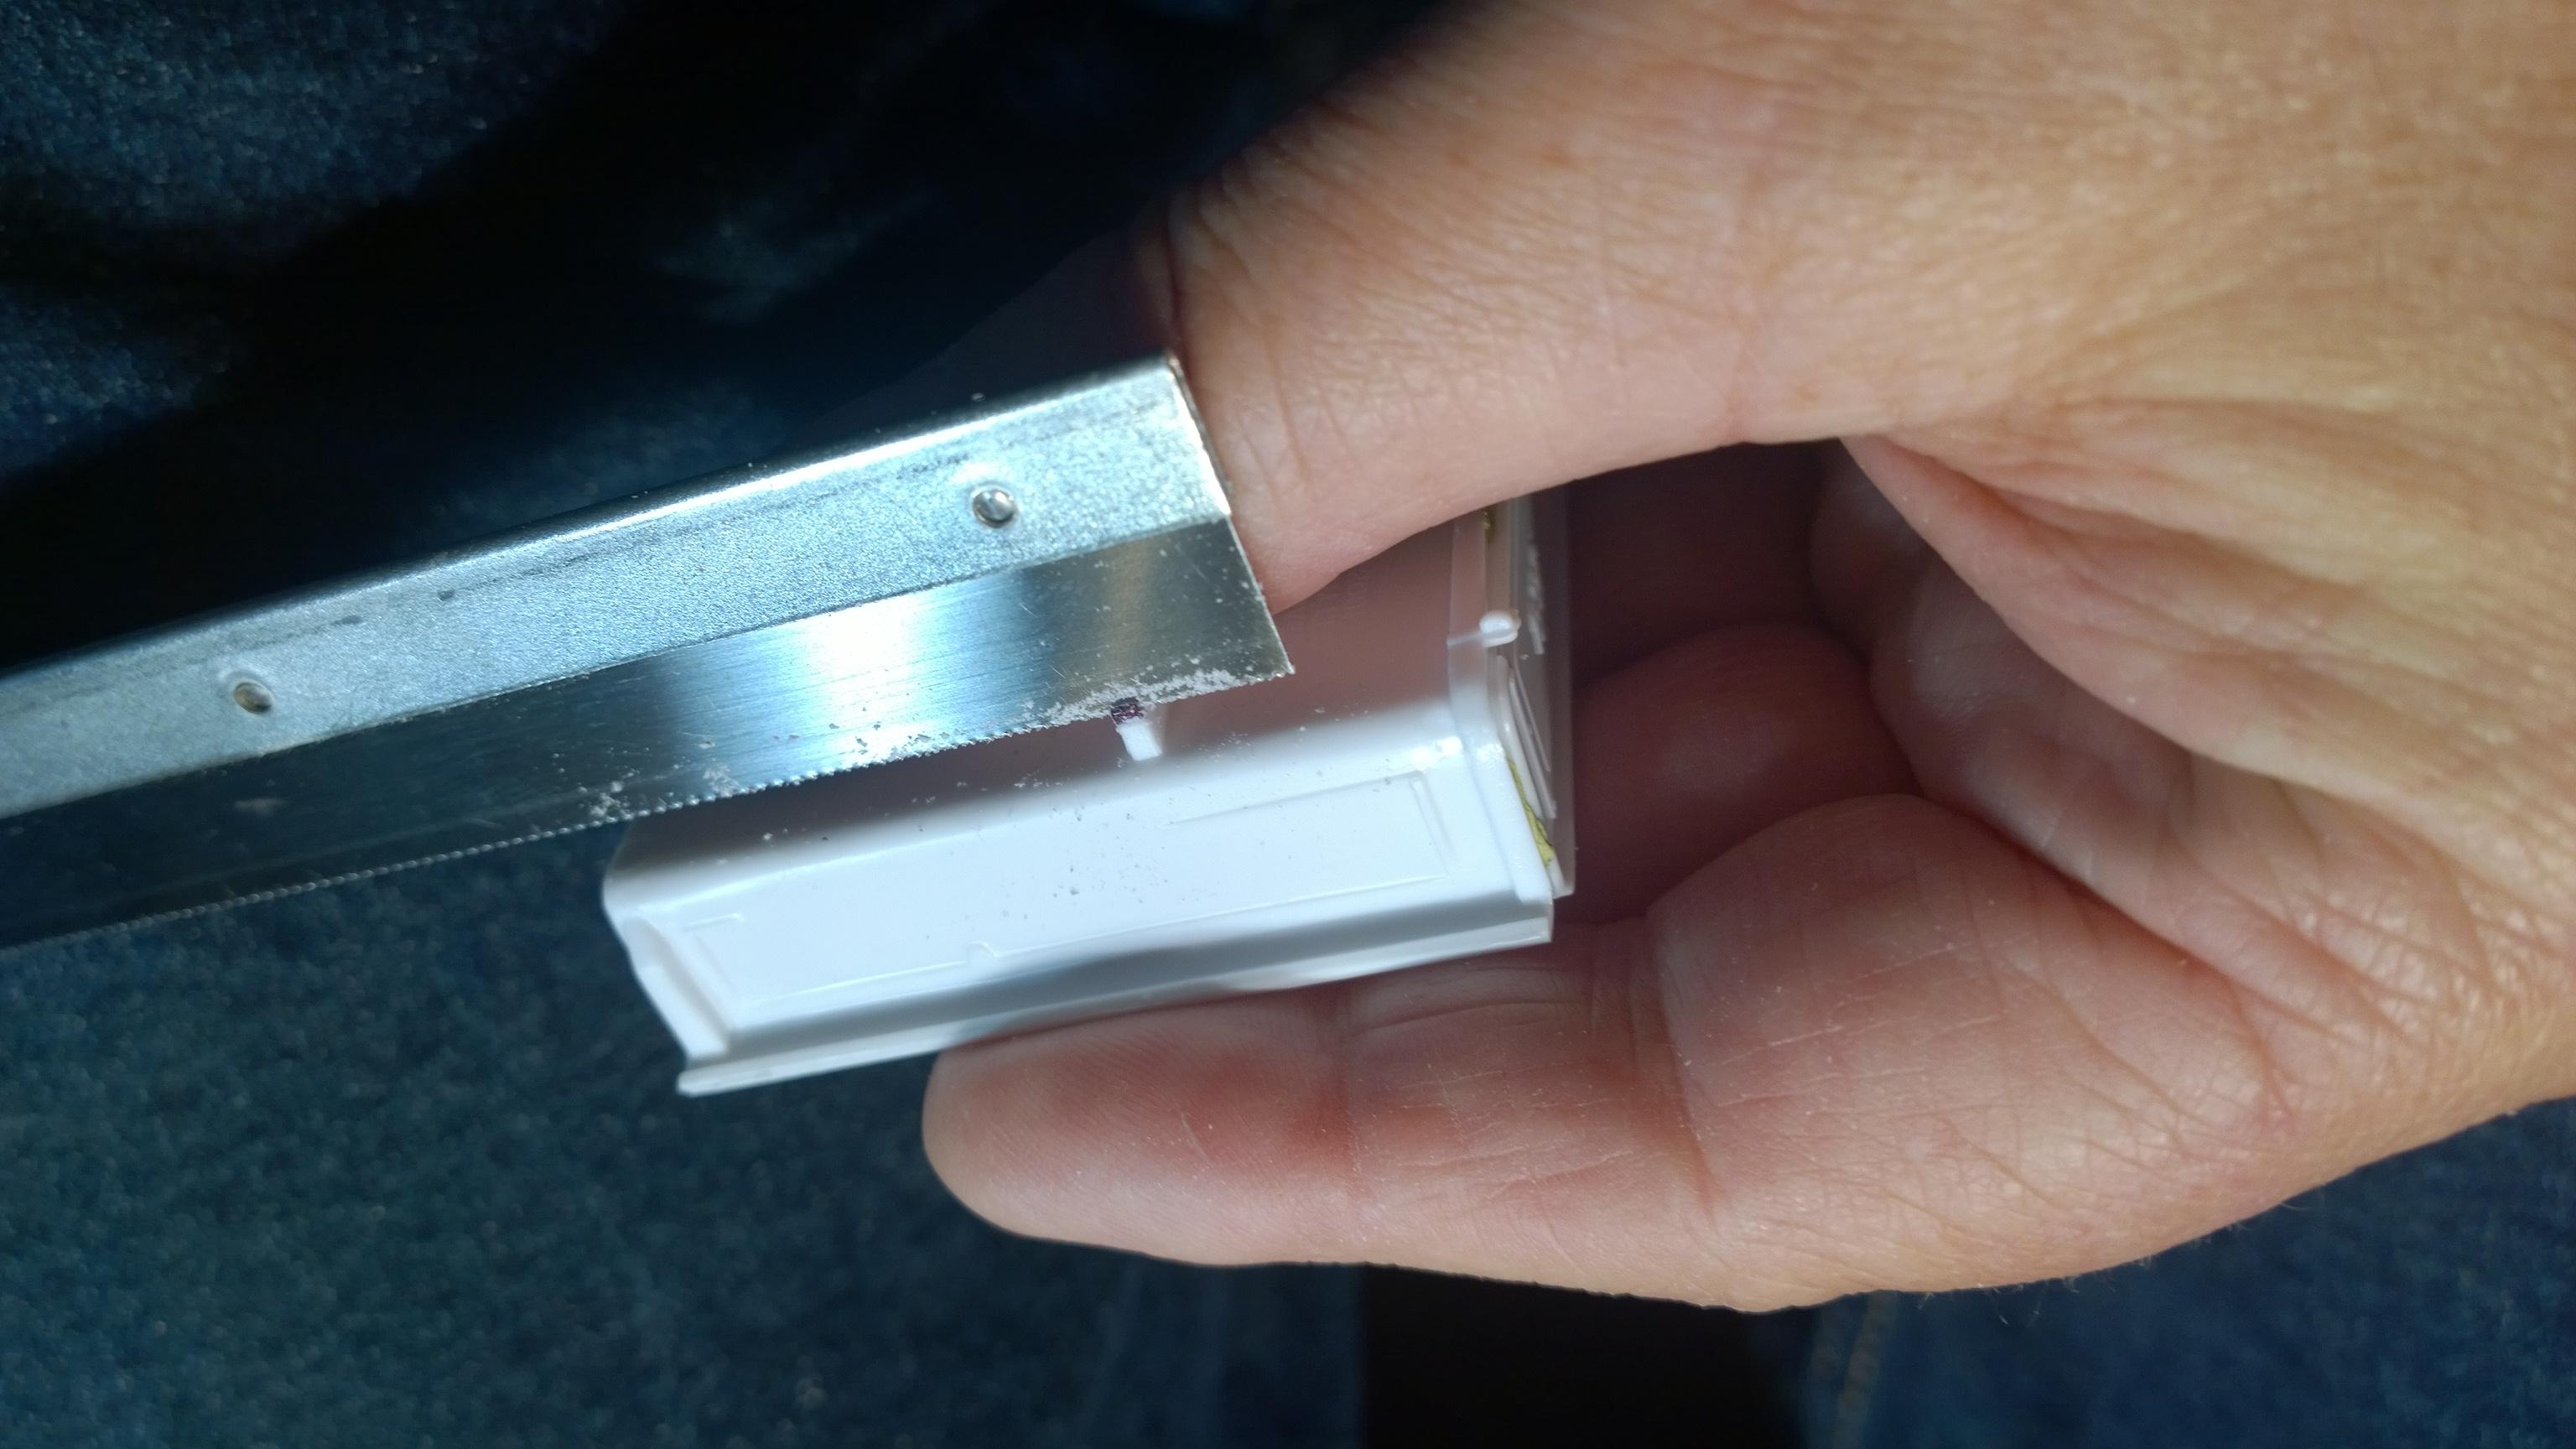
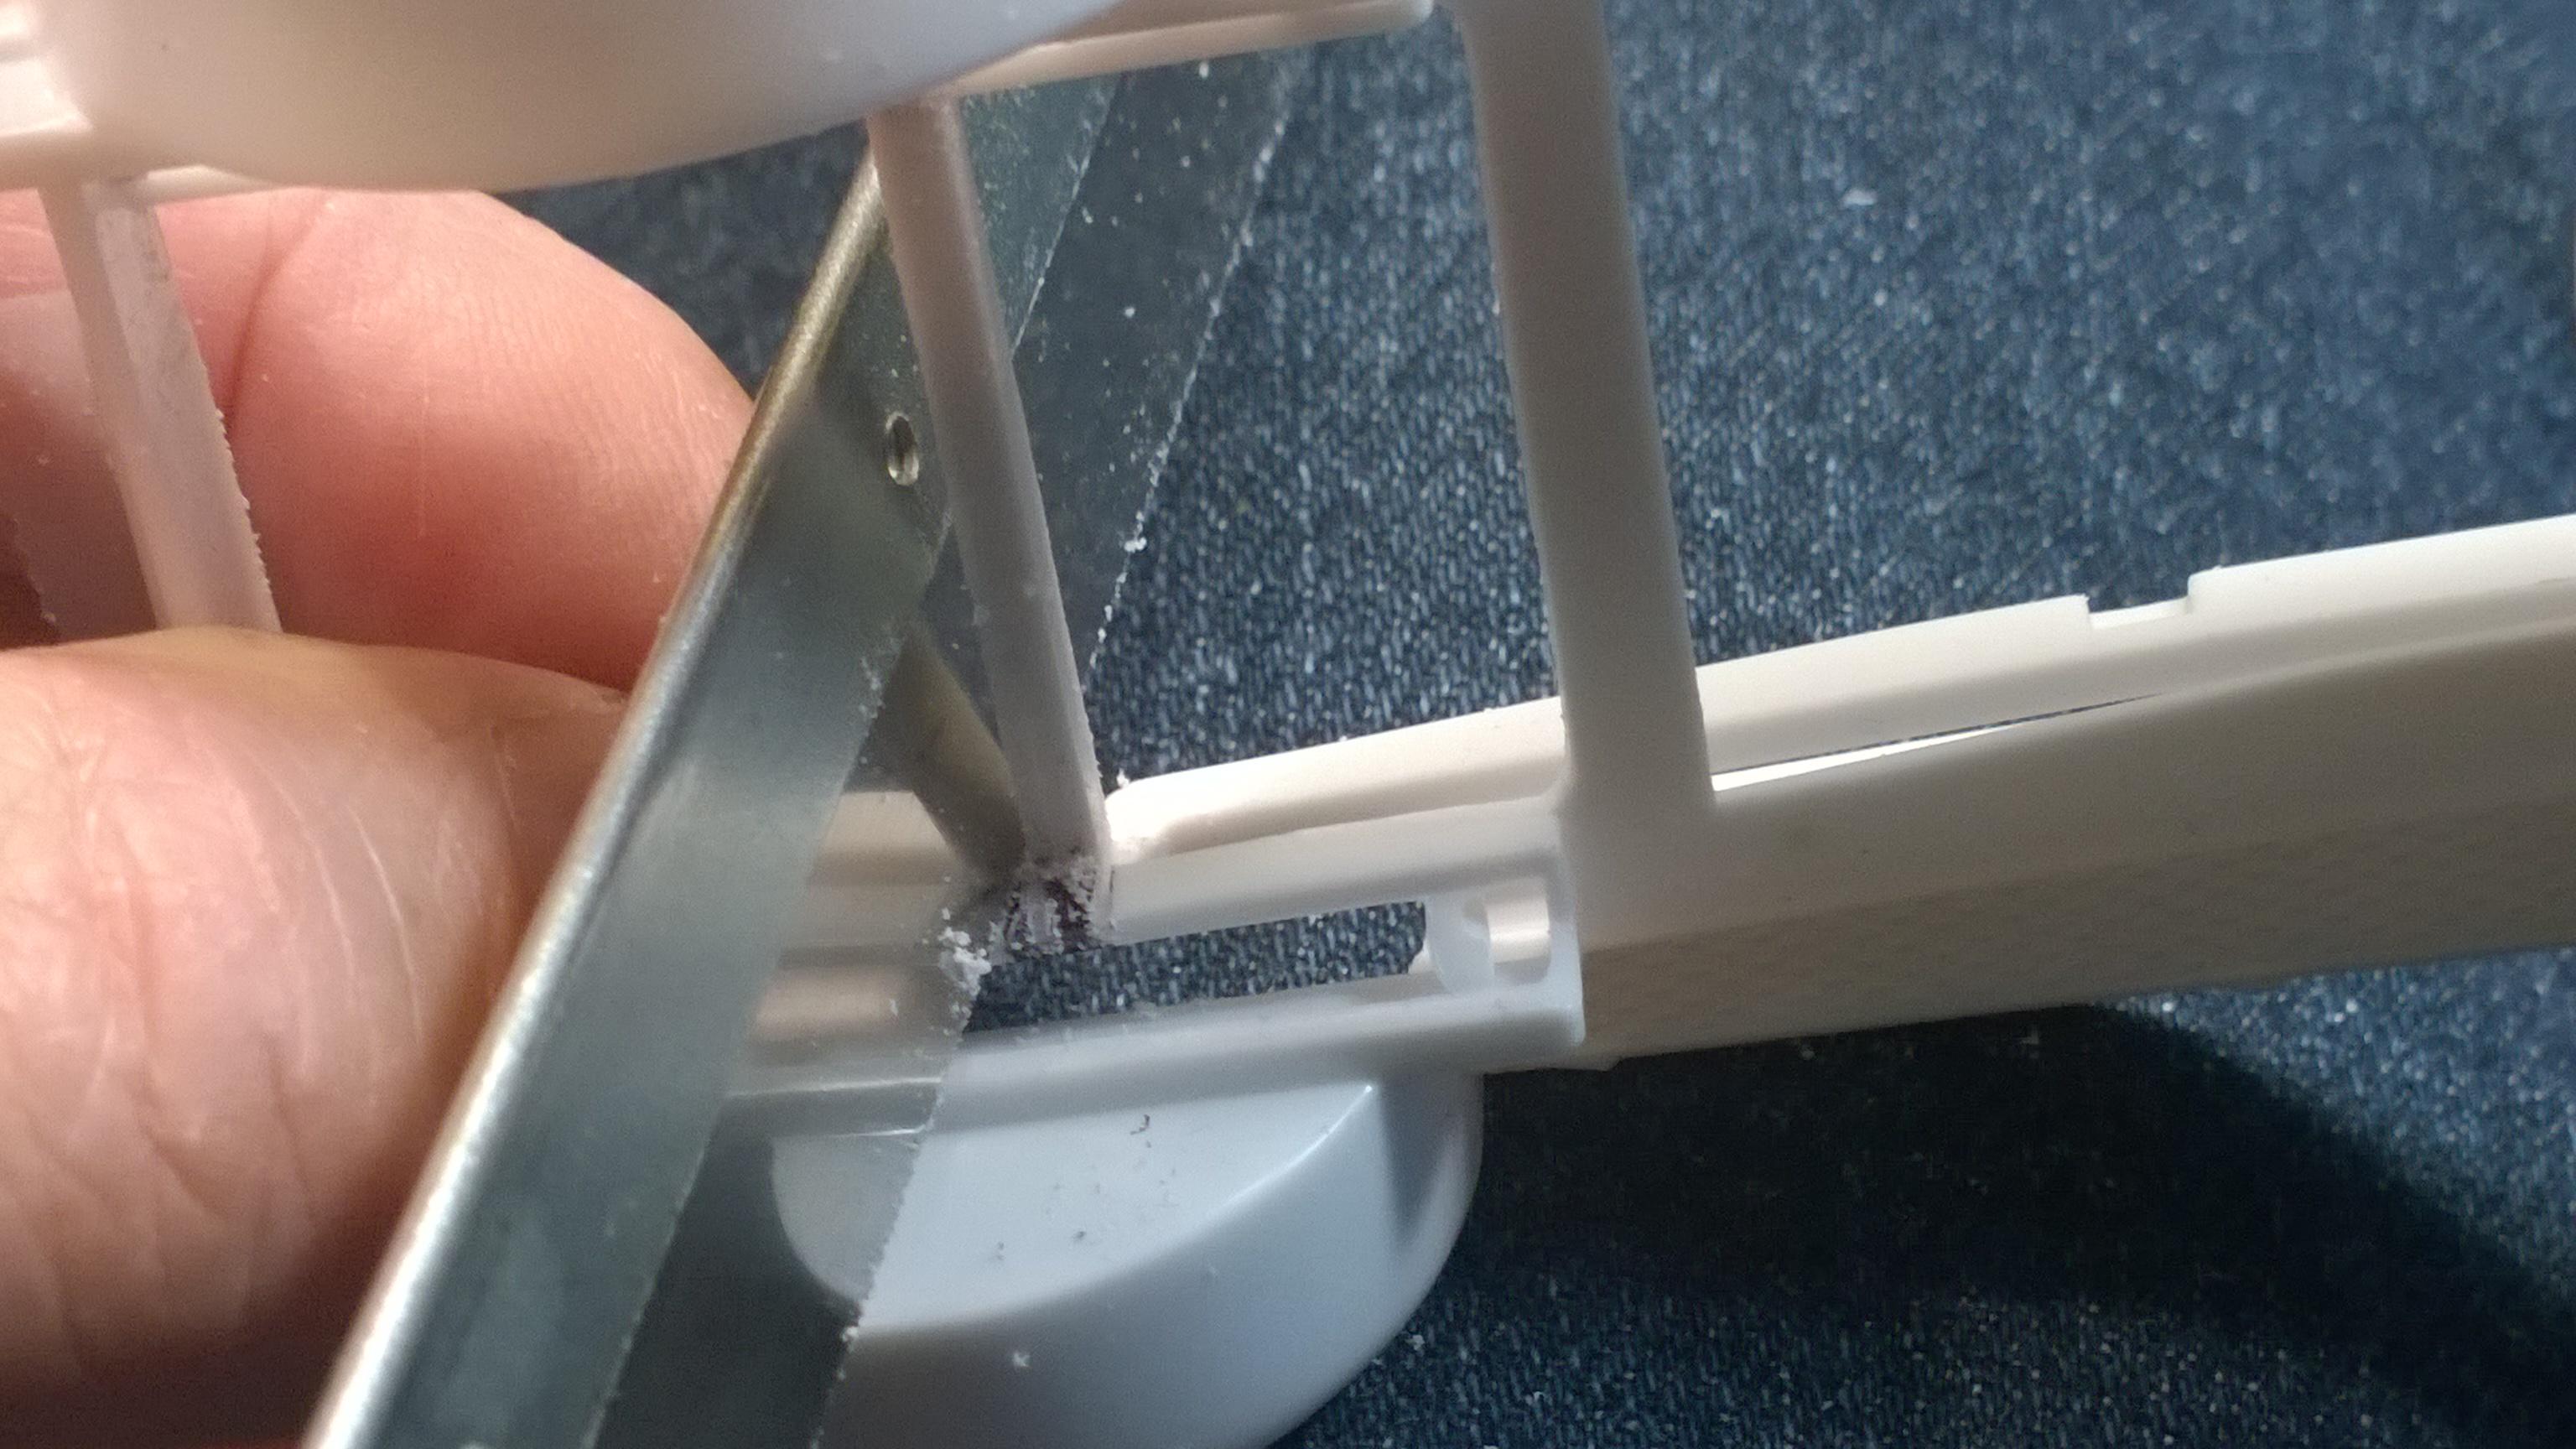
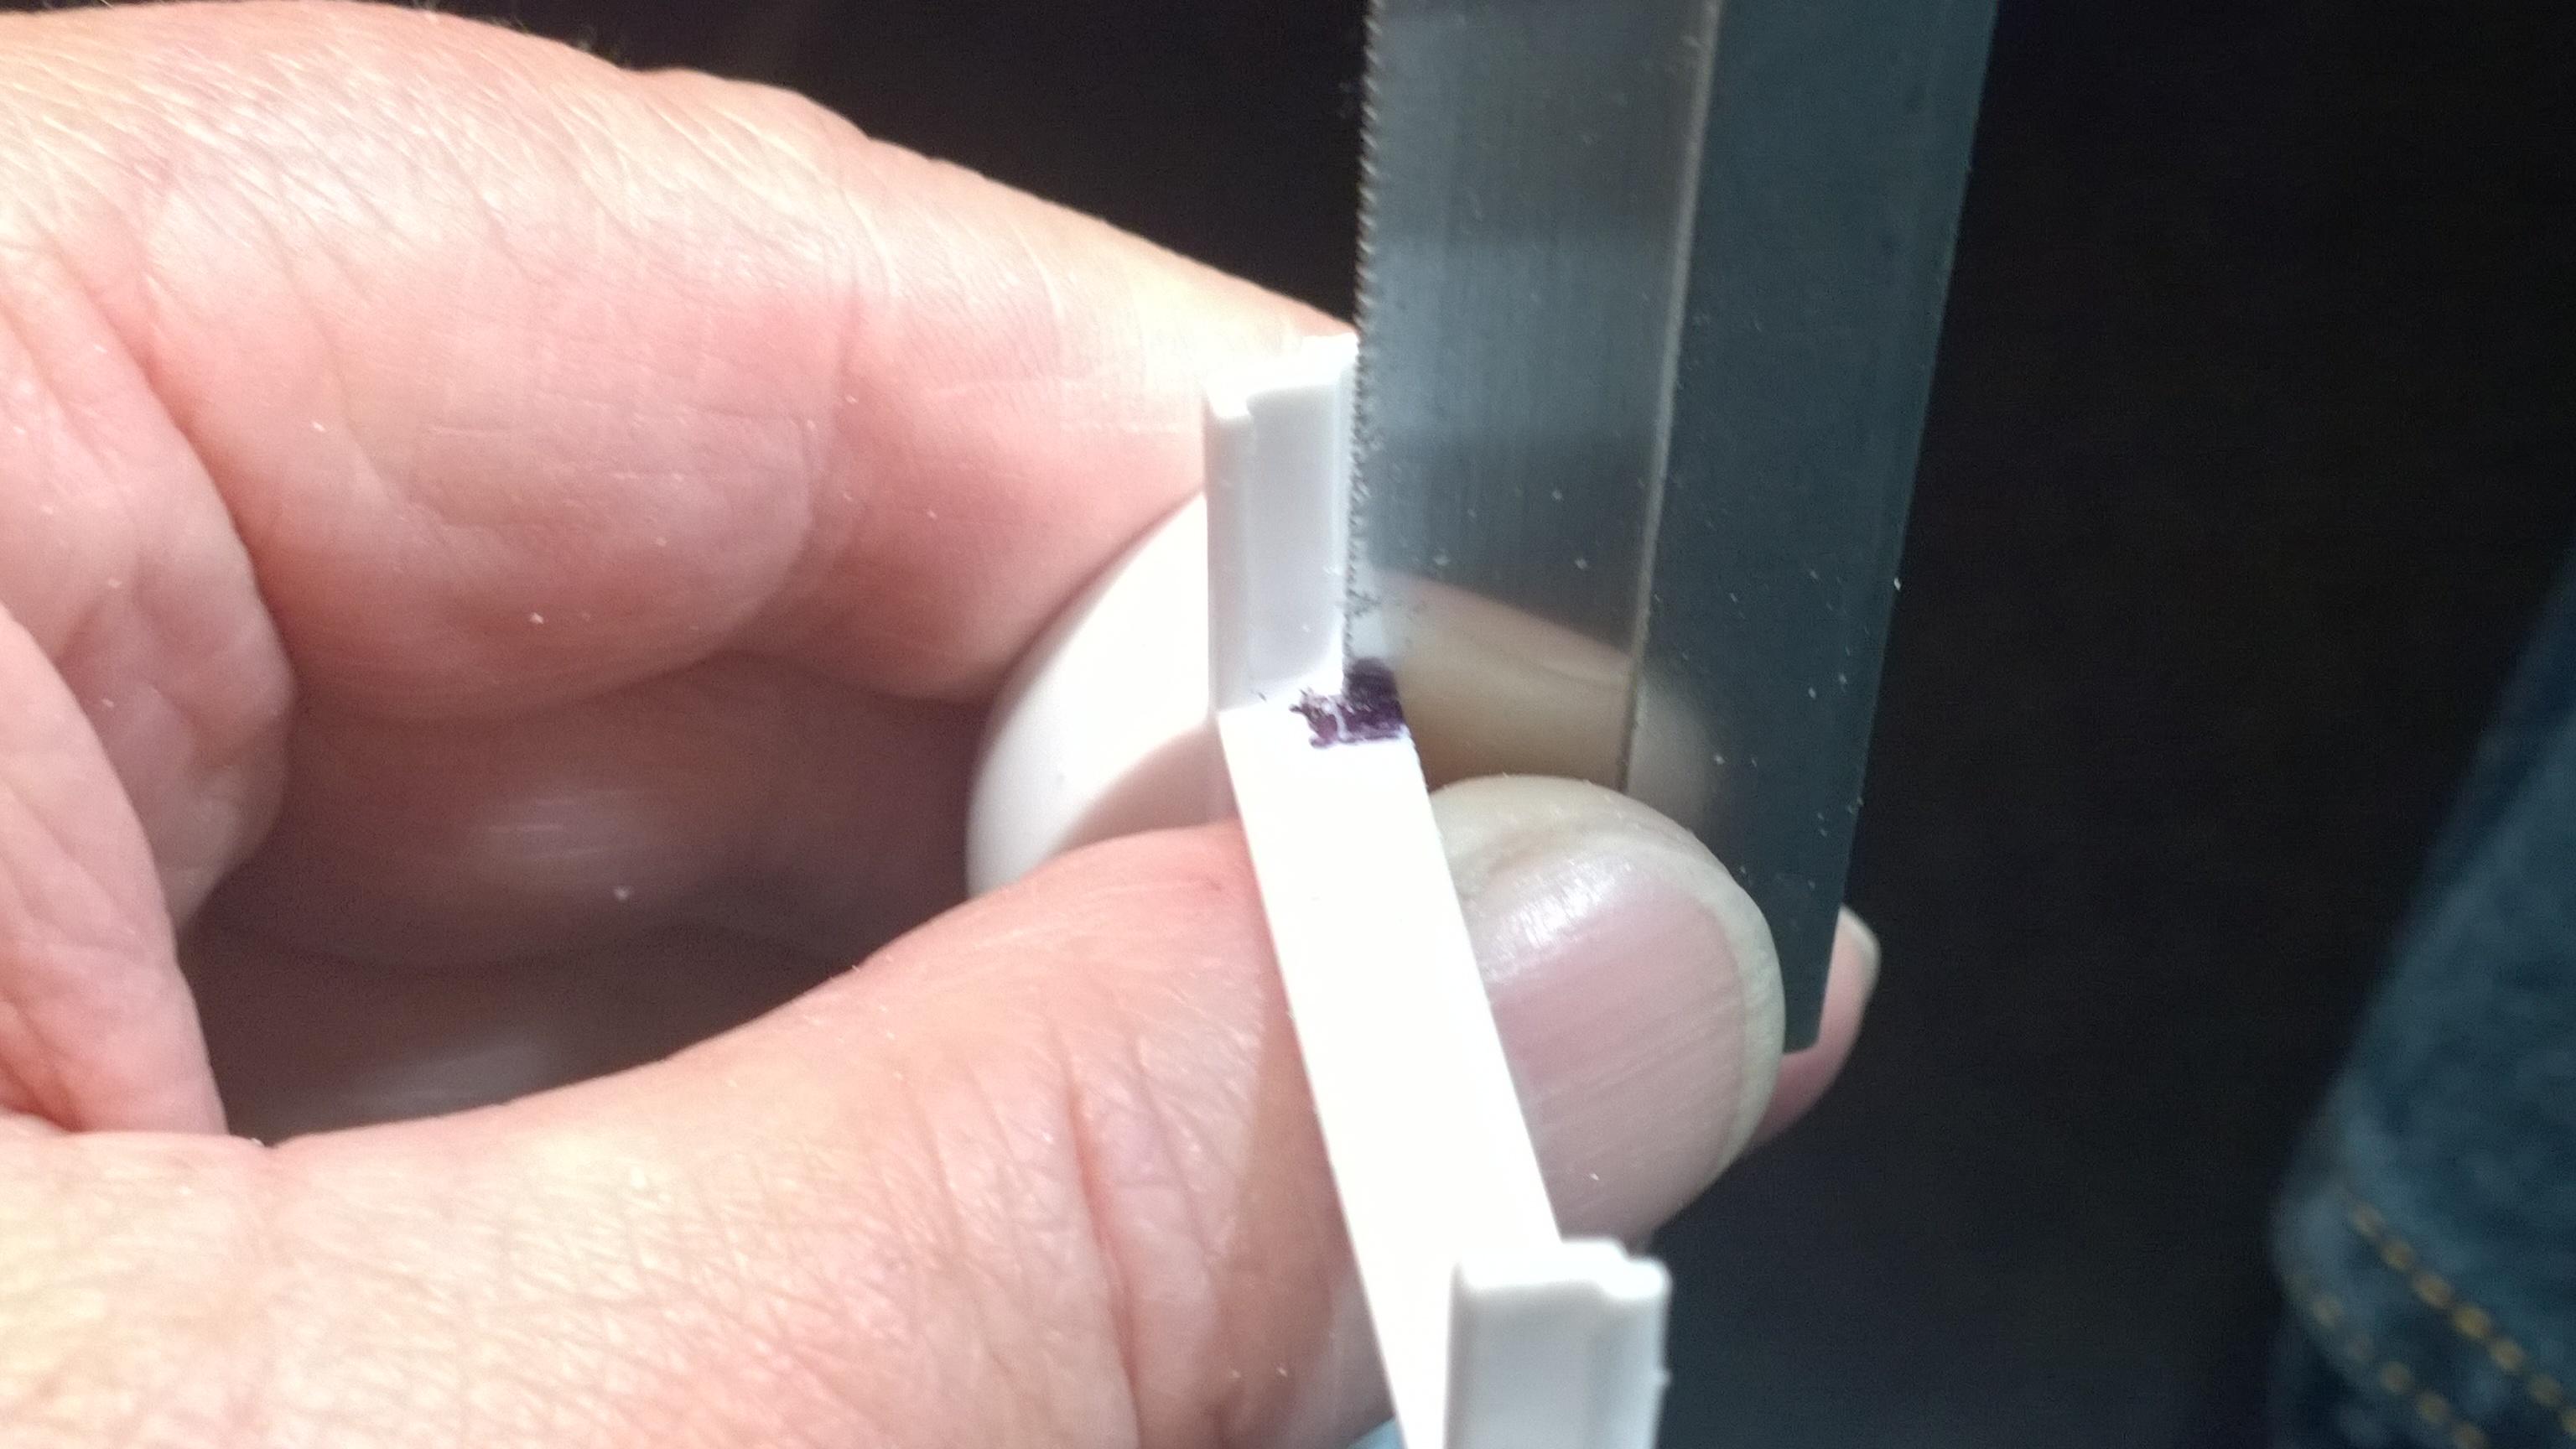
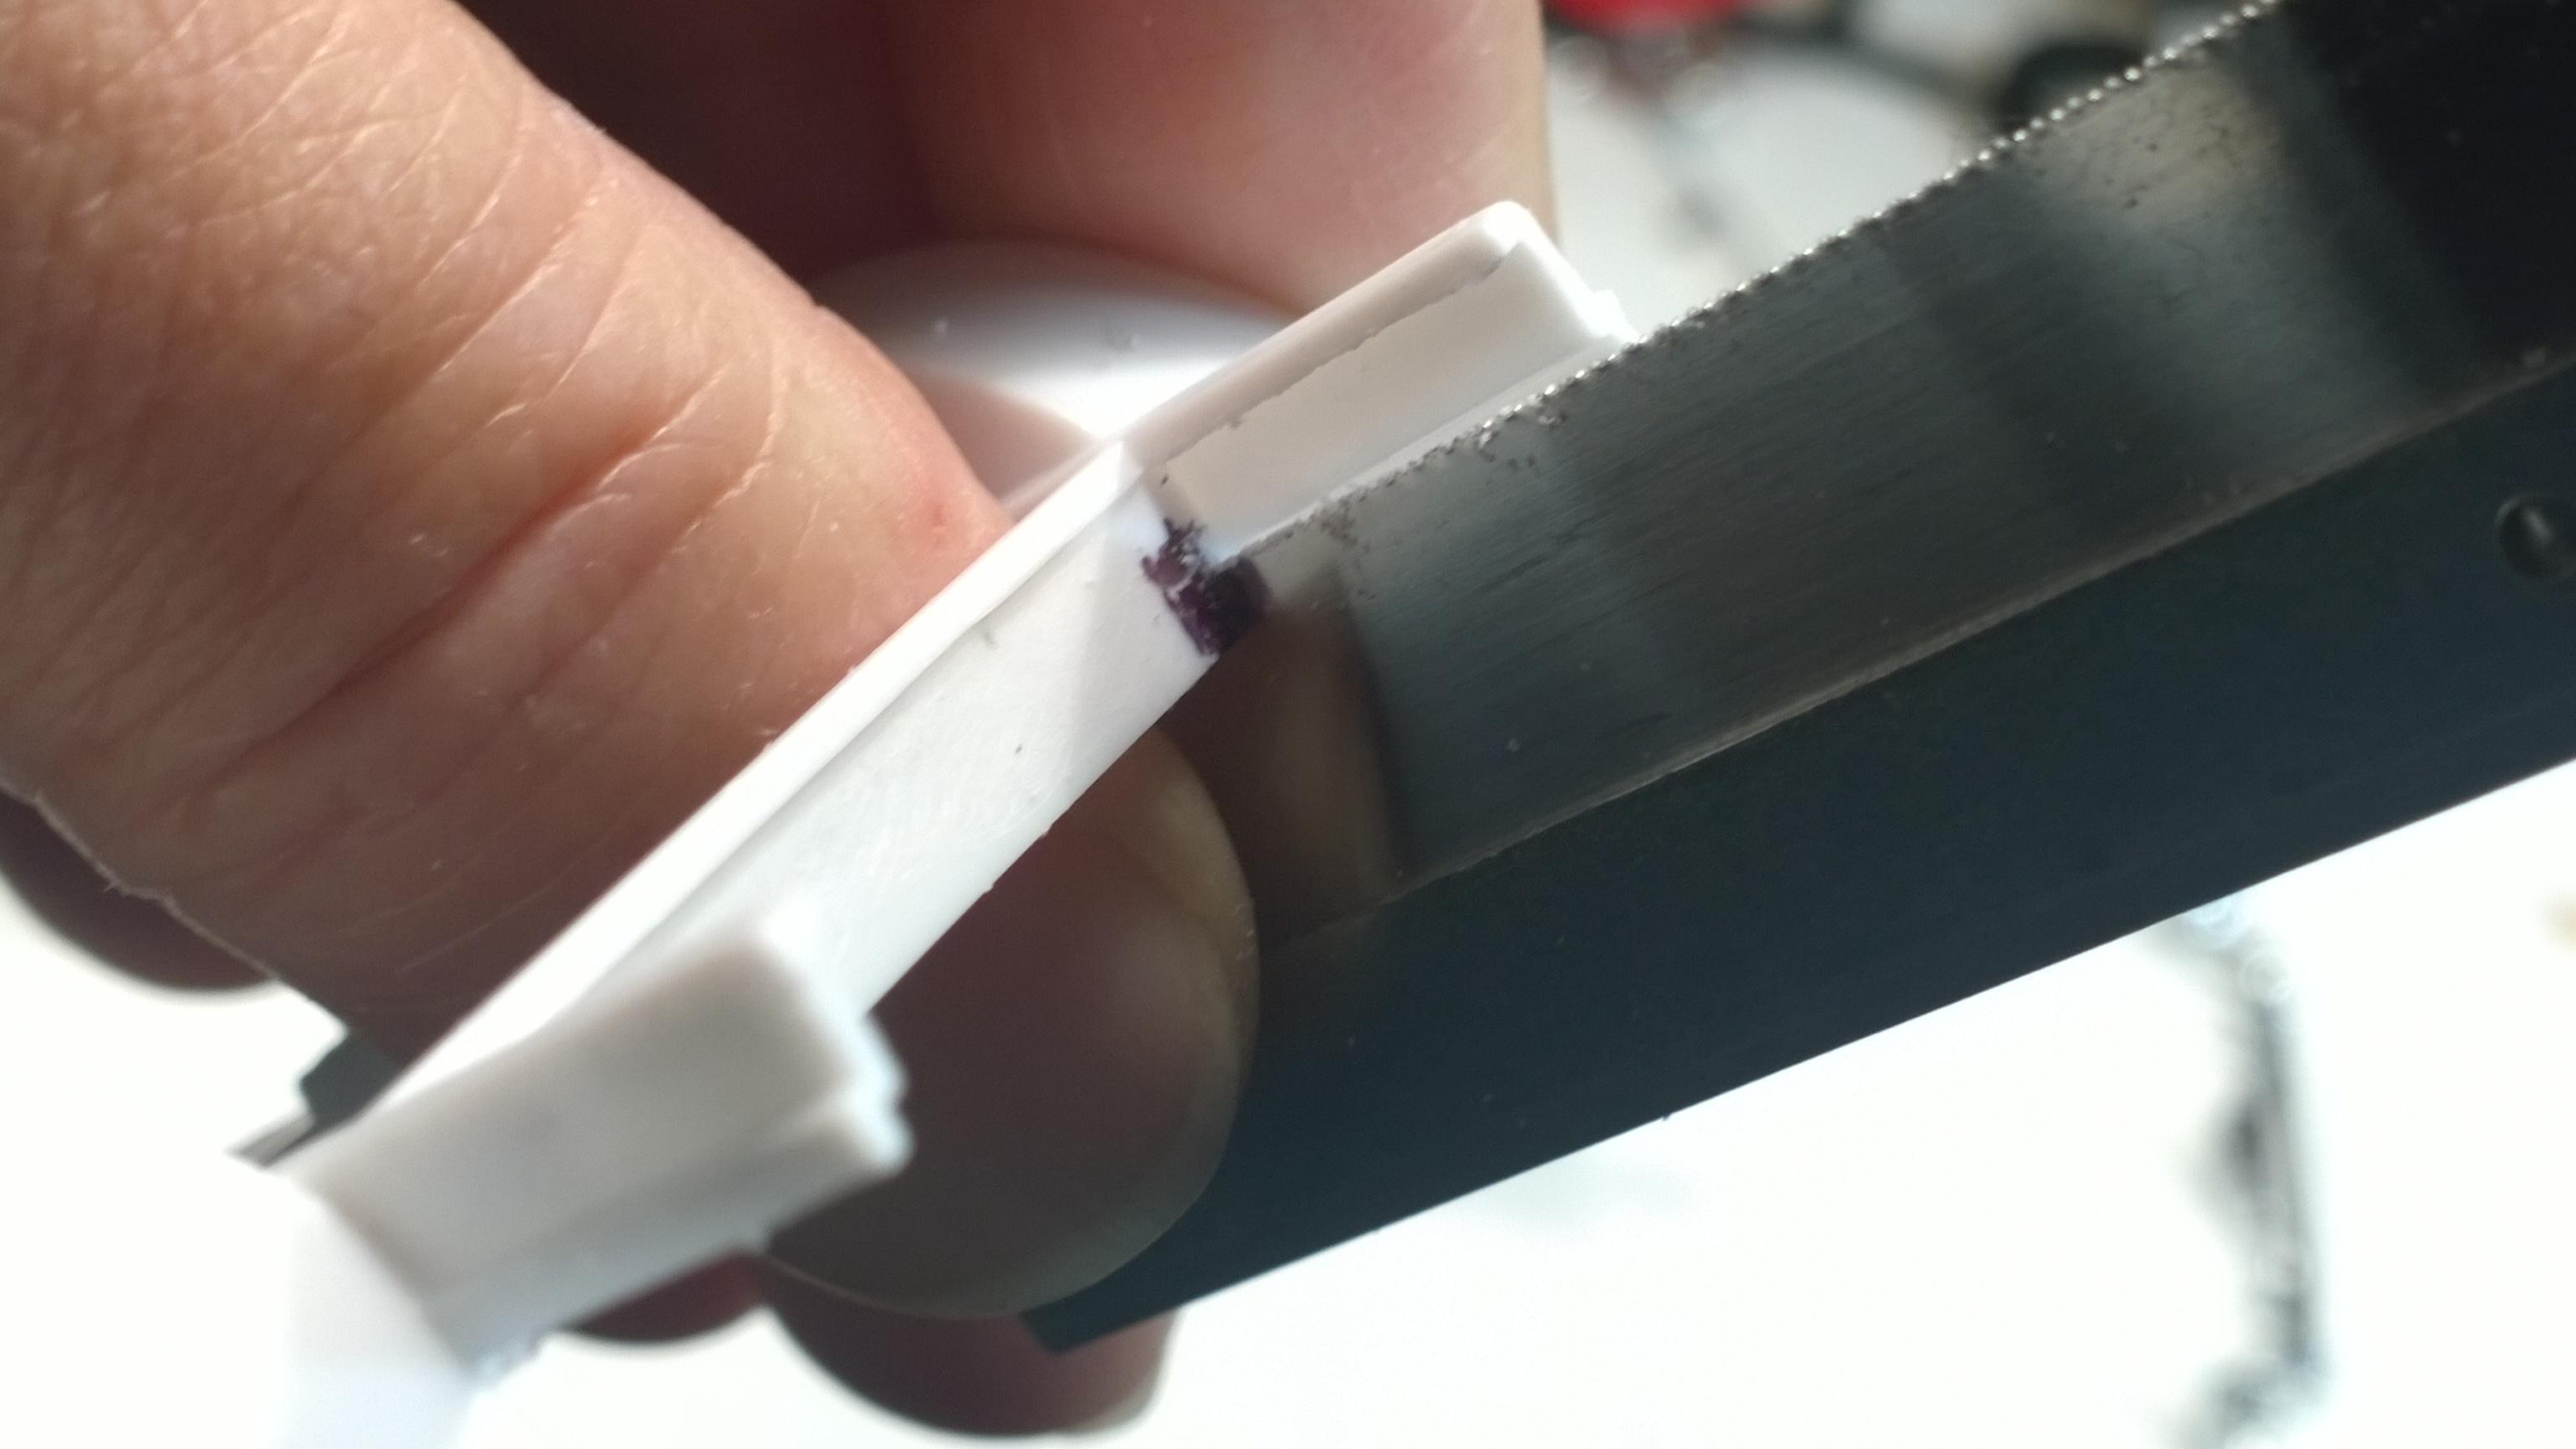
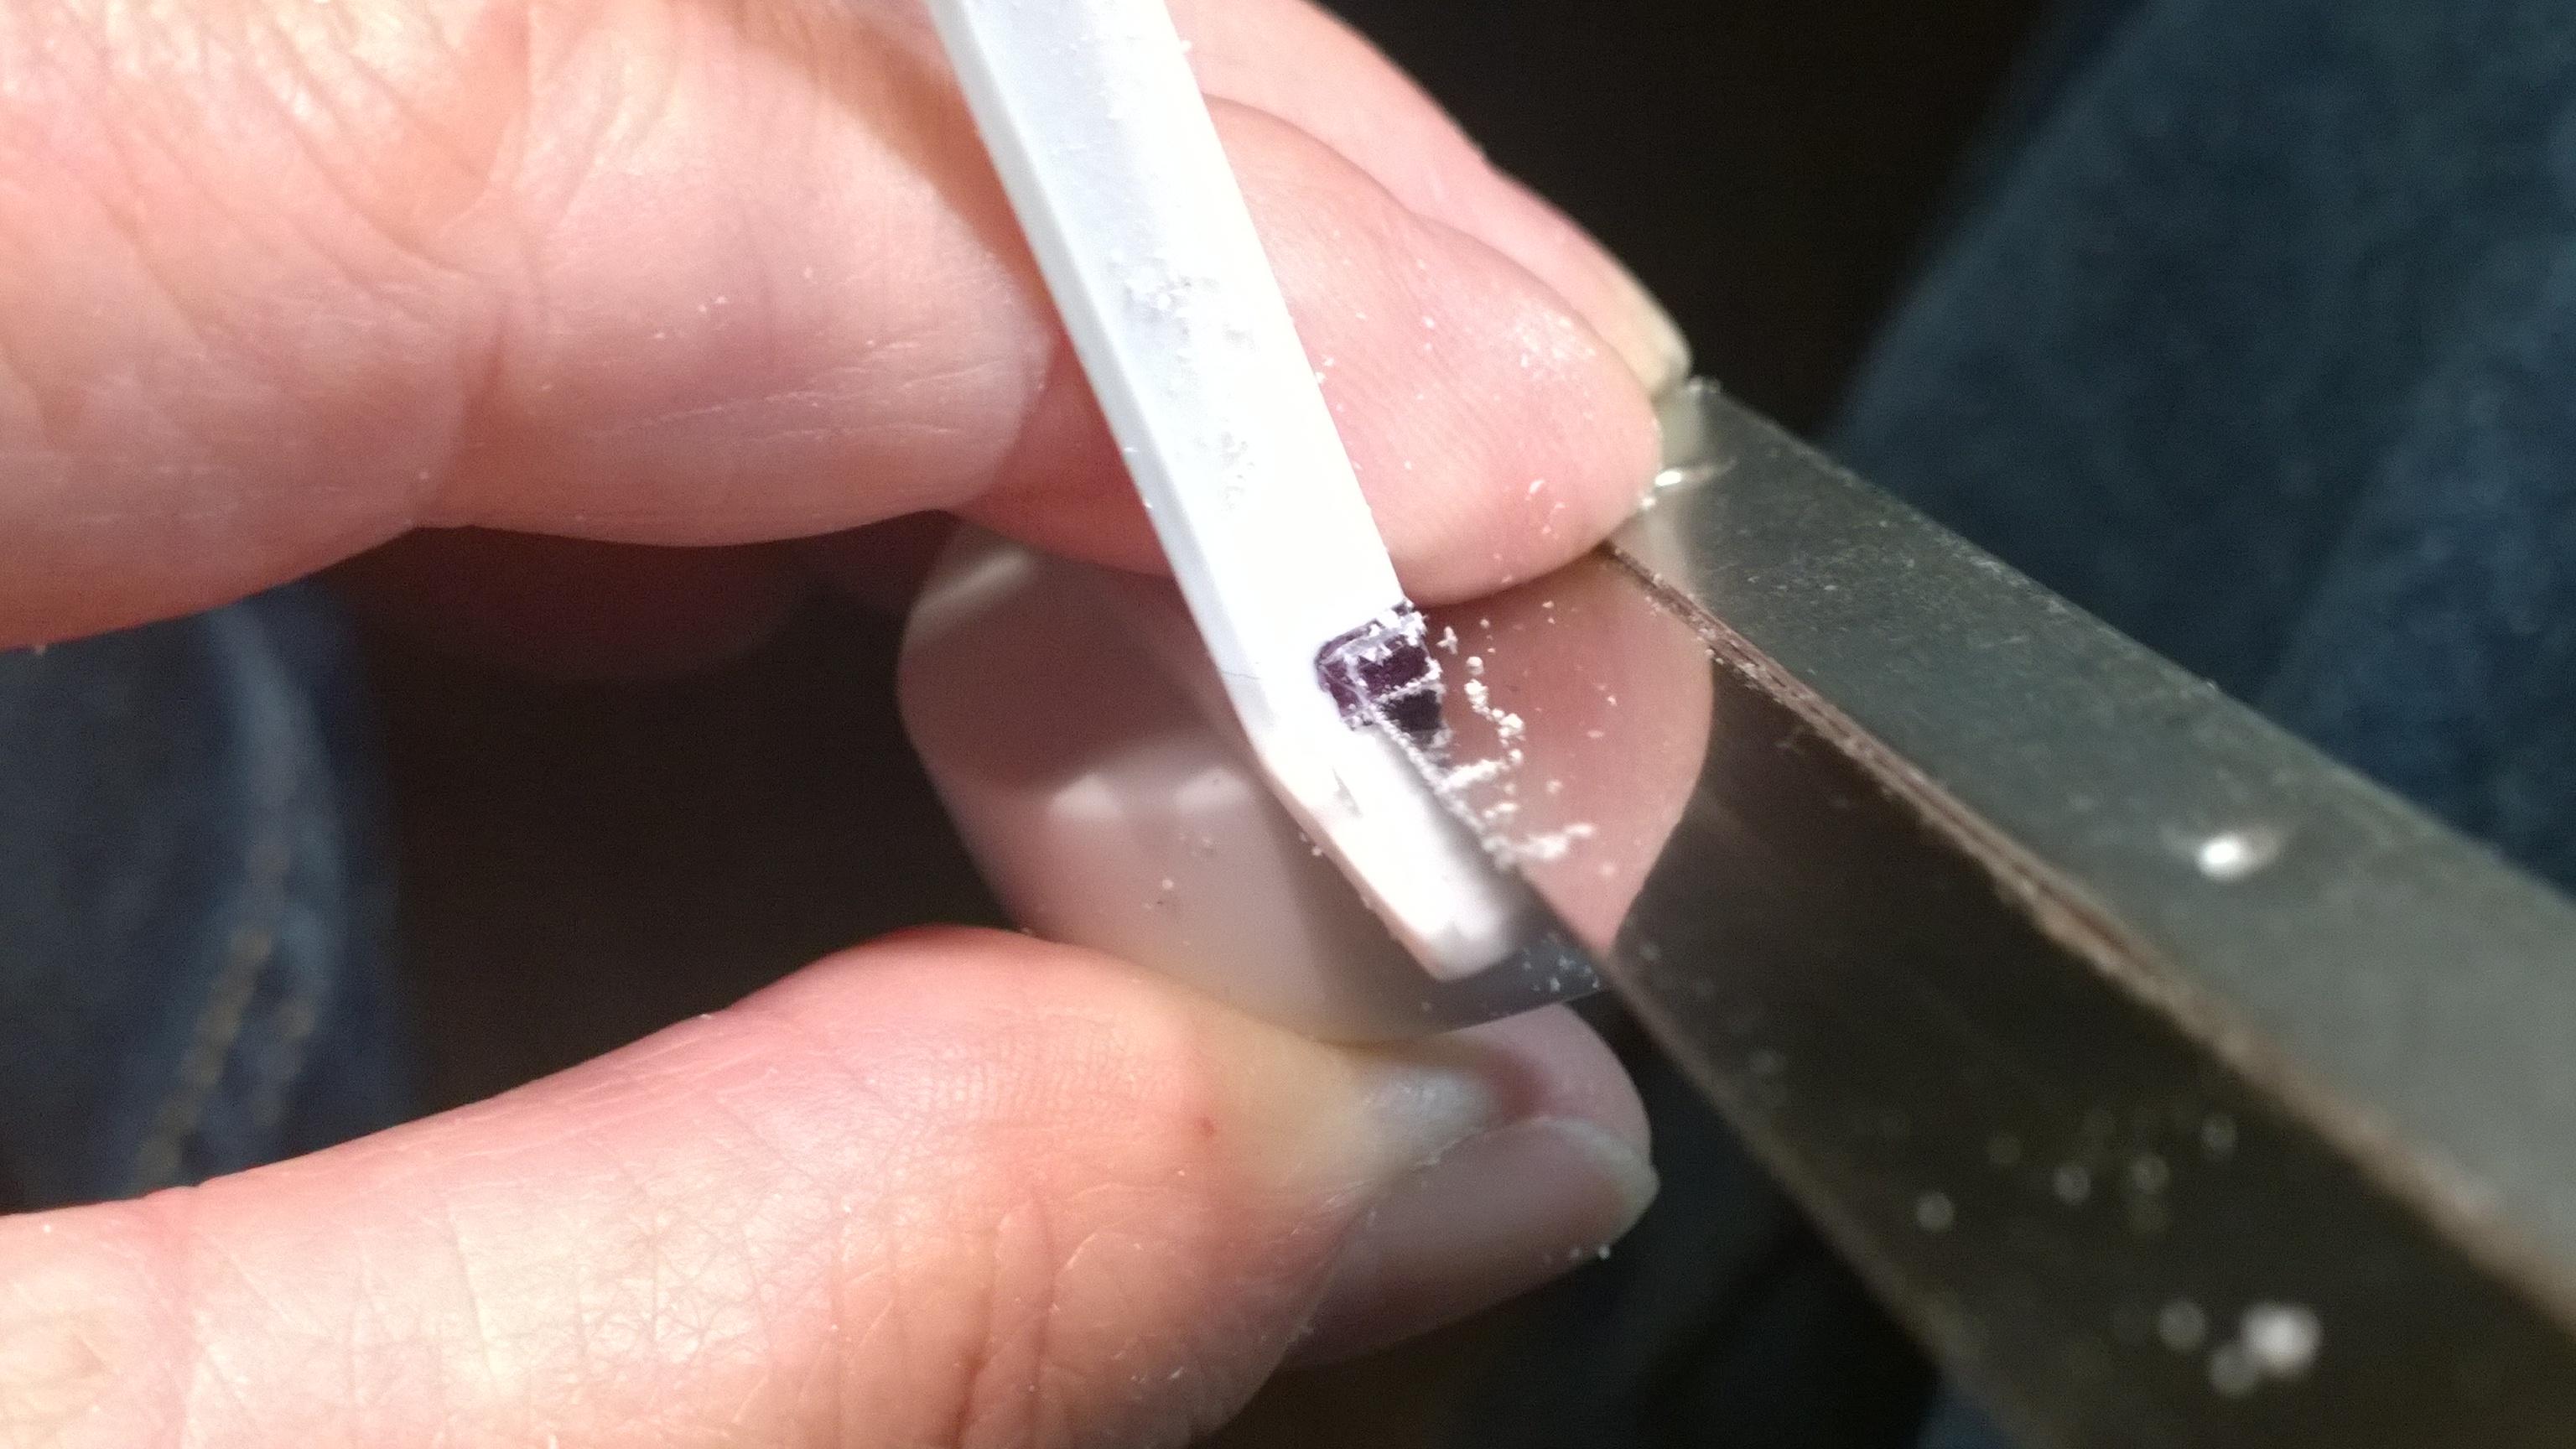
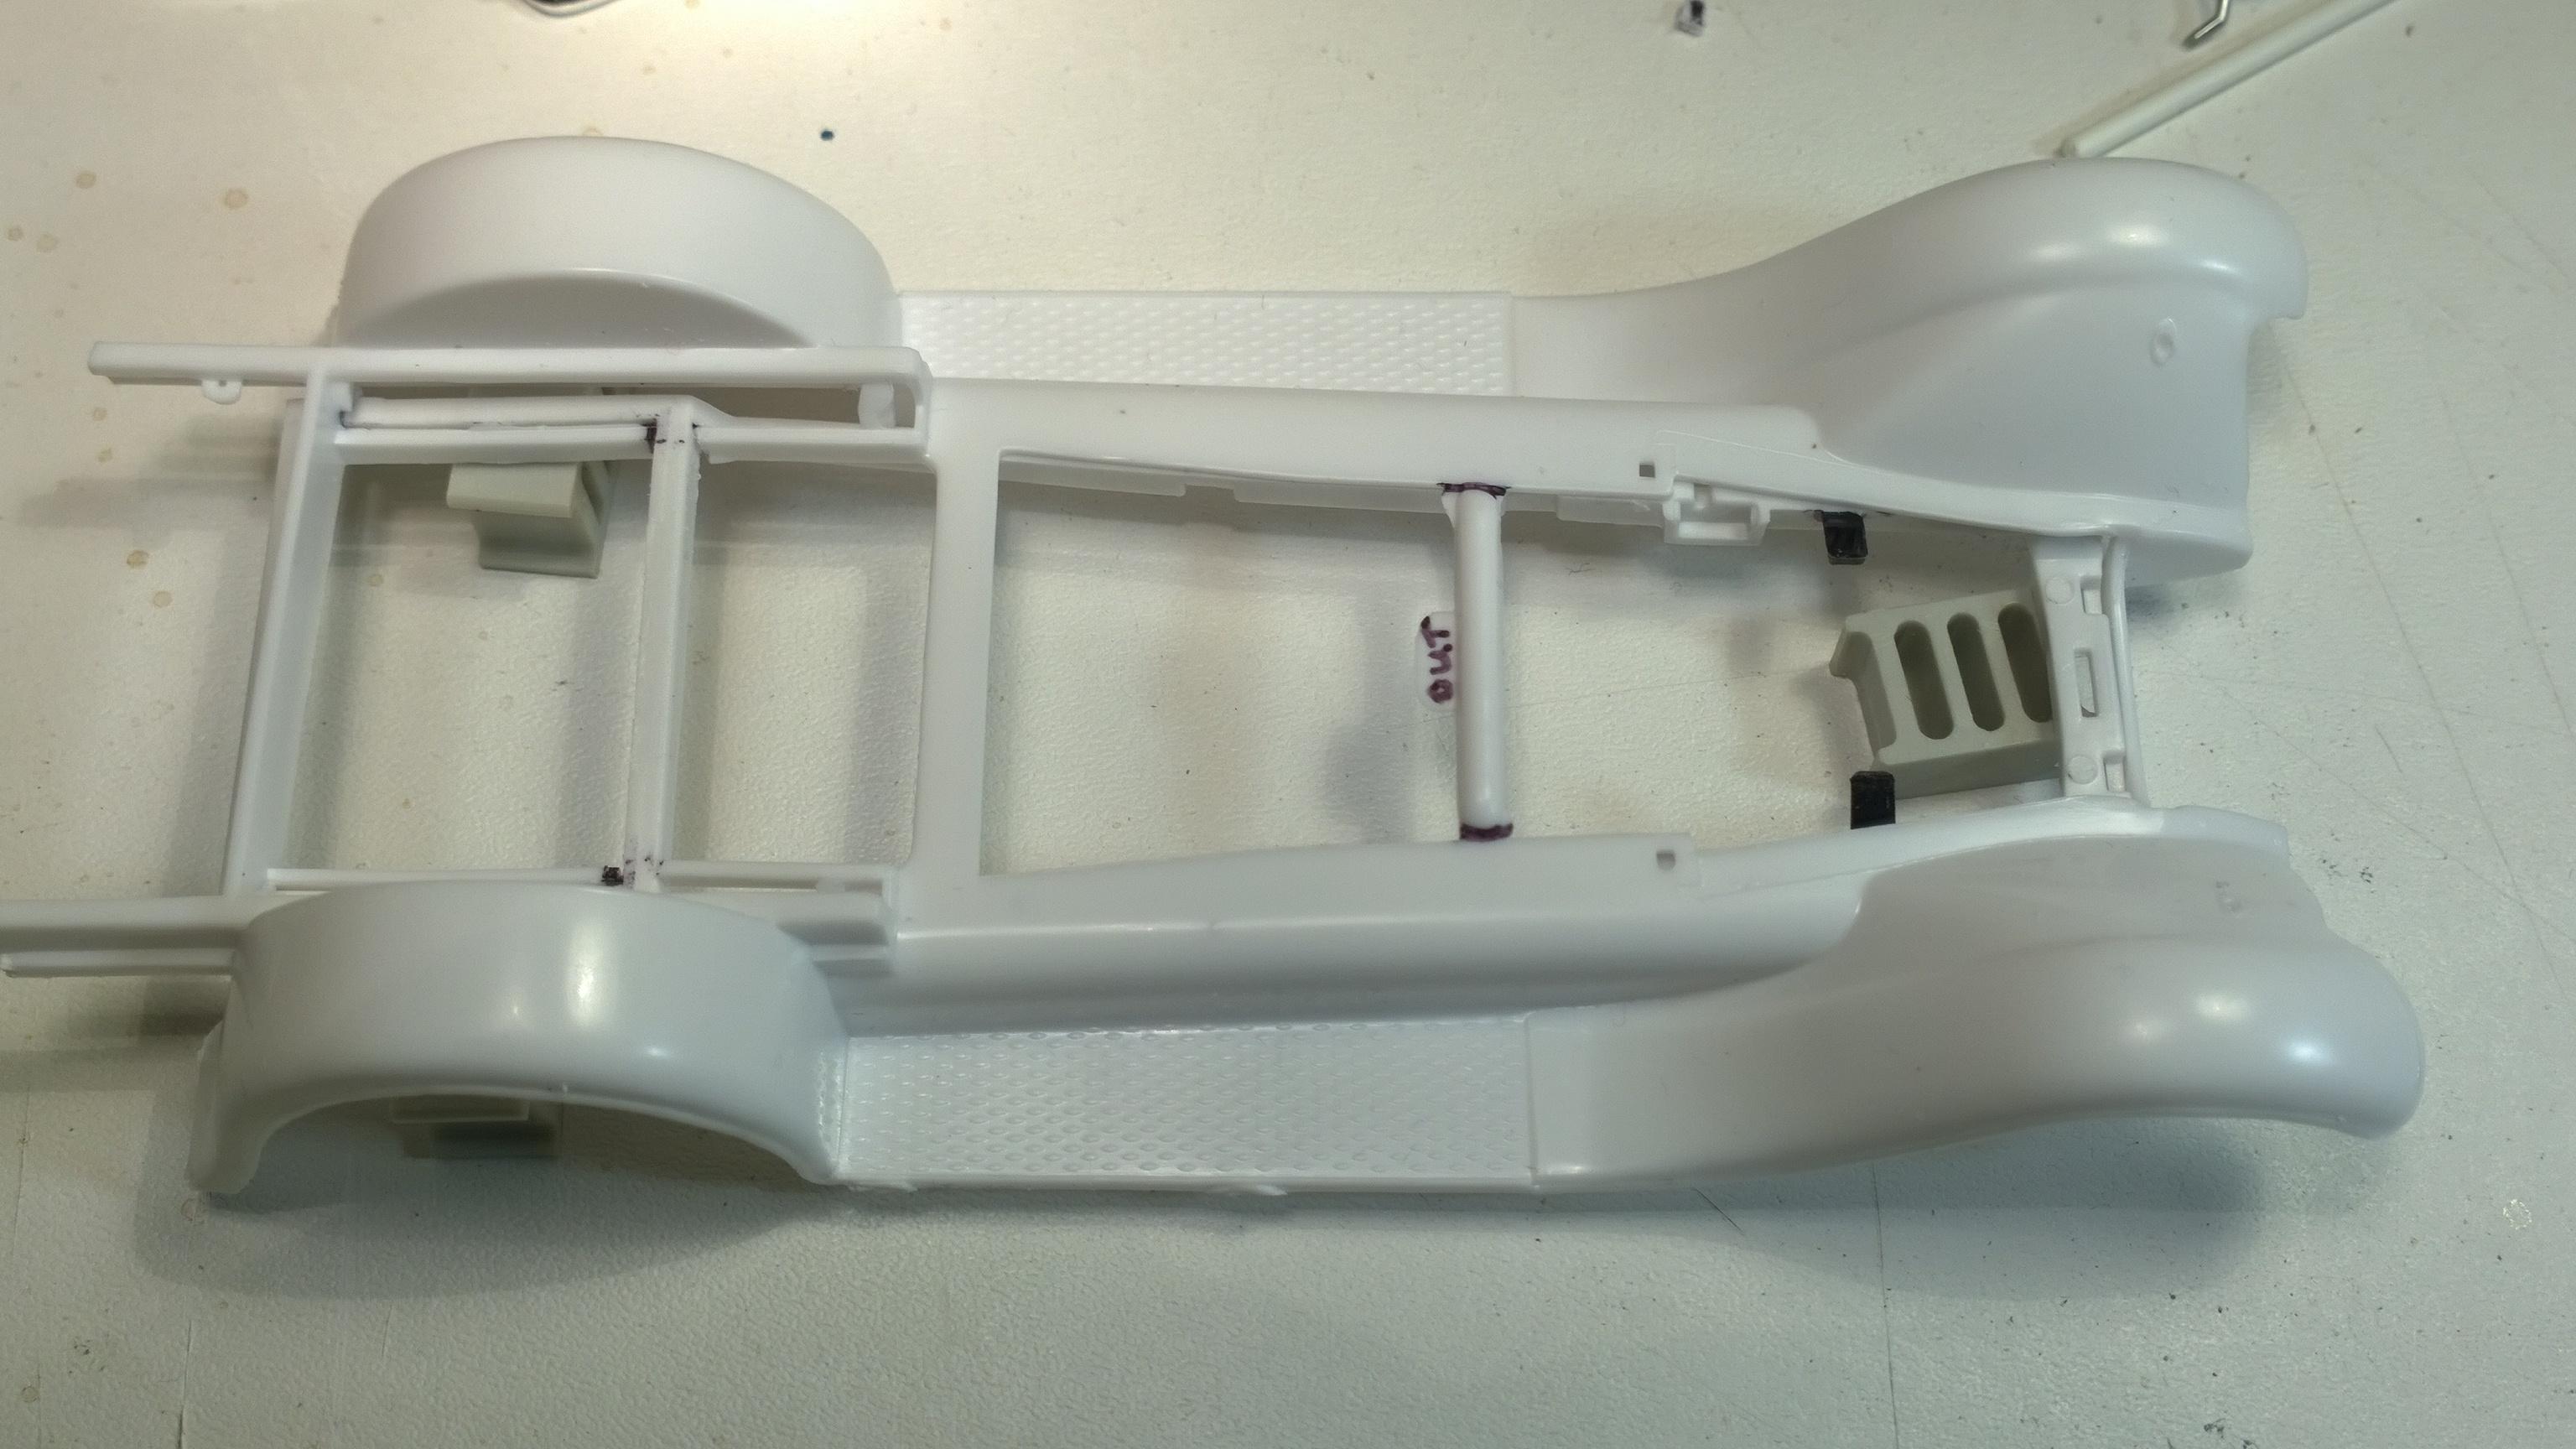
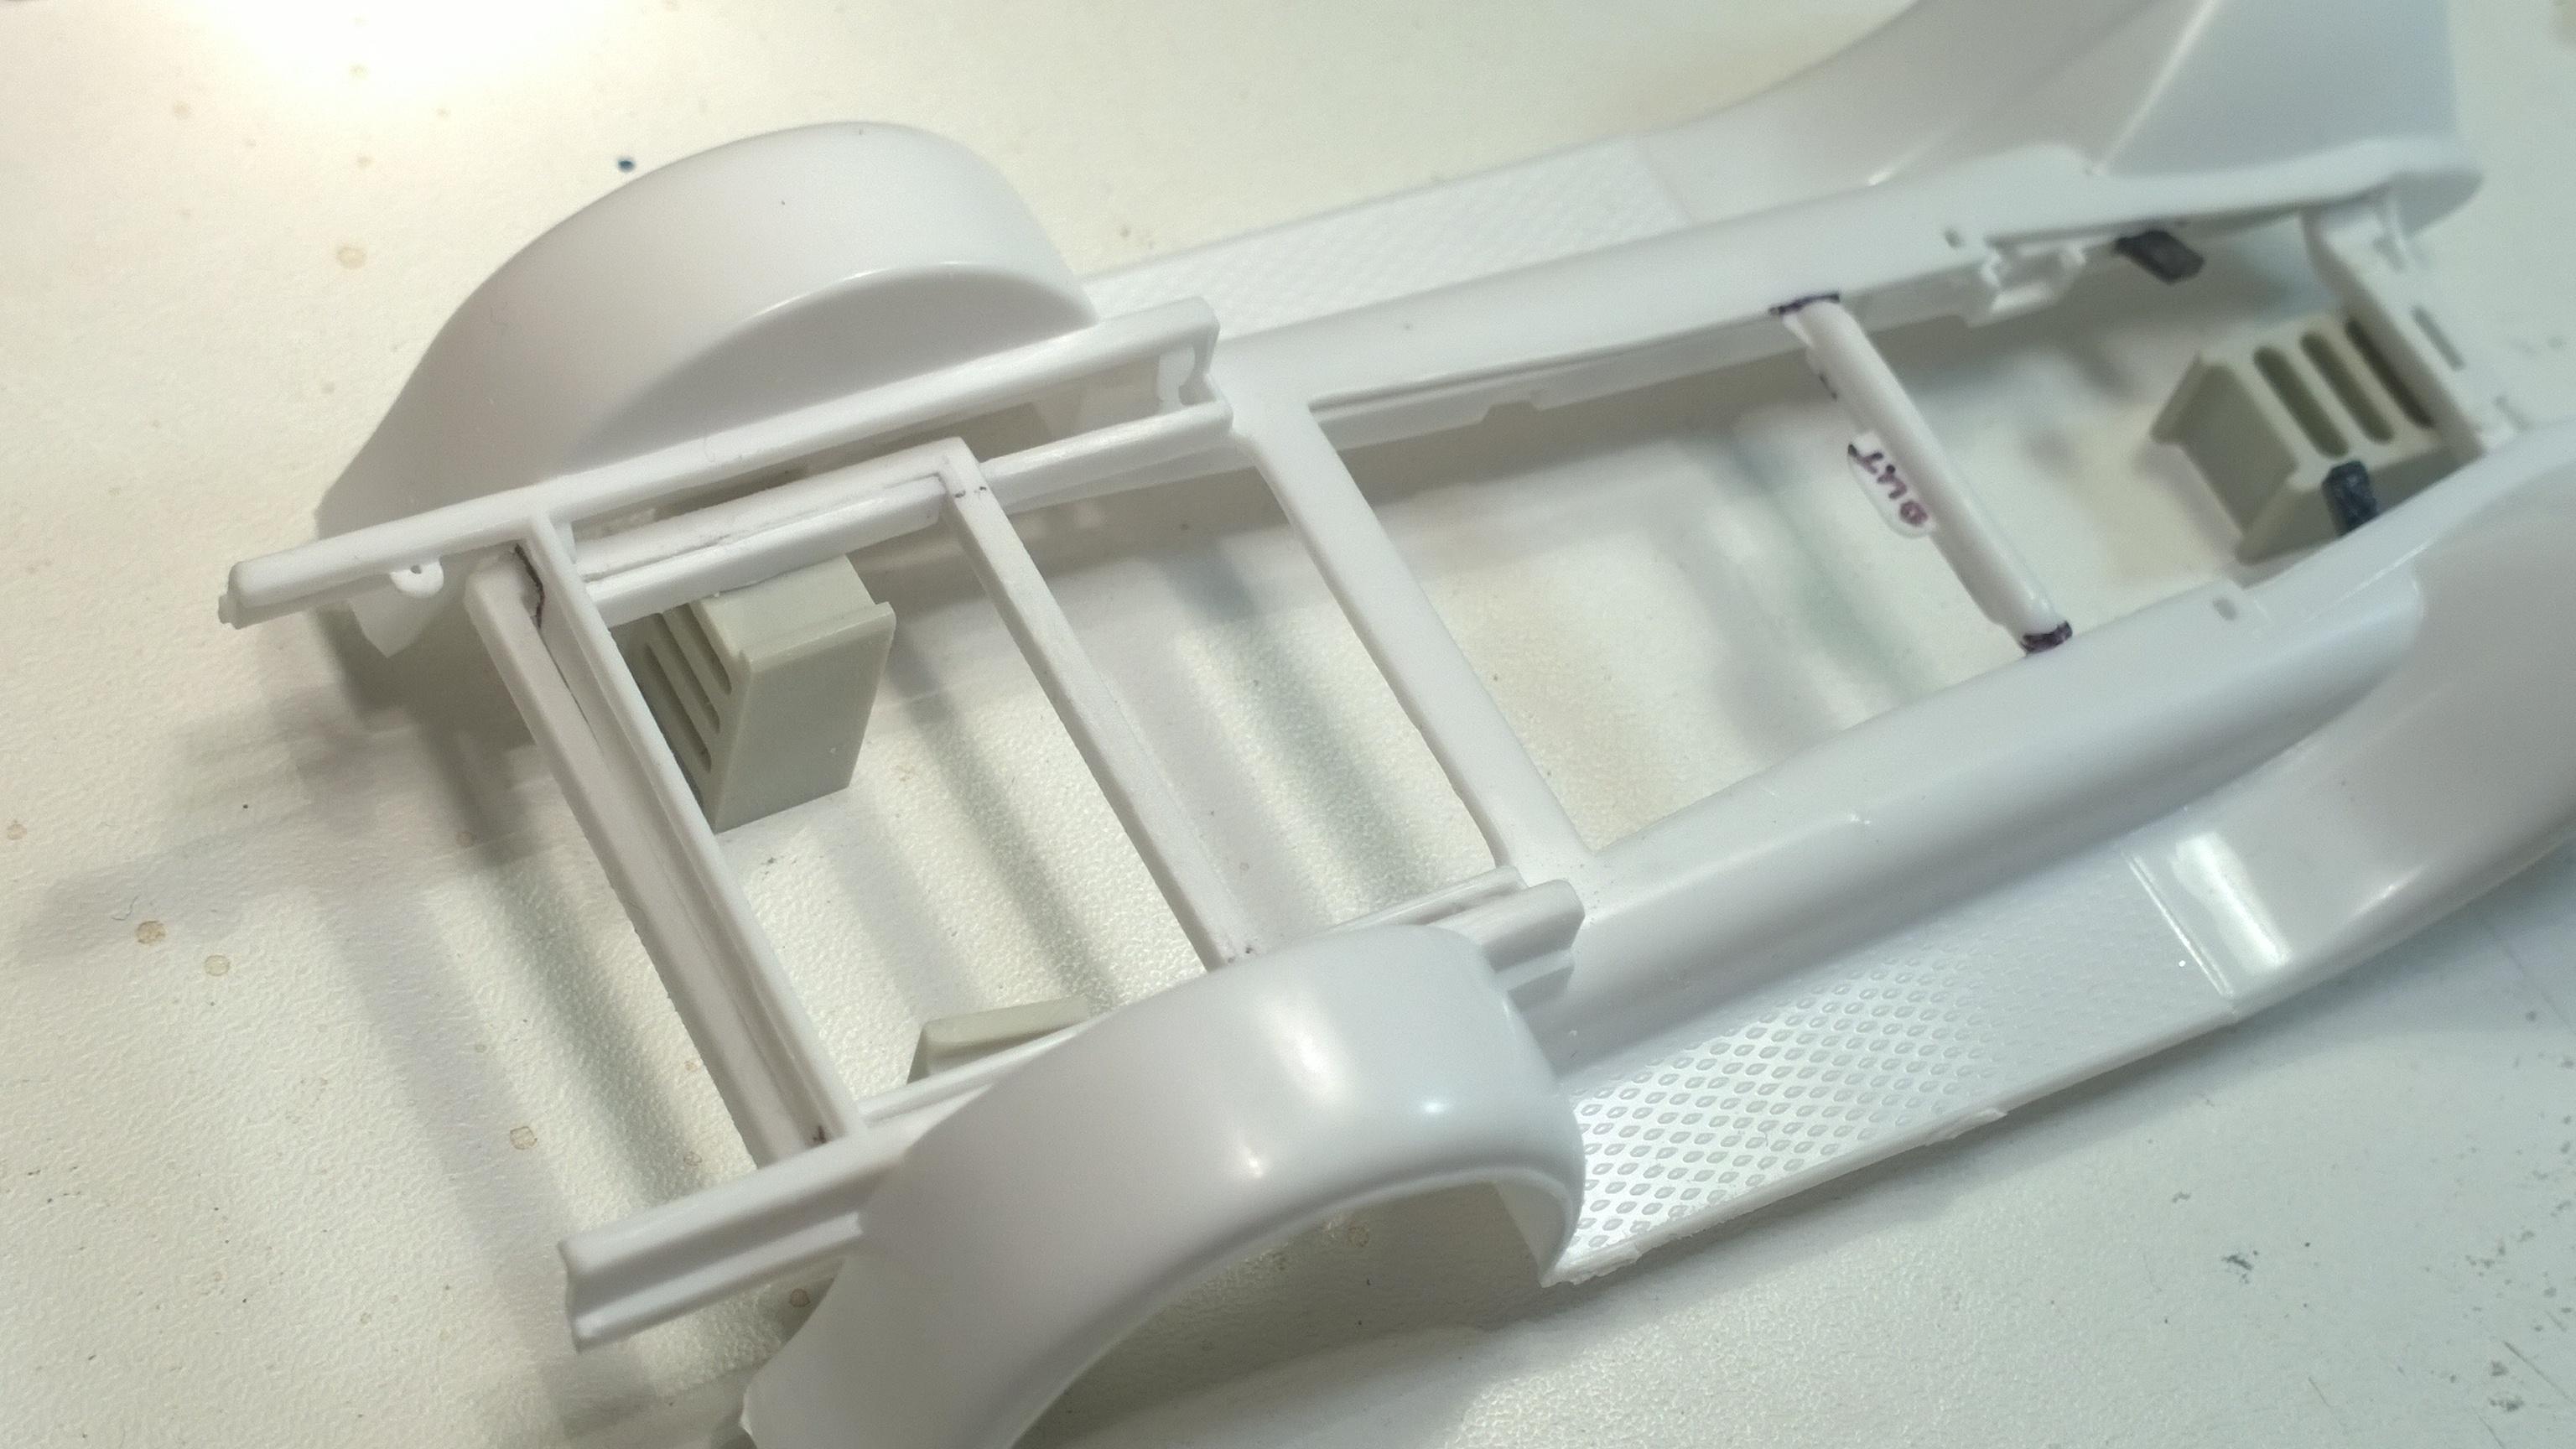
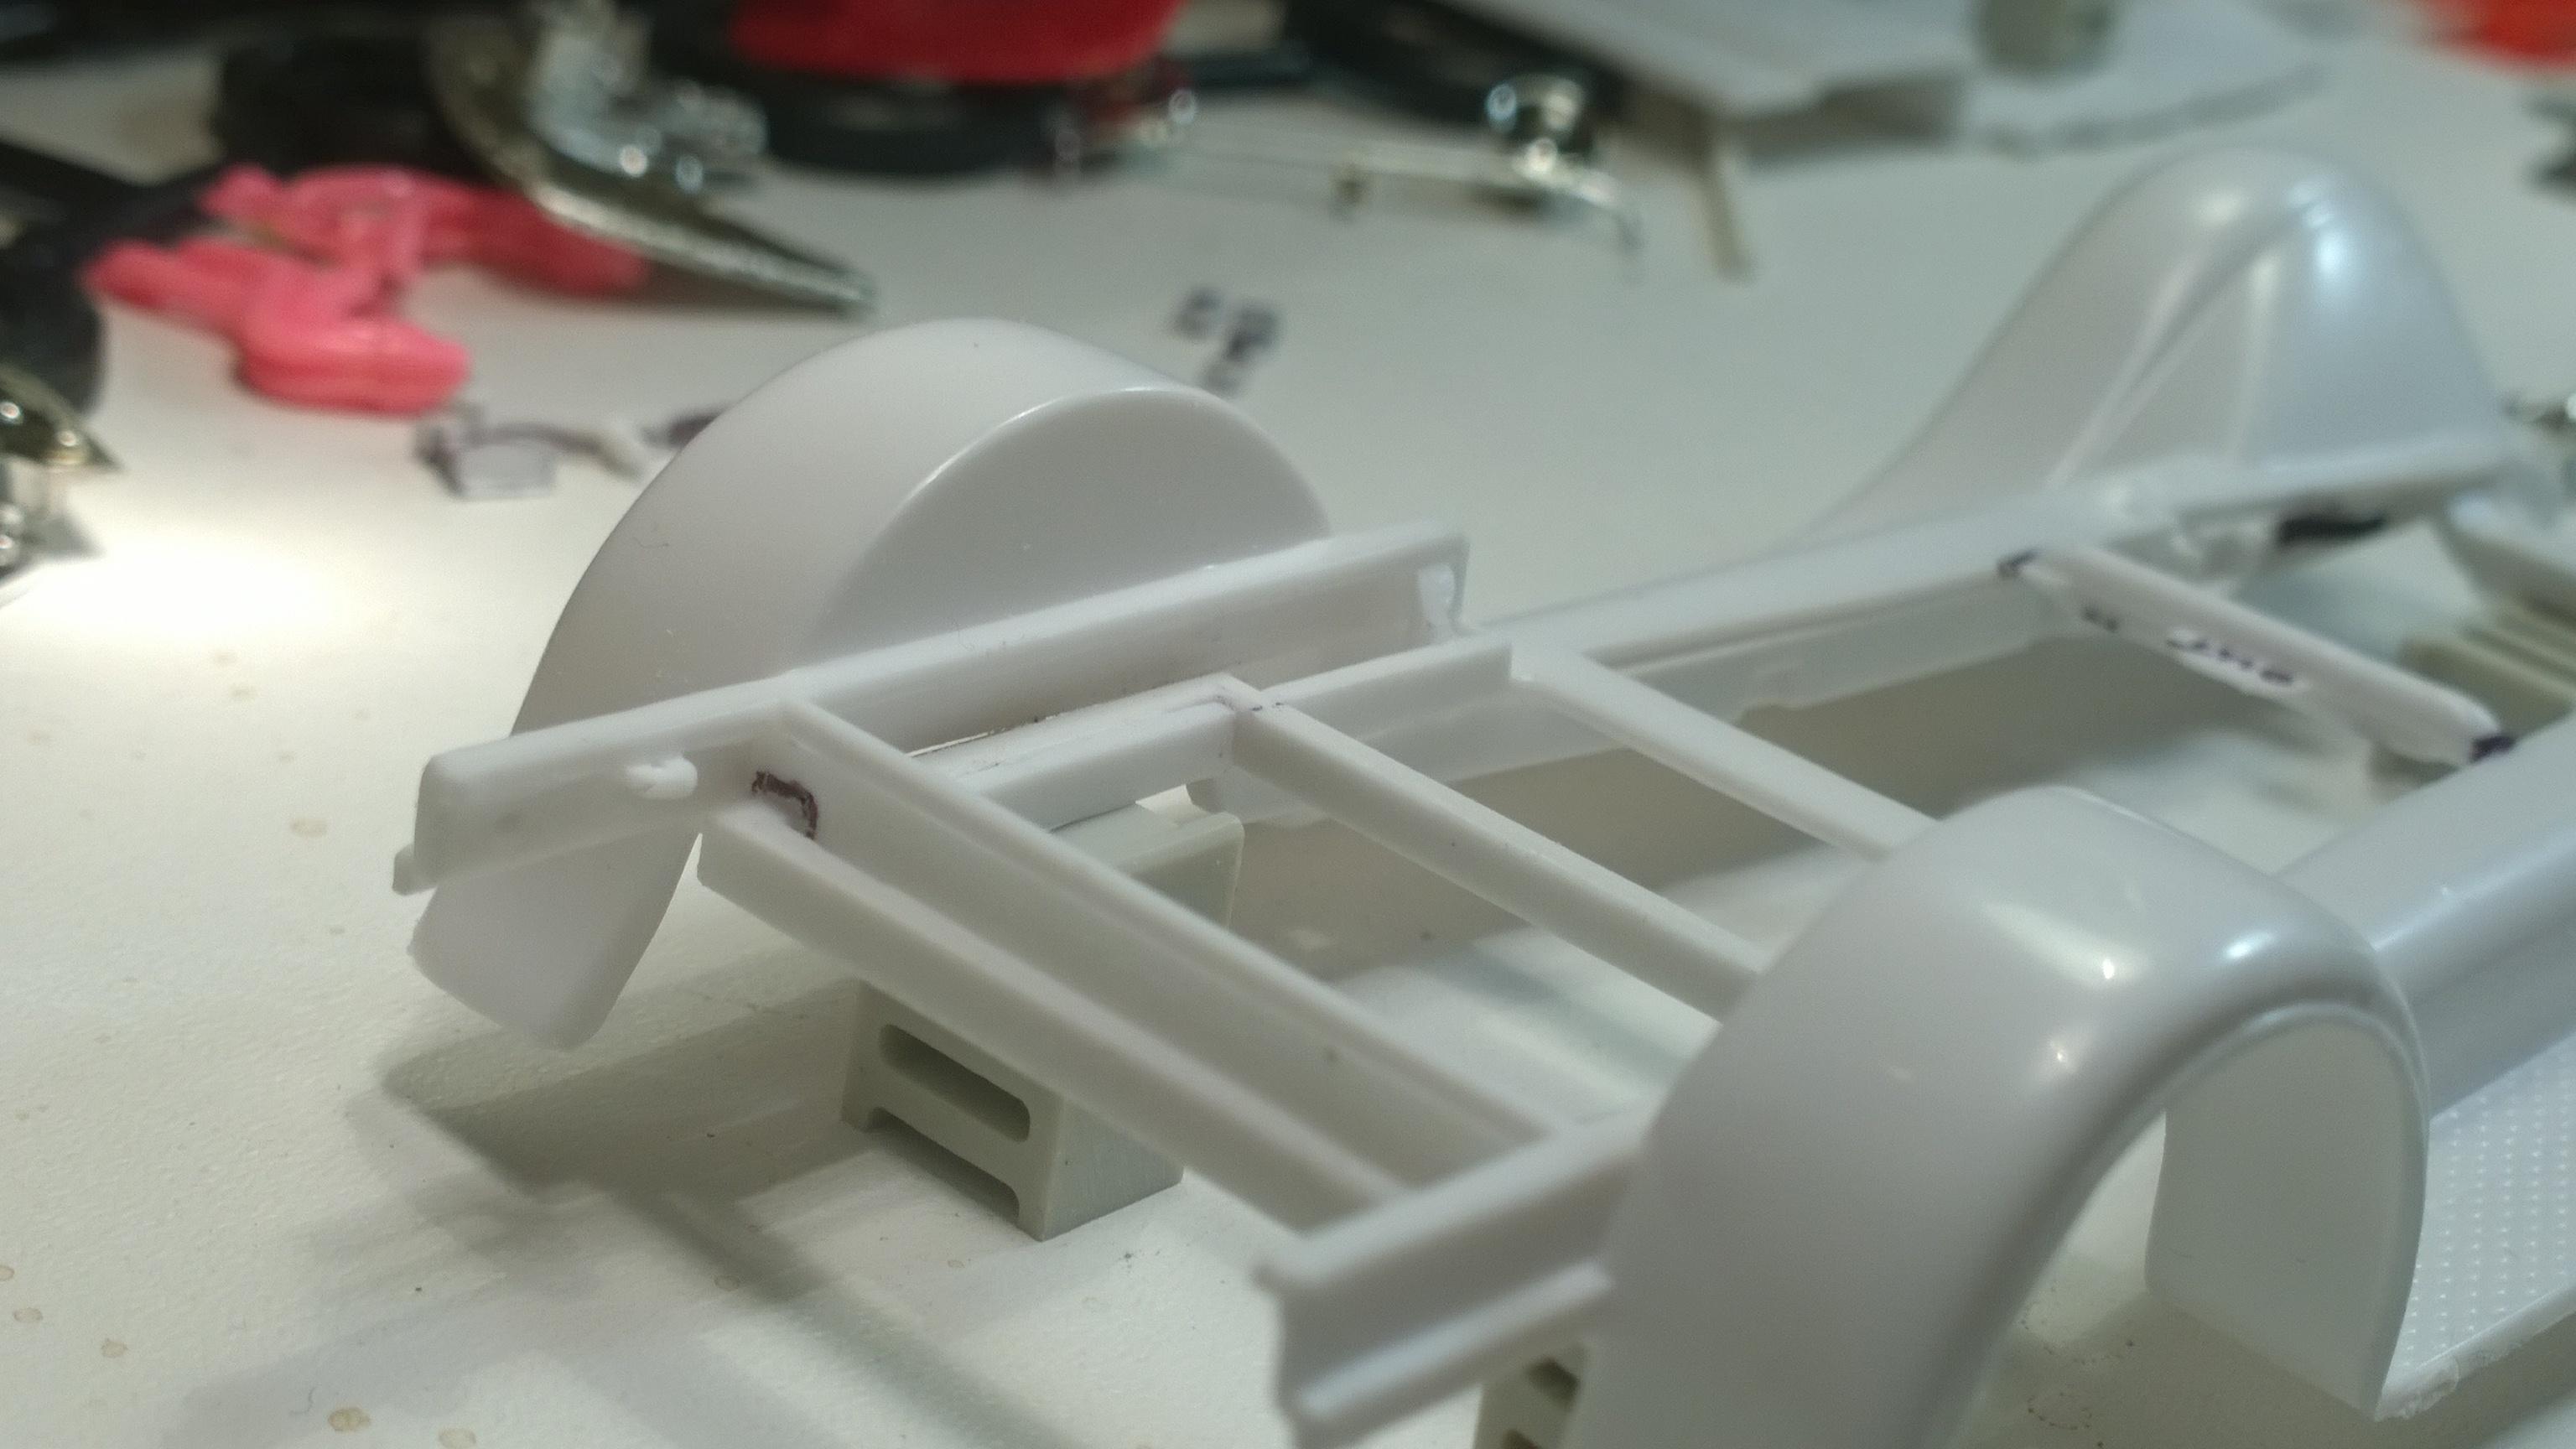
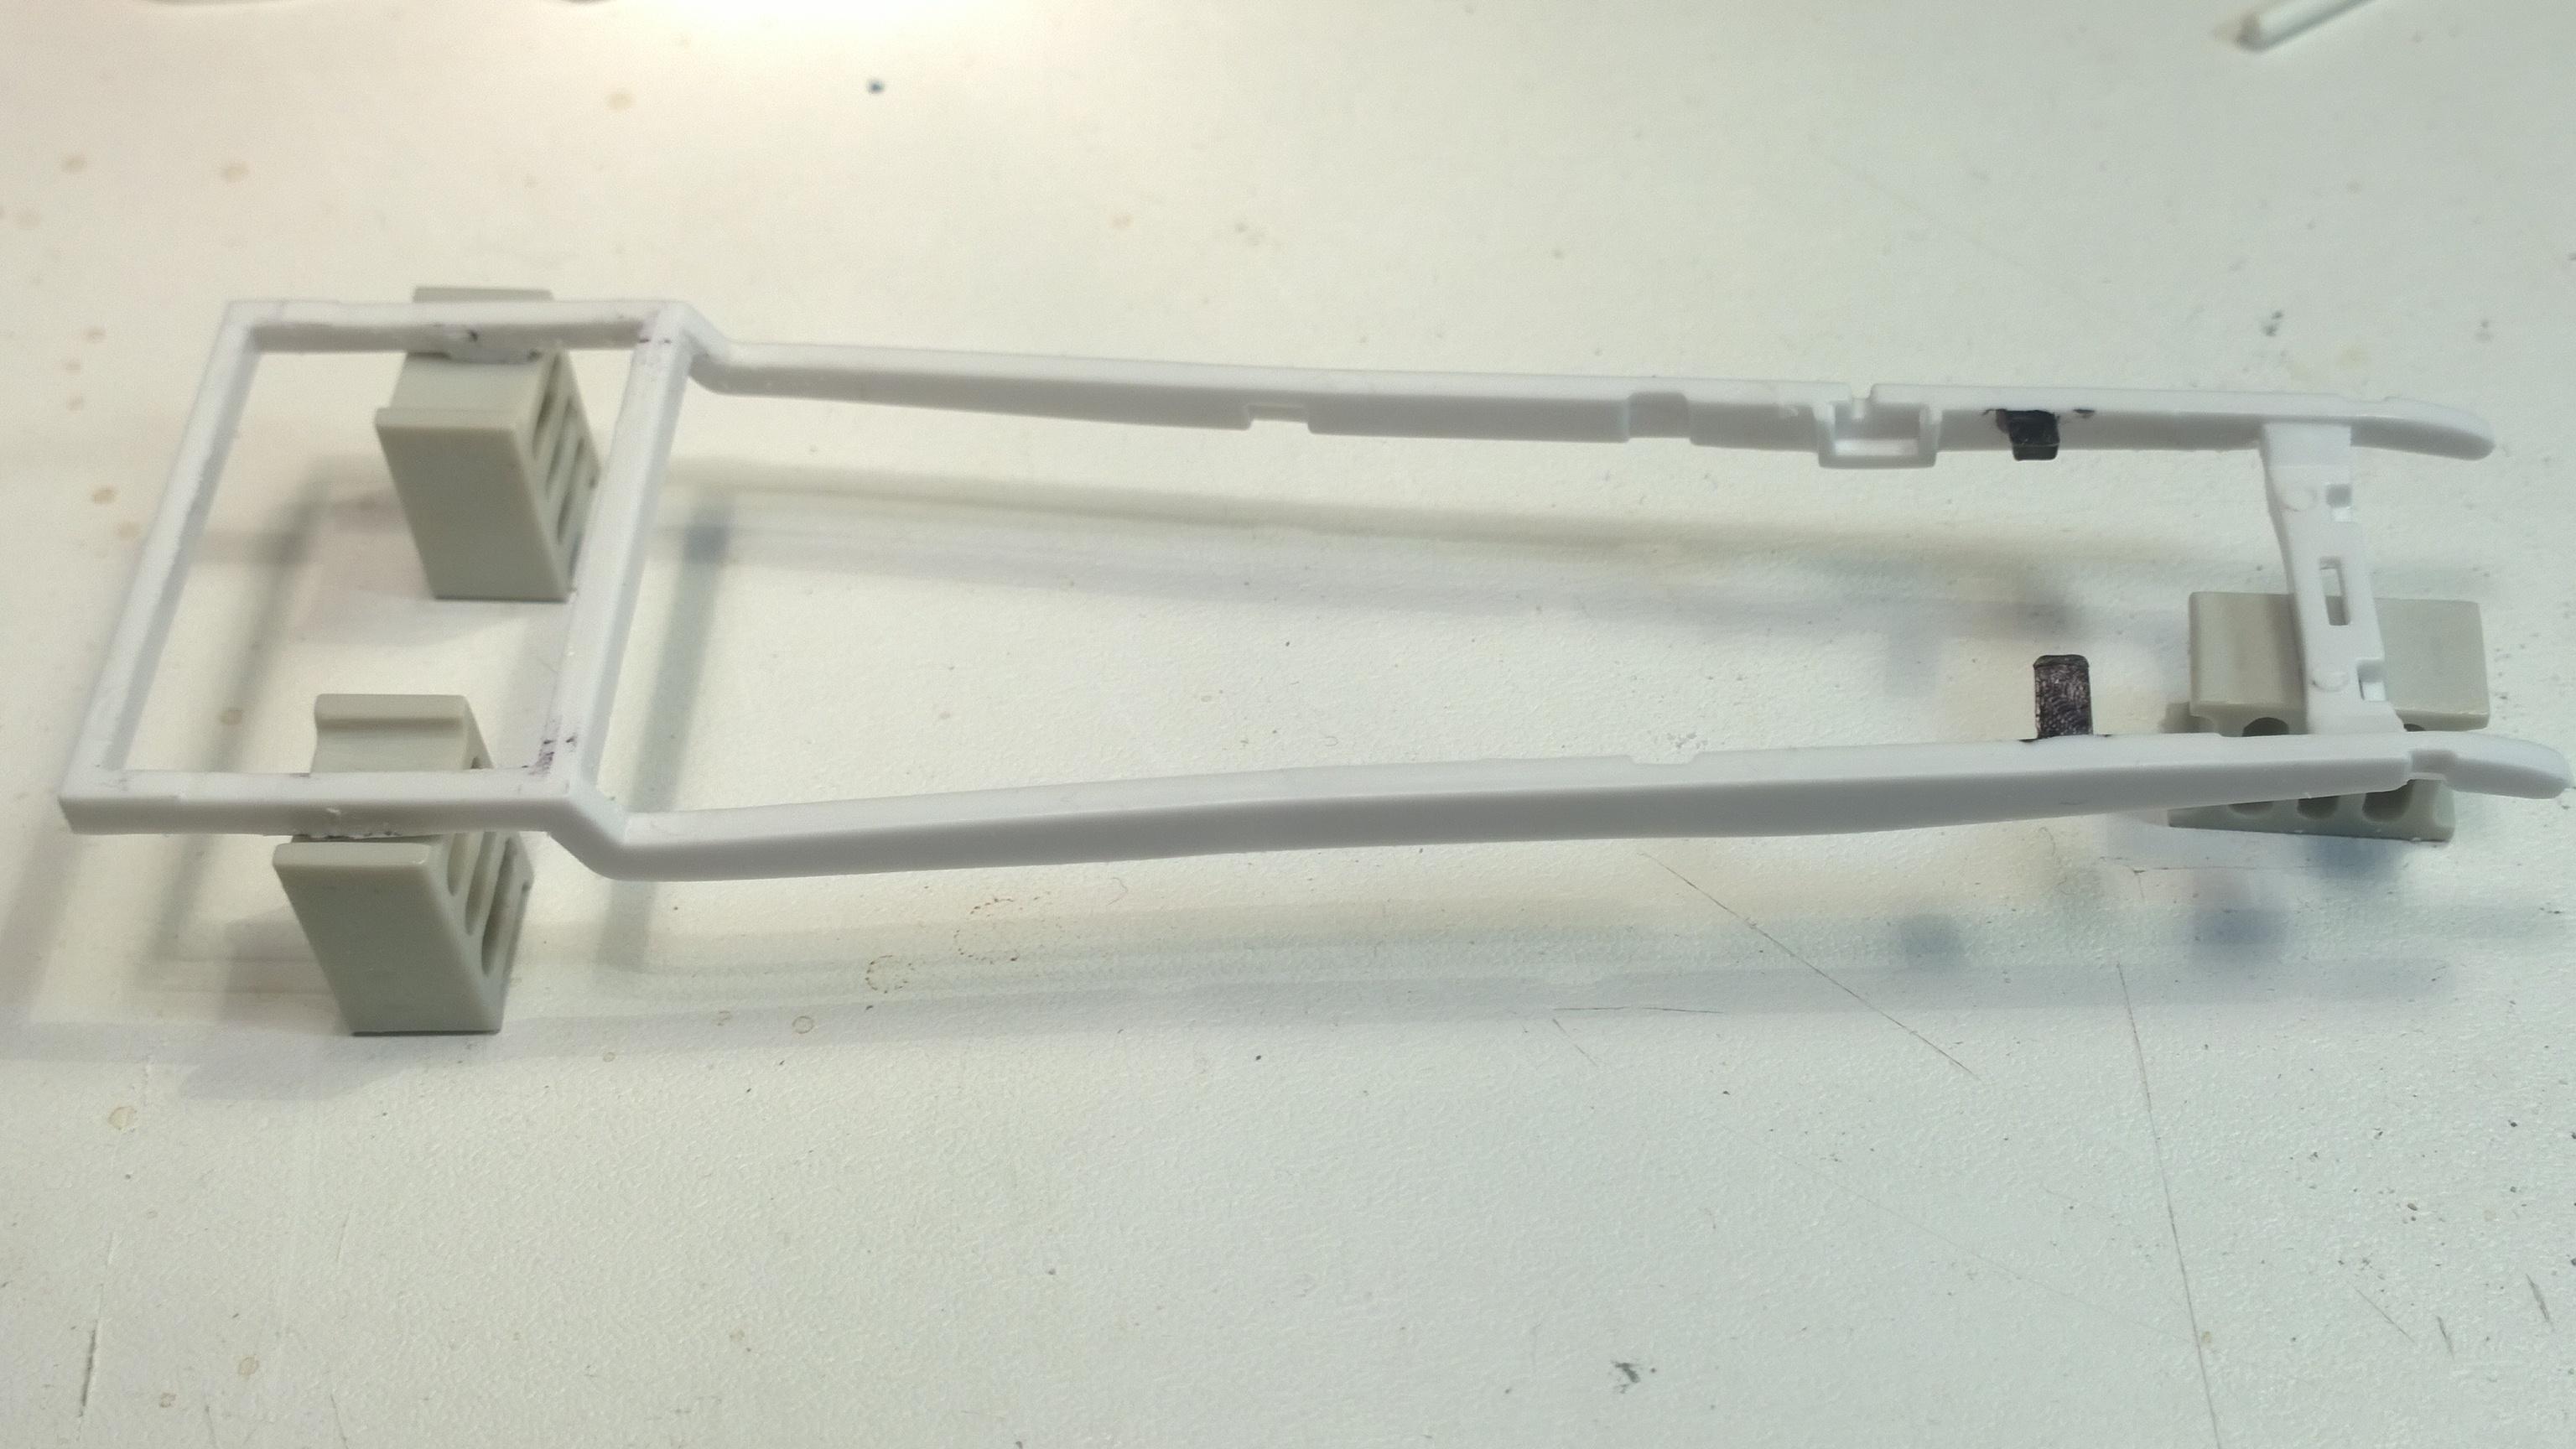
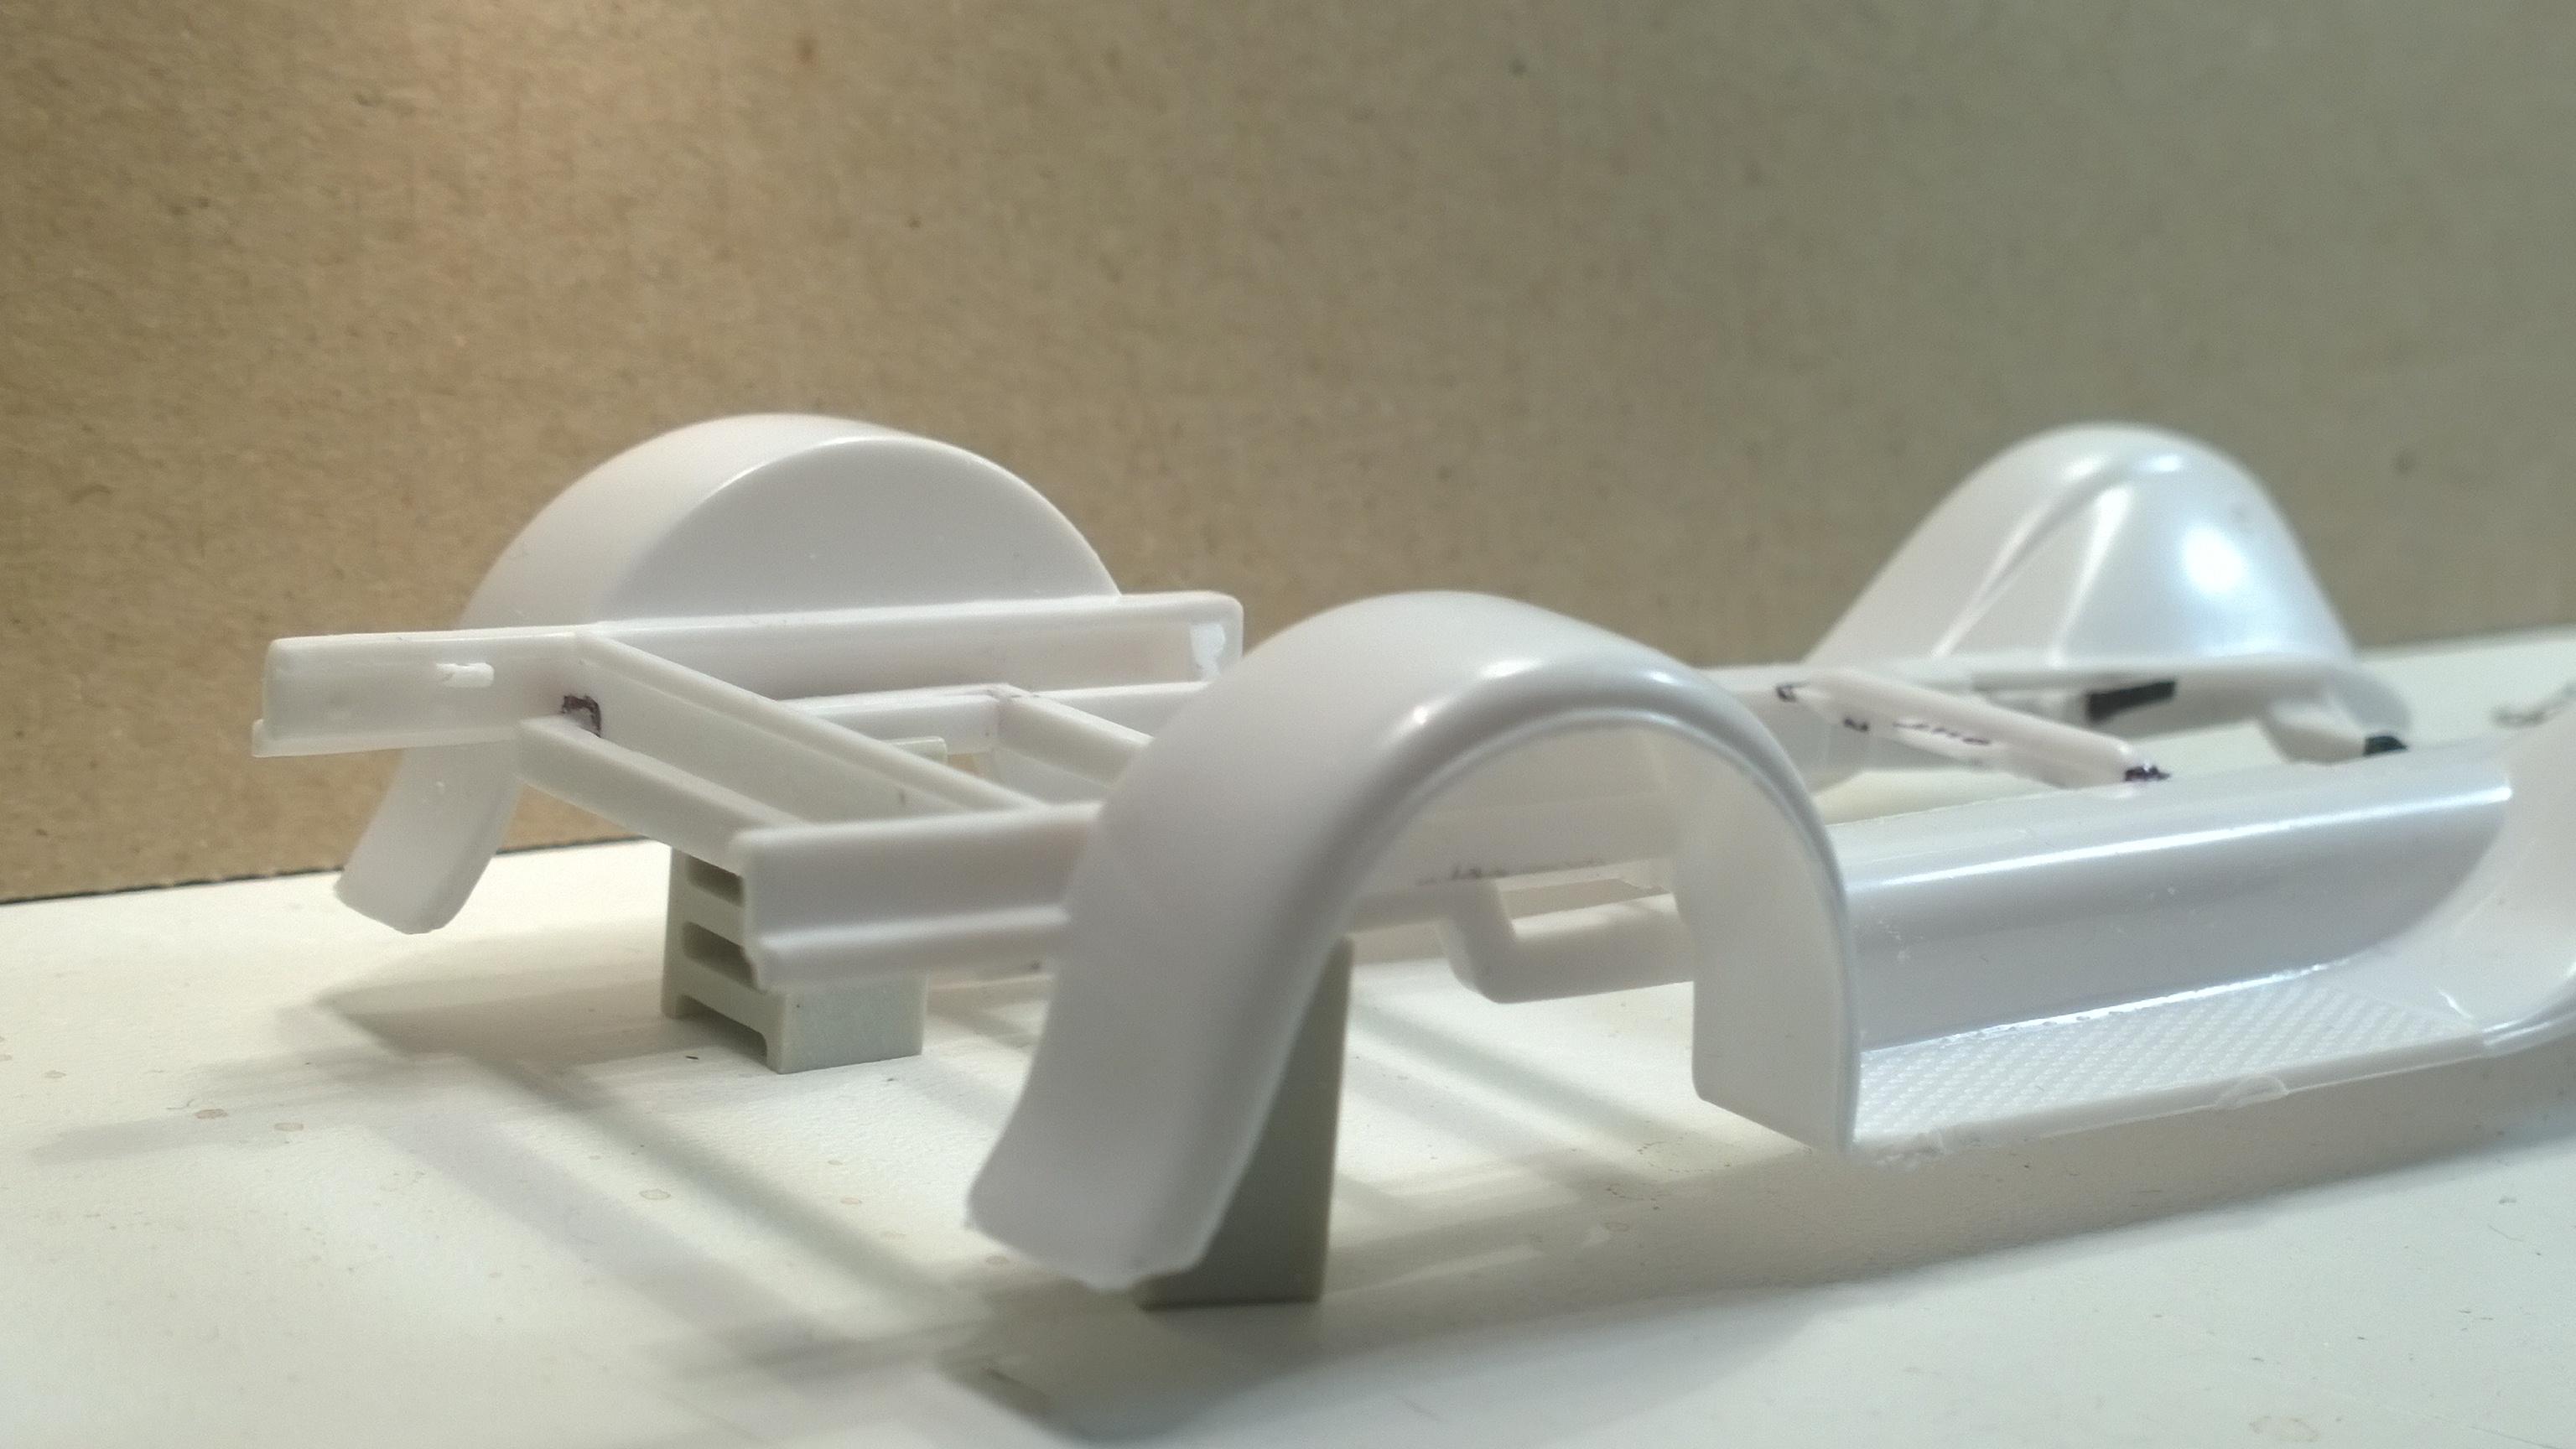
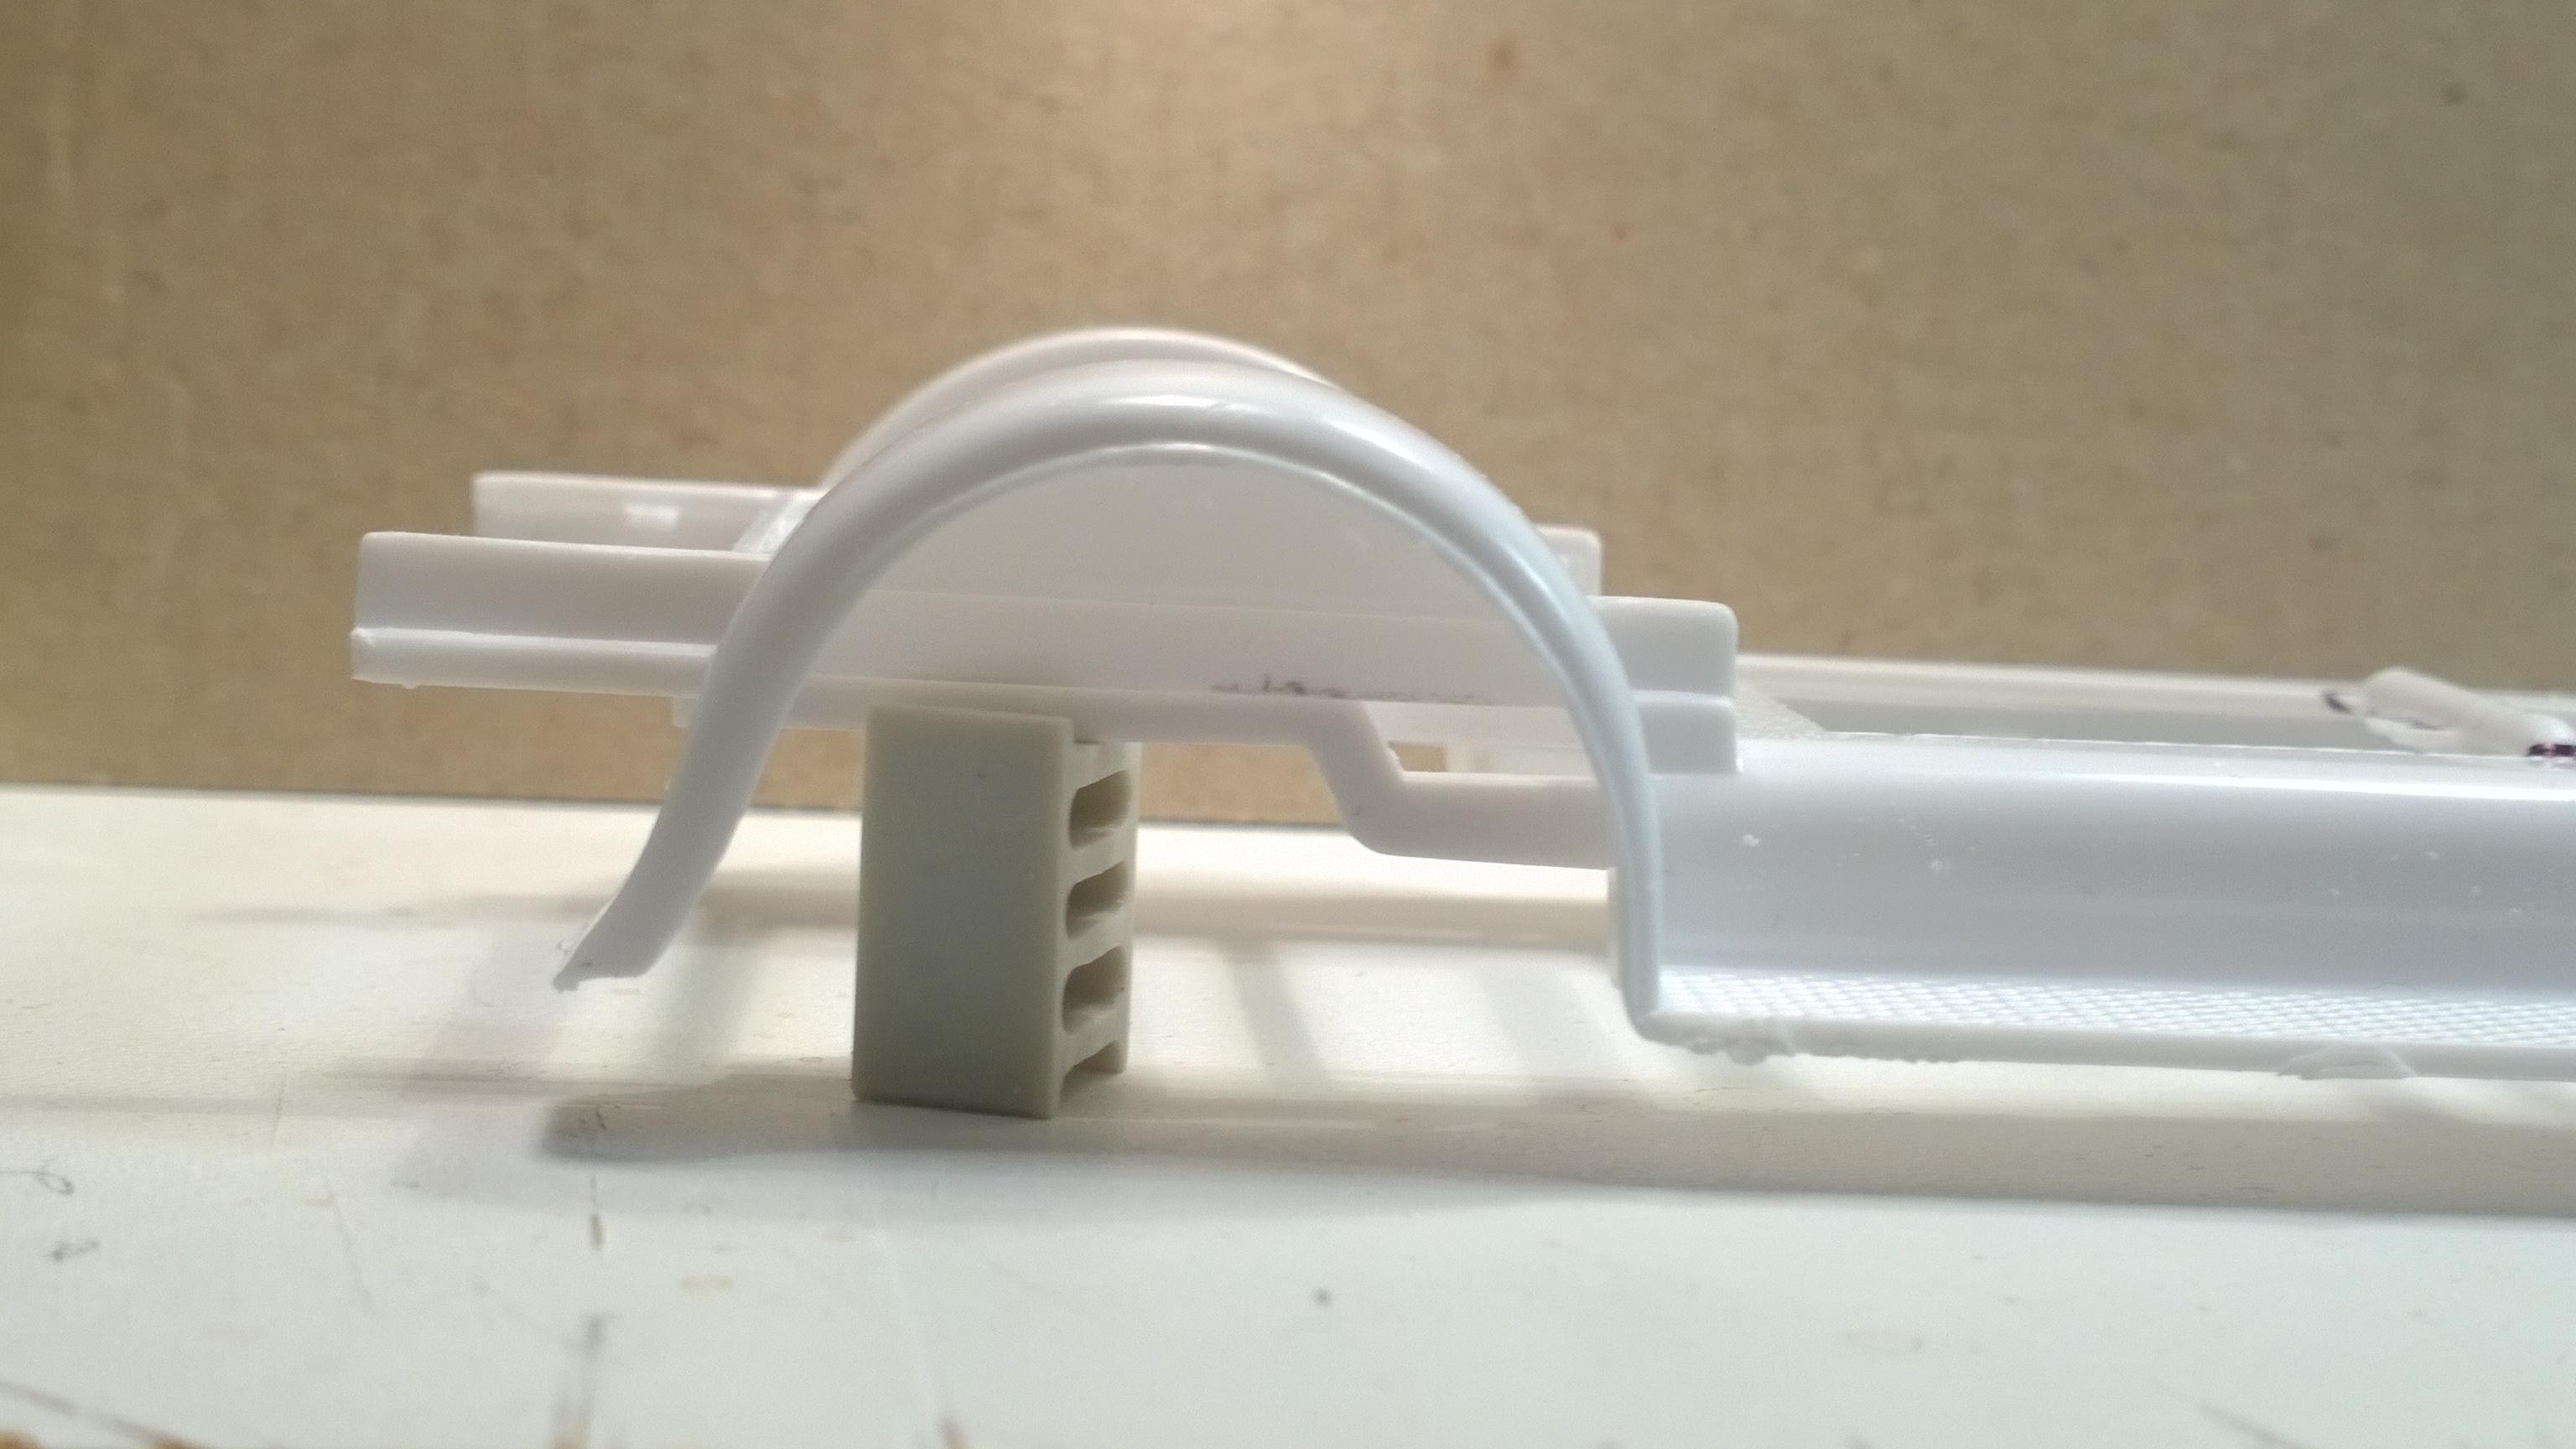
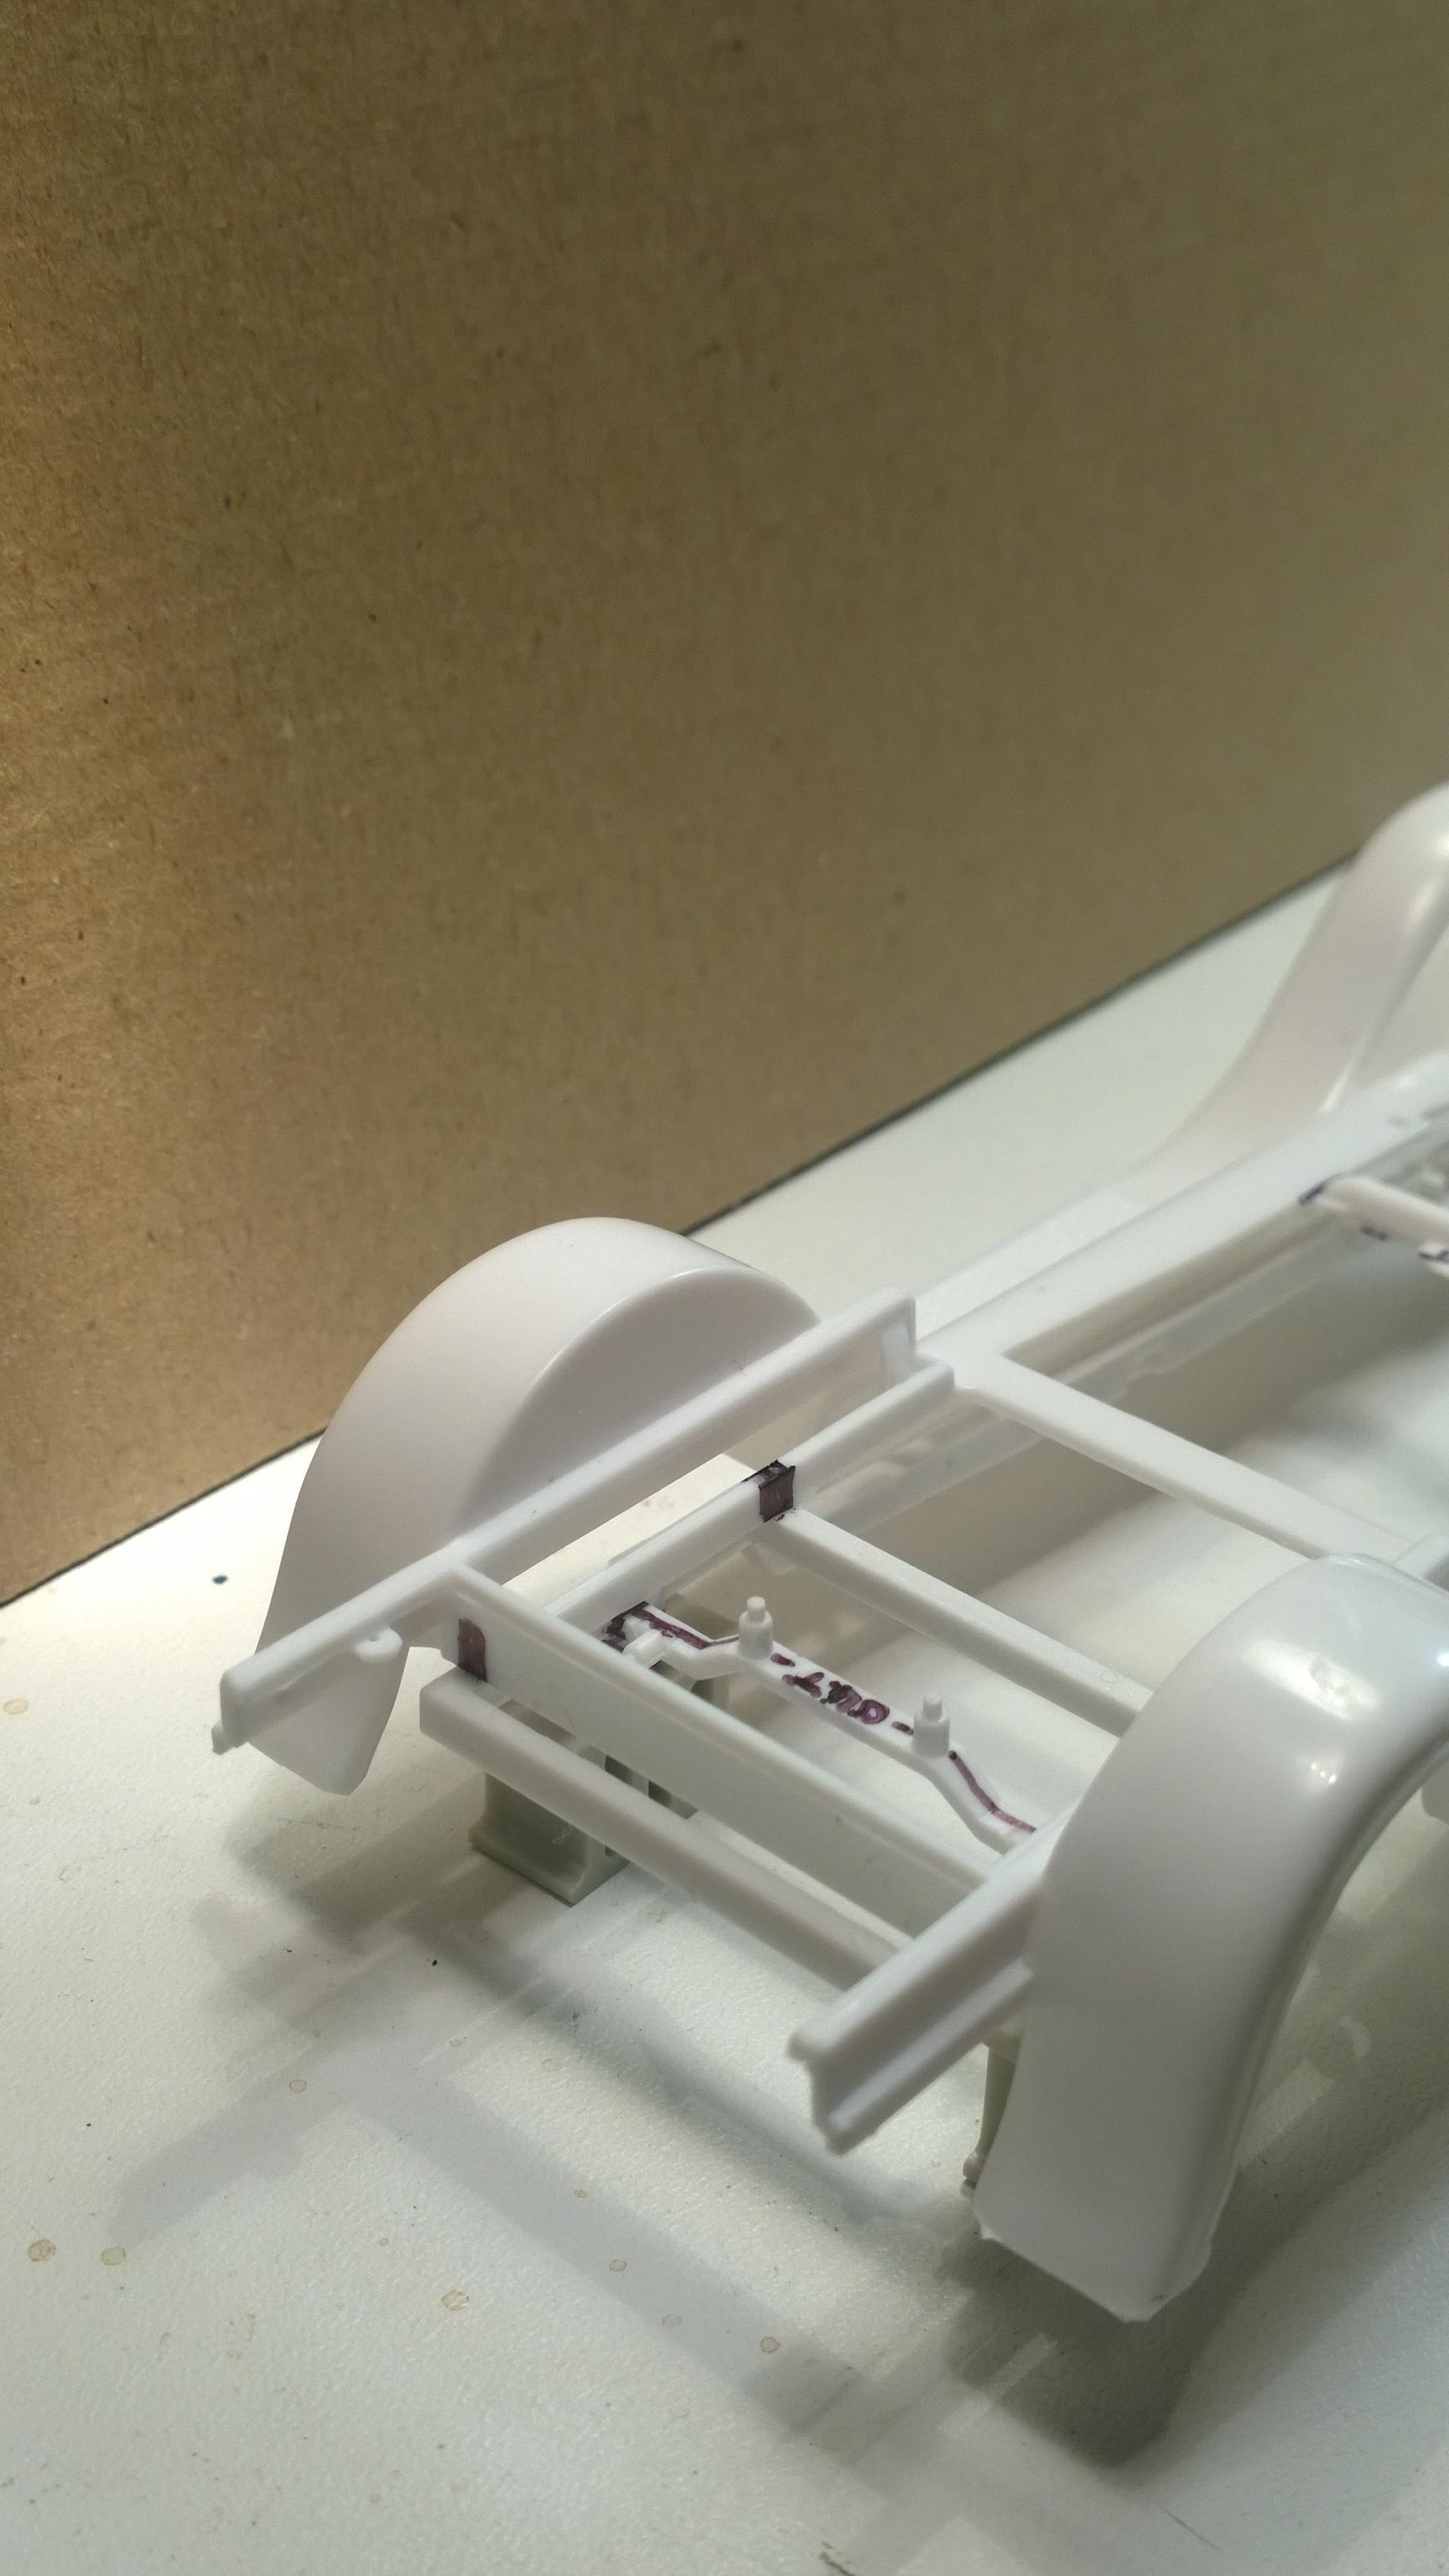
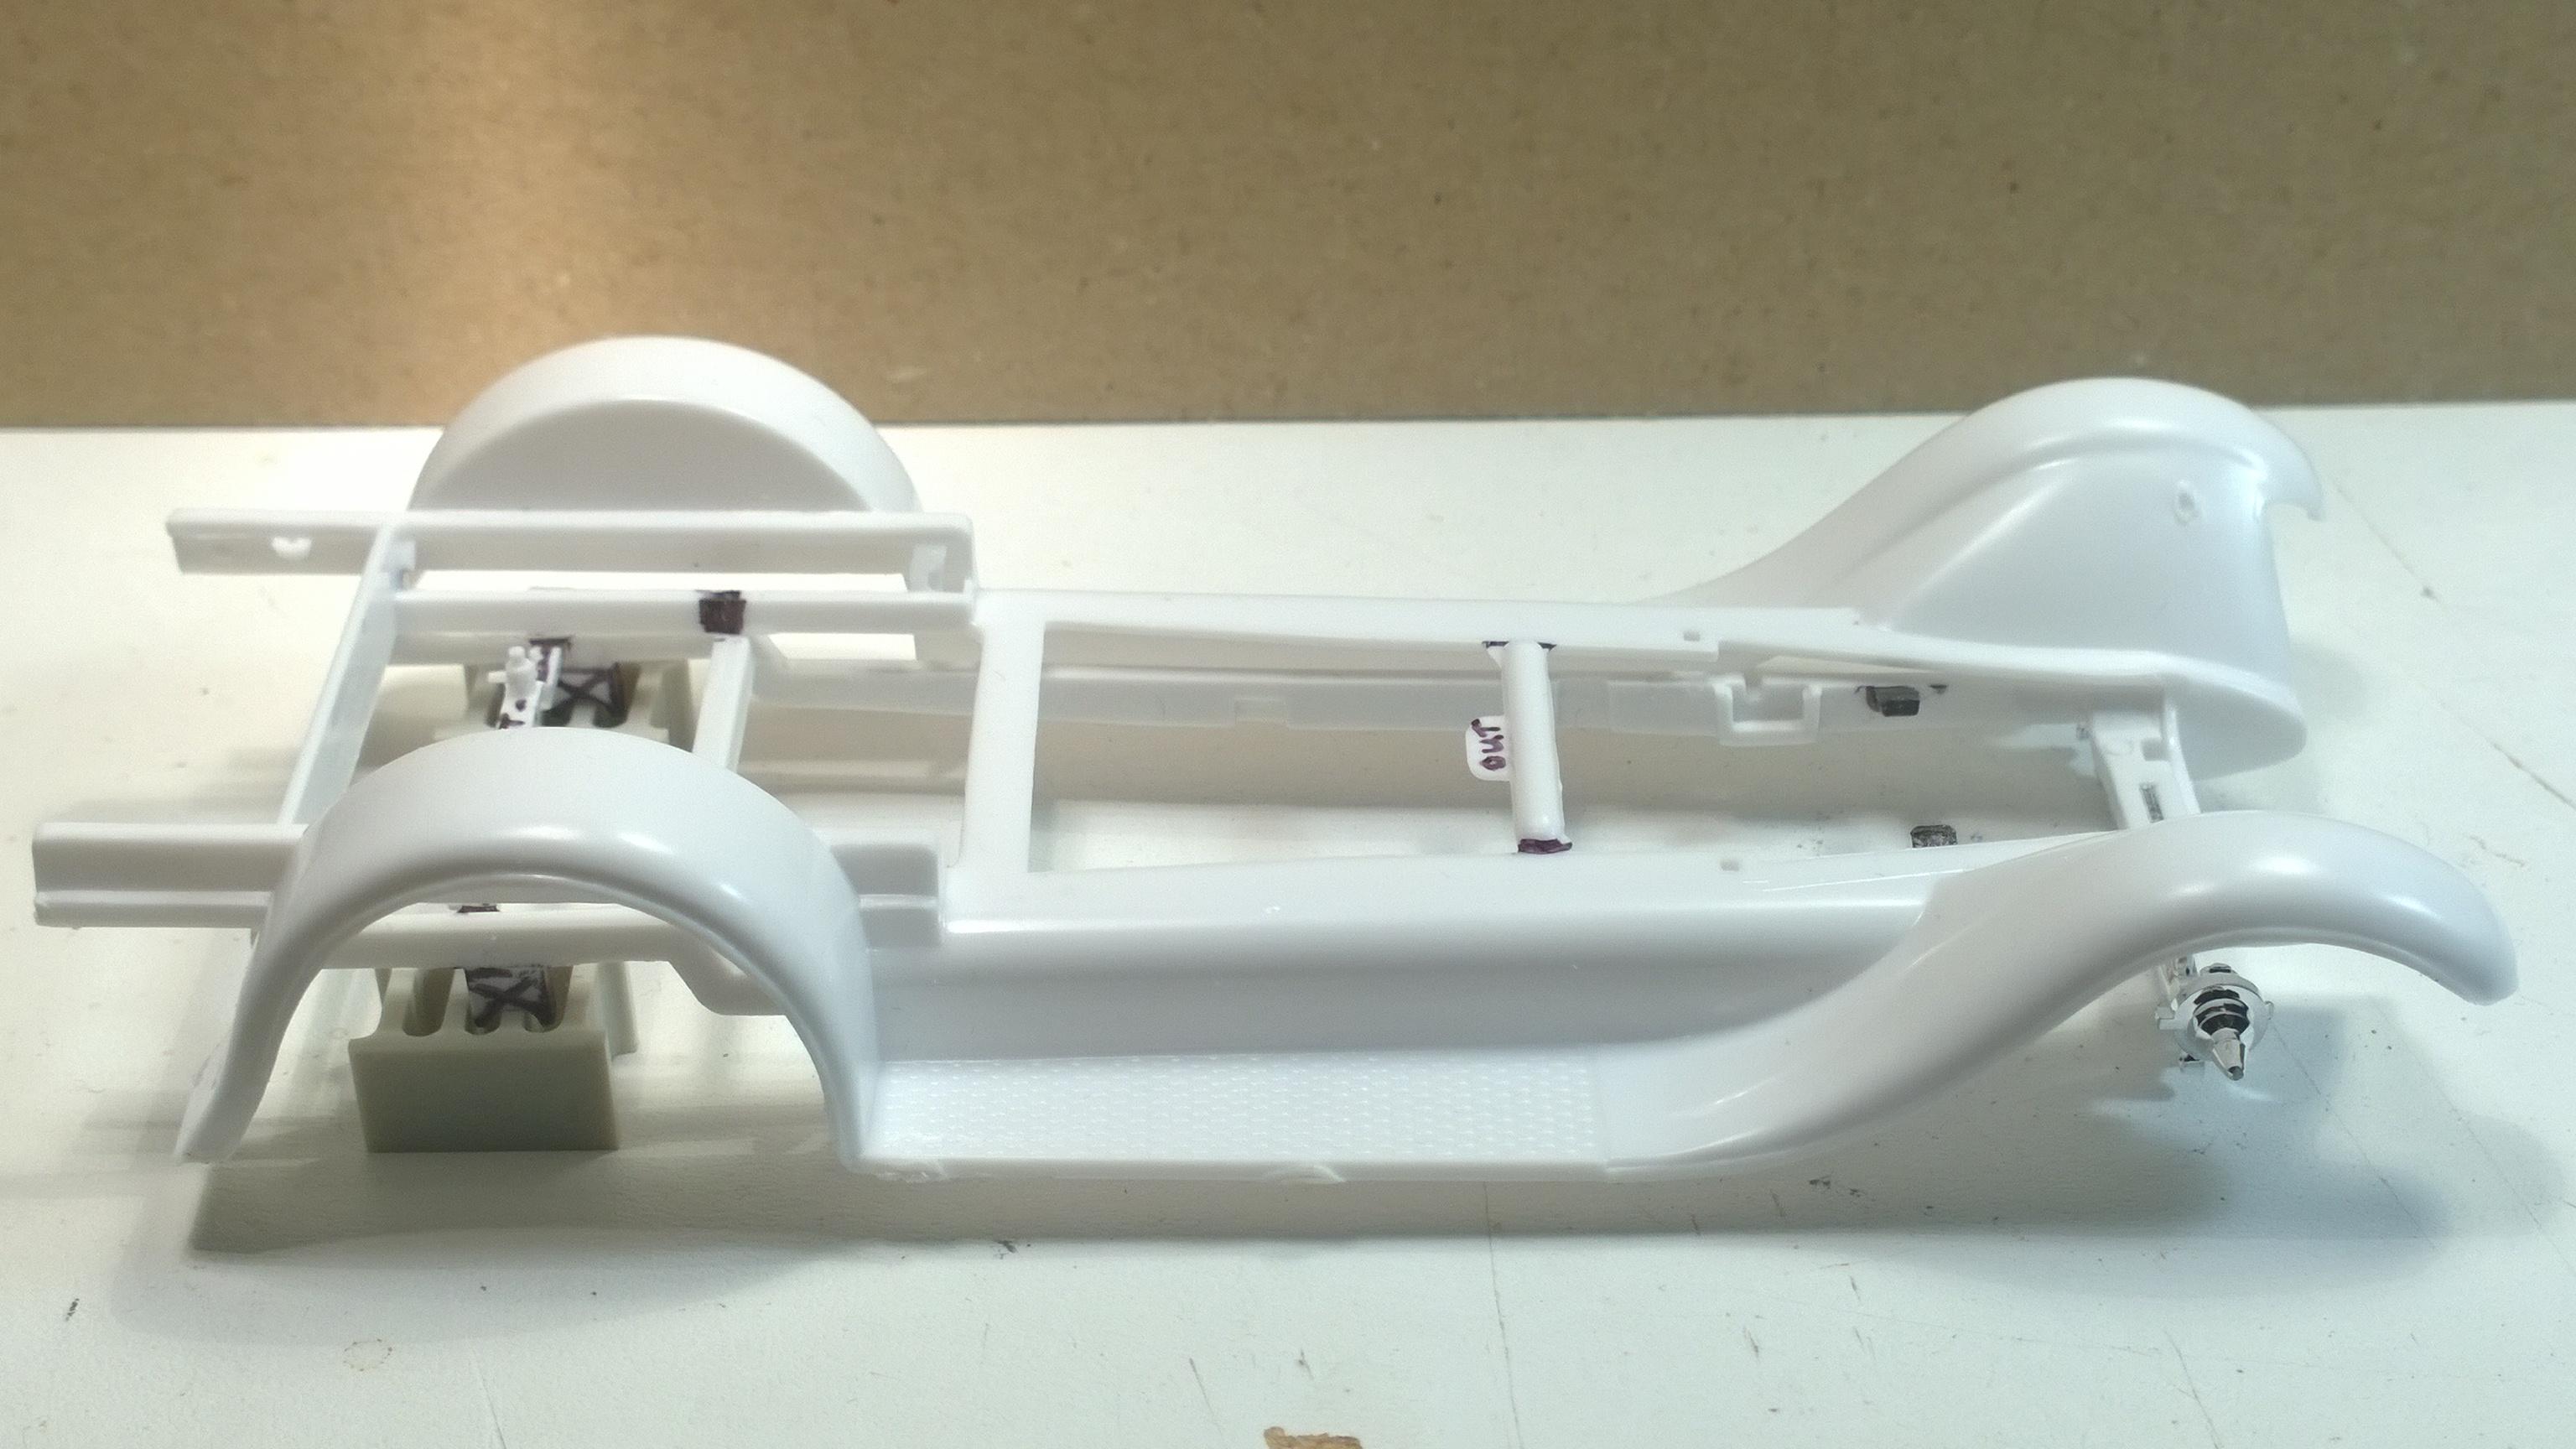
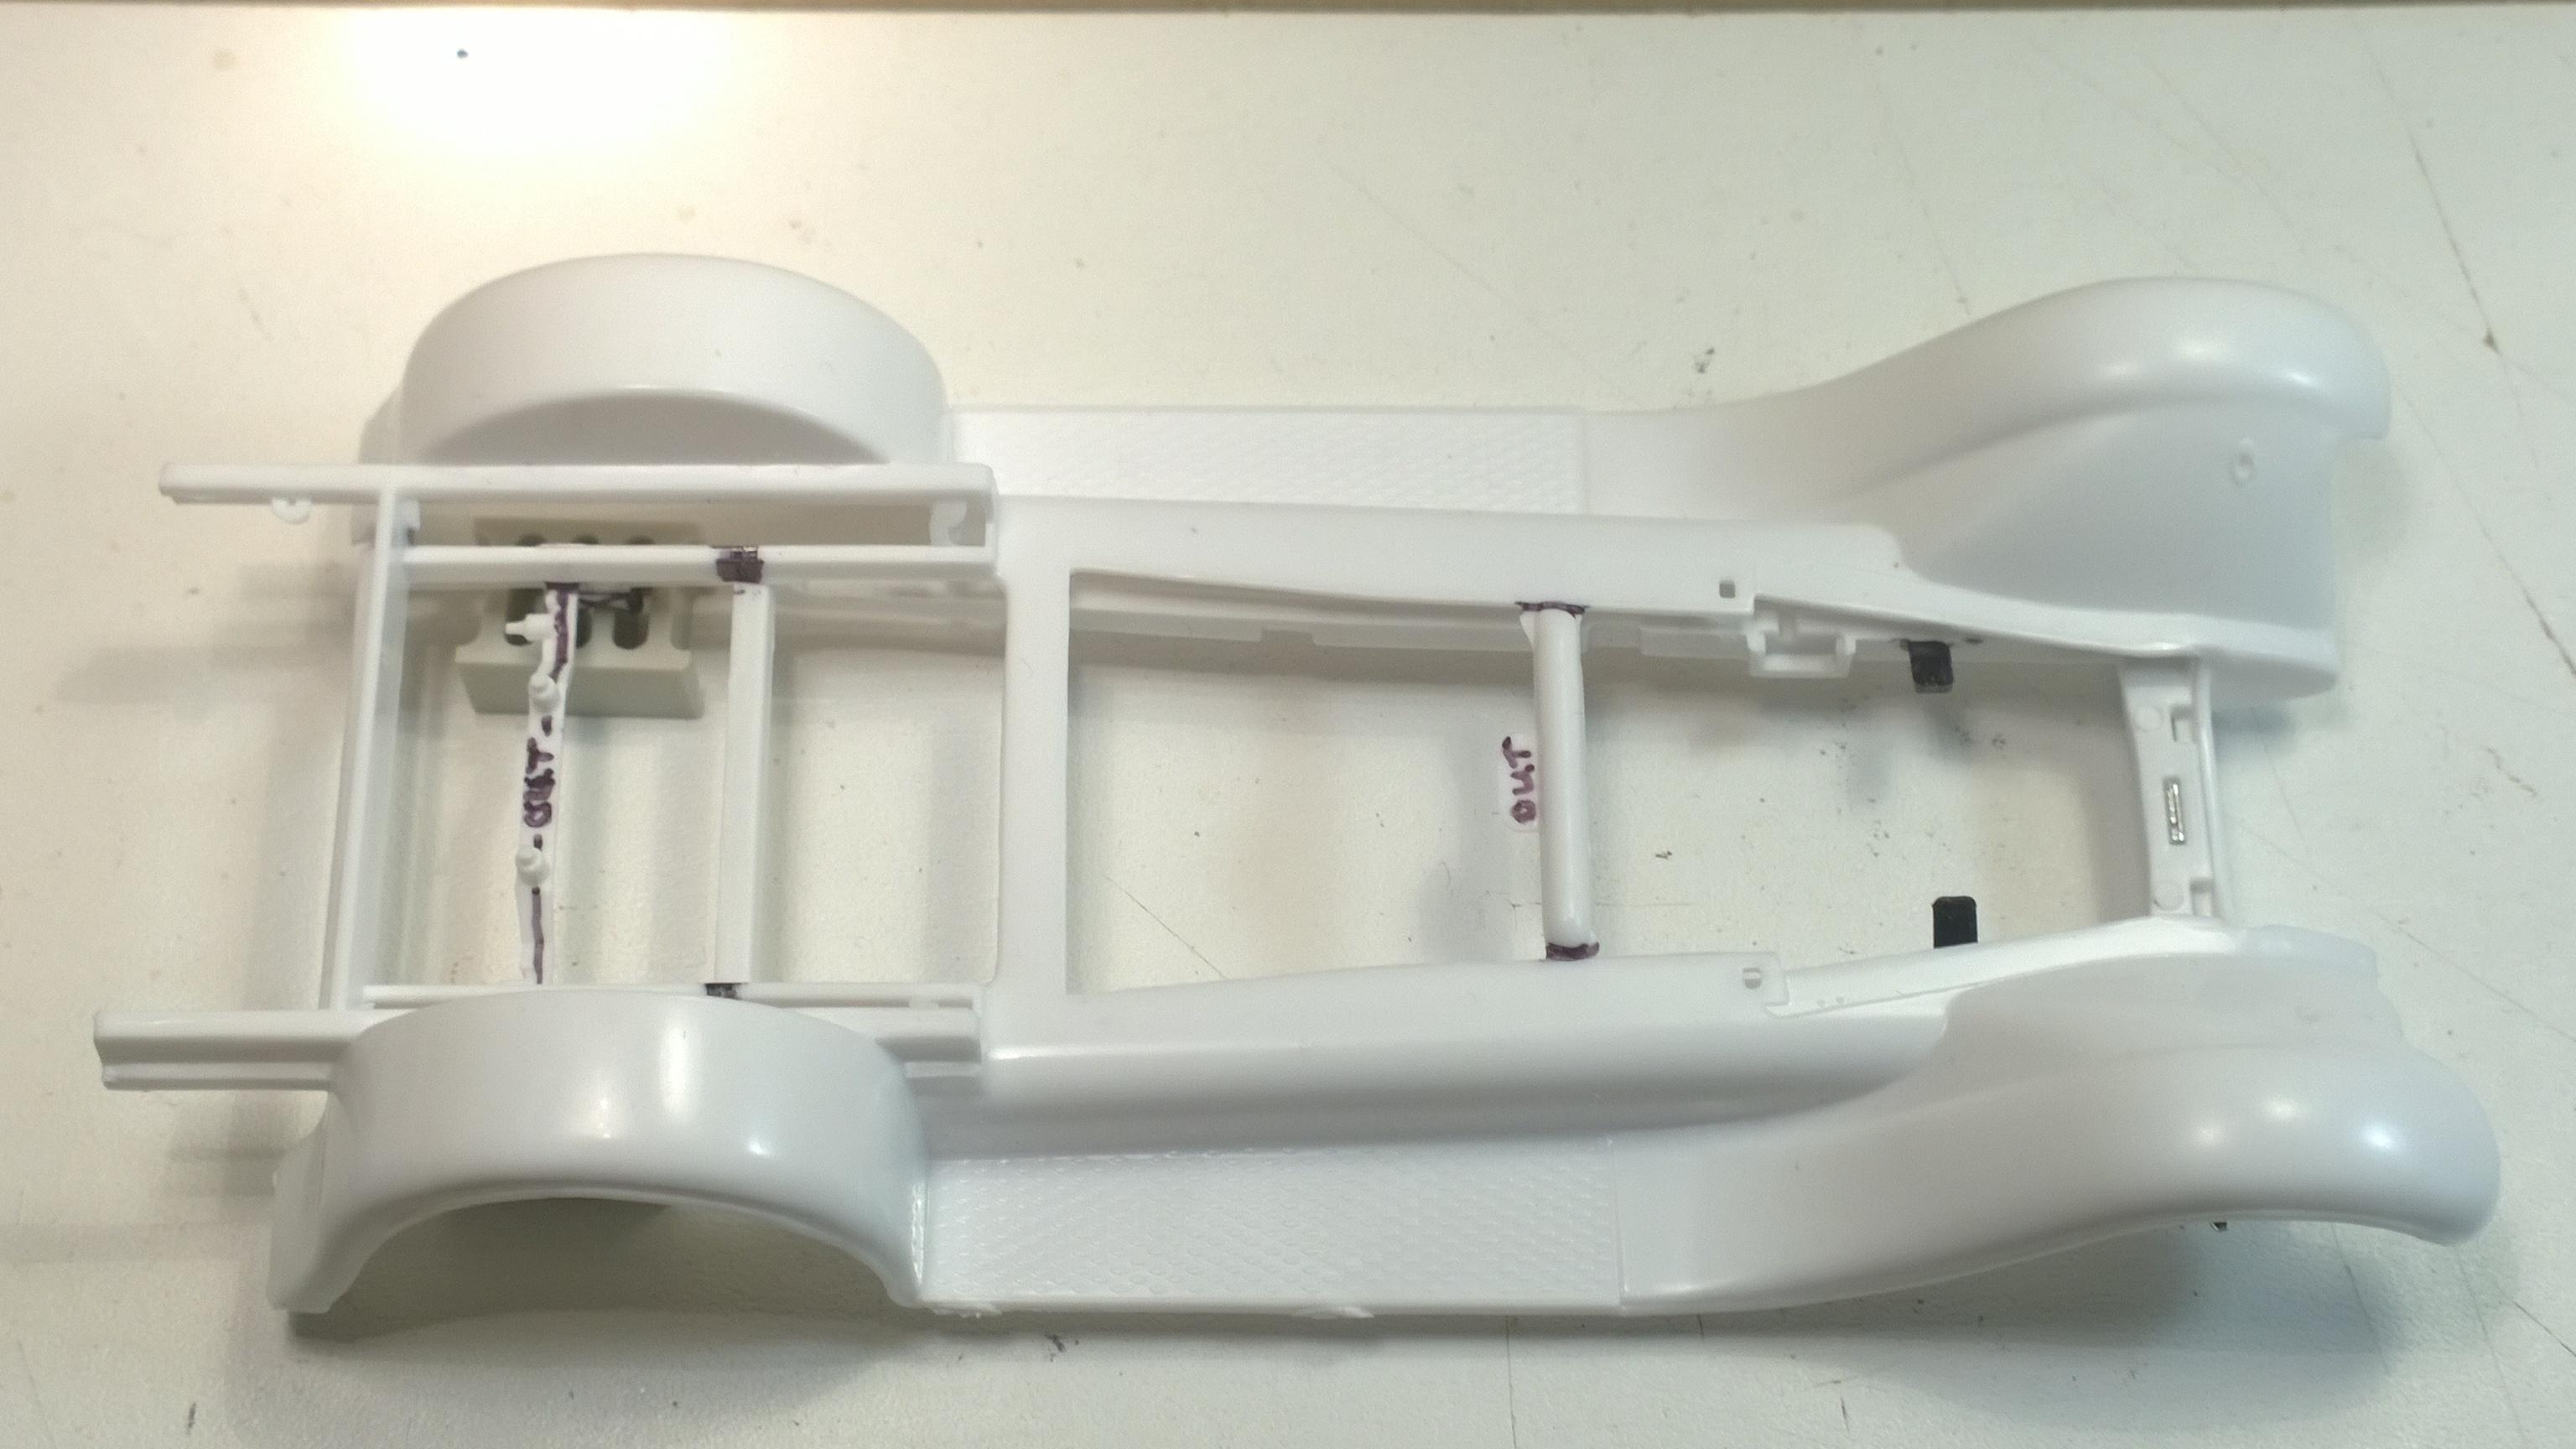
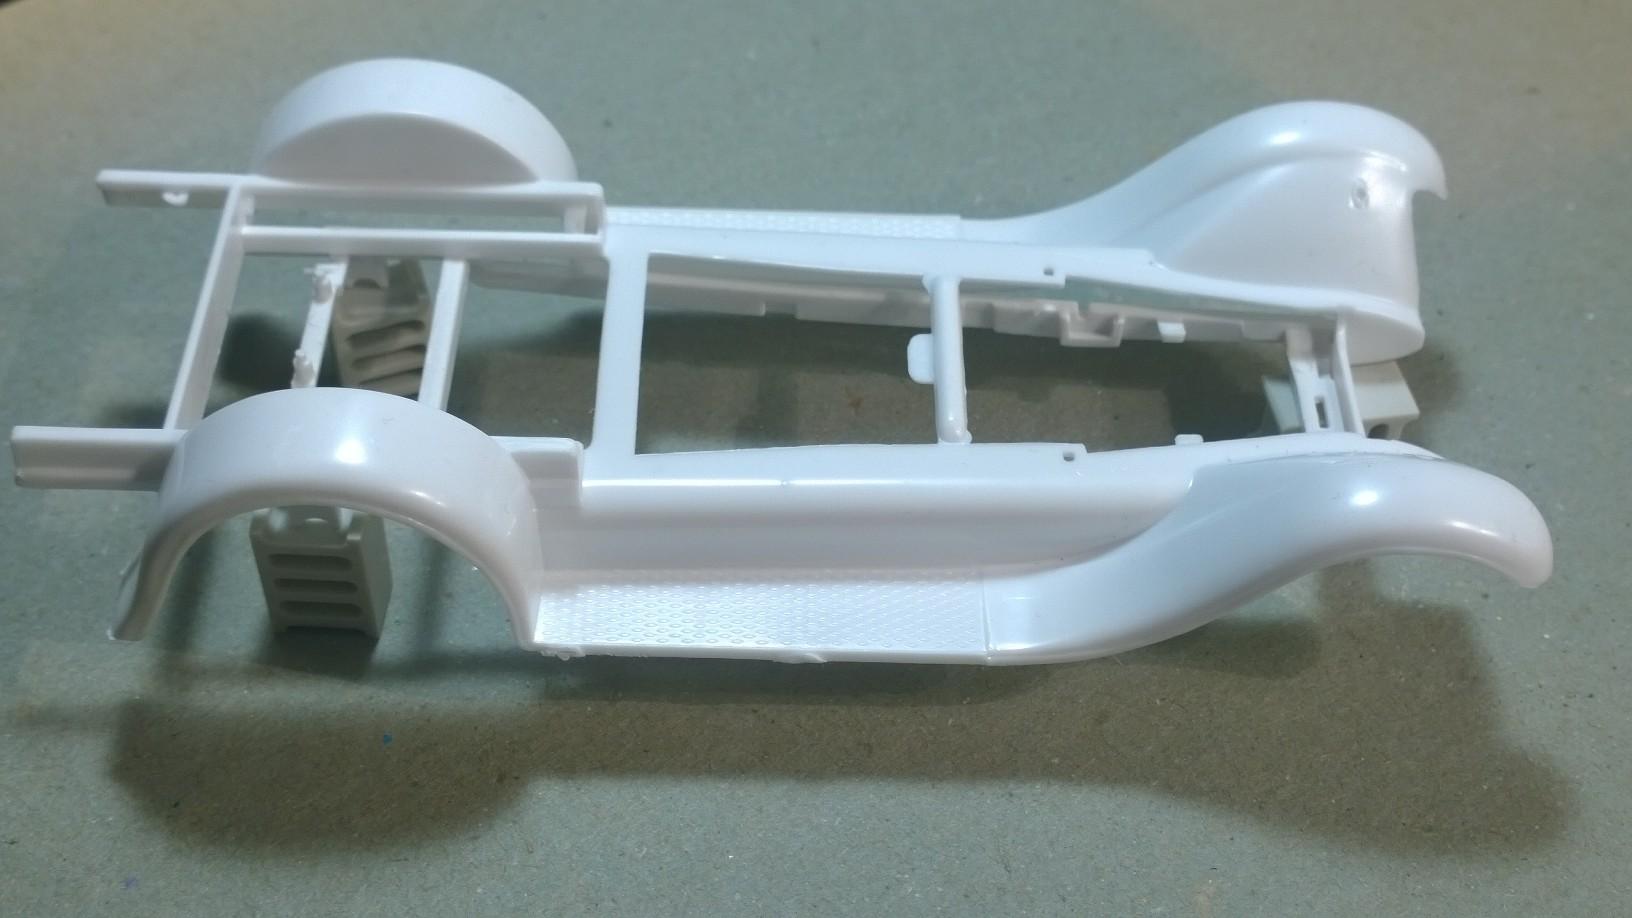
Time to start cutting! Removed the coil-over spreader bar... Cut off the solid axle mounts... on both sides of the frame... Trim with a #11 blade... Easy enough!?. Now to tie the frame and fenders together so as to secure them enough to scribe the cut-lines... Used a strip of tape to hold the back together... and the front end, too... Note where the frame crosses over the blacked out marks... Scribe in the blacked out areas where the cut-lines are going to show where material will be removed... Cut away the blacked out area from the inner rail... on both sides, not cutting all the way through with the saw... Finish trimming with a #11 blade... on both sides... Here where the decision to "Leave" the line or "Take" the line... in this case removing everything between the scribed cut-lines, "Leave" the line! Cutting out the relief in the back valance... again, "Leave" the line... Cut up to the scribed line, but not passed it... on both sides... Use a #11 blade to slice between the cut-lines... With a little cleaning; enough to knock the burrs off... the '29 Roadster Frame and the '29 Pickup Fenders will press/snap together! 77 Frame-Chassis & 51 Fenders fit together like they were made for each other! Neat? Huh? You can imagine how excited I was when I first noticed the commonality between these two kit parts!! '29 Roadster (77) Frame-Chassis under the '29 Pickup (51) Fenders Nice tight fit, because enough material was left in the cut-out areas... that with a little filing and sanding they come together as planned! Notice how the '29 Roadster kit Z'd frame cleans up... where @Dennis Lacy and @Rocking Rodney Rat had to manufacture their Z'd frames, easier? Yup! -KK
-
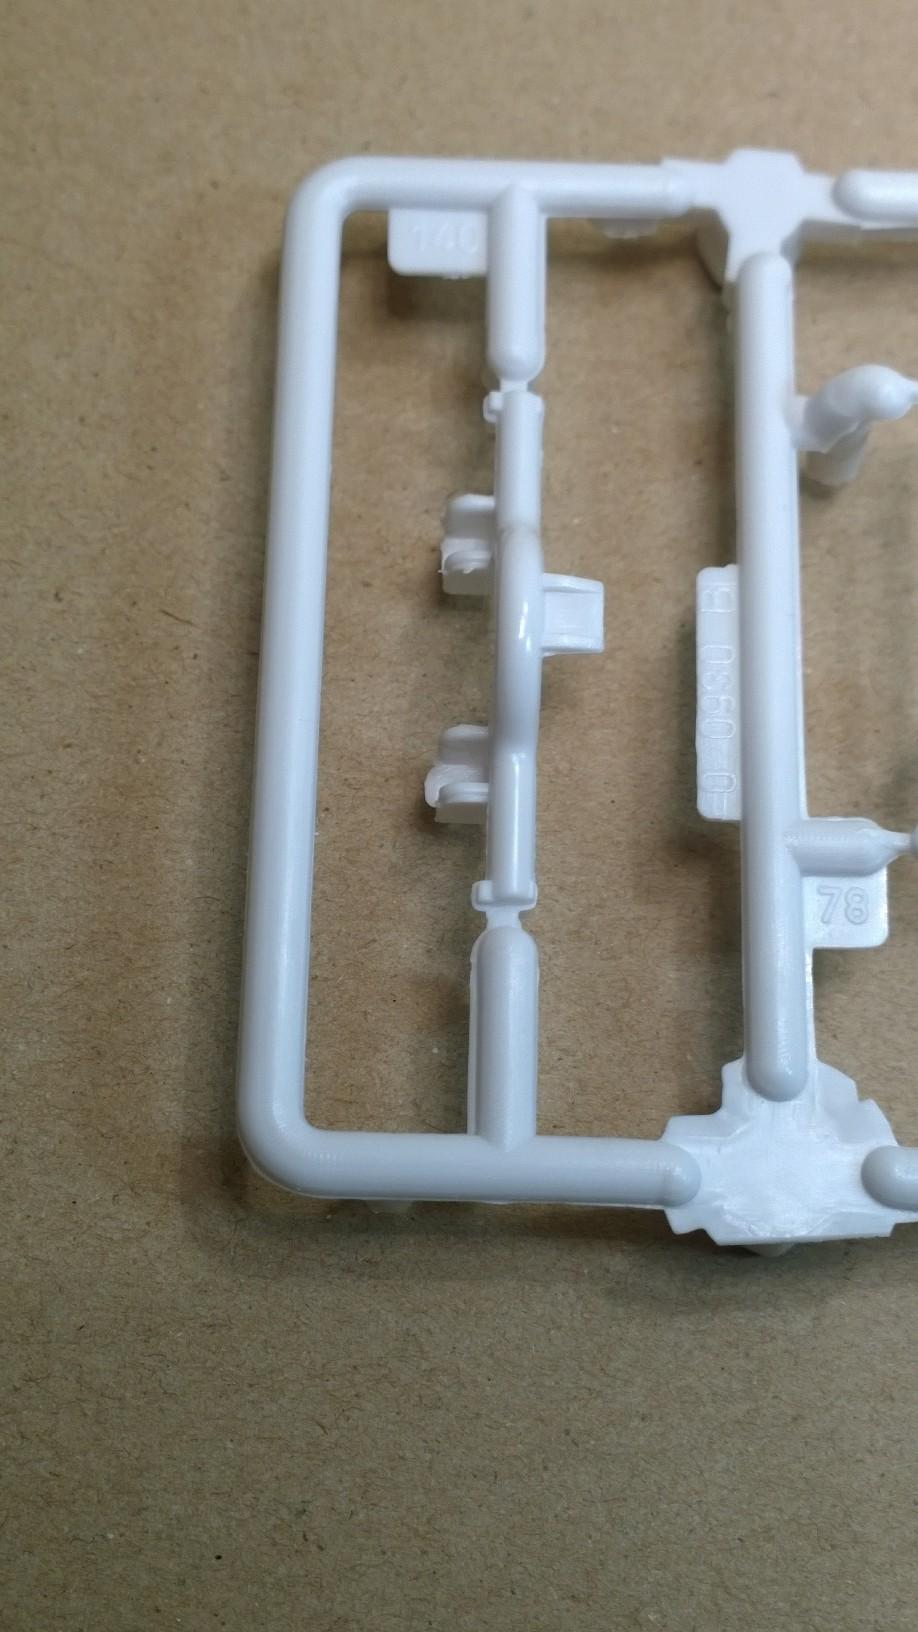
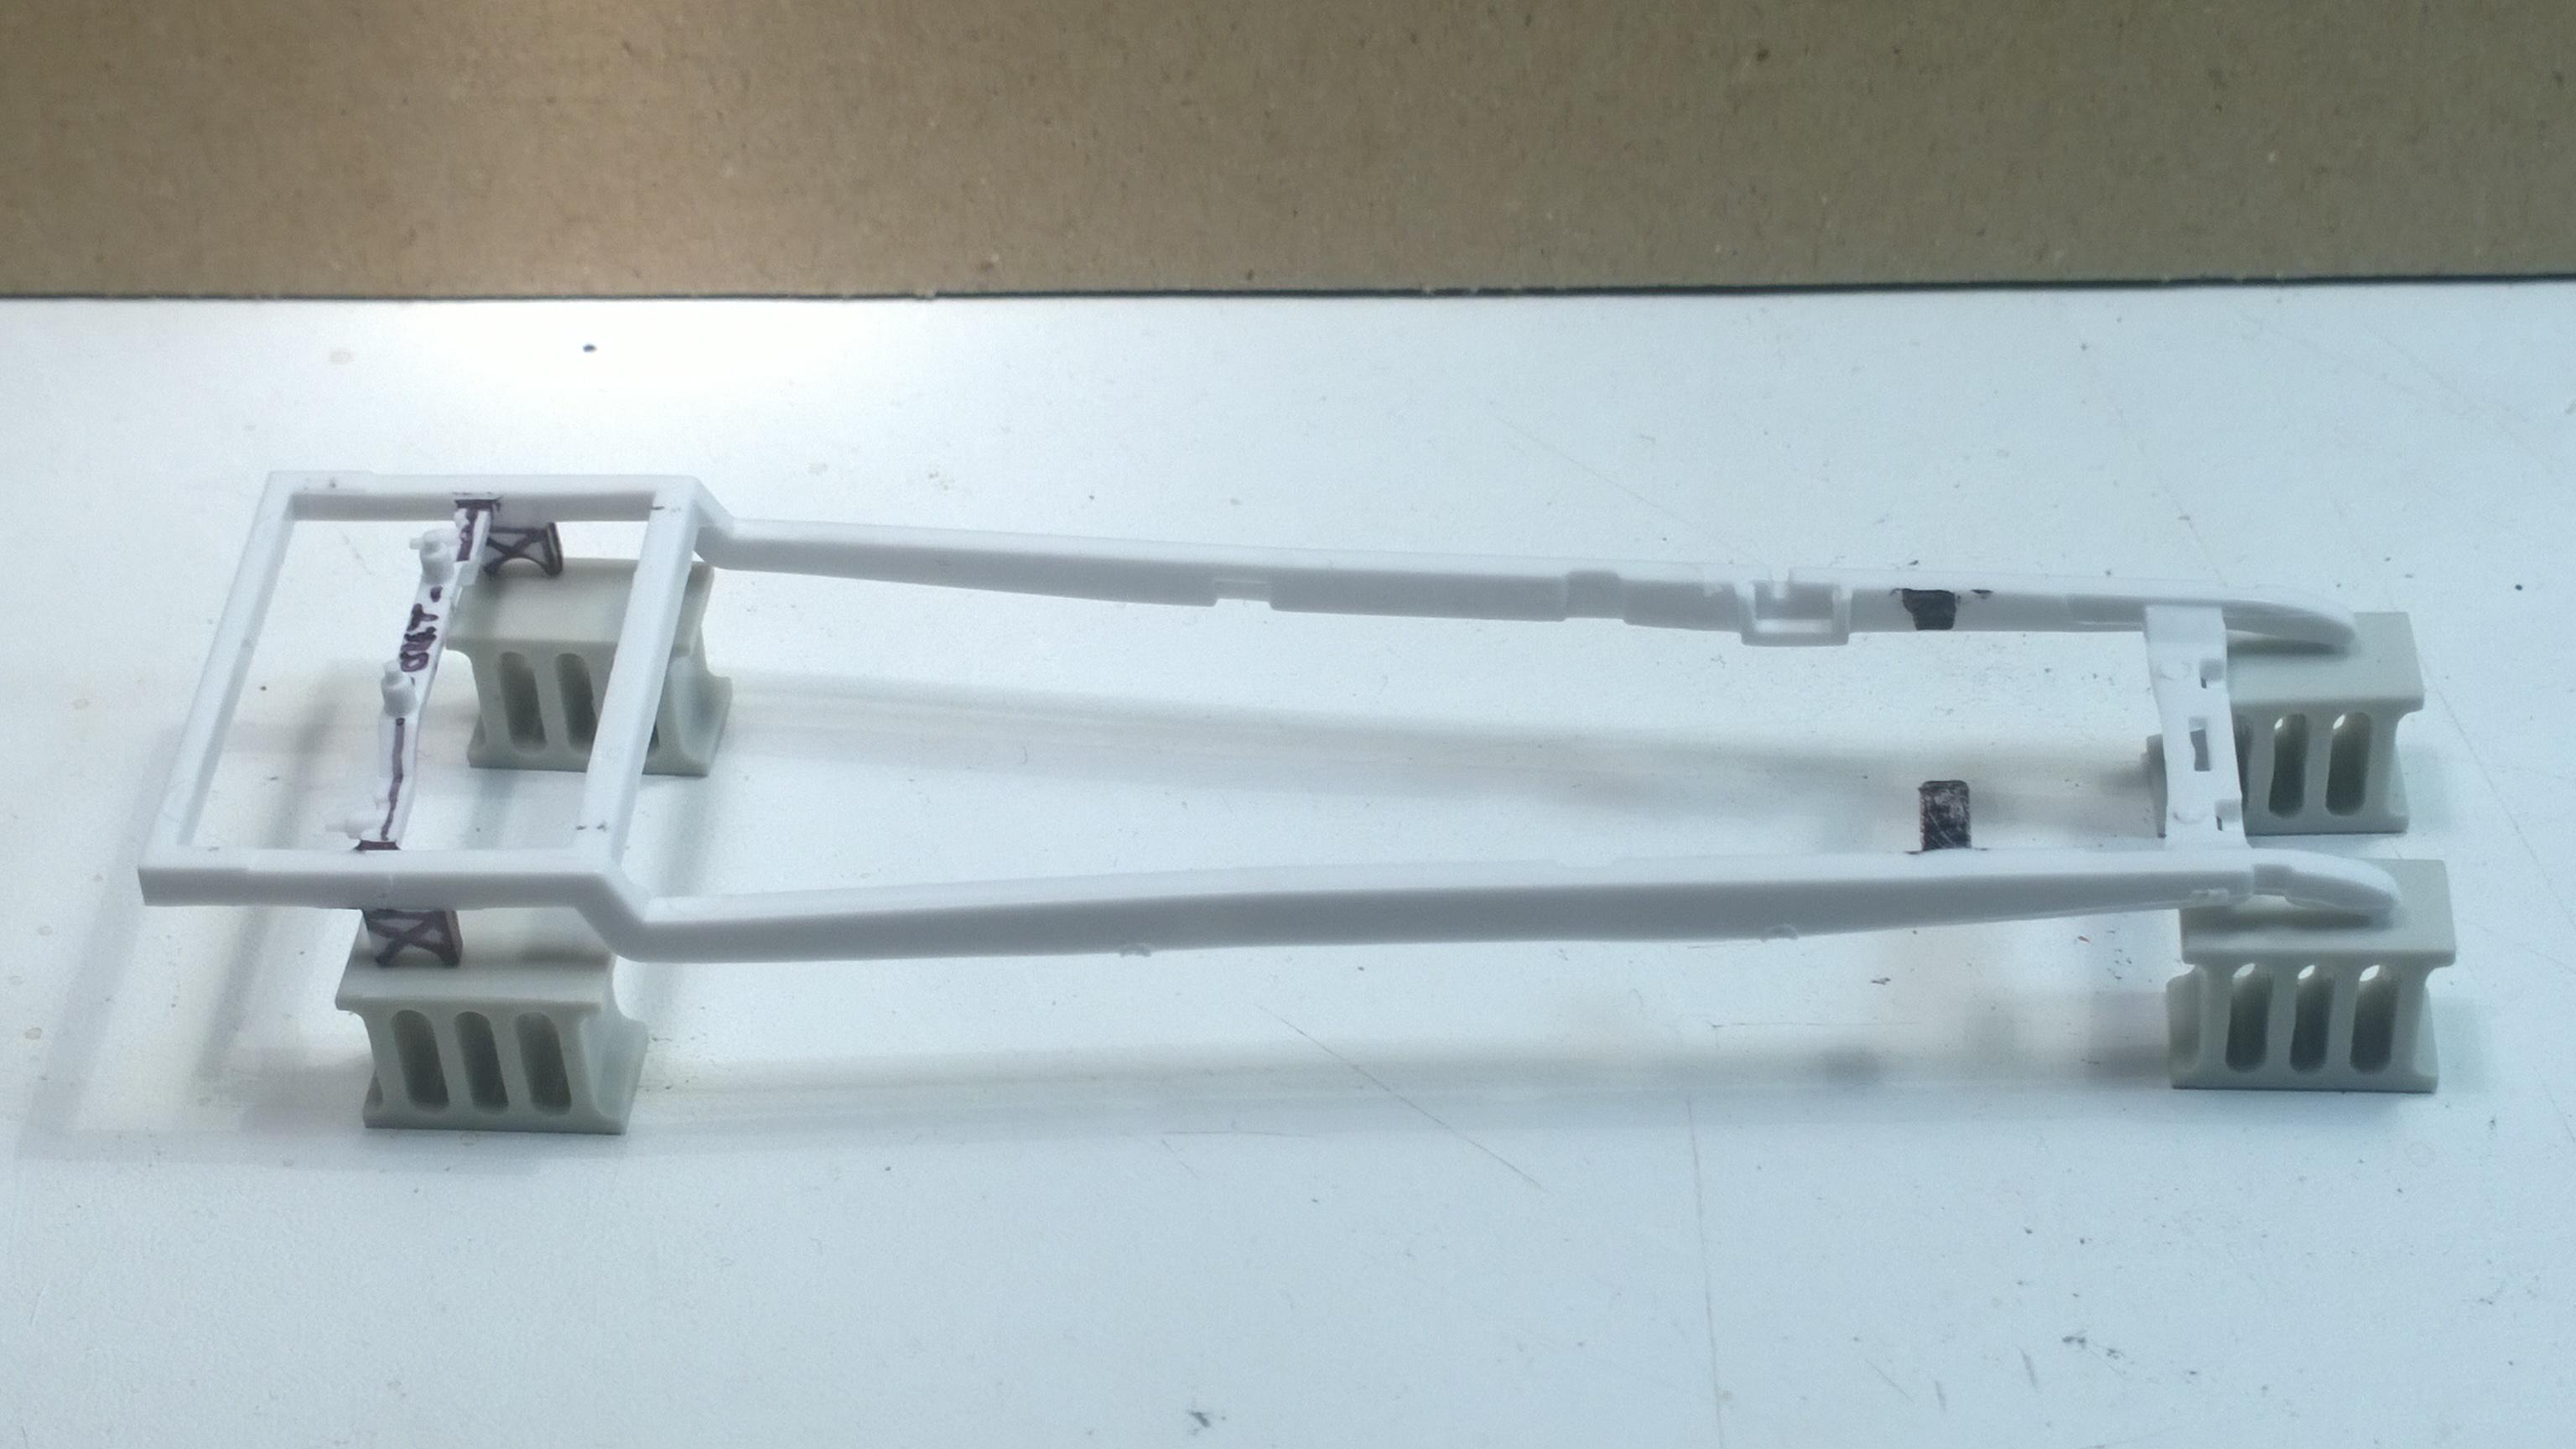
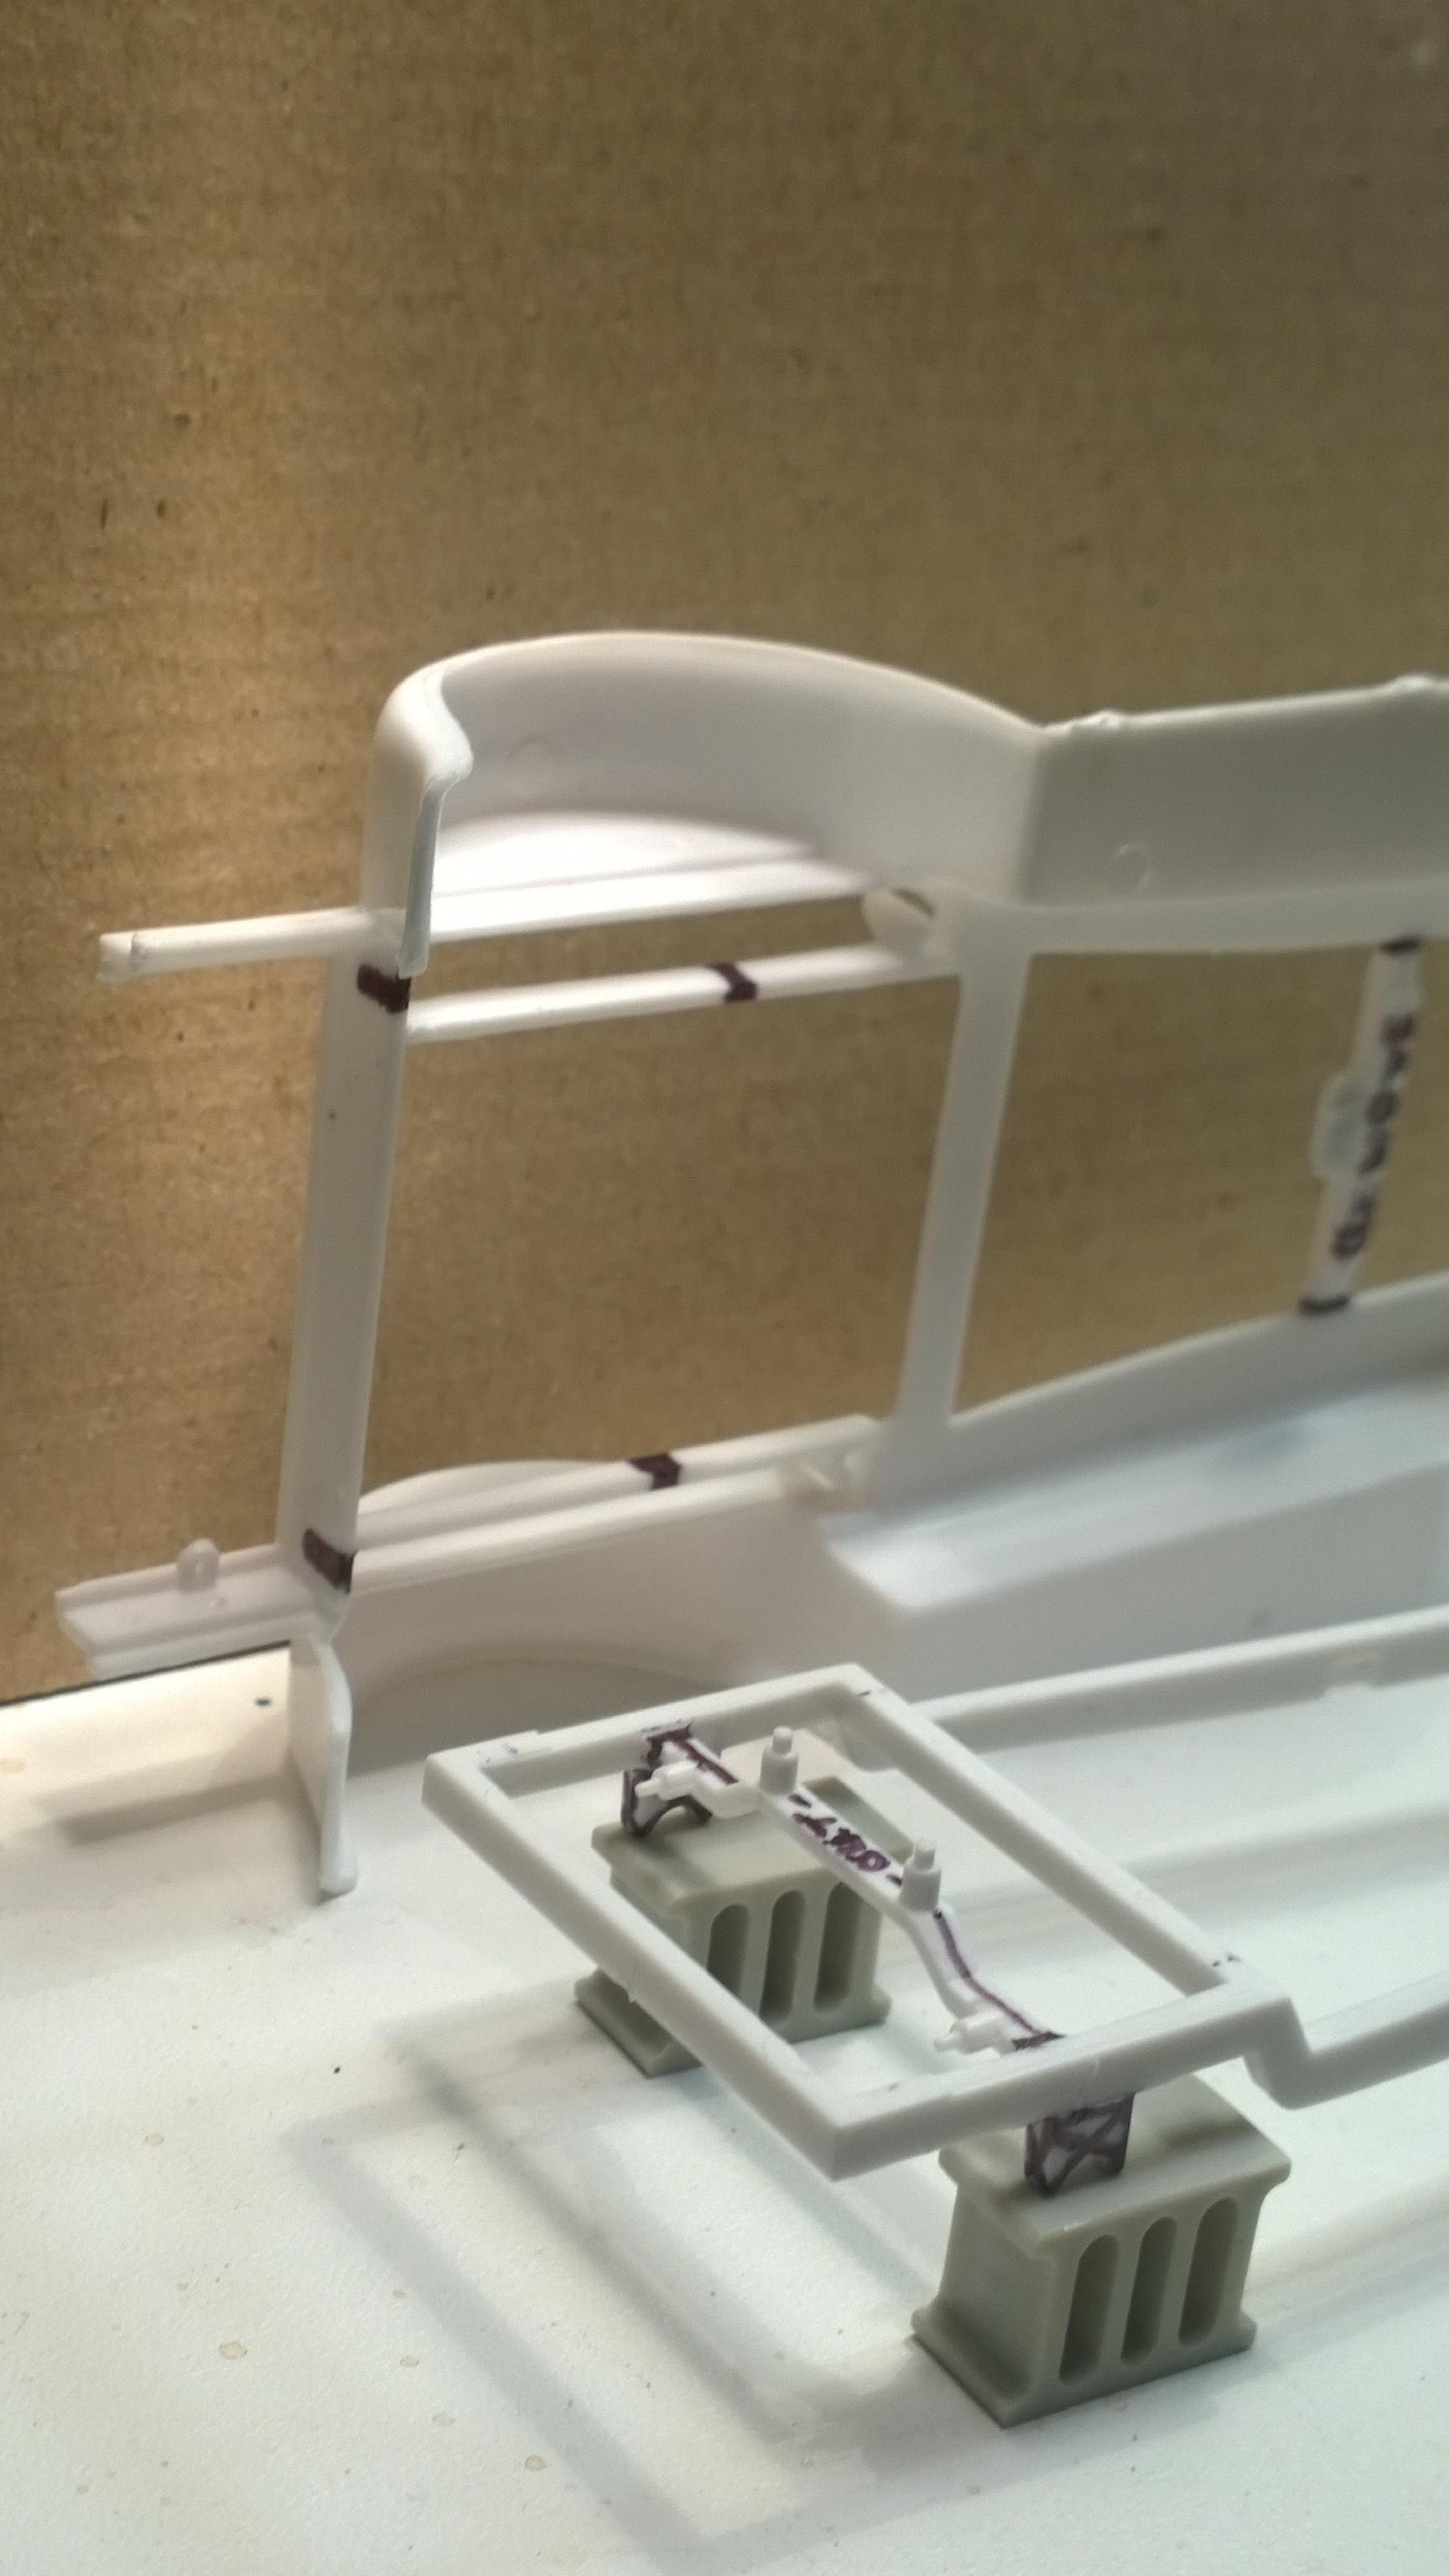
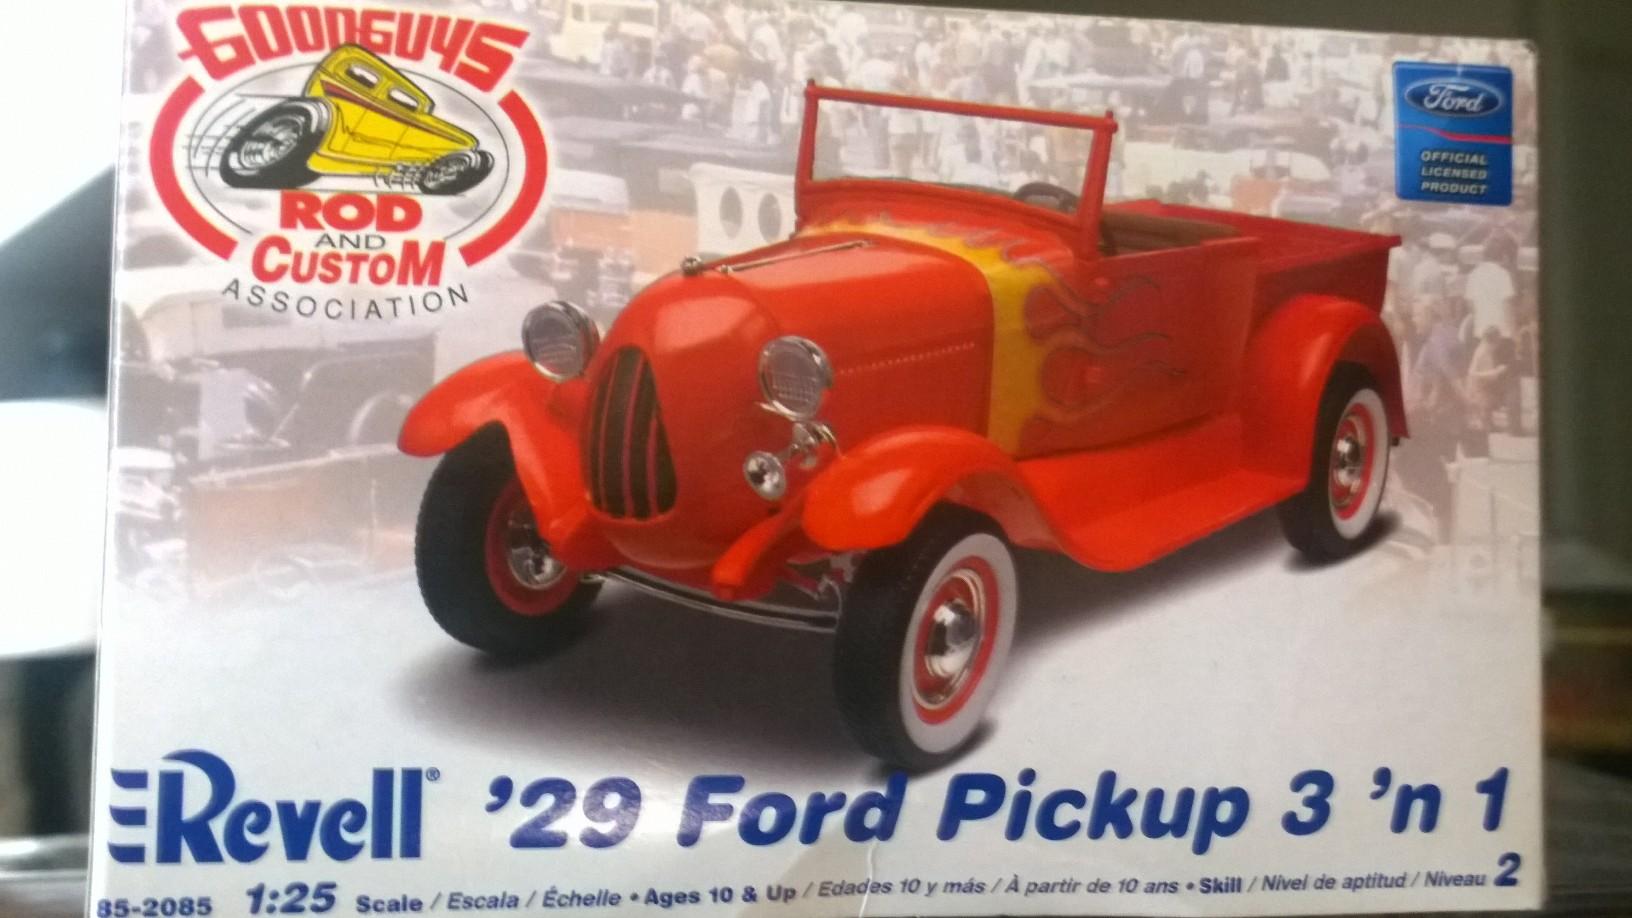
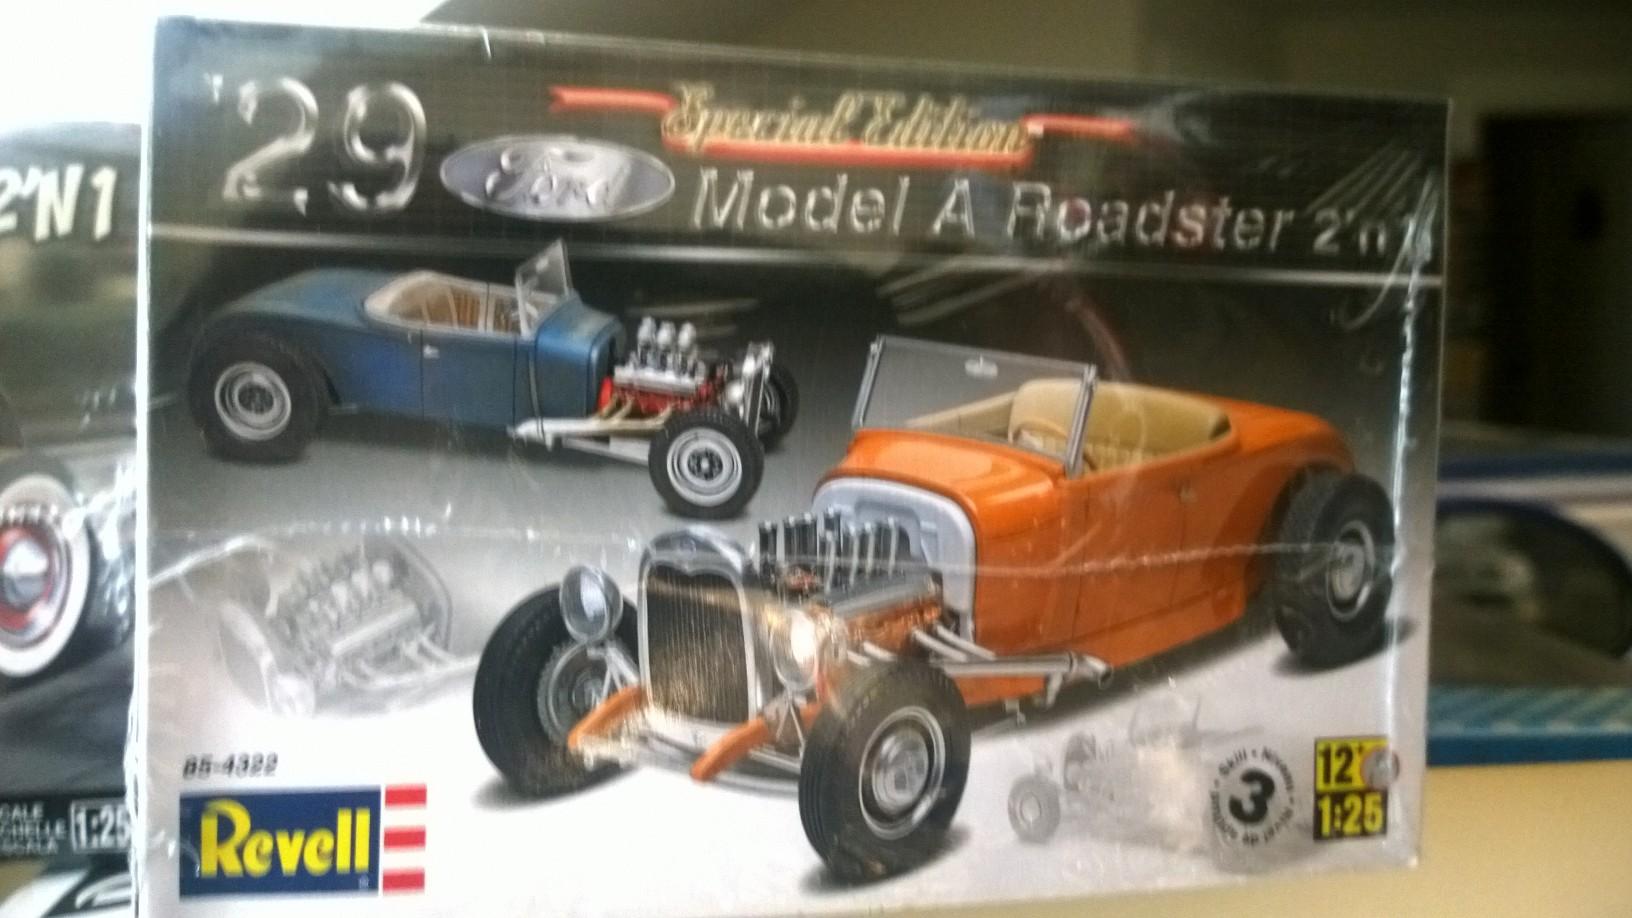
'29 Donor List Revell '29 Ford Pickup Kit 2085 Custom Rod 3'n1 Parts #: 51 Fenders 53 Pickup Bed 54 Tailgate 95 Cab Revell '29 Ford Roadster Kit 4322 Model A Roadster 2'n1 Parts #: 77 Fame/Chassis Revell '32 Ford Sedan Kit 85-2062 Street Rod Parts #: 28 Dropped Tube Front Axle 77 Fame-Chassis Marked for De-Construction 77 Fame-Chassis Marked for De-Construction & 51 Fenders Marked for De-Construction 77 Fame-Chassis Marked for De-Construction & 51 Fenders Marked for De-Construction 77 Fame-Chassis Marked for De-Construction & 51 Fenders Marked for De-Construction 77 Fame-Chassis Marked for De-Construction & 51 Fenders Marked for De-Construction Each BLACK mark and parts marked OUT & REMOVE are then scribed with the actual "cut line". Cutting decisions are made on a "Leave" the line and "Take" the line basis. Always taking into consideration the width of the knife/saw blade; the cut line may be be inside the cut line or outside of the cut line. Deciding to leave or take the line depends on how much material is to be removed or cut off. @Rocking Rodney Rat will say, "I measured it once and cut it twice and it's still too short!" Measure twice and cut once! Cut long and file or sand to length has always worked in craftmanship and modeling. It's always easier to take a little more off that to have to add a little back on! (Or is it?) -KK
-
My hat's off to ADL and his exciting finishing touches that he has added to his @tim boyd Tribute '29A Closed Cab Pickup build! The pictures do not do the work @Dennis Lacy put into these details justice! The scratch-made fuel block is sheer genius! The wiring looms are a whole 'nother story! They were not designed for the gage wire he used and yet they look like they were born there!! Excellent work, Brother!!! -KK
-
Michael, (@mrm) Your Tribute '29A Closed Cab Pickup build is coming along quite well! I'm really enjoying all the variations that keep popping up in your thread and others that have been built over the years since @tim boyd built his '29A Closed Cab Pickup decades ago!! Maybe, when we all get done, we can post a new thread showing even more variations on the same theme!?. -KK
-
Back from the drawing board with a plan for the K&R Kustoms+Rods Tribute '29A Closed Cab Pickup. Using only parts sourced from Revell kits issued most recently: Starting with the frame from the '29 Model A Roadster: Revell '29A Closed Cab Pickup Fenders & Running Boards: Revell '29A Closed Cab Pickup Cab: Revell '29 Model A Roadster Floor Board & Firewall: As these parts come together, step by step pictures of how the parts have to be modified to be able to fit in to the K&R Kustoms+Rods Tribute '29A Closed Cab Pickup. Discussing this build with @Rocking Rodney Rat, the first concern was that this shouldn't be complicated! So, to that end... this is going to be relatively easy build with mods that most modelers can do with basic modeling tools. And, by sourcing parts from currently available Revell kits makes this uniquely different than the builds @Dennis Lacy and @Rocking Rodney Rat are sharing in this thread! Thanks to one of my life-long mentors, @tim boyd, the inspiration for the TRIBUTE build will play out here on our MCM Forum! Thanks, Guys! -KK