Mr. Metallic
-
Posts
2,786 -
Joined
-
Last visited
Content Type
Profiles
Forums
Events
Gallery
Everything posted by Mr. Metallic
-
Hobby Lobby does carry some of the Atlantis ships and aircraft, but for some reason they haven't carried any of the automotive stuff. ?
-
I guess I never posted these pics before the holidays. I was hoping to get some bench time between the holidays on my time off but it didn't work out that way. Anyway, here is where this one stands right now. I cut out a bit of the bed floor to allow the bed to sit down where I want it. The rear crossmember is now permanently in place. And here she is mocked up on all 4's for the first time. With the stance locked in I can start finessing other aspects. You can now see the successfully bobbed rear fenders as well. And I grafted in the cowl from the new roadster so I can use the Duvall windshield. Out of the 2 of those new kits I've bought one windshield was perfect, and the other was warped. If you buy one open it up right away and if you have a warped one get your request in to Revell, they are aware of the issue. I'm going to make mine work by pinning it to the body. Fingers crossed during final assembly. Here you can see the new motor mounts I scratched up from evergreen C channel and tubing. Don't mind the gap between the block and the intake, that's me not making sure everything is where it belongs before I snapped the pic. Flatheads can get lost in a 32 engine bay, especially with fenders, so I want the engine sitting up high. The new motor mounts necessitated small notches in the lower edge of the fender so it sits flush on the frame. And now you can see the effect of mounting the engine higher up.
-
No Witty Name Revell 32 Roadster (update 11/9)
Mr. Metallic replied to Mr. Metallic's topic in WIP: Model Cars
If that's the case then I must not have any copies of Dennis top. I swear I bought some from you but I can't find them anywhere Tim, this one got shuffled a few inches deeper on my bench when I started working on the 32 phaeton conversion for Ed, and I couldn't help myself and started the shorty 32 RPU when I got some sweet new parts from Texas 3D Customs as well. I was hoping to spend my holiday time off work at the bench but ended up doing stuff to the house instead. My bench is seriously 8 projects deep right now, surprised i still have any room to work. -
Revell Chrome Spray
Mr. Metallic replied to Luc Janssens's topic in Car Aftermarket / Resin / 3D Printed
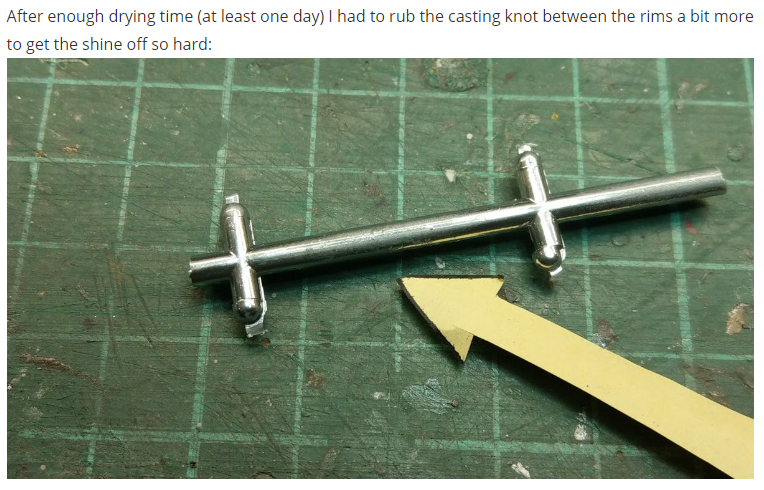
My understanding of the review is that the handling properties are better than Molotow. Sounds like he had to rub it pretty hard to diminish the shine. And I wonder if it would be even better if it sat in the dehydrator overnight. I'm going to see if my LHS can get some and give it a whirl.
-
@Ace-Garageguy thought you'd be interested in this since you started that "ultimate SOHC 427" thread awhile back. I can attest that their offerings are top notch. https://tx3dcustoms.com/products/ford-427-sohc-hilborn-injected
-
The Rep +Min piece is beautiful, but you may want to do more than eyeball it before you get started. The new roadster cowl is about 1 mm wider than the "old" Revell tooling from 1997. You can probably make it fit with some gentle sanding but I would hate to see you get to the paint stage and realize it's not a "drop-on"
-
I am done buying Monogram 40 Fords
Mr. Metallic replied to junkyardjeff's topic in General Automotive Talk (Trucks and Cars)
You can use mineral spirits to help with some of the glue joints. Take a brush, load it up with the MS, and brush it on the glue joint. Wait a couple minutes, and then gently try to work the parts apart. For more stubborn glue joints you may have to score the glue first with the back of a knife blade or a razor saw. -
That's exactly what I did.
-
Chris from Maple Leaf Modelworks has designed a great quick change package that is designed specifically for the Revell 32 Ford series. It's so well done the parts friction fit together for mockups. He also makes one for the Revell model A series as well. He has tons of cool hot rod engine parts as well. I'm using the QC rear on this project. need to snap some pics.
-
Revell 32 Ford Roadster (New tool)...
Mr. Metallic replied to SpikeSchumacher's topic in WIP: Model Cars
Already done. Bu I only pinned the middle. Drilling holes in those skinny outer frame was a scary proposition. Drilling the center one was nerve wracking enough. -
I don't have an issue with the missing back panel since I'll be using the bench seat. Just trying to help Stewart with his build since I have insider knowledge pertaining to that RPU body ?
-
The back panel that is included is the one for the Rat Roaster, with it's inset diamond tuft upholstery and stamped circles in the sheetmetal. Not that it couldn't be modified to work with the new interior side panels, just saying.
-
Thanks again. I'm already working on bobbing a set. After a busy weekend working on the house i hope to get back to this soon.
-
It's designed to fit the 1997 tool roadster kit. All you need to do to fit the interior is trim the mounting tab off the back of the interior. This is my first attempt at adapting the new tooled roadster interior, but so far it looks to only require a small trim of the upper corner of the side panels. The unfortunate part about the new roadster interior is there is no back panel, so if you want to run buckets you have to scratchbuild one.
-
Revell 32 Ford Roadster (New tool)...
Mr. Metallic replied to SpikeSchumacher's topic in WIP: Model Cars
I've got two of these kit. Once has a warped windshield, the other doesn't. I drilled a small hole on the underside directly under the center support and inserted a pin. Then I drilled a corresponding hole in the cowl. When I press down gently on the center the windshield then conforms to the cowl, so I think it can be saved. Nice paint job on yours -
Yes, another project on my bench. Gotta strike while the inspiration is hot, right? Lately I've been getting some stuff from Texas 3D Customs. Beautifully rendered and printed 3D items. When the Pines Winterfront grill hit my mailbox my wheels immediately started turning. I wanted to build a 32 to celebrate the 90th Anniversary of the Deuce. I have been wanting to build one of Drag City Casting's 32 roadster pickup bodies on a set of fenders for years now. Combine these three factors and you get this... Here you can see the Texas 3D Custom flattie dropped between the rails. I pinned the headers to the block. It's a tight squeeze between the rails, but it fits. You can also see I shortened the bed from a Revell 29 Ford pickup (shorty). This frame/fender set is a piece I have sitting on my bench at all times just to drop bodies on and throw wheels under (that's how much I love 32 Fords, who else does that?) Once I get another set of fenders I'm going to try my hand at bobbing them in the rear. Wanted to use the sweet quick change rear end from Maple Leaf Modelworks under the rear since it will be visible with that short bed back there. Chris does make a set specifically for the Revell 32 frame, but when I placed my order he didn't have those yet, so I'm adapting the first set he created for the 32 frame in Revells new Model A kits (which are slightly narrower in the rear area). He did a great job designing this because you can friction fit it together for mockup purposes and it doesn't come apart. I set about removing the rear floor and gas tank, while taking care to leave stub portions of the kit molded in crossmember for the new spring crossmember to marry with. You can see I marked just outboard of the molded in shock mounts. After removing the floor I was ready to see how the new crossmember fit. Like a glove. @Texas_3D_Customs @Spex84 @krassandbernie
-
With RRR's permission I'm sharing the measurements I pulled off of Revells roadster bodies from the last 25 years (since they introduced the roadster as part of their new (at the time) 32 Ford line back in 1997) Here is the original 1997 roadster body. Passenger side Drivers side A difference of only .020. To provide some perspective, here is what .020 looks like. Pretty small, but enough to cause a gap. However, a gap that is easily addressed with a little sanding and careful positioning during final assembly (or a little luck i guess) And here is the NEW roadster body that just came out. Drivers side and passenger side Pretty consistent with the 1997 body. I work in quality, and the .020 difference between the parts would land solidly within our allowable variation.(but we're making office furniture, not aviation components where a .020 gap could be an enormous problem, just for perspective ? ) Here's the measurements of the wheel opening size since RRR noted the NEW body looks larger... 1997 passenger- 1.387 driver- 1.419 2009-ish (red car on box with flames) passenger- 1.388 driver- 1.405 NEW passenger- 1.434 driver- 1.423 I think what is skewing the numbers of the NEW body is if you look closely they molded a small lip inset from the face of the body that actually gets bigger towards the top of the opening and tapers back down at the rear of the opening. I forgot to snap a pic. So, the actual trim/lip around the rear wheel opening appears to have a gap when rested on the fender set. But Revell makes no claims that their body should fit the fenders offered in other kits, so they are in the clear. I just offer up this analysis to make fellow builders aware of the potential (relatively small) issue.
-
Thanks for confirming I'm not crazy ?. Or maybe we both are haha I'll throw a set of calipers on a body when I get home.
-
I'll take a couple sets off your hands. ? But seriously, this is looking good. And thanks for the heads up on the wheel openings being slightly larger. Have you compared both the drivers side and passenger side fit? The reason I ask is the 97 tooled Revell roadster body was asymmetrical left side vs right side. The distance from the front of the cowl to where the rear wheel opening starts was different, meaning the body wouldn't drop on their fenders offered in the other kits without some work. I suspect that is why we never got the roadster with fenders. It looks like they may have addressed that issue with the new body ?
-
Great info, but not sure why you shared it in this thread about Revells revision of the Rat Roaster 32 Ford?
-
CORRECTED. THANKS
-
The Black Widow and Green Hornet have been available recently and with the exception of the tires now being plastic instead of rubber in the GH and newly molded rubber for the BW, they are essentially the same as the first issue. All the parts to build the Badman are included with the just released Monogram 55 Chevy kit, with the exception of the decals. However, if you're looking to go the polished plastic route with any of them you'll want to seek out the older issues.
-
Man, watching you cut/drill/modify all these beautifully painted parts is nerve wracking. Thanks for taking us along on the journey though.
-
I'm working on a resin master and stumbled on something I'm not sure has been mentioned here before or not. But the hoods between the older tooled Revell 32s vs the new roadster/rat roaster tool are a little different. This is the result of a conversation between myself and @68shortfleet Well, here are my findings. I compared the new tooled roadster hood (NEW) to the following... first issue three window (3W) five window (5W) Rat Roaster (RR) Width wise, it appears the NEW and the RR are the same. The crown is the same too. Interesting bit is note the slight forward angle of the NEW hood towards the bottom. This is right out of the box. Here is the NEW compared to the 3W. Note the hoods are aligned at the bottom to show the very slight overall width difference at the top of the pic. About 1mm (or roughly 1 scale inch) Same result with the NEW compared to the 5W hood. Maybe even less of a difference than the 3W Now this is where the difference is more readily apparent, is the thickness and inner contour of the new hood (and the RR). Both of those kits have a stock-ish firewall. The upper profile of this firewall is flatter and wider than the modern style firewall with the recessed clearance box molded in it that has been in every previous version of the venerable Revell 32 Ford line. Note how tightly the NEW hood snugs against the NEW firewall Here is the modern firewall, see how far into the NEW hood the firewall goes, that illustrates what the 1mm width change, the thinner hood thickness and the smaller firewall dimension makes. You can use the NEW hood on old builds, but using the old hoods on builds based on the RR and NEW kits (plus any resin conversions based on those bodies) will require alteration of the hood. Lastly, here are the old modern firewall piled on top of the NEW firewall to illustrate the differences. Revell actually did a good thing when they tooled up this NEW firewall to address an issue that has always existed with the Revell 32 Ford line, is that there is often a visible gap towards the bottom of the firewall where it meets the cowl. Much appreciated Revell! In conclusion, I'm not trying to say Revell did anything wrong. Just wanted to raise the awareness among my fellow scale hot rodders out there.
-
Upcoming Round 2 reissue news via Spotlight Hobbies
Mr. Metallic replied to Dave Darby's topic in Car Kit News & Reviews
@Plowboy, this is what I was talking about. Thanks Dave!