Mr. Metallic
-
Posts
2,781 -
Joined
-
Last visited
Content Type
Profiles
Forums
Events
Gallery
Everything posted by Mr. Metallic
-
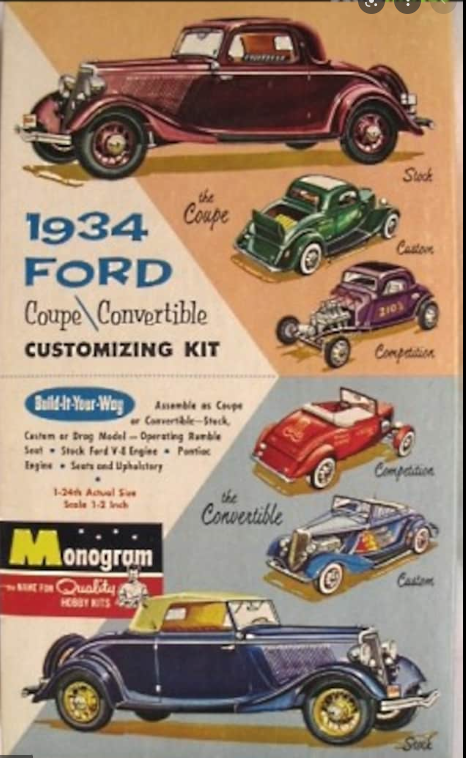
Didn't want to spend too much time trying to come up with a witty name for this one, hence the title. Anyway, thanks to my good friend Randfink, I now have the brand new release of the Revell 32 Ford roadster in my hands. This is the tooling that was released as the Stacy David Rat Roaster a few years ago. Kudos so Revell for taking the opportunity to get this kit back in the catalog now that the Stacy David licensing has expired. Double kudos to Revell for keeping all of the RR parts in the kit , rather than replacing them, they just tooled NEW trees of updated parts but still kept the RR parts in the box (with the exception of the porthole riddled hood and the glass for the chopped windshield glass). even the sweet electric guitar is still there. For those of you unfamiliar with the 1:1 RR, it is kind of a mish-mash of several different eras of hot rodding, and the end result is not everyone's taste. However, when Revell decided to partner with Stacy David to do the RR in scale, this was a boon to scale hot rodders (despite it not having the 1:1 front beam axle, but lets not go there). In order to use this tooling again Revell had to modify the look of the car to avoid copyright and royalty issues, and they took this opportunity to give us some really nice new parts. Specifically an all new traditionally styled interior, lakes style exhaust headers for the SBC, and a Duvall style windshield. Out of the box you can build a perfectly serviceable "newstalgia" style hot/street rod. But I wanted to take this opportunity to backdate it a bit to plant it firmly in the early 60's era of hot rodding. By doing some simple parts swapping from readily available sources I hope I can inspire someone else to try their hands at backdating this kit to more accurately fit one of the earlier eras of hot rodding. Lets get into it. First, here is a look at the new Duvall windshield. While observing the test shots and first box art build of this kit online I began to worry that they had designed the new windshield to be too upright. My taste (and the typical look) of a Duvall is to be raked back a bit. So, first thing I did when I opened the kit is test fir the windshield. Good news is that it looks much better than I had hoped. Not so great news is that it will be tricky to install in the optimal position since there are no positive locating points. There is a slight raised line on the cowl to show you WHERE it goes, but it is so fine that it doesn't give you a positive mounting surface. Anyway, here it is. I built this in my head over and over once I found out this kit was hitting distributors, so I had gathered a bunch of parts ahead of time. The parts included in this kit are most easily adaptable to an early to mid 60's hot rod. Of course it can go earlier or later depending on how deeply you want to swap parts. However, by the 60's Duvall style windshields had fallen out of style. Nice thing is that the chopped stock-style windshield is still in the box. I'll also be swapping out the beautifully molded, but too modern Weiland blower setup for a more era correct blower. I'll be swapping in the beam axle from the Revell Model A series. Not sure how extensive my mods into backdating the rear setup will go, but the airbags will definitely disappear. I went through a handful of wheel/tire combos. I wanted to try the beautiful new Round2 Firestone Supremes from the parts pack, but I couldn't find a good matching rear tire. The different width of the whitewall bothered me paired with these slicks. So, I swapped them out for the standard whitewall found in tons of Round2 AMT kits. Much better. And just for fun I tried some blackwall tires with the beautiful pad printed lettering giving it a definite McMullen Roadster vibe. But I decided to go with the thin whites. Then spent the rest of my evening properly modifying the tires and the 5 spoke wheels from the Revell 32 Ford series (not in the RR based tooling). The rear needs to come down a bit, but otherwise I'm definitely digging this.
-
FuturA Attractions- Very nice stuff. I've never ordered anything online but I have seen and purchased their products in person.
-
First I would take a protractor and make the angled reference lines from top to bottom so you have something to align your pleats to. You don't need to fill up the panel with lines or worry about spacing, you just need 2-3 lines as reference to help you eyeball the pleats as you install them. It will also allow you to make sure the pleats line up visually from the top of the panel to the bottom. Next cut your flat center section out of sheet Evergreen, in whatever thickness matches the thickness of the 1/2 round you are going to use. Glue that to your panel Start installing your pleats from one end, working towards the other. i only use thick super glue for tuck and roll because if you use plastic glue it will probably loosen up your previous work. Install one pleat at a time and allow a few minutes to dry between each piece. It takes a little while but is worth it.
-
Grill design requests
Mr. Metallic replied to Texas_3D_Customs's topic in Car Aftermarket / Resin / 3D Printed
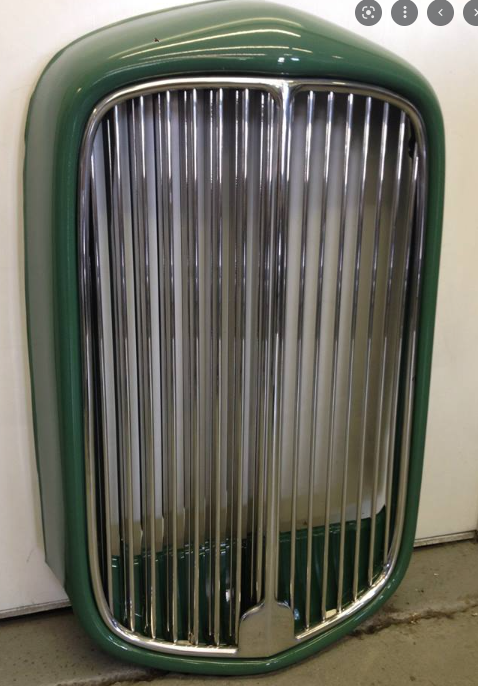
Grills are essentially the same. I fit a first issue roadster (25 years old now ?) grill into the new shell, but I did have to make a swipe down each side with my sanding stick. Removing the chrome was enough to allow it to snuggle into the new shell. So that would mean the old shells are fractionally larger, which would allow a grill designed to fit the new shell to easily fit the old shells. If you need a new shell and/or old shell for scanning or whatever let me know. -
I don't appear to be having the issue anymore
-
I know when we do new product launch (office furniture industry) we have a pre determined period of time that we have to perform 100% inspection of product going out the door. It used to be a step down process as production ramped up as long as they passed at a certain rate. But now they have to stay above a passing threshold for a certain number of consecutive weeks, and once they do the full inspection is removed. However, we are open to legal issues if there is anything wrong with our products because someone could get hurt using them if not built correctly. We do deal with the plastic industry quite a bit, and perform 100% incoming inspection on parts before they are used for production for a certain number of shipments.
-
This tooling actually started out as this in the early 60's It went through a couple renditions before Monogram made the savvy move of capitalizing on ZZ Tops resurgence in the early 80's by almost completely altering the tooling. Even though the engne is supposed to be a SBC you can still see the vestiges of the Pontiac black from the original kit. I built the ZZ car back when it was new, but i was still a brush painting, gluey fingered kid, so my recollection of how good the kit was is not really valid. i have however seen this kit turned into some pretty great street and hot rods over the years. I really need to pick up the new version of the ZZ car to try to build a replica of the 1:1

-
It's been released within the last 10 years, so the tooling is probably permanently stuck in China. Before the version Dave shared was released many were holding out hope that the previous owners of Revell would backdate the tooling to the Little T configuration like they did with the Blue Bandito (former Blue Beetle) but it's doubtful that will happen now, even though they sold out both runs of the Blue Bandito
-
The Beetles
Mr. Metallic replied to Mr. Metallic's topic in WIP: Model Trucks: Pickups, Vans, SUVs, Light Commercial
Sure can, the bed dividers between the wood slats are Evergreen .060 x .040, but it could probably handle up to .100 thick. -
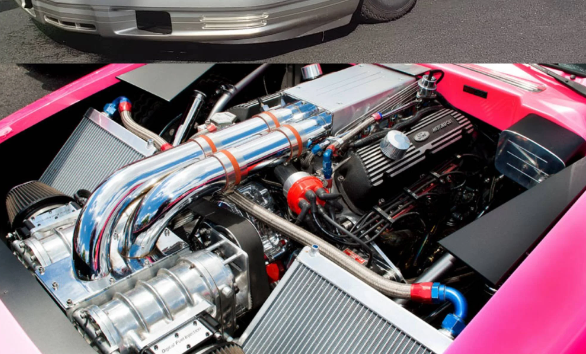
I love this kit, built both the Lincoln and the T-Bird. The Lincoln ended up with one my first decent spray paint job, and it still sits on my shelf all these years later. The 'bird got torn apart for the pro street goodies. Your color combo is looking sharp. Here's a pic of the Matt Hay 'bird to show why the distributor is at a right angle. It wants to live right where the intake tubes from the blowers go.
-
Grill design requests
Mr. Metallic replied to Texas_3D_Customs's topic in Car Aftermarket / Resin / 3D Printed
The Rat Roaster (on which the new roadster is a modified reissue) was an all new tool when it came out. Designed to be compatible with the previous Revell 32 series kits, but some things were changed. 99% sure the grill parts should be the same dimensionally, but I want to confirm that for you first. -
Never seen these before, but where is the scale listed?
-
I thought the point of this thread was to specifically discuss the "completely recreated tooling" kit that Round2 strongly hinted at? Your thread, your rules. But to this point 20 pages filled with speculation around this one release from Round2, now about to be opened to a free for all? ? Like I said, your thread, your rules. I'm just going by your very first post 20 pages ago.
-
Had to scroll up and refresh my memory to what you had going on. Glad to see this one back.
-
Hard to go wrong with a black 32 Ford. You're off to a good start. There are a few intake options for the small block Ford from the kit just in the 32 series alone, let alone all the 1st gen Mustang kits out there to steal from. Of course, a Y block would be cool.
-
Grill design requests
Mr. Metallic replied to Texas_3D_Customs's topic in Car Aftermarket / Resin / 3D Printed
Is the 5W still in the Revell catalog? I was thinking of fitting it to the about-to-hit-the-shelves 32 roadster out in Europe already). I'm assuming the 5-window grille (and all Revell tools before it since they are all the same tool) and the new roadster grille would be the same size, but I will verify that first. Hate to have to do two different versions, but if they are in fact different that would be your call. I'll try to get a comparison made tonight and let you know. -
Grill design requests
Mr. Metallic replied to Texas_3D_Customs's topic in Car Aftermarket / Resin / 3D Printed
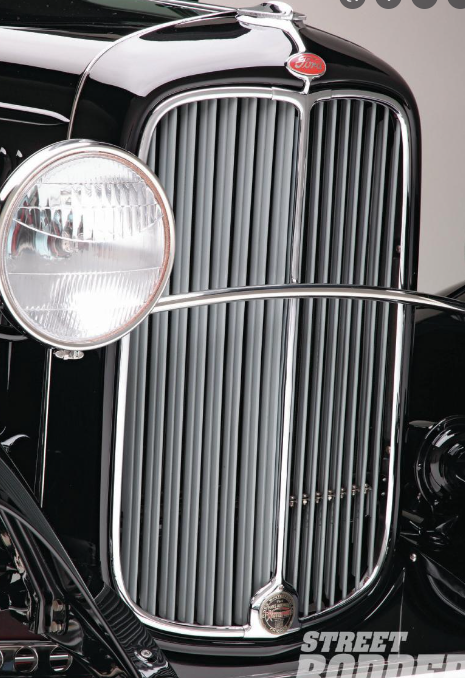
How about a Pines Winterfront grille for 32 Fords? Could be paired with a stock style 32 radiator as well (just a thought) I know those long bars could be problematic to print, but just thought I'd throw it out there. I'd gladly send a Revell 32 shell for you to scan
-
32 Ford Pines Winter front grill
Mr. Metallic replied to m3fan's topic in Model Building Questions and Answers
As long as one of those projects is the 27 T I'll let this slide ? -
When they do clearance it is never advertised. It is different from the every-other-week 40% sale. And not all stores do their clearance markdowns at the same time. My local store always seems to be a couple weeks behind all the other stores that get mentioned in this thread. And typically I miss them because there is a guy that comes in and buys the clearance kits by the literal cartload. I watched it happen once and was confirmed to happen just about every time by employees.
-
You're welcome. I thought I had some in progress pics but couldn't find any
-
Not so much
-
32 Ford Pines Winter front grill
Mr. Metallic replied to m3fan's topic in Model Building Questions and Answers
I was trying to convince @Spex84 to try designing one for 3D printing but he's right, because those slats are so thin it probably wouldn't print well. -
Is it just me, or do many of the forums appear condensed over to the left side of the screen leaving a big grey space on the left?
-
That last pic with the 1/2 round details is headed in the right direction. That big blank space towards the front is just begging for some detail. Either add a door that would indicate storage, or add some simulated bead rolling which would be added in real life to keep that panel from bending. You could use the same 1/2 round and just add a few strips of different length to fill that space. Here's a quick and dirty version done with my computers snipping tool
-
They appear to have replaced the "buick porthole" hood with the new stock style one. Odd that's the only part they decided to replace on all the tooling, leaving the rest of the RR parts as extras. Don't get me wrong, I'm not complaining, especially about the chopped windshield still being included (I can use acetate for the glass). I always appreciate extra parts, especially when they're cool ones.