alan barton
-
Posts
2,105 -
Joined
-
Last visited
Content Type
Profiles
Forums
Events
Gallery
Everything posted by alan barton
-
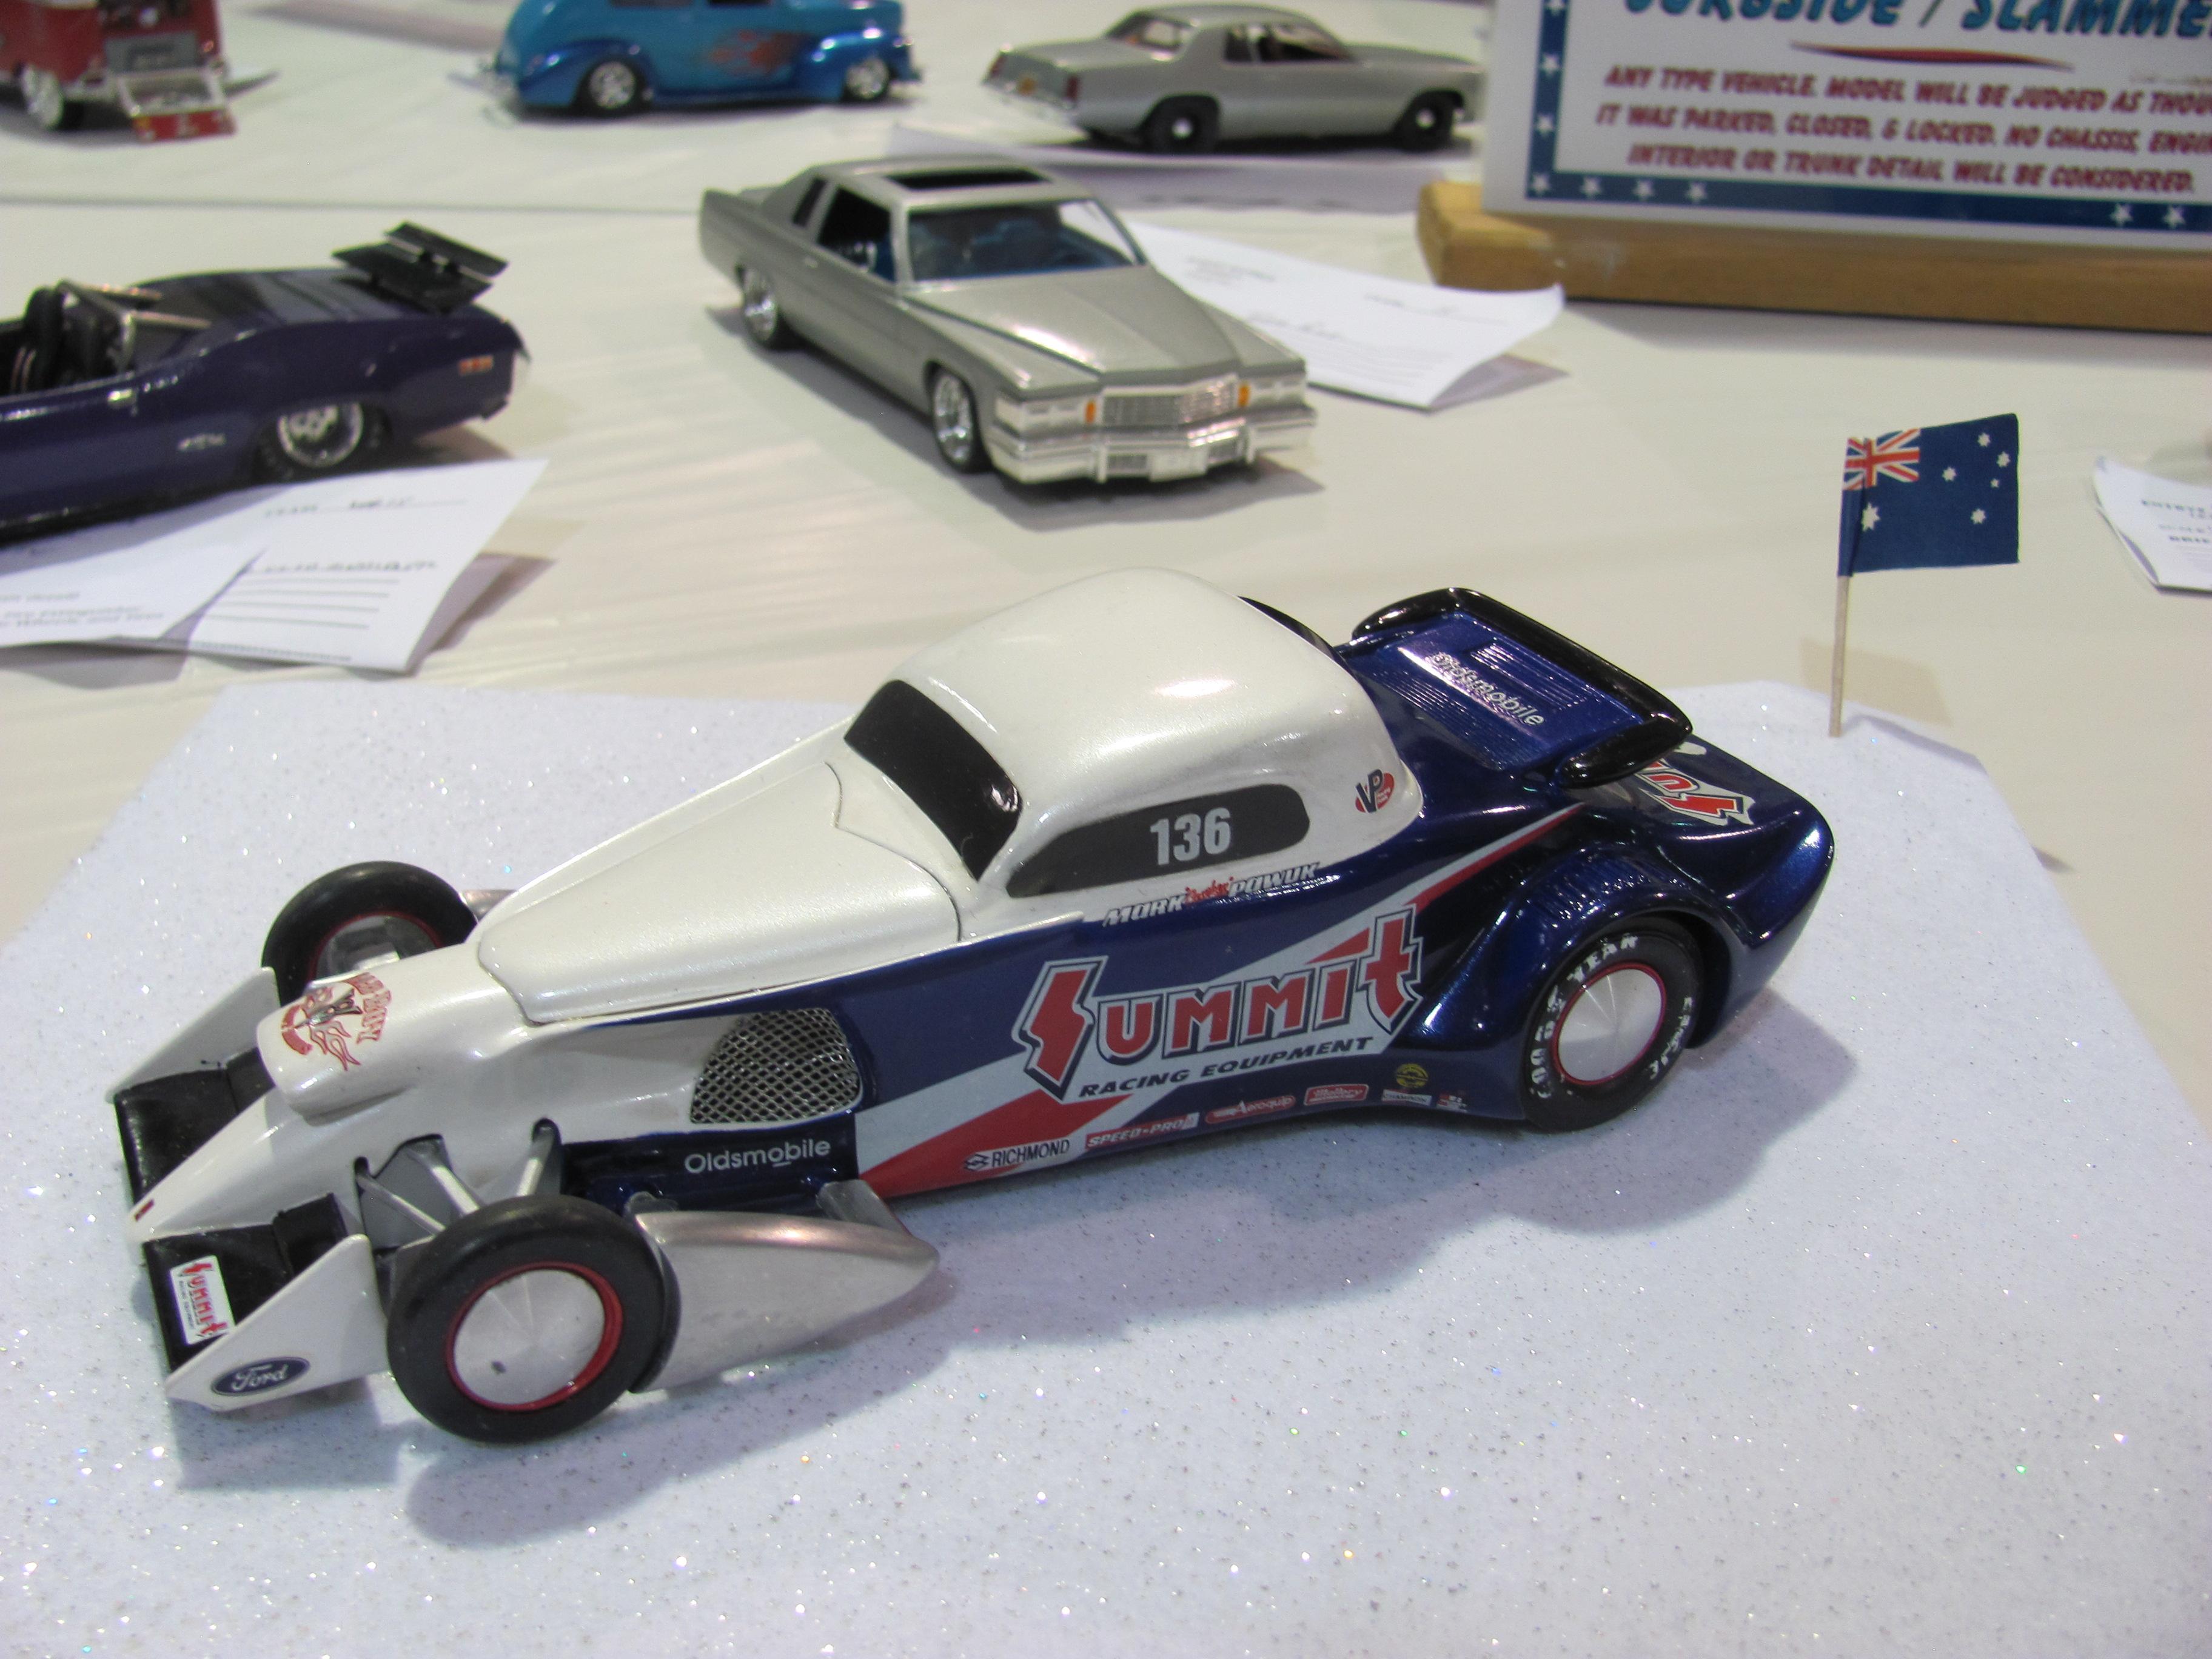
Lots to like here, Roger. Your paint finish is soooooo straight and smooth - I am very envious! I thought you might like to see a full scale interpretation of your 48 Ford pickup that appeared at our 2016 Regional Nationals in Busselton Western Australia. The proportions are remarkably similar to your model and it was voted in the top ten of the 200 or so cars present. What you can't see is that it ahs suicide doors, as if he hadn't done enough bodywork already! Cheers Alan

-
That Anglia could incite people to lick it! And the hearse is so excellently understated. Congrats on a great year! Cheers Alan
-
ИЖ 2125 и Иж 21156 ,promo model of hachette 1:24
alan barton replied to alexandr1977's topic in Model Cars
These are really different, Alexander, and you have done a beautiful job of building and detailing them. The green pickup reminds me of a Datsun 1200 while the blue wagon reminds me of a Ford Taunus with a bit of Ford Zephyr Estate thrown in. Thank you for sharing these models that we would normally never see! Cheers Alan -
Thanks everybody for your kind comments. You seem to like the car as much as I do! Doug, I flatten most of my tyres to give the car some visual "weight" . Admittedly it is a compromise because when you turn over your finished model you see those very obvious flat spots but my models spend far more time on the shelf than upside down so I am prepared to live with that compromise. I wouldn't do it on skinny tyres because you wouldn't expect them to squish as much. Beak Doc, I am tending to favour the steelies myself but I still love the wires so I will just turn it around from time to time! Oliver, the shifter knob is actually jewellery for people who like poking themselves full of holes! Not sure if it is meant to be a nose ring, and ear stud or even somewhere further south. A fellow clubmember spotted them on eBay and bought a bag full for very little coin. I have a whole bunch of them in various colours but this is the first time I remembered to dig them out! They are threaded onto a short bar when they arrive so you simply unscrew them and then stick them over the top of your shifter handle. Cheers and Merry Christmas! Alan
-
Indy-ish Monogram Midget
alan barton replied to Straightliner59's topic in Other Racing: Road Racing, Salt Flat Racers
I had done a bit of cutting and stretching on a Monogram Midget decades ago with a similar end goal to what you have achieved here. Then it went back in the box. I thinkIi now have the ultimate blueprint! And I love the seat upholstery detail - I hope I am up to the challenge! Thank you for sharing this magic model with us all. Cheers Alan -
You can be proud of your year's efforts, Chris! I took a lot longer than three years to get to this standard! Cheers Alan
-
you may good use of 2020, Alan. I love all of your early Fords, especially the 32 Vicky, but the one that really did it for me was the yellow Opel Gt - that is sooooo sweet! Cheers Alan
-
Nice work TJ. I like the wheel detailing on that swoopy Viper! Cheers Alan
-
Gareth, you are rocking the showroom stock genre! What an amazing output and an amazing comeback! I will definitely be looking forward to your work in the future. I rarely build showroom stock but I really enjoy looking at the work of others in this field - when you know what the real car is meant to look like, showroom stock is a very demanding style to build- if it doesn't look right, it isn't right. Us hot rodders can do whatever we like and get away with it! Cheers Alan
-
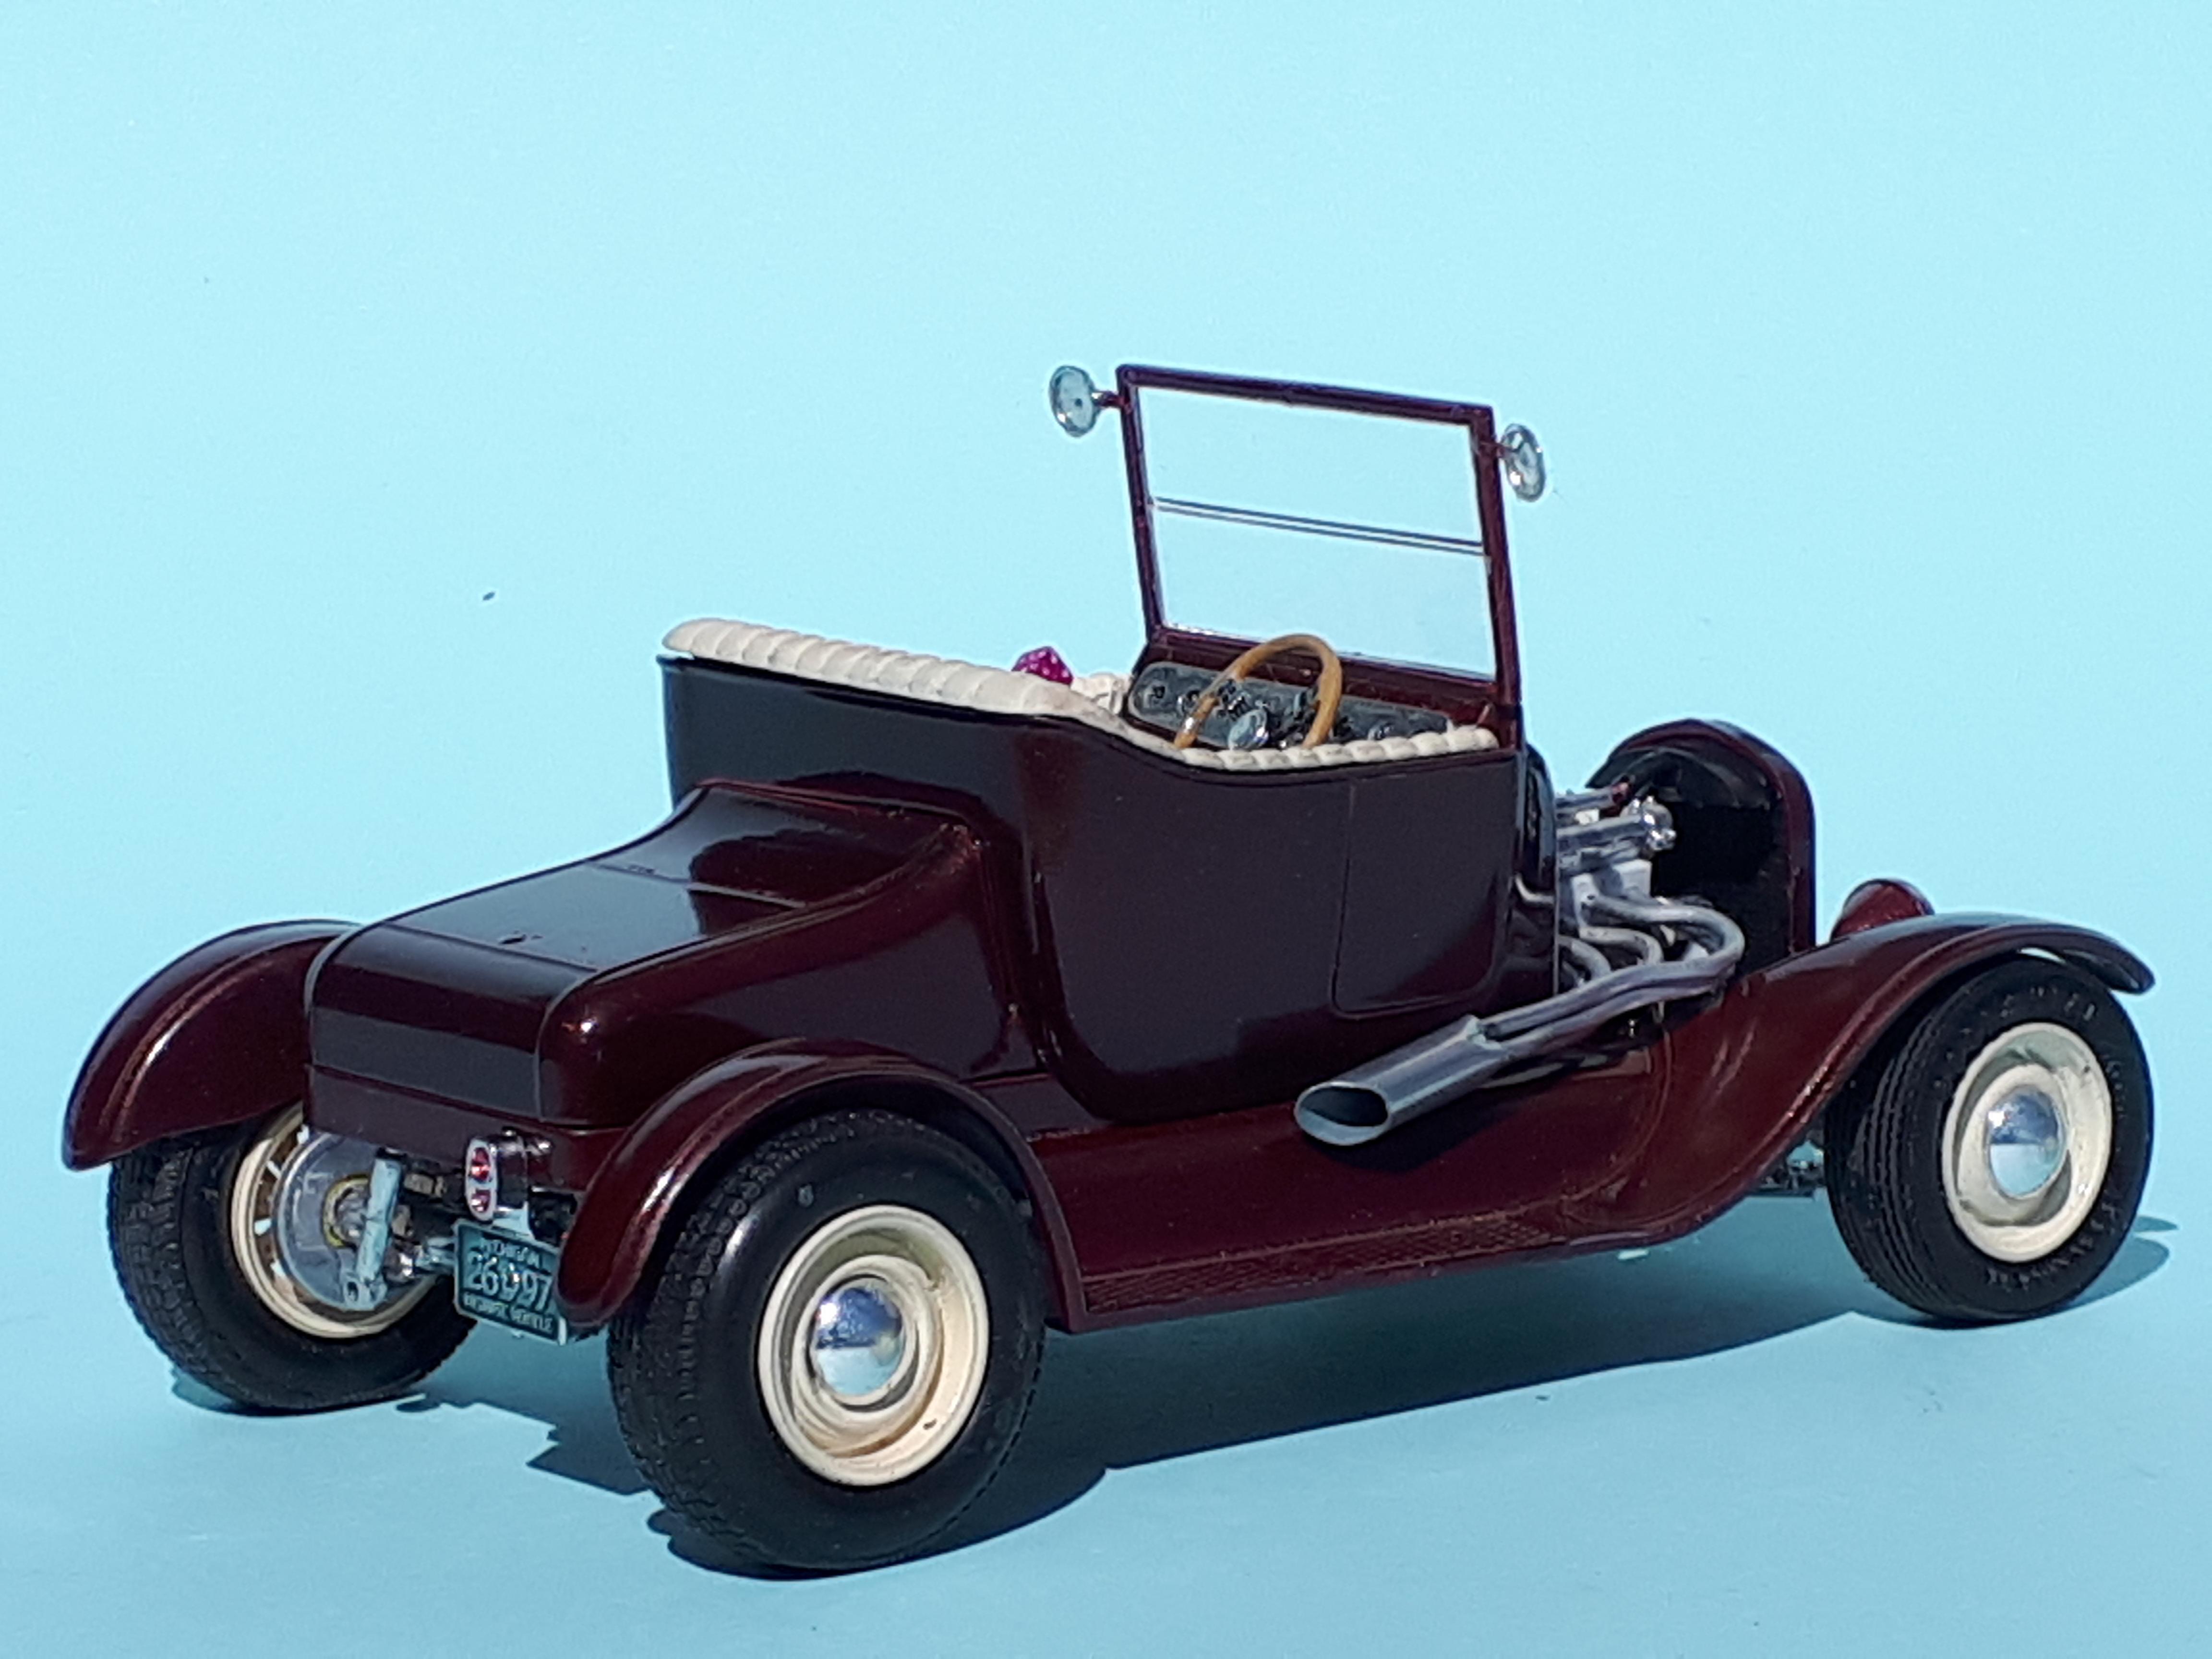
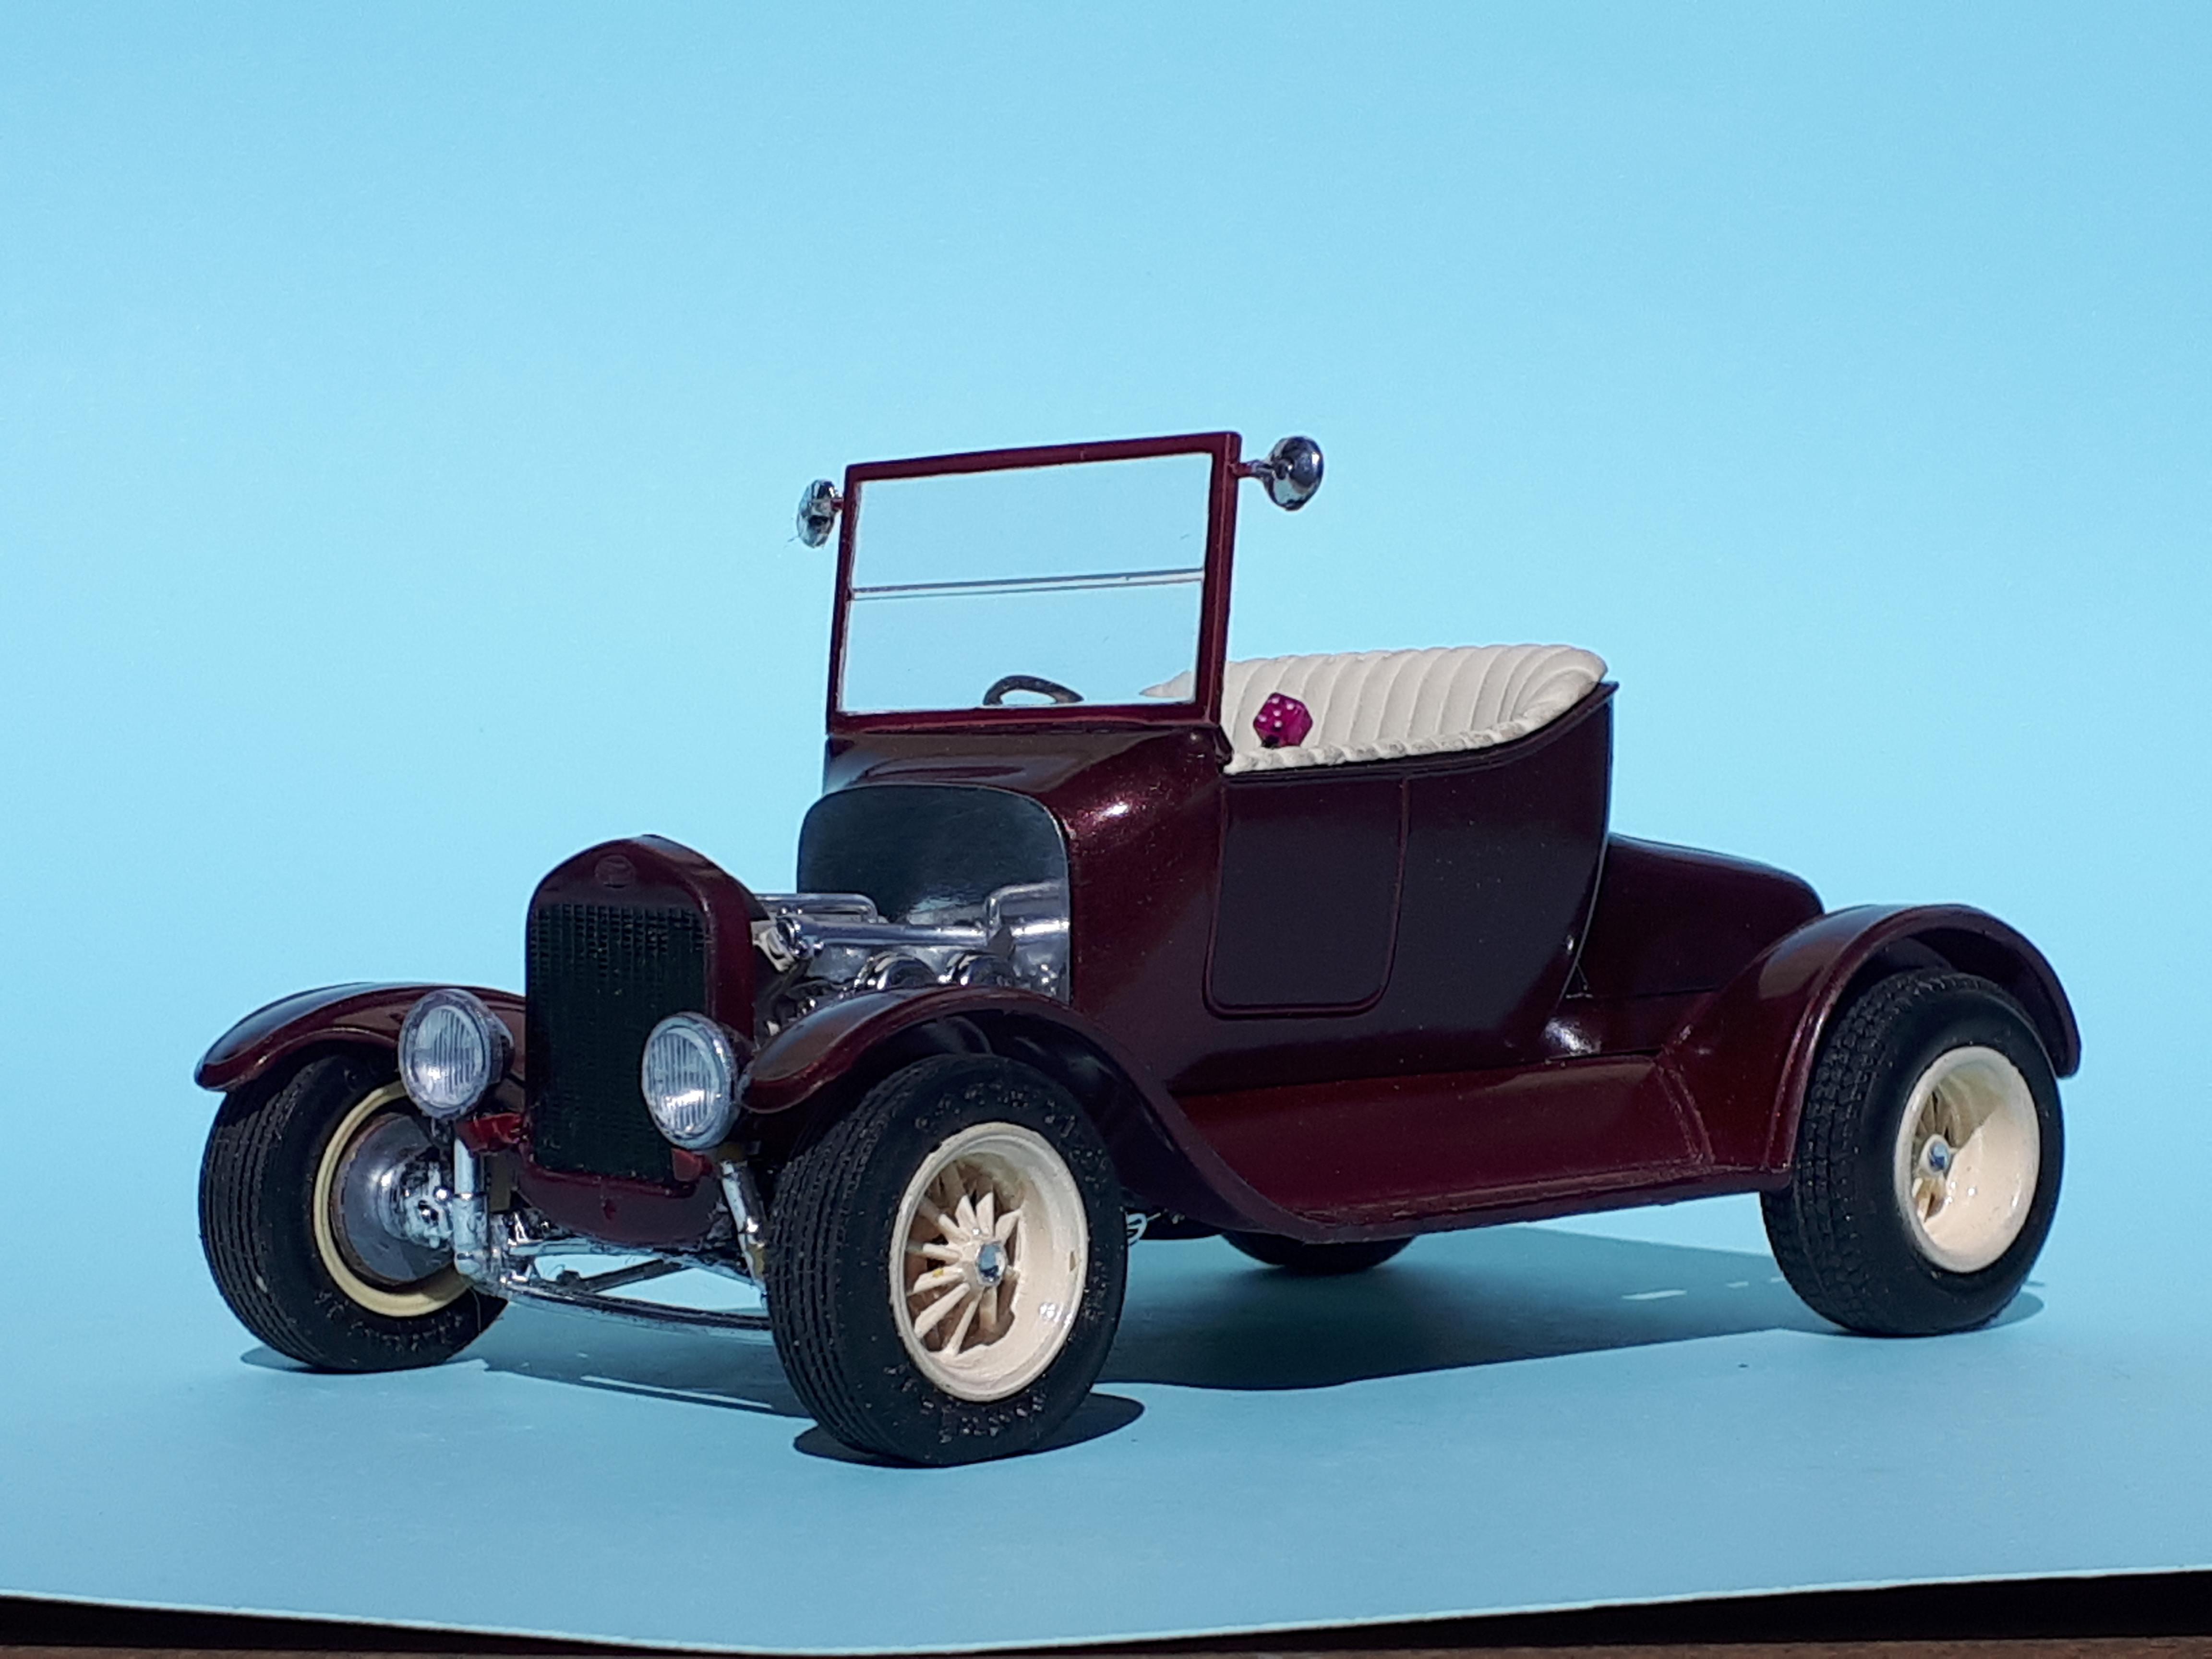
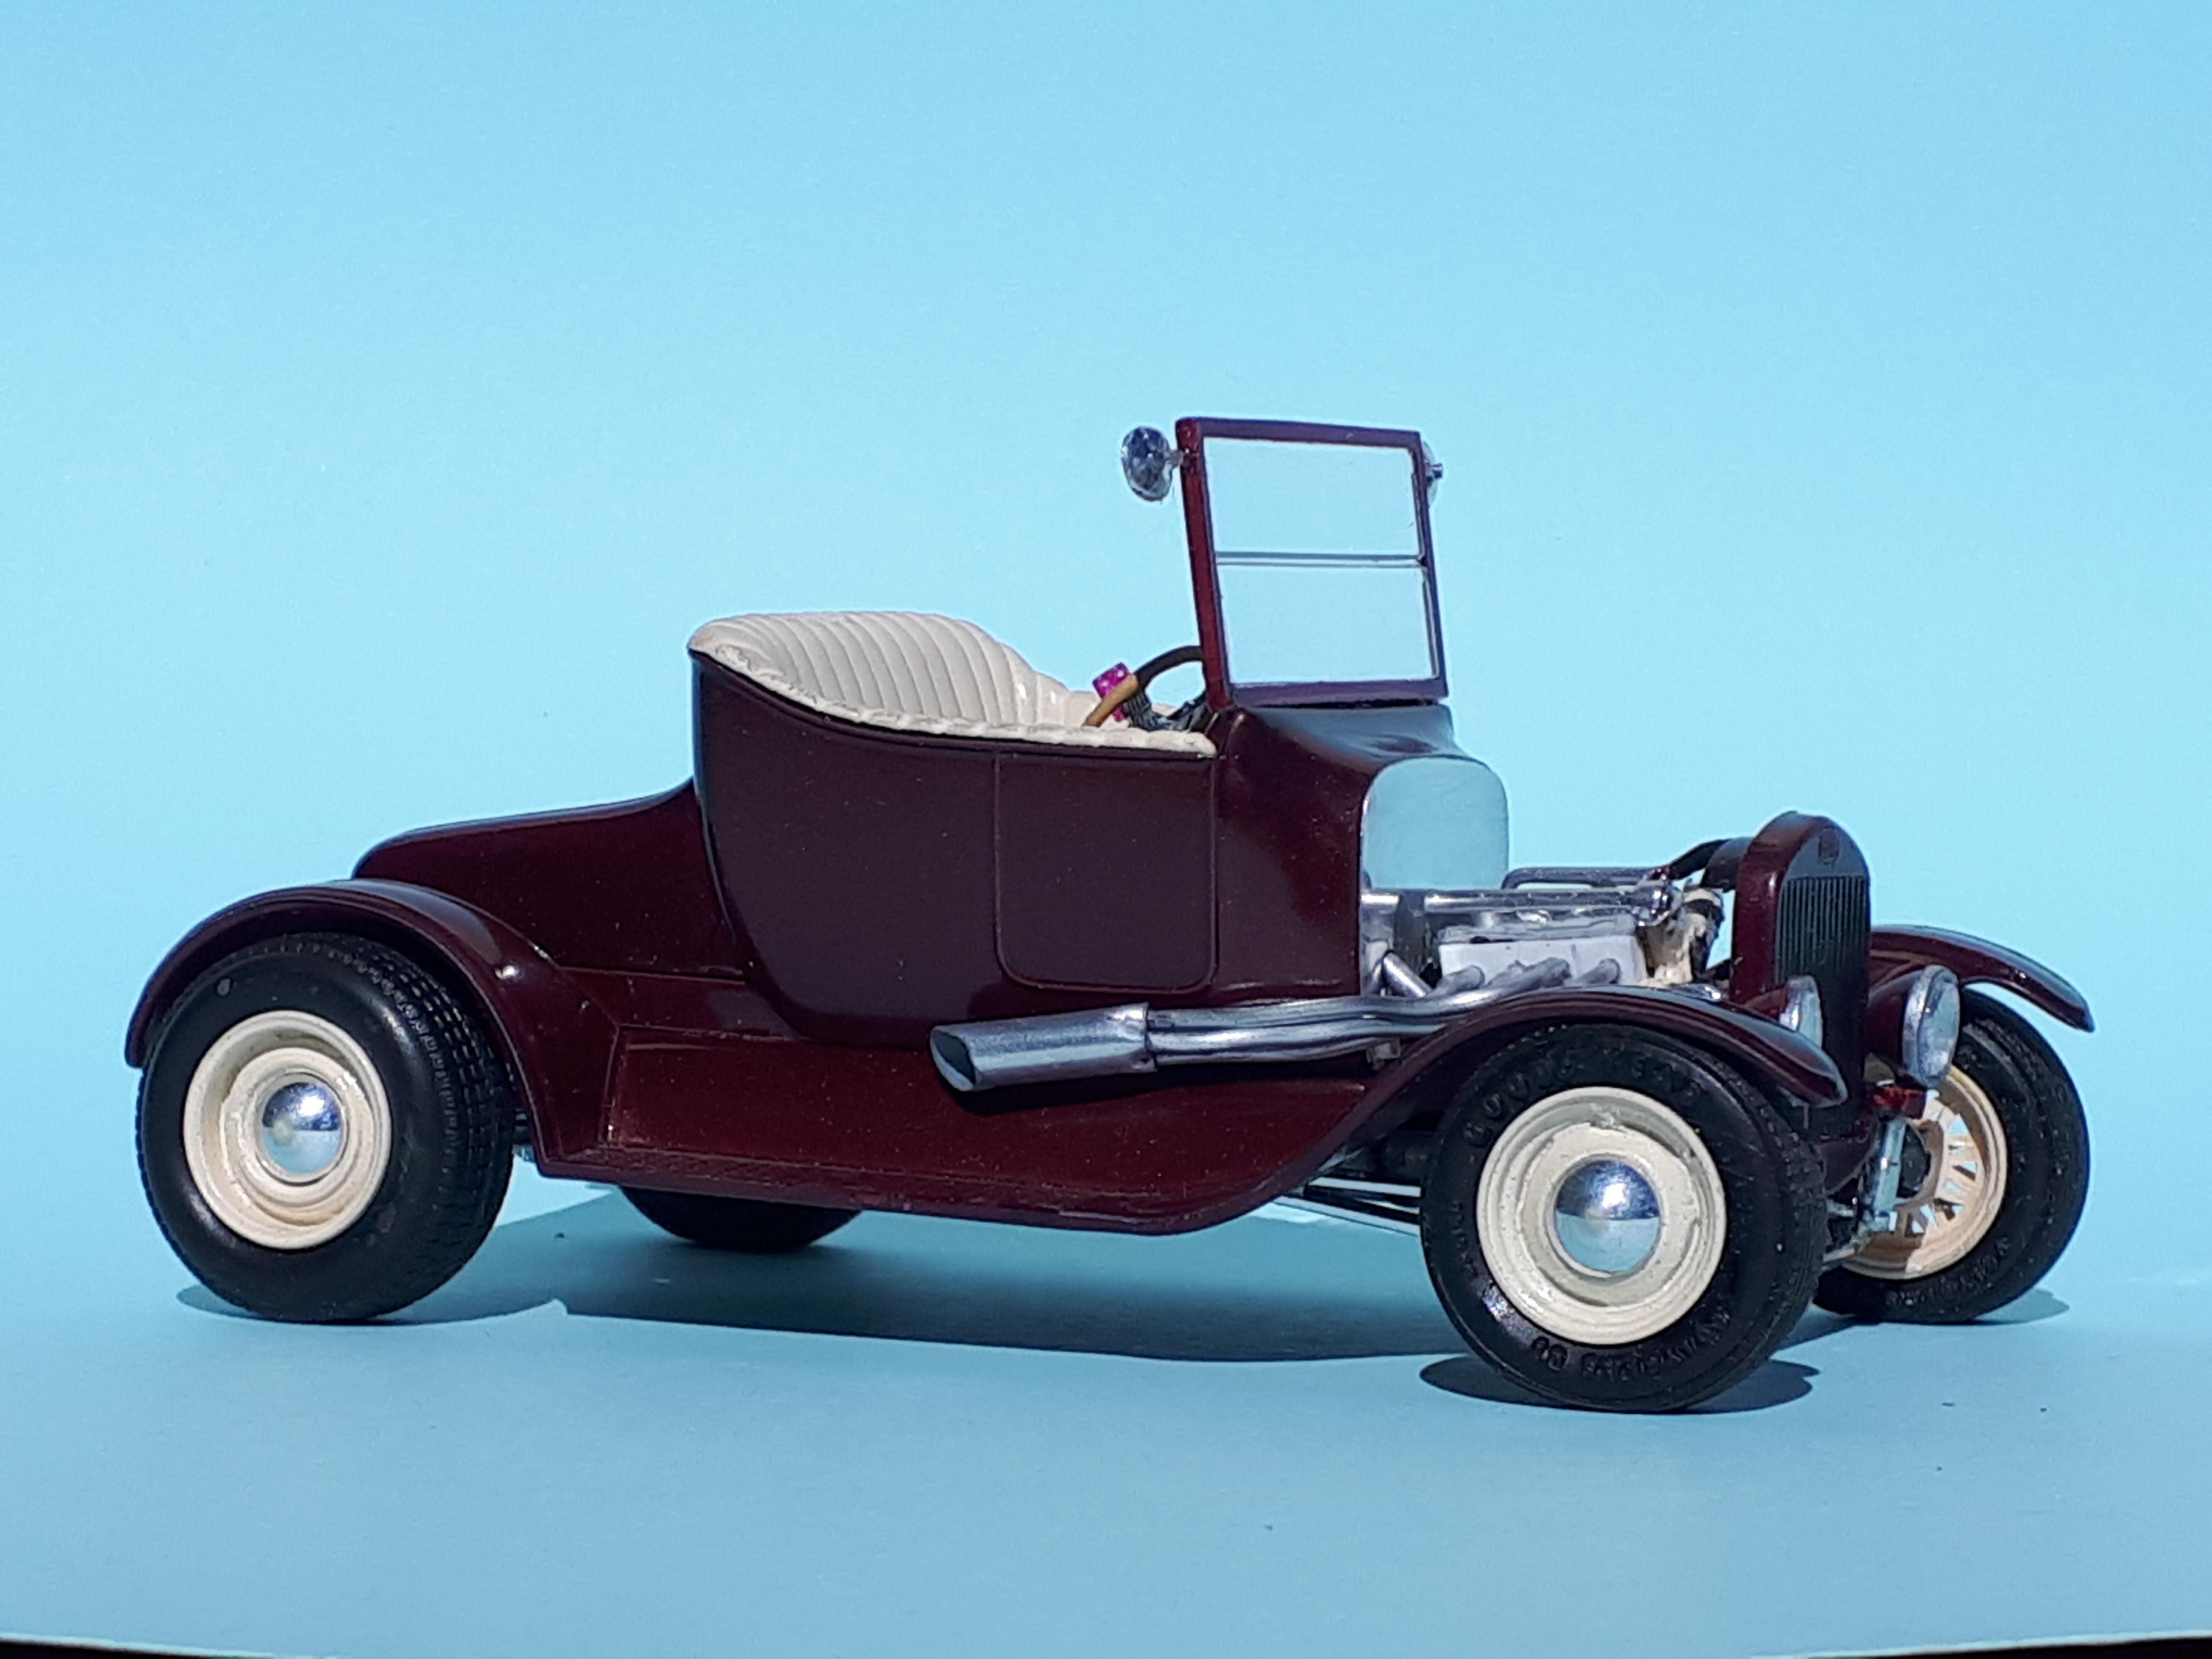
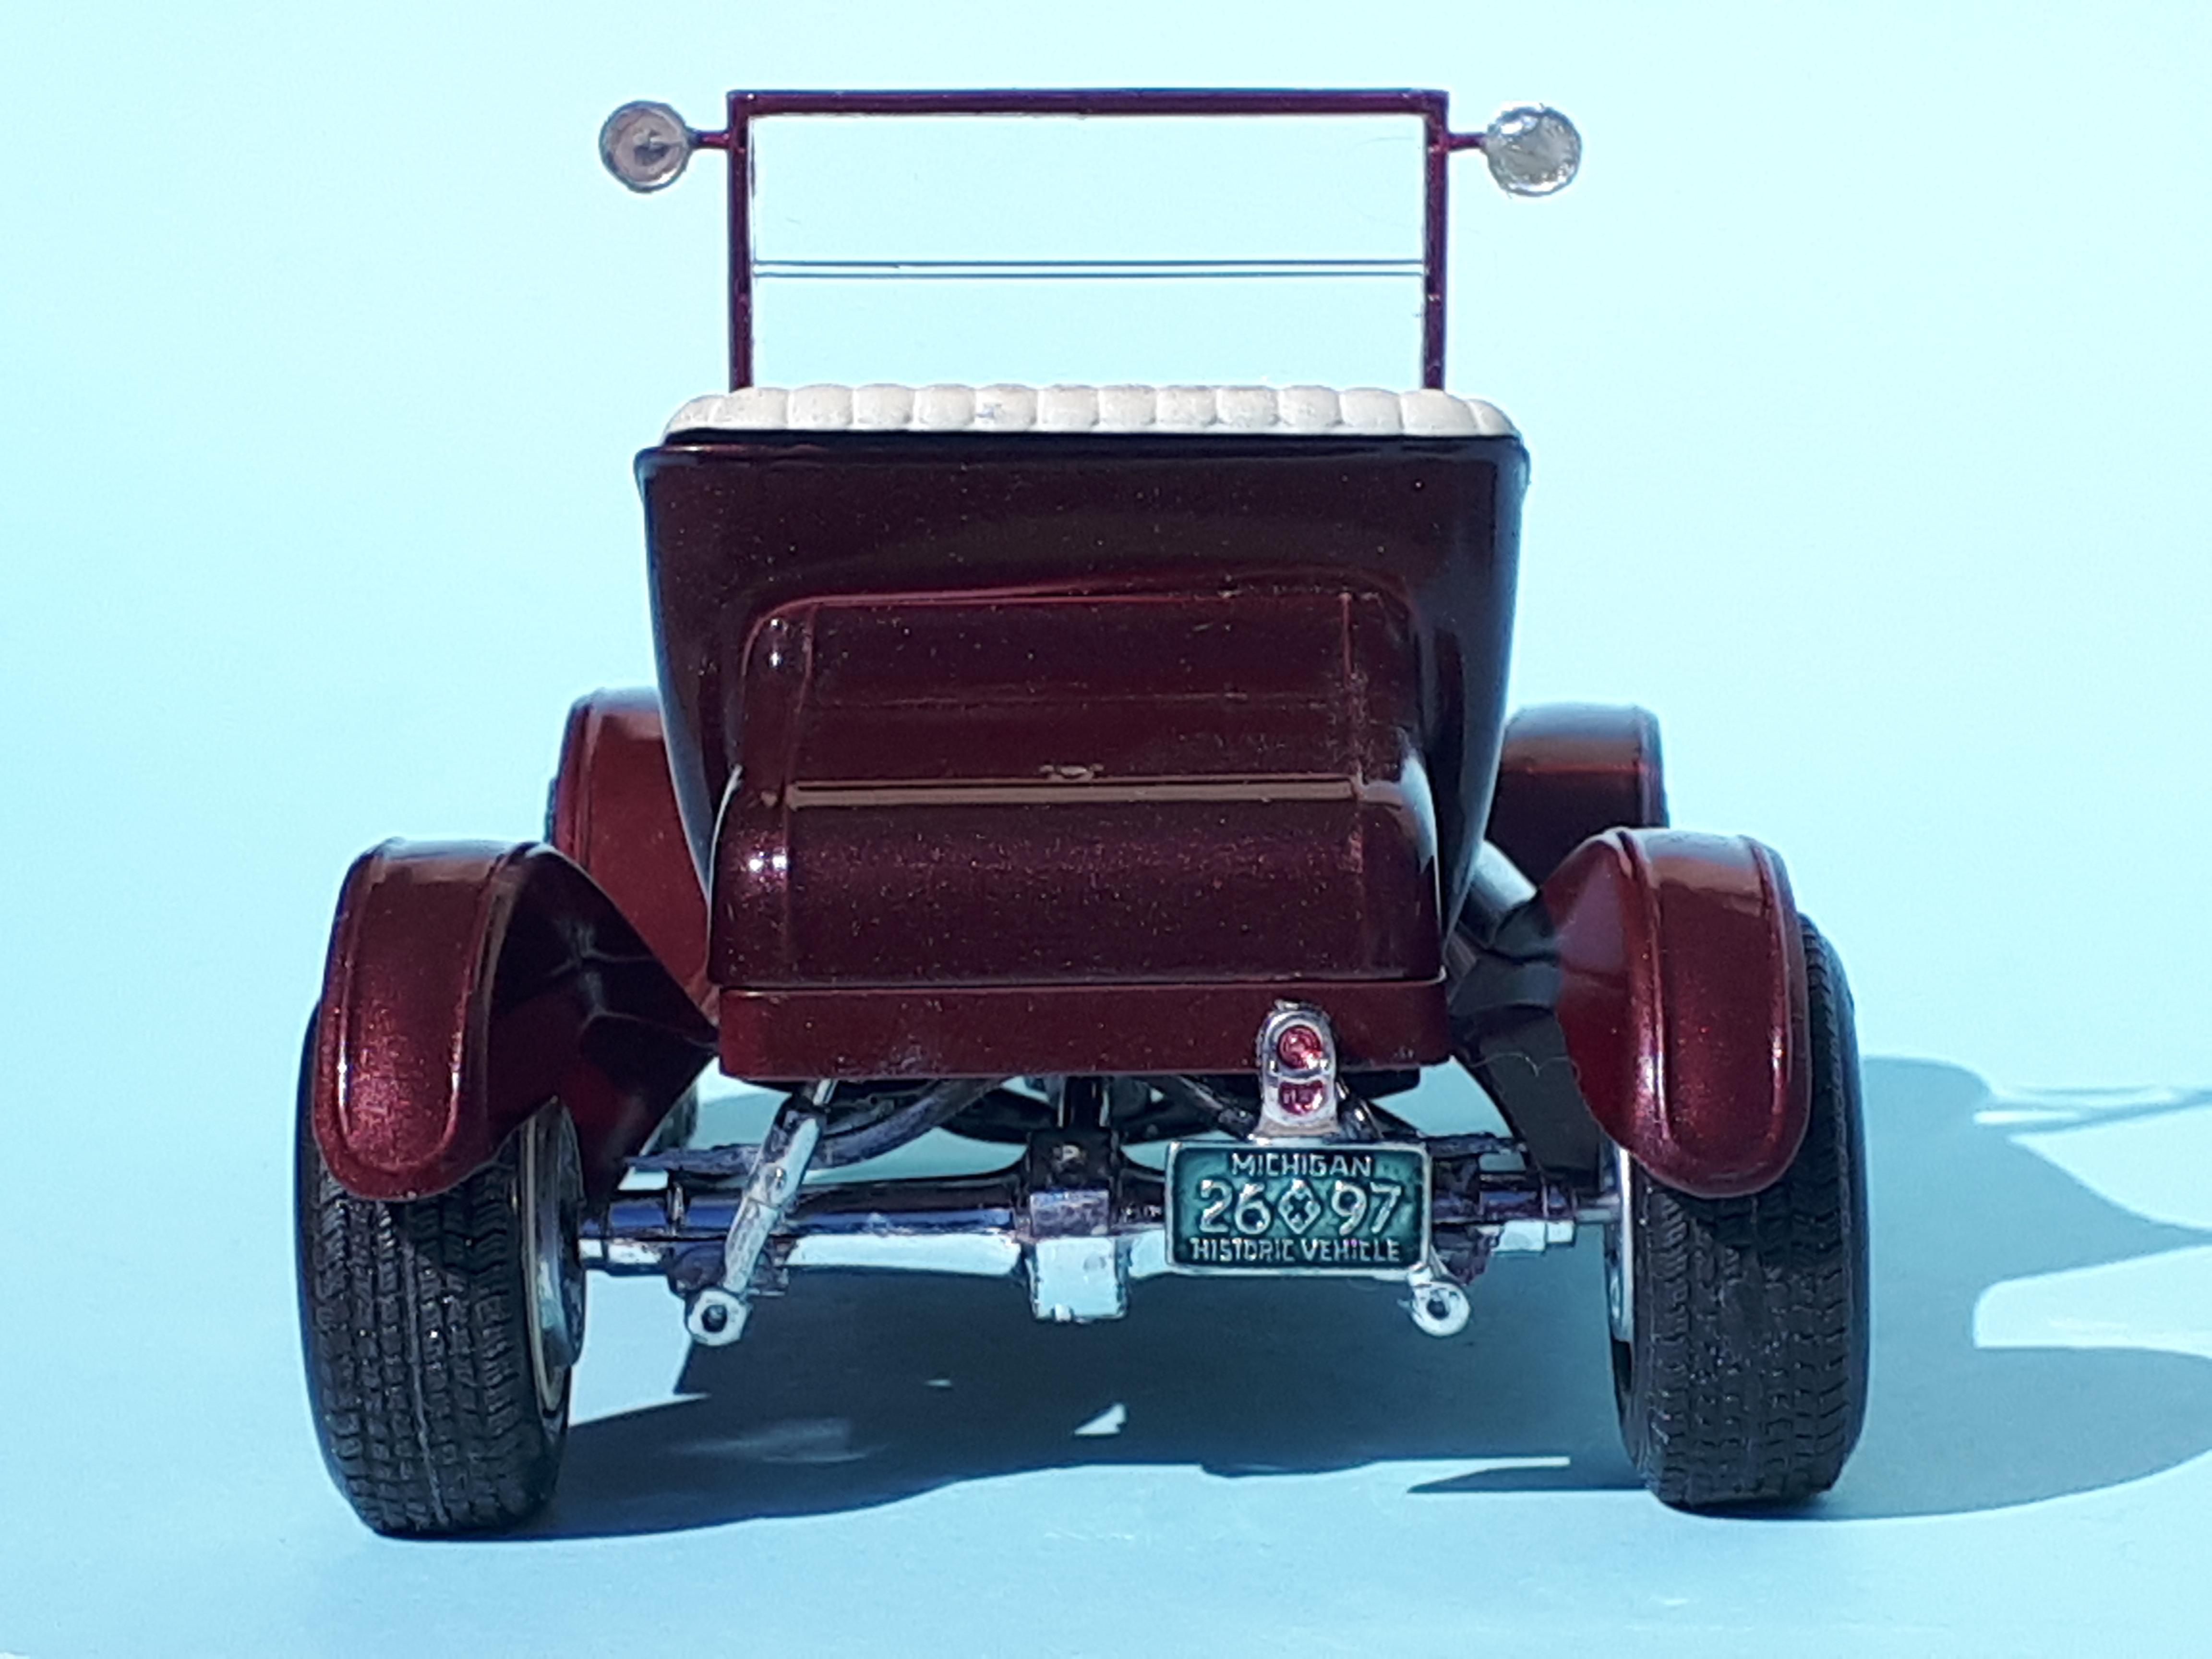
Picture the scenario. You are at Donut Derelicts, or Cars and Coffee, and in the distance you hear a few muffled pops on the freeway off-ramp. A few well trained ears BLAH_BLAH_BLAH_BLAH up? What was that? They return to what they were scrutinizing in the first place when EVERYONE hears an angry snarl at the lights diagonally across from the car park. What IS that thing? As the revs came up, the lights change and what looks like an antique with a geezer at the wheel lightly chirps the tyres and hooks into the event. It shuts off instantly, and the bees swarm to the honeypot. This then, finished today on Christmas Eve, is my AMT 1923 Model T Ford roadster. This is no polished up show queen, nor is it a long distance power everything interstate cruiser. It's an angry little toy, a wheelbarrow if you like, for that most legendary of race motors, the Offenhauser. The shopping list goes something like this. The AMT kit provided the body, interior, fenders, grille, lights, windscreen frame and front axle. The Revell Kurtis Kraft midget gave up its powerplant - don't worry, there's a mighty Australian Holden six waiting to fill that vacancy! Headers are handmade from aluminium tubing and aluminium wire. Rear axle is a tweaked Ala Kart unit, radius rods are from an MPC Switchers 32, dash is from AMT 25 T, radiator from AMT 29 A and steering wheel from the Revell Hiboy. Colour is Testors Burgundy red Metallic and the cream is Testor's Light Ivory. The steelies are from the AMT 40 Ford while the wires are from the Monogram 32 roadster with Pie Wagon outer rim to give a matching deep dish spoke ( the outers match the 32 wire but the inners are completely different so you need to combine the two halves to get this result. With both the 23 and the 25 being on the shelves right now, can I give you one big Christmas tip and that is - Buy the "25! Despite being the newer kit by about a decade, the 25 is much easier to build. The 23 has a multi piece frame, and multi piece fenders, which are simply handled so much better as one piece in the 25 kit. The headlights are meant to be glued into fresh air - there are no mounting points and I ended up whittling my own. Hope you like it. Merry Christmas everyone from Alan Downunder!
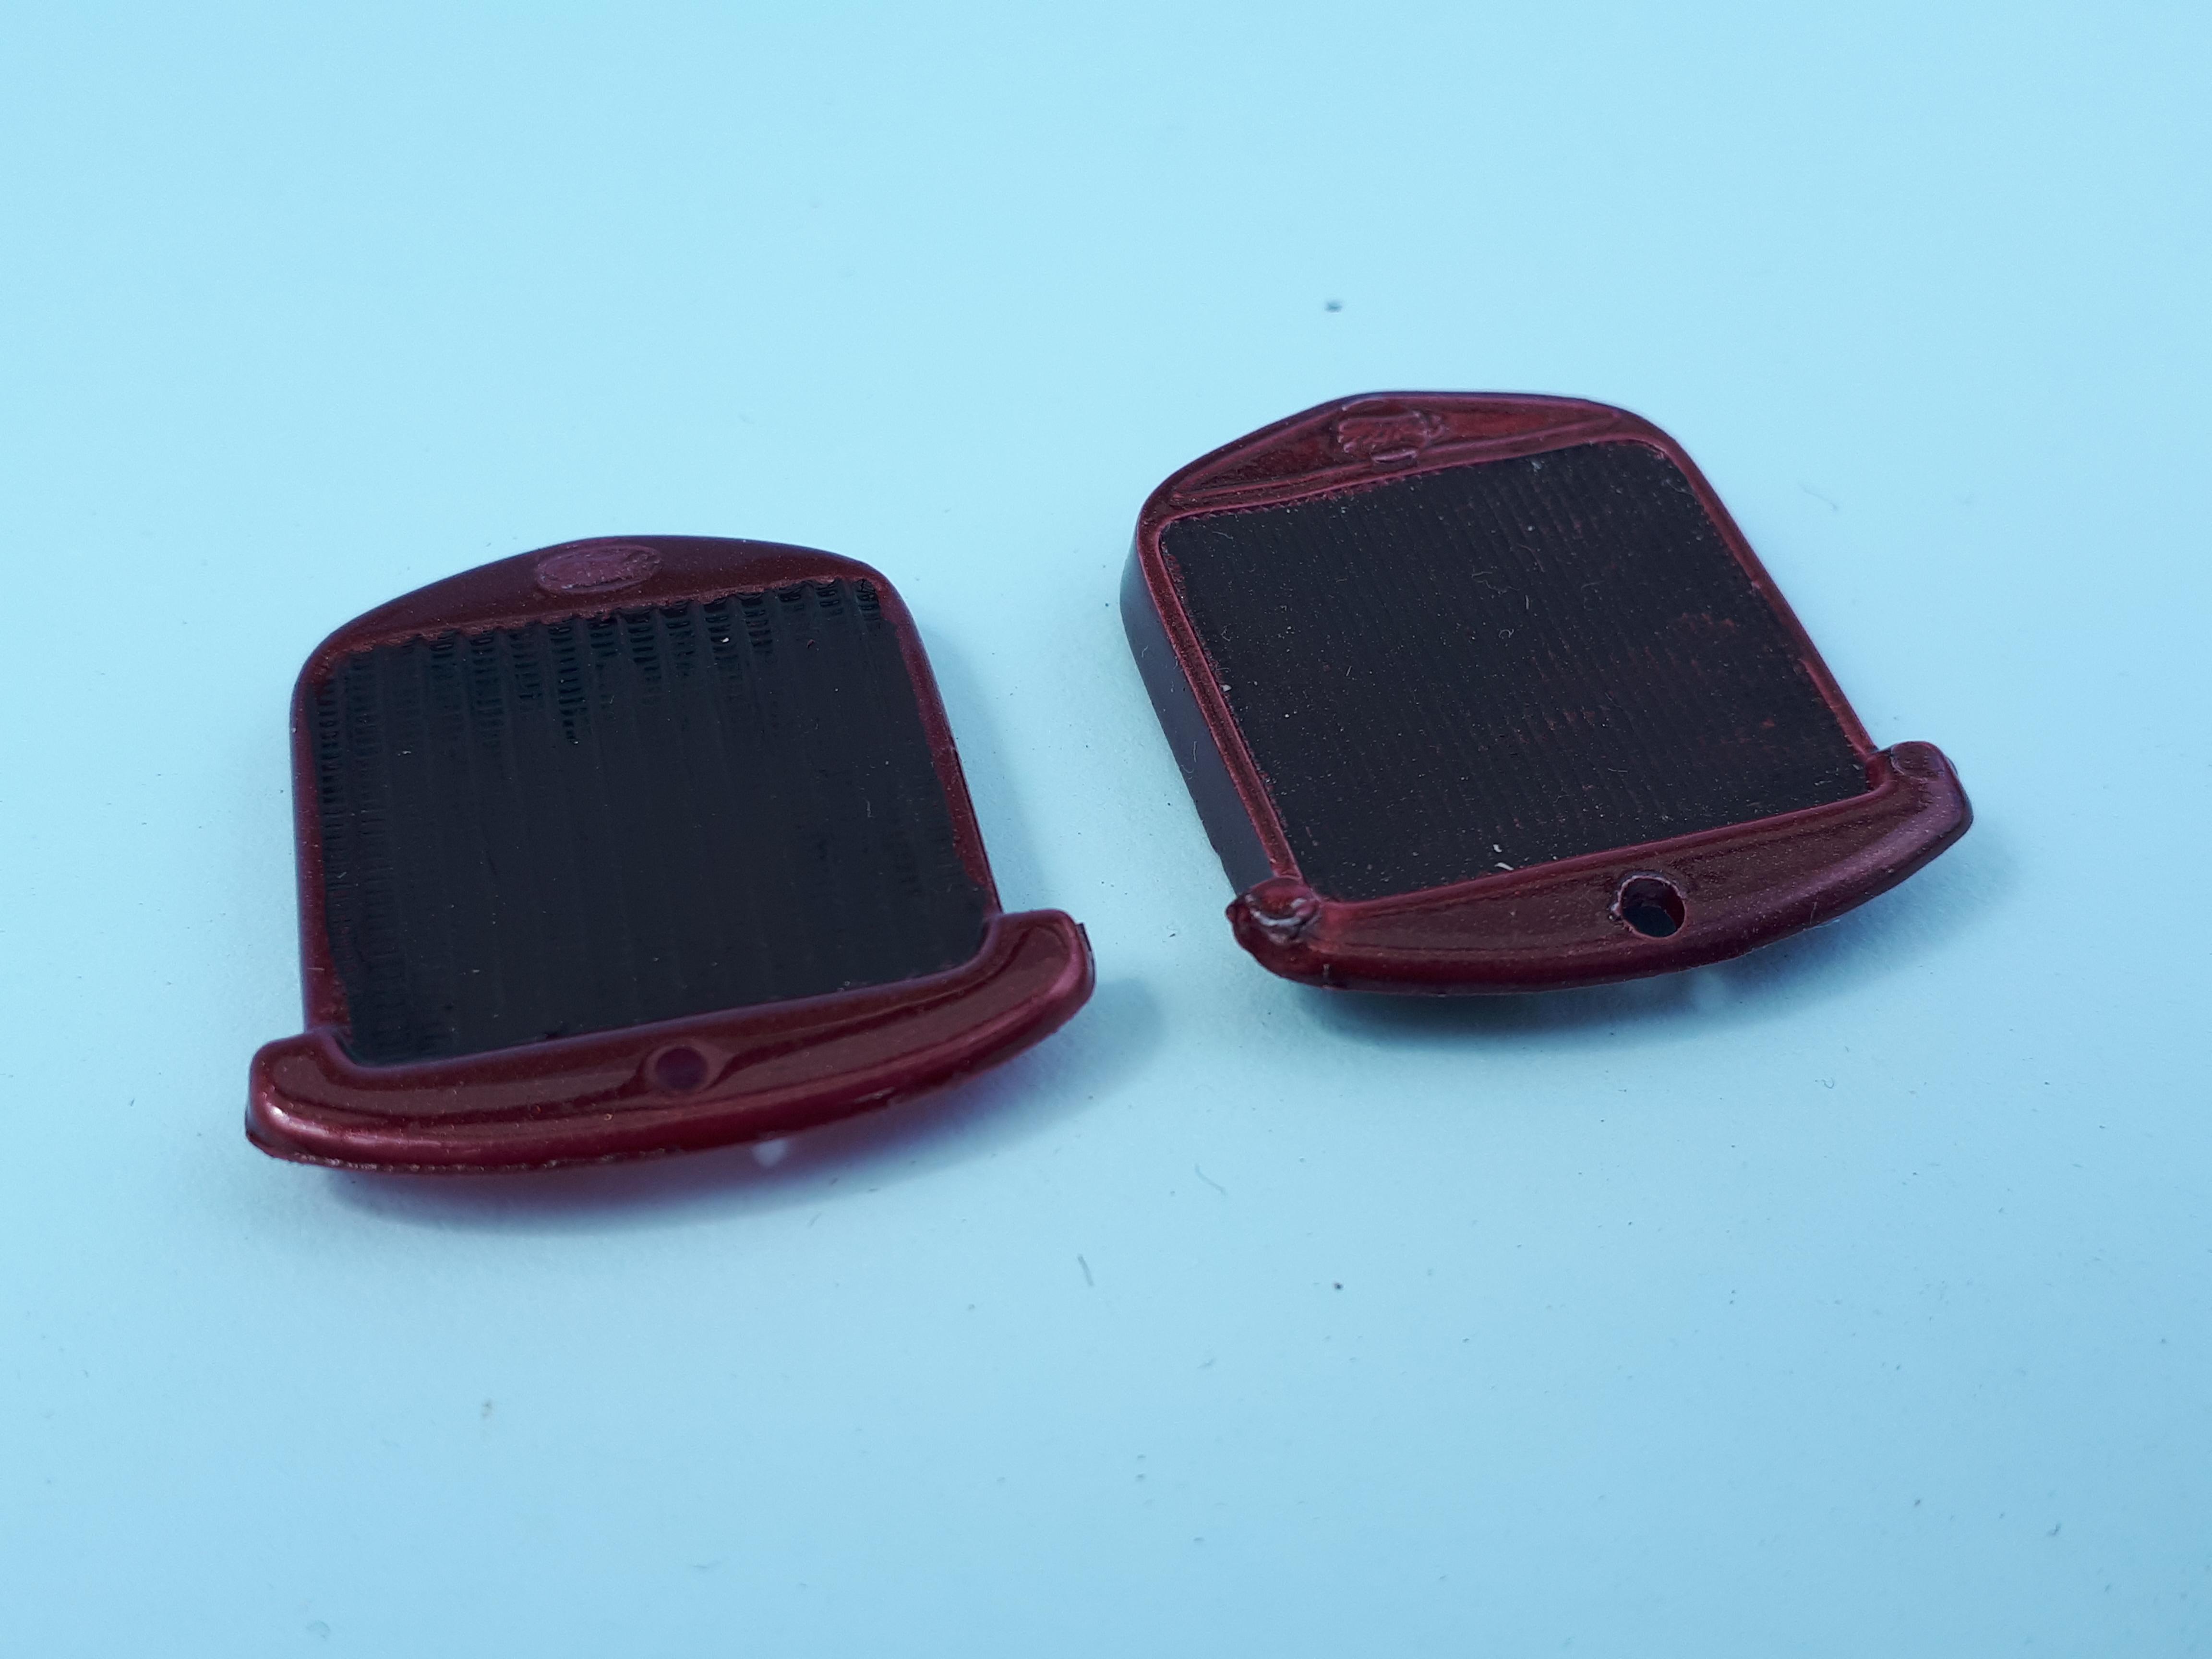
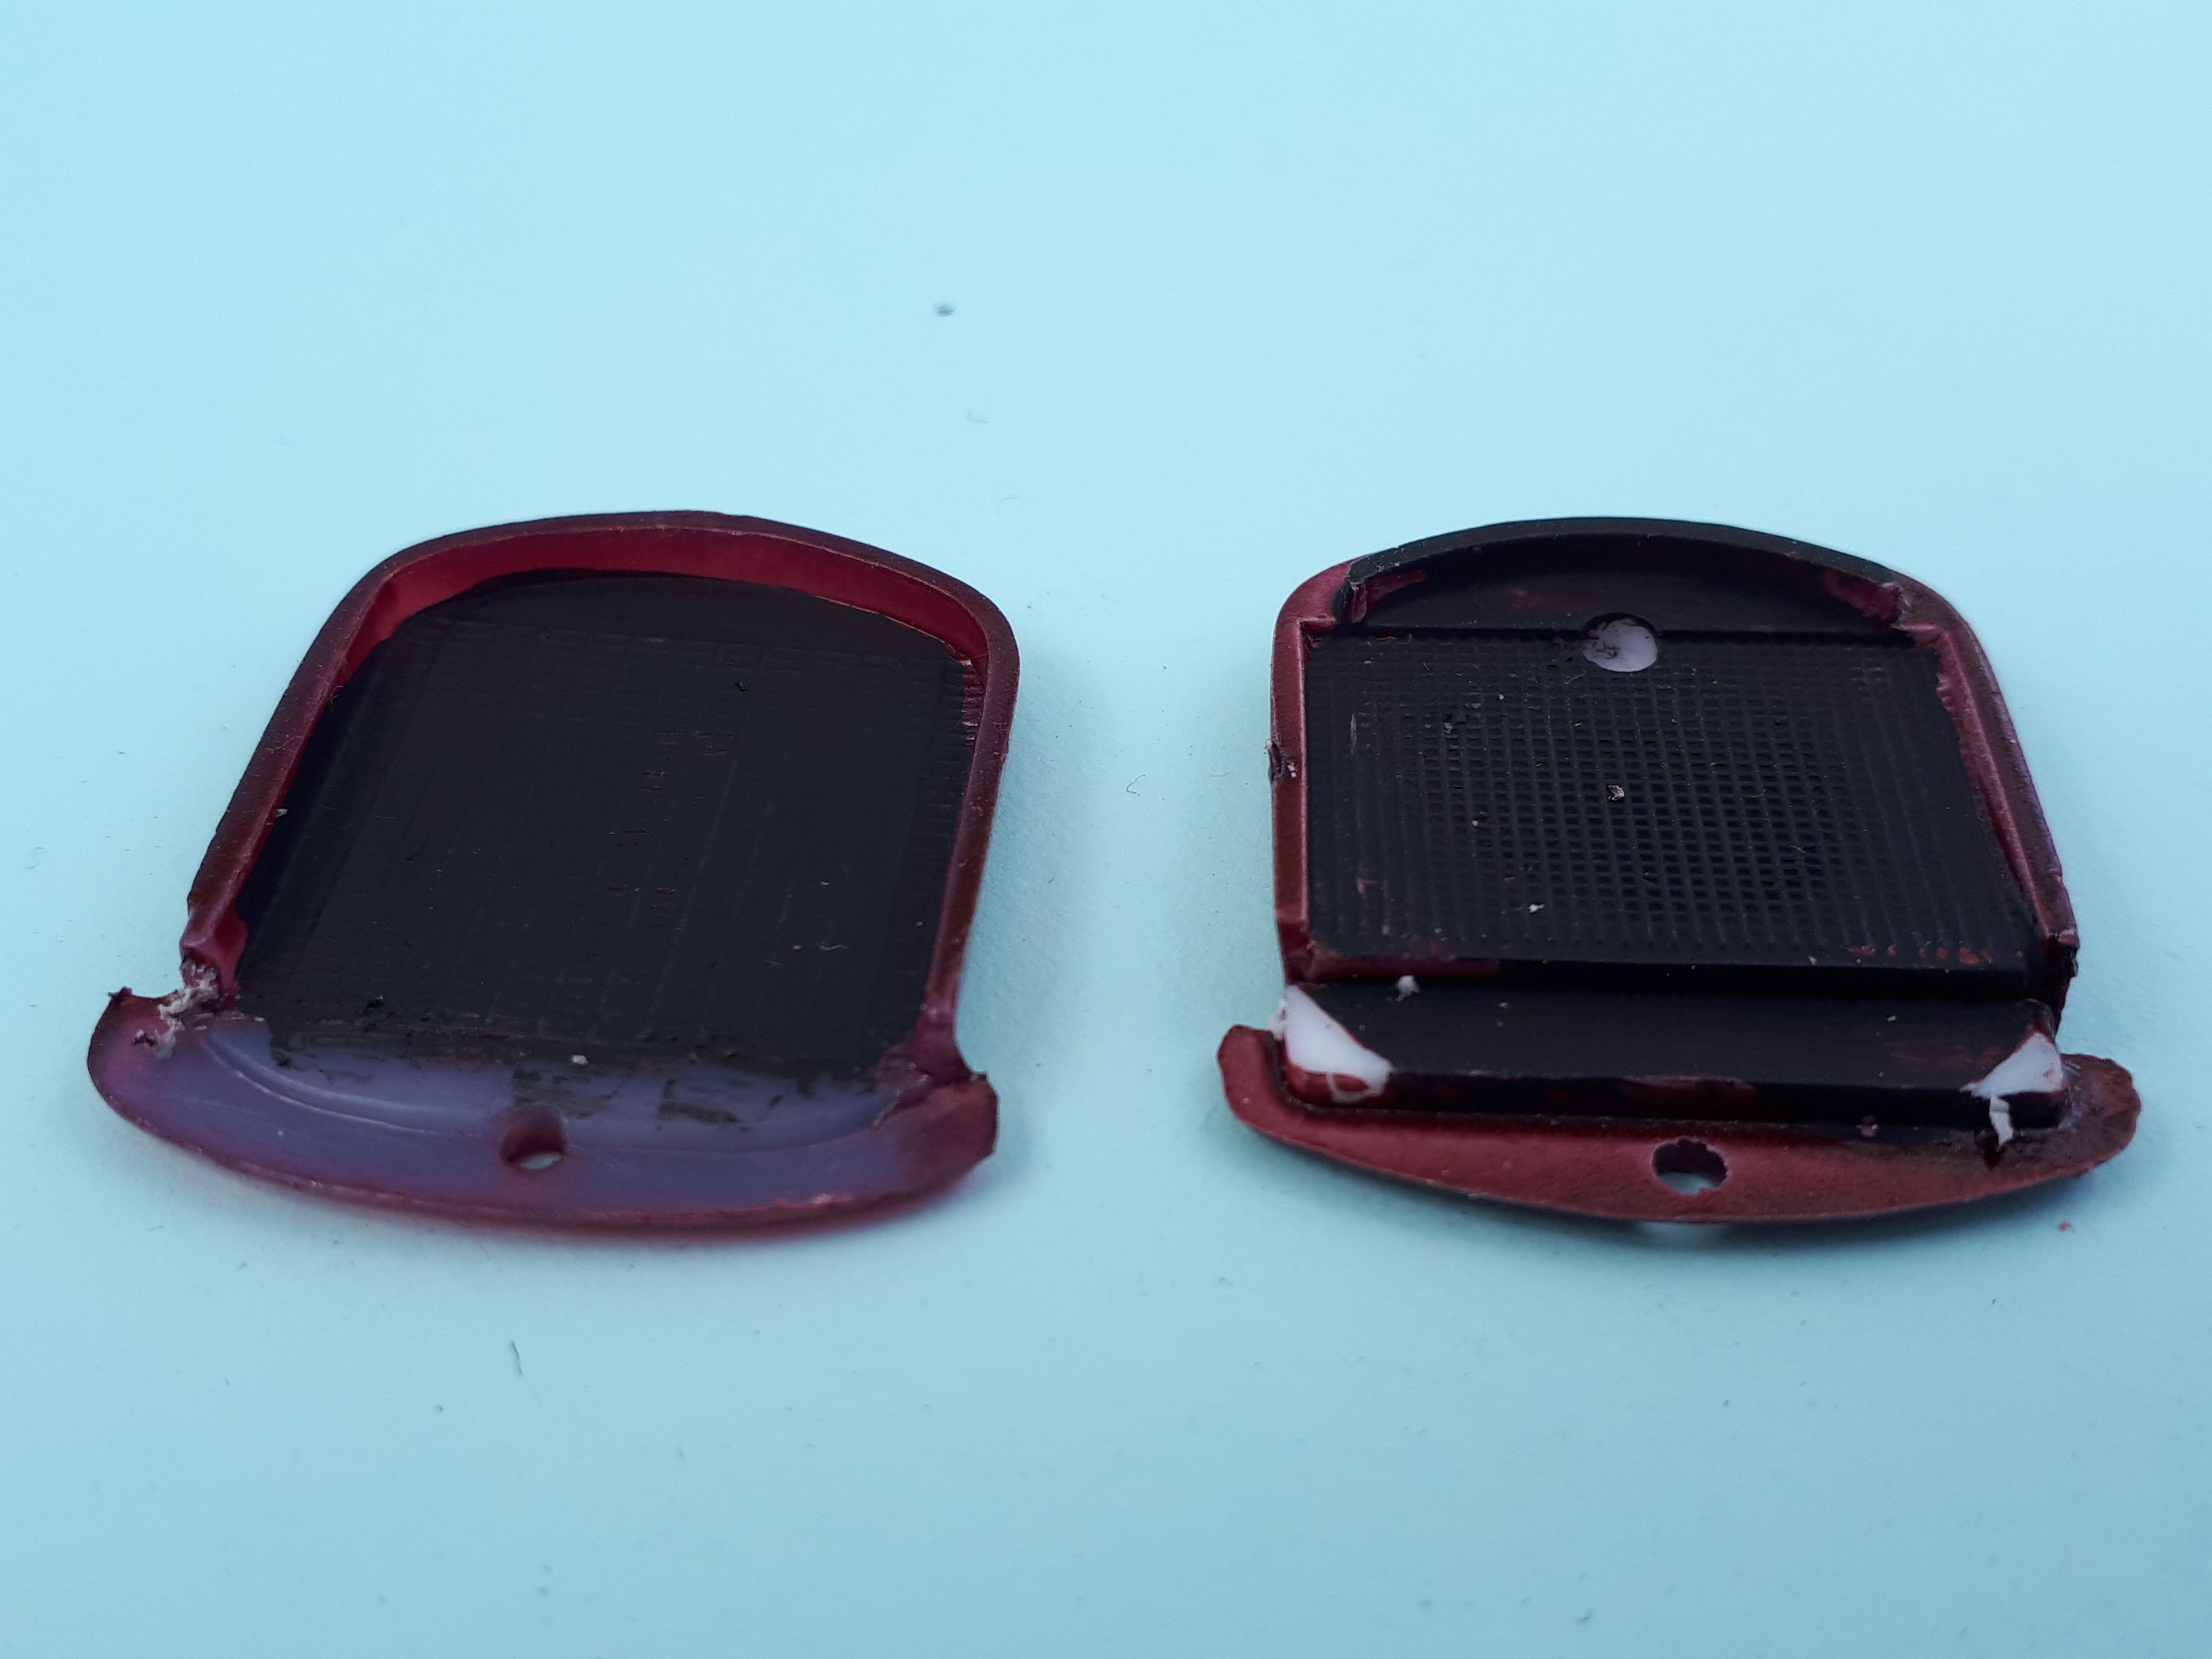
-
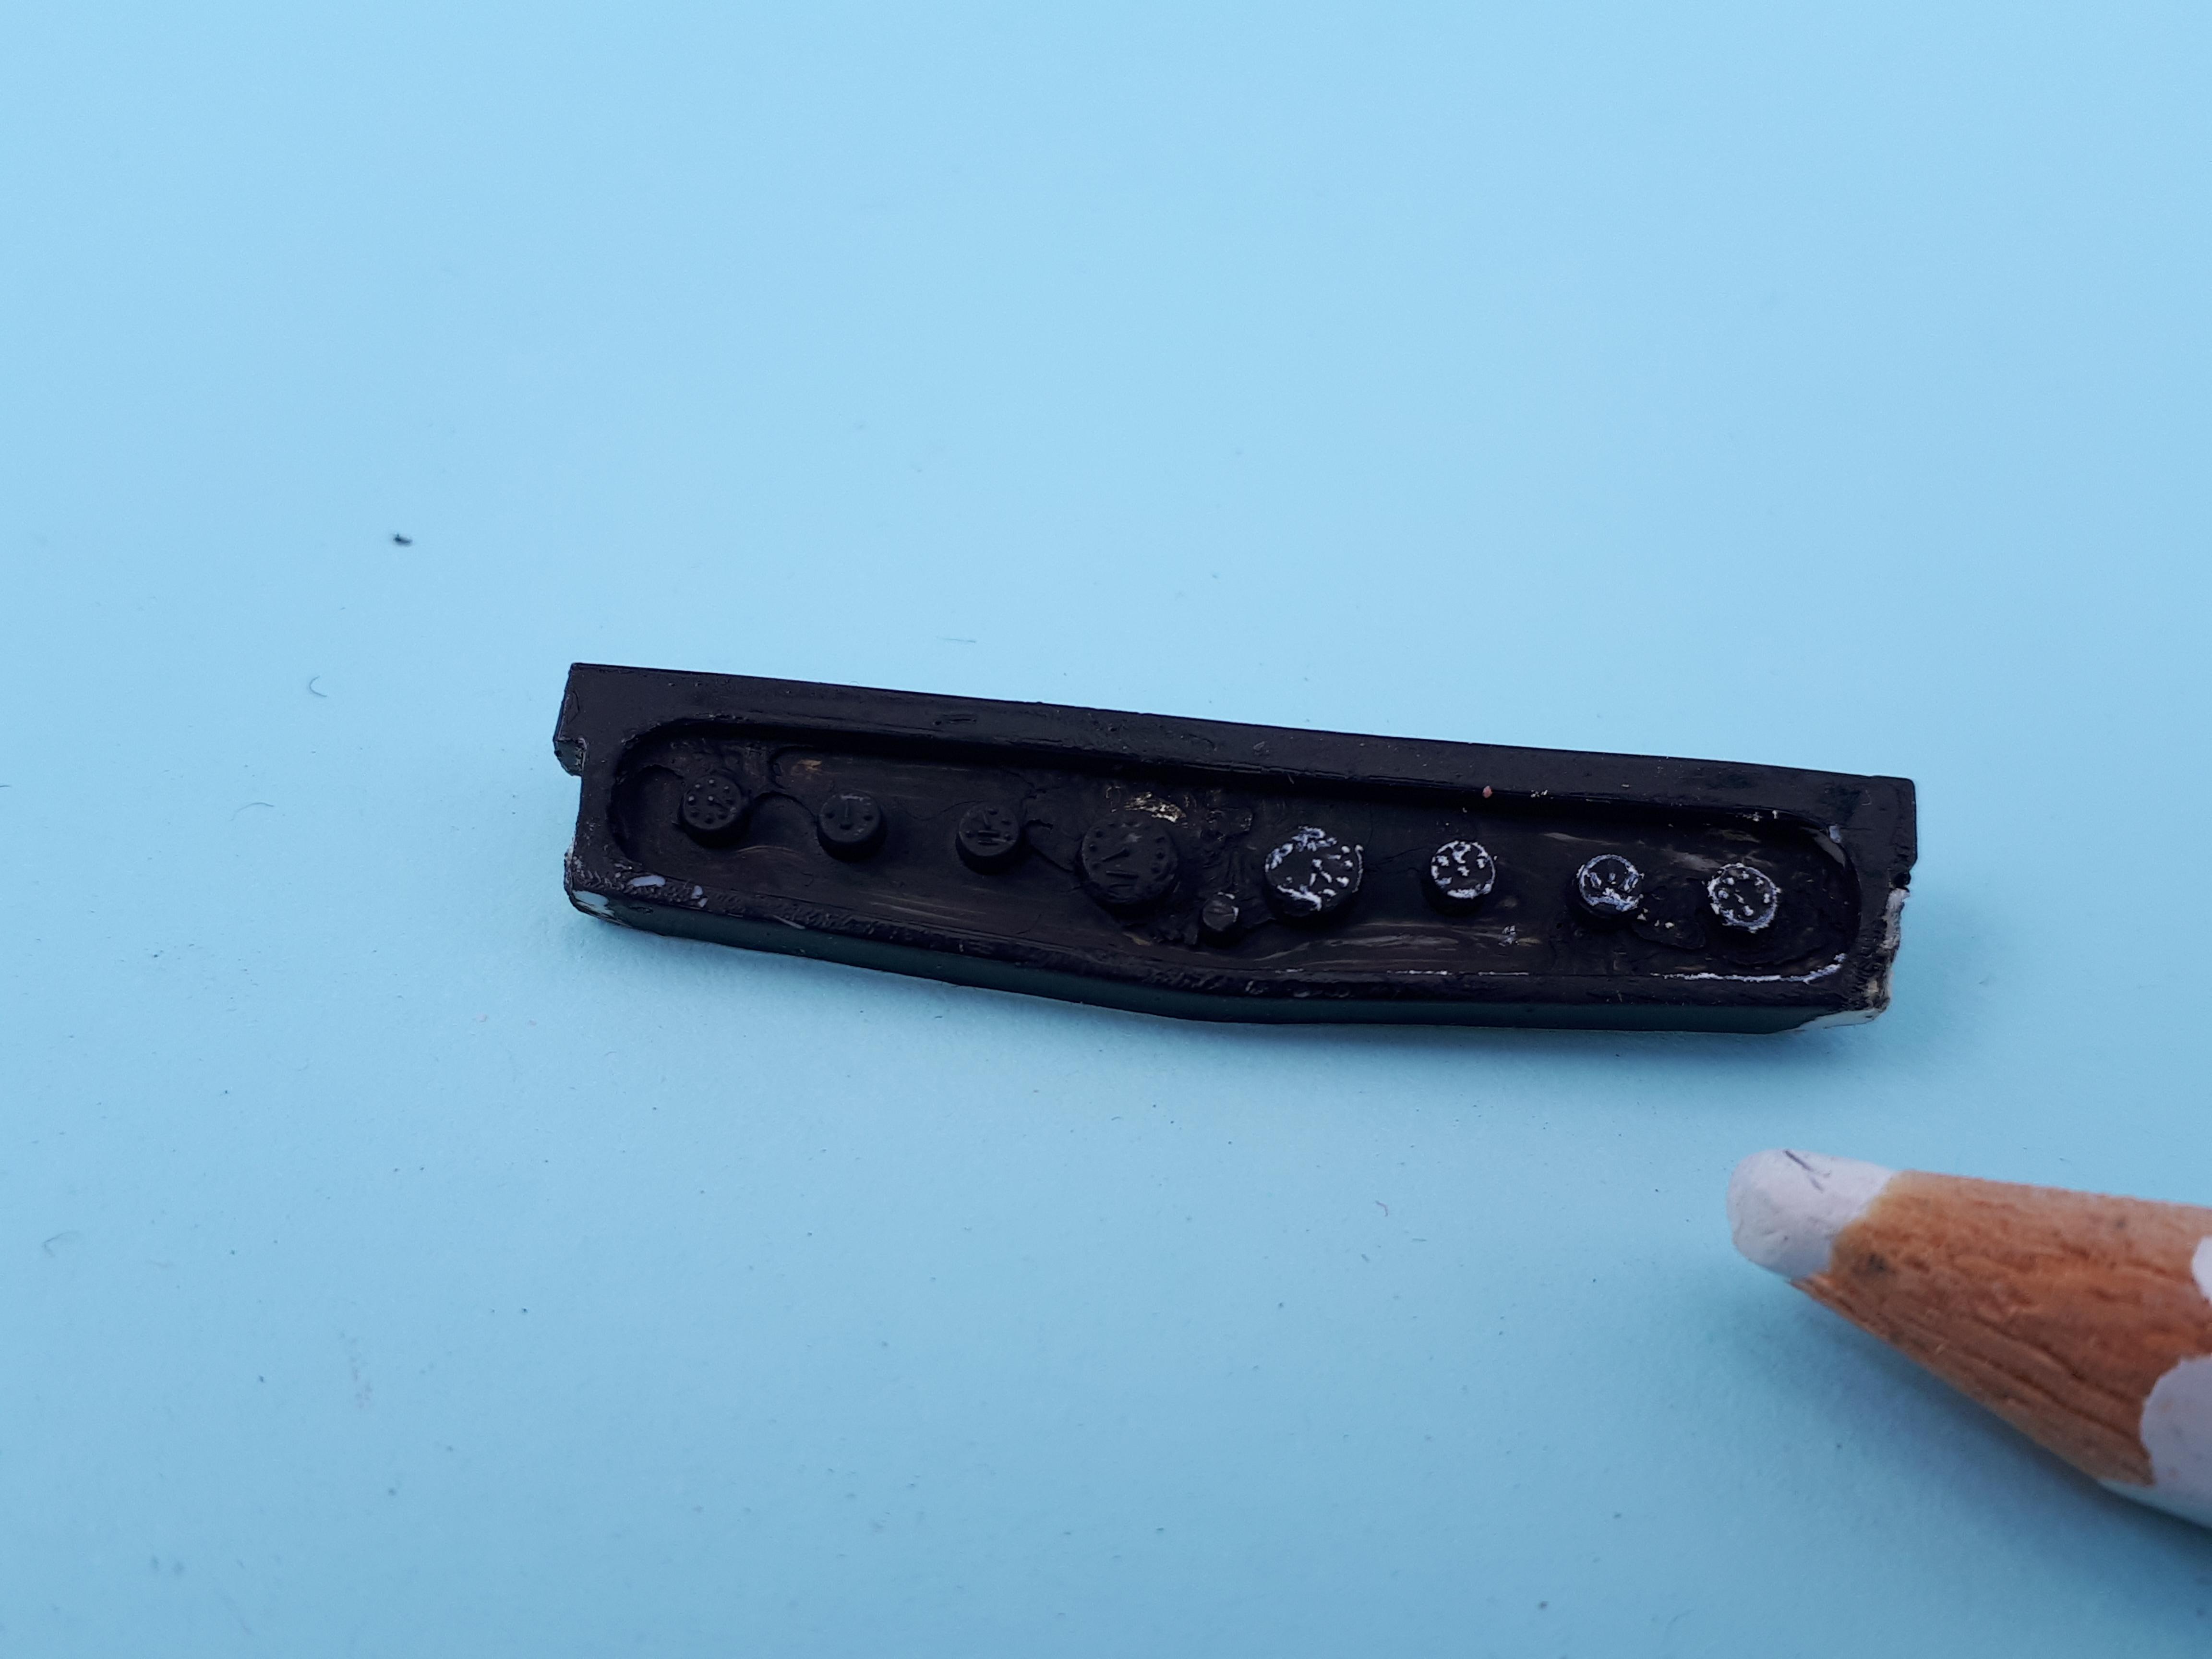
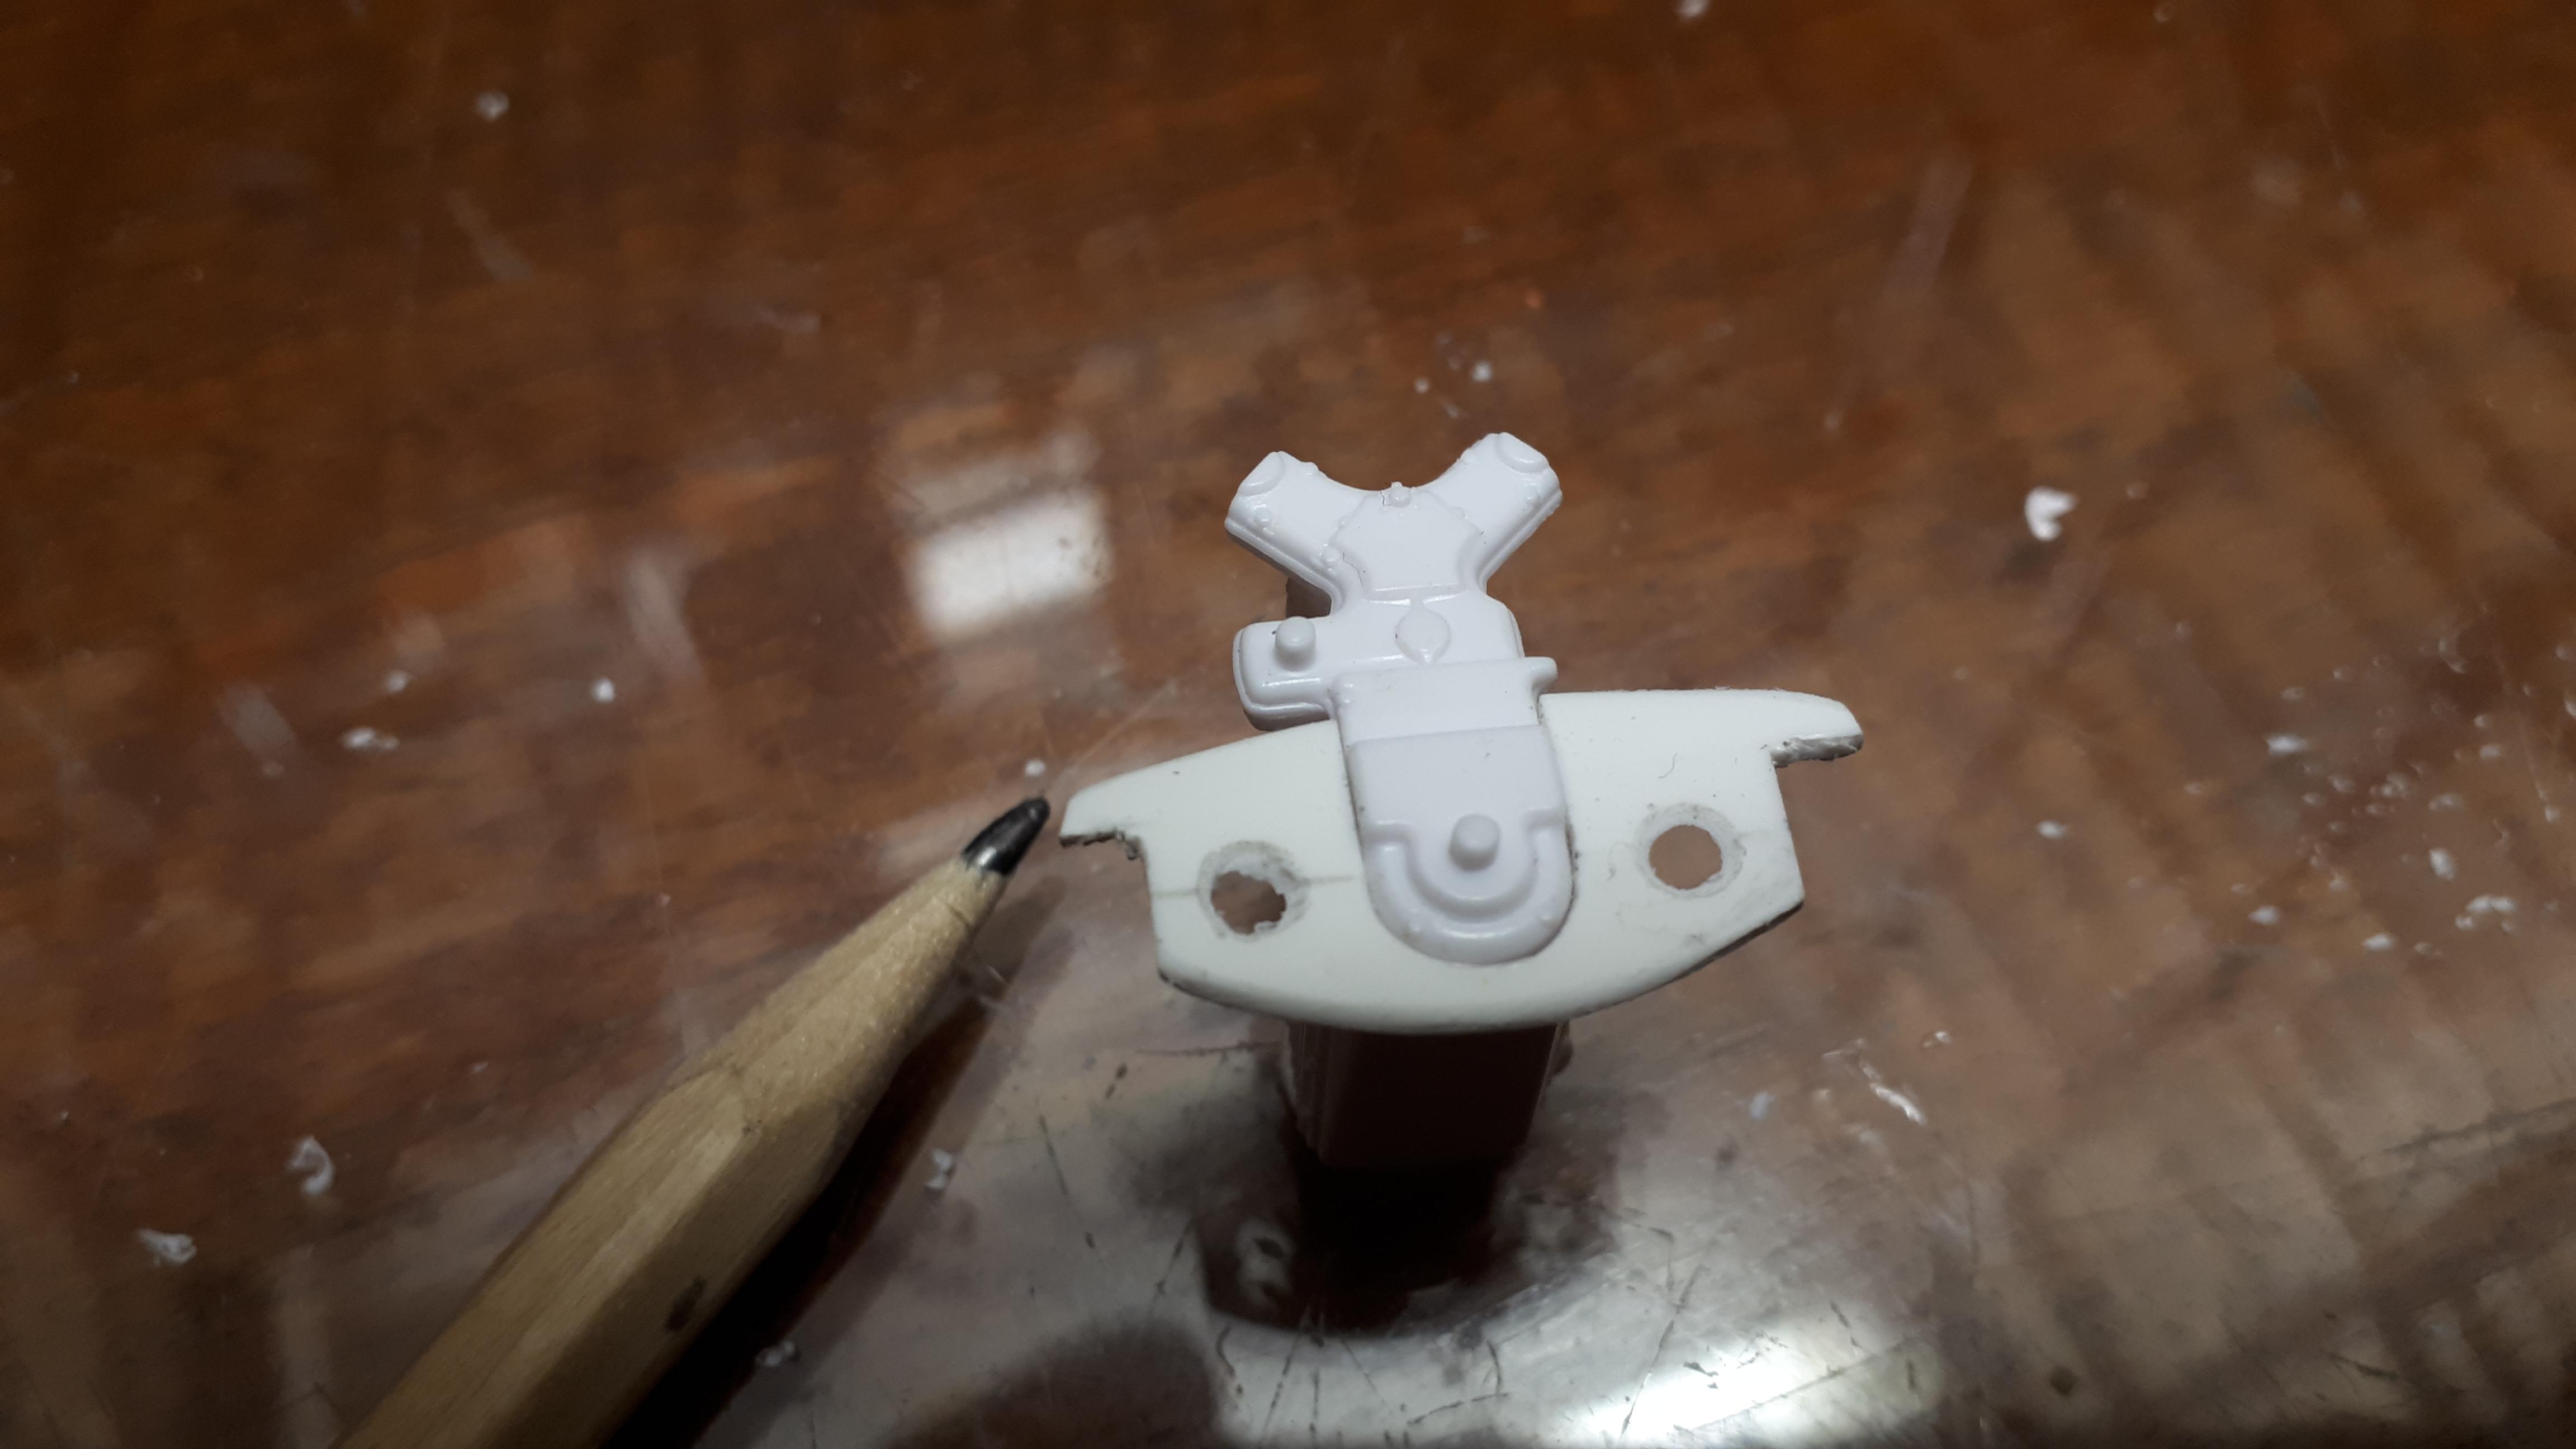
Here are two Model T radiators. The one with the large hole and the fin detail on the rear surface is the '25 T and the one with the small crank hole and no inner detail to speak of is the '23 T. I tried both but settled on using the '23 unit. You can see that the '25 unit also has some prominent ejector in marks that I only noticed after paint - where are my glasses again? Before installing it, I first filed down an AMT '29 roadster radiator until it fitted comfortably inside the T shell, but forgot to take a photo. Again, there is no mounting pins or mounts to speak of - you are simply going to glue the bottom of the grill shell directly to the front of the crossmember. I removed paint from both surfaces before gluing the radiator onto the car, then spent quite a bit of time tweaking it until it sat square and perpendicular - this is why I love Testor's glue in the orange tube so much - it has much better workability and stickum than other glues that I use.
-
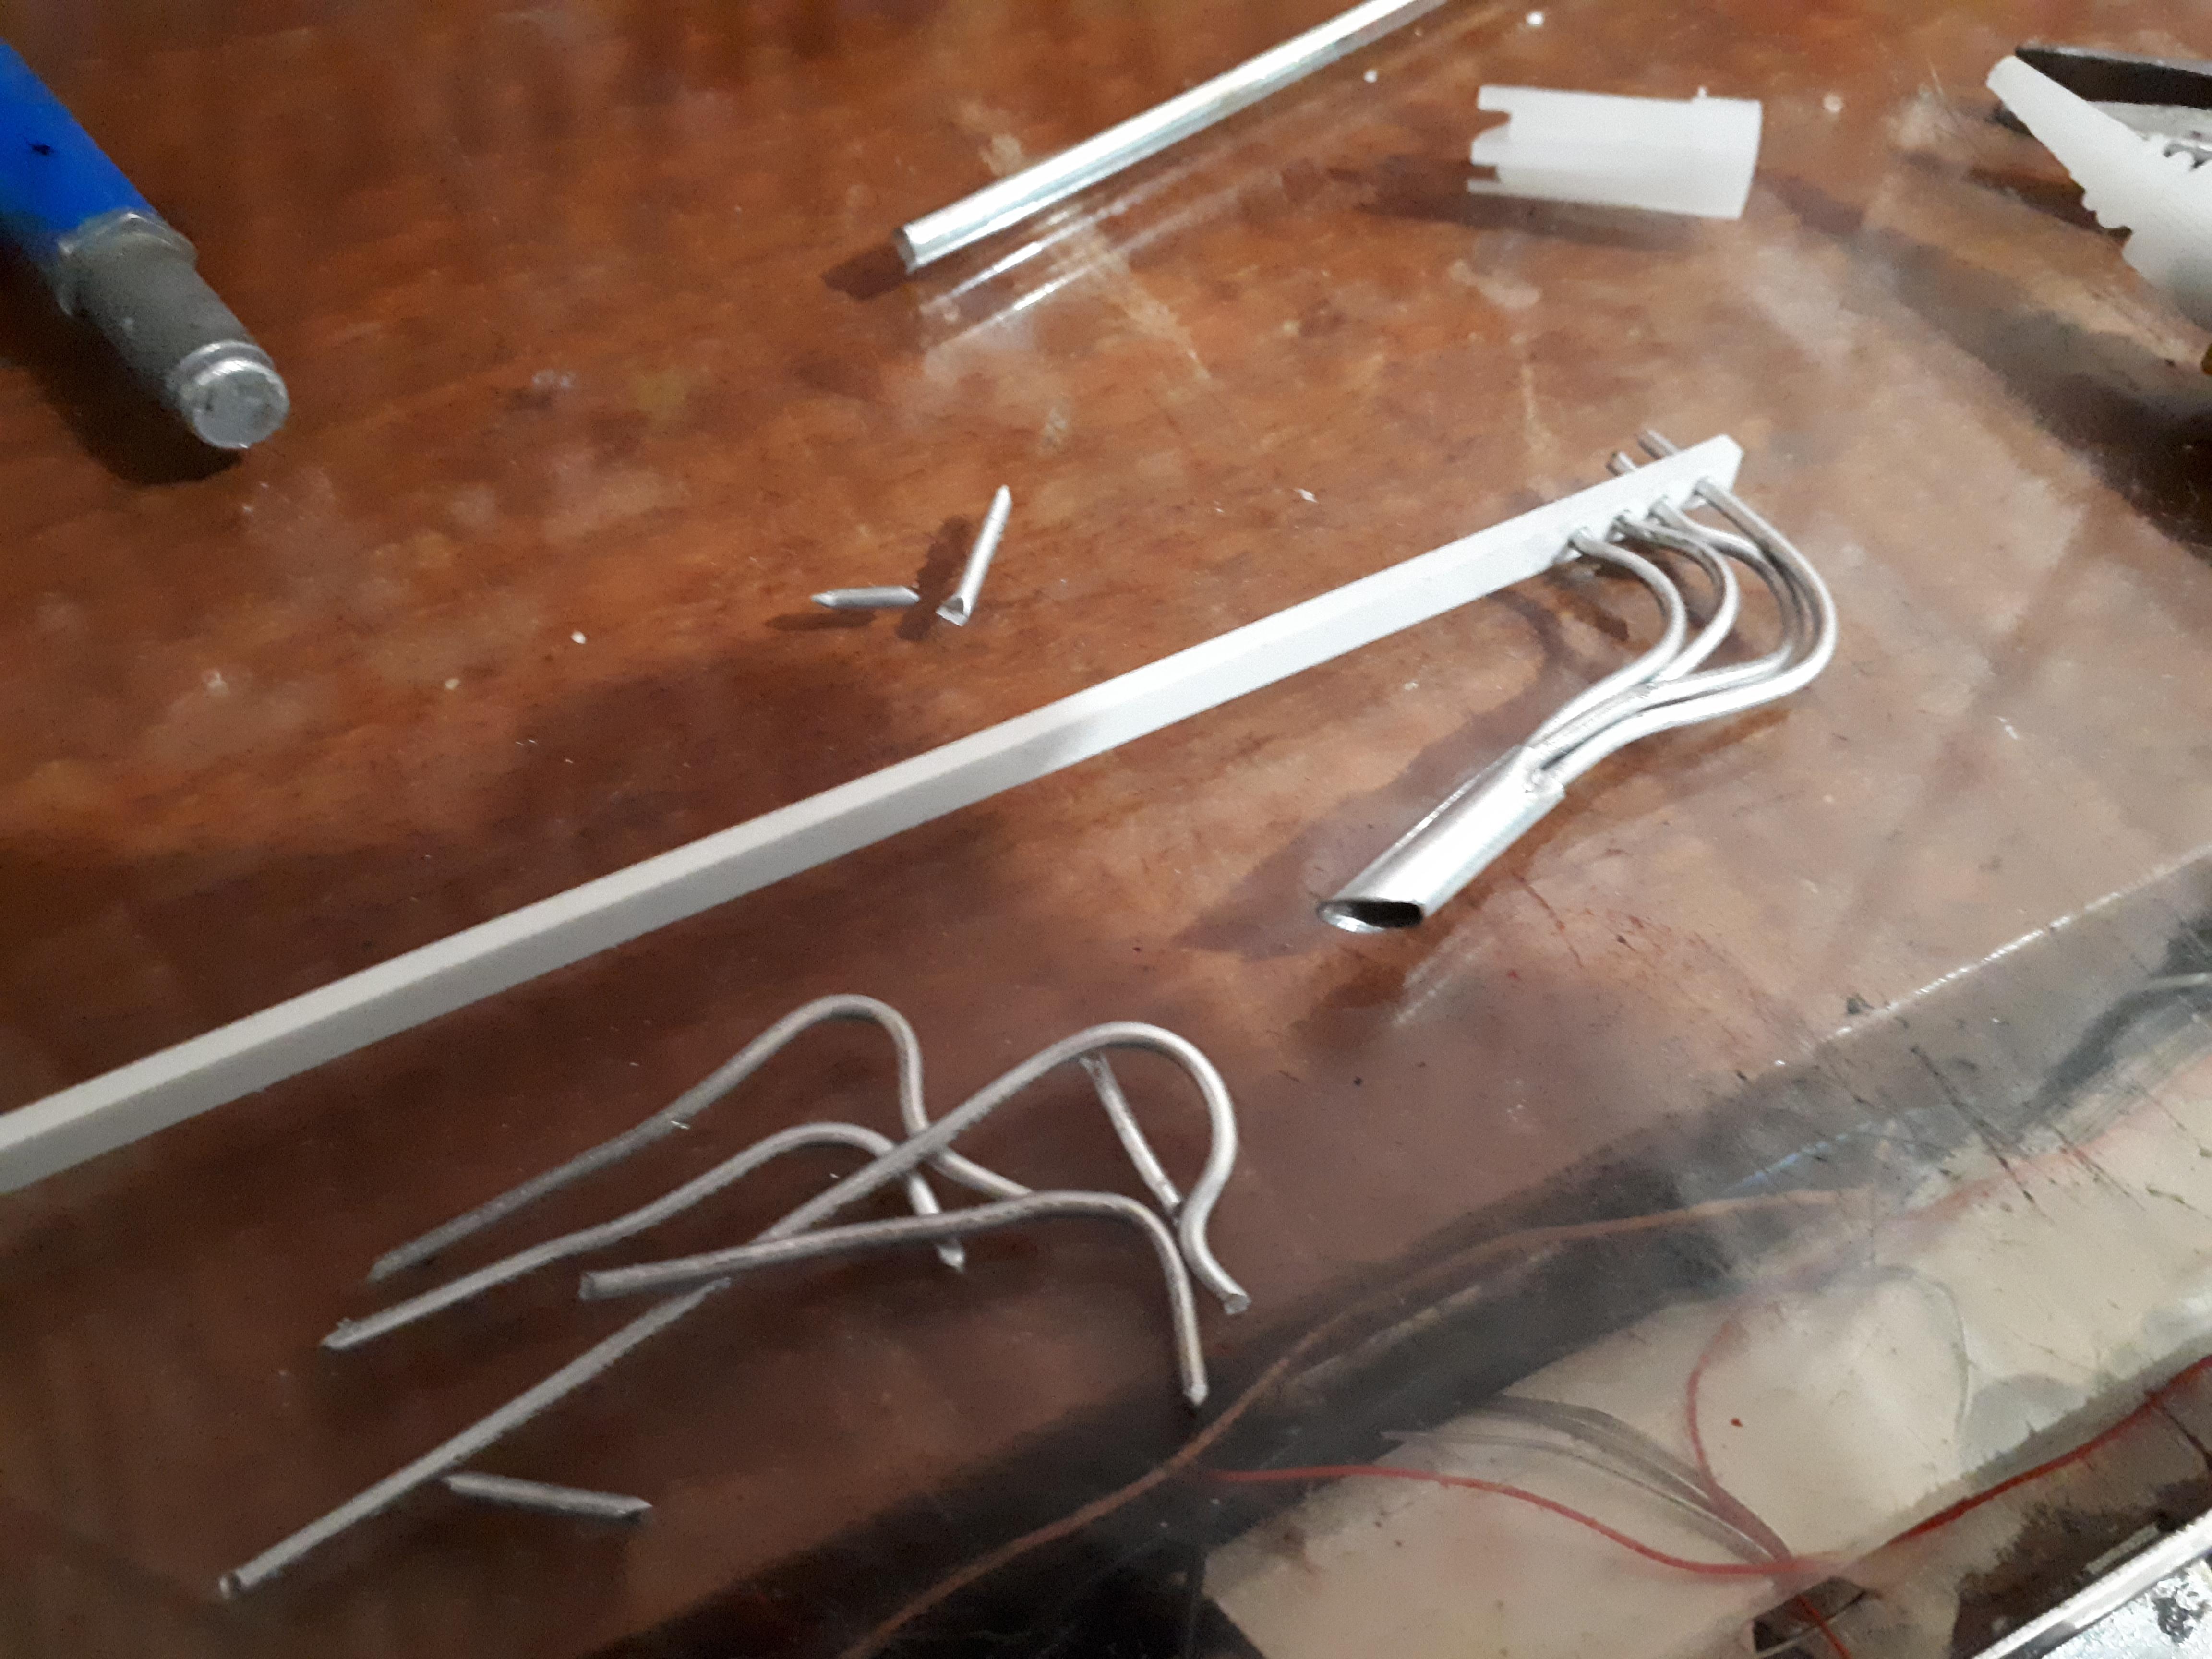
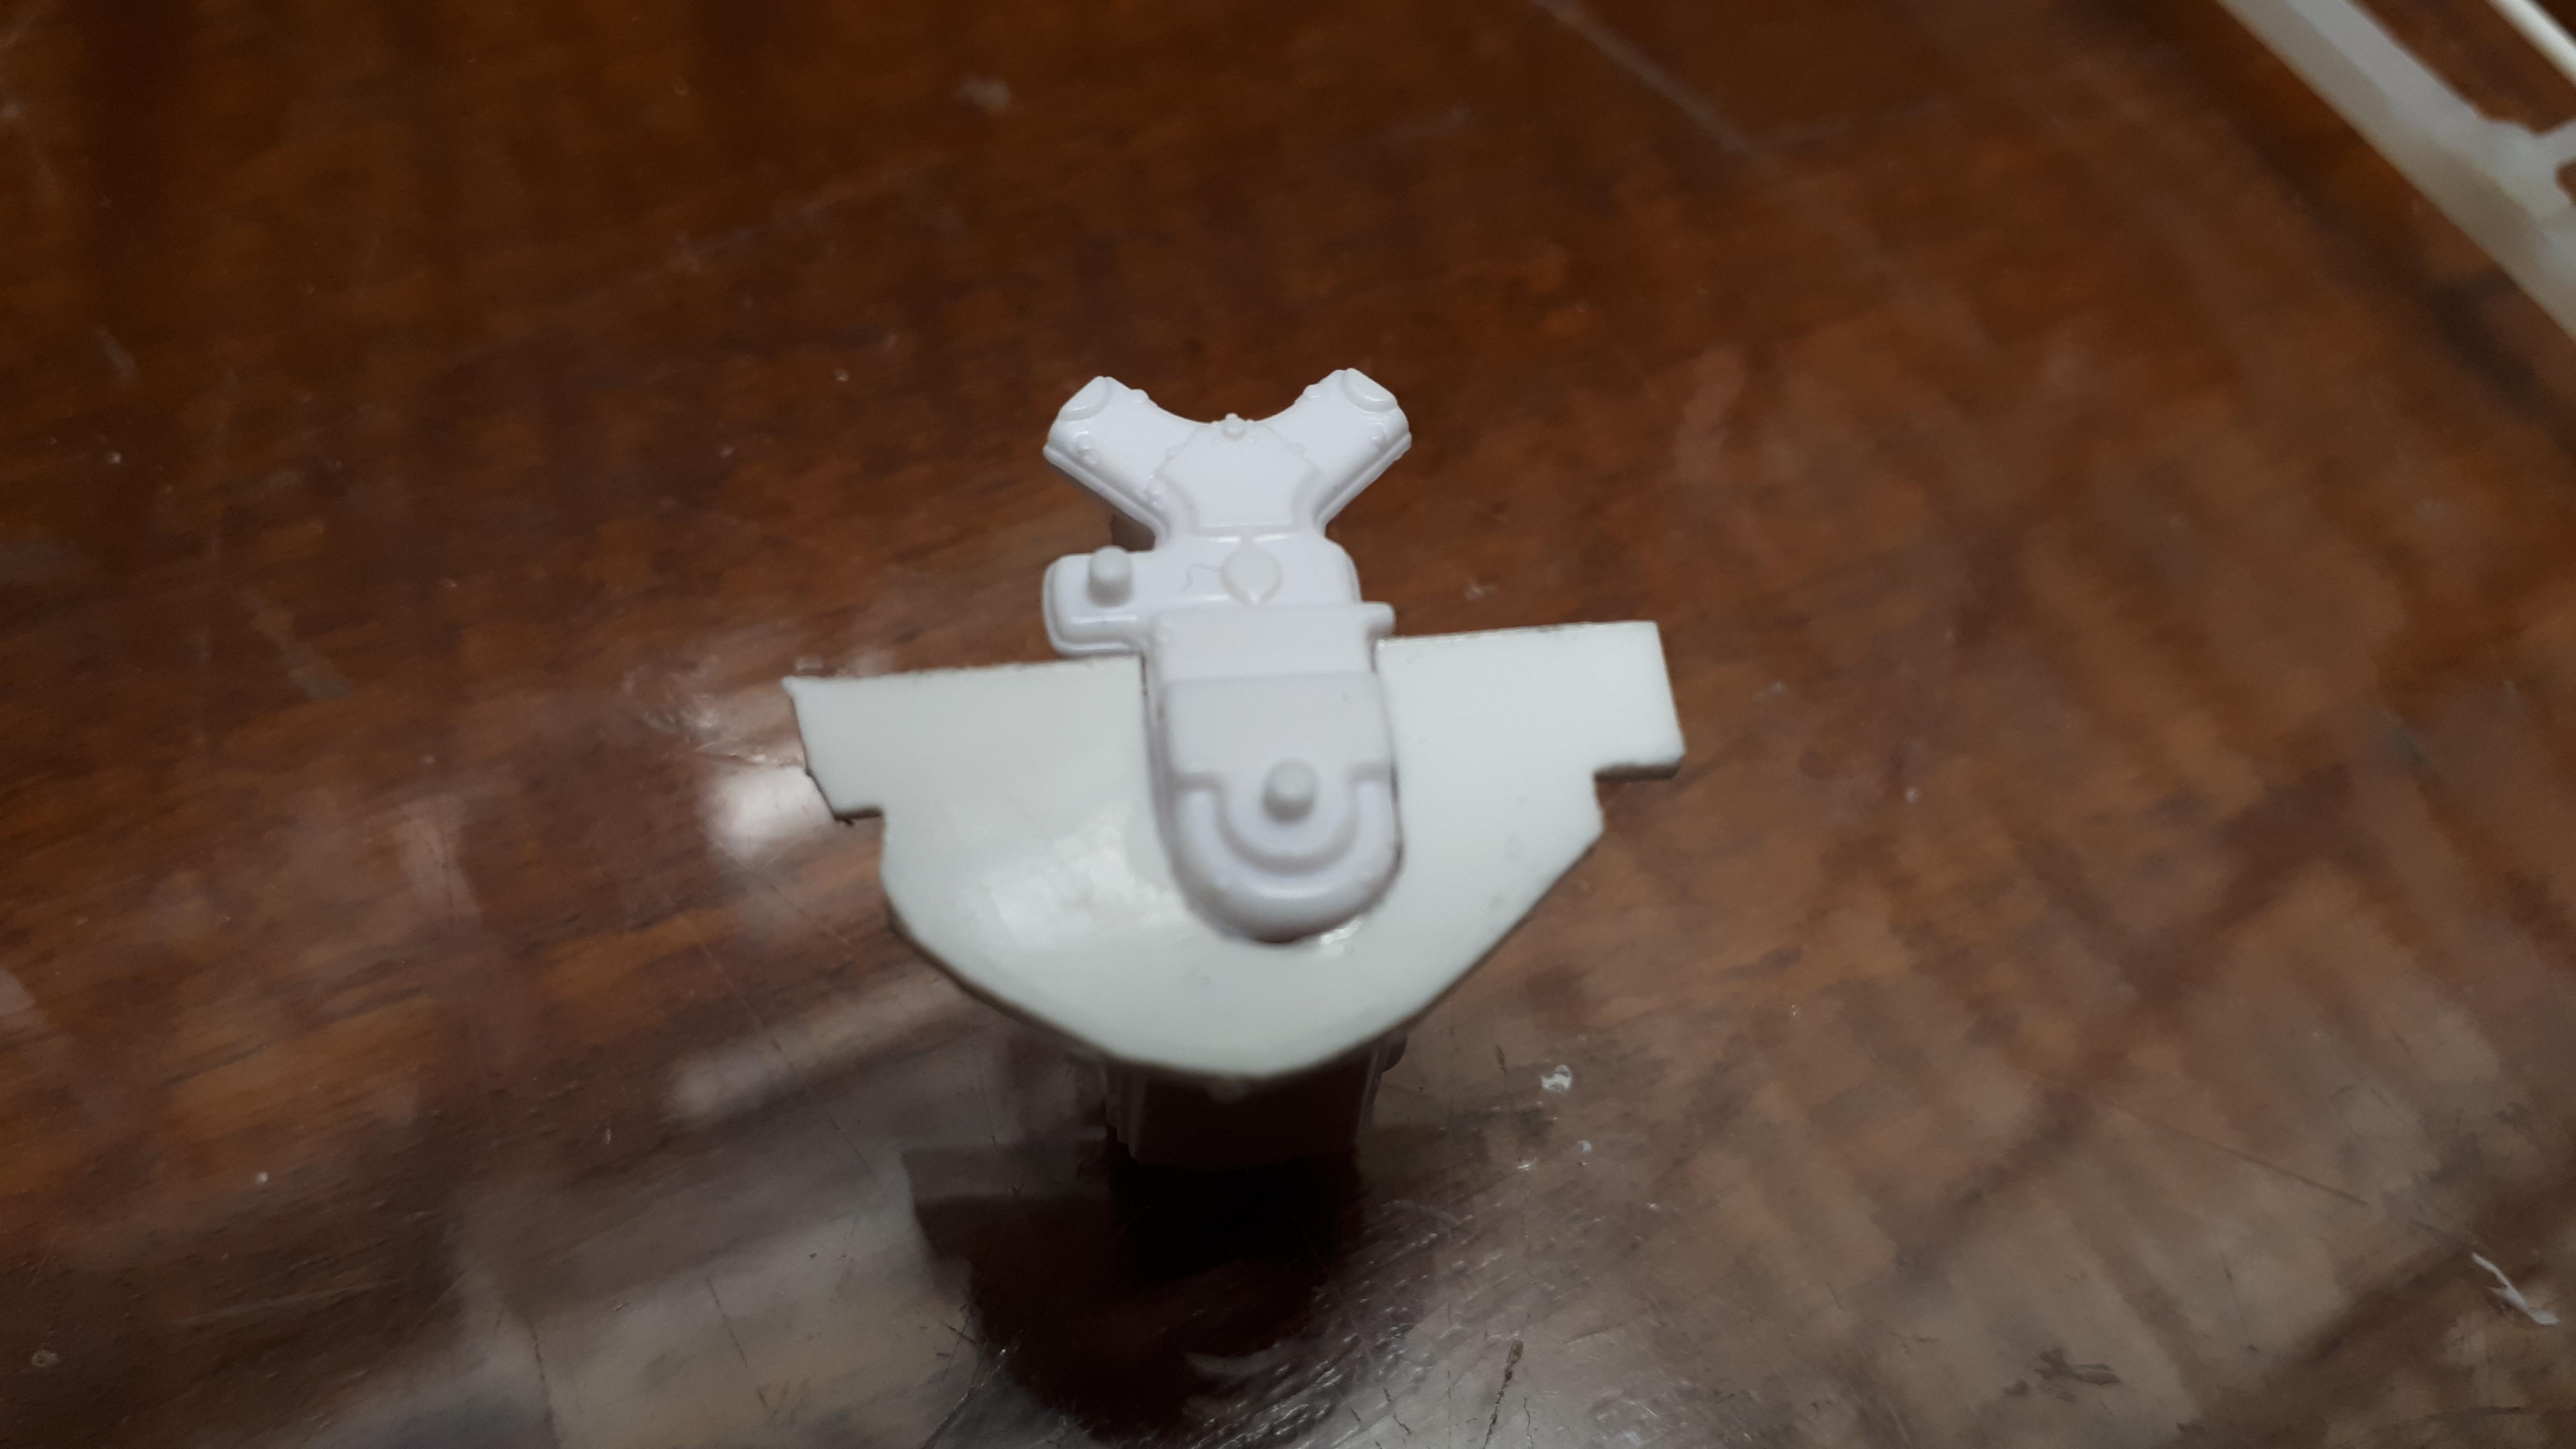
Thanks Gary. It is such a neat motor - I can see an Offy powered A of some sort in my future also! I would love to have used the Offy headers from the kit but they were never going to clear the body so I opted to construct a new set from thick styrene and aluminium wire. As you can see, it took a few shots but I got there eventually. Why are the header flanges so thick, I hear you ask? Because the mounting area on the Offy block is very three dimensional and I needed plenty of material to file down to make it a nice fit on final assembly.
-
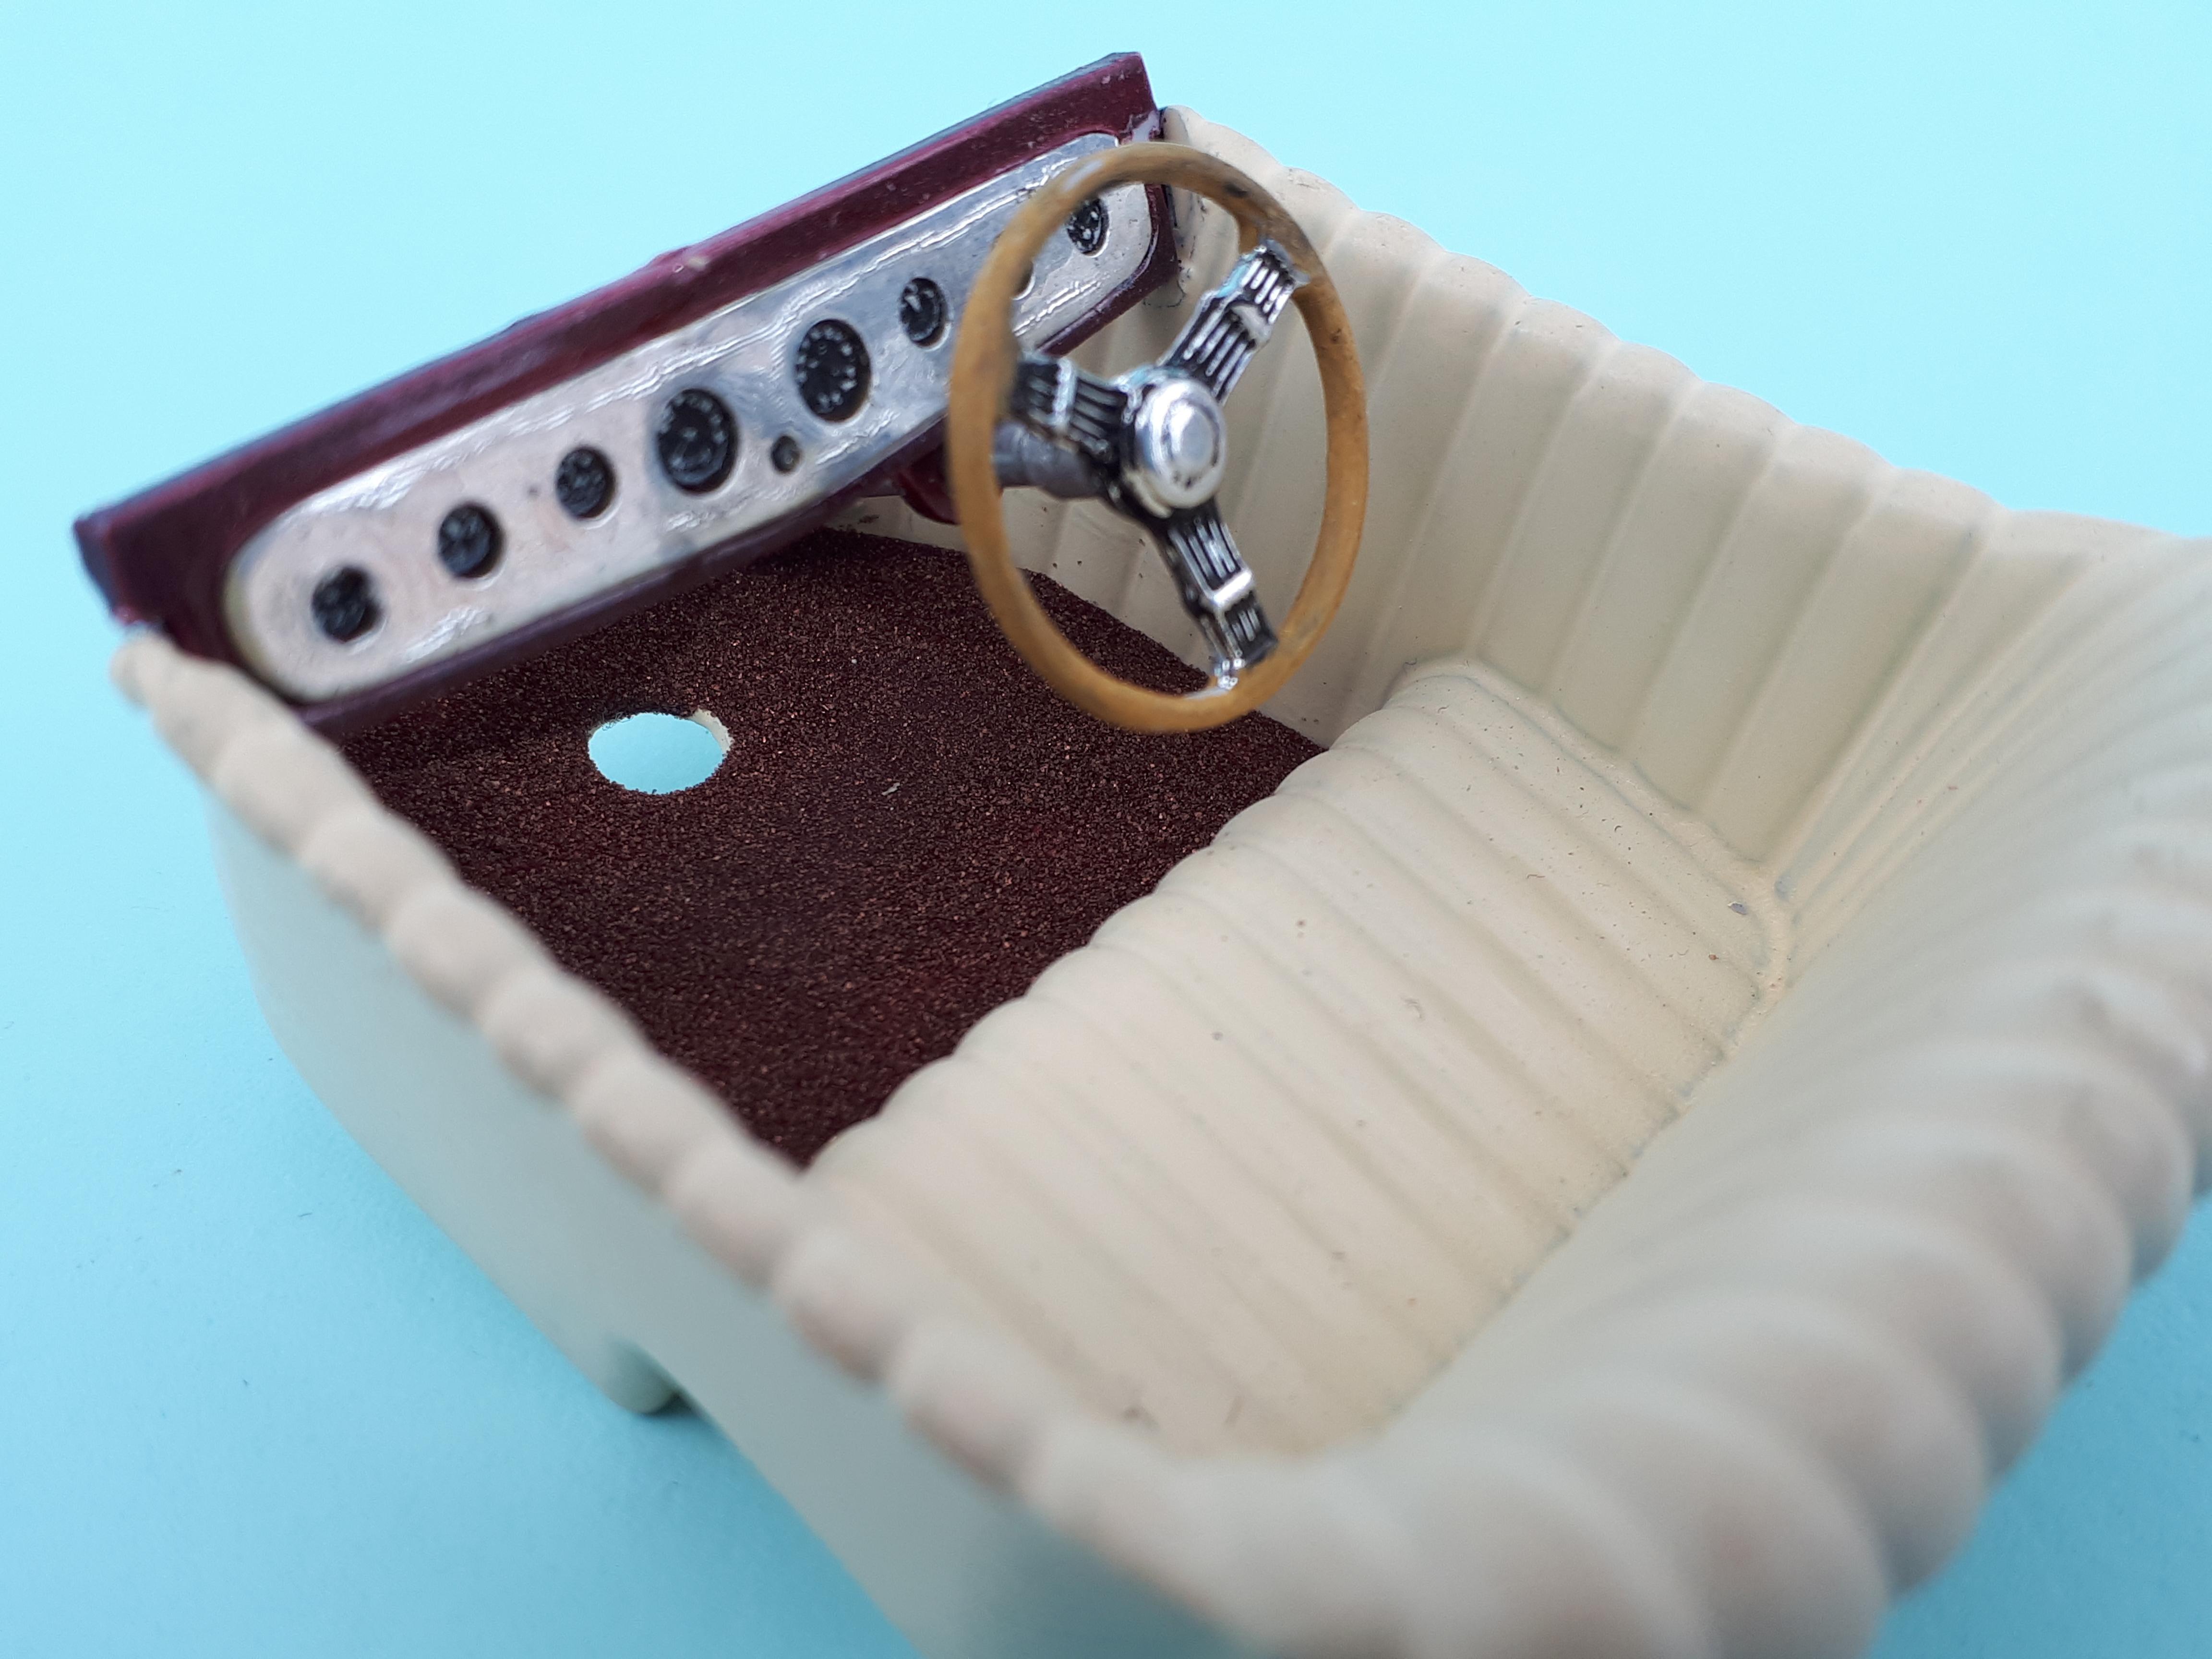
The 25 T comes with the square pleated interior which is more hot roddy but I chose to install the seat from the the 23 T kit as provided. I sprayed it Testors' Light Ivory with Dullcote to take off the shine. I used a copper toned embossing powder for the carpet plus the dashboard form the 1925 T kit. the steering wheel is the small diameter banjo wheel from the Revell Model A hiboy kit. It is a nice size for the tight confines of a Model T. I used a tip form Chris at HPI Guy's YouTube channel. The detail on the gauges was highlighted with a white pencil. I am stunned at how simple this is and how come I never stumbled on it before! Thanks, Chris, much appreciated! Cheers Alan
-
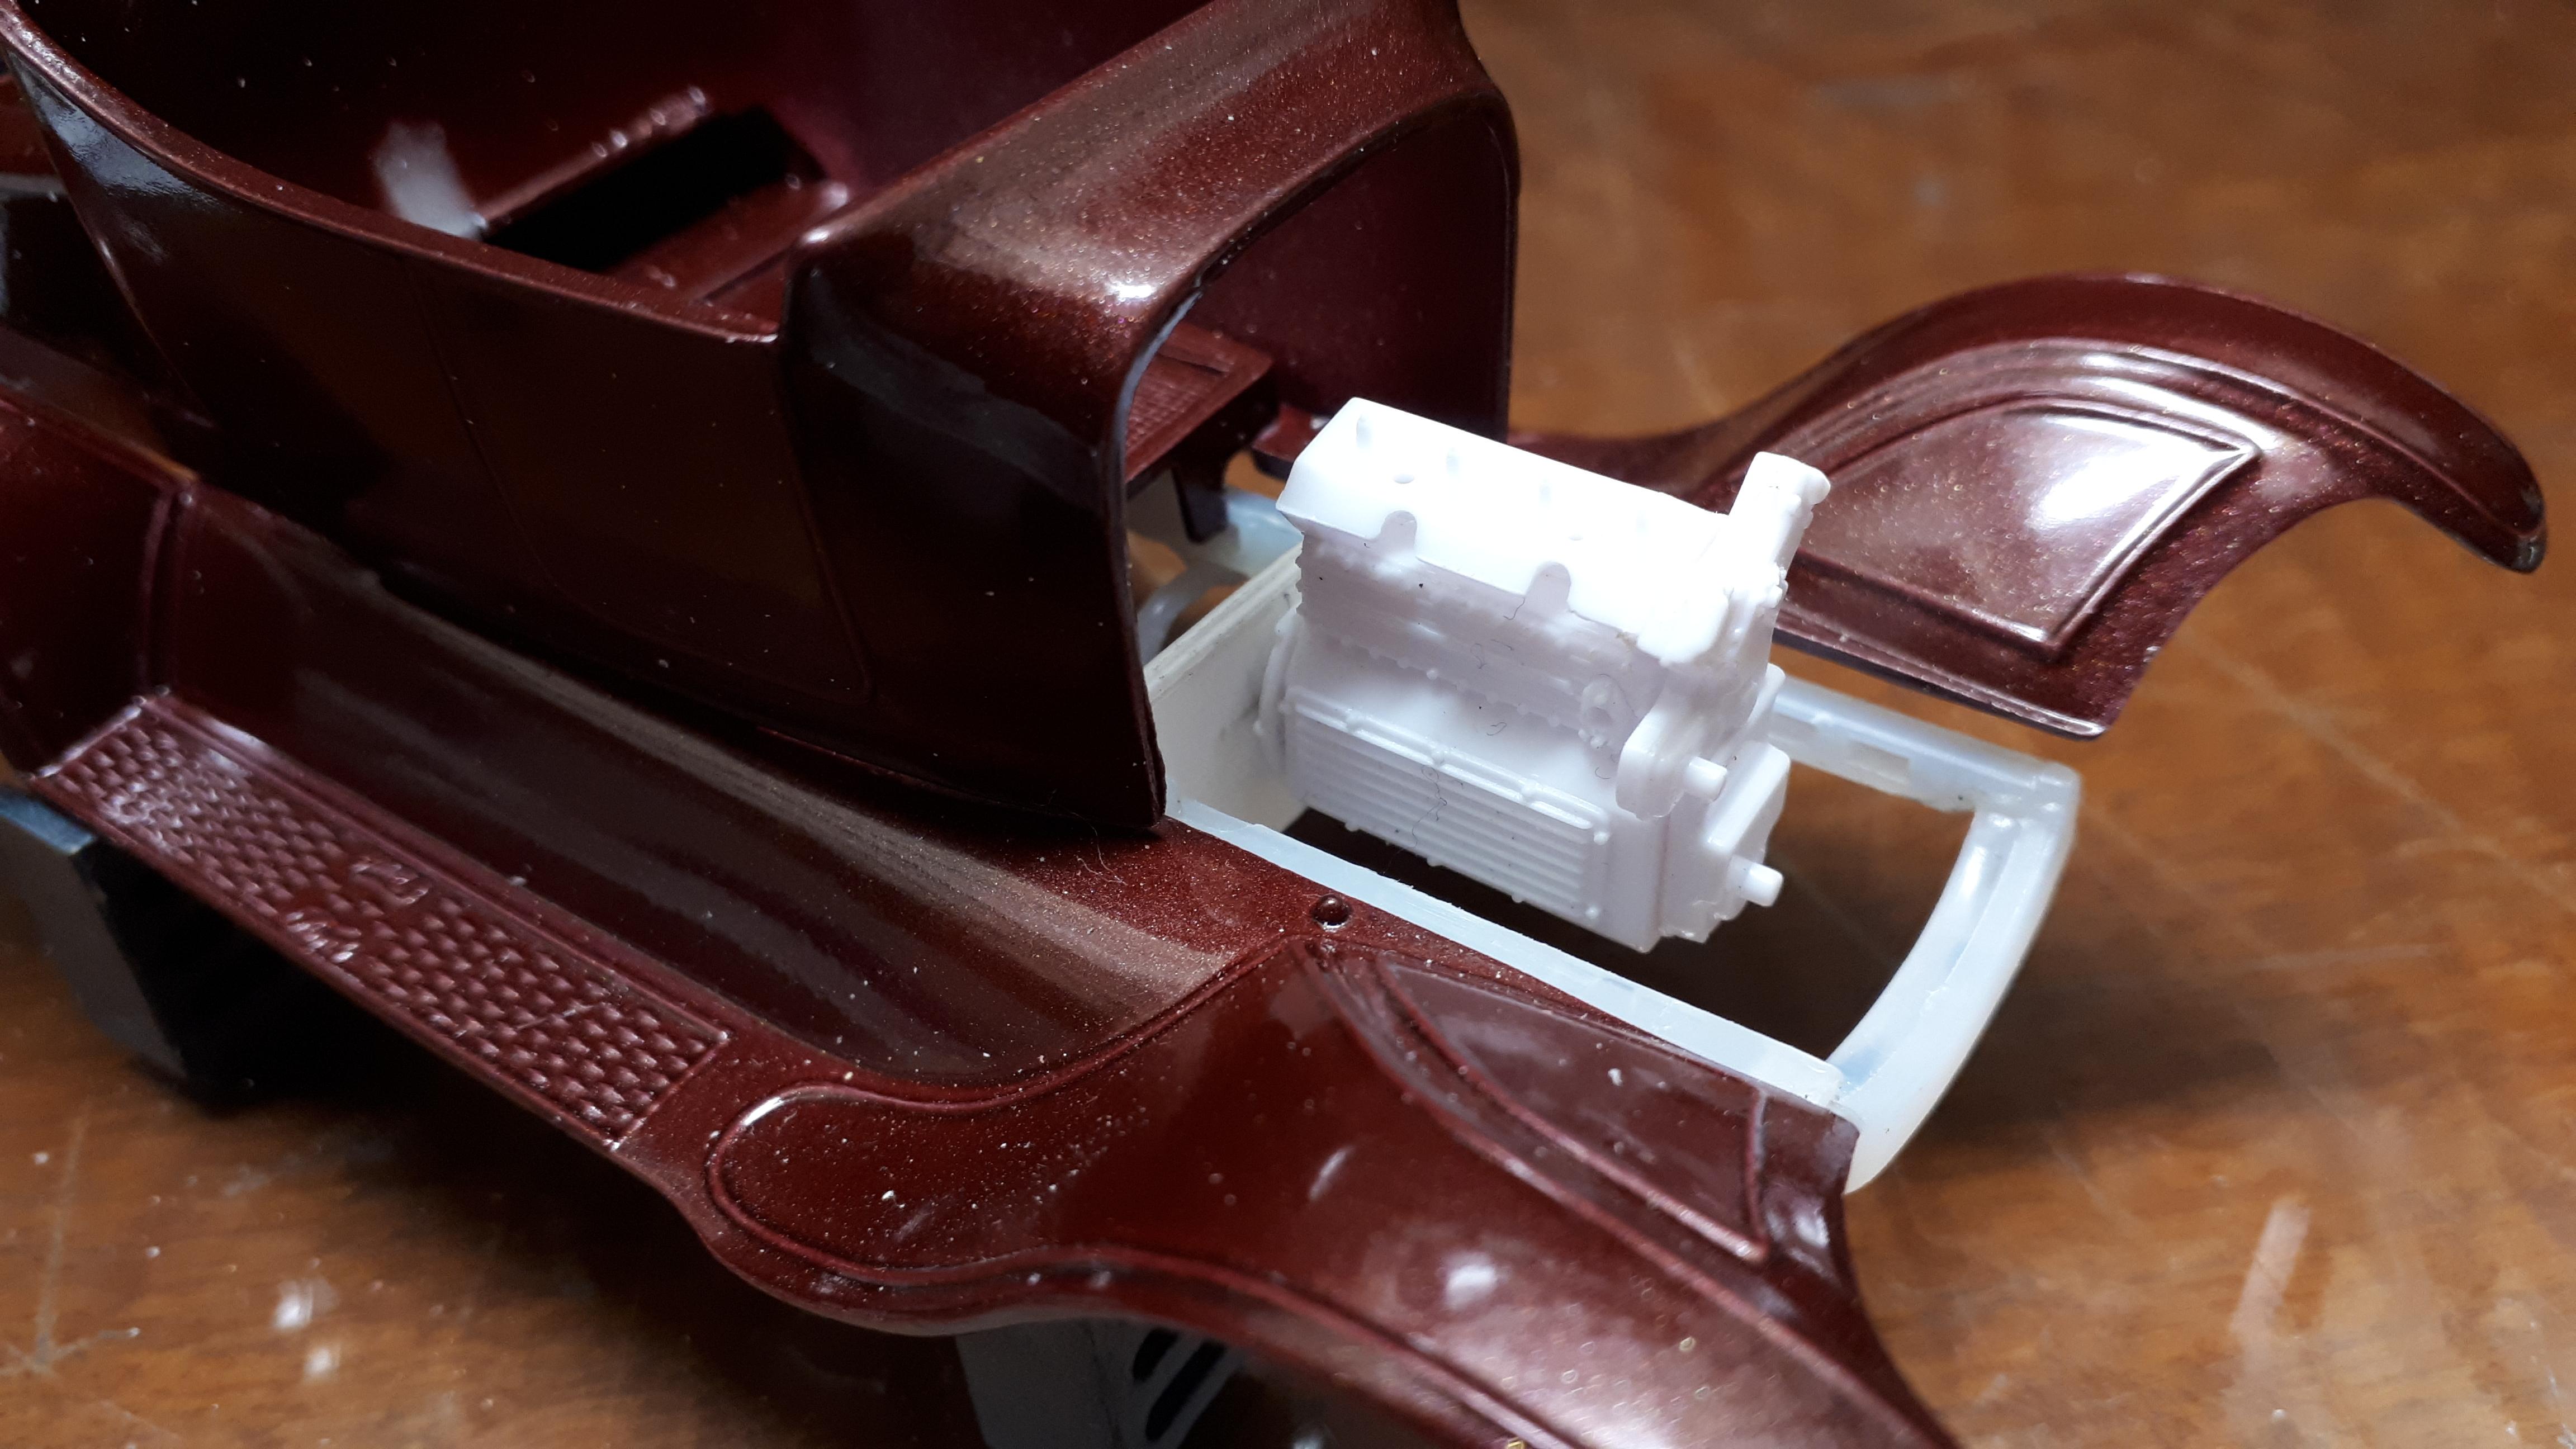
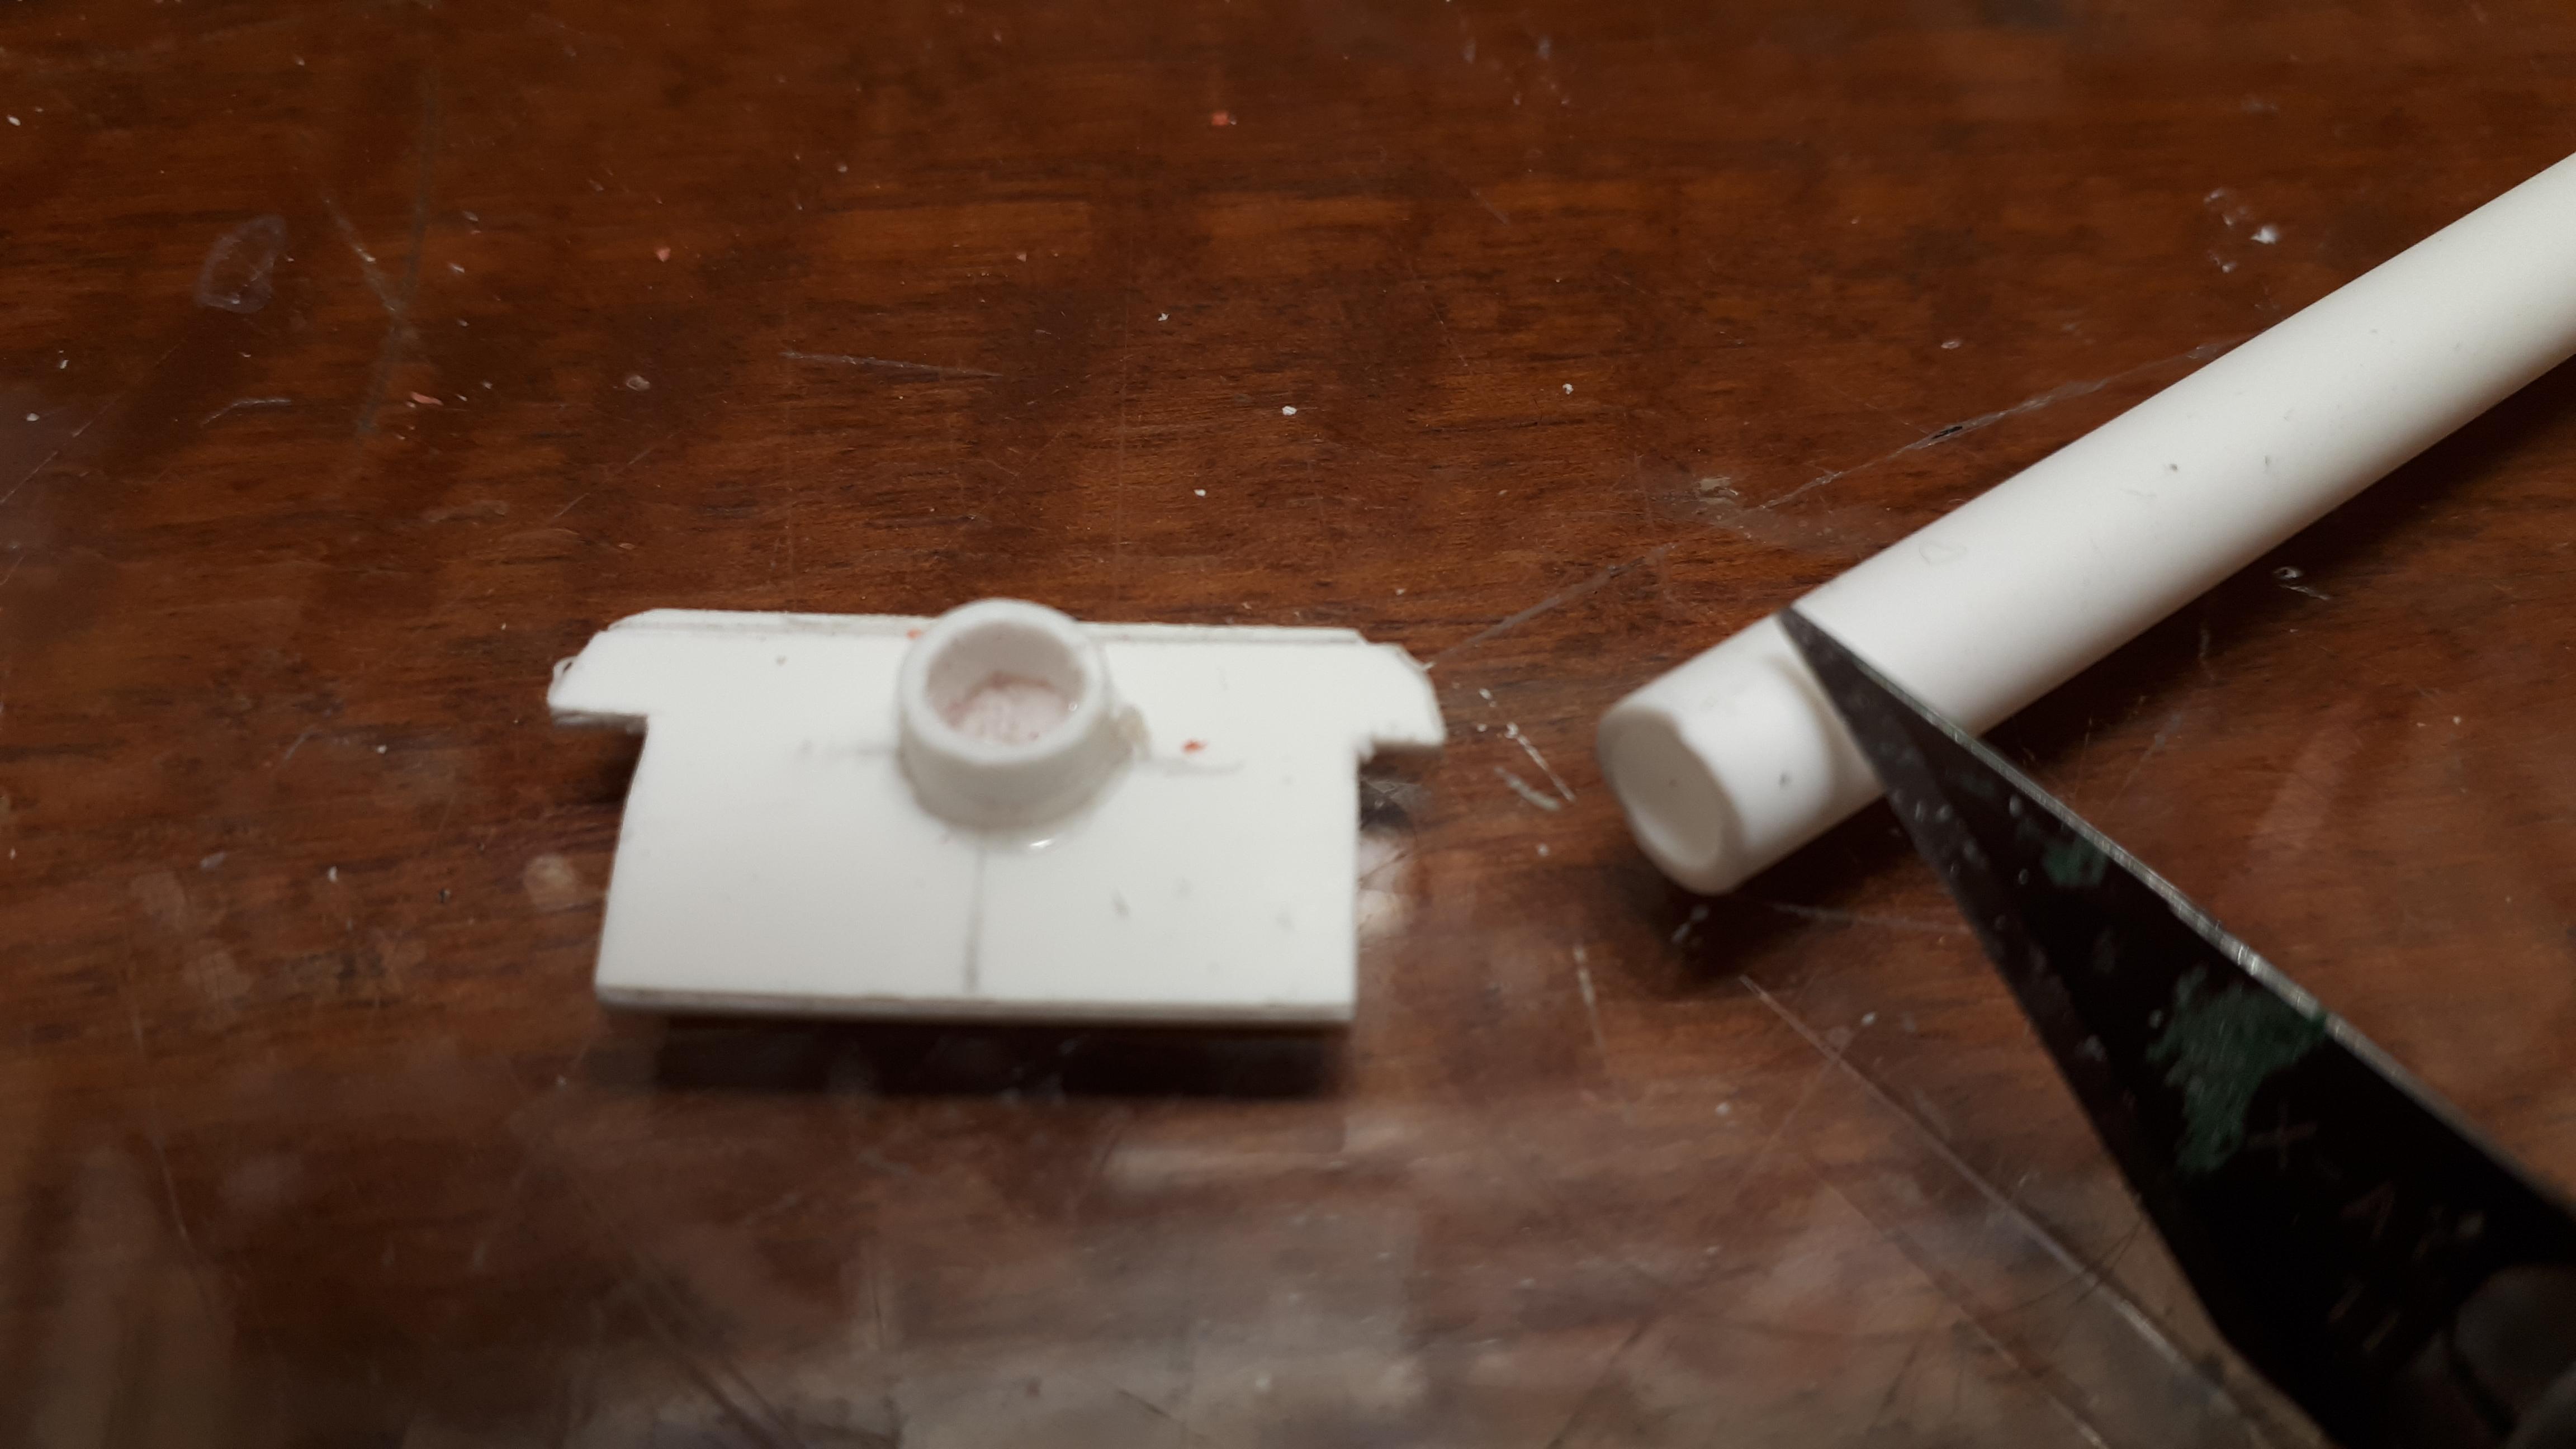
Here's a mockup shot of the Offy sitting in the T. Unfortunately, the gap between the fenders and the frame rails is how the kit was made. There is absolutely no positive location for the front fenders on the frame and the gluing surface is minimal at best. In the interests of a clean build, I opted to leave them just as you see here. With an engine in place, you simply can't see the gap from any angle. As a race engine doesn't have conventional engine mounts, I made two engine plates. I used a short bit of Evergreen tube for a mount to centre the rear of the engine - it worked well! The front mount took two goes and I found drilling a pair of countersunk holes reduced the bulk and added some detail. Cheers Alan
-
Just about the best chop ever done on a 32 so why wouldn't you want an Orange Crate on your shelf? This sounds like a great project, you really did those wheels justice. Cheers Alan
-
A quick and dirty build....and a whole lotta modeling fun....(updated)
alan barton replied to tim boyd's topic in Model Cars
Having the two side by side is magic - it really shows the whole before and after concept , dare I say, to a "T"?!?! As always, I love the hot rod the most. The grey accents on the Halibrands really bring them to life. There is a famous T coupe over here, about a 1915 if I remember correctly, with a twin blown 429 Shotgun up front. Have collected all the parts ( apart from an Outhouse car brass T grille). Your blue car, plus a New Year's resolution perhaps, could see it done! Cheers Alan -
Steveracer - Builder of Models :)
alan barton replied to steveracer's topic in Welcome! Introduce Yourself
Welcome Steve - and eclectic is the new black! -
Your dream hot rod
alan barton replied to bamadon's topic in General Automotive Talk (Trucks and Cars)
This one! Been driving it 36 + years now, not got sick of it yet. Turned out my teenage dream was on the money!
-
Thanks, Craig, I really appreciate your comments. I am proud of how a fairly forgettable kit can look at home with the better stuff on the shelf with the standard hot rod tweaks - wheels, colour, stance. It certainly exceeded my expectations! Cheers Alan.
-
Wow, a great variety there and anyone of them would fit in my collection. Some really stand out for me - I built the Nash years ago and it is rare to see them built. The 33 Willys Hiboy is such a cool combination. The chopped 40 delivery is soooo slick! I must have missed your wild 60 Pontiac's completion so it is great to see that all done. Believe it or not,I have a close friend in Alberta who is building a similarly modified 53 Studebaker with a Mercedes V10 engine and Lambo transaxle - full size! I have seen photos of the rolling car in primer and the similarities to your tin Indian are amazing! I have planned to build a Crown Vic wagon for years so that was of interest to me also. But they all have a nice clean finish to them and look totally believable. Congrats on a great year! Cheeers Alan
-
Radical Bonneville Salt Flats Coupe
alan barton replied to tim boyd's topic in Other Racing: Road Racing, Salt Flat Racers
I don't think I have seen this one before, Tim. I do like the way you grafted all the disparate pieces together. Those ram tubes hint at a front blown Hemi! Recently you mentioned how you like when other builders join in a thread when they have a similar build - well, I absolutely had to join in on this one!!! Similar but different to yours, mine started as an AMT 36 coupe but has leftover pieces from a ruined Monogram 34 coupe chop top for a roof. This made for a nice fit with a ZZTop hood. Like yours, it was started long ago, 1981 if my memory holds up but did not get finished until around 2010. It went through at least three different fronts and two different rears along the way. Like yours it is curbside but unlike yours, I didn't summon up the courage to scribe in door lines. Door lines have defeated me many times just on bare plastic and I knew tackling multiple layers of plastic, putty and glues would end sadly. My hat is off to you in how well you designed and executed your door cuts. That is a skill I still need to master! I think the two would look great sitting in line at Bonneville. My photo was taken at the LIARS show in 2013. Cheers Alan
-
To my eye the delivery body has a better balance than the coupe body in the original kit. Will be interested to follow this one! Cheers Alan
-
You ain't scared of nuthin', huh?
-
36 ford humpback sedan, 38 slantback hump
alan barton replied to damodelguy az's topic in WIP: Model Cars
That graft you did of plastic to resin sure took some skill and patience! Nice job. I definitely think you made the right decision on the 36/38 mashup. Whoever mastered that 38 standard did a pretty god job also. Cheers Alan -
By the way, those are not stains, my camera did not like the reflections!