alan barton
-
Posts
2,105 -
Joined
-
Last visited
Content Type
Profiles
Forums
Events
Gallery
Everything posted by alan barton
-
Another Starbird show car Ultra Truck aka Orange Hauler Gseeds
alan barton replied to gseeds's topic in Model Cars
Gee you have a clean building style, Gary! I have one of these built in my collection, but not my build as it belonged to a dearly departed friend of mine. His was closer to the box art so it is nice to see your earlier version. Cheers Alan -
Not often you get such a "just right" look out of such a "simple" build. No doubt the colour really brings it together. This has been on my list for a long time but hasn't popped to the top yet. I can only hope mine comes out as good as this! Cheers Alan
-
The I’ve gone to far 32 five window coupe
alan barton replied to Bullybeef's topic in WIP: Model Cars
Bill, just a heads up, when using the Monogram frame without fenders, make sure you add a strip of plastic to the outside of the frame forward of the firewall and to the inside of the frame behind the firewall. I have built three hiboys using this frame but Monogram did something funny in their treatment of this part and it will look very undernourished without this little addition. It doesn't take long but it does make a difference. Cheers Alan
-
I'm amazed at how well you manipulate that bodywork on an area with quite fine detail - you have my utmost respect! It is one of the areas that I am most challenged by. I think I have built every AMT hot rod model in history EXCEPT for the 36 so your thread is going to be very educational. Cheers Alan
-
St John Jeep
alan barton replied to Tom Geiger's topic in WIP: Model Trucks: Pickups, Vans, SUVs, Light Commercial
Tom, you realise the original builder put this jalopy together just so that you might see it one day and know you HAD to build it? I mean, this thing has Tom Geiger written all over it! Jeep - check! Commercial vehicle - Check! Funky home made body - Check! Moderate weathering - Check! Place that probably has really cool stamps at the Post Office - Check! What took you so long? Cheers Alan -
You're not wrong Tom, that is off the scale! Cheers Alan
-
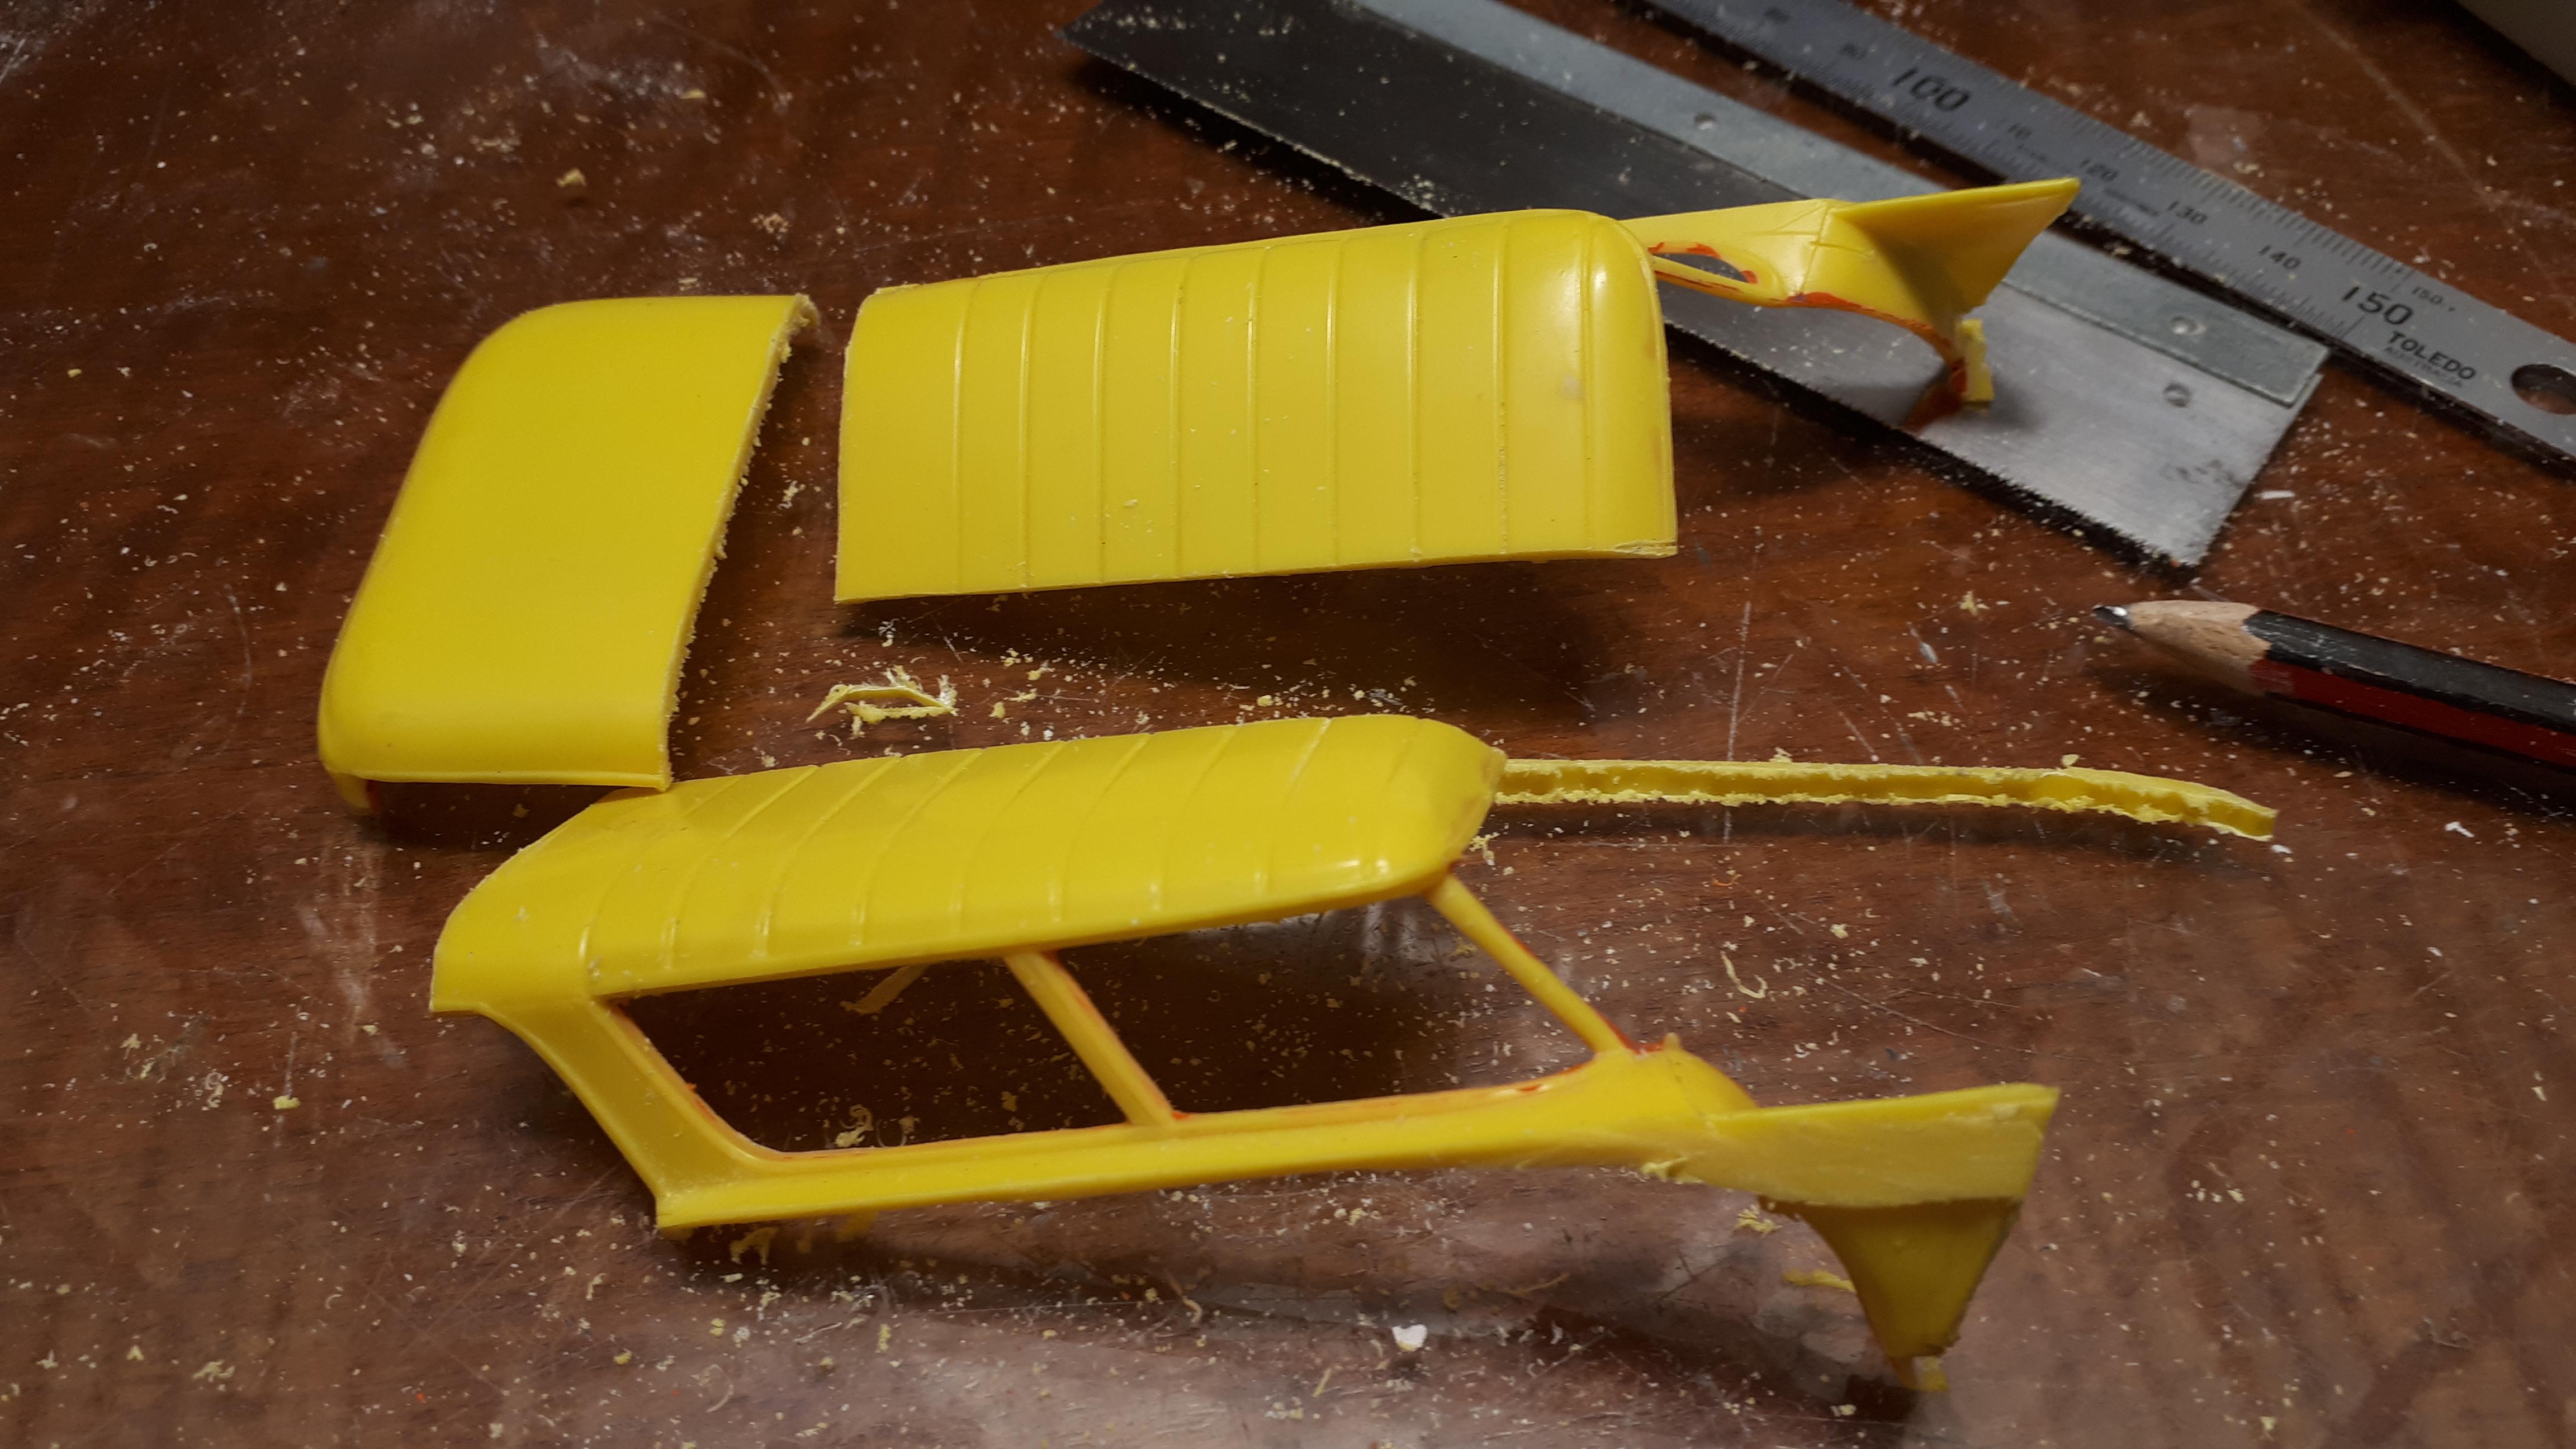
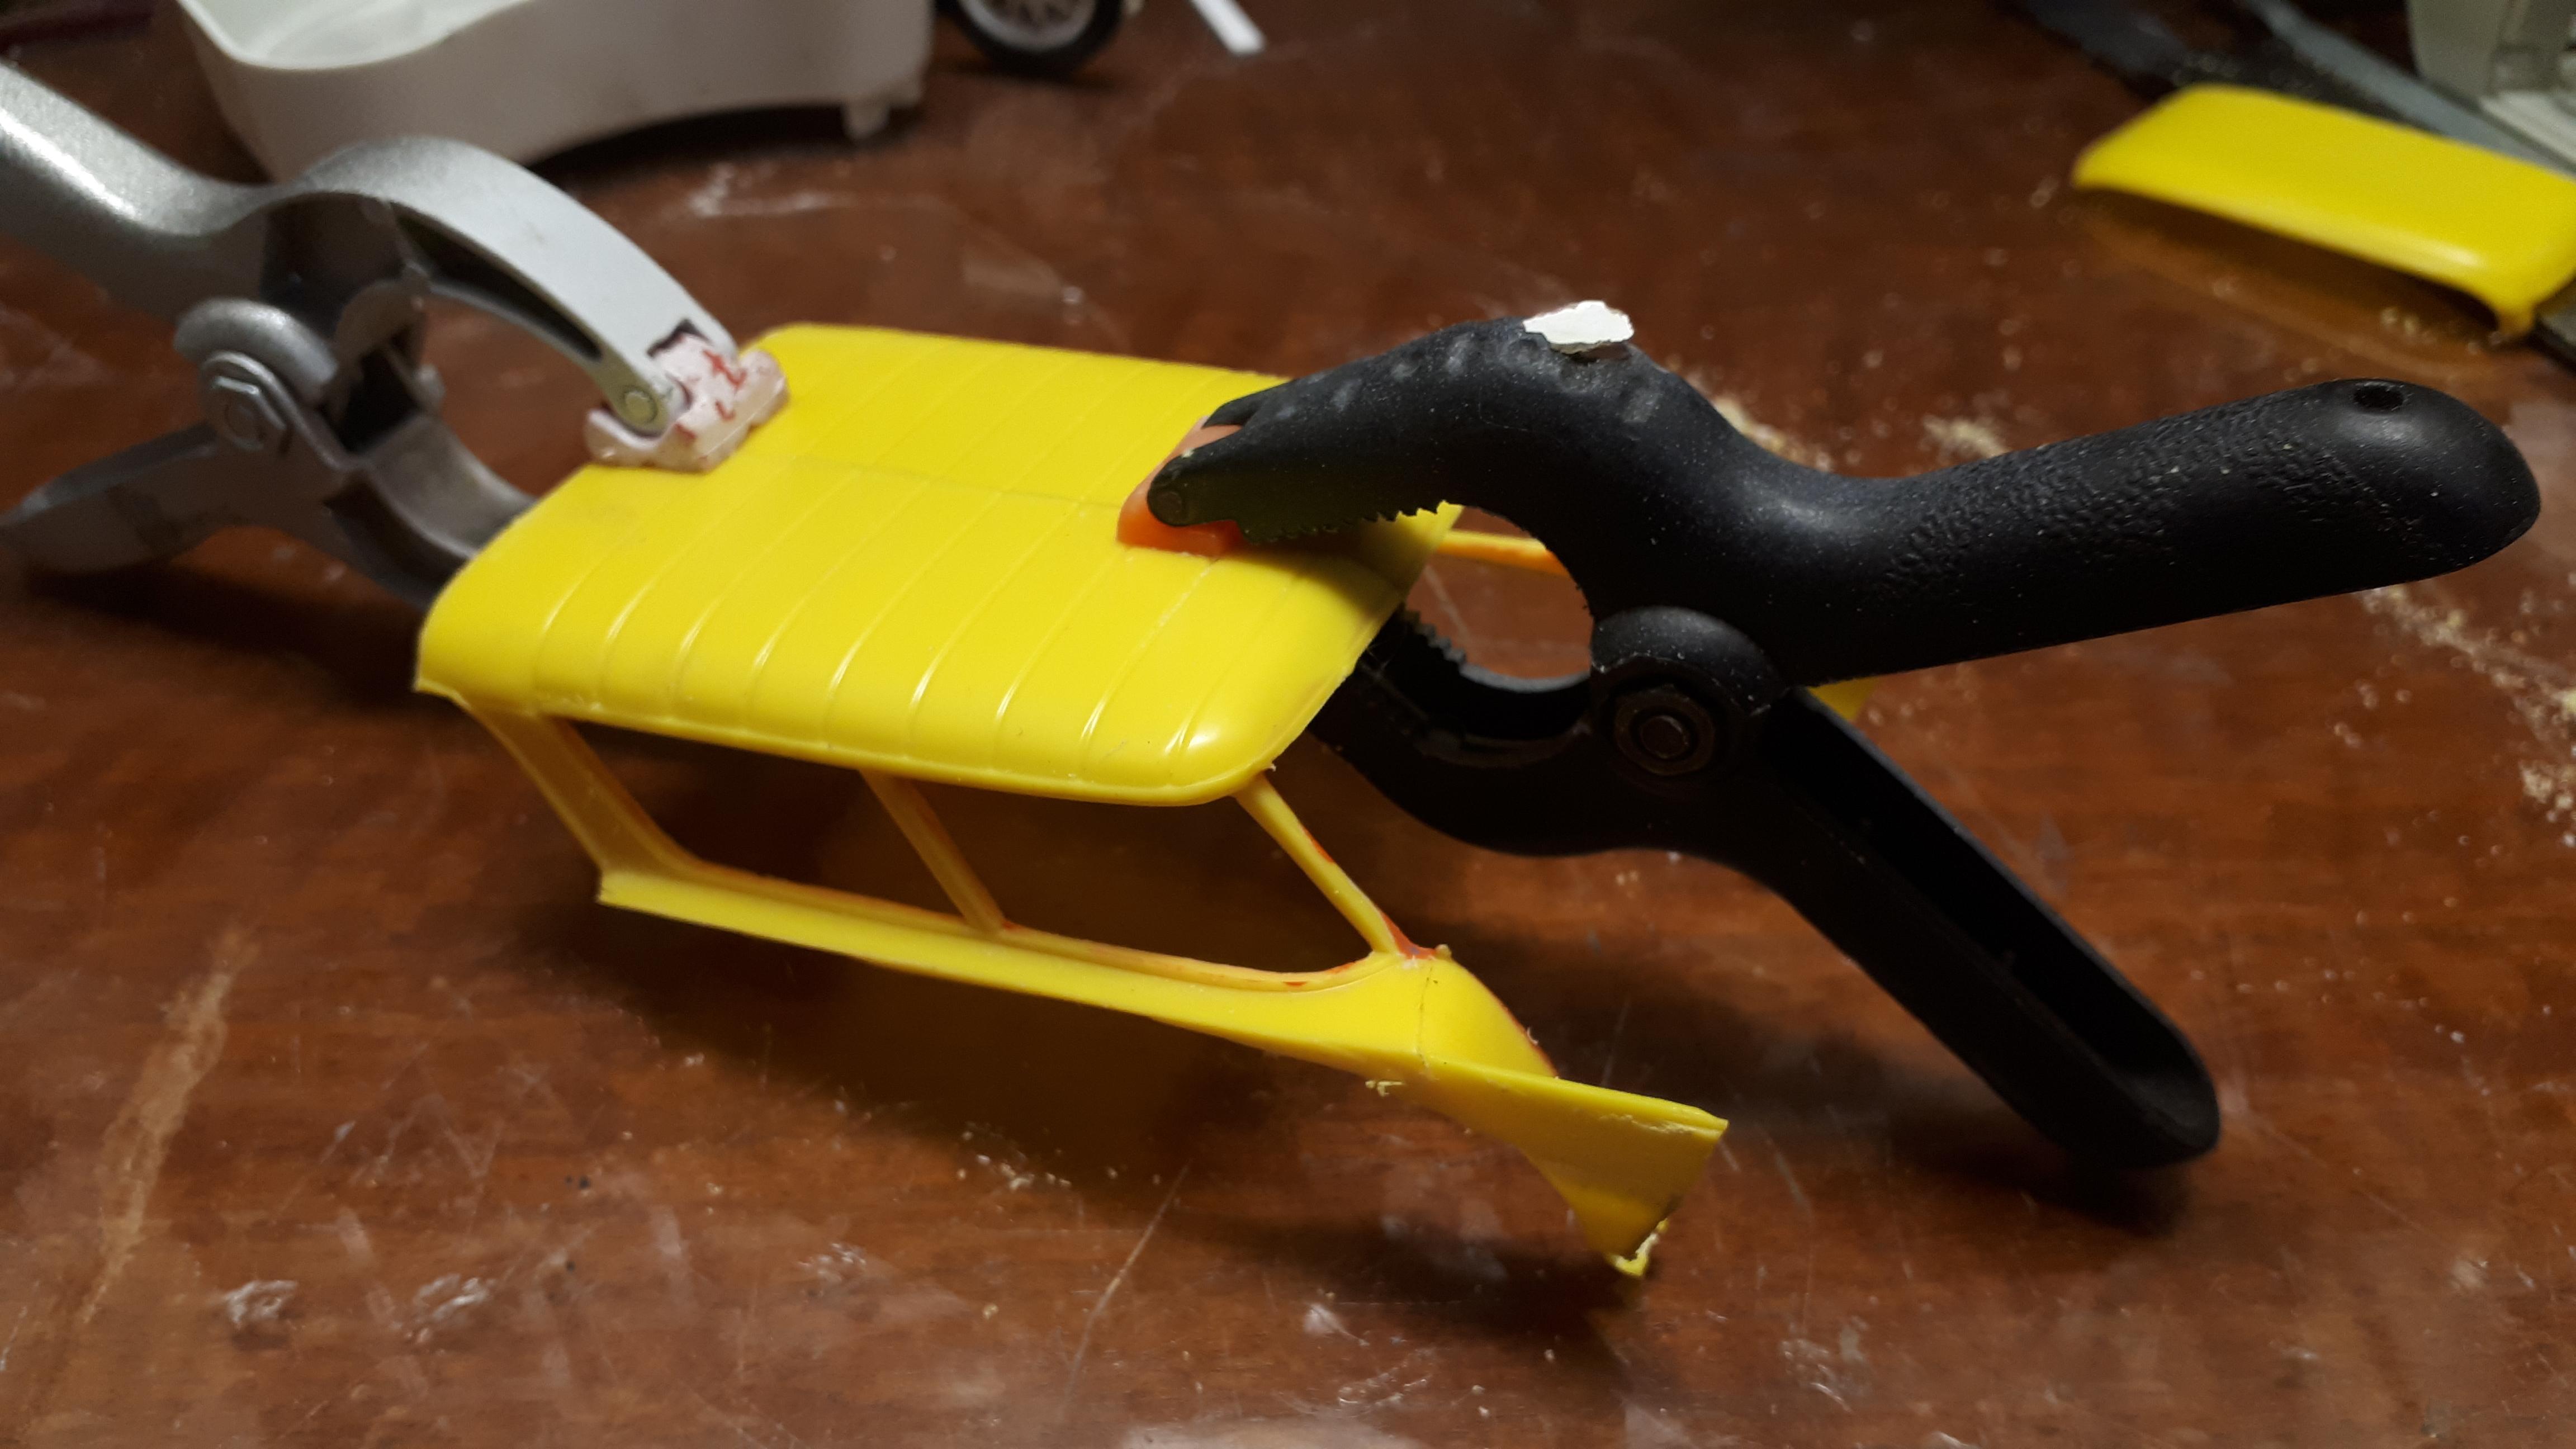
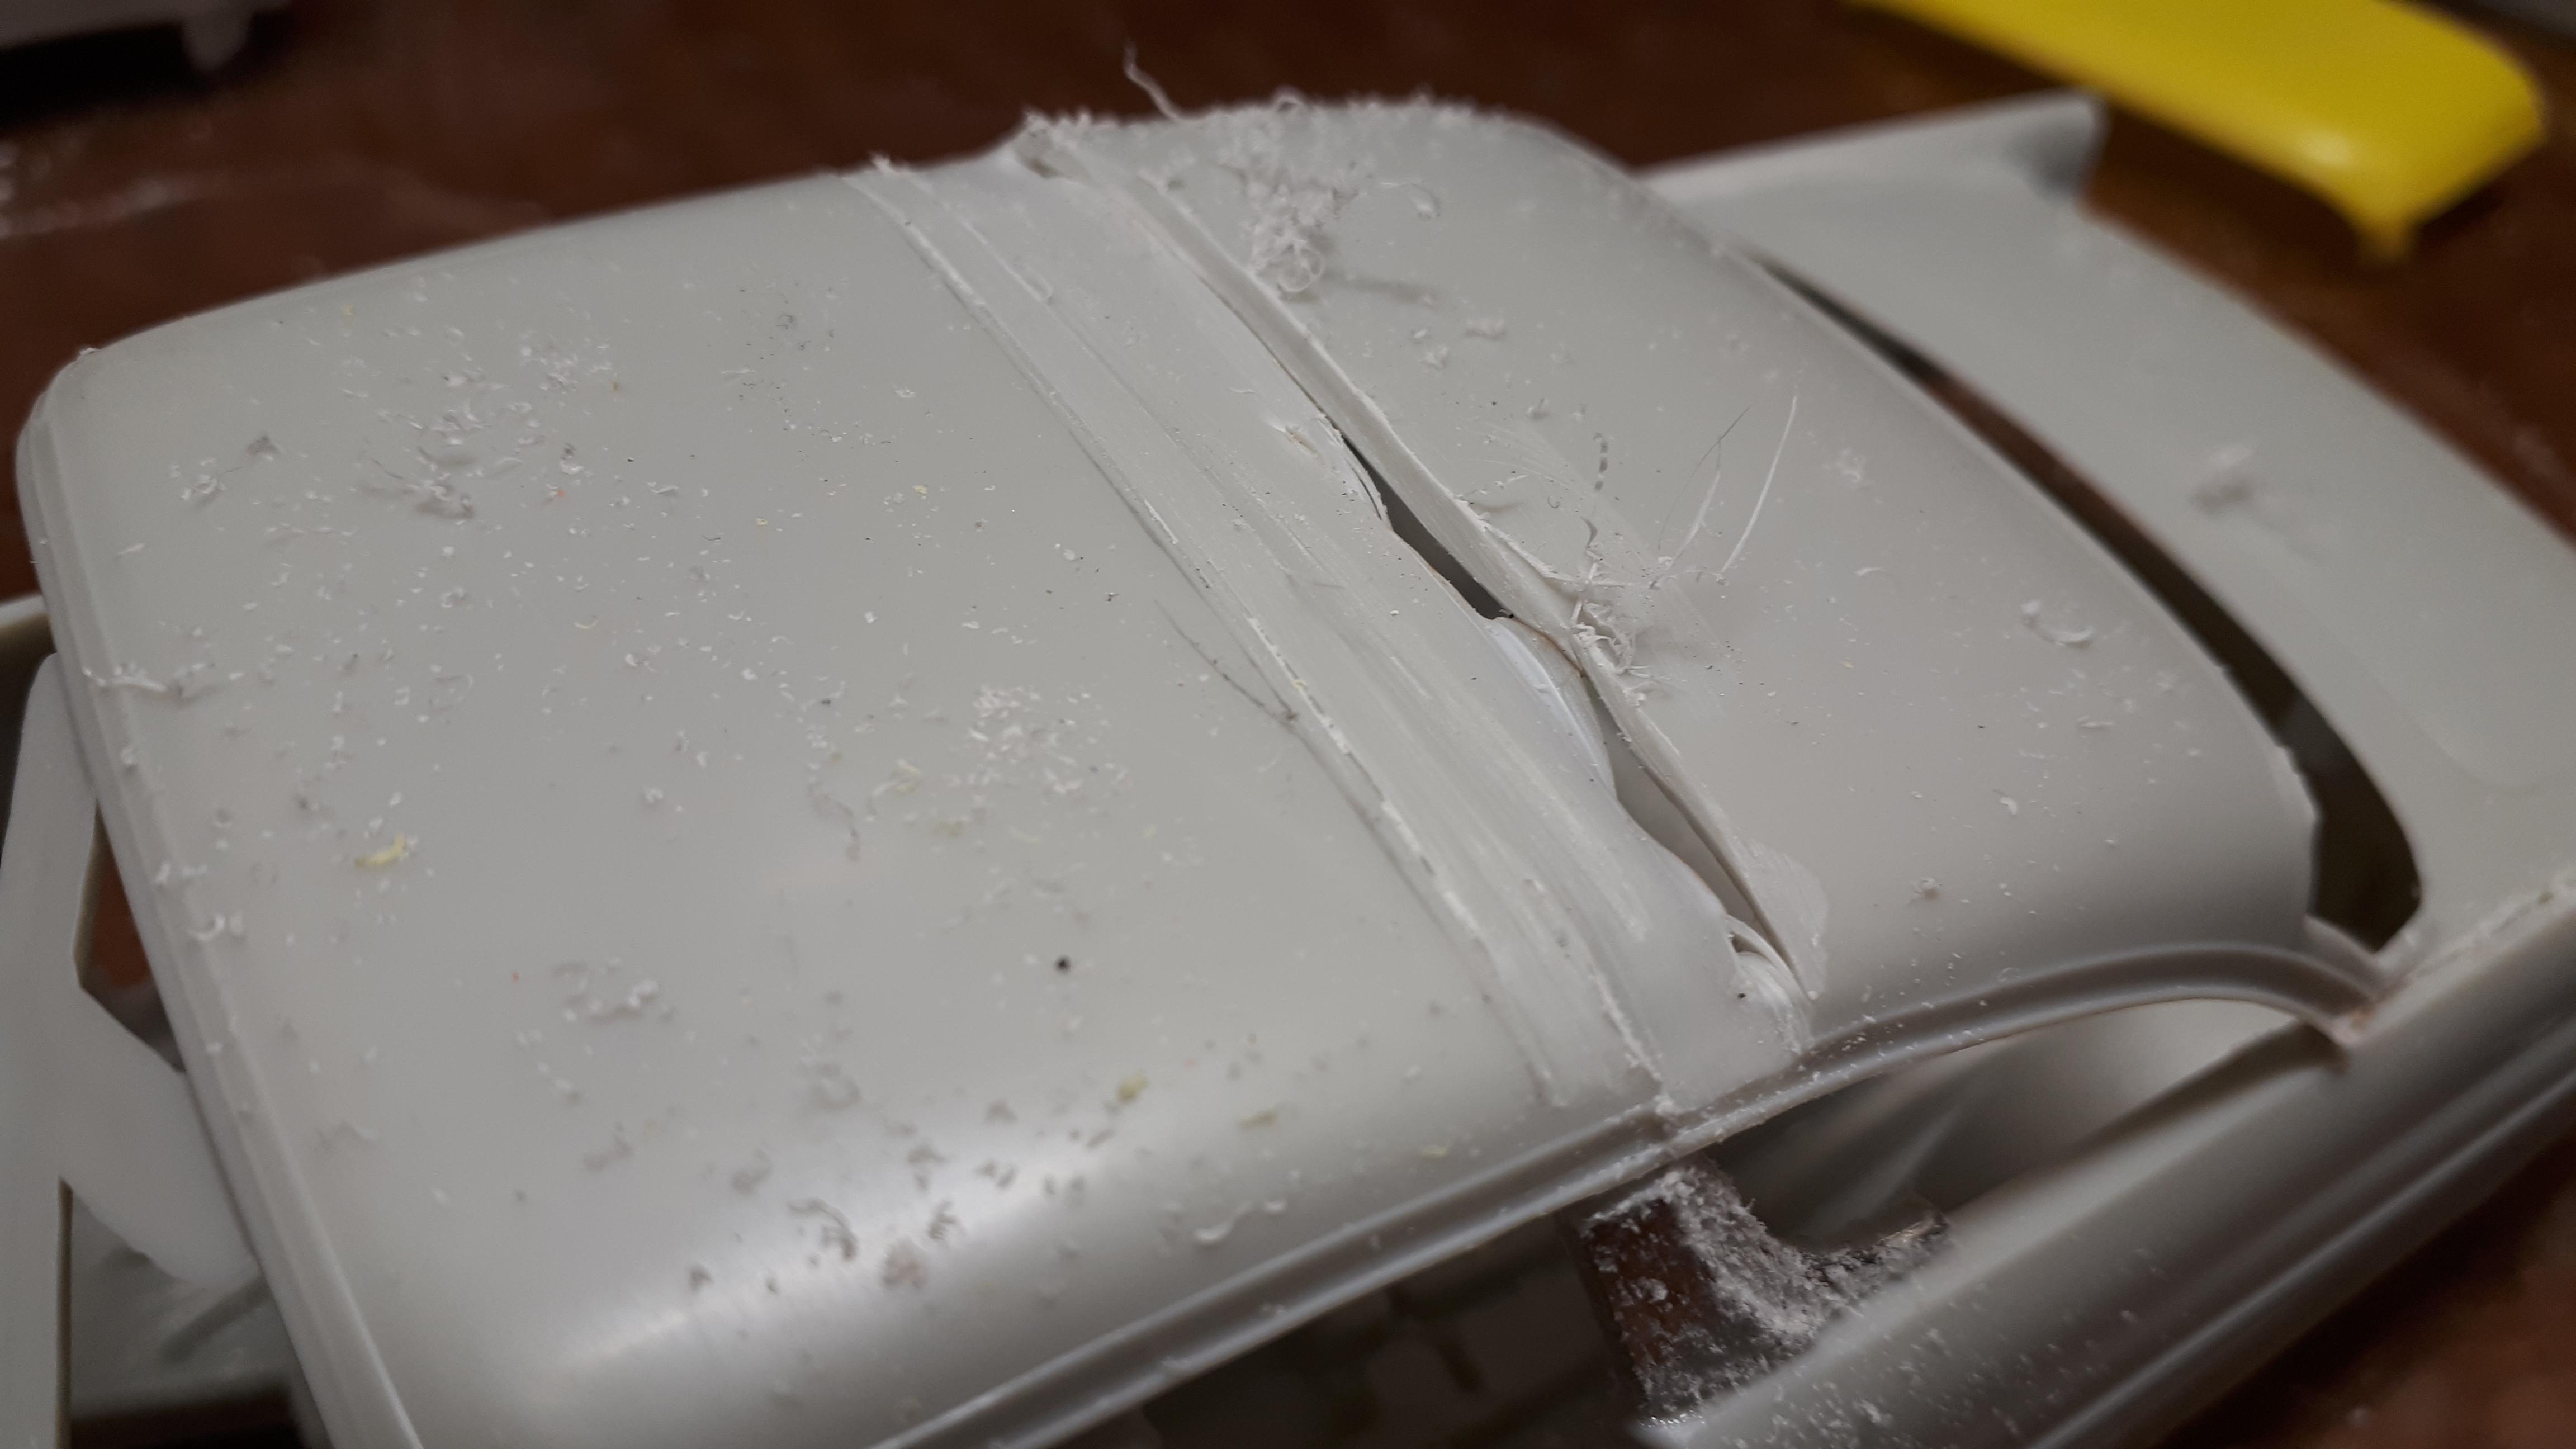
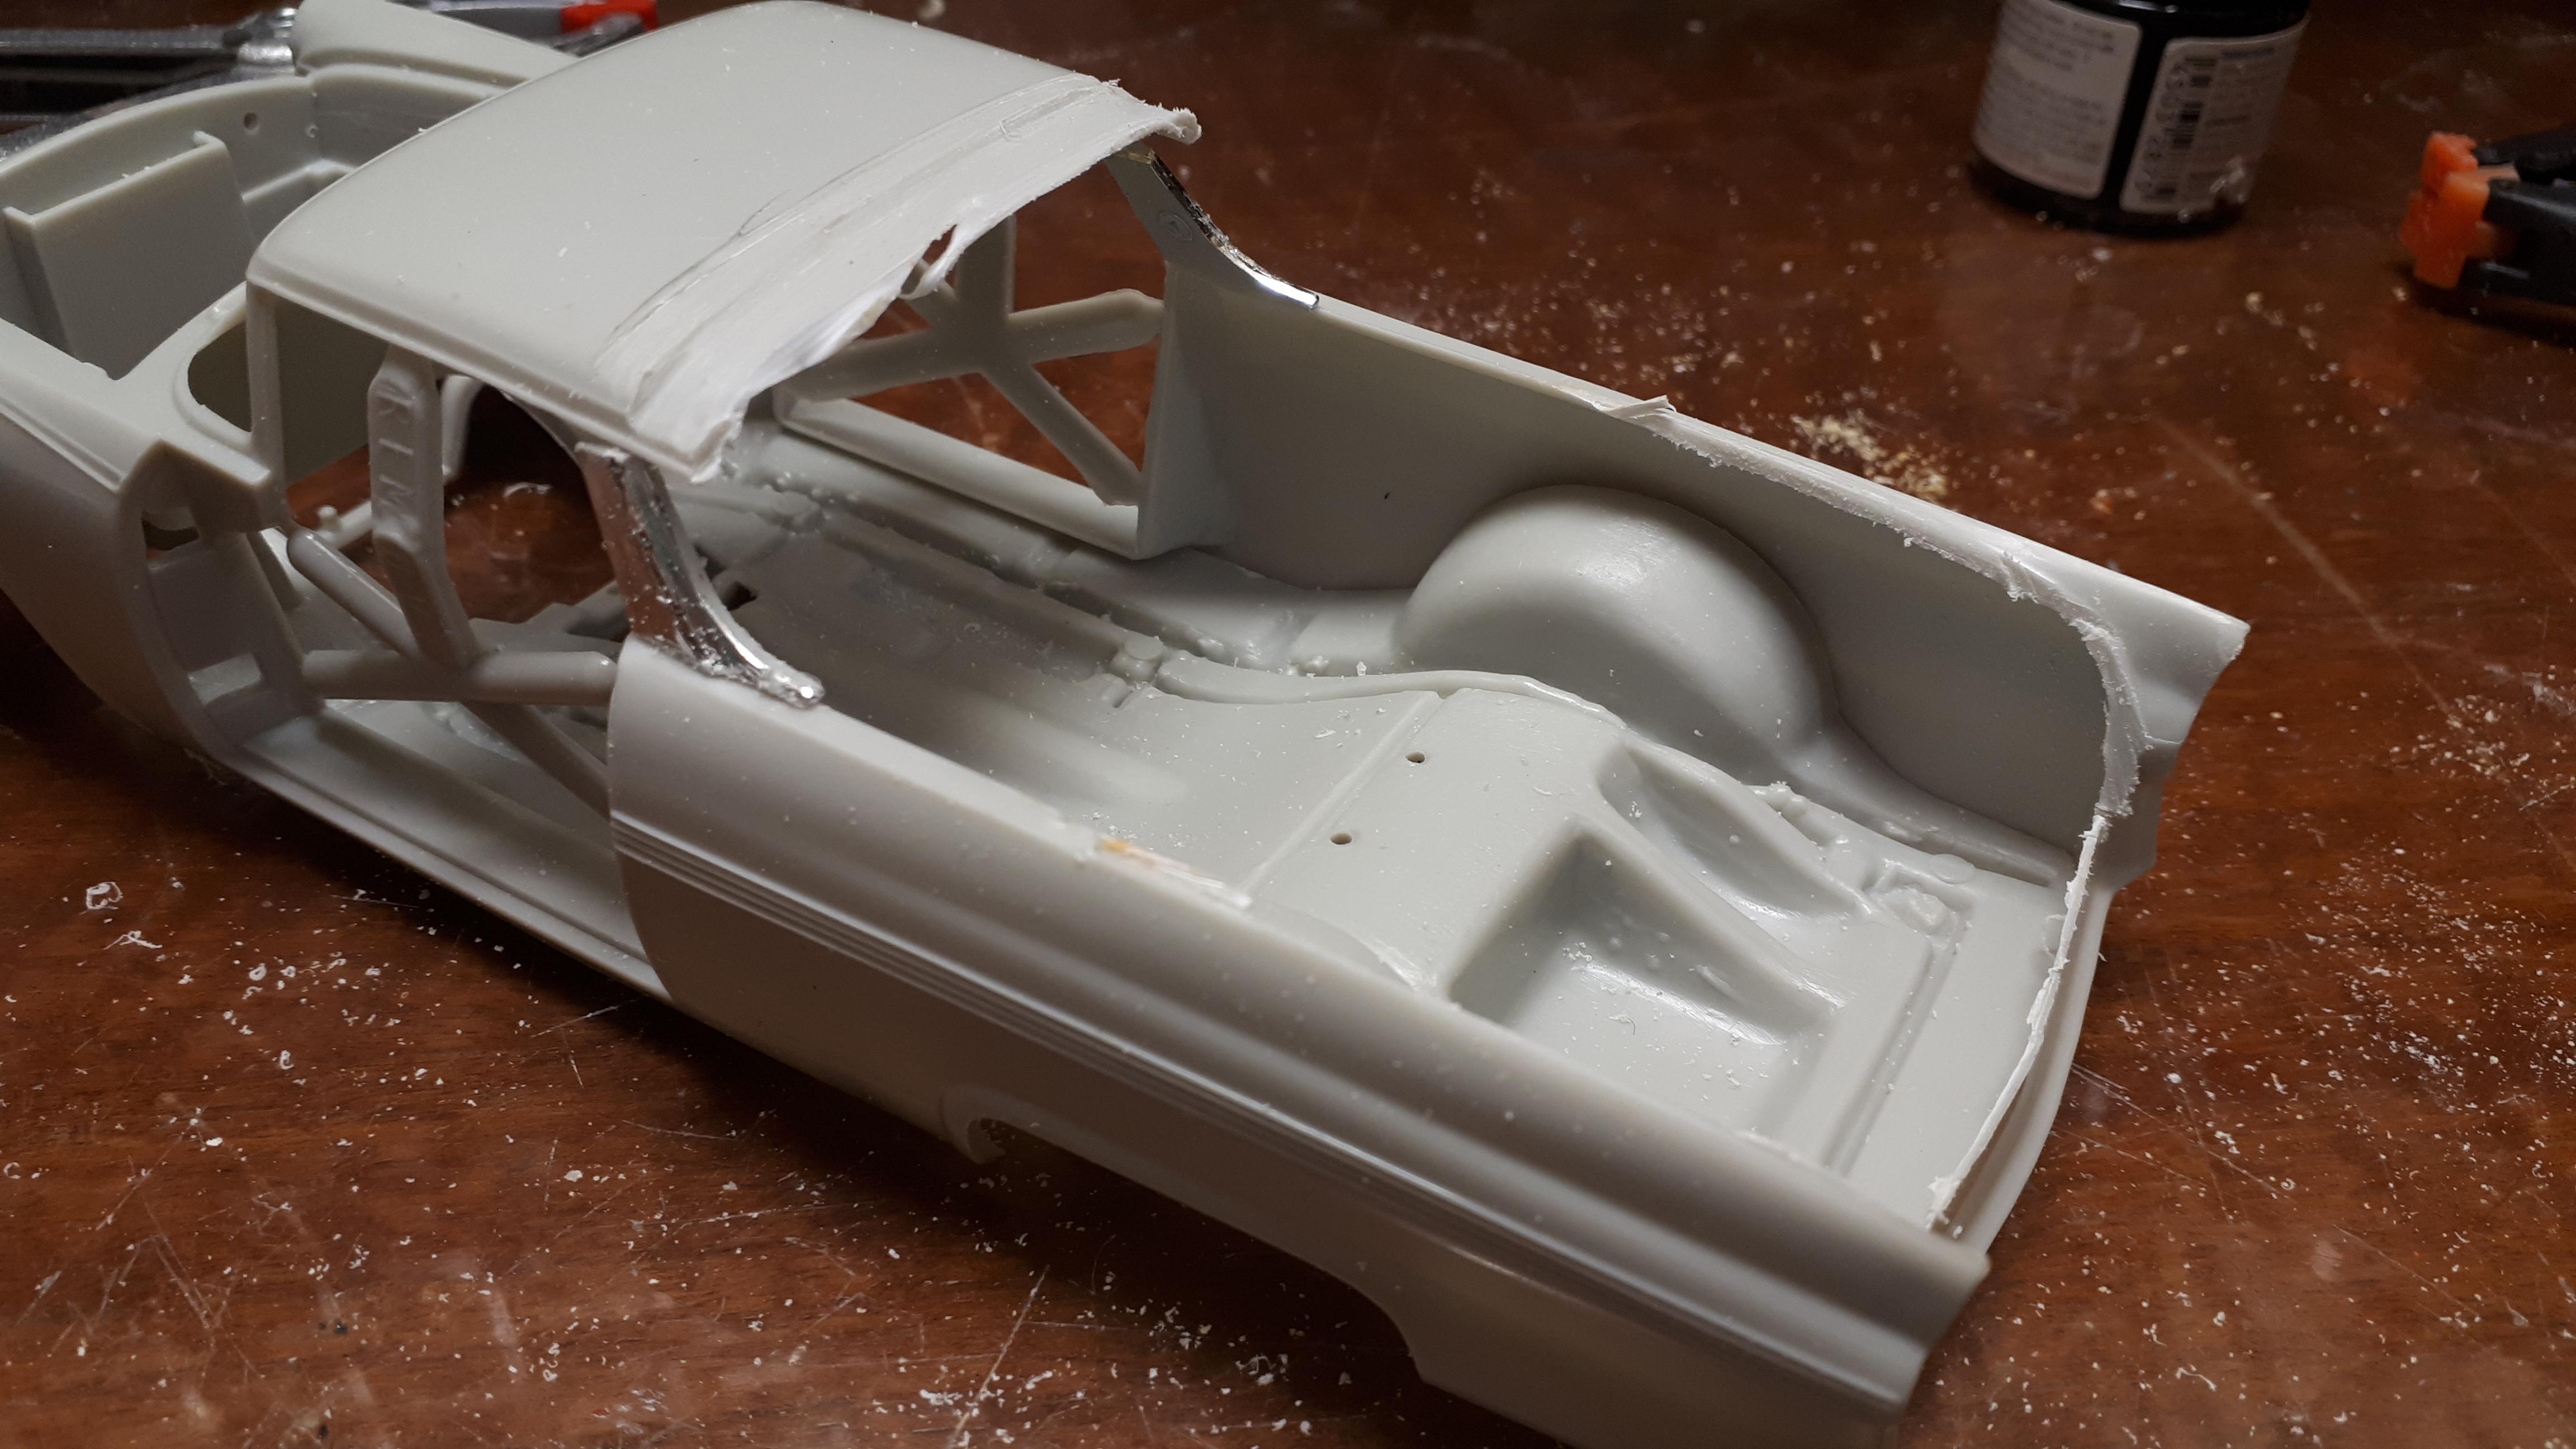
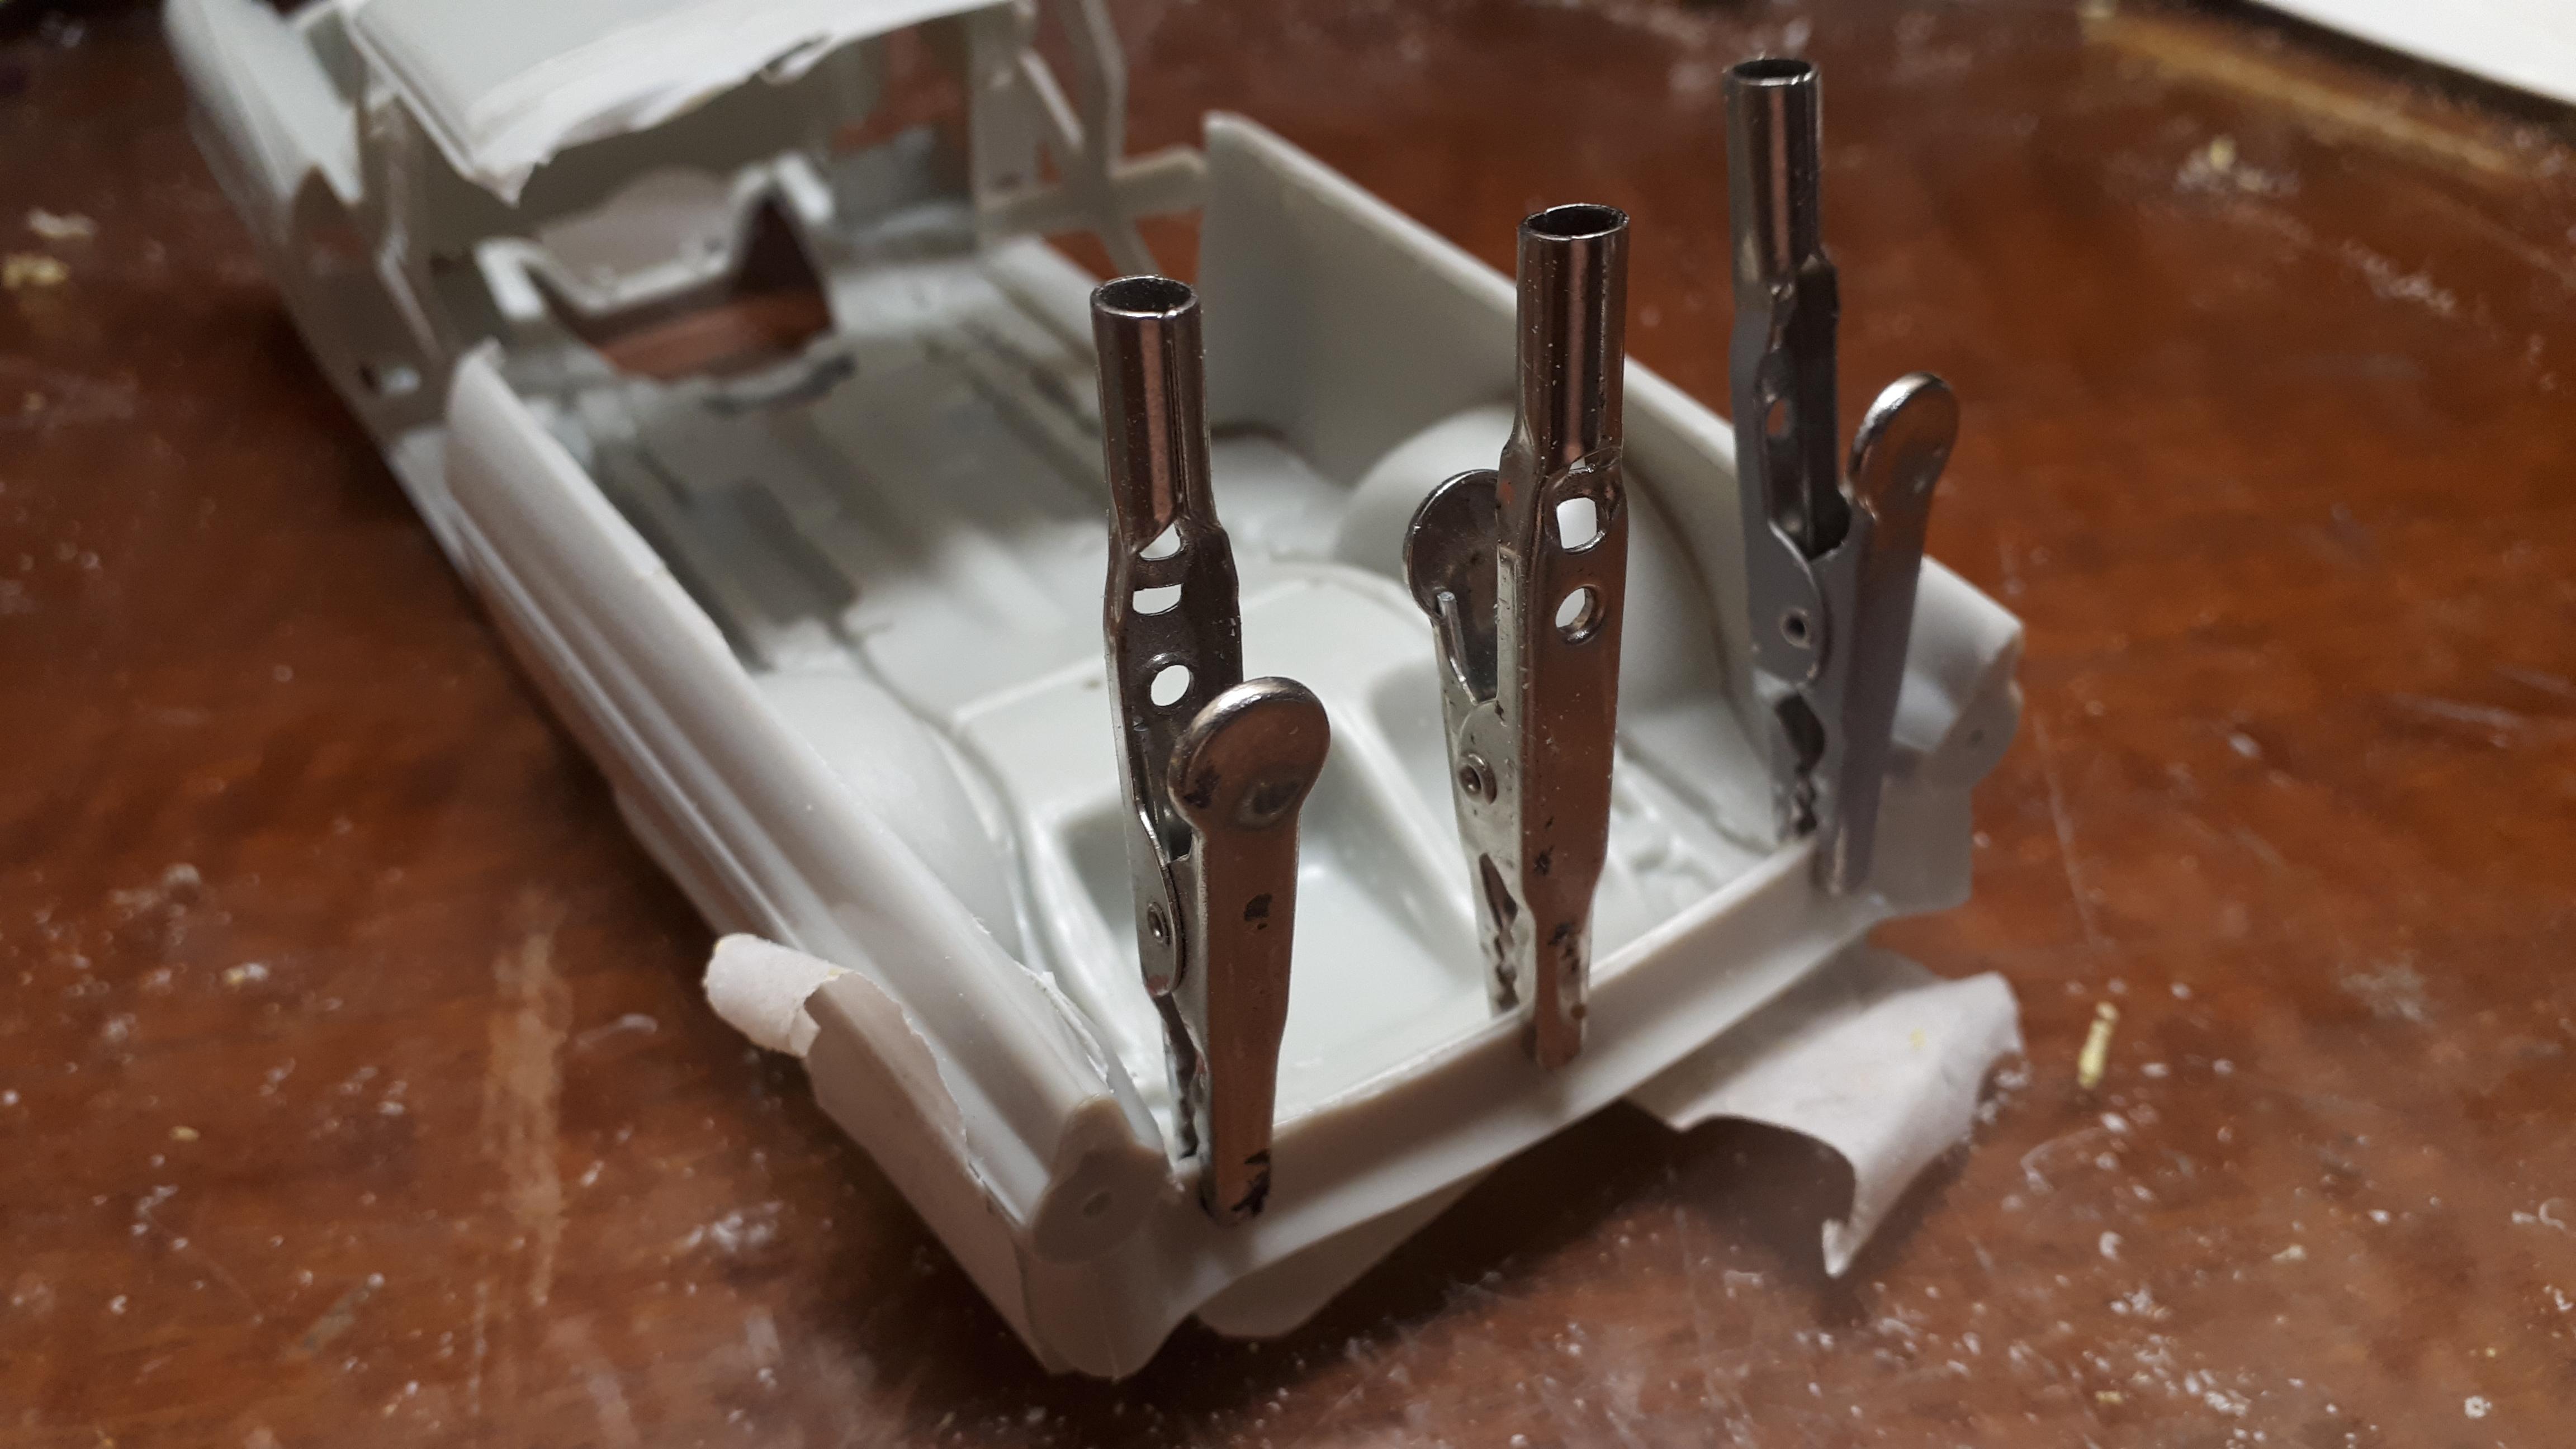
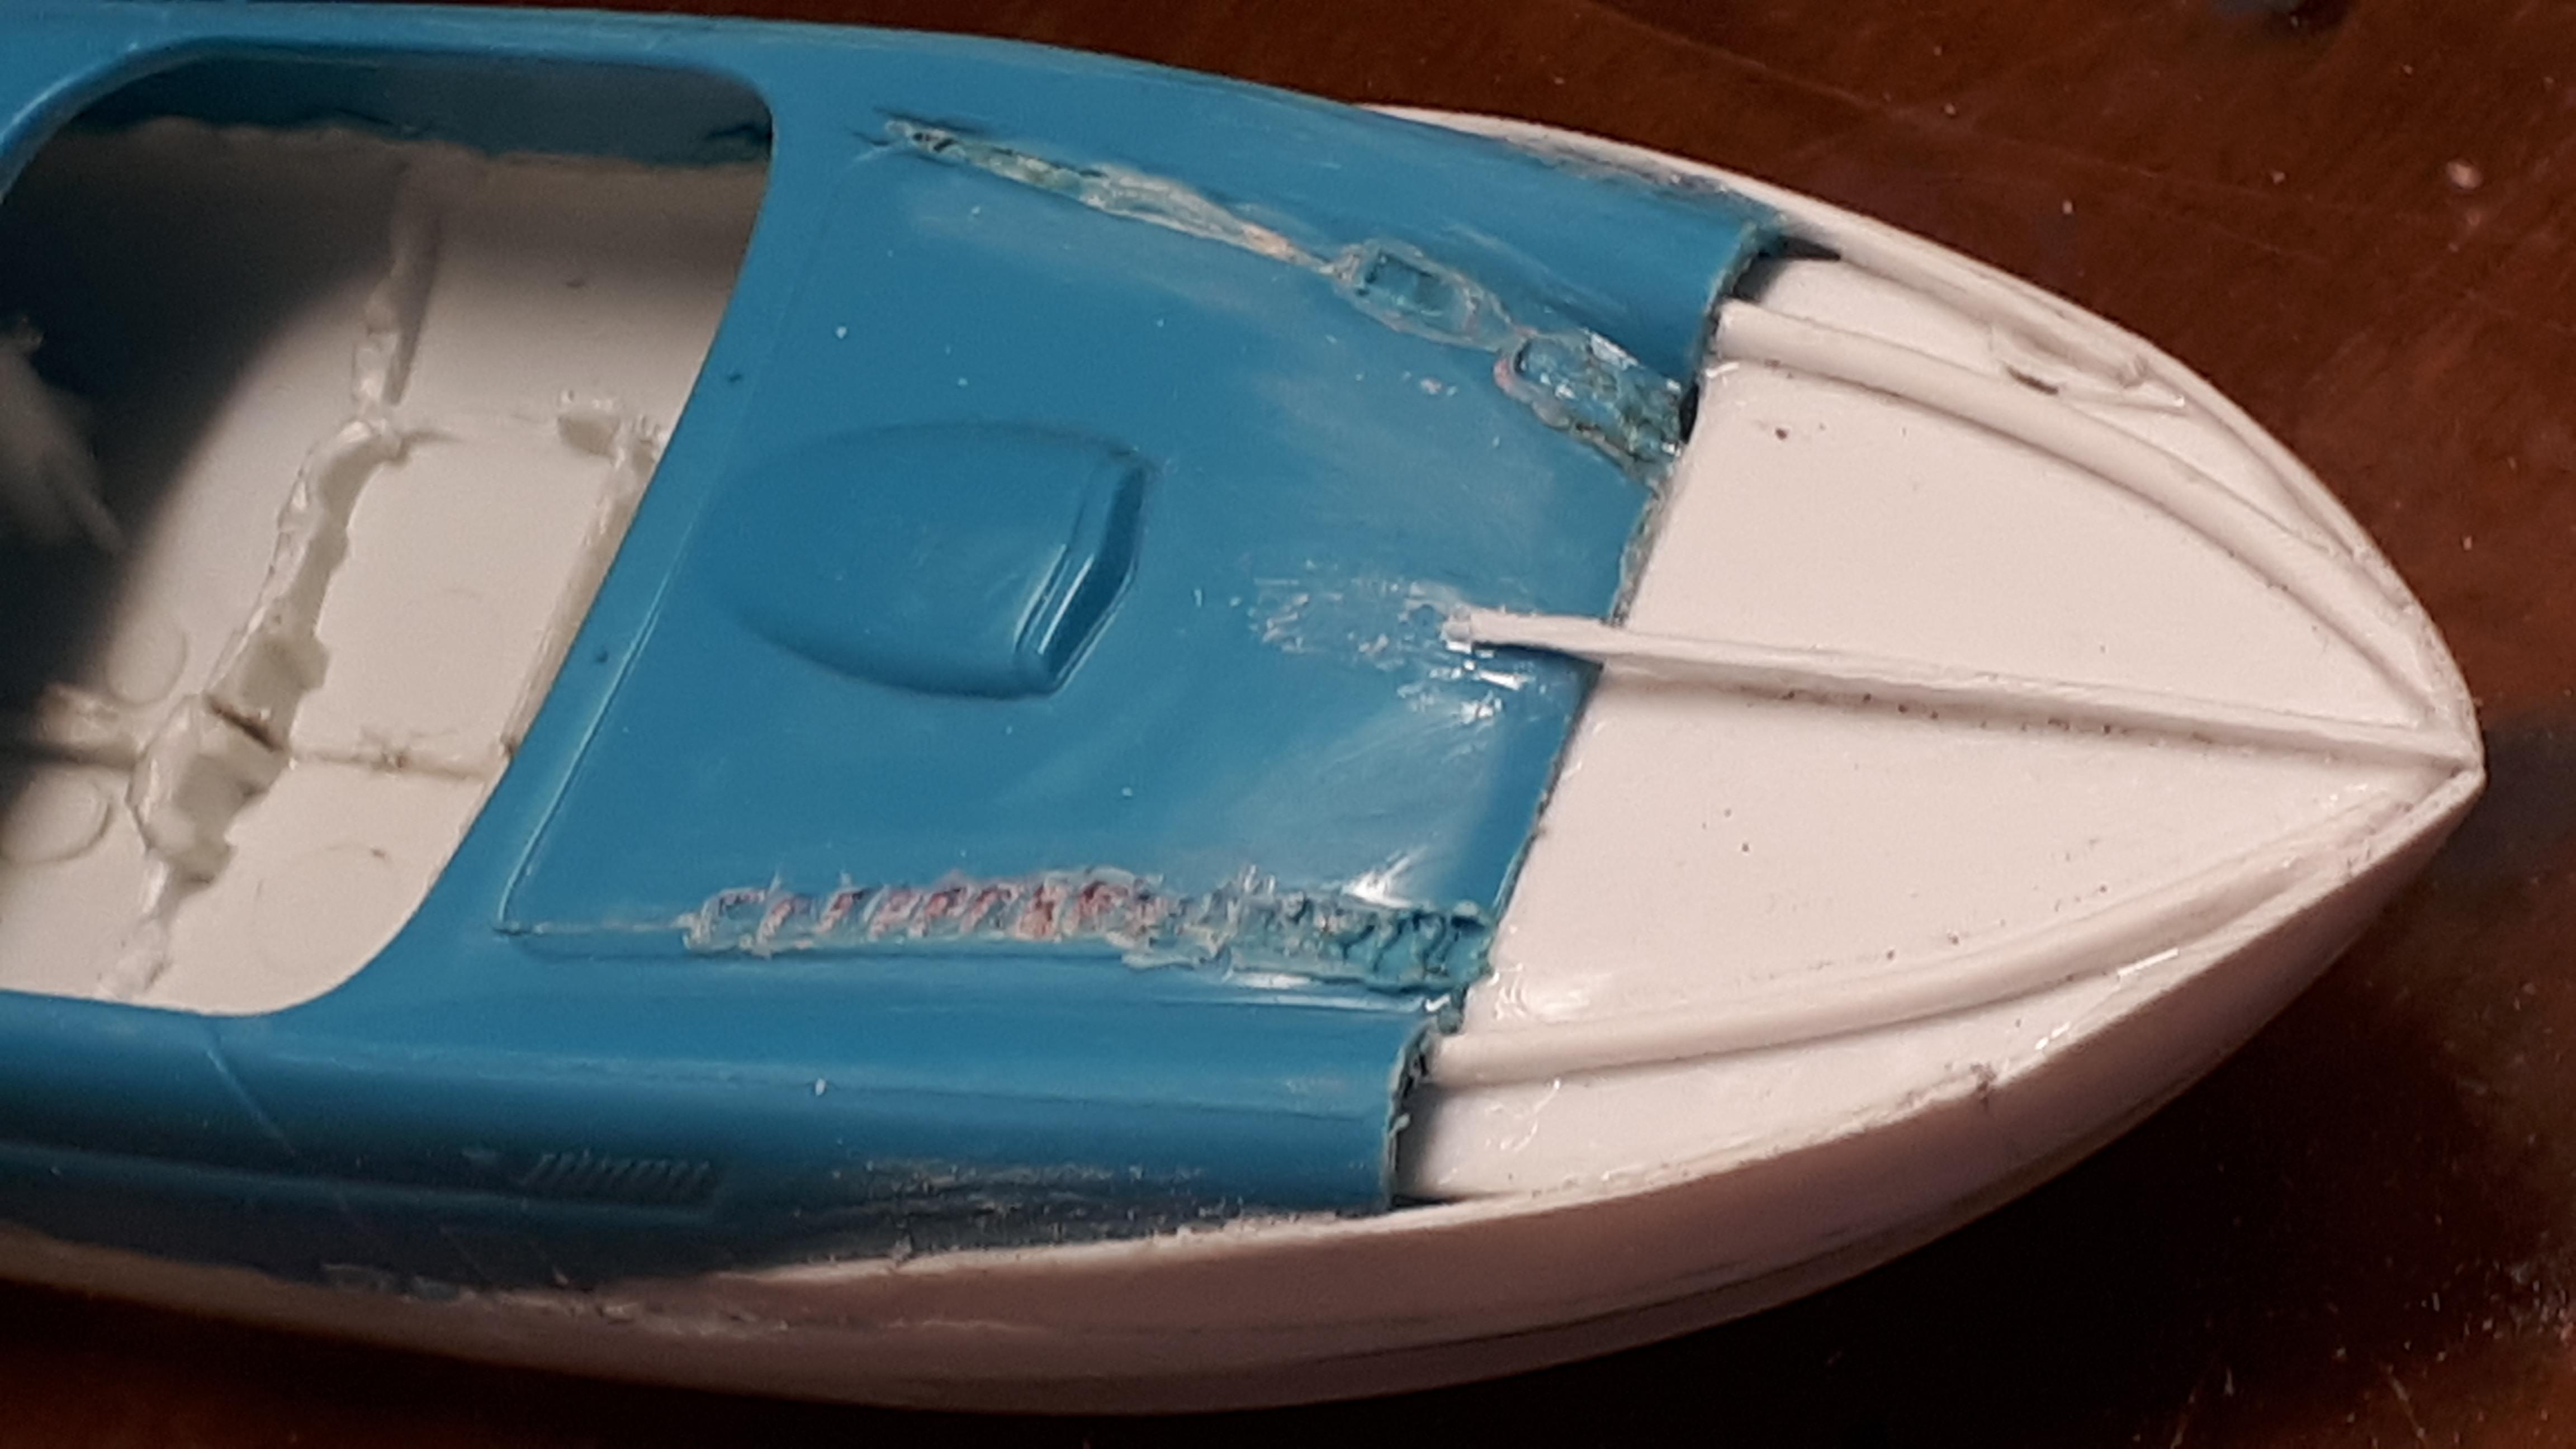
O.K., got sidetracked a bit this week as I had to submit my hot rod for its annual inspection and even though I didn't leave it til the last minute, I still found a worn tie rod end at the last minute that started a domino effect all its own! Any how, she finally passed, 37 years on the road, and we are good to go for the next 12 months. I did get some work done at night though and the boat got its second coat of bog and its first coat of primer. I like where it is going but there is still some finessing required, especially on the bow. I have also started on the 56 Crown Wagon ( "Squire of the Crown"?) I don't want the Crown trim to protrude from the roof as much as the kit parts do so first job was to file a recess across the roof, without breaking anything! I then decided to keep going and reduce the thickness of the next 5mm or so to help provide a mating surface for the new roof extension. I also sawed off the trunk area and then glued a strip of styrene across the beaver panel to ensure it didn't break during surgery. At this stage I am trying to graft a roof from the unbuildable Revell 57 Nomad. I know, I know, everything is buildable but I still have nightmares from my teenage attempts to build my first one. 50 something years at this hobby and it is the ONLY model I never finished and actually parted out so it would never happen ( some of the "sheetmetal" wound up in my Bel Aqua). What a shocker. The body was so warped when it came out of the box that I couldn't imagine how I would ever straighten it.' I did upholster the seats in velvet and I did detail paint the chassis. I also brush painted the entire body, fairly smoothly, in Humbrol yellow. On the other hand, they hadn't invented superglue yet! The first step was to trim it down to size, followed by a section of 2 mm down the middle. I glued the two halves back together and once they were dry and I removed the fins. This is where we are today.
-
I really enjoyed seeing your model, Robert. It is so rare to see a showroom stock model of this Bill Mitchell design and you have certainly made it look sharp. Cheers Alan
-
Janos, this is an amazing tribute to your decades of commitment to achieve your goal. Rather than saying "I can't make that", you used your hands, your brain and what you had available to manufacture the car of your dreams. I think most of us on this forum would be looking at your finished model with all the amazing details and thinking, "Wow, how did he do that?" Your description hides the amount of difficulty you must have experienced. Congratulations on an amazing effort! And yes, I too had ( and still have!) the metallic red Matchbox Lamborghini Marzal toy - it was a favourite toy of mine and is still in fairly good condition for being over fifty years old. Cheers Alan
-
Great original and looks like it will be a great model. Will you be doing the swage line around the number plate opening? It's a great styling touch on this era rod. Cheers Alan
-
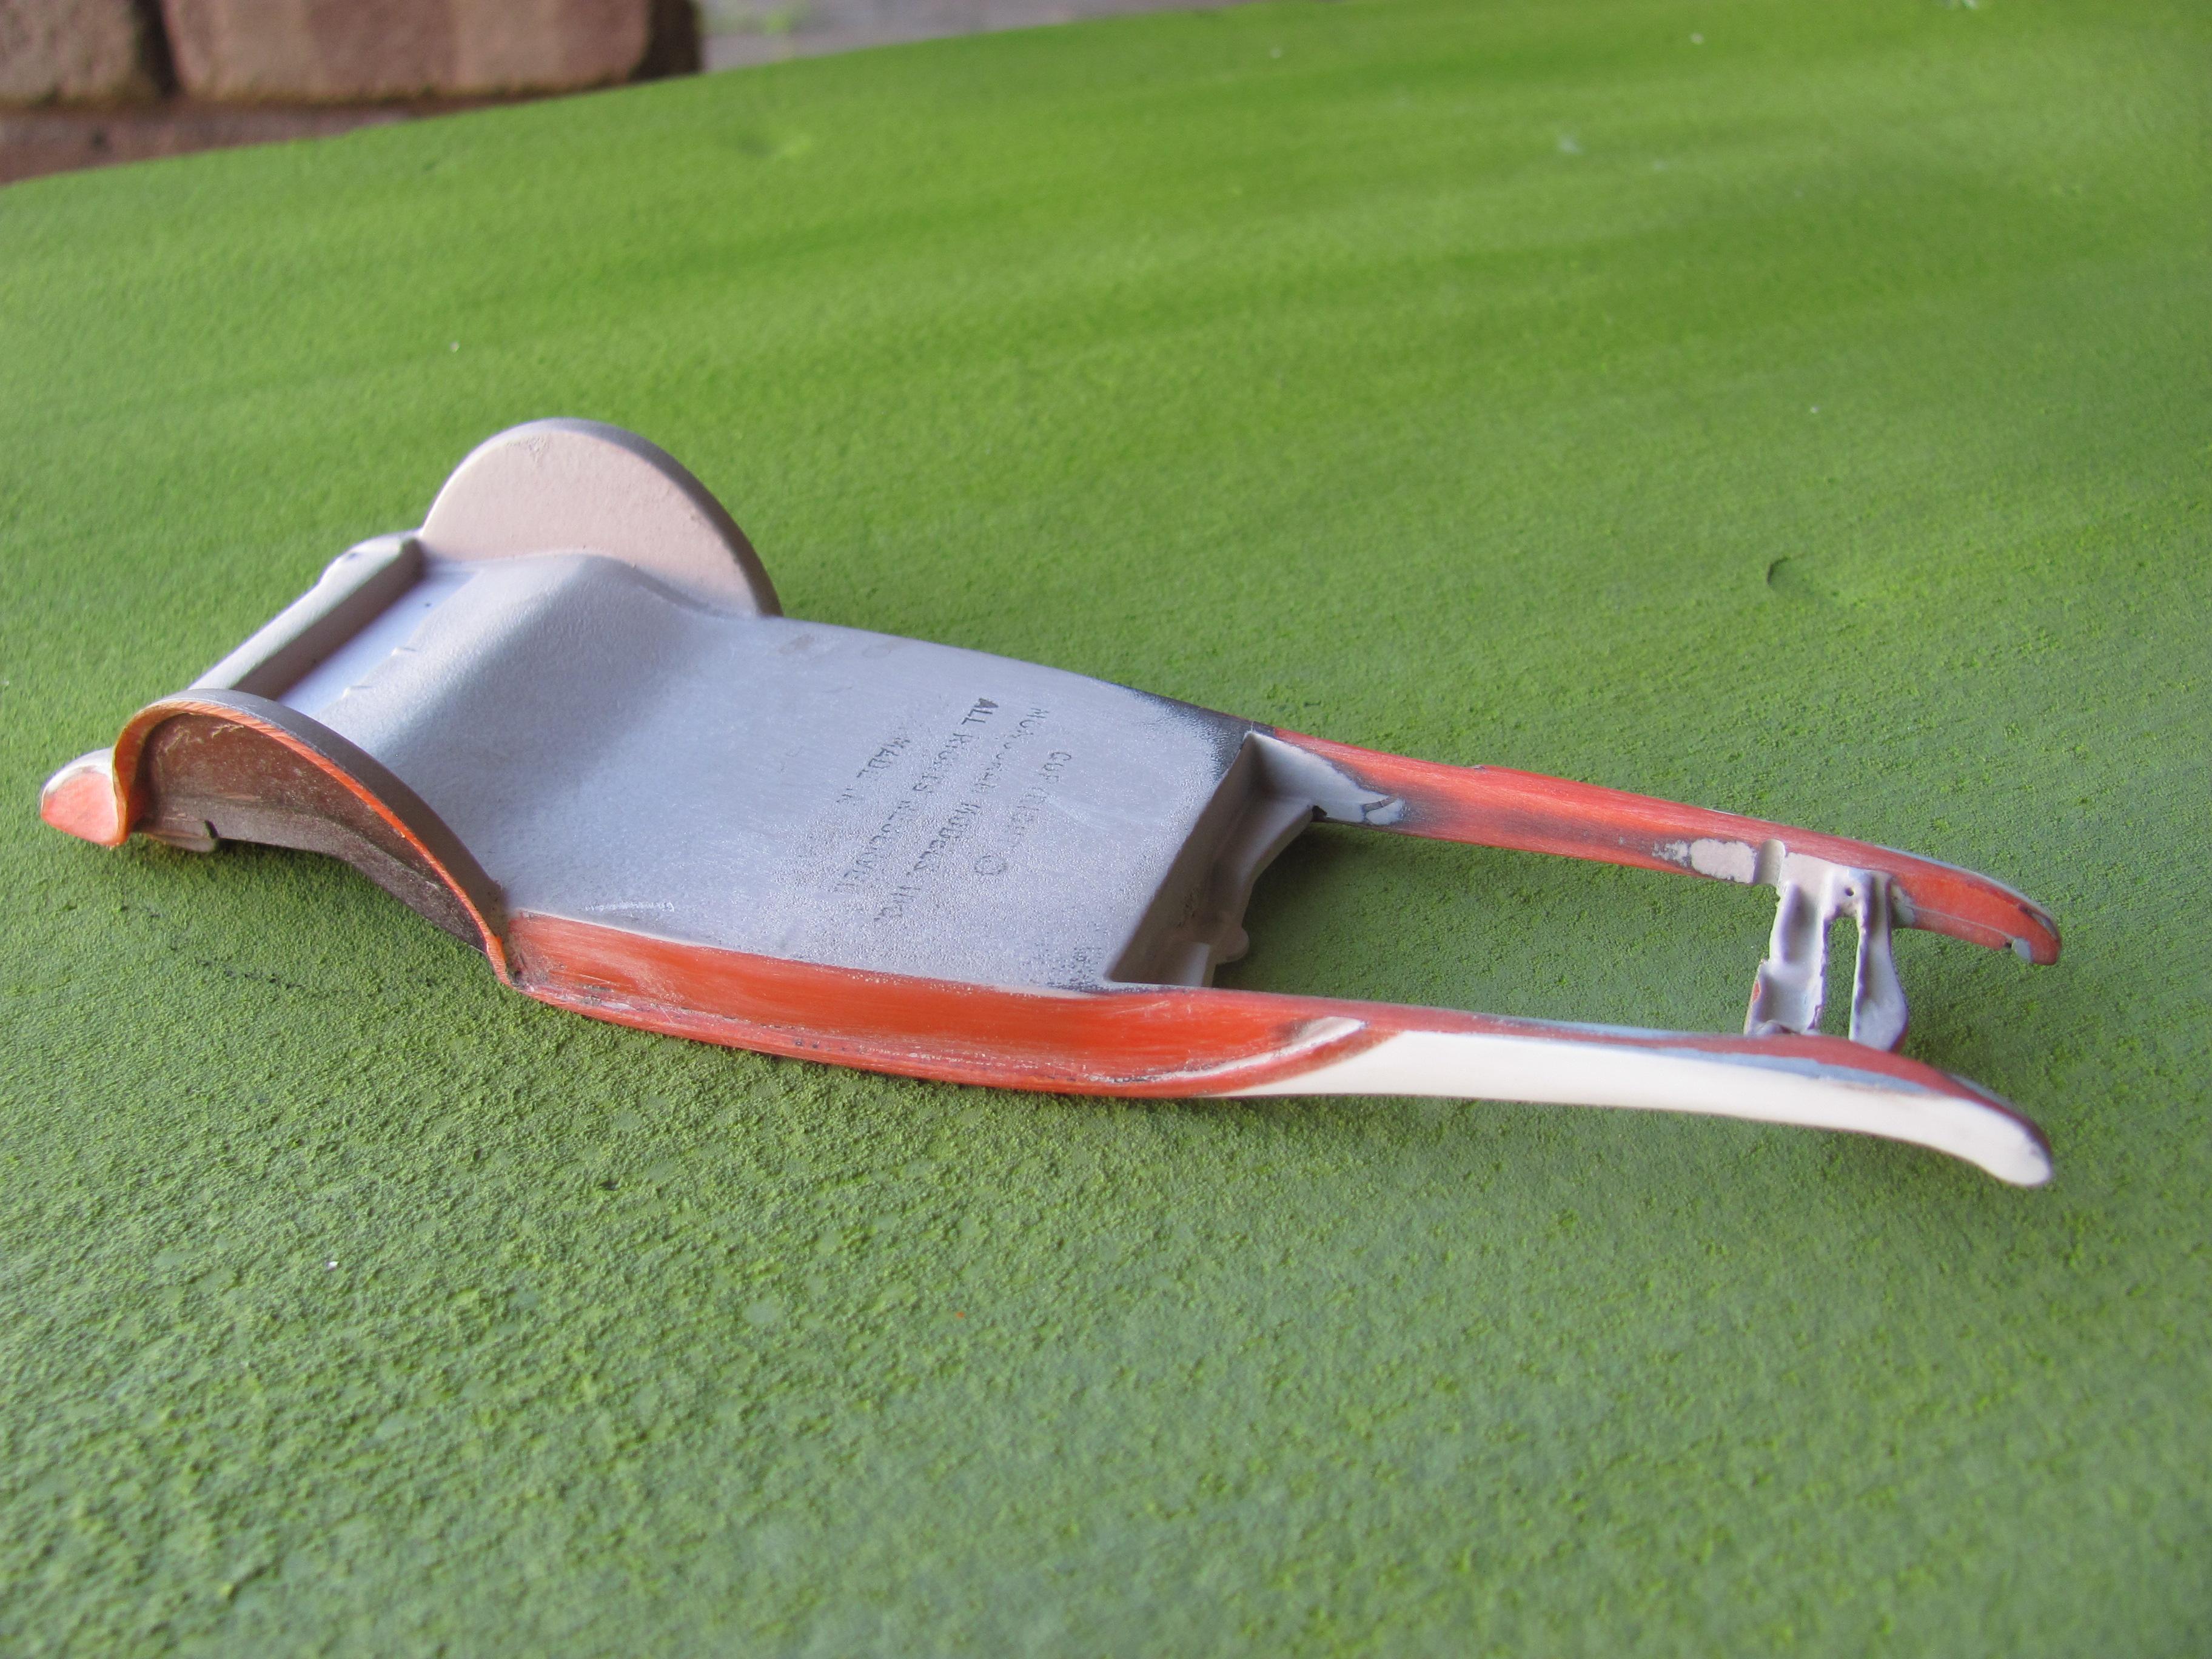
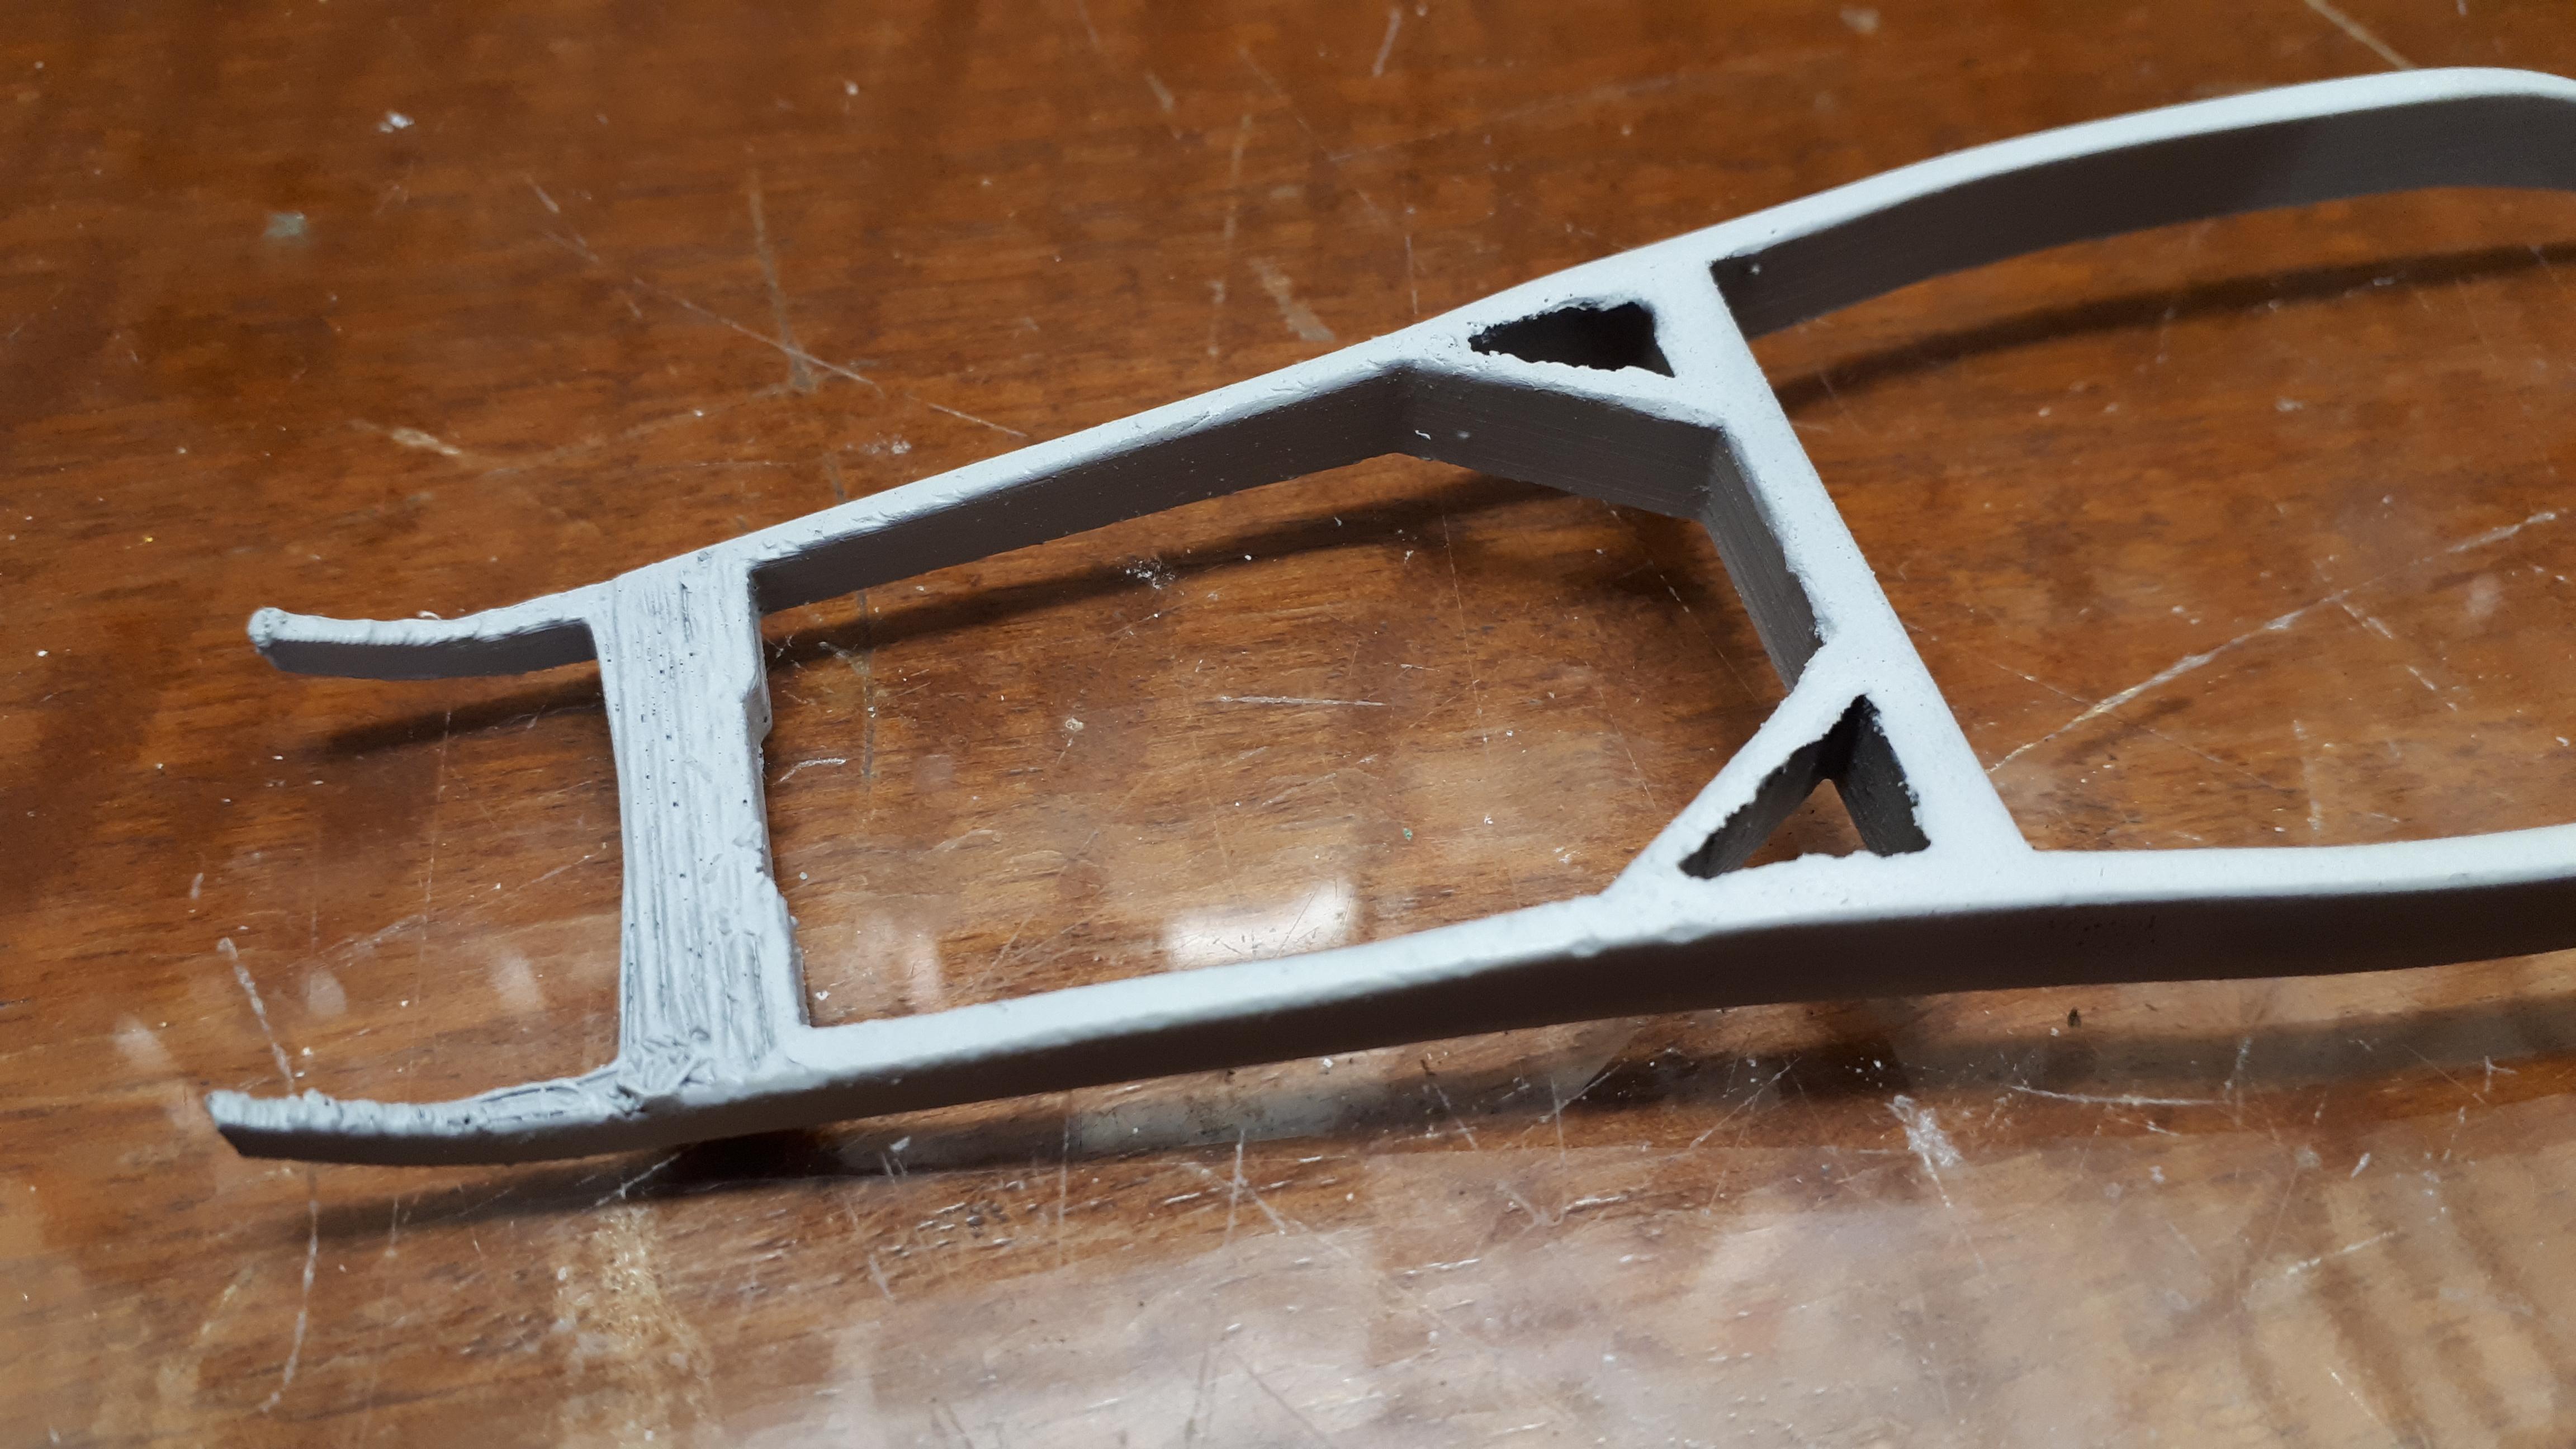
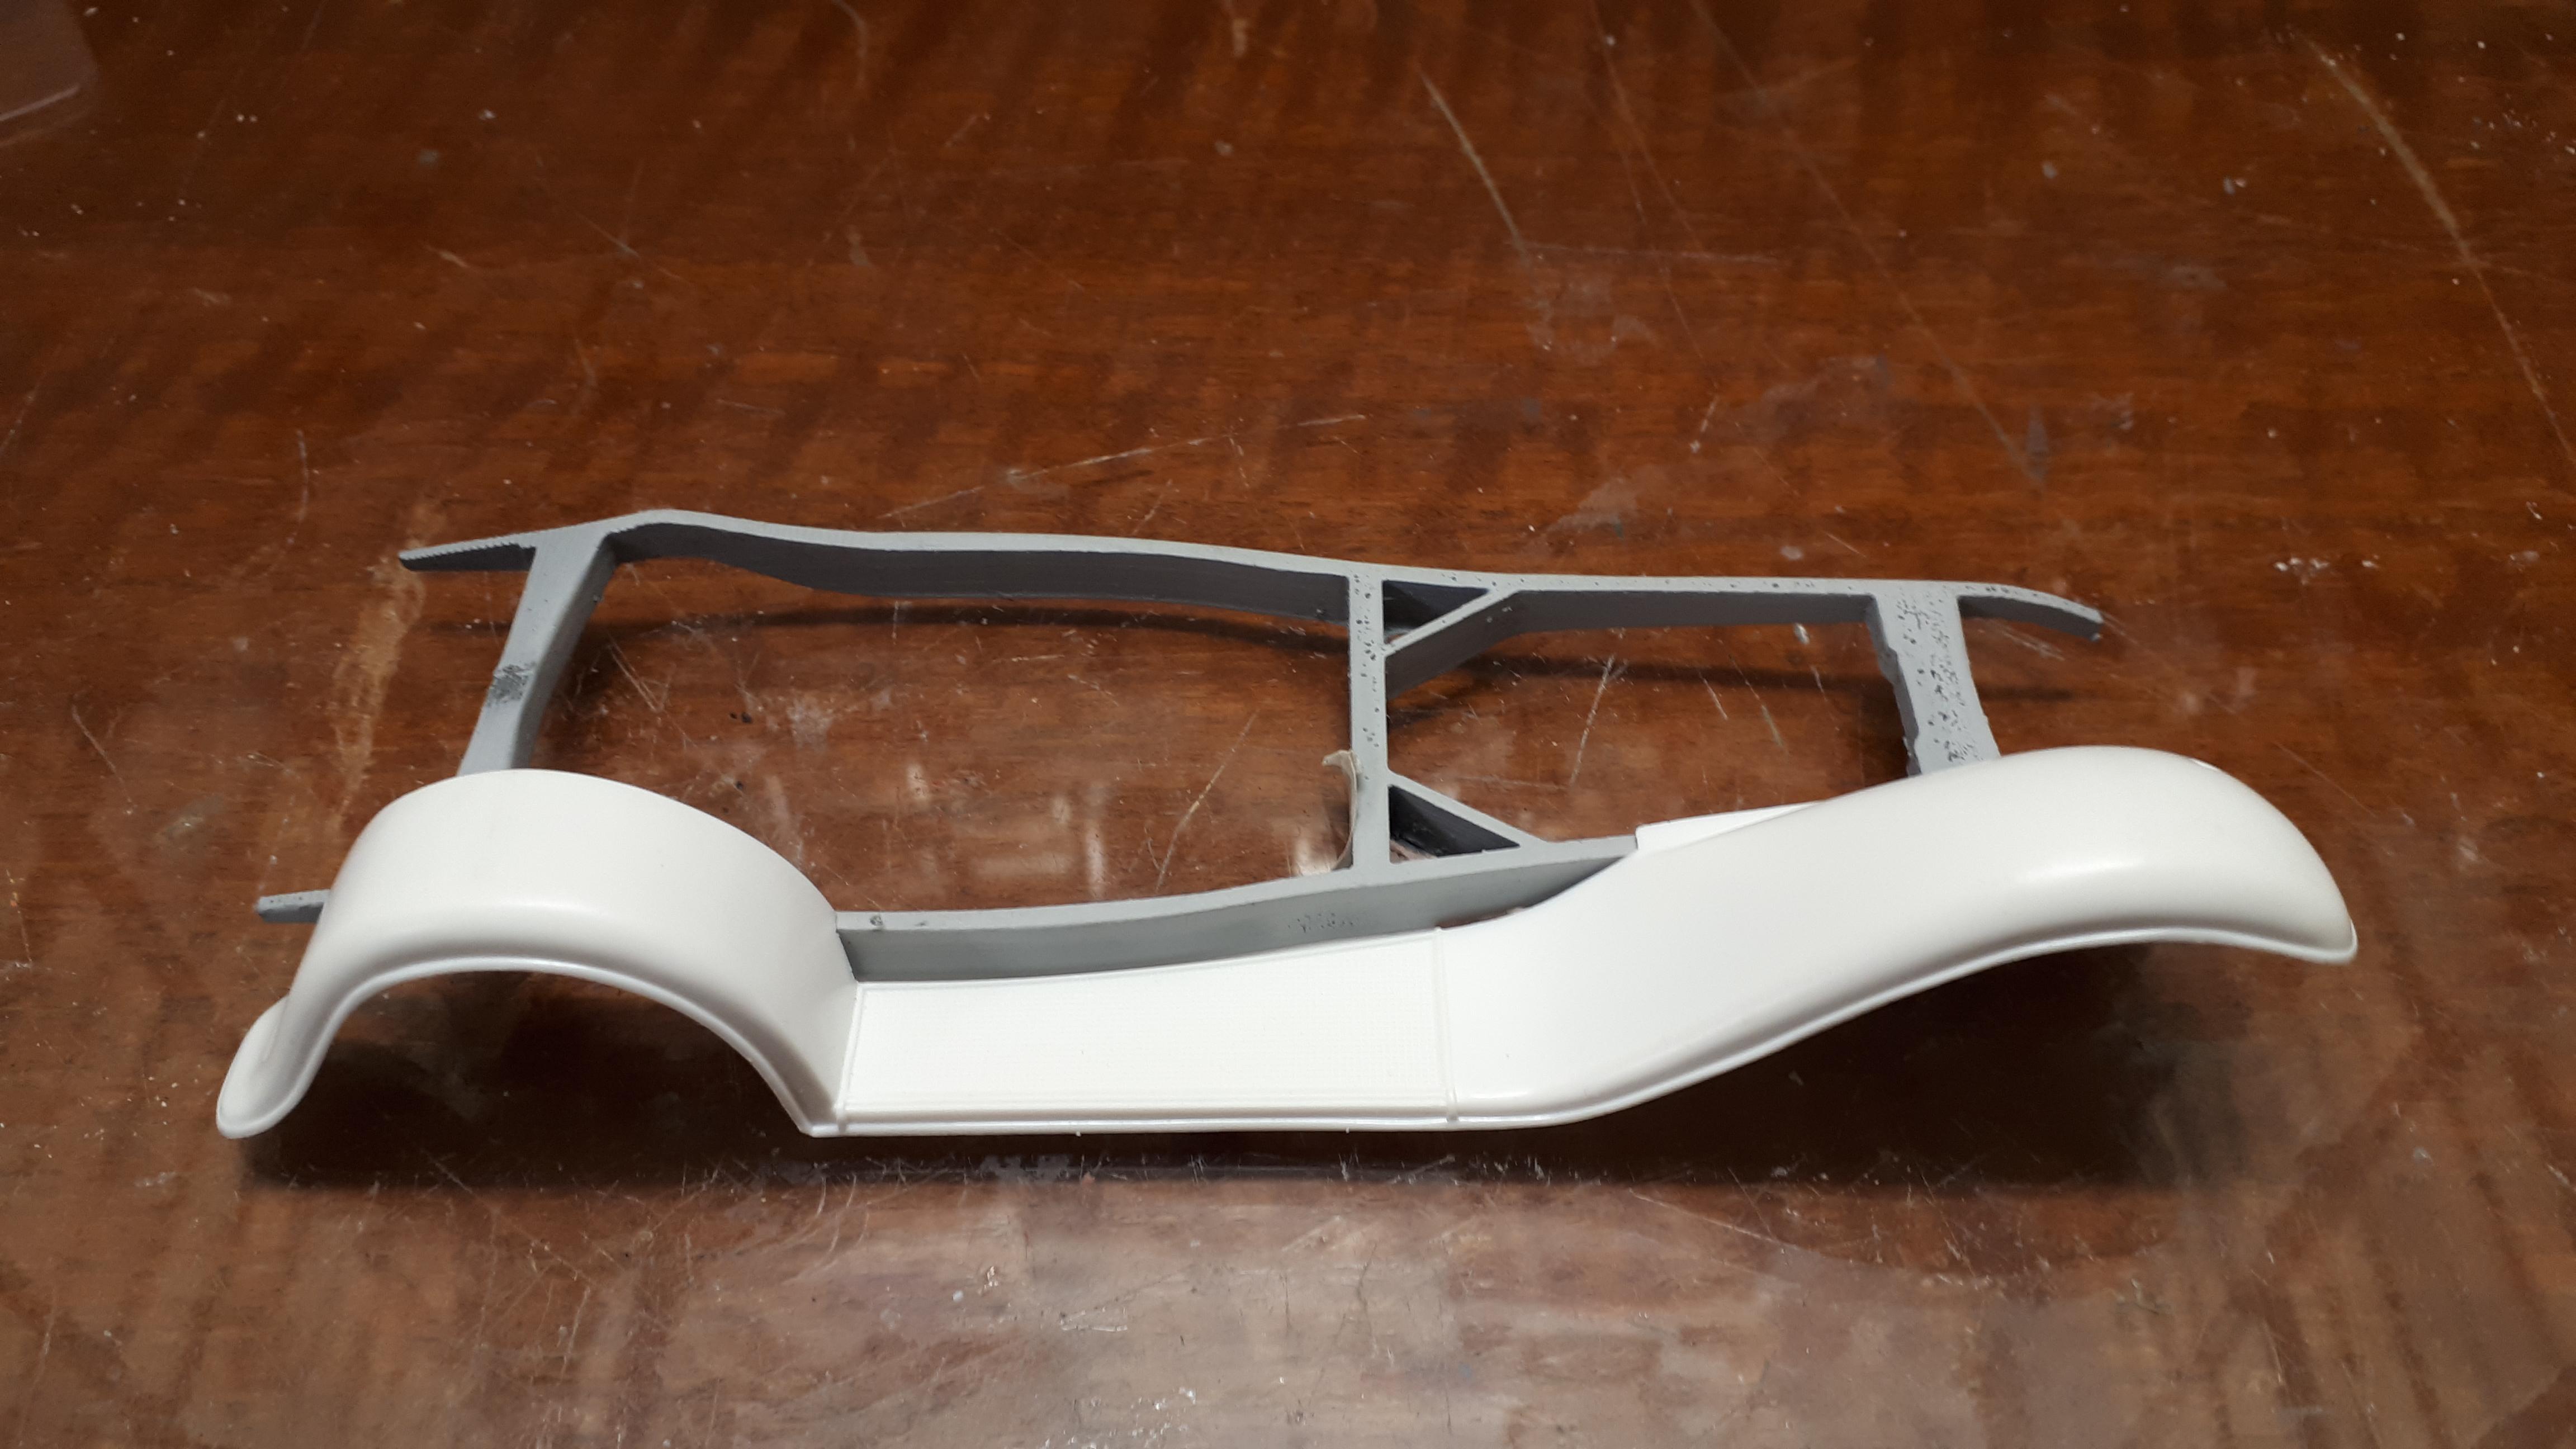
Hi guys, I am happy to share some photos of Bully's 32 frame with you here. In the interests of full disclosure, he is a friend of mine and has been doing this for about a year. He is from a family of hot rodders with a hot rod business so he is in the right place to get ideas and he is also very open to other people's ideas to develop his product. He gave me this frame, one of his first, to trial and get some feedback from. As suggested above, there are some lines and ridges in the surface. I did a very quick scrape of rough edges with an Xacto, followed by a sand with 100 grit and a quick smear of Tamiya putty. I gave that a rub down with 32) and fired a shot of primer on it and this is what you see here. In total I would have about 20 minutes work in it at this point. So, here's what you need to know. I can still see and feel a few ridges, typical of 3D printing, but I don't think it will take long to correct them The frame has simplified flat crossmembers and will require some extra fabrication with thin styrene if you want to mount a transverse spring. If you are using an independent front or rear end, or a coilover rear end, you are half way there already. This first frame has a 32 style centre crossmember but Bully already has a frame with a 40 Ford crossmember and a street rod industry style tubular crossmember ( which is going to save A LOT of fabricating work!) on his list. I haven't got to see these in the flesh just yet. The frame does not have the characteristic reveal down the lower edge of the frame rail. However, the good news is that this frame is very near a snap fit onto the Revel fender unit. When I took the photo below, I had one little bit of tape in the centre of the running board and a bit of blu tac underneath Its that good! Cheers Alan ,
-
Good points there Tim. Mind you, an outboard hangs off the very stern so maybe they favour a rear mount? Dunno, never owned a boat and probably ridden in maybe three! Looking at your two photos, the windshield really visually shortens the boat styling. Maybe bring the top edge of the windshield height down to nearly level with the headrests? The side cut would be at a lot flatter angle - the box-art of the Monogram Calloway speedster springs to mind. Proportionally, I think you nailed it as a runabout but that top photo just oozes sex appeal - seems a shame to lose it! Cheers Alan
-
Wow, Tim, there are a lot of similarities in concept there. That is a great choice of a donor vehicle because the lines of the 62 really lend themselves to the marine styling. That is going to be one very pretty boat. If it was mine, and at this stage where you are not ready for paint just yet, I would be very inclined to remove the interior and slide it back to the existing upper trunk cut line. I love how it looks right now but to my eye any form of windshield could be a massive barb as your eye flows from front to rear. Your eye would hit it a bit too early! But that side profile, just wow. That is sooooo slippery! Imagine it in the water! Cheers Alan
-
Thanks everyone, I didn't expect such a response. I have applied more putty and also started on the conversion of the Crown Vicky to a Crown Wagon.. The scale of the undersized T bird used for the boat suits it perfectly - I will post more pictures tomorrow. Les, your XJ220 bot is stunning - I love the flow! That is one menacing looking piece of water equipment, Please, keep working on it, please! Mike, you are dead right about finding hulls. I always have one eye open scanning for these things if I am in a toy or hobby shop but haven't found more than two other than what the kit manufacturers occasionally give us. From my trips to the USA in the past< I reckon antique malls would be a great place to start looking - they are full of toys and if it falls outside collector status ( ie, Hot Wheels, Matchbox, Buddy L, tinplate) there are bargains to be had, I don't know if they have a Brass Armadillo in North Dakota but these places are a treasure trove! Gerald, if you can cut and glue plastic you already have the skills - you just haven't tested them yet! Looks to me like the old Miami Vice hull would be a great start for this one. MArk, the lifebuoy ring is genius - that might just happen! Cheers Alan
-
Wow, that is a nice colour - it suits the car perfectly. Thanks for the sunshine shots - glad the cloud break gave you long enough to grab them! Cheers Alan
-
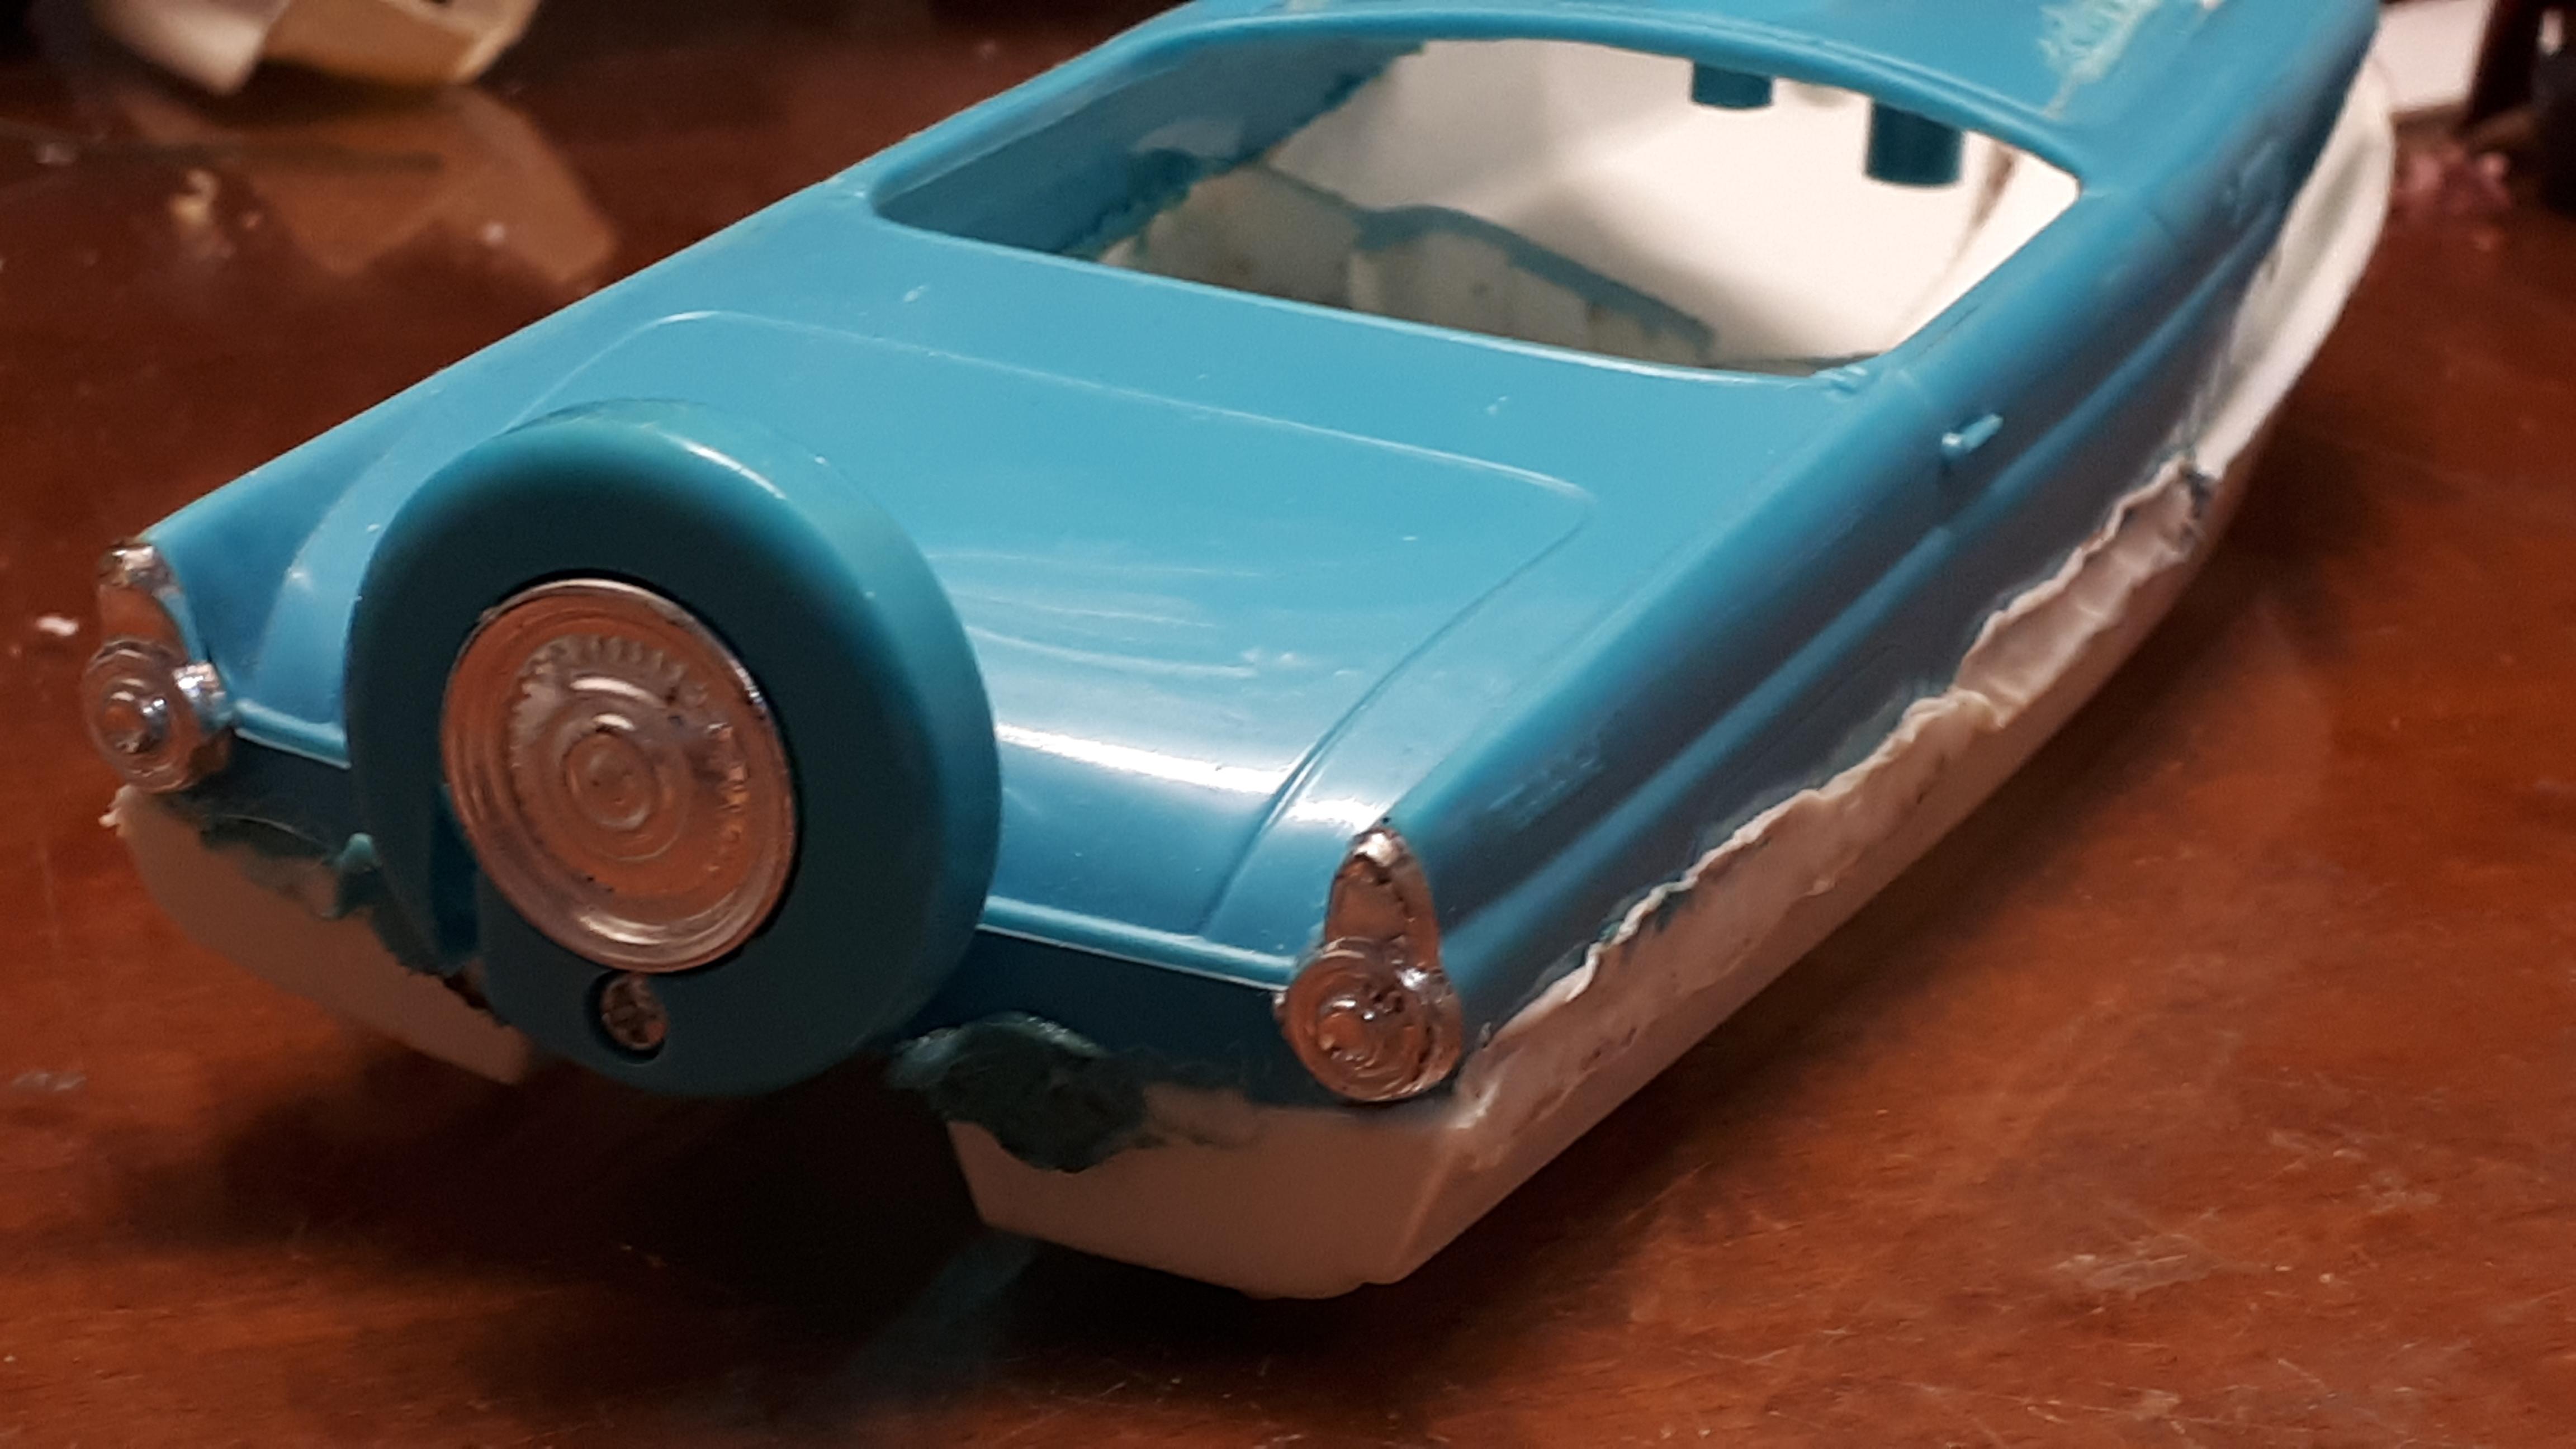
With the glue drying firmly overnight, this afternoon I mixed up a decent batch of bog and started shovelling it on. To prevent damage to details on the car side of the join I put two layers of masking tape over the blue plastic. This worked really well and I will use this idea again in the future. The photo below shows the rough shaping that I completed this evening. Obviously there will be a few more applications of putty/sanding/putty sanding routine before we start looking at primer but I do like the proportions so far. I should look neat tucked in behind the 56 Vicky 2 door wagon! Cheers Alan
-
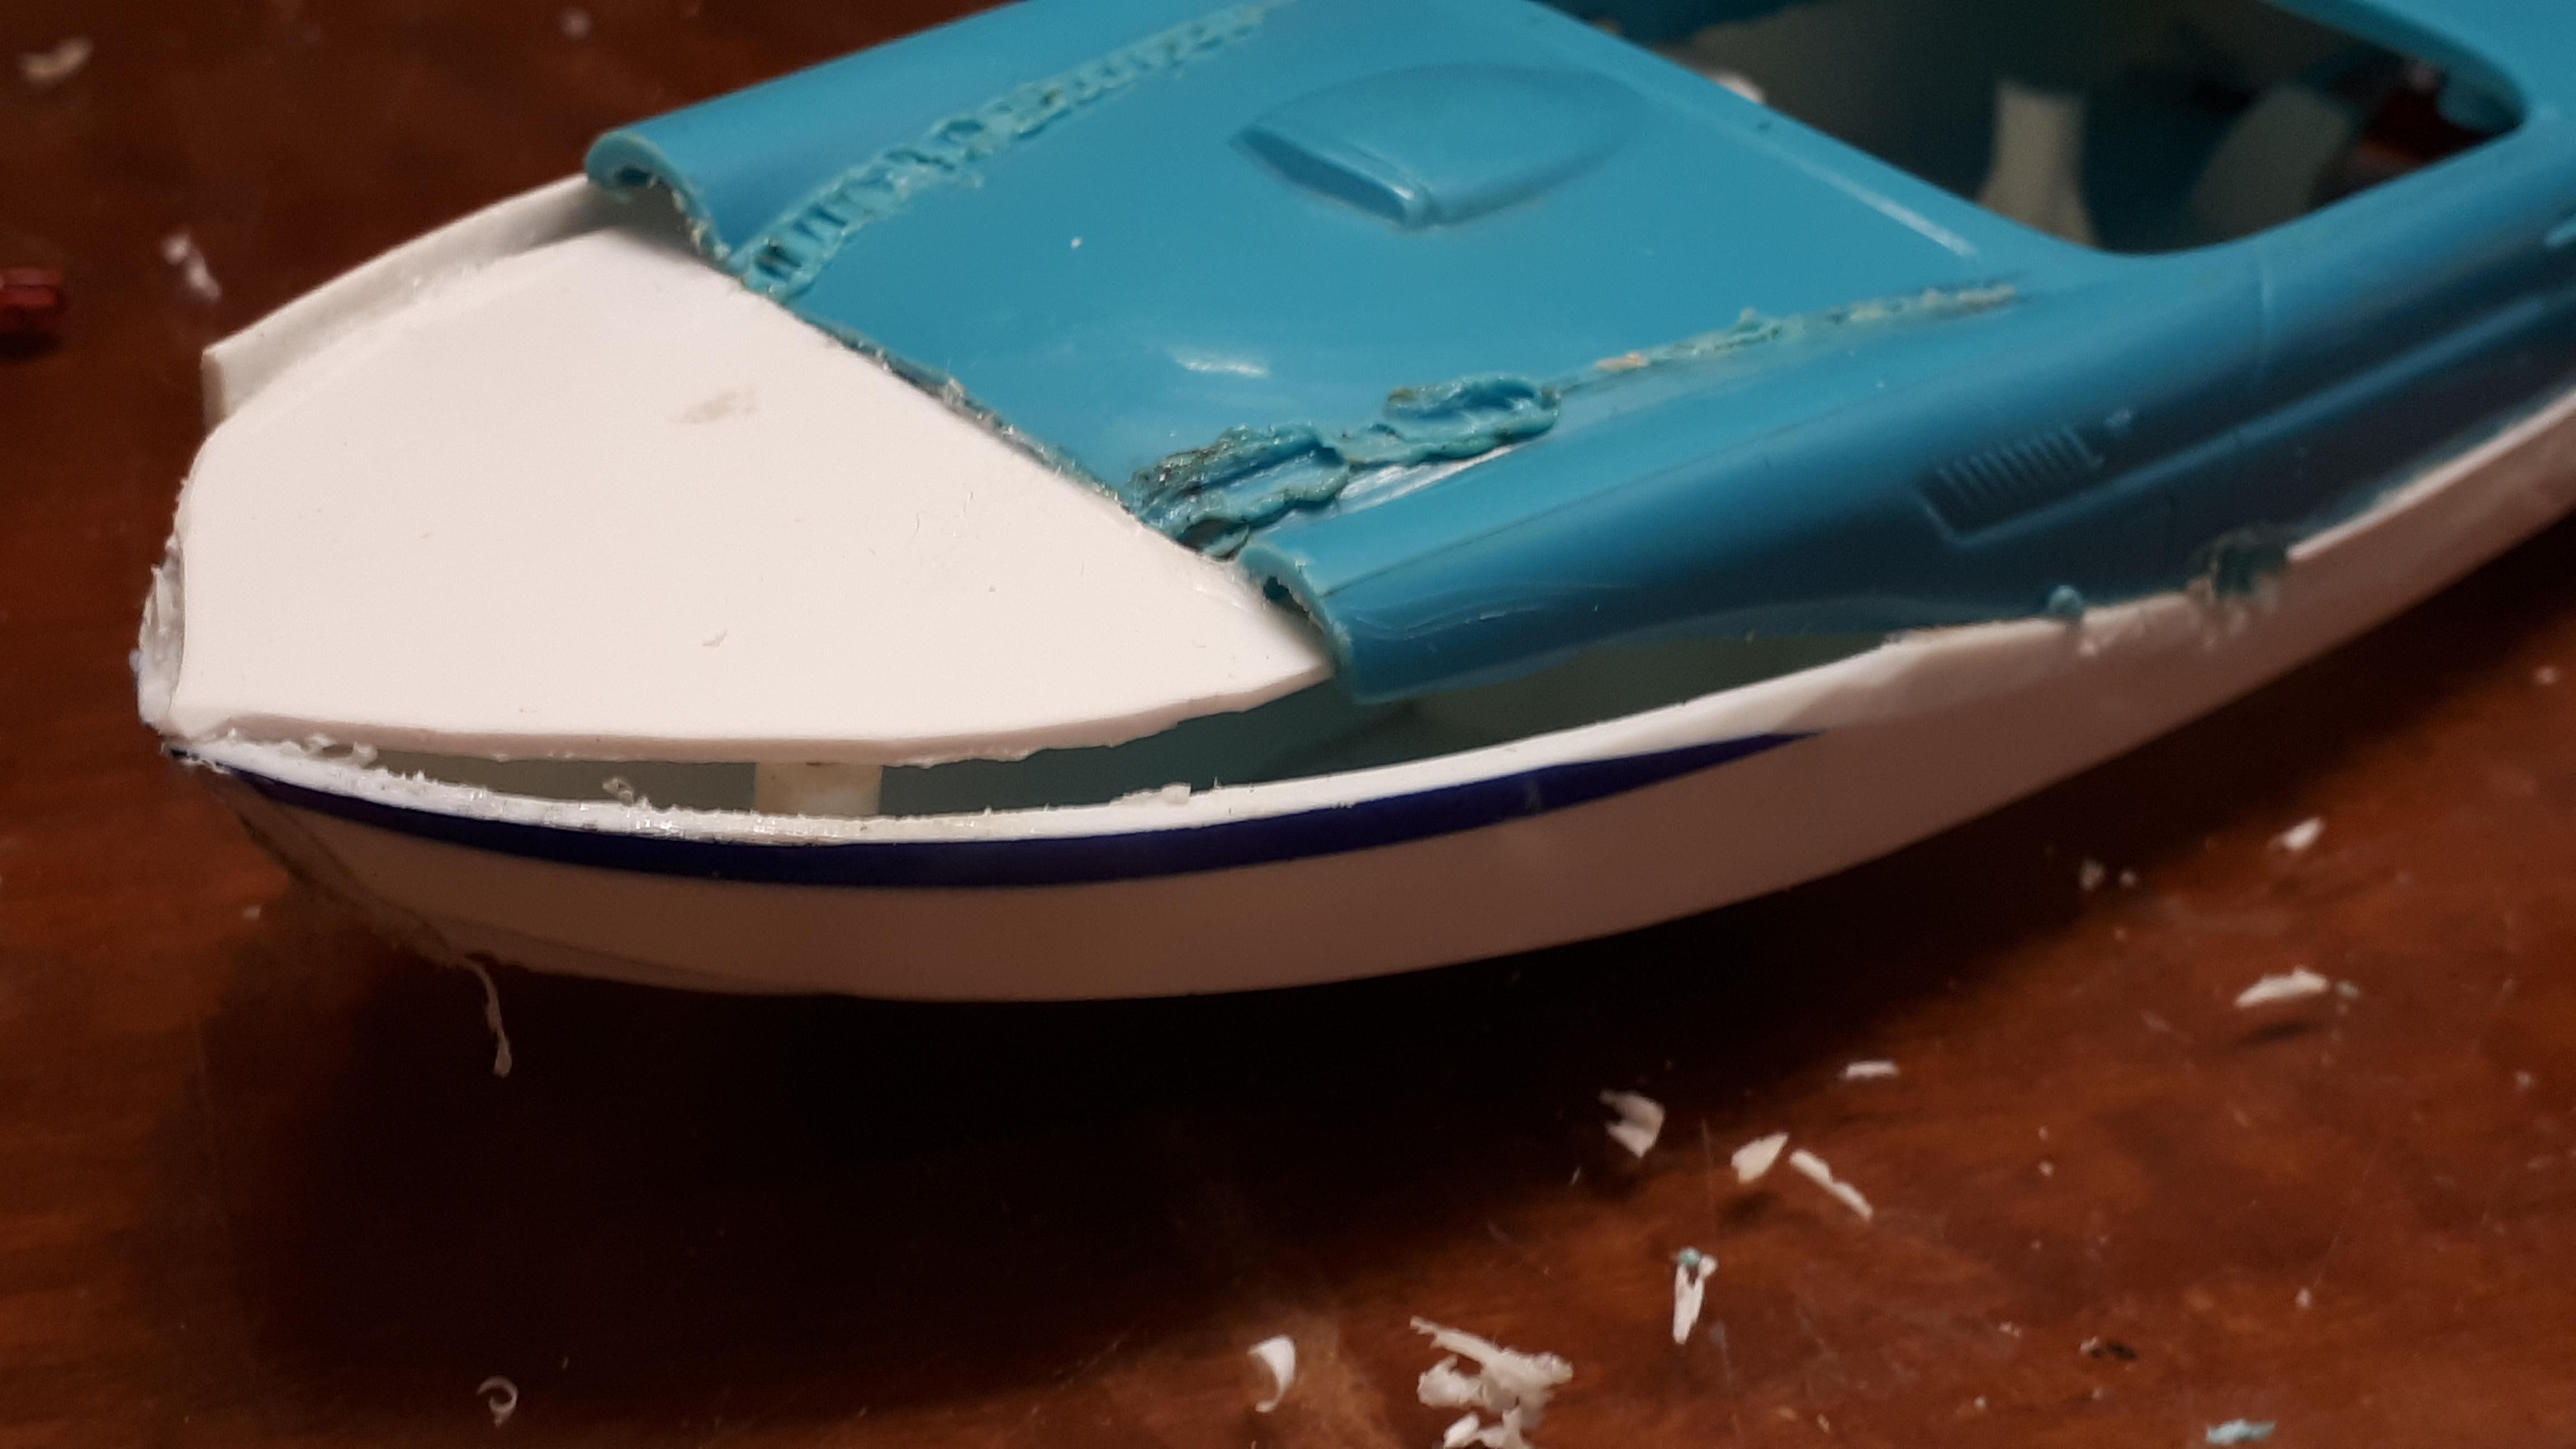
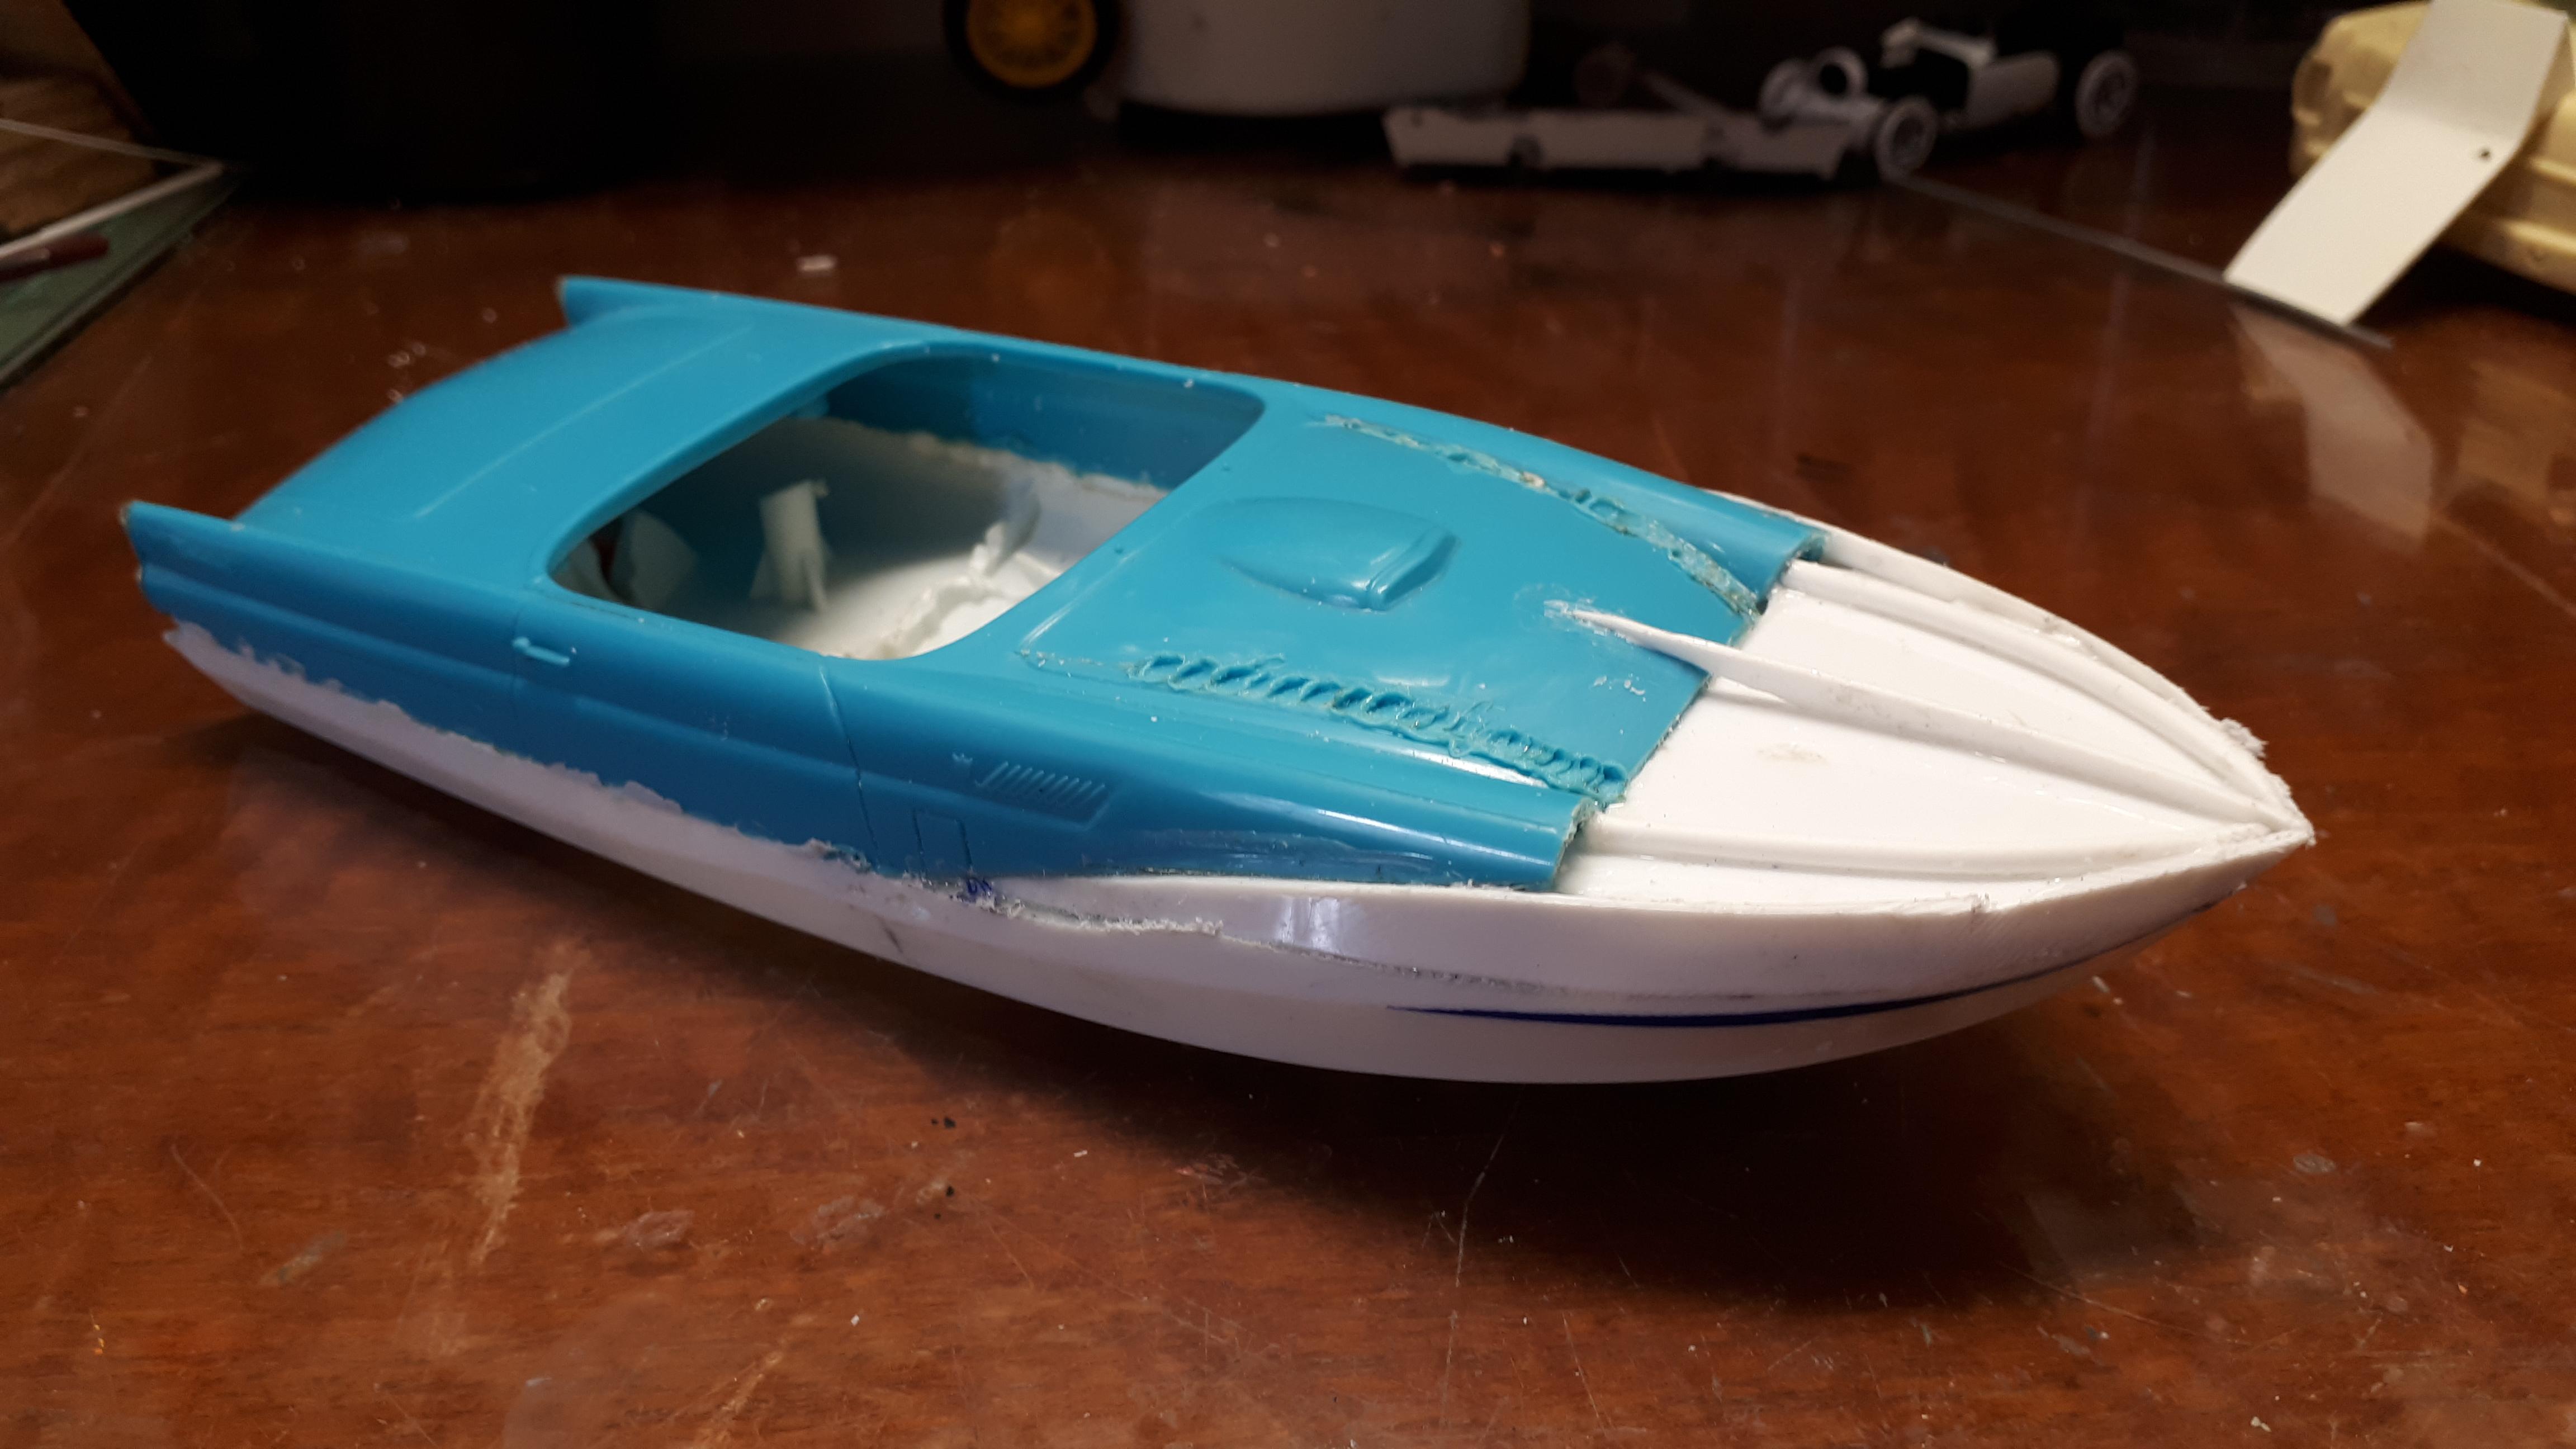
Was looking for some parts last night for my other boat project and figured 2021 could be the year of the Thunderboat team. First I had to get rid of all that air. Again, not pretty! If you are looking for finely honed craftsmanship then you are on the wrong thread. I used strips of flat styrene to form up the sides towards the bow and then used a large flat peice to fill in the front deck. Finally I glued soem strips of styrene to try and guide my sanding efforts when I get the bog out!
-
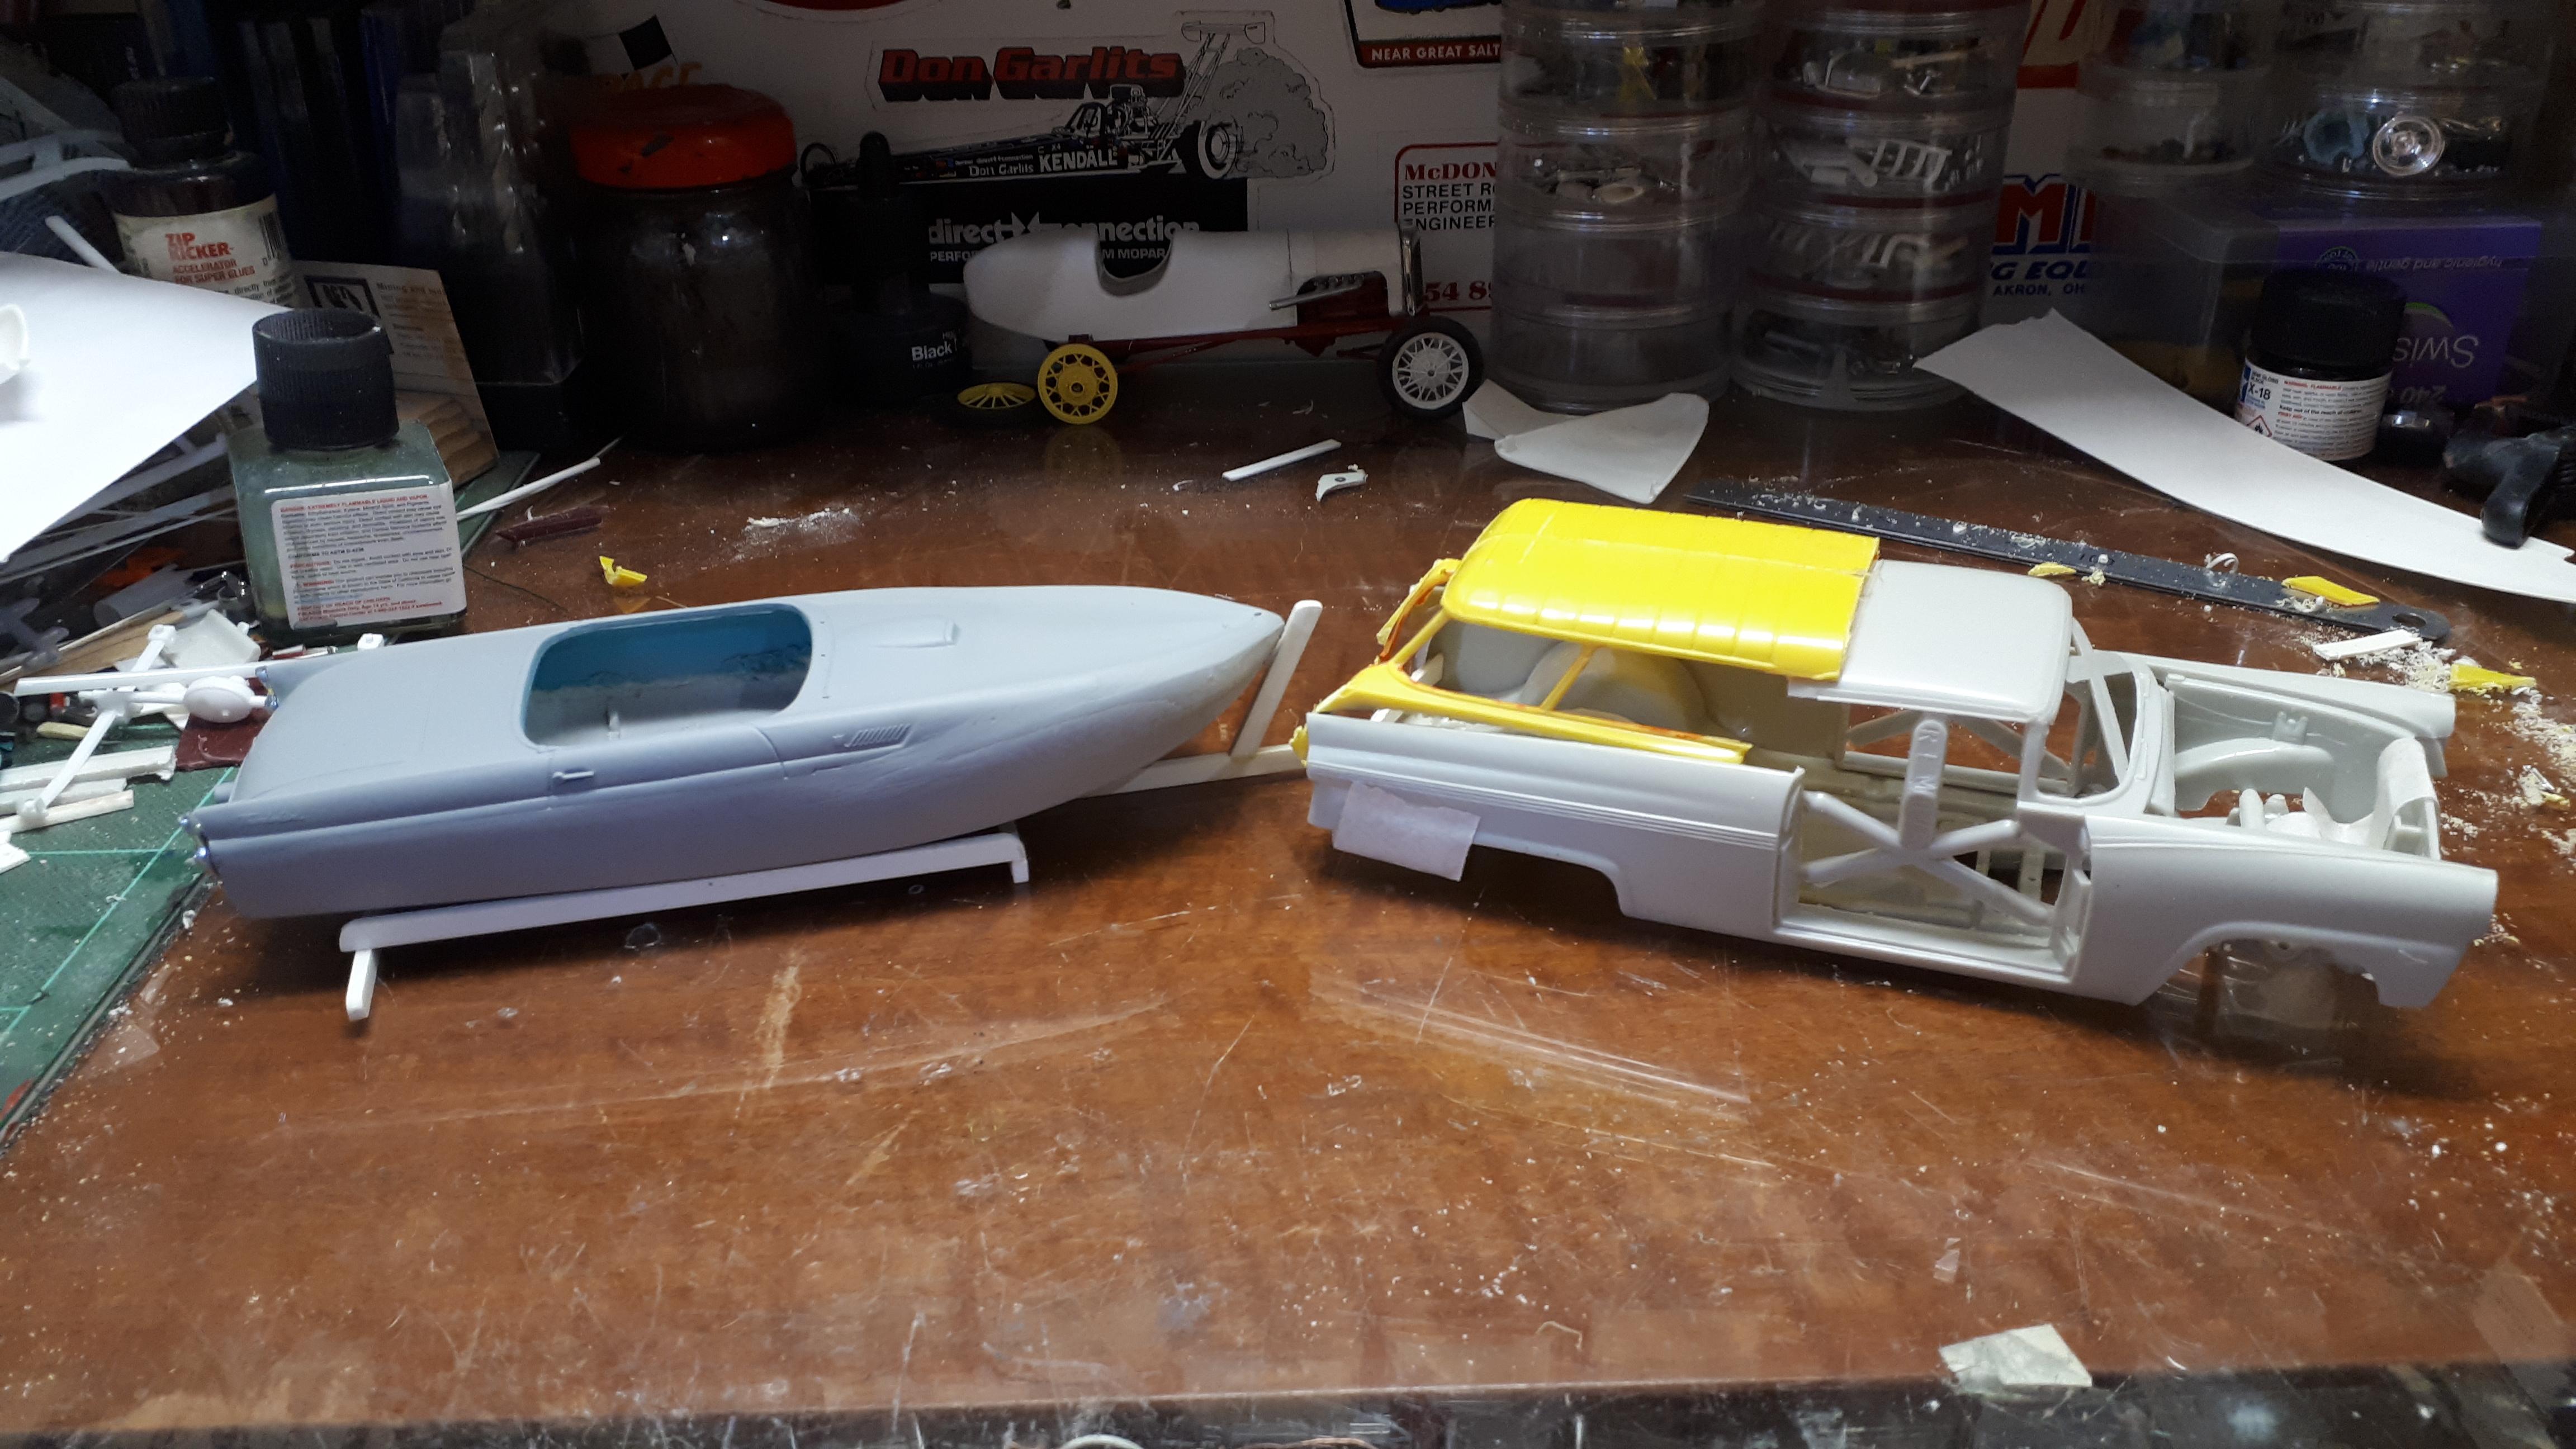
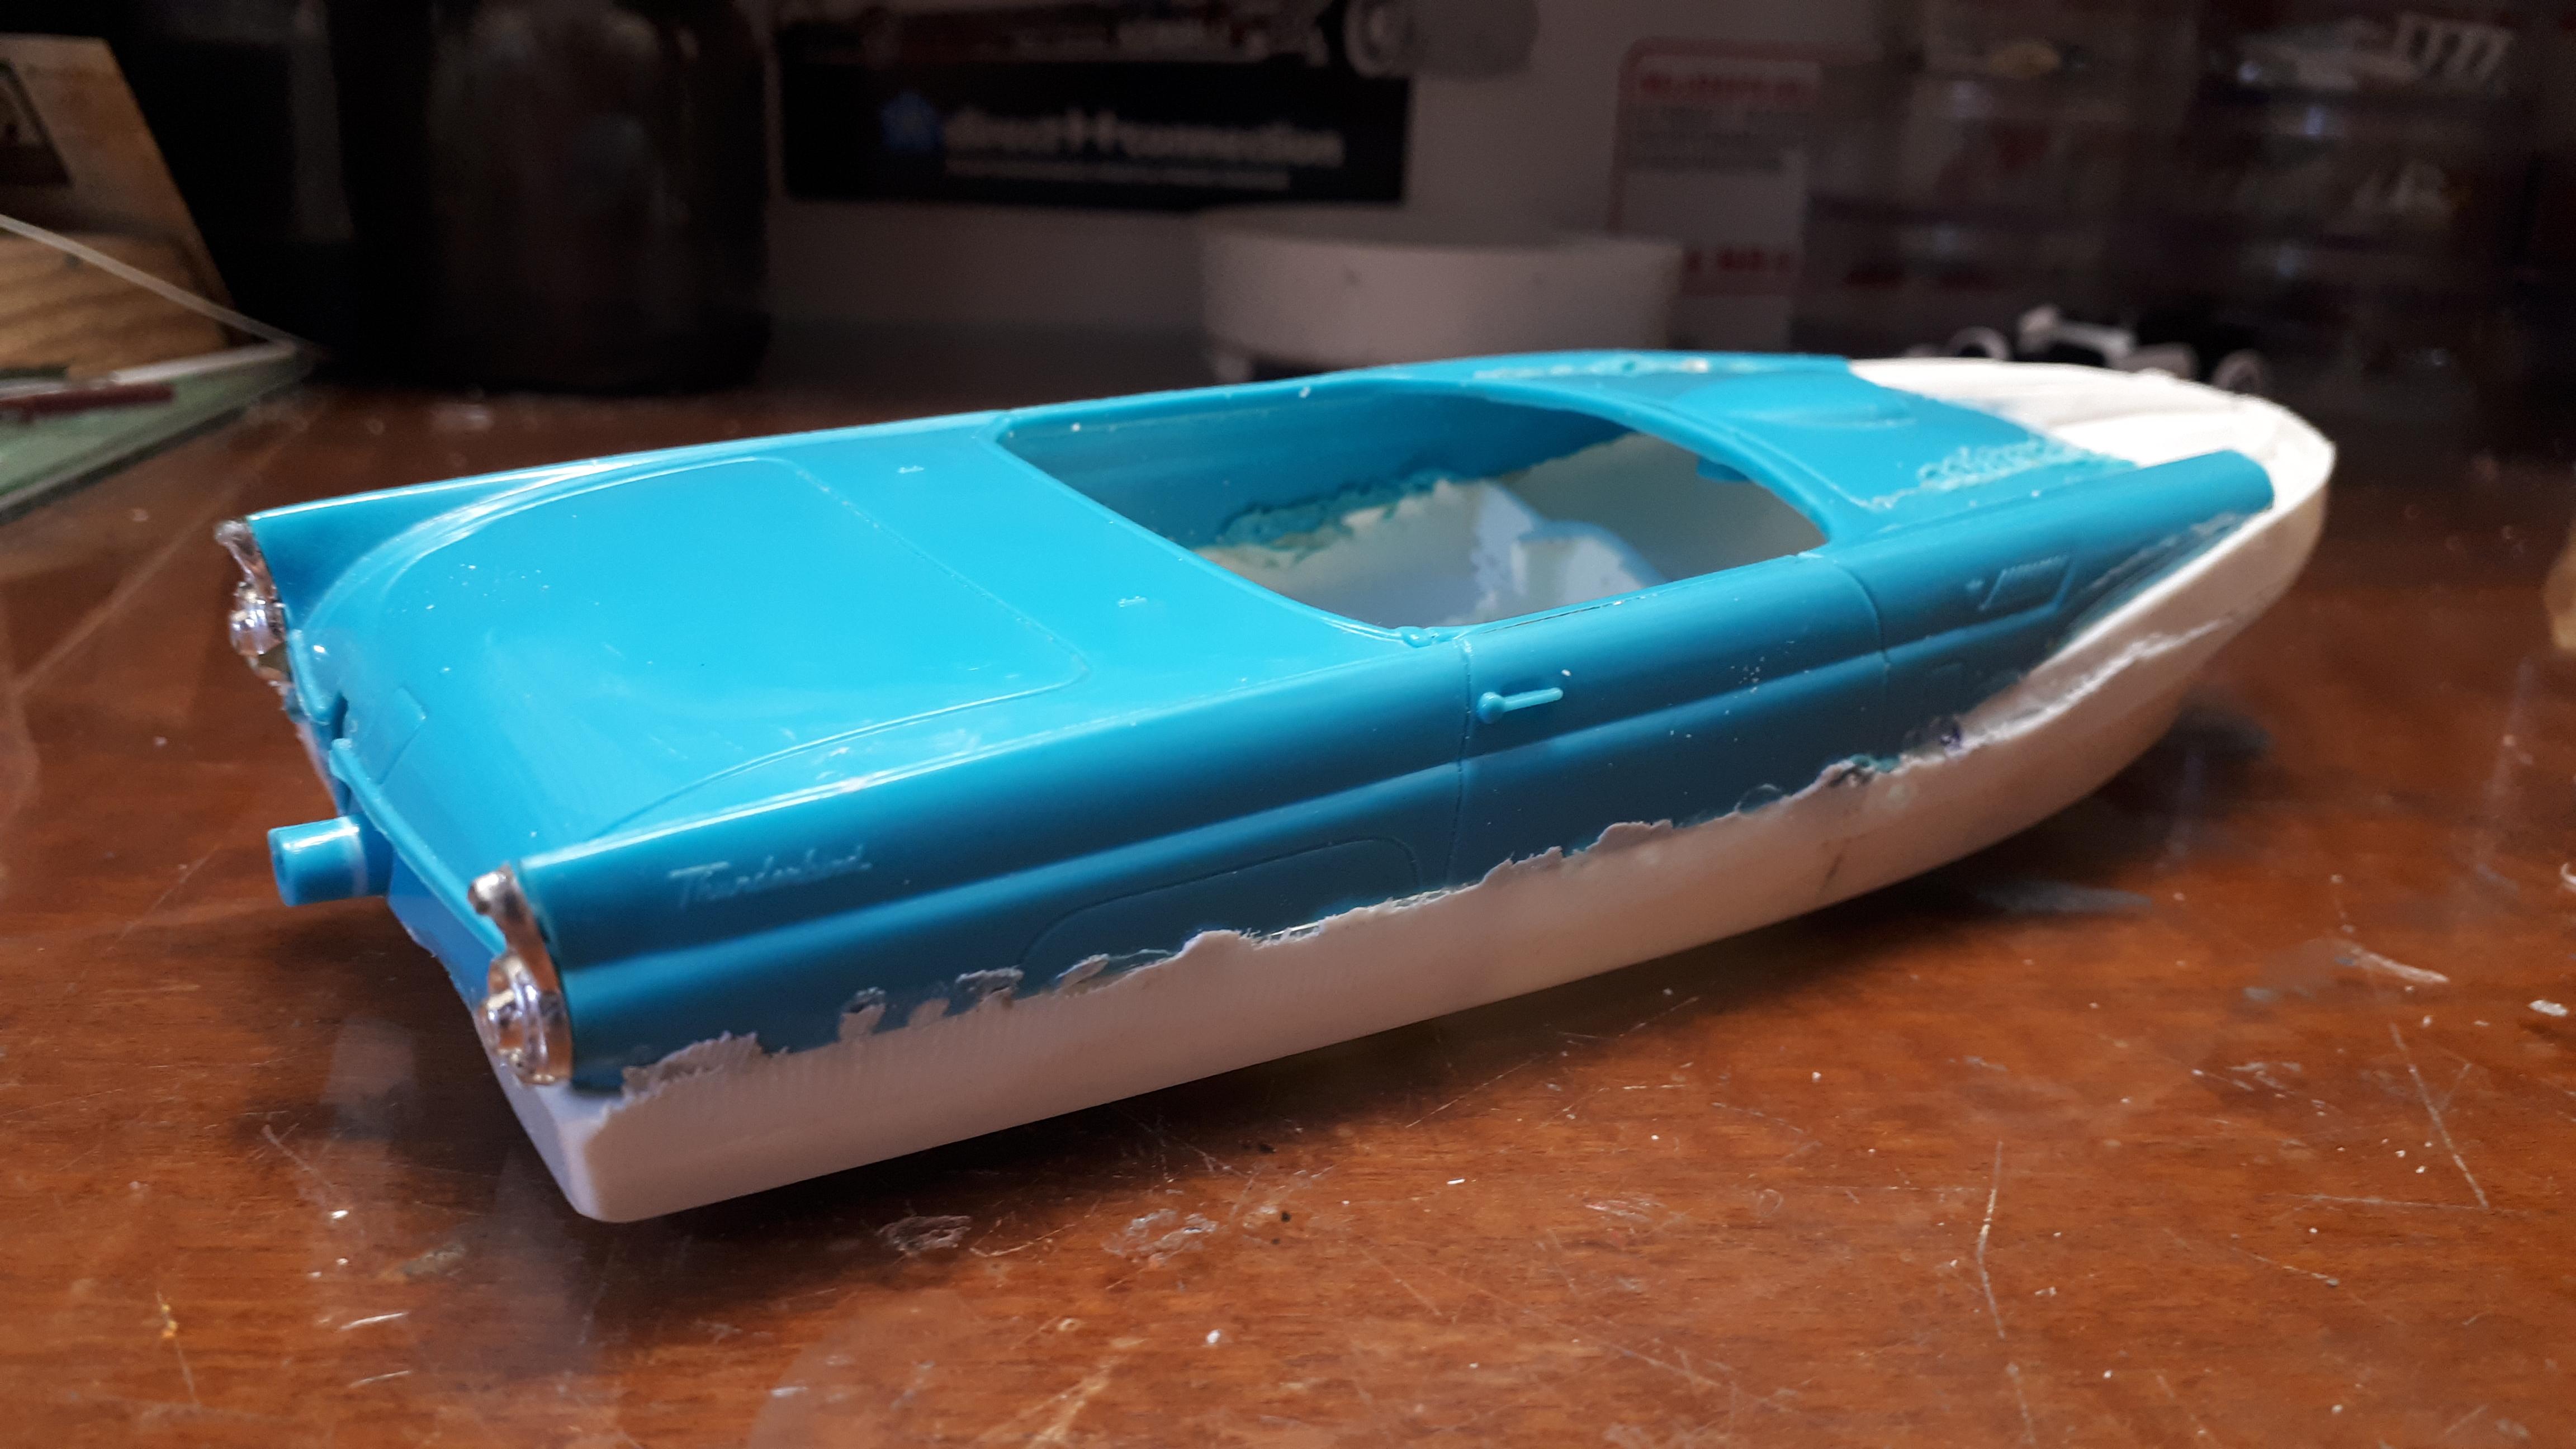
Turns out it is at least three years since I worked on any of my boats but this time I want to do a full combo from the get go. For ages I have wanted to do a 56 Ford "Nomad" for want of a better word. It will use the Crown Vic roof and tiara and yes, I know it has been done before but at least I can say I thought of it BEFORE I saw pictures of a real one! I will also scratchbuild a classy trailer to tie it all together. The idea is that the combo will be the counterpoint to my existing 57 Chev Bel Air/ Bel Aqua combo that has been on here before. I can't remember the last time I worked on the boat you see here but I'm sure it is longer than I remember. For some reason i didn't take photos of the early stages so i will have to paint you a picture instead. The 56 Thunderboat started off as two toys. The boat was a cabin cruiser in what I would estimate was around 1/32 scale and I bought it at least thirty years ago for the sole intention of using the hull to make a 1/25th scale speed boat. The 56 T-Bird was also an undersize toy, approximately 1/28th by my uneducated guess. It had a little tab in the continental kit and when you pulled it out on a string and released it, it shot off across the floor. The details and proportions were pretty good and I purchased it intending to use it to build a 56 T Bird Pro Mod on a Charlie Carpenter chassis. Didn't happen but one day I thought of the possibly of doing a blue oval version of my Bel Aqua set and it all came together! After removing the superstructure, I had to radically cut down the hull to a speedboat kinda depth. It also needed to be narrowed to match the width of the T-Bird. Predictably, I also had to saw off the bottom of the T Bird, about 1/4 inch below the body line. The next problem was the front end of the car. I made a vertical cut across the front to remove the whole grille/bumper/ headlight area. I also made two pie cuts up along the side hood cut lines and used hot water to pull the fender peaks in towards the centre of the car. I really didn't expect the model to cope with these sort of stresses if I glued it together so instead I used a soldering iron to weld it together. Not pretty but man, is it strong. Here's where I got to before putting it away several years ago.
-
Time to kick up some scale road dust....and some water mist, too!
alan barton replied to tim boyd's topic in Model Cars
I can't believe I missed a Tim Boyd boat thread! I am working on two boats today, both long stalled projects that have floated to the top of the queue. I did a Google search to revisit MCM forum boat posts and found this one! Unreal. All the hot rod nerves in my body are screaming NOOOOOO but I must confess, top of the pick as many others have said is the Firebird combo. That colour is so rich! I too like to colour match my tow vehicle when I can and on several occasions, I have built a new tow vehicle dedicated to the job. Today's work was on a narrowed Hemi Hydro which turns out I painted in 2017 ( thought it was last year LOL!) and another totally off the wall job that I will start a new thread on tonight. Keep on floating! Cheers Alan -
I would go with the Tudor door line. I don't hate the Brookville bodies but there is definitely a conflict between the sloping door line and the straight cowl line. That should mean that I don't like 32 3 windows and I love them so go figure! The value of my opinion plus $2.00 will buy you a Coke! Love the wooden peg idea! Have looked at those many times and thought, eh, I've got heaps of clamps. Didn't think of their resistance to styrene cement - better get some! Funny, i was just doing swage lines on a 32 roadster today, just on the opposite of the world to you - great minds think alike! Cheers Alan
-
Tom, if I can answer on Kit's behalf, chopping most anything other than a Model T requires careful planning to choose the best spot to cut. Think of an ice cream cone. If you chopped a one inch section out of the middle and tried to put the two pieces back together, there would be a serious mismatch. It is not as bad on models as it is with the real thing but as above, it requires careful planning. Sometimes It also pays to remove the rear window panel, chop the top and then re-insert that panel otherwise the back window looks ridiculous. Kit is good at what he does! Cheers Alan
-
Vintage Top Fuel FEDs, 1:16 brass chassis
alan barton replied to Mike Williams's topic in WIP: Drag Racing Models
That goes for me too! I built two chassis for a Niekamp roadster and at that basic level it was fun but when I see the work that Mike is doing here, WOW! You have a lot of talent Mike, and I too love FEDs so will look forward to following this one. Cheers Alan -
If I'm not very much mistaken, that was inspired by Rod Hadfield's Hot Rod Lincoln that he shipped from Oz to USA some years ago. Nice job! Cheers Alan
-
Ray, I believe this is a heavily modified Hot Wheels Car Transporter/carry case - I found two of them cheap at a thrift shop here in Perth. Finding one would give you a chromed grille. The wheels on the toy were fixed, and are large diameter chromed billet style truck wheels. Me, I would be looking at the large diameter steels from the AMT Black Force Slammer kit.
-
Tom Daniels inspired '40 Ford coupe Show 'n' go rod
alan barton replied to kiwicraigr@gmail.com's topic in Model Cars
What I am really enjoying is not so much the Daniel's connection but the fact that it looks so like something you would have seen on the cover of Model Car Science circa 64-65. Not sure what vintage you are kiwicraig but that is exactly the style they were building then! Cheers from across the dutch, Alan