alan barton
-
Posts
2,105 -
Joined
-
Last visited
Content Type
Profiles
Forums
Events
Gallery
Everything posted by alan barton
-
The finishes on the body, engine and interior are really something - very true to scale! Cheers Alan
-
I wasn't expecting that! you've done a great job of blending the Swedish body with American running gear and the result is very convincing. The colour suits it particualrly well! Cheers Alan
-
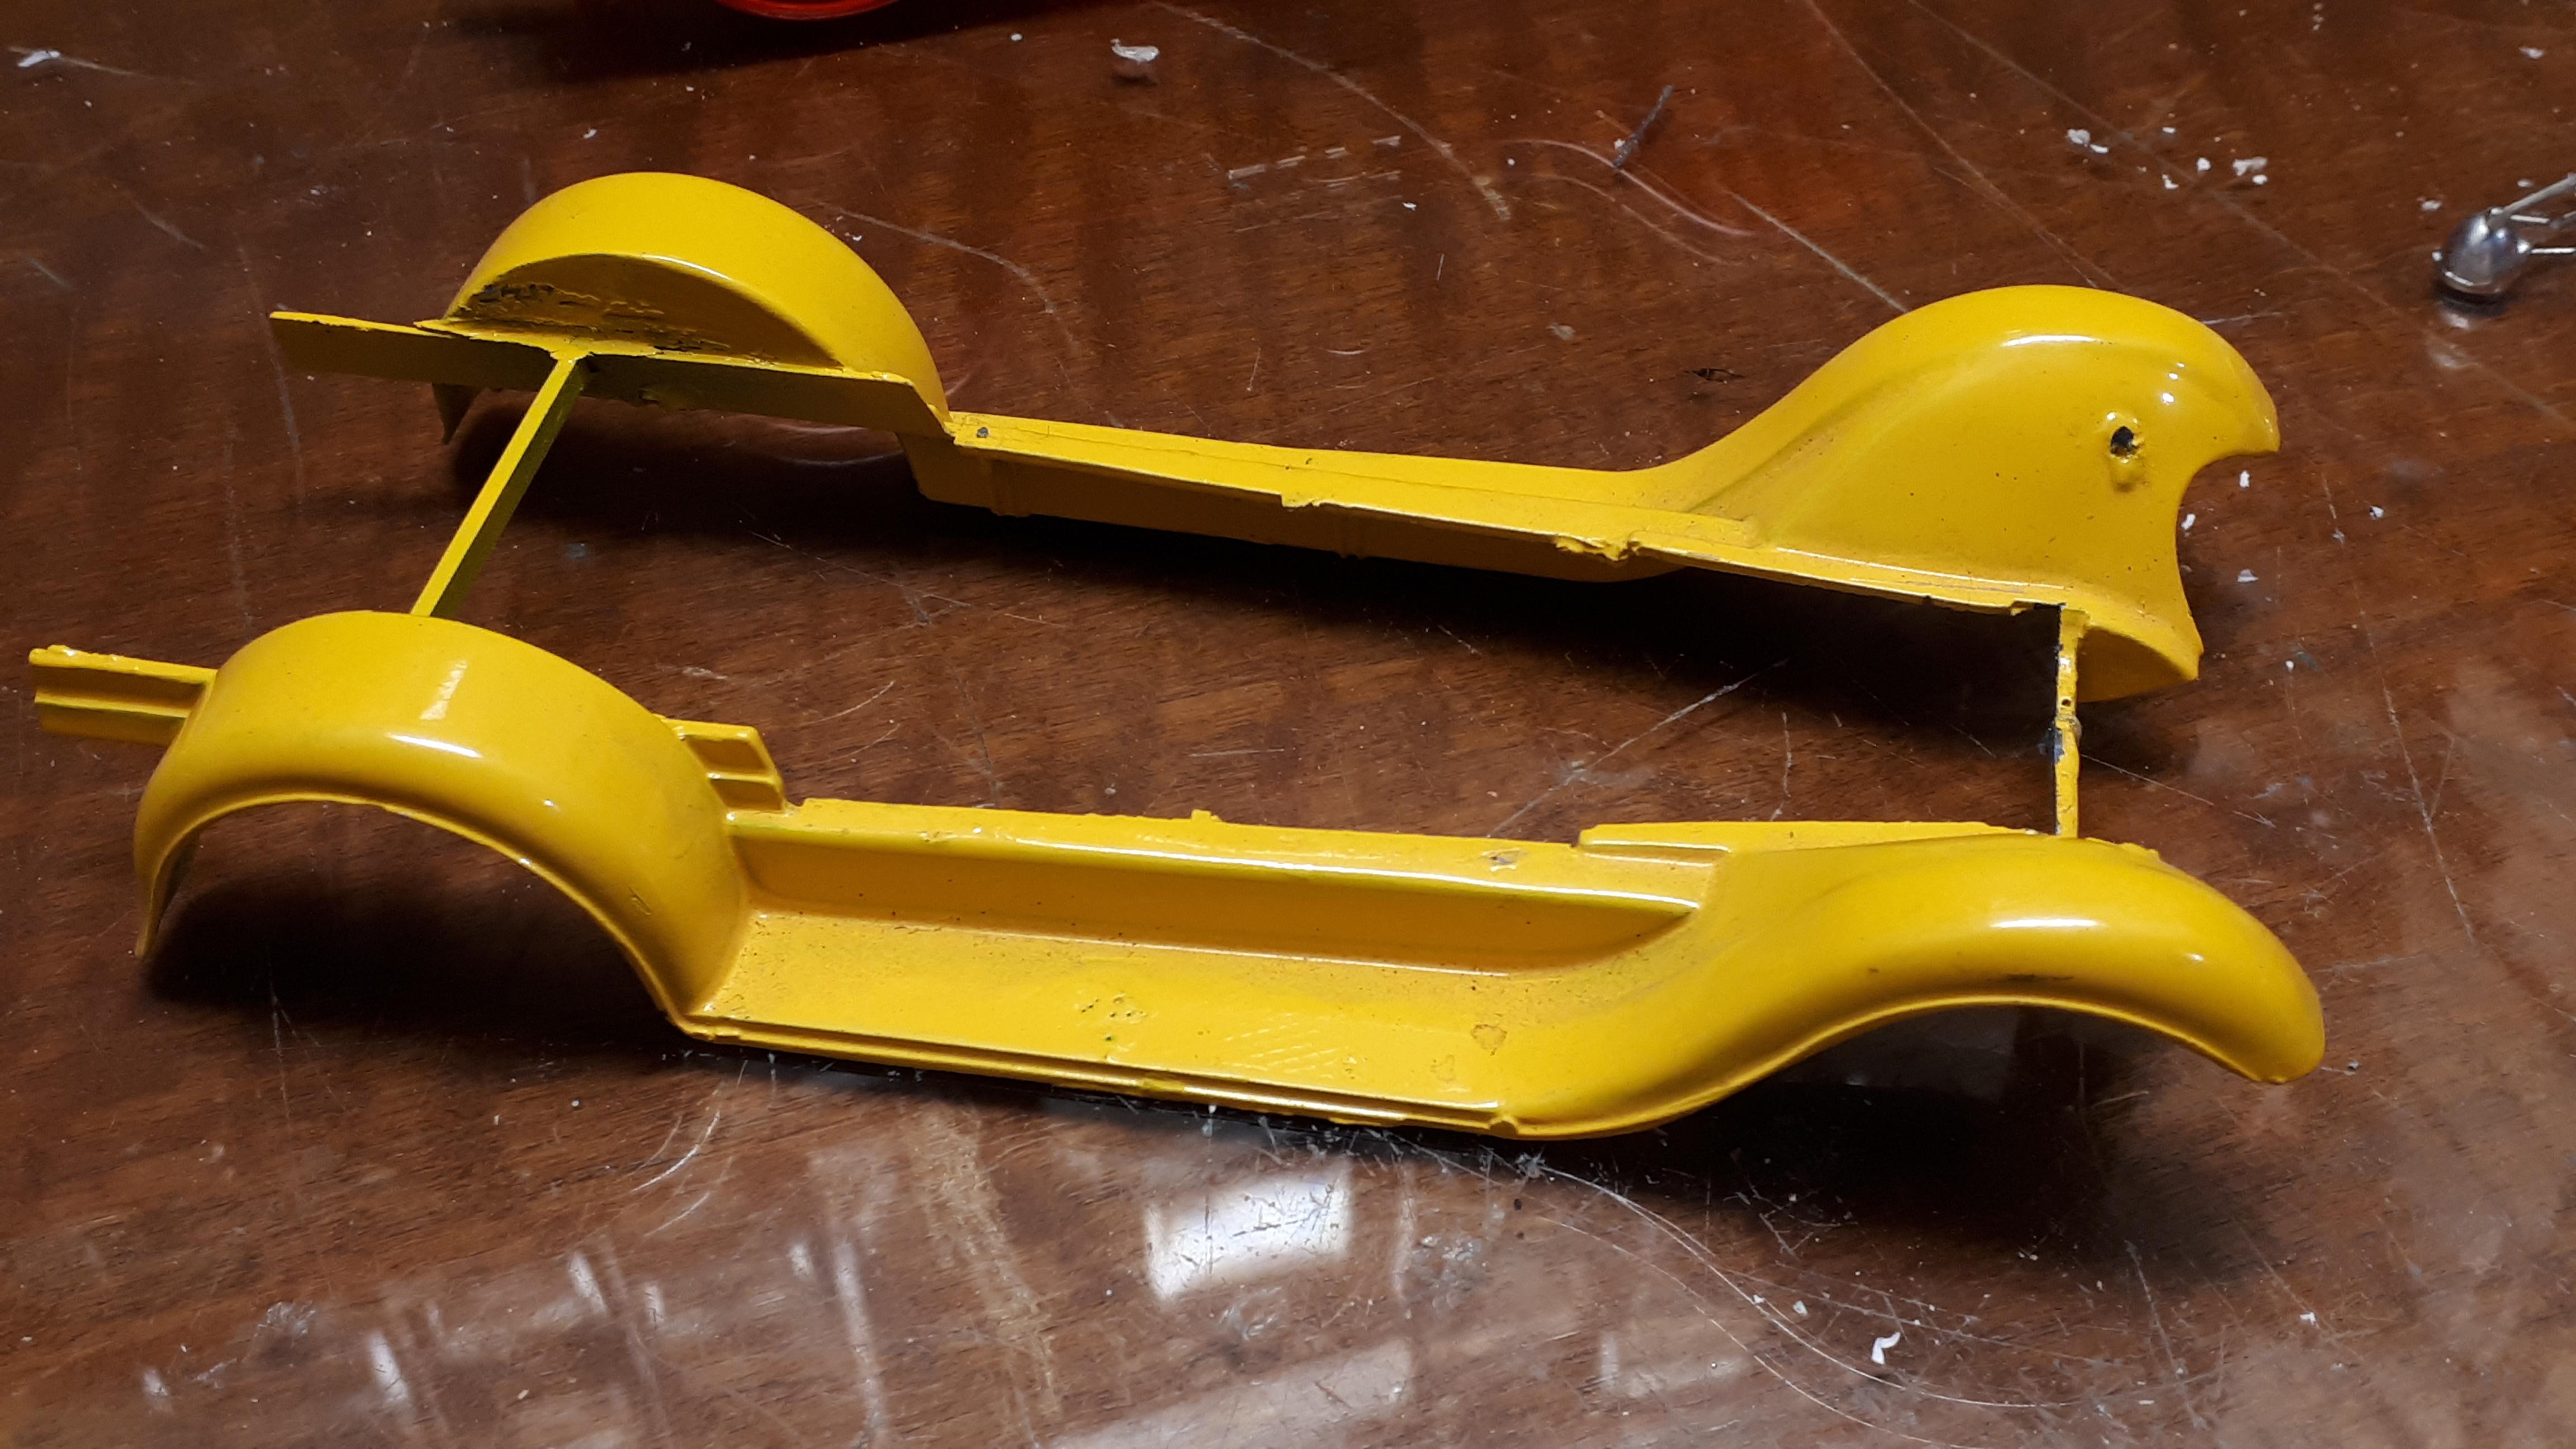
Yep, it's going to work! I used a sharp Xacto to scrape off the damaged ( and simplified) running board detail from the Bandai fenders and then sanded it as smooth as I can for now. Into the stripper tonight, primer tomorrow and we will see where this goes.

-
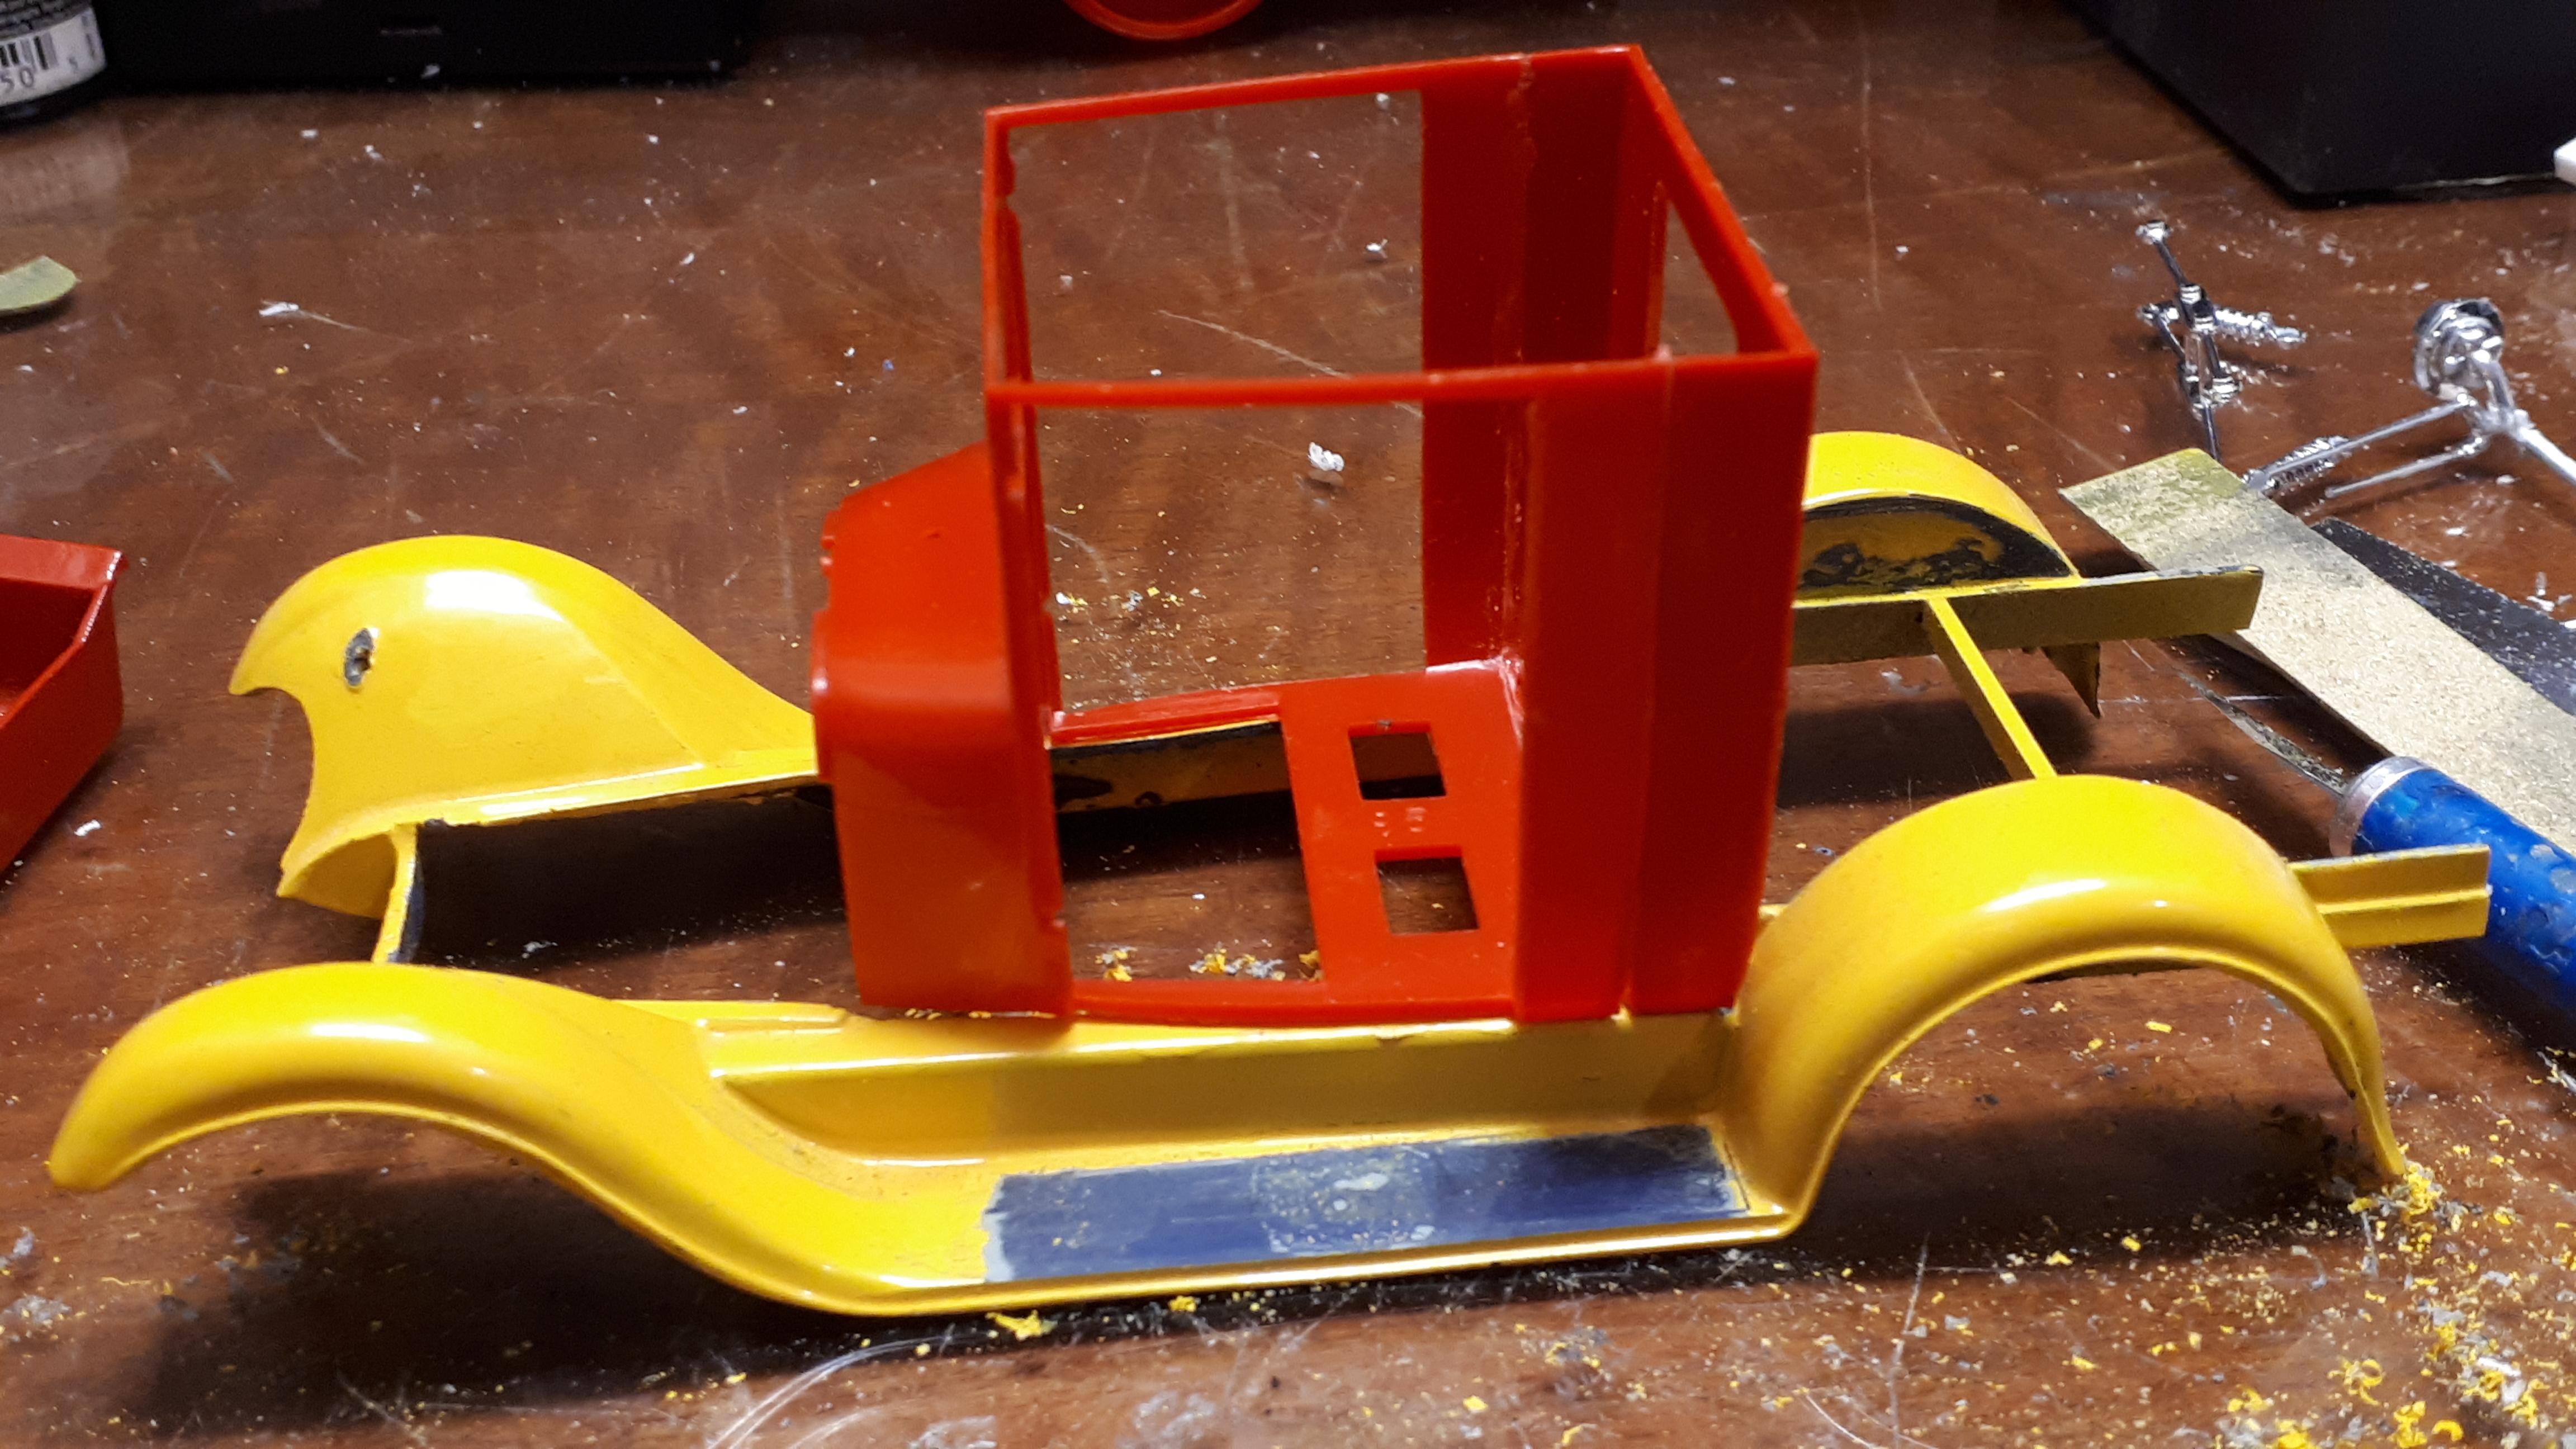
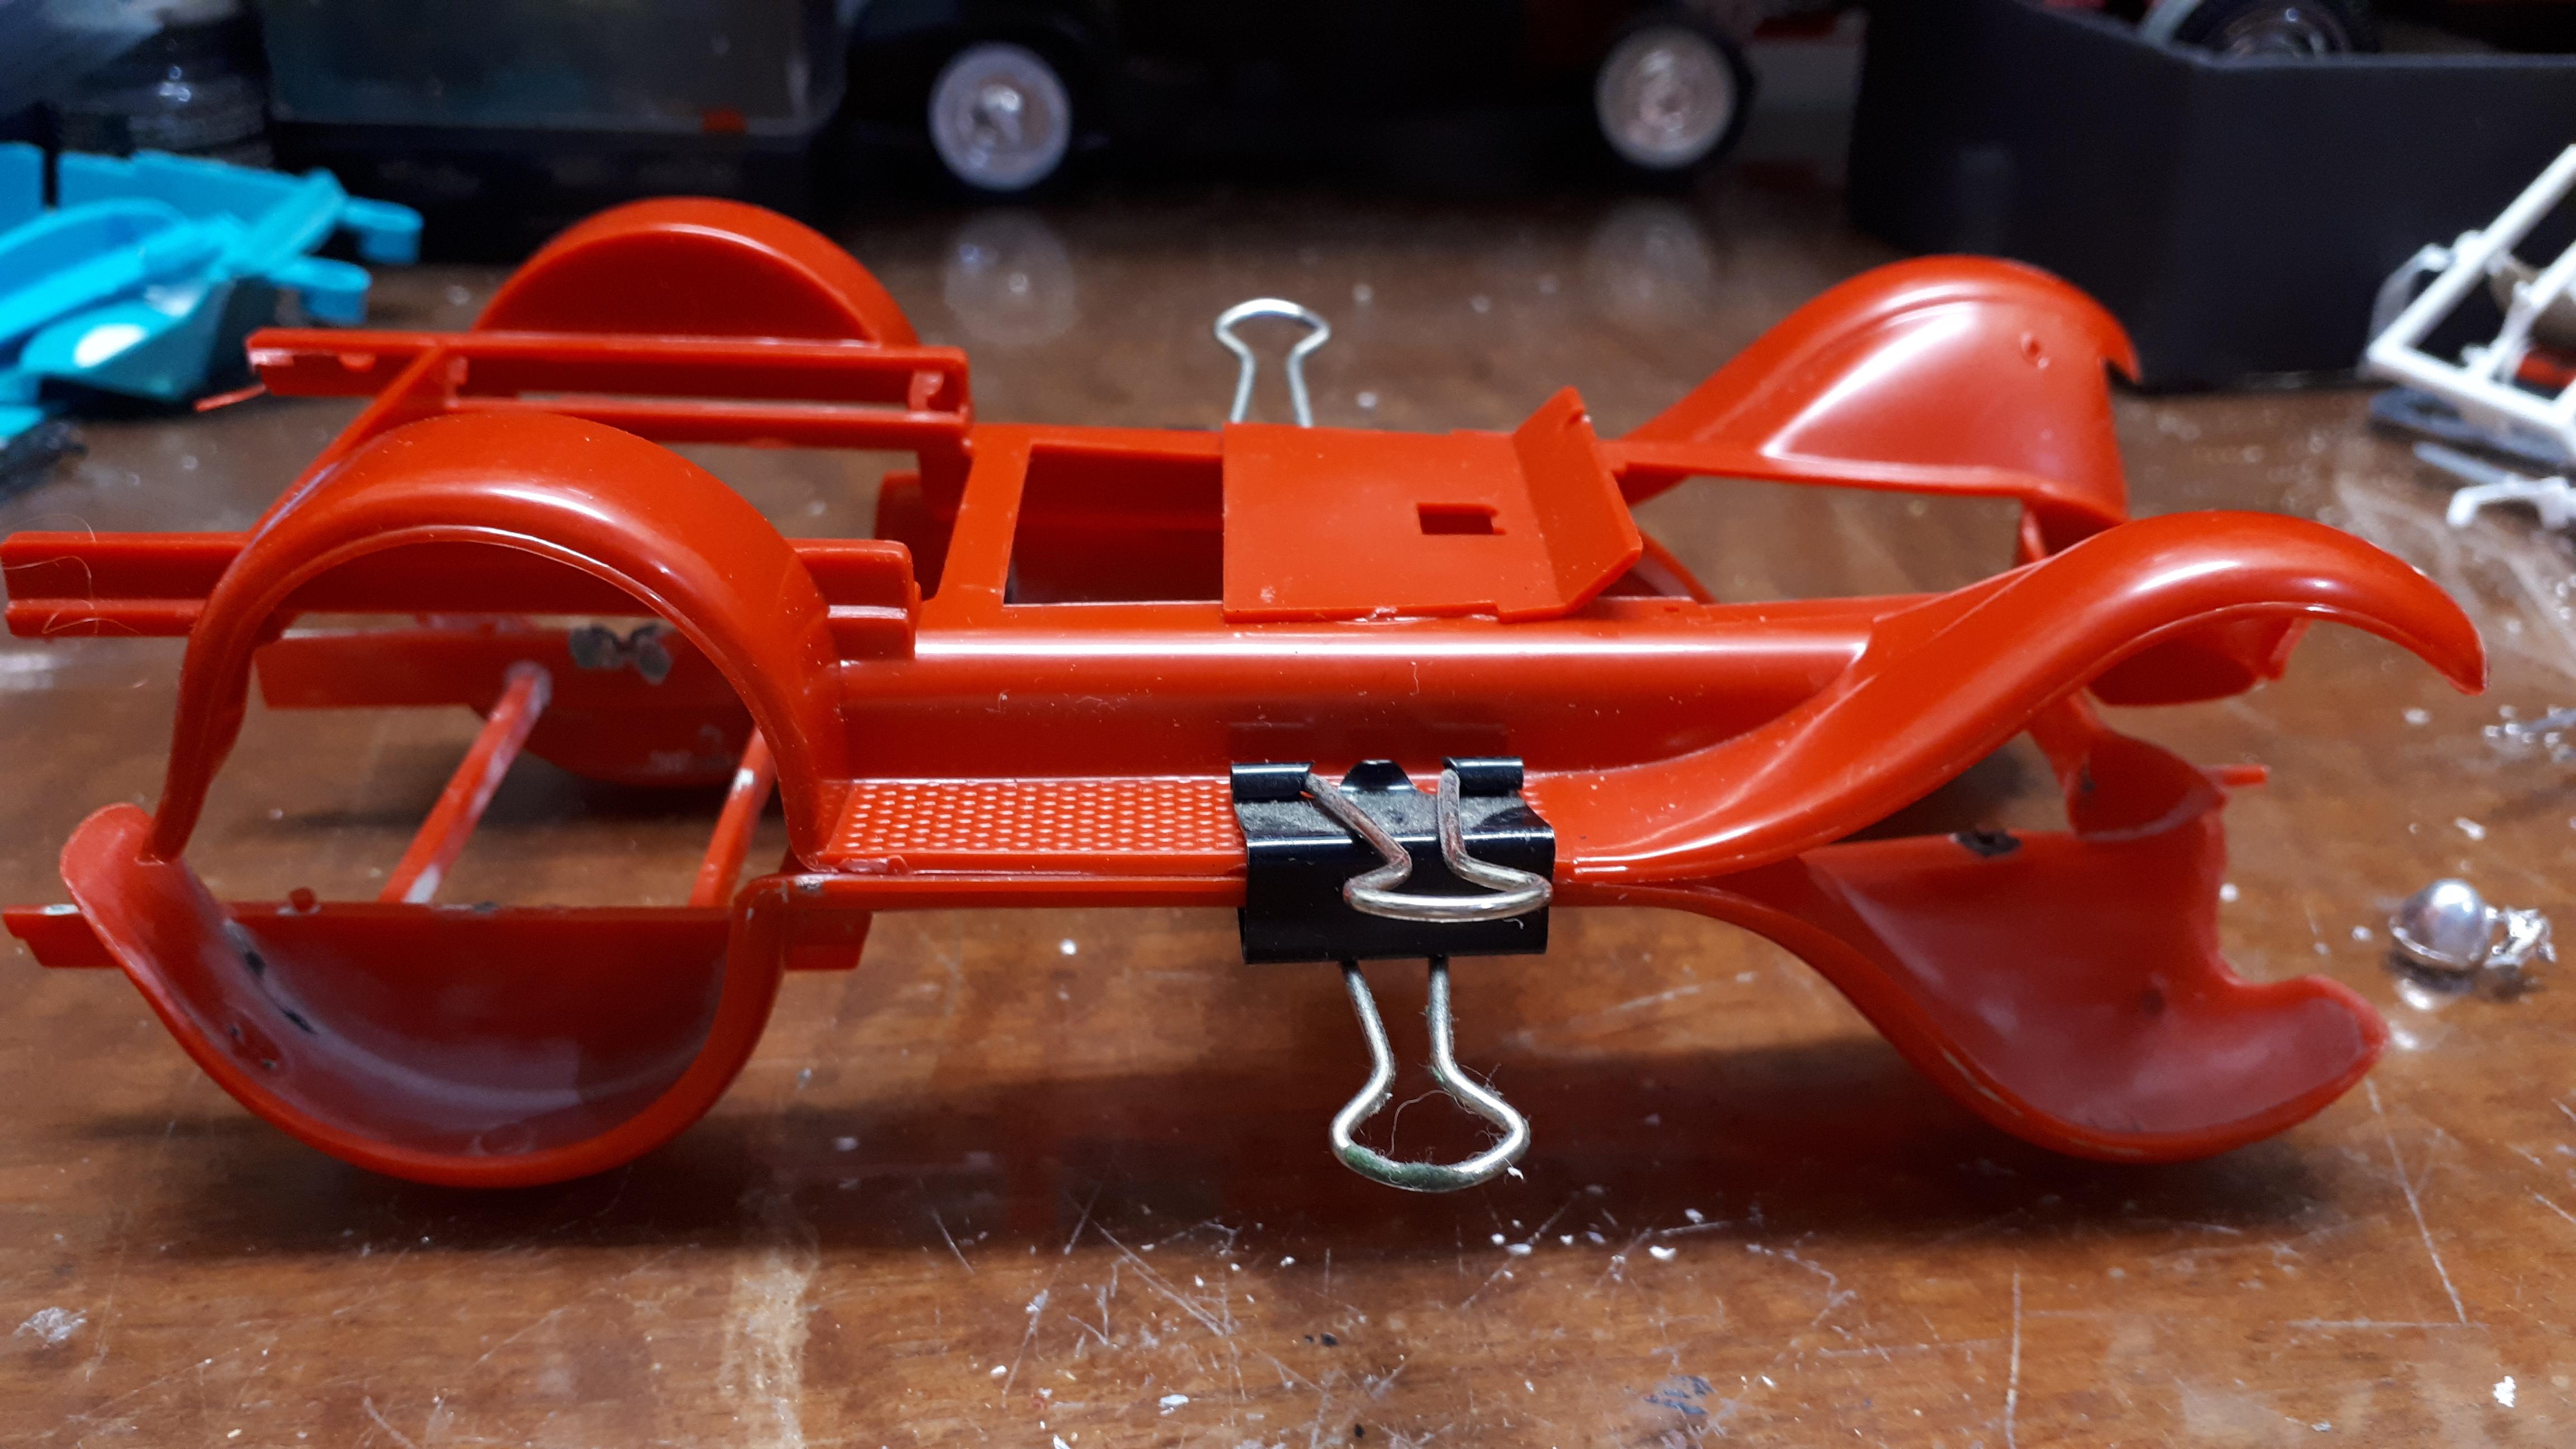
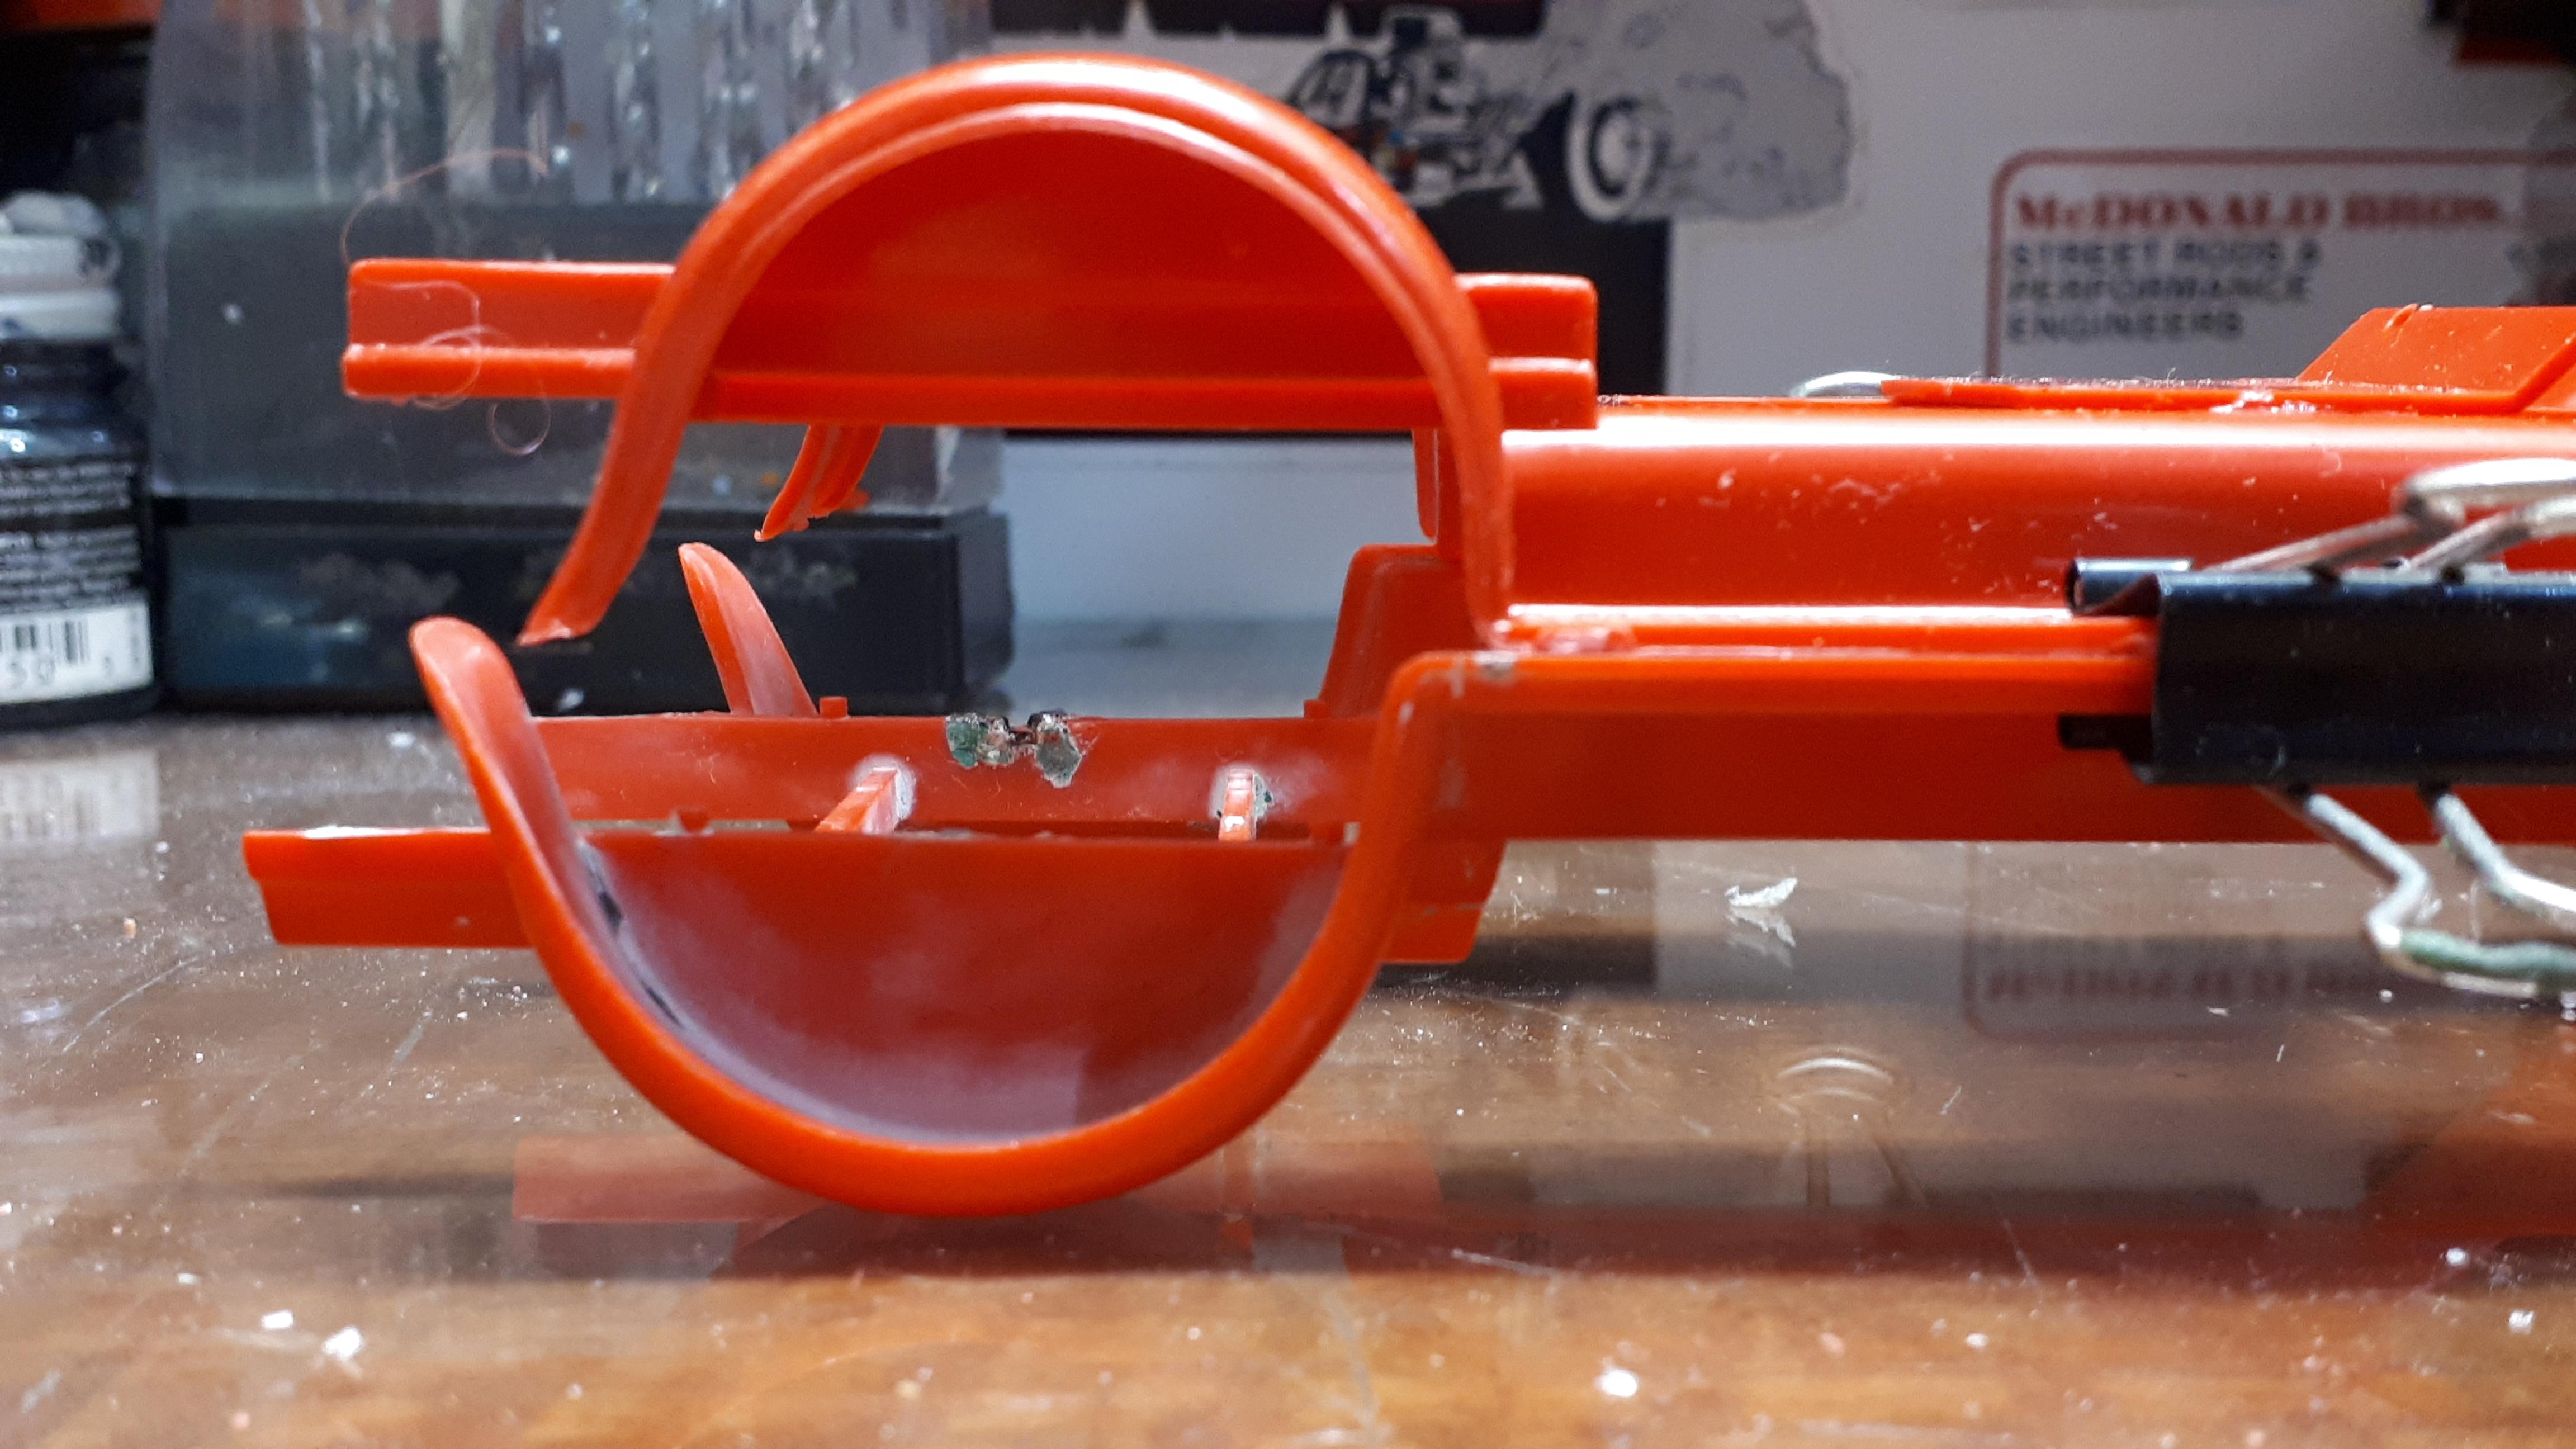
O.K., guys, you are going to love this one! i spent some time tonight gluing the Jag rear end together, sanding seams off the V6, basic stuff. I then started trial fitting the extended cab to the Revell fenders and determined that it just wasn't going to fit - the lower corners of the cab were going to hit the fenders no matter what I did. I started digging through my Revell Model A PU box - there are roughly enough parts in there to build four of them. I picked up another red fender unit and it suddenly dawned on me that it was not a Revell one, it was a Monogram Boss A Bone version. Must have got dropped in there by mistake. Then a light bulb went off. Maybe a 1/24th fender unit would have enough additional length to allow the cab to fit. It did! But would that make it out of scale with the rest of the cab? Amazingly NO! The Monogram and Revell fender units are within thousandths. of a mm to the same width. Who'da thunk? But wait, there's more. The Boss A Bone unit was in pretty good nick, a remnant from my younger brother's model building days and quite clean after I had stripped. it. I avoid chopping up "historical" parts if i can find something less precious. I went back to my Monogram pickup box and found, of all things, the fender unit from a Bandai Blue Beetle. Yep, the Japanese company did a pretty good, pretty detailed knock off of the Monogram kit. It was originally powered by the ubiquitous Mabuchi can motor that the Japanese infected their kits with. The very dark blue plastic has a very thick coat of Testors Bright yellow on it, and serious glue burns from the step plates that I glued on in my teen years. And it DOESN'T have the exhaust holes in the top of the valance panels, so no need for filling So now I'm going to sand off what remains of the running board detail for the smoothie one piece fender unit look and I will be one step closer to getting all these bits to work. Only down side is that the Revell roadster frame wont fit at all but I am happy to rework a Monogram one, still retaining the running gear I had previously planned. Check these pics out - what a fluke!
-
Back to the 80's (aka the Bodacious Billet Build-off)
alan barton replied to Mr. Metallic's topic in Community Builds
I will be joining this later in the year with a Buttera /Corno roadster that is well underway but I have a bunch of other projects that must get finished first. In the meantime, love Jackson's Tudor - that's two Perth guys in the same thread. World domination will be ours! Cheers Alan -
Madliner: a 60 Starliner & Alternomad custom mash-up
alan barton replied to Claude Thibodeau's topic in Model Cars
Ahh, Claude, you've done it again! And, like Oliver, i am now wondering what a dead Alternomad body in my stash could be turned into? Doesn't hurt that I love wagons! The shape at the rear is a natural for a conversion like this and with your typical craftsmanship, the whole thing comes together. Cheers Alan -
Solo Speedster the 'Salinas Special'
alan barton replied to Rocking Rodney Rat's topic in Model Cars
Wow, that is pure, styrene porn! Yes, it would be a blast to drive around in, even if you were a physical wreck after the first fifteen minutes! The chipped rusty edge of the side panel where the hood closes on it - who even thinks of this stuff? You do, Rodney, you do. The rear exhaust brackets are so delicate, you got the bodywork done inside AND outside, the understatement of the single carbed, stock exhaust flathead (about all you would need to scare yourself in this roller skate!) This is the new benchmark. Just love it! Not to take anything away from your thread, but I can't believe the similarities with a project taking a break on my bench at the moment. It started out as an MPC 29 Lincoln, yep, another Gangbusters series just like your Chrysler. It is getting the Lincoln V12 from the Monogram 41. Haven't started the frame yet but it will have more of a dry lakes modified feel than the circle track racer inspiration of your single seater.
-
Hadn't thought about the extended fender unit, to be honest. The thing is, I have never been particularly adept at body work in the close confines of detail such as the diamond plate running boards of this little truck - then again, could be time to go for smoothy running boards, which would solve that problem! When I trim away the extension of the pickup bed rail to let the cab drop down I will consider it but I must admit I have a fondness for the short length of a stock Model A. Still, no harm looking, you just never know! By using the Jag I can really put the rear end crossmember wherever I choose. Will be going for a moulded in roof and stubby visor in body colour, body colour grille and headlights, and probably a straight headlight bar, although I am not sure if I still have the one that came with the kit. Cheers Alan
-
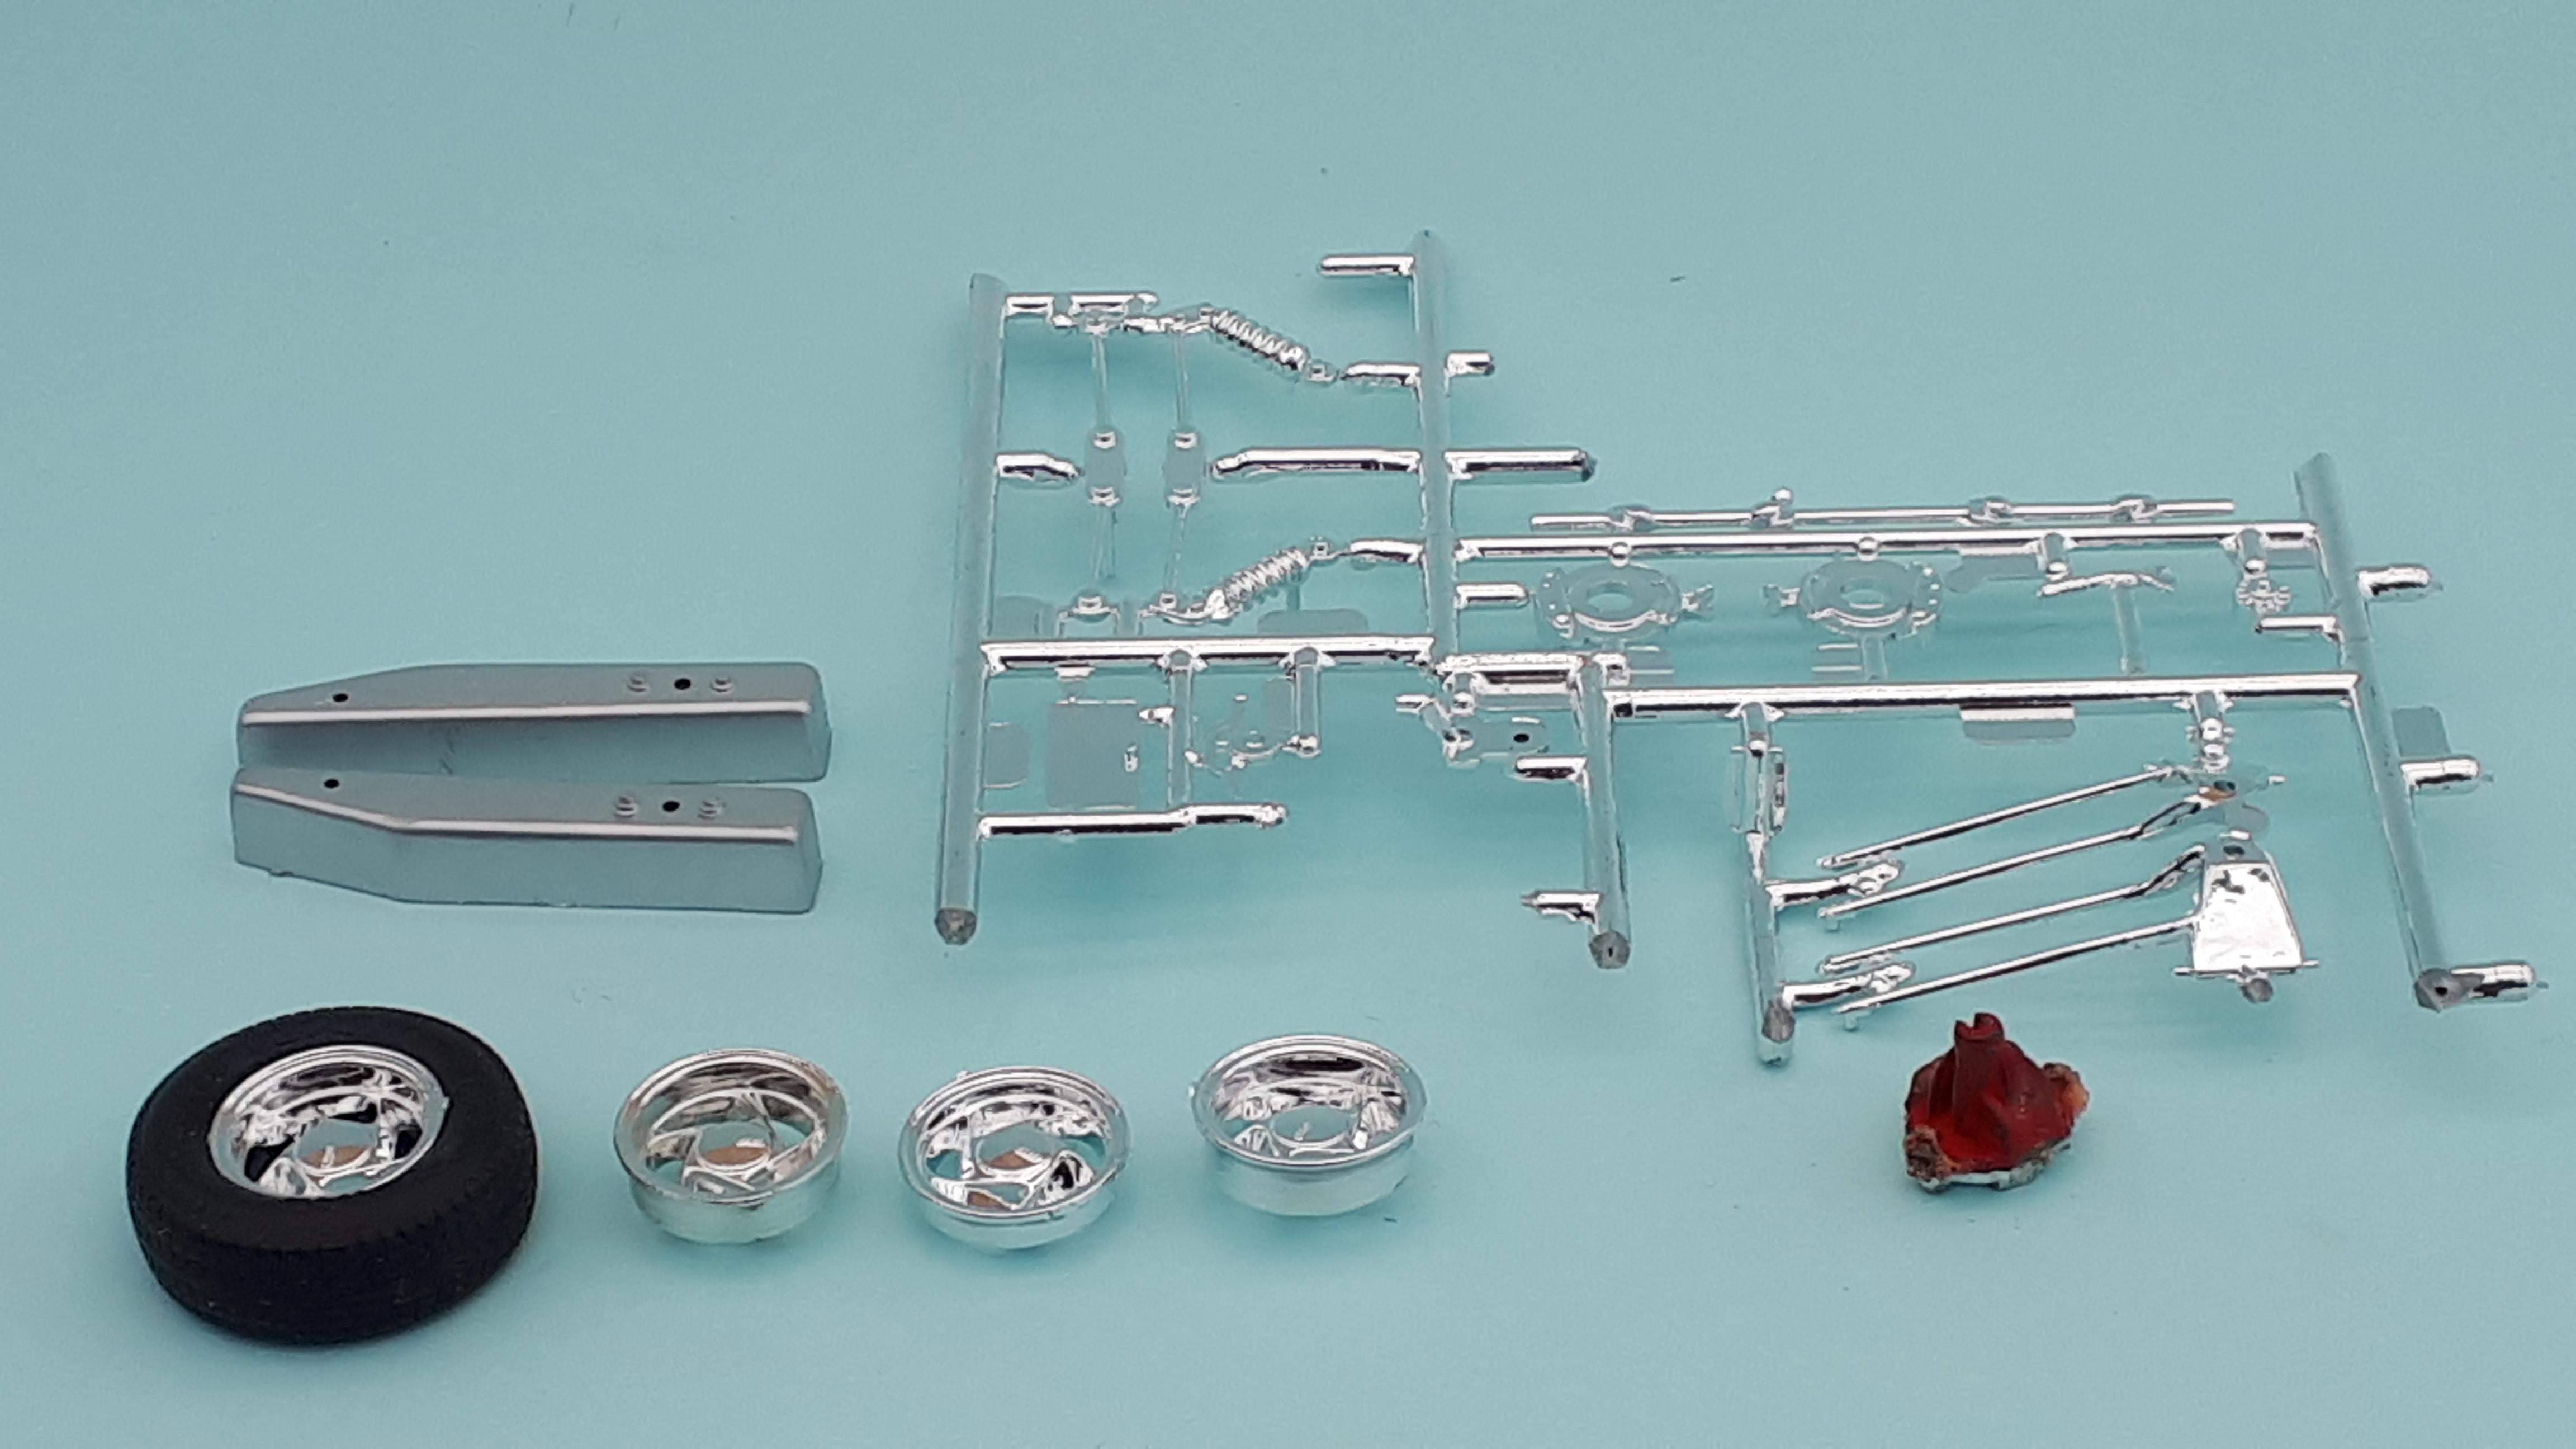
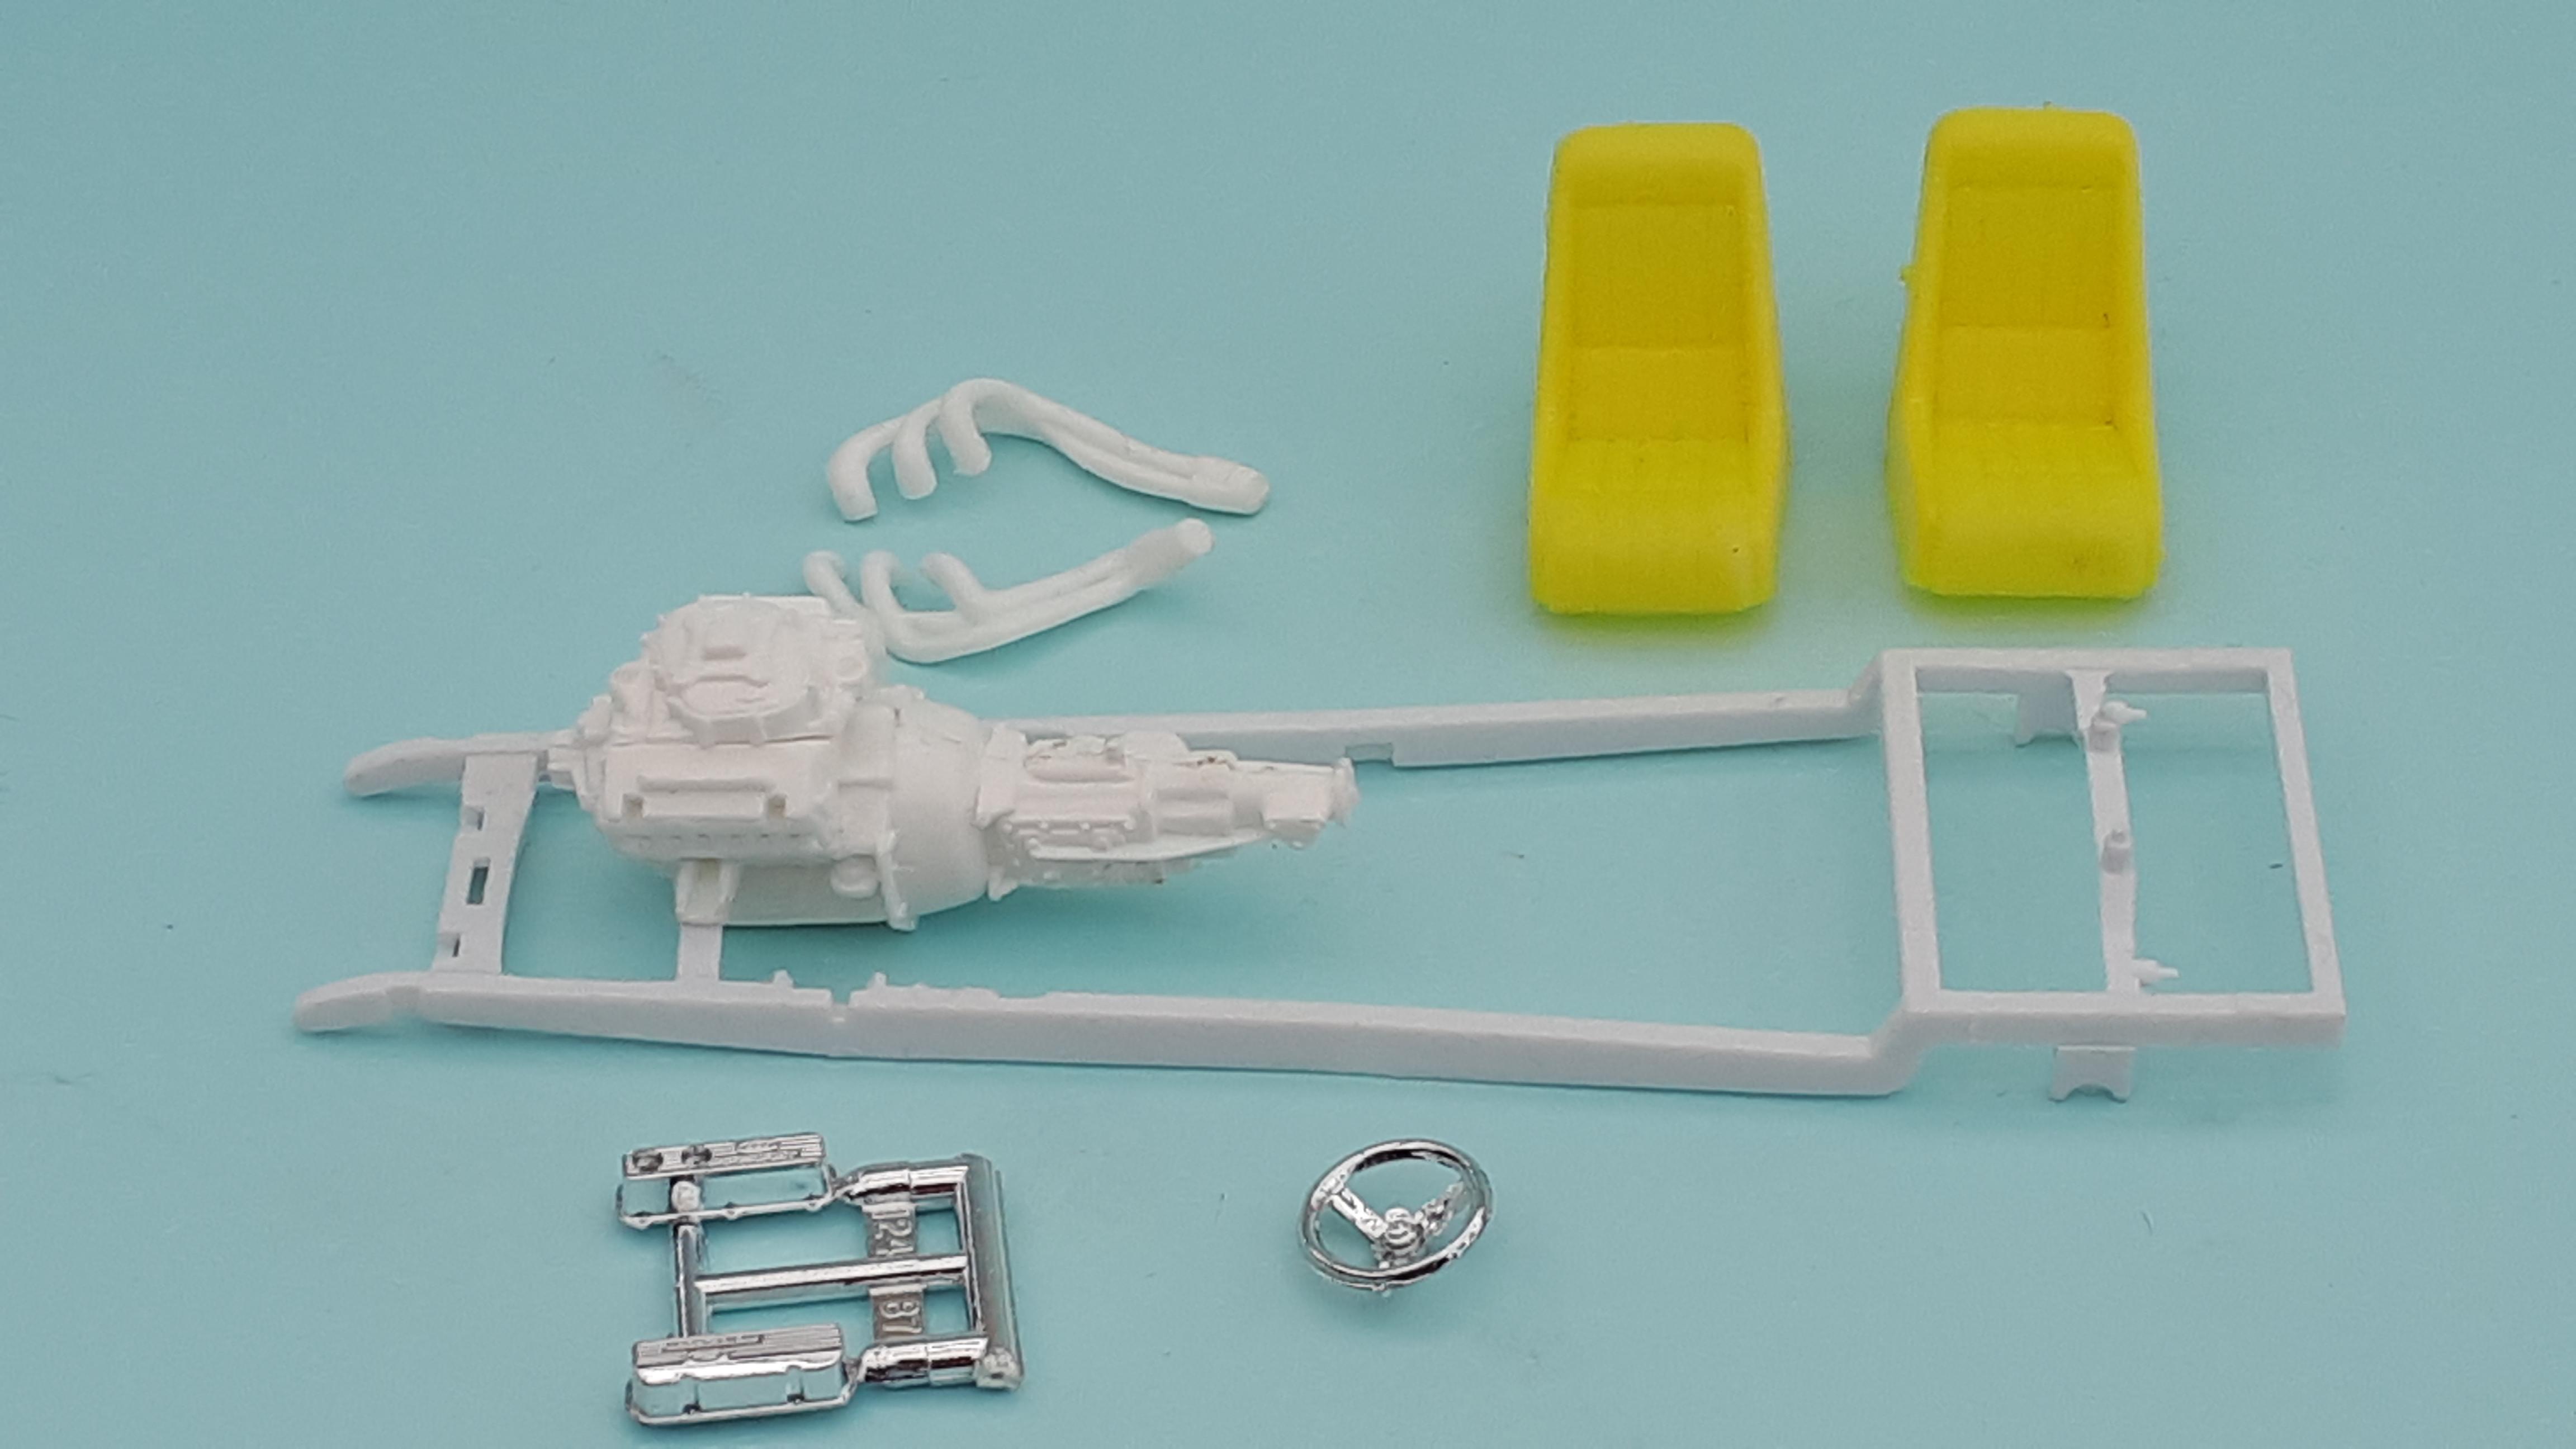
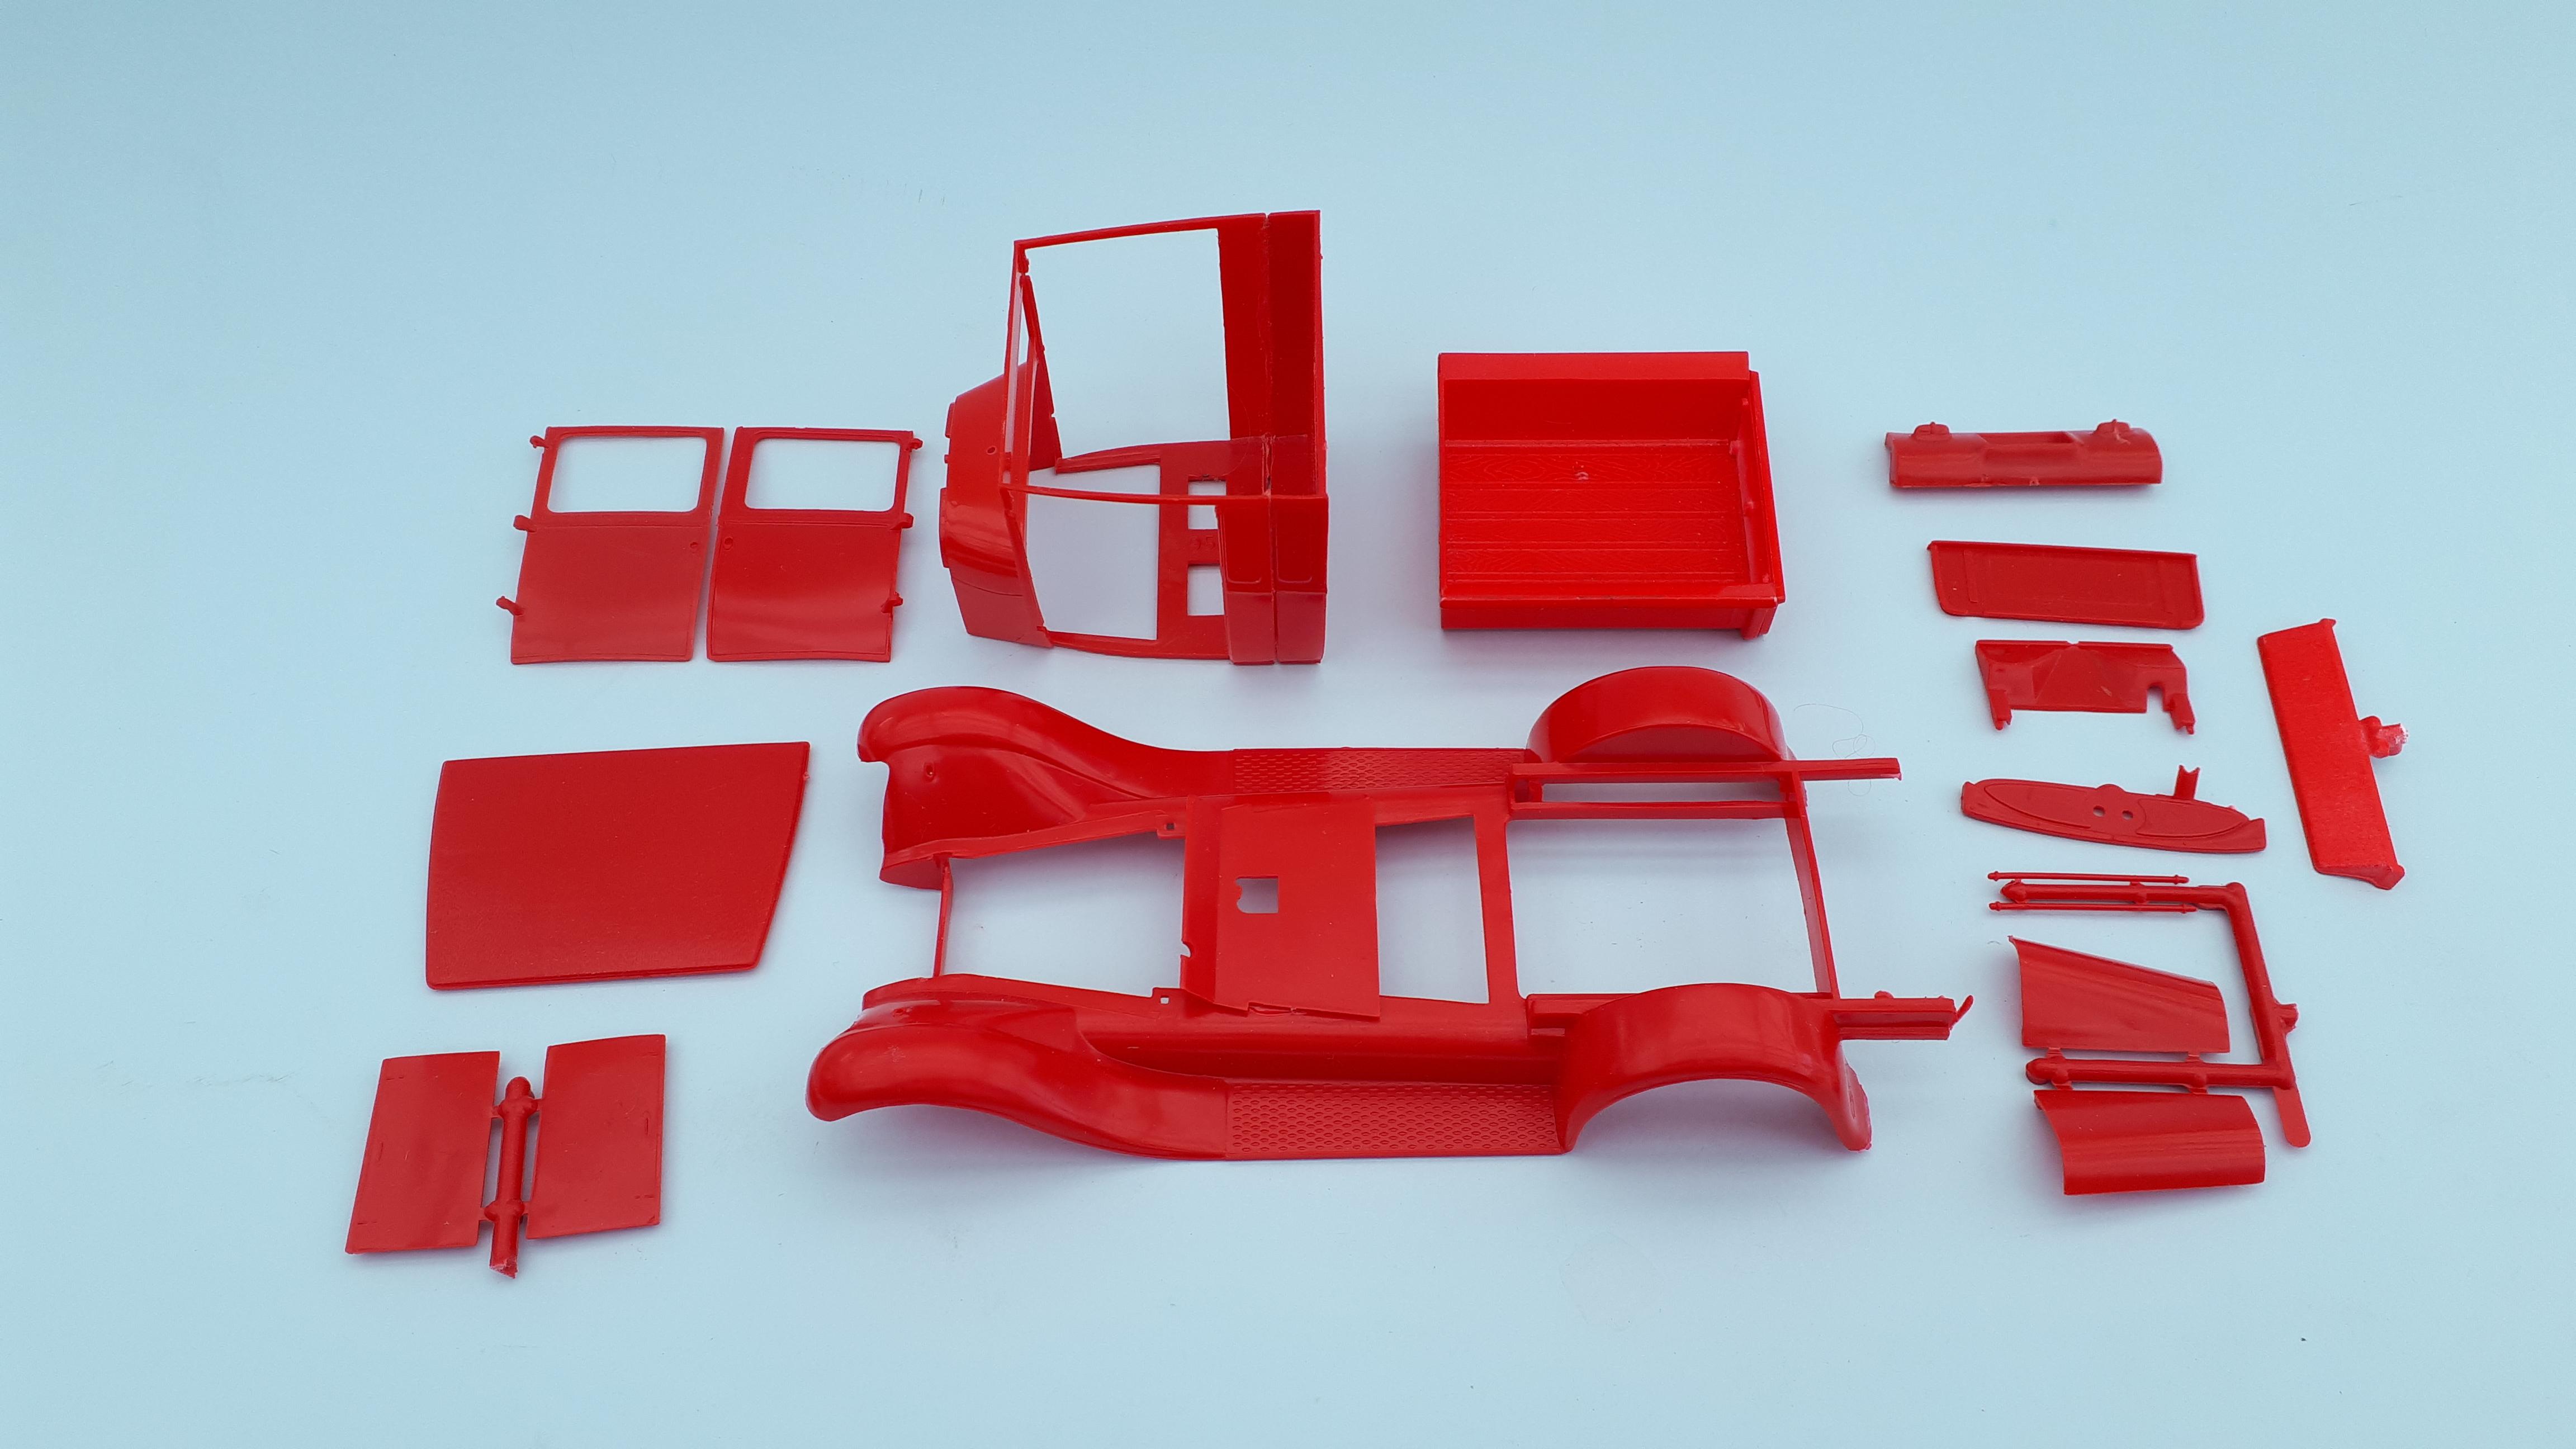
For running gear, I will forgo the Revell Model A pickup kit altogether and kit bash this combo. Revell 29 roadster chassis as recommended by Kit, Buttera T series Jag IRS as well as the front seats, steering wheel and saddle tanks - what could be more eighties than saddle tanks? To fit with a Boyd style dare -to-be-different theme, I dug out a Ford V6 from the Revell ASA Thunderbird. From what I have read this is really a Chevy V6 with Ford rocker covers but I will move the distributor to the front to keep Tim's blood pressure down! I think the wheels might be from a Revell 69 Corvette only because of the colour of the plastic. Unsure whether to keep the high polish chrome or go for billet aluminium - knowing me I will try two of each on opposite sides. I used to be indecisive, but now, I'm not so sure! Not shown but I will probably use the Superbell dropped tube front axle and four bars from the Revell 32 series. Tubes were more common than I beams in this era. No idea of colour just yet but I keep seeing red! Cheers Alan
-
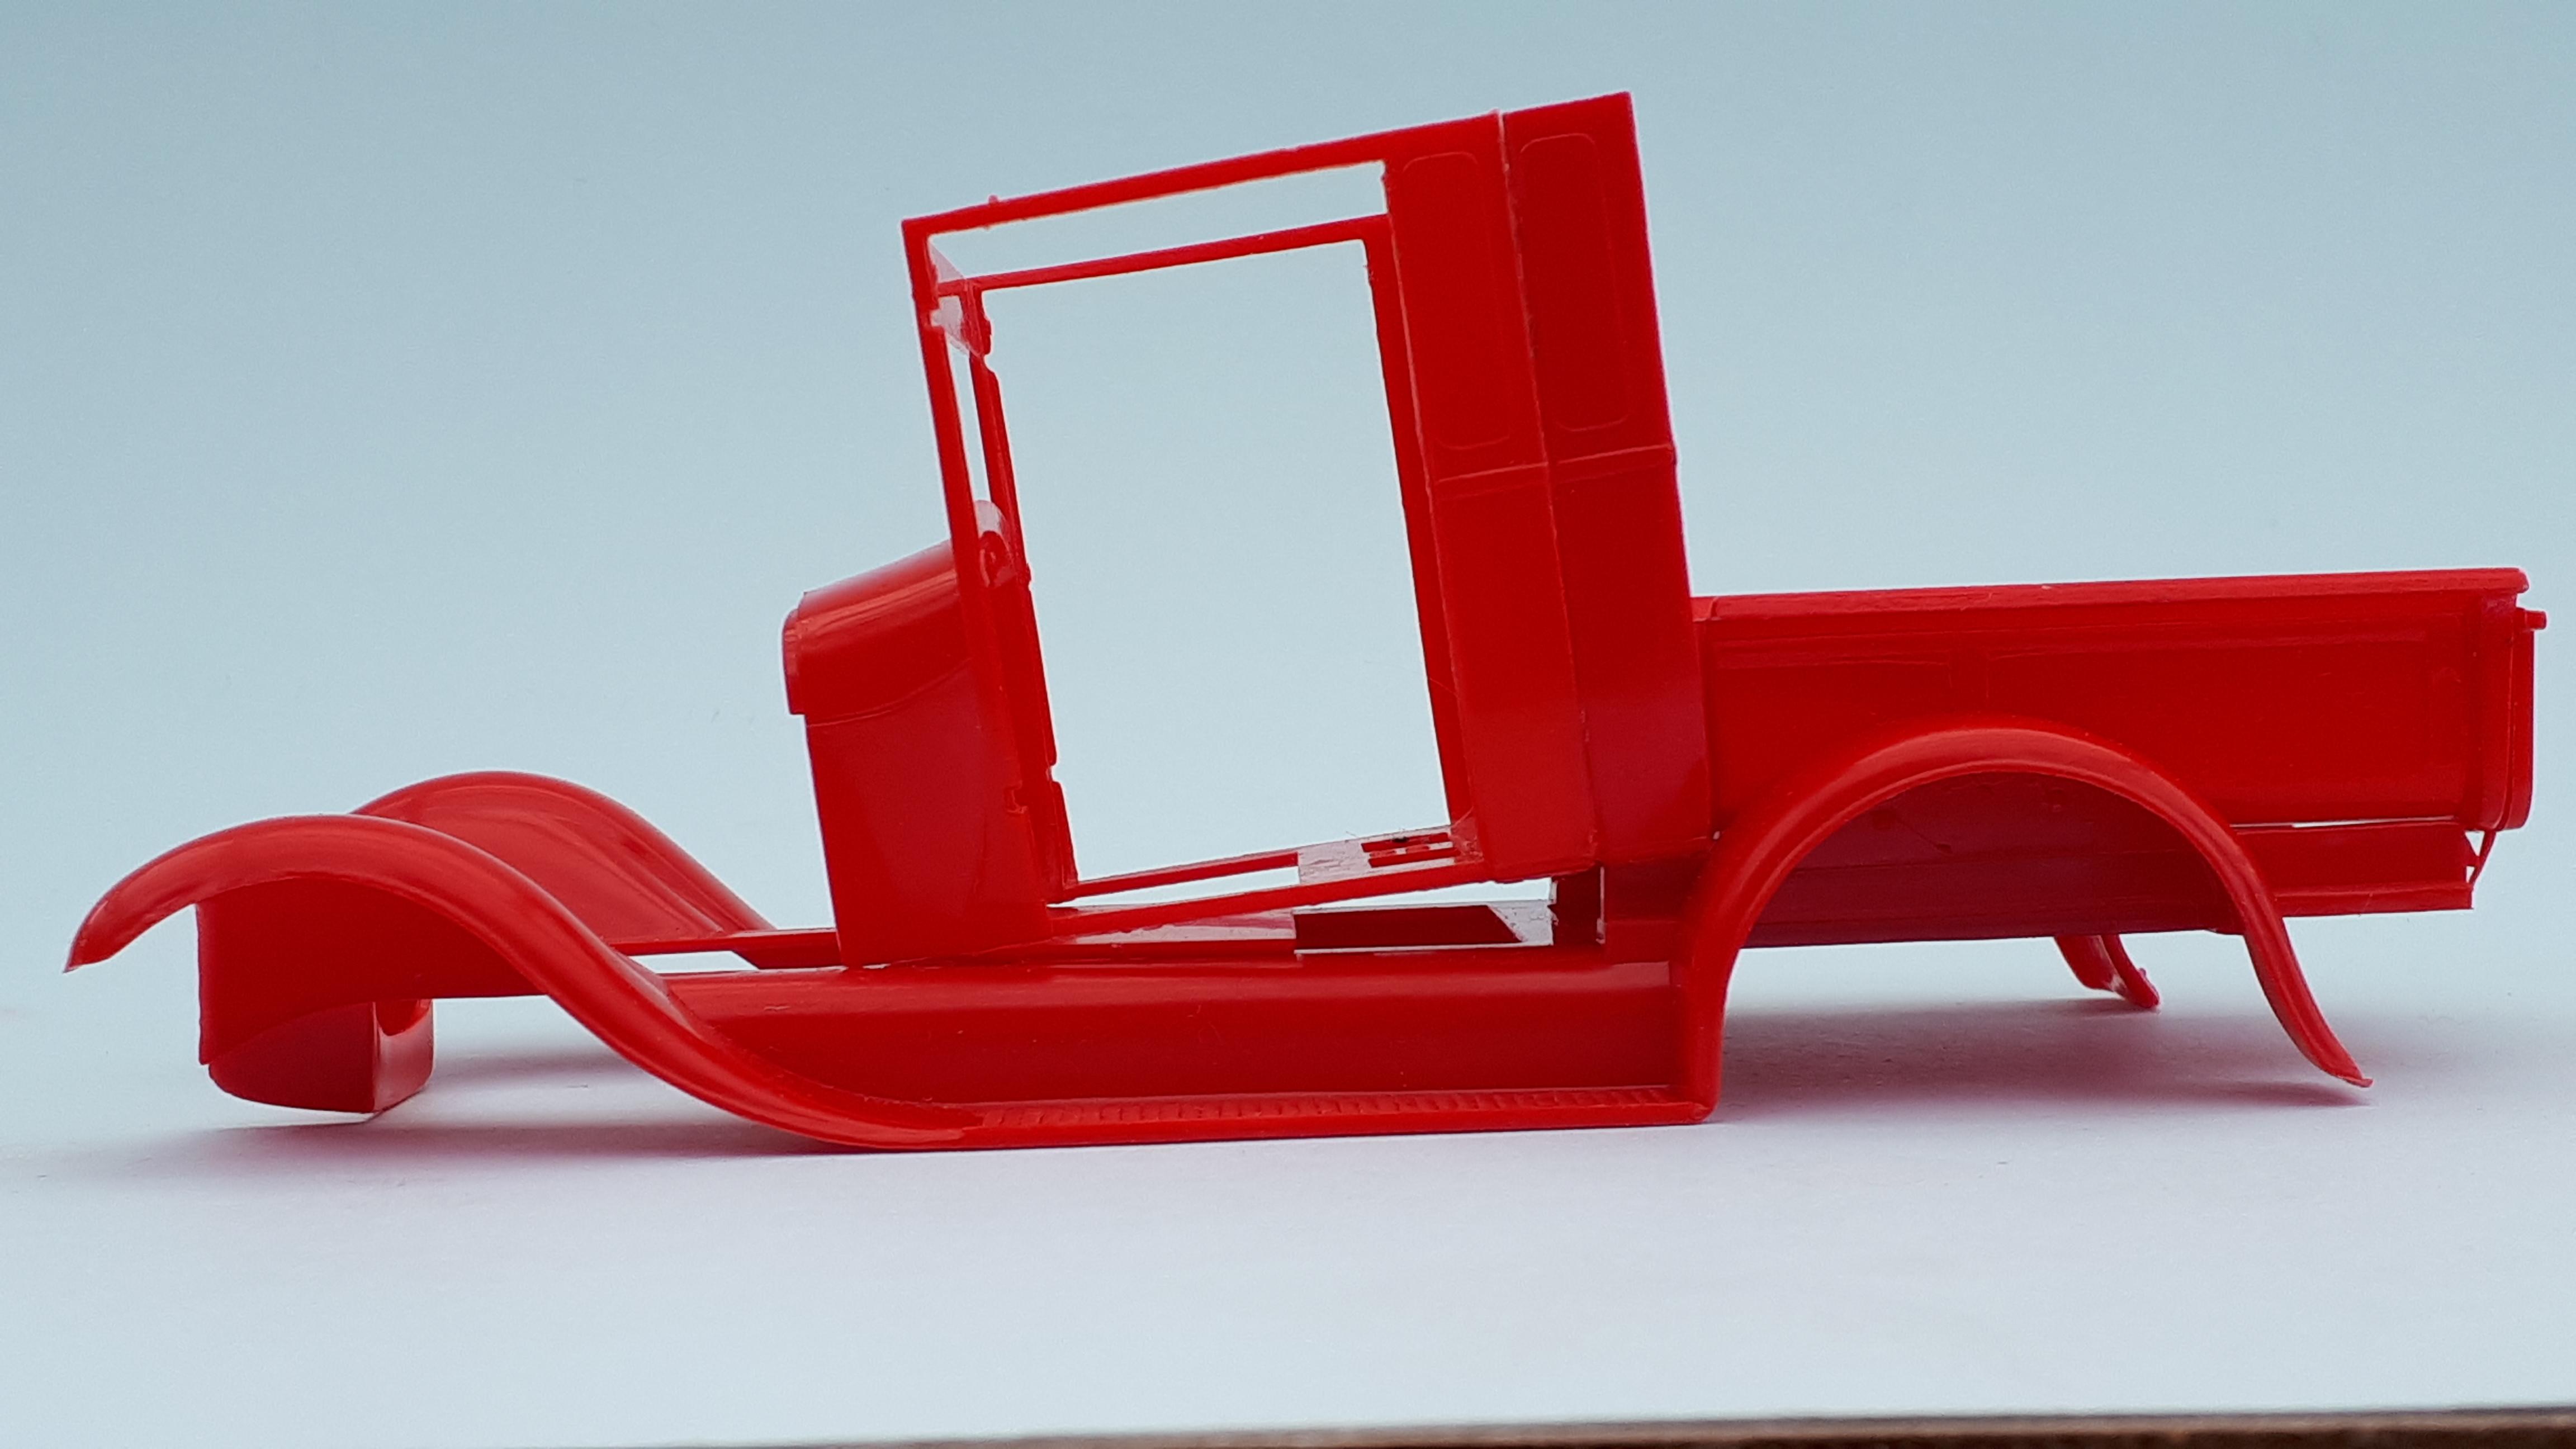
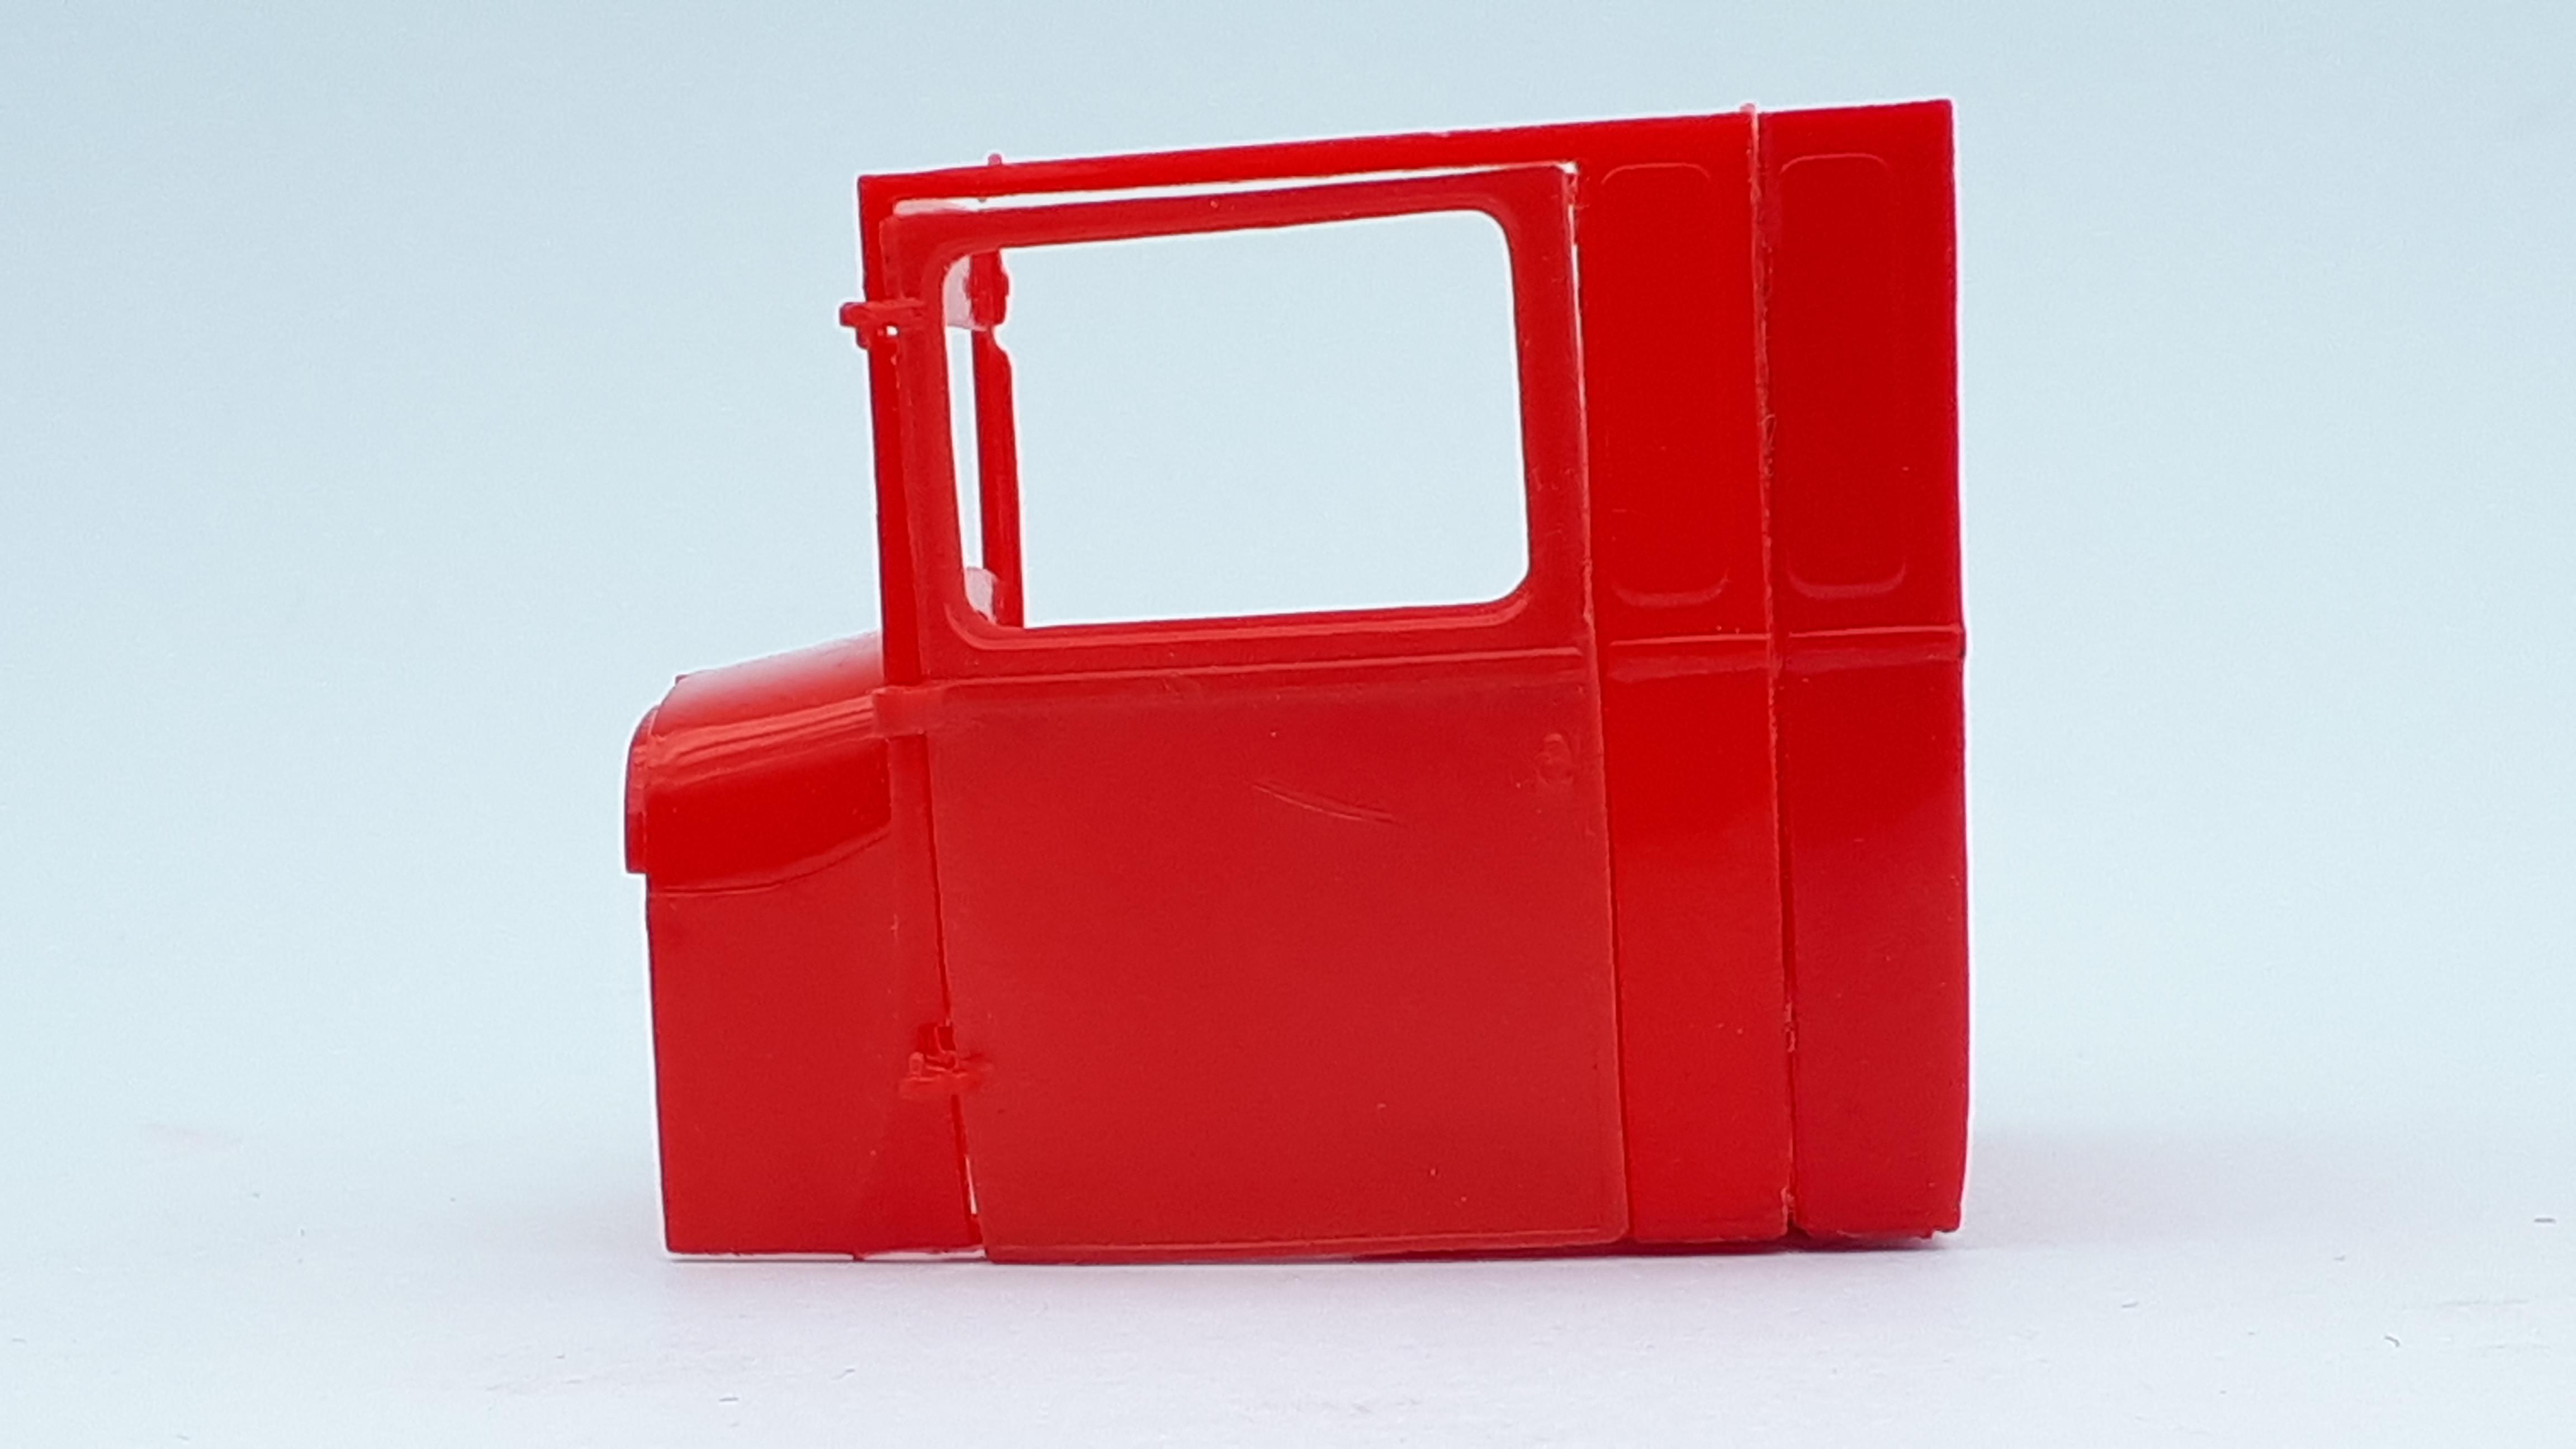
In a pair of happy coincidences, I will have the right parts to complete a build that I first contemplated back in 1992 after photographing a real rod at Valla Park Rod Run on the east coast. They had used two rear cab pillars to make an extended cab to suit the owner's plus-size frame. I recall driving my roadster back to Western Australia and getting two pickup bodies out, cutting and joining them and for whatever reason, putting them away until last night! I think this will add a nice, eighties appropriate twist to the rod - after all, if I photographed it in the early nineties he probably built it in the eighties, right? The second totally unexpected twist concerns the pickup bed. This came in a box that a mate gave me and some painting had been done, and the pickup bed had been shortened AT THE FRONT! Turns out it was cut in exactly the right place to match up with my extended cab, as you can see in this bodgied up photo. Ya can't make this stuff up. The original builder had used the most recent white plastic version and sprayed a so-so coat of red on the body panels but that was as far as he got.
-
I'm not sure how quickly this build will go but looks I've got the right parts to get there. The vast majority of the body components will come from a Hot Rod series issue of the kit - the smooth hood sides and tailgate in this issue are made for the job.
-
'34 Roadster Pickup
alan barton replied to JollySipper's topic in WIP: Model Trucks: Pickups, Vans, SUVs, Light Commercial
TJ, if I could respectively make a suggestion, when you chose a windshield frame to use, maybe reworking an AMT or Monogram roadster one, or even a Monogram 30 A tourer, it will look so much nicer if it is laid back just a touch - a couple of degrees off vertical will look a lot nicer than straight up like a farm gate. Pretty much the only Fords with vertical windshields were Model T's but a lot of modellers stand them all up straight. Cheers Alan -
Tim, you're stealing my thunder! Have been working on the Buttera roadster (actually a Buttera/Corno combo to be precise) for about four years now and it got it's first coat of primer last week! It has been my "going away" model. When I have to work at remote minesites, I take it with me to while away the evening hours but from here on will be finishing it at home. Turns out to be a VERY complex model seeing as how it looks like such a simple car! Meanwhile, started hunting through boxes last night and hope to have photos of the components up on this thread in the next day or so. I have a few surprises..... And you are absolutely right about building ourselves into a corner - if I see one more maroon or Washington Blue chopped 30 A coupe with black steel wheels and hubcaps ........ Kit, I will be unashamedly copying some of your tricks straight across to my project, especially using the roadster frame and the notching for the pickup rails. Thanks for the tips! Cheers Alan Cheers
-
Andrew, this has been an incredible read so far. I have three tow trucks in my collection, one a resin conversion and the other two largely scratchbuilt like your own. I went through EXACTLY the process you have gone through here, except that I was fortunate enough to stumble on the exact style I wanted to build in a car park one day and got a whole bunch of close up photos, so I didn't have to photograph the TV but, hey, what a great solution to a problem. I can't wait to see your finished photos because everything I have seen so far has been amazing. Your dirty interior is easily the best I have ever seen! Congratulations on a beautifully executed model. Cheers Alan
-
Corvair Modified
alan barton replied to TonyK's topic in Other Racing: Road Racing, Salt Flat Racers
I'm a big fan of modifieds and have my own version of the second generation body style. Love the proportions of your model and the colour really suits it. Cheers Alan -
Yeah, you've shamed me into it! Won't be home til, next week but I have a few ideas that haven't been seen on this thread yet. I'll just push a few older projects back a bit, it won't be the first time! Cheers Alan
-
Hi Bob, I think you are on the money when you say 1/25th or larger. If you tag it behind a decent sized land yacht of the sixties, it looks fine. Trailers are easy. Use Evergreen rectangular strip ( I think I used 167 but dont quote, me, I am not at home at the moment to check!) and a simple magnetic jig that I have. Lay down a main beam first that is the length of your boat plus towbar. Then cut two side rails to the length of the bottom of the hull and space them out accordingly. Some crossmembers, simple tube axles ( I don't always worry about leaf springs because they tend to lift the trailer too high and make the boat look even bigger than it is!) and you are well on the way to a trailer that will fit your boat perfectly. And a lot cheaper than buying a trailer and cutting it up! Cheers Alan
-
Yeah , what Tim said, nailed it! The things that worked for me are the lack of a headlight bar ( I like headlight bars but this is so right for the 80's) and the billet dash and taillights. I have these pieces in my stash, it is time I used them! Did you use bits of Evergreen or similar to replace the working hinges? The whole car sits right, looks right and just flat works. I may still have a crack at this! Cheers Alan
-
Tim, it was mostly fun! Getting the hull narrowed and cleaned up was frustrating in spots but as you have always espoused, it makes a big difference to the final appearance. It probably would have been finished years ago if I had taken your advice when I first got it! Revell kits from this era are notoriously fiddly but when you persevere you are rewarded! Tom, if there was any chance of popping a photo up here, I would love to see it and compare - it is one of my favourite parts of modelling - the ol" "compare and contrast". I would especially like to see it hooked up to your tow vehicle. I don't have a tow car nominated for this one yet. When I do, I won't be able to do my normal colour pairing because we can no longer buy Testor's paint in Western Australia and although I squeezed two hot rods,, a boat and a trailer out of the one can, there is no more where that came from! Thank you Steve, Nick and Carl for your comments. There seems to be a lot of interest in these hot rod boats, it's just a shame that we have to hide them in "All the Rest". Cheers Alan
-
One thing you have a really good handle on is colour vison! You could obviously "see" the colours right back when you painted the engine block pink. The whole car is right on target - like you, can't wait to see it finished! Cheers Alan
-
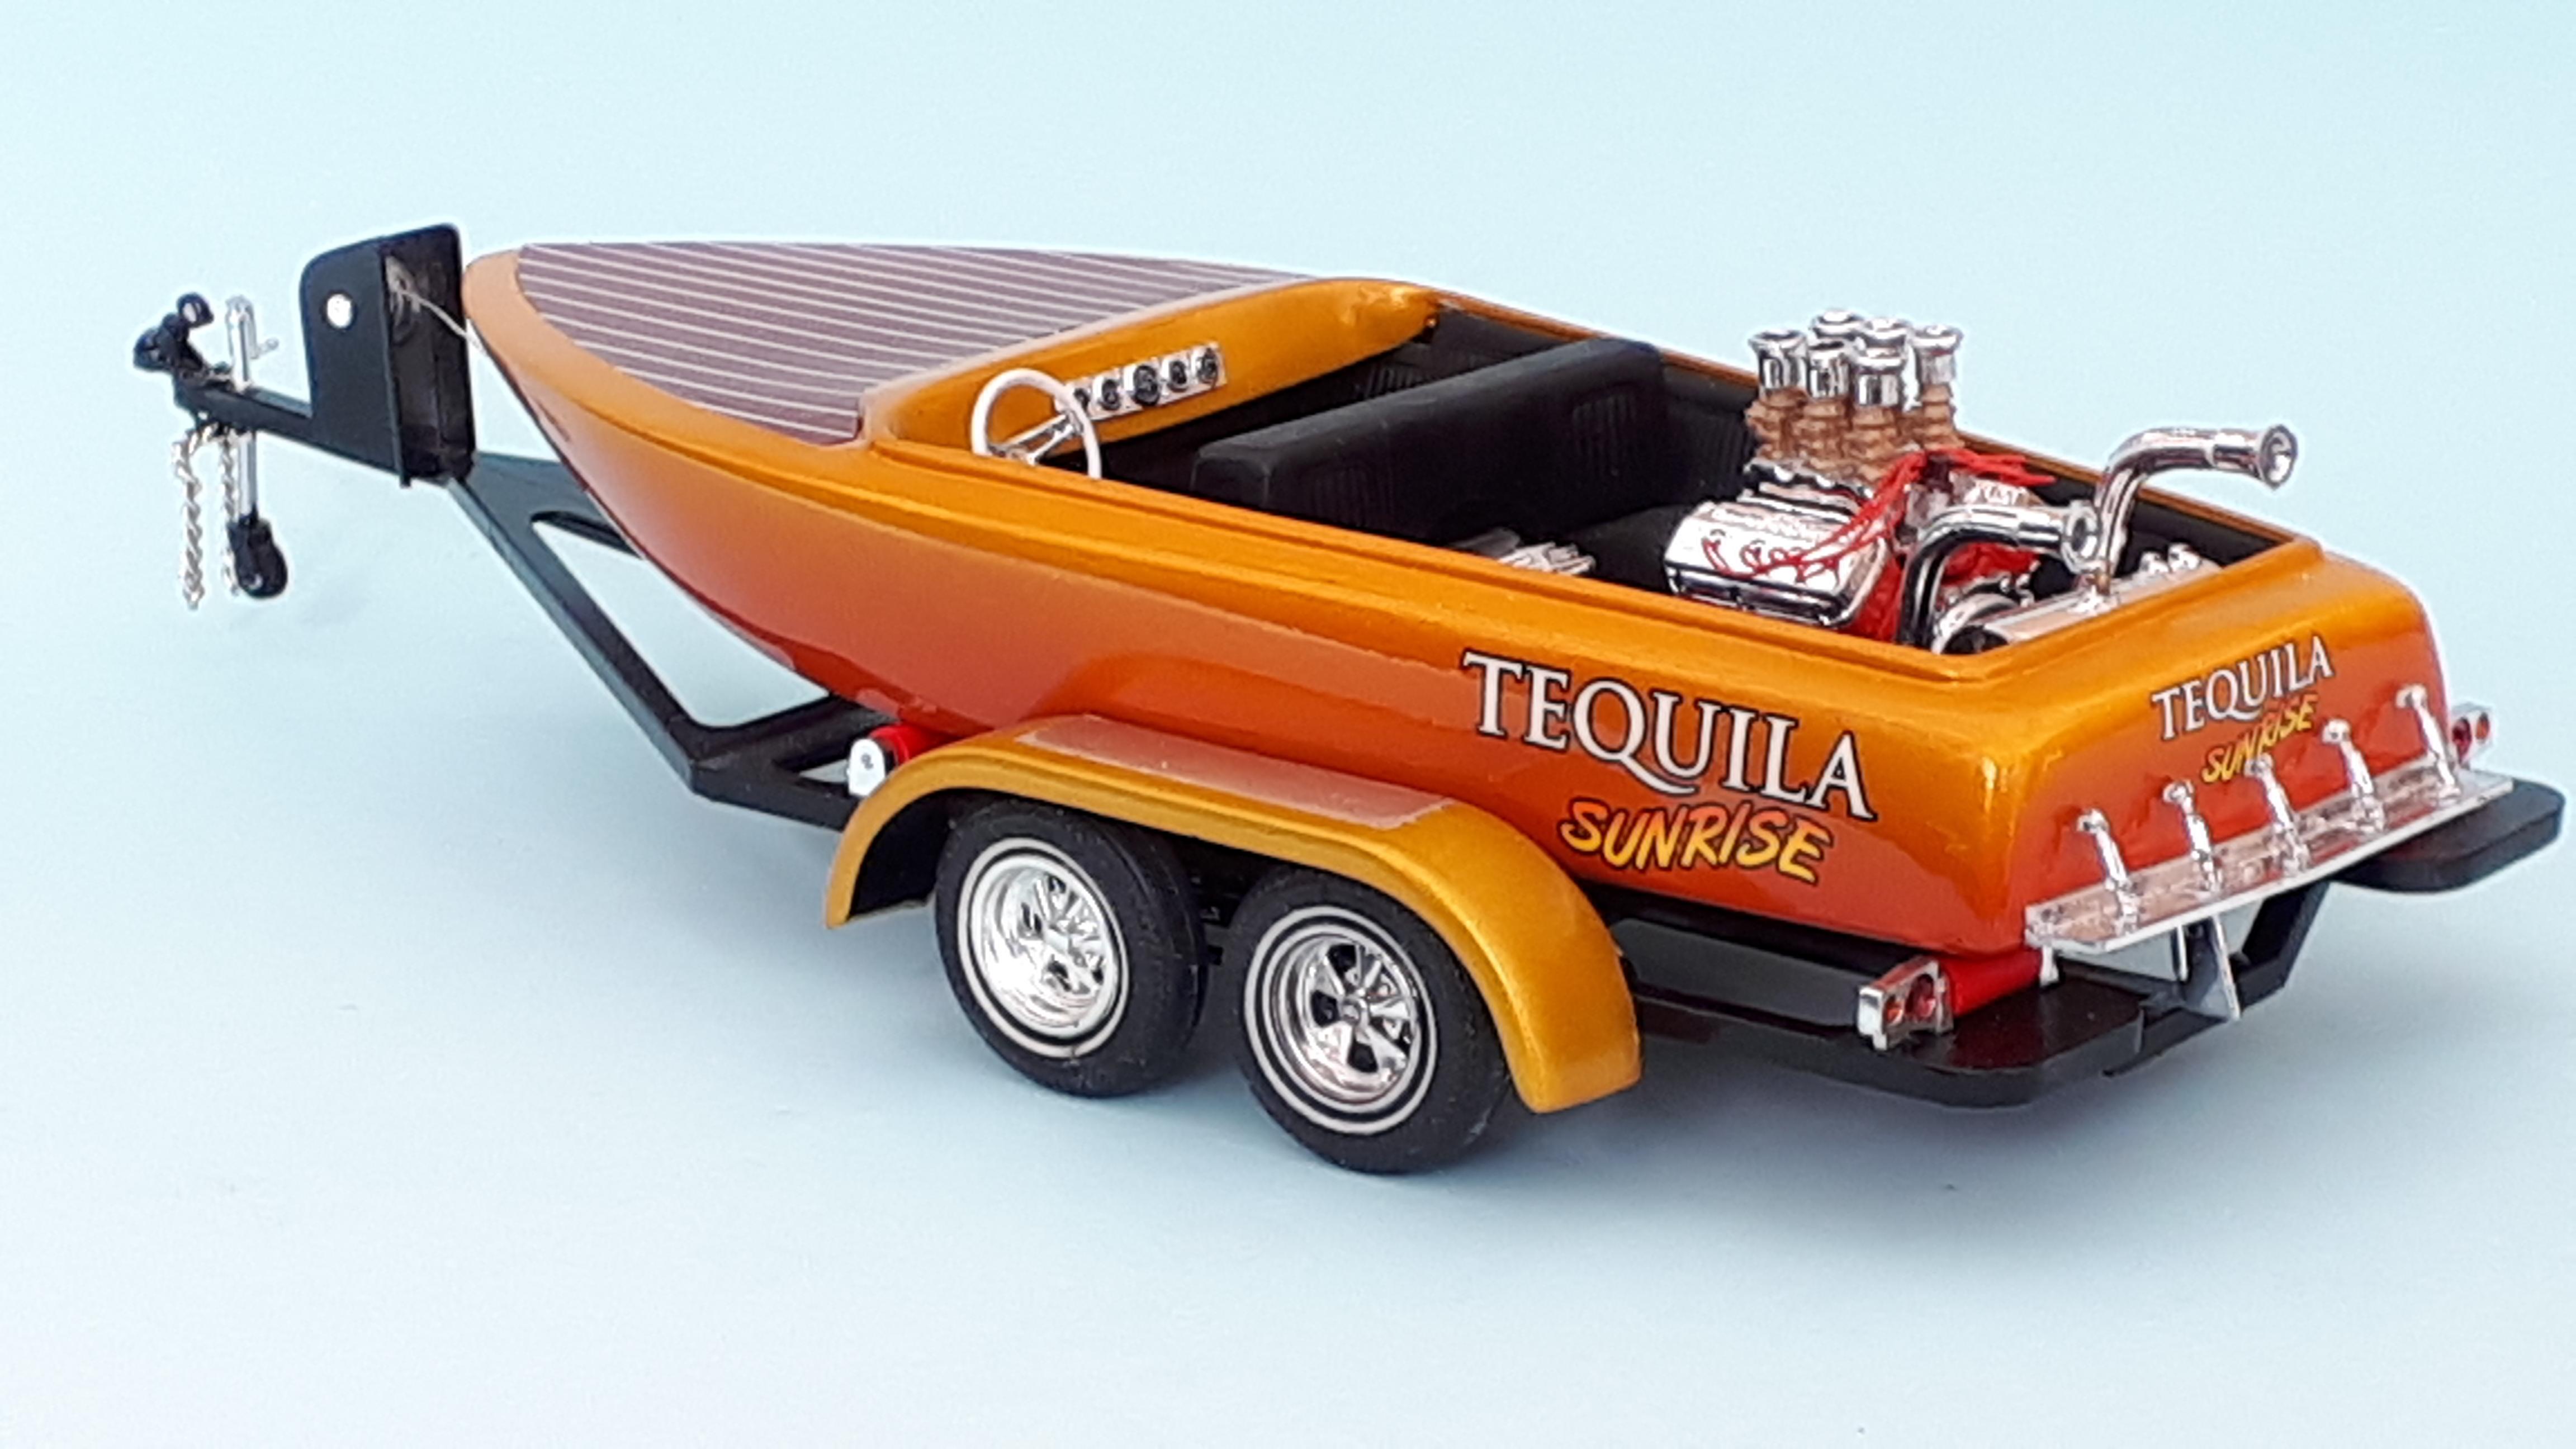
Thanks Larry, David, Chris and David. It is always nice when your peers enjoy your efforts. I wish you could see it in person - the colour change from orange to gold is much more obvious in the light and really gives it the look of a Tequila Sunrise. I am mostly a rattle can guy so anytime I get a nice finish with an airbrush it puts a smile on my face. In this case, Testor's rattle can pearl gold, Tamiya Orange airbrushed to a fade away and Testo'rs high gloss clear rattle can to finish. Cheers Alan
-
I know you have already done the gutters ( nice job too) but............ if it was mine, and I am a wagon guy, having spent an irreplaceable portion of my childhood in the back of one, I would add some extra plastic to the lower edge of the roof, below the gutters. As it stands, the side window profile is a bit "empty". It is also slightly curved upwards. Straightening out that curve with some additional plastic (1-2 mm at most) would give you that upmarket feel you wanted, a bit more gangster, ( modern Chrysler 300 look) and might also improve the flow towards the rear of the car. I have had one of these for years and fully intend to do the wagon conversion, Your work so far has given me a lot of ideas. I'm fifty fifty on the skirts but having them in primer would make it easier to choose. Are you going to paint this maroon, seems like a great look in the photo. Cheers Alan
-
yep, Tim, I'm glad I did it now though there were times when I had my doubts. The trailer is nearly stock Revell. I didn't narrow it but I did notch the fenders so that they hugged the boat a bit closer than the originals would have. ( The single wheel fenders are now on my Thunderboat trailer - waste not, want not) A dear friend and sadly deceased gave me the resin fenders - I think they are off the F1 trailer but haven't checked. Cheers Alan
-
Thanks Chris, thanks Tony, glad you liked it. Cheers Alan P.S., Just looking back through my photos and spotted a honking great lump of masking tape that I used to help position the seat. Ugh! Gonna fish that out now!
-
Seeing as how this thread has become the unofficial MCM marina for all speedboat kits, I thought I would pop up a photo of the latest addition to my fleet. Tequila Sunrise is a narrowed Revell Hemi Hydro with mostly stock running gear and a few upgraded details. More photos and details can be found here.