alan barton
-
Posts
2,105 -
Joined
-
Last visited
Content Type
Profiles
Forums
Events
Gallery
Everything posted by alan barton
-
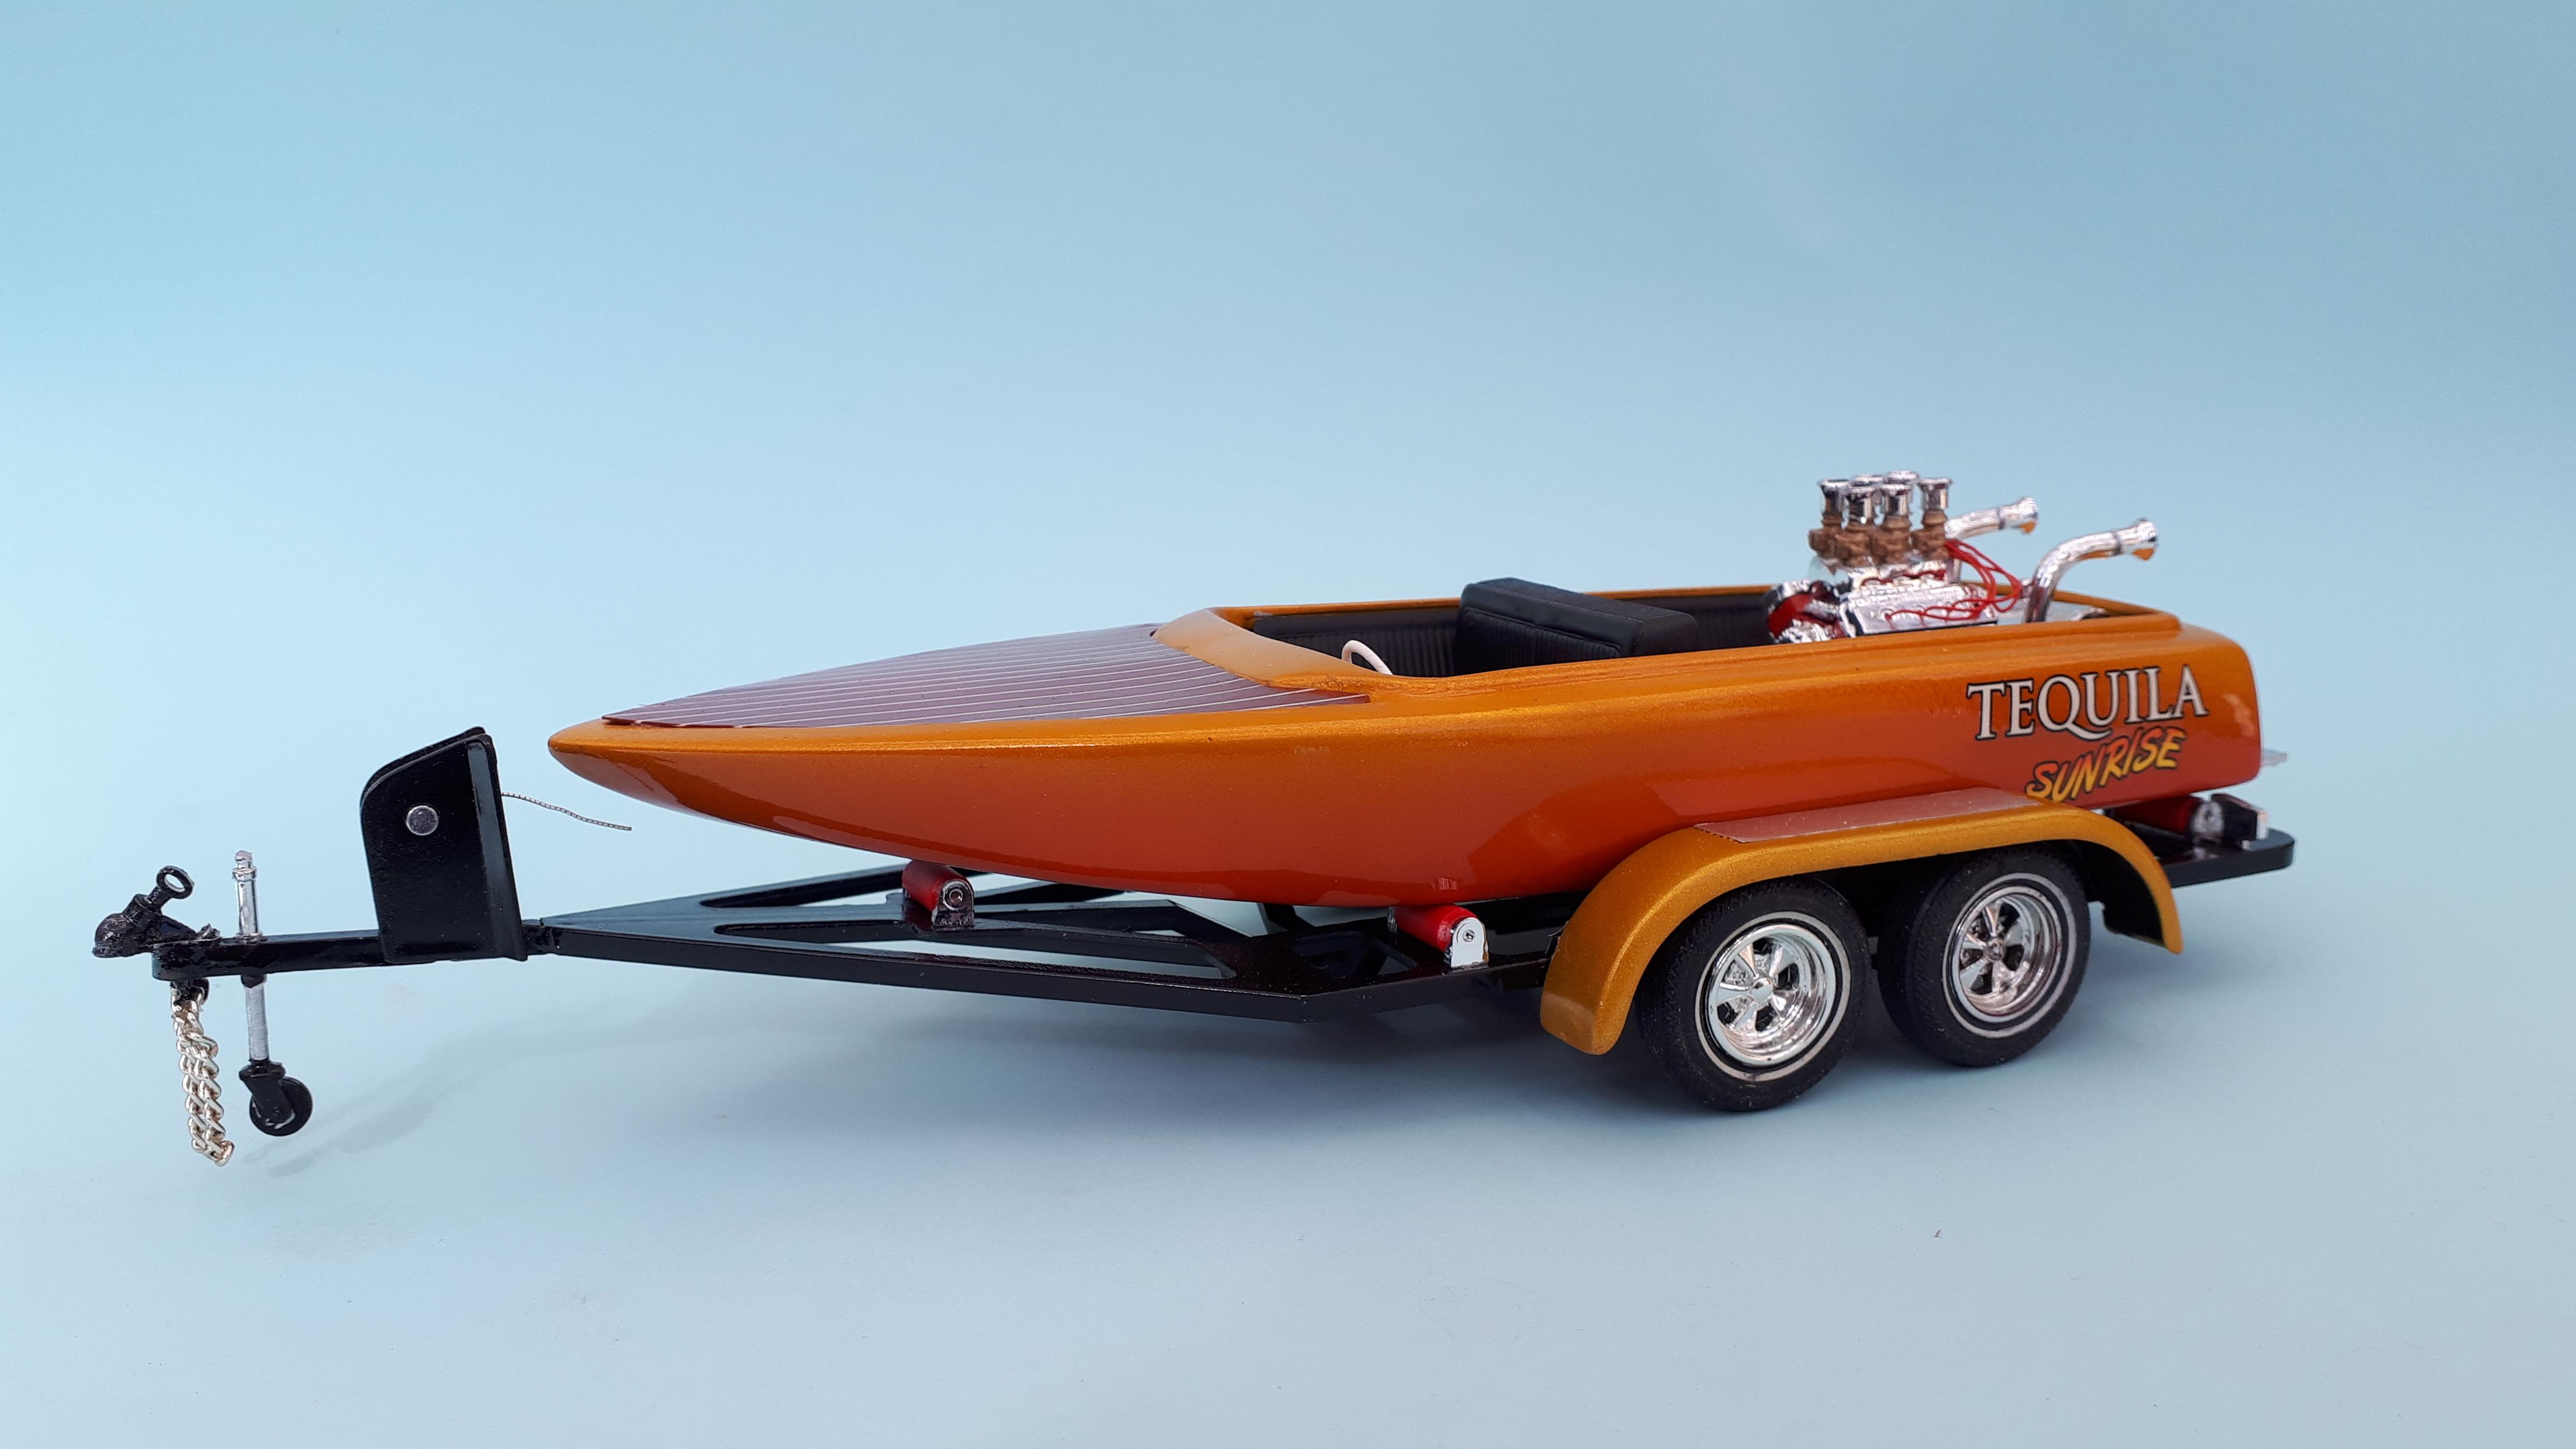
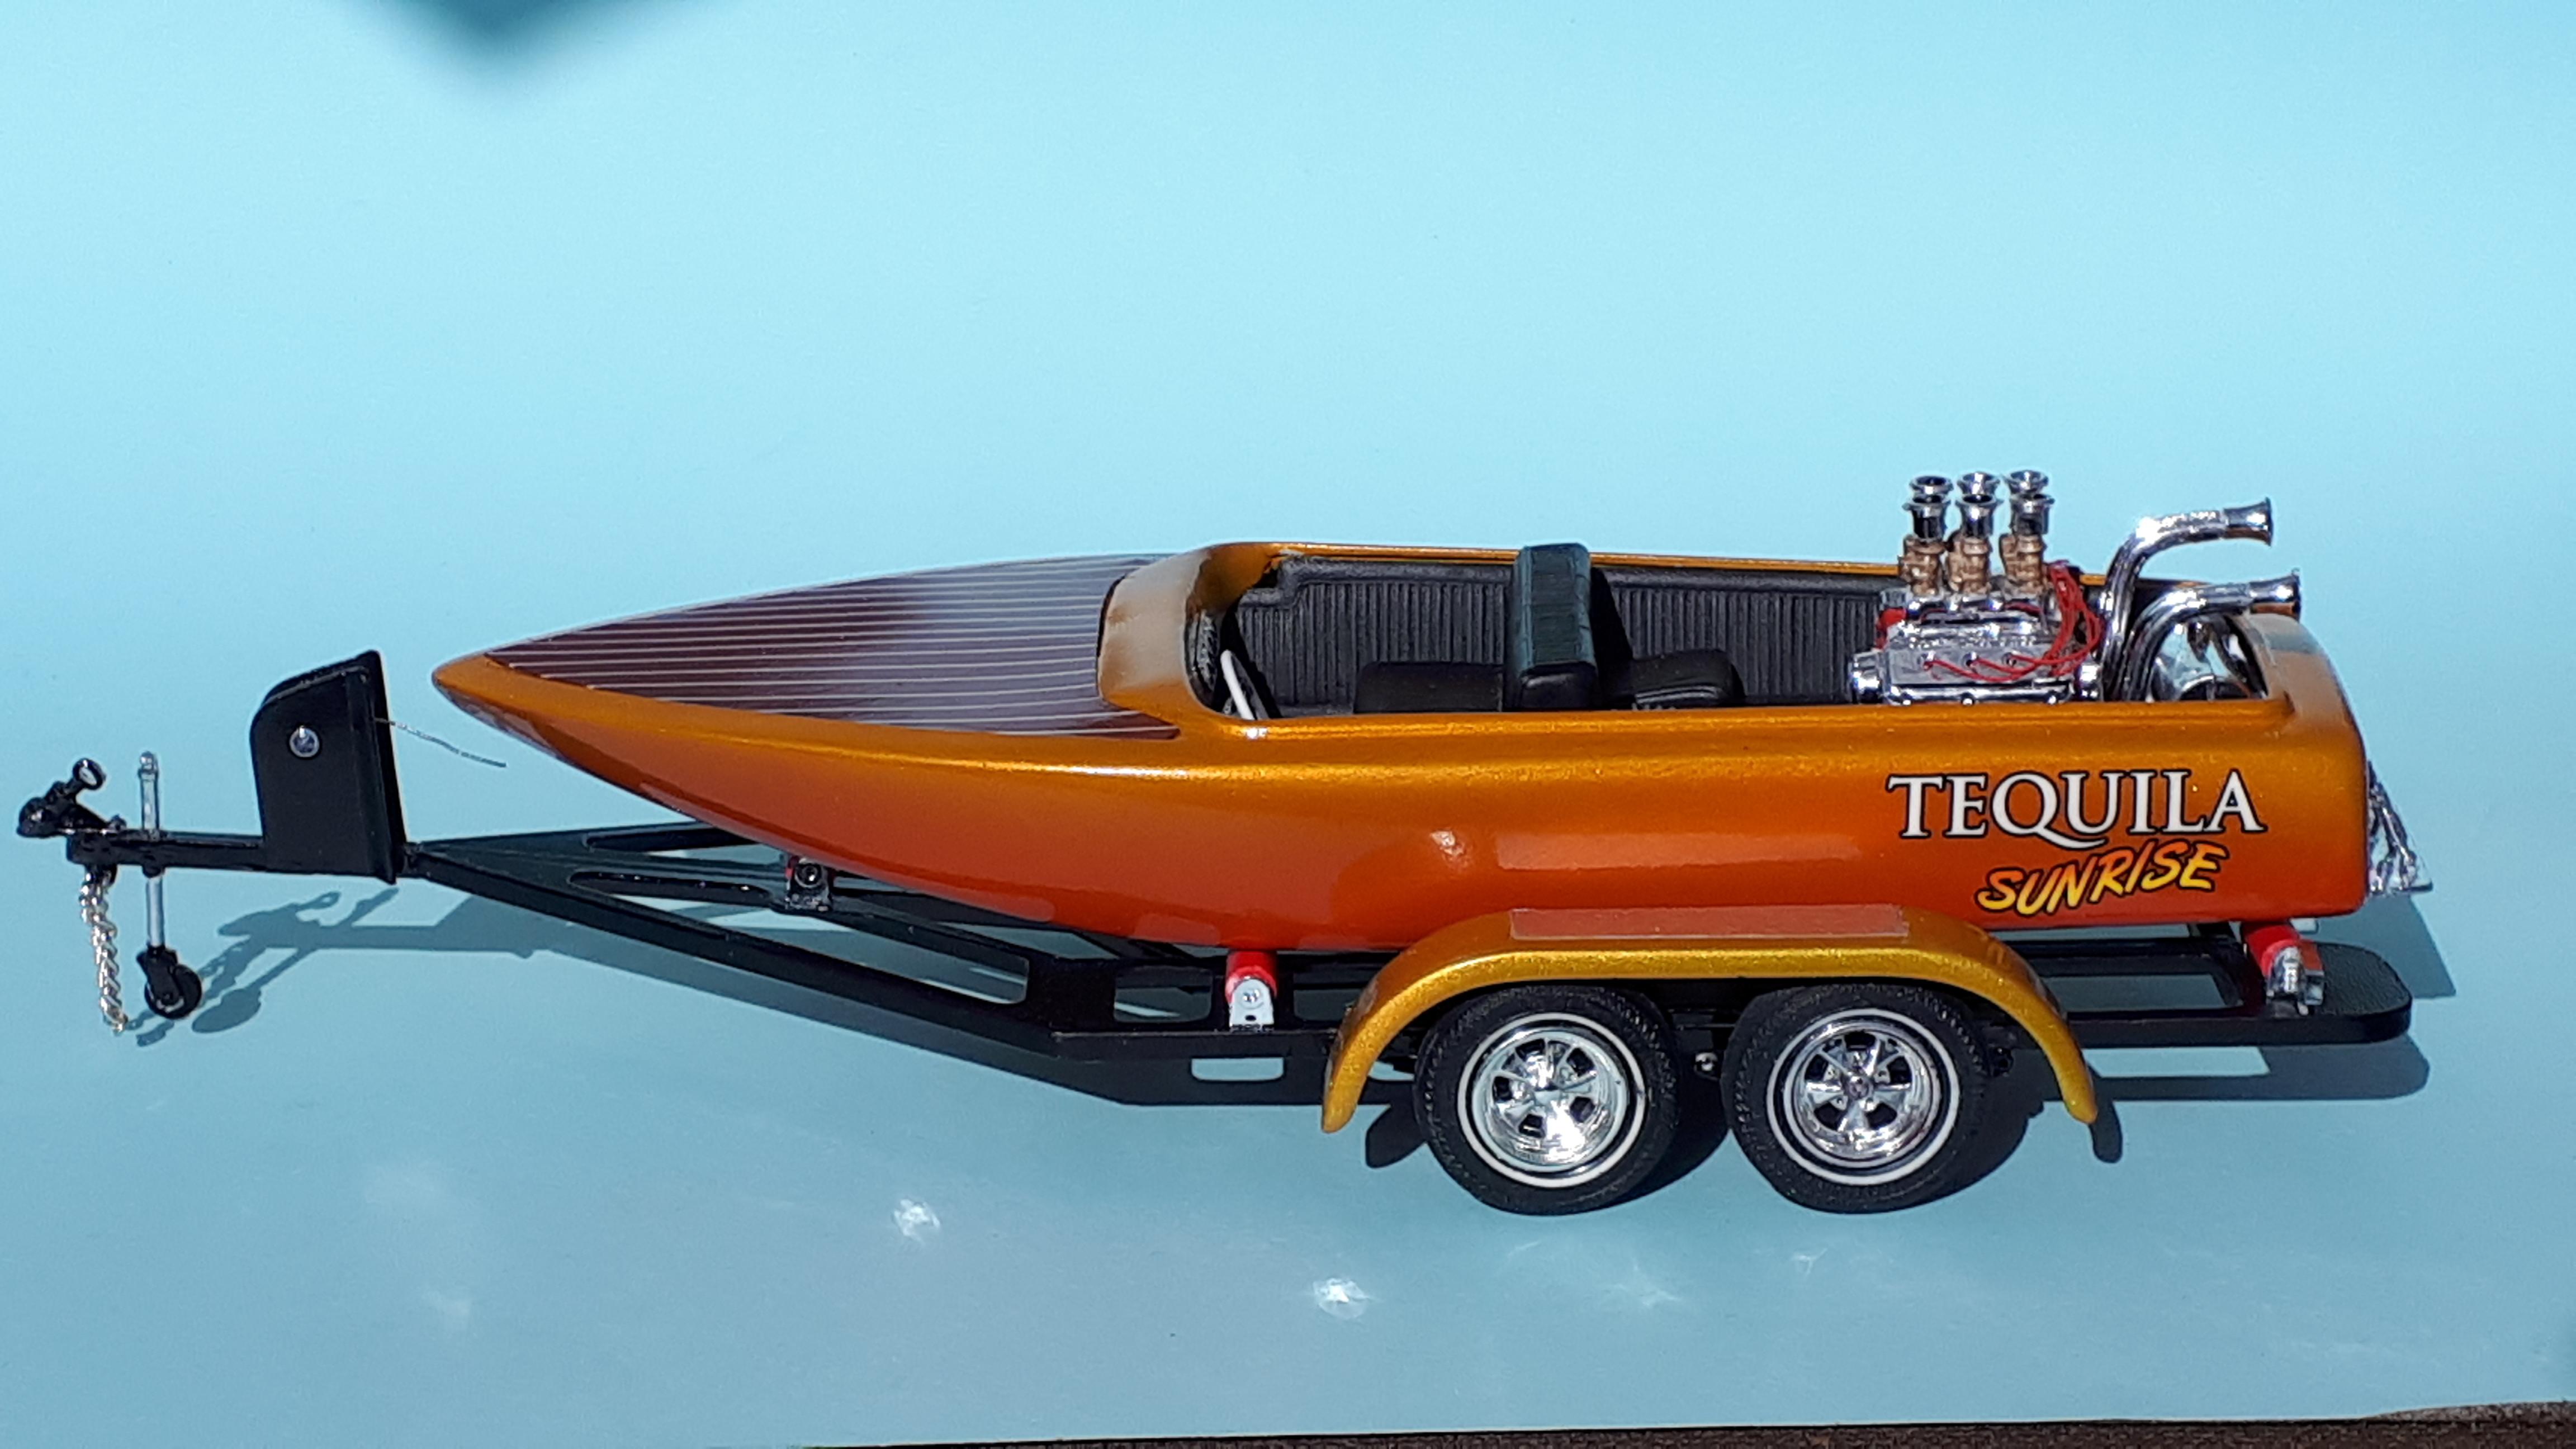
This has been a long term project starting with the reissued double kit with the 60 Chevy stepside . I straightened most of the warp on the trailer, cut the single wheel fenders off and glued two new axles ( Evergreen Tube) across the frame to help restrain the warpage. This was all painted black. I got the hull assembled and started the painful filling of the entire hull - the moulded in floor ribs create a veritable railway line of sink marks on the bottom surface! I got to that point and parked it for a while. In the meantime I got some other boats finished and kept re-reading various TIm Boyd articles about them. I had intended to leave the Revell hull full width, so that it could be compared to the narrower AMT hulls but man, was that sucker ever wide! After trying to ignore the voices in my head (mostly Tim's!) for a few years I finally just grabbed the razor saw and cut 'er up. No going back now. While I was at it I separated the dash/cowl from the front decks and did my best to rebate the edges to take a wooden deck. Rather fiddly work and I am not sure I would do it again. I had some plastic adhesive backed cherry wood that I got from a craft store and it looked magnificent so I made a template and cut that out. This faux wood was already planked so cutting it was a bit tricky but we got there eventually. I got the Testors gold pearl on it and it looked pretty good but not quite what I was looking for so it went back to the bottom of the pile ( bottom of the ocean?). Some time later, I got a promotional email from Slixx decals and in their new name sheet there was the name "Tequila Sunrise" A light bulb went off!!! I ordered the decals and then while I was waiting airbrushed the bottom of the hull and partially up the sides with Tamiya Bright Orange. The decals were a perfect complement to the paint and then the whole thing took on a life of it's own. There was one final obstacle however, in my zeal to get the bottom of the hull as smooth as possible, I completely overlooked that there were four holes on the centre line, through which the skeg, propeller shaft and rudder were attached to the hull. These all disappeared when I remove 6mm or so from the middle of the hull. Re-drilling and shaping those holes in an already painted hull was somewhat stressful. And then I lost the deck! I still had more of the material but I started to worry about the thickness so Instead I cut and trimmed a very thin piece of styrene ( like paper thin), masked the calking lines with fingernail tape and sprayed brown primer followed by Testor's clear over the lot. I am very pleased with the final result, although I know the original deck will now turn up somewhere! So here is the ingredients list: Revell Hemi Hydro. Narrowed Hull Reworked front deck area. Stock engine with plug leads. Stock v drive and "chassis" Unknown fuel tank 57 Chevy accessory instrument panel, put on a diet! Stock steering wheel and side panels Narrowed floor boards and AMT Hullraiser seat. Narrowed chrome thingy on the back Trailer - stock frame with dual axles and matching fenders Unknown "parts store" style taillights Scratchbuilt tow hitch with chains. MPC chromed Cragars with AMT firestone thin whitewall tyres. This brings my boat fleet to eight, with about five to go. The Chrysler Hydro Vee kit never seemed to make it to Australia so I don't have that one but considering it is out of scale, and the amount of space the 1/25th scale ones take up, that's probably not a bad thing! Hope you enjoy my speed boat! Cheers Alan

-
I think I like the first one best but they are both pretty cool in their own way. I managed to get the frame of one under a Monogram 30A kit many years ago and it has a nicely detailed small block Ford that was ahead of its time. Must build the actual kit one day! Cheers Alan
-
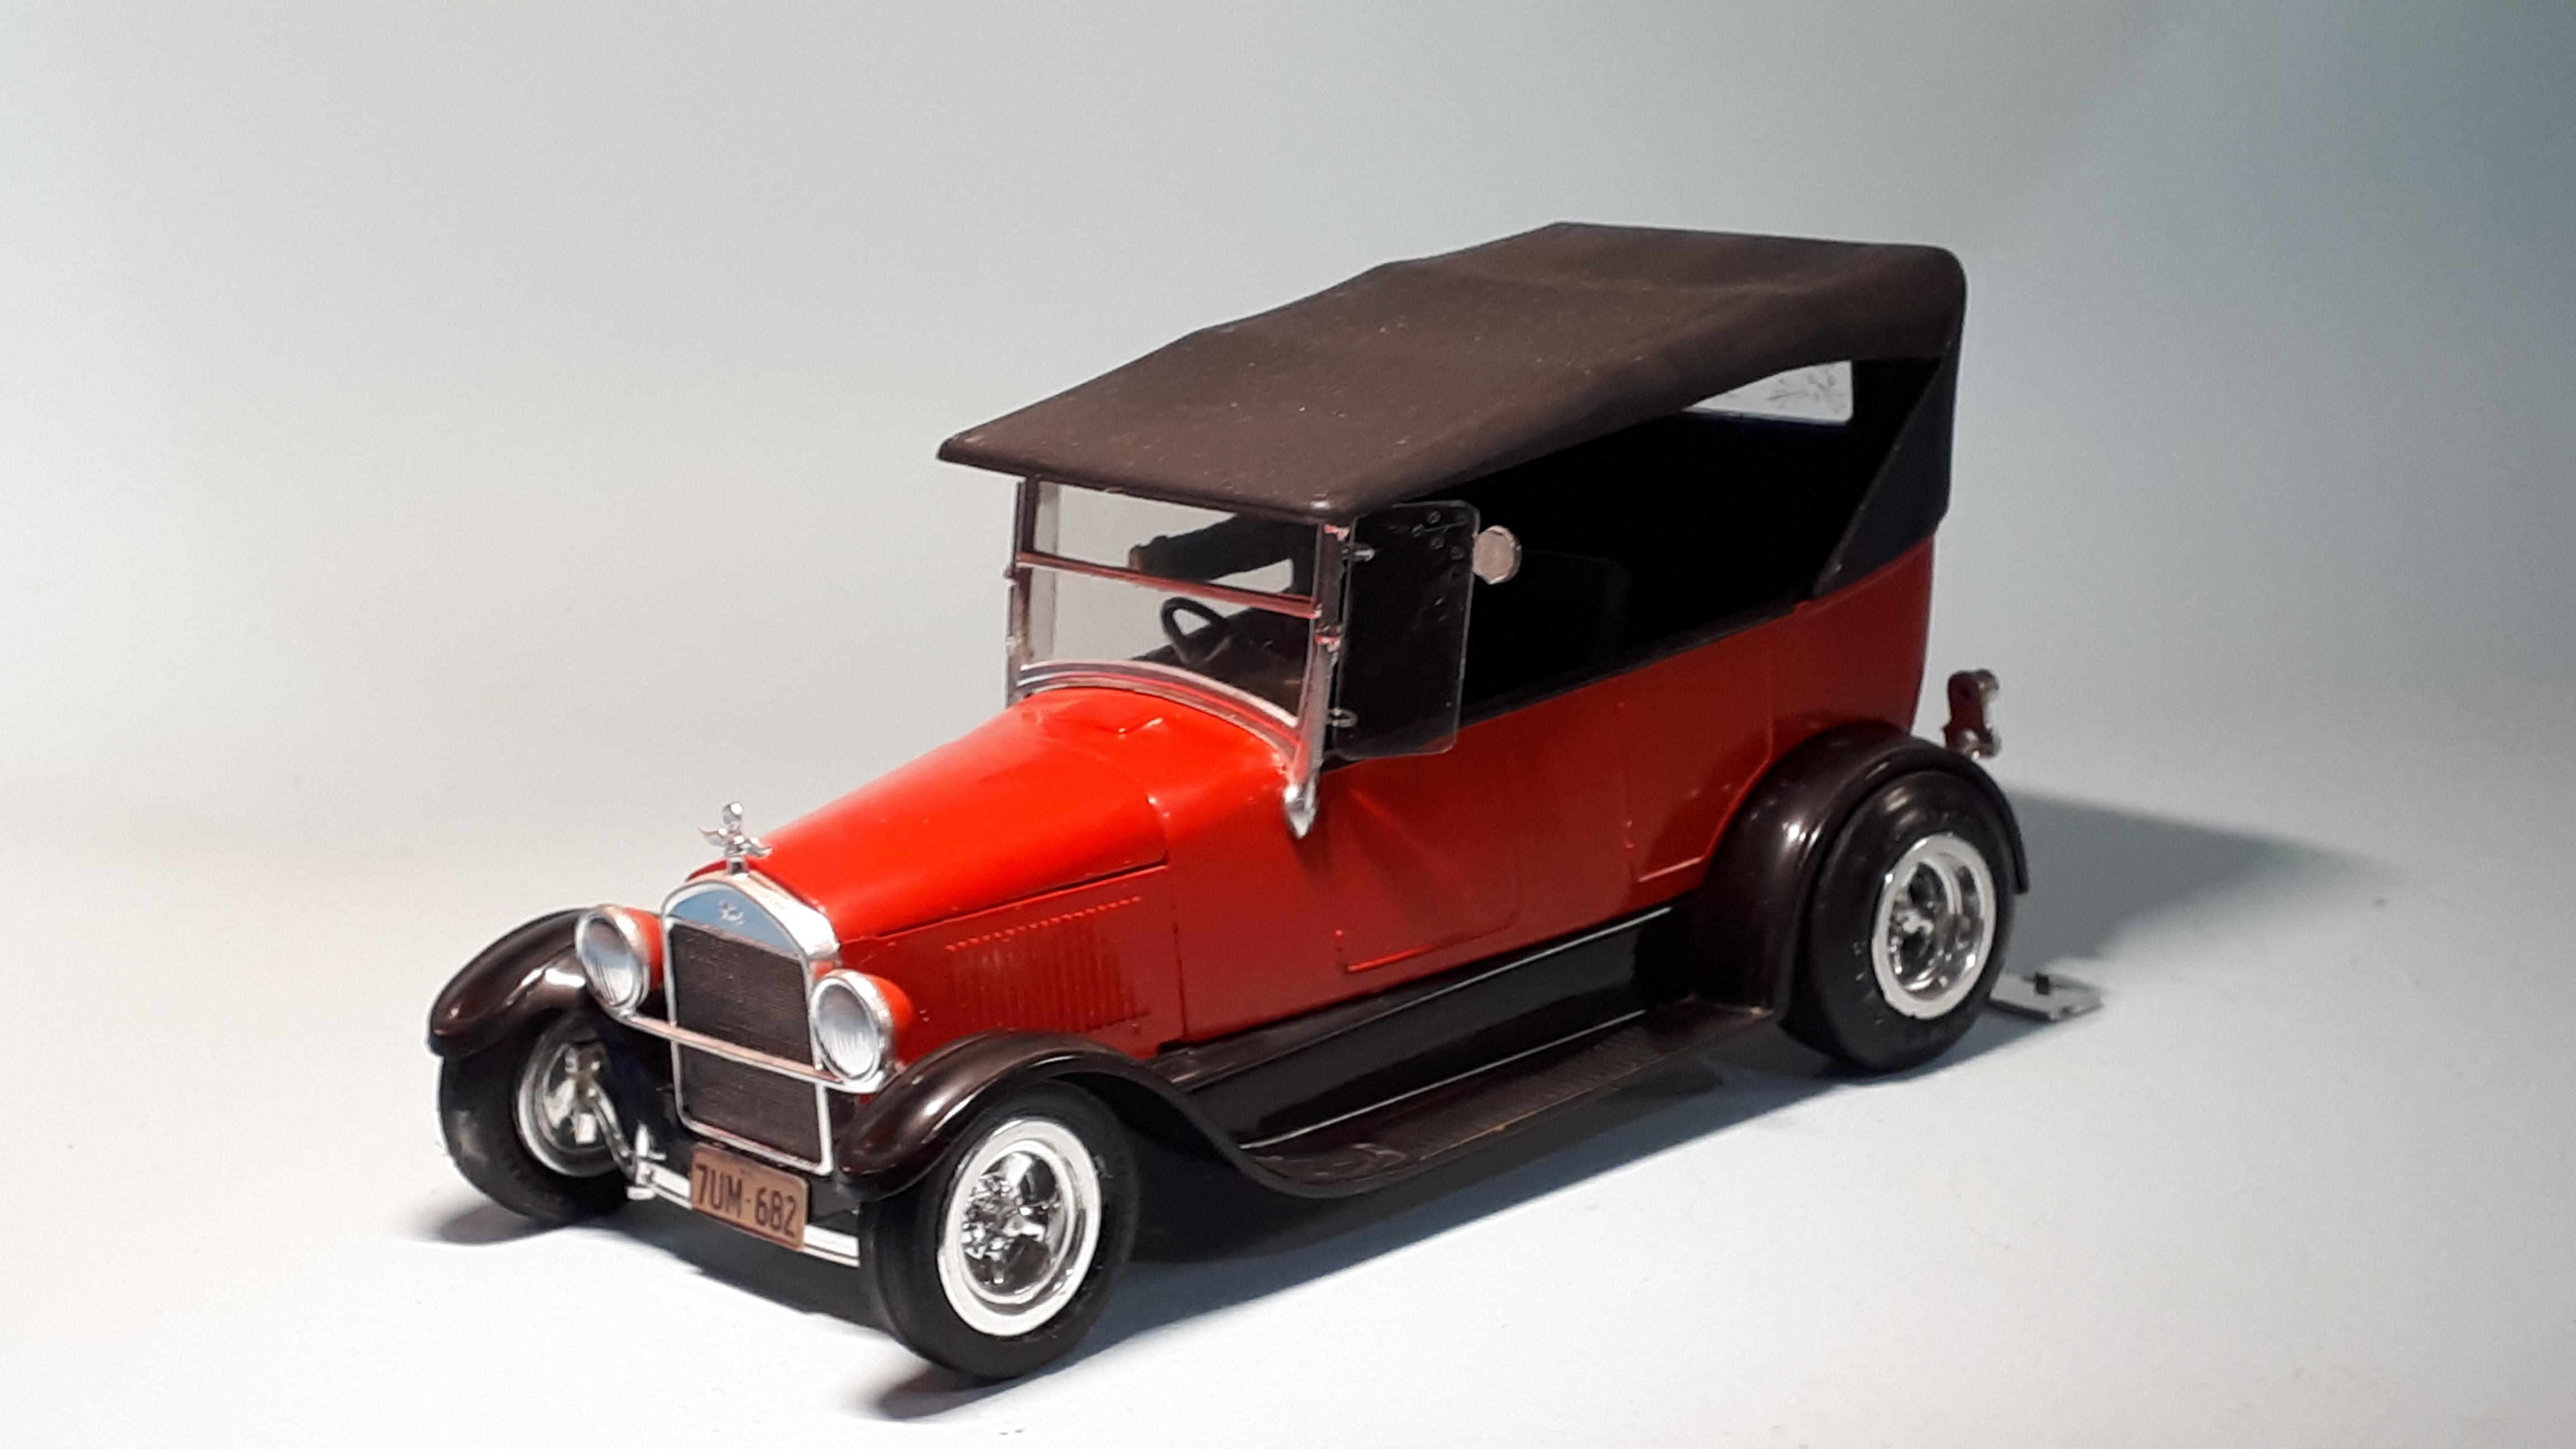
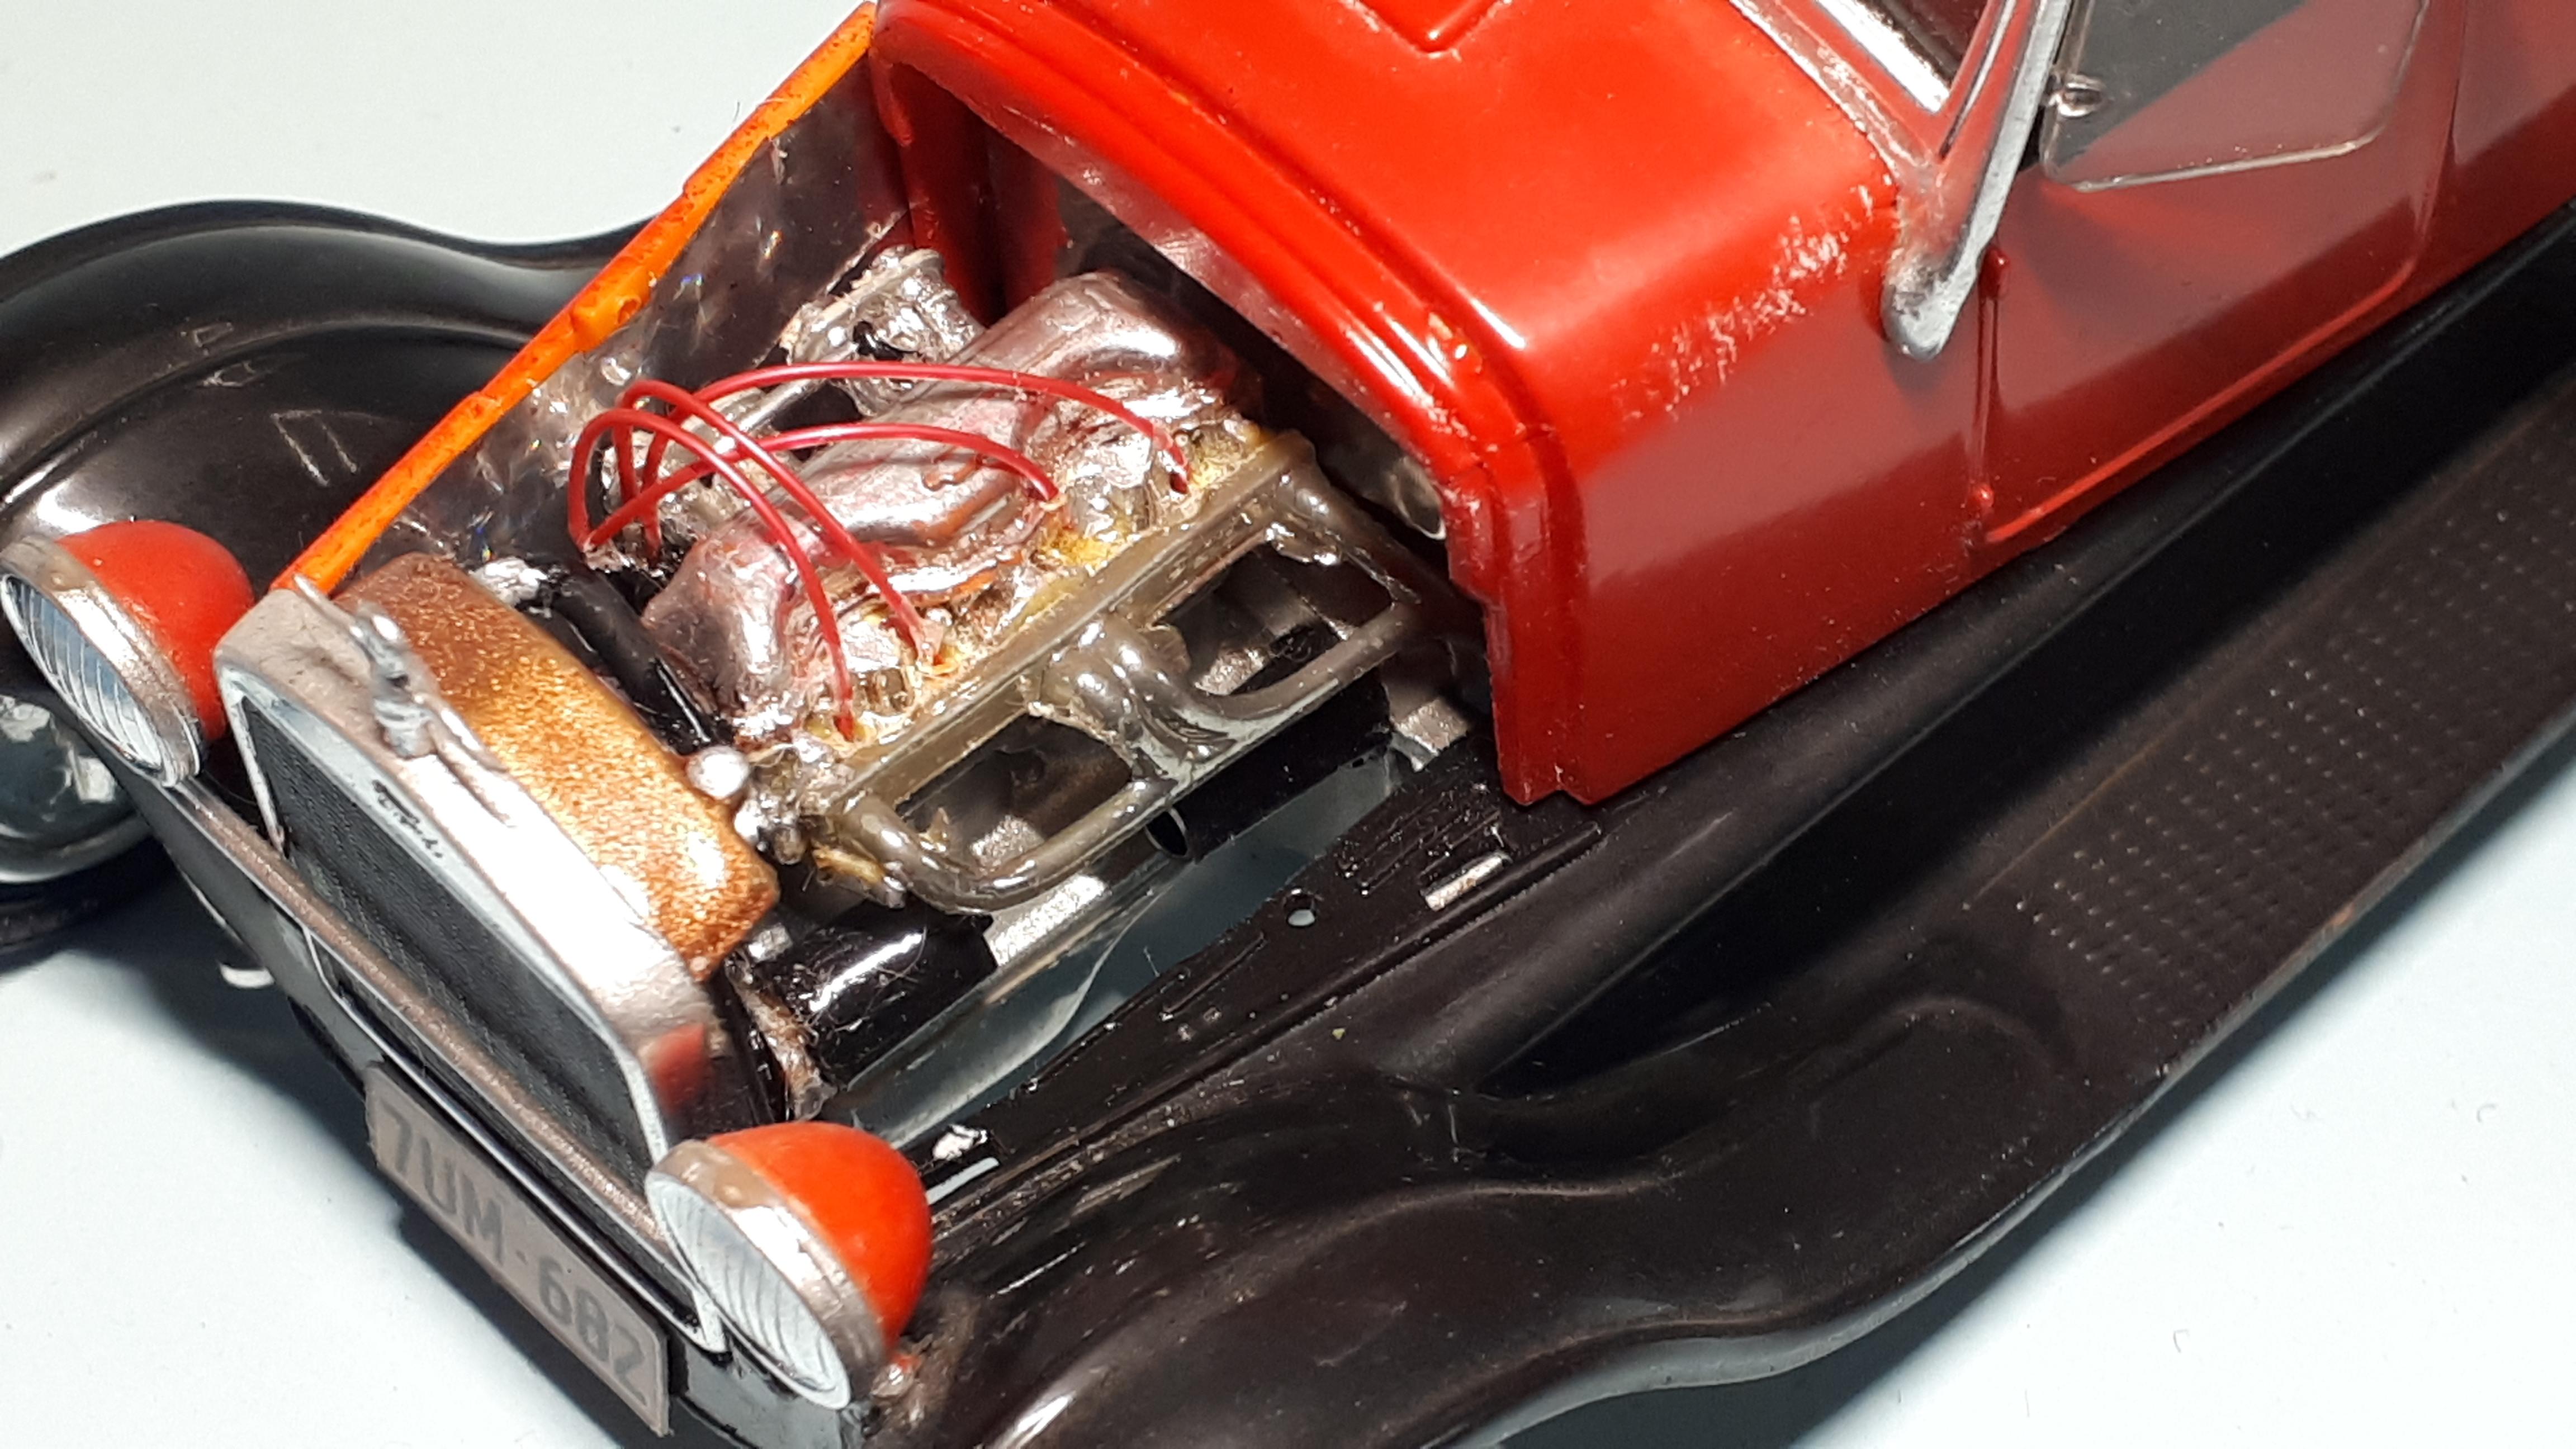
Seeing Tim's green T reminded me that I had one in the back of the cabinet that was inspired by....... Tim's green T! Black fenders, rake, stock roof and wait til you see what I used for an engine! I built this a long time ago. I wanted to keep the Buttera frame for a Model A roadster build so I used a Revell 31 Model A frame, with a twist. The thing is, a Model A has a longer wheelbase than a Model T. I discovered that if you cut the frame horns off the front of the A frame ( because Ts don't have them) and then use the stock A rear spring and the stock A rear crossmember but attach the spring BEHIND the axle ( to the backing plates in my case) you end up with the shorter wheelbase with very little surgery. And it lowers the rear end while you are at it! Now, that engine is the Uber rare 204.5 W conversion for a Model A banger. A what????? I bet you didn't know that the head and rocker cover from a Revell Revell 409 Chevy ( 53/54 Chevy kits) fits straight onto a Revell Model A block? Thing is, Tim had used a Pinto engine and I didn't have any contemporary four bangers in my stash so I made one. This worked so well that I tricked up another Model A banger to go into an Anglia, this time using the finned rocker cover and chromed head from the Cadillac in the Monogram Boss A Bone 29 pickup. When you put these parts together, it just makes you grin at how well they match. Nice Red Chariot, Tom, I have a very similar one on the shelf these days, like yours, made from a newer kit with older parts. A great bit of history. Cheers Alan
-
Apart from the fact that I love everything about this build, that just might be the most realistic faux leather sheen I have ever seen on a plastic seat. Nice job! Cheers Alan
-
Yeah, we want to some ruination! I gotta admit, it looks way better than i expected.. You have some design talent there, sir! Cheers Alan
-
This is a very educational thread when you already have a love for Bonneville! Your final paint scheme is ideal for the car and the era. I must try some of that Renshape. I have previously produced LSR cars by vacforming over a hand-carved Jelutong mould. The Renshape looks really interesting. I will be following for sure! Cheers Alan
-
Kit, I am thoroughly enjoying your progress on your pickup. The clear and detailed explanations of your steps are a pleasure to read - and I have spent my working life as a teacher for 31 years and a trainer now for nearly nine years so I know good instructions when I see them! I am thinking that maybe putting the roadster floor above the cab floor will also help with mounting later because of the raised floor layout in the Revell roadster/coupe kits. However, there are some little voices in my head that are screaming at the top of their voices so, knowing that you really care about the details on your rods, I hope I can respectfully share these concerns with you. It's the firewall. I said it somewhere else once but I am 99.9% confident that no-one in the history of hot rodding ever tried to graft a 30/31 firewall into a 28/29. It just looks odd. However, Revell did so now it has almost become the norm in our 1/25th scale world. On the other hand, the firewall is a great fit in your body and against your floor and has that nicely sculpted recess for the engine. Sooo, what about if you were to file the 30/31 swages off the firewall, losing some of the identifying features and in turn producing a smooth, slick firewall as would have been the trend in the eighties? On the other hand, if you love the look of that firewall in the early cab, then I will keep my thoughts to myself and continue to enjoy the awesome work I am seeing here. I would love to join in this venture and went as far as digging out the parts a few weeks ago but I have a ridiculous number of projects on the go already and have decided to sit this one out. Cheers Alan
-
Nice job on a nice kit, Russell. They just might be the nicest set of in-scale wooden hood bows I've seen yet- very fine crafstmanship there. Love the detail on the flattie as well! Cheers Alan
-
Roger, i wouldn't be in any hurry to lower the body to hide the lack of a reveal. There are aftermarket frames out there in1:1 with no reveal and as you are heading in a very contemporary direction, especially if you use the LS, that smooth frame would look just fine. The stance is so nice right now it would be a shame to hurt it. Cheers Alan.
-
Monogram '55 Chevy Two Lane Blacktop (ish)
alan barton replied to Spottedlaurel's topic in Model Cars
I like it! It captures the raw, driven into the ground spirit of the movie car. Yeah, we know it's not meant to be a hardtop but honestly, stick this on the table at any show anywhere and the first thing out of people's mouths will be - "hey, two Lane Blacktop '55!" Mission accomplished!!! Cheers Alan -
Gee that looks sharp. I built one of these over thirty years ago and it sits at the back of the cabinet. It looks like your skill and your chocie of a factory colour scheme ahs gone a long way towards disguising the proportional issues of this kit. Nice job! Cheers Alan
-
Chris, that is a truly superb model you have constructed there and the colours give a very custom look to a showroom stock build. Congratulations for persevering. I too have a Skip's Fiesta 59 that was returned to the box over twenty years ago. I don't recall having adhesion issues up to the point that I stopped at ( rolling chassis, first coat of primer on body) but my problem was a combination of the multi-piece body with the standard Revell warpage. As all of us who built models from this era know, Revell employed a particularly sadistic little man to sit next to the body moulding machine and upon ejection of each body, he would take it with both hands and give it a firm twist, like you were wringing out a dish towel. This ensured that none of the opening doors, hood or trunk would ever fit so you would never know how bad the hinging was. A simple but effective form of quality control. Now old Fred feared being made redundant when Revell started reissuing these multi piece bodies so in a desperate attempt to keep his job, he selected the cowl/dashboard/upper front fender piece of the 59 and gave that a tweak instead. So when I came along to complete this model in my early adulthood and I attempted to assemble the two side panels to that front section , I found that the left hand side pointed north while the right hand side pointed south. I persevered and eventually got the body assembled but alas, after umpteen attempts at joining these parts accurately, I incurred some glue damage along the top edge of the chrome spear along the join. It's not major but with the application of Bare Metal foil it will stick out like canine testicles so for now, it rests in the dark. Seeing all these fine builds on this thread , and especially yours, is making me reconsider it though! Cheers Alan
-
I'm glad you found this , Tim, I knew you had other tubs but I didn't find them when I was posting the other night. Looks like a case of "you inspired me inspired you!" And Jim's pearl white beauty pushed me over the edge. I have just finished the basic construction of two 29 Model A tubs, a Monogram based 1/24th scale and a Revell based 1/25th scale. The 1/24th scale one is also going to be a hiboy, probably with a hopped up flathead V-8 this time but definitely on the nostalgia theme, influenced by Jim Jacobs red decoupage tourer from the eighties. Your blue T confirms I am heading in the right direction. I love the tall- in- the- saddle stance although the picture in my head is of a slightly lower ground clearance. Still, that could change! Keep 'em coming, guys! Cheers Alan
-
Alexandr, congratulations on a beautiful model with an absolutely breath-taking finish. The reflections in the paint on the roof are completely flawless! You can be very proud of your work! Cheers Alan
-
Have quite a few Tom Daniel's kits in my cabinets but have never owned that one. It is very cool to see what a neat job you did on it. Cheers Alan
-
Thanks guys! And Dave, I love your survivor cars. That grille looks right at home, even with fenders. Cheers Alan
-
Three out of three - colour, stance , wheels. I think I am going to steal this look for my 64 Chevelle wagon - I bought it ten years ago and although it was always going to have Americans on it, I couldn't for the life of me pick a colour. Loving this! Cheers Alan
-
Anyone who can get an AMT 36 of any description, let alone a resin conversion and cut 'N" shut together with such tight gaps is truly a magician! and I don't think i have ever seen a two tone yellow paint jpb before but this looks fantastic! Congratulations on a great model. Cheers Alan
-
That colour looks fantastic. I really do need to build mine - thanks for the inspiration. Cheers Alan
-
That is an exceptionally clean built of a truly wonderful kit. Just about the cleanest hubcap highlighting I've ever seen! Cheers Alan
-
I'm really enjoying watching your body conversion work on this and other models, Glen. That Merc has already got the right amount of "fatness" about it. Are you going to make the neat little barrel style taillights that they had originally? Cheers Alan
-
Wow, this brought back memories! When I lived in Alberta Canada in 1996, a local racer had a blue 36 Ford 5W coupe , fenderless with a Model A grille. You could not believe how much this similar but different model reminds me of it. Was called Hot Pants if my memory is correct. A very different treatment of this kit and it really looks the part. Cheers Alan
-
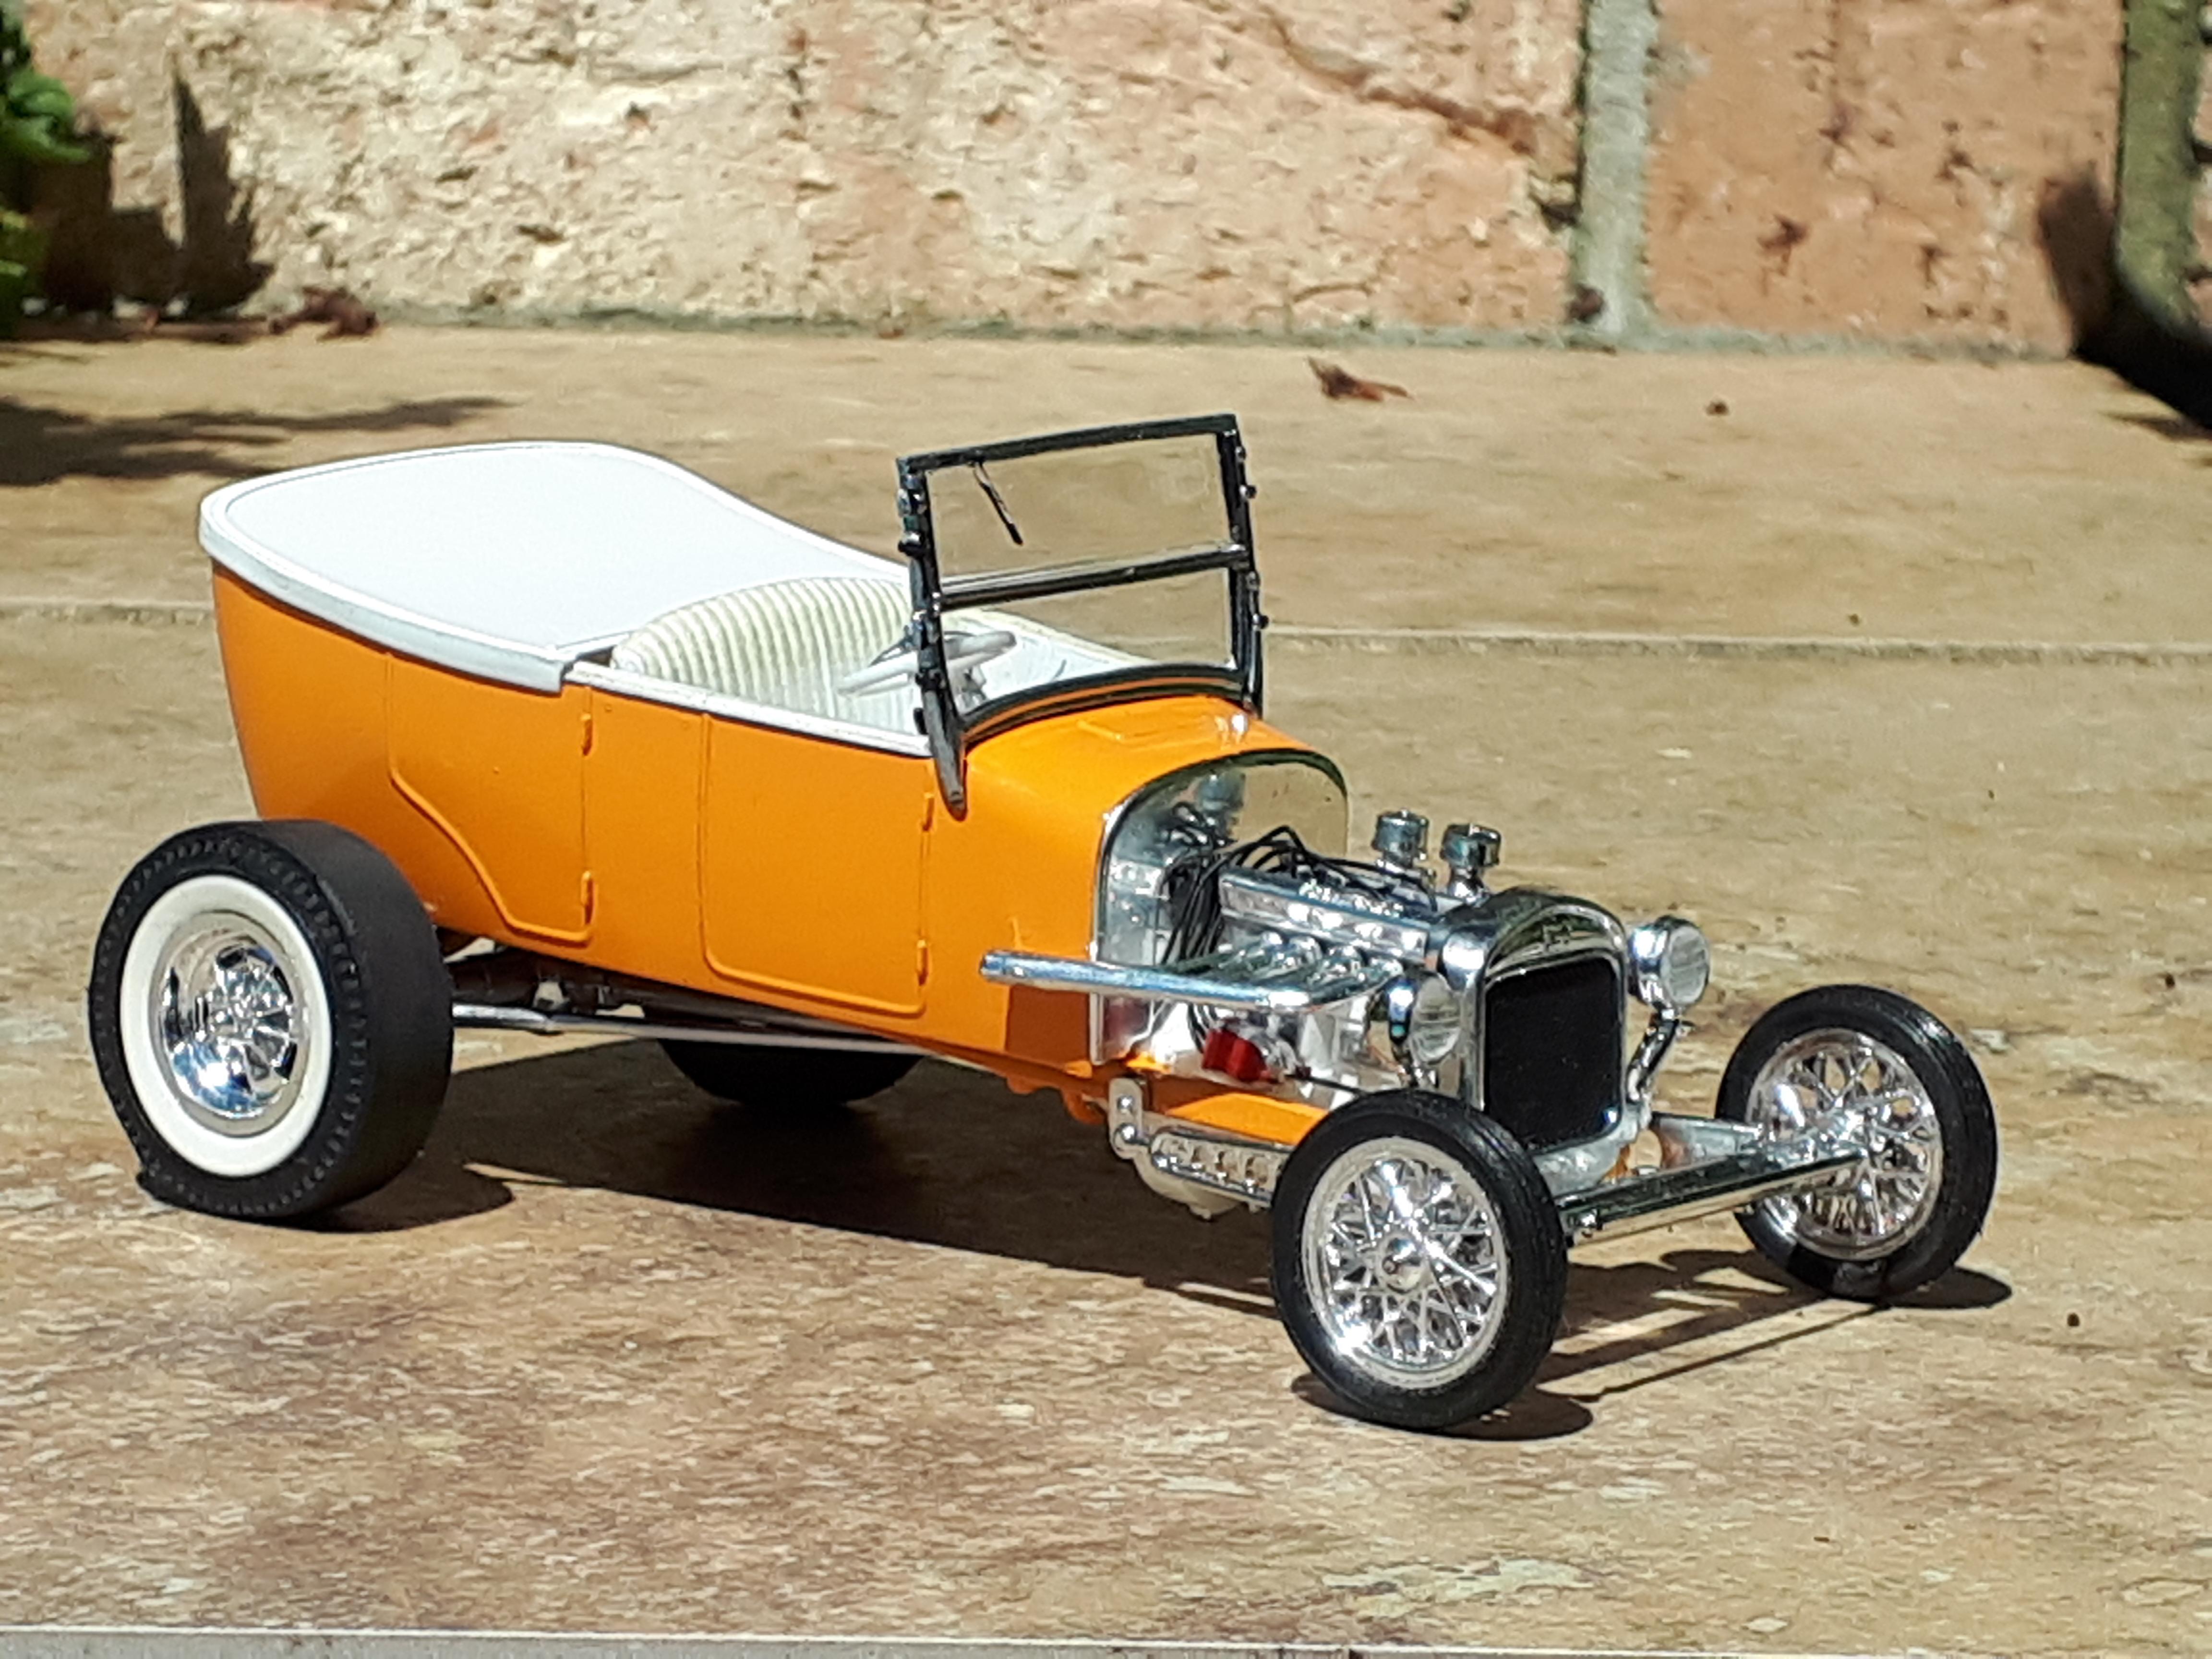
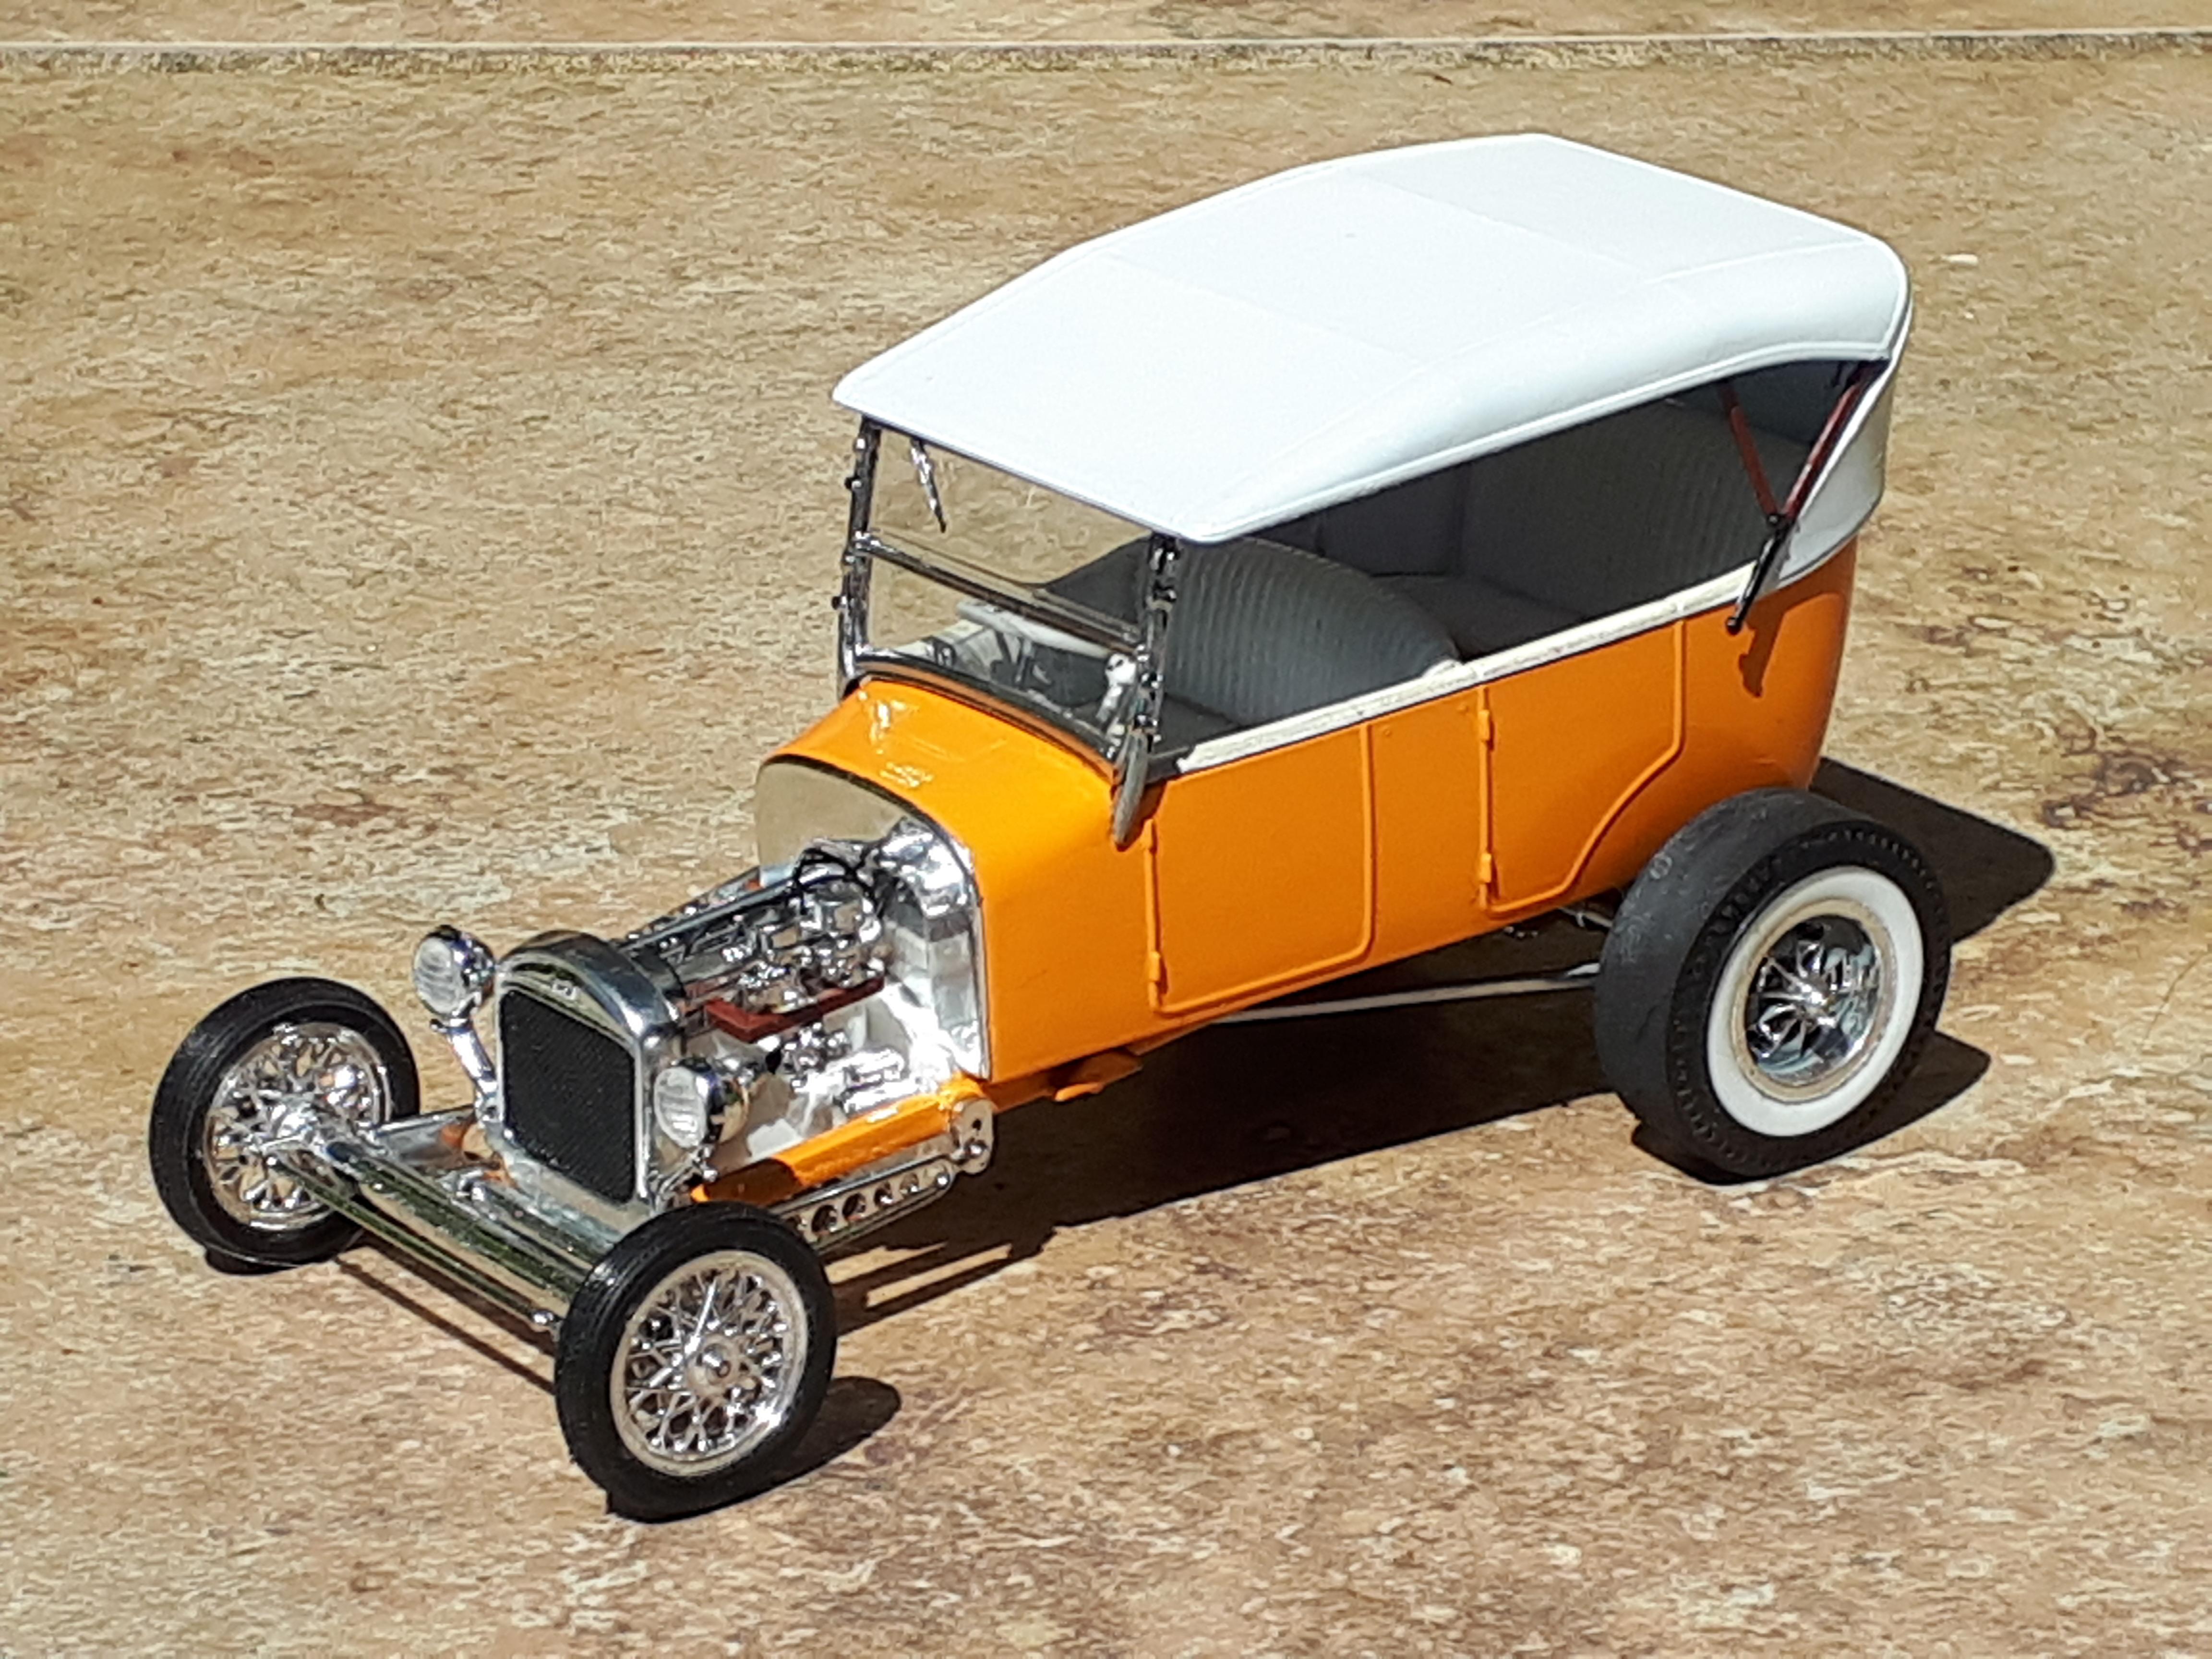
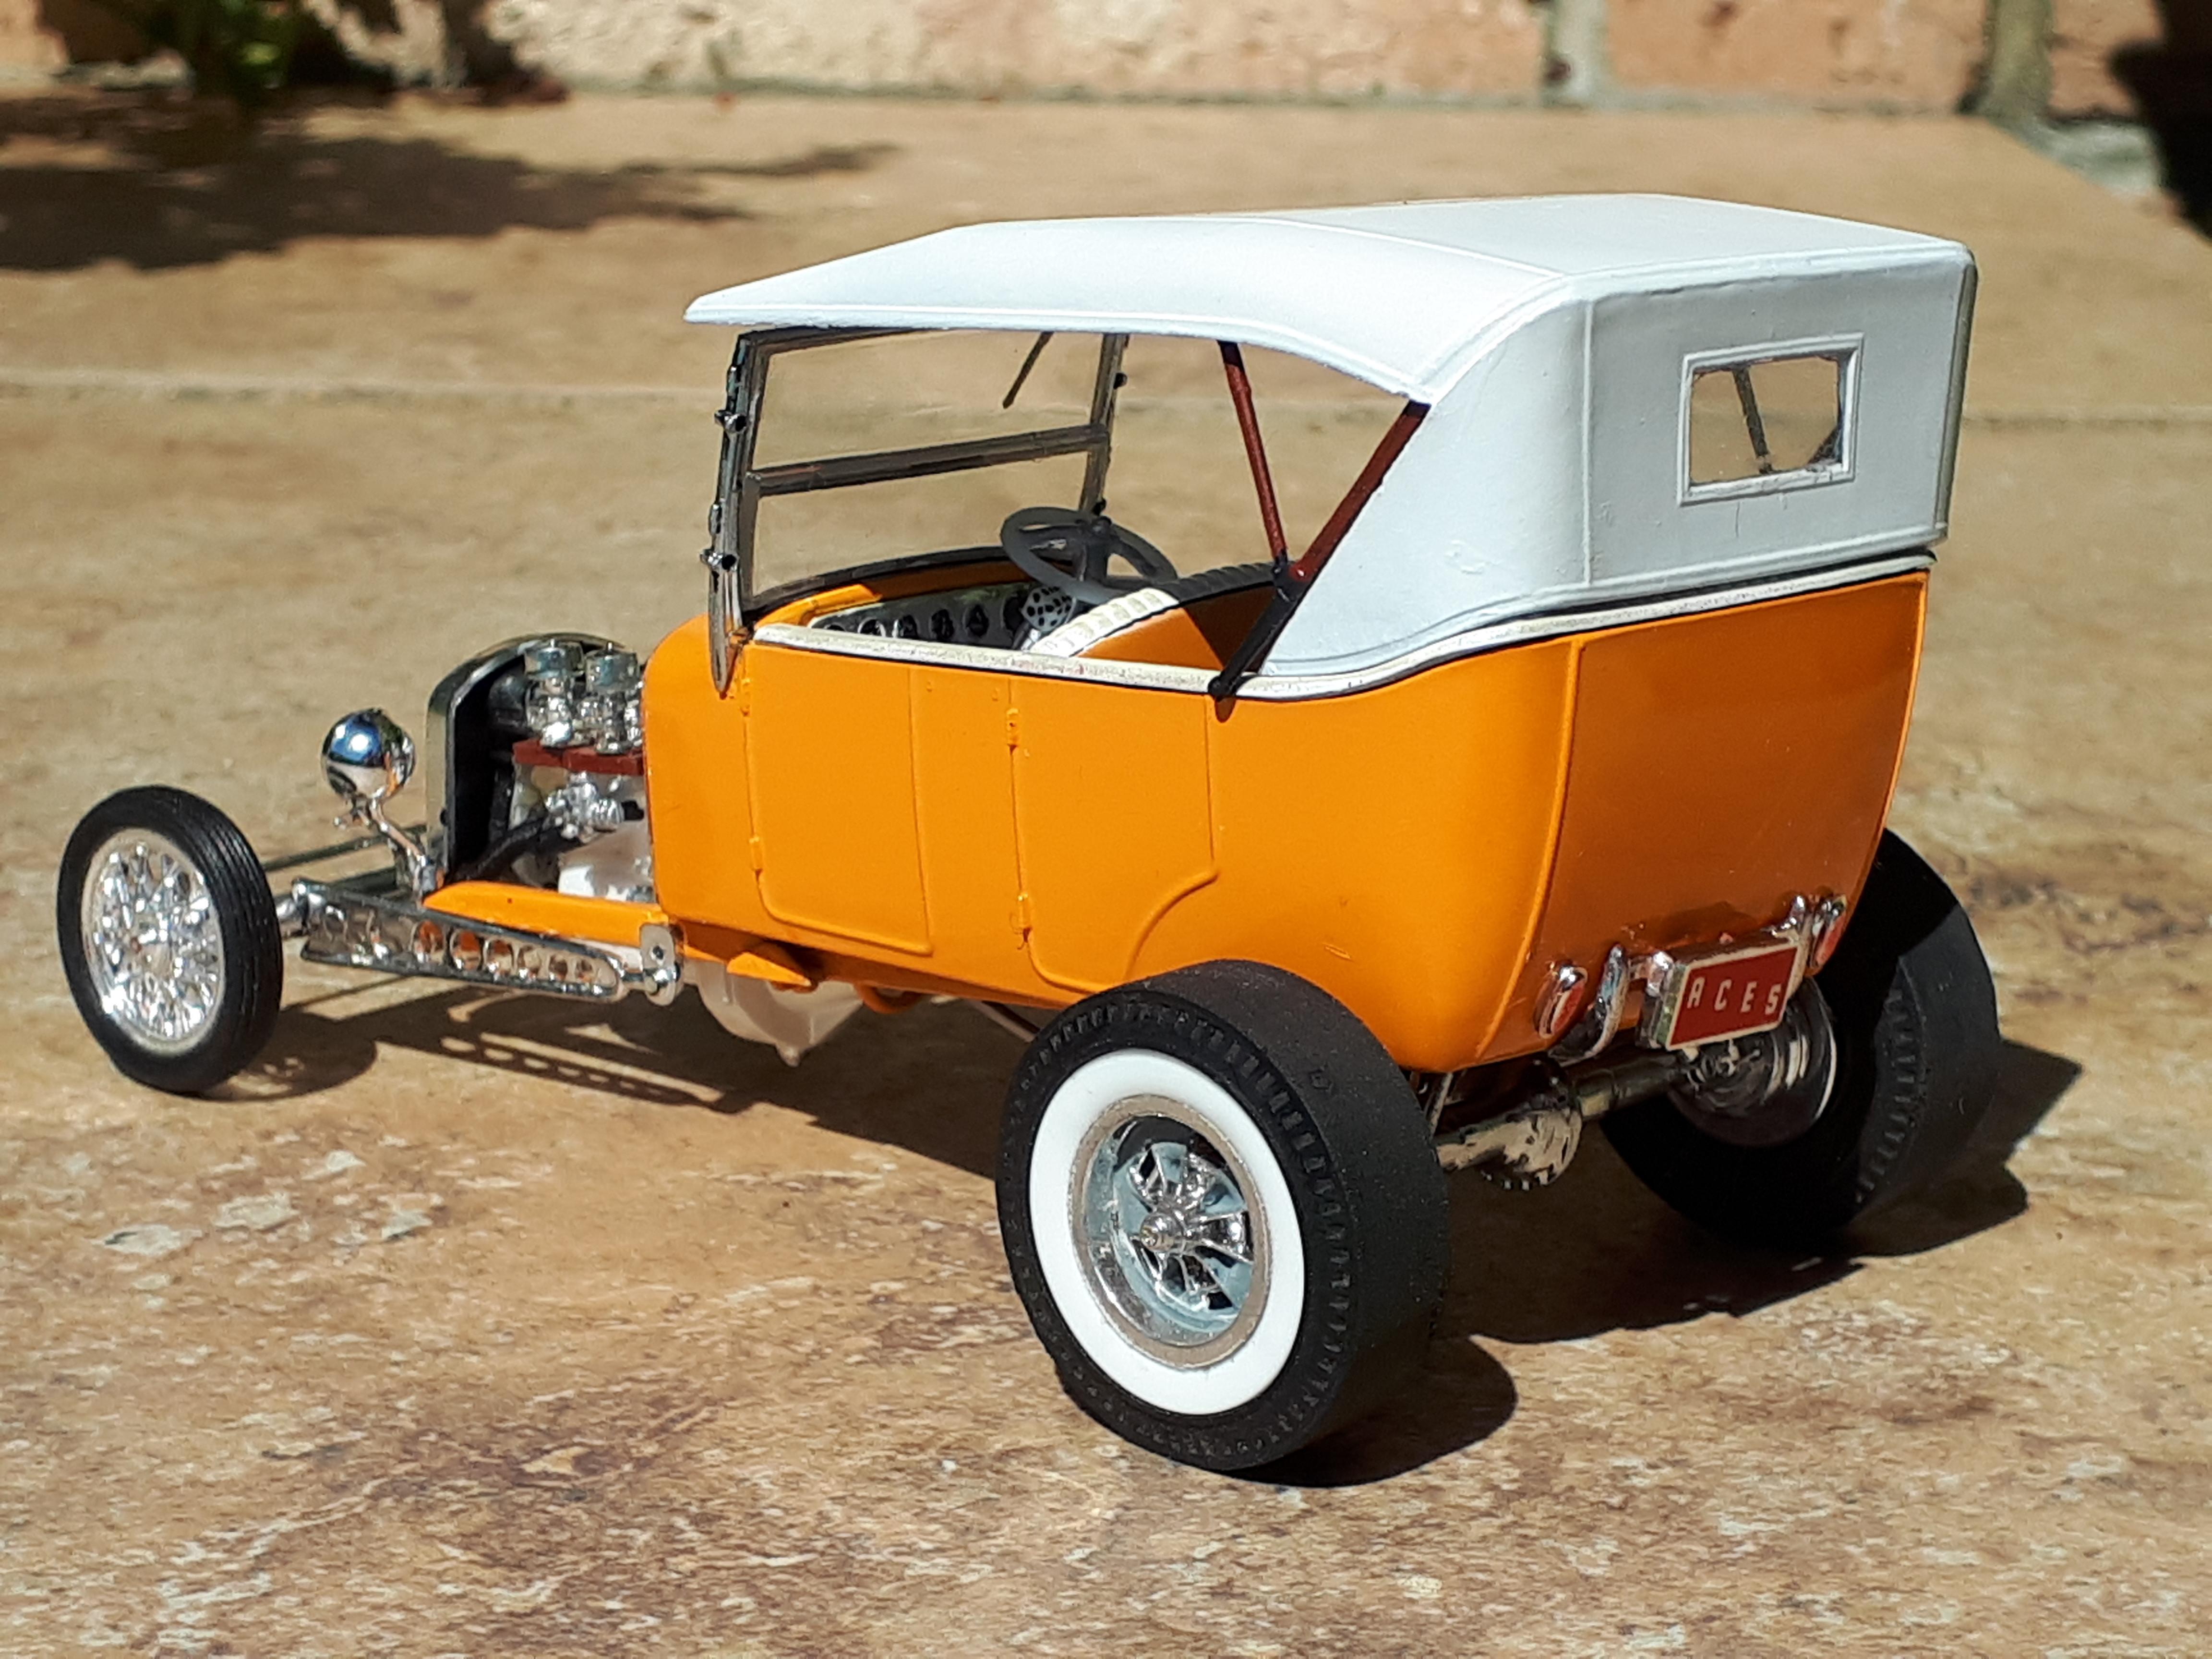
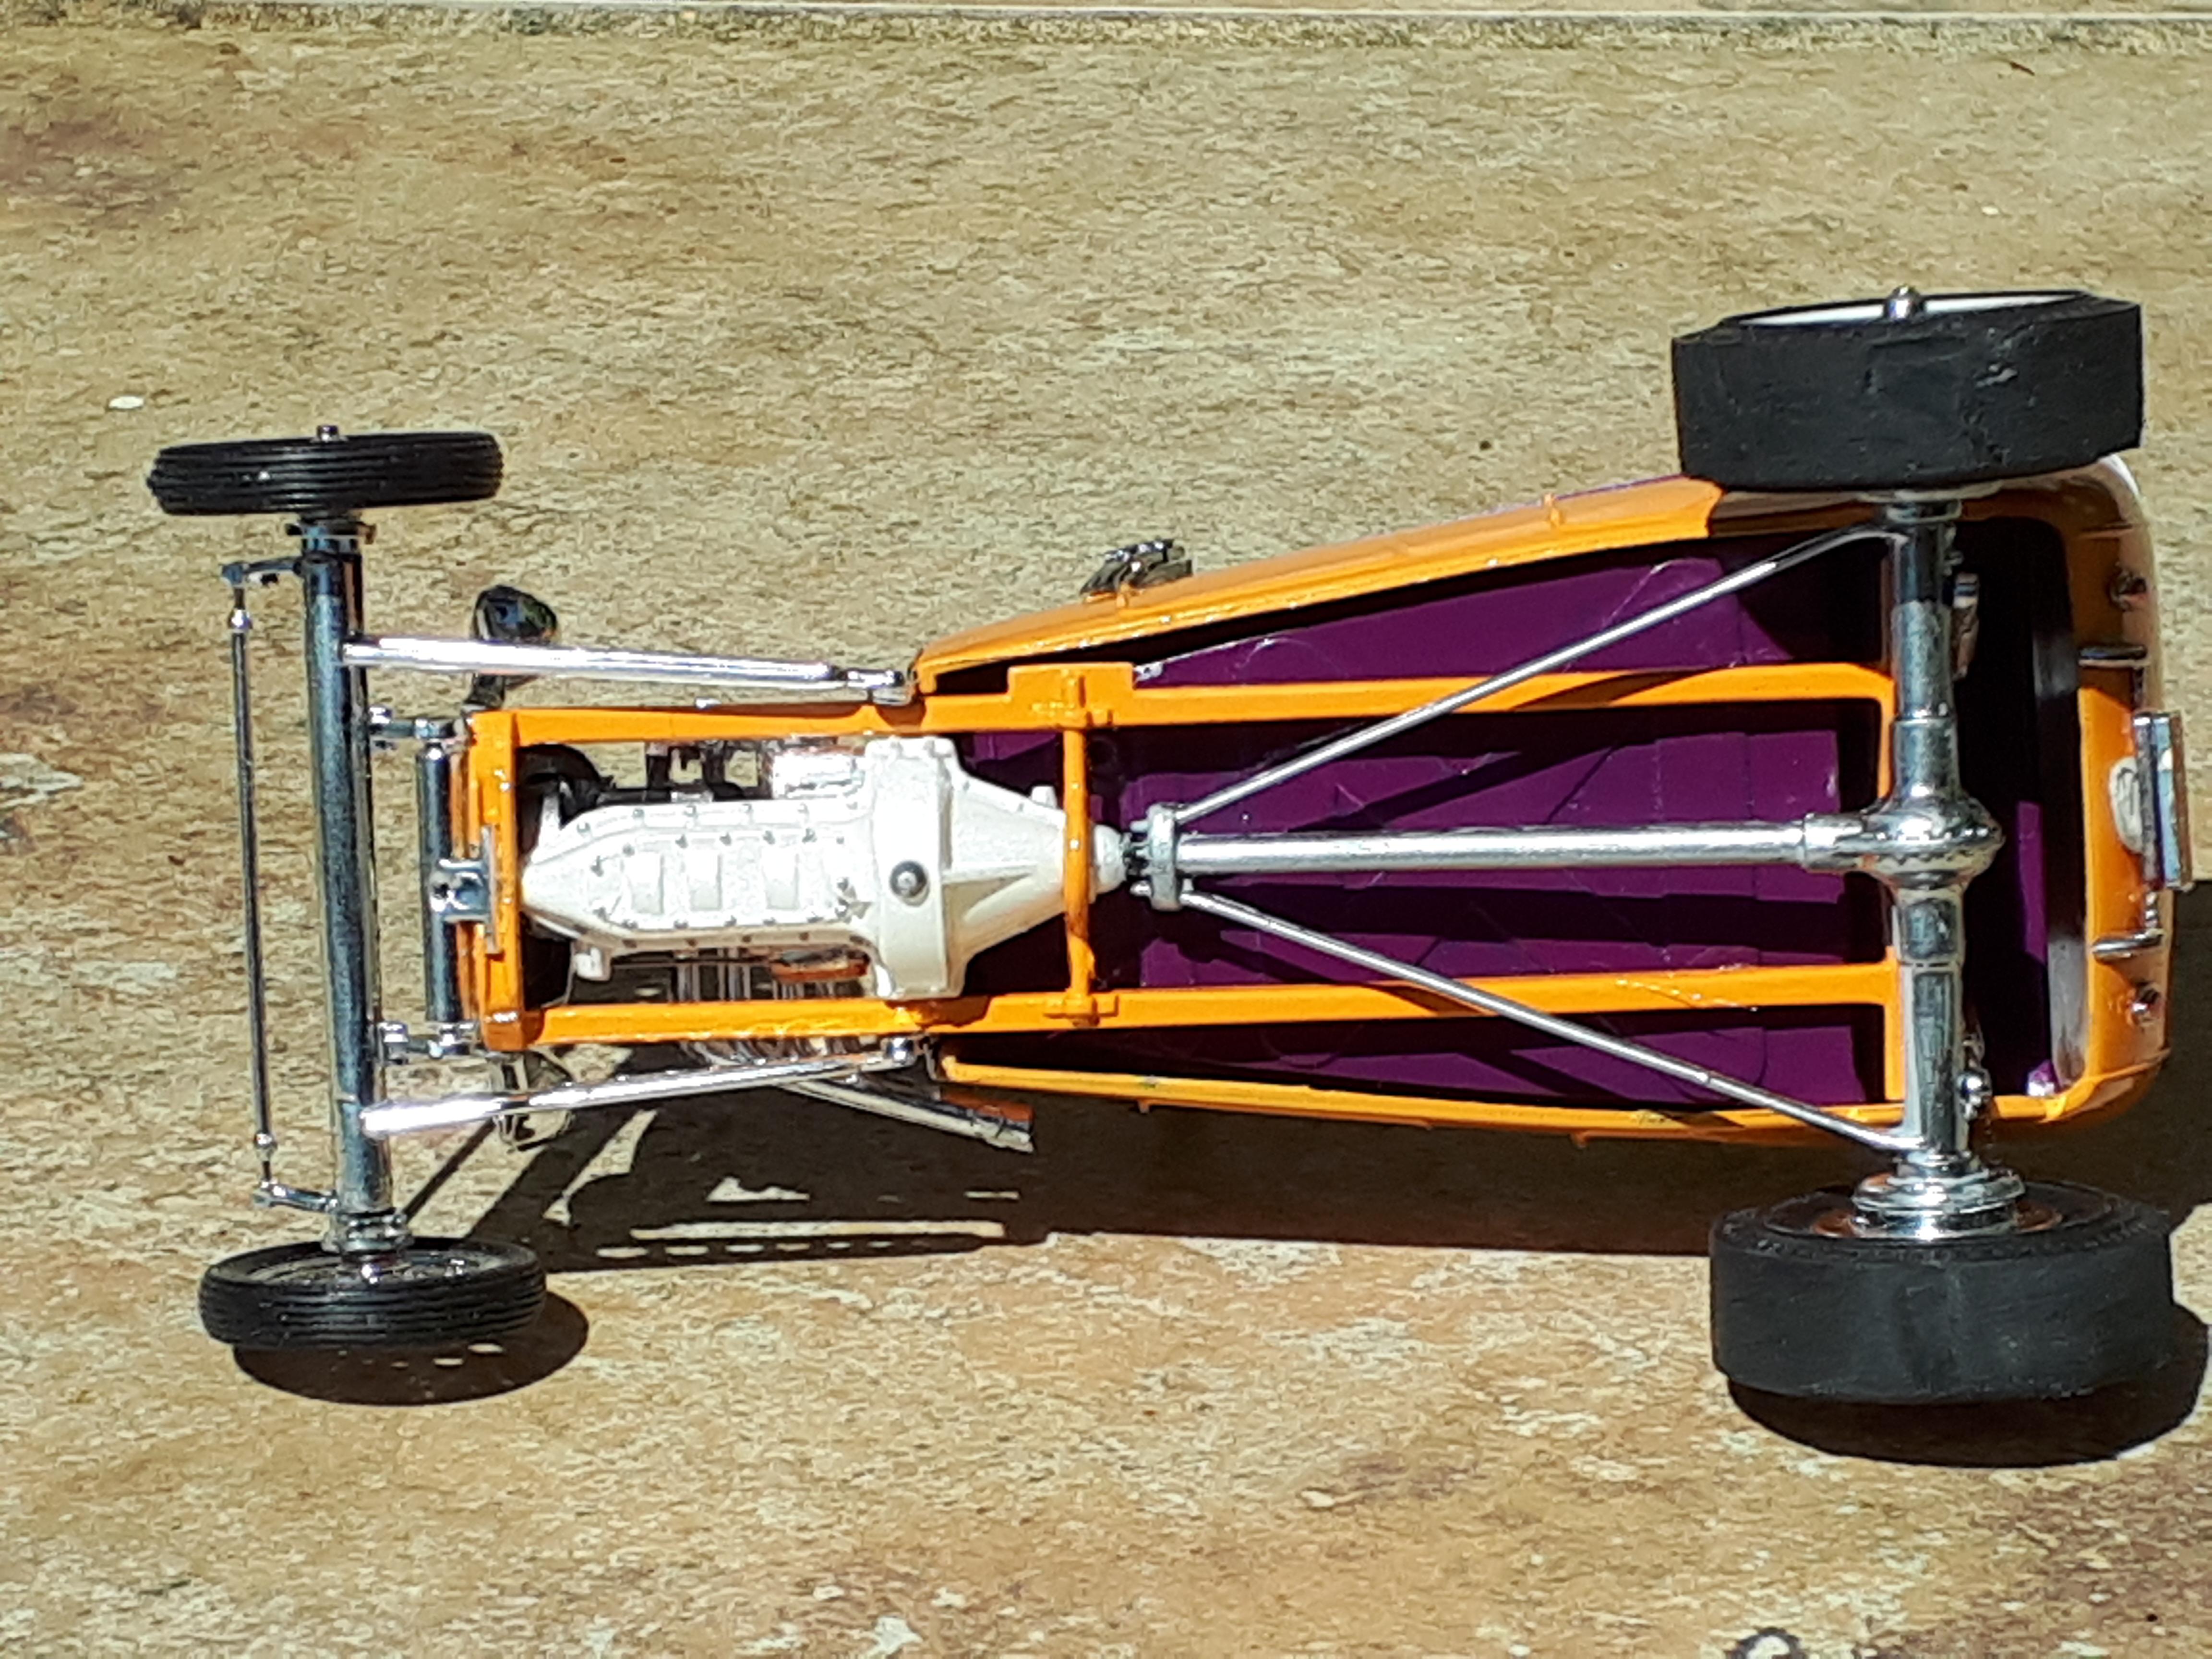
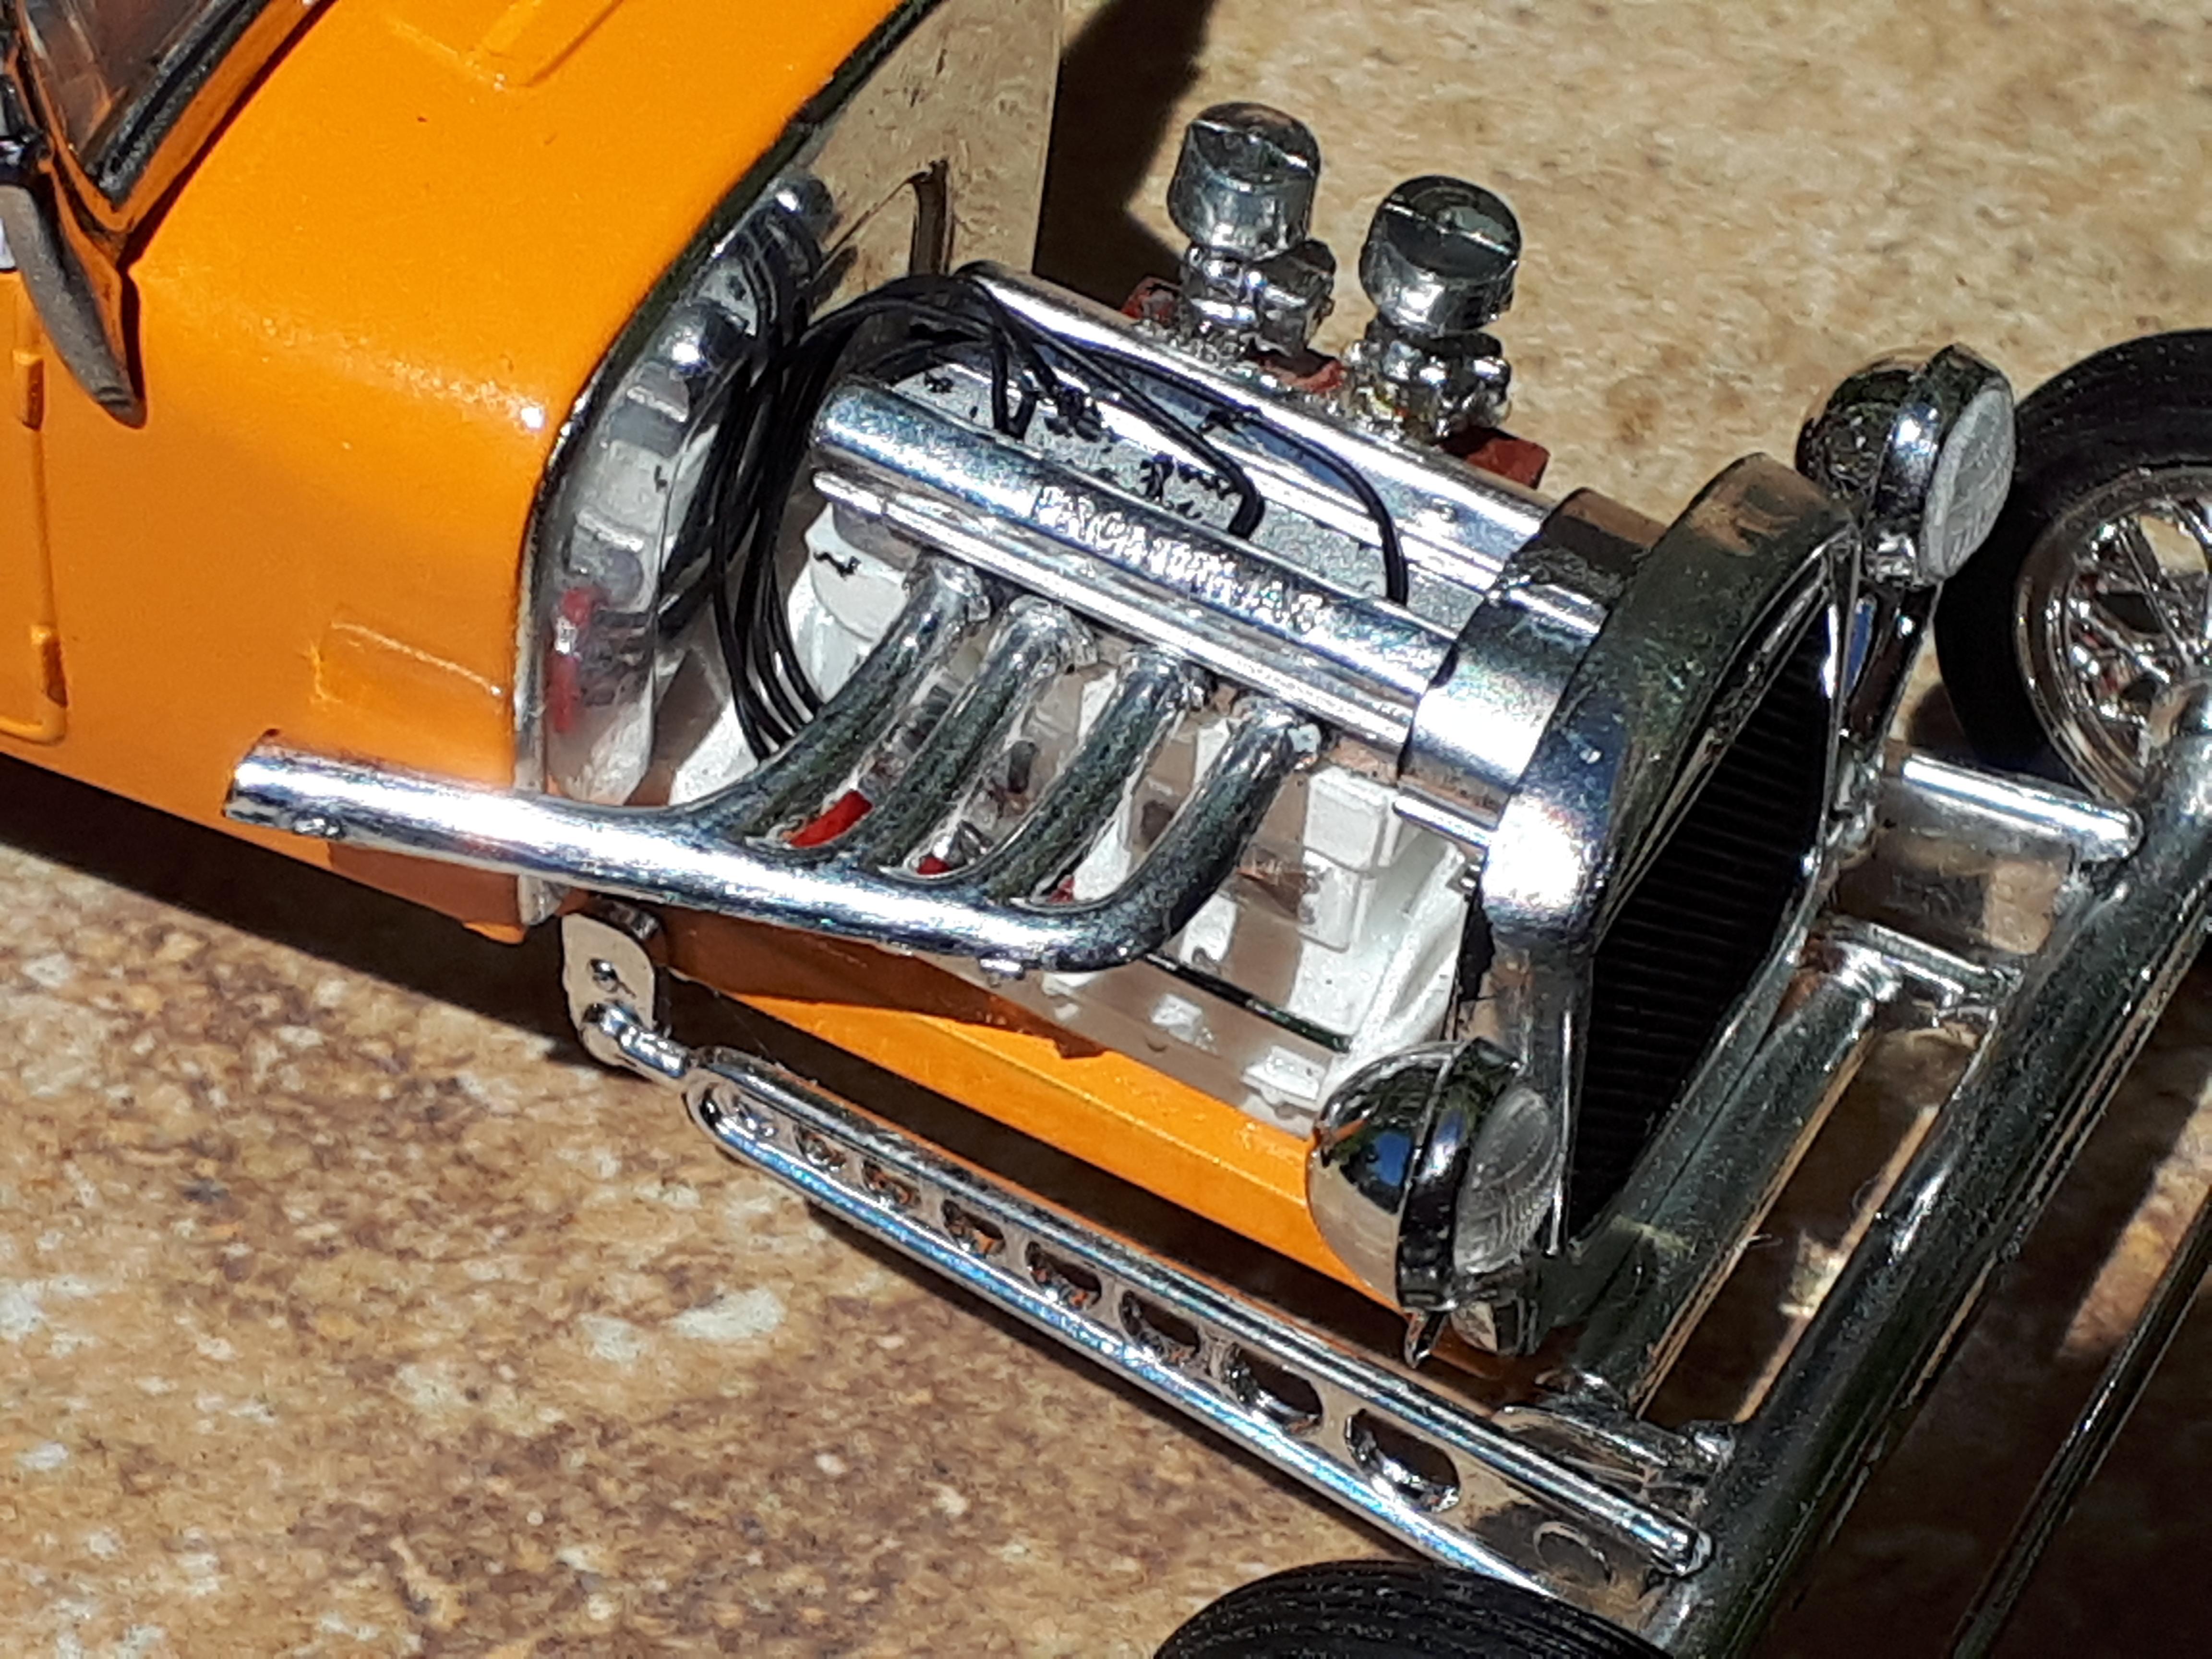
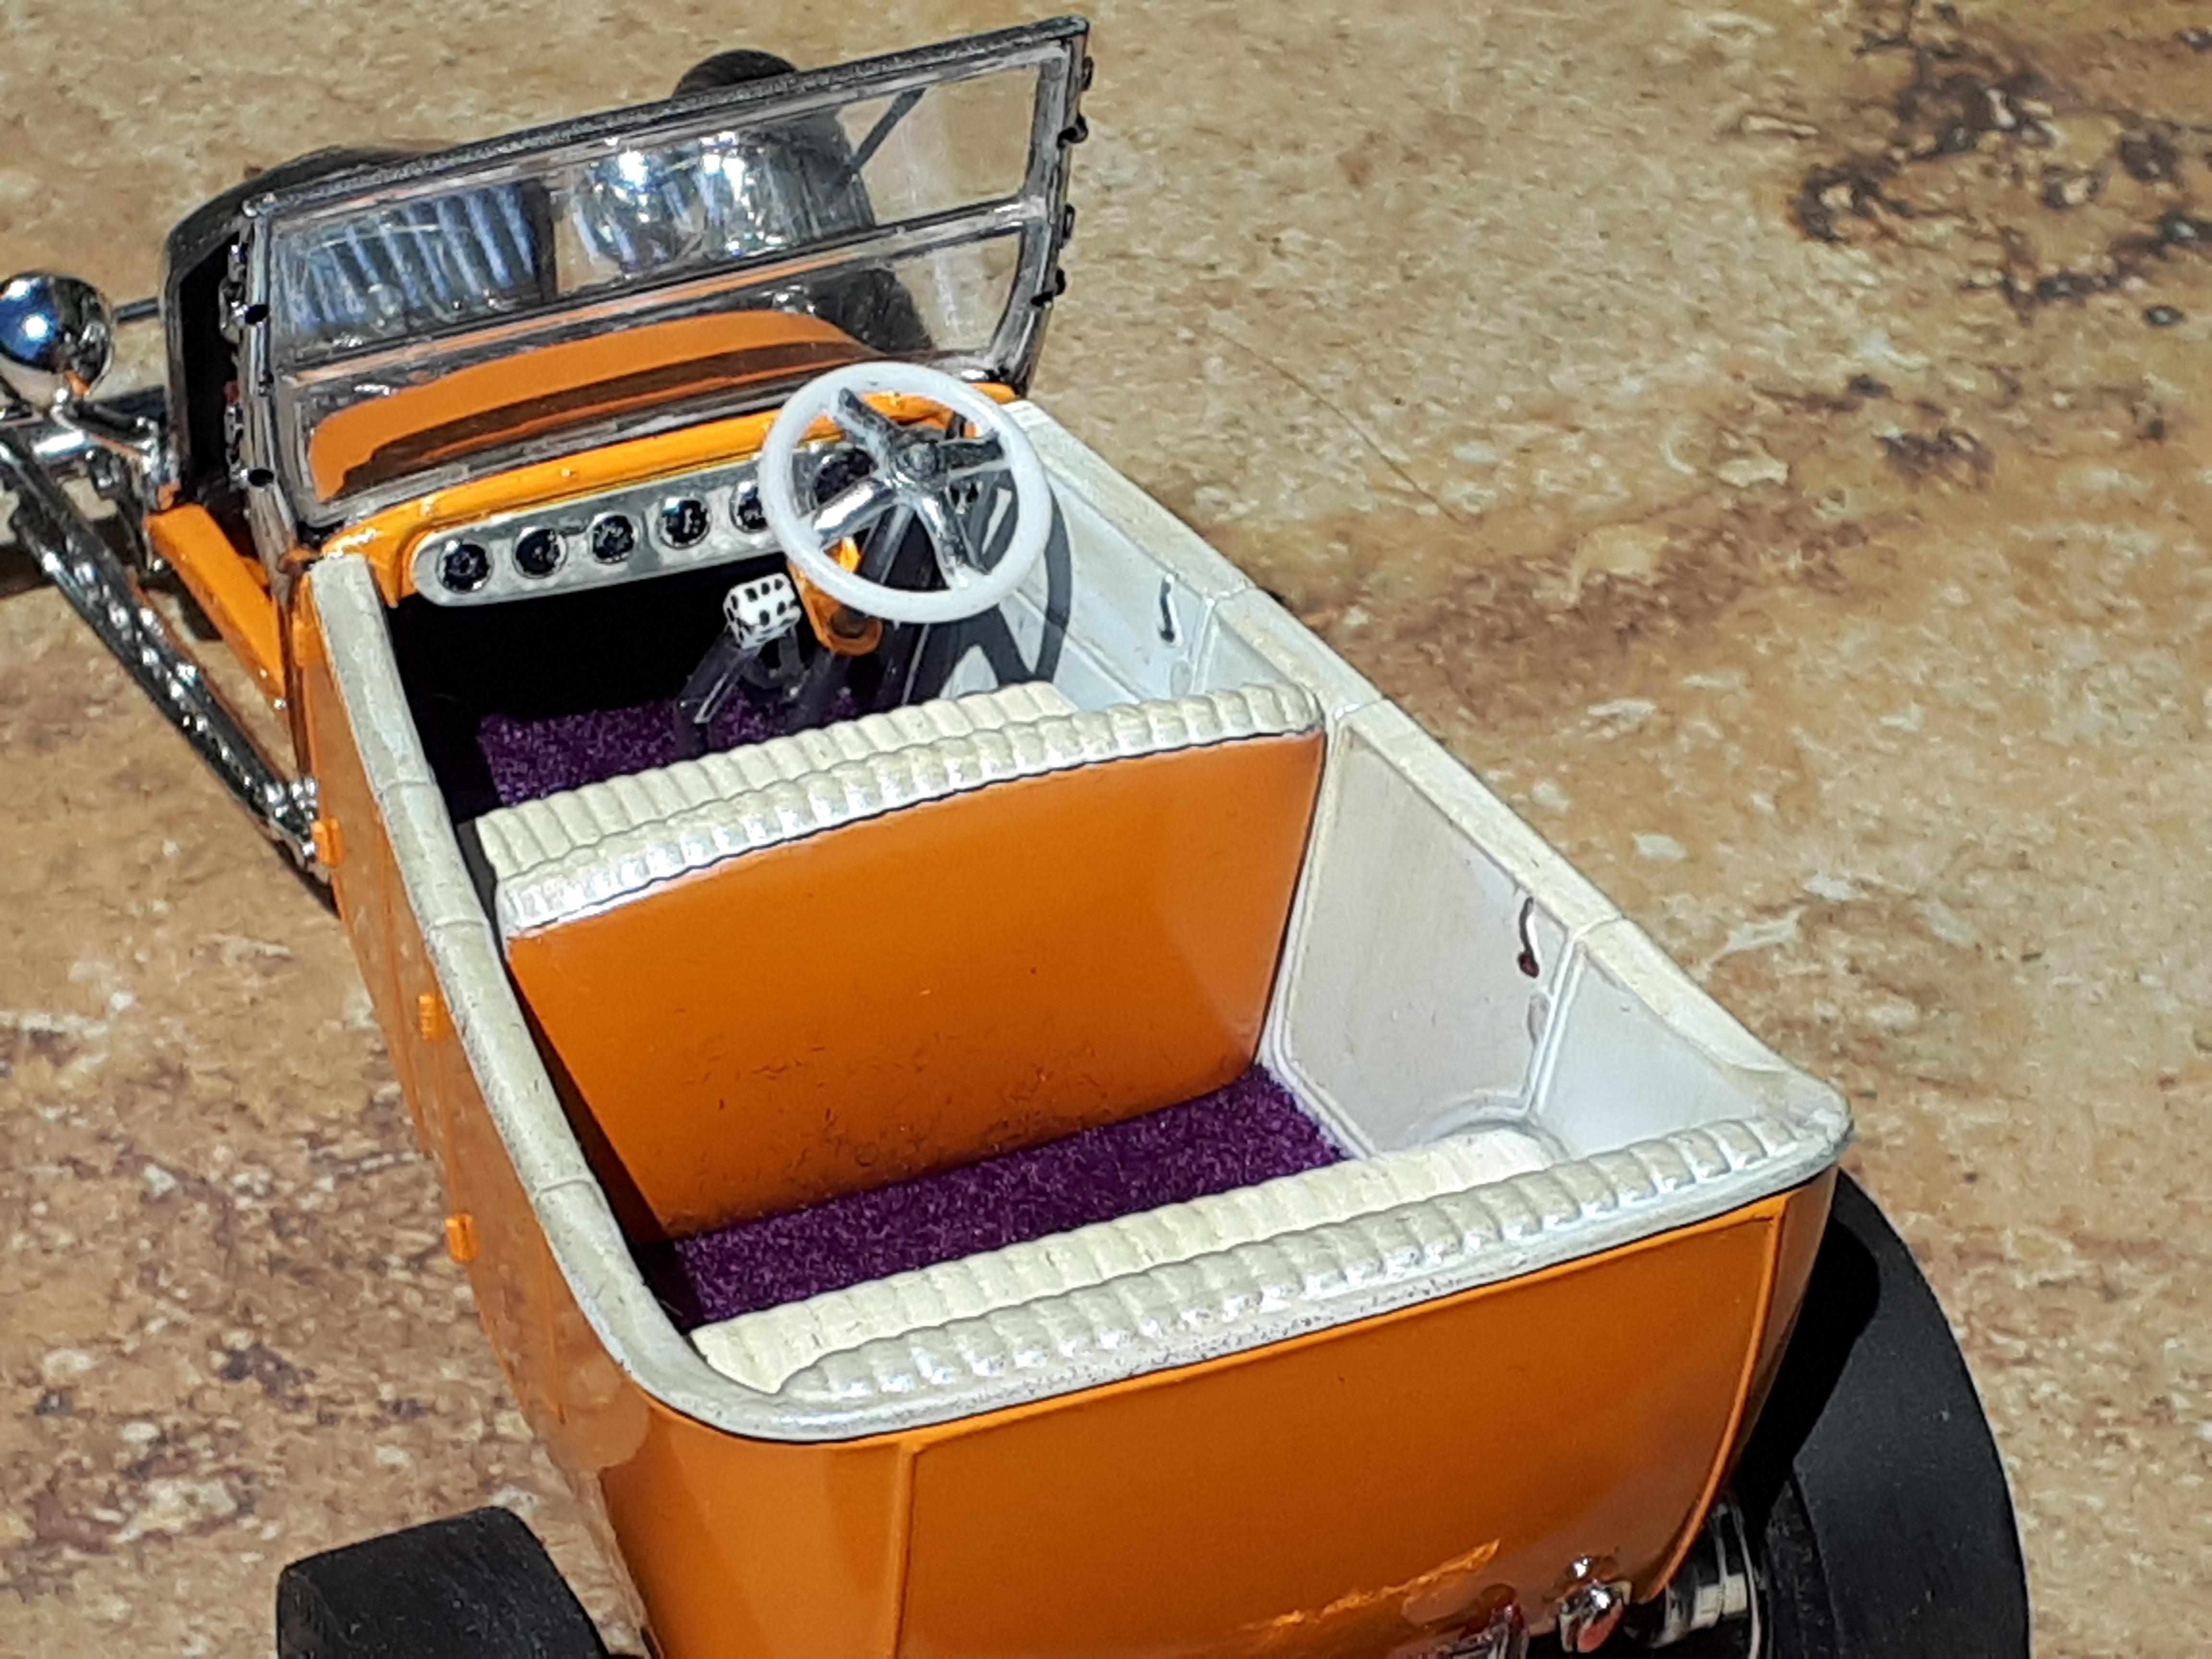
The truth is, if it hadn't been for first Tim, then Jim, I doubt whether I would have built this model. I bought the original AMT XR6 /27 touring kit from a modeller in Drumheller, Alberta, Canada back in 1996. I really just wanted the XR6 but figured I would do something with the touring one day. But after seeing Tim and Jim's models, it made me go back through the stash and realise that I had all those original bits that had been deleted in later re-issues, so I really should create a bit of history. Having said that, the unique double headlights that I had had all along, magically disappeared while I was building this model. I resigned myself to using a set of single ones instead, especially as I wanted to have it finished for our model club's quarterly contest. Barely hours before the club meeting, I glued the singles in place. Wouldn't you know it, the very next night, not 24 hours after the singles were glued on, I was looking for parts for my next build, opened a small clear container and there were the twins that had eluded me for two months! They were within inches of my hand all that time! The model pixies can be very cruel at times. So without any further ado, here is my version of the AMT hiboy tub. I didn't do a built thread because I haven't changed a lot. I scratch-built a tonneau cover out of thin styrene that literally snaps in place! I added a flashier instrument panel and I left out the chassis - to- body crossmembers because they just added extra height that really wasn't necessary. I used AMT Parts Pack slicks to improve the stance, mounted on those Revell Halibrand mags that Dennis Lacey identified on his Revell T tub build. FIrst time EVER that I have used these wheels but I think I will be looking at them more closely in the future! If anyone else has an original AMT 27 hiboy tub, or even a later version or a Revell kit bash, please feel free to add it to this gallery. Tim ( light green) and Jim (pearl white with flames) graciously and enthusiastically approved of having these three together. Please stick to hiboy 27 tubs so that we can compare apples to apples.! Cheers Alan
-
56 Ford short track car.
alan barton replied to wrenchr's topic in WIP: Stock Cars (NASCAR, Super Stock, Late Model, etc.)
That worked - glad to be of assistance! Cheers Alan -
That works too! Cheers Alan