alan barton
-
Posts
2,105 -
Joined
-
Last visited
Content Type
Profiles
Forums
Events
Gallery
Everything posted by alan barton
-
One of your best ever, Ray. I wouldn't change a thing! Such a beautiful build of a beautiful kit. Cheers Alan
-
From a time when we built models for fun and to be creative, rather than trying to achieve a photographic likeness of the real thing! I love it. It would have been right at home on the cover of Model Car Science or Car Model magazines back in the day! Cheers Alan
-
Thanks Dennis! Doing the windshield posts like that is something I always wanted to try and I was helped by being down to my last windshield frame at the time, which was broken! I want to improve them by making a couple of tiny little "washers" to glue to the inside edge of the stanchions and replicate where the top half of the posts bolt on. There's still a ton of details to add to this model before I can truly call it finished but I like where it is going so far and I'm glad you like it too! Cheers Alan
-
Ah, Dennis, you've done it again! Stance to die for and I'll keep saying it, those wheels look amazing. As on all your builds, I love the precision of your front and rear end assemblies. Something that has inspired me to try harder to reach that level. Guys who build "modern" cars will never understand how much fabrication work goes into building a traditional hot rod suspension, keeping it all square and getting all four wheels on the ground. You are a master of this facet of model building. Cheers Alan
-
The word you were after, Mattias, is pegboard! I built a workshop diorama many years ago and am enjoying watching your build. Good luck with it! If i could make one suggestion, find yourself a 1/25th scale figure and use him to visualise where you want to put things so that they are at a realistic working or reaching height. Its a lot quicker than measuring! Cheers Alan
-
Thank you Brian, what an amazing experience it must have been to view this display. The magnitude is hard to comprehend! Cheers Alan
-
Your build really displays how nicely those early Monogram kits build up and this is one of my favourites. I still have some of the Humbrol brush painted builds from my youth and they stand up well alongside spray painted models of my adulthood. However, as others have commented, the Humbrol of today is much thinner and more inclined to streaks than that beautiful old enamel. Congratulations on a beautiful model! Cheers Alan
-
Mission Impossible - American Graffiti cop car from a wreck
alan barton replied to alan barton's topic in WIP: Model Cars
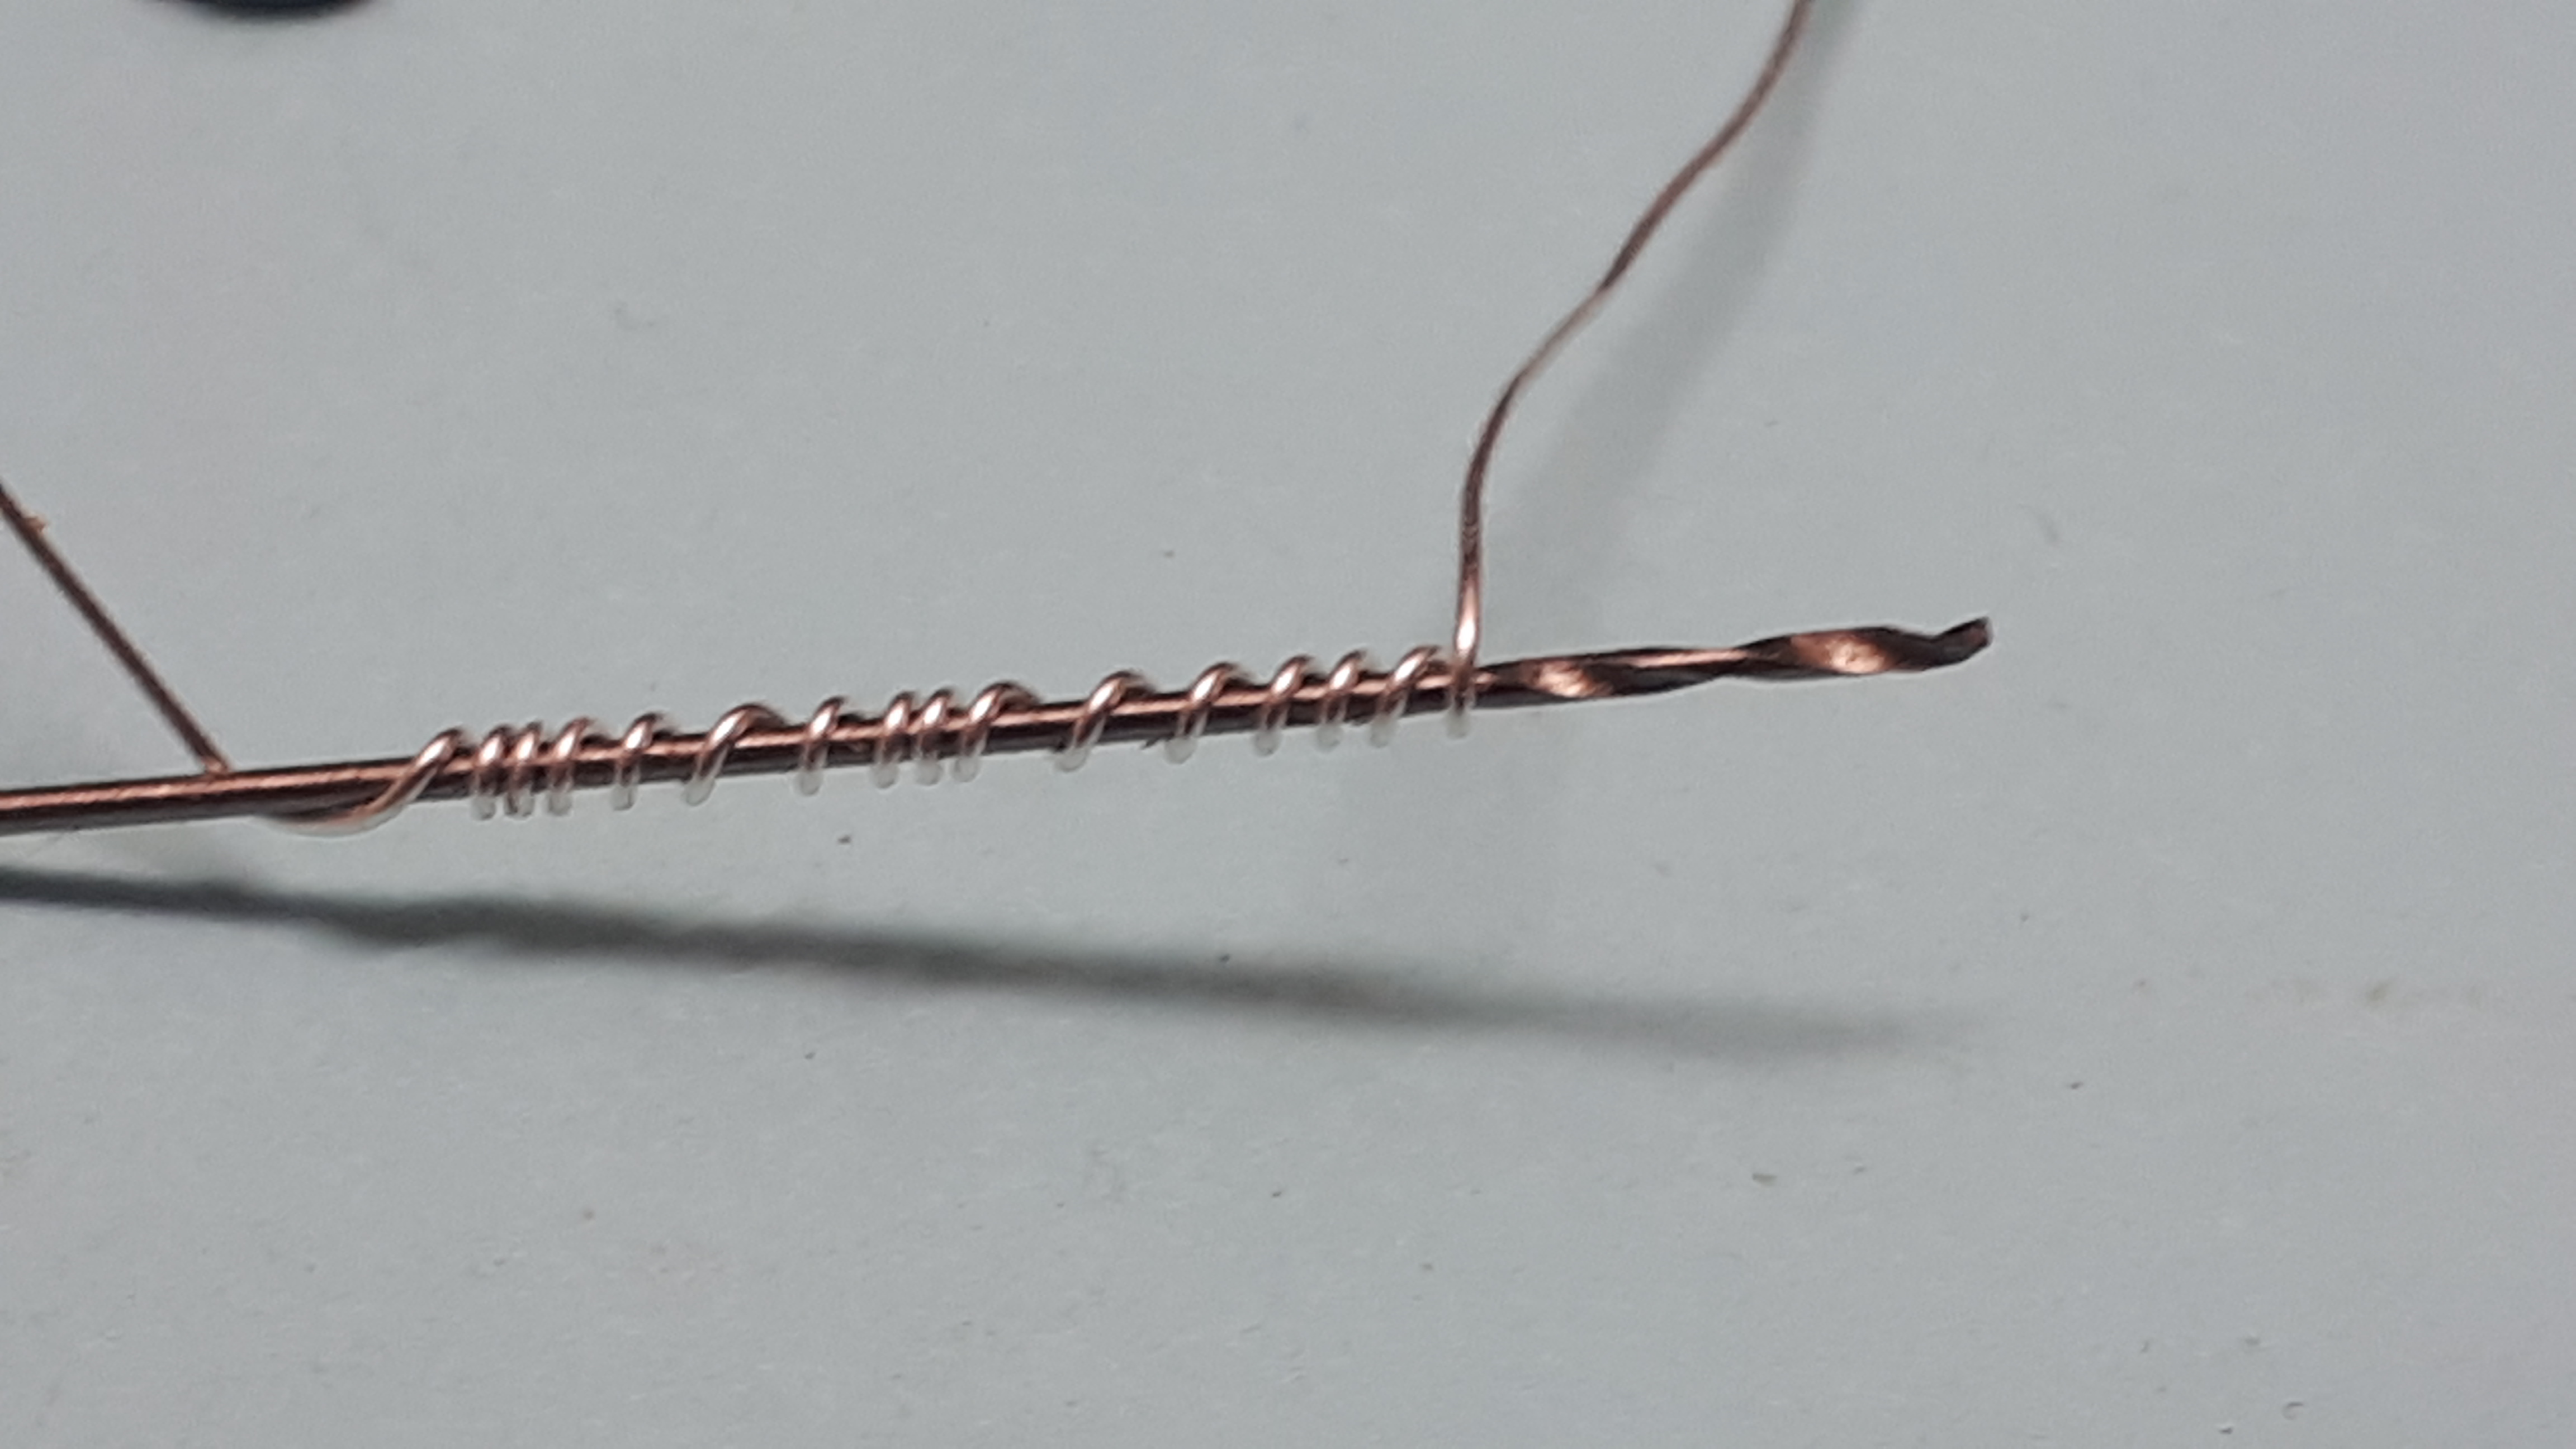
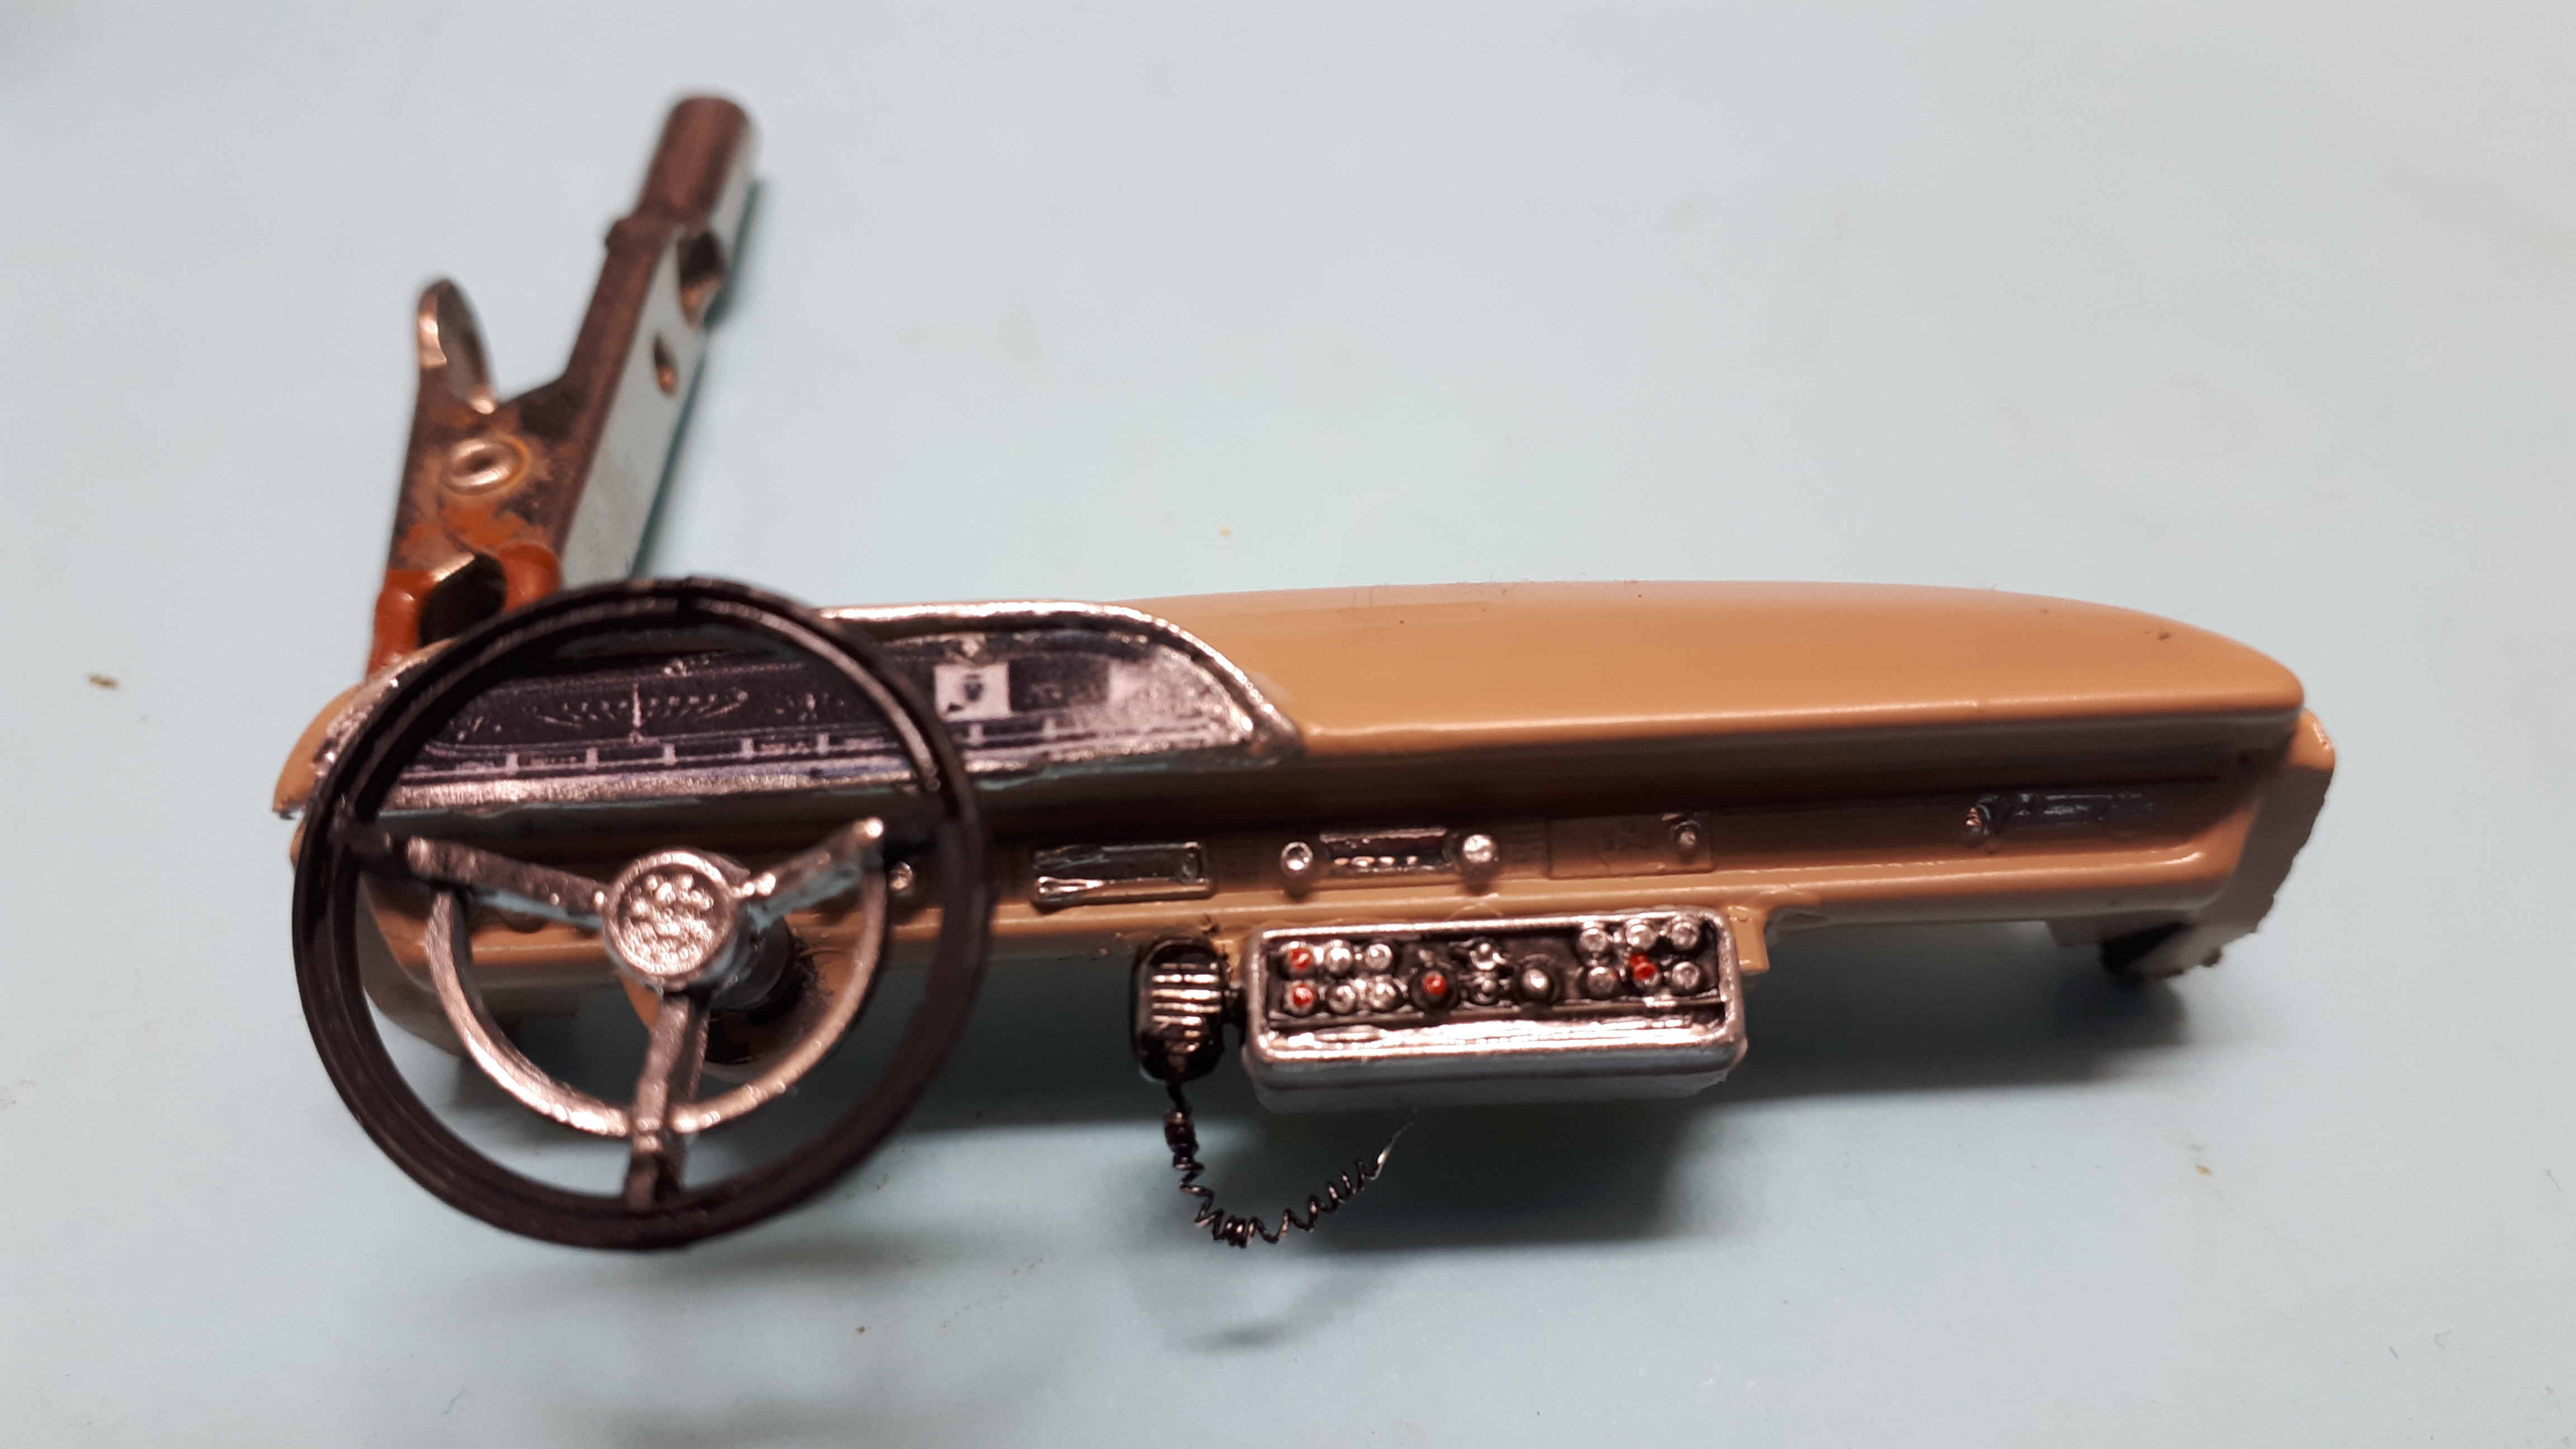
Thank you Bob, thank you Trevor. Funny how an American cop car built by an Aussie is appealing to Americans, Canadians, British,Welsh and Swedish modellers! Unfortunately today has turned into a real winter's day, cold and wet, so although I did get my primer on I ma going to wait until later in the week to do a final rub down with 800 and get the white paint on. In the meantime I thought I would tackle the dash. A few weeks ago I extended the 63 instrument housing with plastic and putty and cut out a photocopy of a 61 Galaxie instrument cluster from the internet. It isn't particularly clear but it gives the right effect. I found an under dash radio, from the AMT 53 Ford Pickup I think or maybe the Monogram 55, either way, the one with a telephone style handset on it. I sliced off the phone and made a more two -way radio like handpiece from a pedal, with a strip of fine coiled wire for the cord. Pretty happy with the final result, just enough detail to create interest, even if no-one ever looks inside! Cheers Alan
-
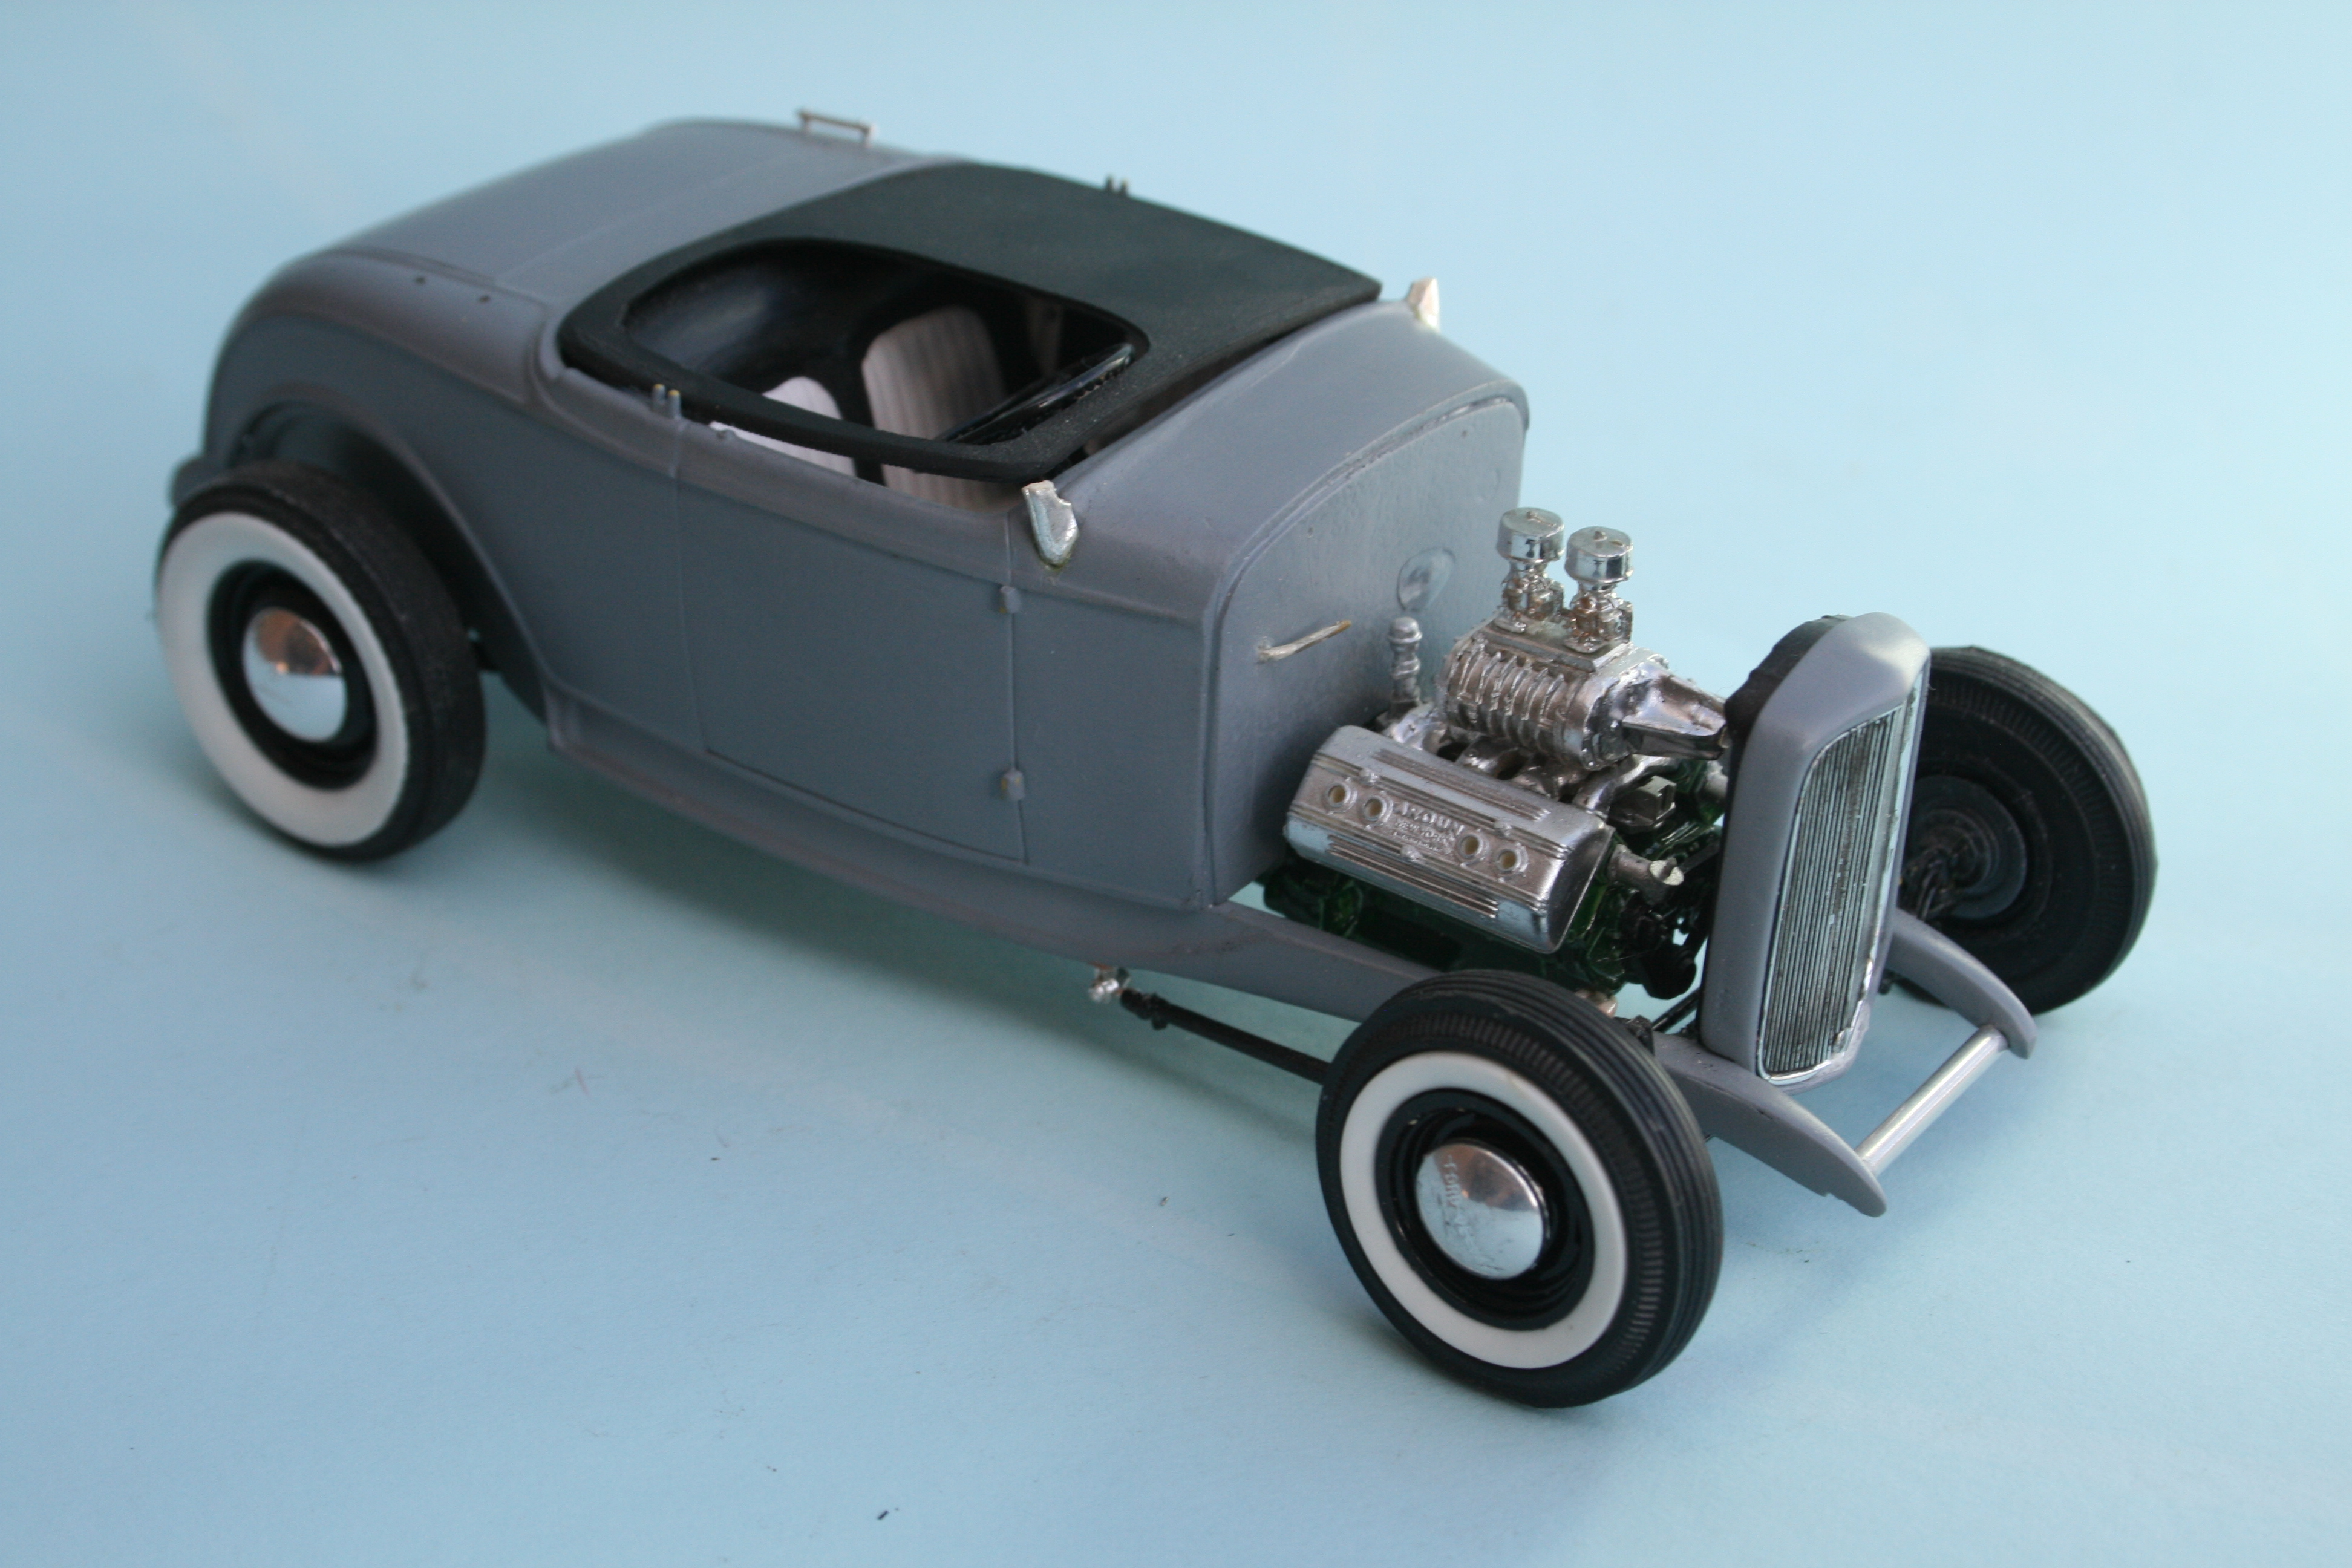
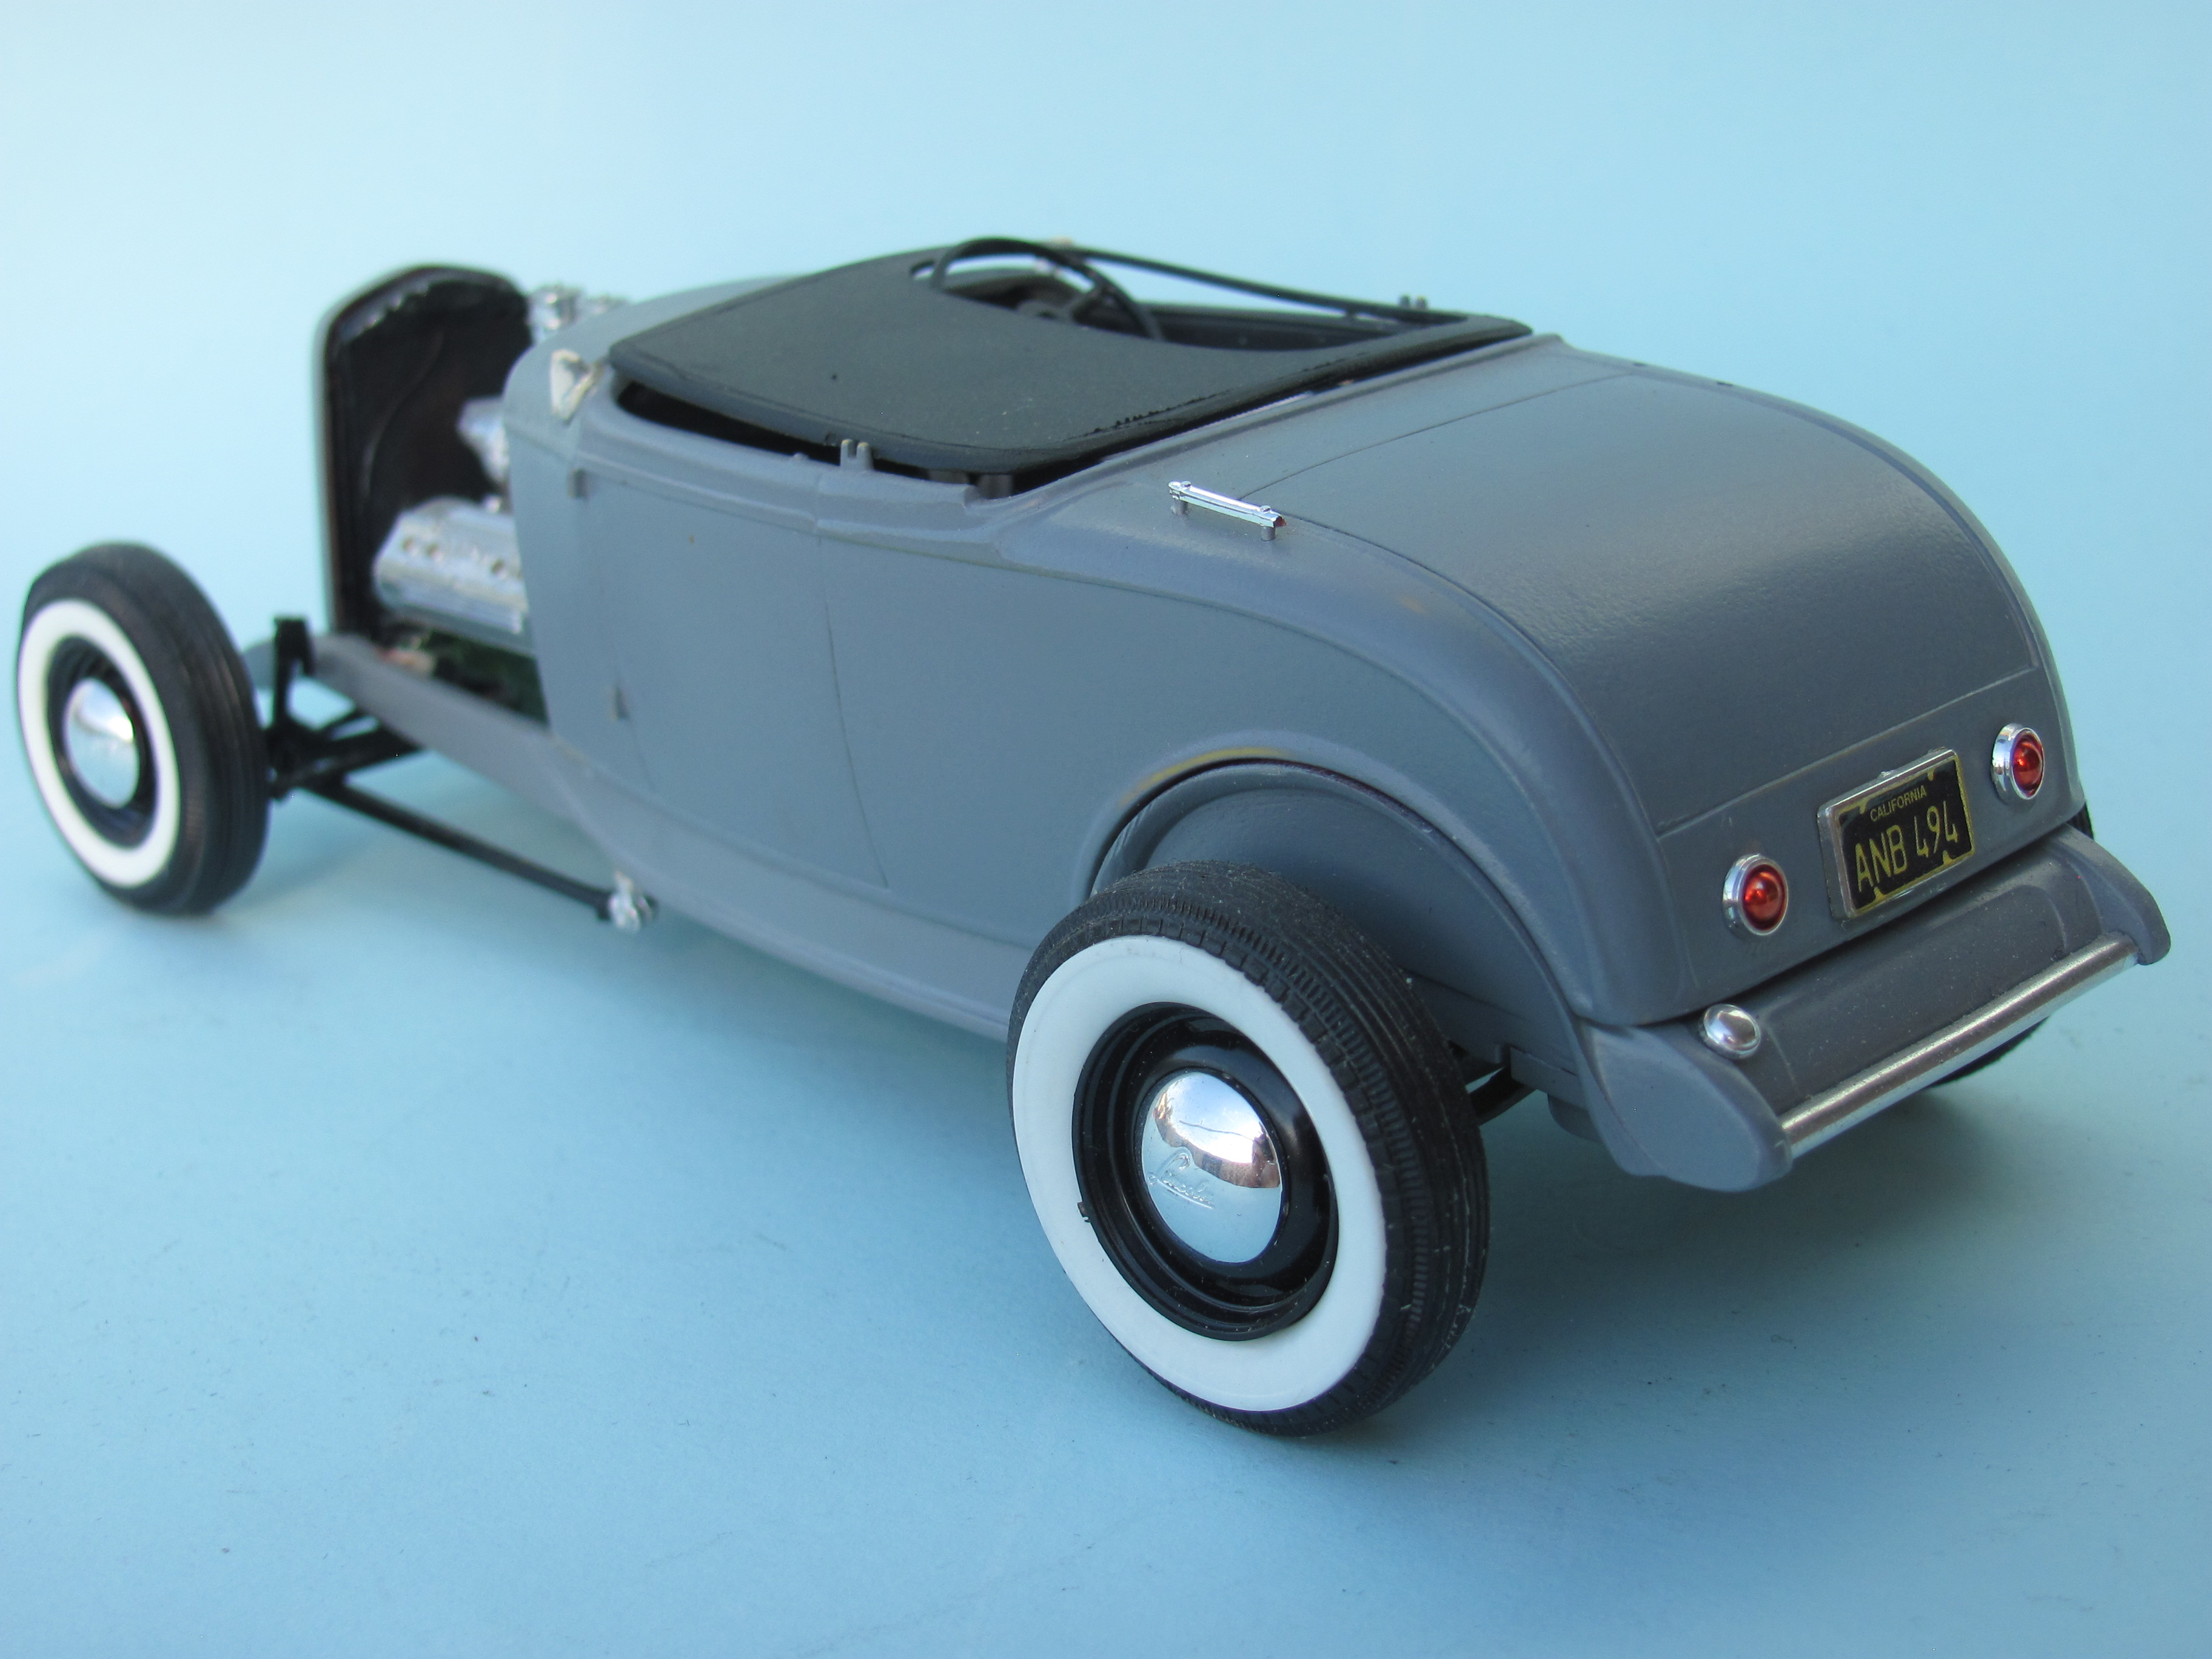
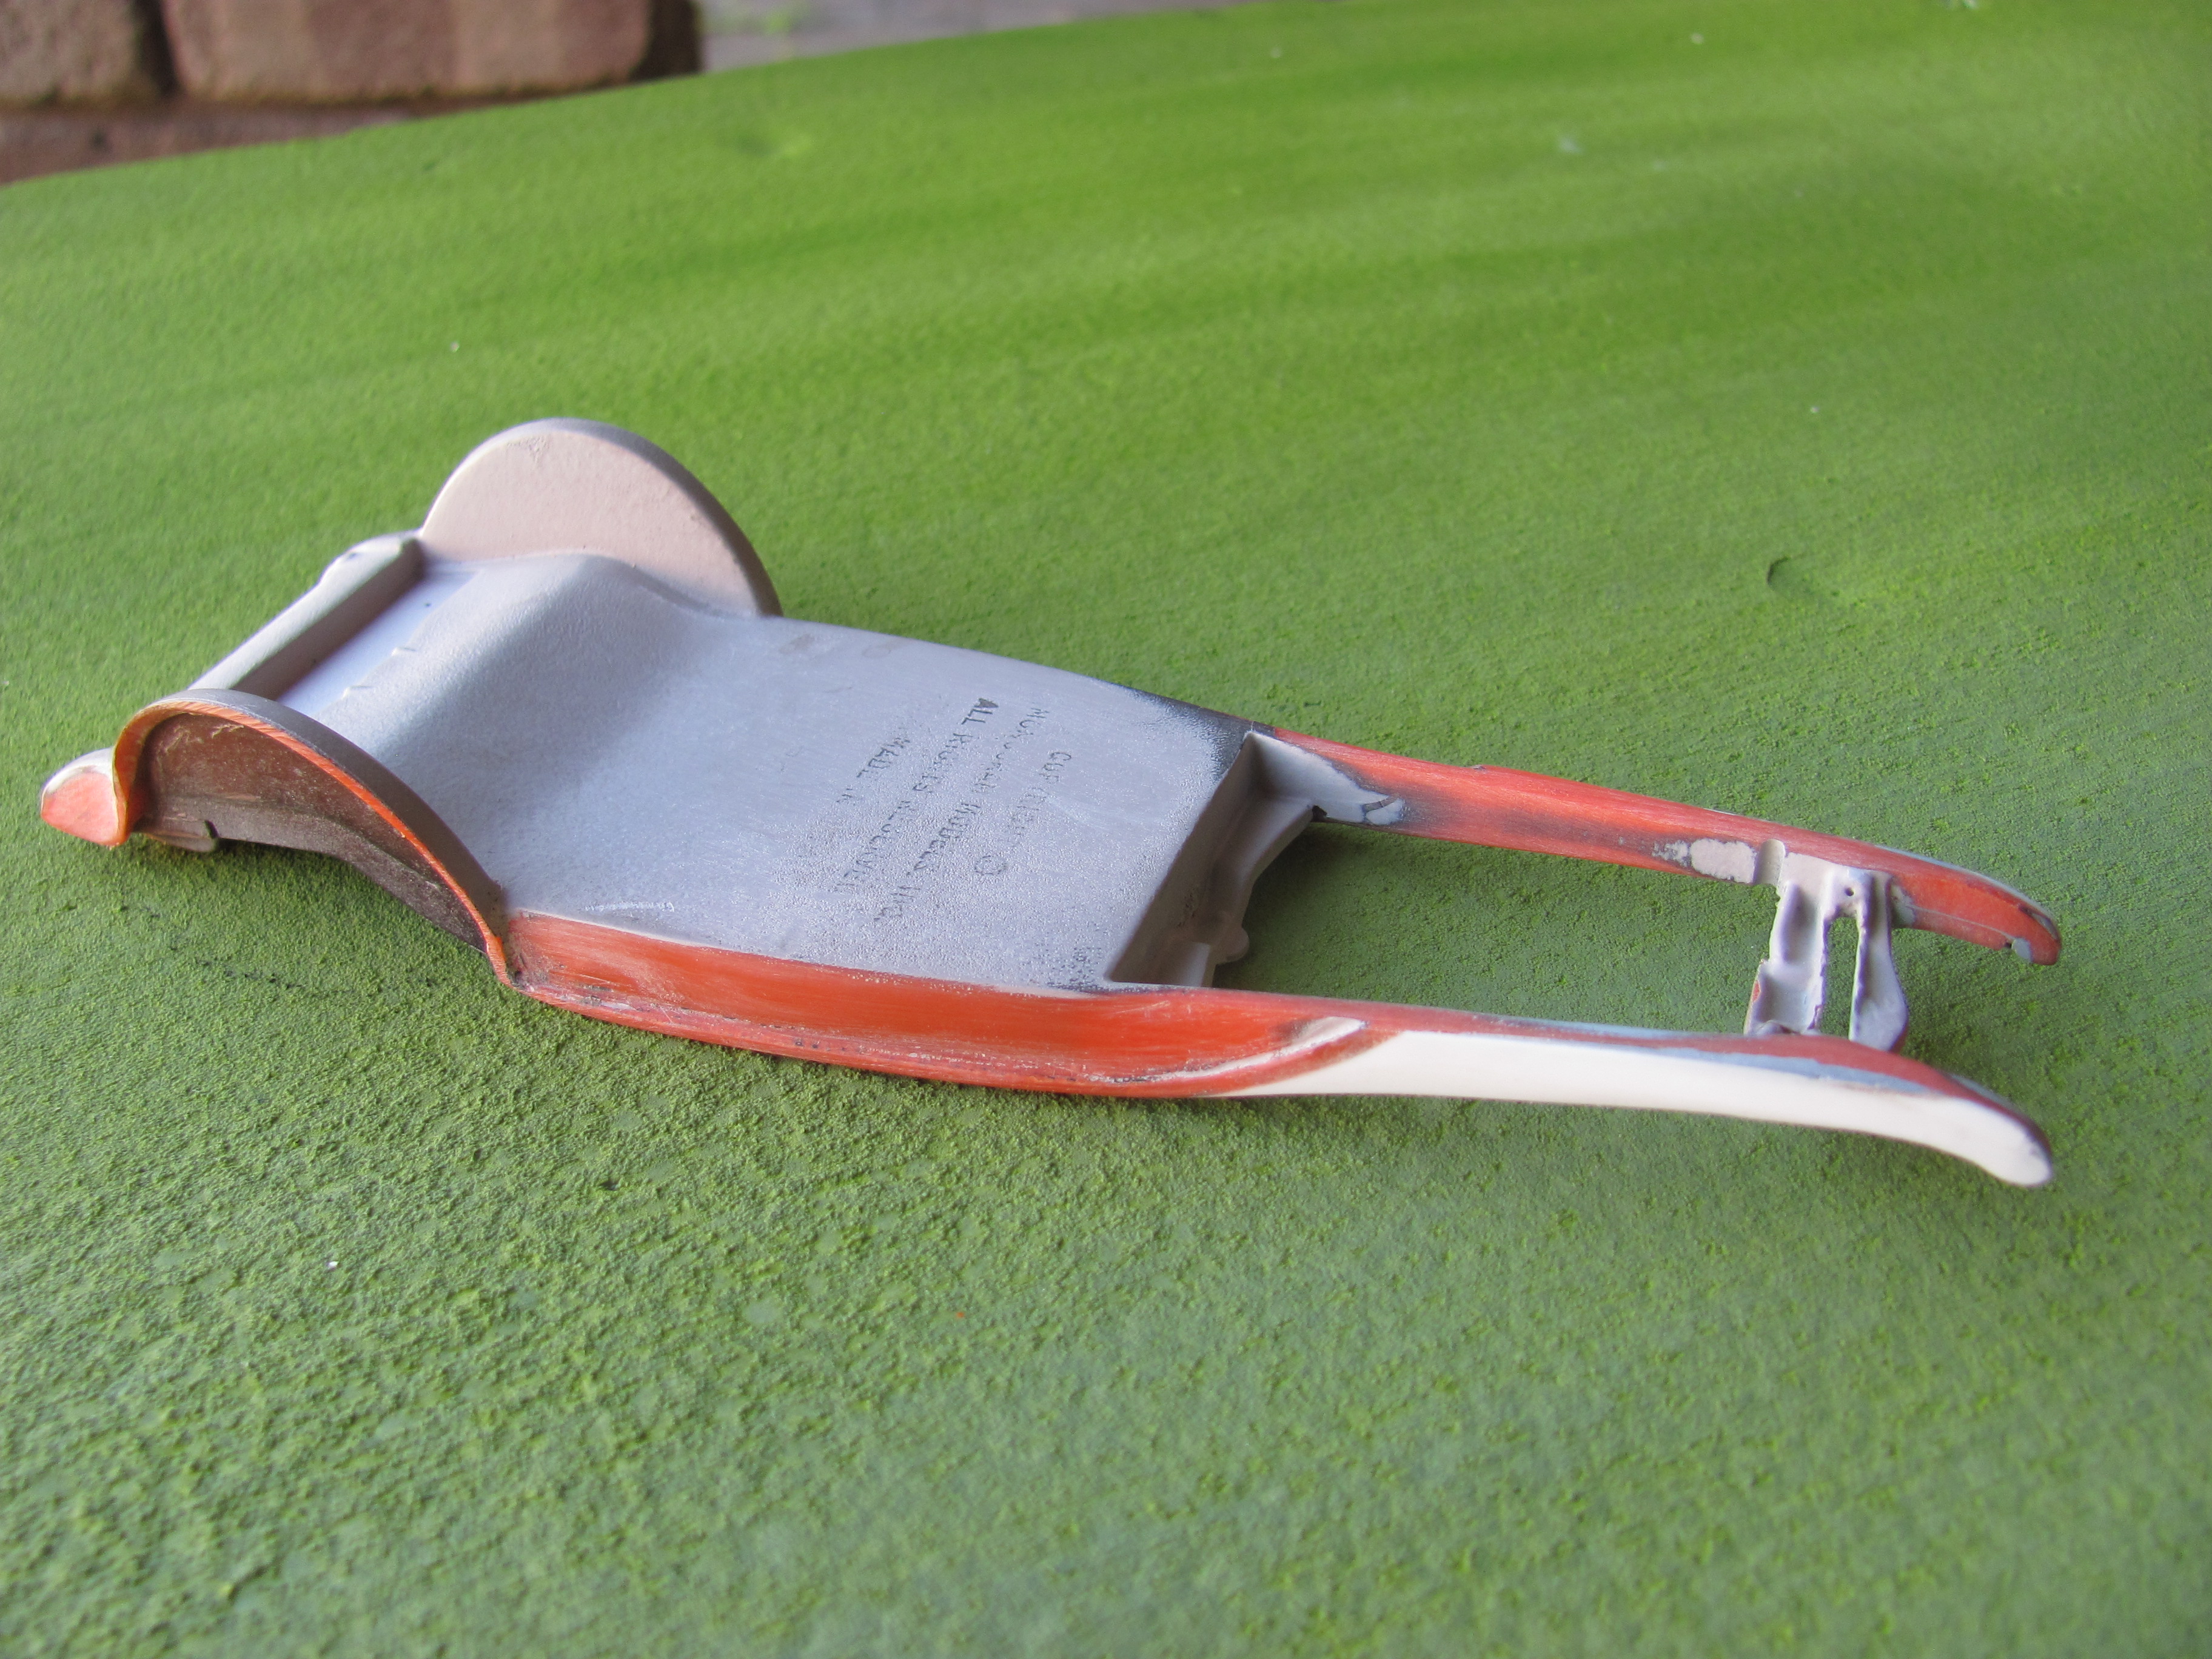
Talk about brothers from a different mother! I too built my first one when I was around 15 or 16. It was a replica of a local car, the only hiboy in Perth at the time. it was also my very first spray paint job ever, with a coat or three of Testor's metallic Purple, I think. Man, was it thick. When I got back into modelling in my early twenties, I stripped it to create the red one below in 1982 and guess what, it doesn't have the reveal either - I simply hadn't thought about it when I was 15! About ten years ago I started a new one, intended as a dry lakes car, but it isn't quite finished yet. This time I knew about the reveal and found it relatively easy to achieve. It uses a resin ArDun flathead conversion and 41 Lincoln rear wheels and tyres.
-
Thanks Bob. The following photos should give you a rough idea of how I did it.
-
Mission Impossible - American Graffiti cop car from a wreck
alan barton replied to alan barton's topic in WIP: Model Cars
Got a bit sidetracked on other projects but the Galaxie got its last coat of primer today - I think! The roof widening and post straightening is good for about a B+ but with less than two months to go I need to get a wriggle on! I also started carving up two Monogram Sprint car drivers to man the cop car, so to speak. This involved straightening the knee joint, straightening and repositioning the arms for a braced position, pie cutting the ankles to get the feet to fit the floor , hollowing out his back to better conform to the seat and doing similar plastic surgery on his derriere! It is far from pretty at this stage but putty should fix most sins. Fun fact - Holstein, the officer in the movie, is wearing a short sleeve shirt and a black bow tie - how normal was that for an American police officer in 1962? Our guys used to have to wear a long tie and long sleeves summer or winter although it is different these days. You can also see the front seat - it started life as the back seat in an unknown interior tub the pleats had a passing resemblance to the stock rear seat and with them mostly being covered by police officers that was good enough for this job. I also cut up one of the original bucket seats to widen the rear seat where I removed the convertible hood mounting compartments. I sprayed them flat black and then misted them with a Testors Tan so that plenty of shadows would show on the upholstery. You can just make out some of the work I have done so far on the door panels. again, they will be near enough for this job. The dash cluster housing has been widened to more closely represent a 61 dash - a print from the Internet will be used for the instruments themselves. Cheers Alan
-
Model car contests
alan barton replied to Repstock's topic in General Automotive Talk (Trucks and Cars)
Absolutely agree, Pete! If you go the Olympics, you can win as many gold medals as you are capable of winning, as our Aussie swimmers have proven many times. Should someone living in the middle of the Sahara get preference because he is nowhere near water - nope! But on contests in general, I am surprised NNLs haven't completely put them to sleep. I assisted judging our club's quarterly competition last week and it was one of the toughest thing I have ever done. We have a very uniformly high standard in our club and there was absolutely nothing in it. How do you choose between an impeccably finished Revell 69 Camaro and an equally well finished Japanese kit of a Datsun 240Z with a quarter of the parts? I gave it to the Camaro based on degree of difficulty but felt I had treated the Datsun builder badly as a result - he shouldn't be penalised for building the car he loved that just happened to be a simpler kit. People's Choice and Modeller's Choice - the only way for me! Cheers Alan -
Custom wheel hoops made on Taig mini-lathe
alan barton replied to Bills72sj's topic in Tips, Tricks, and Tutorials
They are so nice and the concept is so simple! Might have to start looking seriously into this! Cheers Alan -
Hi Steve, Heaps of Aussies on here plus Kiwis as well! They let us all play in the same sandpit! Your engine shows a skill level well beyond what I would expect from a rookie - congrats on a beautiful job so far. For what it is worth, I can thoroughly recommend spray cans to get a decent paint job. I own and have used airbrushes but they do have their challenges. Fantastic for custom graphics and shades of paint that you cant get in a spray can but you will be pleasantly surprised with the spray can, especially in our warm weather (not sure how bad your humidity might affect things though, its a bit drier heat over here). My favourite was always Testors but almost impossible to get in Oz now. Next best would be Tamiya acrylic spray cans followed by Duplicolor automotive lacquers - just make sure you always put them over Duplicolor primer. First coat sprayed from a distance - should basically look like overspray and you can still see plastic or primer through the paint. Second coat about five-ten minutes later, a bit closer, should just cover the primer or plastic and will have a dry, orange peel look. Third coat, ten minutes later, up close, be brave and make it fairly wet - then leave it alone for at least 24 hours, a week is better. You should now have a smooth glossy paint job. The one thing you must avoid at all costs with Tamiya is getting it too thick and causing it to run and bubble. The bubbles will go down to the primer! This requires a complete strip to repair, and the only thing I have found in Australia that will remove Tamiya acrylic is Dettol mixed 50/50 with water. It strips it off but it is an icky sticky, not to mention smelly job! Better two little paint than too much! Welcome to our gang, you will love it here and let me warn you, posting becomes very addictive! Cheers Alan
-
MCM #208 is HERE!
alan barton replied to larrygre's topic in Model Cars Magazine News and Discussions
Still waitin' in Oz - I think the postal pixies have forgotten we exist since COVID! Cheers Alan -
One every one forgets is the Tom Daniels Pie Wagon. I/24th scale, finned heads, triple carb manifold and only about six or seven years newer than your 34 kit. Cheers Alan P.S. "Exhaust Port Retentive" - Ace, you get my saying of the week award!!!!!!!
-
Beautiful work Ismo! I particularly like the chrome blisters on the hood - did you repurpose old kit headlights or jewellery items or what to make these? Cheers Alan
-
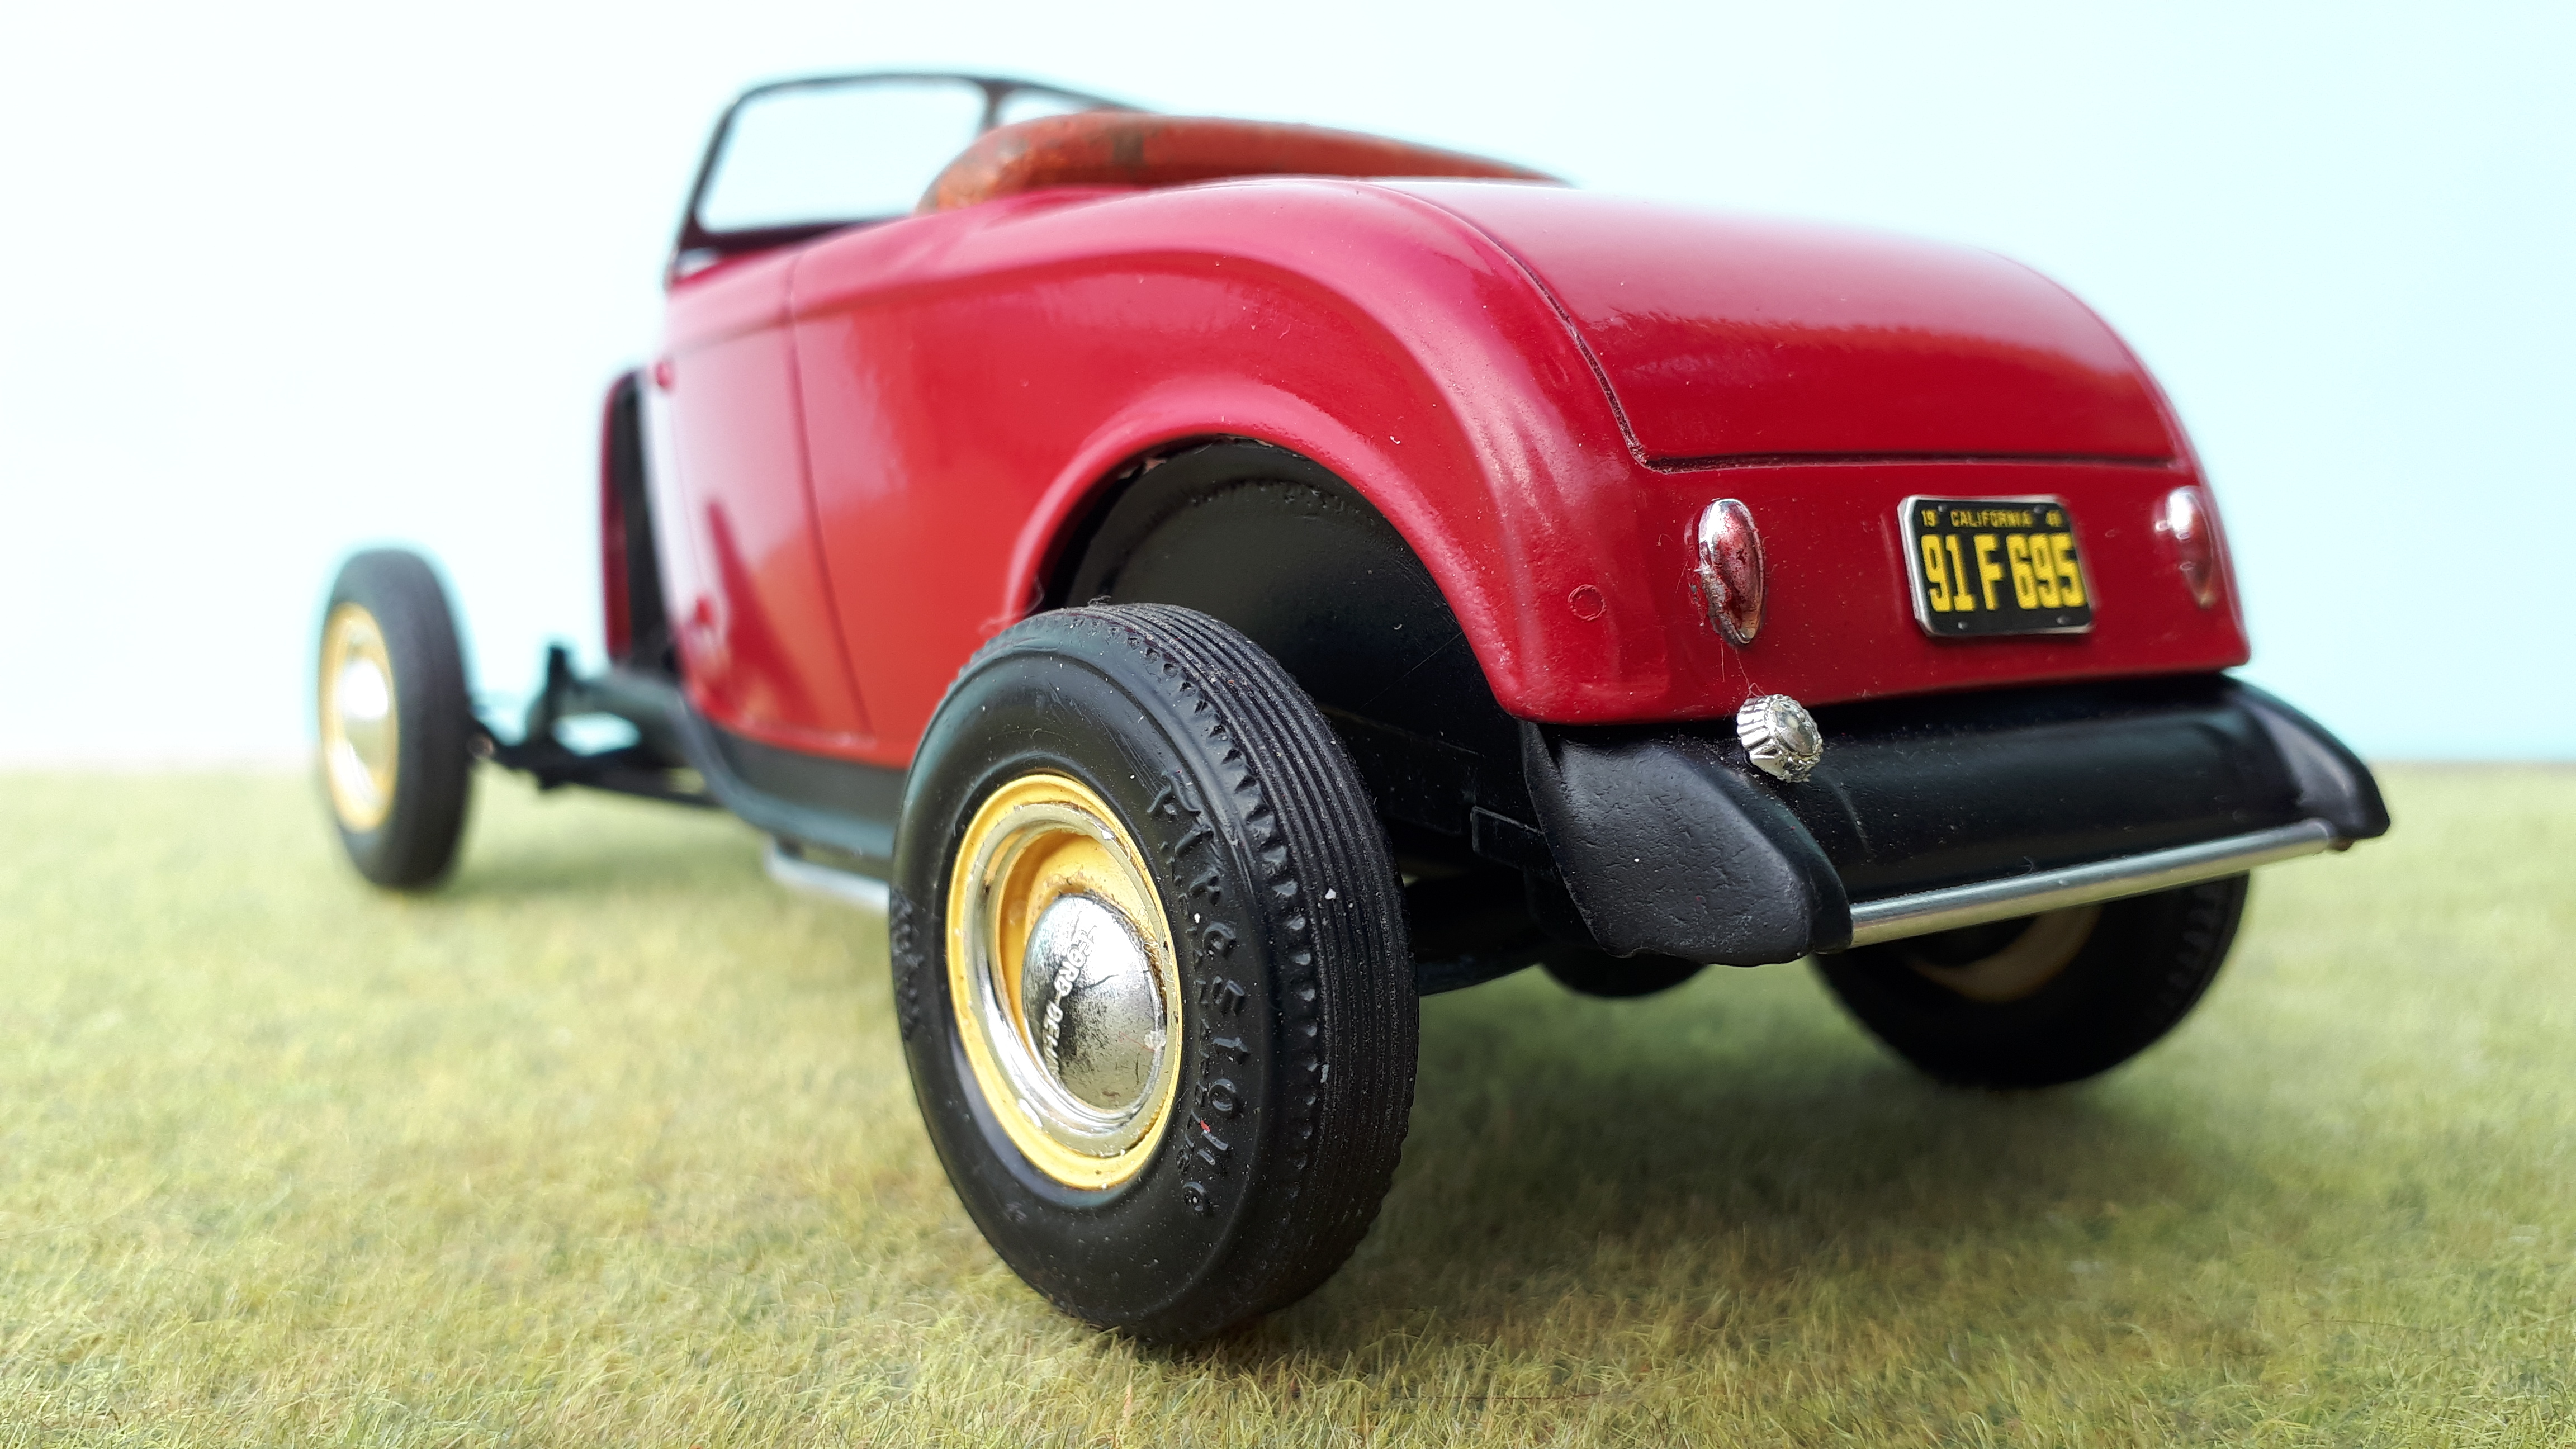
Thanks guys, I appreciate your comments. However, I really must check my photos more closely, I didn't notice that the rear hubcap had slipped out of position - old age I guess! I often use Blu tac, a poster putty type of product, to fit hubcaps without risking glue damage to paint but it appears to have let me down this time! Cheers Alan
-
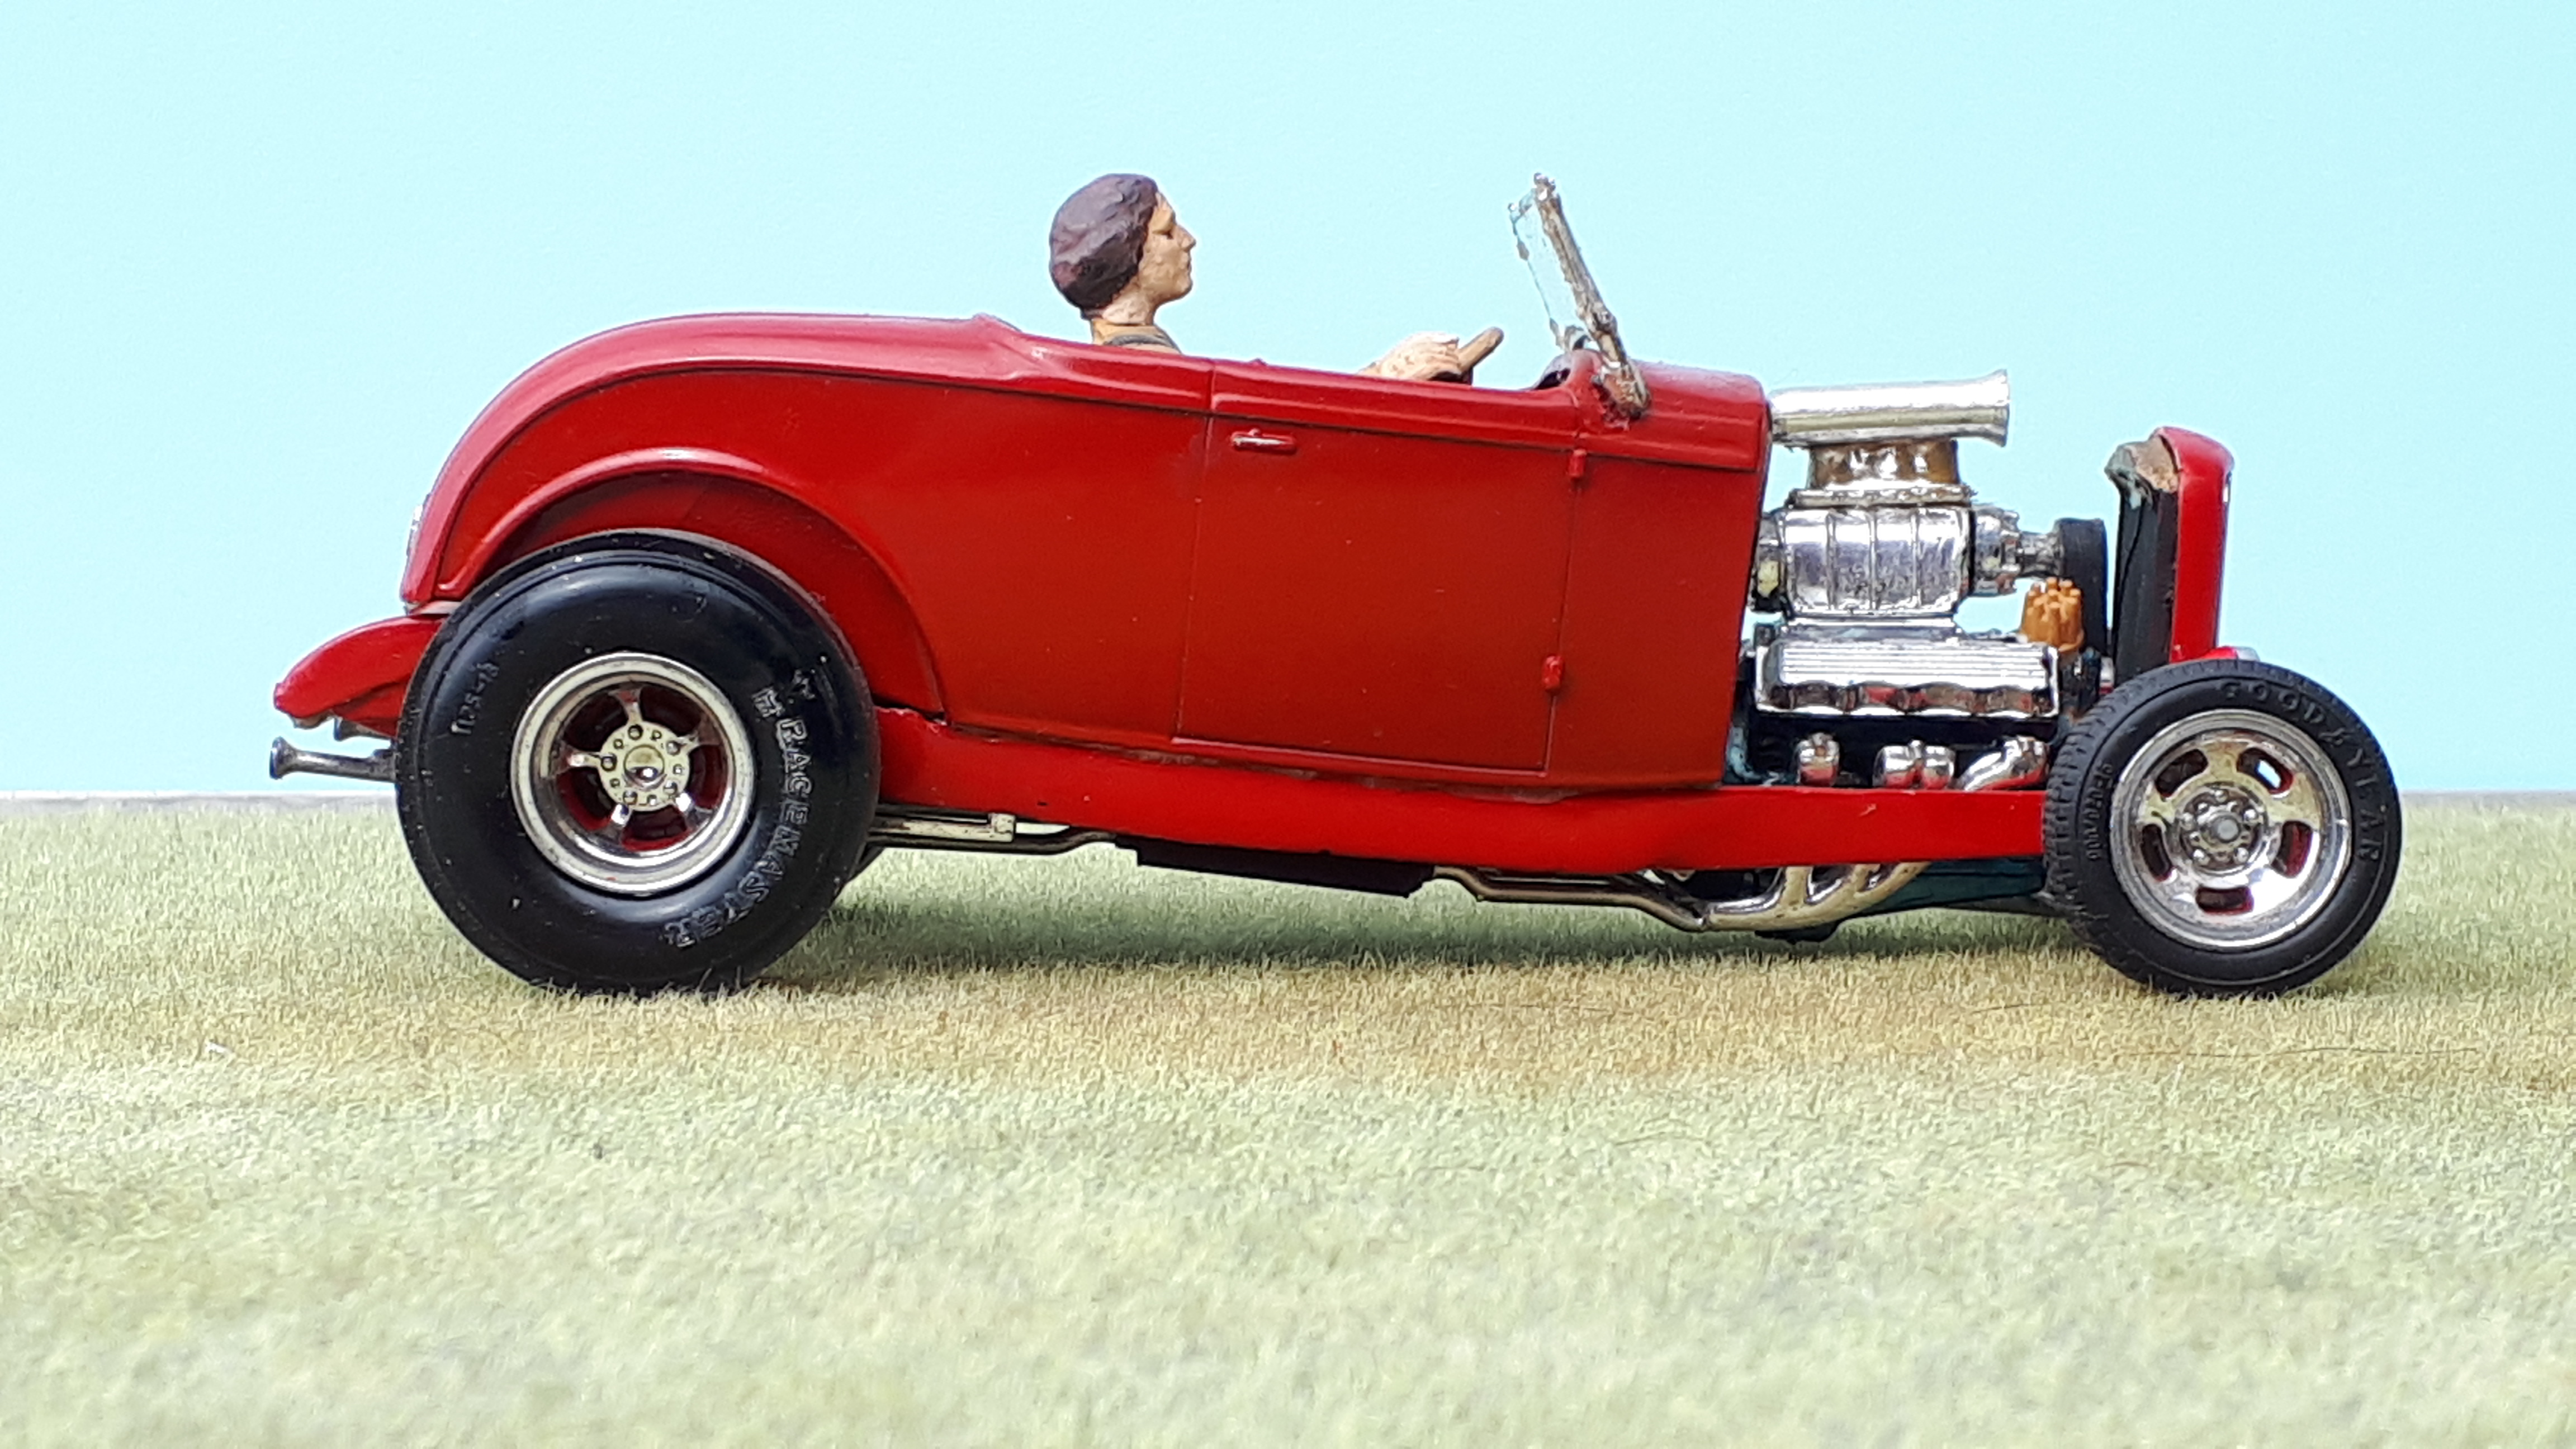
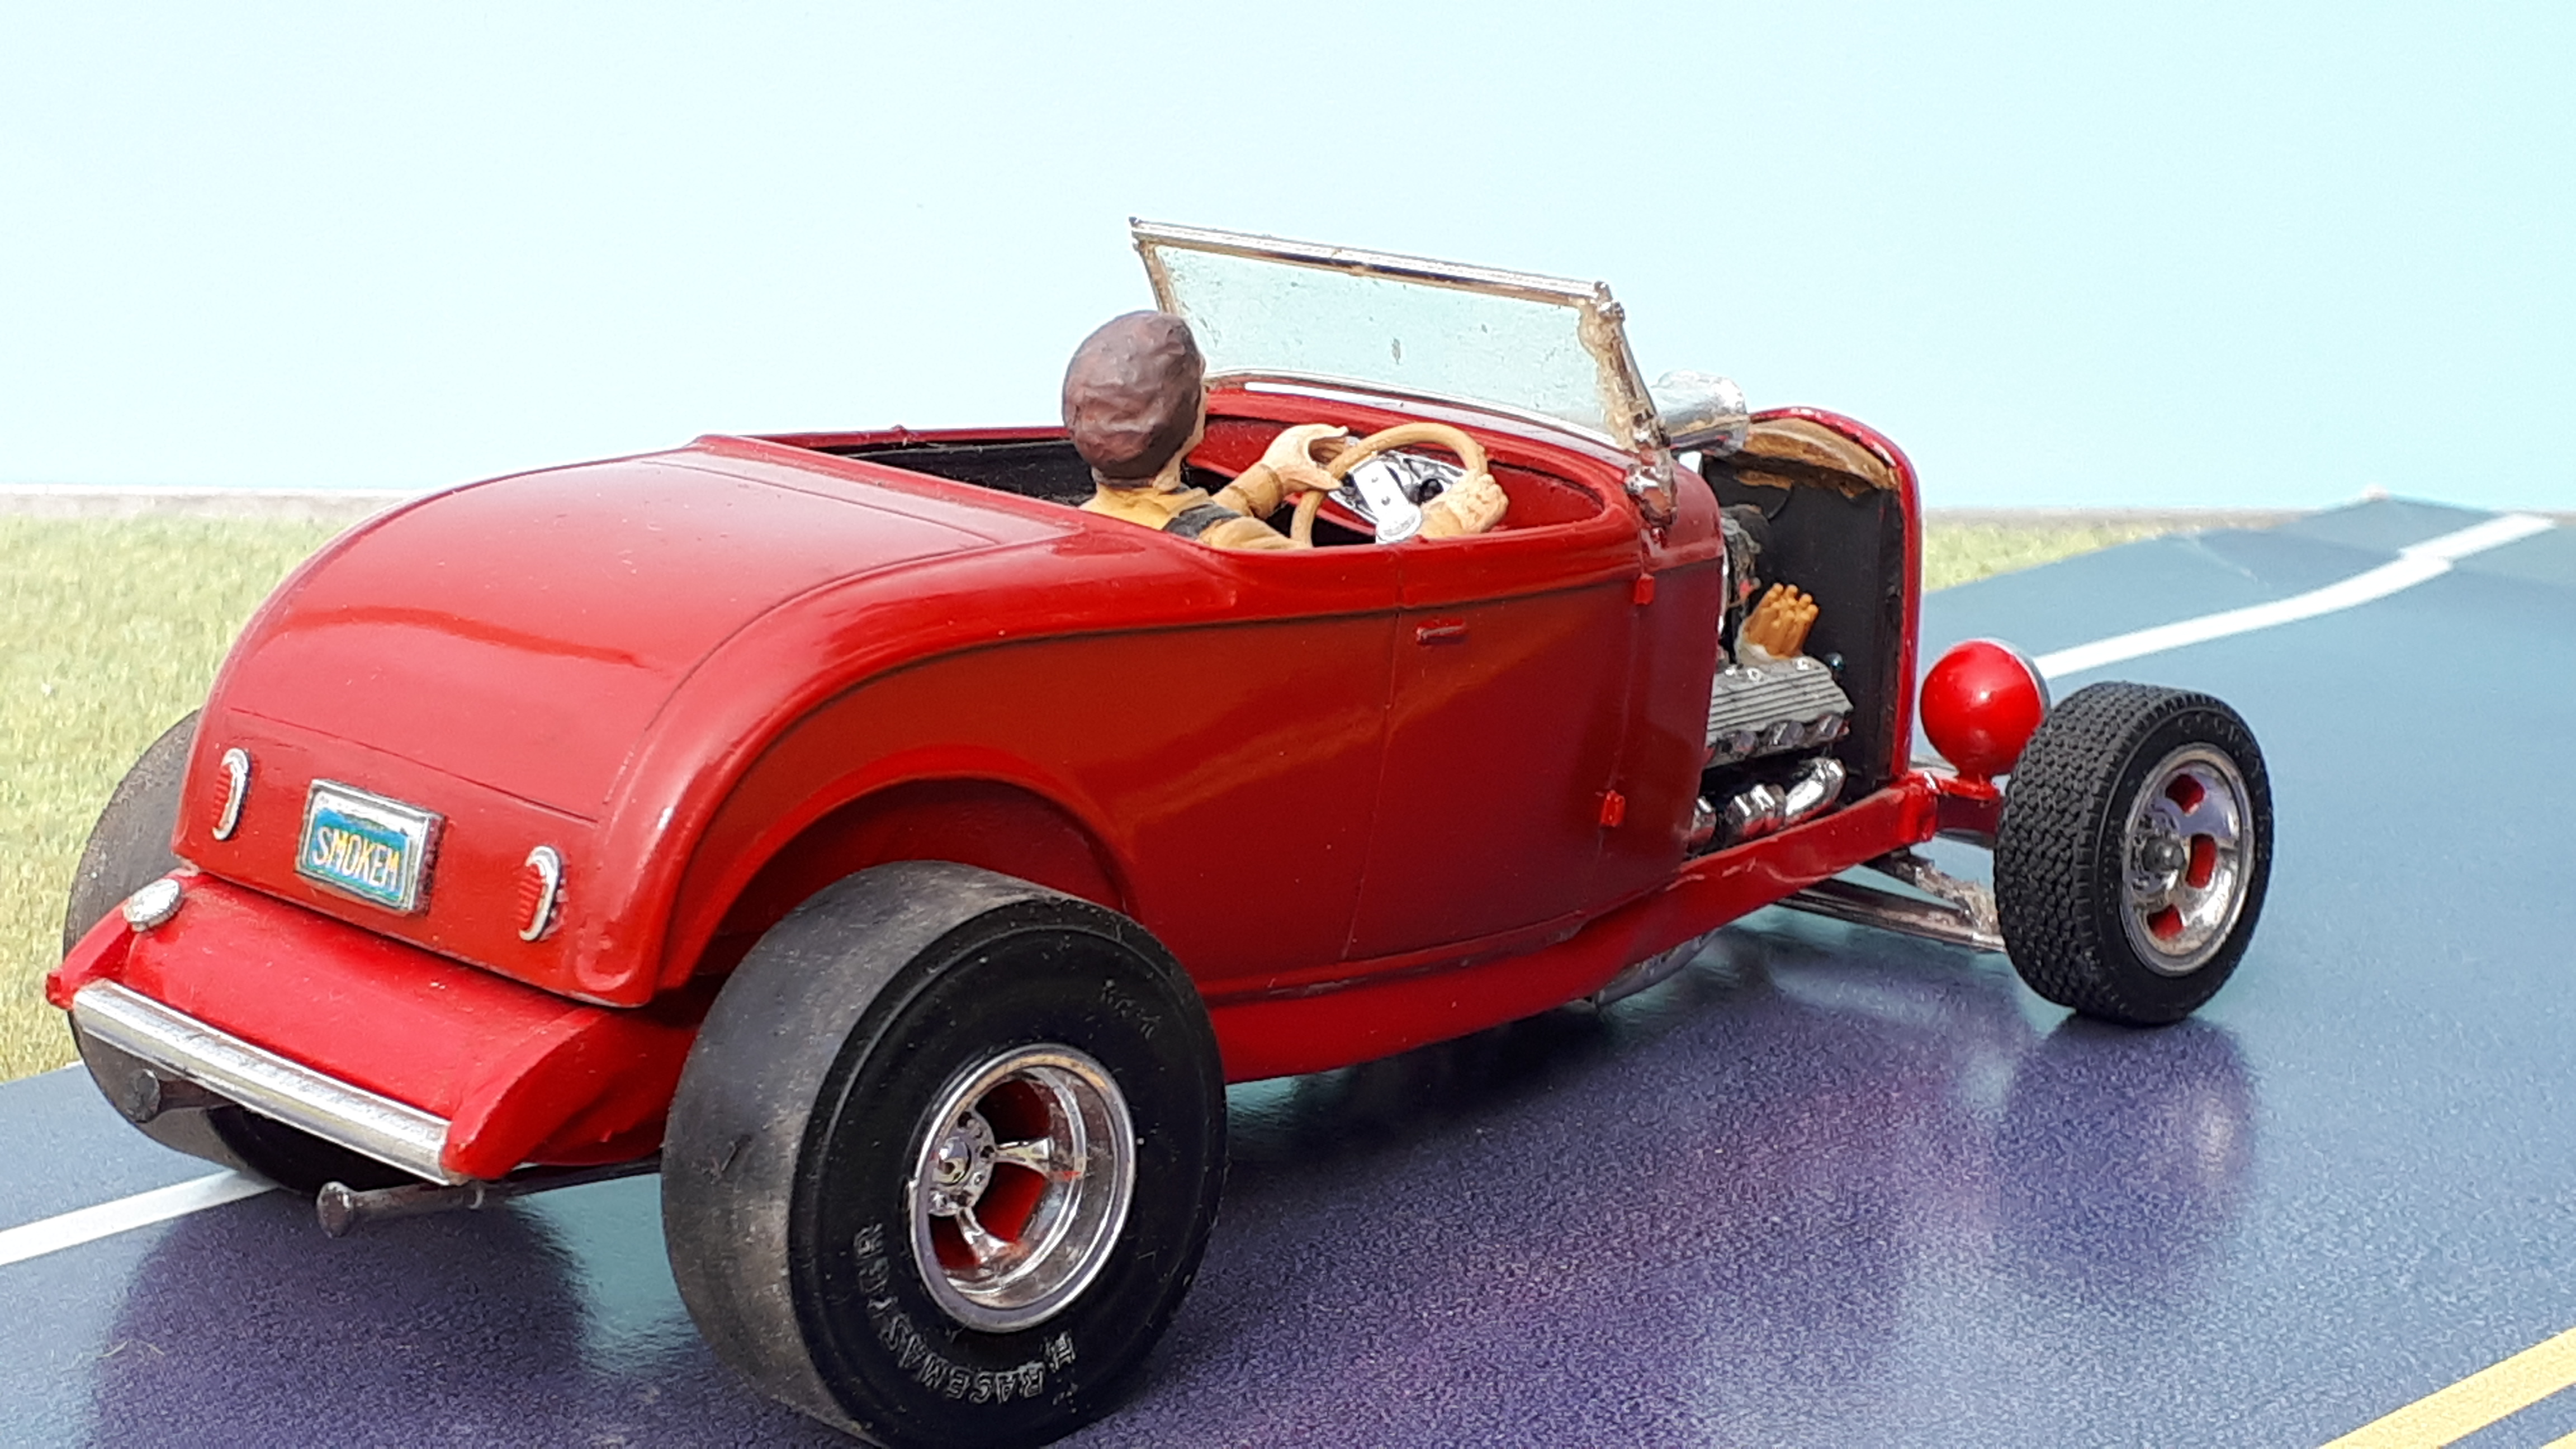
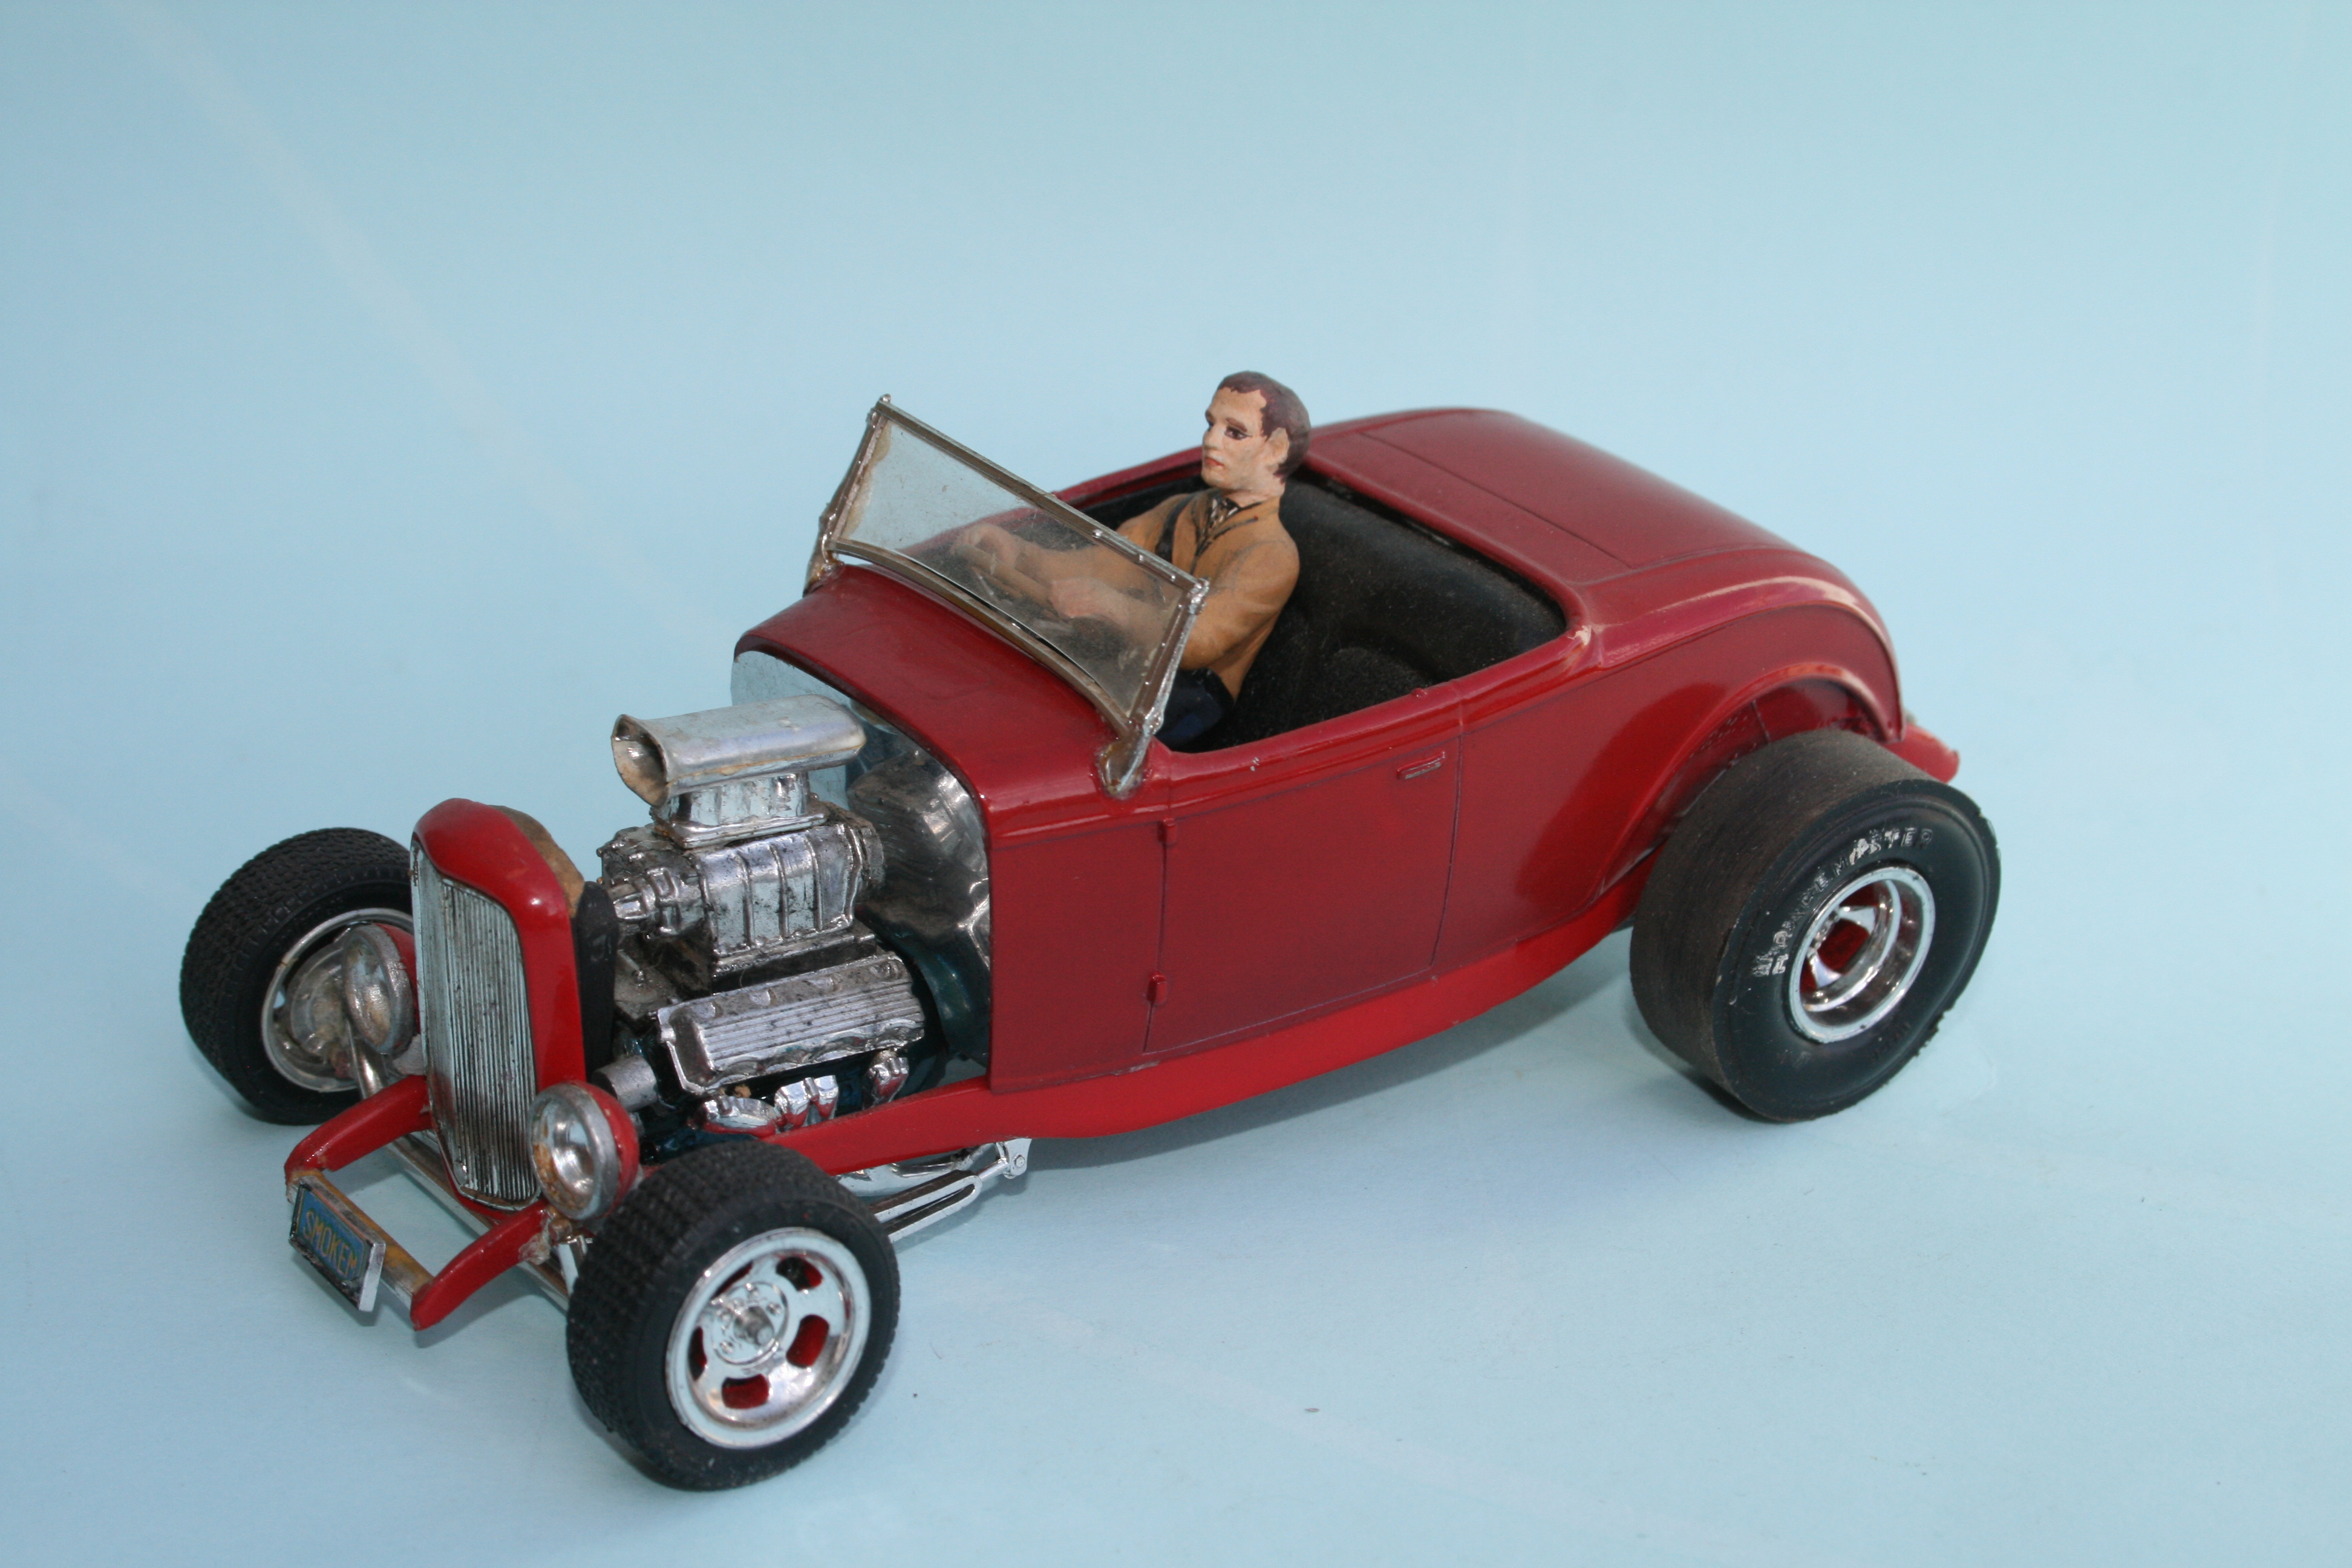
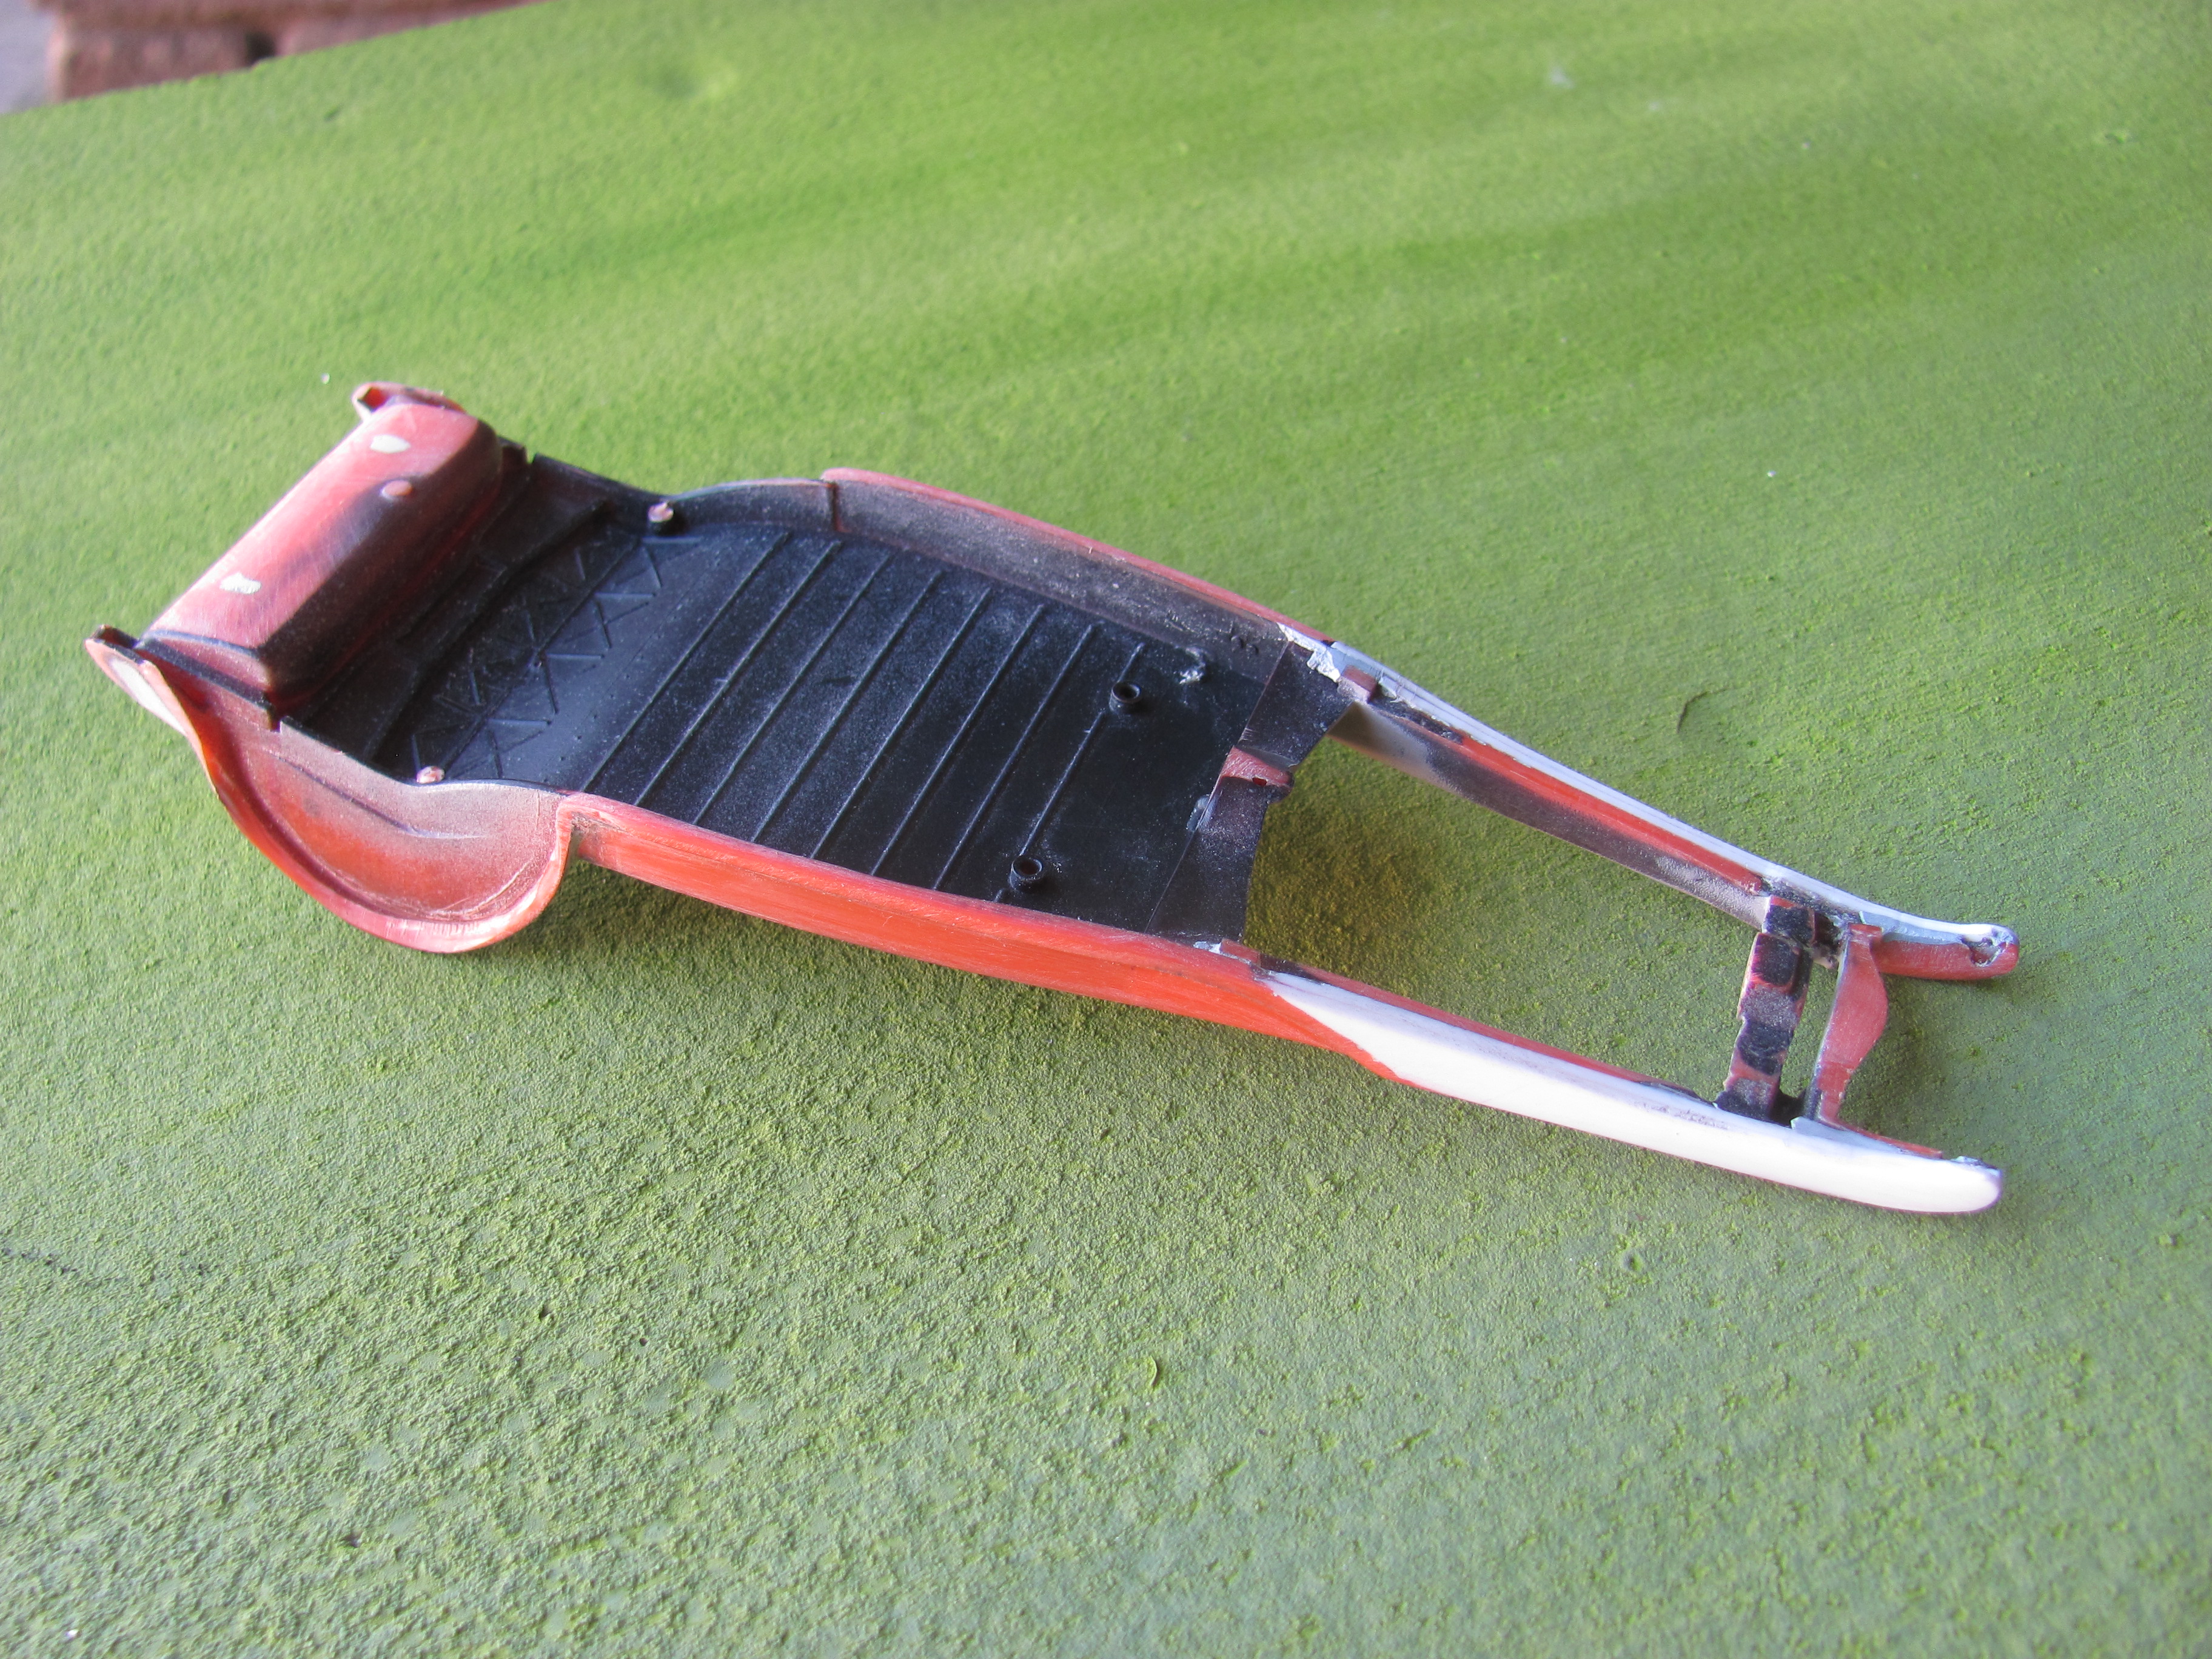
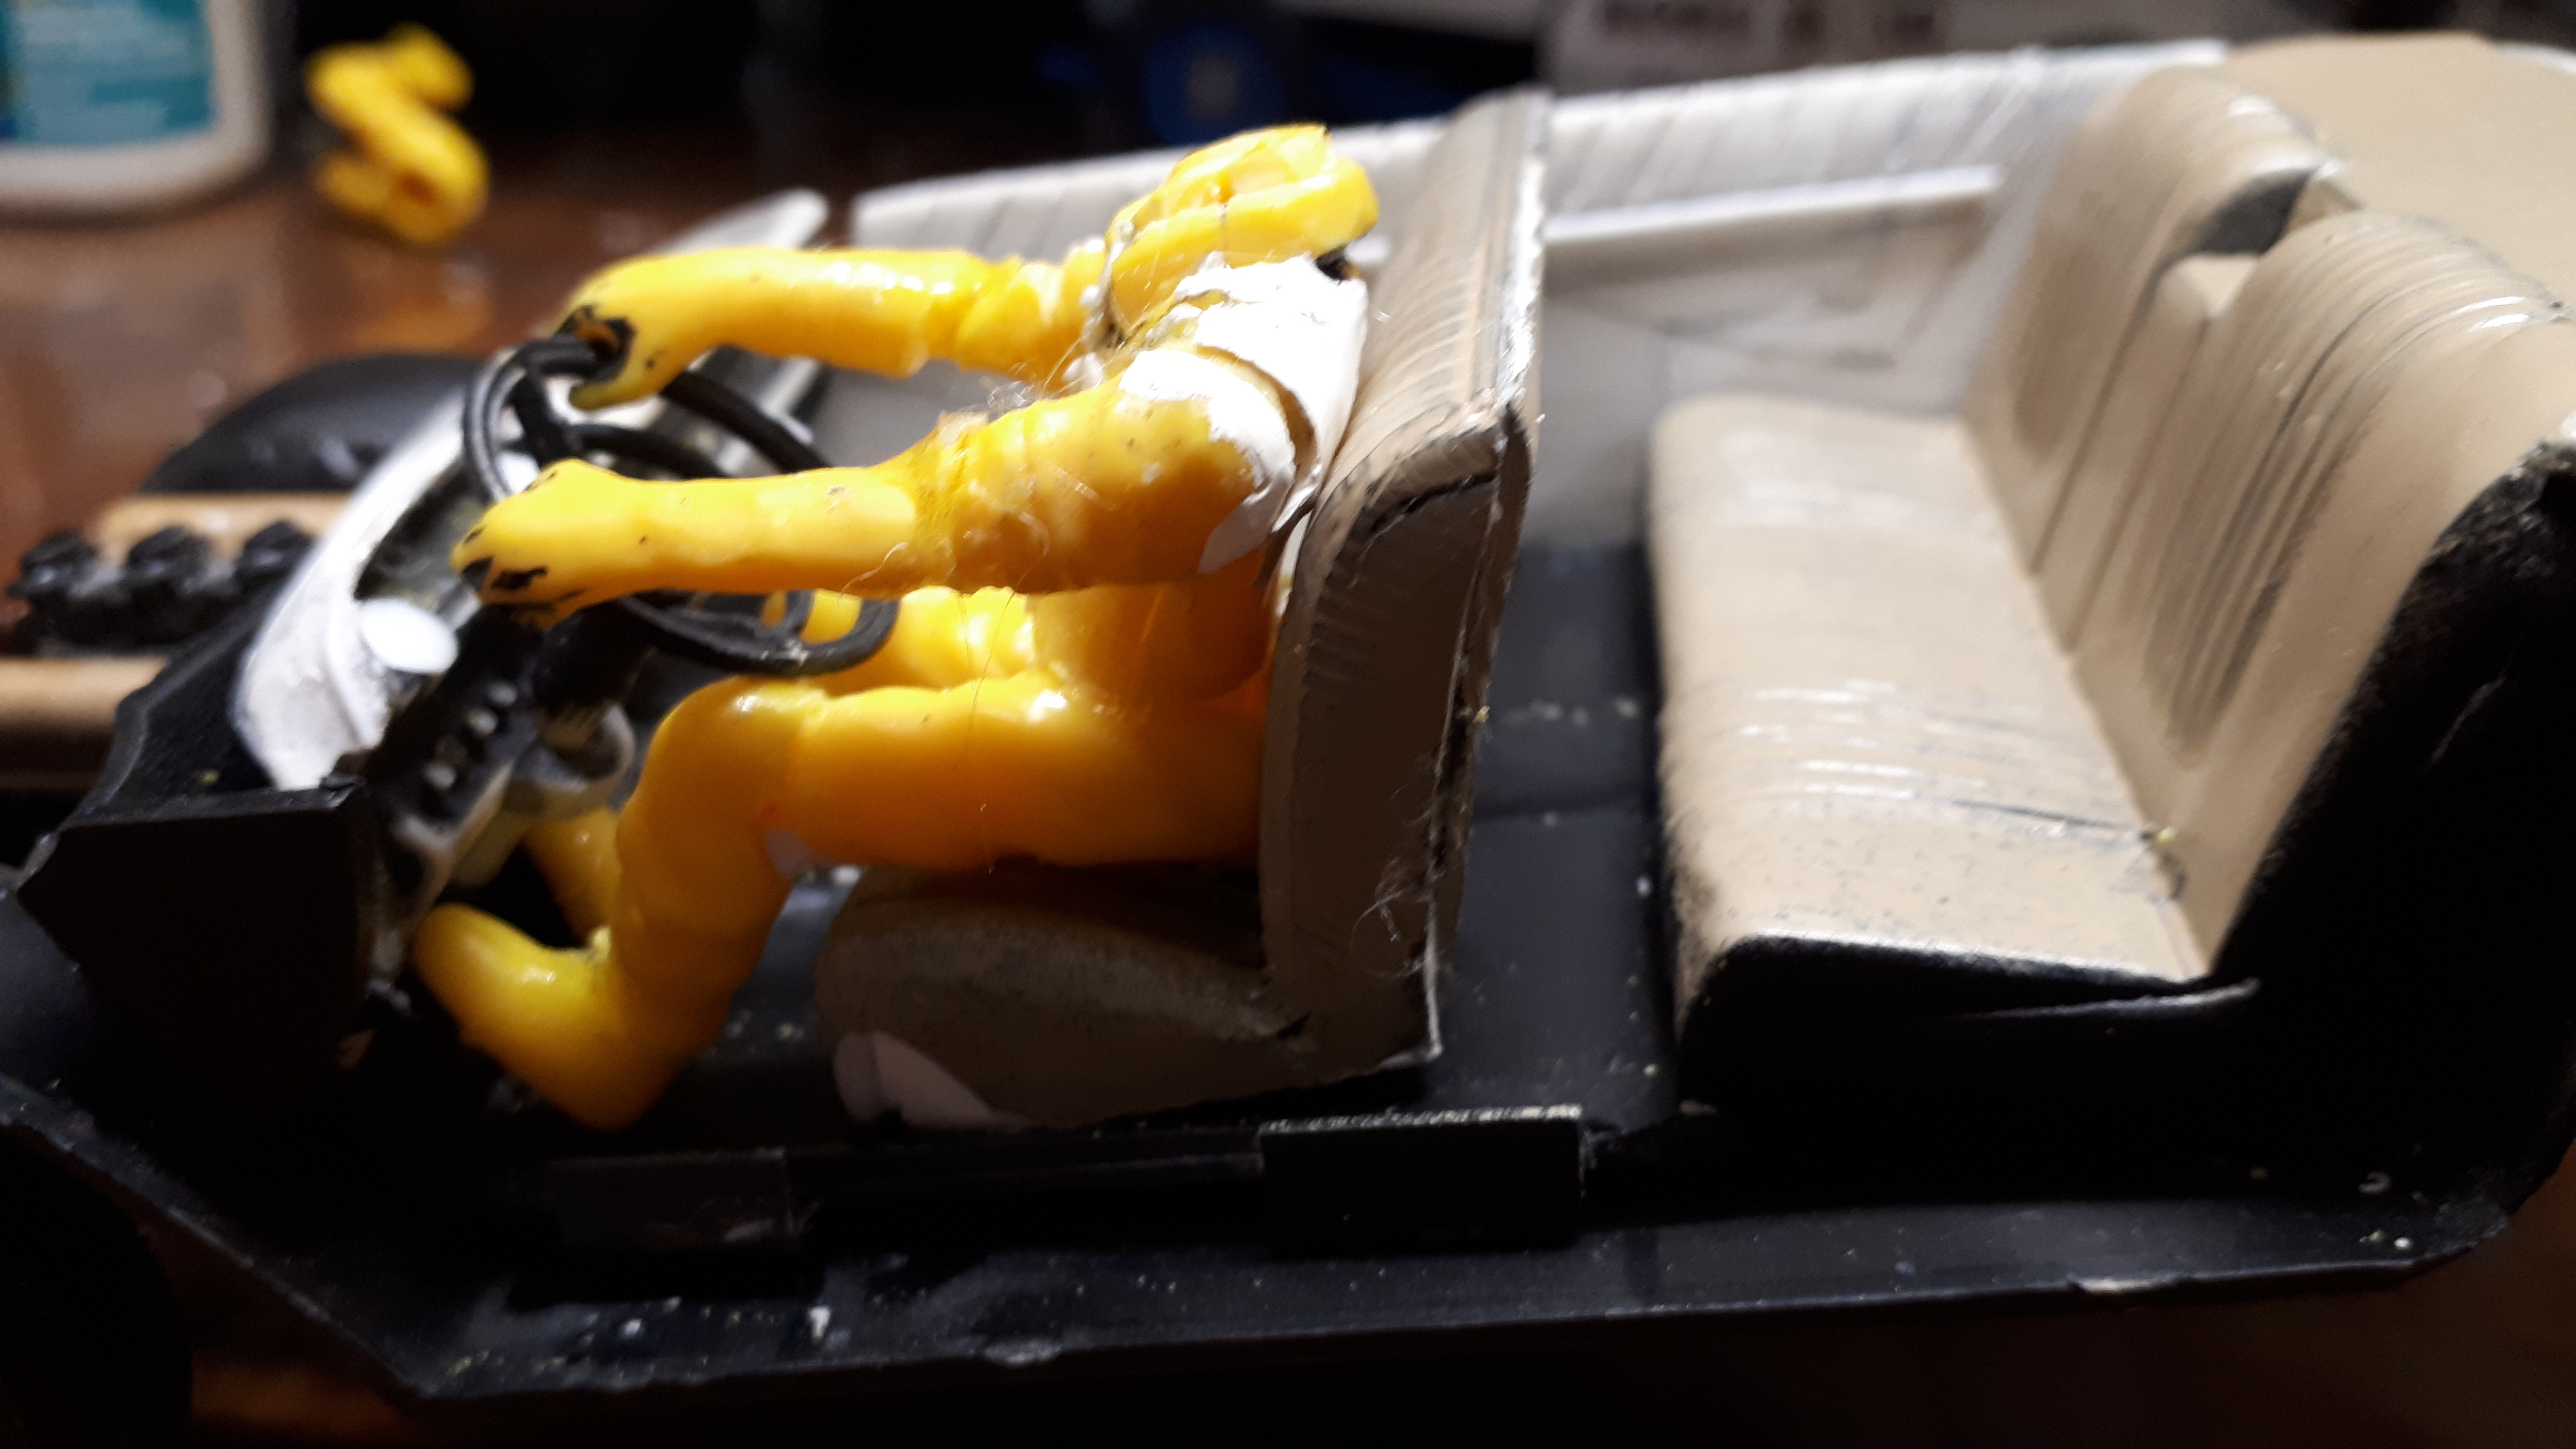
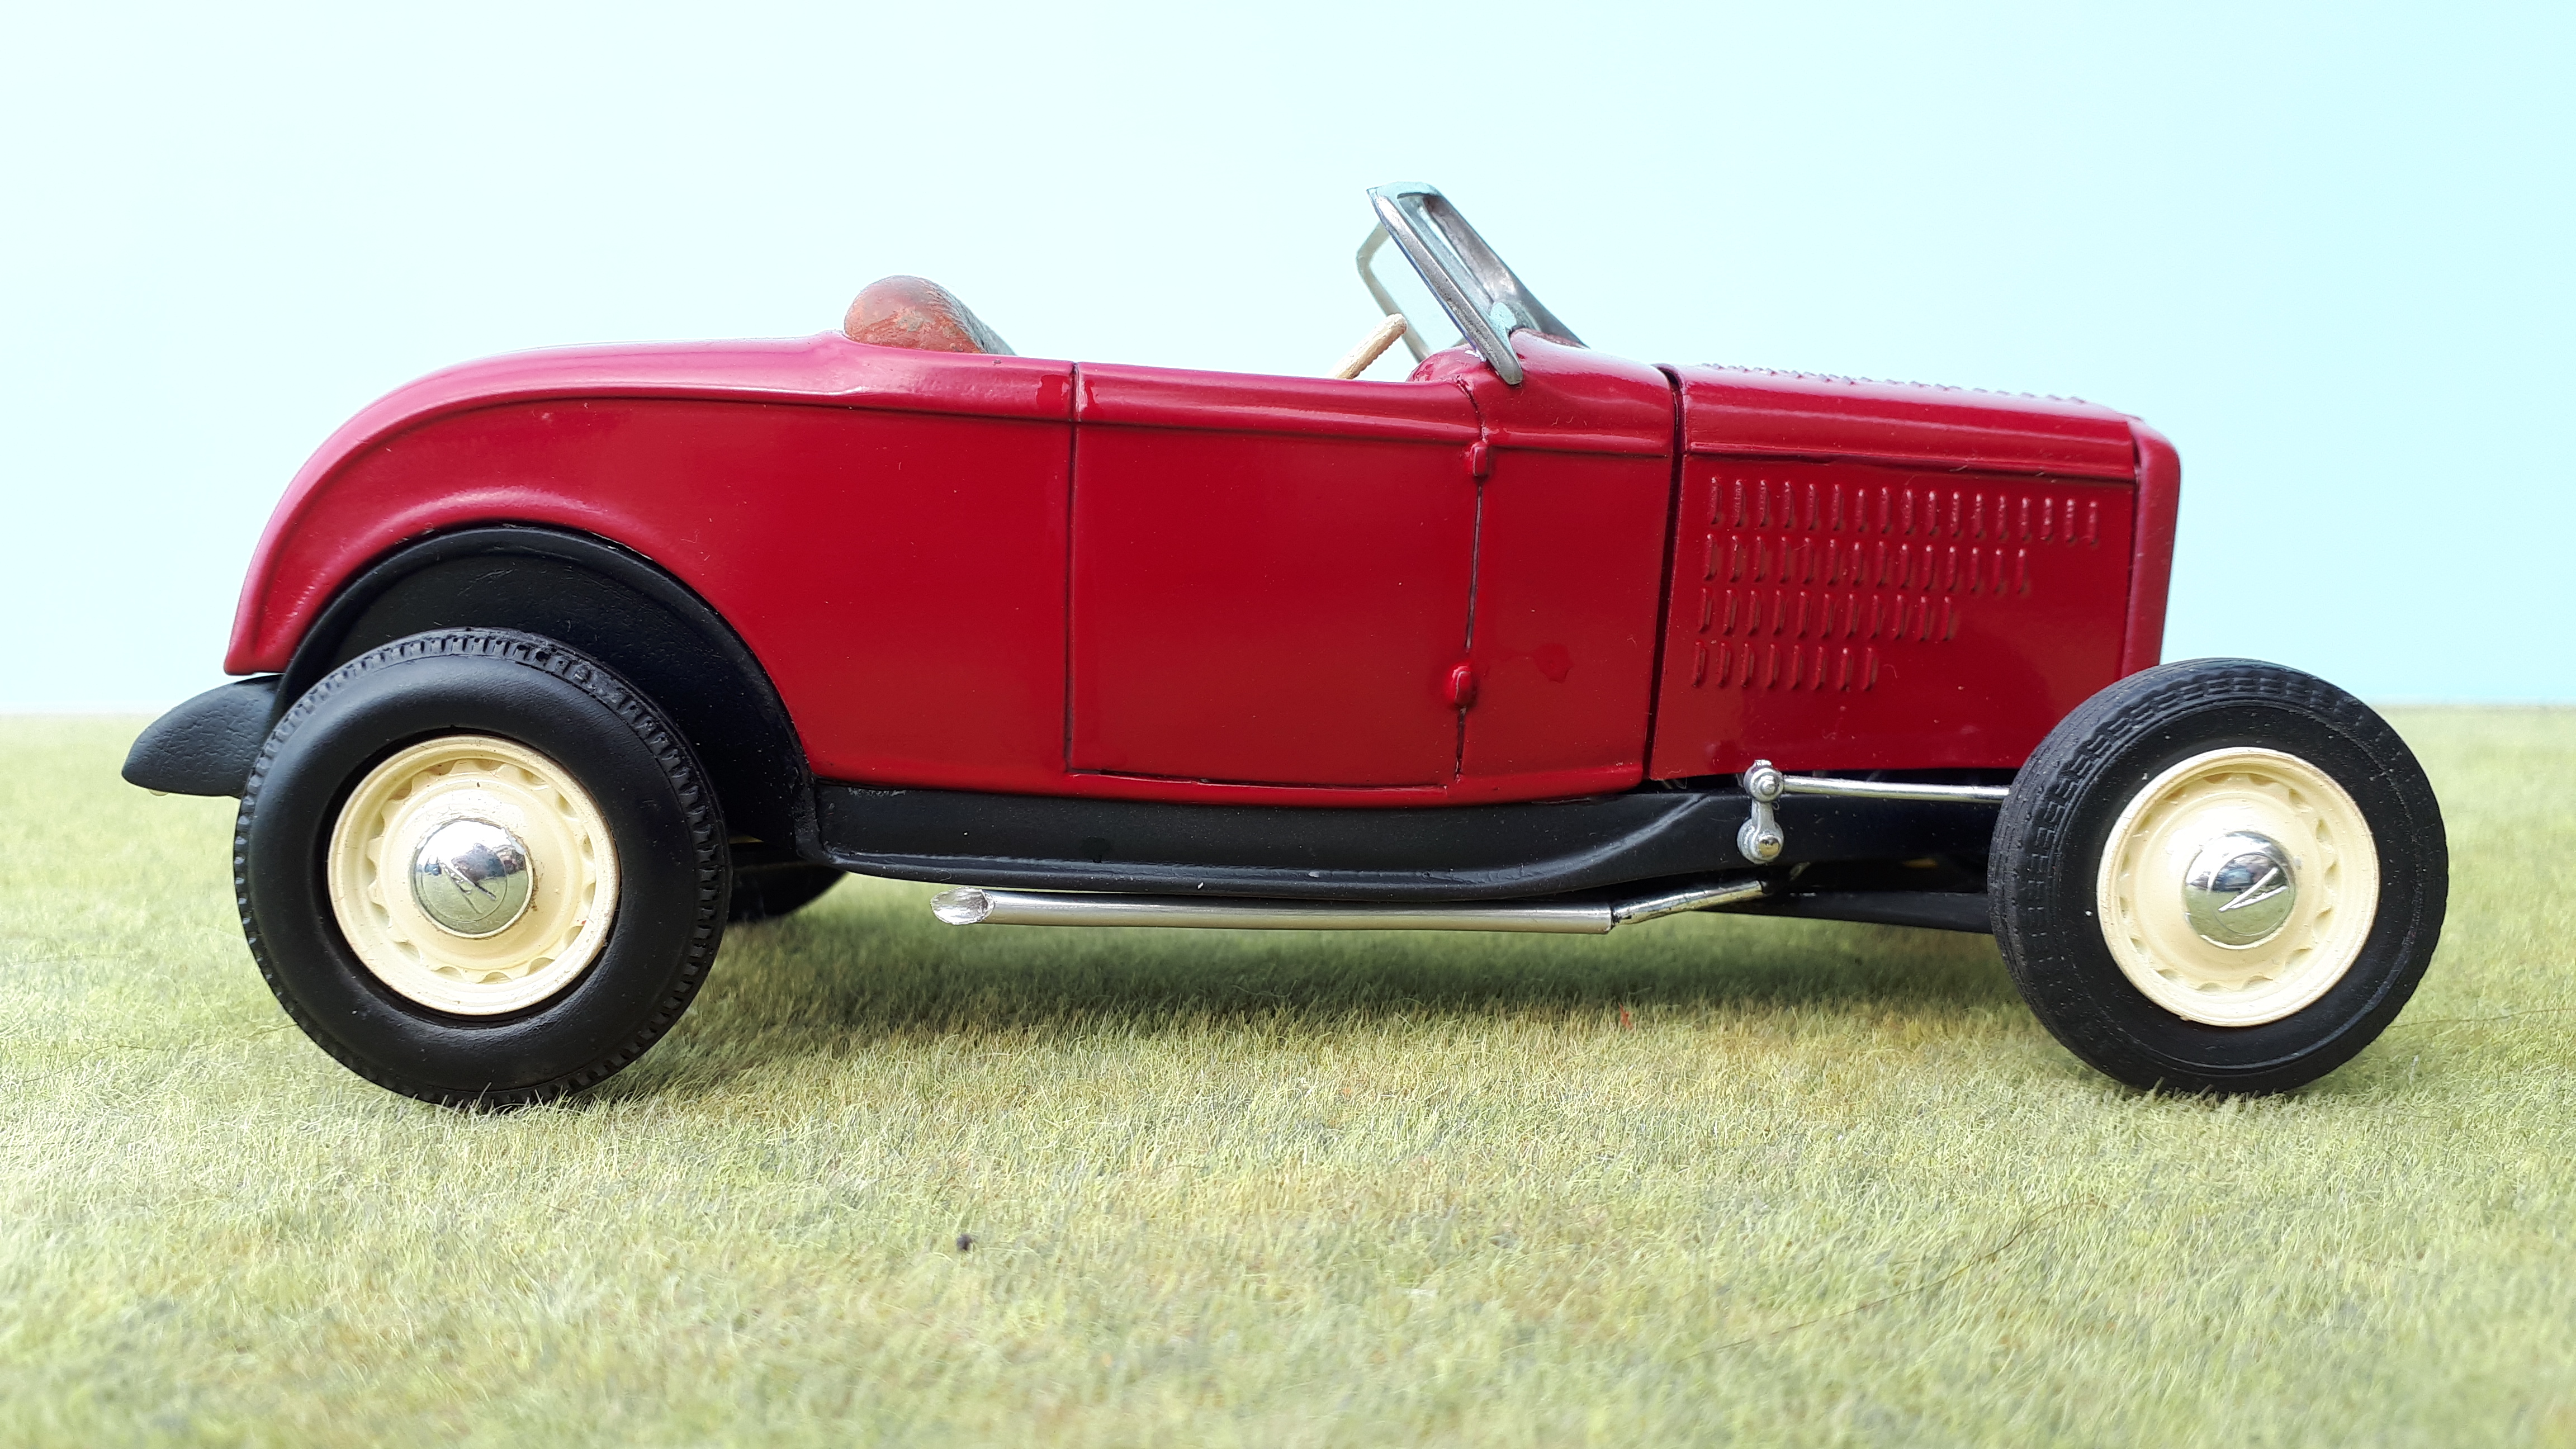
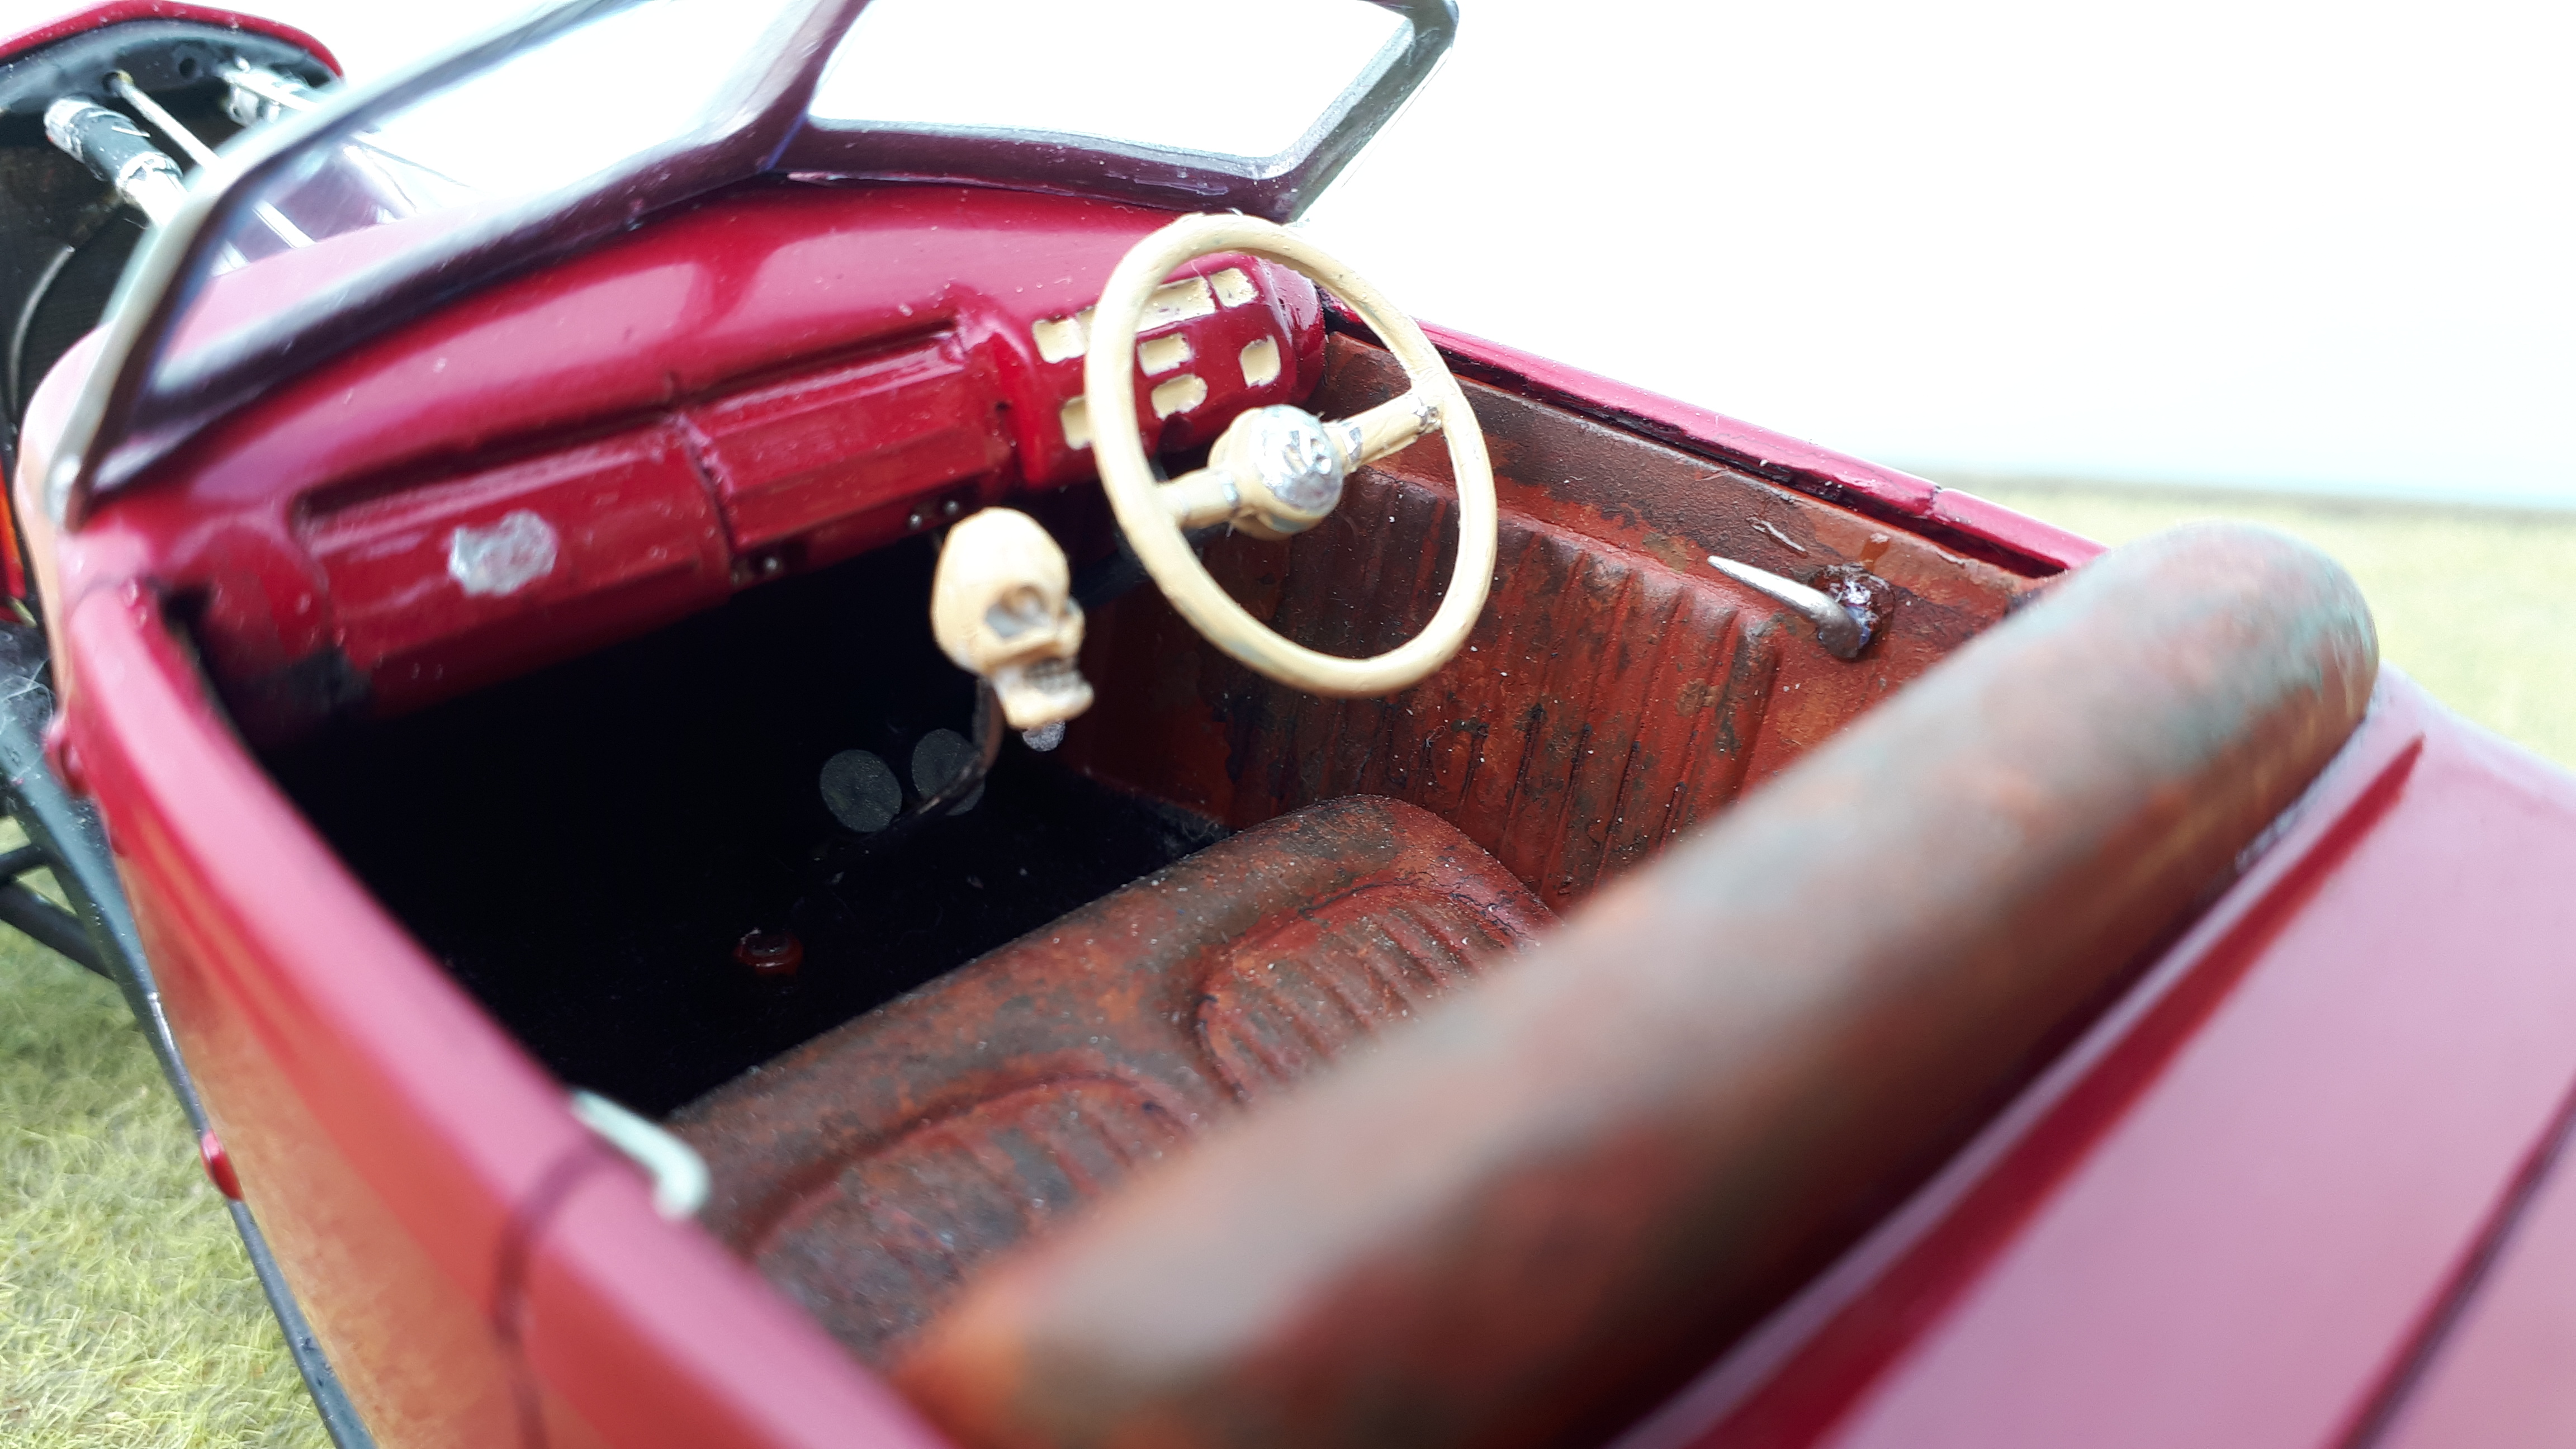
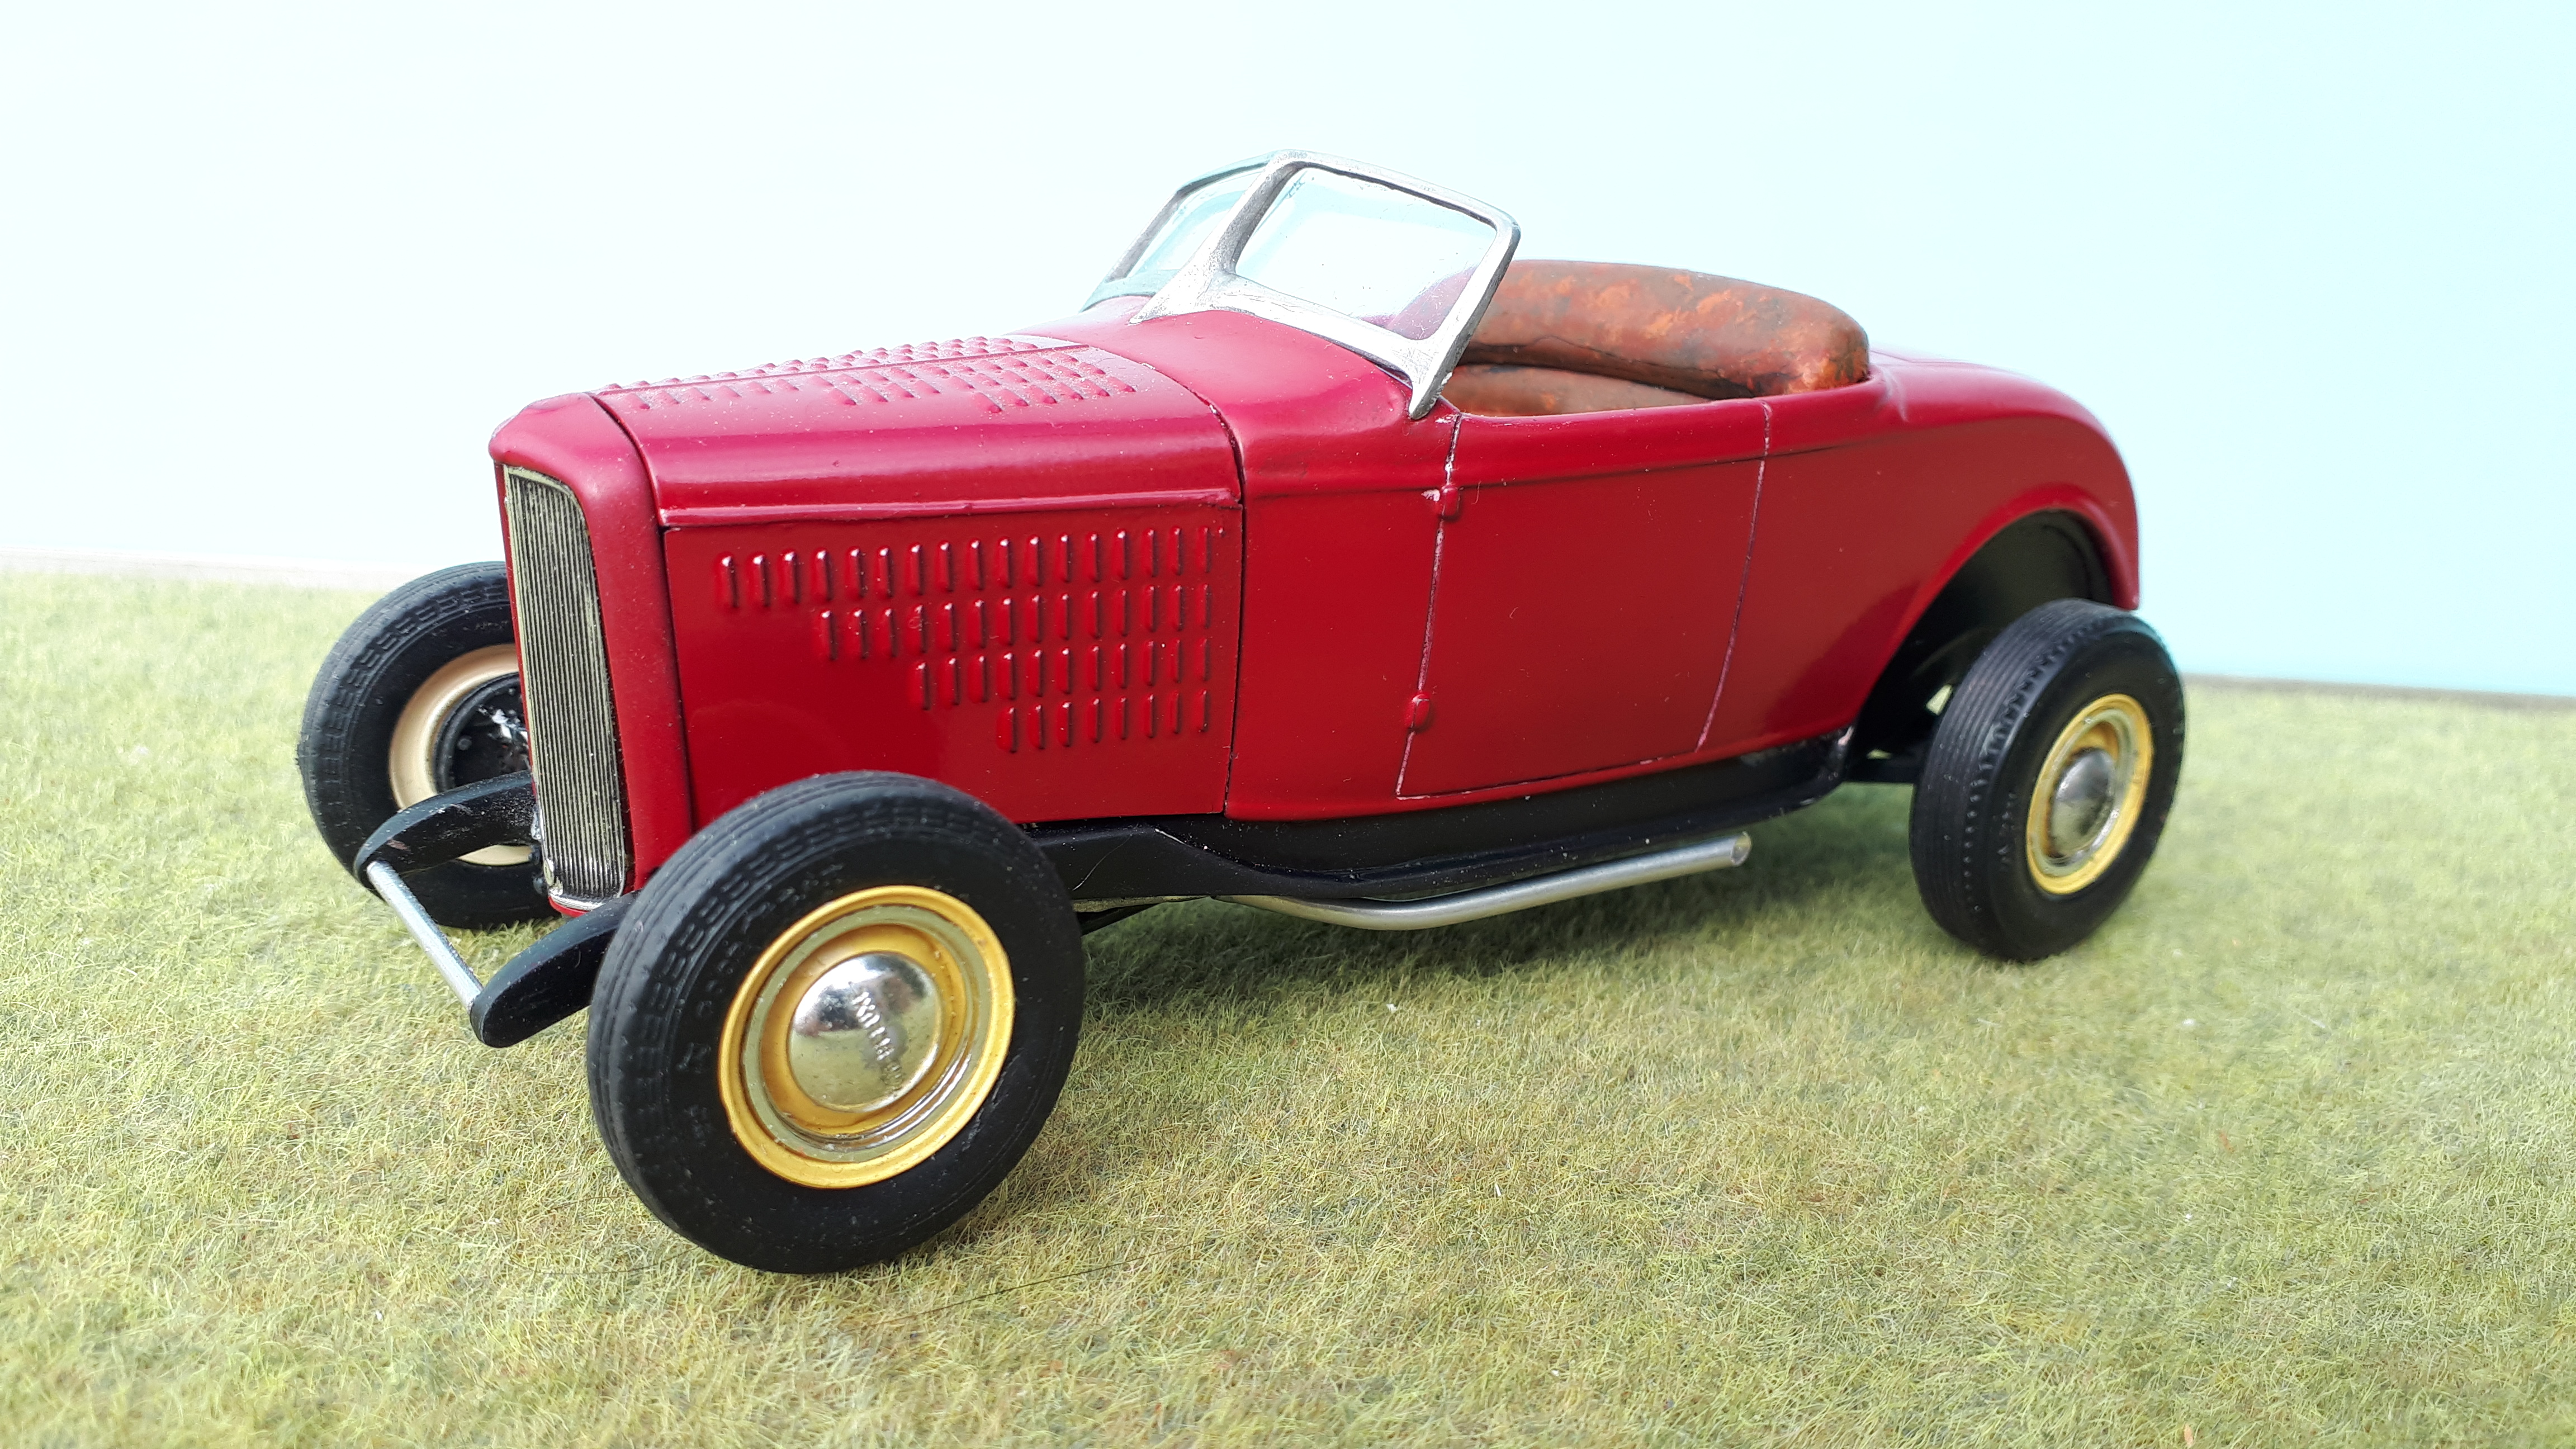
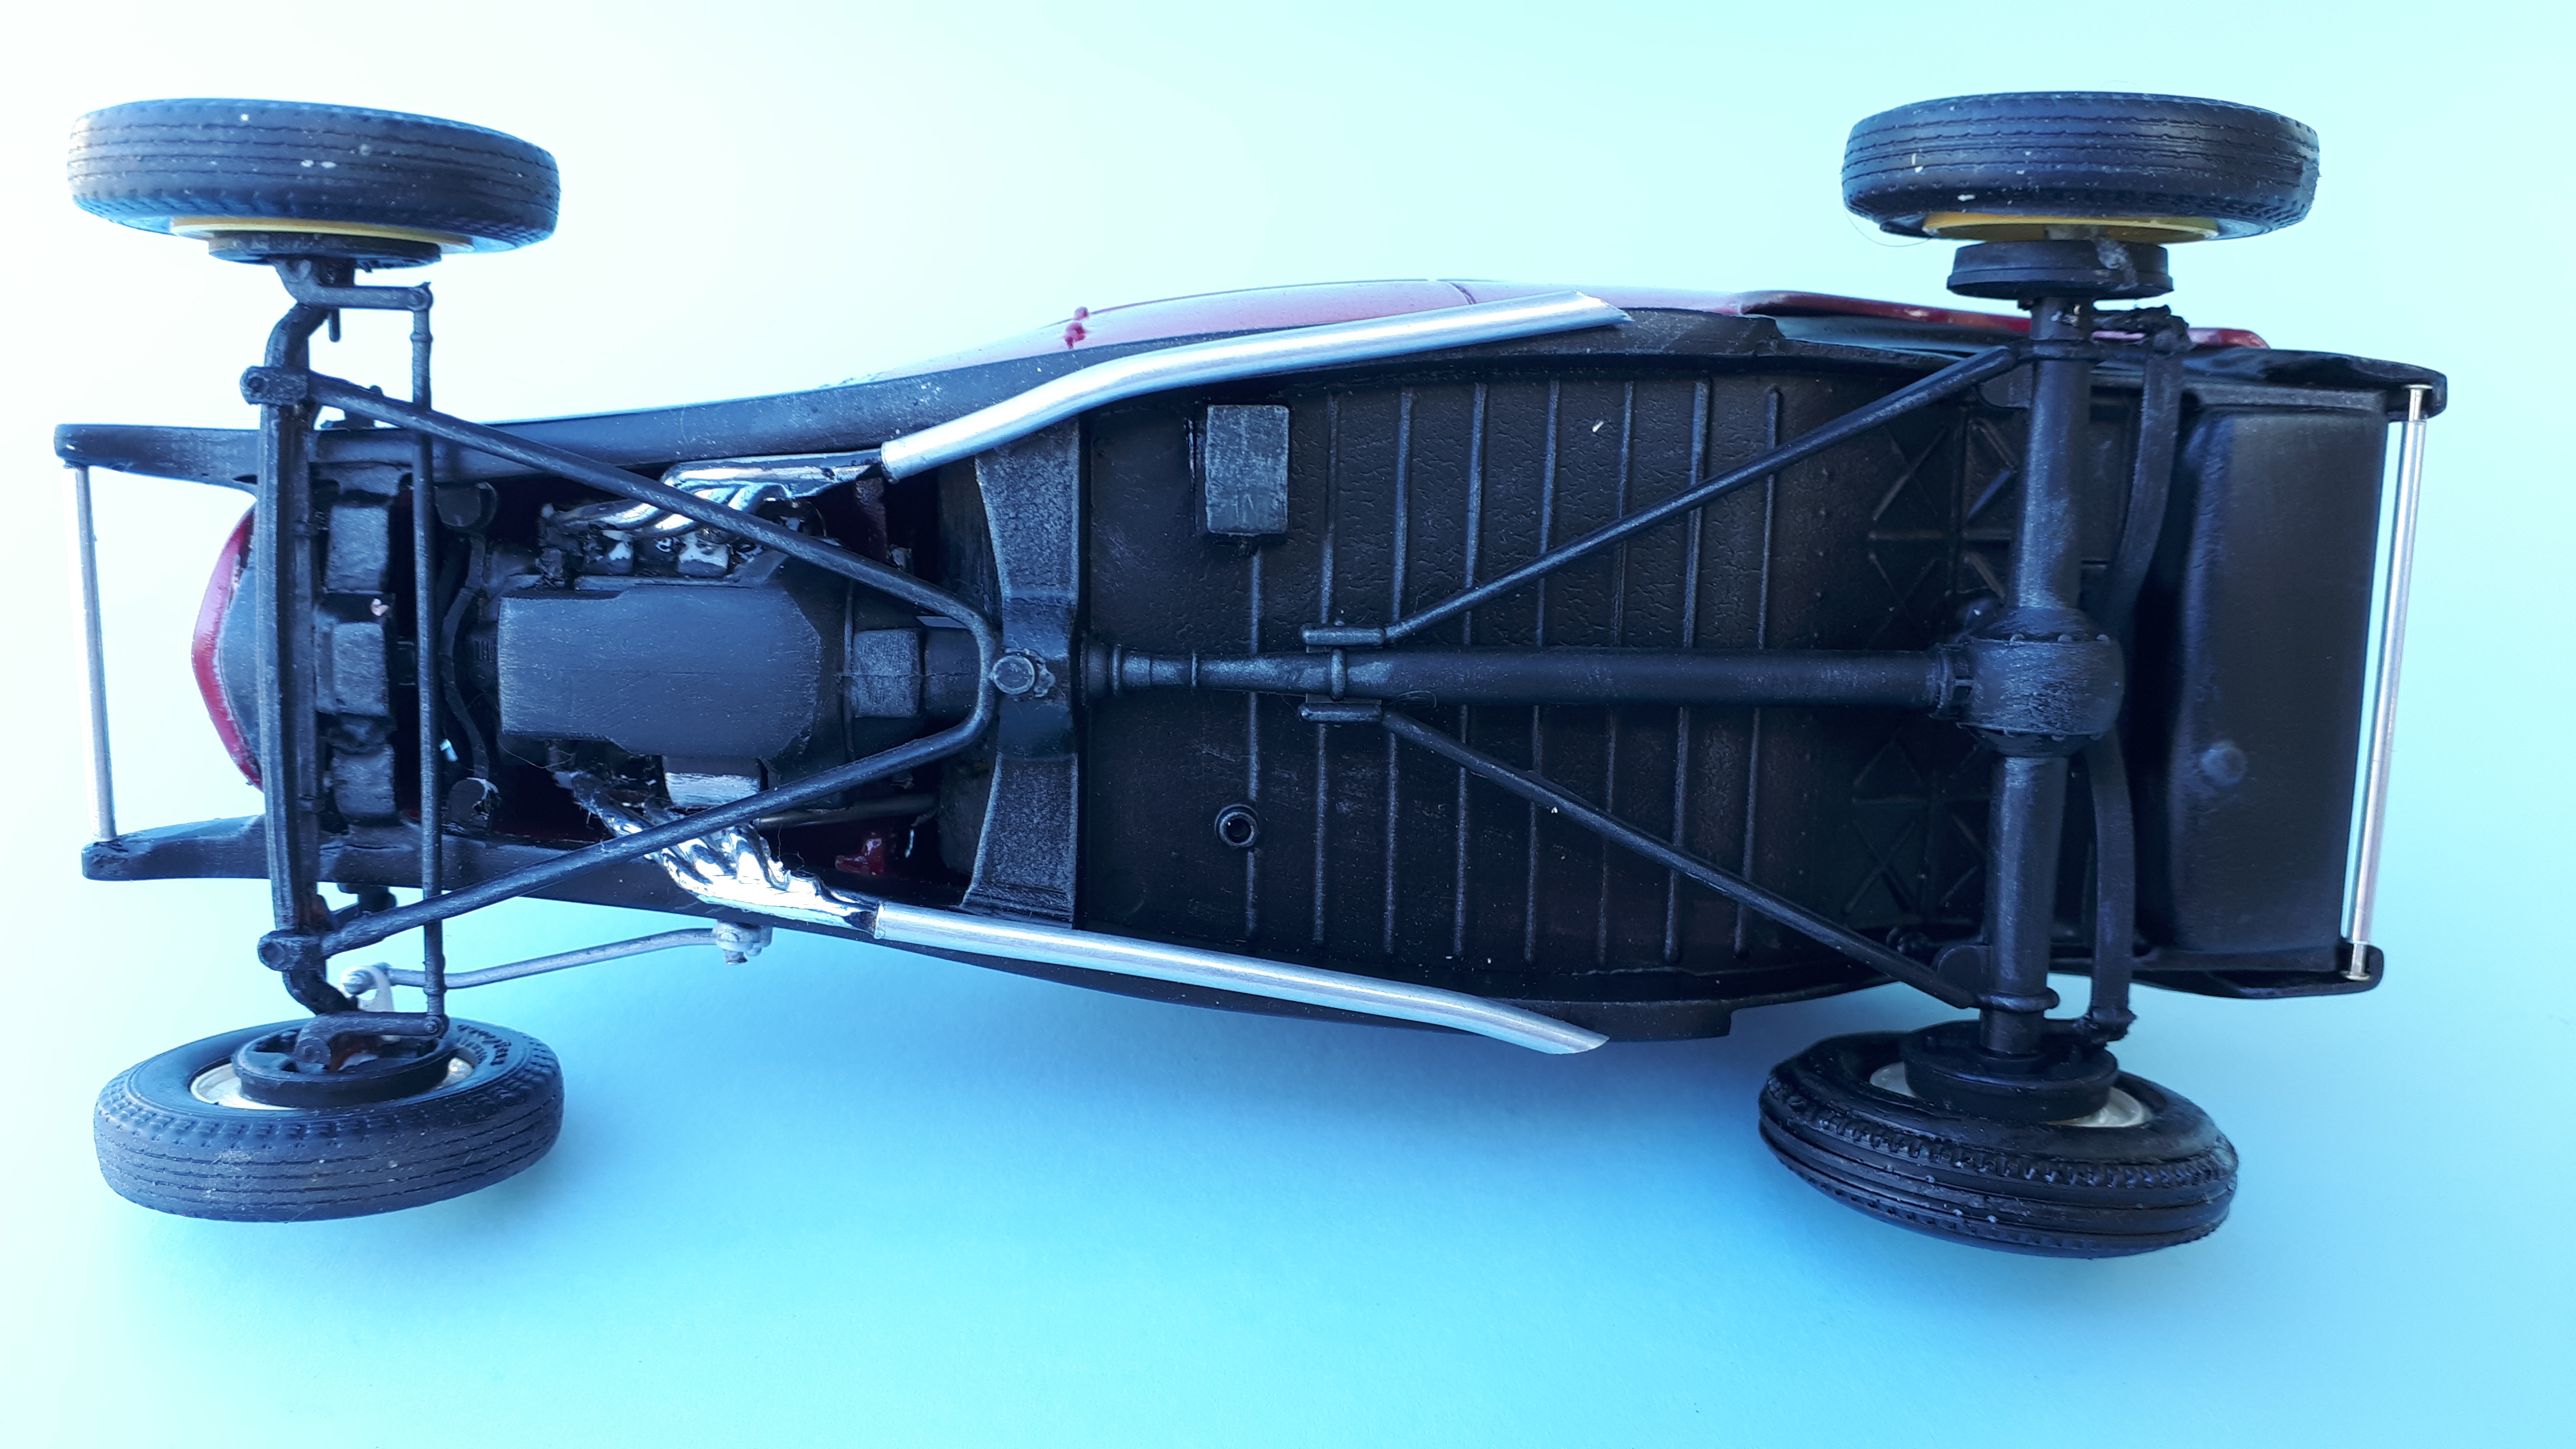
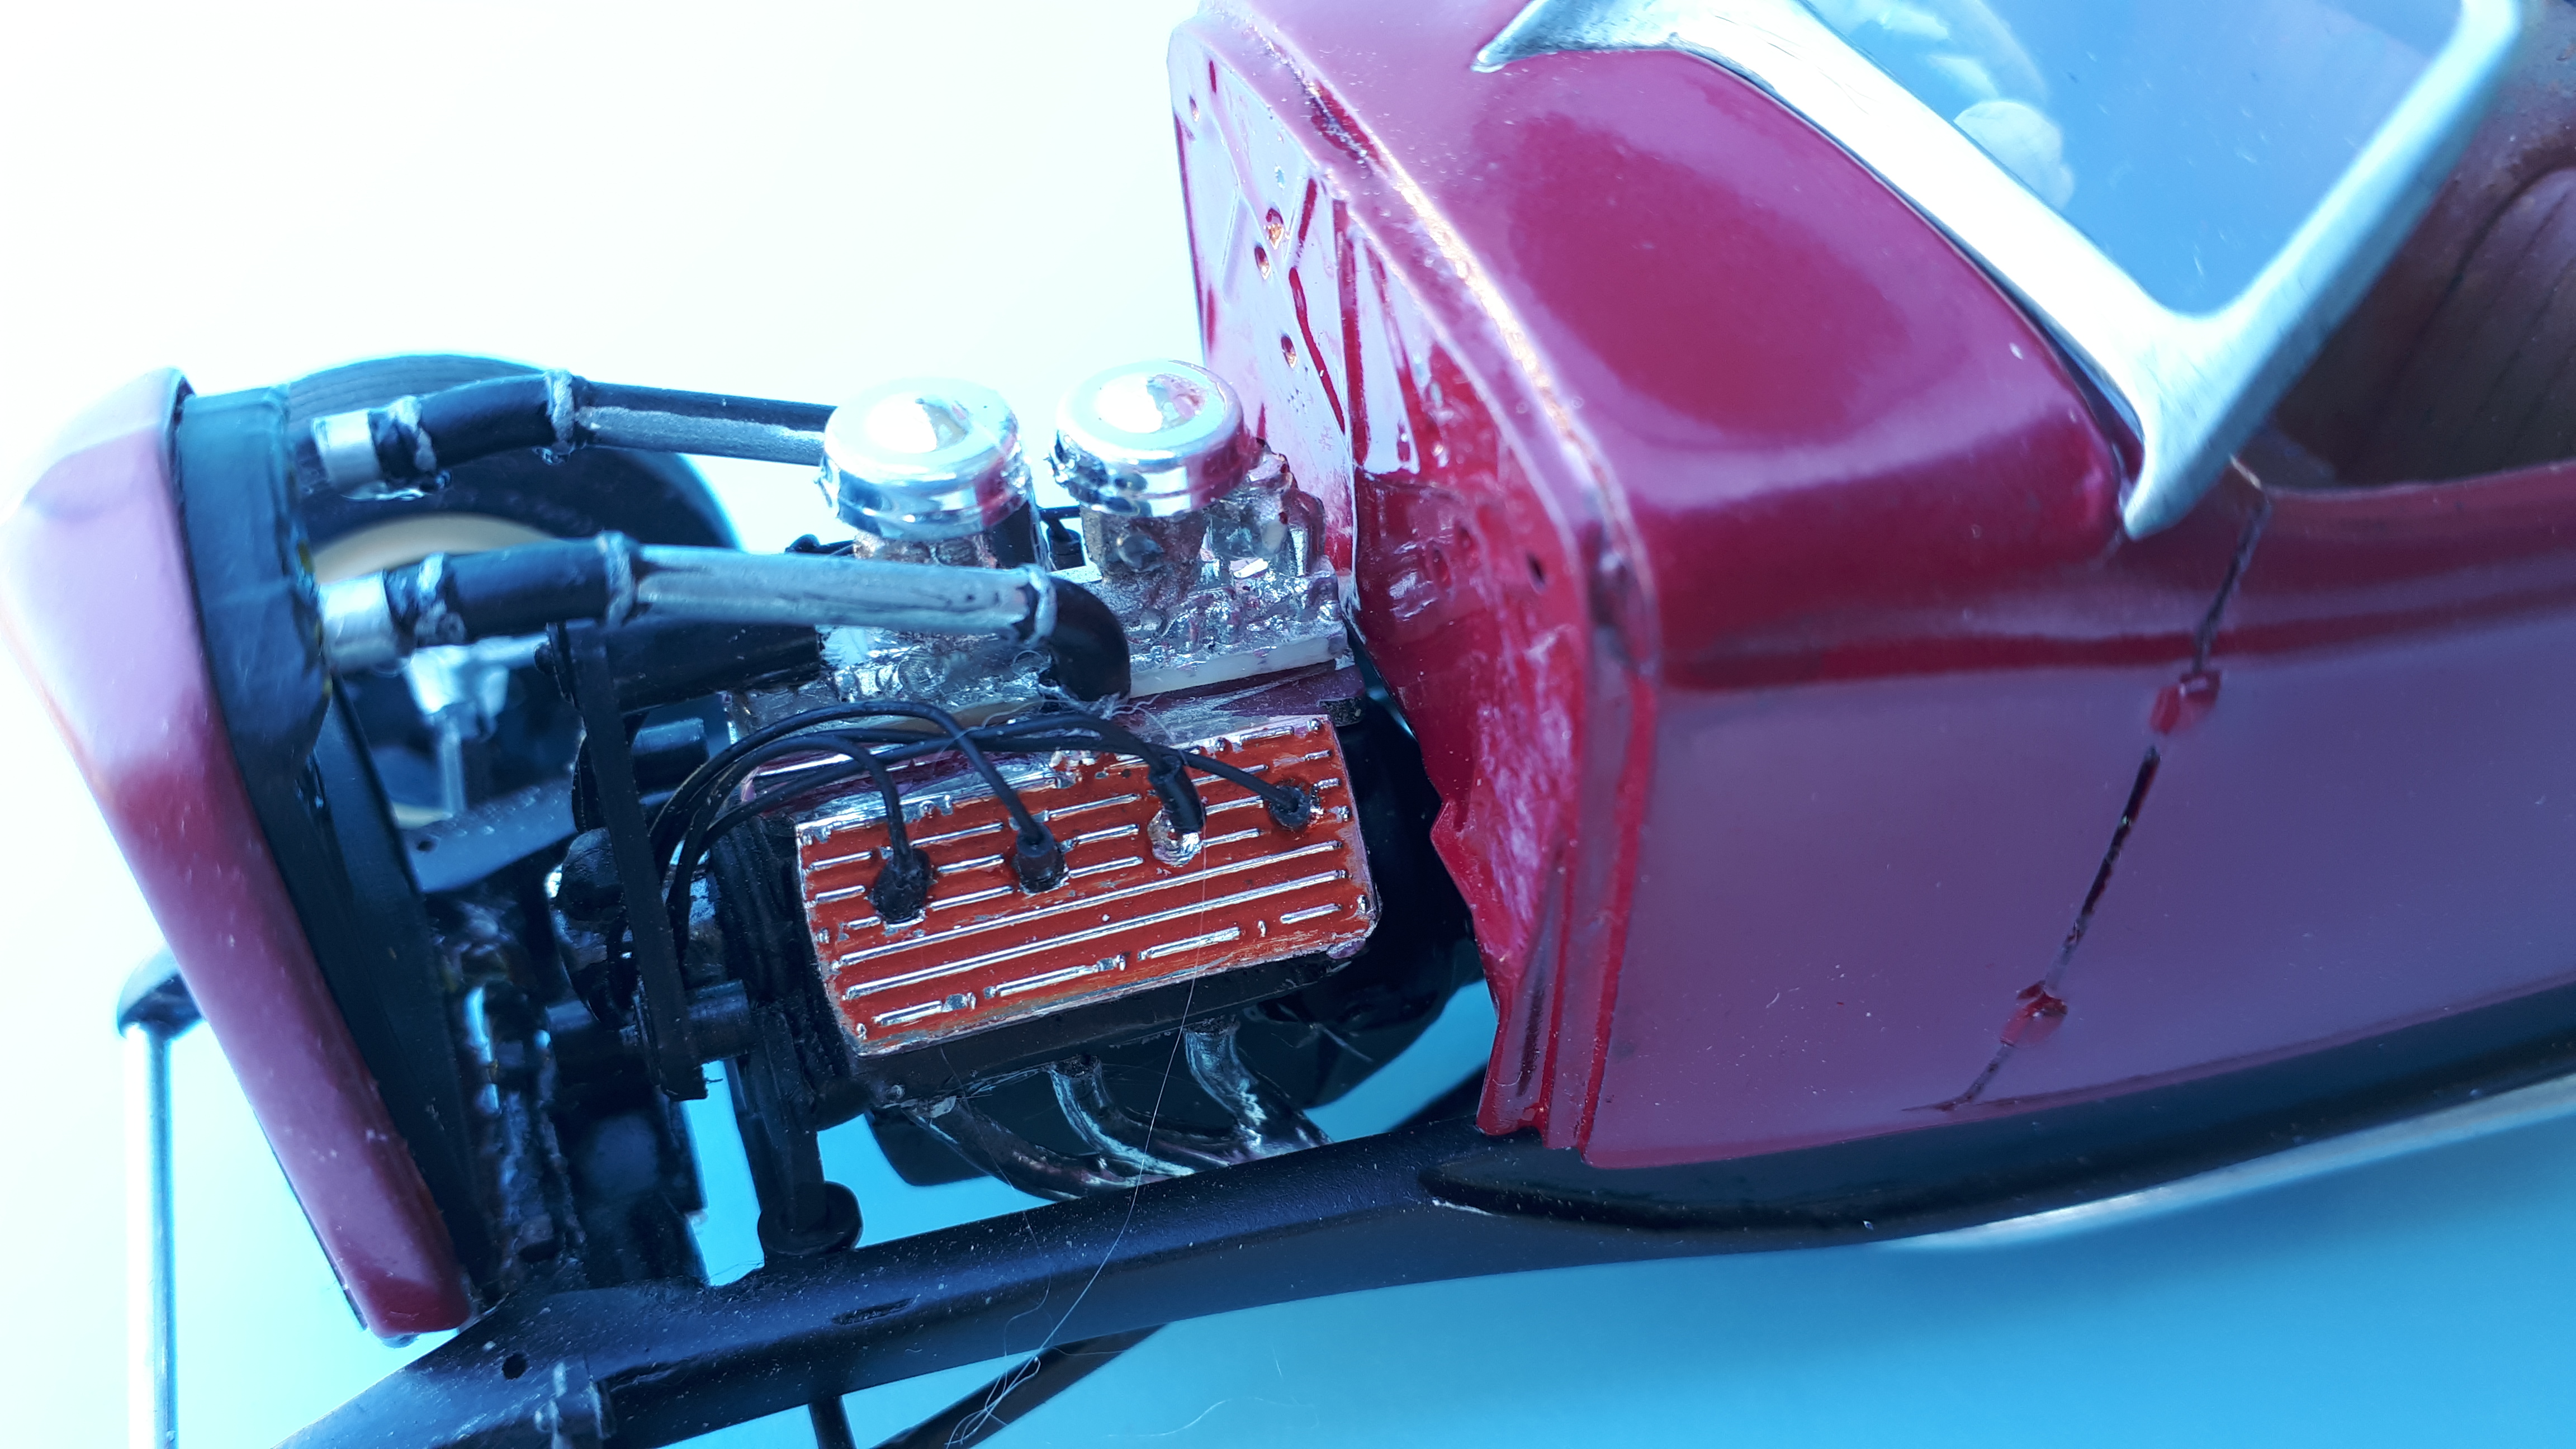
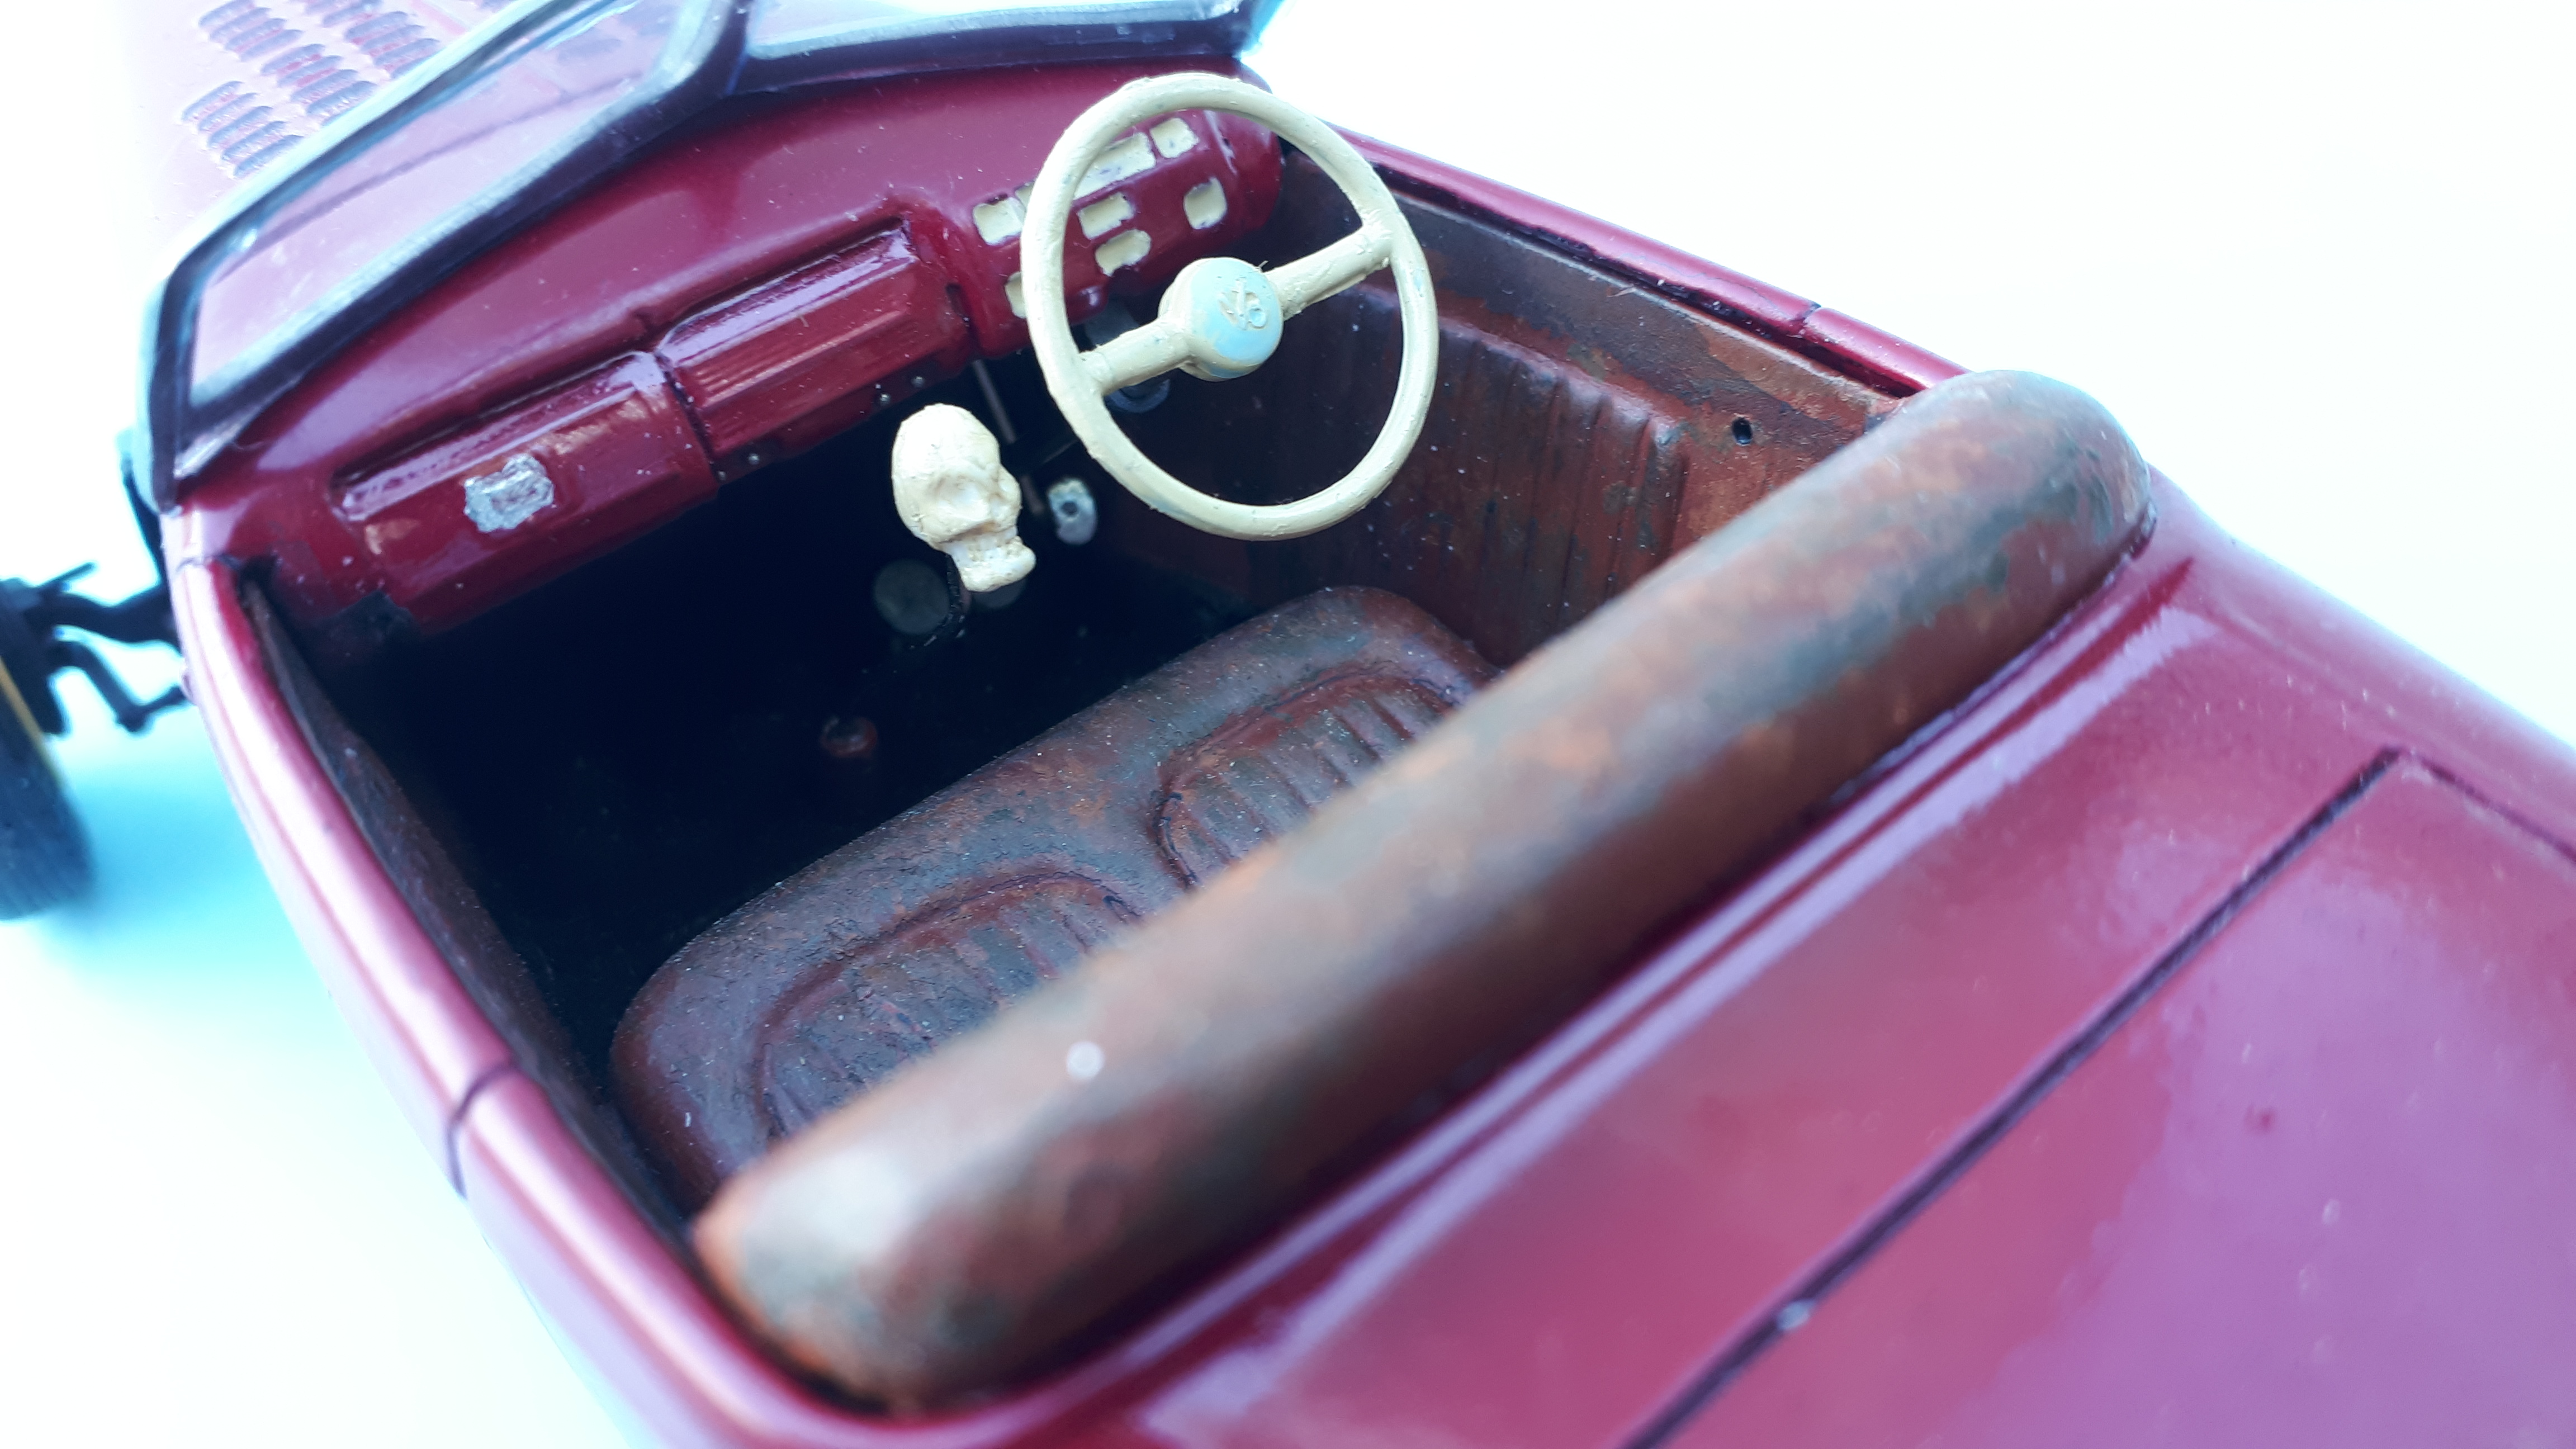
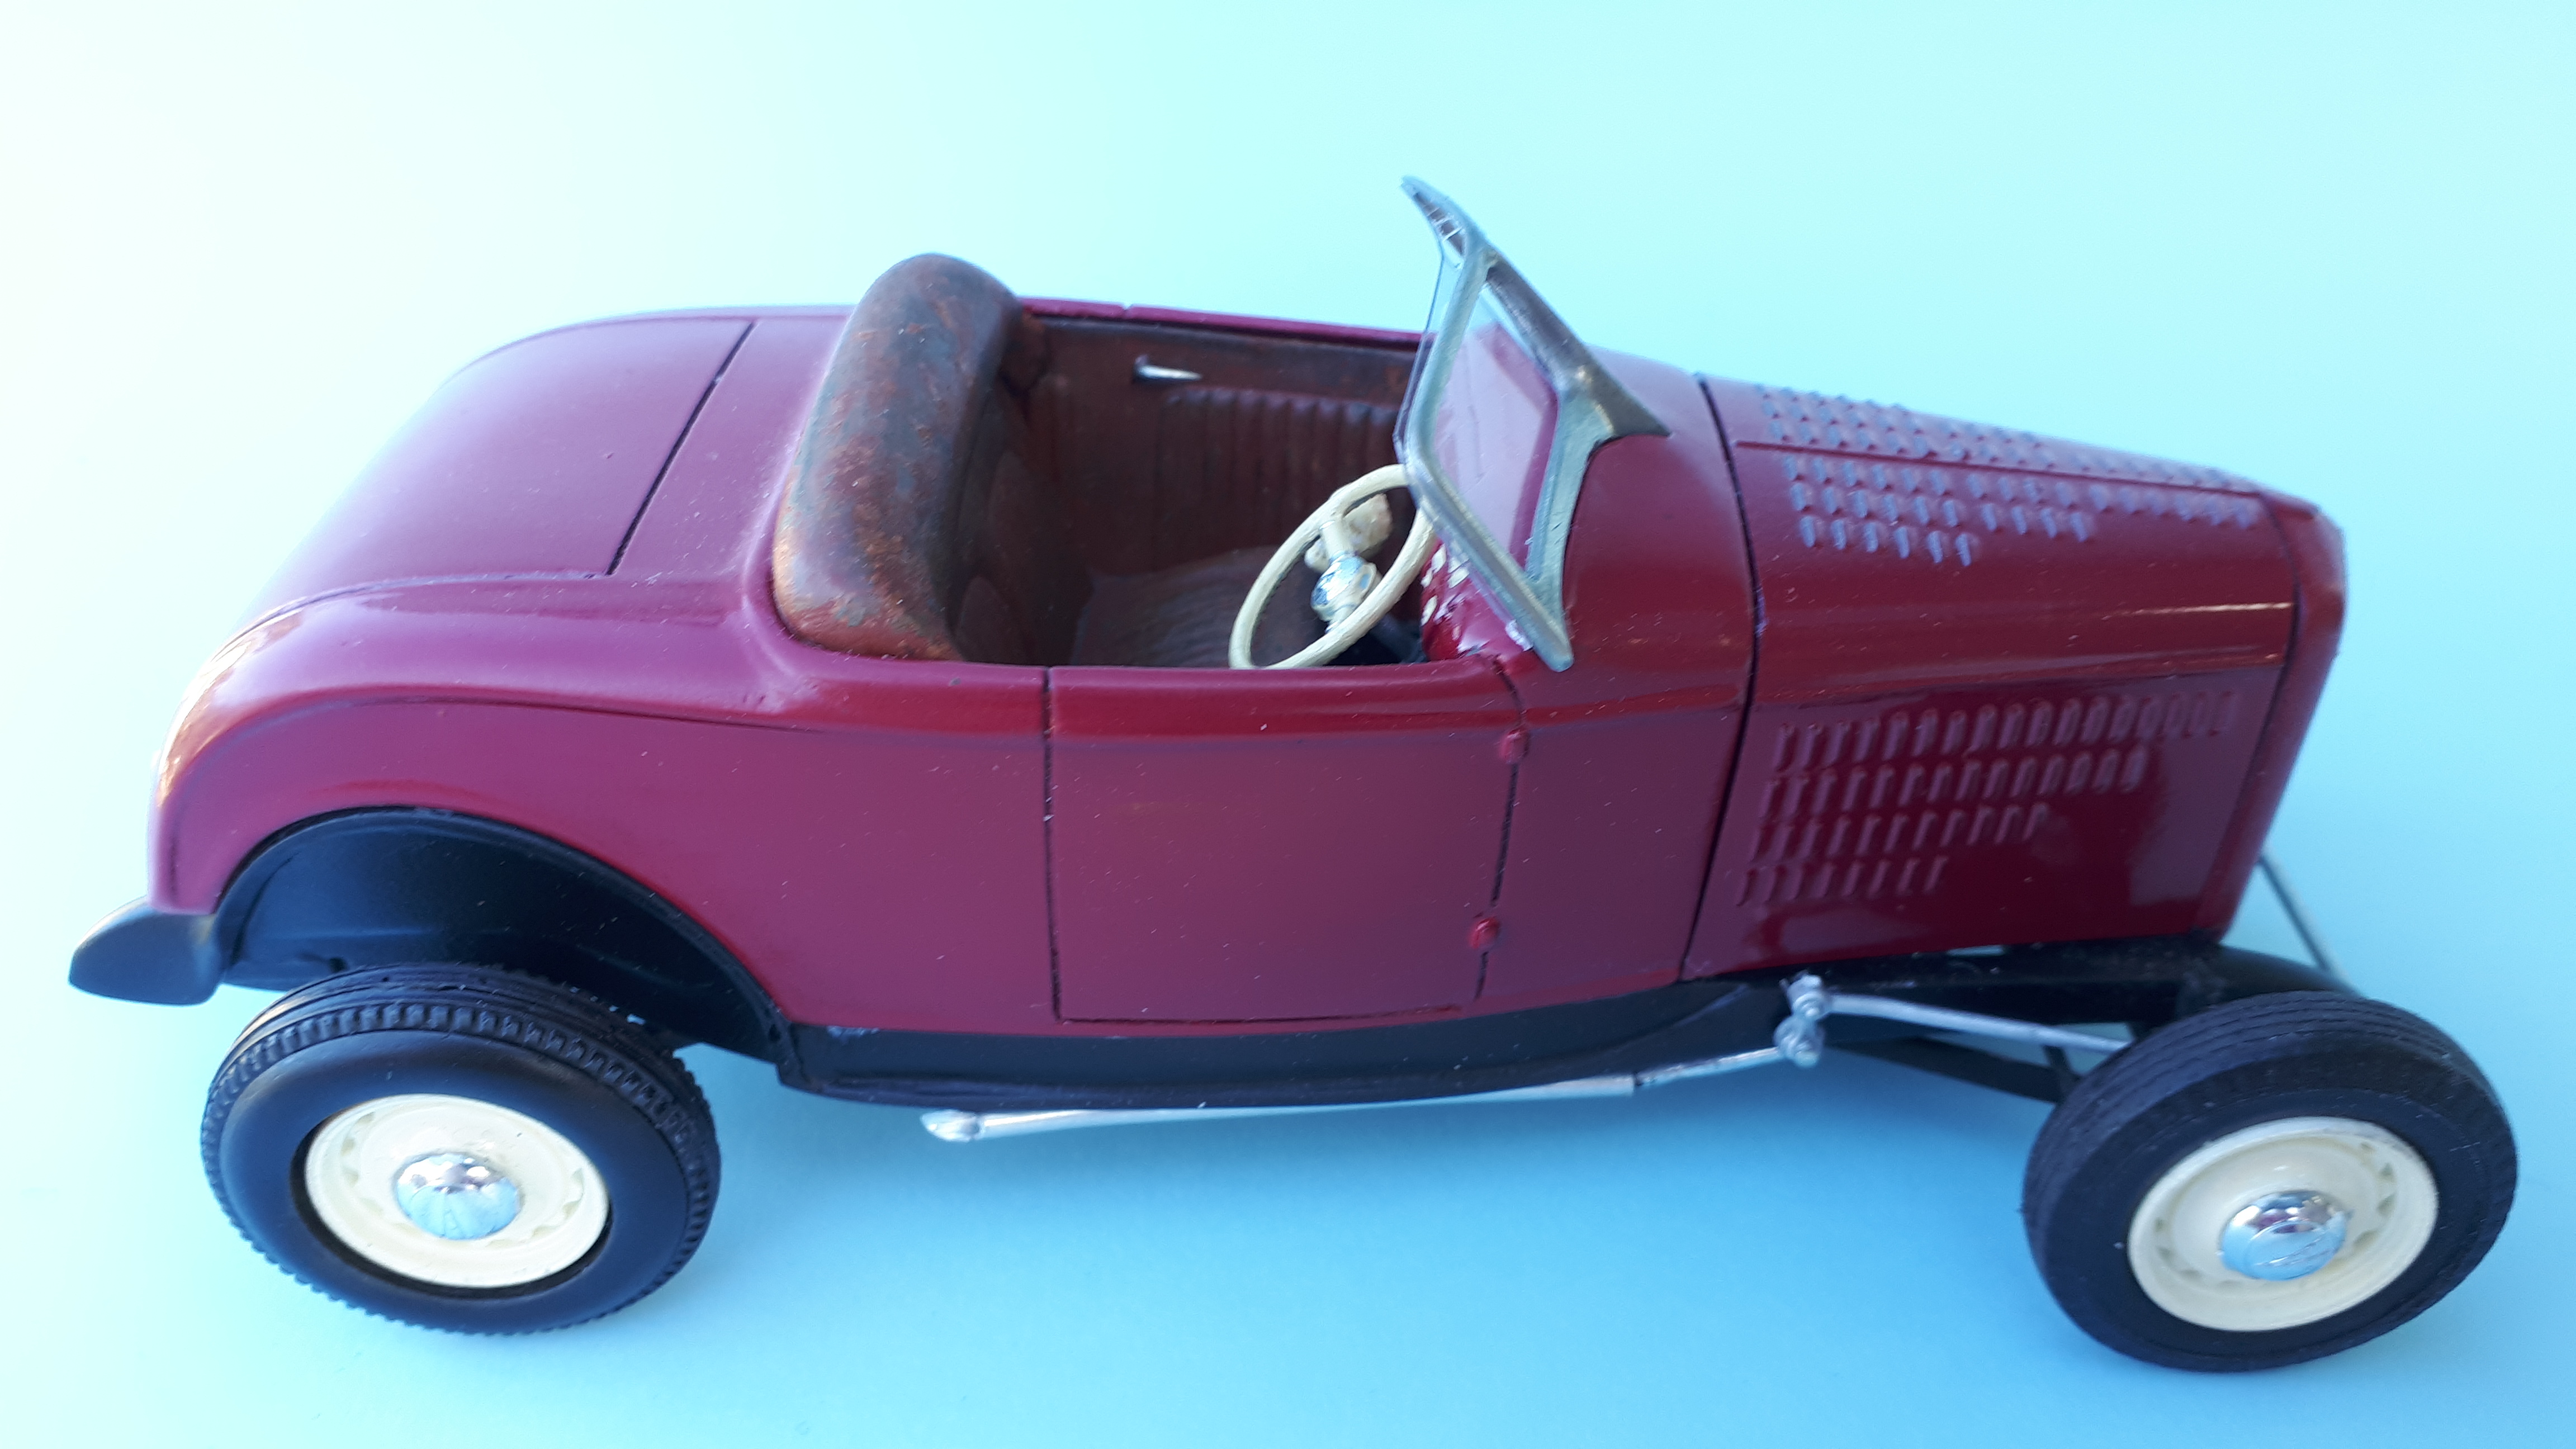
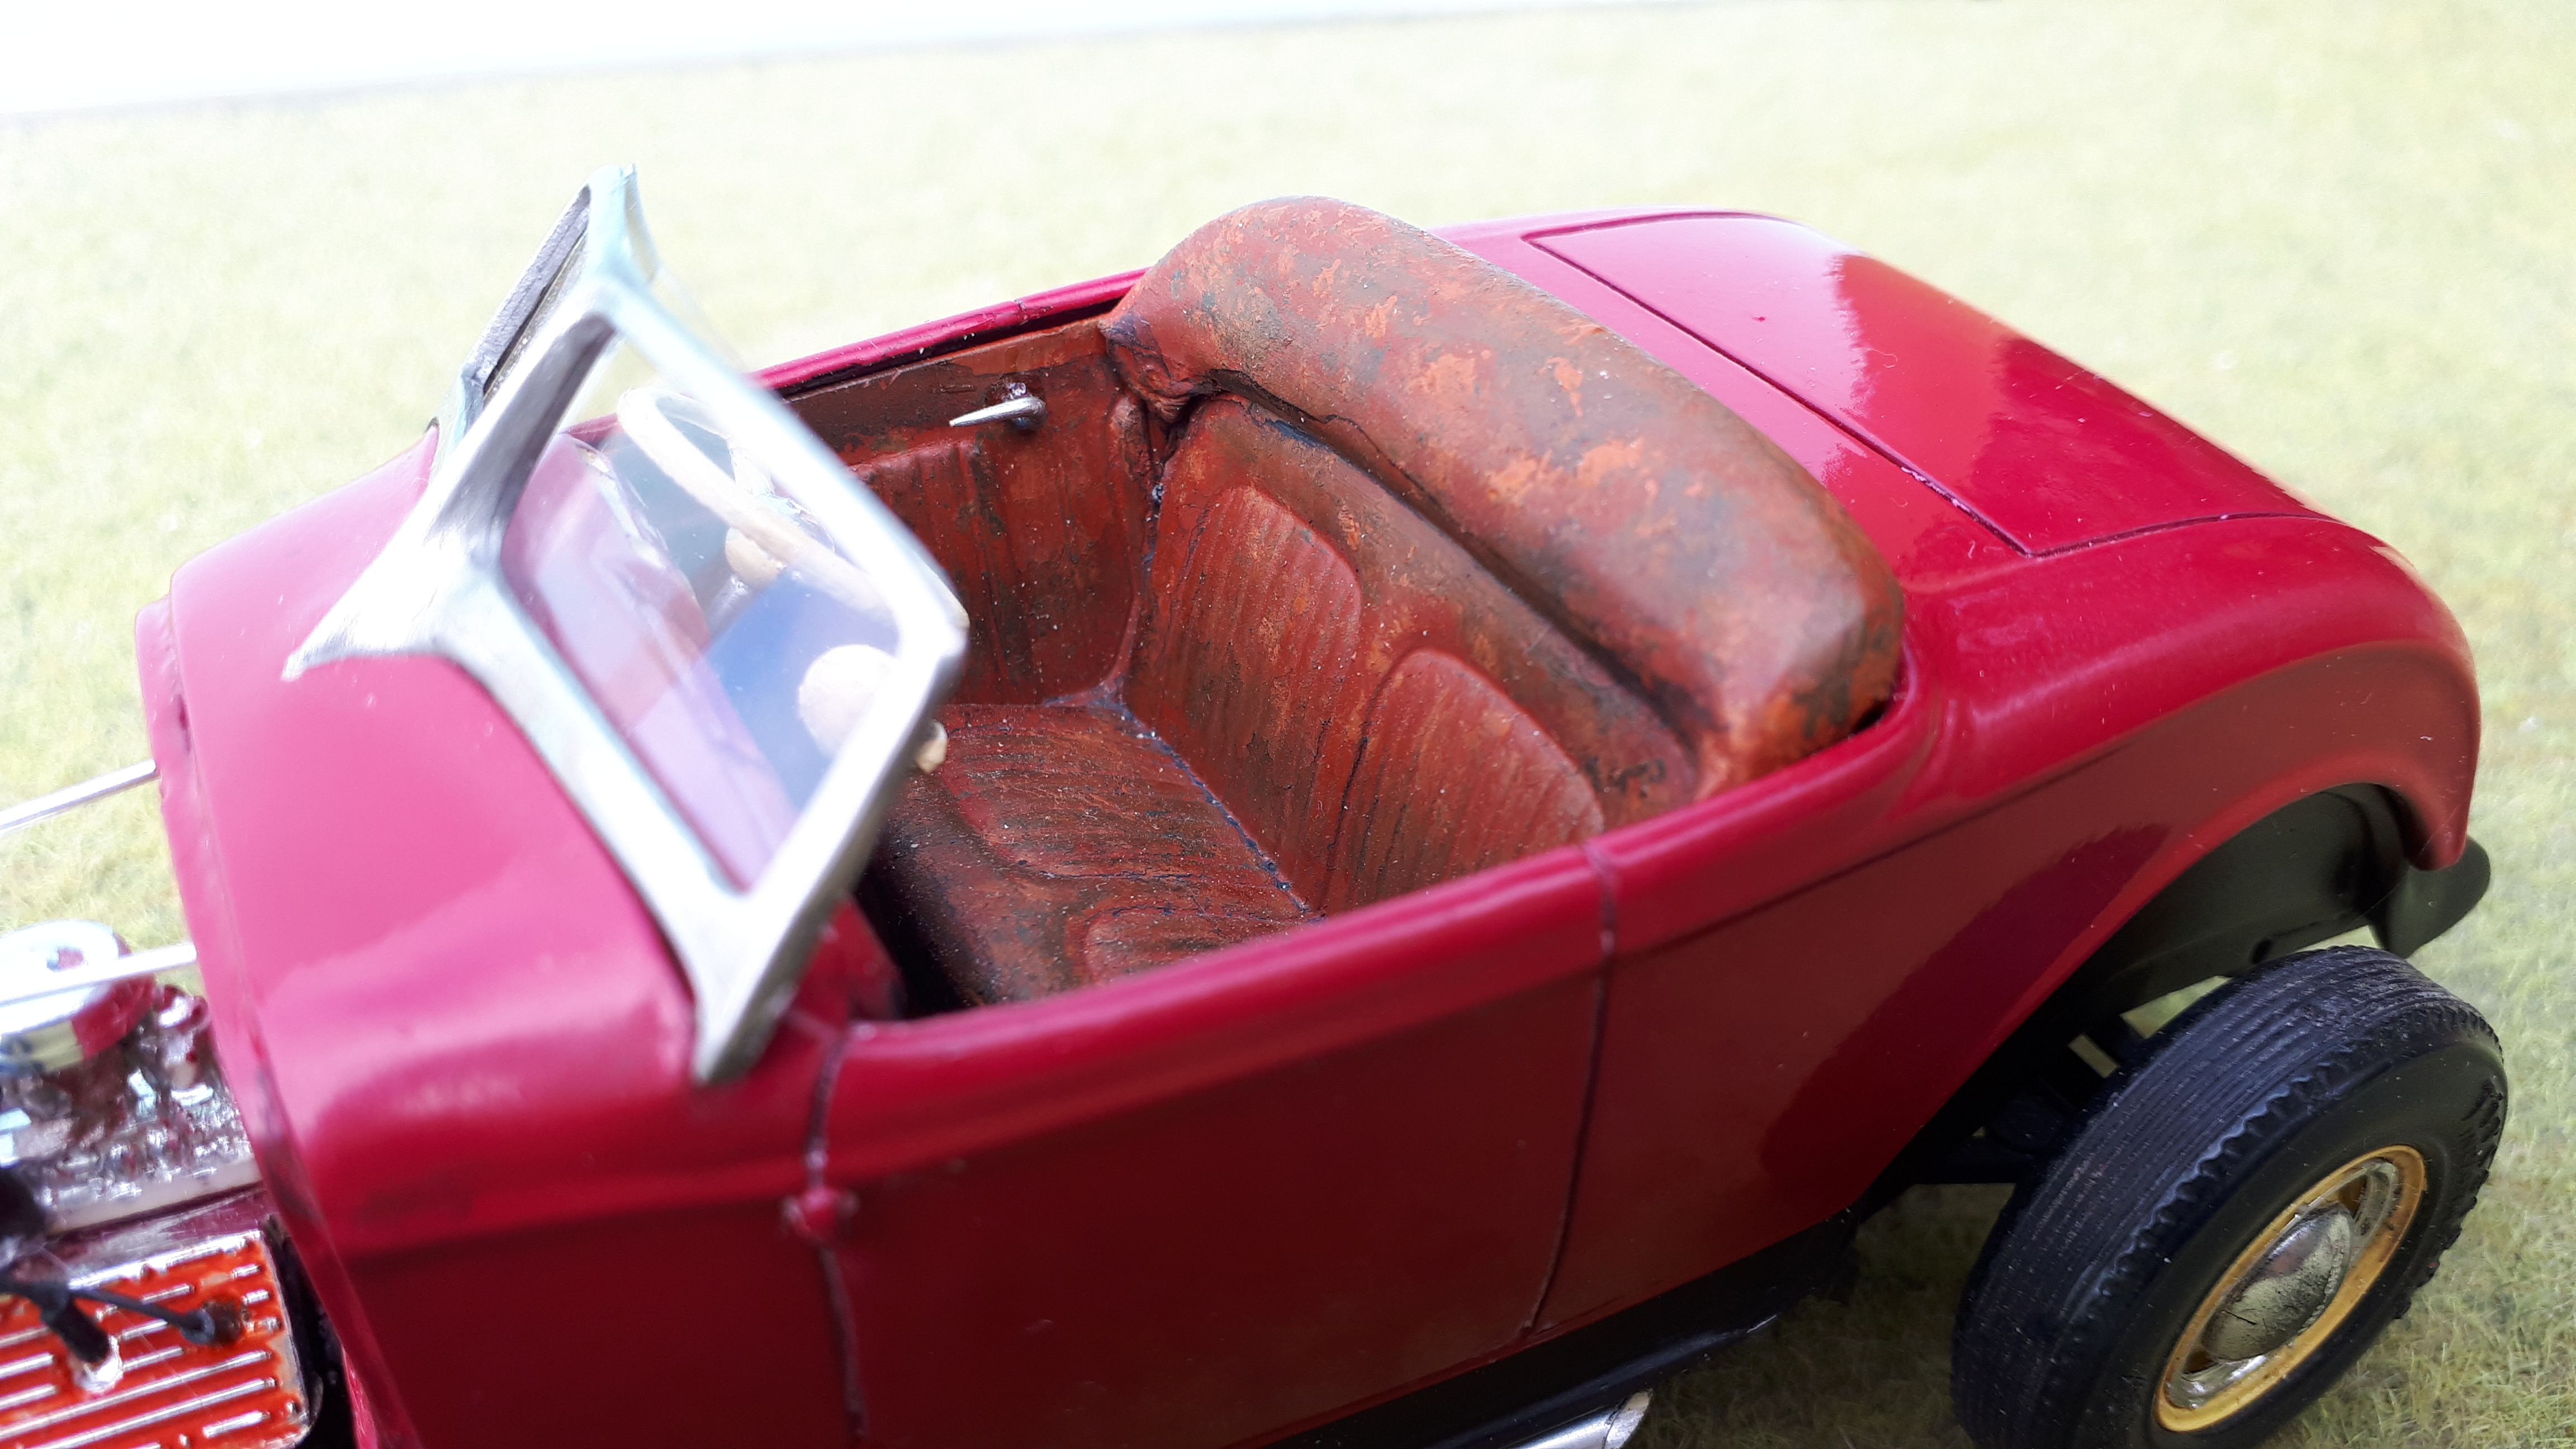
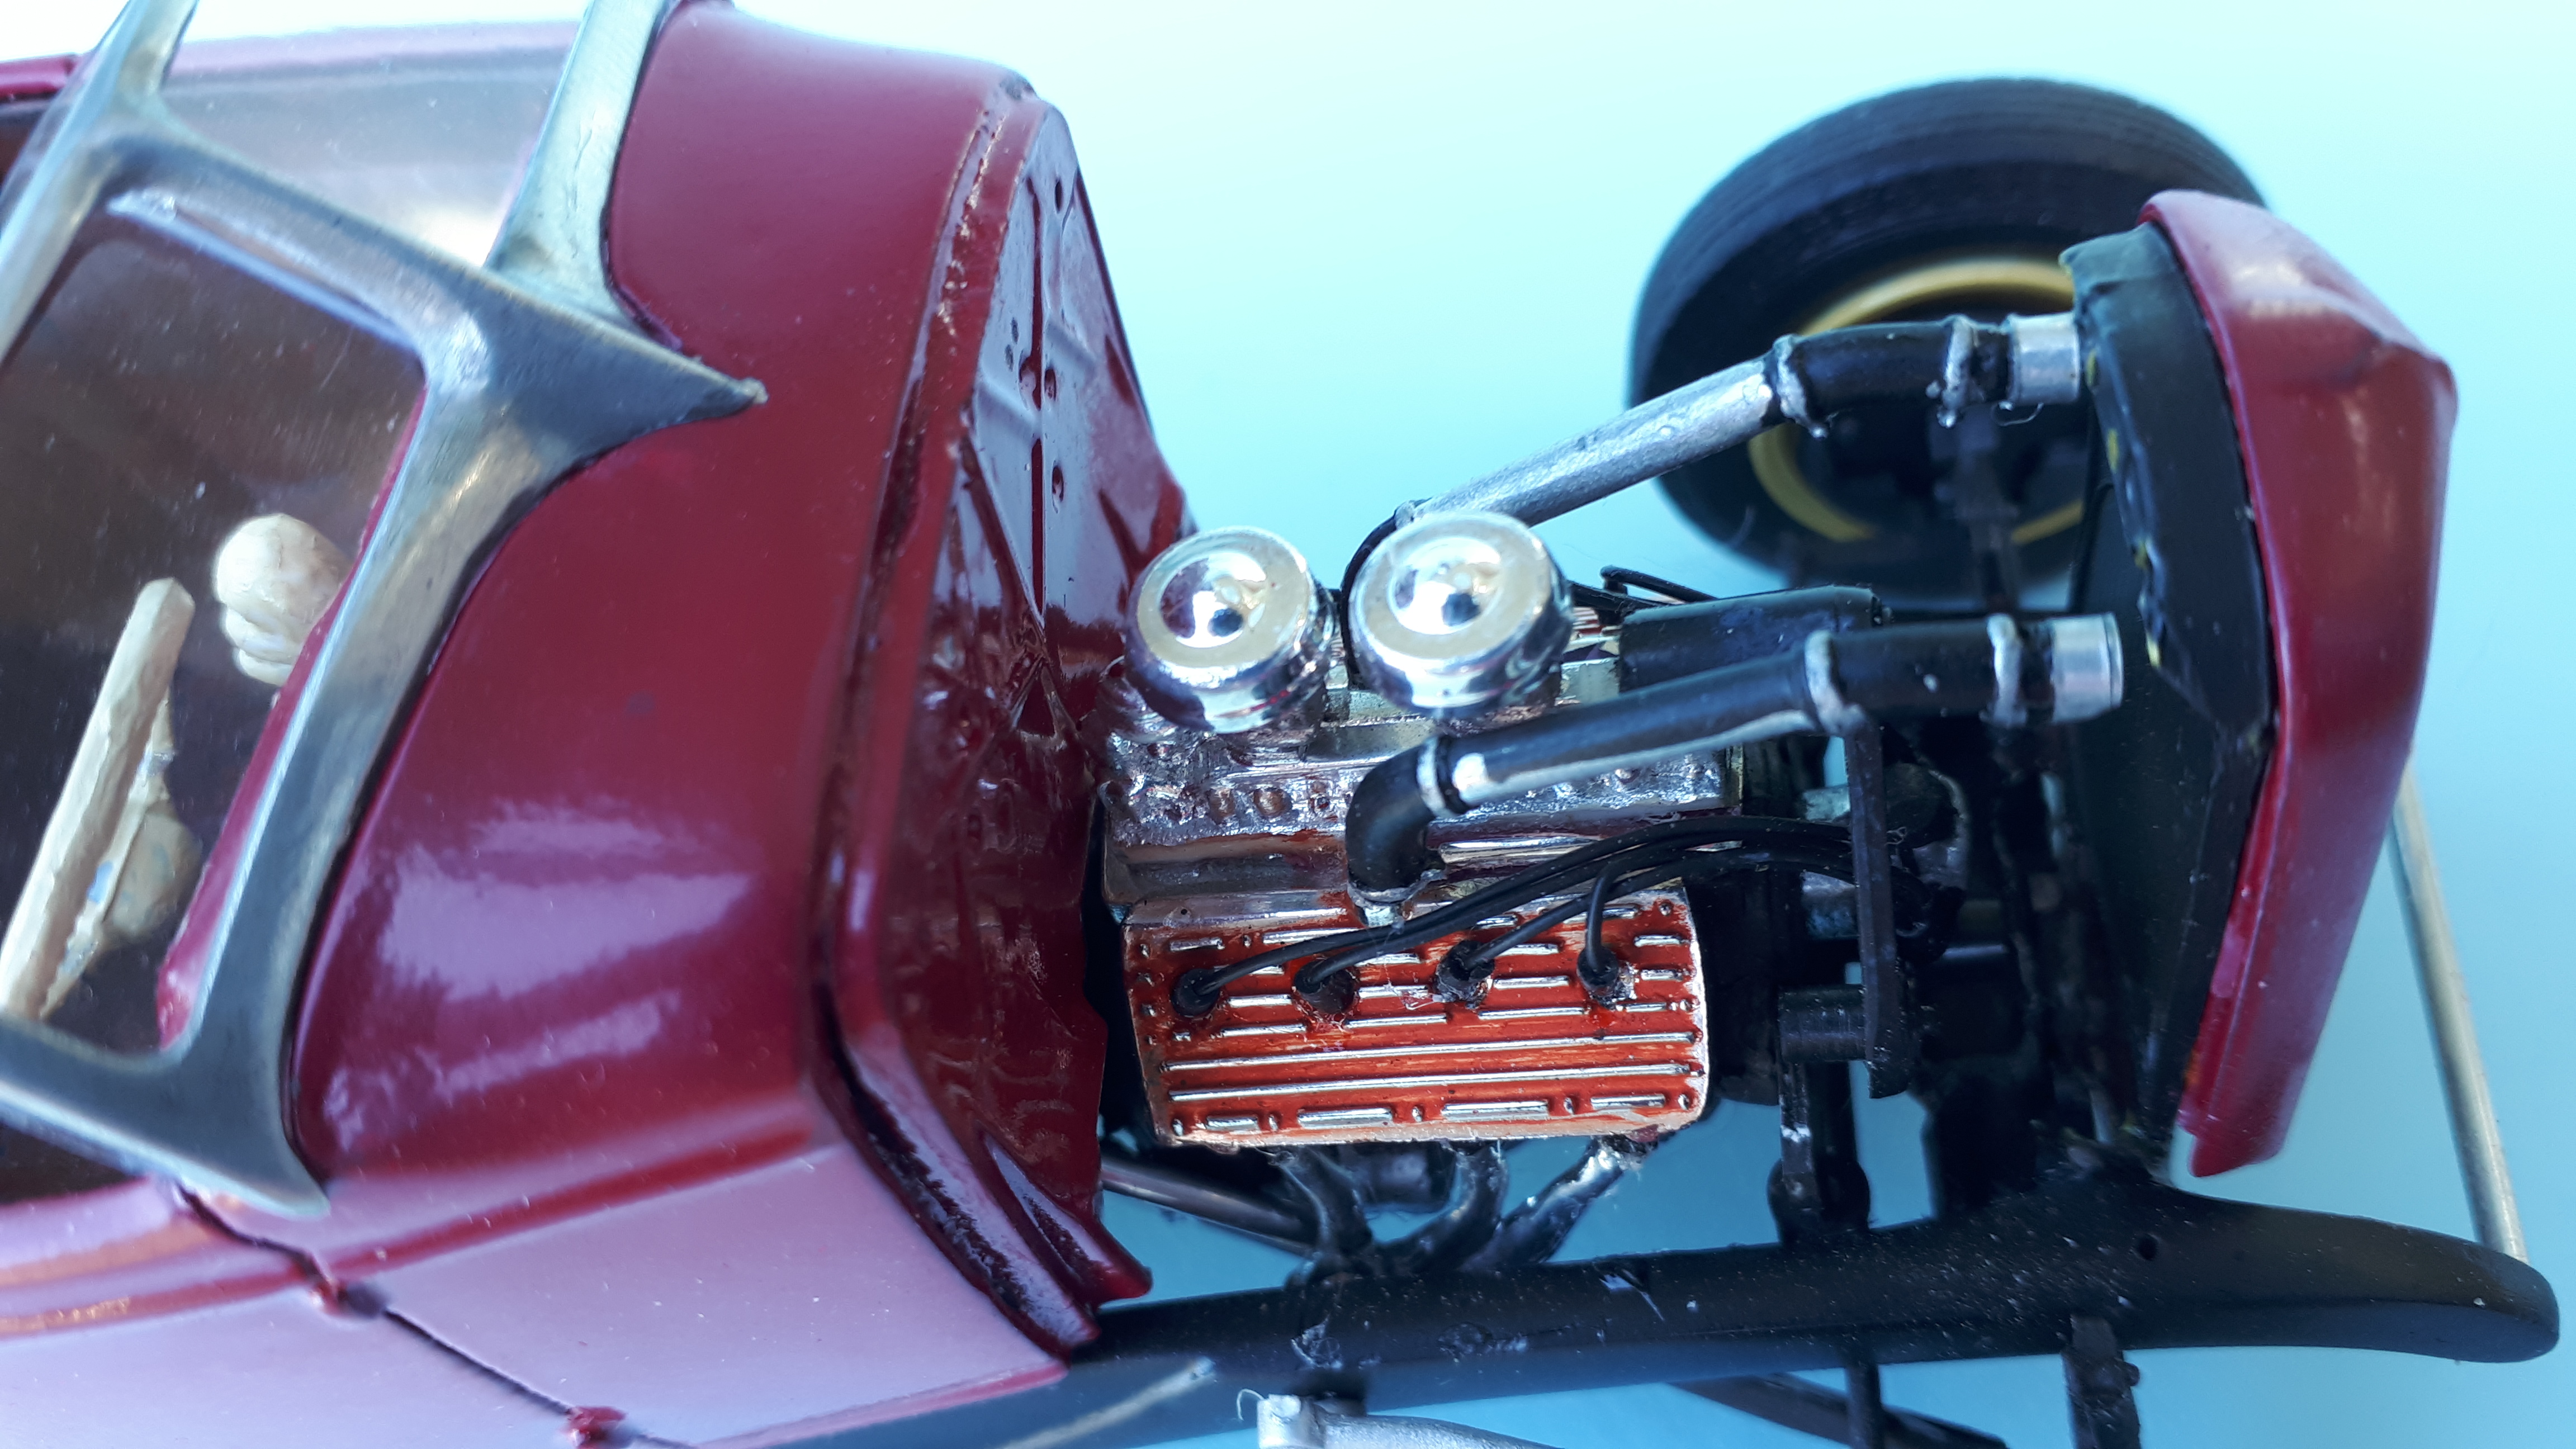
I have been building scale hot rods since I was 12 and the first rod model I ever bought with my own money was the Monogram Son of Ford. 32 Roadster. In the ensuing 50 years I have built eight of these kits with another three on the bench and they are definitely my favourite model hot rod kit. Notice I didn't say the best kit, just my favourite. And yet, they just dont seem to get built much. I see far more of the AMT kit which in my opinion is a very crude, bordering on Palmerish, 32 roadster. I completely understand the historical significance of that iconic kit and have built two myself but it bears little resemblance to a real 32. Give me the Little Deuce any day! To convert a Monogram full fendered roadster is not as hard as you might think. It takes a little time but you could complete the conversion in a night or two. The trick is to cut the fenders and running boards off first, with about a 1 or 2 mm flange left on the frame side. Seen from underneath the frame will appear to be skinny on the outside at the front and skinny on the inside from the cowl back. By making up some filler strips from flat styrene, you can thicken up these areas and then file the whole thing to shape, including the infamous character line of the stock deuce frame. The front and rear horns will also need some work but in my opinion it actually gives a more prototypically correct look than the esteemed Revell kit of the 1990s. This model was always going to be an early 40's style hiboy and it got a white metal Duvall windscreen very early in the build but I ground to a halt over the interior. The Monogram kit in it's many variations has the distinctive horse collar style pleated and padded upholstery. As much as I like that piece, it does rather identify it's origins and I wasn't quite ready to start scratchbuilding an alternative. Then Bernard posted his lakes-inspired high seat roll hiboy here a while back and the light bulb went on! By adding the ever so period correct high roll, I would also help disguise the origins of the kit. This inspiration hurried up the completion of a long stalled project. I used the seat roll of a Lindberg 23 T bucket kit, yeah, the ugly one, and built it up with body filler. The body was a glue bomb from my childhood that had been sprayed with lacquer causing significant crazing. As a result some of the swage marks around the rear of the car are a bit soft as it took a lot of sanding to correct the damage and I wasn't prepared to start reconstructing swages on this project. Please excuse the dodgey painting of the gauge panel. Somewhere I have a beautiful MCG photoetched panel but I have put it in a safe place and until I find that safe place, I have to put up with the results of my shaky hand! Paint is cheap hardware store enamel with just the right amount for shine, with a satin black frame. The interior was sprayed first with red lead primer then stippled with various Humbrol orange and brown enamels. It was nearly working but then I applied a black wash and it really popped. Probably my favourite part of the car. The recipe is as follows. Monogram 32 Roadster - Body, hood, grille, frame, front axle rear axle, interior Firewall Resin copy of Rat Roaster stock style firewall. Front wishbone and steering gear - AMT 32 Ford slightly extended Duval Windscreen - white metal, Replicas and Miniatures Or R&D Unique - it was a long time ago! Dashboard and steering wheel- AMT 40 Ford converted to RHD. Skull shifter knob - Off the front of Hot Wheels Rigor Motor toy ( looks like Grandpa Munster's dragster) Engine Monogram Tom Daniel's Pie Wagon show rod flathead Headers Revell 427 SOHC with one pipe removed (Henry J, Willys P/U, Austin) with aluminium lakes pipes Wheels Revell 37 Ford Commercial on one side, AMT 40 Ford on the other. Tyres - I forget but I think they are AMT skinnies on the front and the revell 37 slightly taller skinnies on the rear, just to give a rubber rake. So thank you, Bernard, for kicking this off the dead projects pile and getting it "under Glass." Let me know what you think! Cheers Alan
-
Scrapbox Stockers
alan barton replied to satterwhite78's topic in Other Racing: Road Racing, Salt Flat Racers
Best use ever of parts box refugees! I particularly like your Camaro, have something similar in mind myself. The Chevelle looks pretty tough as well. Cheers Alan -
37 Chevy Coupe Modified
alan barton replied to raisin27's topic in Stock Cars (NASCAR, Super Stock, Late Model, etc.)
I like all of them but #11 is especially nice. It is so refreshing to see someone use the appropriate sized wires throughout their engine bay. That engine shot is to die for! Cheers Alan -
86 monte carlo dirt st.stock
alan barton replied to cheyenne93's topic in WIP: Other Racing: Road Racing, Land Speed Racers
Nice project so far, Joel. I am a big fan of dirt trackers and like using NASCAR kits as a basis - just this morning I scored an unopened AMT at a toy fair for $10 so i am very happy with that. As for the wheels, hands-down the green. As others have said, it would be extremely unusual to see a chromed wheel at the speedway, dirt track at least, and it loses that home grown, small town racer look. If the green isn't working for you, I would try out red, orange, yellow or white for a different look. Hey, it's only paint! Cheers Alan -
‘54 Willys P/U
alan barton replied to NOBLNG's topic in WIP: Model Trucks: Pickups, Vans, SUVs, Light Commercial
A truly magnificent build. While I have no interest in Jeeps or 4WD in general, the beautifully detailed techniques you have explained to all of us can only help improve our modelling skills. The realism you have achieved is fantastic! Cheers Alan -
Thanks guys! It's no show - winner, that's for sure, but after doing a bunch of very complicated projects over the last 18 months it was nice to literally slap one together. For me, the most glaring problem showed up by the photos is the Bare Metal foil along the side trim - I guess my eyes are getting worse than I thought because it looks like I tore the trim of the l.h. door with my teeth! When I get home tonight, Snake, i will have another look at those lights. I thought I got them straight (crooked headlights are a pet hate of mine) but the reflections on the photo suggest otherwise. An easy fix for sure. Cheers Alan
-
Thanks Bill, I had those smooth hood sides in my hand tonight but with the combination of parts I am using I have decided to go with Kit's idea of reworking the AMT hood, mainly for having a solid one piece unit. Only chore is that after preliminary fitting it looks like I will have to extend the leading edge to meet up with the grille. Good luck with your project! Cheers Alan