alan barton
-
Posts
2,105 -
Joined
-
Last visited
Everything posted by alan barton
-
Here's a mock-up to check how I was going. I then got some primer on the frame and bellypan and thinks are looking very satisfactory. The rear end also got painted, with the upper four bar links attached. As they disappear through a hole in the bellypan, there was no need to add rod ends and they would have simply interfered with final assembly. Cheers Alan

-
The hood should be easy, right??? Nah, not a chance. The extended length of a Deuce frame gave a nice fit for small block Ford power but meant the hood was short. As the photos show, I added some strip styrene to the front of the hood and then had to laminate extra pieces along the right hand side mostly to get everything fitting as snug as I hoped for. A lot of filing and sanding went into getting an acceptable finish inside and out.
-
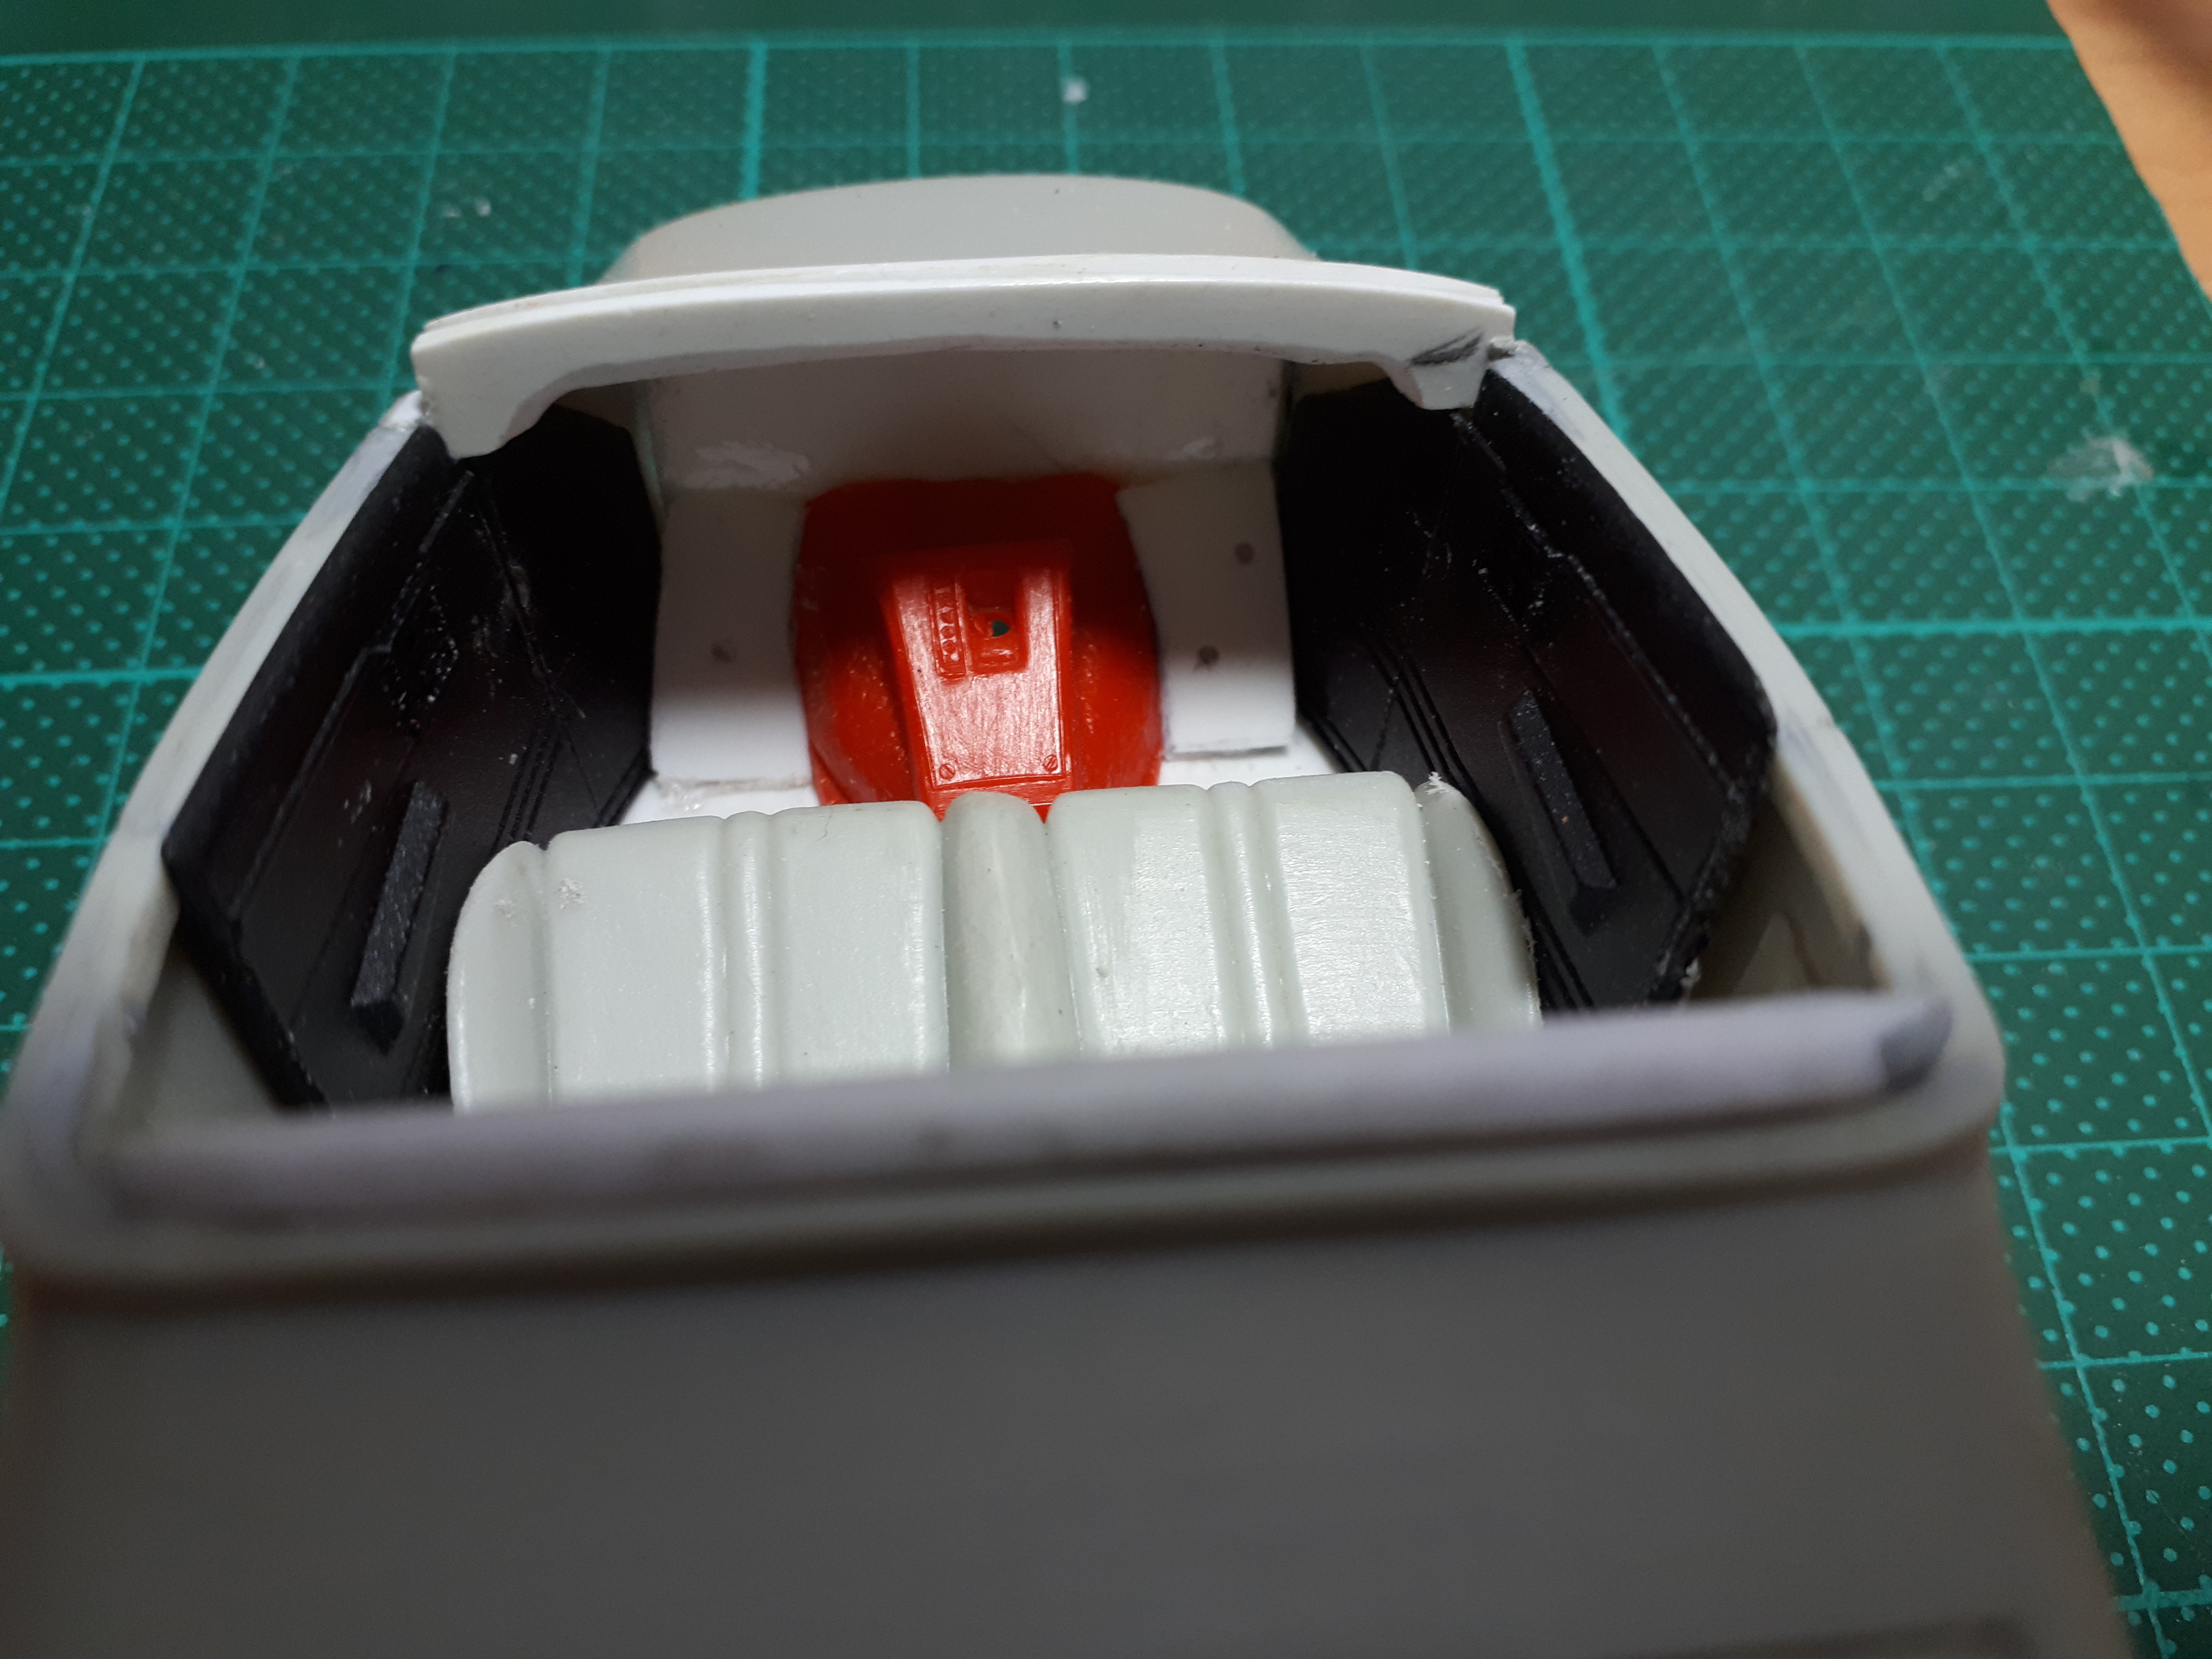
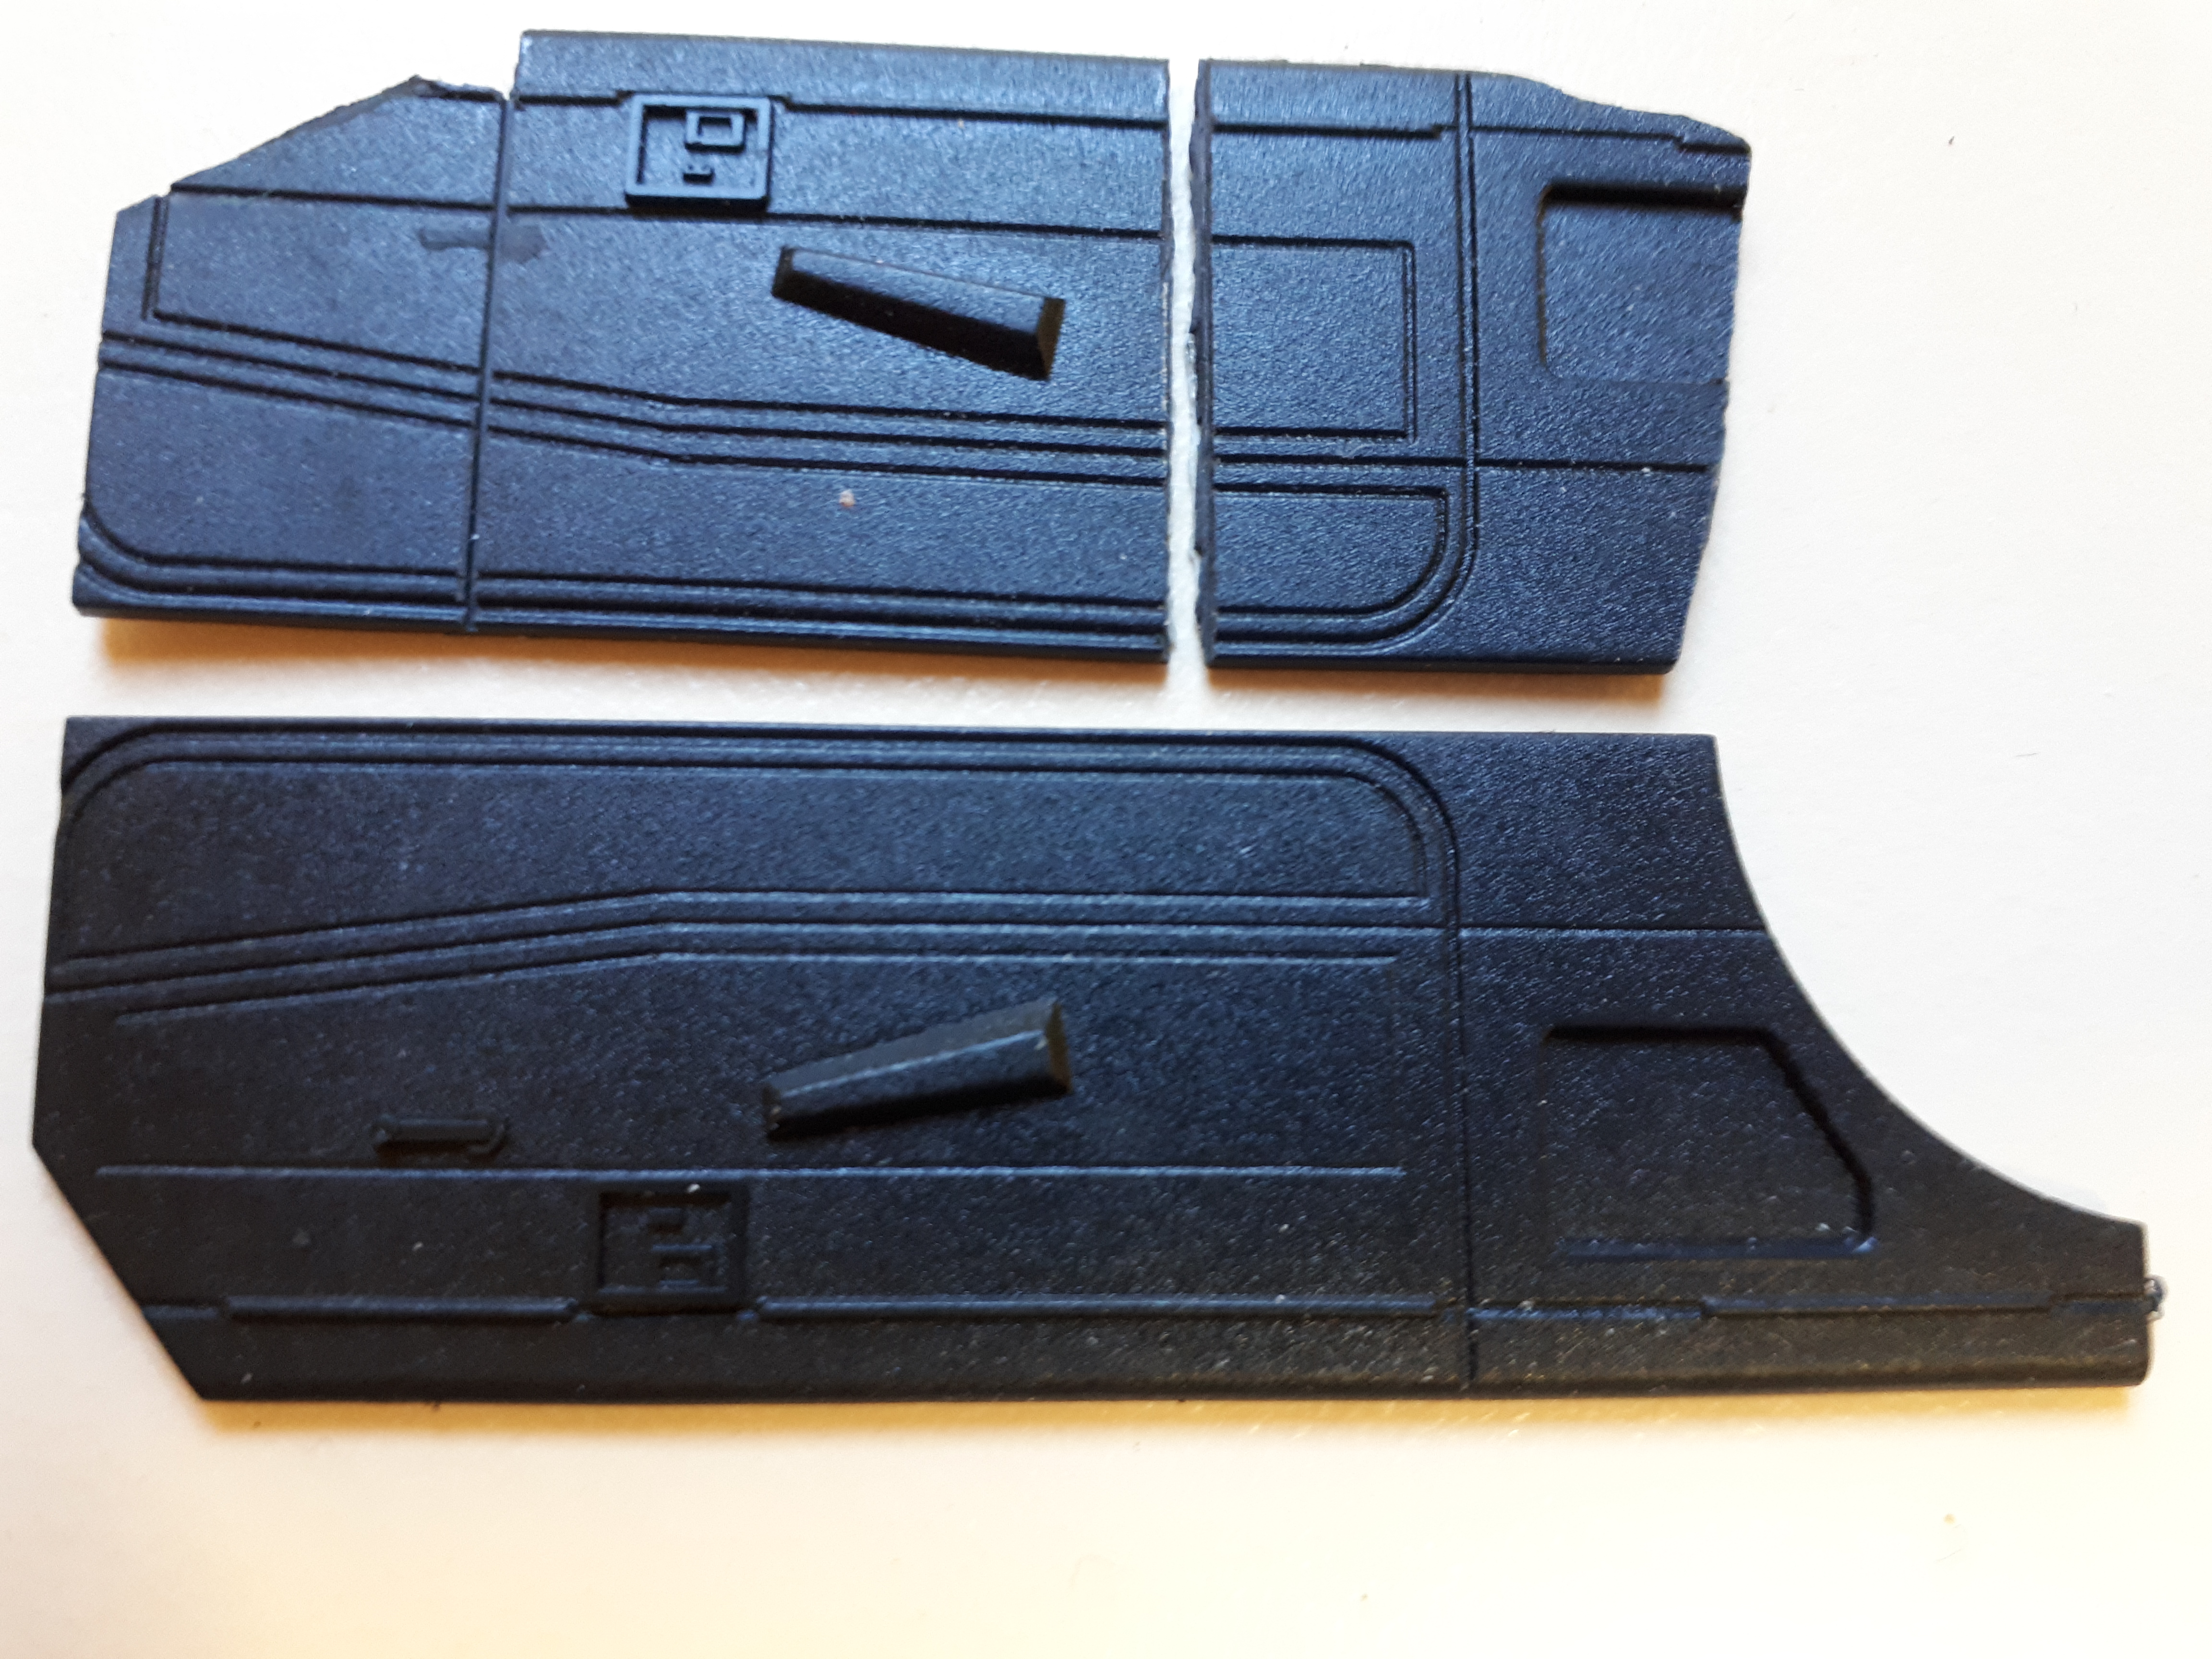
You could knock me over with a feather, Larry, I had no idea the car had featured in a show! And Claude, you are dead right when you say "simple"! One of the most complex rods I have built and yet such a simple design. There lies the genius of Lil John's design. It turned out that building this car was very sequential, if that makes sense. Everything affected everything else so a lot of planning took place before anything was made. The exception to that was the front suspension - I just couldn't find a way to pre-assemble these parts so had to do it as nearly the last step - only the windshield came later because it could have been knocked off while setting up the front end. The only photos I could find of the interior were of the original car and it just wasn't to my taste at all. The bulky maroon velour bench seemed at odds with the whole concept of the car, as did the Dodge van dash. The much later grey slate square block pattern upholstery didn't do it for me either. I couldn't find any photos of my construction of the seat but I started with the custom rear seat from the nineties version of the AMT 57 Fairlane. I took about 6mm out of the middle of the seat then re-joined it and smoothed off the centre section. The sides also took a lot of trimming - compare the width of a 57 Ford to a 29 ford and you will see what I mean. I then added a half round strip across the top to build up the height and allow it to be massaged into a very close fit with the edge of the passenger compartment. For the sides, I started with two black plastic door panels from an unknown Japanese kit. It didn't take a lot of work to get these fitted except where they wrap around the dashboard. I am not wild about the chunky square door handles but the work involved to fix them just wasn't worth it and they seem OK in the finished interior. The main thing is it gave me a simple, sculptured look to the interior and was one of the simplest jobs of the whole build. The transmission hump came out of an unknown orange interior tub. It is bulkier than I would have preferred but was the smallest I could get away with and still get the trans to fit. Thanks for all the great comments so far, I hope you continue to enjoy the instalments. Cheers Alan
-
That's the plan, Kit. Although I am making a few reasonably subtle changes, my intention is that people will look at it and go - oh, the Buttera roadster! Cheers Alan
-
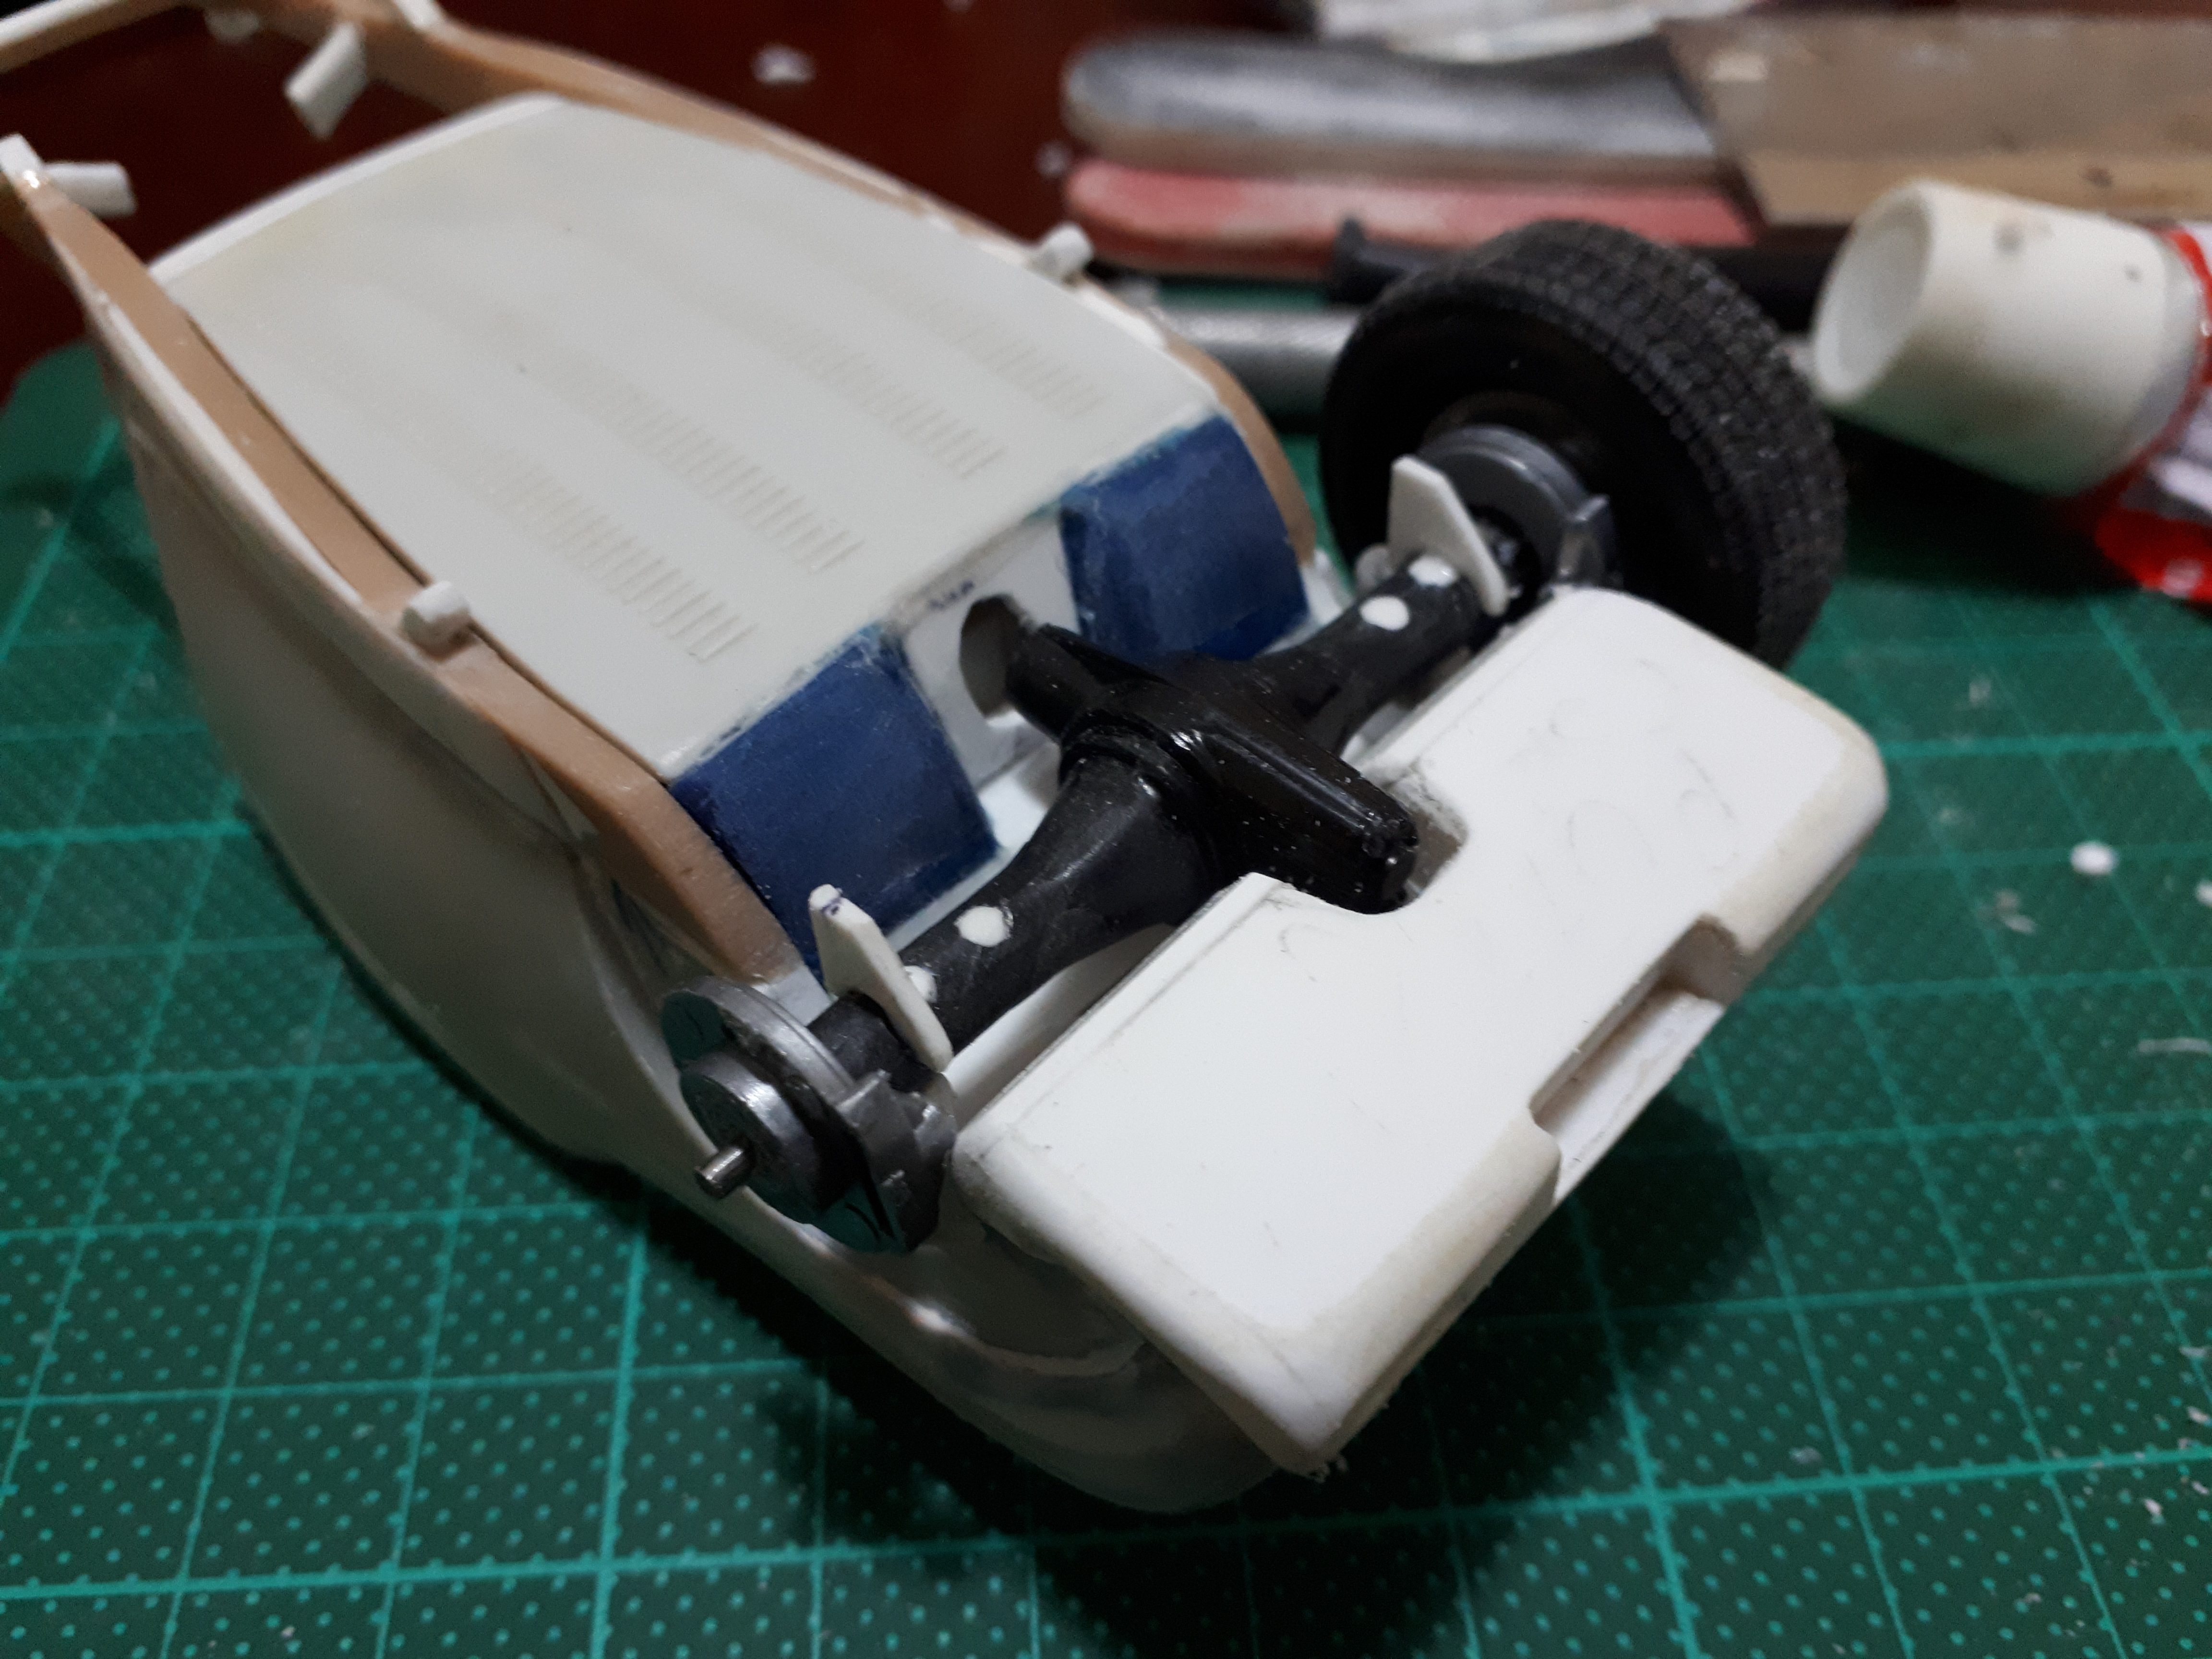
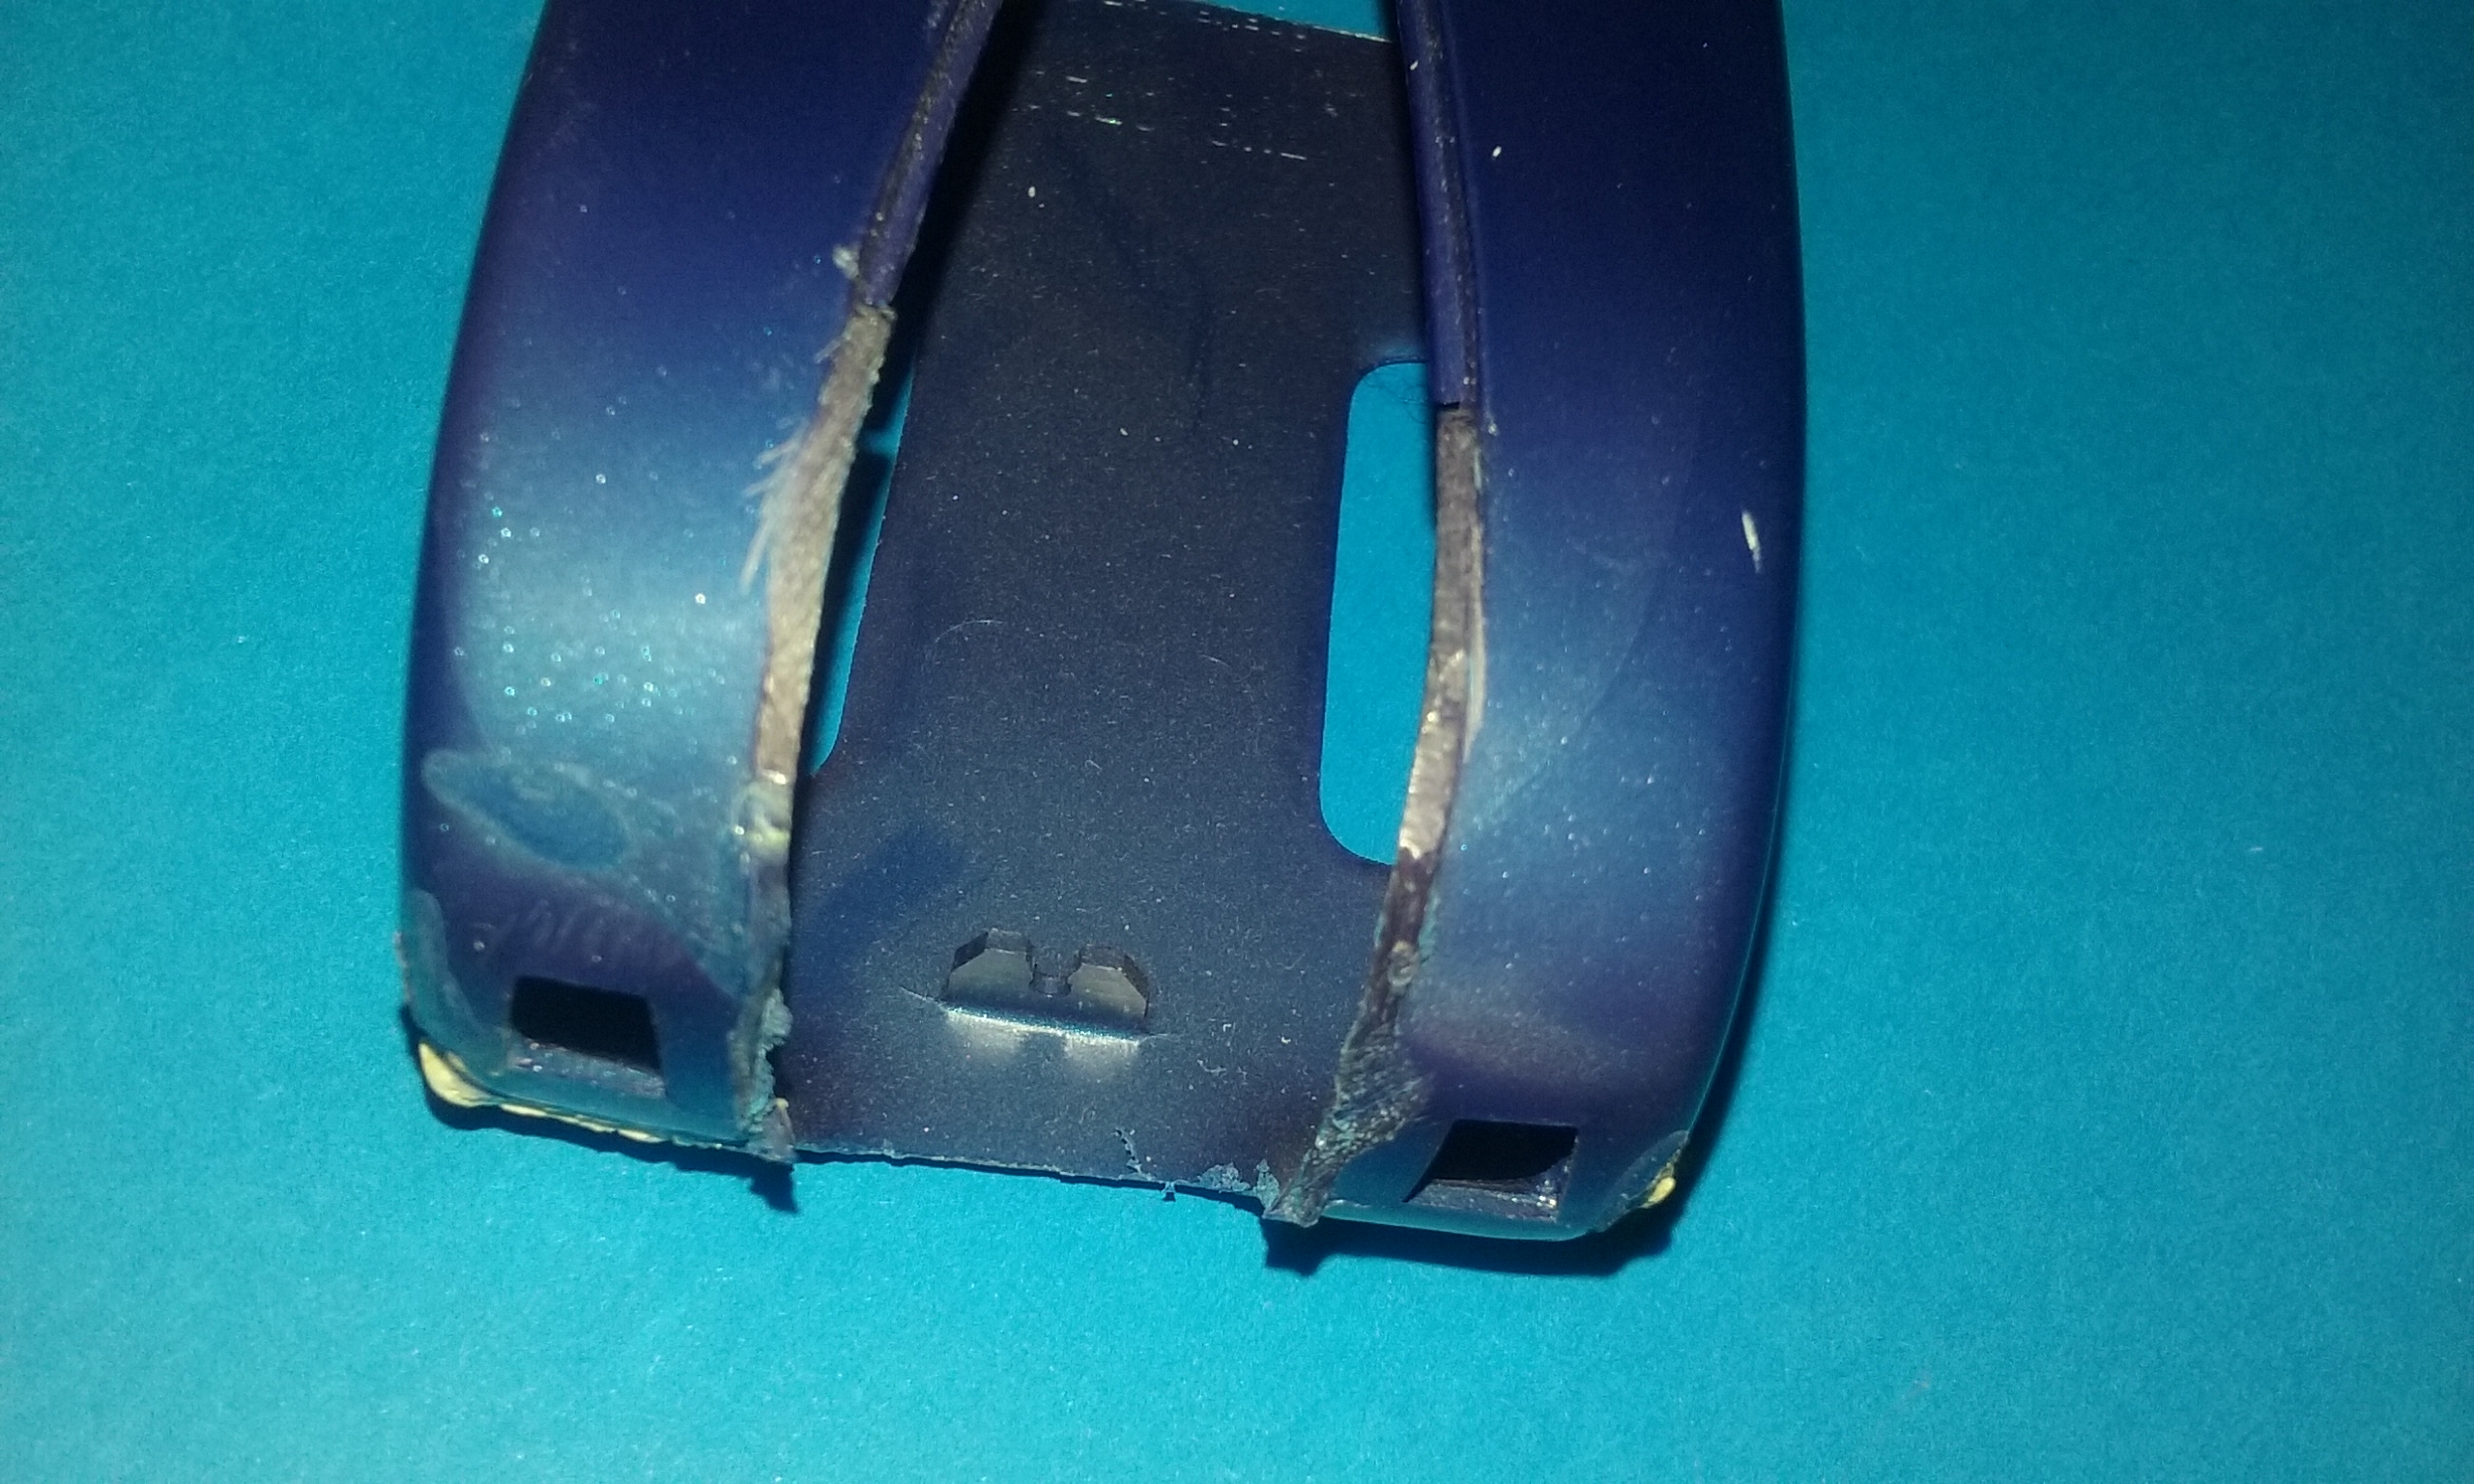
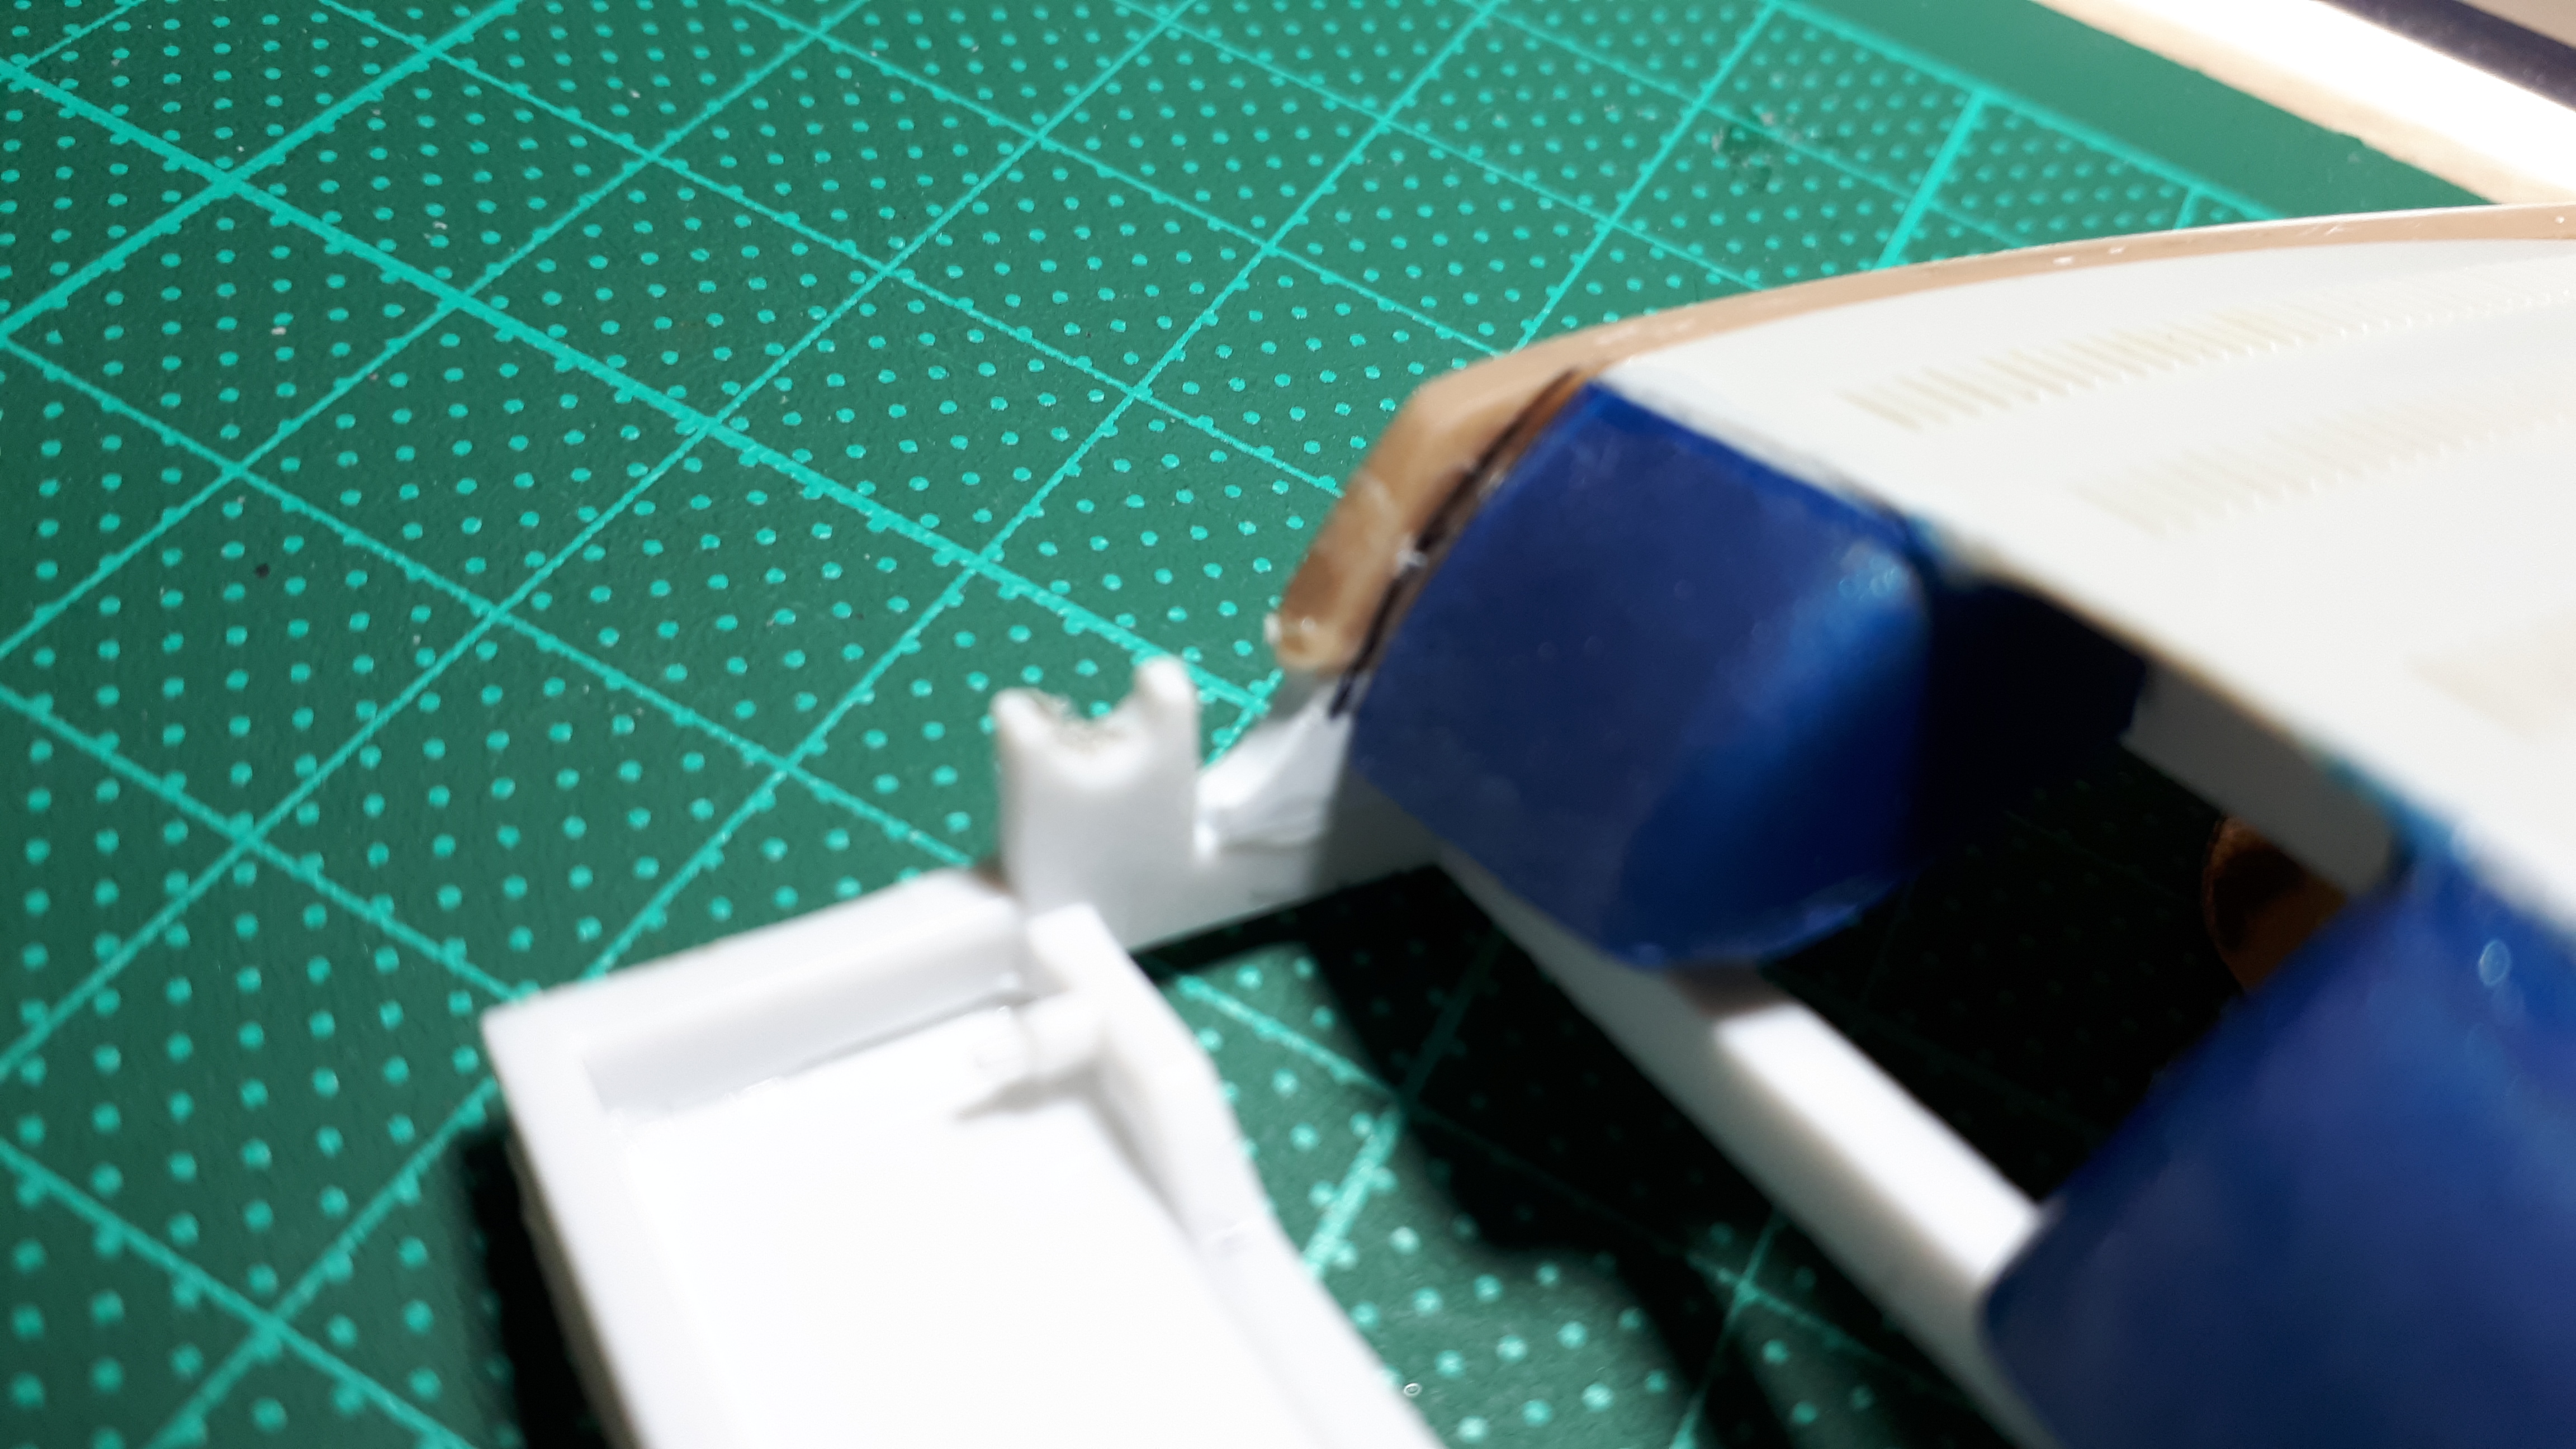
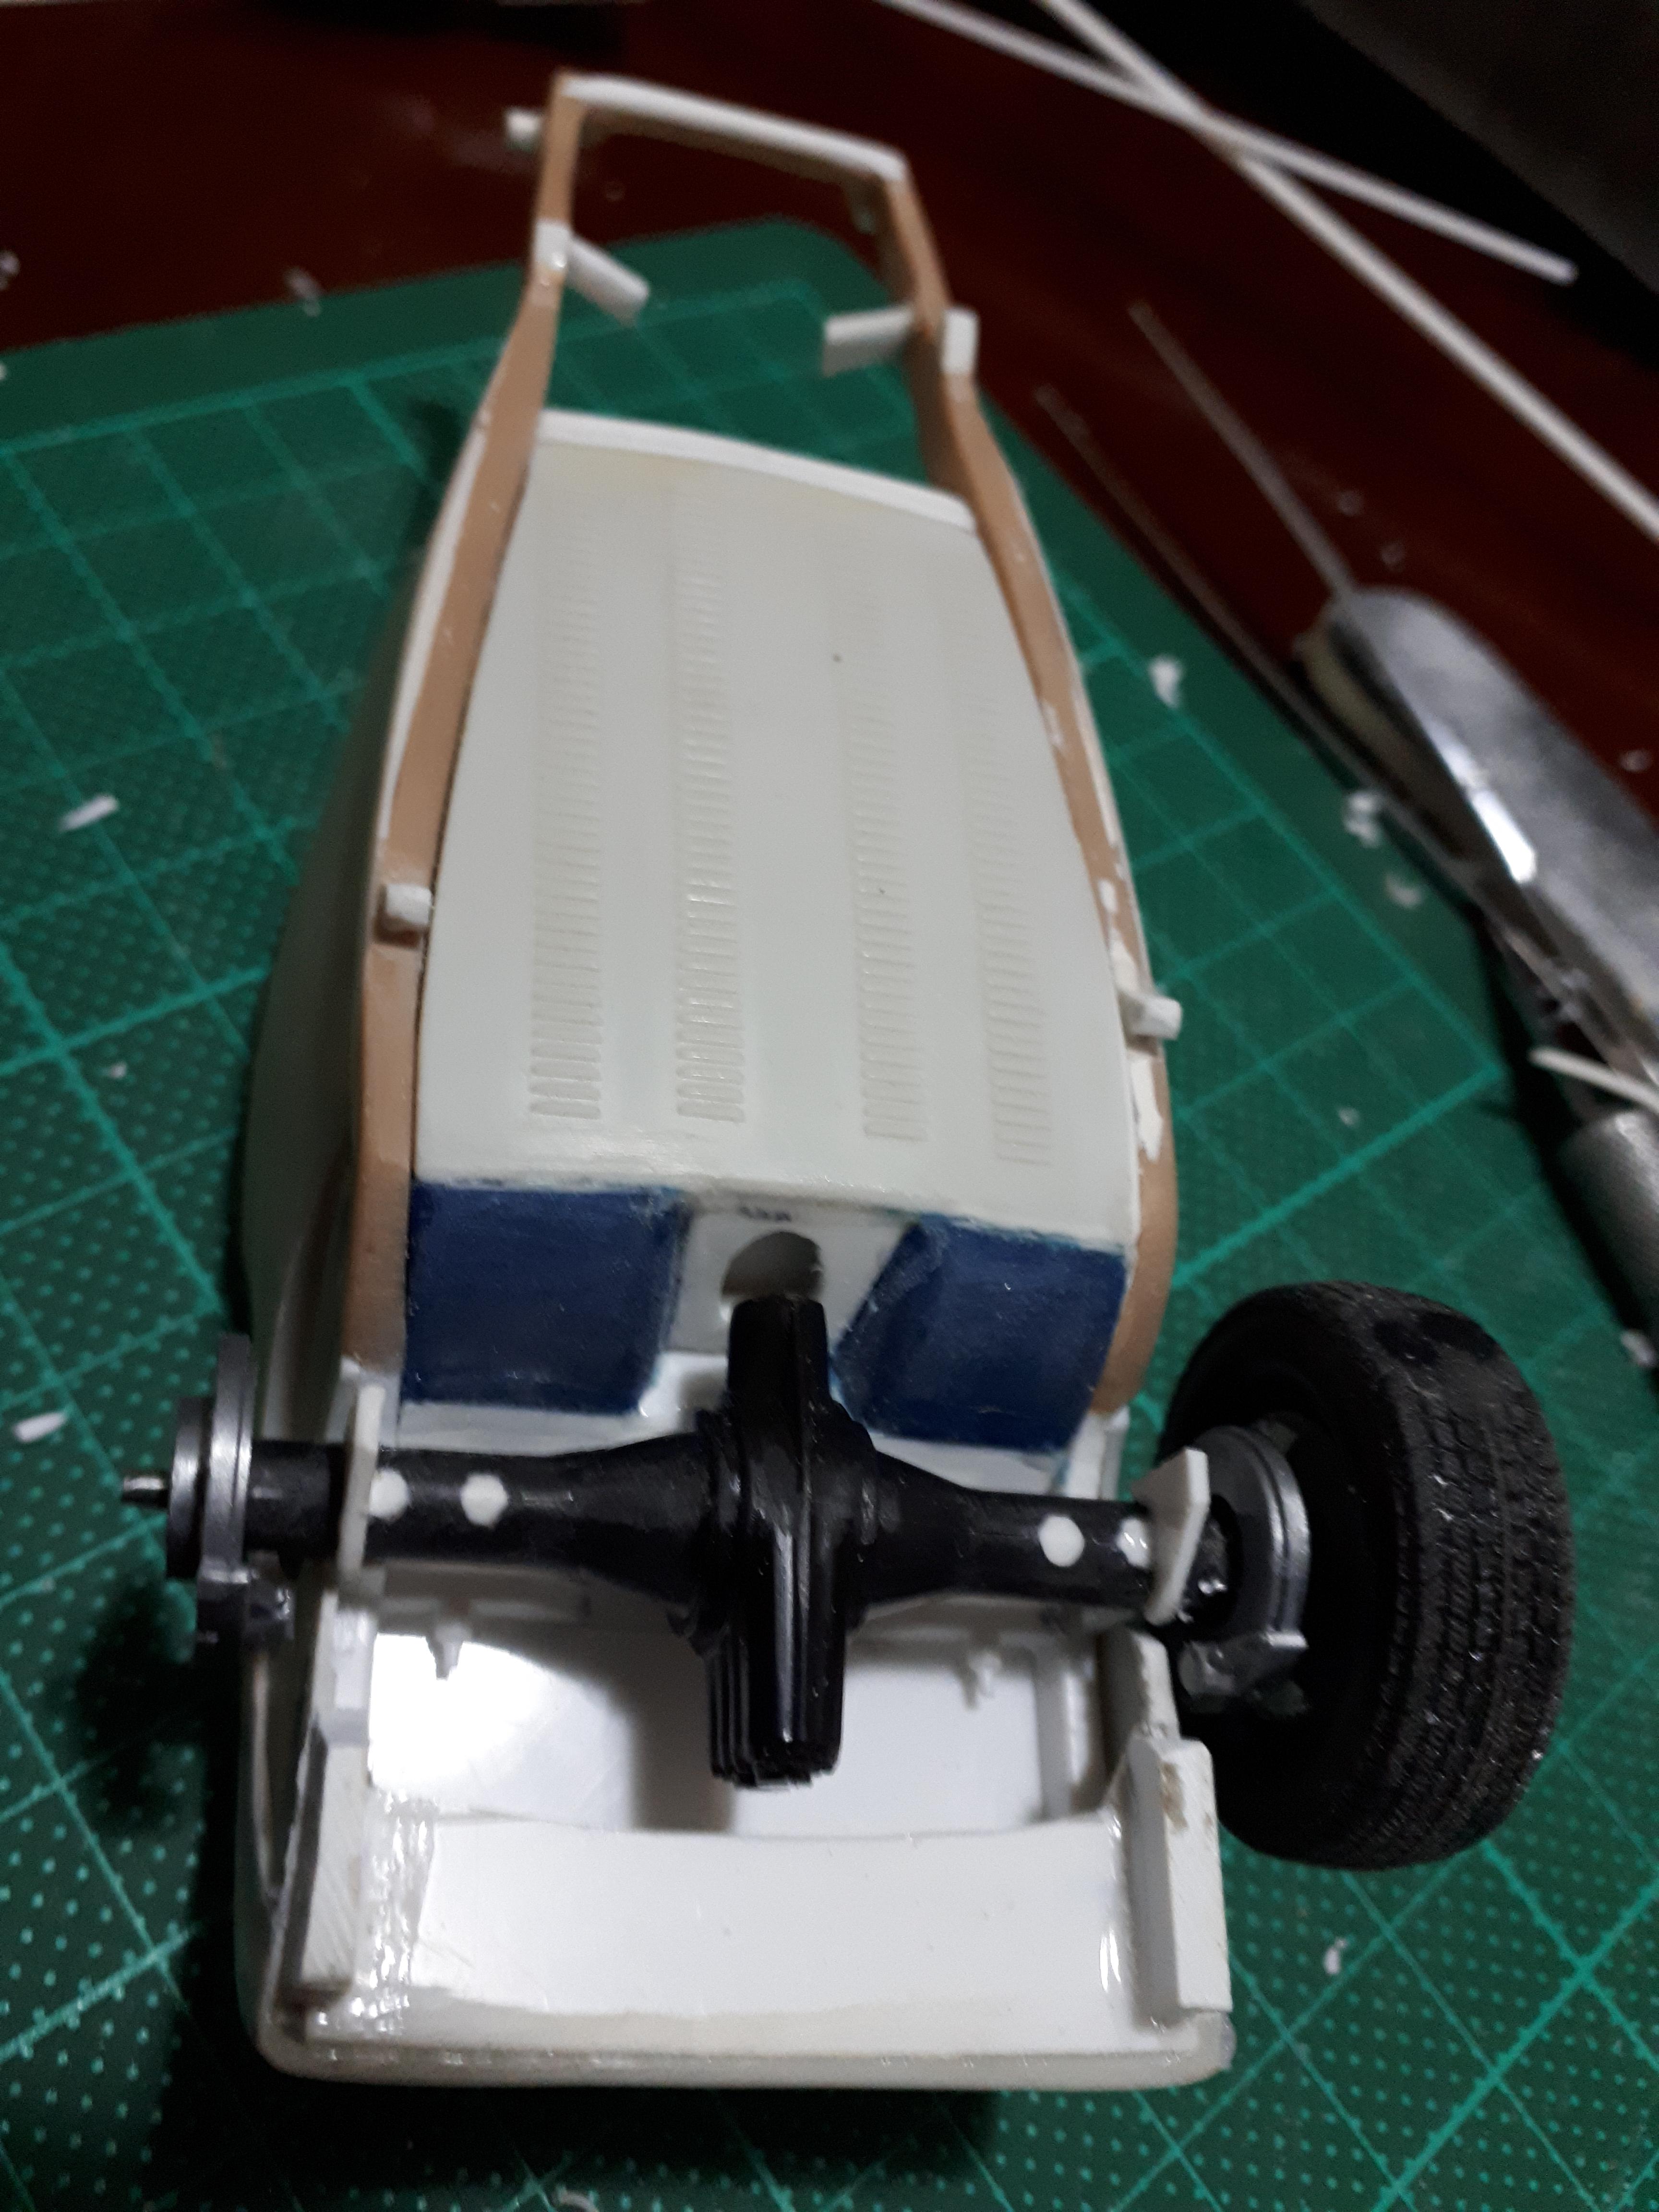
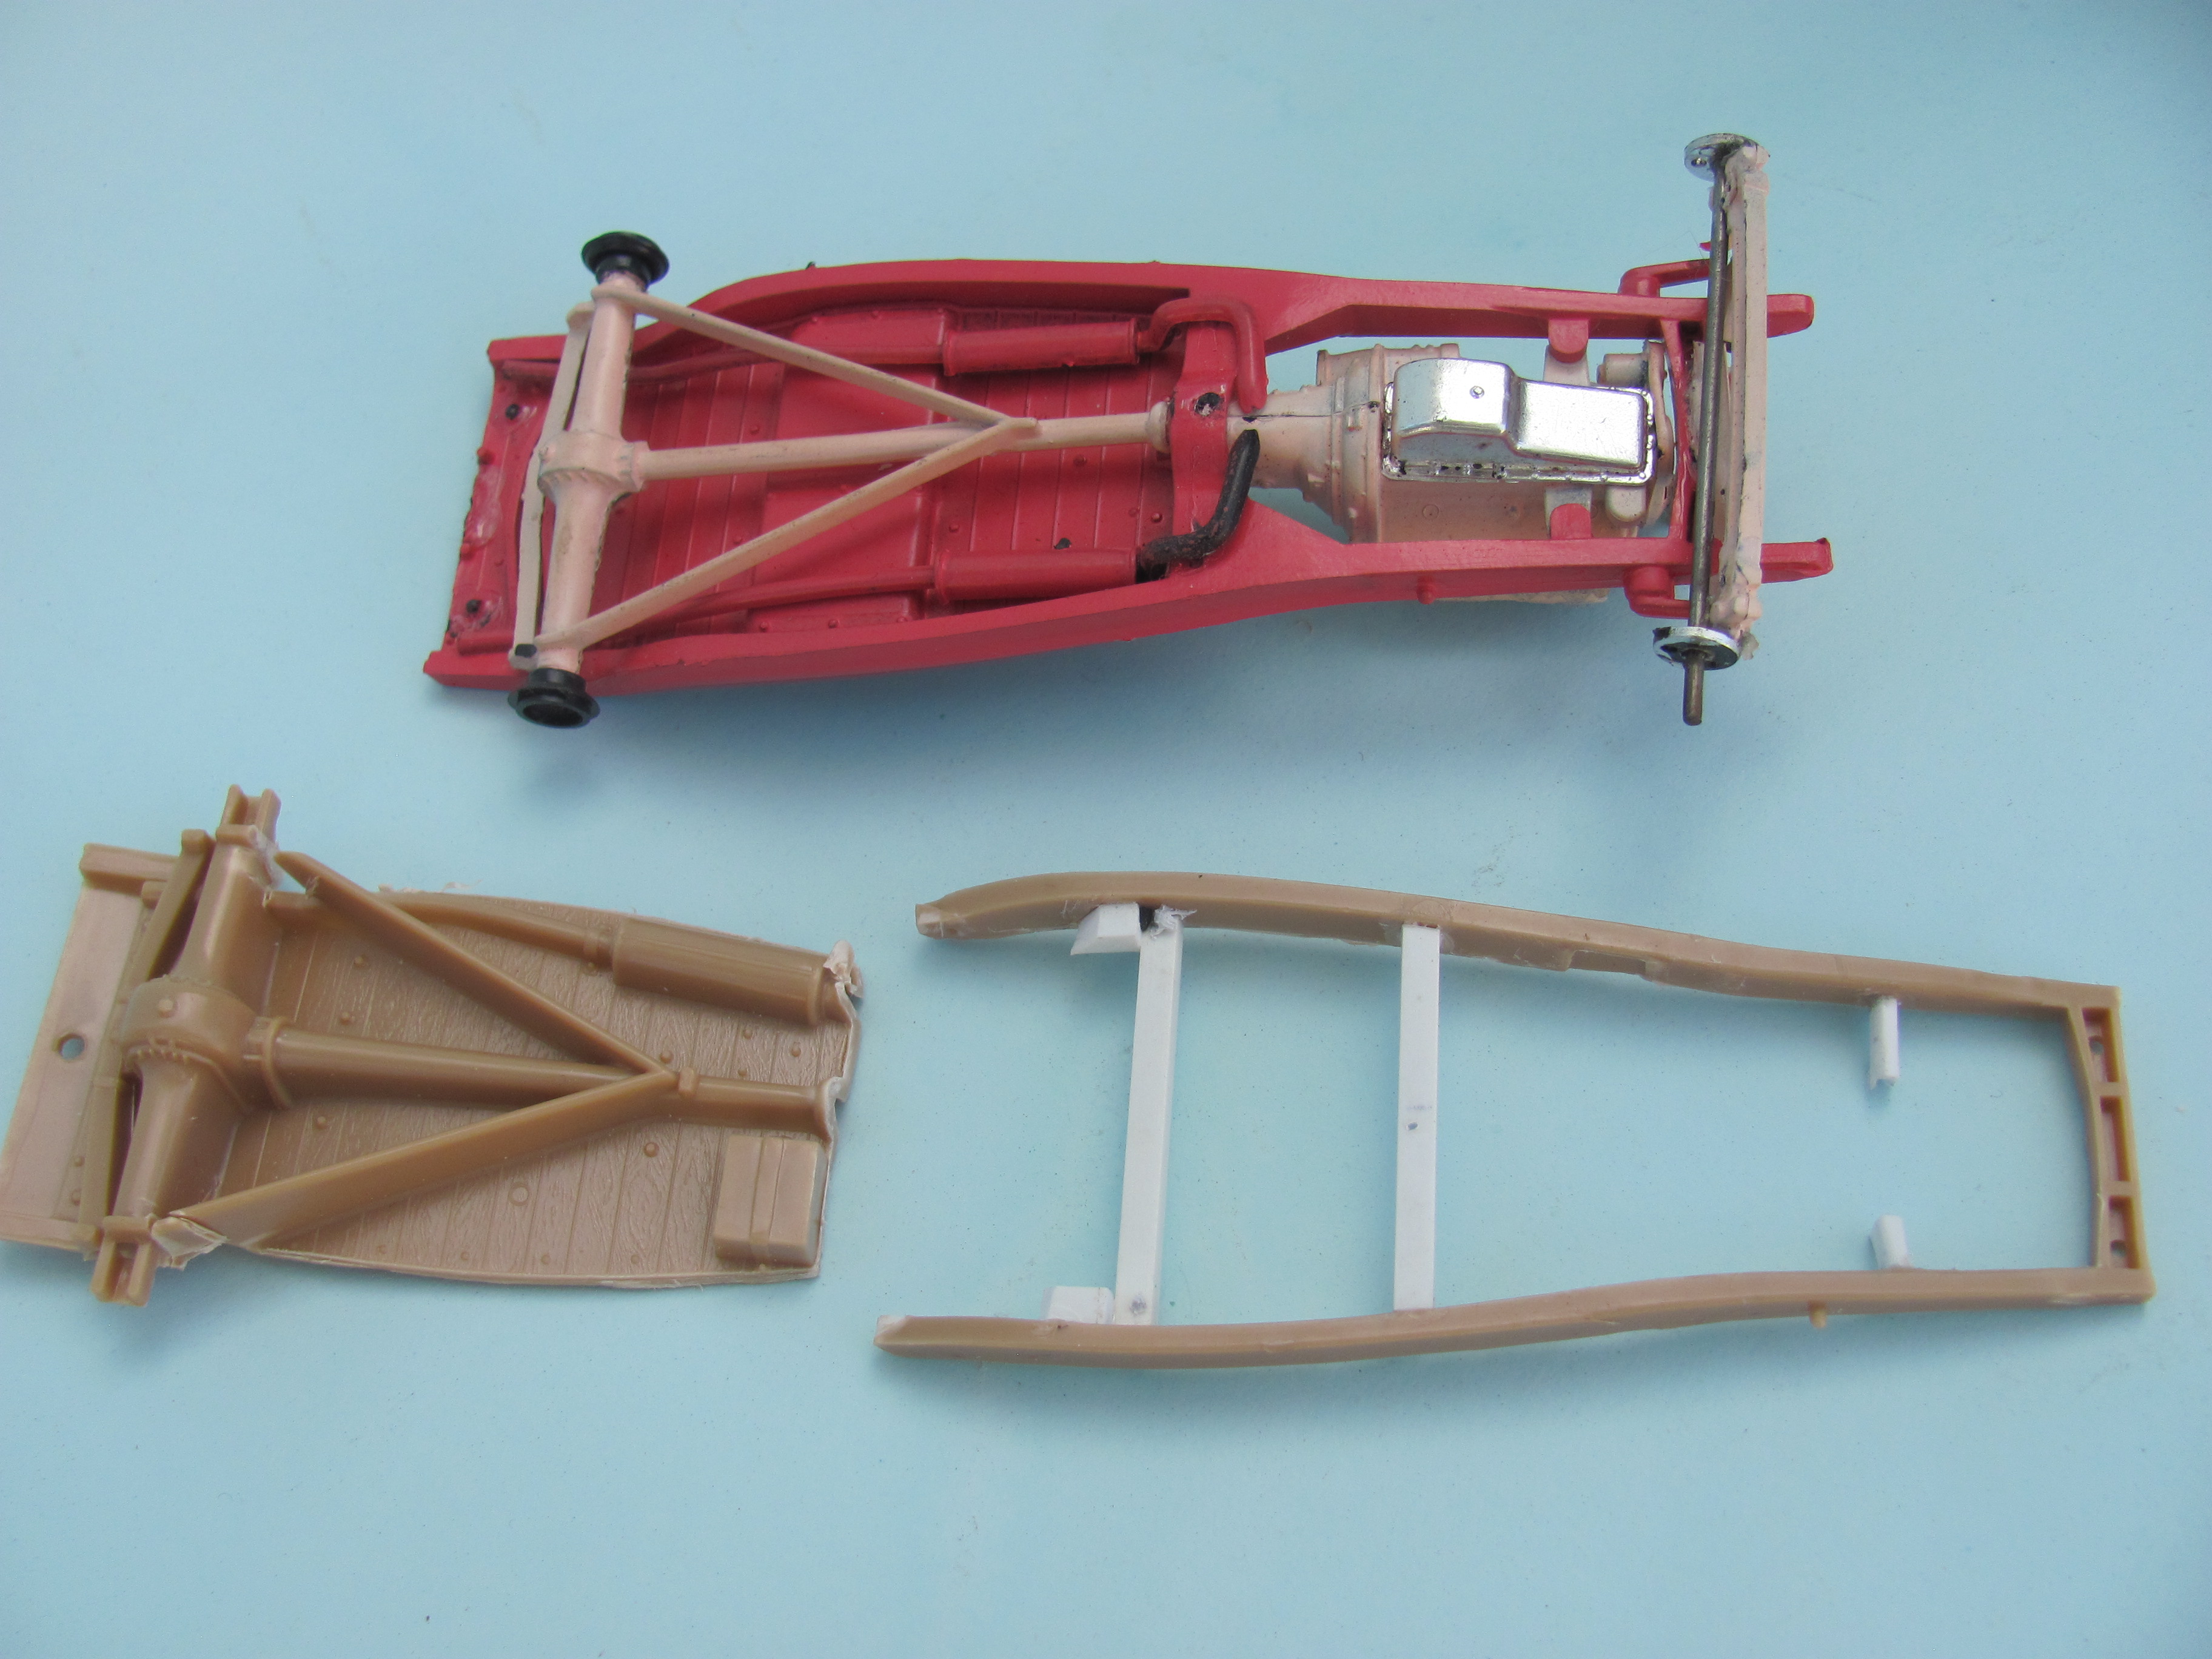
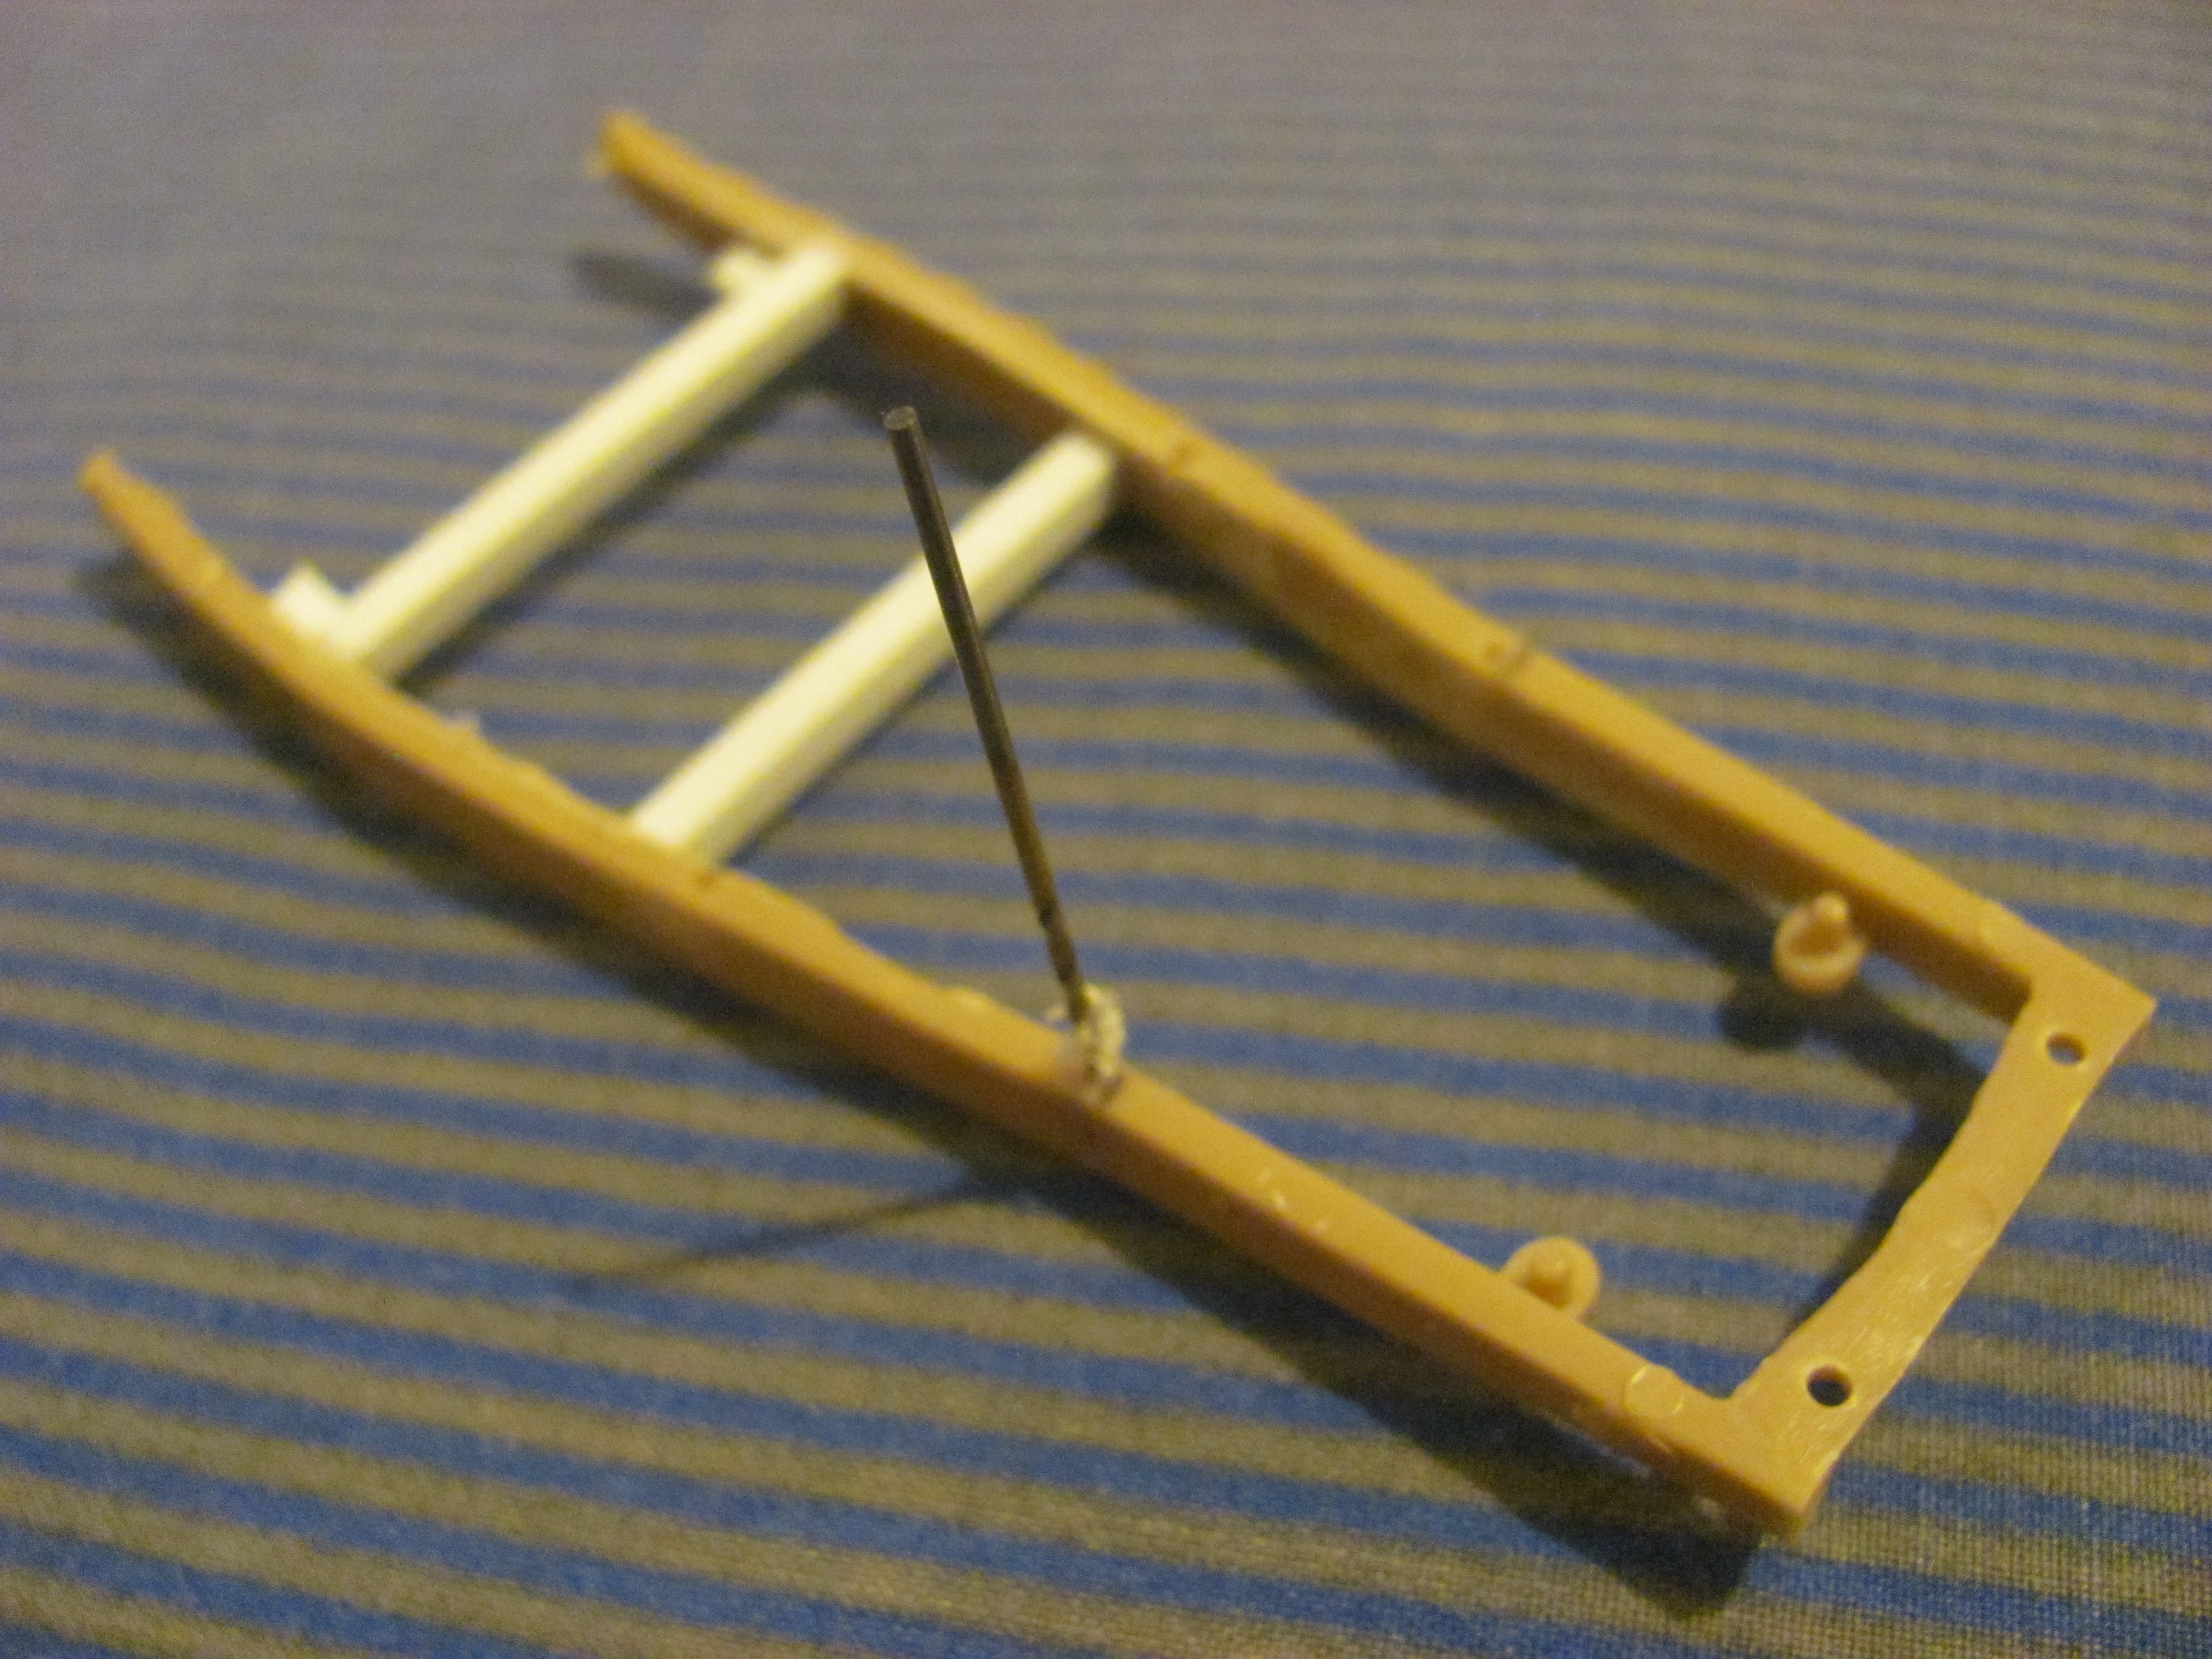
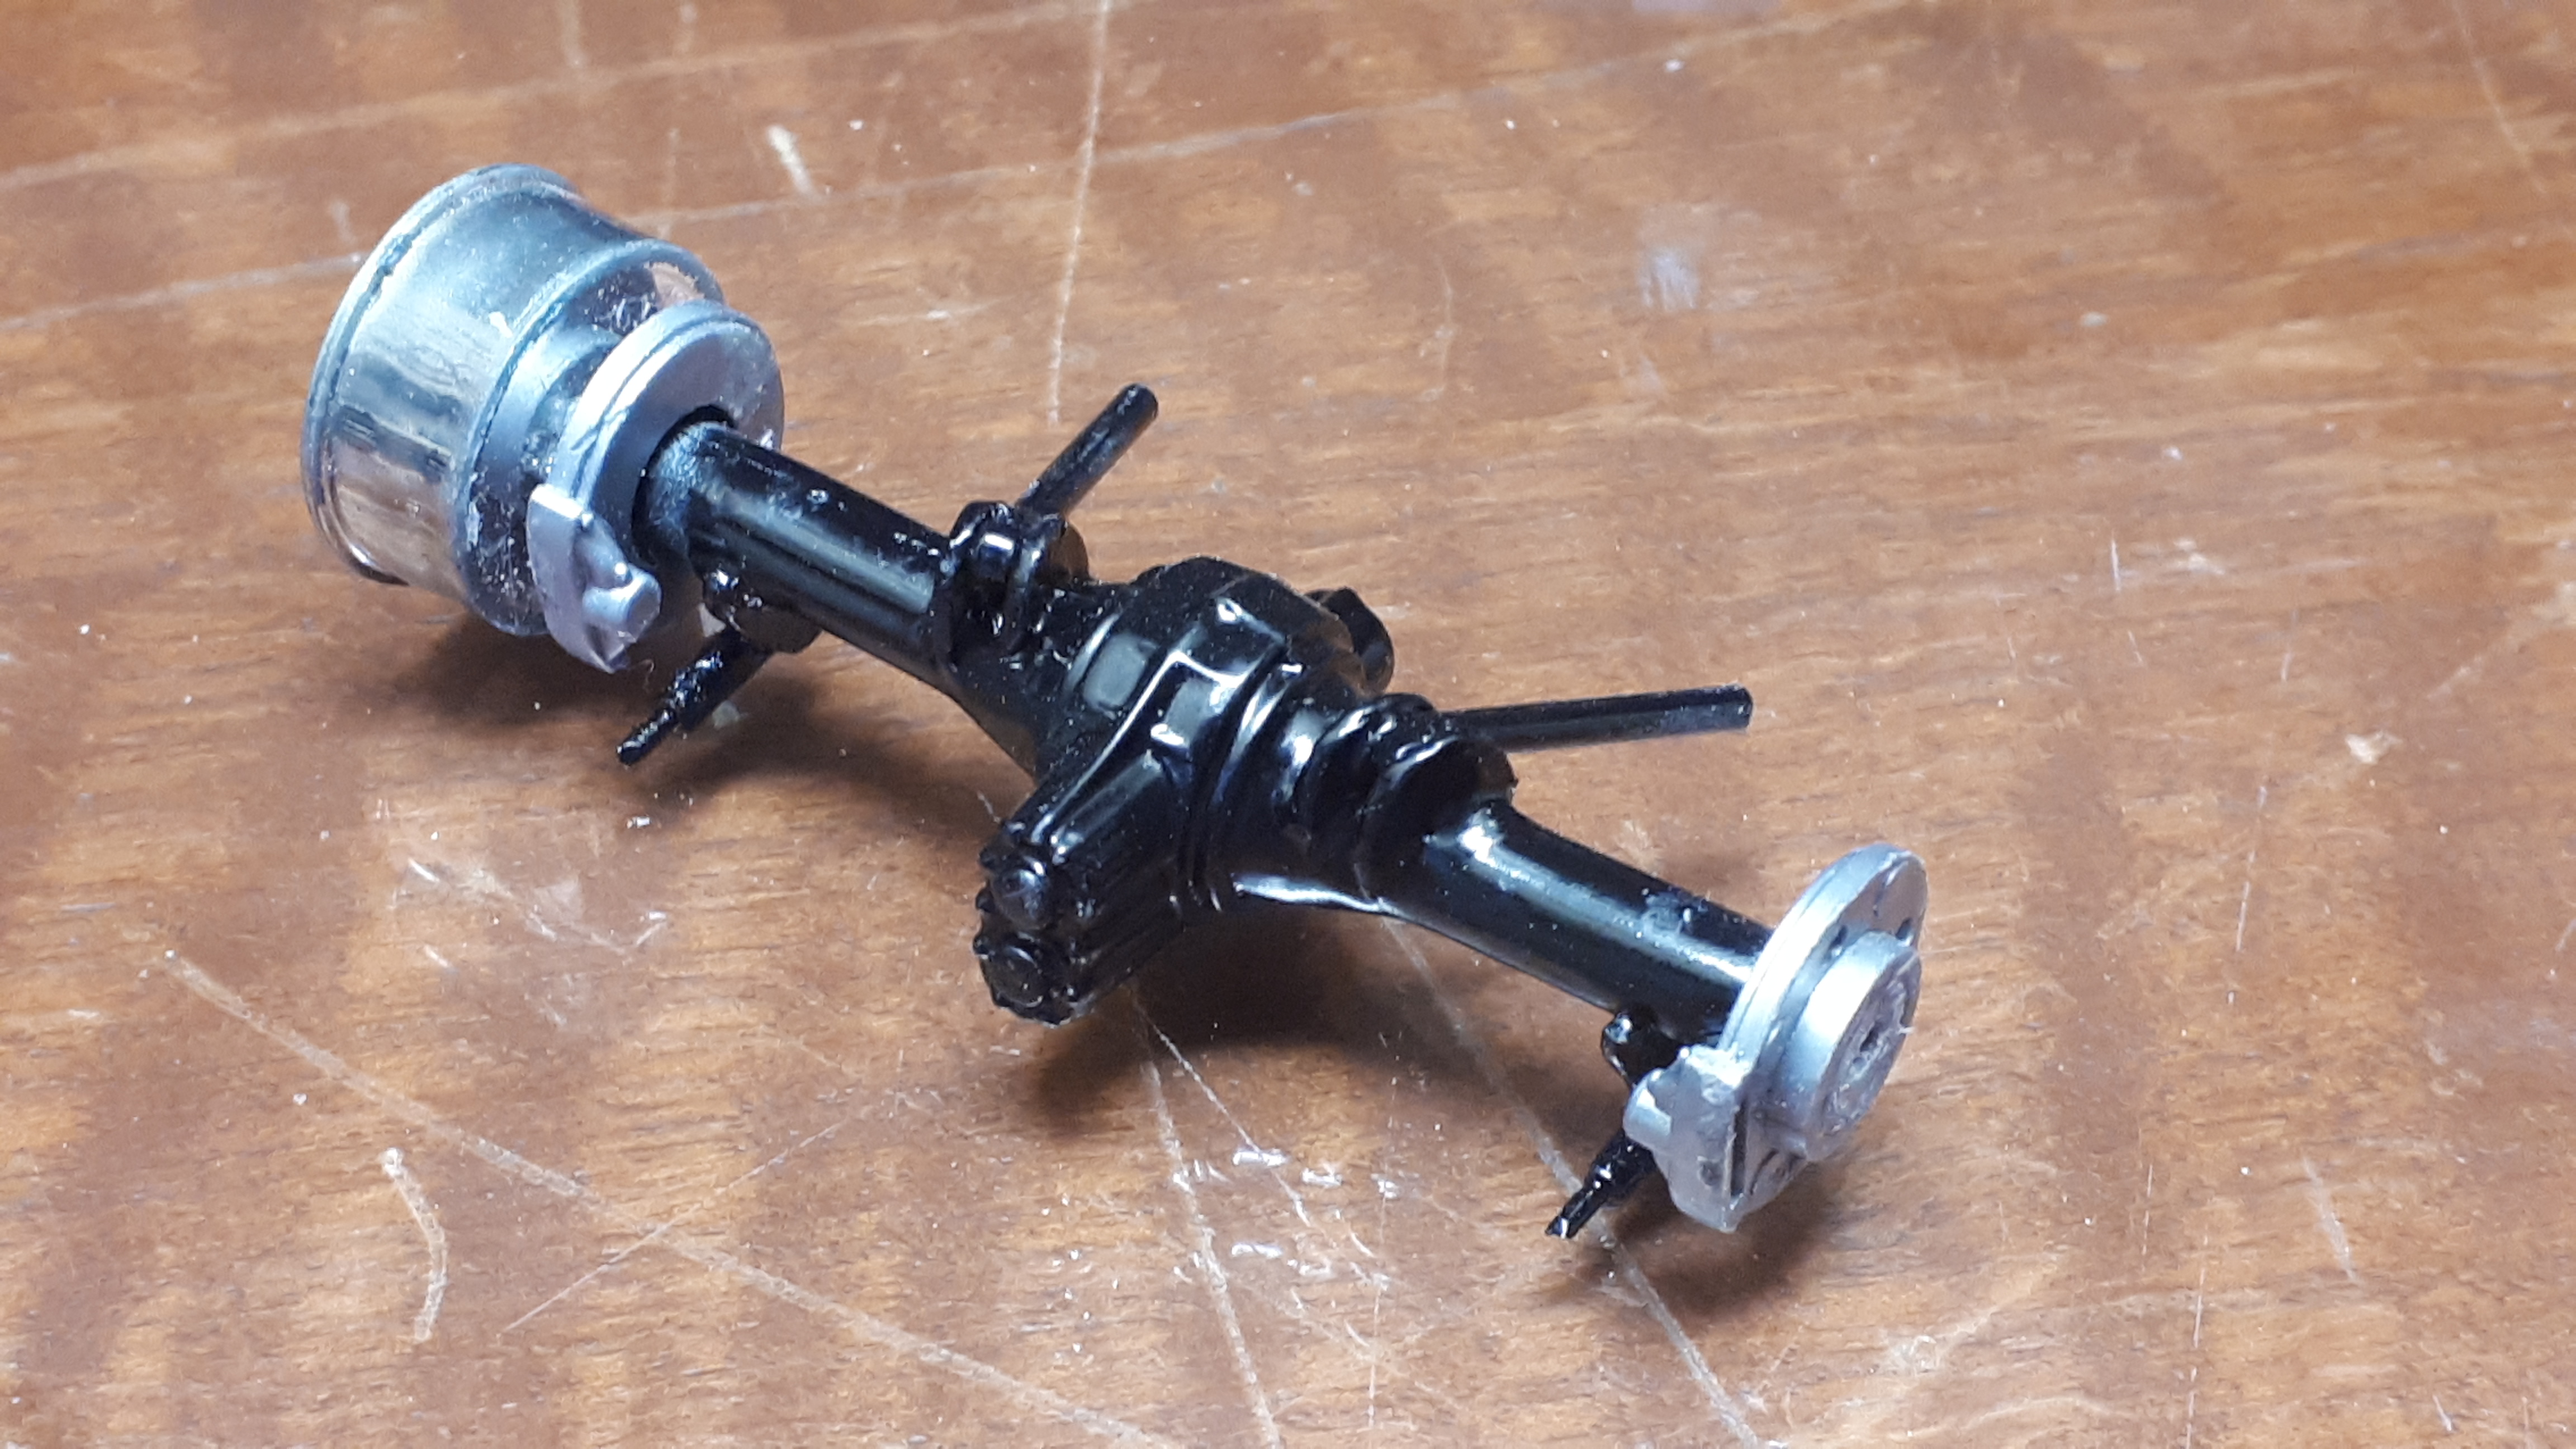
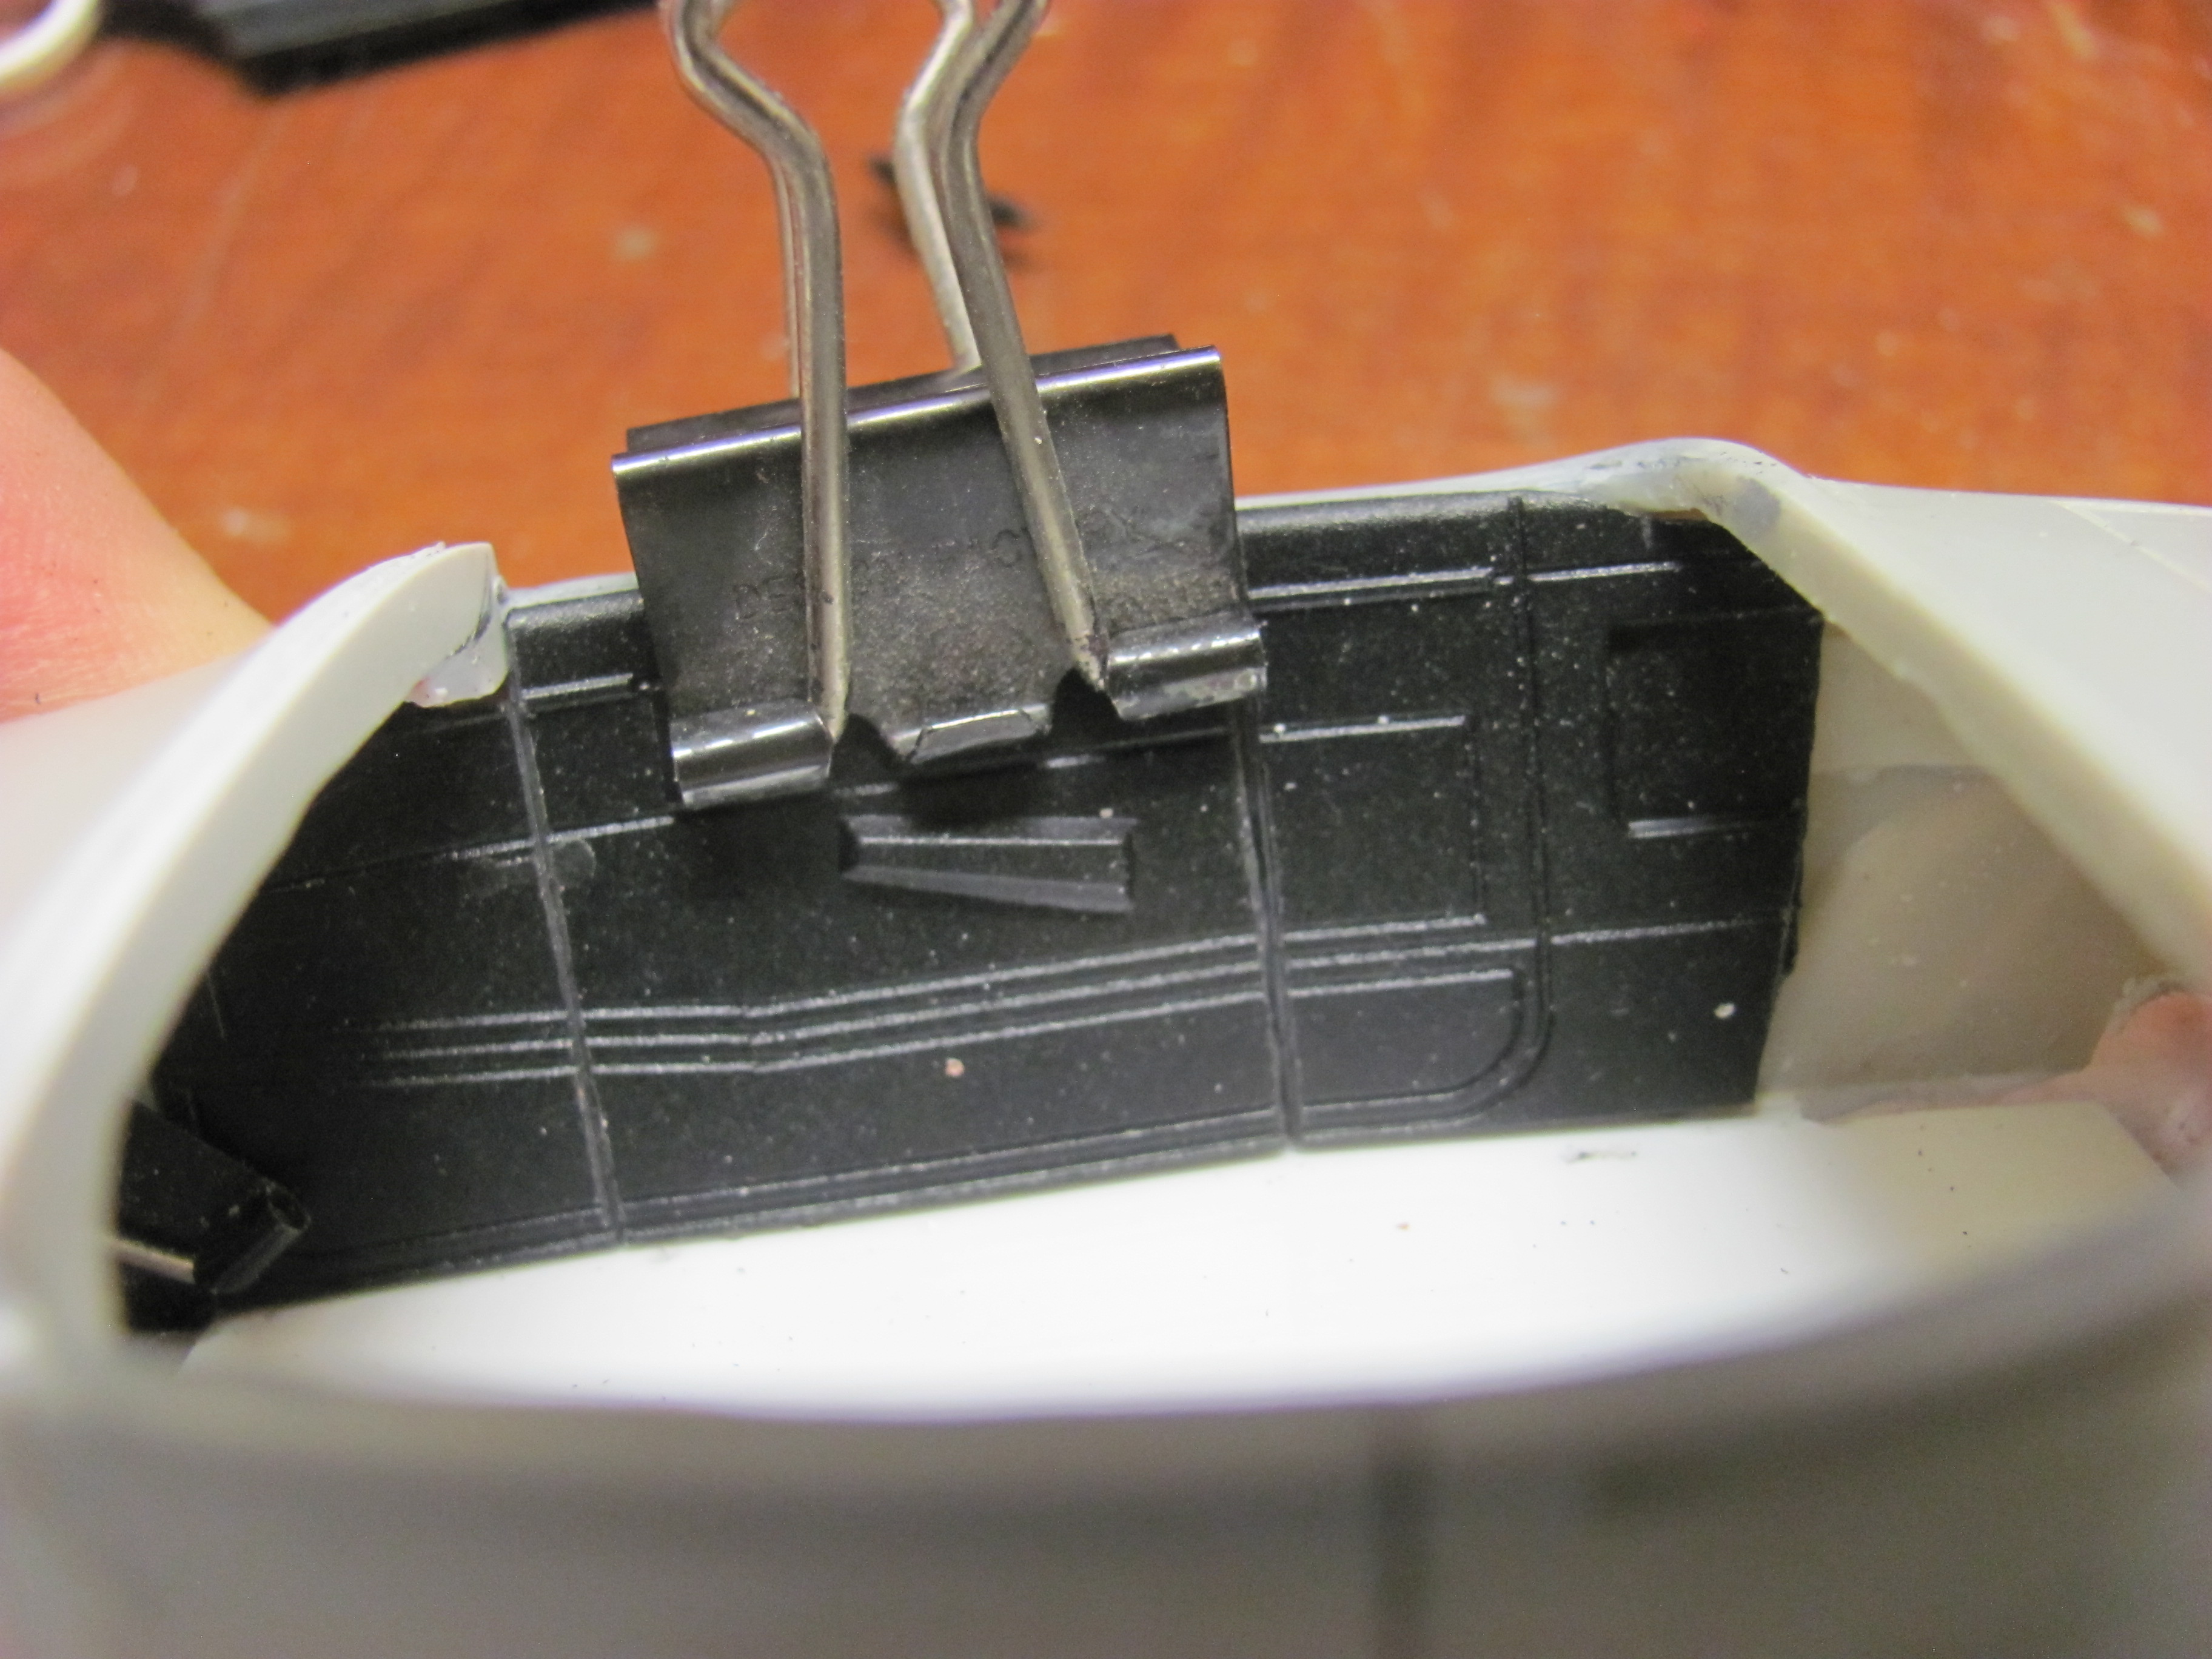
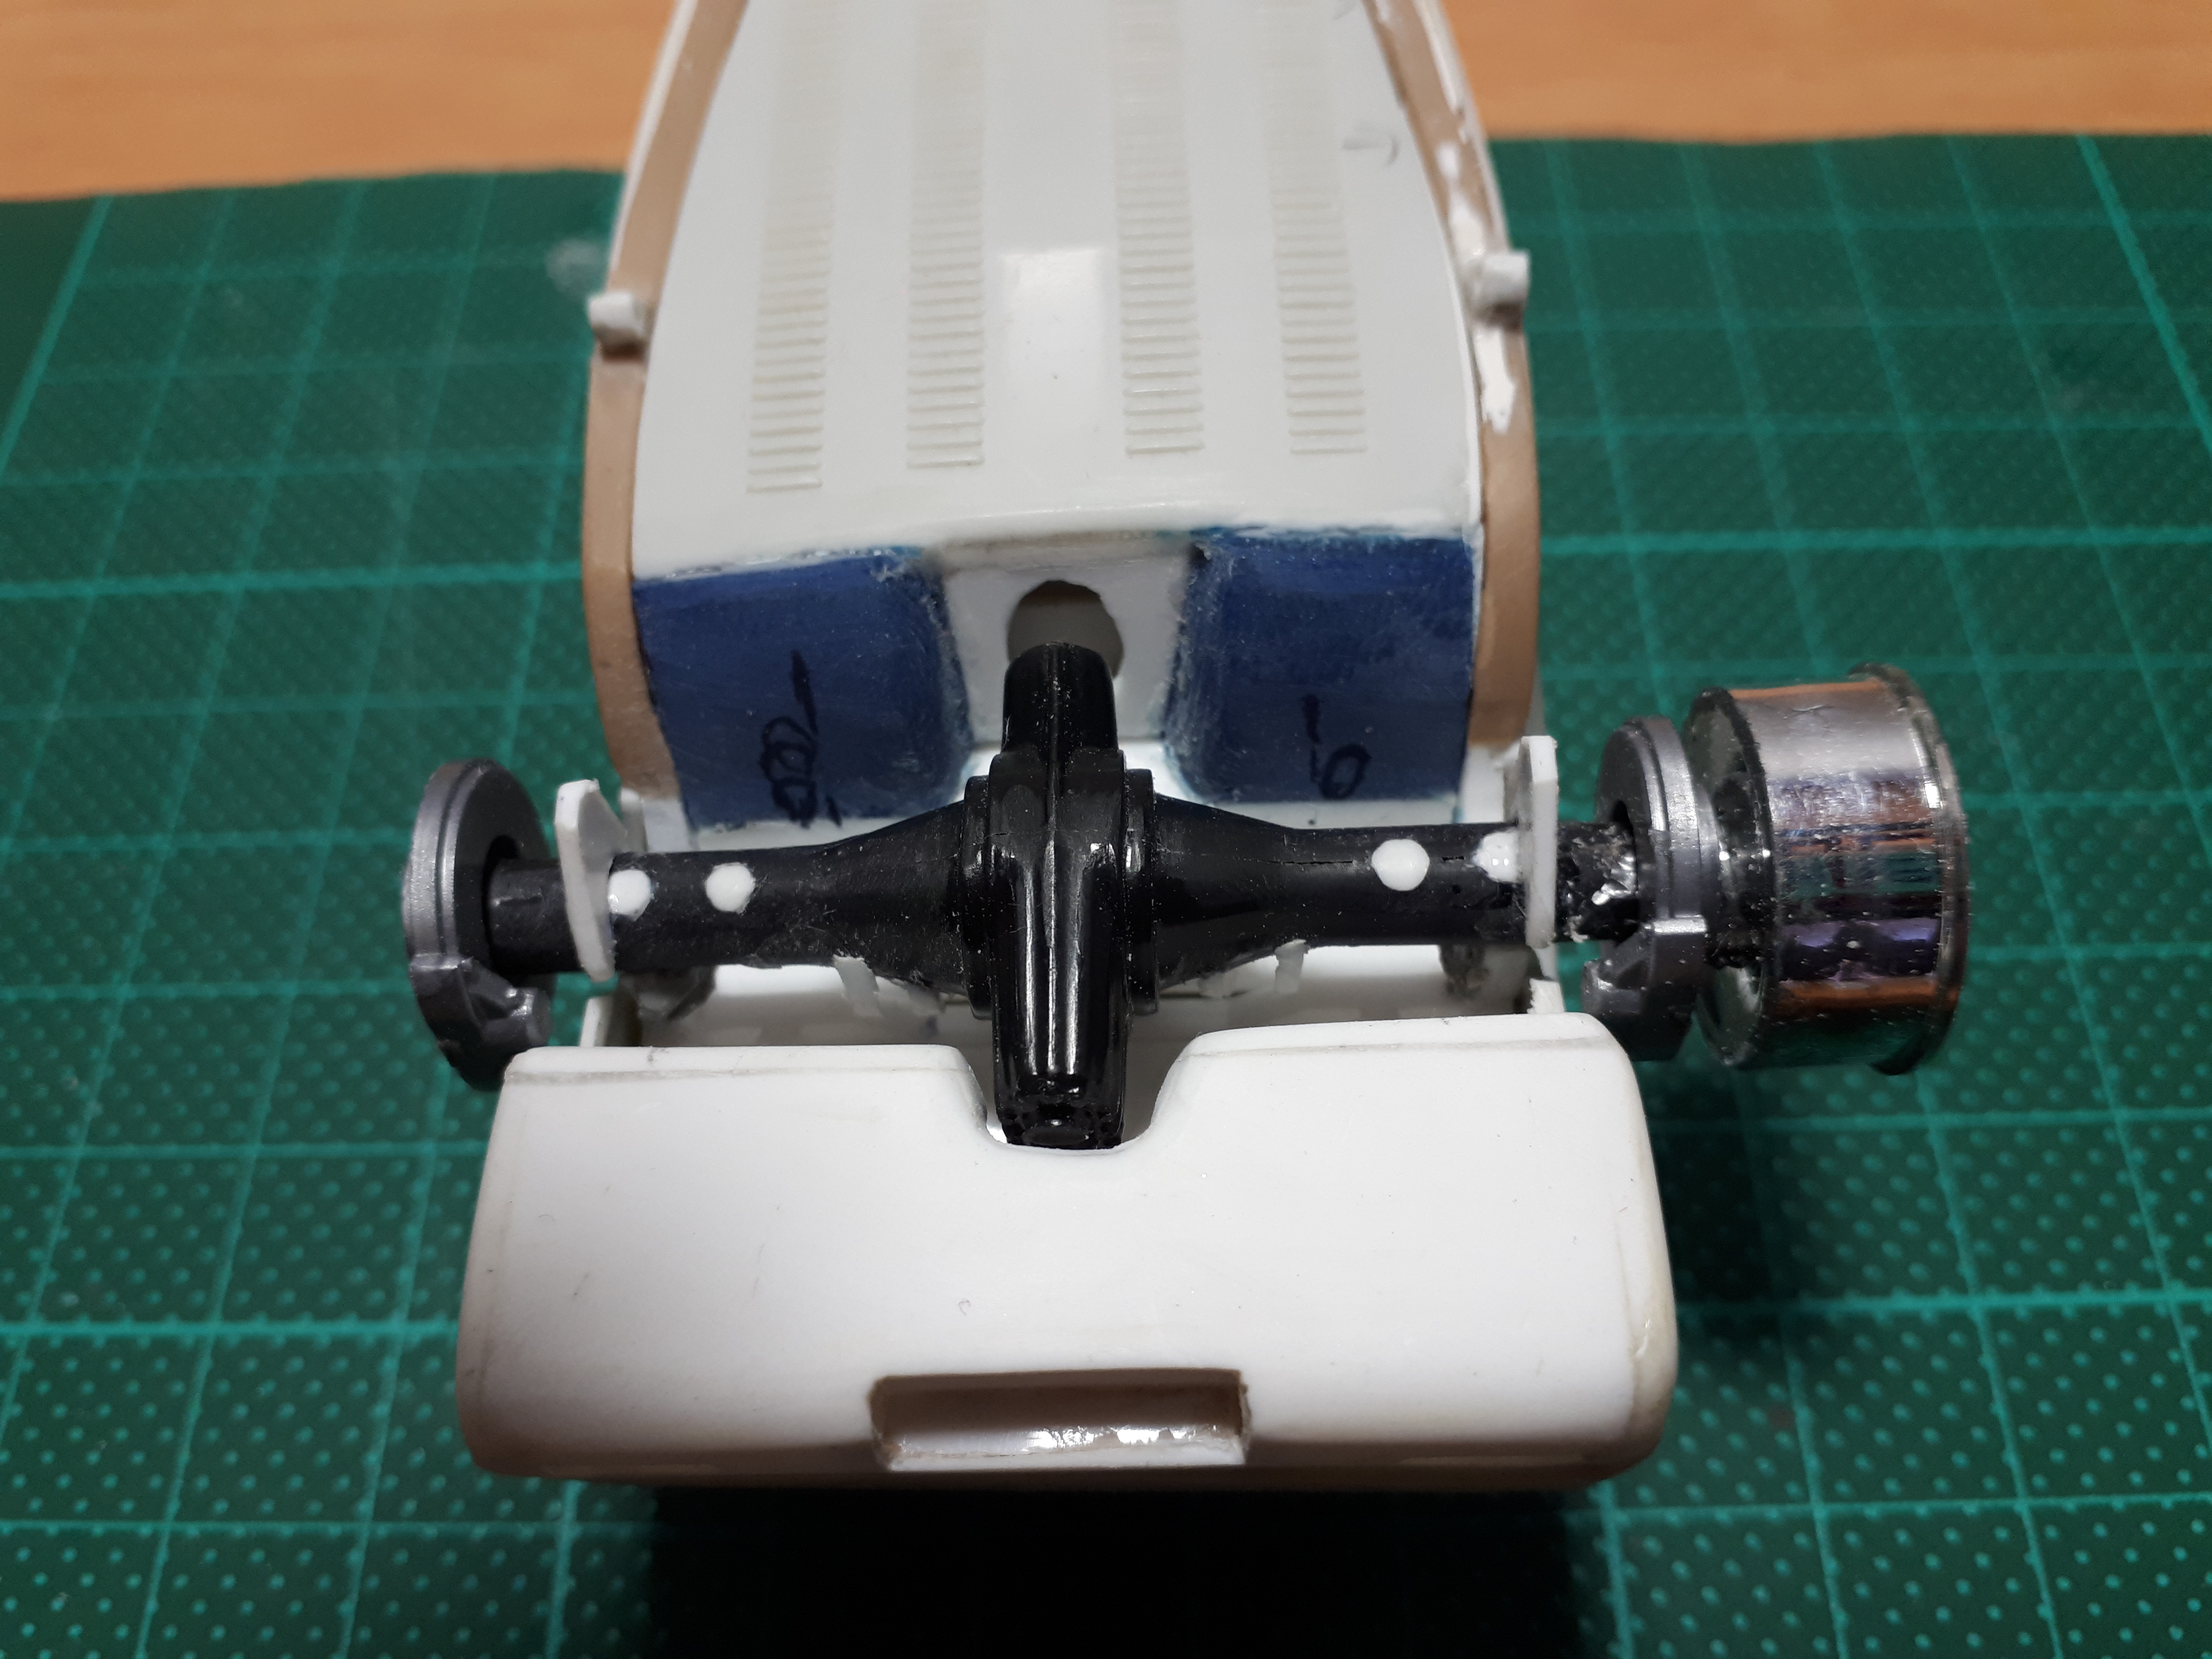
The rear axle came from a most unlikely source, the Revell 41 Willys Pickup/Henry J/Austin chassis. I had to fill all the holes form its original application and then manufacture brackets to attach the triangulated four bars and coil-overs. I chose it because it had a sturdy look to it. Being so embedded in the belly pan and roll pan it didn't need the fine web and bolt detail that appears on other kit quick-changes. I added some unknown disc brakes and a metal axle through the middle for strength. The four bars are made from Evergreen plastic rod and tube. With some careful manipulation I glued them onto the rear axle in such a way that they became a part of the axle assembly but could be gingerly inserted through the holes in the bellly pan.
-
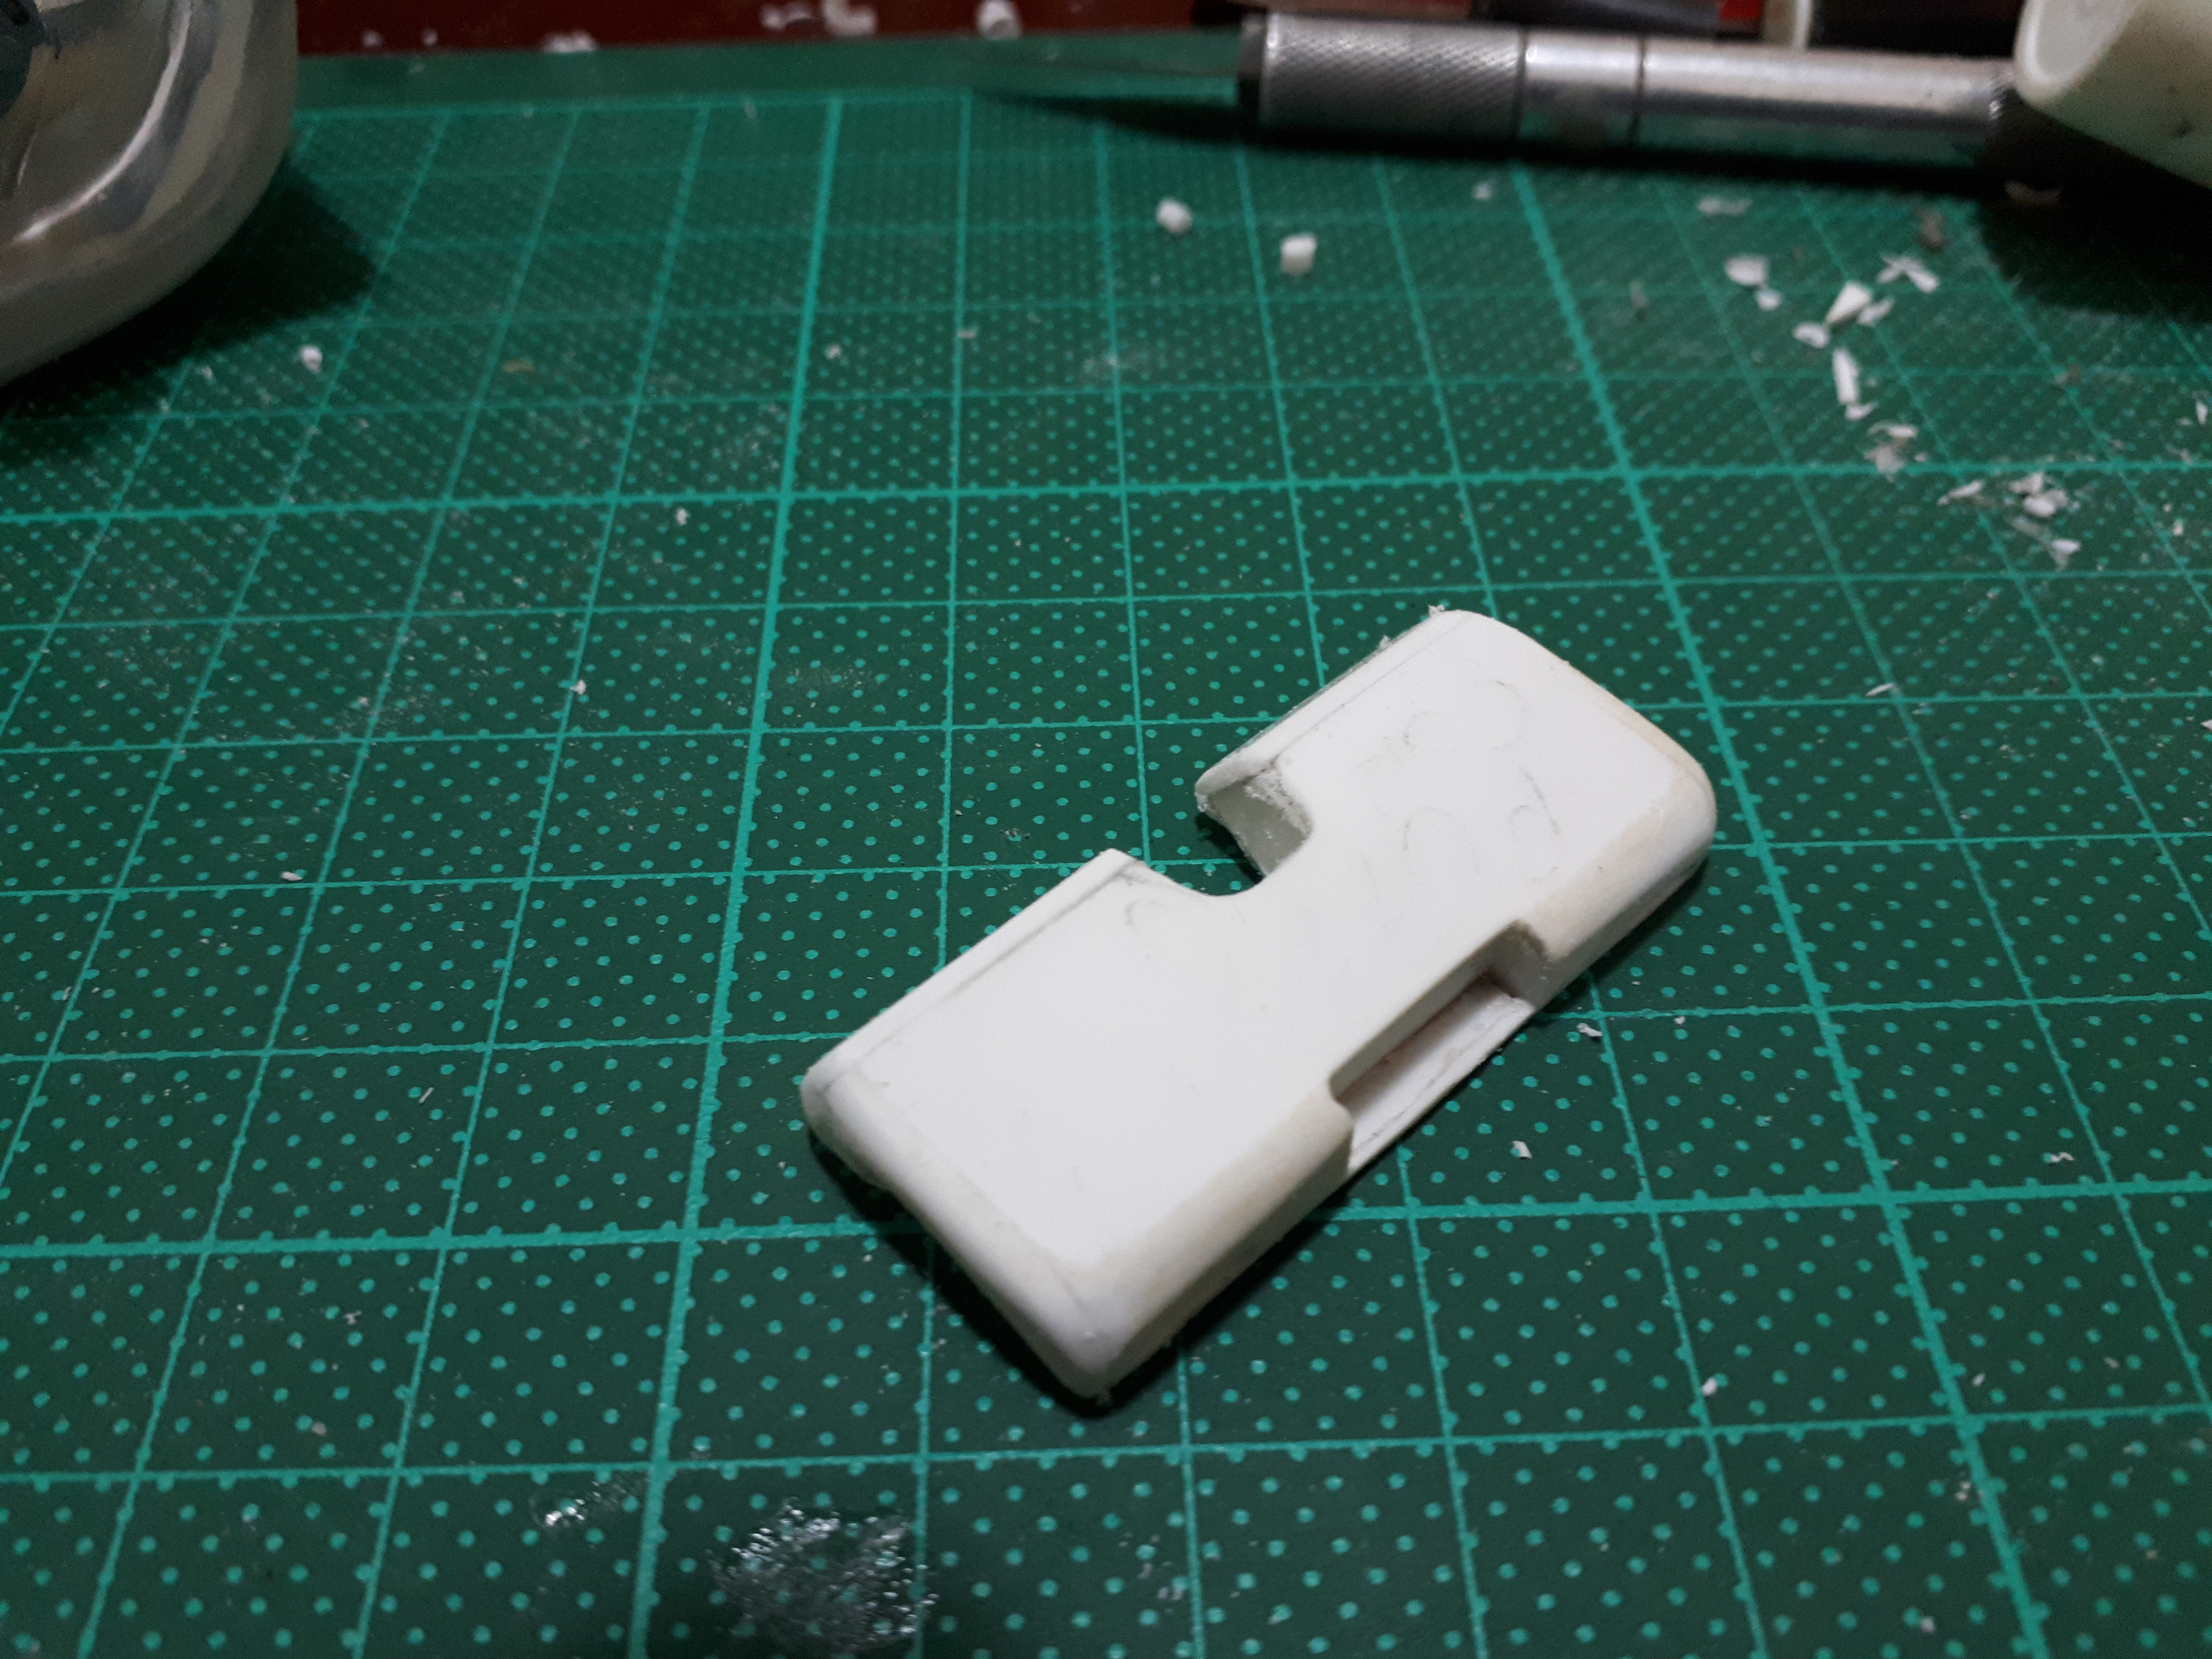
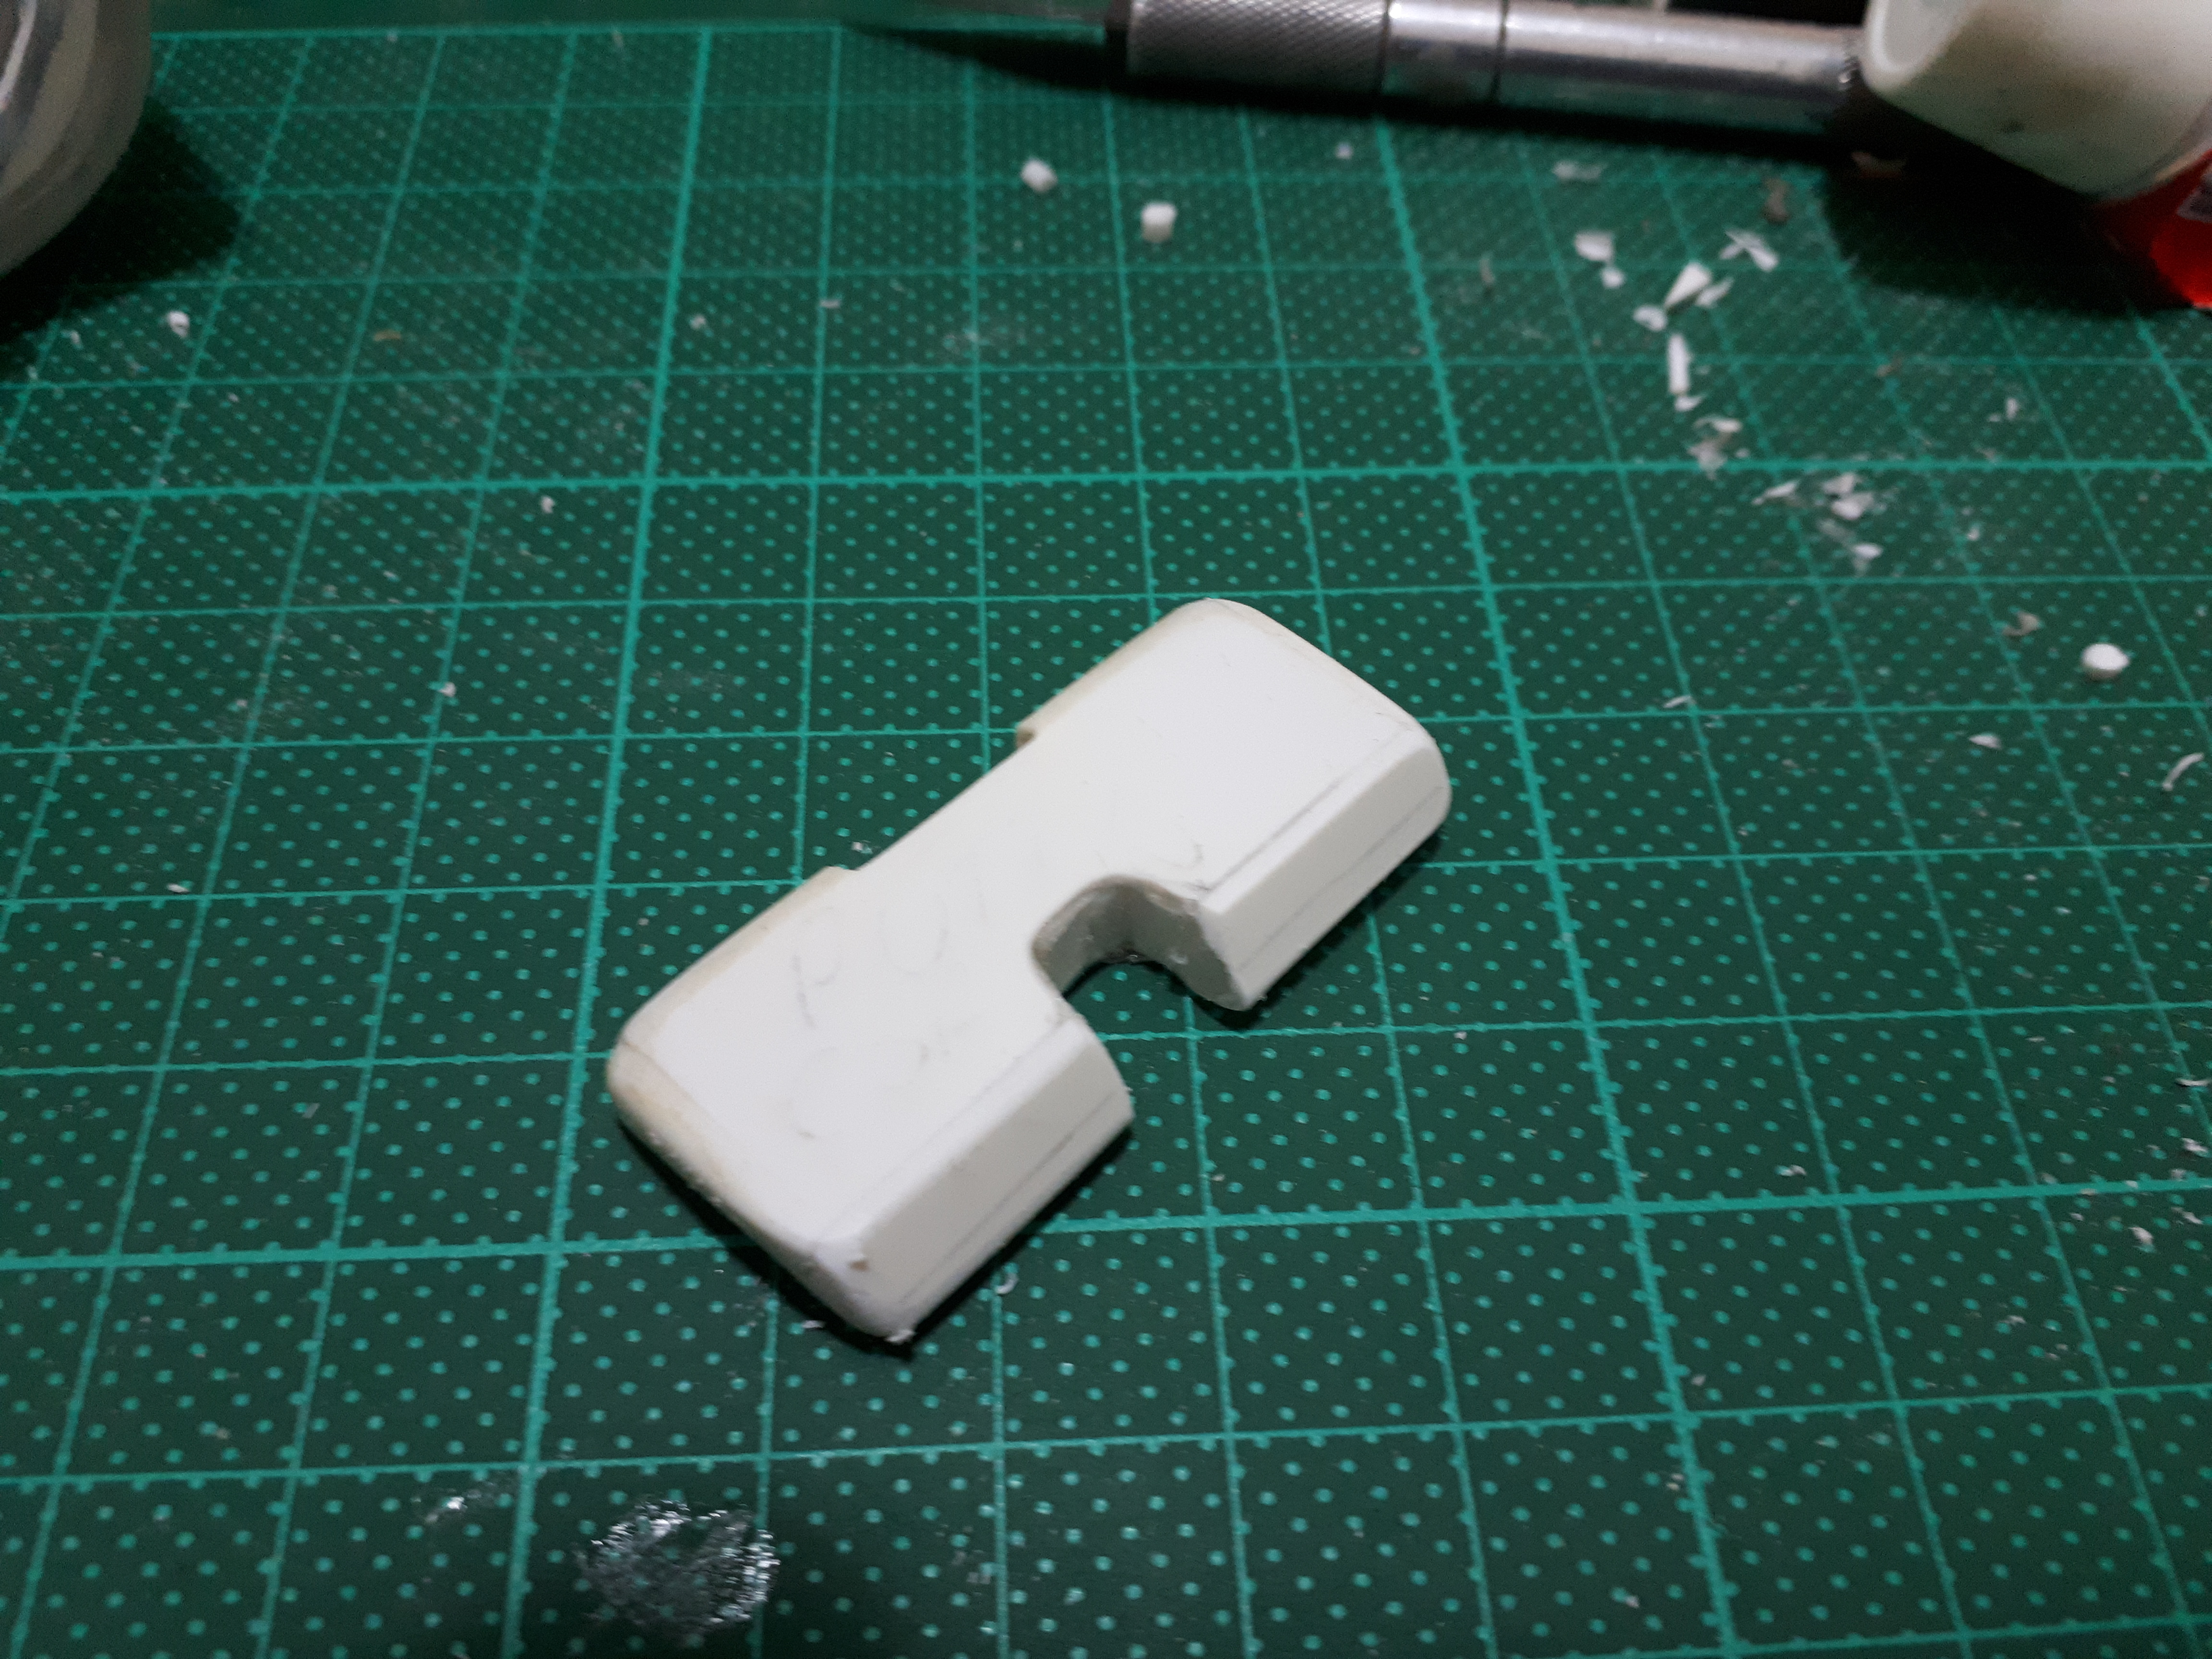
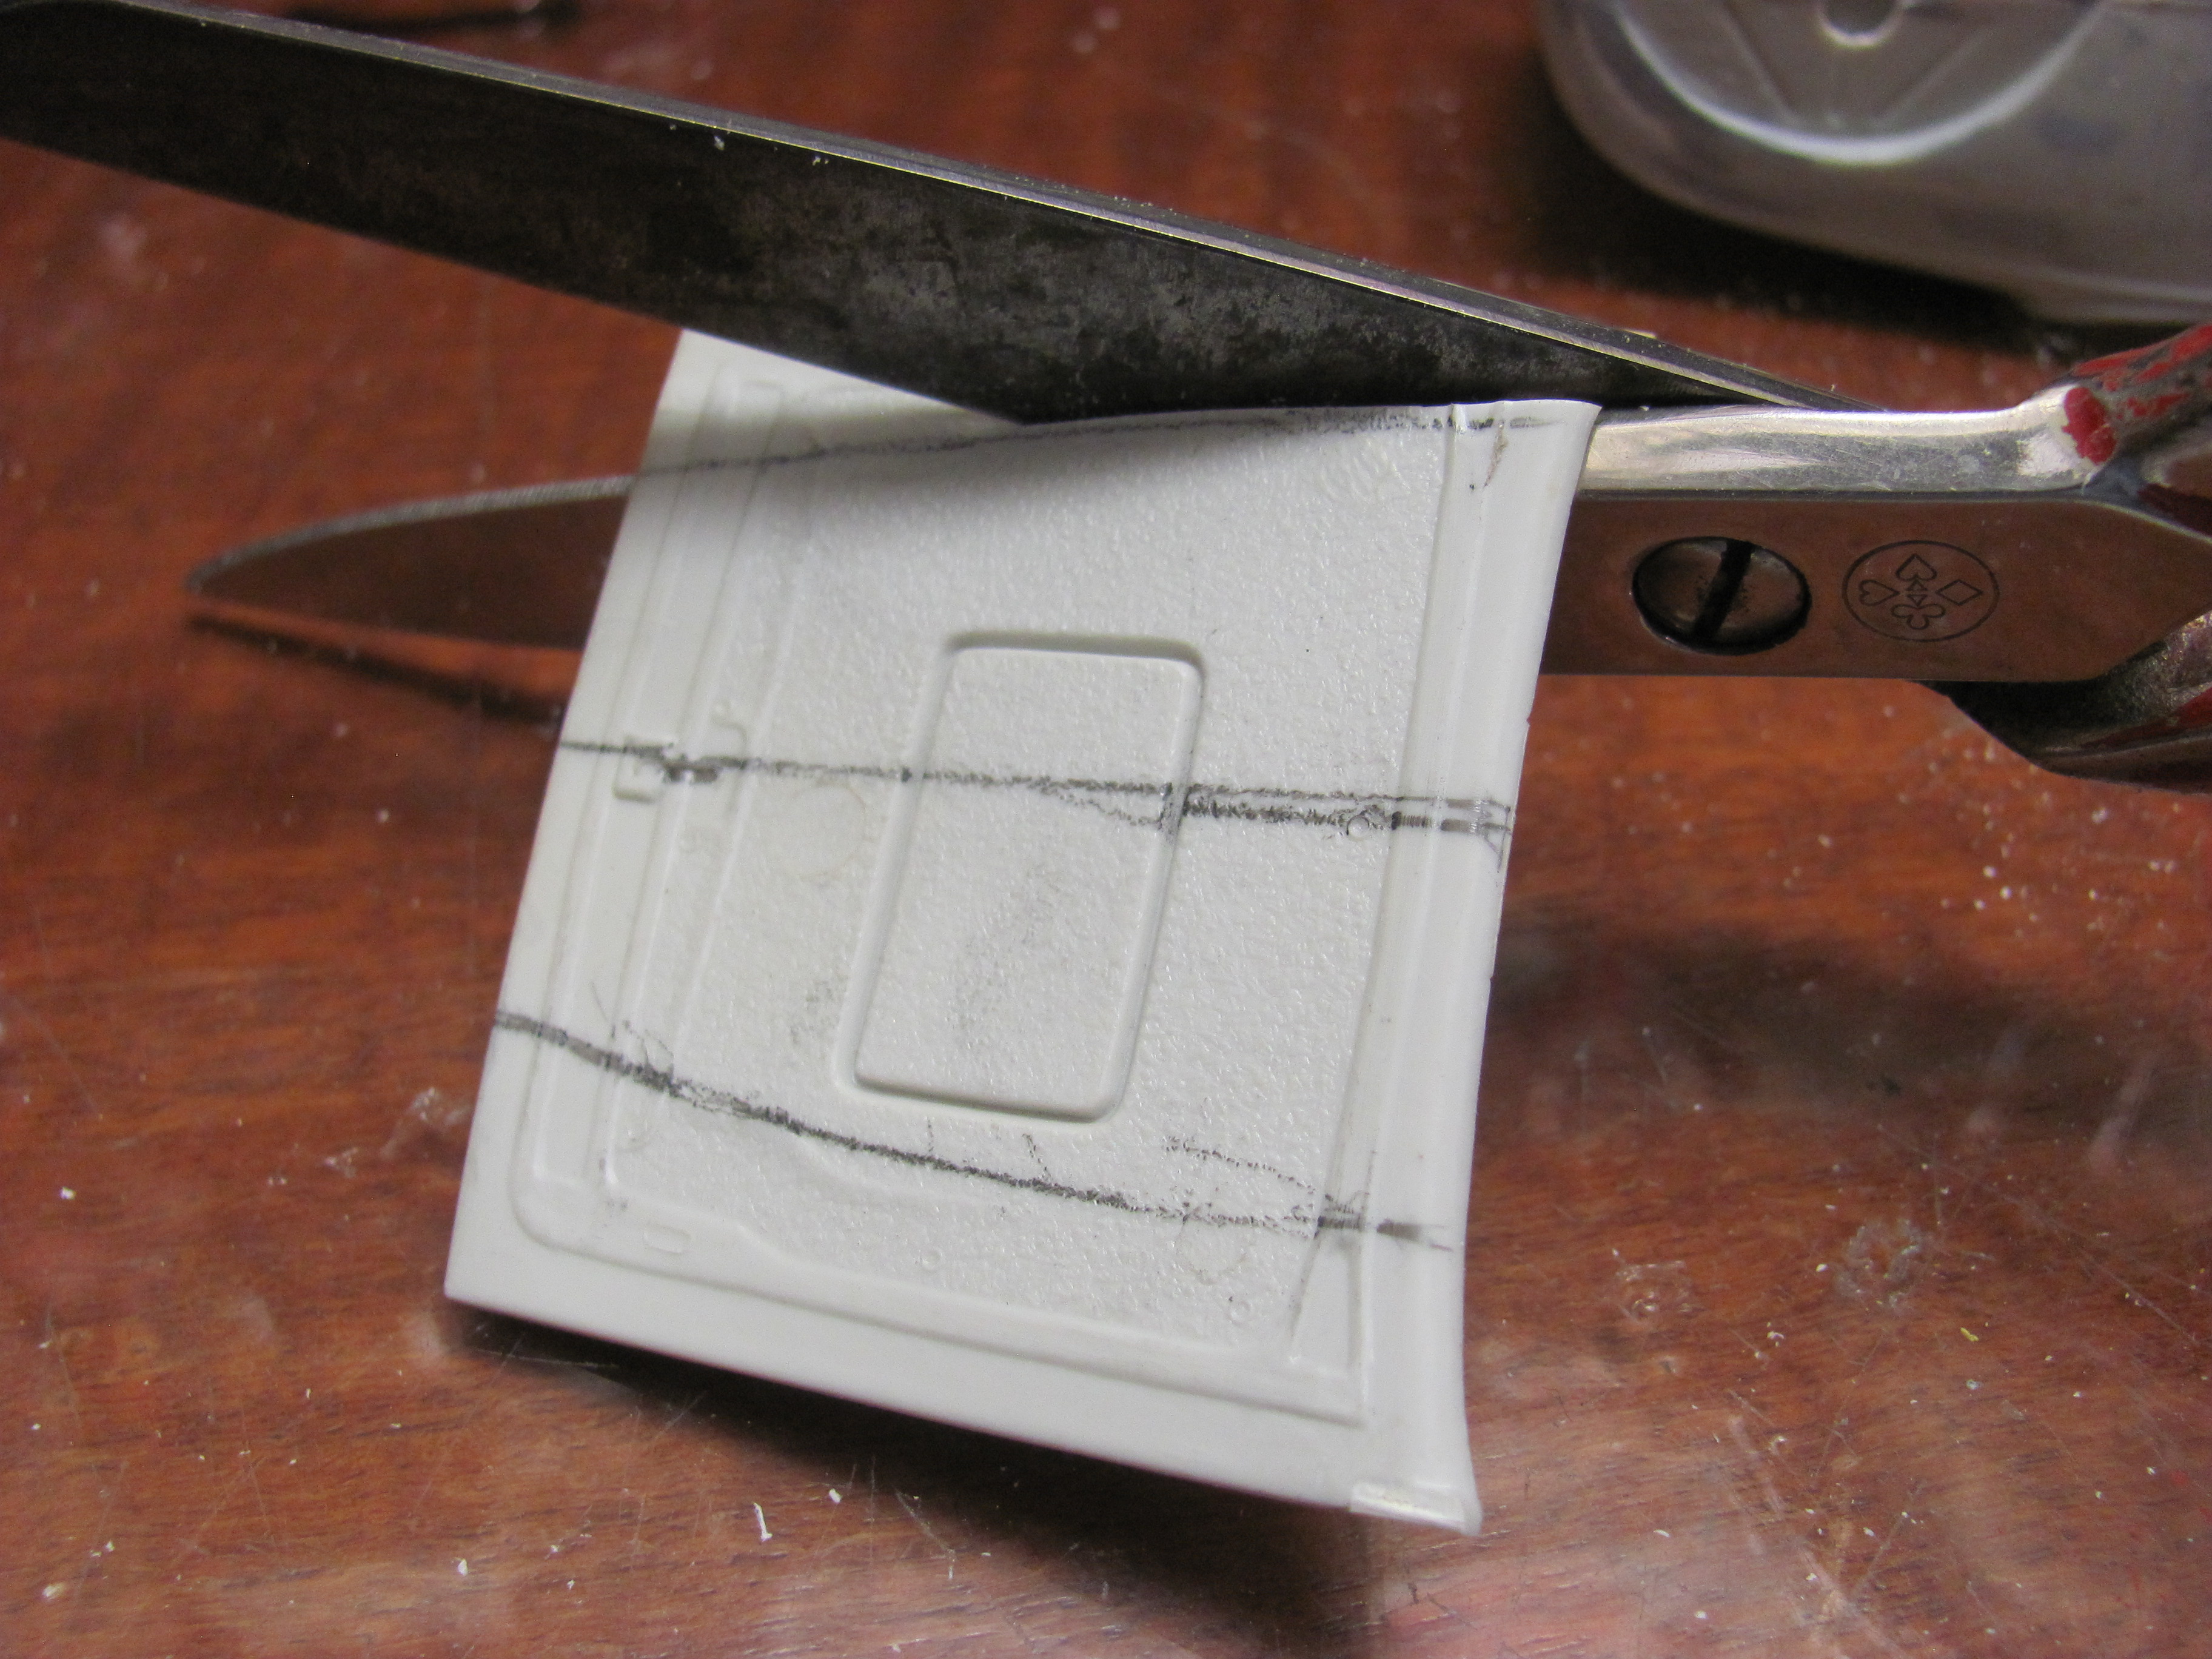
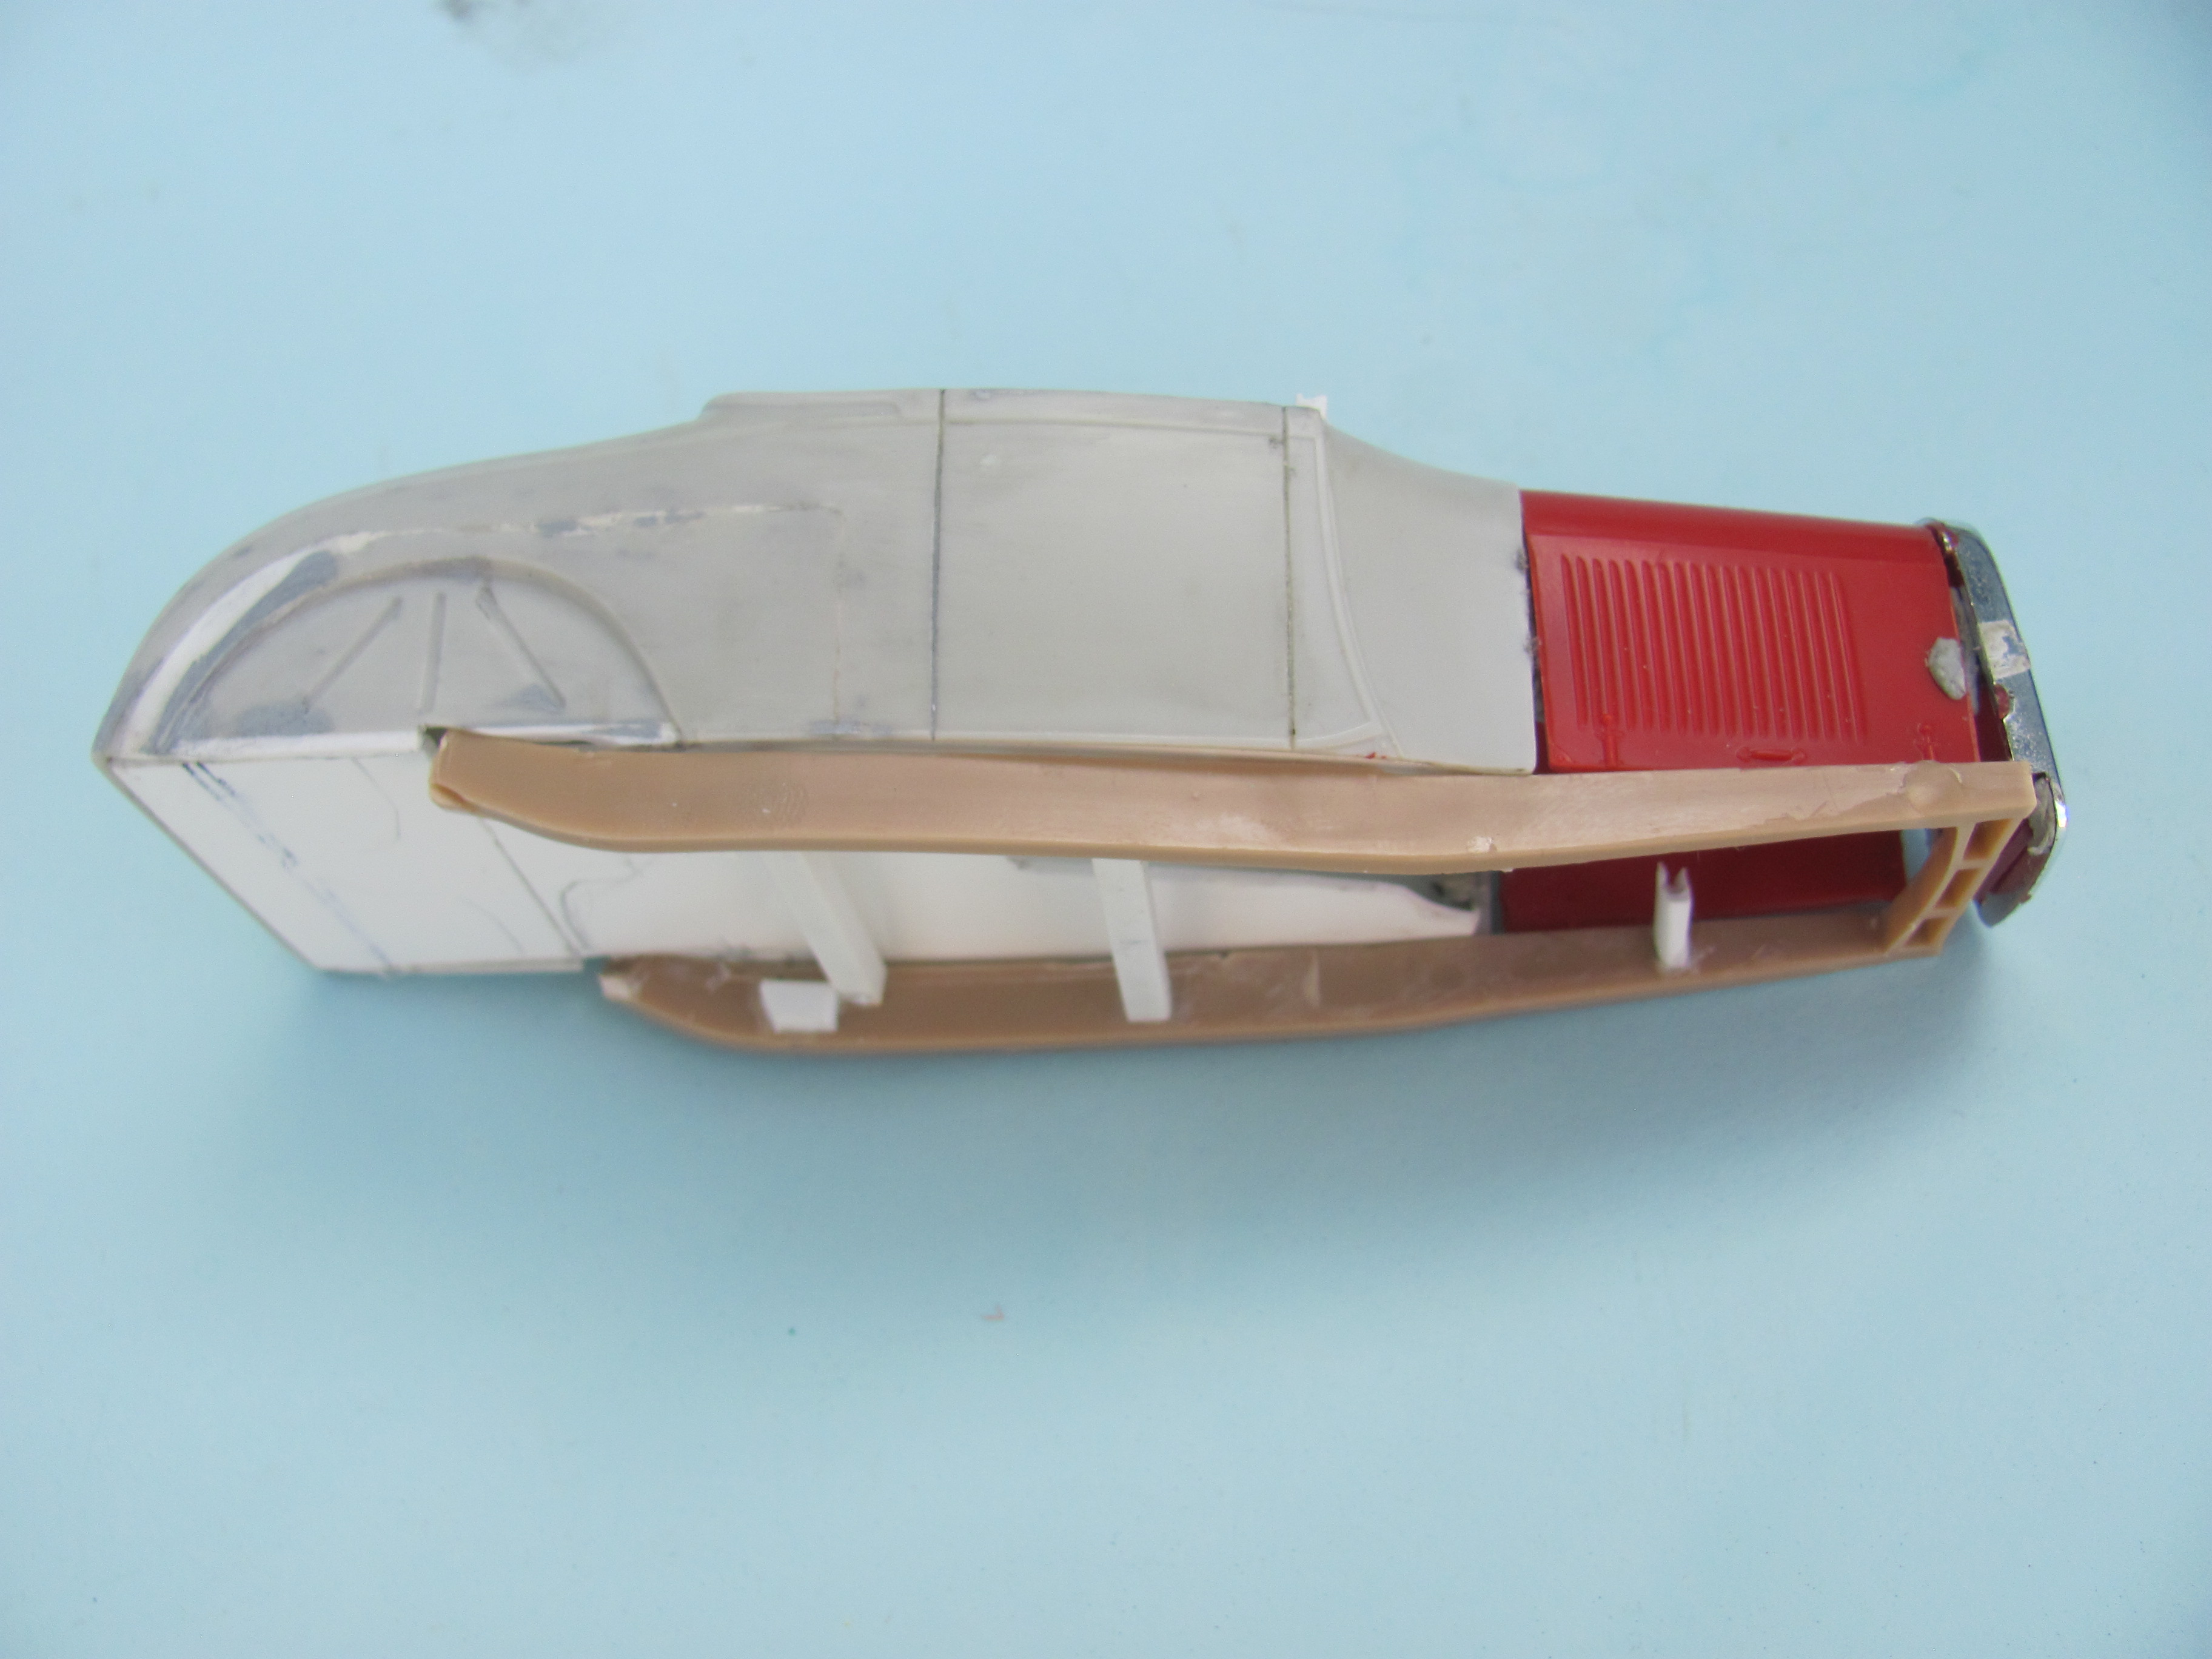
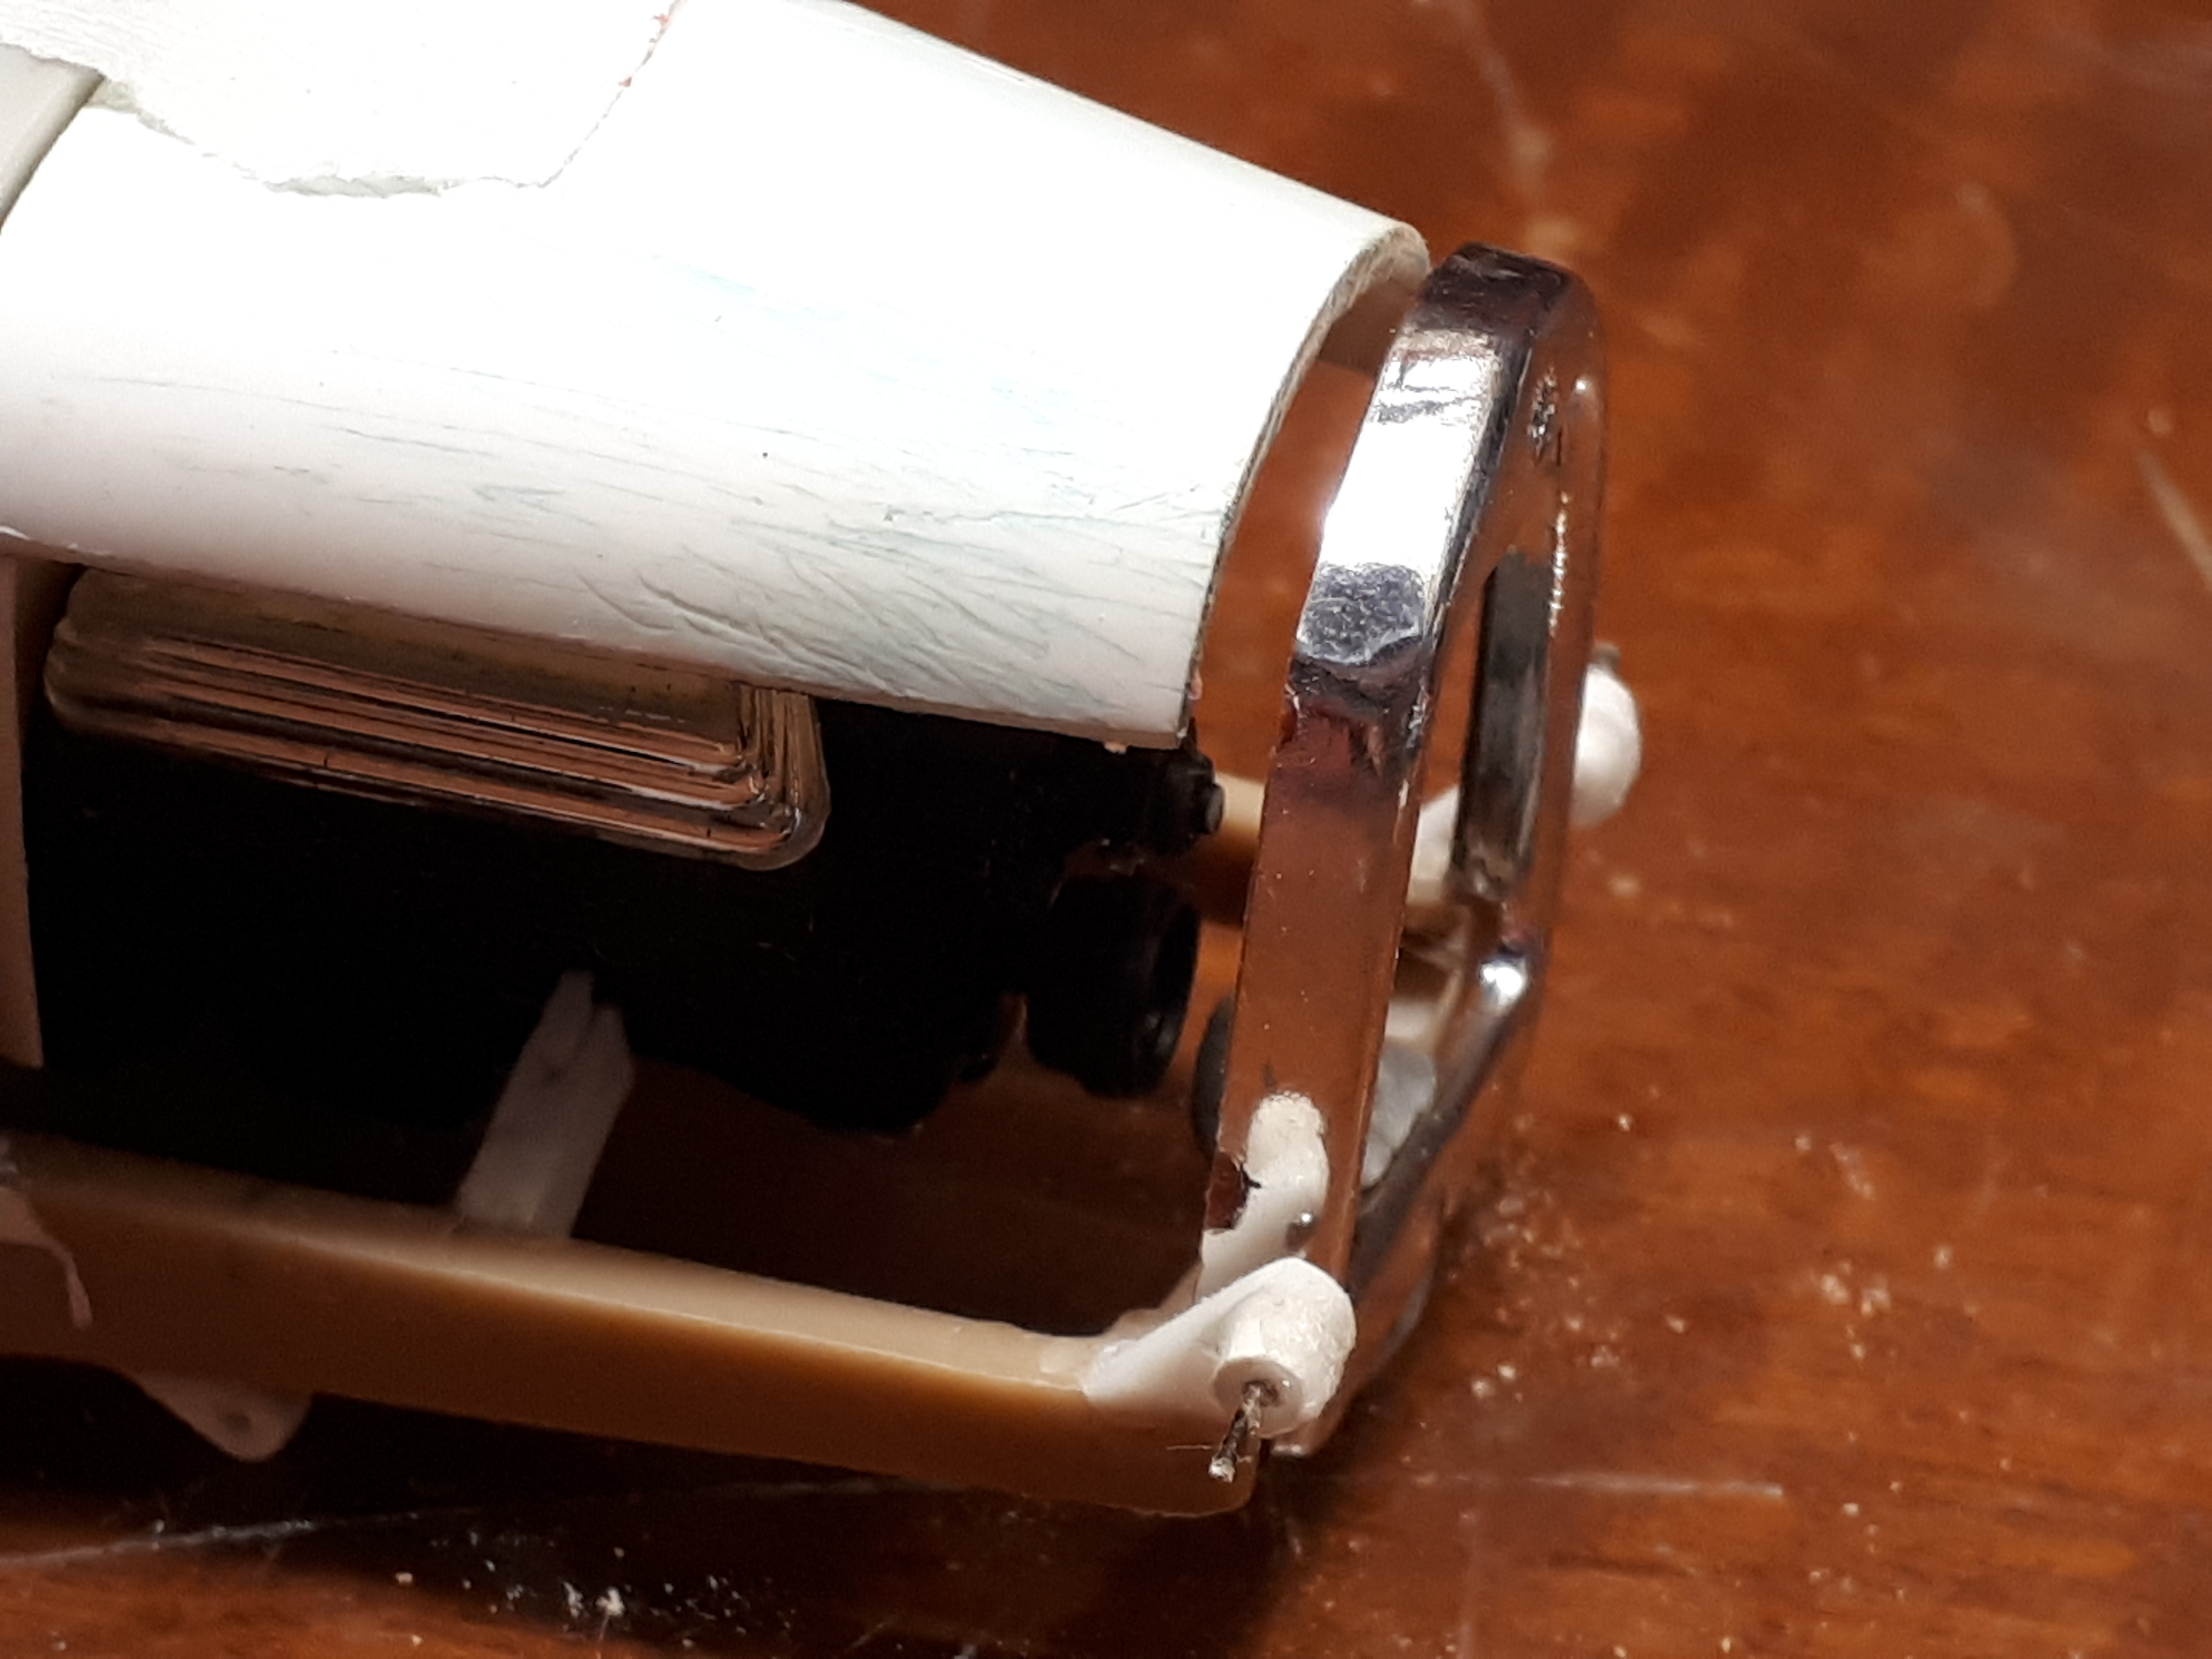
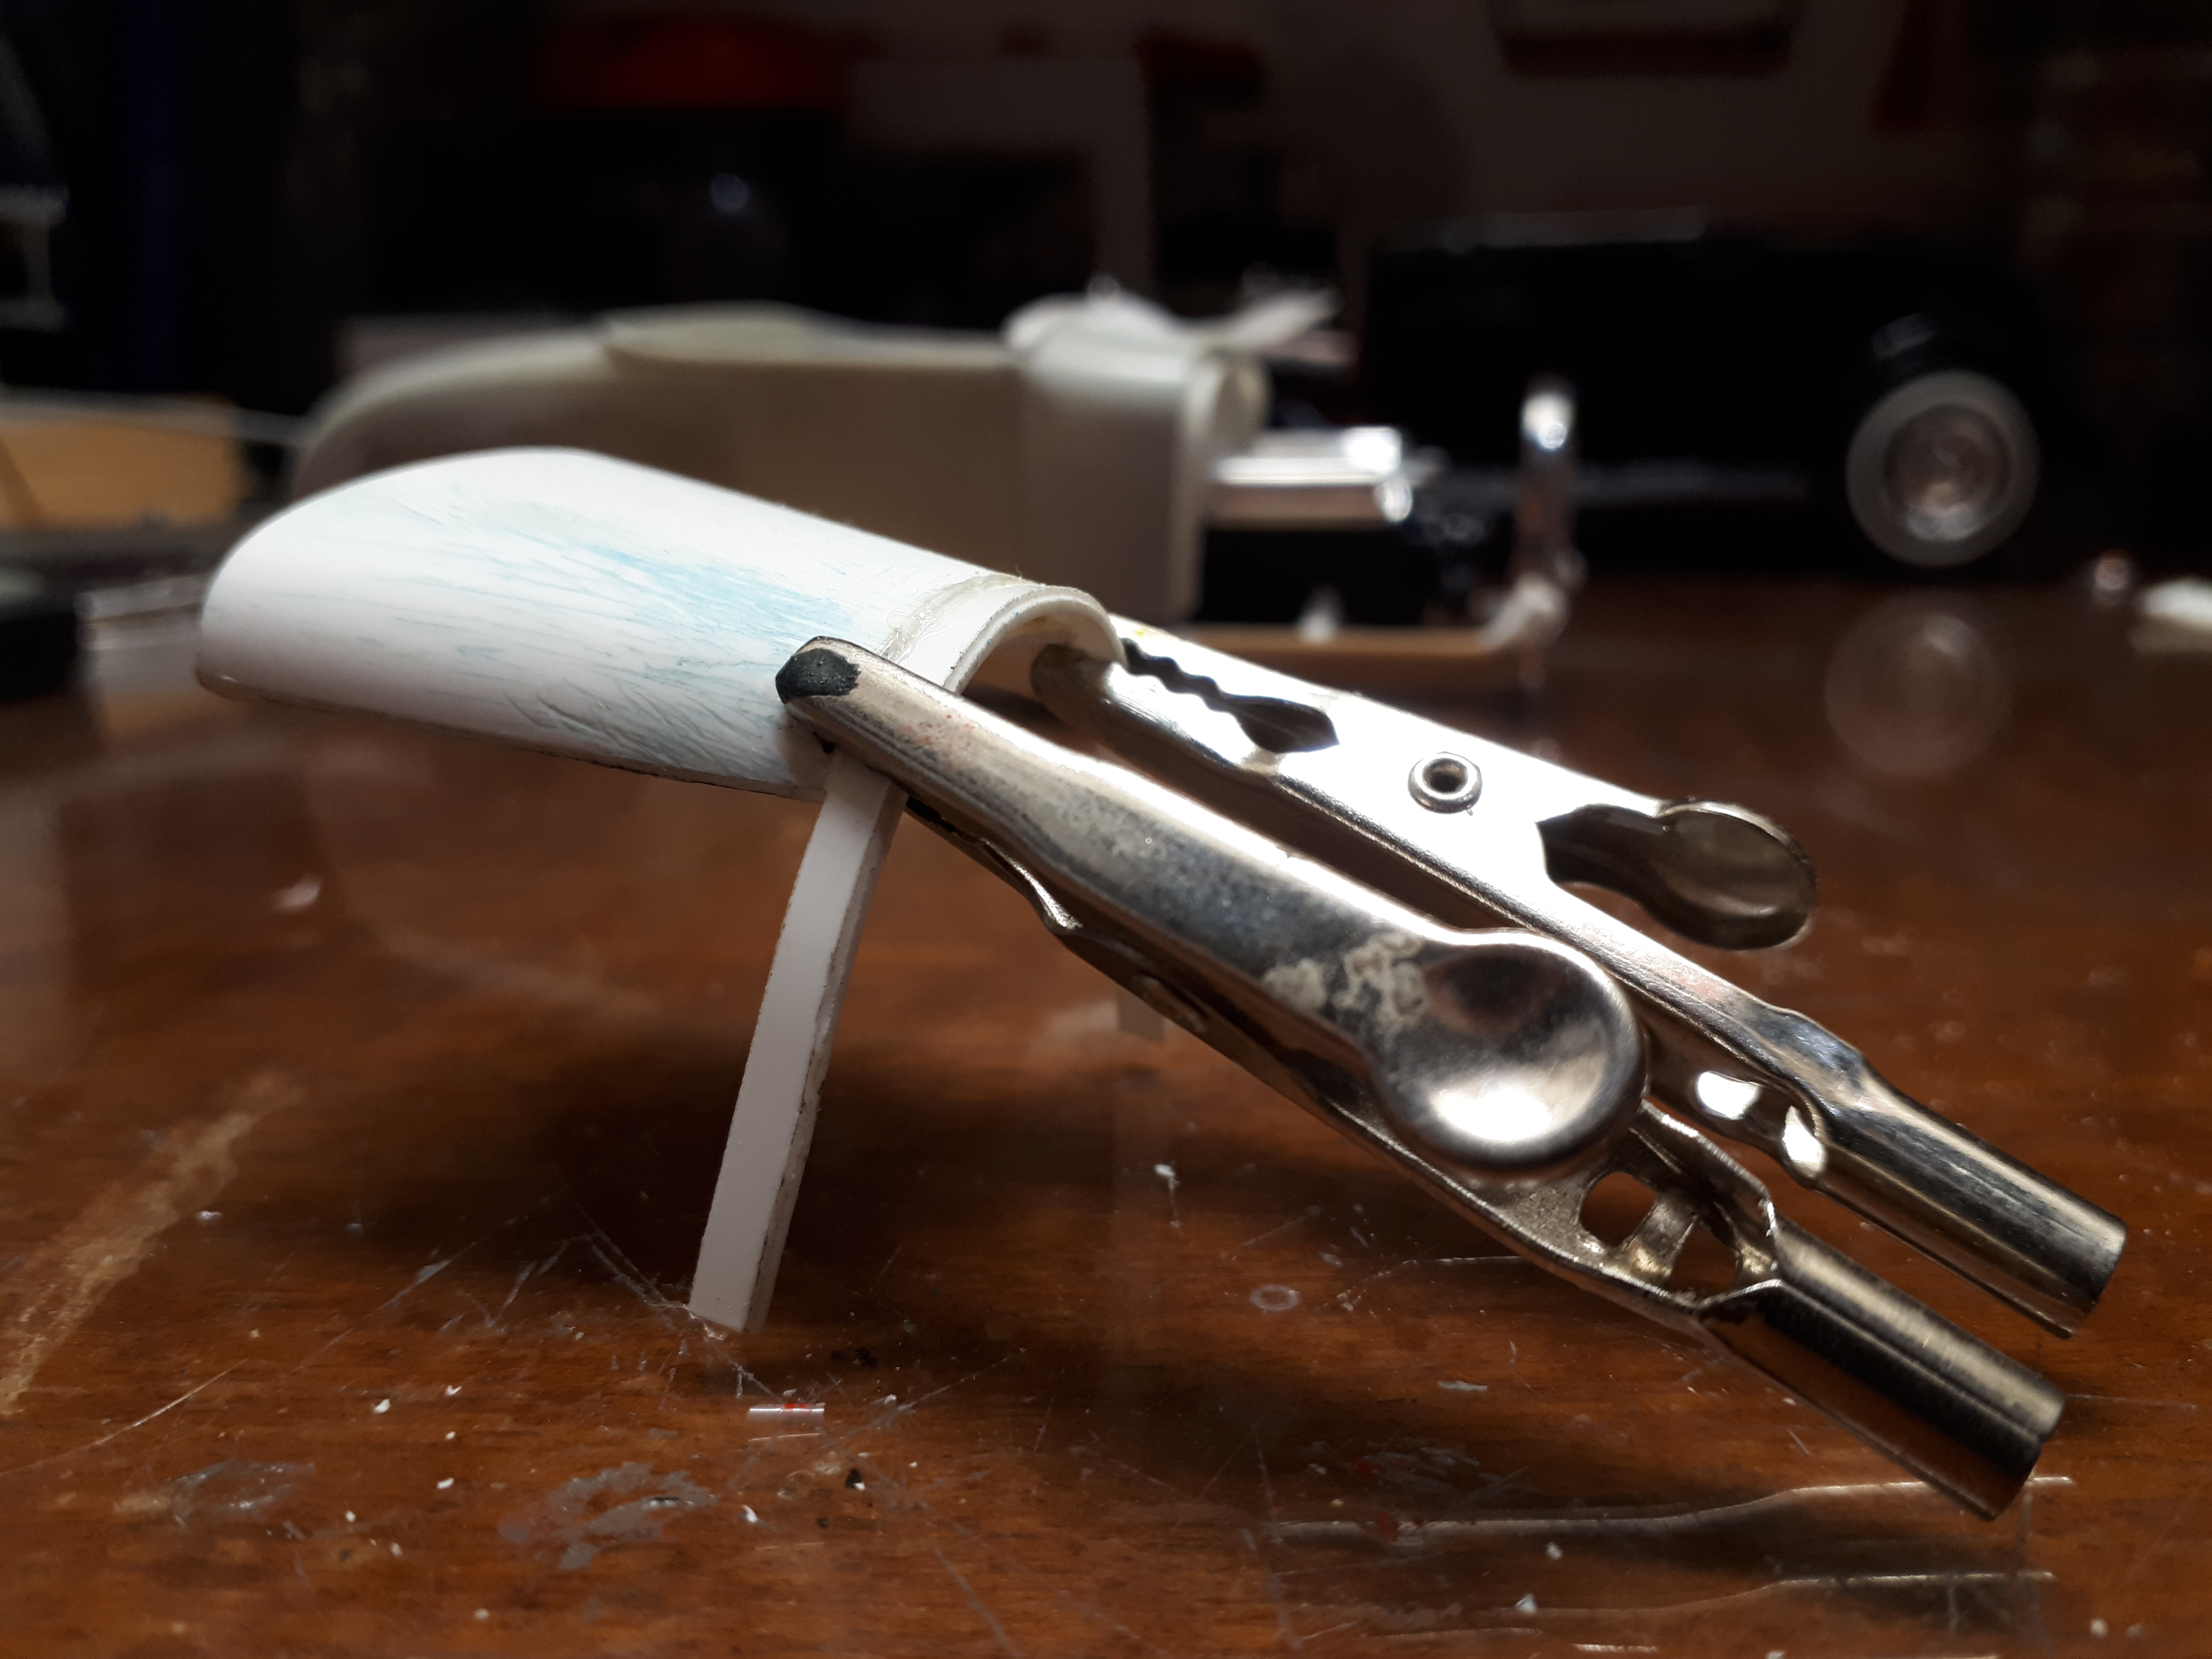
The first car had an open rear end but I am certain that the Corno car had a rollpan. I had spare rollpans from my Niekamp build from thirty years ago. One of the really fiddly parts of the car, I had to notch it for both the rear of the quickchange and the coil-overs. Sand, glue, file, putty, cut off, reglue, file, sand putty - you get the idea. I also cut out and boxed in a recess for the number plate as well as some slots for the taillights.
-
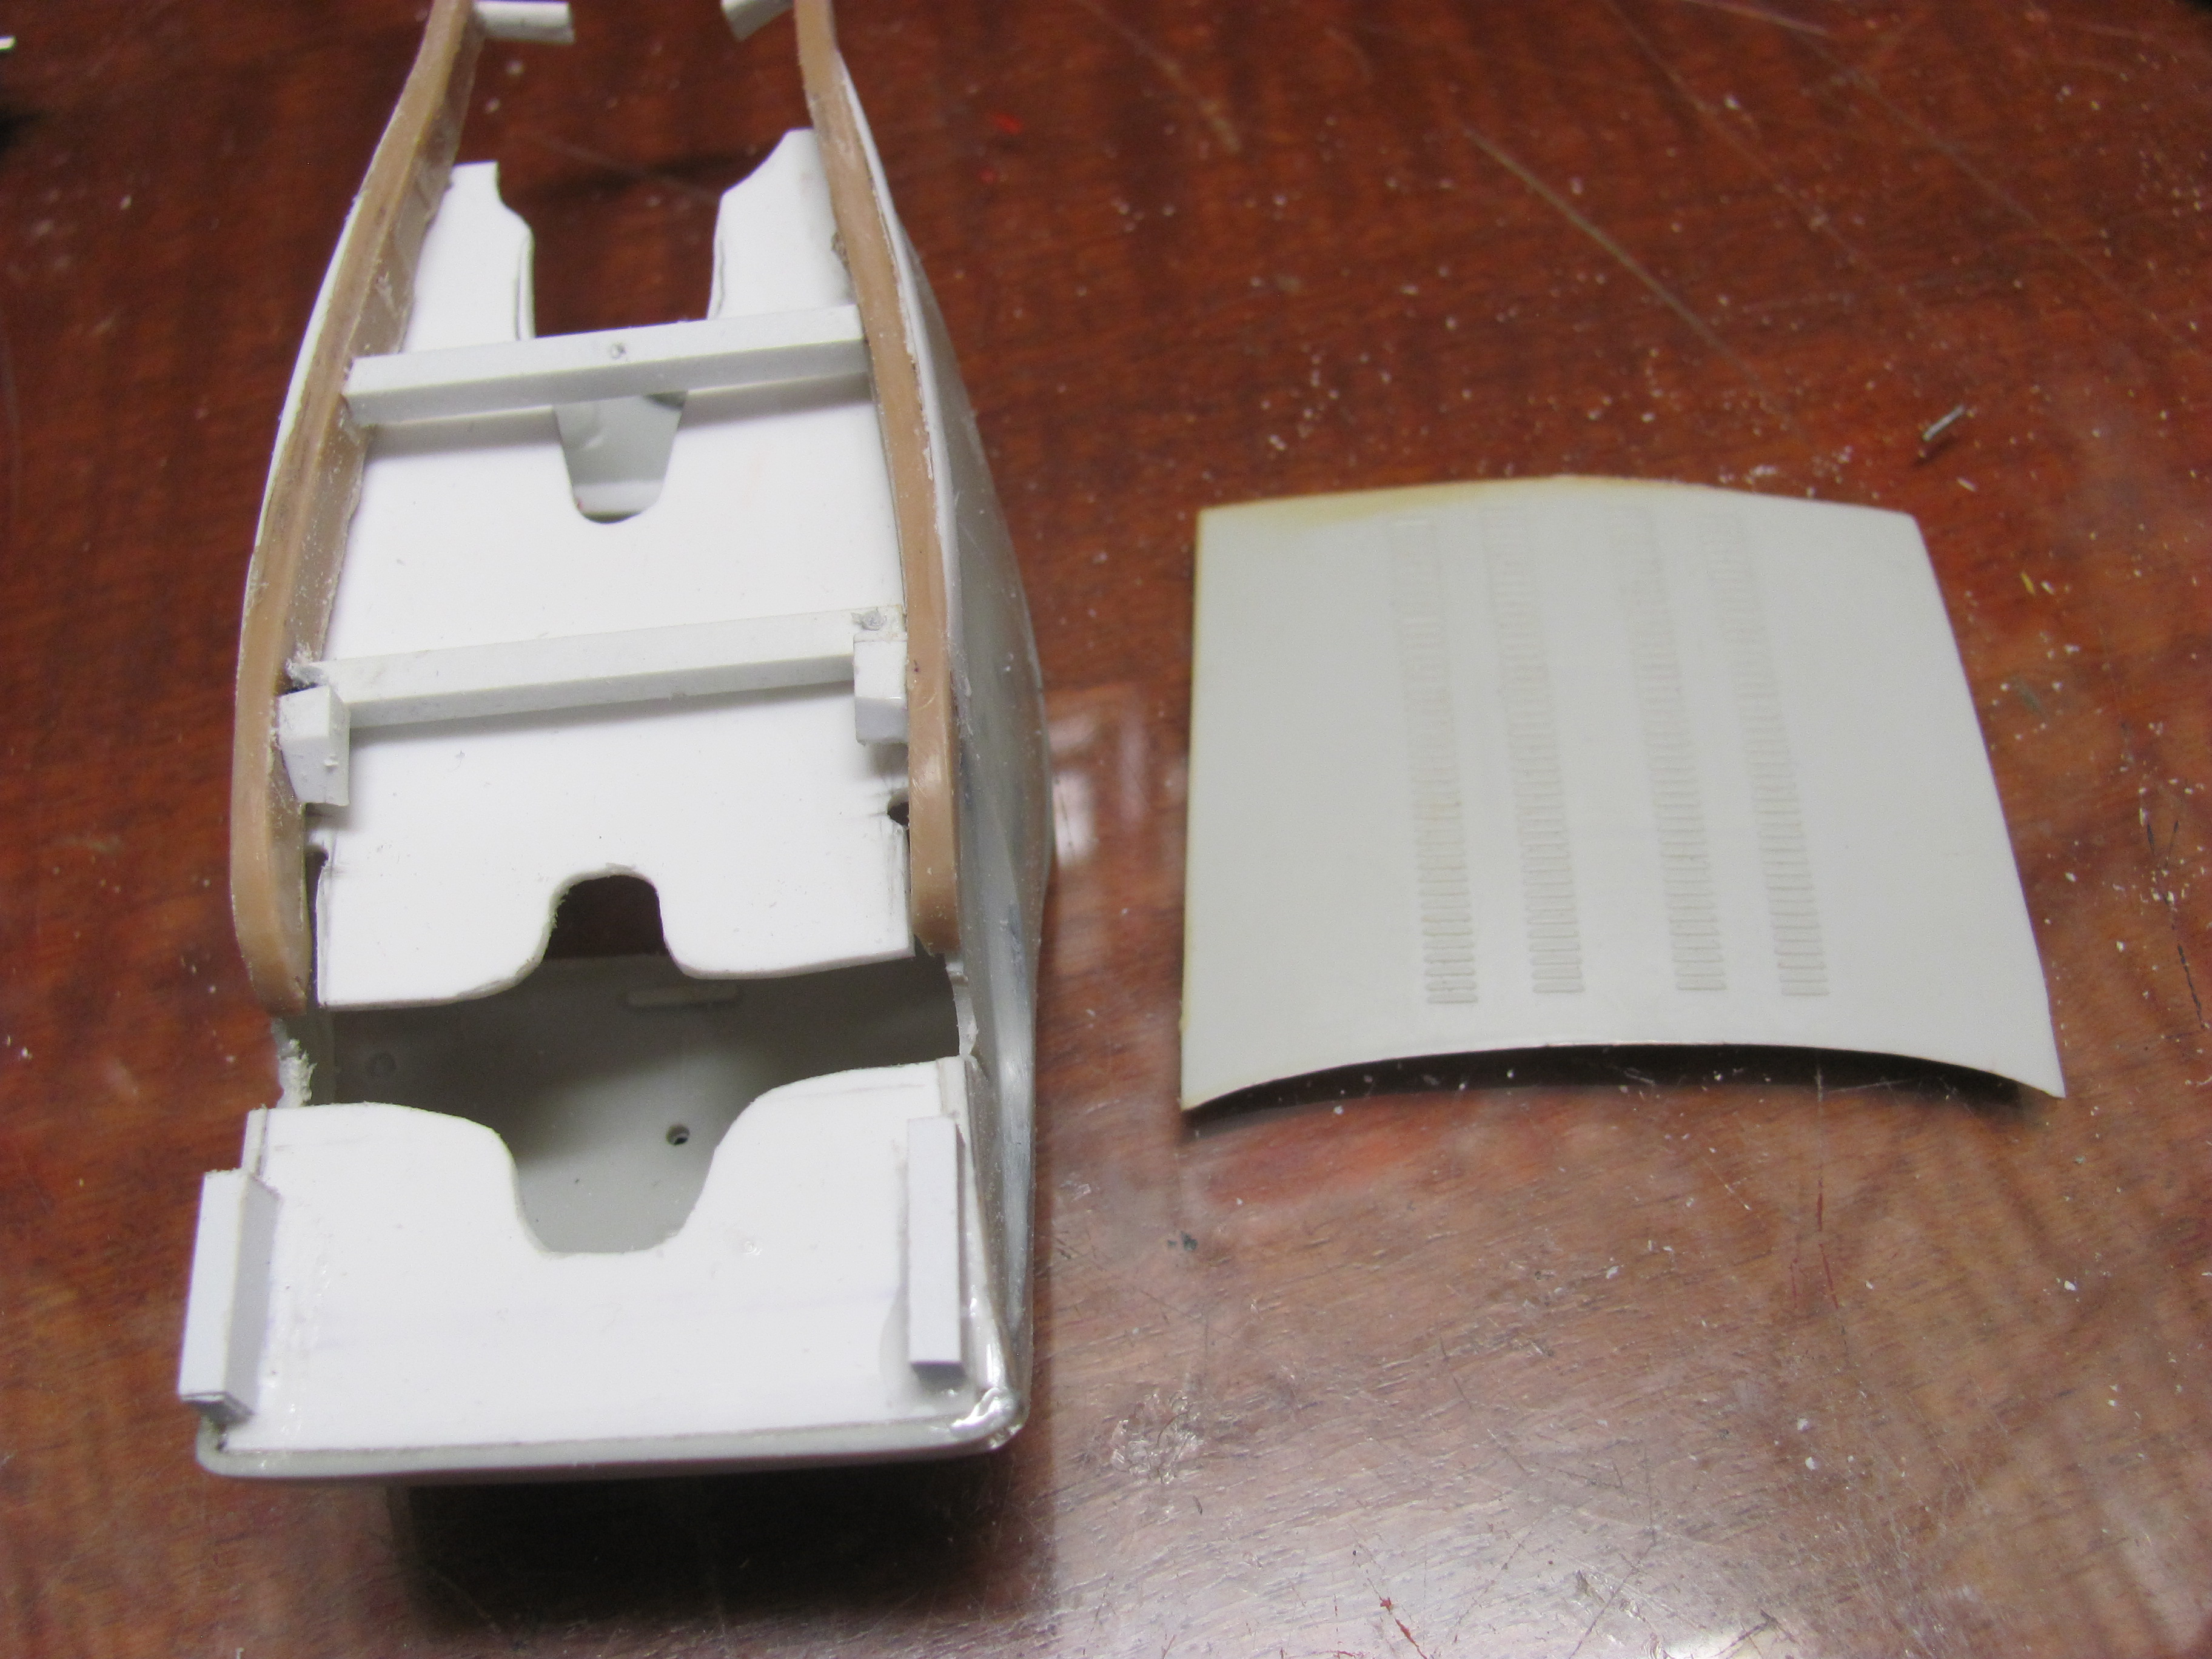
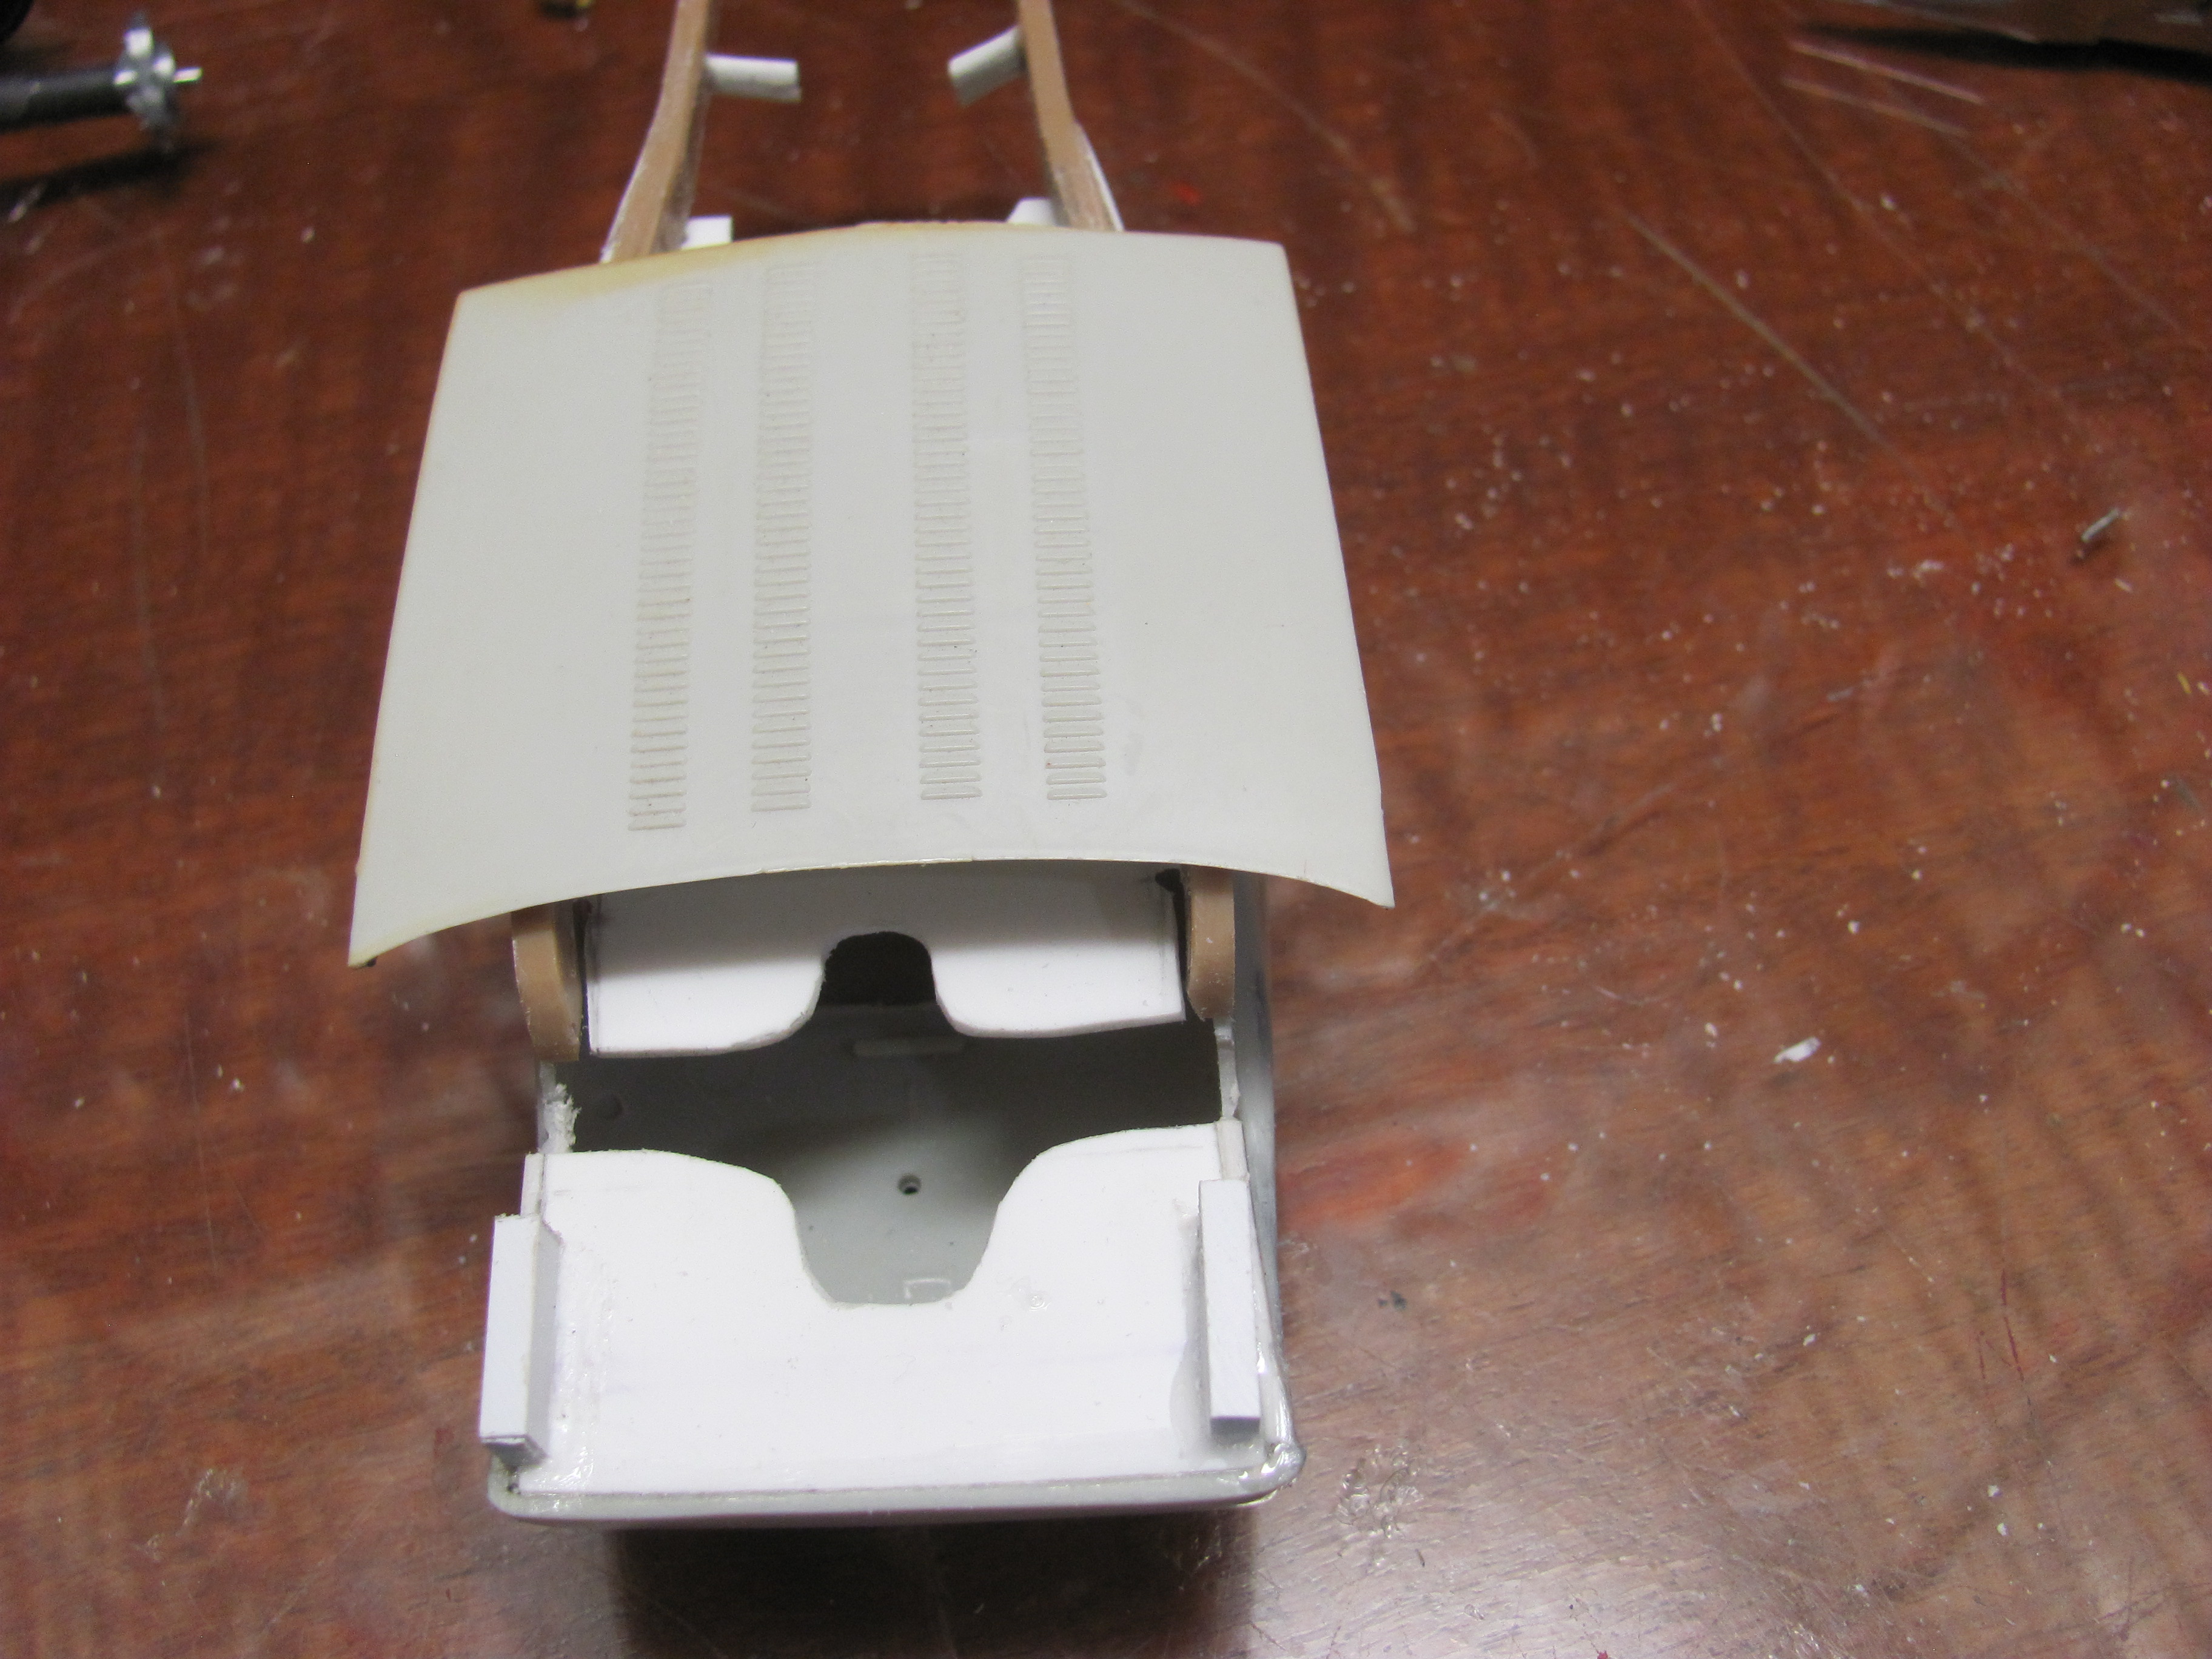
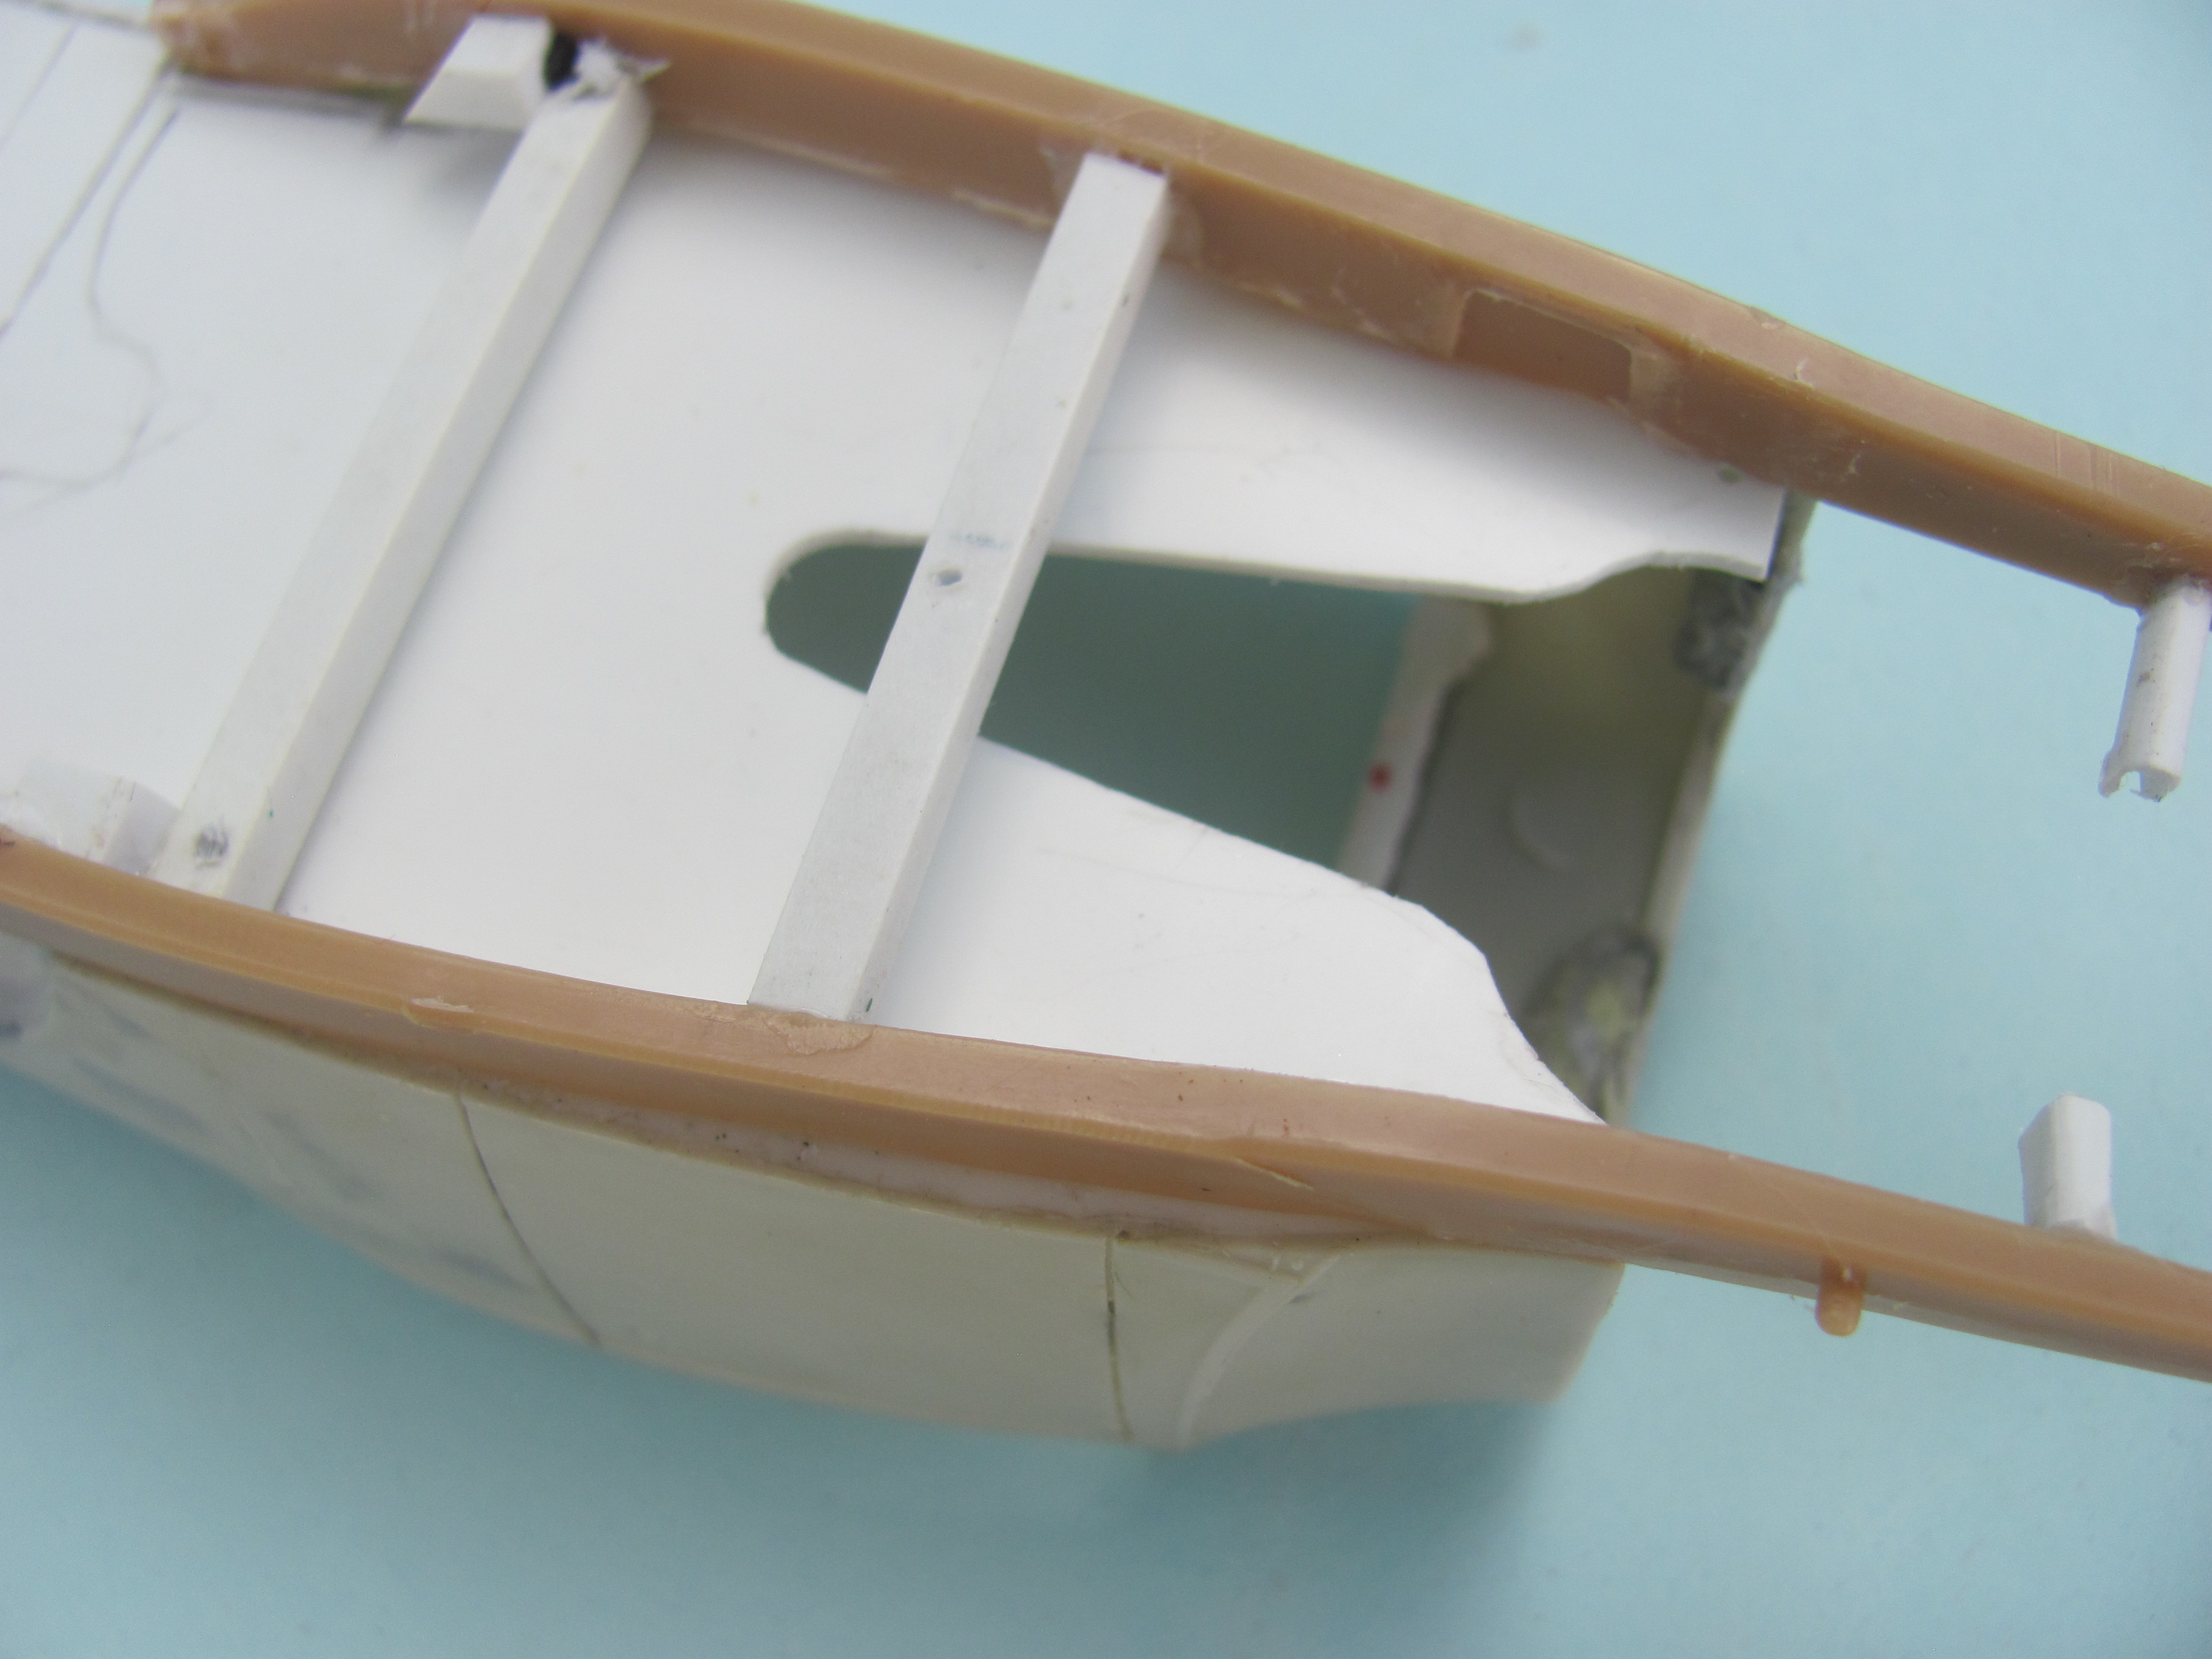
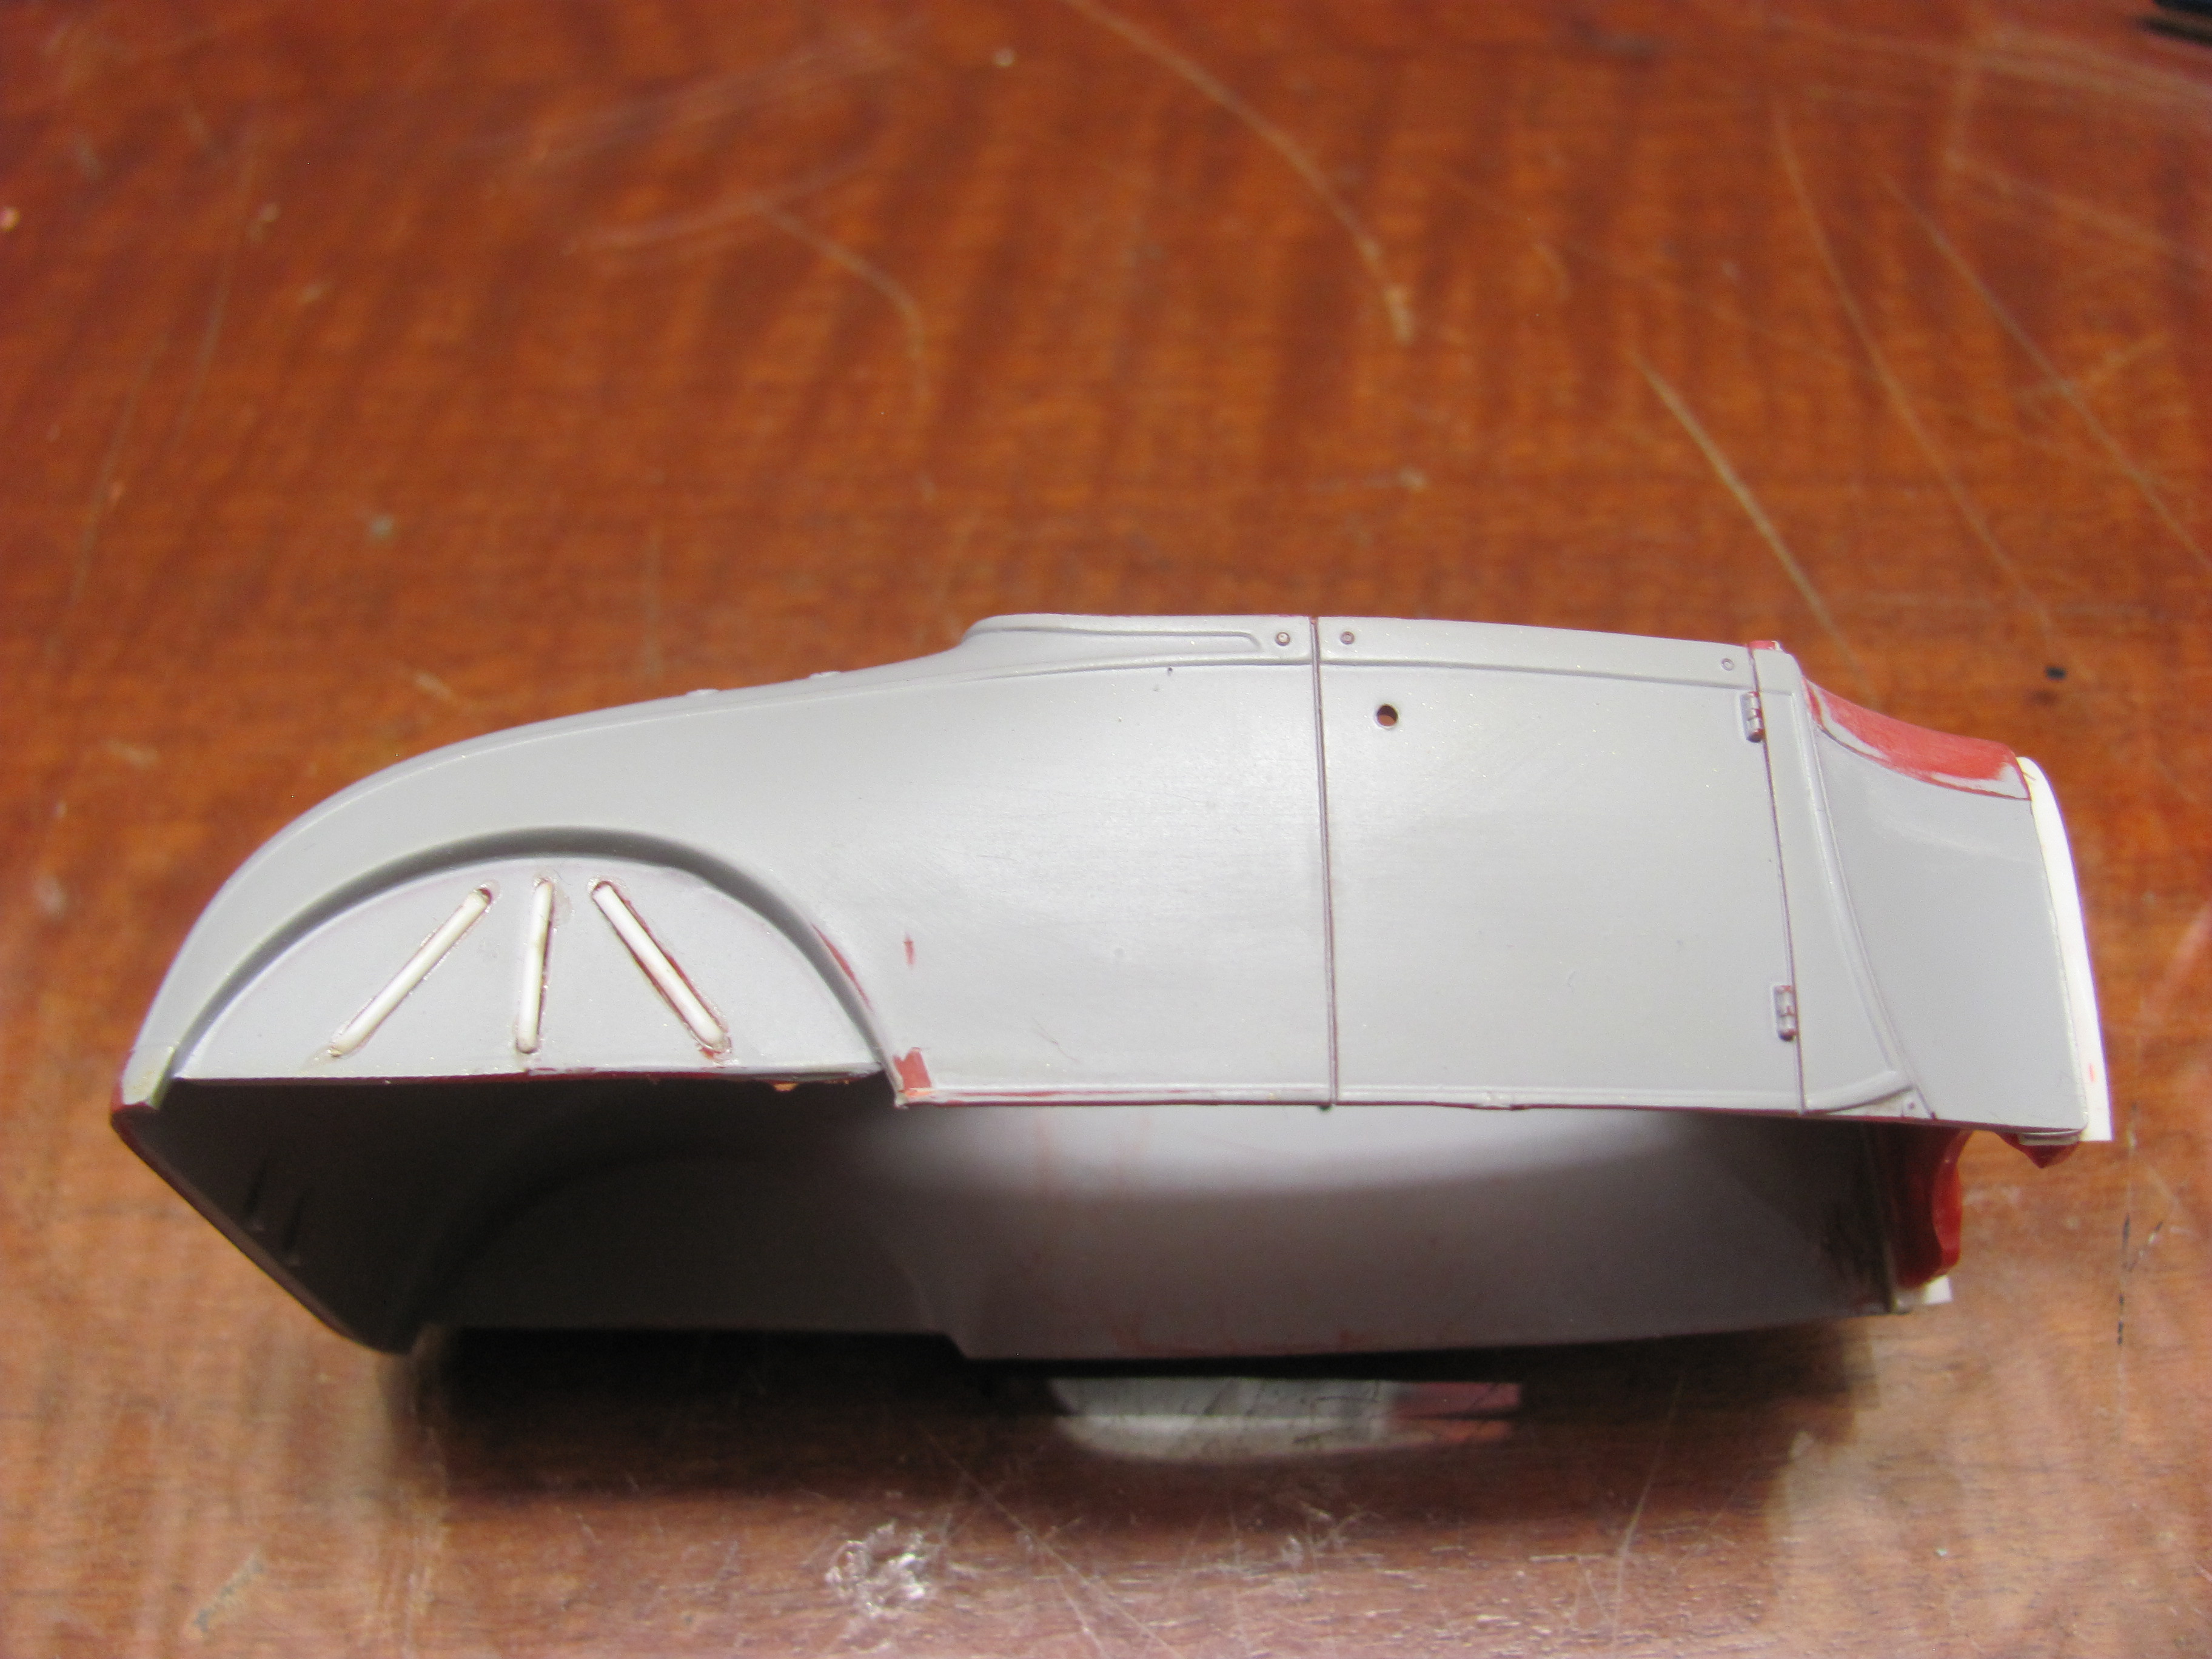
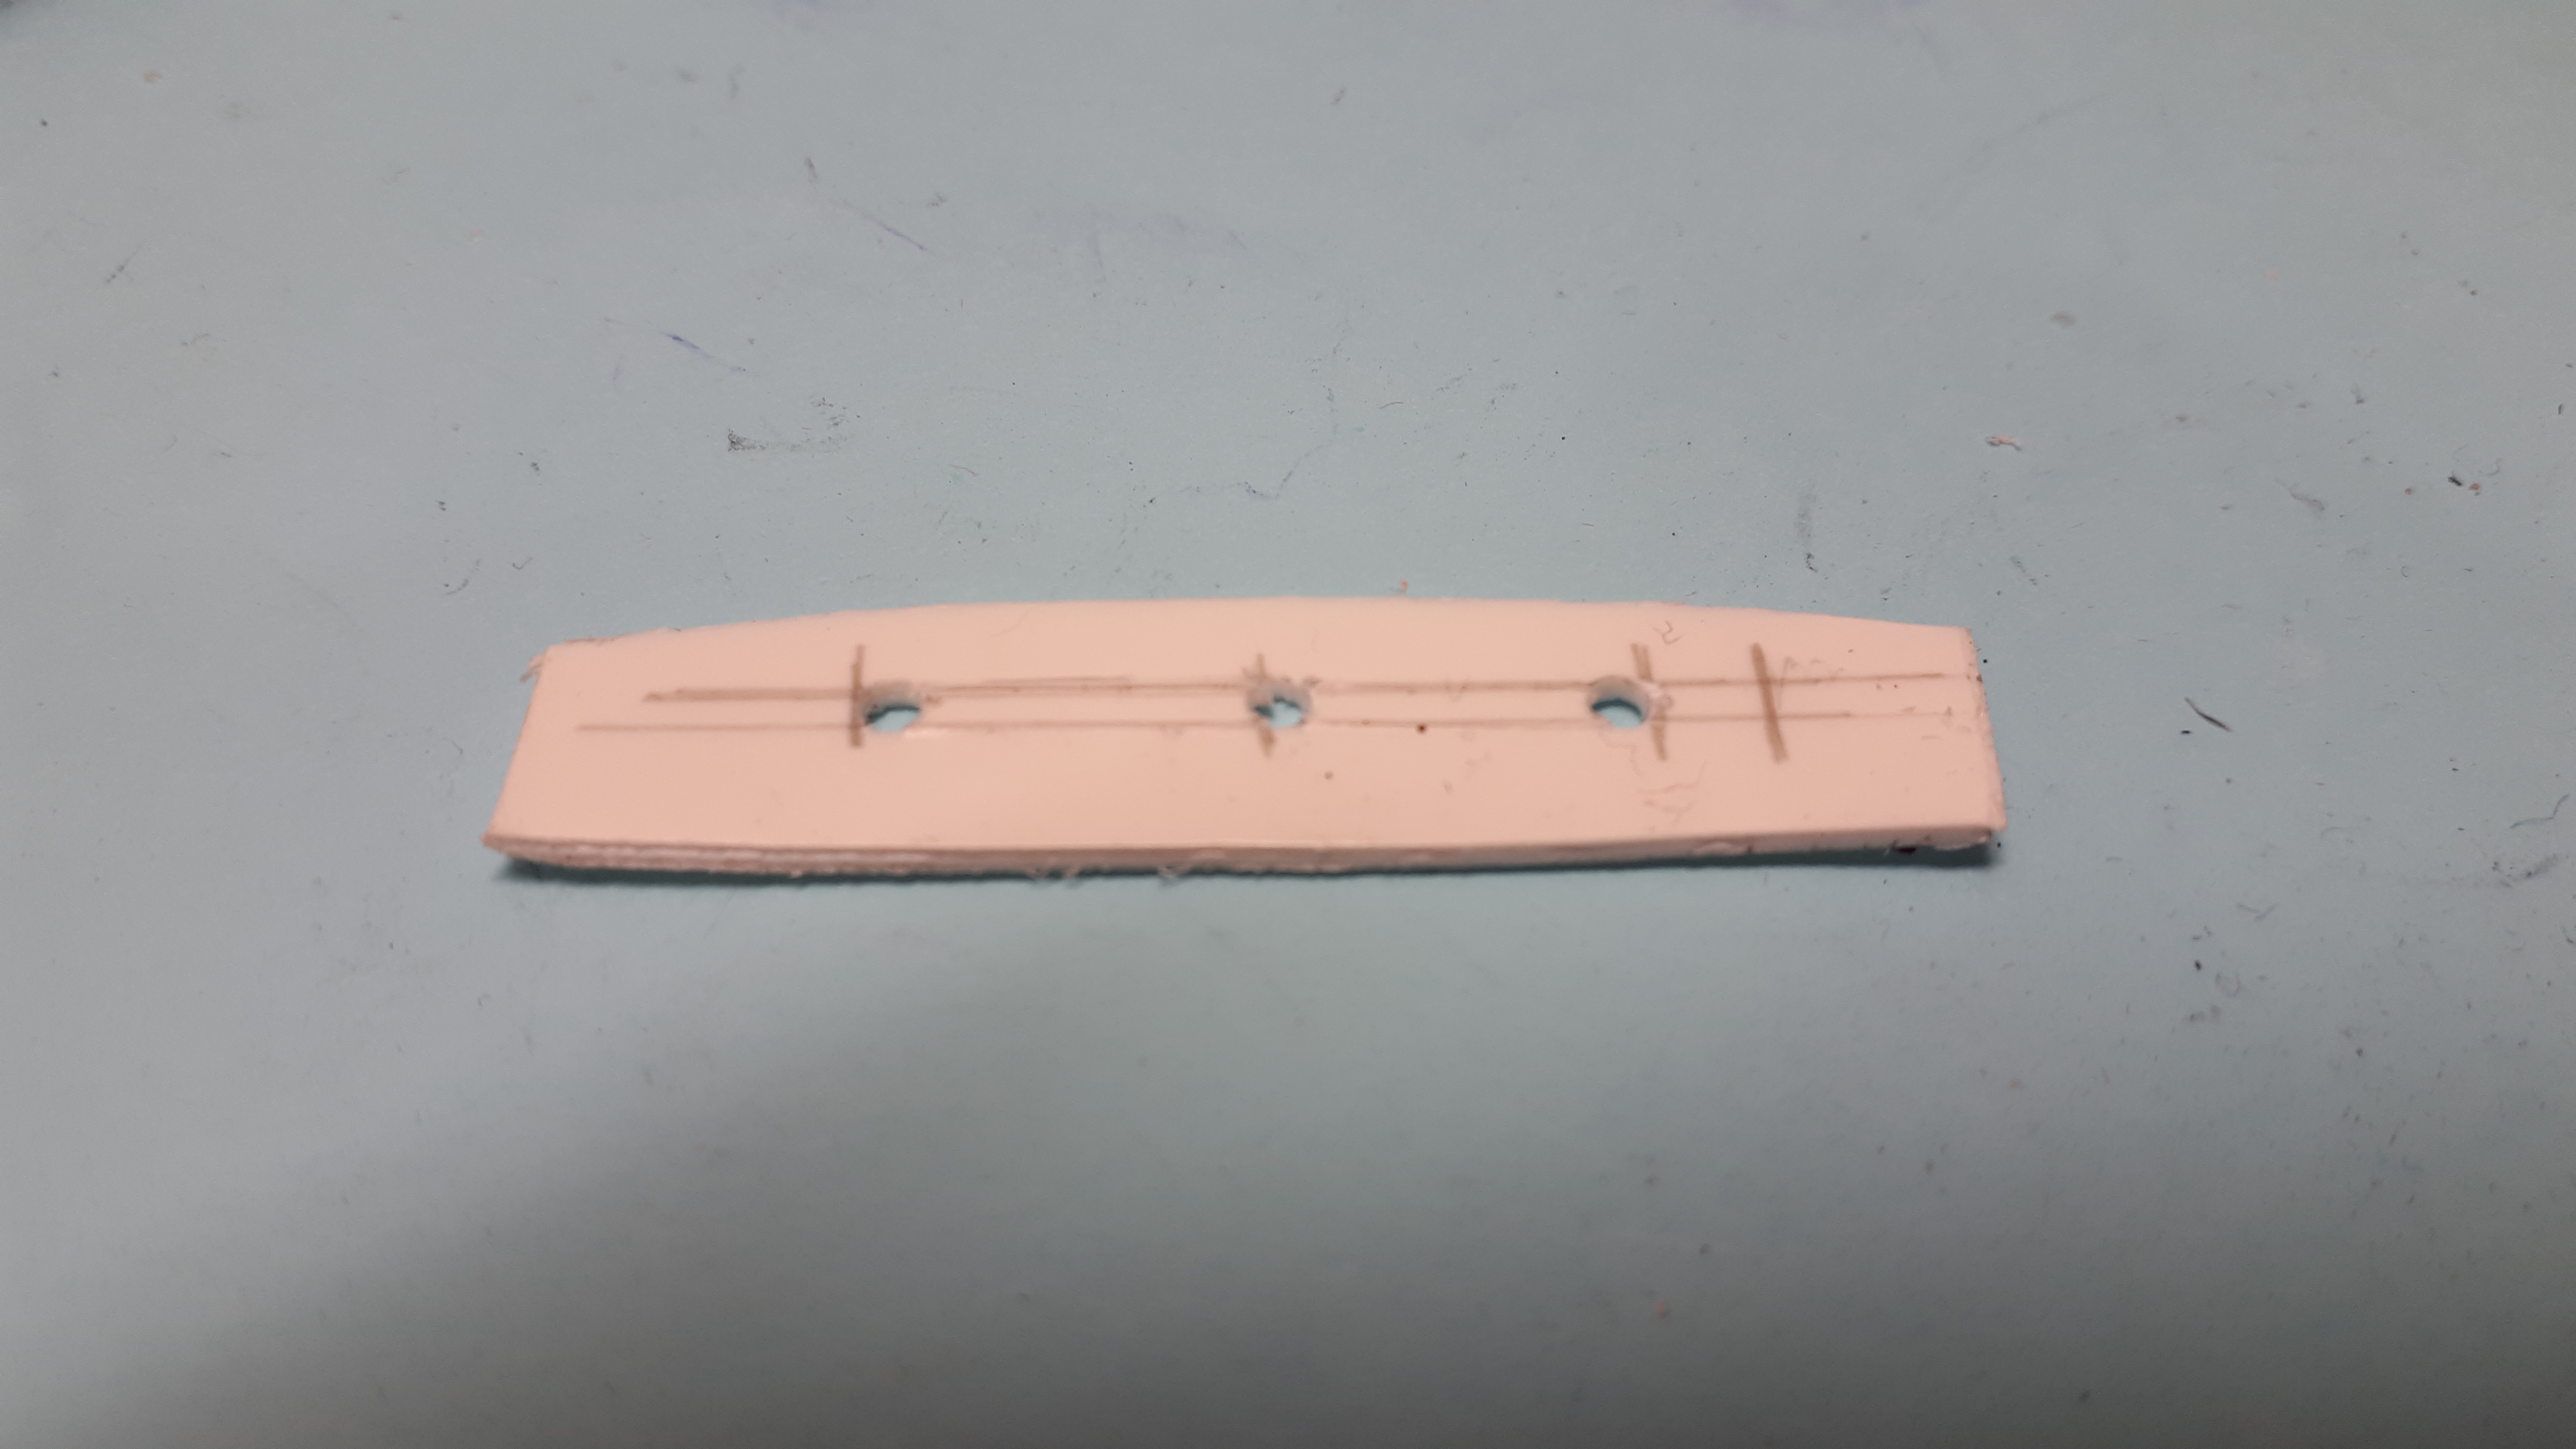
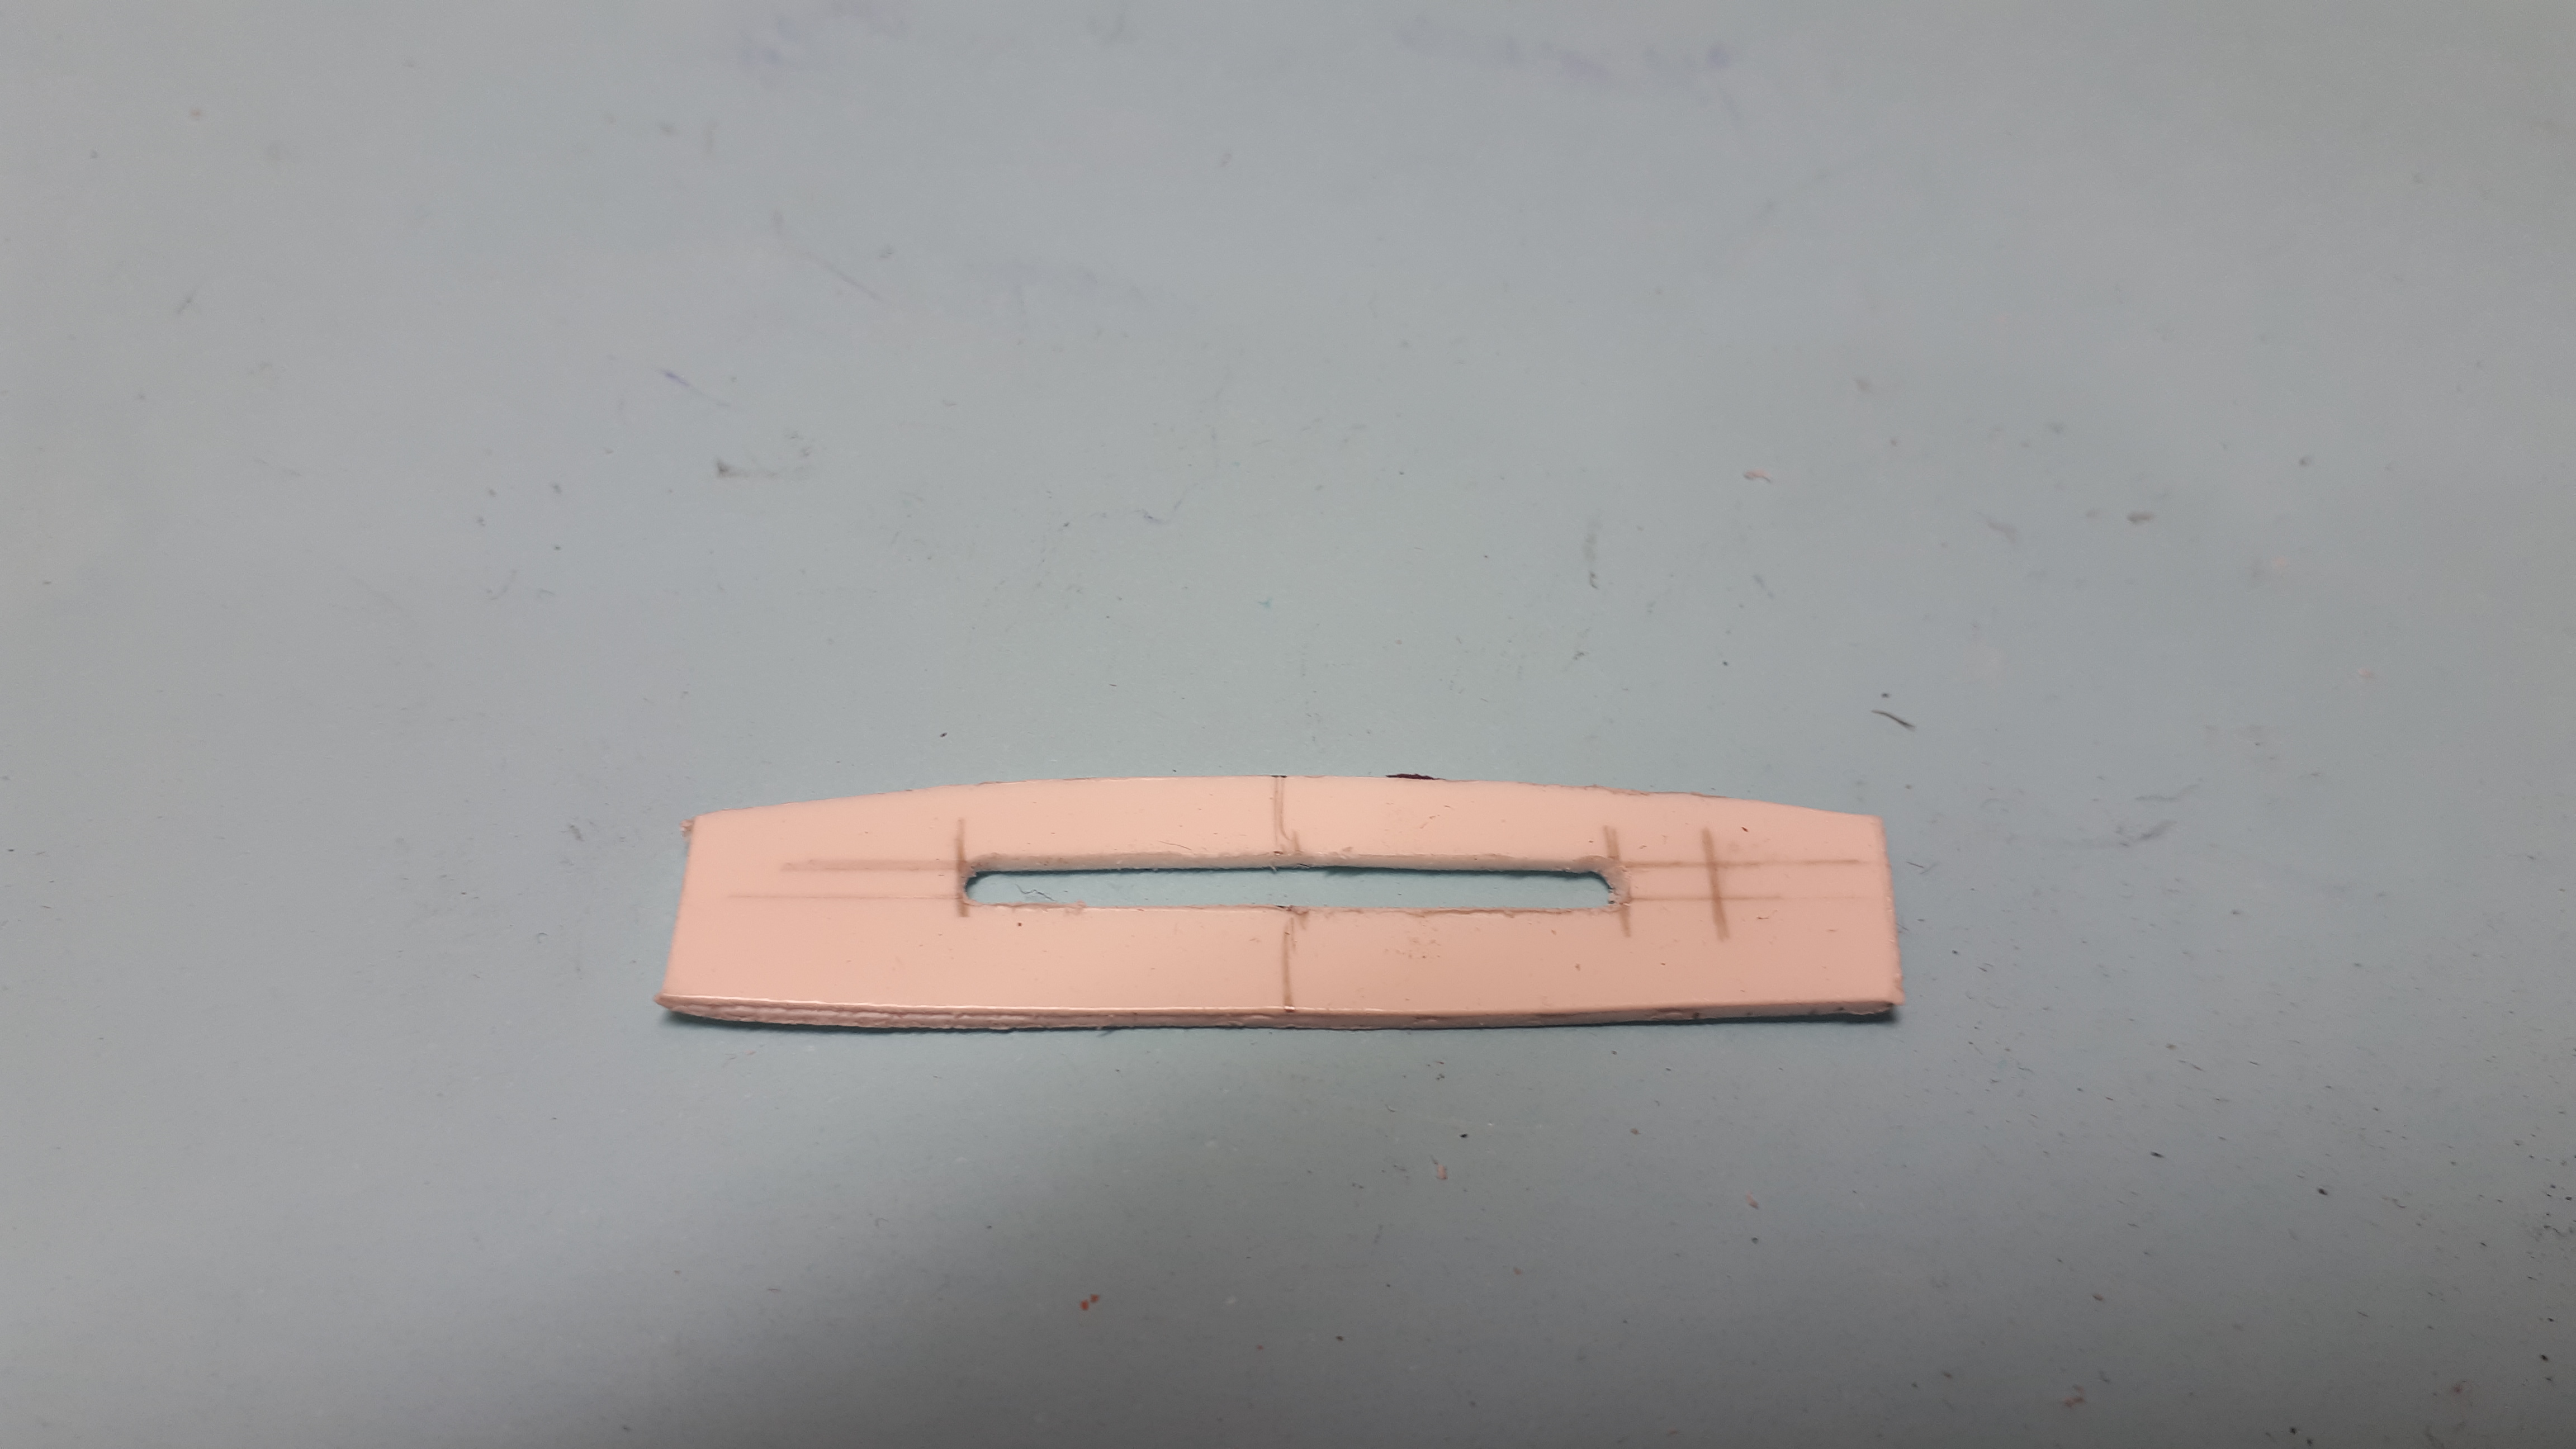
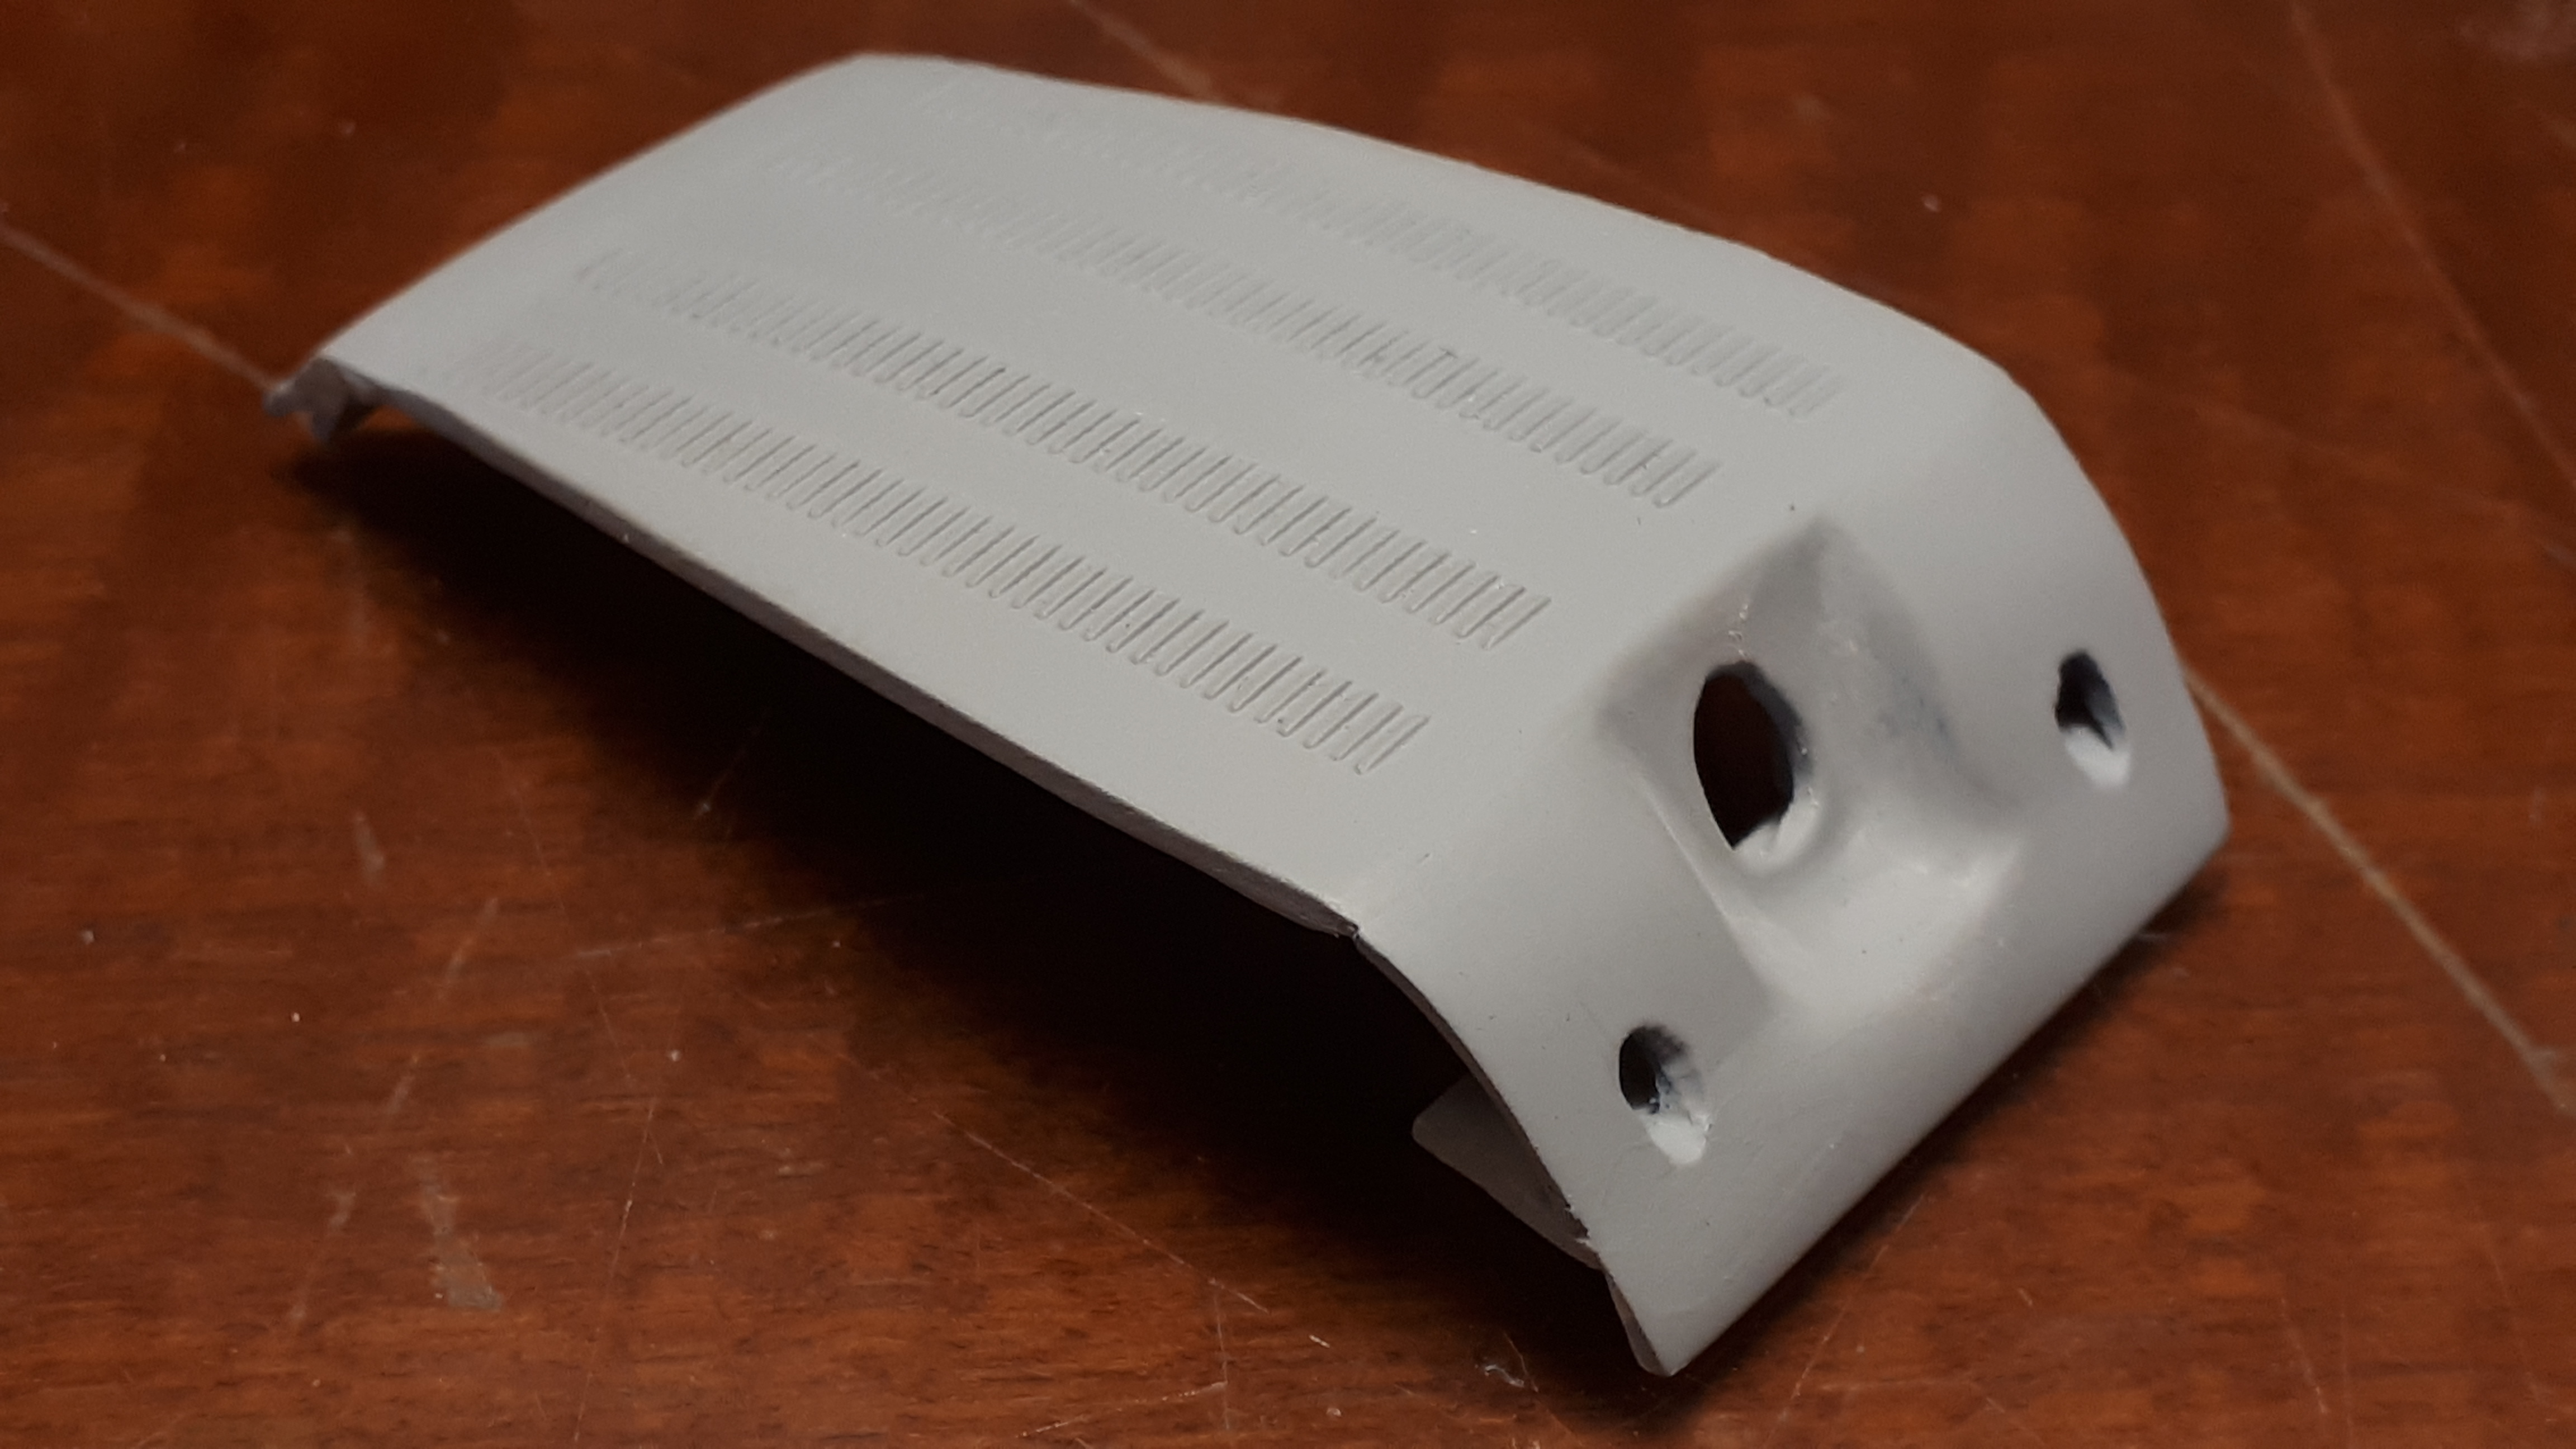
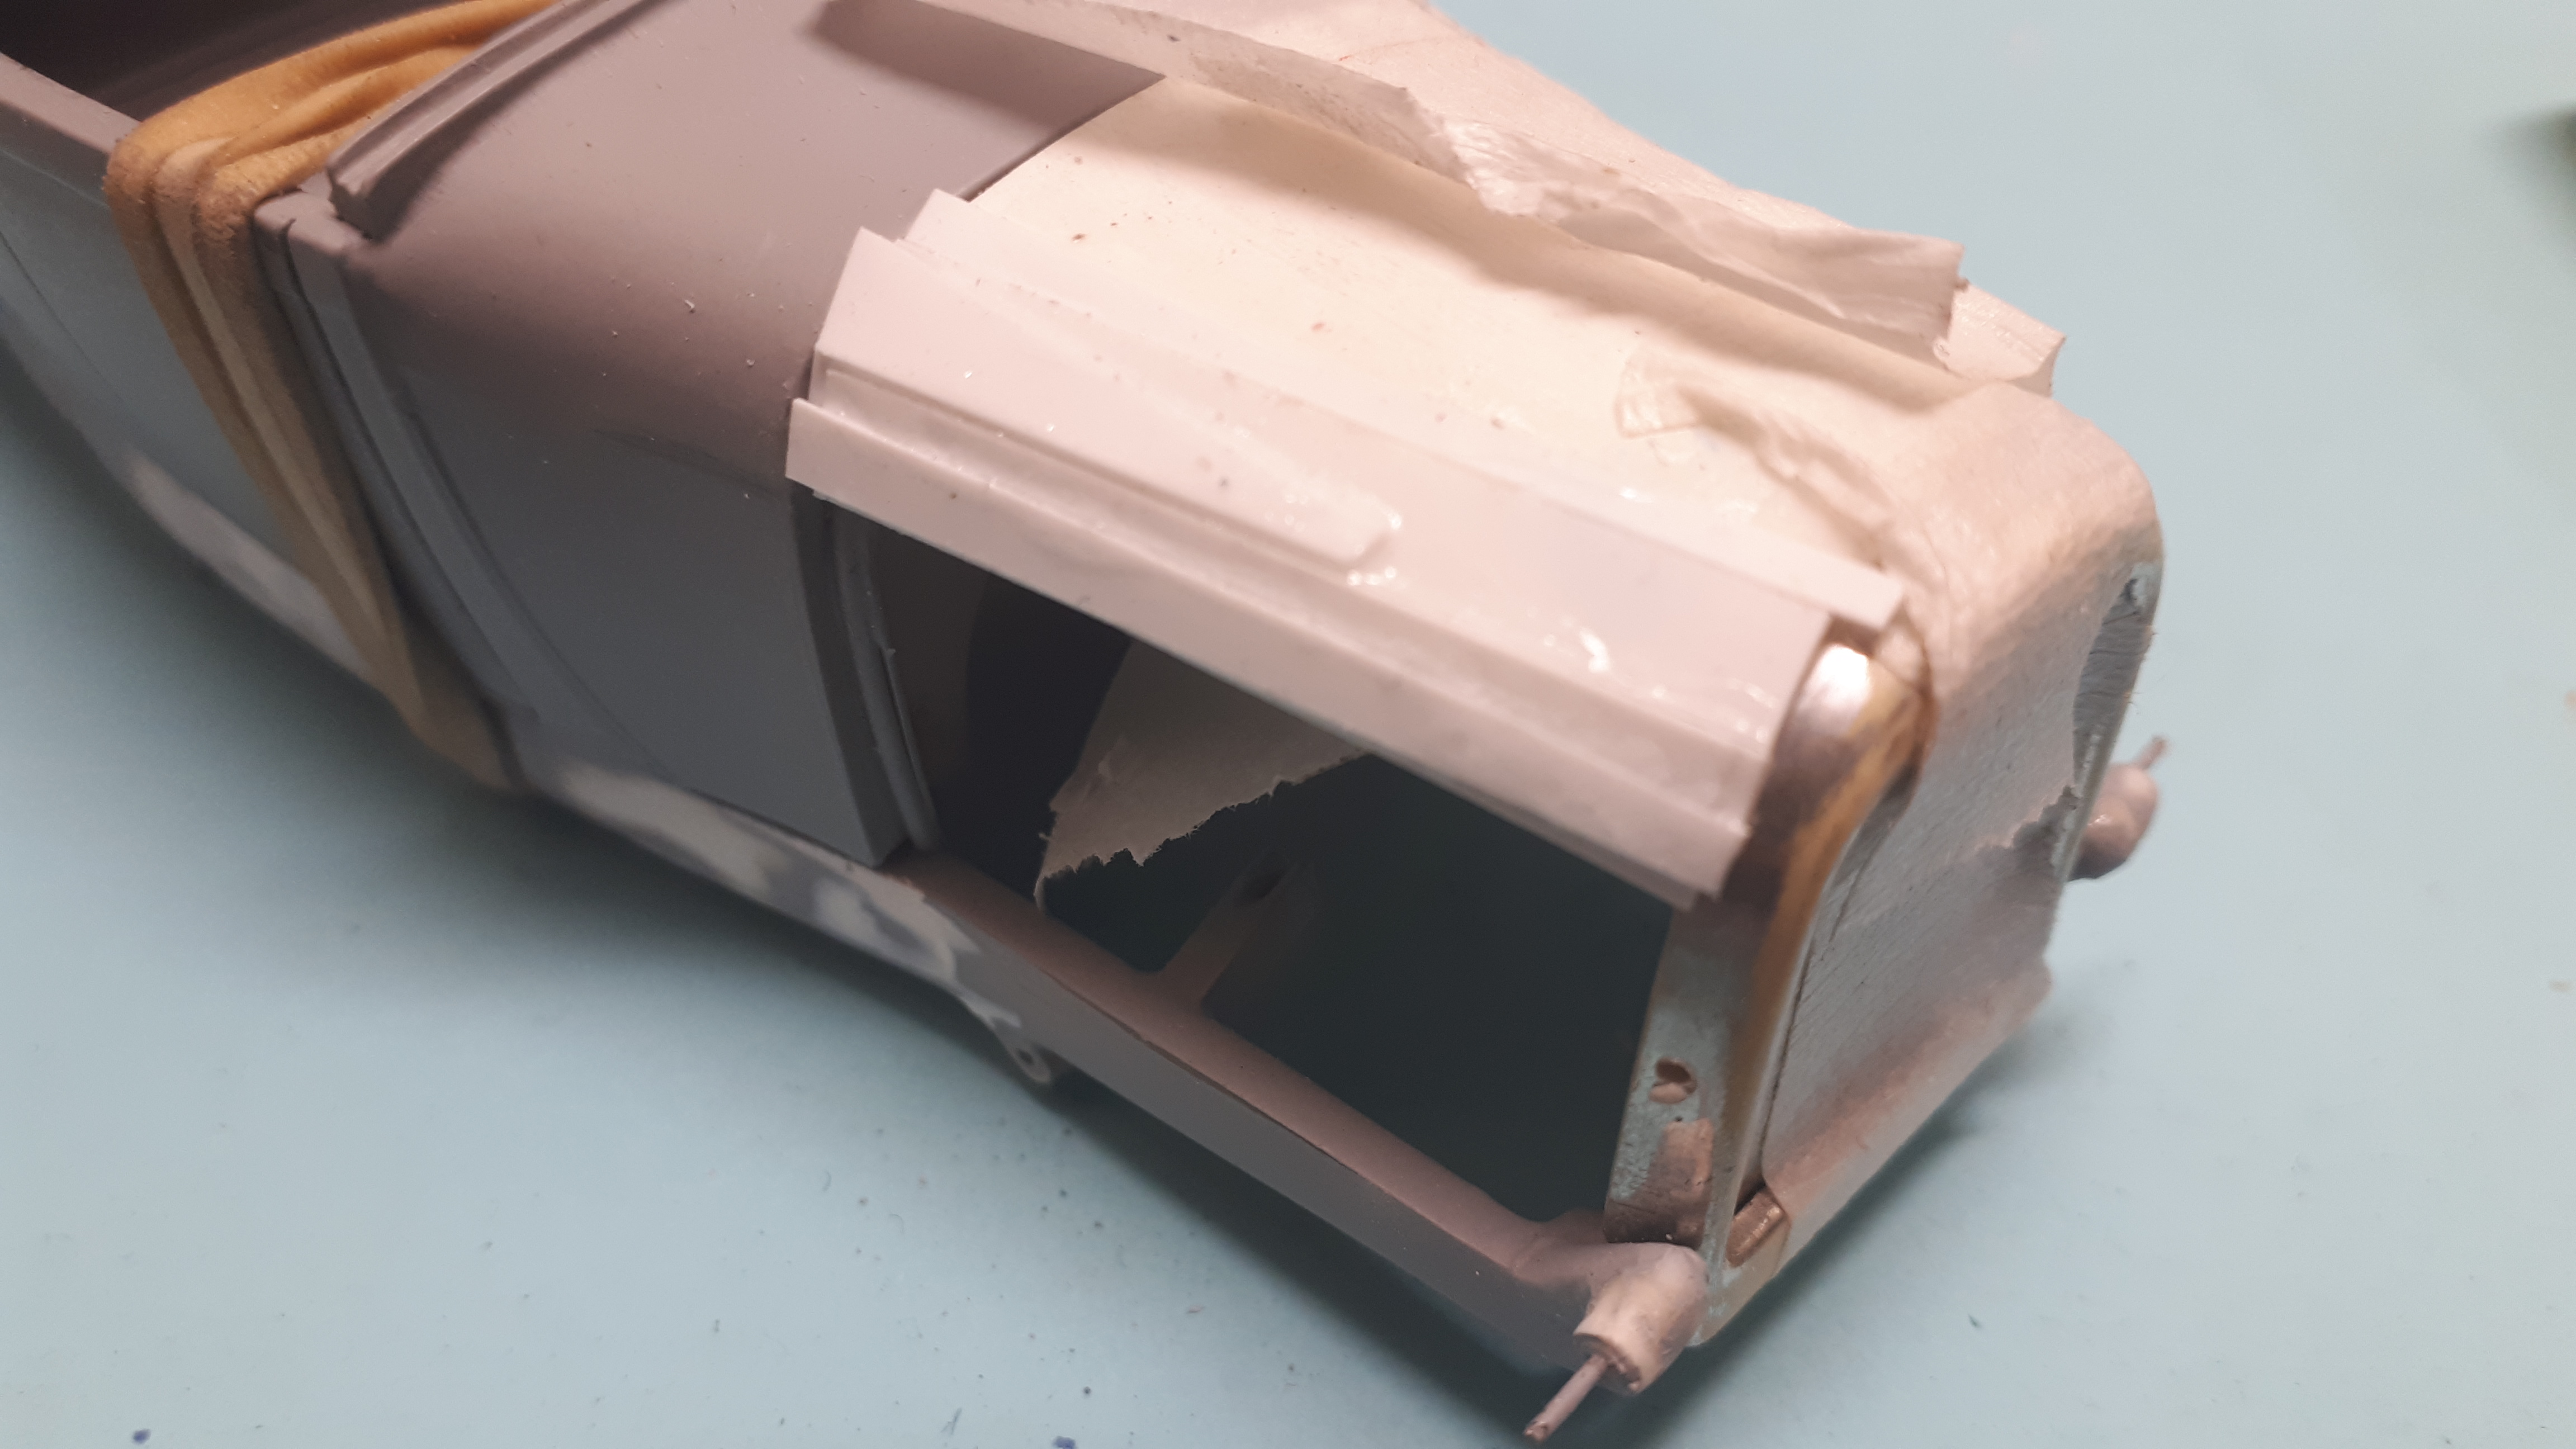
Your wish is my command, Bill! The enxt distinctive feature to attend to was the louvered belly pan. I had this louvered hood in my stash which I have wanted to use for ages. I recently discovered it was off some sort of small car like an Omni or a Chevette or something like that. The light grey plastic suggests AMT but that's as much as I know. I placed it against the frame and traced it with a pencil and then cut it to a rough shape with a pair of scissors. That plastic is soft! I then spent a long time, one stroke of the file at a time, to get it to be a snug fit inside the frame rails. In some shots you might see the small blocks of plastic that I glued onto the inside of the frame rails to ensure that the pan always went back into the same spot on the frame. I then needed to address the area around the rear axle, or diff as we call it. I found in my scrap box the corners off the rear of the Revell Attempt 1 kit and set to to graft these into place. other gaps were filled with scraps of styrene. This took a silly amount of time to perfect but it was an important feature of the car and I just had to persevere.
-
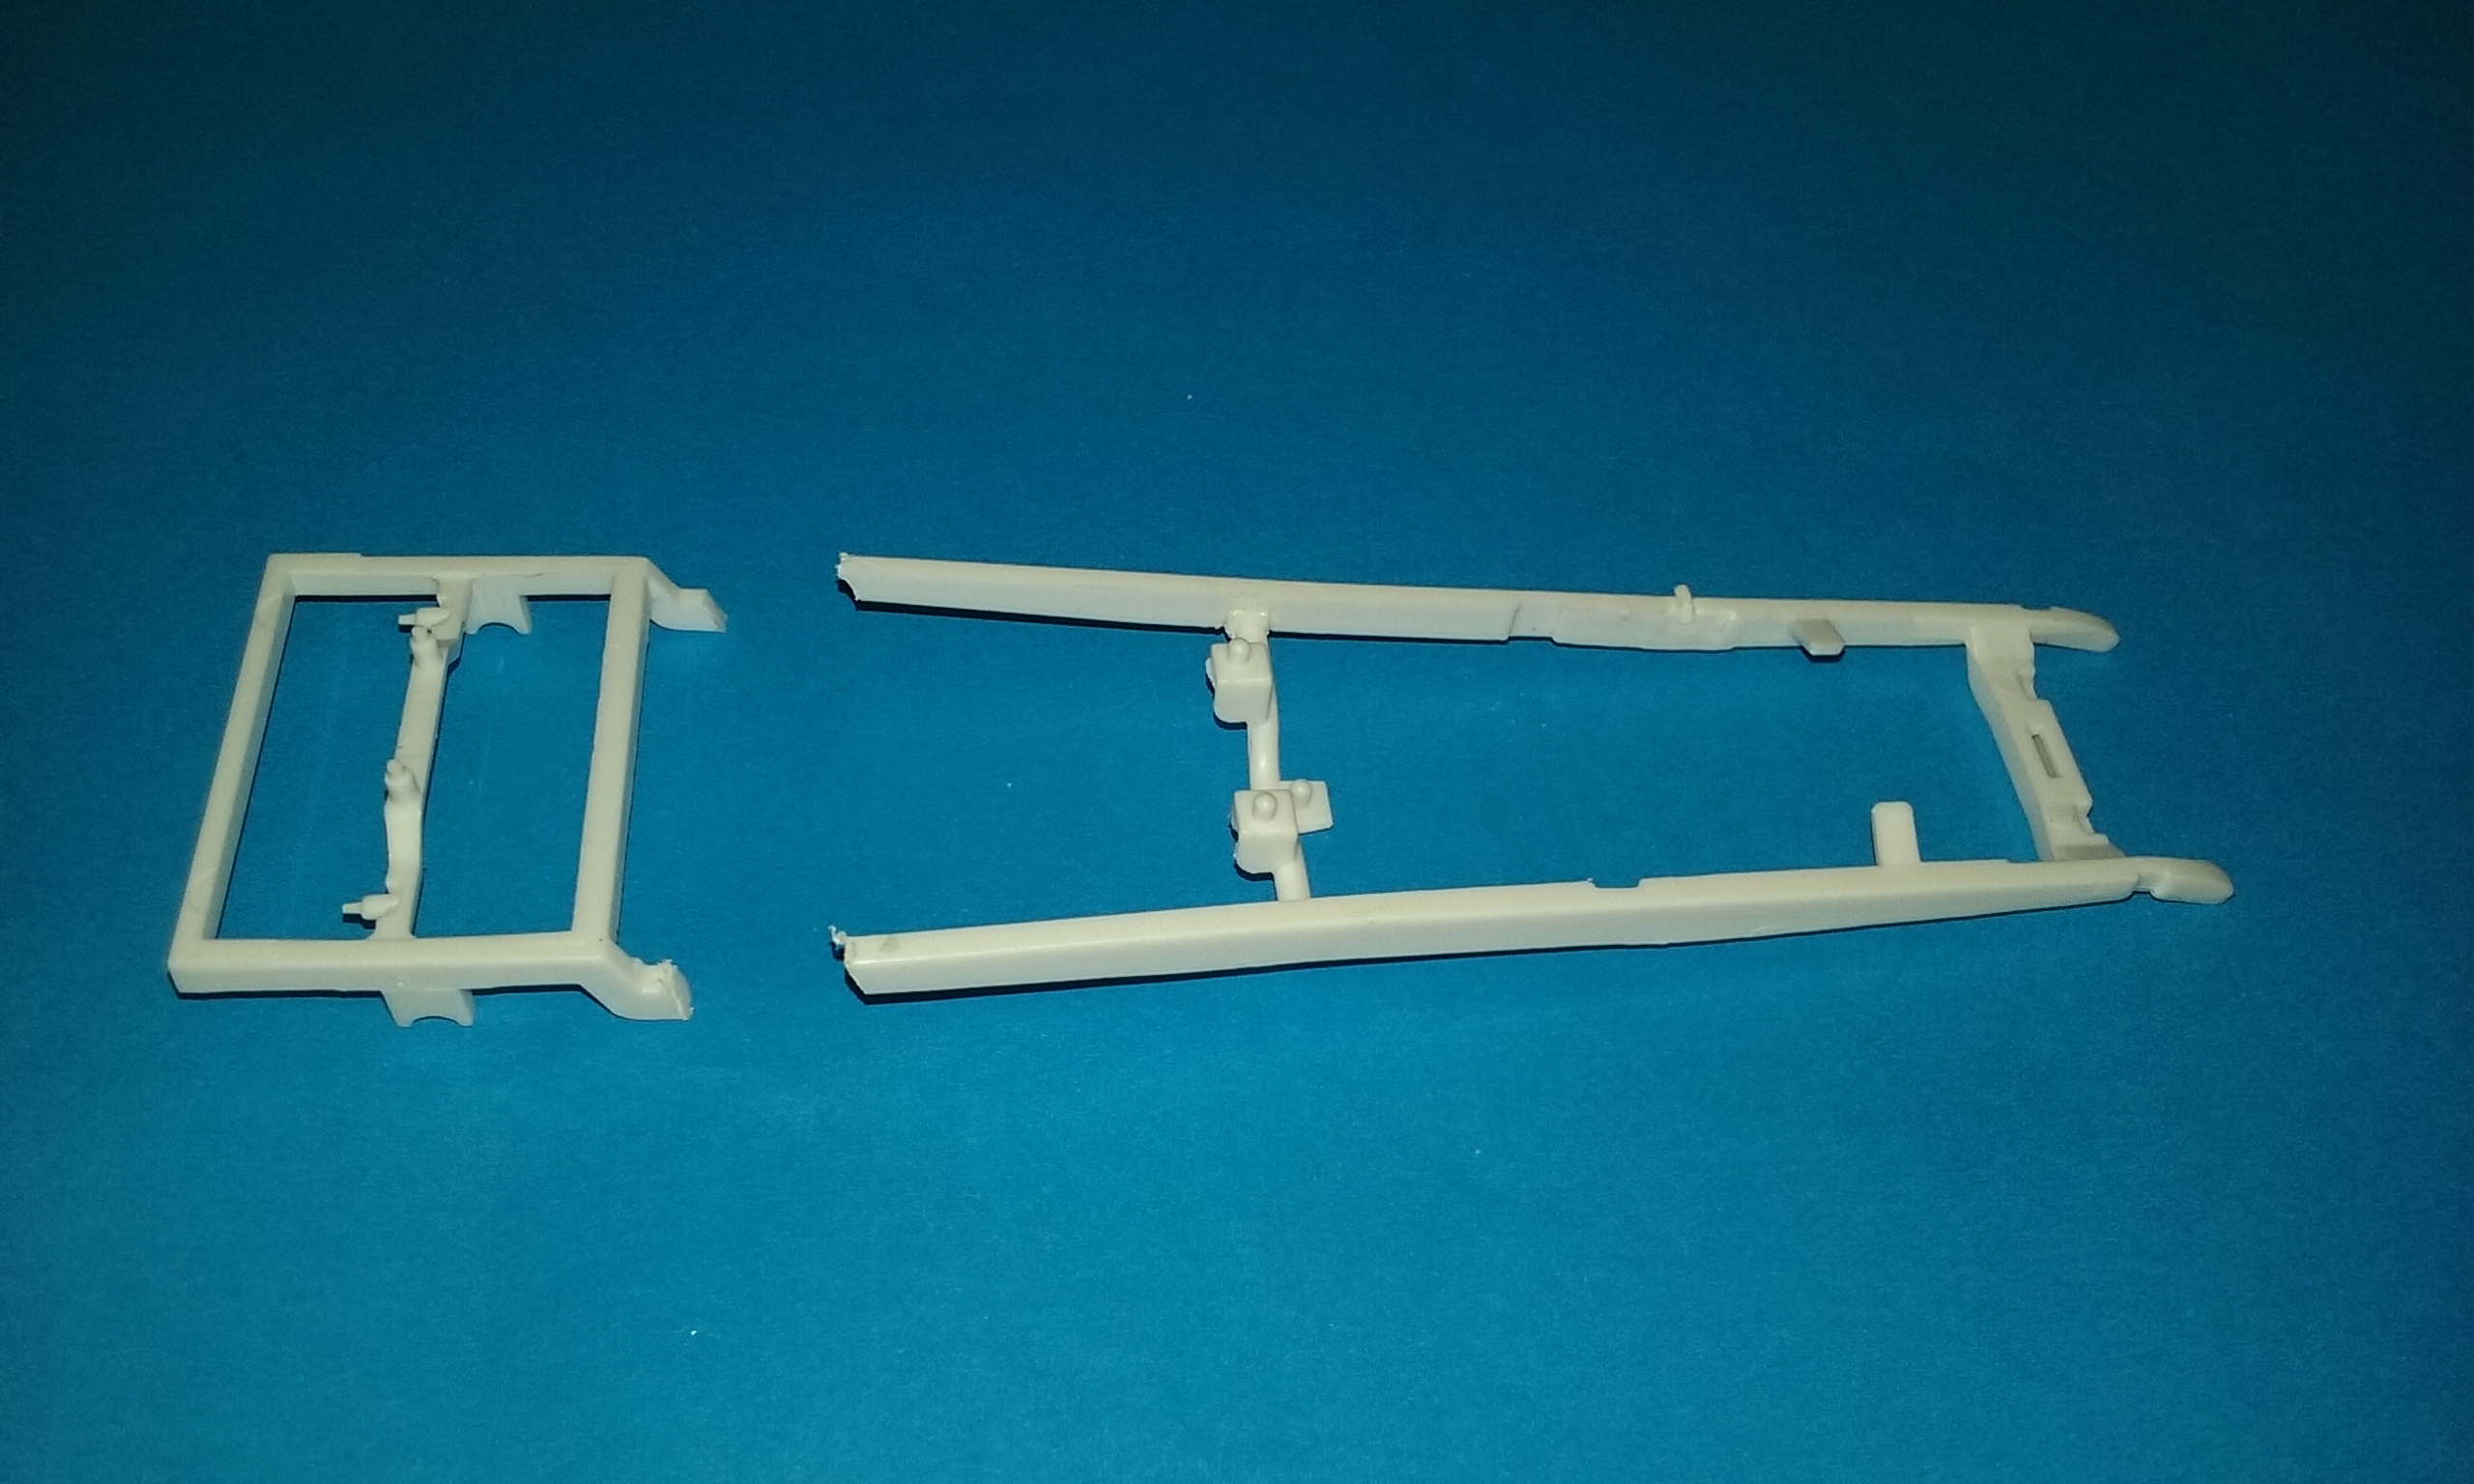
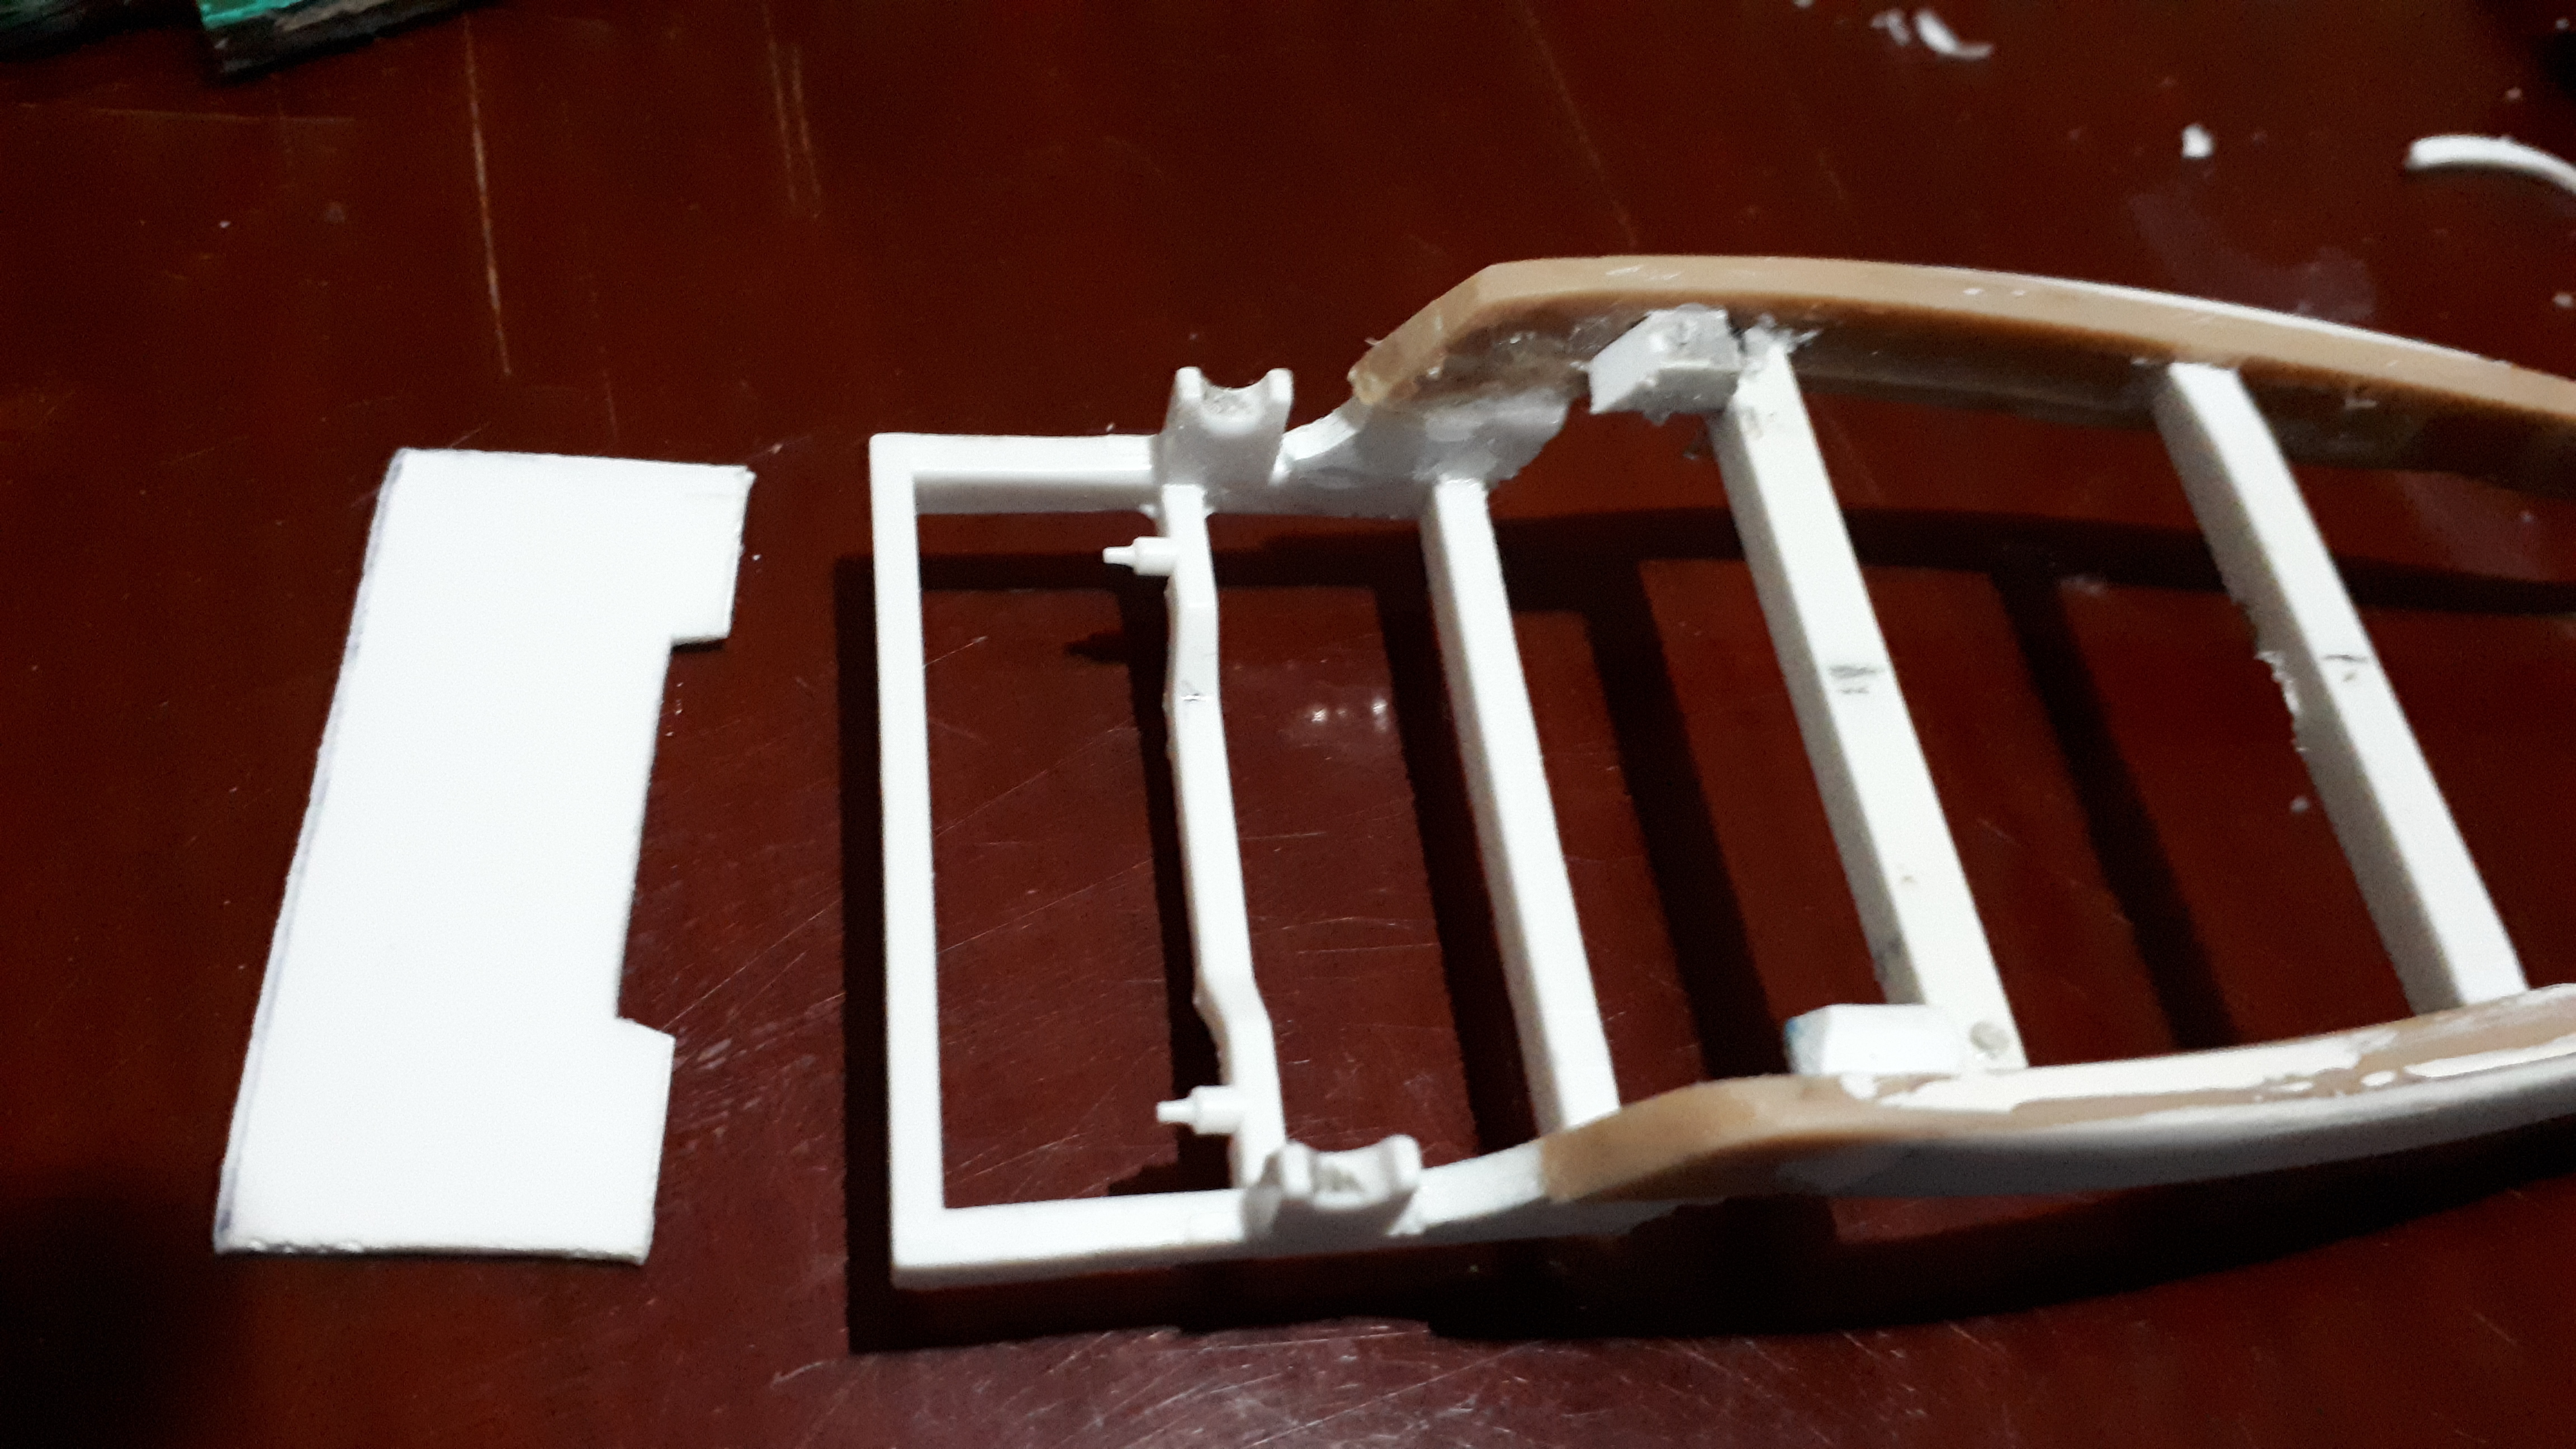
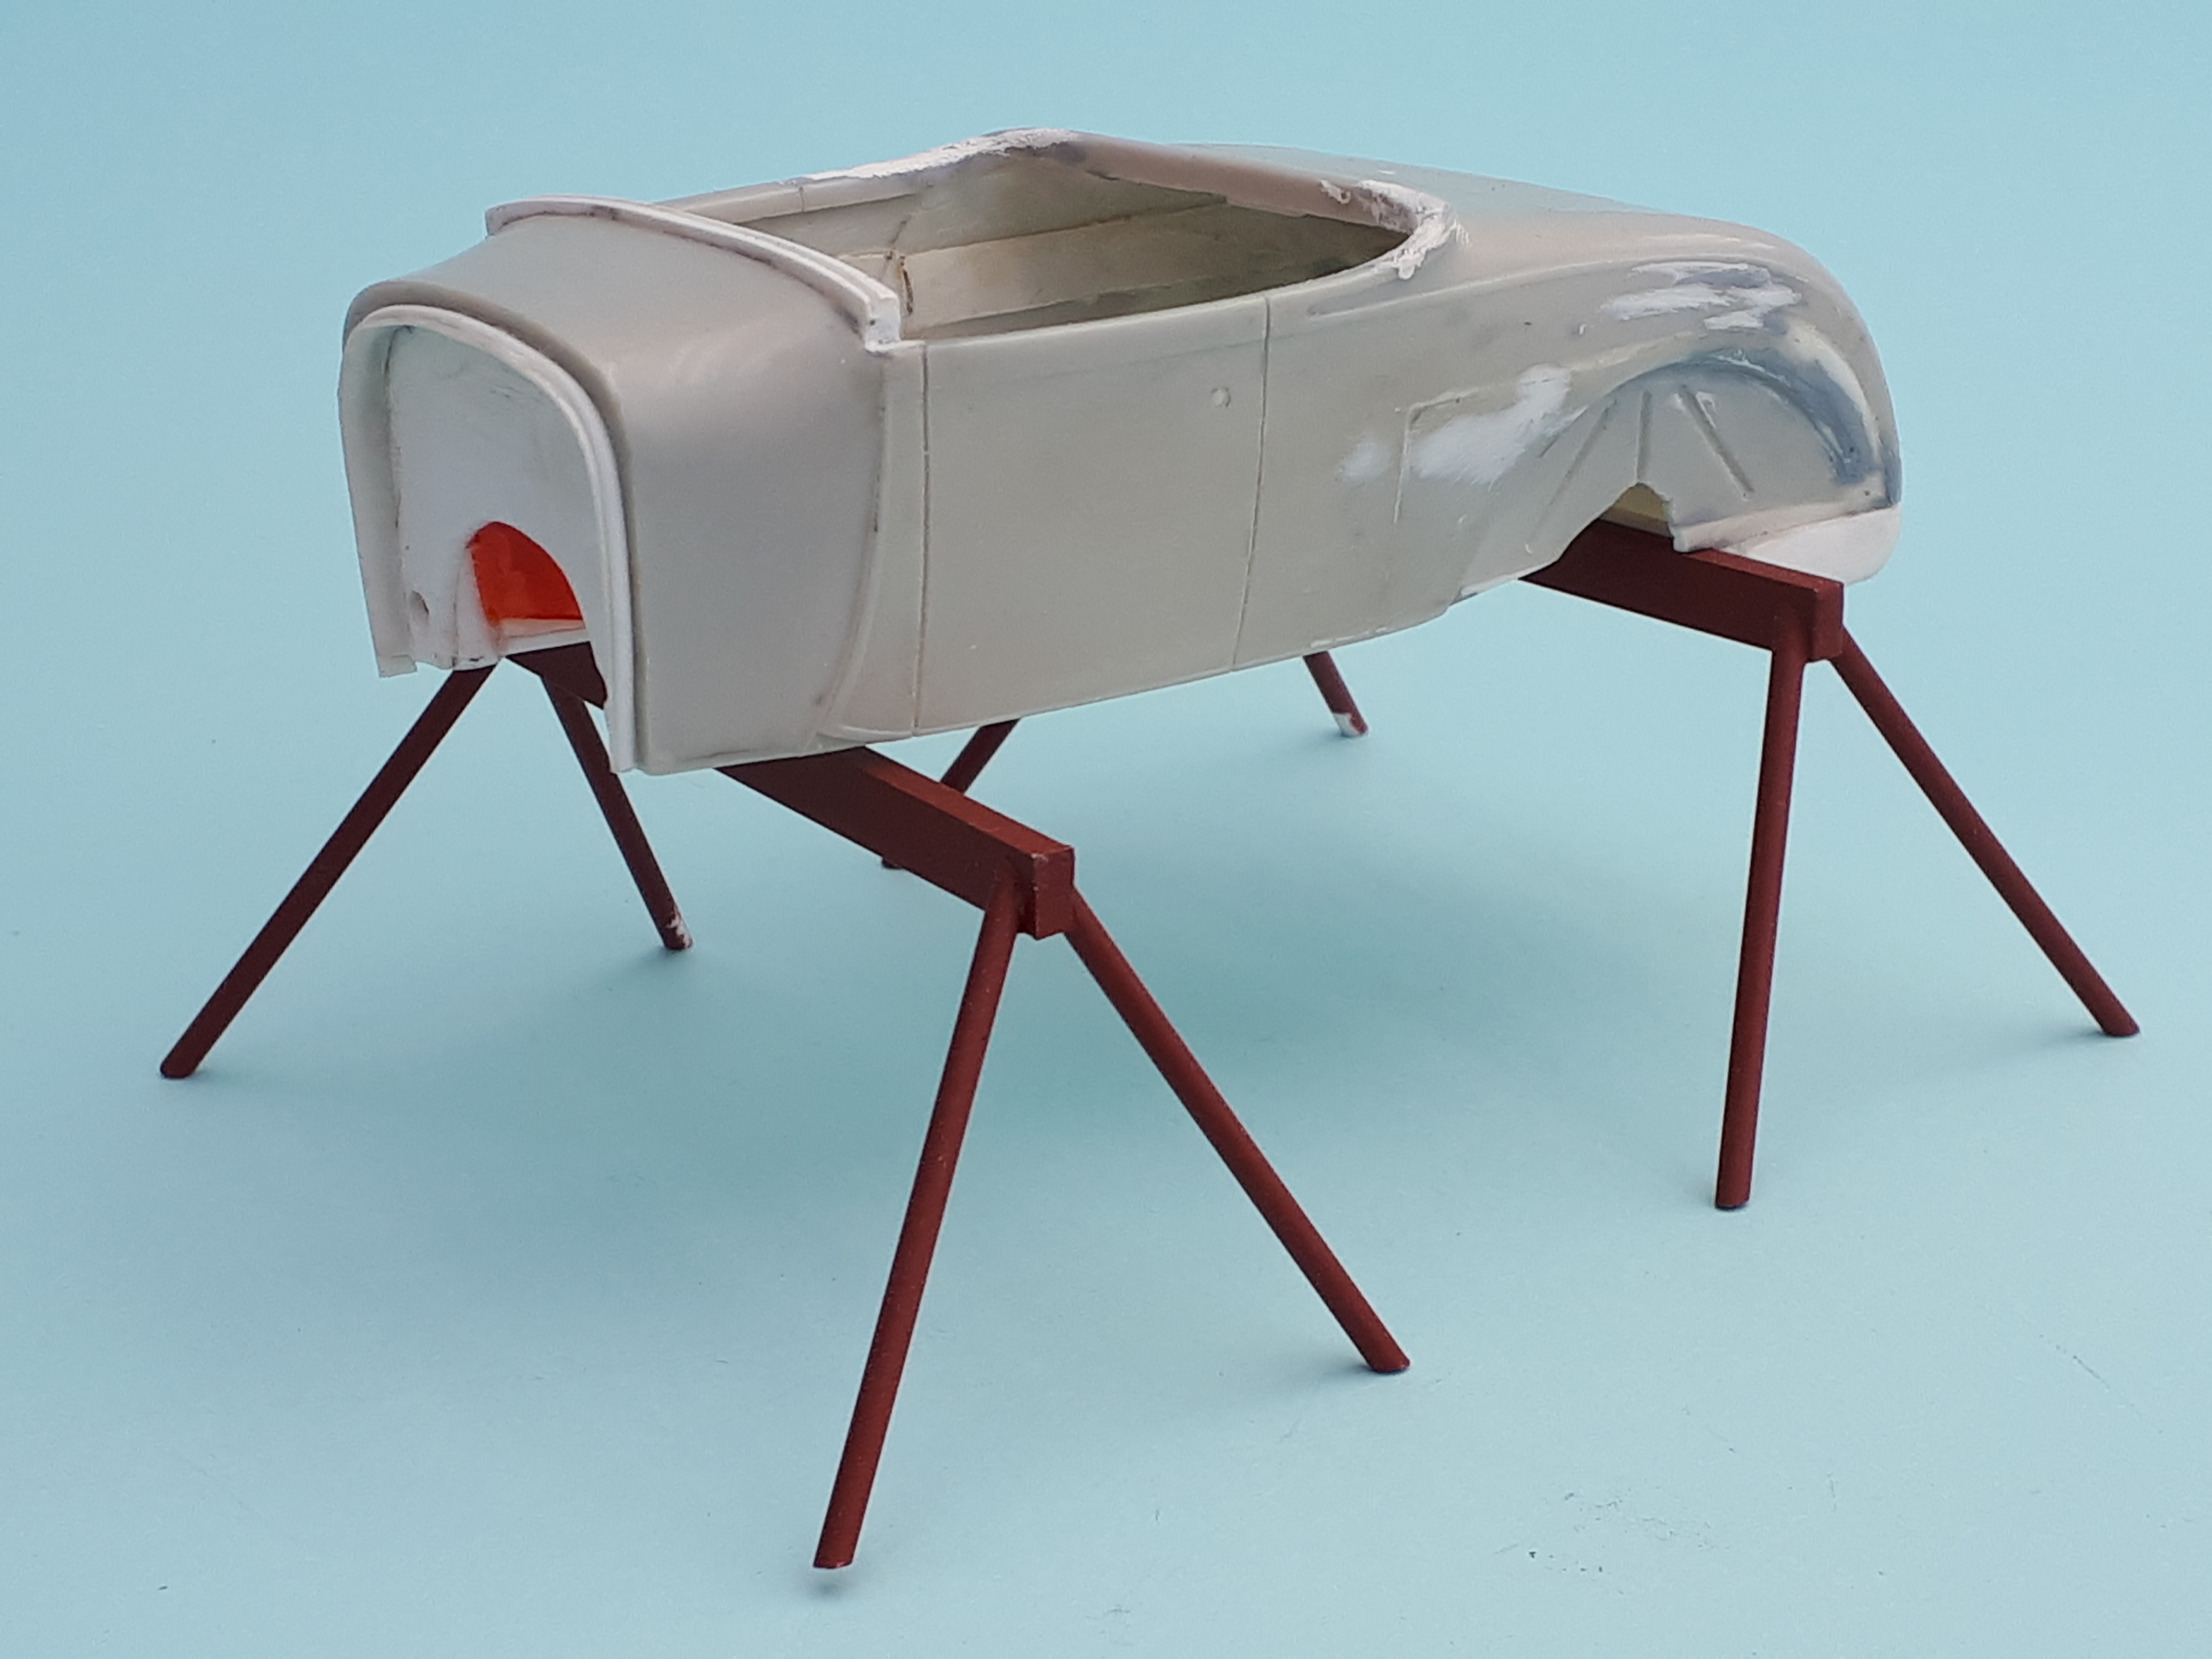
Now that I had a flat floor surface to work against it was time to build up a frame. I wanted to use a fabricated style of frame rather than a stock Deuce style as the white car ended up on later in its life. I started with an AMT 32 Vicky/Phaeton frame. The entire floorboard section was removed, the frame horns were flushed off with the front crossmember and the rear section beyond the frame kickup was removed entirely. I then fabricated two simple square section crossmembers to keep the frame spread apart at the correct width to suit the Model A reoadster bodies – all AMT Deuce frames are narrower than stock anyway. The car is destined to receive a full bellypan so time was not wasted on details that can not be seen when completed. Having a strong stable frame was far more important. I knew from previous experience that with scratchbuilding and extensive modifications, consistency is everything so I drilled three tiny holes through the floor and into the frame. Cut down pins were glued into the frame holes so that the body could be removed and replaced knowing it would go back in the some place every time. This one step saved my bacon countless times during the build! The next step was to fabricate a rear frame section. As I had cut the step up from the Revell Model A frame in my pink 30 coupe from last year, I chose to fit this to the Deuce frame, giving me a set of mounts for the coilover shocks as well as a significant Z-ing effect. This was probably the simplest part of the frame fabrication!
-
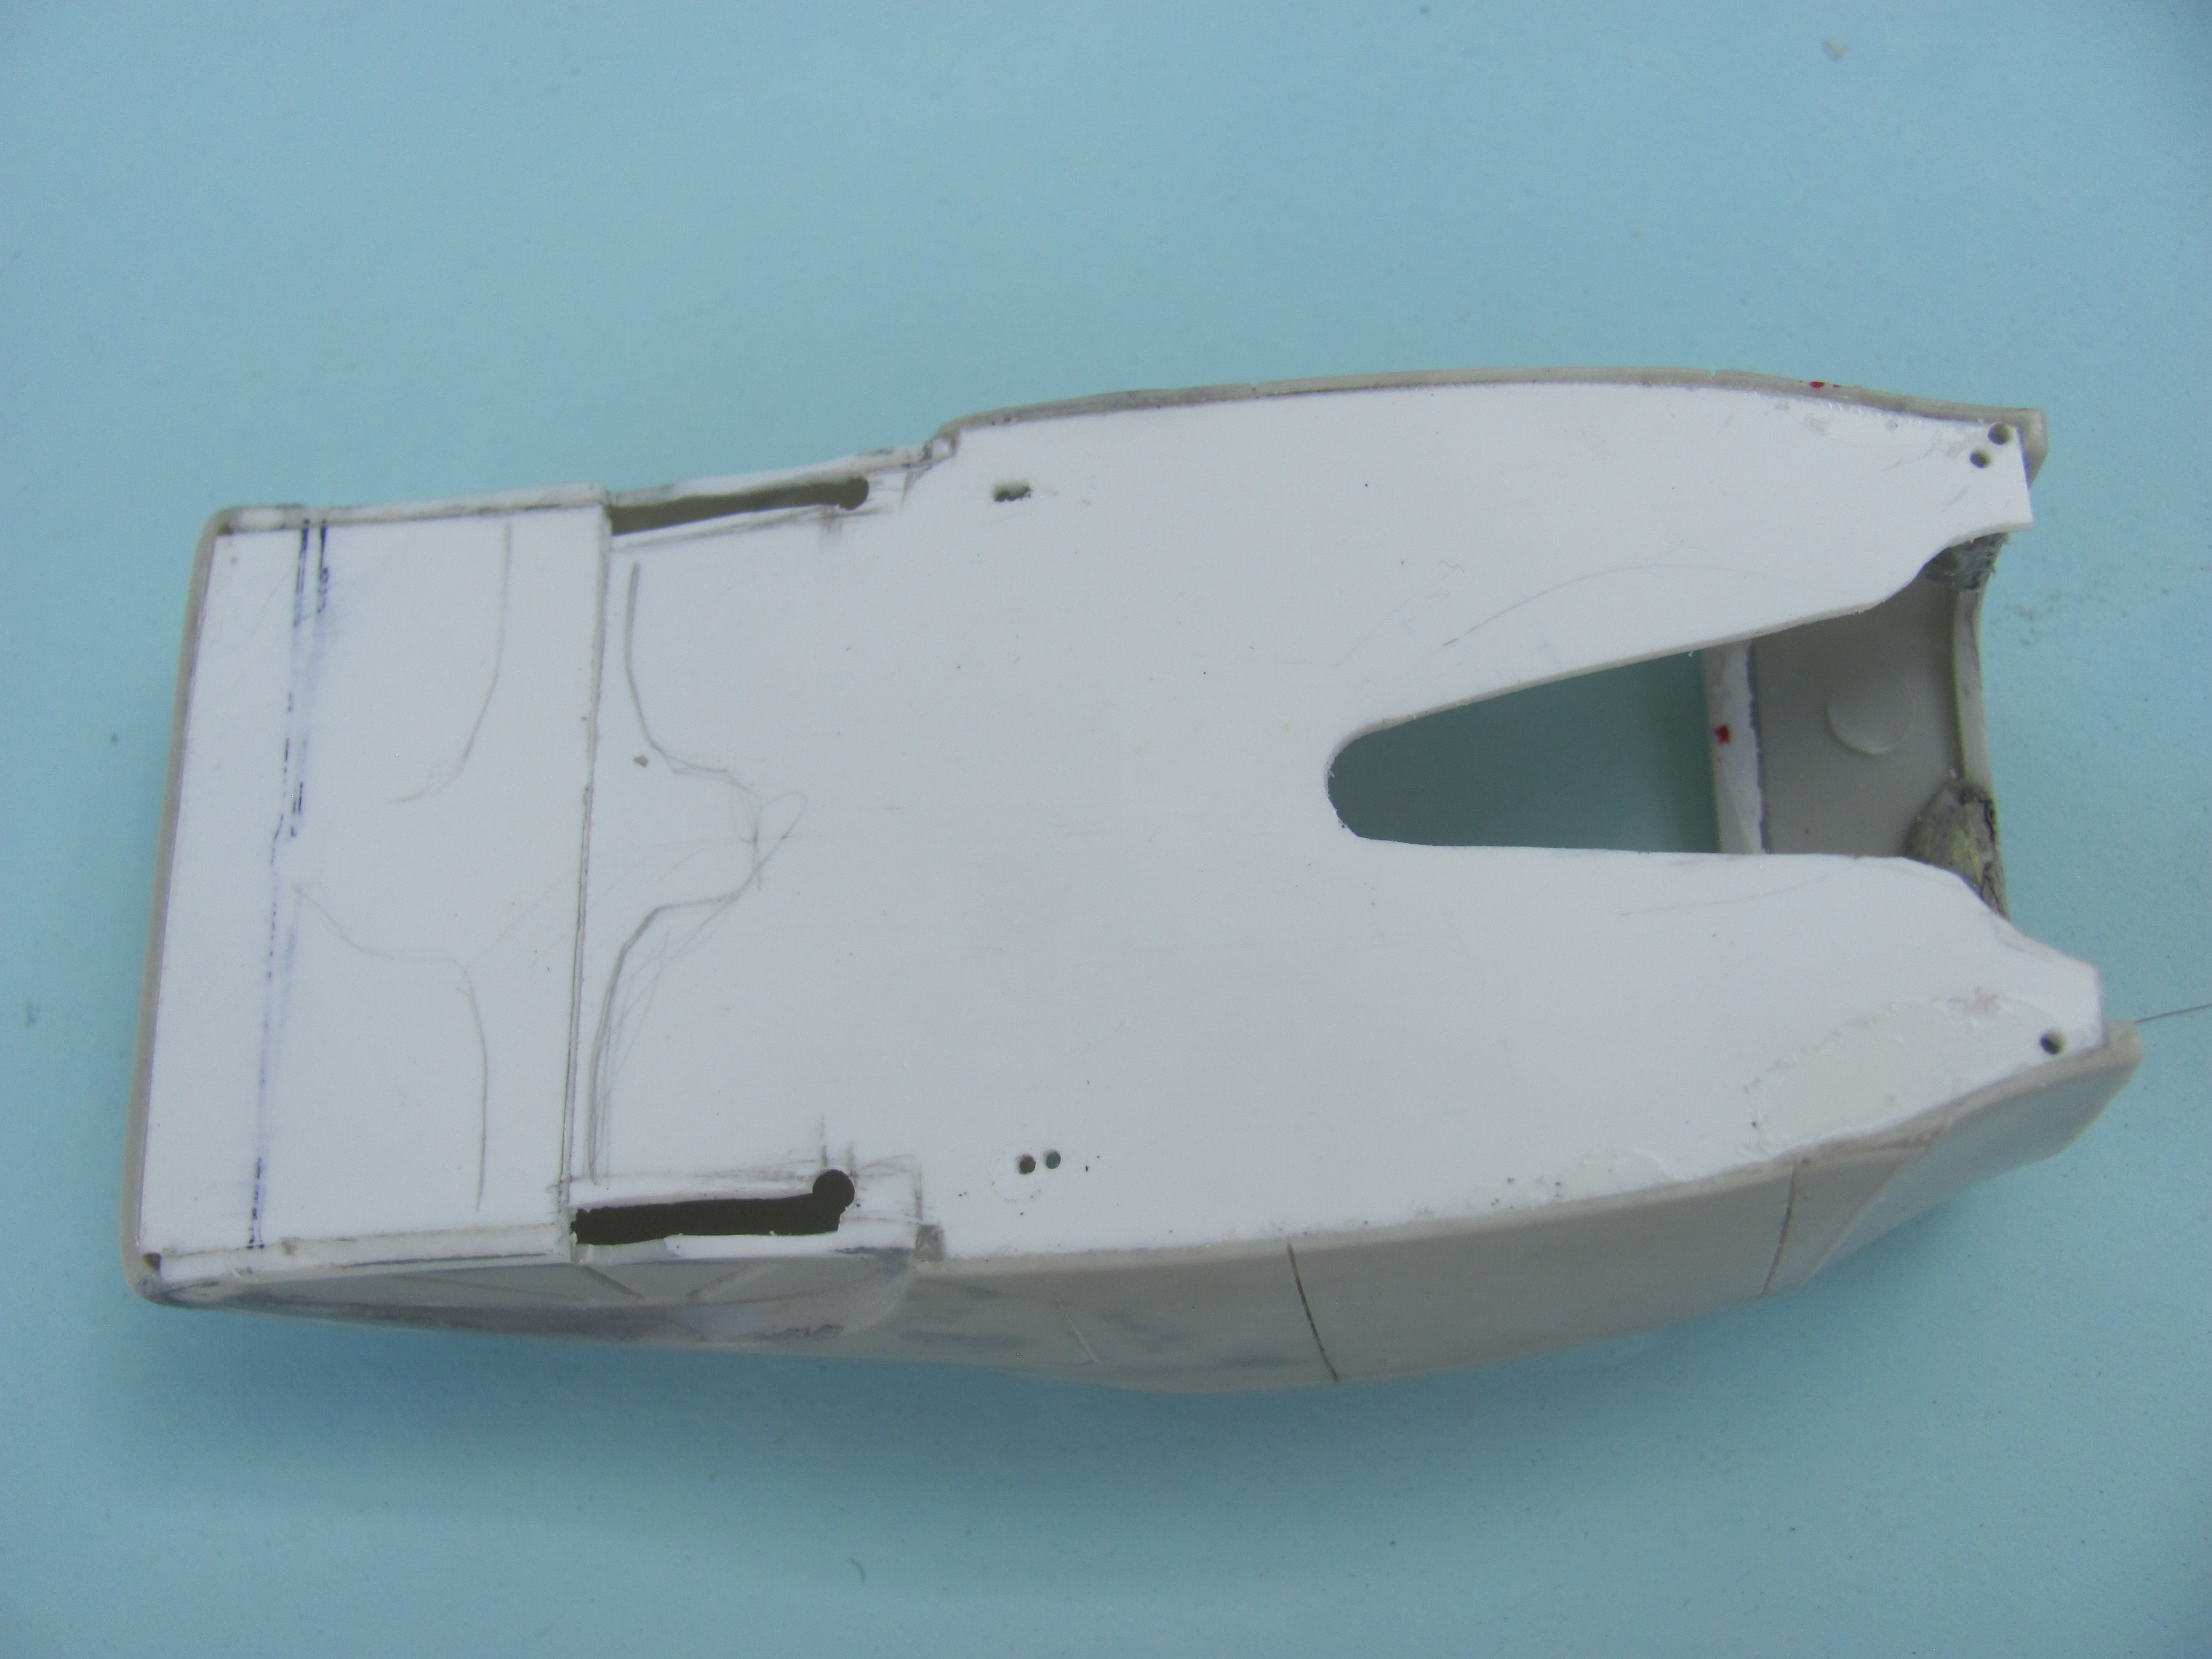
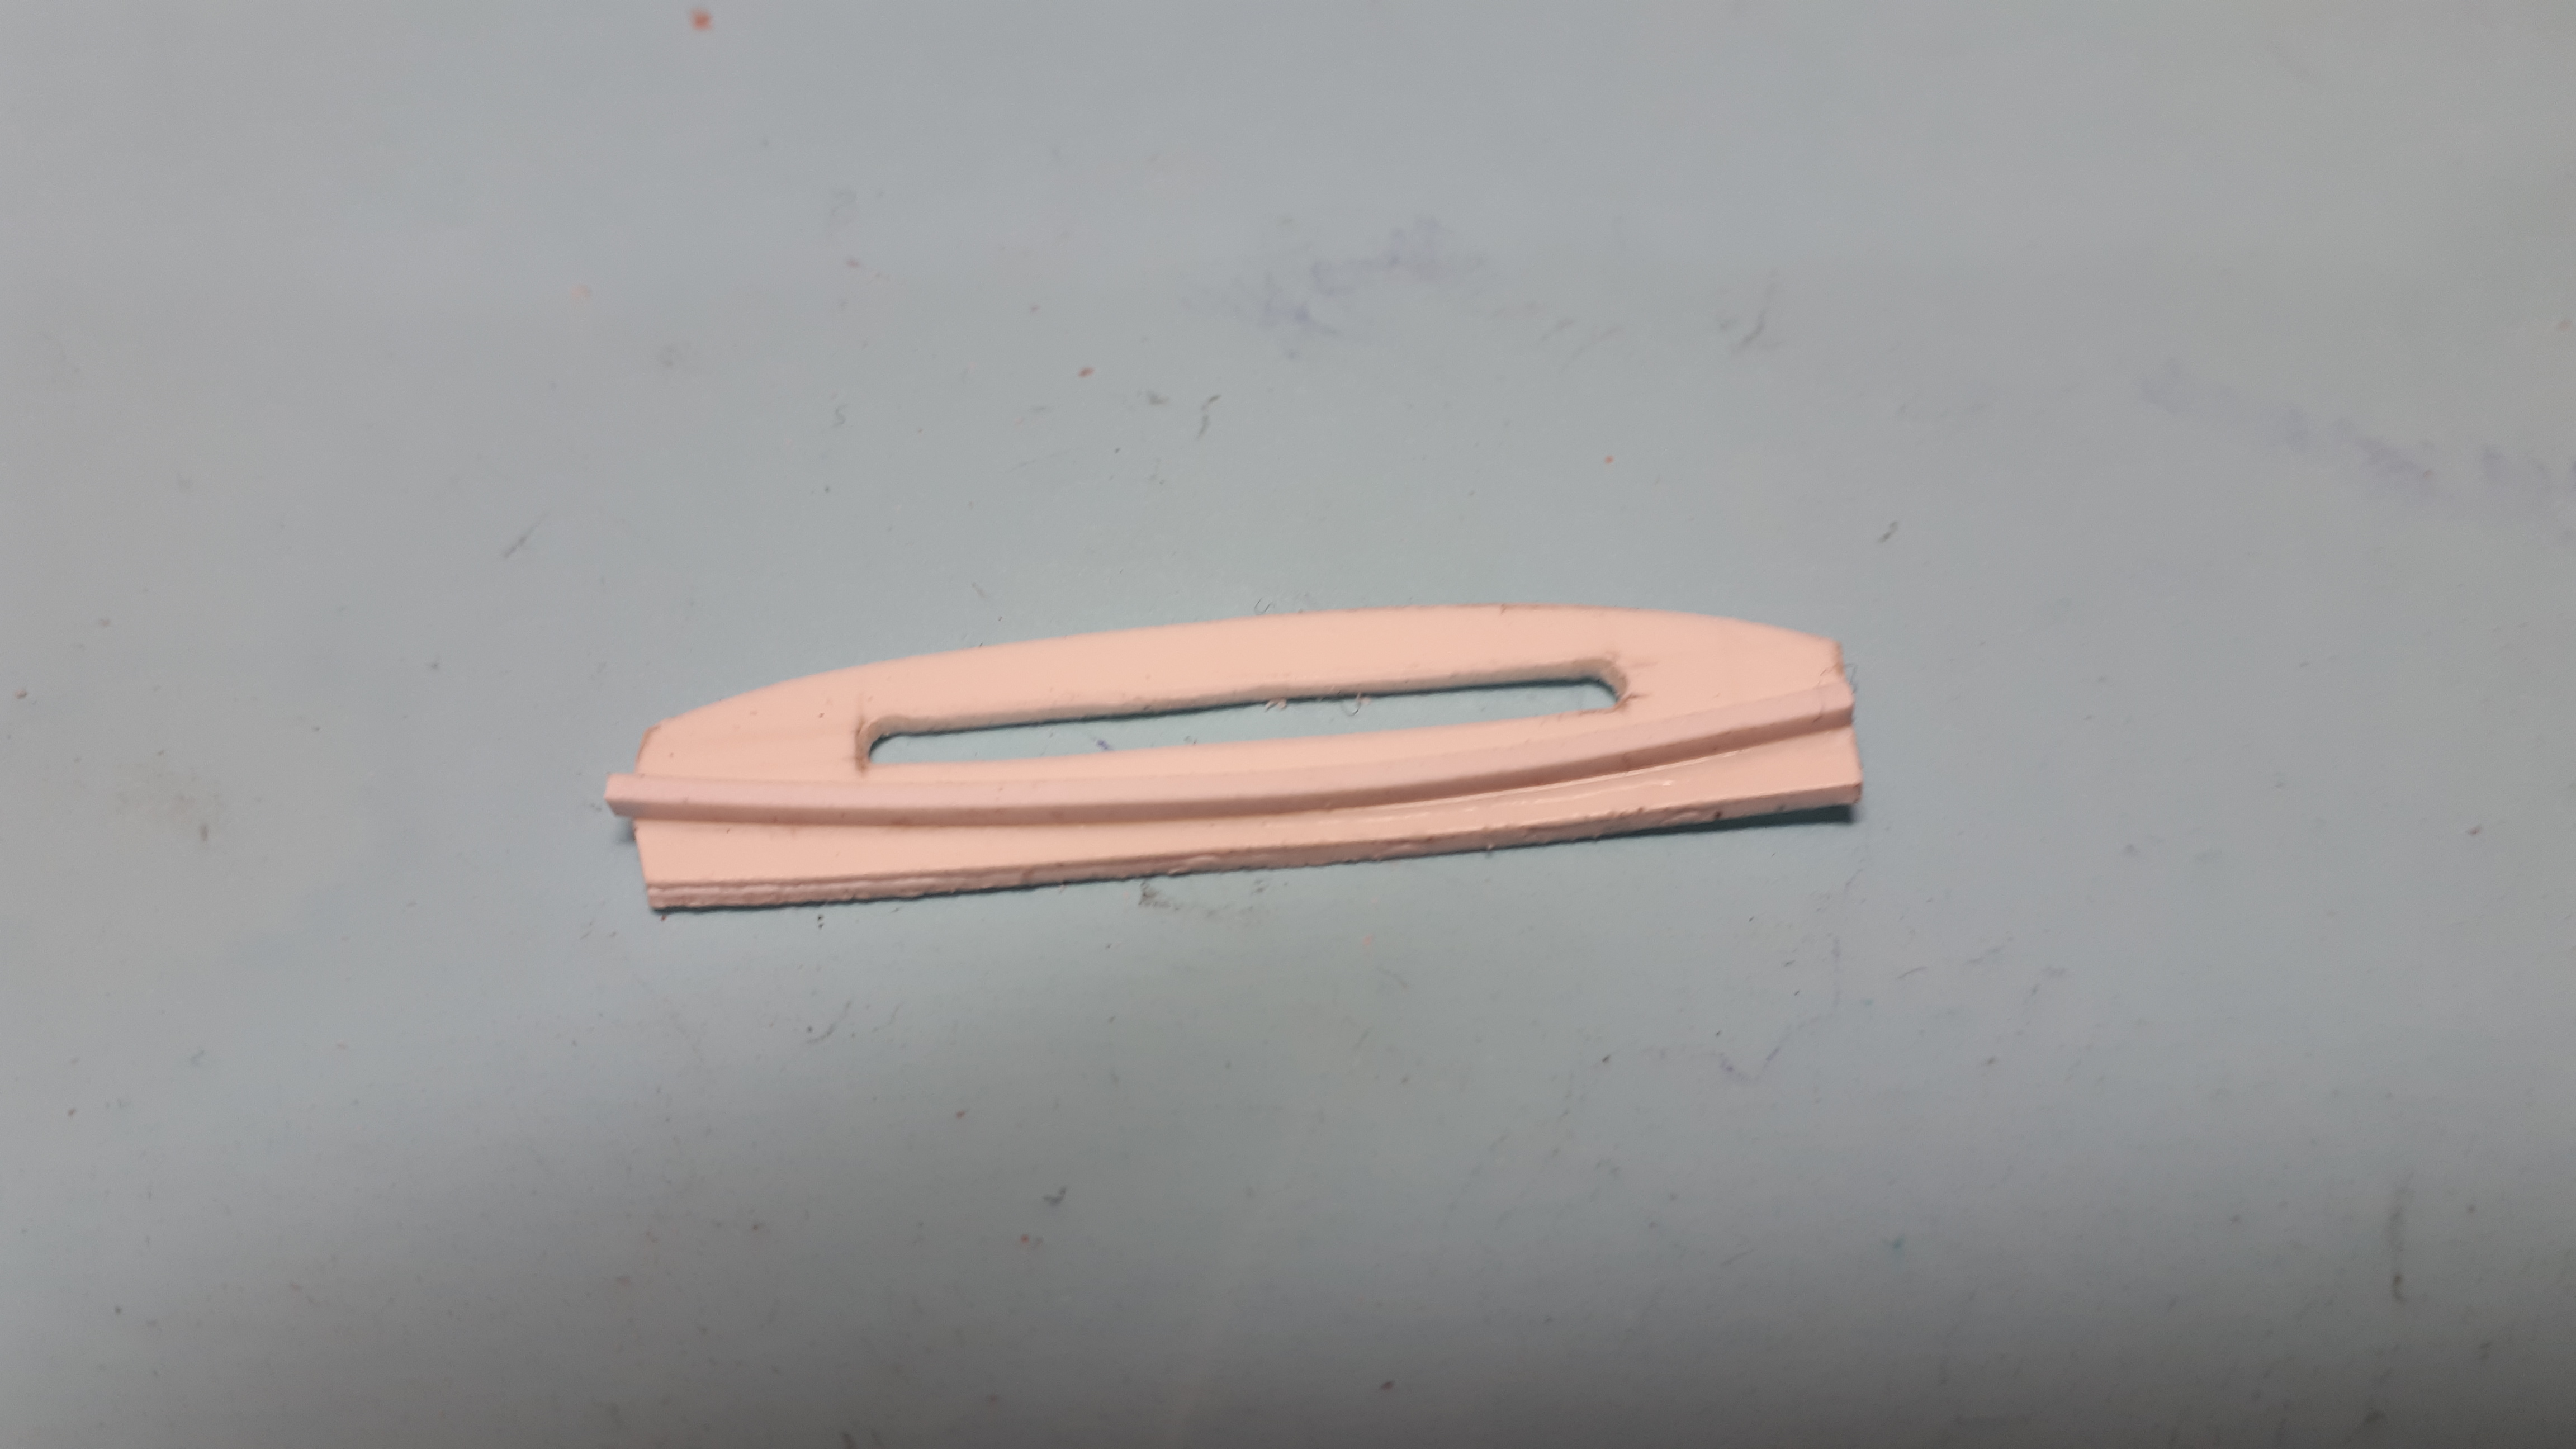
The most distinctive feature of the car to my eyes is that the rear wheel arches were moved forward at least four inches. The front axle was pulled forward a similar amount and this gives the car a ready-to-pounce appearance that really appeals to me. I spent a lot of time pontificating on whether to use the AMT or Revell 29 roadsters body. I finally settled on the AMT but now that it is finished I will say that the Revell might have been the better choice. The body swage marks on the rear quarters are getting very faint on the AMT body and the removable wheel wells of the Revell would have lent themselves to the forward movement of them but at the time I liked the shape better and did not want to ‘waste” the nicely rendered windshield setup on the Revell so the AMT version was chosen. I measured about six mm ahead of the leading edge of the wheel well and made a vertical cut. I then cut up around yet below the rear swage mark and then straight forward horizontally.to remove the wheel well. I then trimmed 4mm off the front of the removed section of quarter panel and glued to back into the body, reinforcing it with scrap styrene from the rear of the joint. I also sanded the body moulding that runs down the body on either side of the trunk lid opening – on a real roadster this is a T shaped moulding that can simply be unbolted. Stretched sprue was inserted into all handle holes and glued with superglue. The seat opening was massaged as there are a lot of mould lines and clumsy transition in this area and the nature of my planned interior was going to expose them. A thin strip of plastic was filed and sanded to shape to represent the trim panel over the top of the dash. I believe the first car used stock Model A but the Corno roadster used a 34 Plymouth item if I remember correctly so I went with that style for my build. I also made a dash from a flat piece of styrene with a long, narrow oblong slot cut and filed into it for the planned digital dashboard. A piece of 1mm styrene was marked out and cut to make a snug fitting floor panel for the roadster body. At this stage it was the full length but you will see from later photos that I eventually removed the section around the rear axle to allow more clearance of the low riding suspension. A piece of square styrene had a slot sawed in it to accept the windshield later on and was then glued to the top of the cowl. I also added a flange to the leading edge of the firewall, filled the tank to cowl seam and removed the door hinges. Buttera did not remove his but I though it added to the slick white look.
-
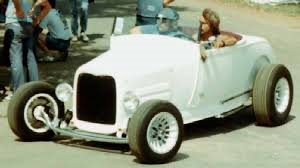
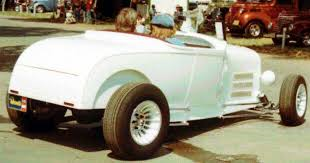
I have been slowly building up a collection, a timeline if you like, of significant 1929 Model A Ford roadster hot rods. The full sized red one in my garage means I am a little biased in this regard. I have already built the Niekamp roadster, the Tony Nancy Buick roadster, the Bud Bryan flathead roadster and have a bunch of others planned. This thread is to follow the build of my rendition of the John Buttera white roadster that debuted in 1976, yep, 45 years ago! It was the car that singlehandedly kicked off the billet smoothy movement, a style often berated by contemporary “old school” rodders. I get this to some degree because the billet era evolved into some very tacky, tasteless and overdone cars but the one that started it all was in fact, an extremely traditional car! In the interests of full disclosure, this model has been finished for a few months now. I started the build at least four years ago but never detailed it on here at the time because I knew it was going to be a very long term model and I have no shortage of stale W.I.P.s on this forum! In recent years I have spent many weeks away from home working on remote mining sites in the Australian outback. This is the model I took with me to work on in my mining camp accommodation (usually just room for a bed, a small desk and a bar fridge!) Because there was a massive amount of fabrication involved before any actual assembly took place, it was the ideal project to travel with. Airport baggage handlers are expert at dismantling any assembly that you might have done! It was a tough car to research. There are at least two white John Buttera roadsters plus a red one as best I can tell, built for John Corno, but these cars seemed to have had significant changes to wheels, tyres, upholstery and even frames and suspension at different times in their evolution. There are surprisingly few photos on the net. I had three magazine articles on the roadsters, but I appear to have accidentally misplaced two of them since I started the build. The one I still have handy, Rod Action August 76, shows the car when it was brand new and it has some features that you would never associate with a high tech car, especially the huge, overstuffed, maroon velour front seat – I kid you not. So this is a long winded way of saying that I decided to build a tribute car, embodying the features of all three that particularly appealed to me and adding a few touches of my own. Here's a few photos I borrowed from the net so you can see what I was aiming for.
-
Stunning work! That firewall is one of he most beautifully sculptured firewalls I have ever seen! Superb finish and scale fidellity. Cheers Alan
-
Flipnose street machines - 2 classic Chevrolets...
alan barton replied to 1959scudetto's topic in Model Cars
Wow, someone finally did something really different with a 57 Chevy! For a box stock model, it looks like you put a lot of your own touches on it. It is encouraging to see how good it looks when properly assembled. I have a mild glue bomb that is waiting in line but my intention is to build it as 57 post version of the Badman, with original Tom Daniels decals. I also plan to use the stripped 57 chassis from an MPC Slammer modified kit to upgrade the generic chassis that MPC used. I'm thinking it might move up the list more quickly now! Congratulations on a great model! Cheers Alan -
Heavily Chopped & Channeled '32 Ford 3-window
alan barton replied to Bernard Kron's topic in WIP: Model Cars
So low it could parachute out of a snake's bum and freefall for the first ten minutes! -
Nice job, Ray, You wouldn't know it was 1/32nd scale from the photos. I build 1/32nd scale hot rods and most of them are OBVIOUSLY 1/32nd scale - the various manufacturers were not as true to scale as Revell was with this one! Cheers Alan
-
Mission Accomplished - 61 Galaxie Police Car
alan barton replied to alan barton's topic in Model Cars
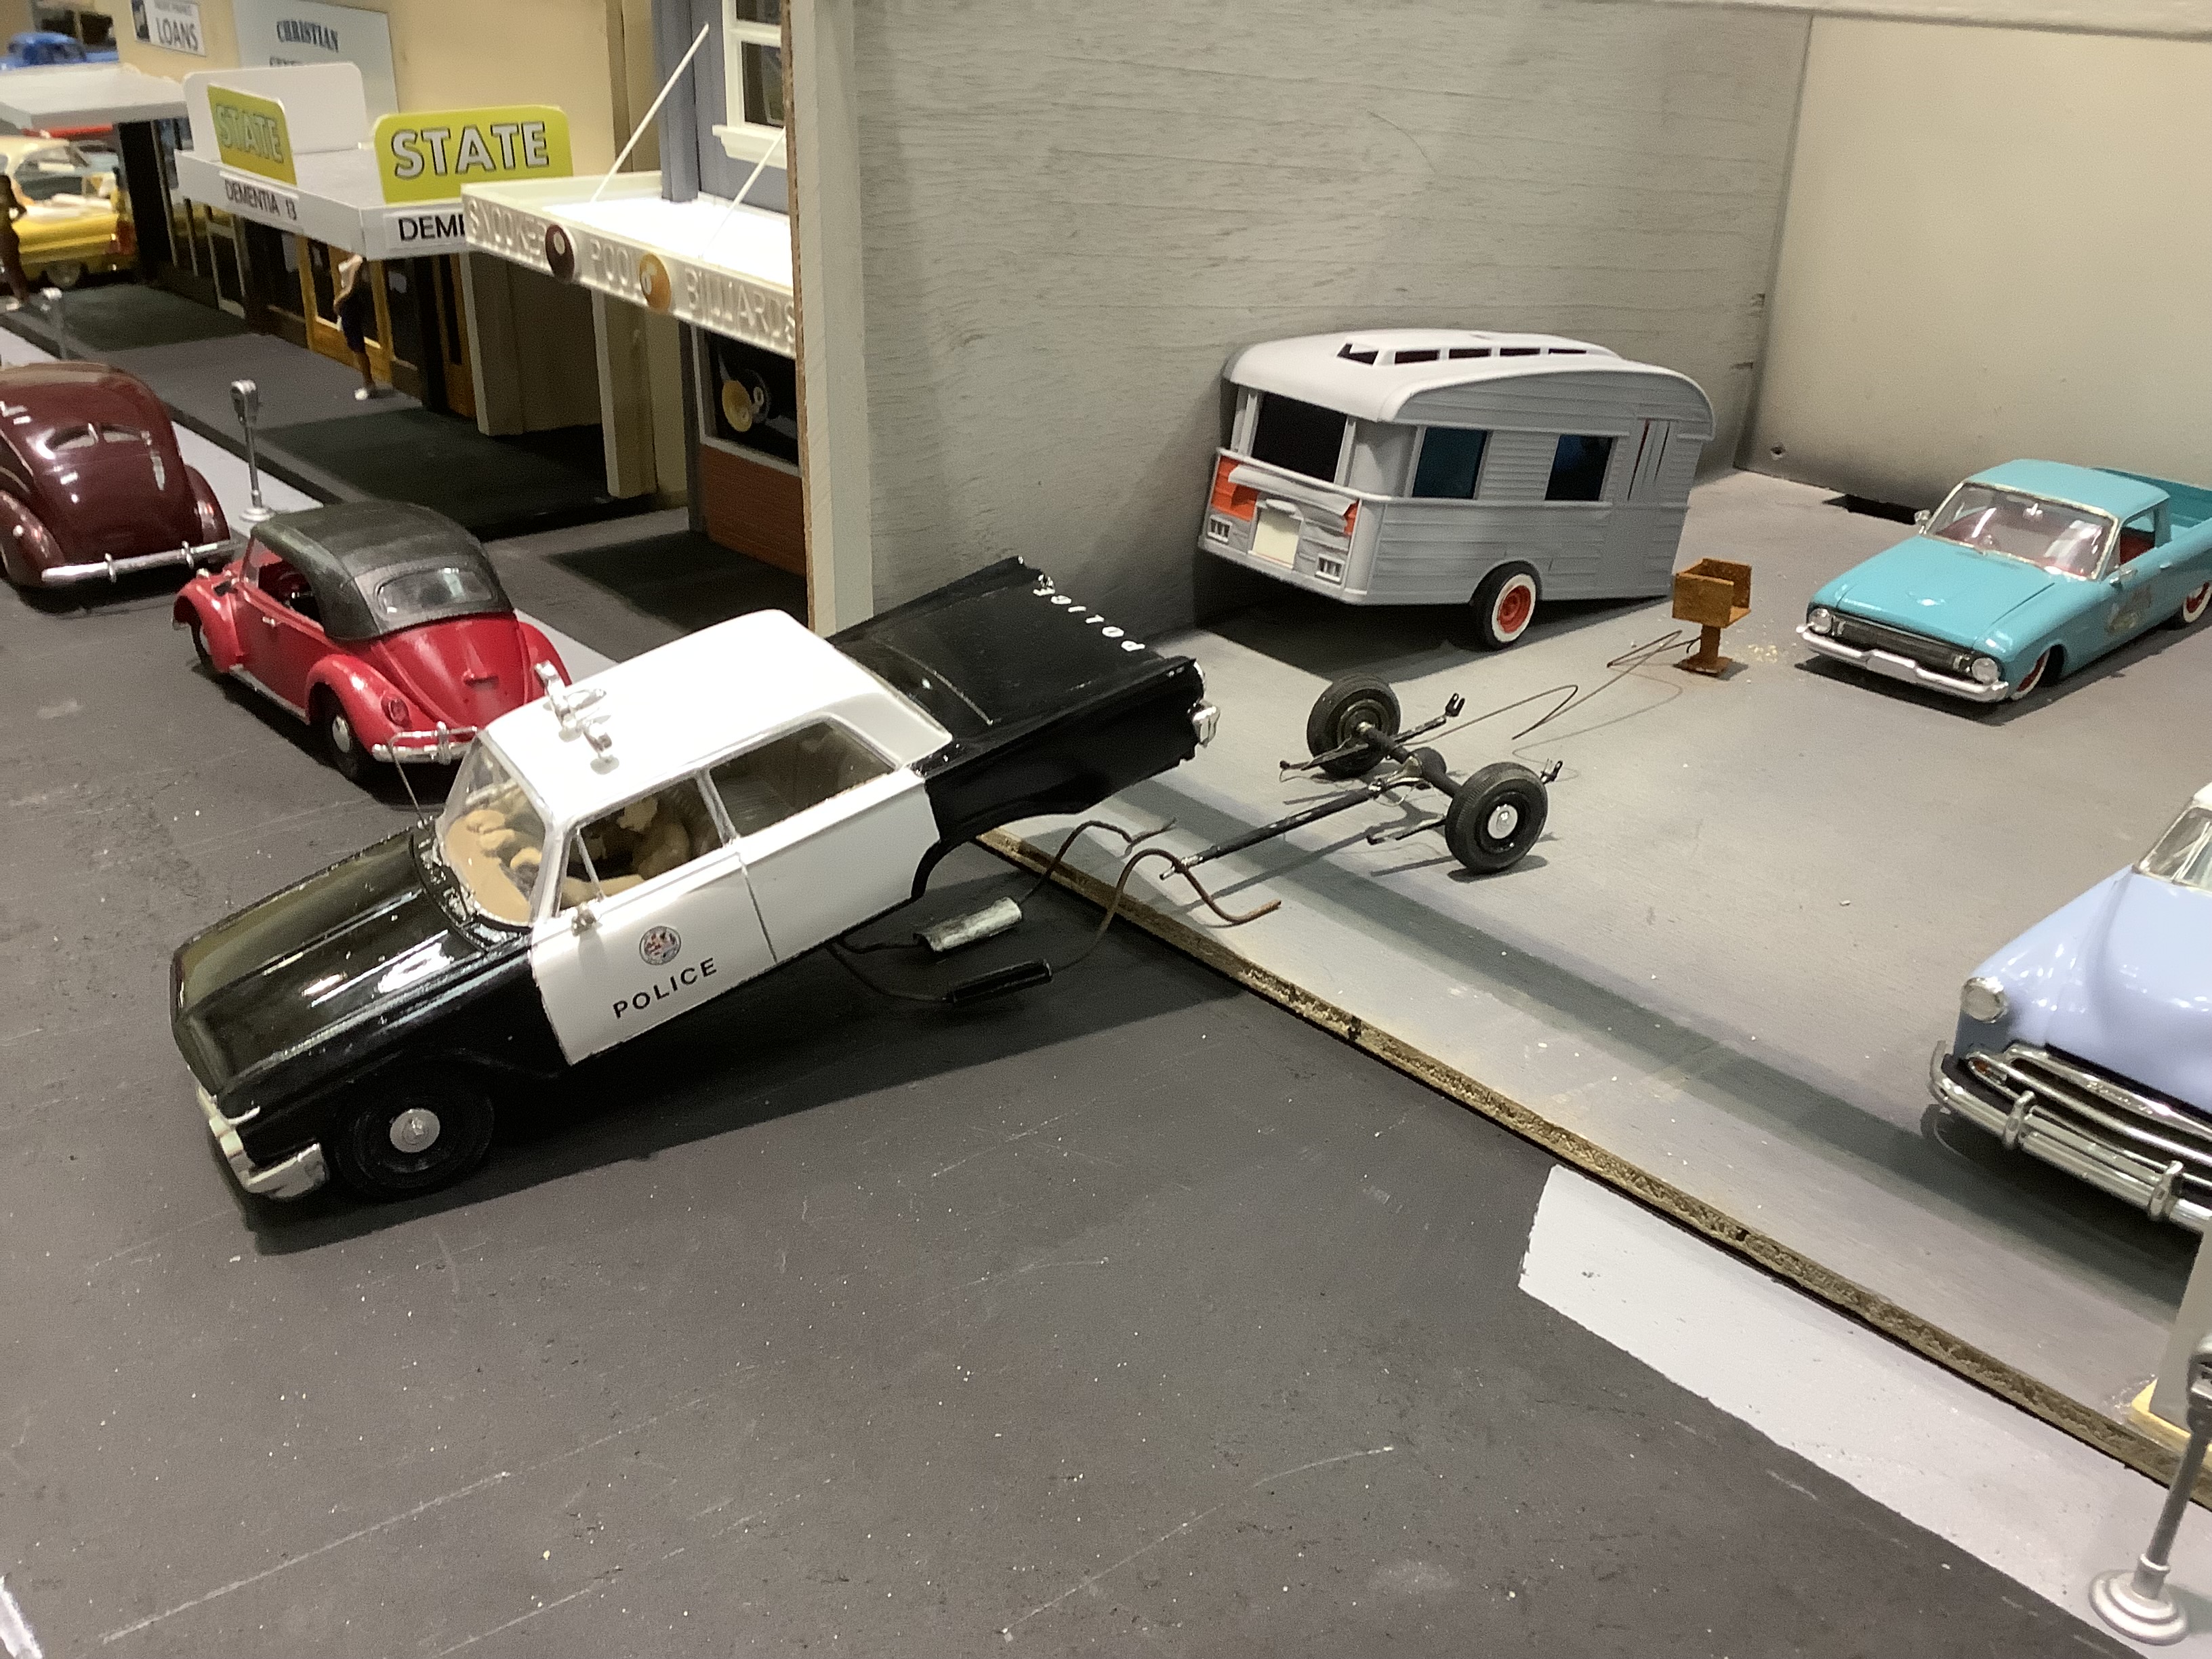
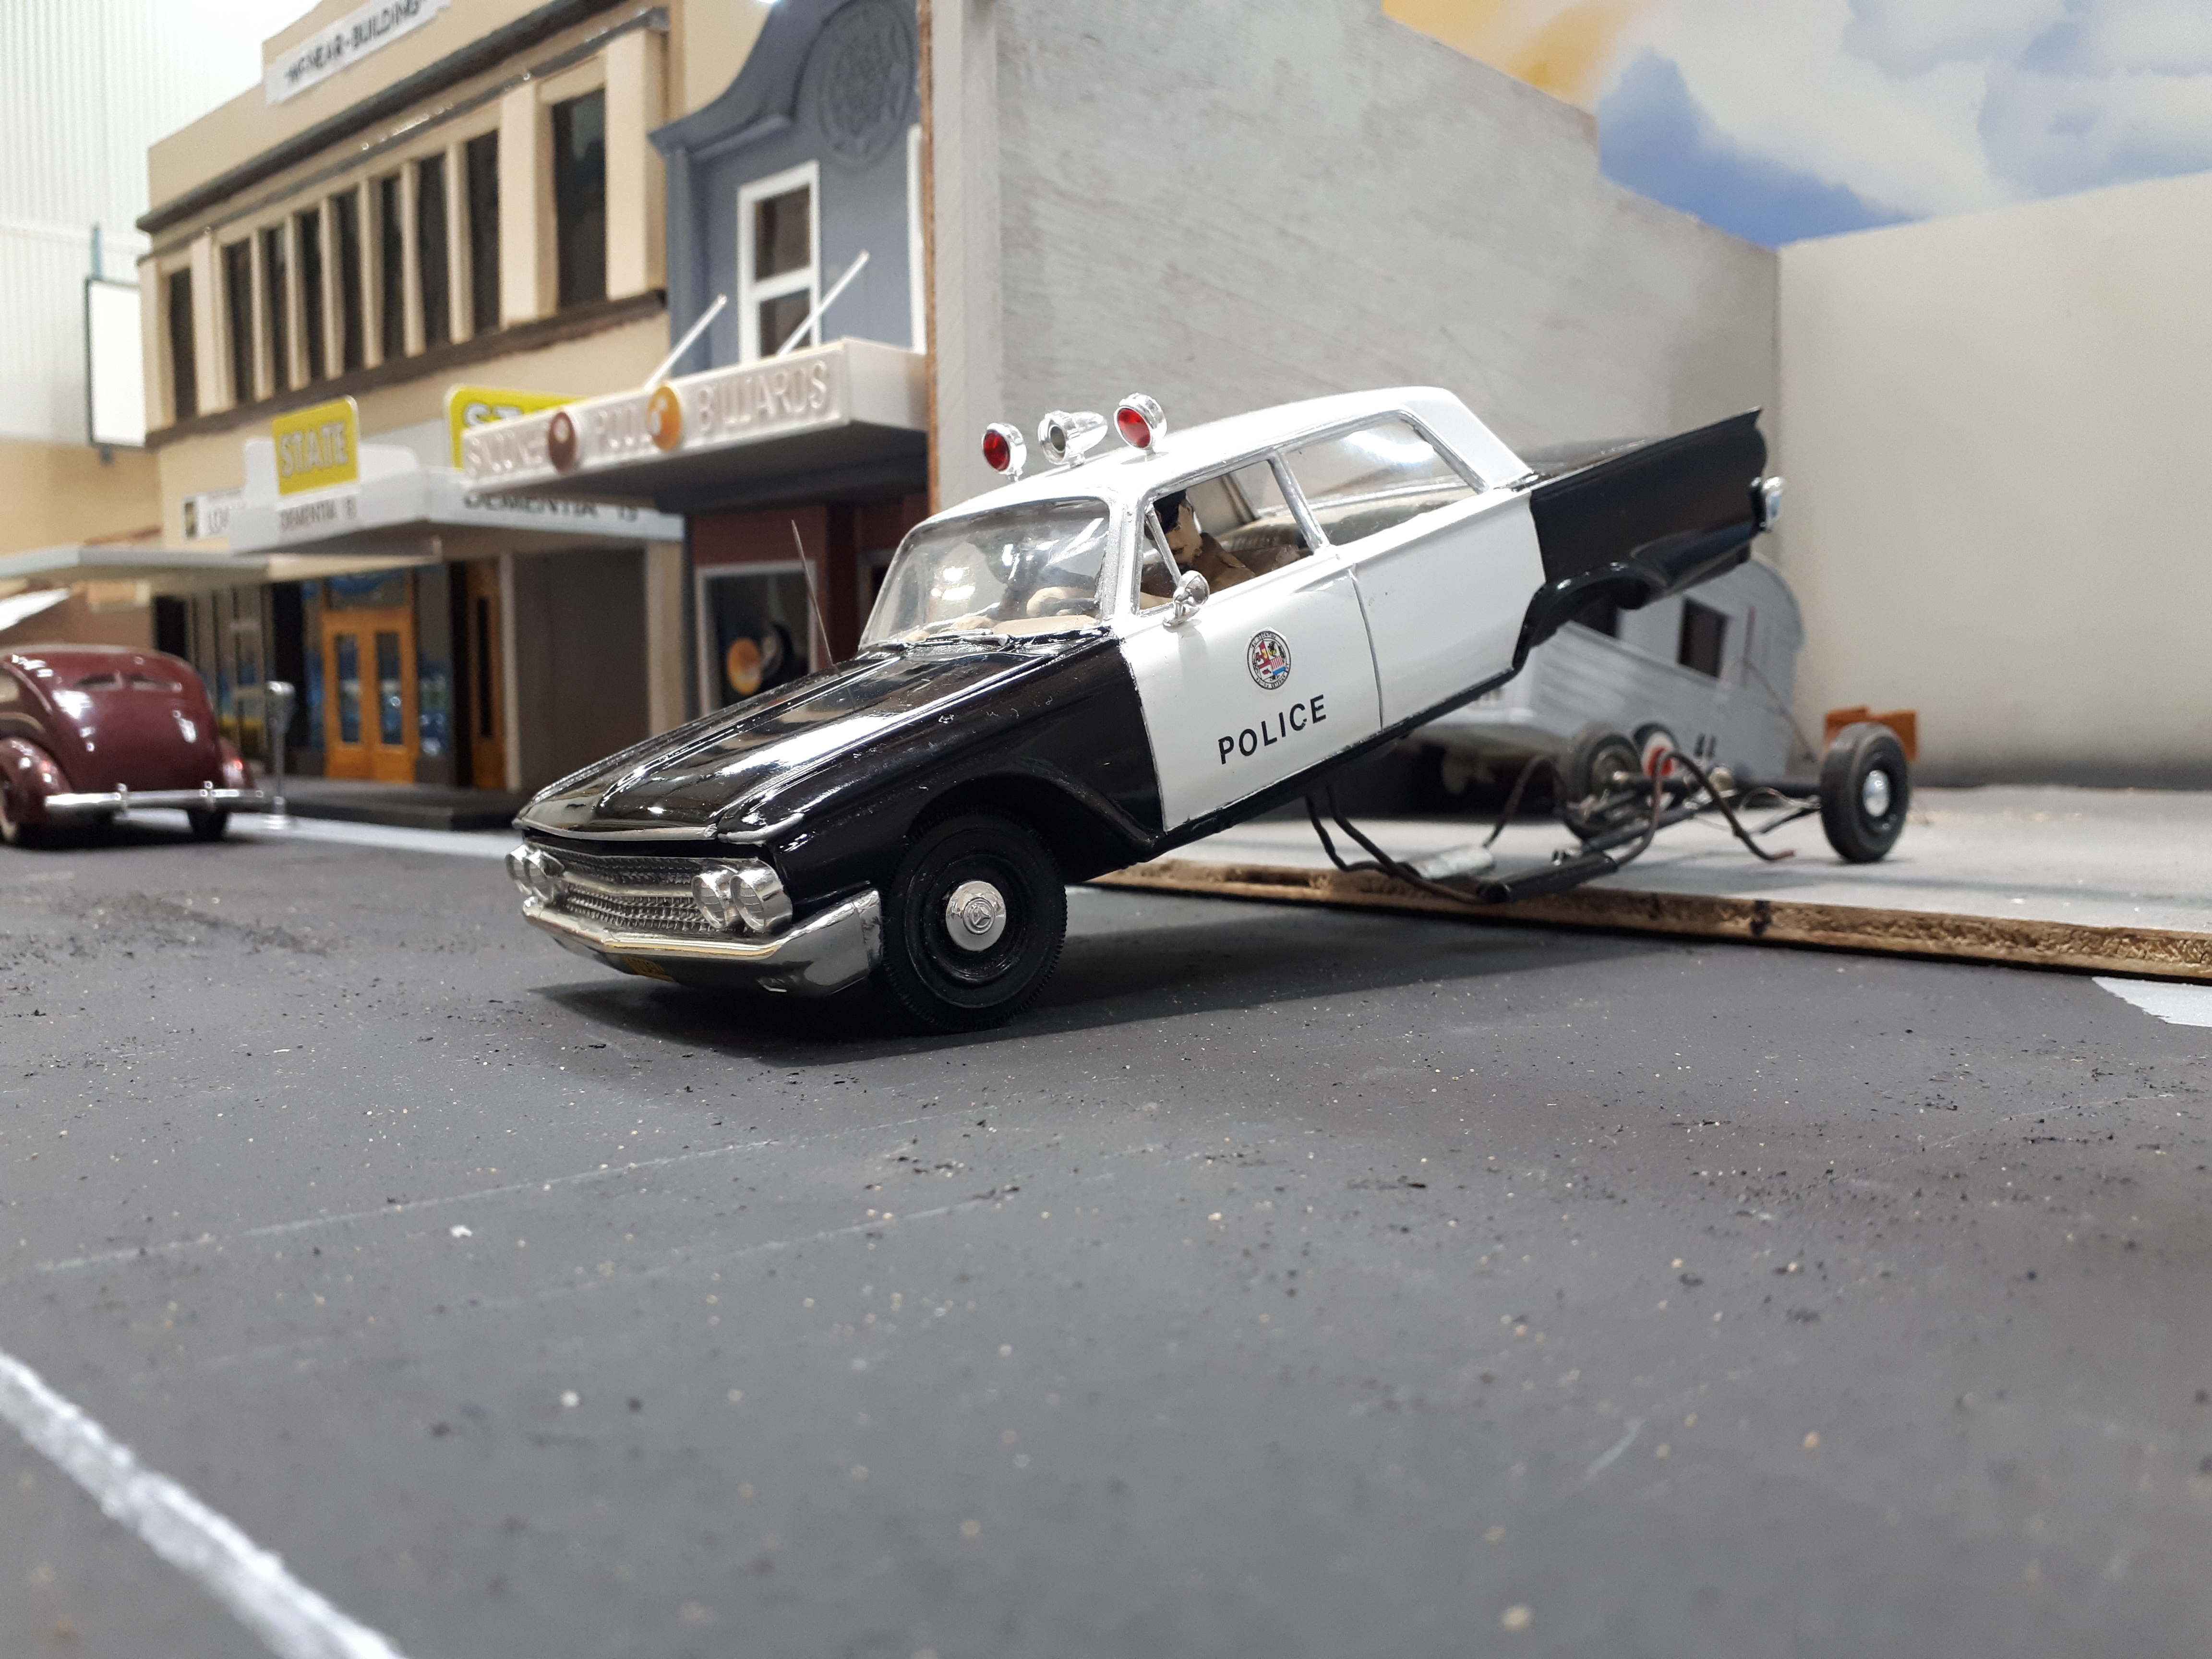
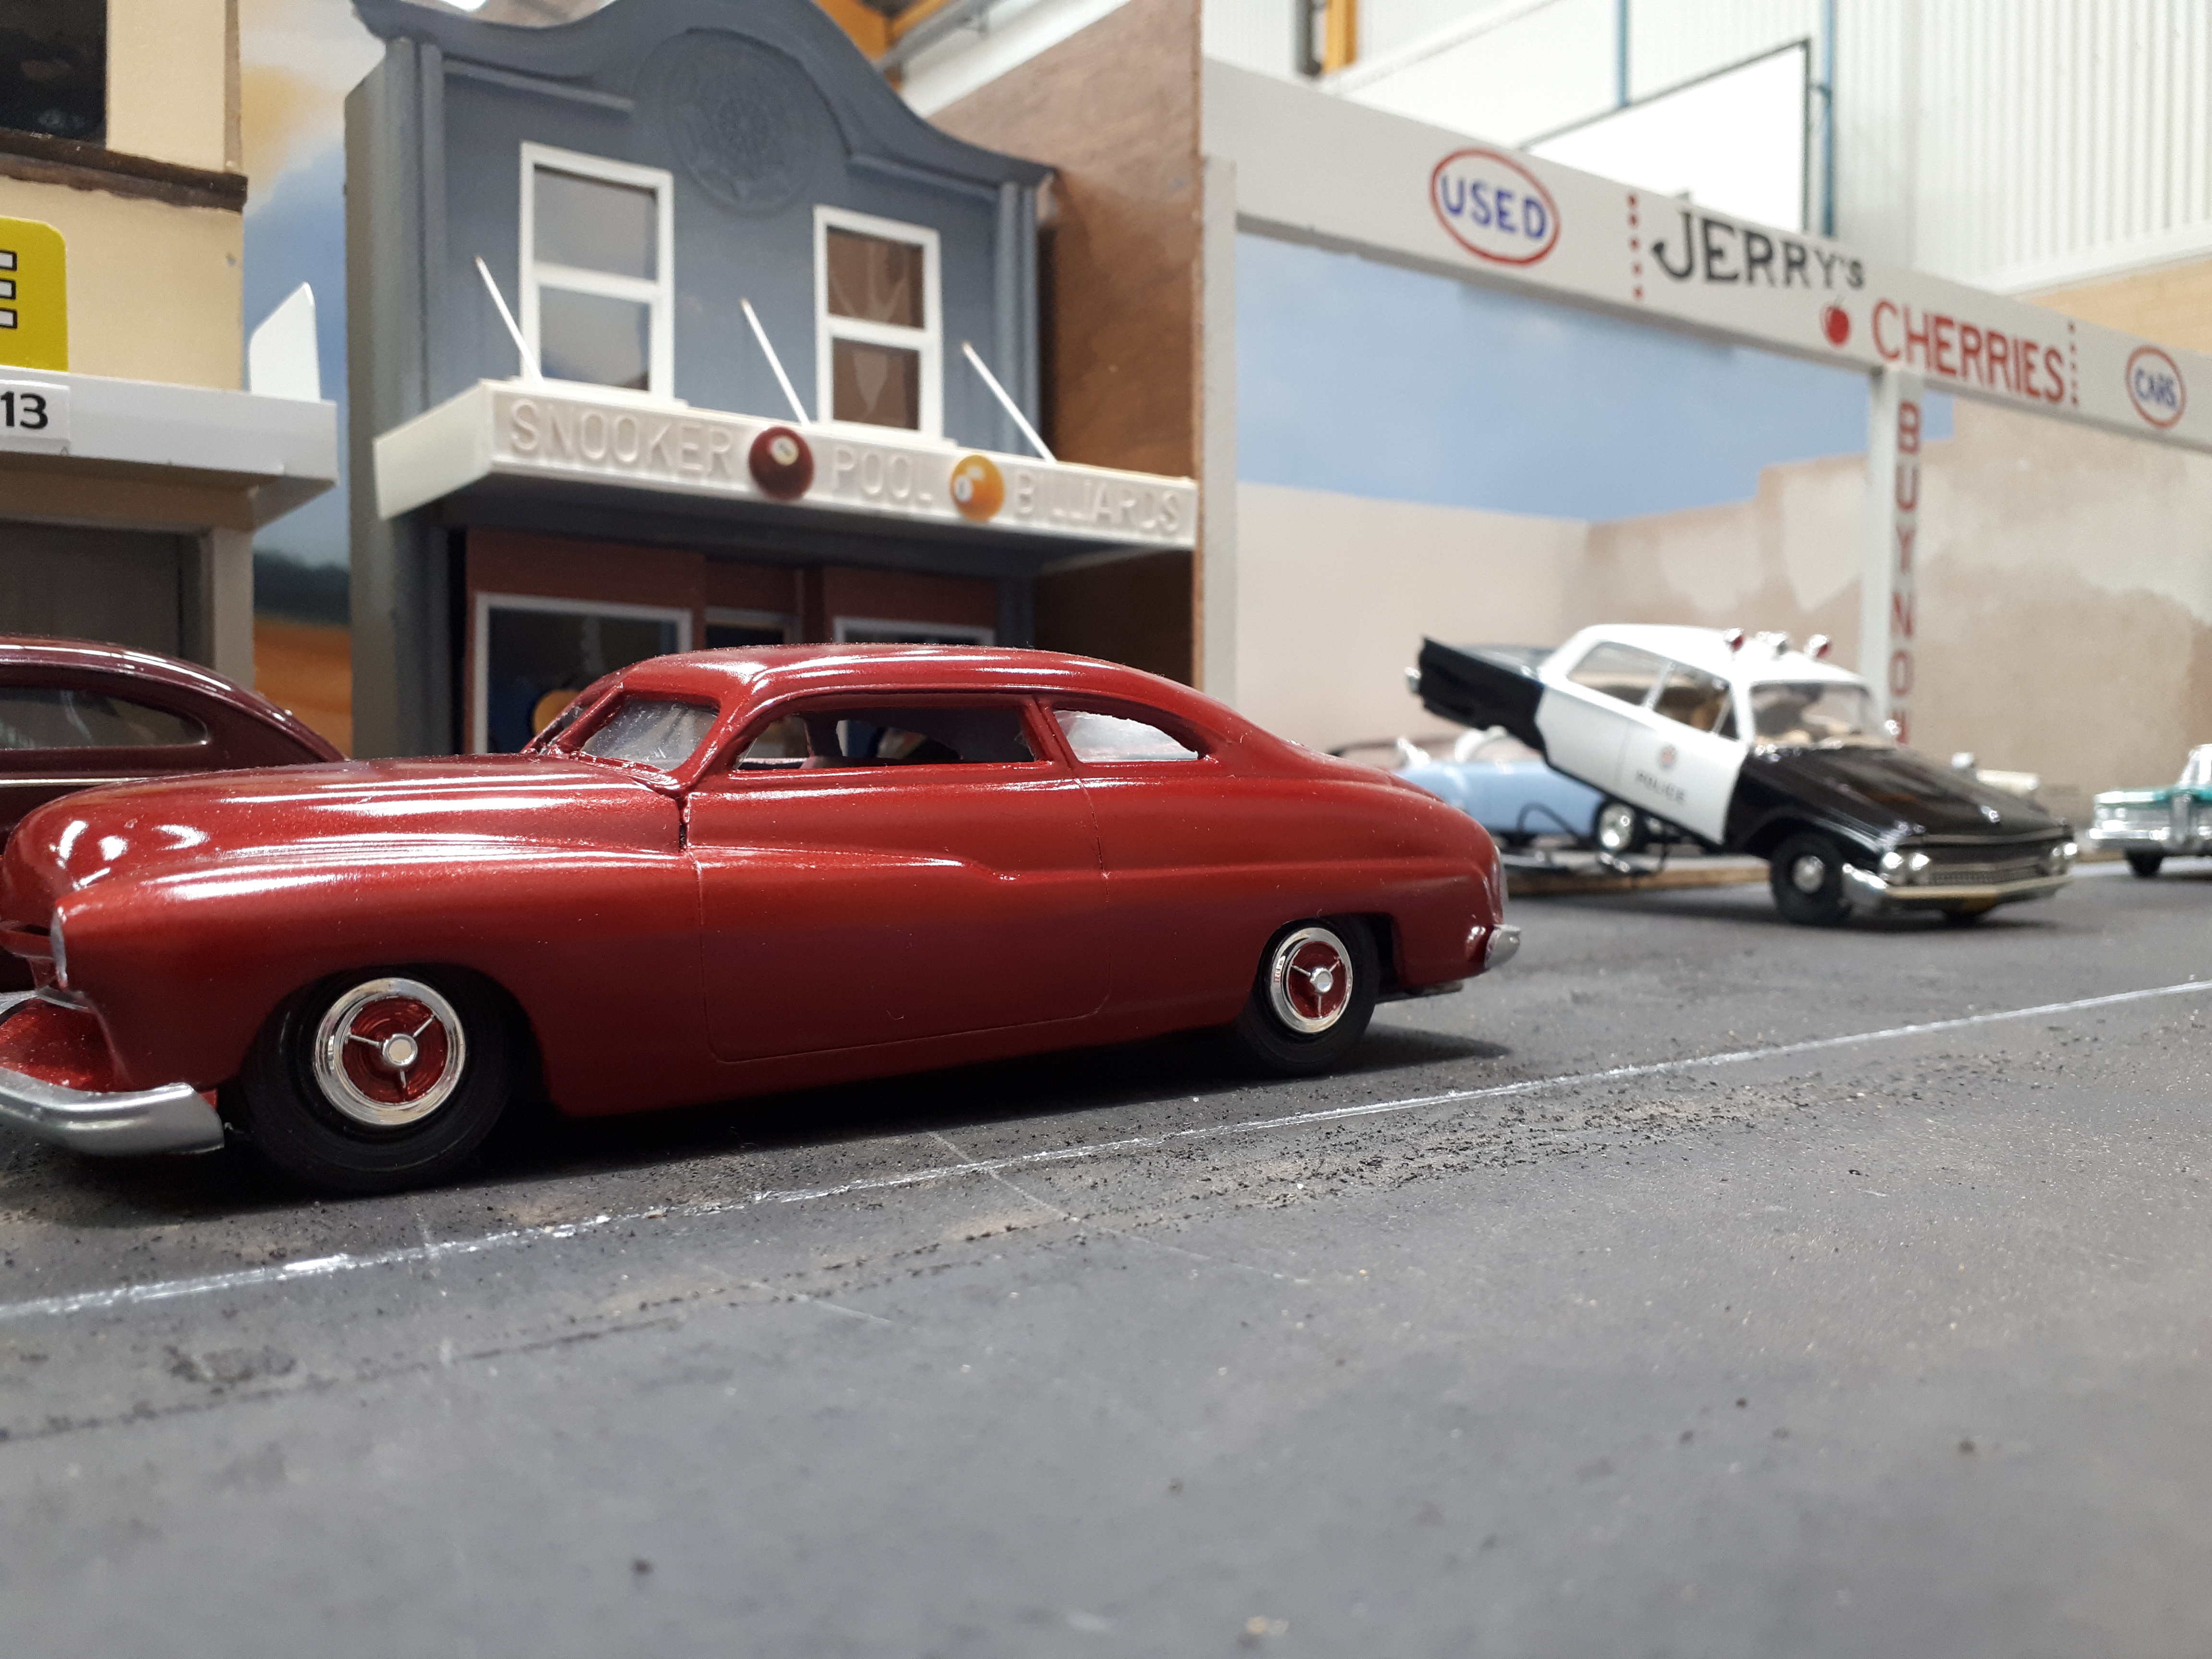
You mean like this? The rear axle was all part of a diorama we displayed two weeks ago at our NNL. Just for the record, it was cable, not chain. Having freeze framed this scene a gazillion times for research. I am now the most fully knowledgeable, staggeringly boring geek on the planet in regards to this scene! The rear axle was just a bit awkward to arrange for my photos in the sun. Thanks again guys, your comments mean a lot to me. Cheers Alan
-
Touche! YEah, I've got that one in my collection so I should have known better. Cheers Alan
-
Yeah, you are probably right Mark, but I like my hot rods to be by Hot Wheels, not Matchbox. It's an image thing, ya know! After all, Hot wheels invented the concept of hot rod diecast, they should be true to their heritage. Truth is, as long as SOMEONE keeps making cool toys for this old bloke to play with, I'm good with that. But as I said first, the irony of it all! Cheers Alan
-
How ironic! As an Aussie I was brought up on Matchbox cars (product of the British Empire and all that) but I mean, how many Vauxhalls and Bedford trucks do you want, even as a kid? In 1969 I instantly fell in love with Hot Wheels because they were the first company to ever make hot rods in a 1/64th scale toy. Nowadays, Hot Wheels has completely lost its way and seems obsessed with making cars out of toasters, spiders, and wheelchairs, not to mention JDM (yawn!) while Matchbox is producing terrific, original subjects like Rolling Bones coupes, 34 Plymouth Sedans, 34 Chevy coupes and Henry J gassers. And the weird thing is, they are both owned by Mattel! Cheers Alan
-
I'll never build one but I love looking at yours. That Tiebar front weight is a great detail touch and the whole thing looks very believable. Cheers Alan
-
I have yet to build my convert kit so it is very inspiring to see someone do this nice a job. I love the redwalls - they are the finishing touch! Cheers Alan
-
The talent on this board never ceases to amaze me. That's an amazing accomplishment Steve, and well worth the time you invested. Cheers Alan
-
Mission Accomplished - 61 Galaxie Police Car
alan barton replied to alan barton's topic in Model Cars
Sort of, Bob. It whistled along through the early stages of fabrication and I hit some real milestones quite early on. The final bodywork, especially on the roof and the hood just became very frustrating as no amount of filling, filing, sanding and priming seemed to make some faults go away - at times they got worse! I am now very wary of Tamiya paint products and am thinking that I will only use them in future on cars with minimal bodywork because I simply haven't encountered these problems before when I used primarily Testor's paint and cheap hardware store primer. Thanks again every one for the positive comments , it makes me very proud to part of this community. Cheers Alan -
Mission Accomplished - 61 Galaxie Police Car
alan barton replied to alan barton's topic in Model Cars
Thanks everyone, this model seems to really have hit a nerve for a lot of people. It received by far the highest number of views in WIP of any model I have ever built on here which amazes me because this is not a genre I usually venture into. I guess one thing that kept me moving forward was knowing that I could never make it worse than what I started with!!! Cheers Alan -
Yeah, when you talk about stance on a drag car, roll cage positioning is one of the most critical elements. Raising it helped immensely. Back in the late seventies, Matchbox made a little Beetle with cartoon like proportions and a giant V8 in the back. Long before Hot Wheels, Johnny Lightning etc got into making accurate drag cars, I cut one up into spookily similar proportions to your project, Rodney. Seeing this makes me want to finish it! Cheers Alan
-
You passed the BMF test - that is a very nice quarter vent, in my opinion, the hardest part to do without wrinkles. This will really add to the realism of the finished model. Cheers Alan


(2).jpg.712e77524181a595b97a7e28015f108d.jpg)