alan barton
-
Posts
2,105 -
Joined
-
Last visited
Everything posted by alan barton
-
This is a great old classic, John that has stood the test of time. When I did a few forties a couple of years ago, I improved the look of the fat fenders by getting a bit of 240 wet and dry and rolling the edge of the wheel openings. AMT has split the mould along these edges leaving a sharp edge. Check some real forties and you will see the shape fo the front wheel opening in particular can take a little massaging as well. I am talking less that half an hour in total for this upgrade and it really shows when you get the paint on! Good luck with your forty! Cheers Alan
-
I've got the hood fitting after quite a long session at the bench and it is now primed and waiting for my return. The 1/24th scale fender unit is quite a bit longer from the cowl forward than the 1/25th scale unit. I think I have managed to avoid the Pinnochio look but still might get another mm off it. Cheers Alan

-
Wow, Steve, that is just stunning! You could hop right inside it and drive it away! That just might be the sweetest version of that kit that I have ever seen. And you are right abut the modifications. It really is a domino effect! I have been planning this one very carefully to avoid that sort of problem and until now I thought I was doing really well but this hood issue snuck up from behind. I did the lengthening job on the hood last night before I turned the lights out and if the modifications don't leave tell-tale shadows in the paint, it should work pretty well. Cheers Alan
-
I went to fit the Revell hood sides and tops but there were all sorts of issues here. The Revell hinging arrangements leave a massive wedge shaped gap in the middle but worse still, the hood would not reach to grille shell. Didn't see that coming but maybe I should have! My next thought was to try a Monogram hood. It is a pretty good fit at the cowl after thinning the trailing edge a smidgen but it is the same length as the Revell 1/25th scale hood, thus the gap is still there! I have lengthened hoods before and it is not my favourite job - keeping all the contours working , keeping a smooth, even curve to wrap around the grill, yeah, a bit of a challenge. I found a lacquer etched wreck of a hood in the Model A pickup box, might see if I can use that to make the additional length and work from there. Anyone with better ideas, I am all ears!!! Cheers Alan
-
*1934 Ford Pickup*
alan barton replied to Zippi's topic in WIP: Model Trucks: Pickups, Vans, SUVs, Light Commercial
It's a lovely kit, a giant leap in detail from the AMT hot rod kits that came before it. The kit comes with two front axles, stock and dropped, but they are difficult to tell apart unless you look closely. Ask how I know this! Even then, you will need to file out the crossmember and file don't most of the spring if you want to get it down a bit. If you copy and past the following link you will find a whole bunch of posts on the truck right here. Funny thing is, I couldn't find mine from this year! 34 ford tow truck model cars mag forum Cheers Alan -
N worries Bob, and I have one more tip. Back a page or so you mentioned your favourite part, the windshield frame. When I built my delivery decades ago, I didn't notice the gap but I did notice that the lower frame is way too thick or "tall" - it's at least twice what a real 32 windshield would be. If you get a brand new blade and vertically slice the centre piece away from the either sides, then slide it down a mm or so and glue it back together, you should be able to file and sand it to an exact fit in the windshield opening and it will look far more realistic, even if you now have a short vertical cut line at each end. It is pretty easy to do and worth the effort. Cheers Alan
-
You are doing well with this sedan Bob. If you want to get it lower I would look at bending a piece of K&S aluminium tubing to the shape you want and then inserting the MPC plastic axle ends into it - that should get you lower without having to buy another kit. I don't think it is as easy as ranking model companies in order of quality. I have built hot rods from every company imaginable and some are good, some are not so good. Quality is a tough value to describe. Early Revell hot rods had some of the finest detailed parts ever put in a kit but pity help anyone who tried to assemble them! Tamiya produce superb kits with outstanding engineering but I have exactly one in my collection because they don't do the cars I love, and they don't do engines. Monogram do terrific hot rods but some people don't like 1/24th and the Beachboys 3 window coupe was an eyesore! AMT really kicked off the whole hot rod thing but their 34 Tudor was drawn up by someone who was legally blind. The Switchers kit wasn't MPC's finest hour but if you ever get the chance to build an AMT 28 Tudor, actually designed by MPC, it is one of the most delicately yet accurately presented hot rod kits of all time. And some times, with the best model kit in the history of model kits, you personally will screw up and not get the result you planned for! It's just the way it goes. Never be afraid to ask the guys on this forum for tips and tricks about any kit you are looking at buying - the knowledge pool on this board is amazing! Keep up the good work! Cheers Alan
-
Love the panel paint from back in the day. Can't wait to see this sparkle! Cheers Alan
-
Midnight blue - nice!!!! Years ago a friend had a '34 coupe, painted a very, very dark Volvo blue. He called it Snot Black, because every time someone mentioned the colour of his car, he would reply "'S'not Black!!!!!! Still psyching myself up to see if I can hang those doors...... Cheers Alan
-
Hi Mike, Check my photos of the Vending Machine show rod here. These are truly beautiful Cragars, shallow and deep, with near perfect Cragar S/S hubcaps. You will still need slicks but I don't think you will find better Cragars anywhere and this was a recent re-issue from Round 2. Hope that helps Cheers Alan
-
I was looking at the T parts pack body only days before I saw this. Wow- the red one looks fantastic - I definitely need to build that and it is good to know about pushing the engine back in the frame. All four of your builds look awesome and I especially like the range of colours used. Still have to build a streamliner to complete my set. Great work, Scott. Cheers Alan
-
"Double Trouble" AMT Double Dragster built to match box art.
alan barton replied to larman's topic in Drag Racing
Very cool - I like them both. I have four built and more planned. Hard to say what it is about these models but the nostalgic factor is huge. We all know that they are not the most accurate representation of a dragster of that era but there is something about them that you just can't ignore! Thanks for sharing yours! Cheers Alan -
Nice job Nick! That blue is stunning _ I used it on my 63 Galaxie slot car with similar effect. It loves the sunlight! Like others have said, the black wheels really add to the factory no-frills vibe. Cheers Alan
-
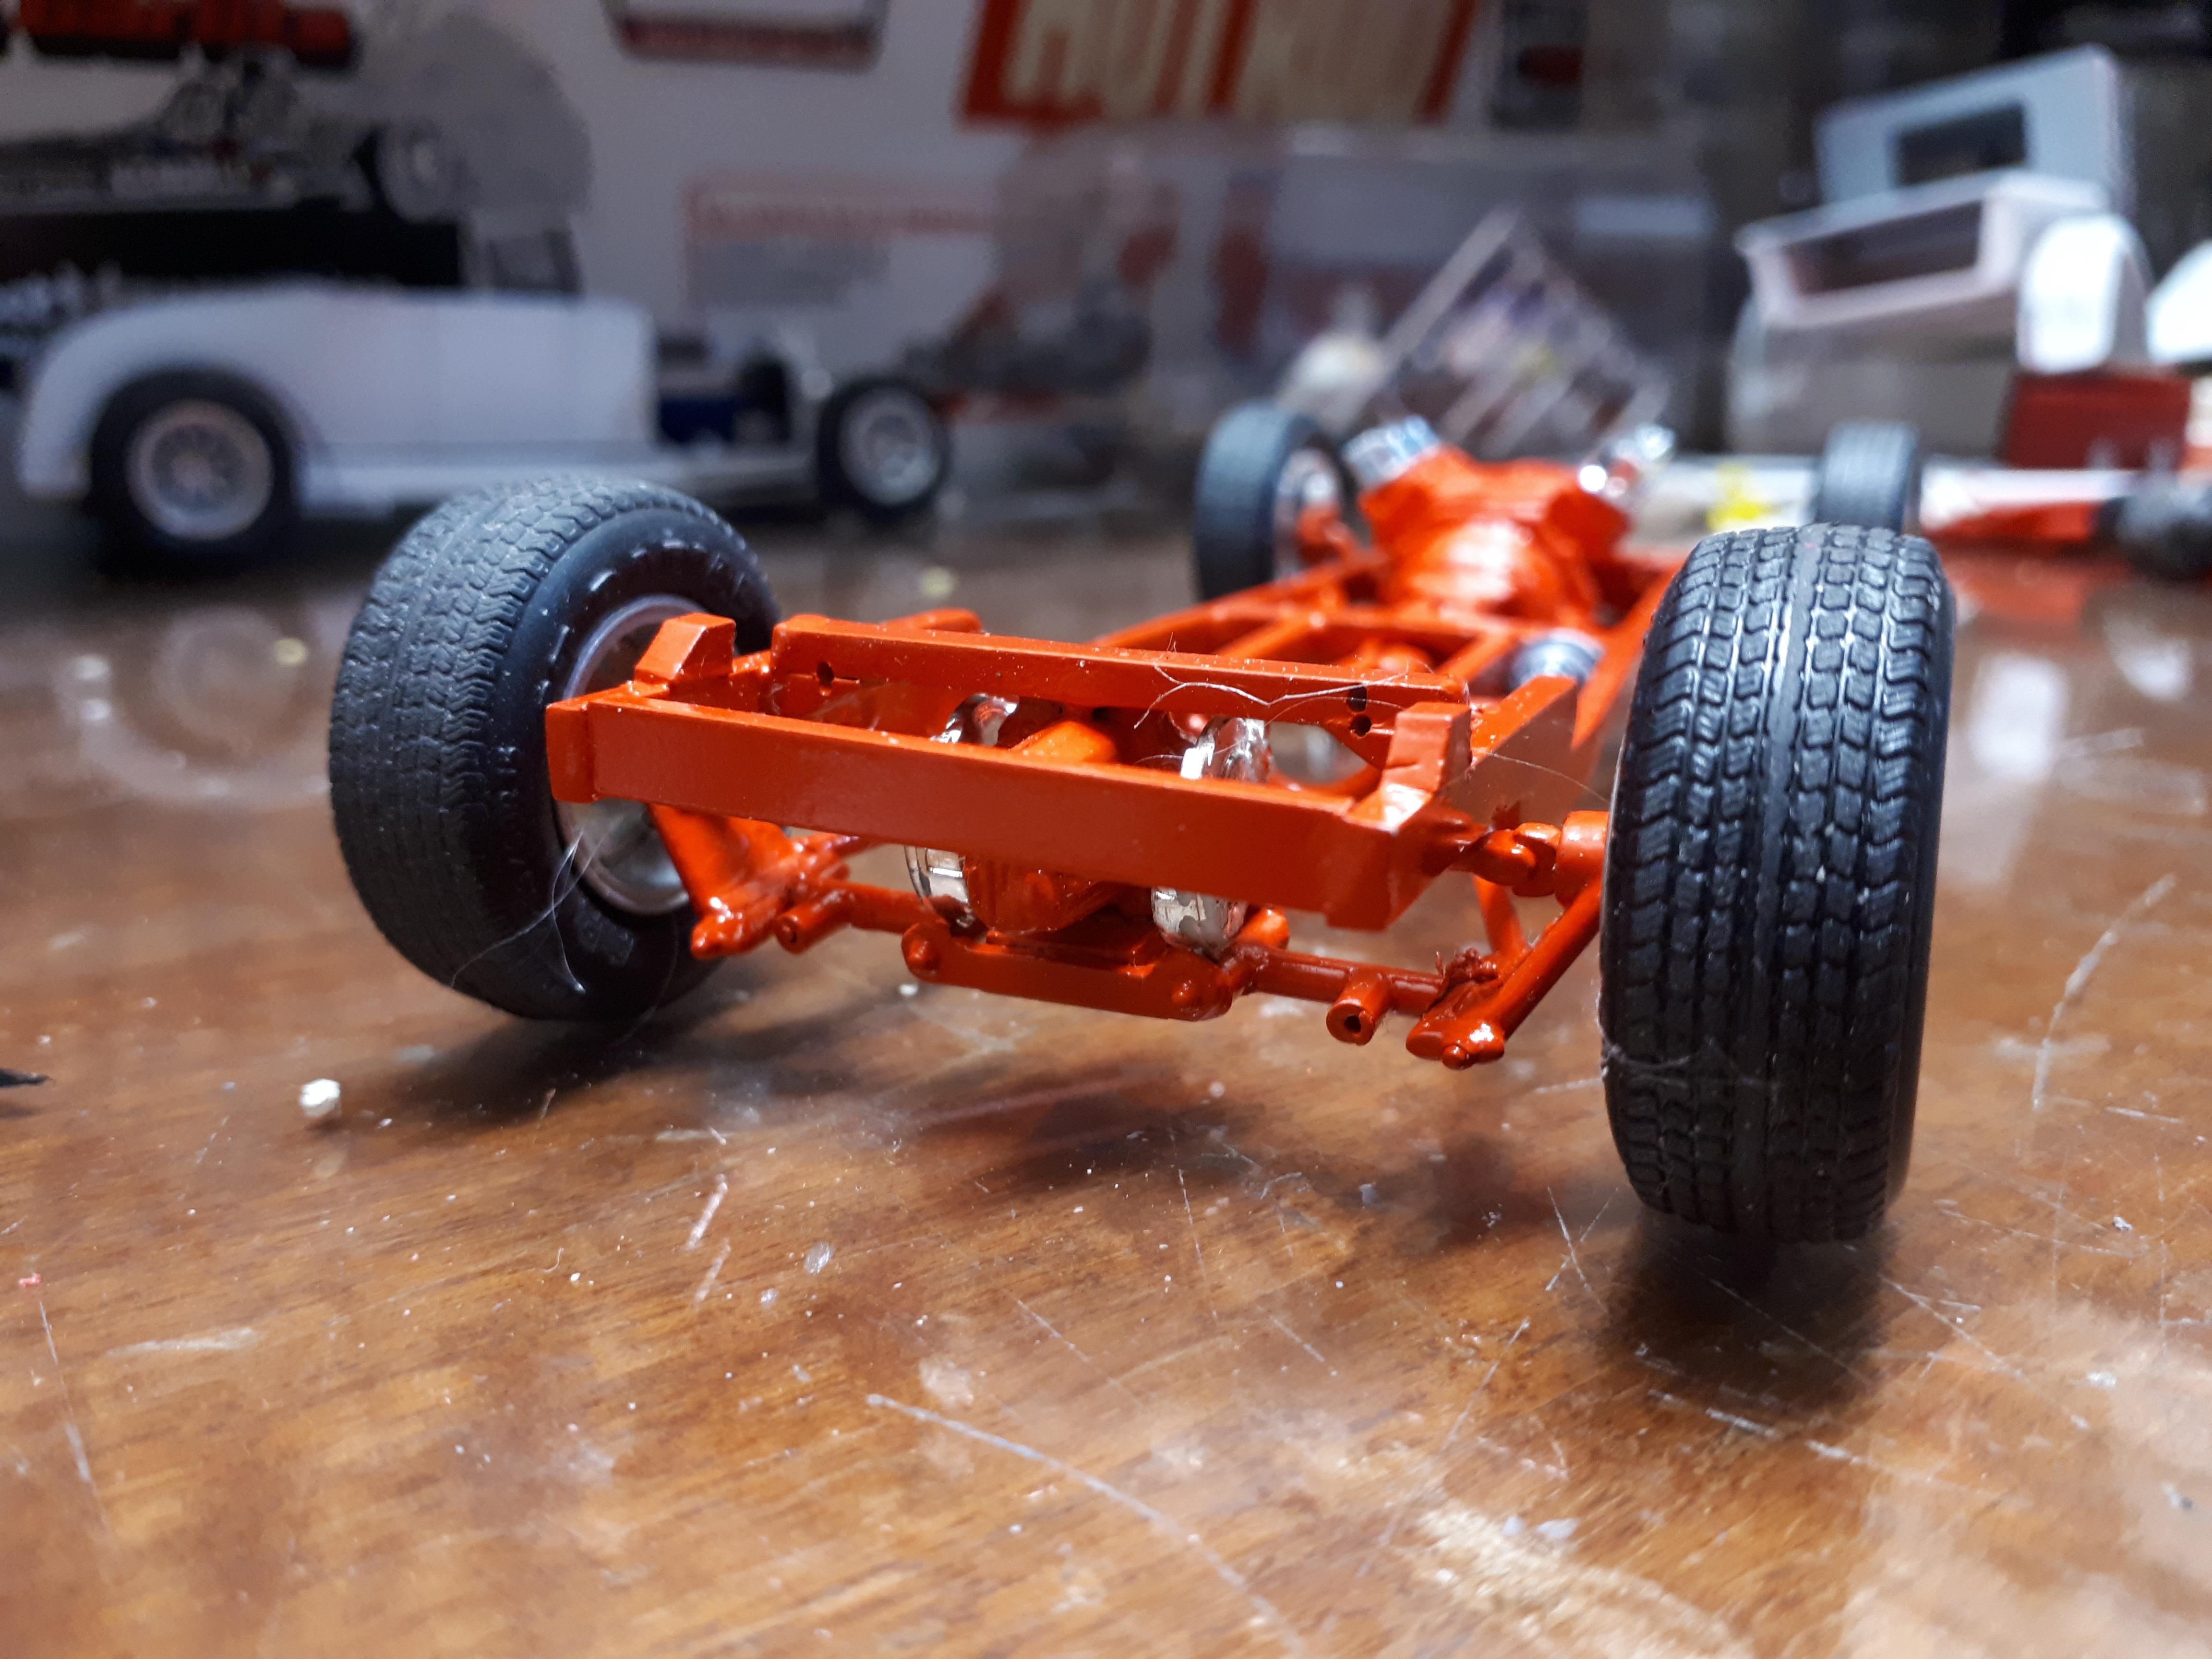
Burgundy? Should look very cool! How are you going to hold your doors while painting, Kit? I painted my frame about a month ago but in view of the cold, damp weather here I waited a long time before handling it. Got the rear brakes and wheels/tyres on today, with the front axle and wheels and tyres just mocked up for today. Still got to come up with an exhaust, a driveshaft and some sort of an intake. Still haven't tackled the hinges - just wasn't in the right frame of mind and I expect to take few nights to get them right. At least I have made some headway. Cheers Alan
-
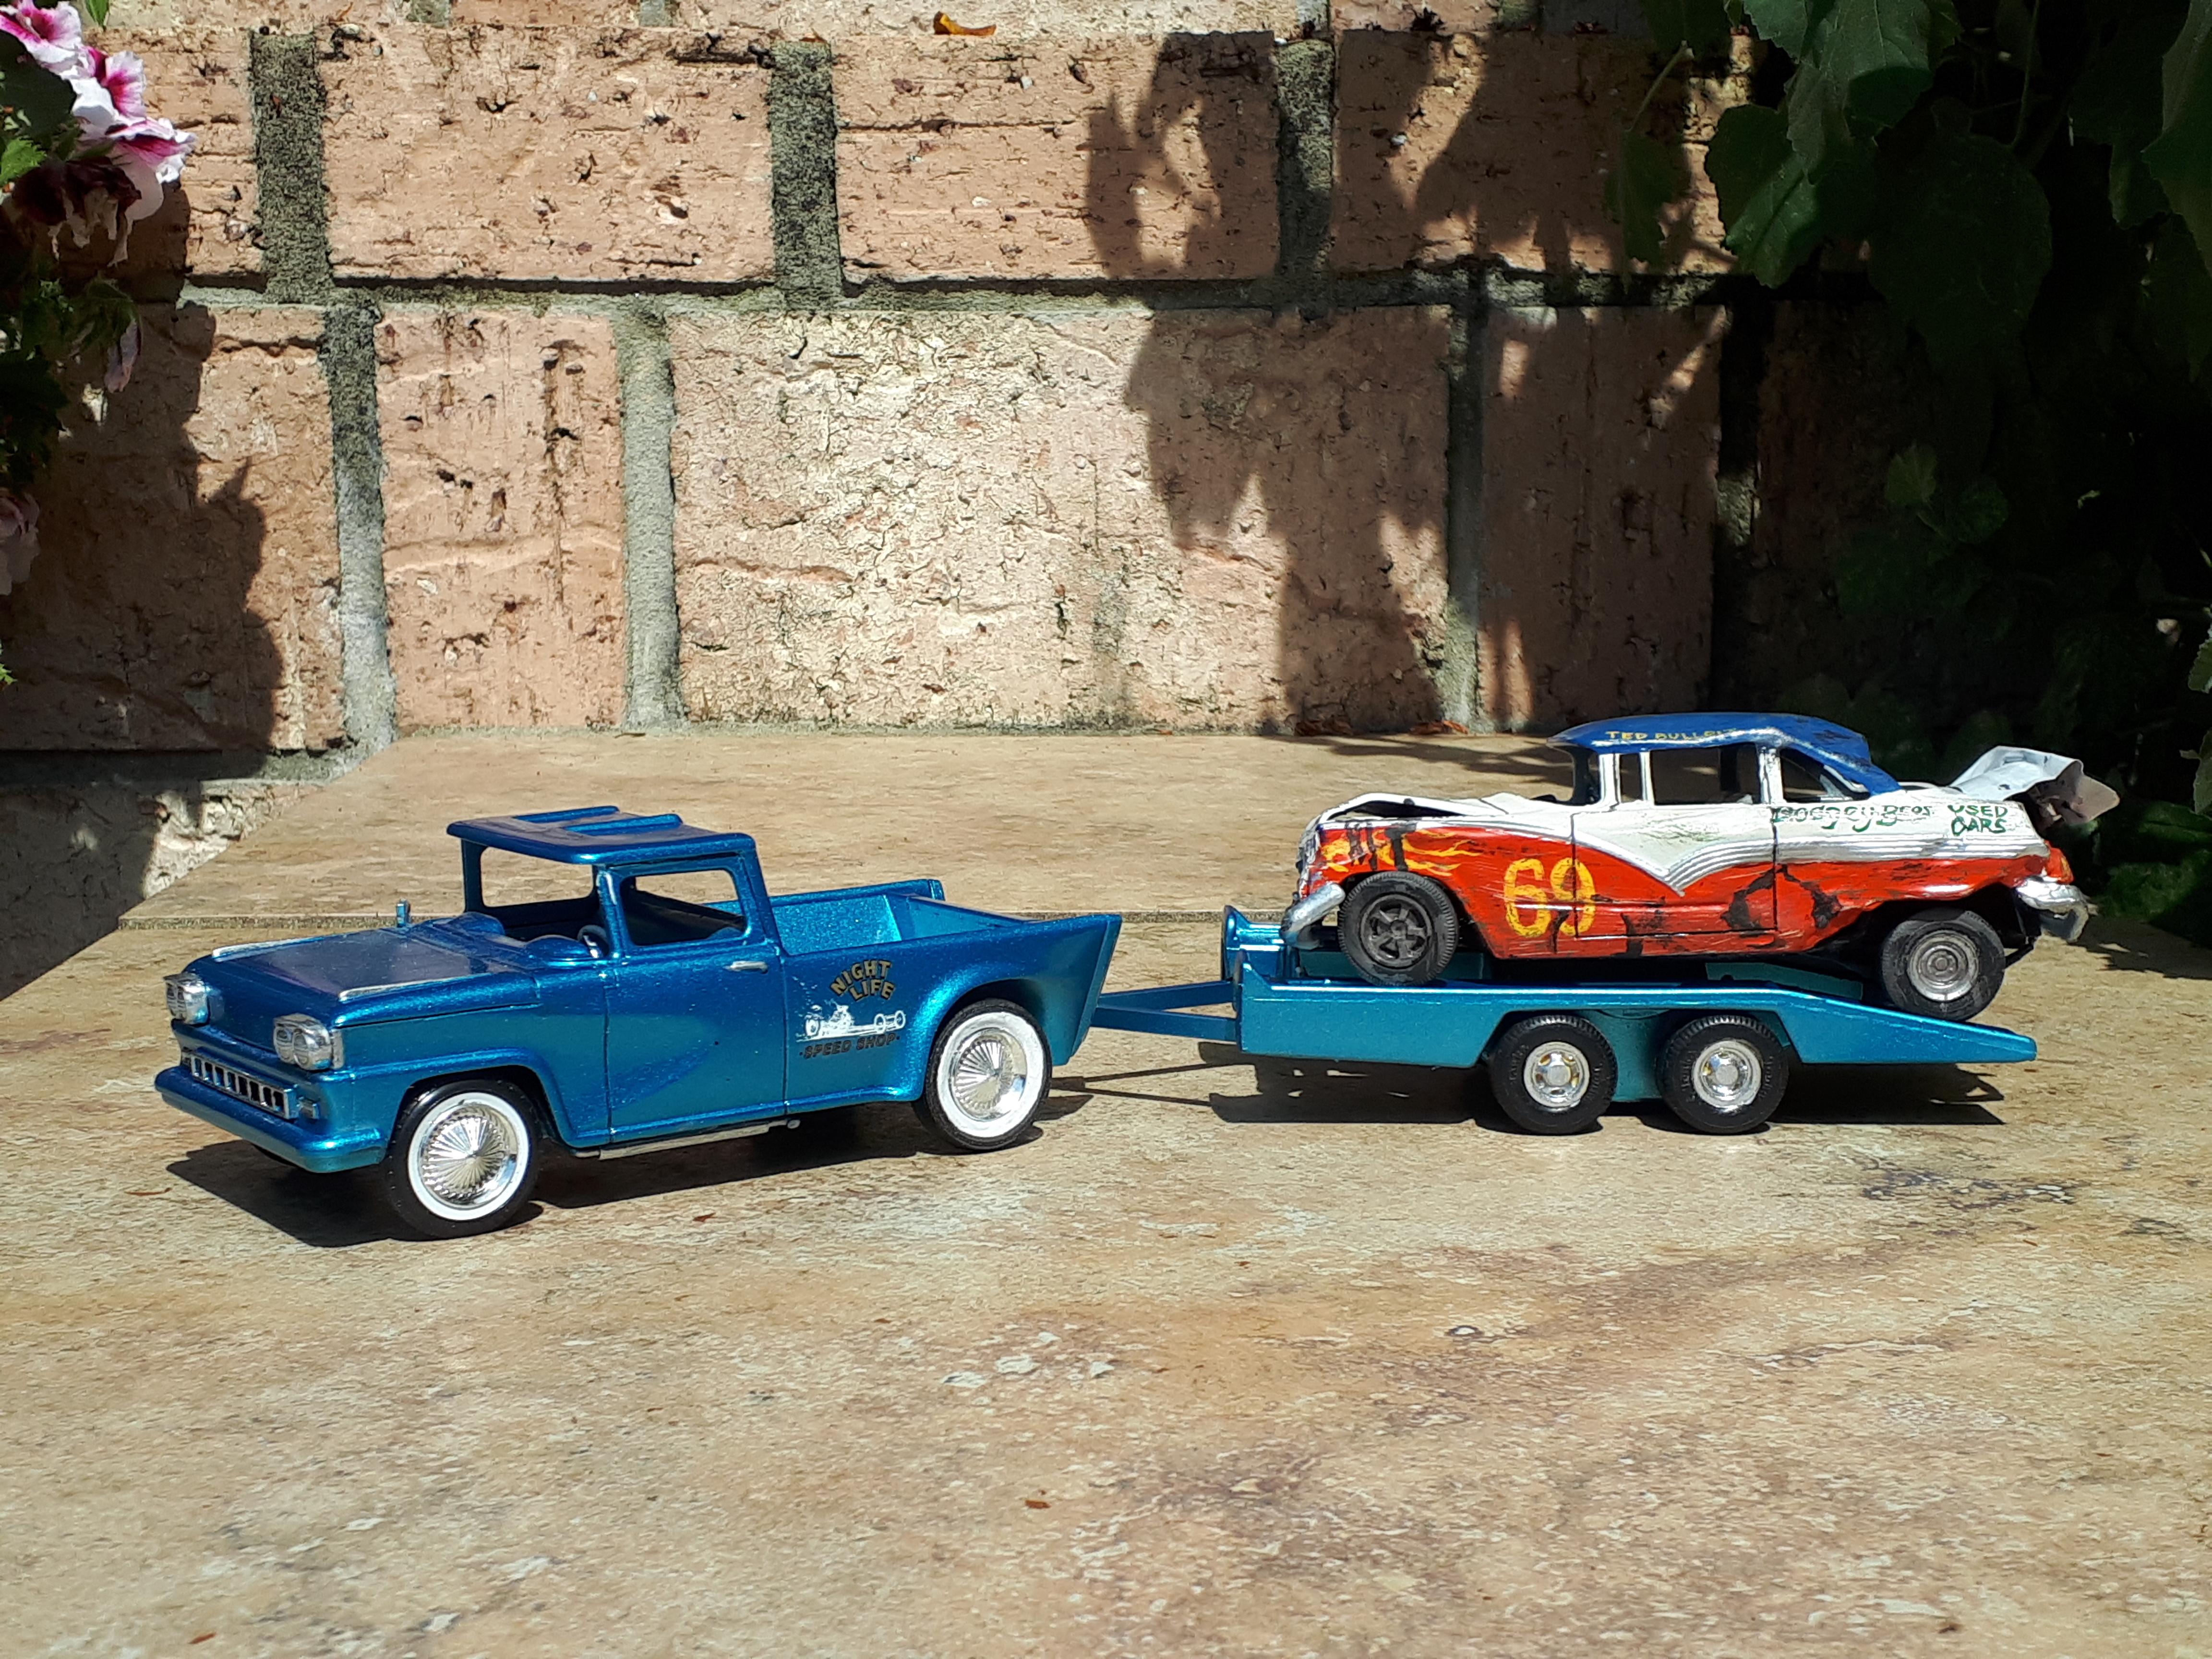
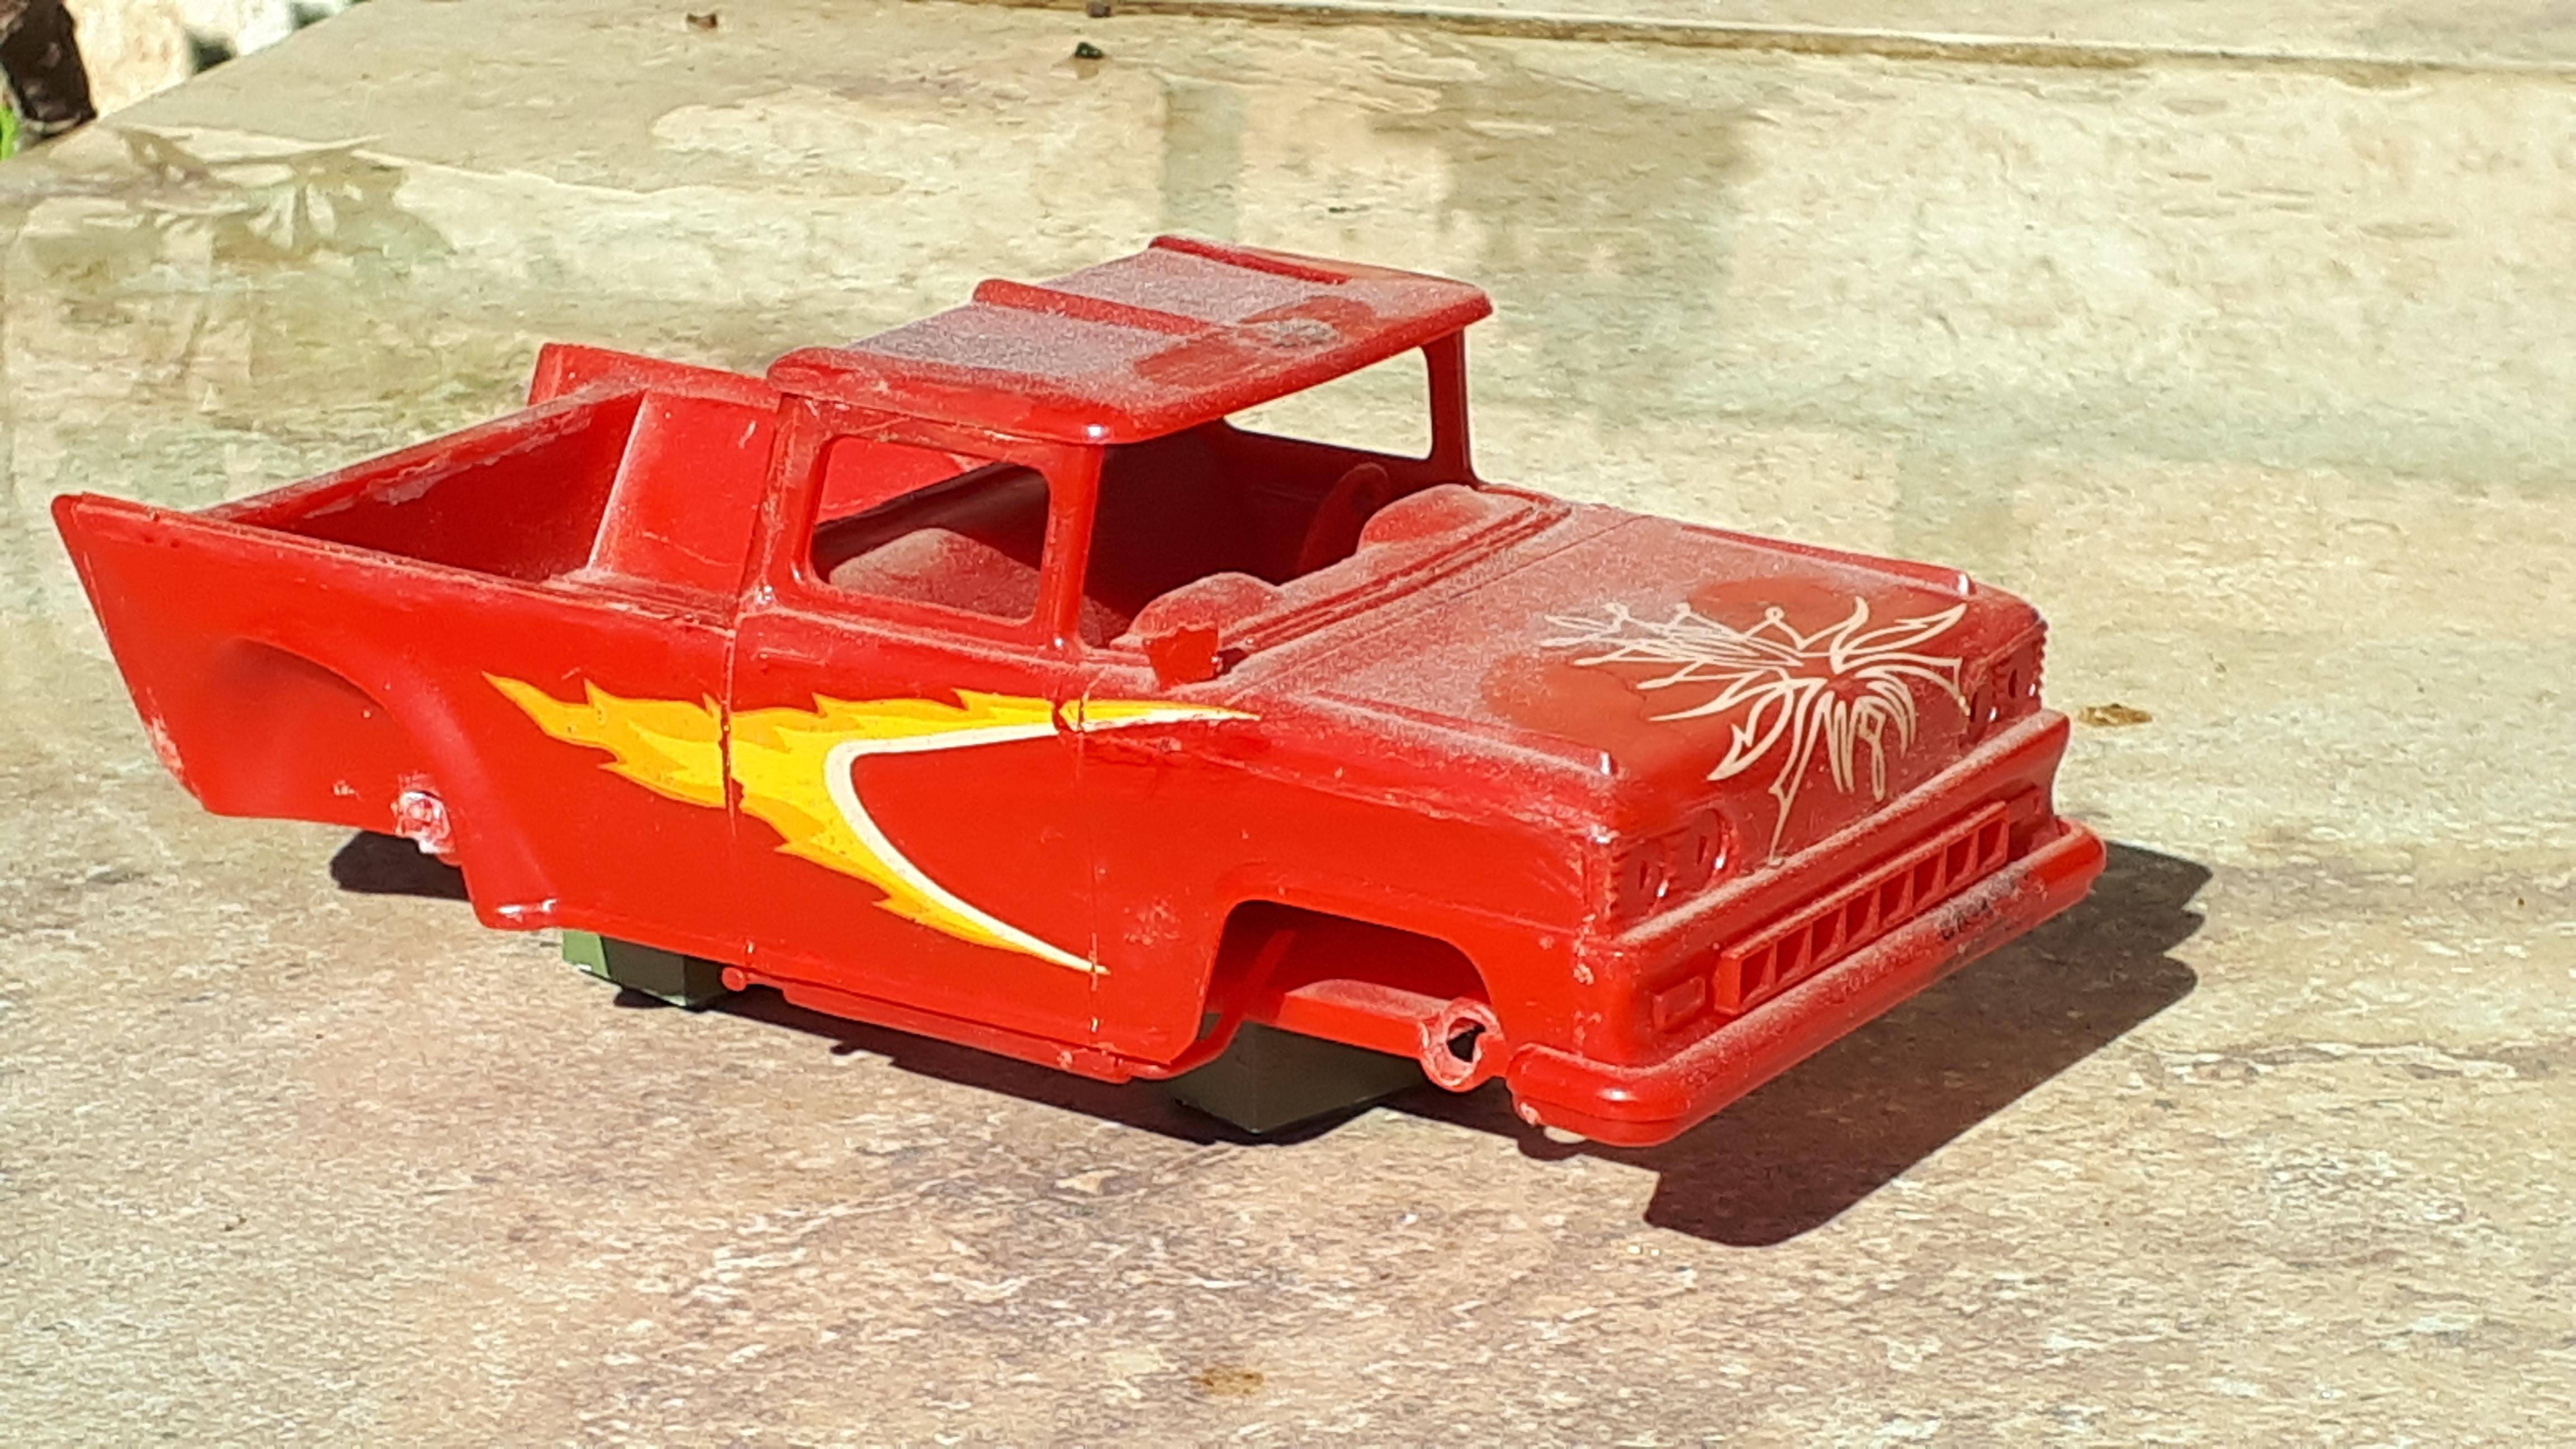
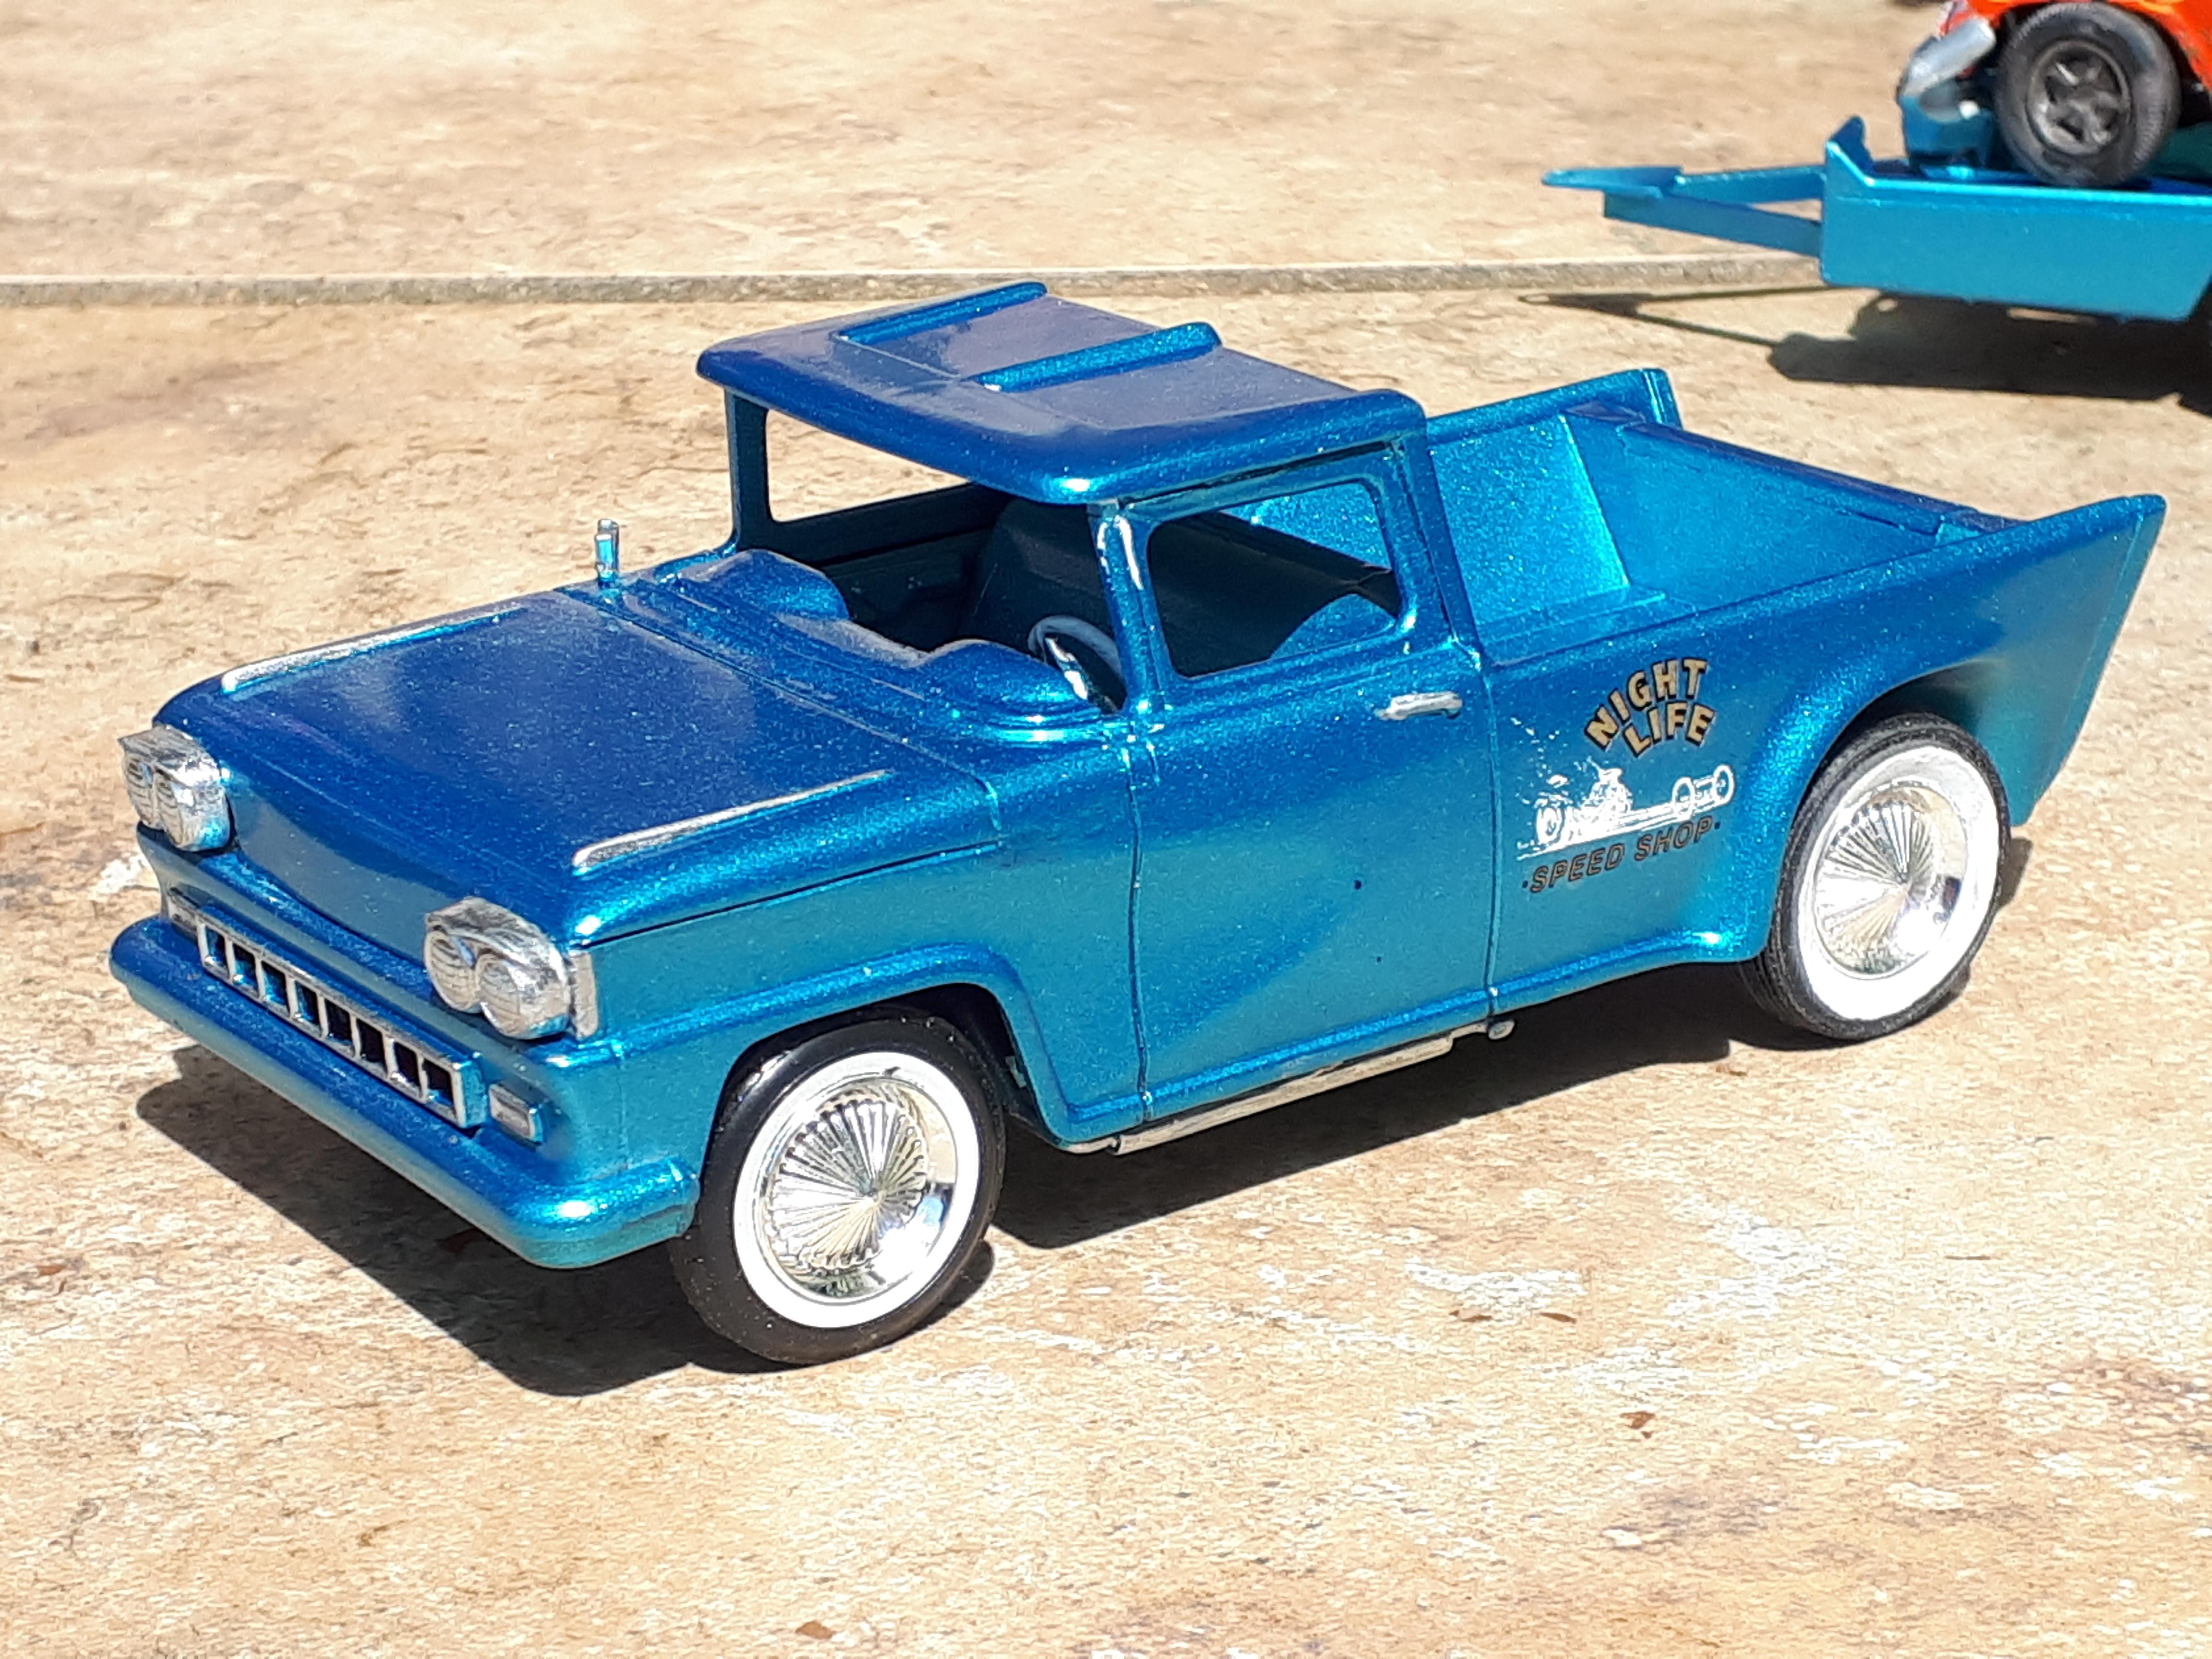
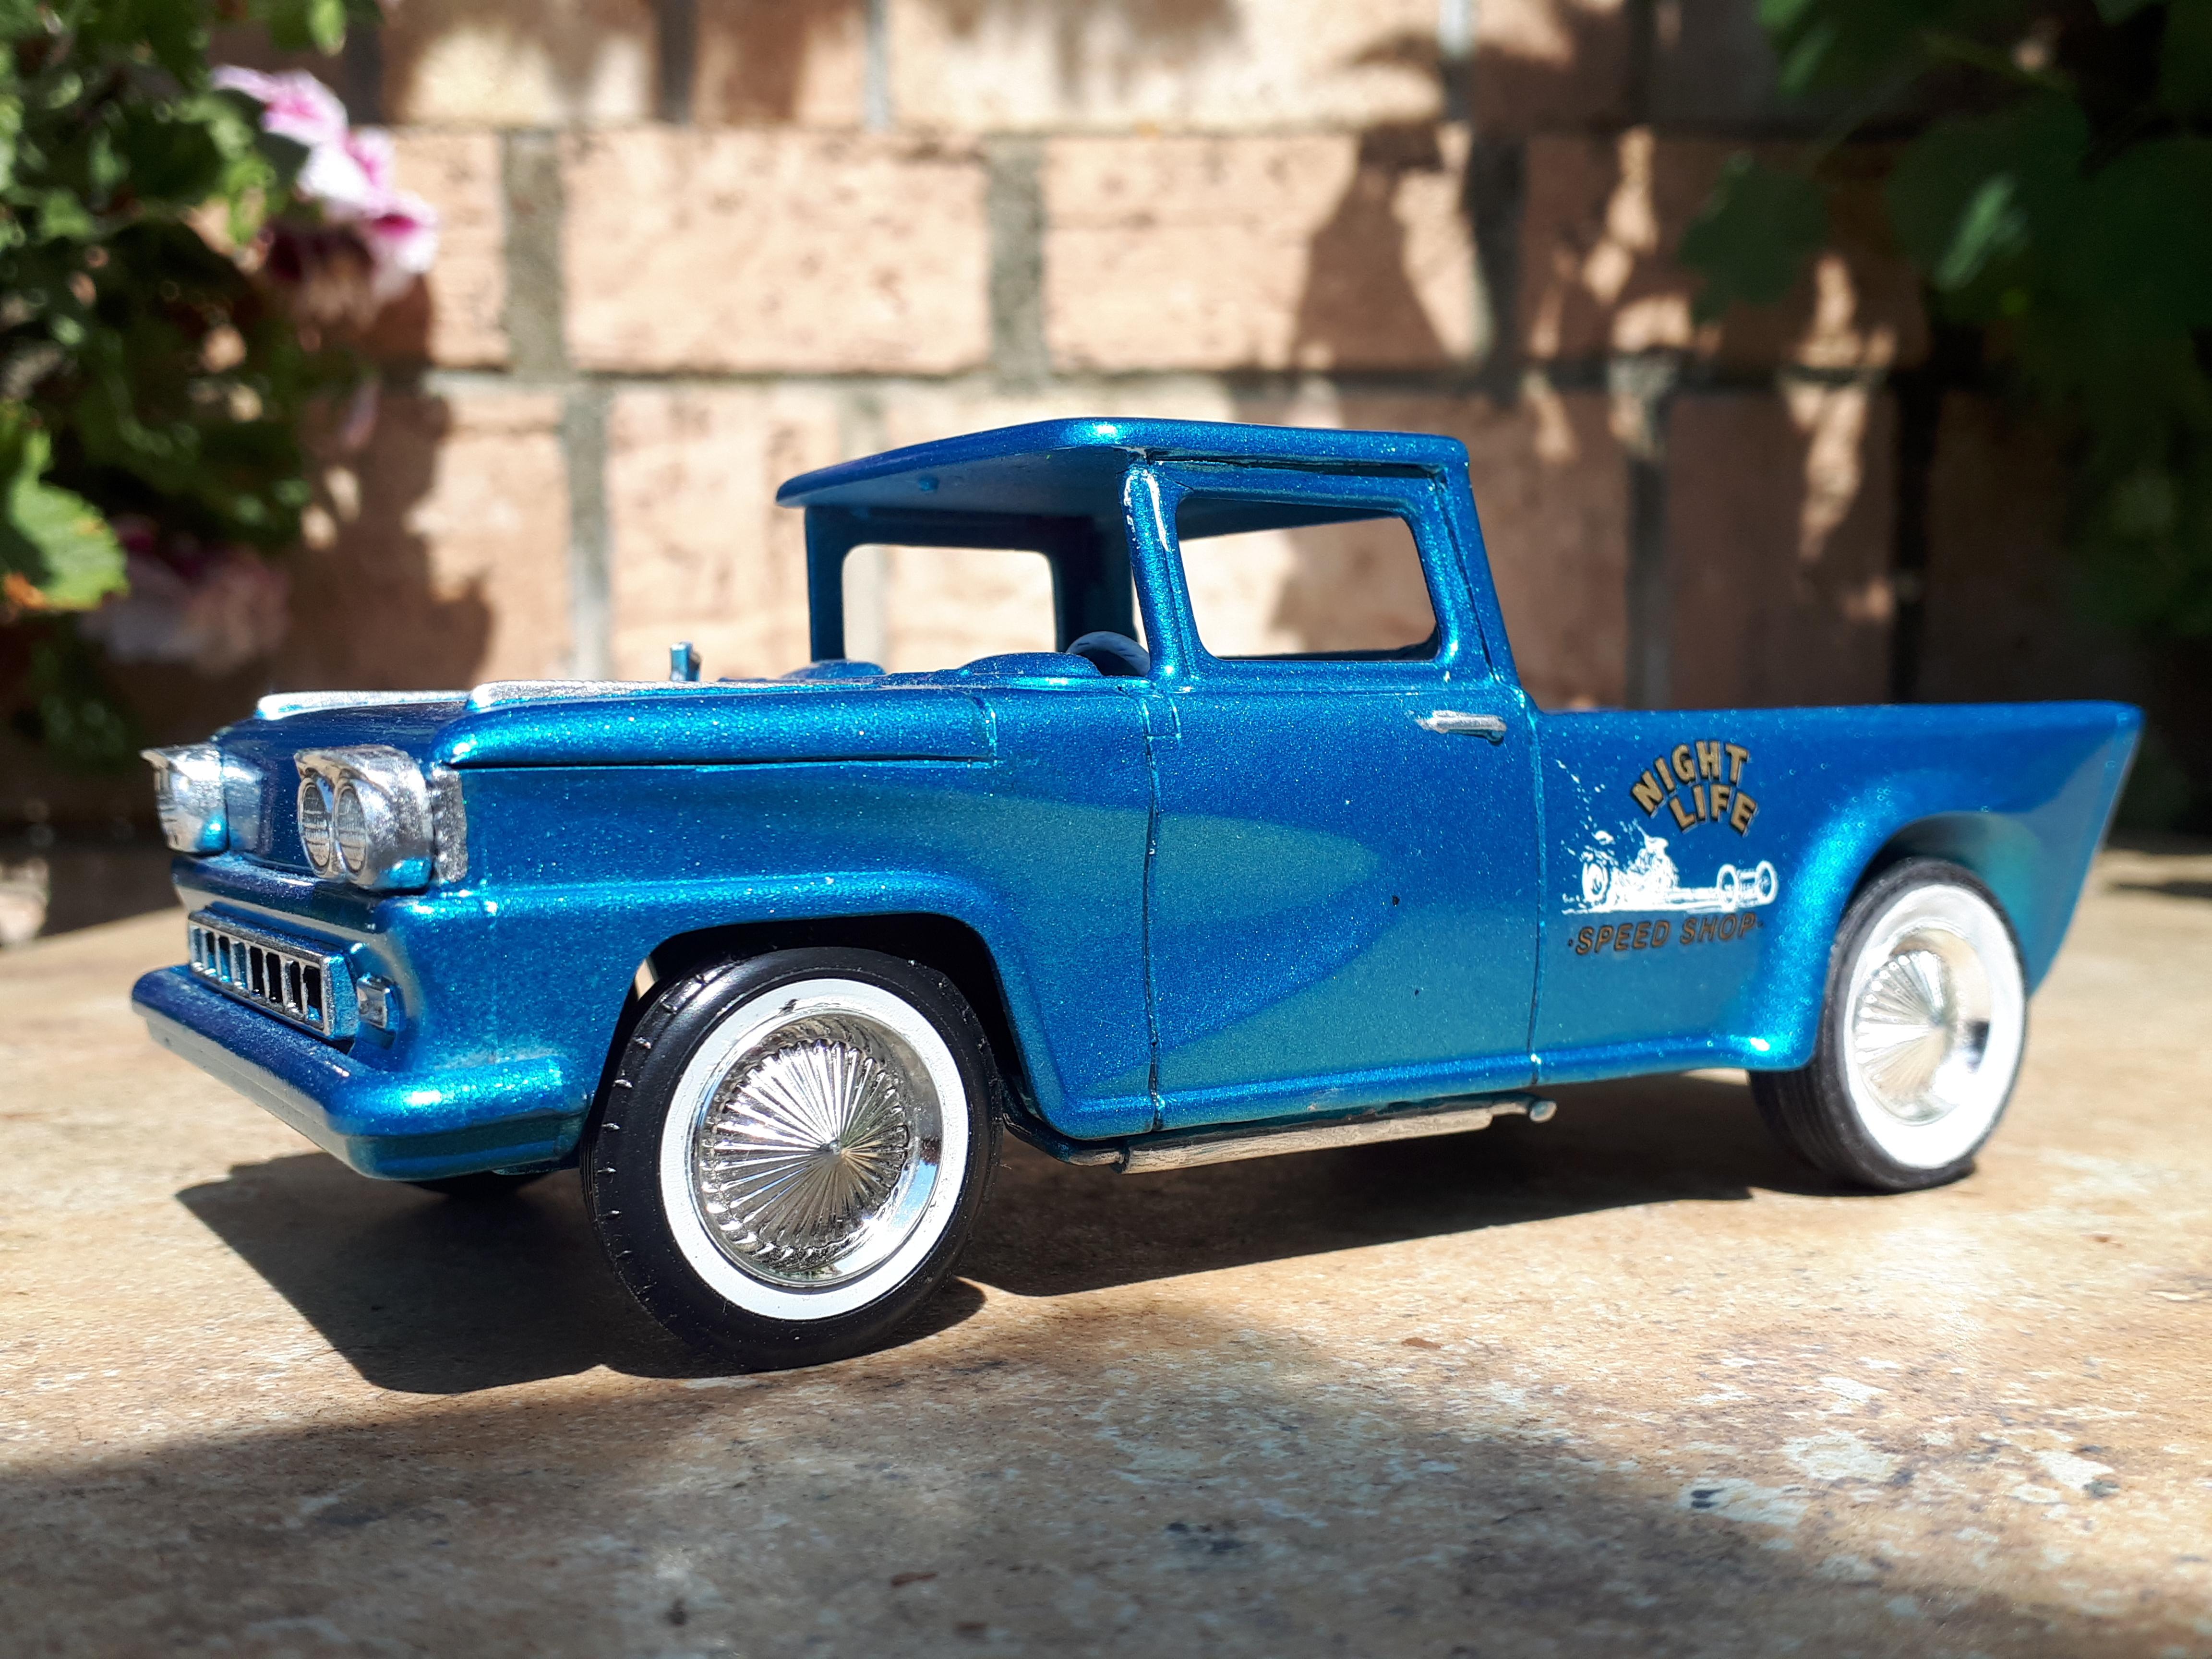
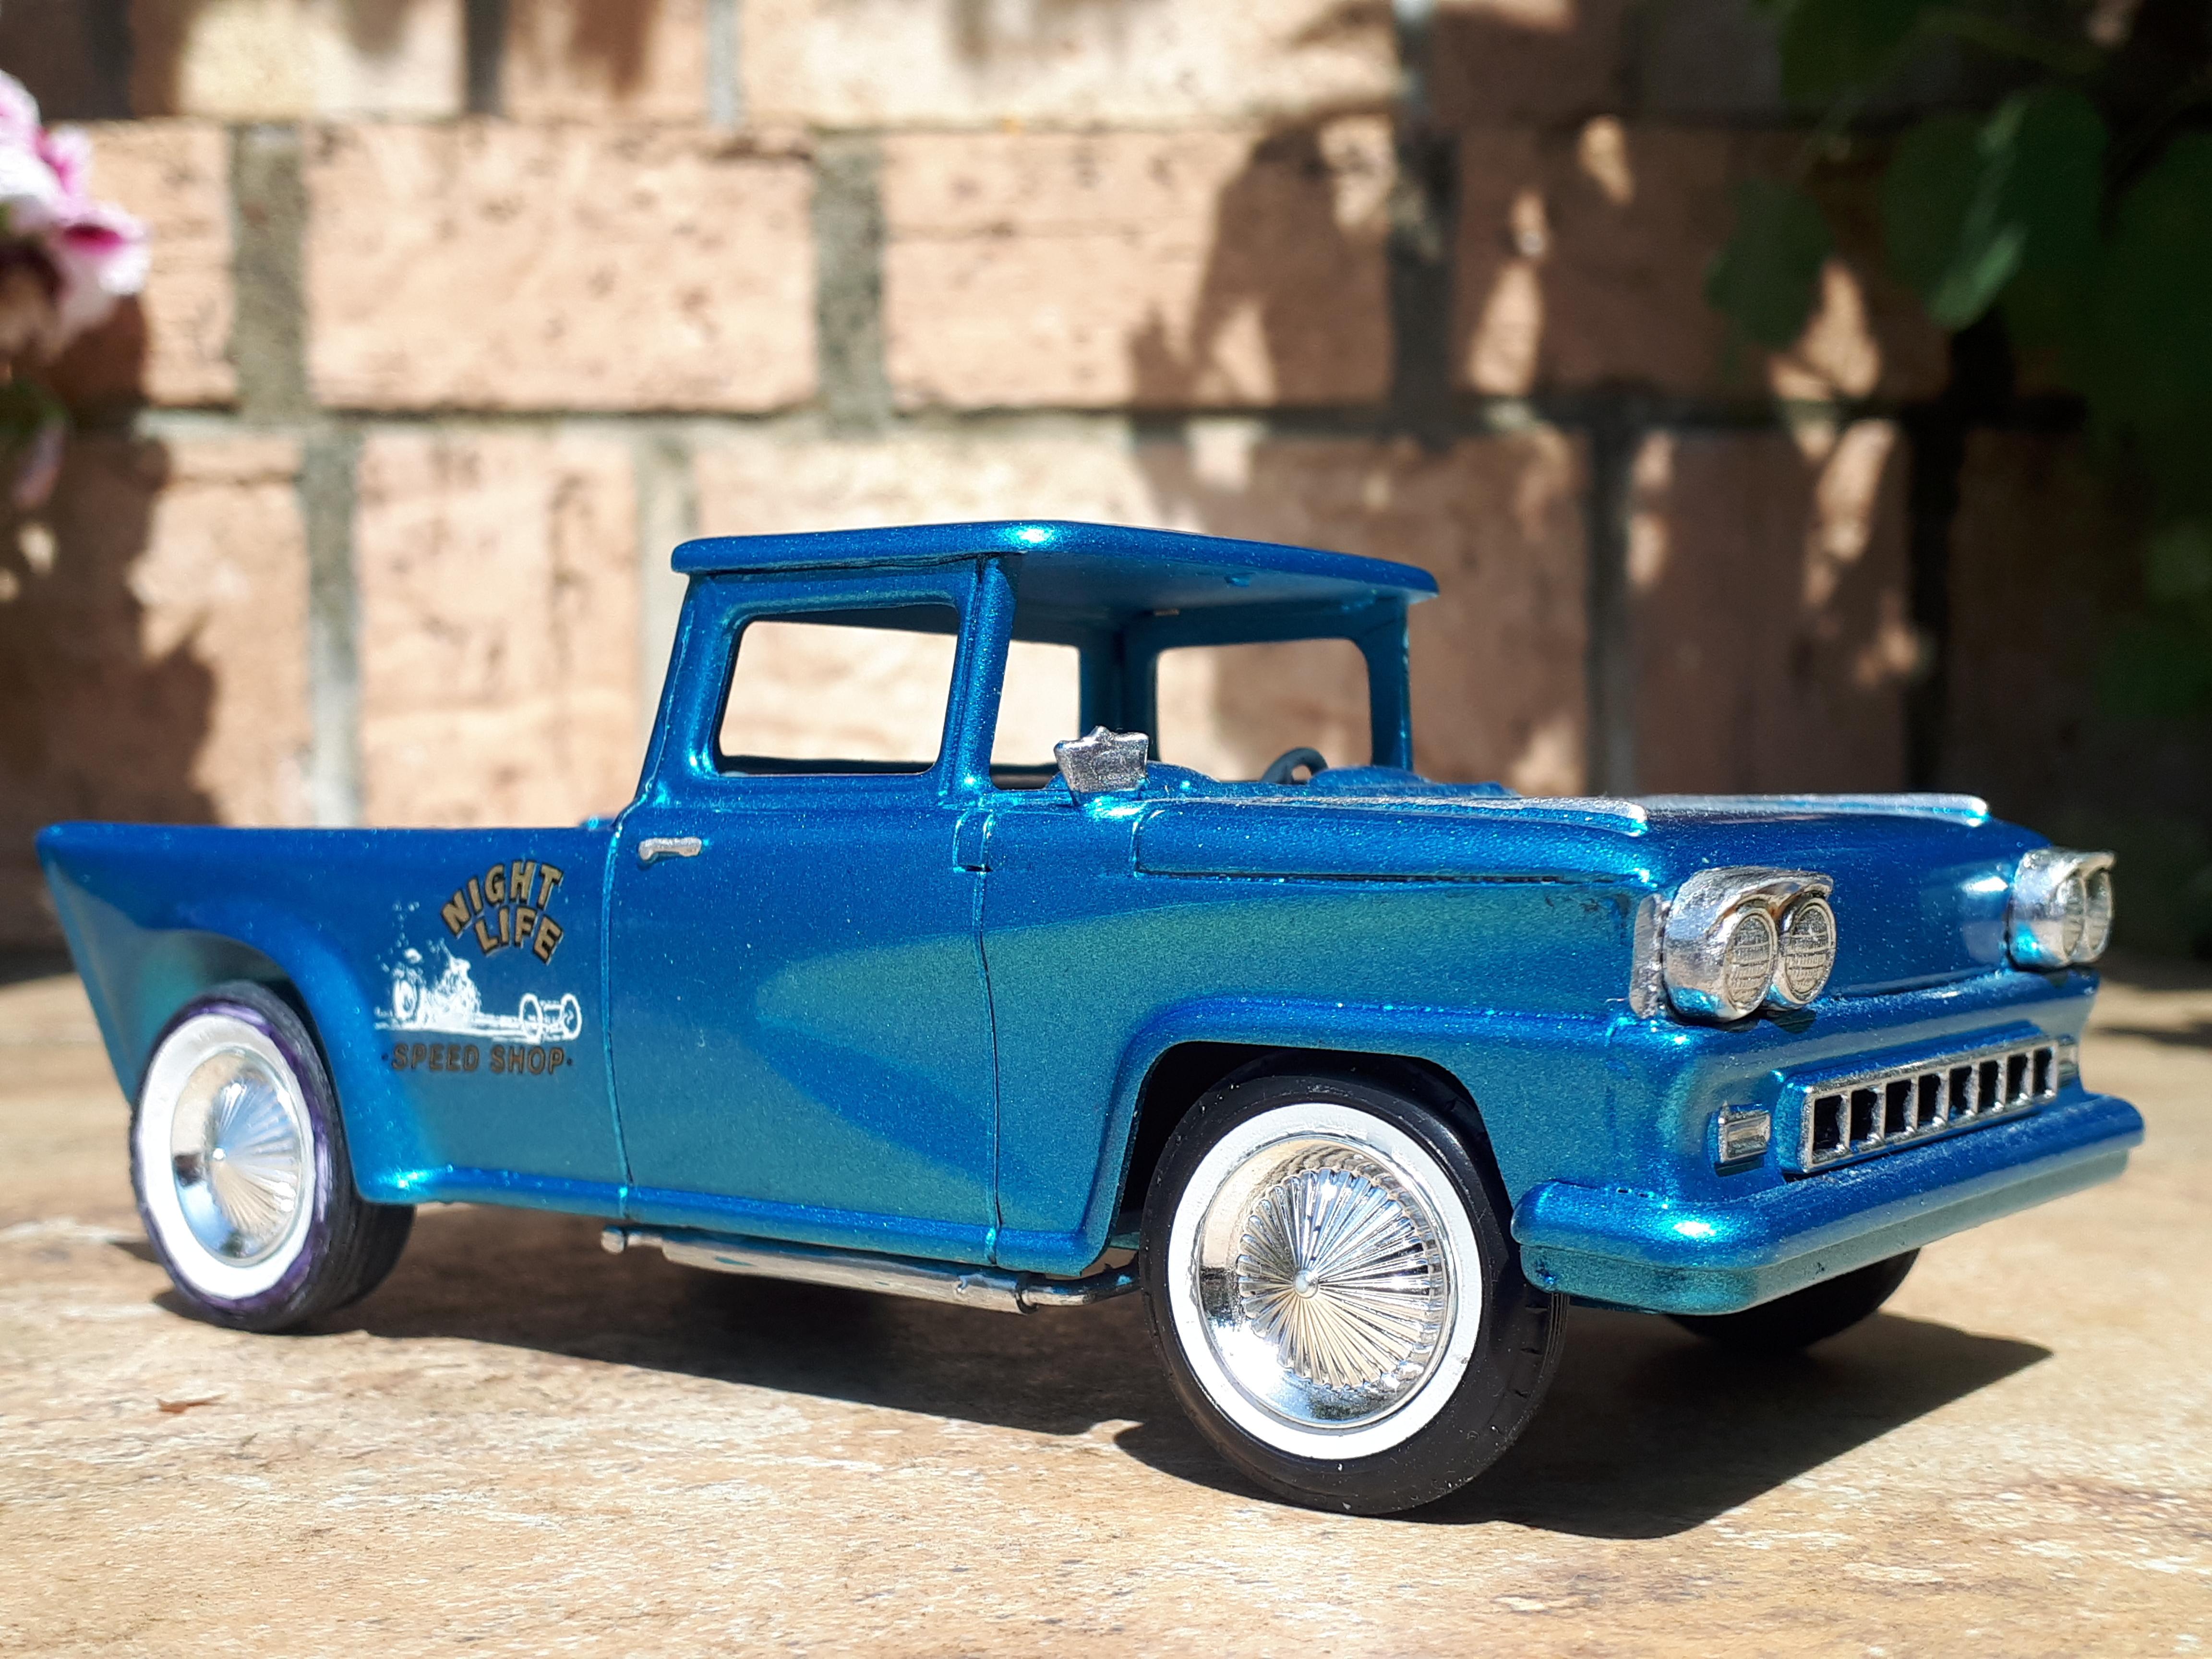
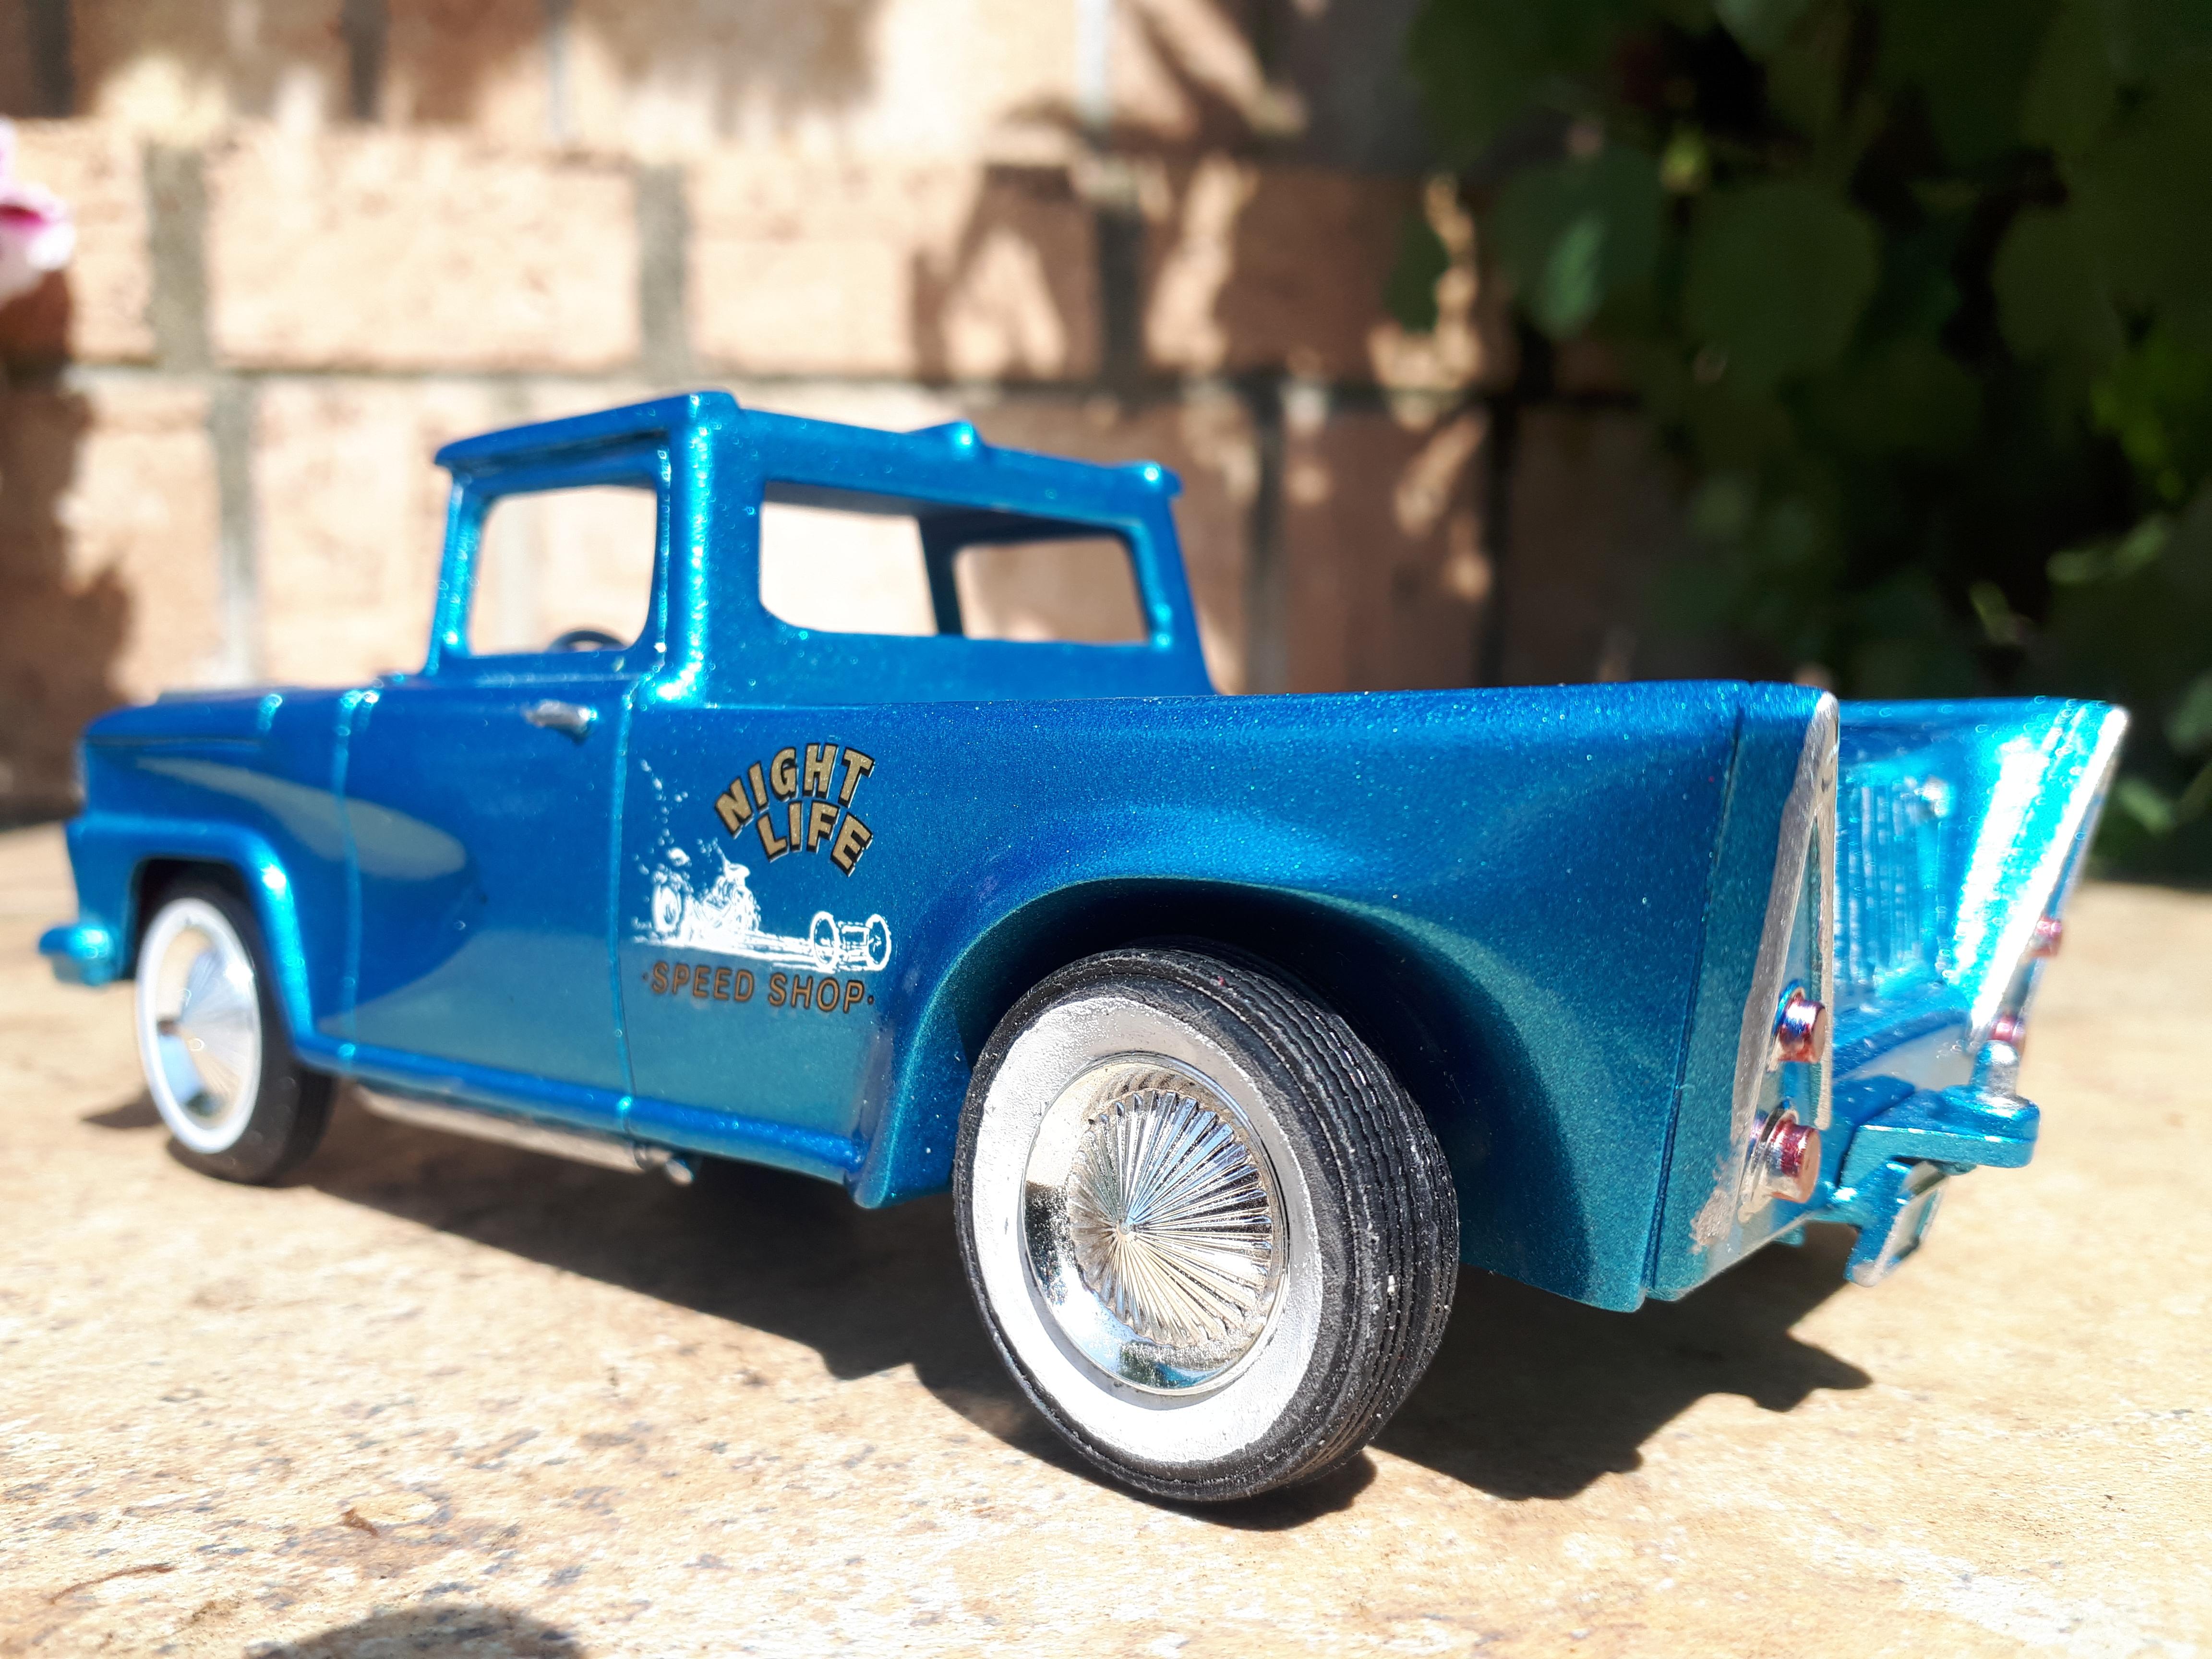
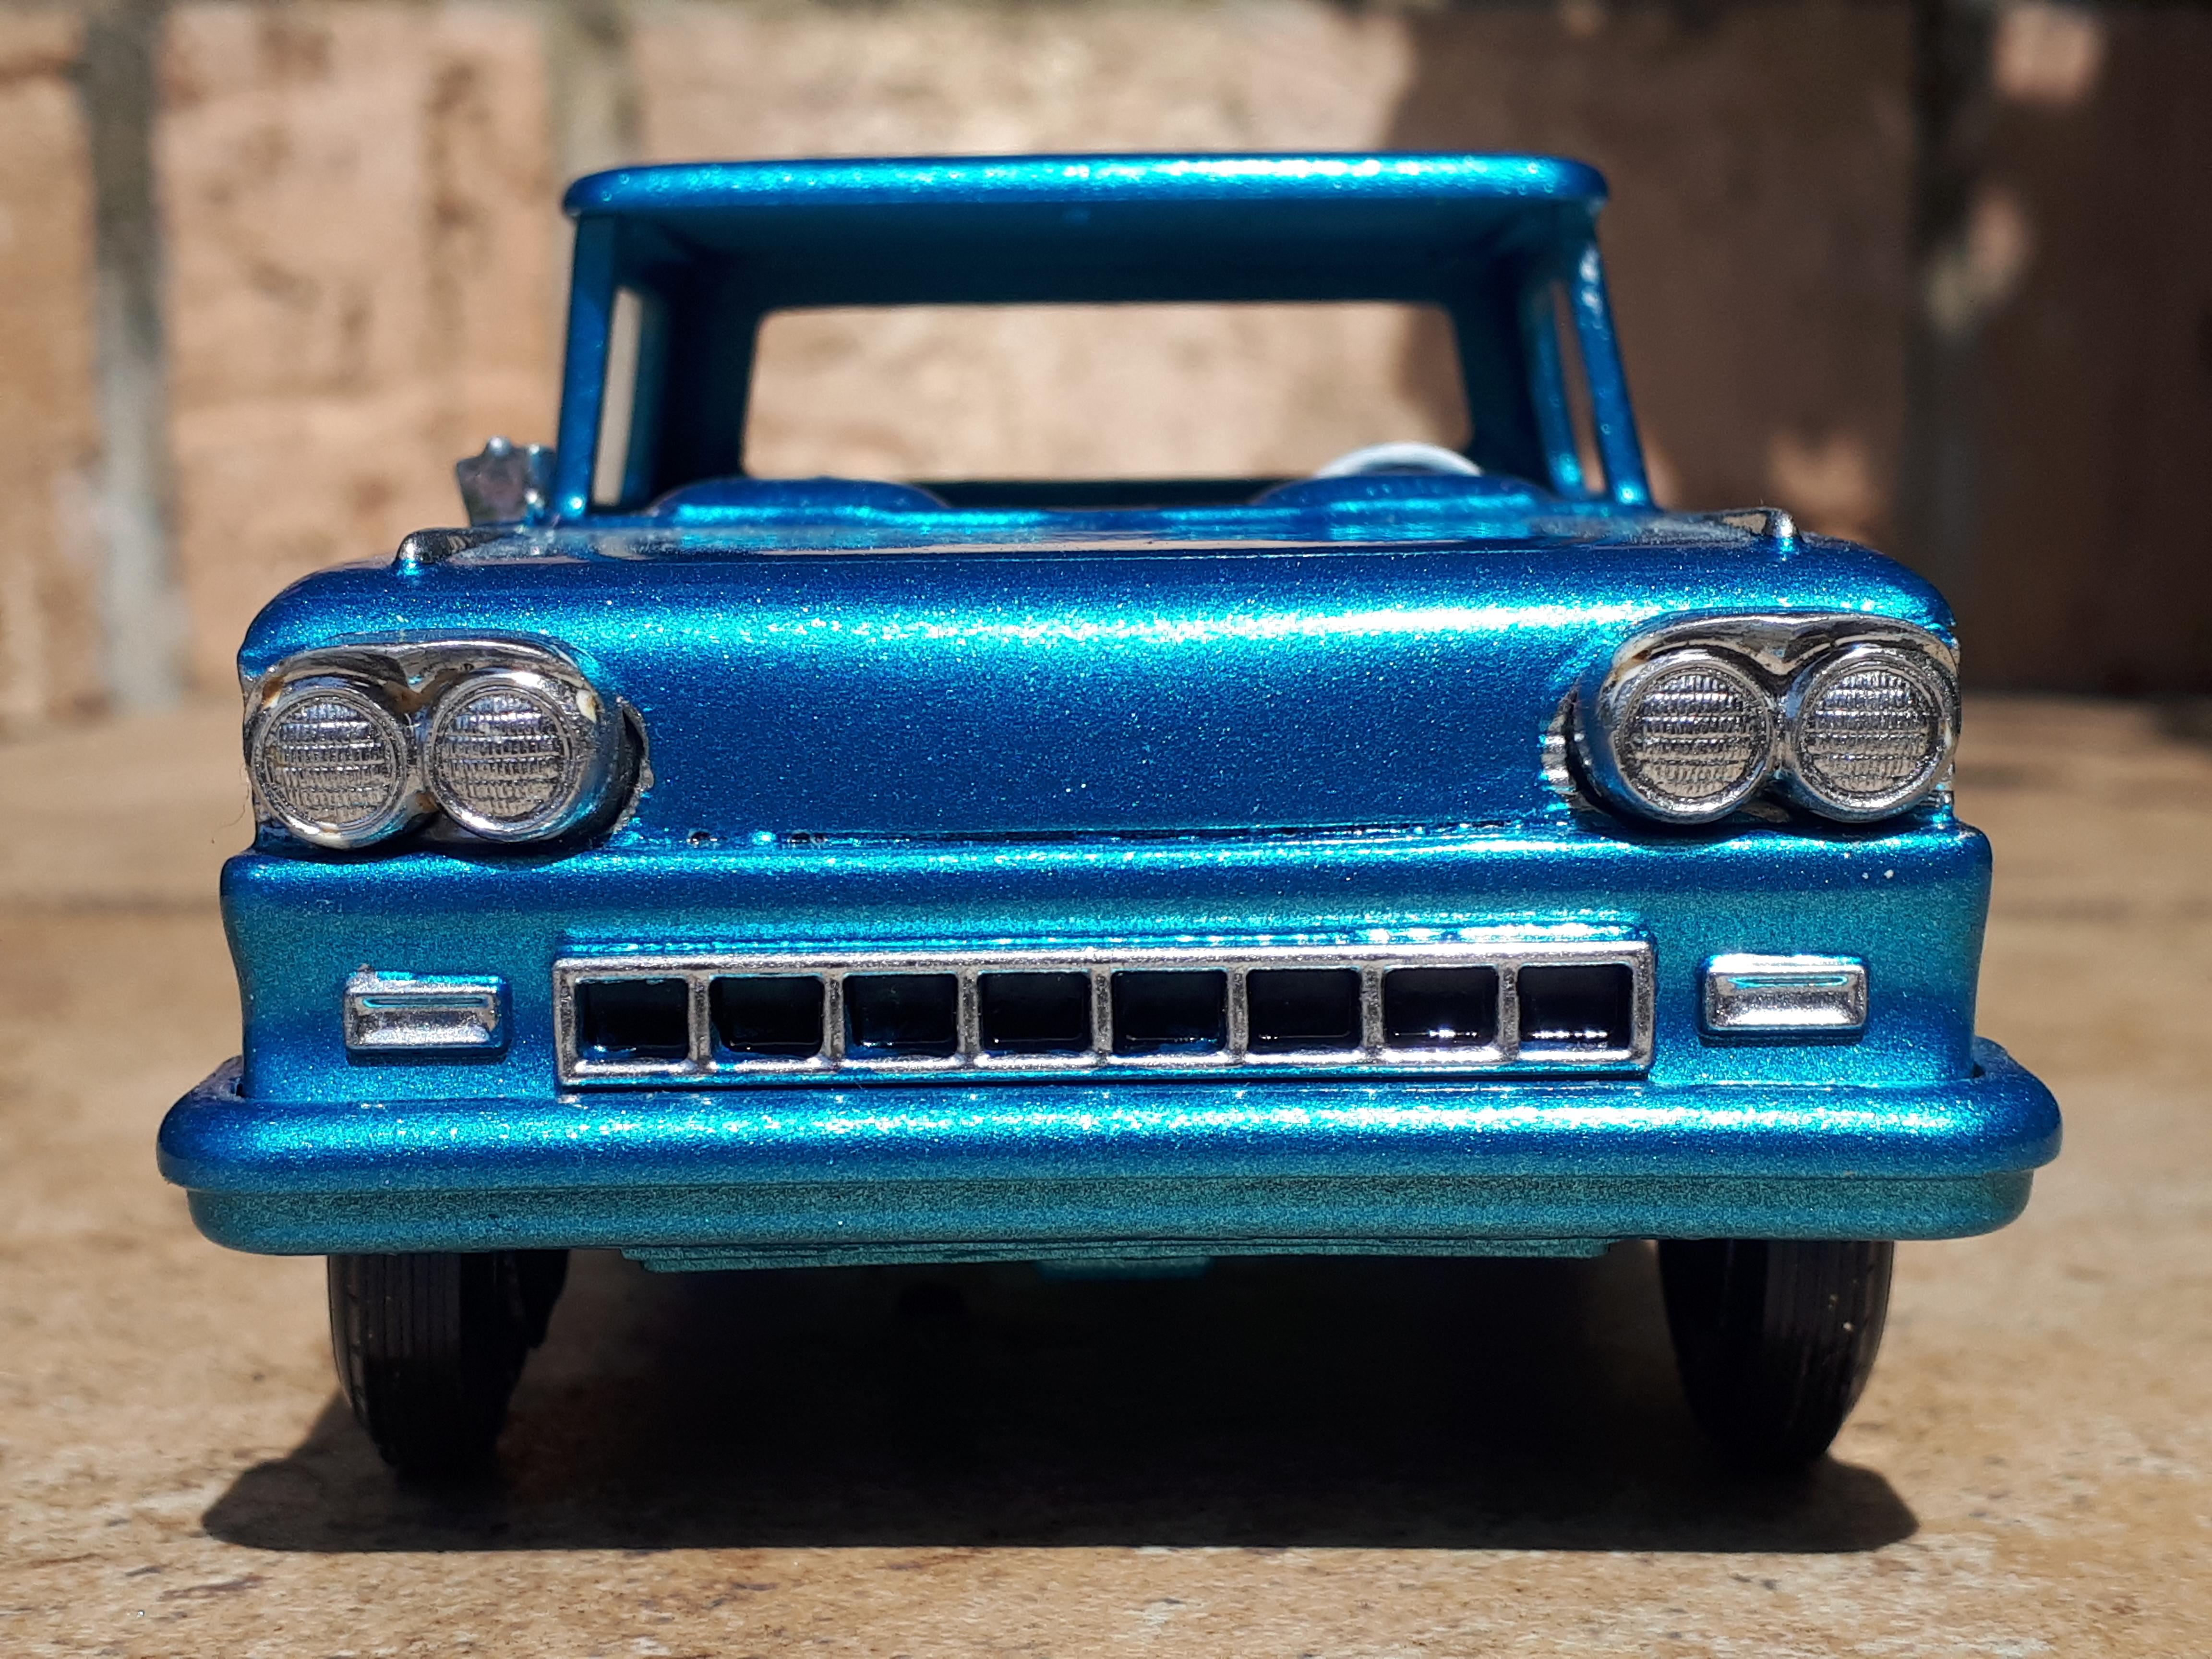
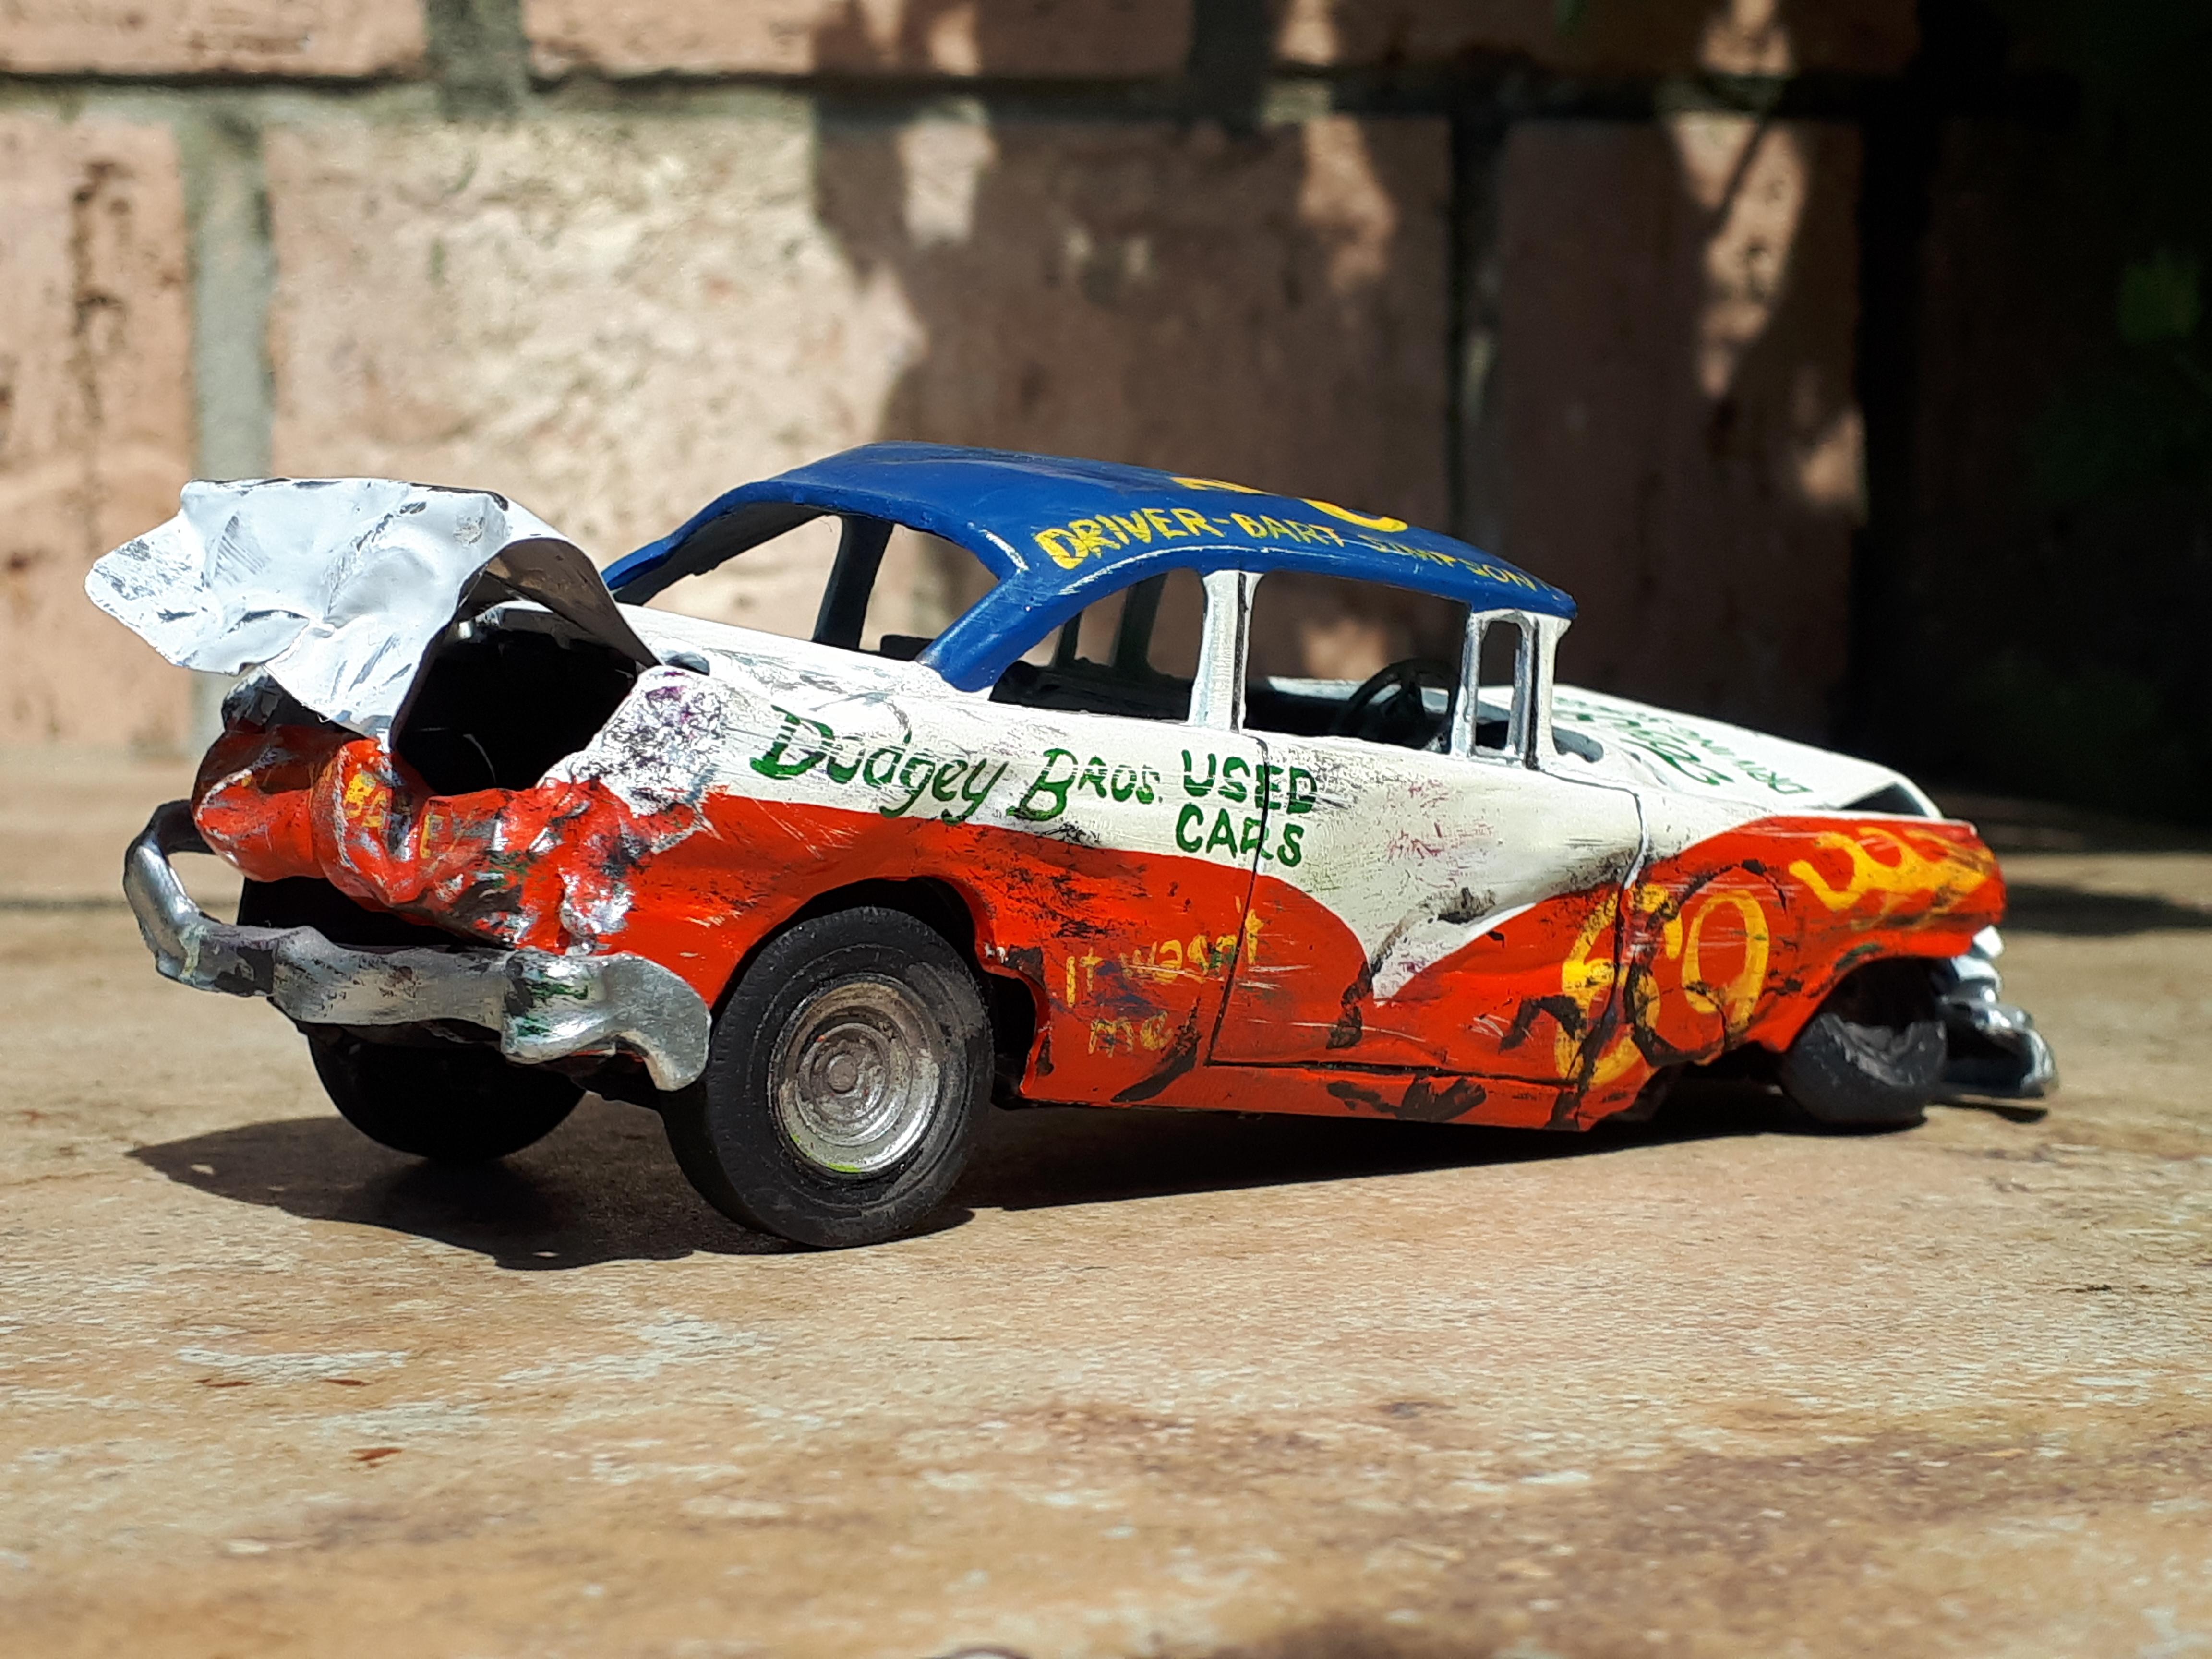
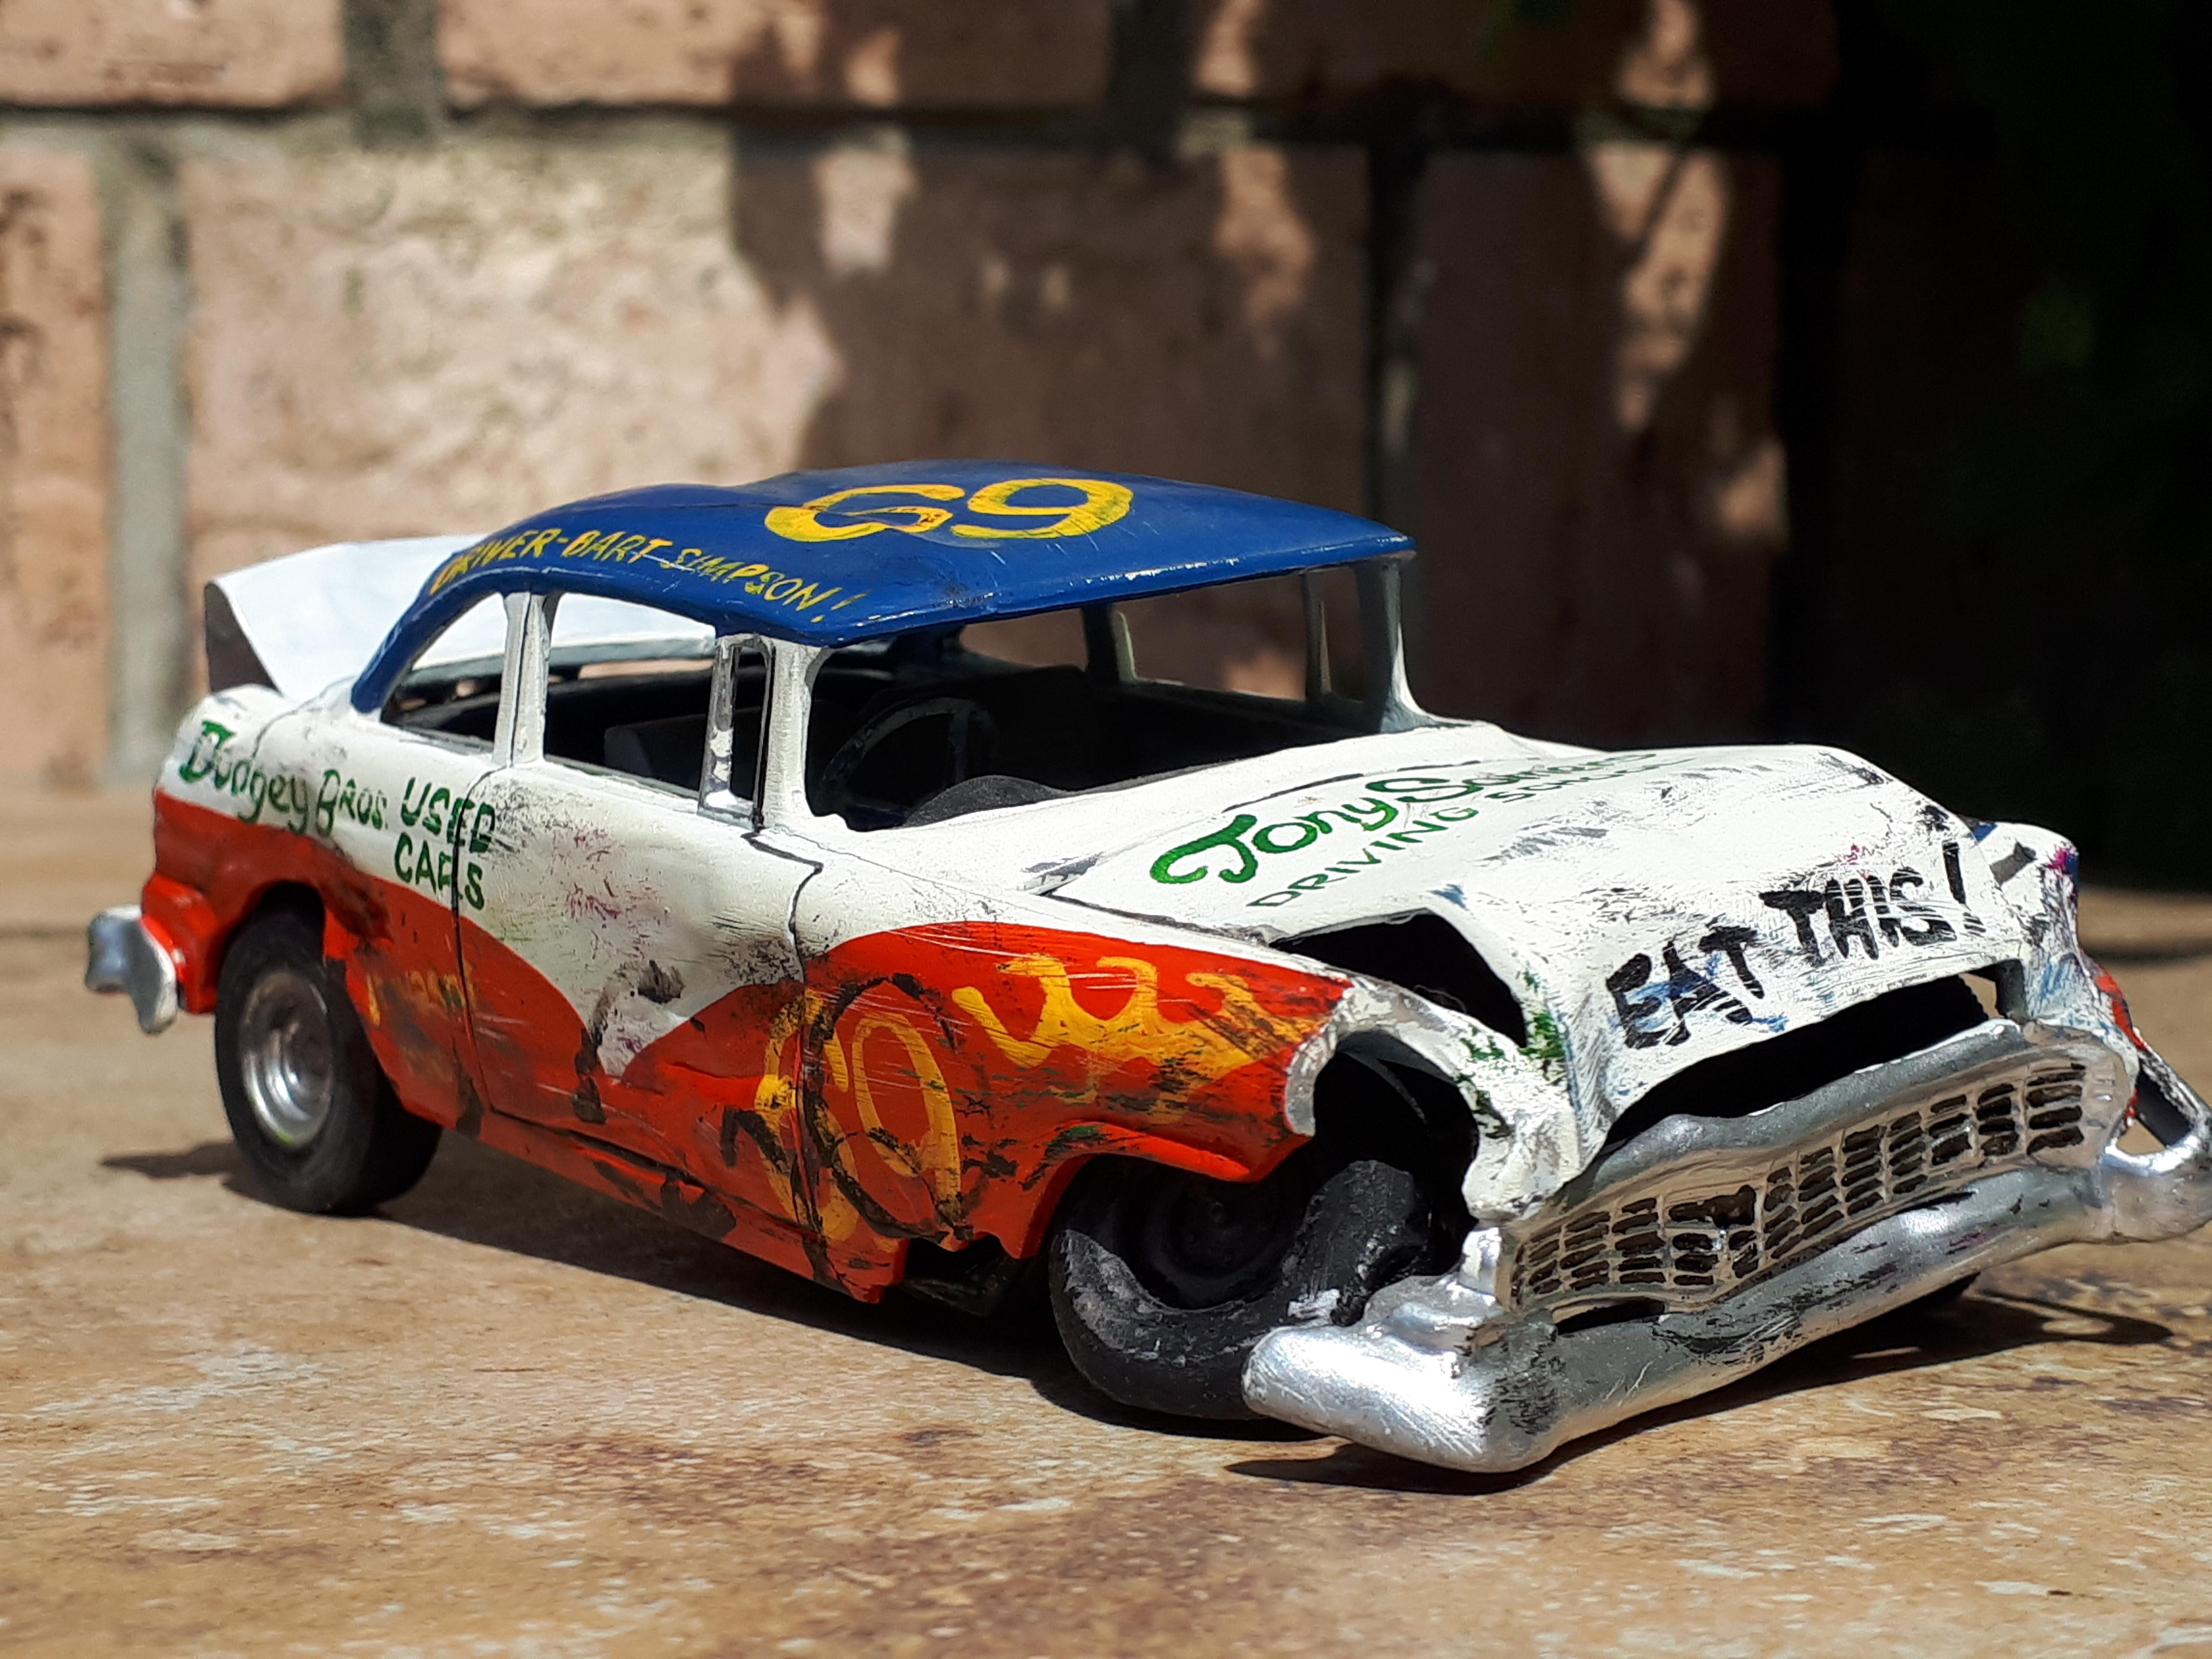
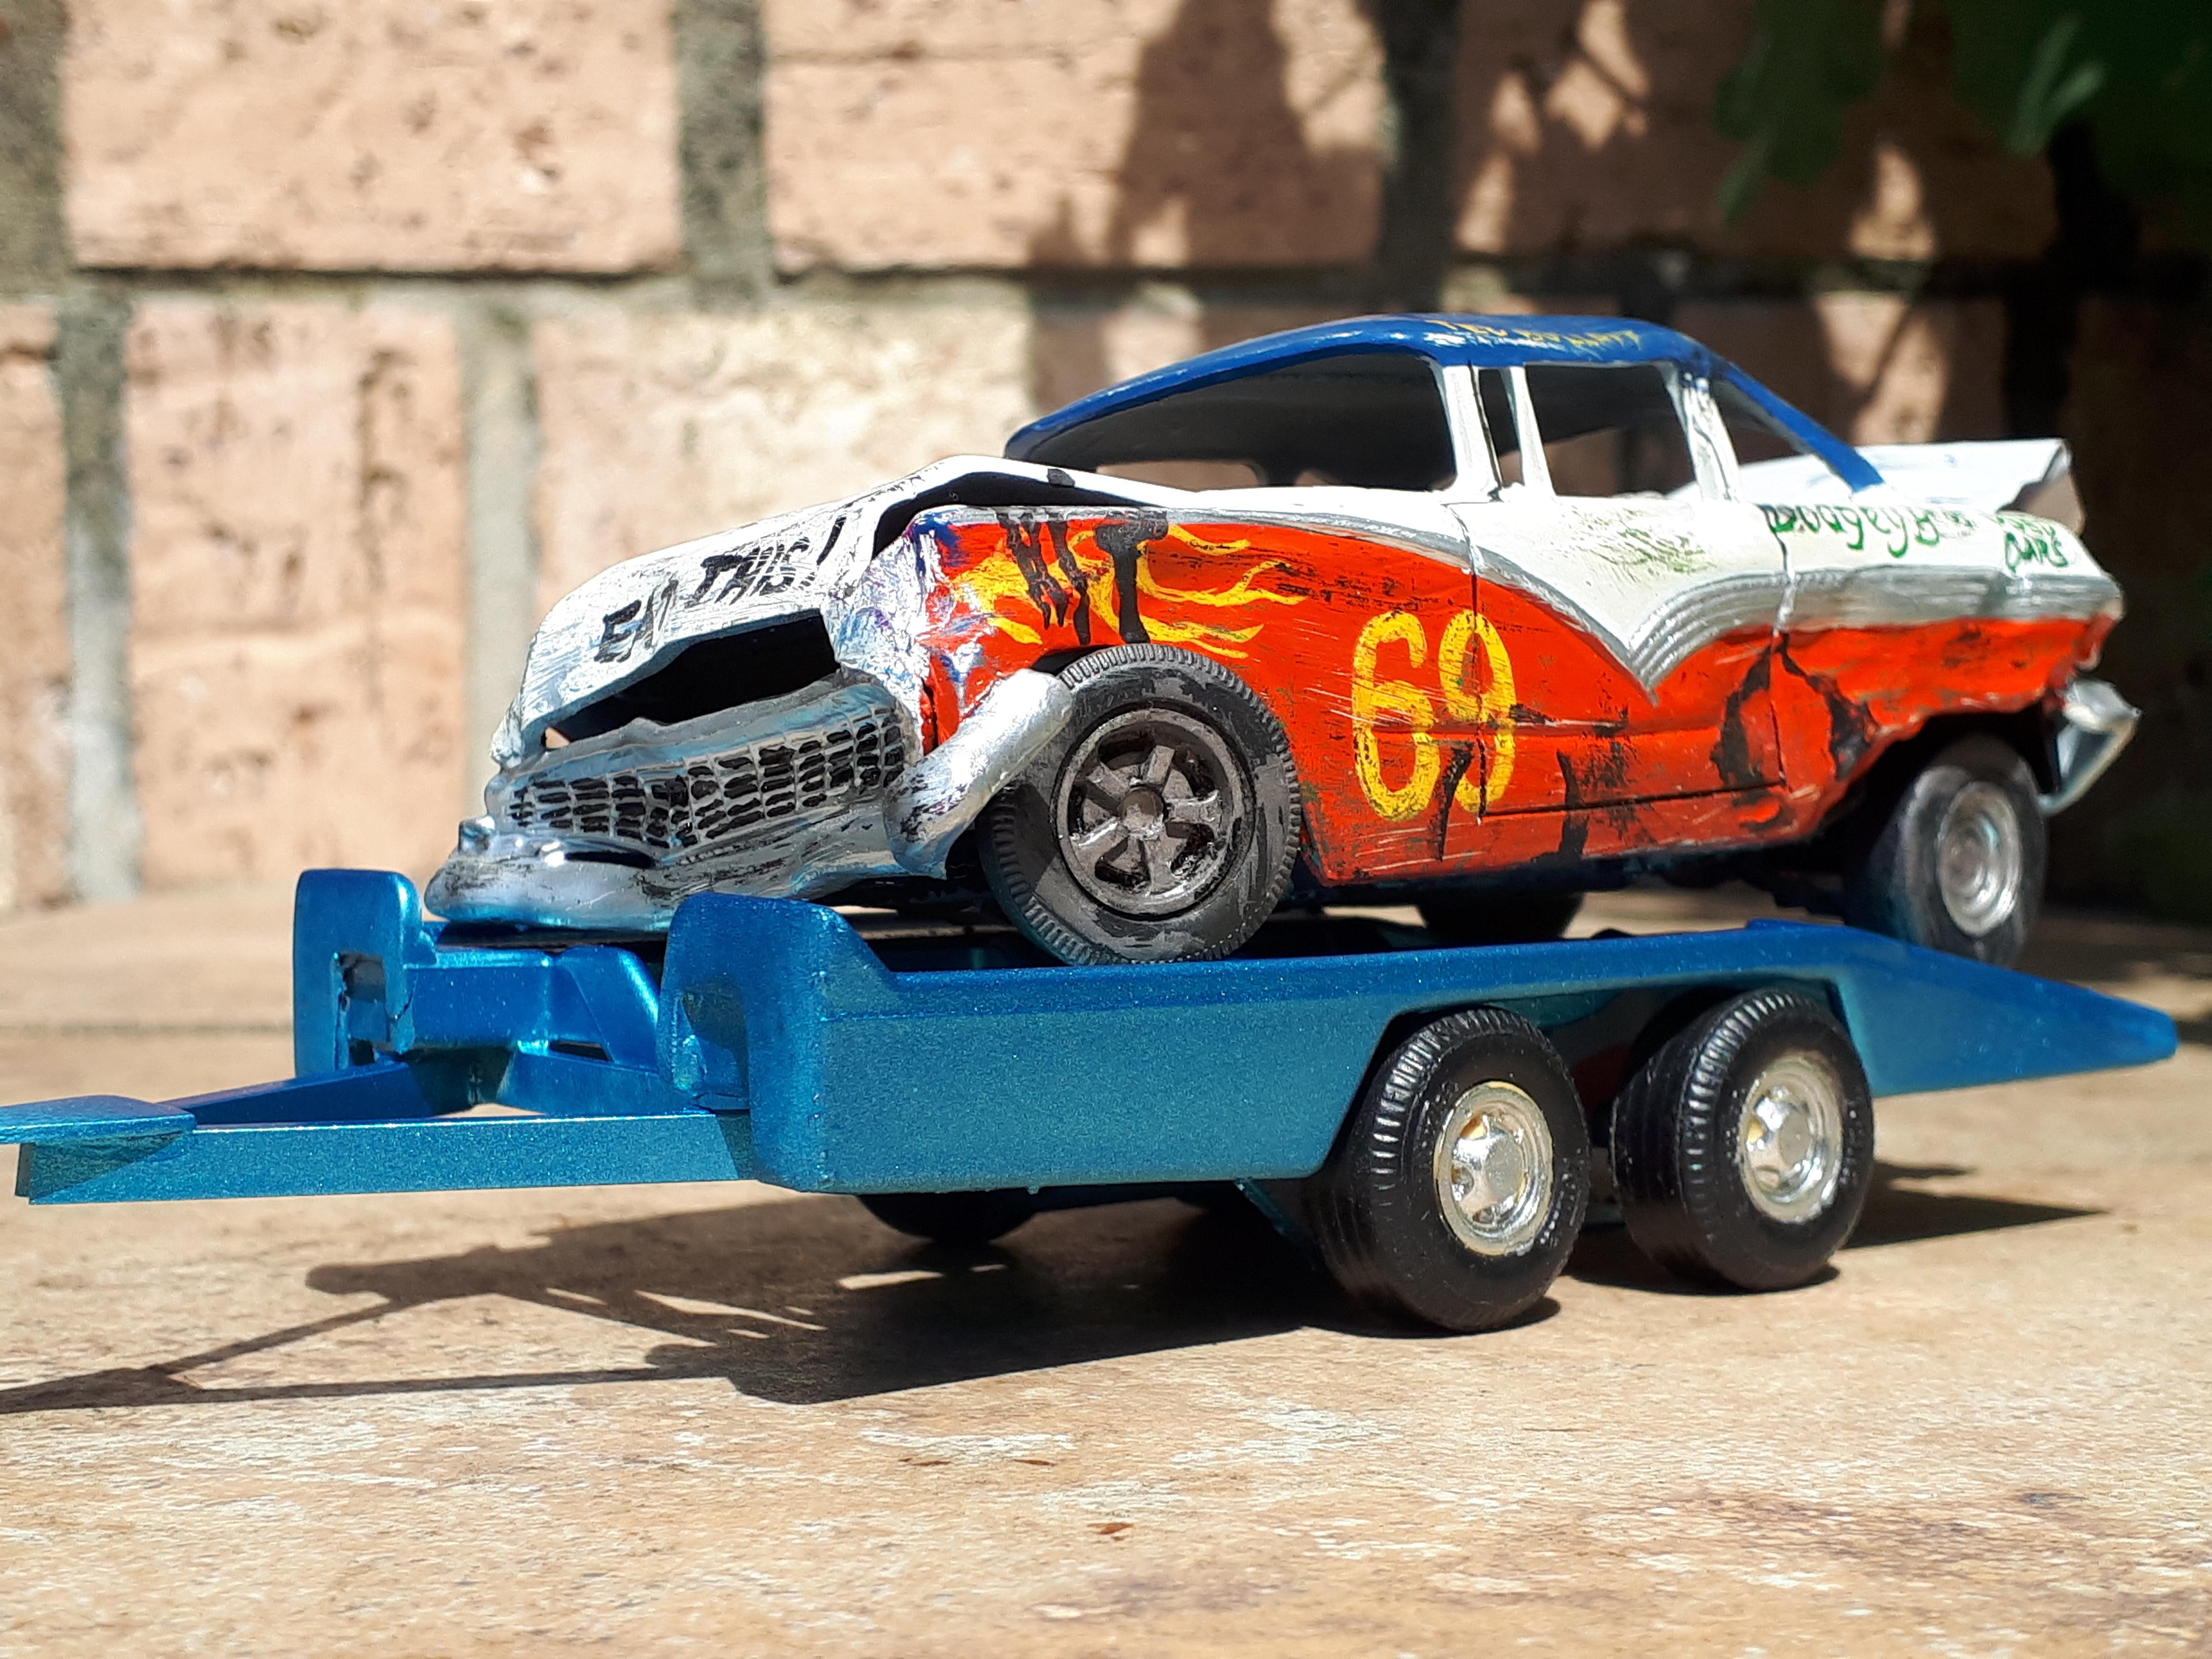
Although the 56 Ford in these photos has been finished for about twenty years, I just recently finished the custom Chevy truck and Tonka trailer to tow it with. The Aurora Demolition Demon is one of those unicorns that is very hard to track down but I cheated by buying it new when I was about fourteen, in the early seventies. I roughly brushpainted it in lime green back in the day but did an adult restoration in the late nineties. It has a fabricated trunklid (from an aluminium croissant tray) owing to losing the original one. The front wheels are old slot car items. All the damage was part of the original kit, a most unique model I'm sure you would agree. The Aurora Custom Chevy pickup was sent to me by a friend in the USA. Apart from some glue burns on the roof it was in decent condition but it really was glued solid! Anyone who has worked with Aurora models knows that they are made of very hard brittle plastic so I made the decision to restore it without dismantling it. This means that for now it has a metallic blue interior! It also lacks a windshield but I have a box of old plastic windshields to sort through yet. There is very little of a gluing surface on this model so thin acetate is out of the question this time. The wheels and tyres are the smallest ones I could find in my 1/25th scale stash but look appropriate for a big Chevy pickup. The headlights are from my stash - Oldsmobile perhaps? They were old, yellowed white plastic and I restored them with a Molotow pen. The trailer is a Tonka toy with a modified tow hitch. Would you believe that barely four days after modifying it and painting it I went to a toy fair in South Australia where a good friend gave me a terrific deal on not one but two mint Aurora show car trailers in their original box? I will build these for another project now - the Tonka one worked too well to warrant changing it. It just goes to show that with a bit of love and adult building skills these old Aurora 1/32nd scale models can look very cool. As I have a display cabinet dedicated to dirt track race cars, this is a perfect fit for me! Cheers Alan
-
Stripping silver paint
alan barton replied to NOBLNG's topic in Model Building Questions and Answers
I'll second that, Joe! You could dip that screen in Future right now, as it is, and the windows would look like brand new! Cheers Alan -
Big John Cuda funny car progress
alan barton replied to 4mula1fan's topic in WIP: Drag Racing Models
They sound interesting! Don't worry about your finish, those glues are water based, and a Q tip dipped in water ( or spit, LOL!) will clean it up in a jiffy with no damage to your paint. Even after it is dried, some careful wiping with a wet cloth will fix it. Cheers Alan -
Big John Cuda funny car progress
alan barton replied to 4mula1fan's topic in WIP: Drag Racing Models
When I was a kid, I fell in love and tried to build my own Logghe style funnycar, using the frame rails from an AMT Double Dragster and the floor pan from an MPC 69 Dodge Coronet! What I achieved was a hot mess (I was still pretty proud of it through teenage eyes) but what I WANTED it to look like was your frame here! That is some cool detail you have added there. I have three suggestions for your glass issues. I'm sure Elmer's would work fine - I believe that is a "white" glue , PVA, like our Aquadhere in Australia. The only down side is you have to leave it a solid day for strength and it is best to tape it in place. I have recently started using Modge Plodge, after seeing it on hpiguys youtube channel and then finding it locally. That seems to be a bit stickier than PVA and sets up quicker. I like it a lot. In the past I have also used Micro Liquitape and Micro Crystal Clear which are a hobby shop product. If you give any of these products adequate time to dry, like at least a day, they will work fine. I would love to see how small your watchmaking screws are but suspect they might still look like 1/2 inch bolts in scale! O.K. for the rat rod look but not so slick for a cool funnycar like yours. Hope that helps Alan -
What a treasure trove! A fantastic story and a great piece of history. Thanks for sharing it with us. Cheers Alan
-
427 Cammer in a '67 Mustang GT aka "Platinum Pony"
alan barton replied to Bills72sj's topic in Drag Racing
What a beautifully presented car in a completely believable setting. It is great to see a modern workshop, nicely laid out, neat and tidy, in contrast to the older crusty types that we often see. Your colour sense is superb - the scene just reeks of realism! Cheers Alan -
Wow- that chassis is razor sharp! I would be perfectly happy with that under any of my models. Might even pinch the colour scheme for a future project. I can't wait to see the finished coupe, I can just tell it is going to be very nice! Cheers Alan
-
Delighted to report that #209 has arrived in Perth Western Australia yesterday, which I am going to guess is the longest distance any of the magazines travel (or very near to!) Great job guys, enjoyed reading and will be re-reading it tonight. So if the first USA copy reported here was on August 27, then my copy took 39 days extra which is considerably better than the last issue. Woohoo! Cheers Alan
-
I continue to enjoy your meticulous approach to your models, Steve. I can really feel your pain on the exhaust system as I have experienced similar challenges in the past. What I like is that your solution to the problem is elegant and completely believable. As you said, in 1/25th, things don't always go as planned because of what I call scale tolerances that build up and against you plus the fact that the original model company undoubtedly used some artistic license as well. Thank you for your dedication and for documenting your work for us all to enjoy. Cheers Alan
-
Gee, you do clean work, Kit! I aspire to it but sometimes feel like I fall short.......again! Lovely to watch the progress on this model. I have been focussed on a different model for my model column in Austrlaian Street Rodding magazine but hope to get my doors hinged this week so that I am ready for the paint booth soon - we are just starting to get a bit of warm weather here after one of our coldest wettest winters in decades so it will be good to get the colour on. Good luck with your painting efforts! Cheers Alan
-
Yep, definitely spinners. The reason you might be experiencing problems with the fit on these kits is that they were originally part of the Switchers range and the parts were meant to be swapped back and forth between models - meaning the fit wasn't that great to start with. Don't sweat it, your work so far looks great and you are seeing more faults than we are! Cheers Alan