alan barton
-
Posts
2,105 -
Joined
-
Last visited
Content Type
Profiles
Forums
Events
Gallery
Everything posted by alan barton
-
All good Luke, I am a modelling machine at the moment but there have definitely been times when I haven't been able to drag myself out of the comfy chair in the lounge and into the model room. And bad days painting can exaggerate that situation! Hope you work through it soon - that is way too neat a model to be stalled! Cheers Alan
-
Your proportions are looking great Luke. It has a very factory look to it and the stance is very contemporary. Are you going to go for a factory style colour scheme?. If I could make one suggestion to improve the details - currently, your B pillar seems to start a mm or so behind the door jam. As utes use sedan doors, the B pillar usually appears to be slightly forward of the trailing door edge. If you added about a 2-3mm strip onto the front edge of your B pillar, it would look more convincing as well as adding a window frame to the back of the door. The trick would be to add the strip WITHOUT filling in the join - this would create the door seam at the same time. Cheers Alan
-
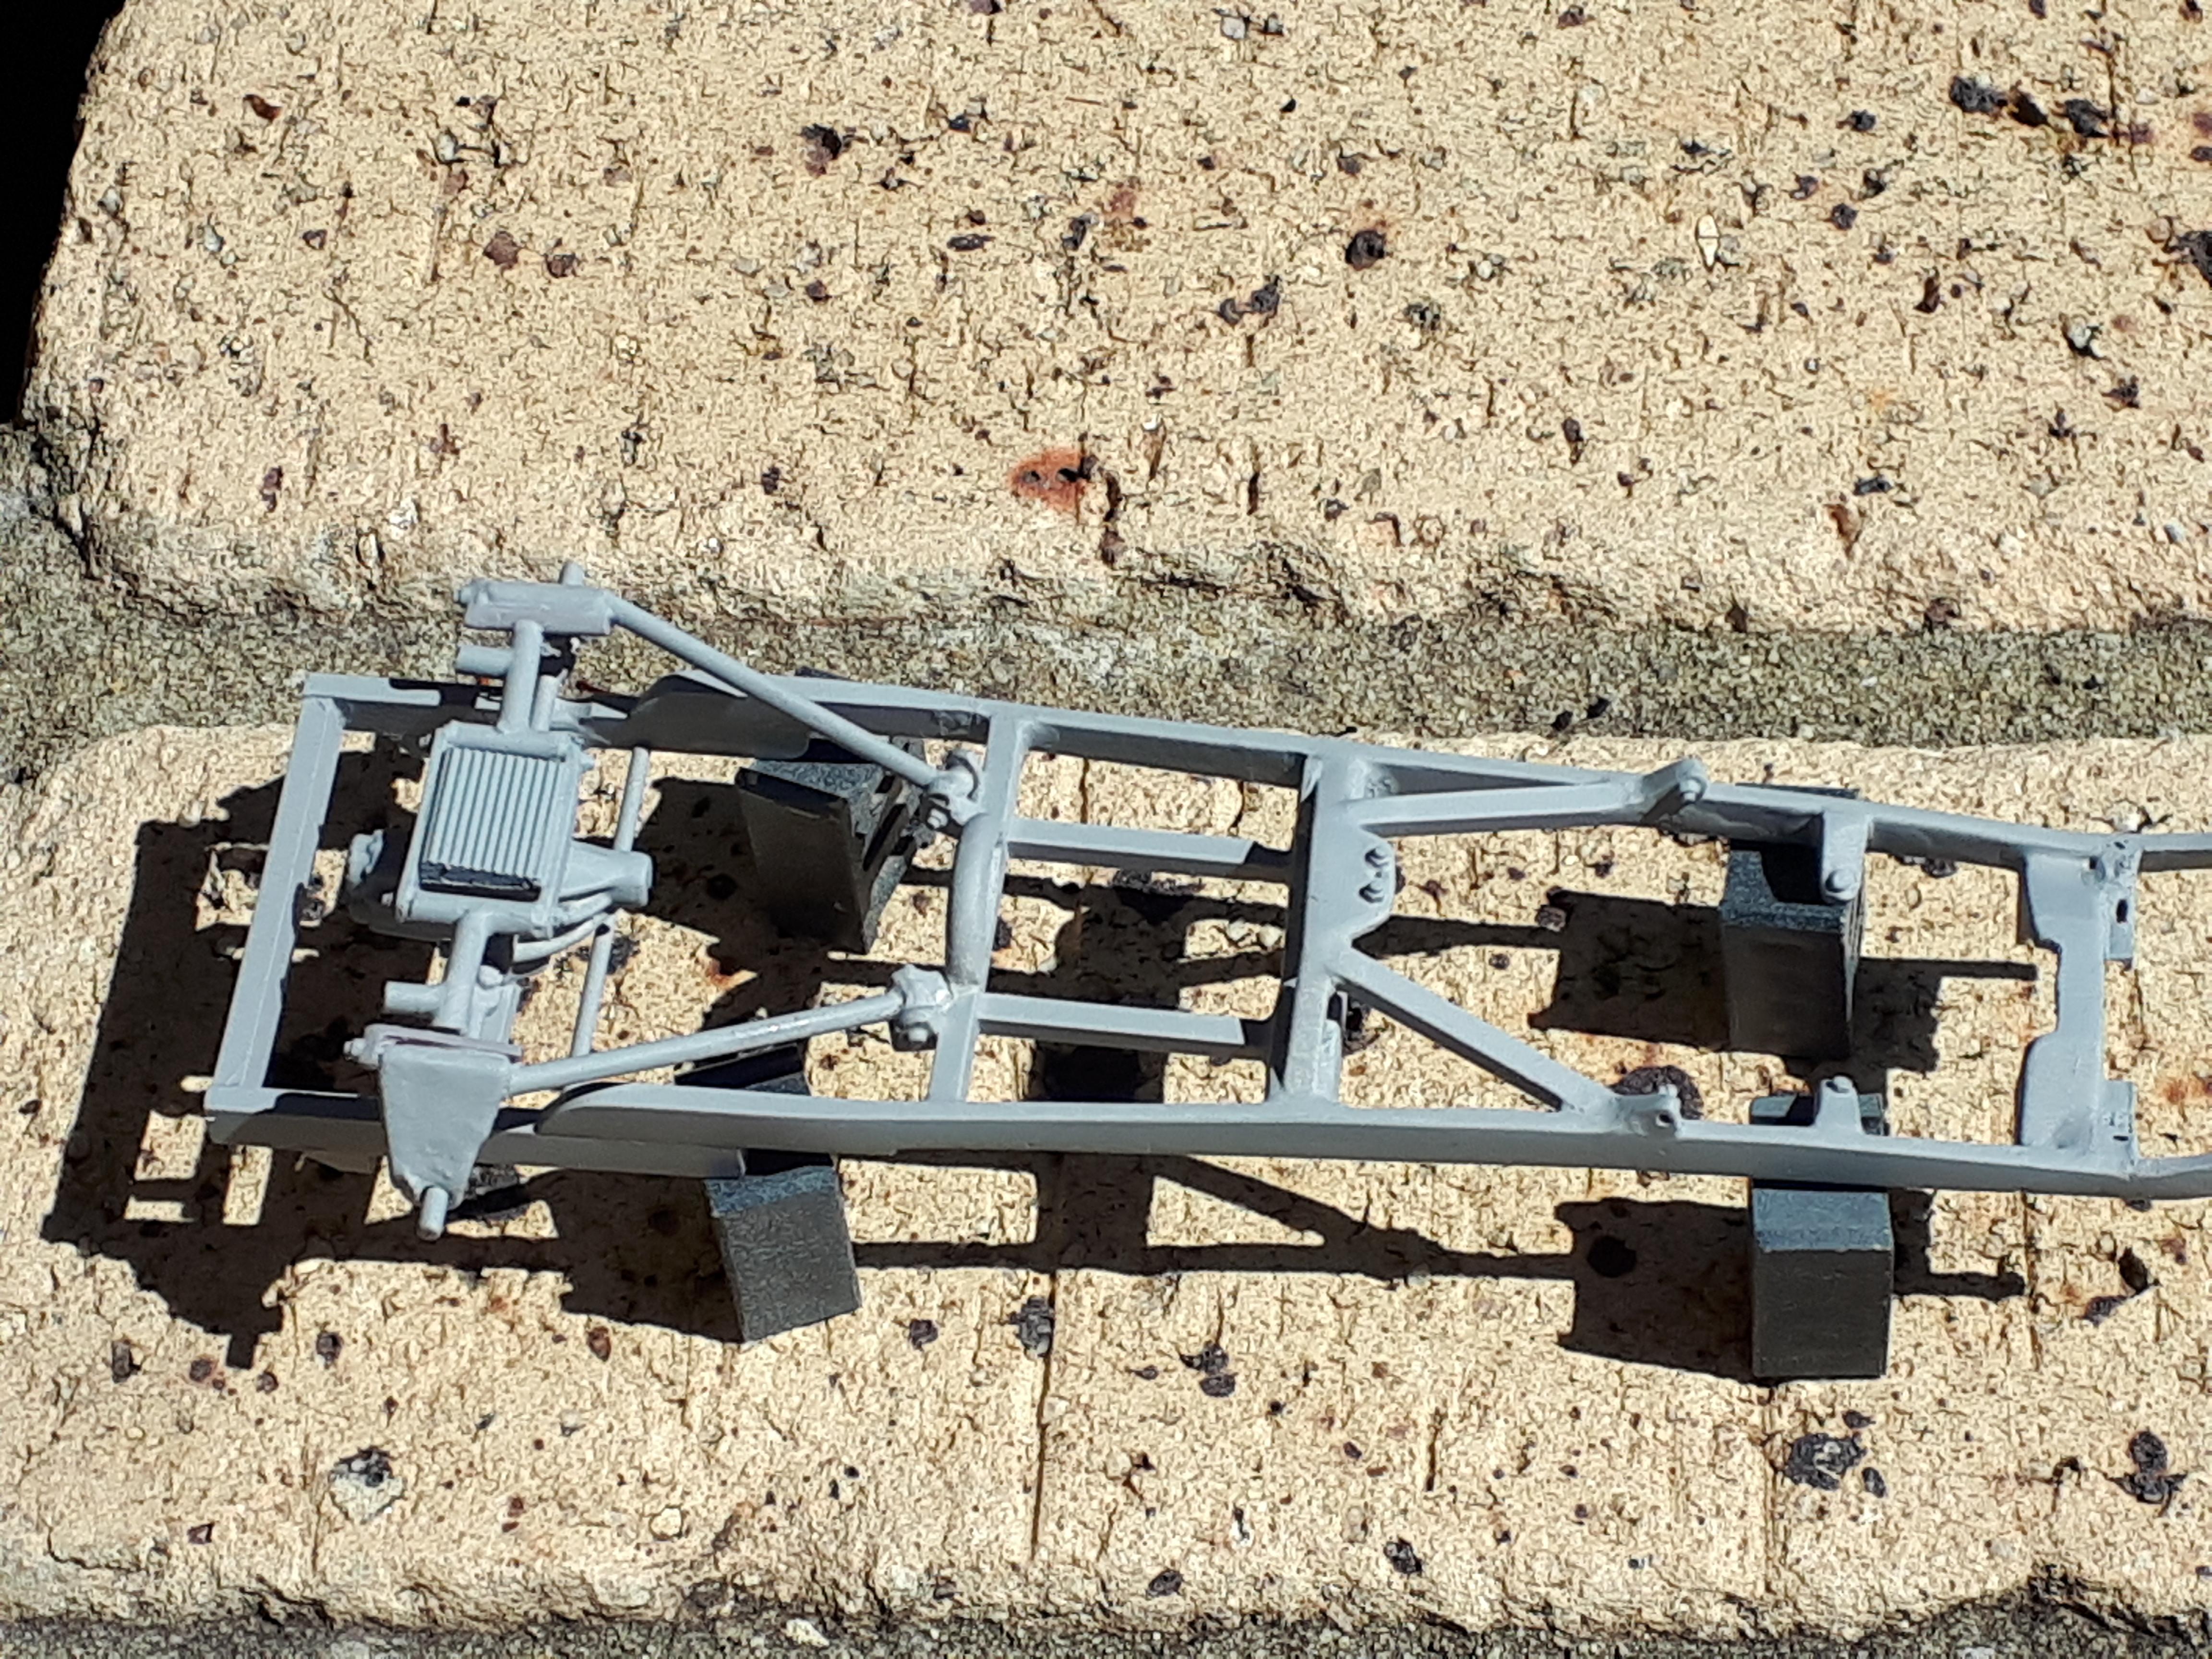
Thanks Kit! Got a bit done this weekend. After a bit of tidying up I got primer on the chassis. I used some Meng nut and bolt heads to detail some of the joints. Onto the final stages of body work now but still have to organise hood, radiator shell, headlights and hanging the doors. Cheers Alan

-
That chassis and fender unit looks superb. I started a similar Vicky project , but in plastic, by grafting the top of the AMT body to the cowl of a Speedwagon, probably what the resin guys did. Its stalled for now but I am enjoying watching your progress so far. Cheers Alan
-
Paint Strippers - What to Use?
alan barton replied to pbj59's topic in Model Building Questions and Answers
Steve, a couple of years ago I wrote a model column on paint stripping for Australian Street Rodding magazine. I tried oven cleaner, caustic soda, brake fluid and iso-propyl alcohol. The only thing that budged Tamiya for me was Dettol disinfectant, diluted 50/50 with water. It took overnight and then takes a LOT of wiping and scrubbing to get the sticky mess off but off it did come. My first coat of Duplicolour primer after the strip revealed no issues. I'm not a fan of the smell and the clean-up is tedious but if you have old Tamiya, I think it is your only option. Cheers Alan -
Wow, you really captured the look there, Jim. Your research and careful consideration of the finishes has been rewarded. This must look amazing in the sun! Cheers Alan
-
Ken, I don't think I have ever seen a weathering tutorial that was so precise in explaining exactly what you do. Thank you for taking the time, I will definitely be borrowing some of these tips in the future when working on engines in some of my dirt track racers. The tones on that Ducati engine are exactly what I am looking for. Cheers Alan
-
Thank you Mark, for showing us all your work and especially the amazing variety of materials and processes you use to create your results. It is fascinating watching the progress of your model and the results of all your efforts. Cheers Alan
-
I'm looking forward to the finished results on this one, Bob. I like the look of that engine - I haven't build one of the Chevy engined kits and I like the look of yours so far. Cheers Alan
-
Wow, so much goodness there! That is stunning detail work, Bob. It is giving me a lot of inspiration. You see, when I was a kid I customised to death a 1964 Chevelle wagon. I have since acquired, at considerable cost, a replacement mint kit. I have been following the work of Steve G and yourself for some time and I think the time is fast approaching to tackle it, using the techniques that you guys have developed. Thank you for the inspiration, and for all the time you guys take to document the process. Cheers Alan
-
Just YEEEEEAAAAAHHHHH!!!!! Cheers Alan
-
Thanks for your support David, glad you like the grilles. I am 90% convinced but might try some options before I lock that choice in. Great to hear from you Tim. I remember a lot of Chuck's models but can't place his Buttera roadster - was it white? My model is so close to finished but I have some obligations at the moment that will keep me away from the final finishing for a week or so. I will be sure to pop it in here as soon as it is done. Cheers Alan
-
A whole bunch of good ideas there guys, thanks for your input. I'm away from home for a while so cant get back to the model just now but it is food for thought. Obviously the car had to be white and yeah, I don't do white very often. A friend did this killer 60 Ponty in the crispest white I've ever seen so I asked him what he used and he told me about the Tamiya clear over Tamiya white primer over Tamiya grey primer. Sounded cool. The car was initially hung on a bunch of sprues holding it together to paint but for some reason it simply didn't come out even. Then I just started chasing my tail! Jim, I will have to have a hunt around locally and see if anyone carries Createx paints over here. Here's Bruce's 60. I need this white!
-
It's O.K., Mr Metallic, I don't think I spoke about wheels yet! I found a neat trick for getting deep dish rims out of other wise flat ones. I build a lot of dirt track cars and old NASCAR kits make great donors for chassis, rollcage etc. It dawned on me one day that if I cut the outer rim off a Monogram 1/24th scale chromed NASCAR rim, I could glue it over the top of a 1/25th scale rim for a coll deep dish rim. Also works a treat on chromies, Cragars, American Racing etc! Bob, I used Tamiya clear over Tamiya white primer over Tamiya light grey primer. Problem is, it is like candy red, every coat makes it a different shade. At first, the chassis was noticeably greyer than the body so I put another coat on the chassis. Now the body is greyer, and inexplicably, some parts of the body like the sides look greyer than the top. The effect is far more noticeable in the sunlight but GRRRRRRRR! Thanks Gilles, for your support! Cheers Alan
-
Like everyone else said, a magnificent custom but my favourite part is that wide smooth floating grille bar. It is the crowning touch to a slippery custom. Oh yeah, great to see Snappy getting a ride on the parcel shelf! Cheers Alan
-
AMT '67 Mustang Fastback-Now in Under Glass Section
alan barton replied to mustang1989's topic in WIP: Model Cars
So nice to see smoothly flowing plug leads! Cheers Alan -
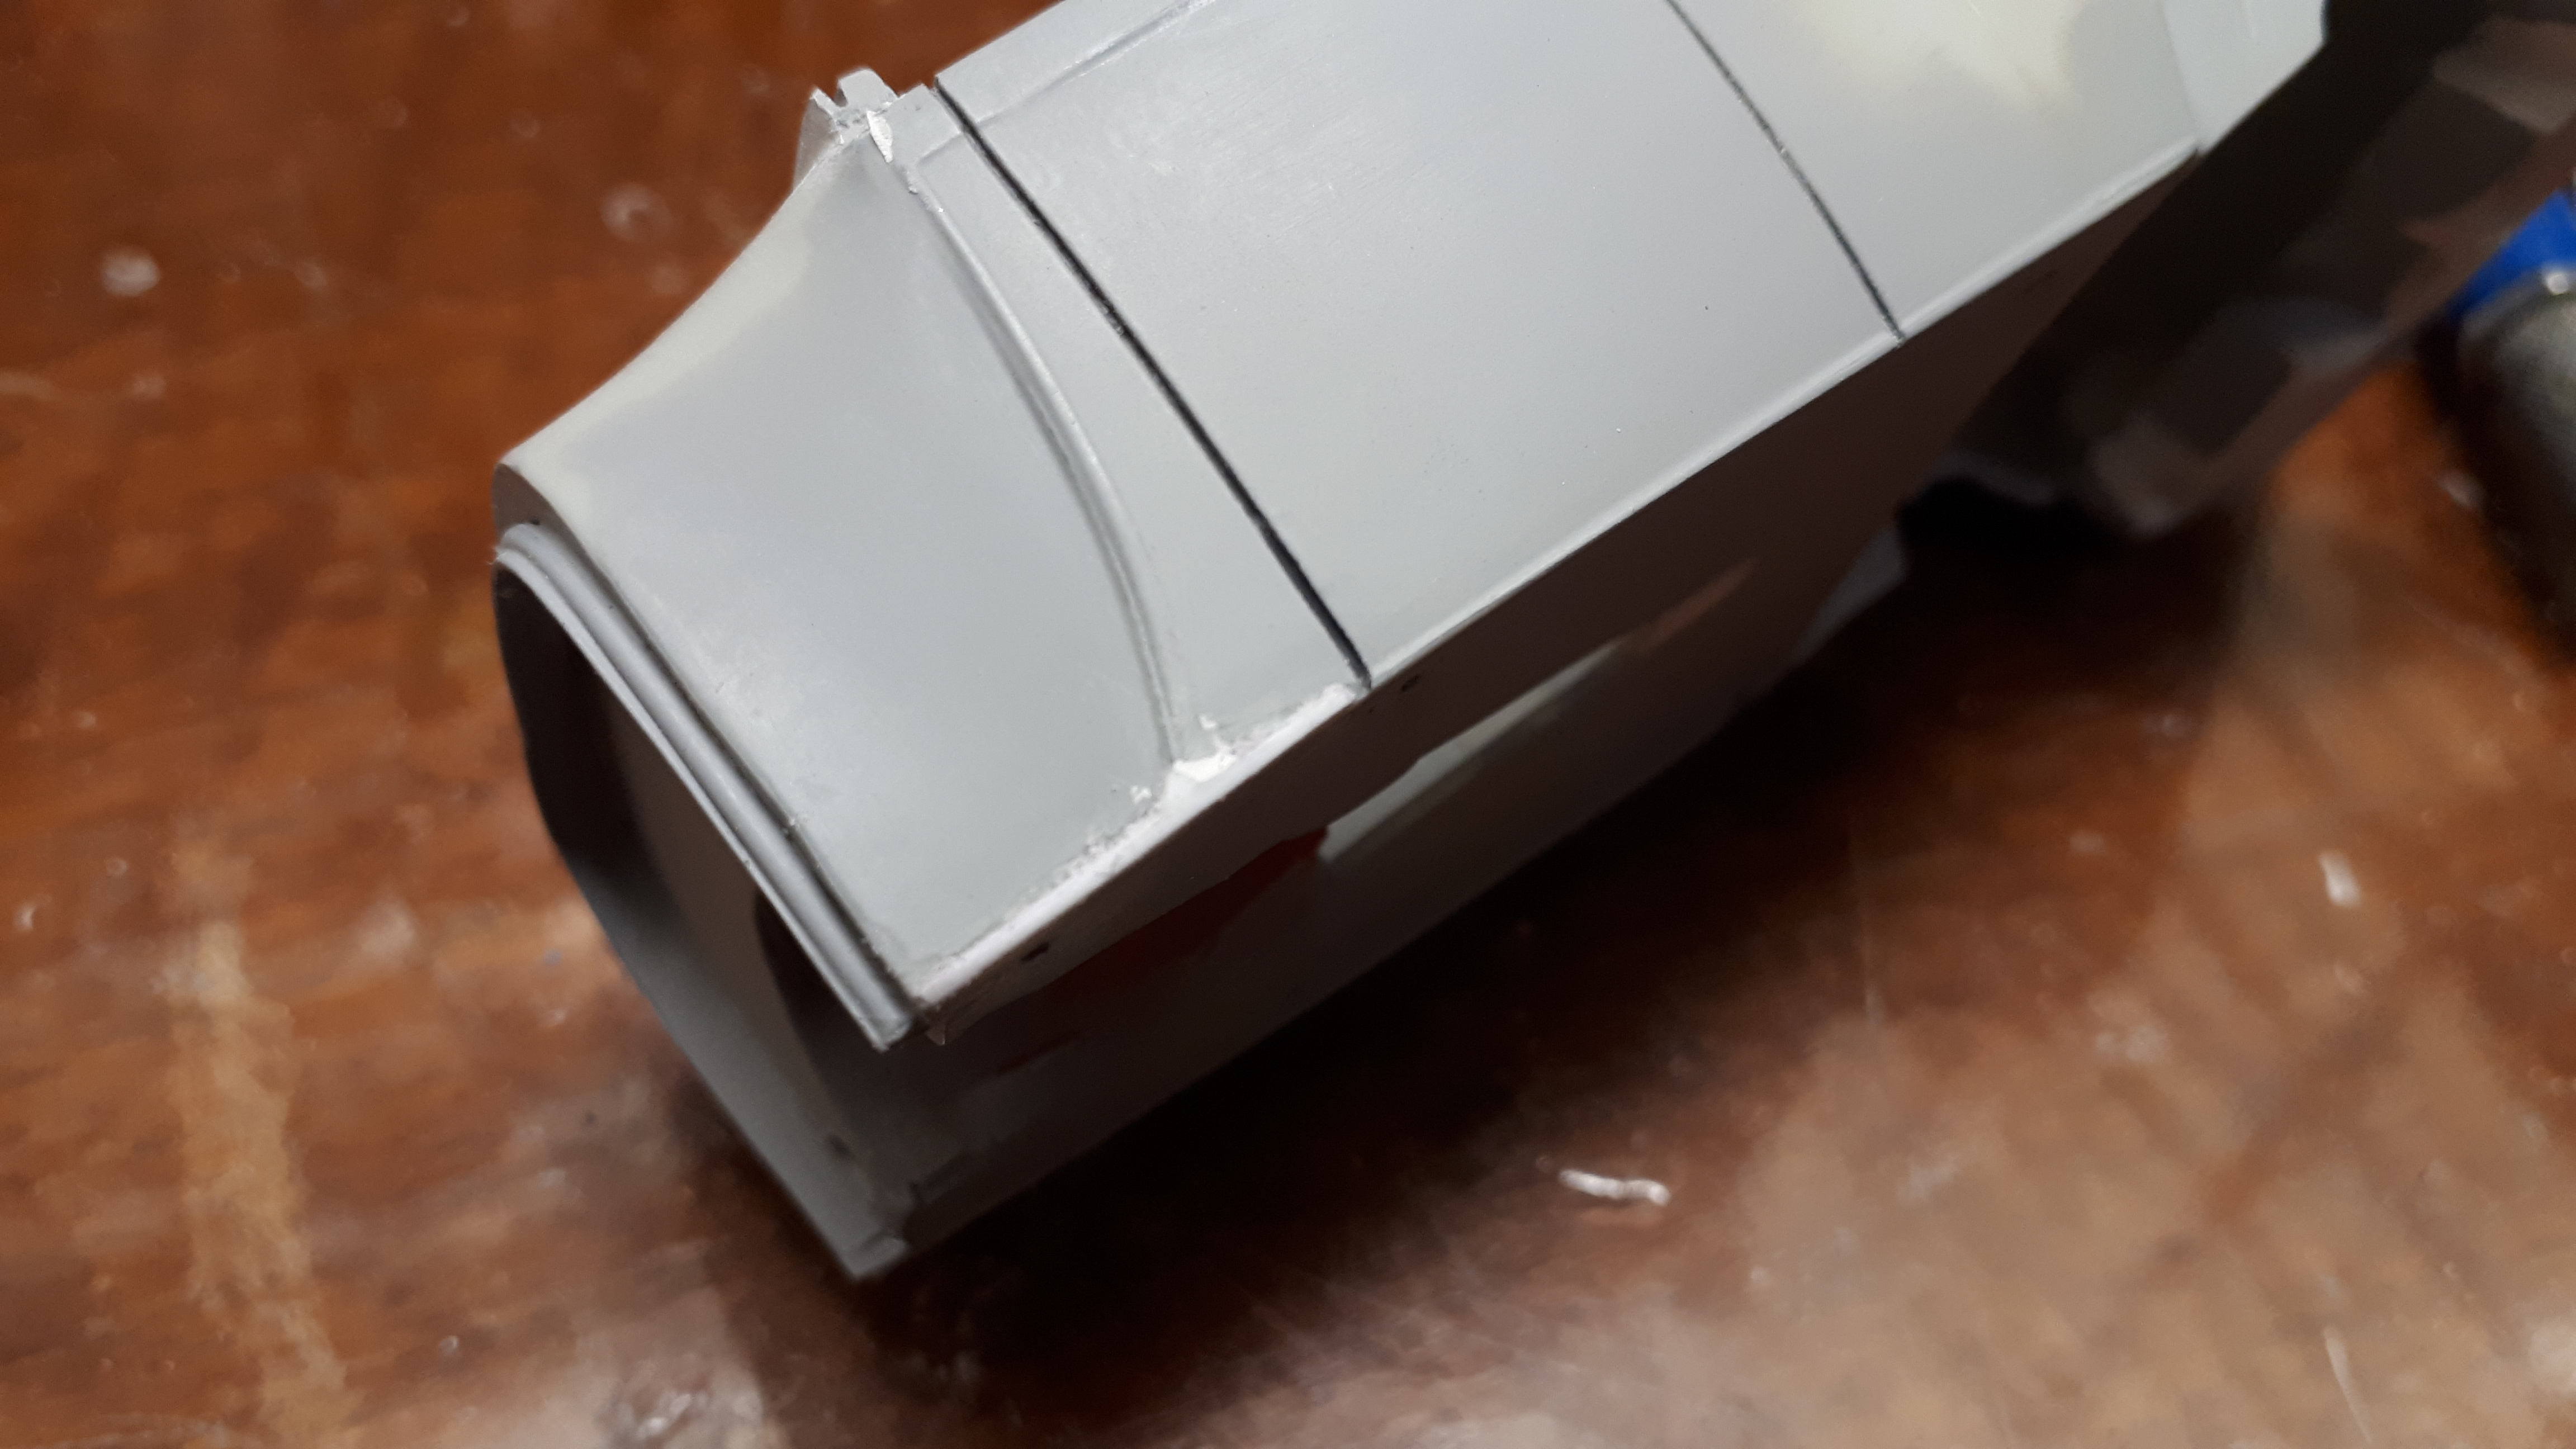
I tried a trick here that I saw on WIP Model A hiboy in a noted Bakersfield hot rodder's garage. He had added a swage line to the bottom of the cowl to continue that line in an uninterrupted fashion from the front of the wheels arch to the grille. I thought it might be a suitable detail for this hi-tech rod even though Lil John himself did not use it. I thin strip of Evergreen did the job. The next item on here concerns the hood sides. The original car had very traditional louvres, which I am normally a fan of, and then later iterations has smooth hood sides. I wanted something more in keeping with a hi tech car Having already sacrificed one hood for the bellypan, I looked through my hood box for a suitable candidate for hood sides. I was originally looking for something scooped, like an early GTO but having none of those I settled on a Nova, a 69 I think. After making cardboard templates I cut two hood sides out of the Nova Hood and by slicing it precisely down the middle of the peak, gained a swage line along the lower edge. Right now I have lost the photos of that step so instead I will give a sneak peak of the nearly finished car so that you can see the hood sides. Now, here's the thing -I've pulled the car apart at this stage. I have ended up with different shades of white and it is bugging me! I am also having second thoughts about the hood sides and I am wondering if they would be better suited to my Tim Boyd 29 closed cab tribute build. I will be interested to hear your thoughts. Cheers Alan
-
"Spare Parts" Channeled Deuce Roadster - 50's Style
alan barton replied to Bernard Kron's topic in WIP: Model Cars
That's a favourite look of mine, Bernard. When I got into hot rods in the mid to late 60s, nearly every cool rod in Australia was either a channelled 29 roadster, a channelled 32 roadster or a channelled 34 coupe. I have two on the bench right now but they are a little way from the top of the stack. Your colour choice was superb! Cheers Alan -
You nailed it right there, Snake! I am always fixing or improving things at home using modelling skills and often my modelling tools. My wife actually comes to me saying "Can you use your flux capacitor (or whatever) to fix this?" Mind you, she is pretty handy herself and has been known to tell me when I got home what she has used to fix a problem. But back to Andy's questions ( great save on the grille, by the way, I did the very same thing on a 72 Holden, decades ago) probably the most unusual one was to do a favour for a friend. He was converting a late seventies Dodge Ram pickup to RHD. Those of you familiar with my models on this forum would know that I convert most of my models to RHD, being Austrlalian and all! Paul came to me with two dash inserts ( full width of the dash) and asked if I would like to tackle it as he knew I converted models. A bit of a stretch but he did have the correct hi-tech plastic adhesive to do the job which made it a lot easier. But...... While this dash looked perfectly rectangular in every aspect, there were actually no parallel or perpendicular lines anywhere on it, a designers trick to make it look right when you are sitting in the cab. Ended up being a big job but it is still in the truck to this day. Cheers Alan
-
Wow, that's amazing to think you get to see this car now - it's 45 years old! And yeah, I am really happy about how well the bellypan came out - I really pushed myself on that part. Cheers Alan
-
Triple post removed - it kept telling me to reply!
-
Double post removed
-
Thanks guys, glad you are enjoying it. Going backwards a bit here, this is a photo of the early stages of the fabbing up the front shock mounts. By drilling some small holes and placing long pins through them, I was able to eyeball that everything was going to be square and parallel where it needed to be. Also, you can see the start of the engine mounts to support the Revell 32 Ford 302 Windsor engine. One detail I chose not to add was the extended frame horn and the panhard bar that attaches to it. All my initial mockups indicated that any attempt to duplicate this feature in scale was going to push the axle well forward, and possibly down, from the location I wished to achieve. Sometimes you just cant get everything into a confined space, scale or not. Cheers Alan
-
Flame decal Identification
alan barton replied to Modlbldr's topic in General Automotive Talk (Trucks and Cars)
Revell El Camino? I don't have the model but have seen them or similar on other people's models. Hope that helps Alan -
This is why I love zombie threads! Somehow I missed this one 7 years ago and now I can enjoy the spectacular model that it is. As I am on a bit of an early sixties show car kick at the moment the timing couldn't be better. If you still check in here, Manuel, I love it! Cheers Alan