alan barton
-
Posts
2,105 -
Joined
-
Last visited
Everything posted by alan barton
-
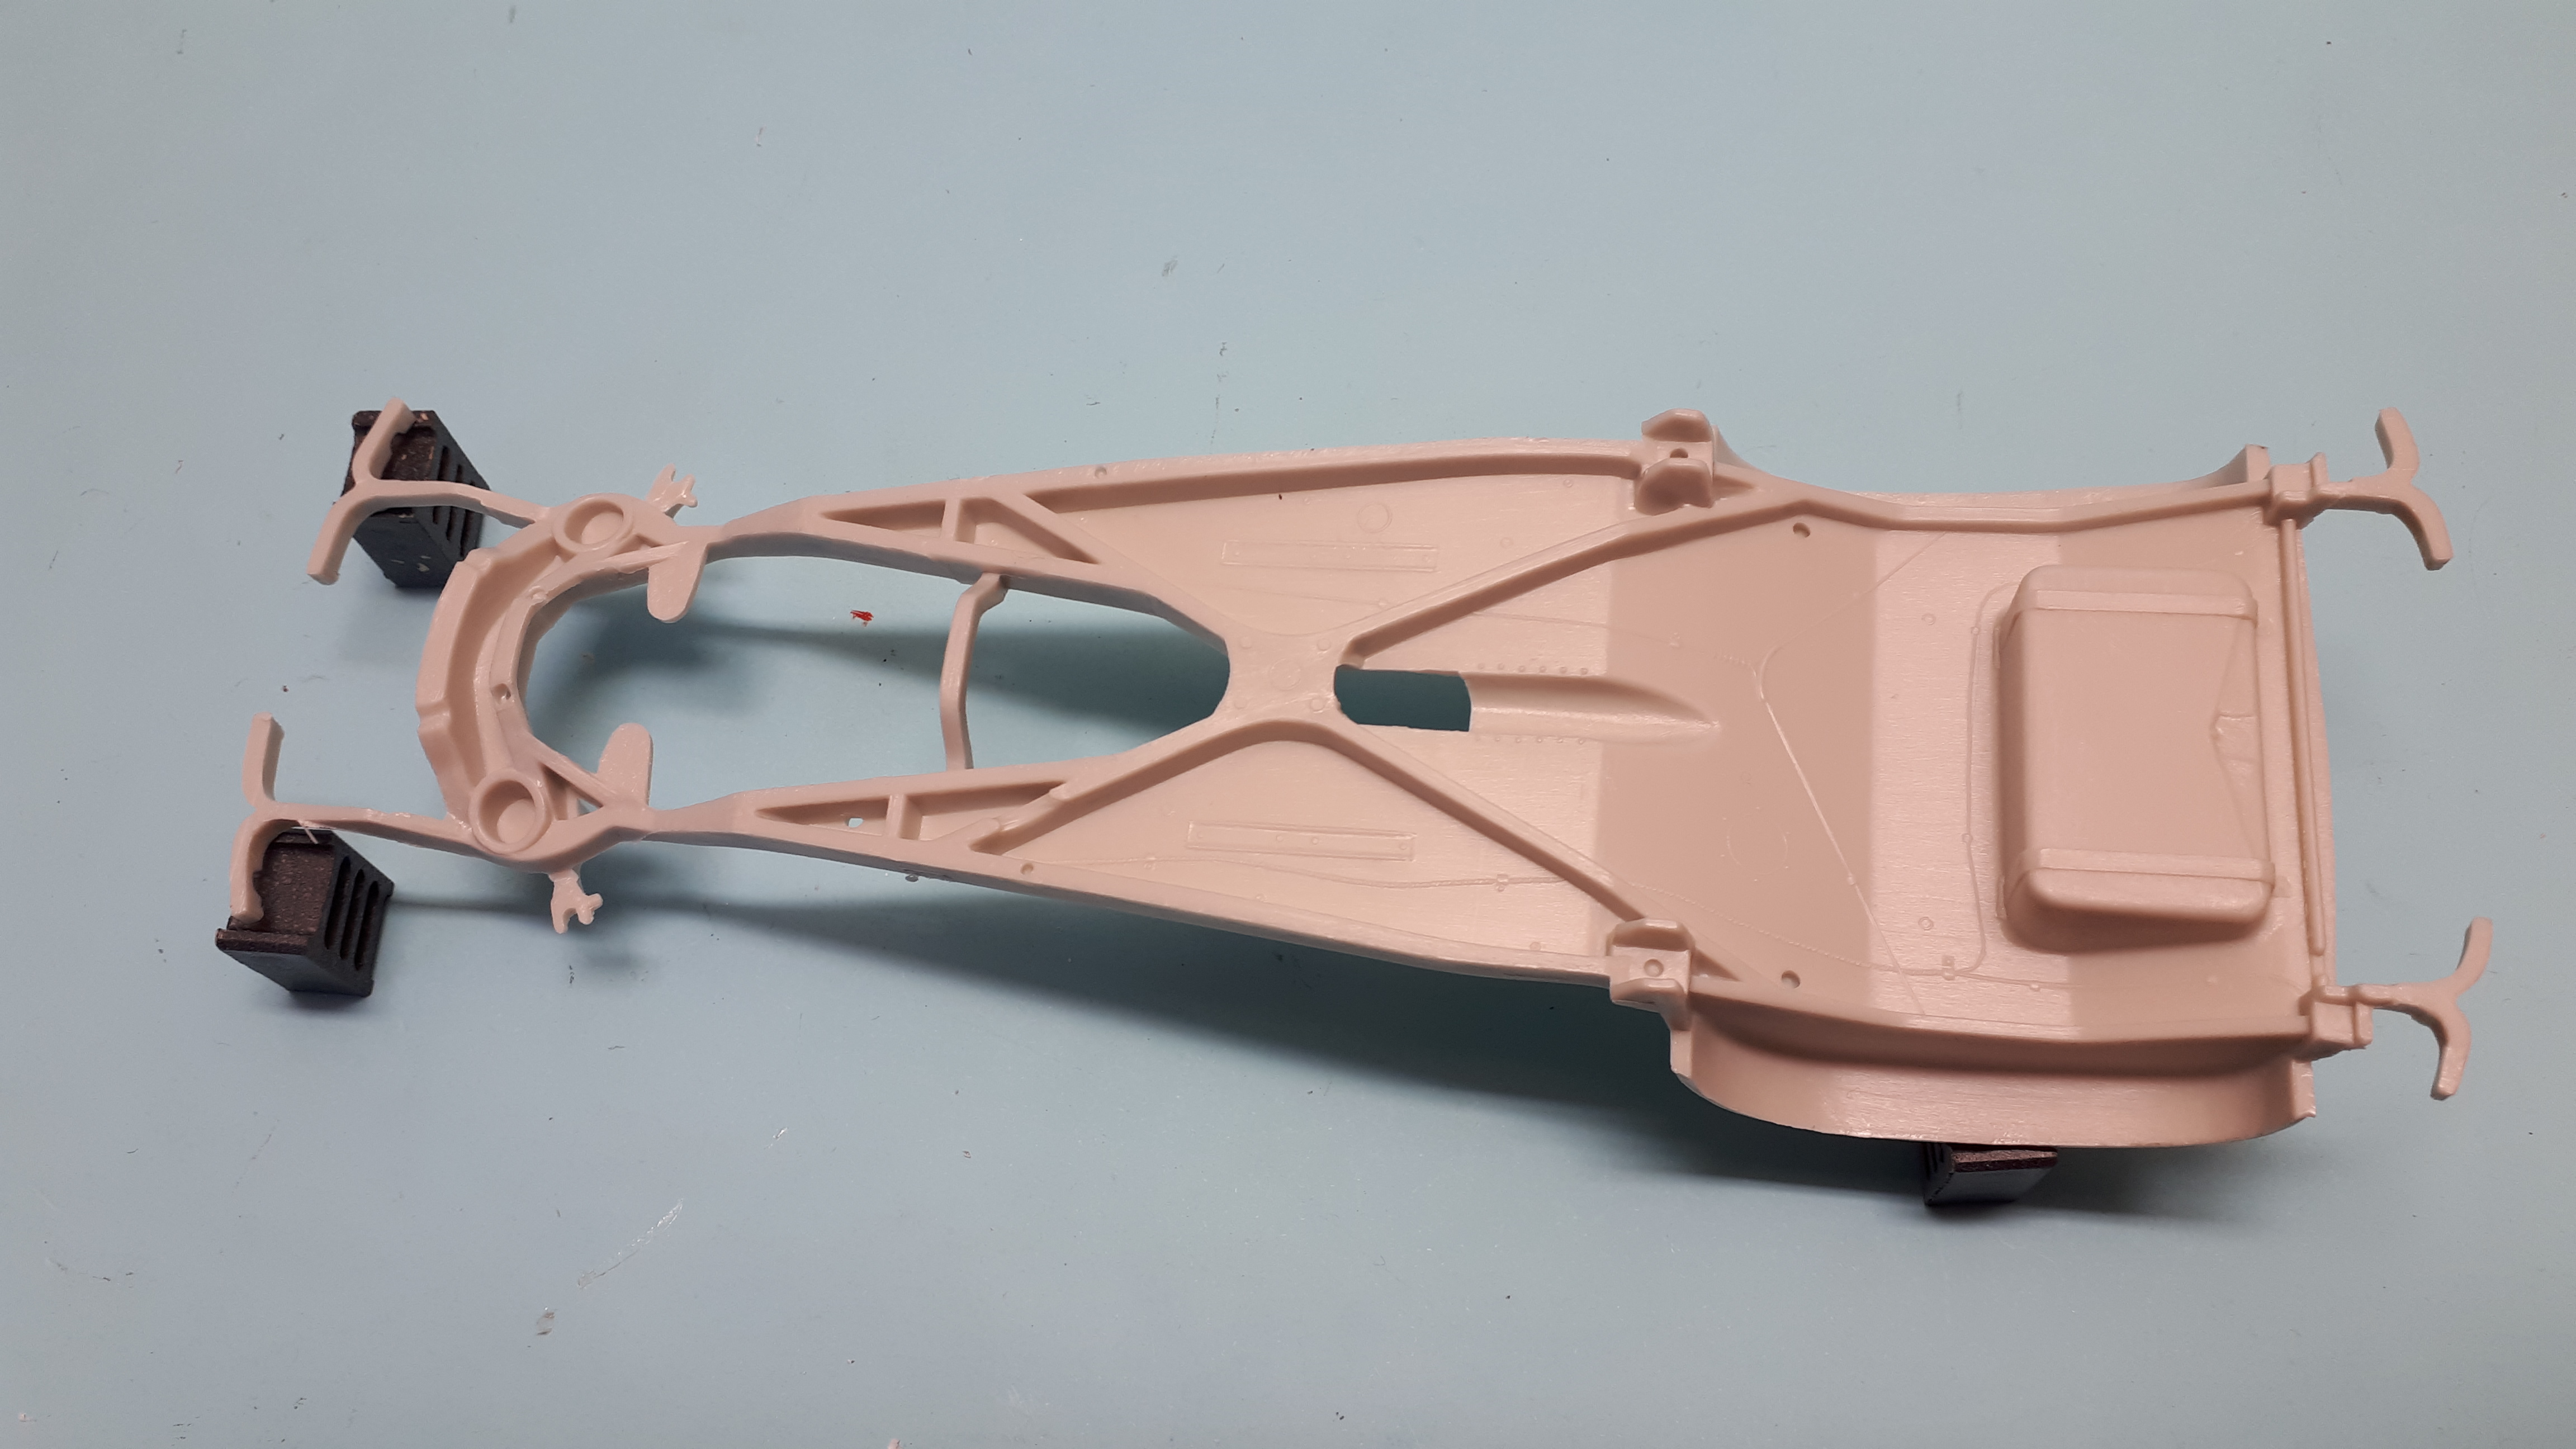
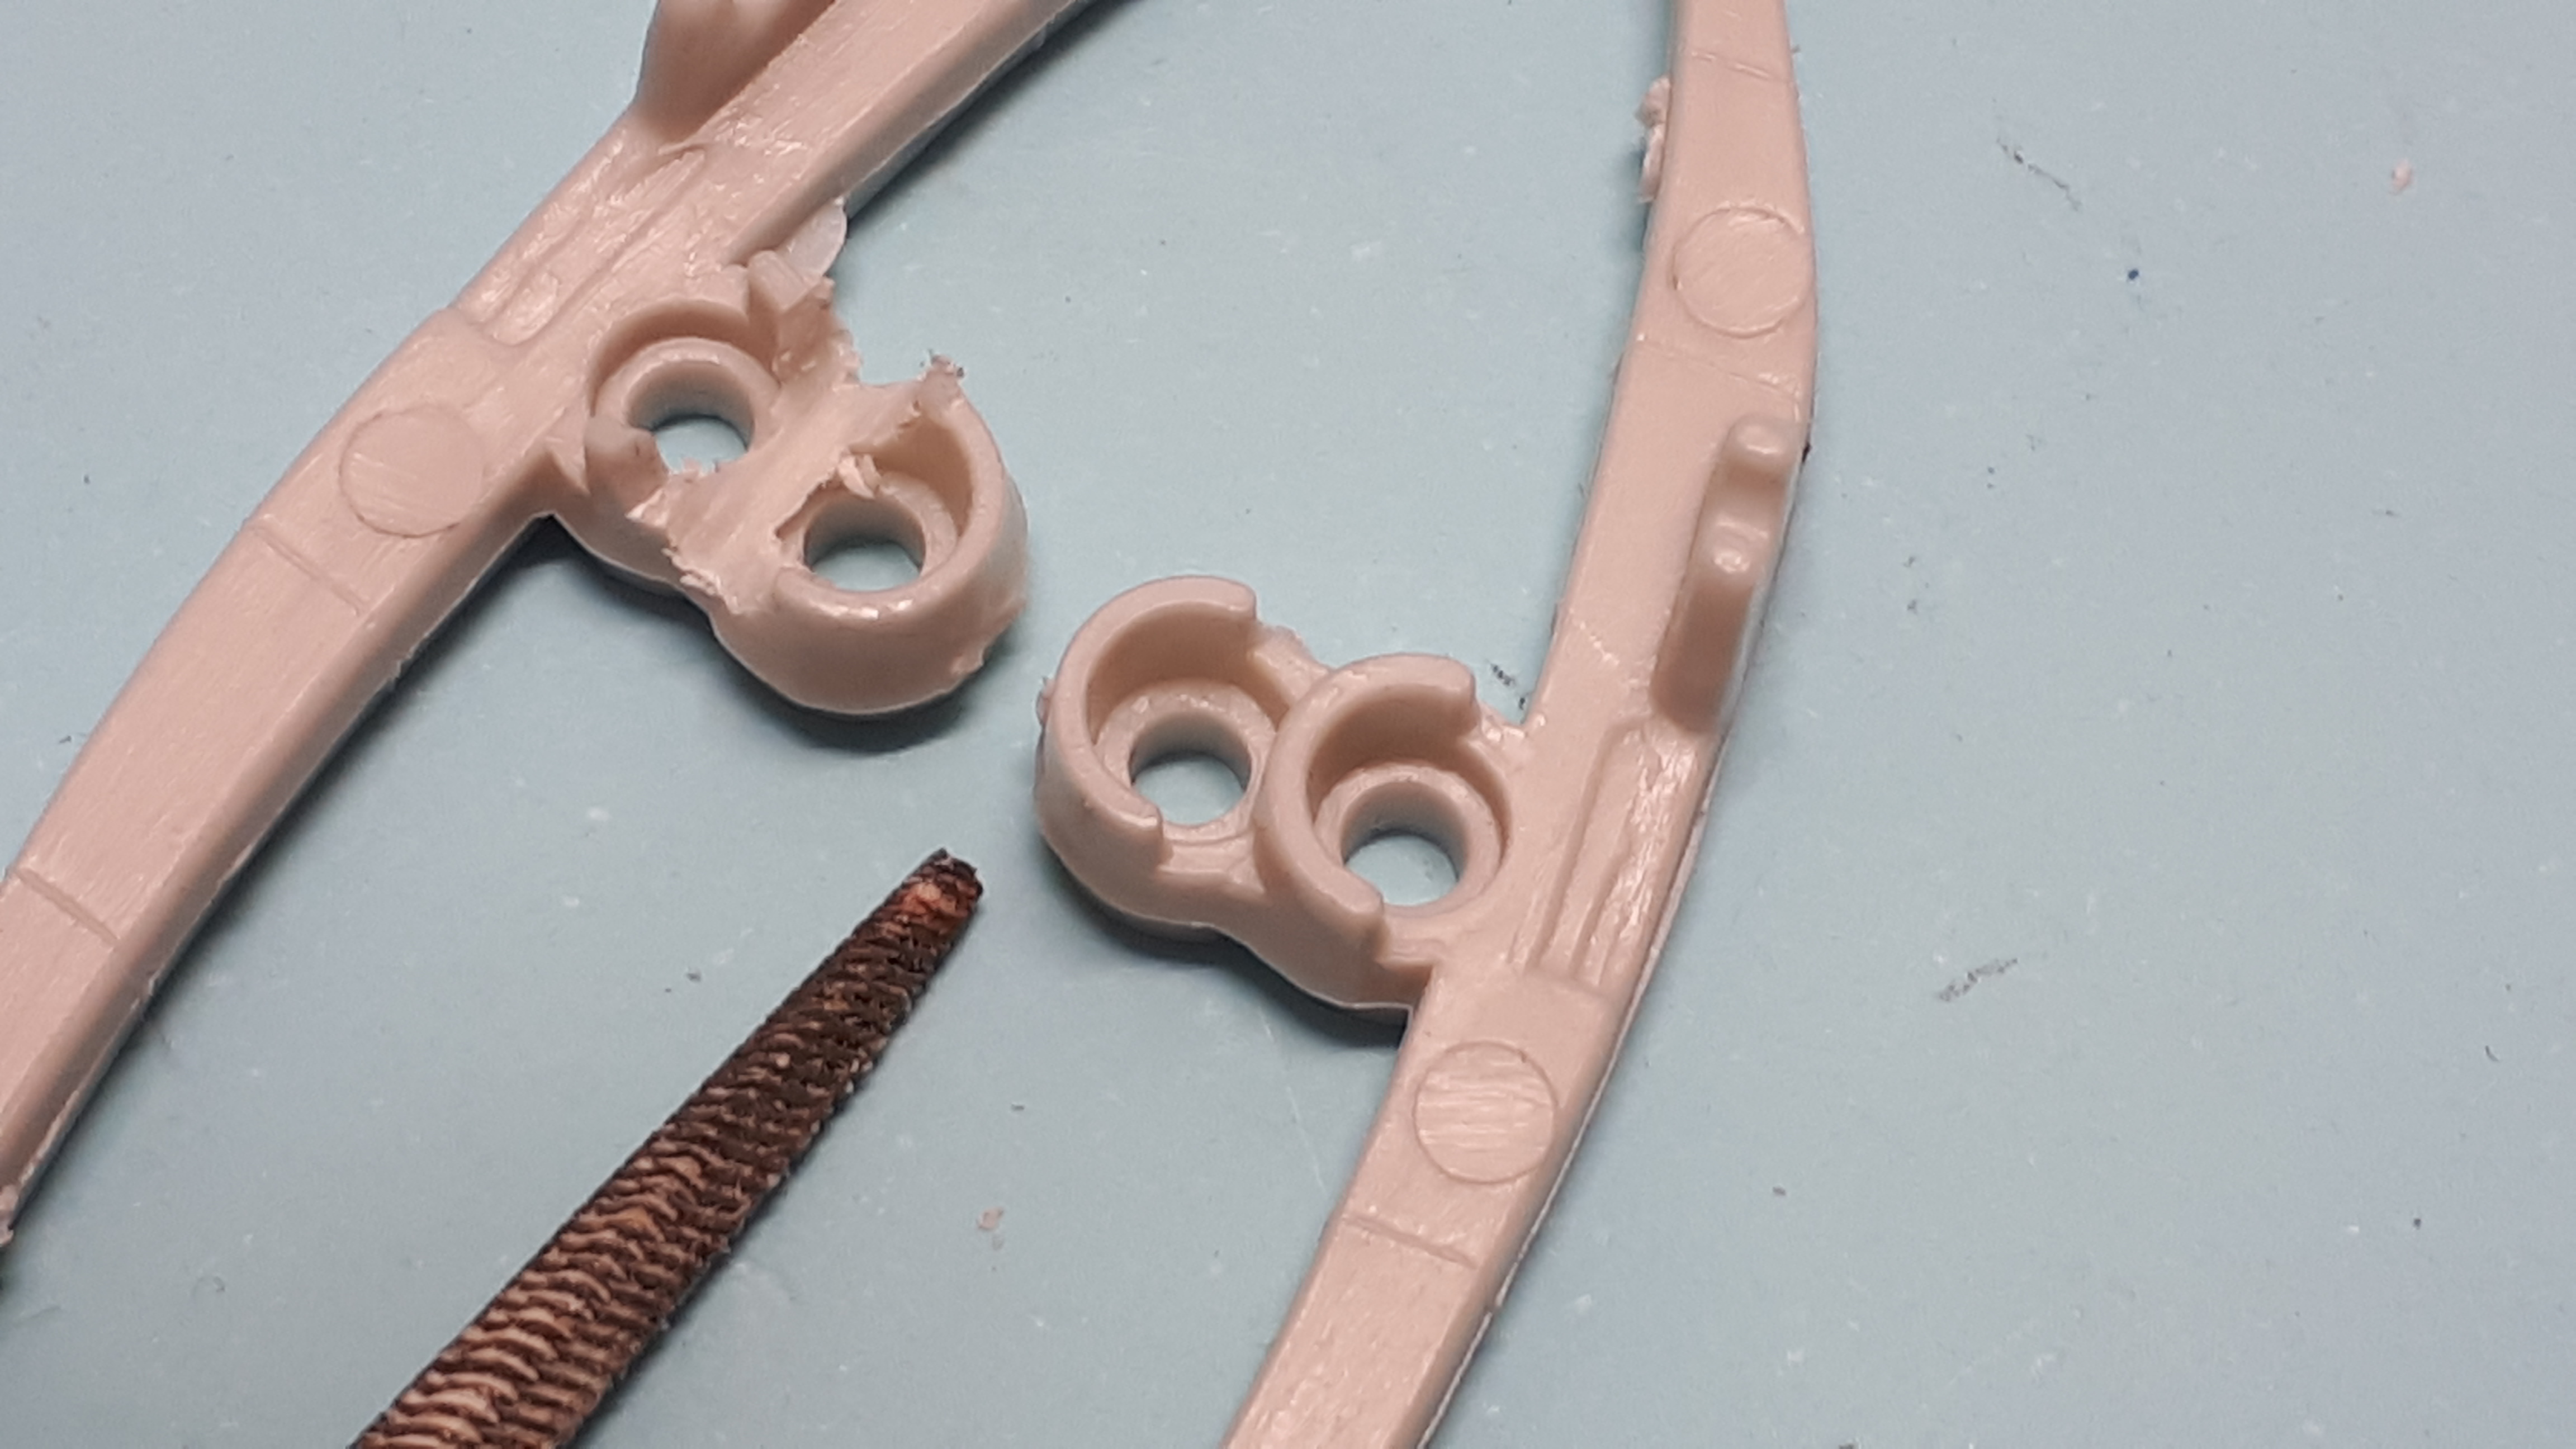
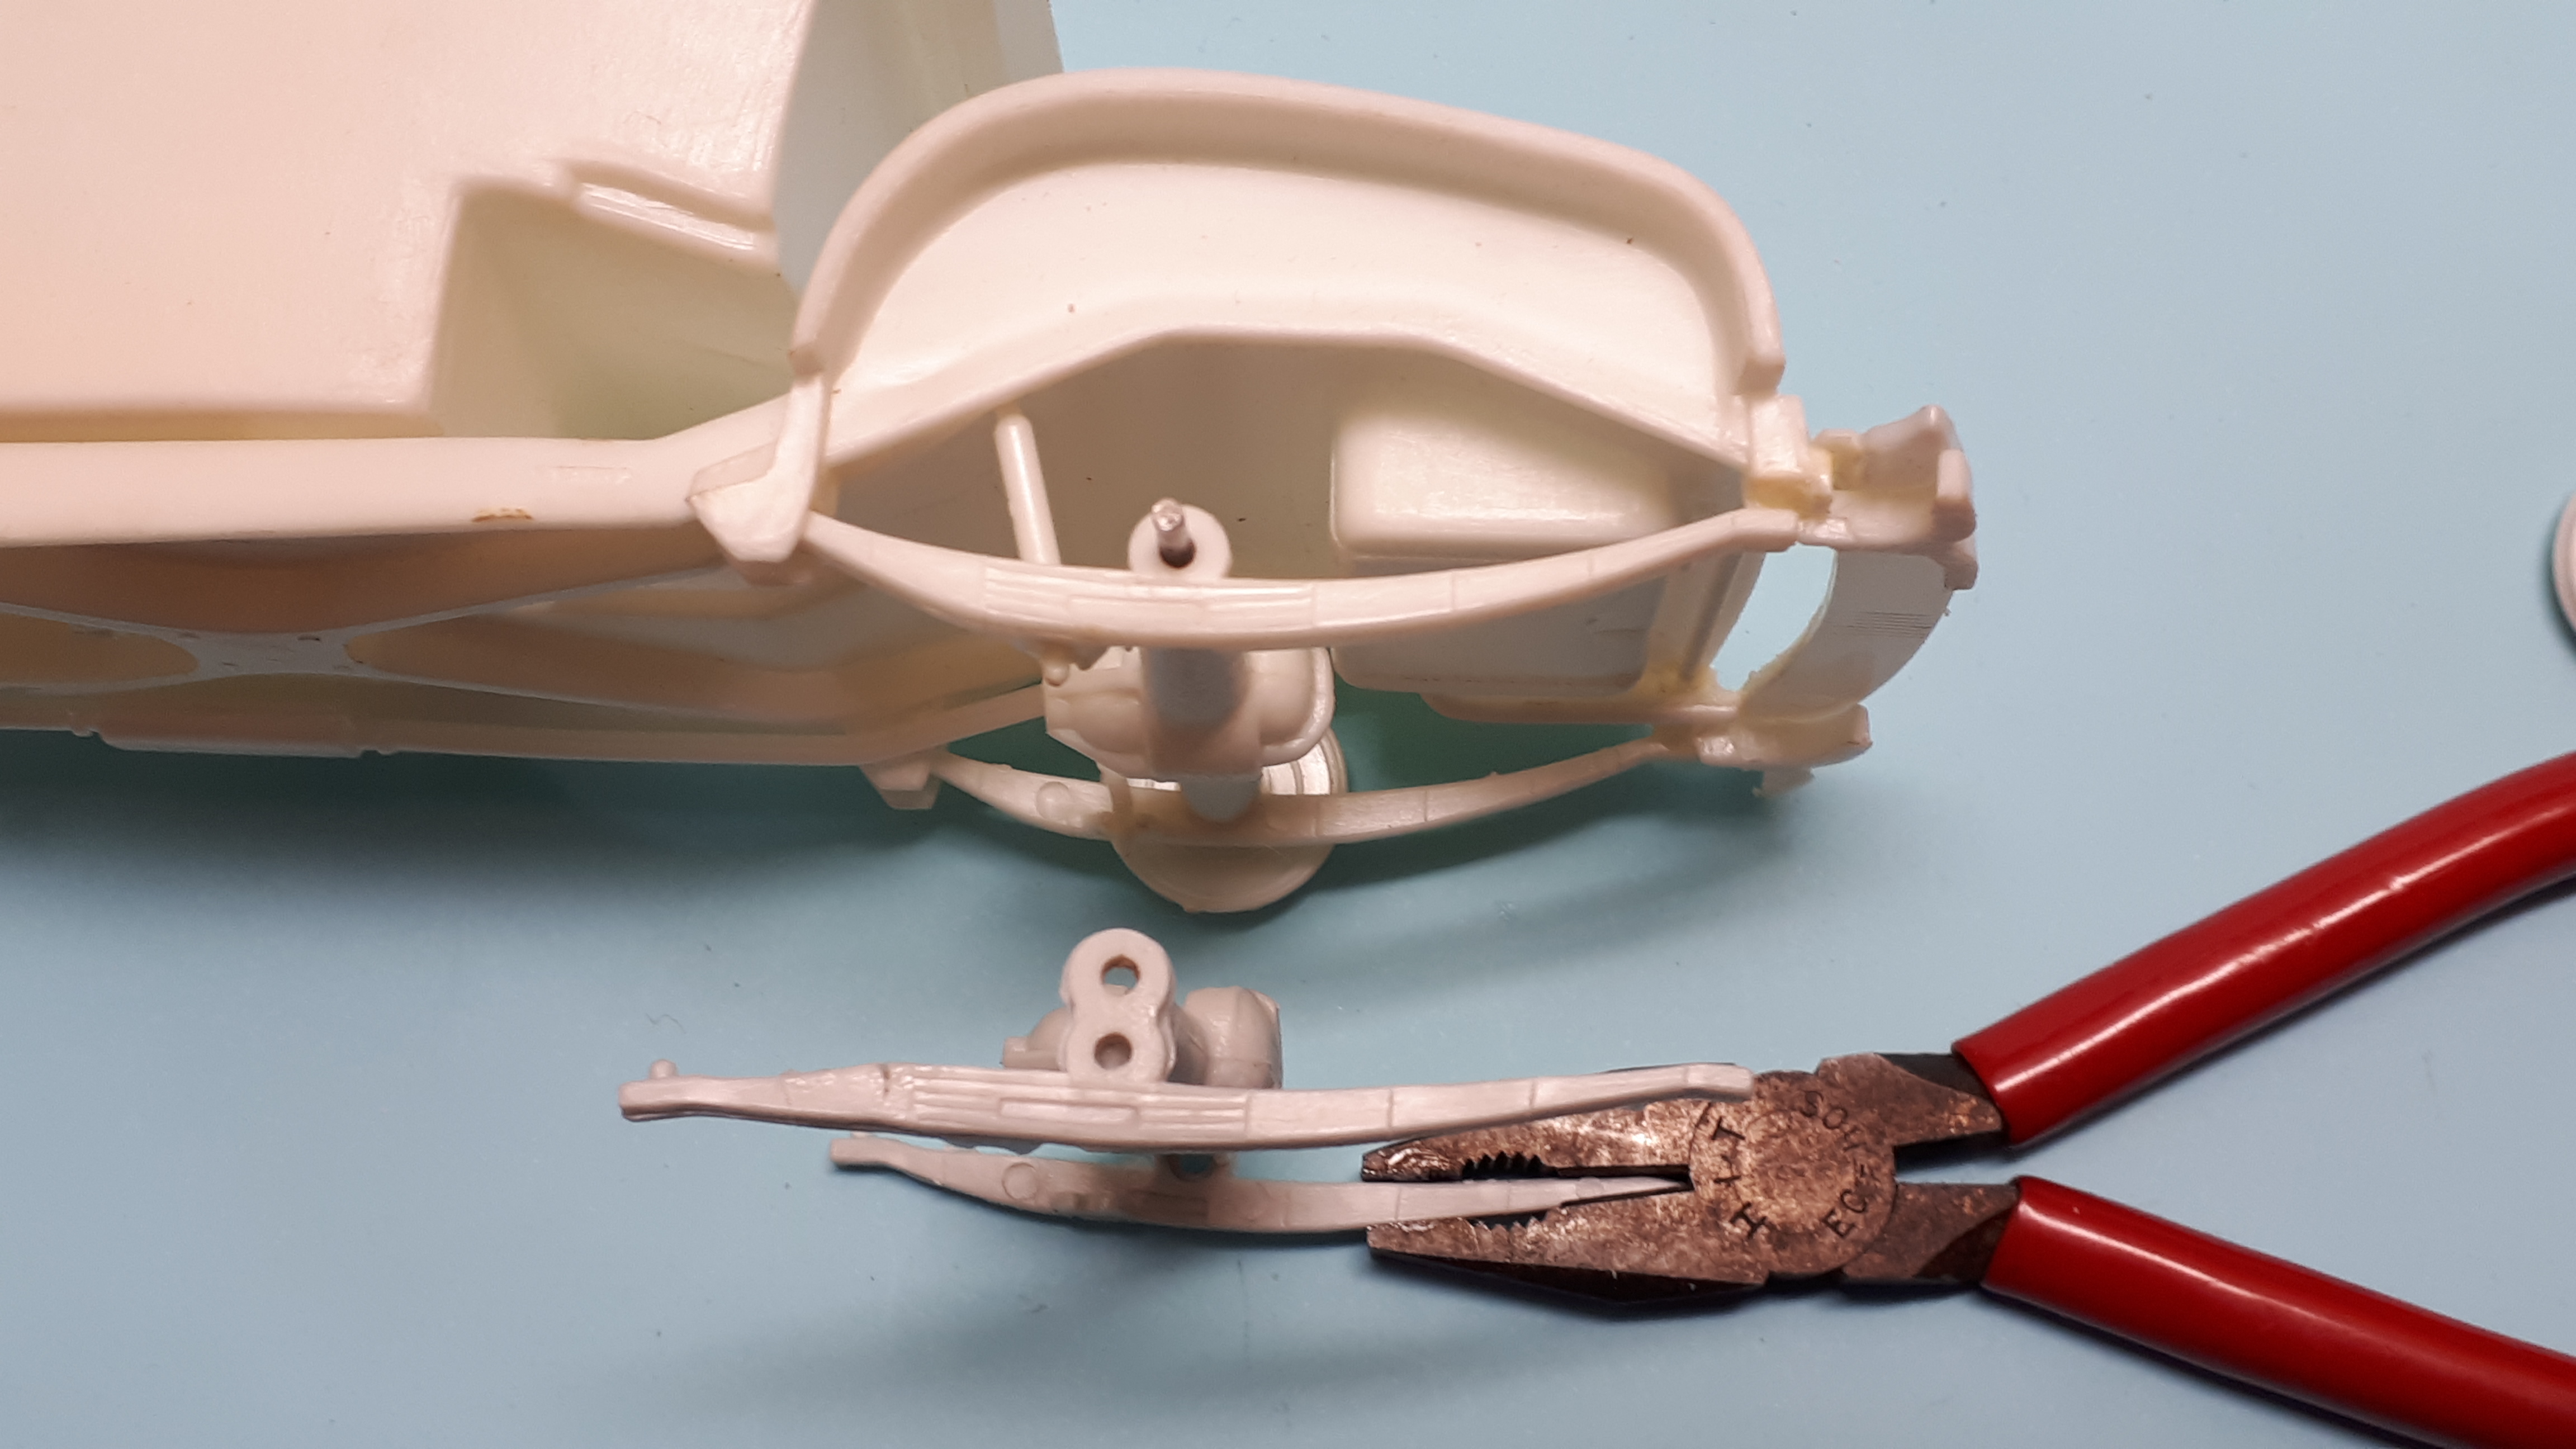
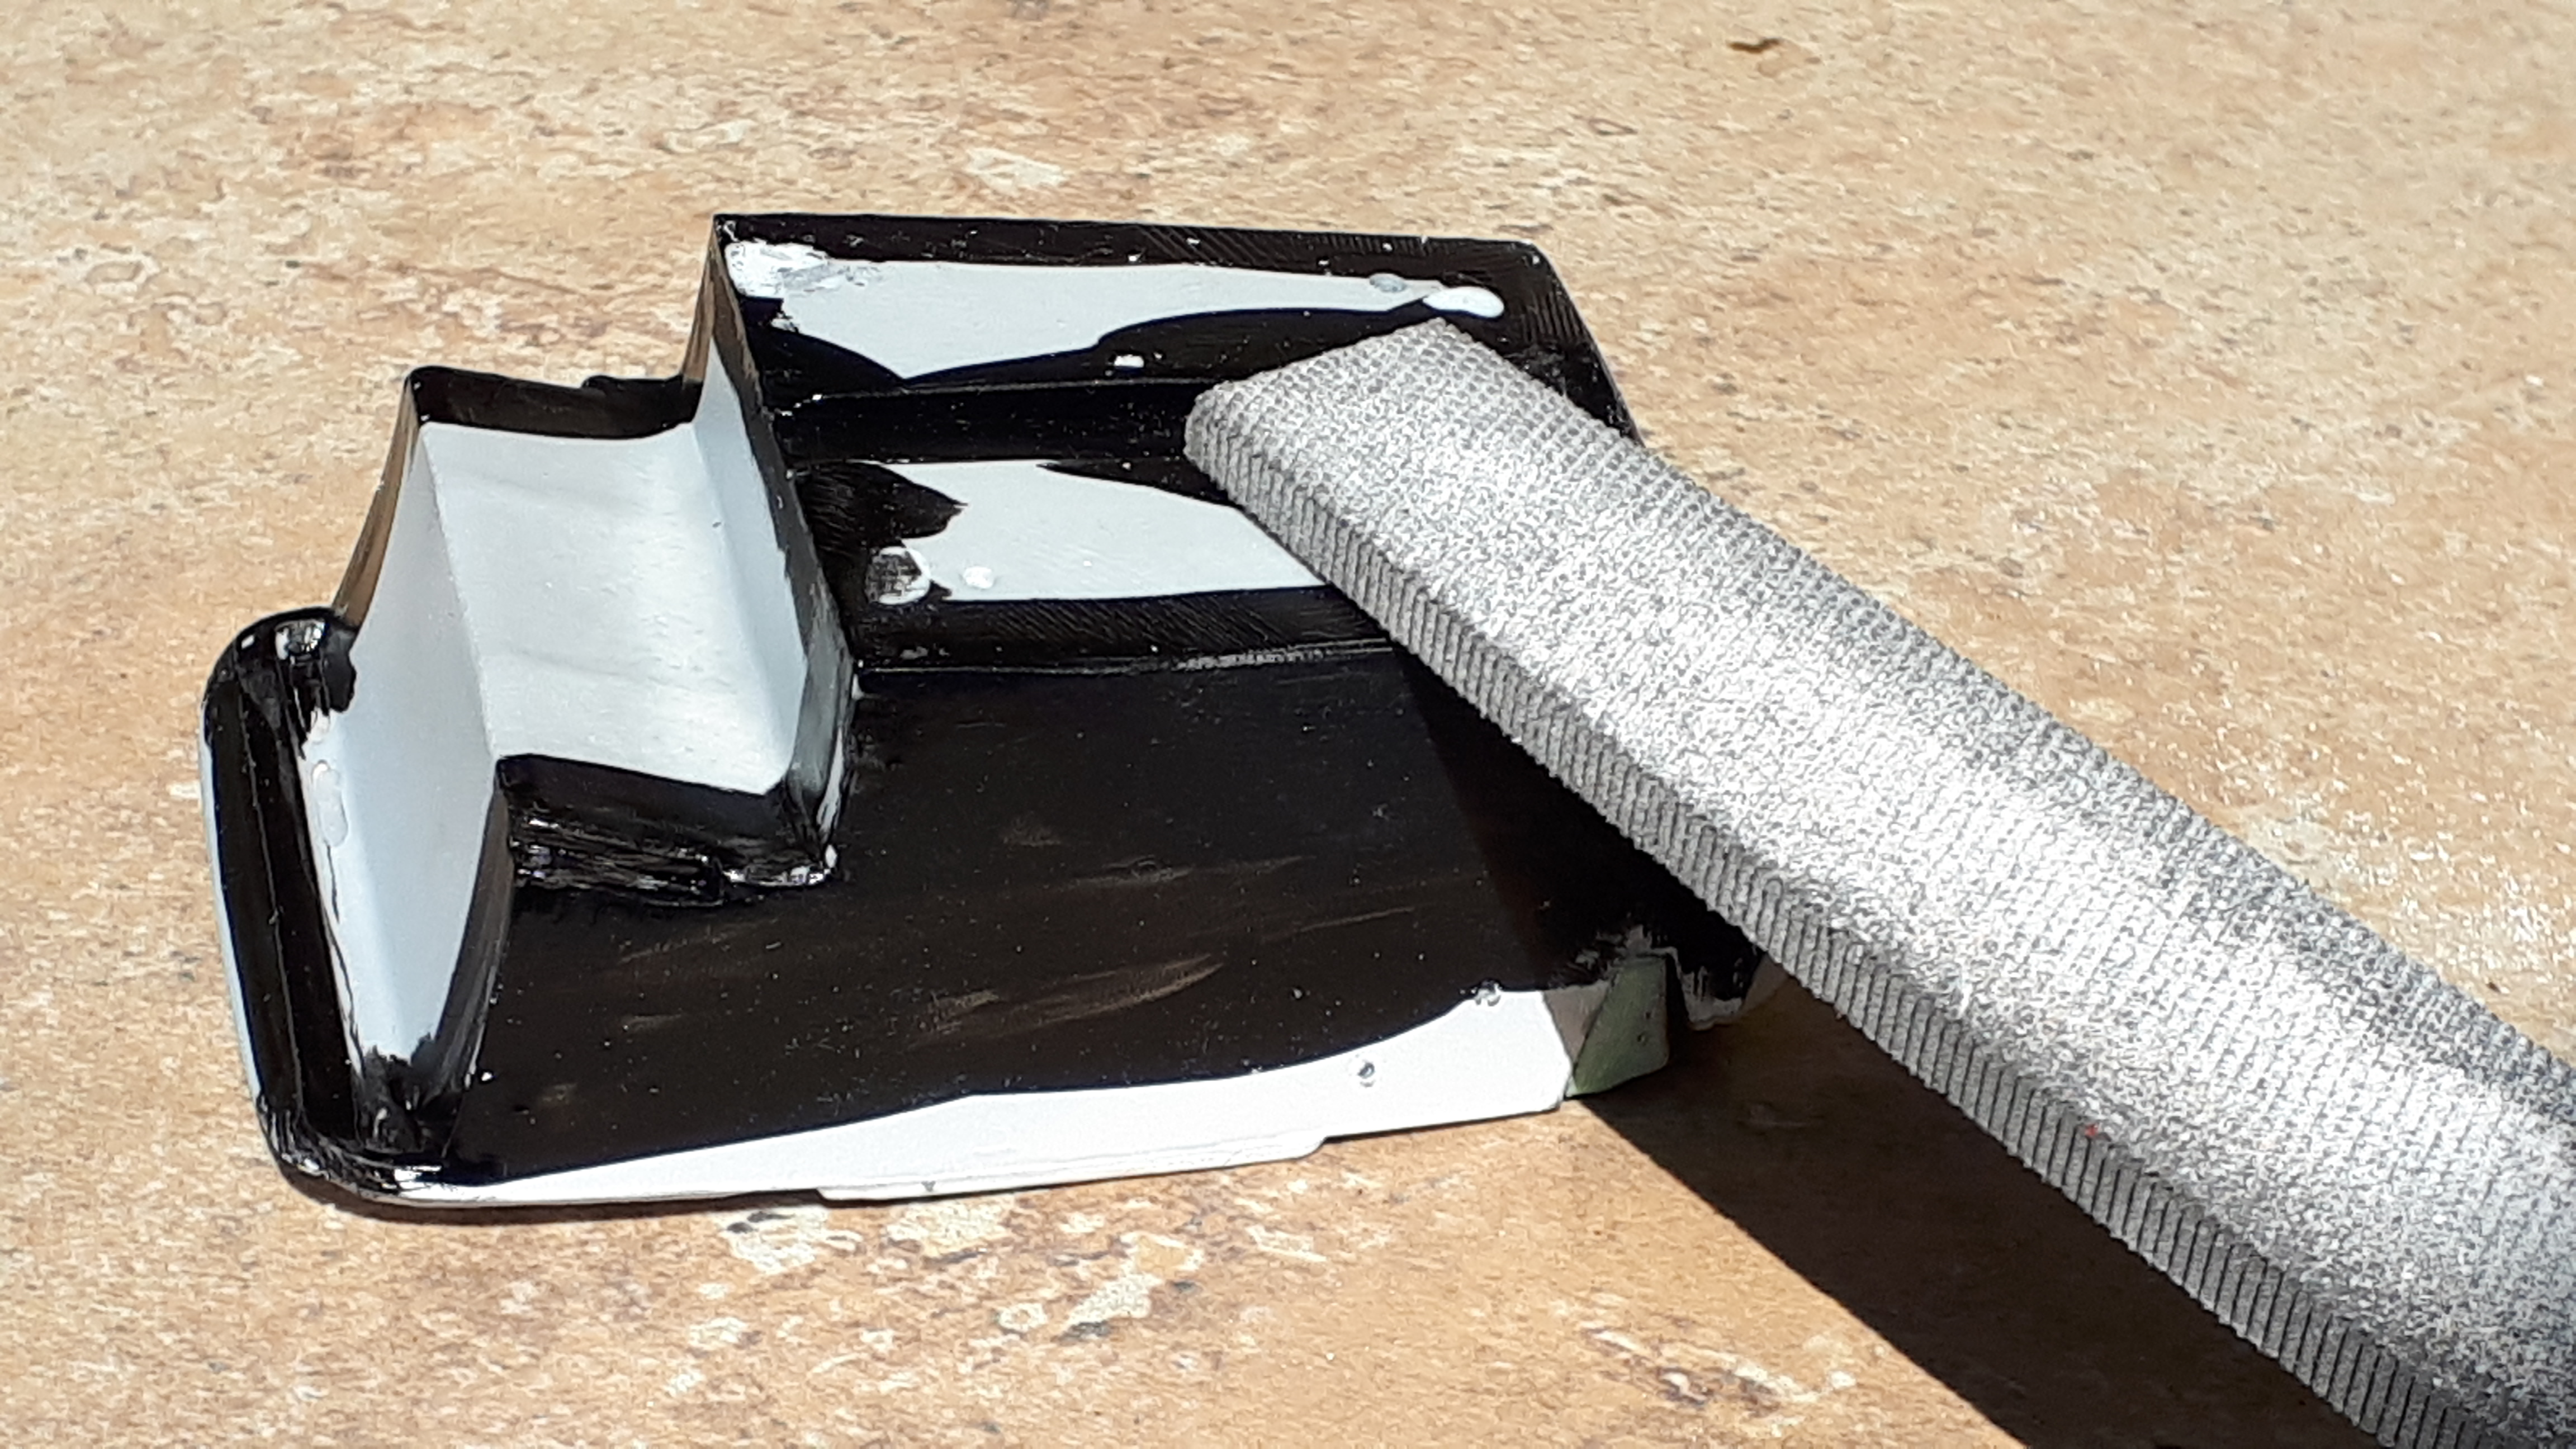
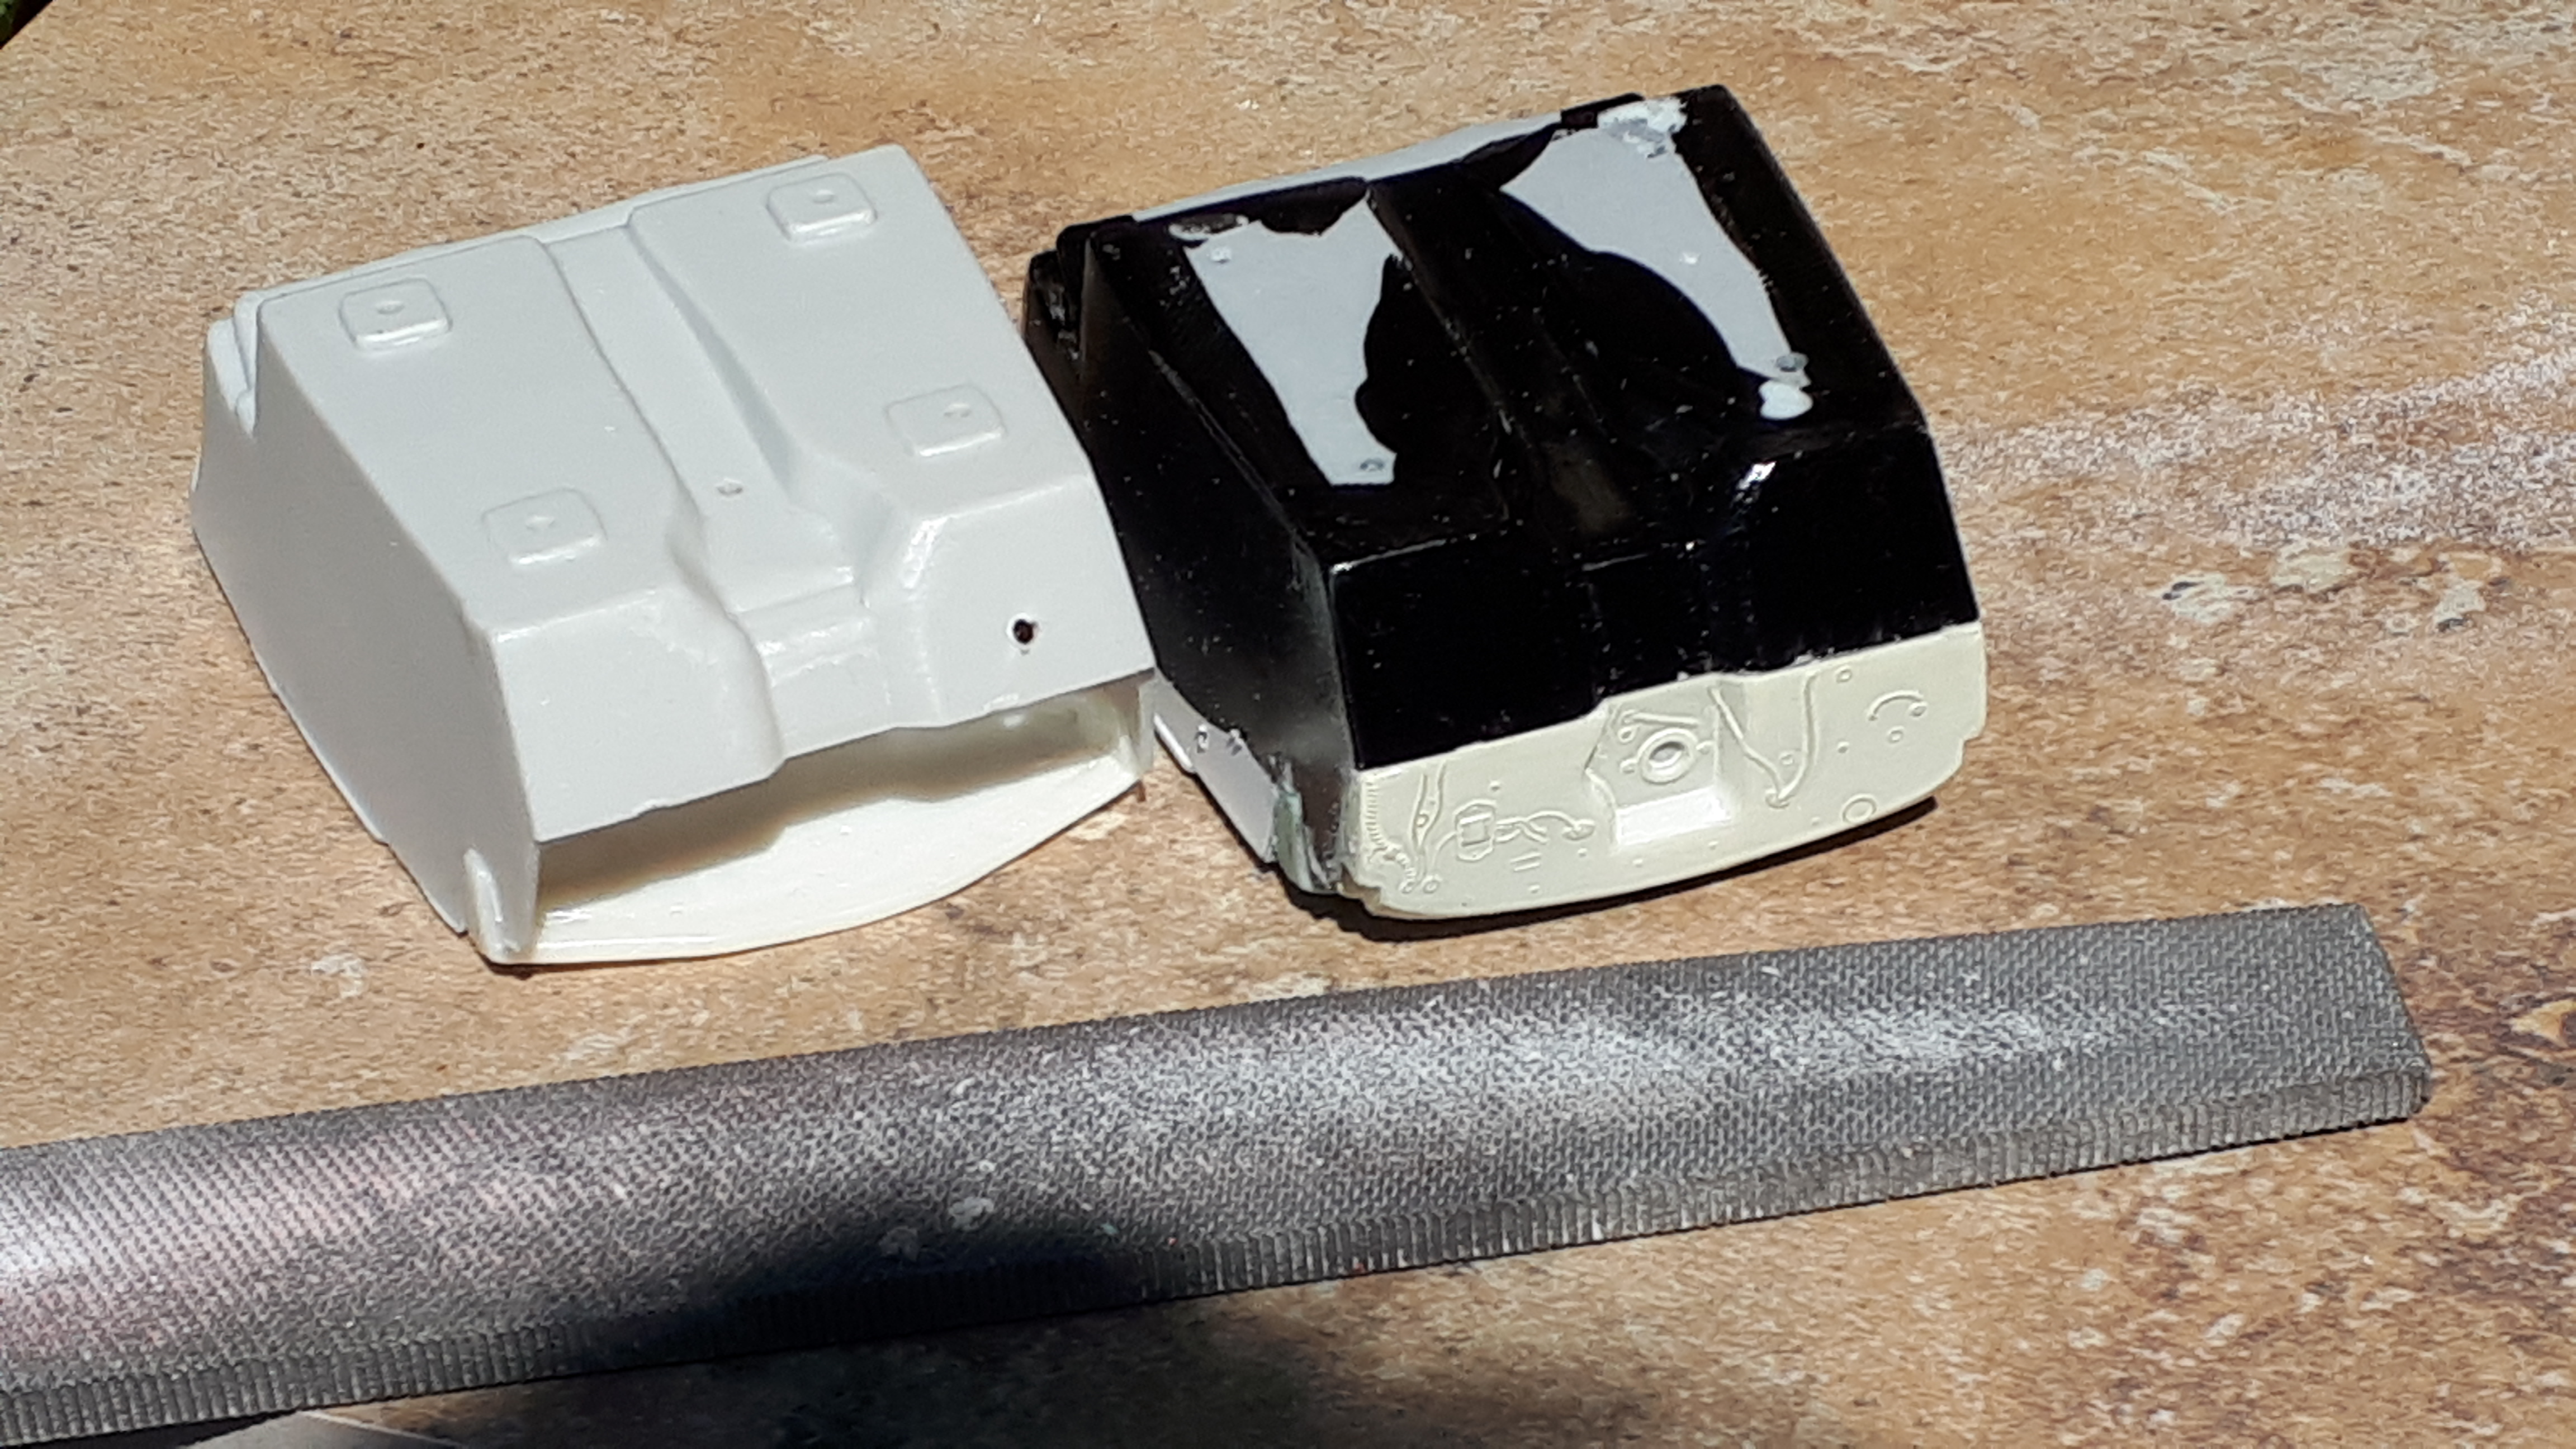
I was really trying to avoid overcomplicationitis on this build so took the easiest approach I could to lowering the old girl. At the back, after filing a C-notch into the frame, I took a pair of plyers and gently squeezed the leaf springs as much as I dared without snapping them - I had a rear end from a later kit with grey plastic and I think that helped somewhat as it is noticeably more pliable. I also cut the pins of the rear of the springs to allow them to slide rearward on the frame. Next step was to glue the front of the springs to their original mounts and leave them to dry overnight. I then glued the rear of the springs the frame with as much pressure as my clamps could generate to get them closer to the frame. I decided I could achieve a gentle channelling effect by simply filing off the four thick pads on the bottom of the interior. This was quite easy to do and gave me the lowering effect you can see in the last photo.

-
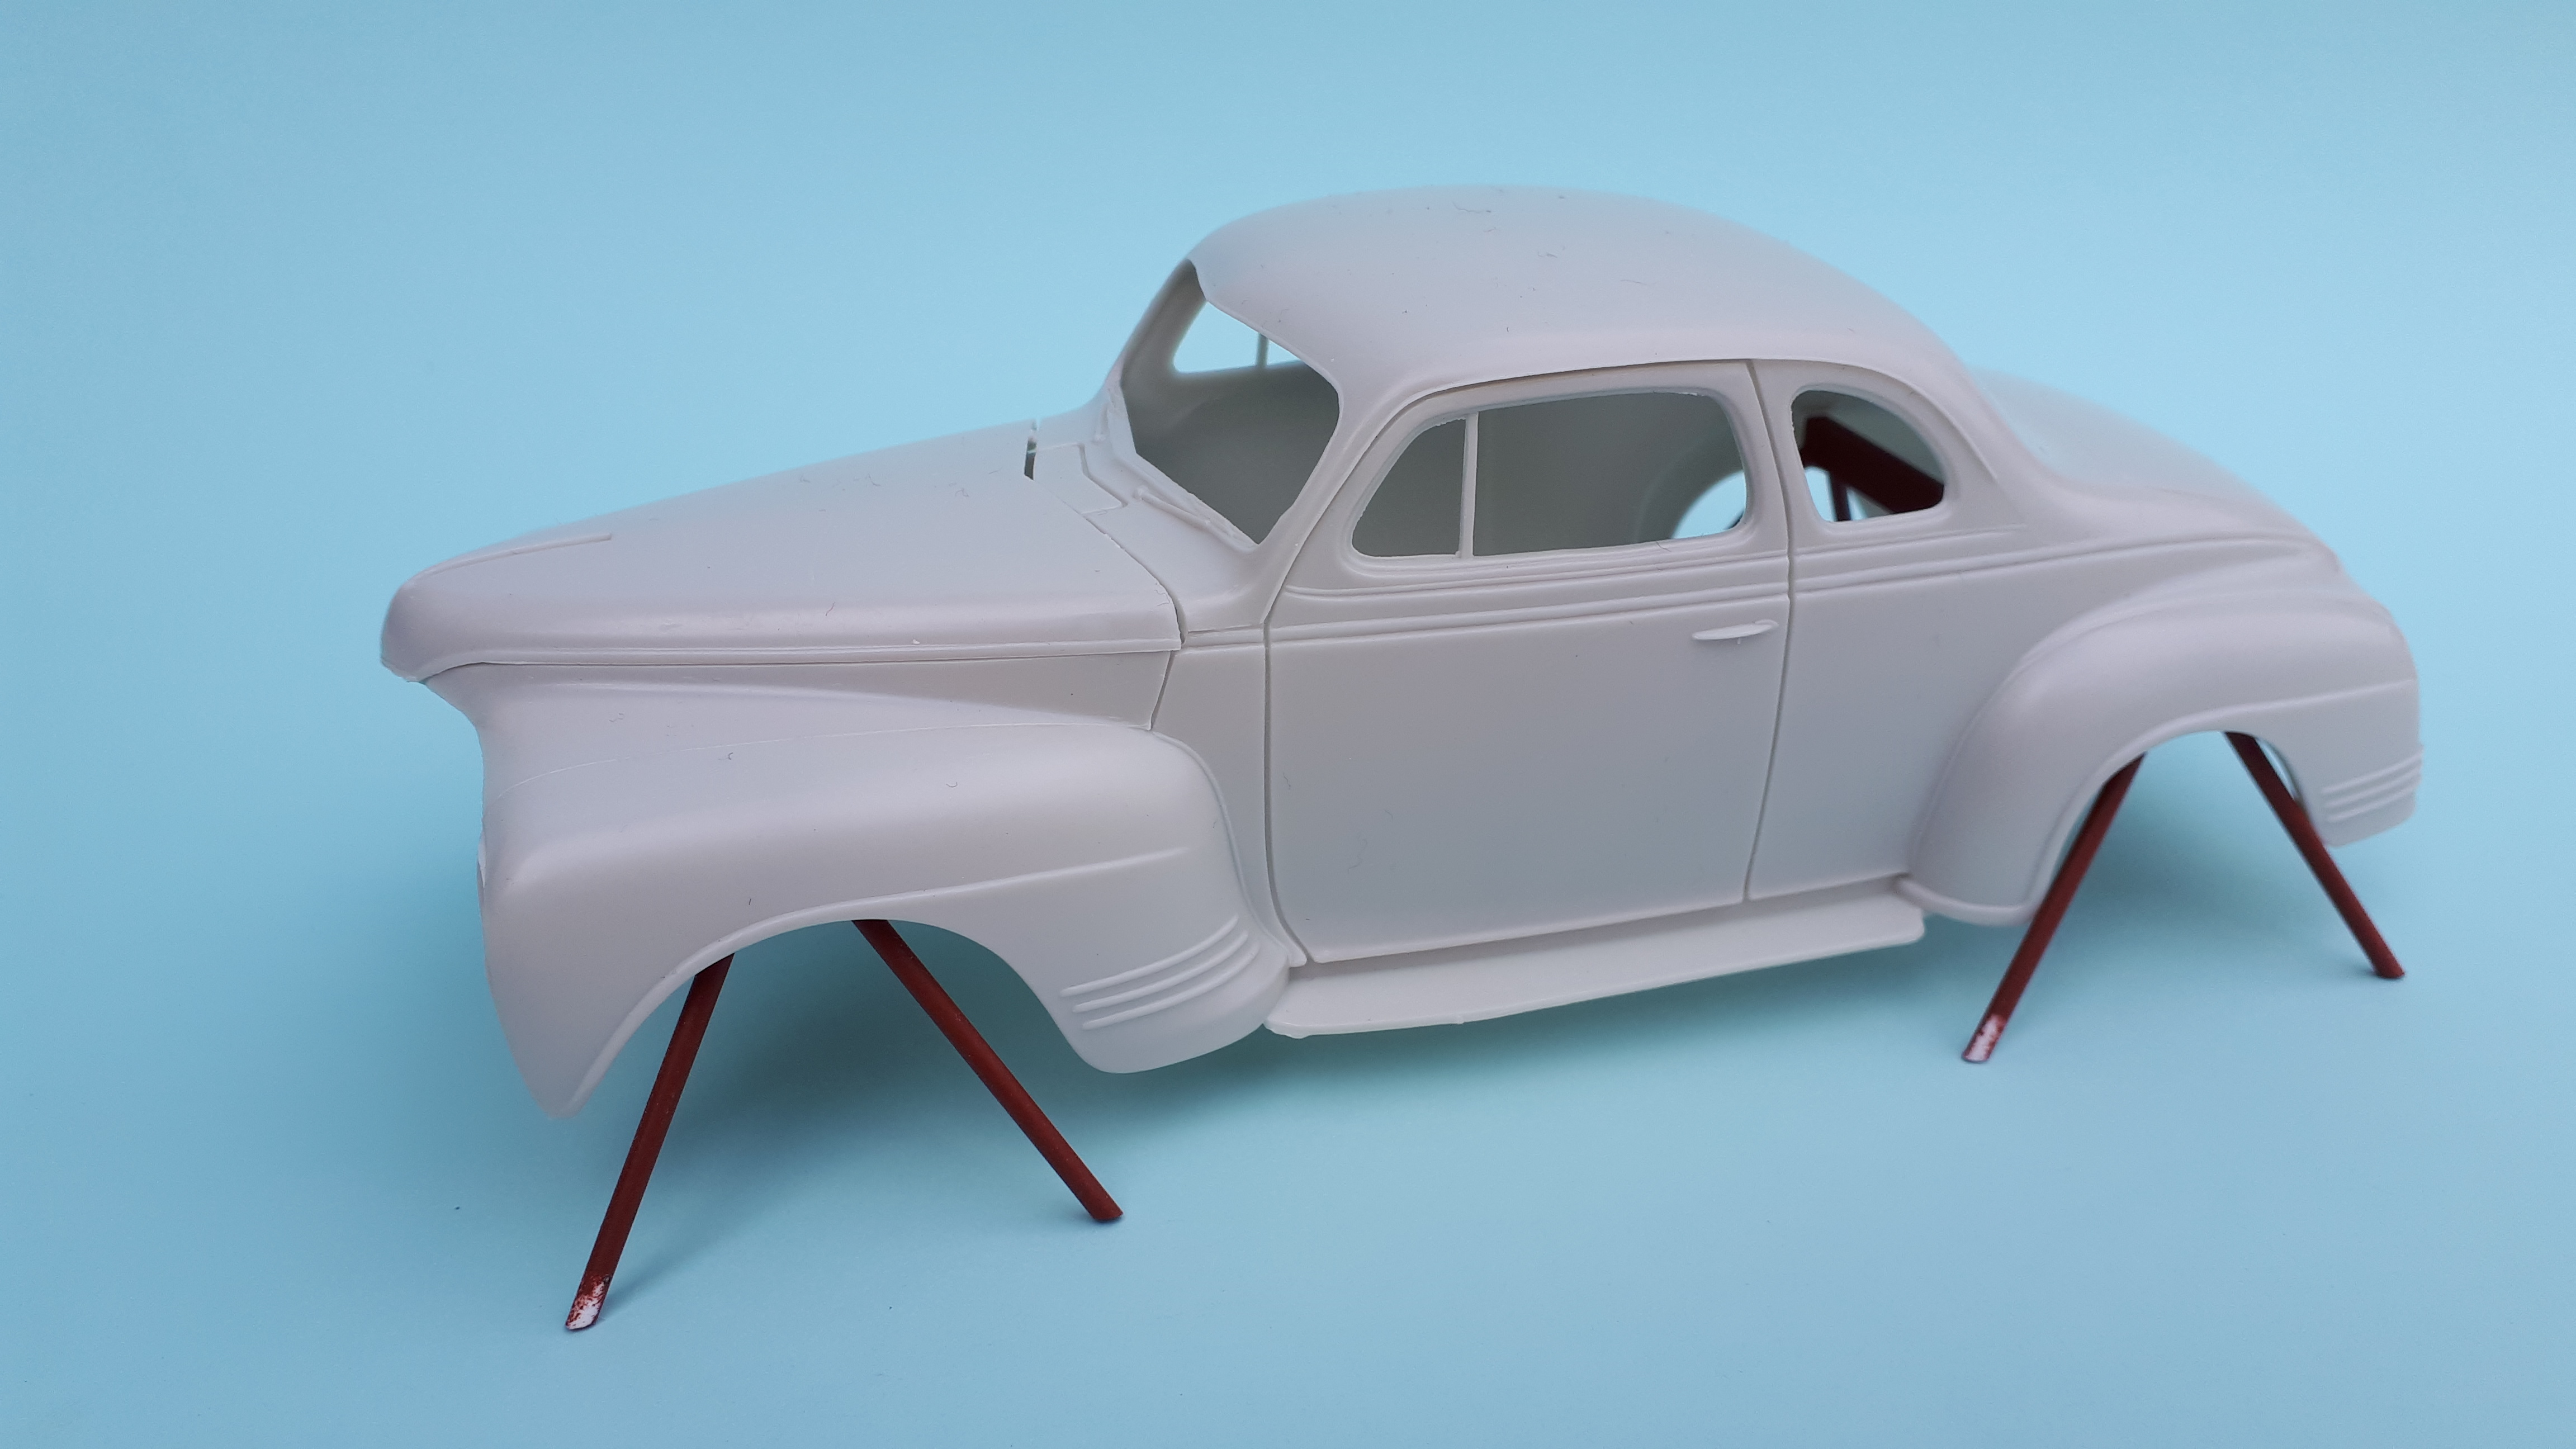
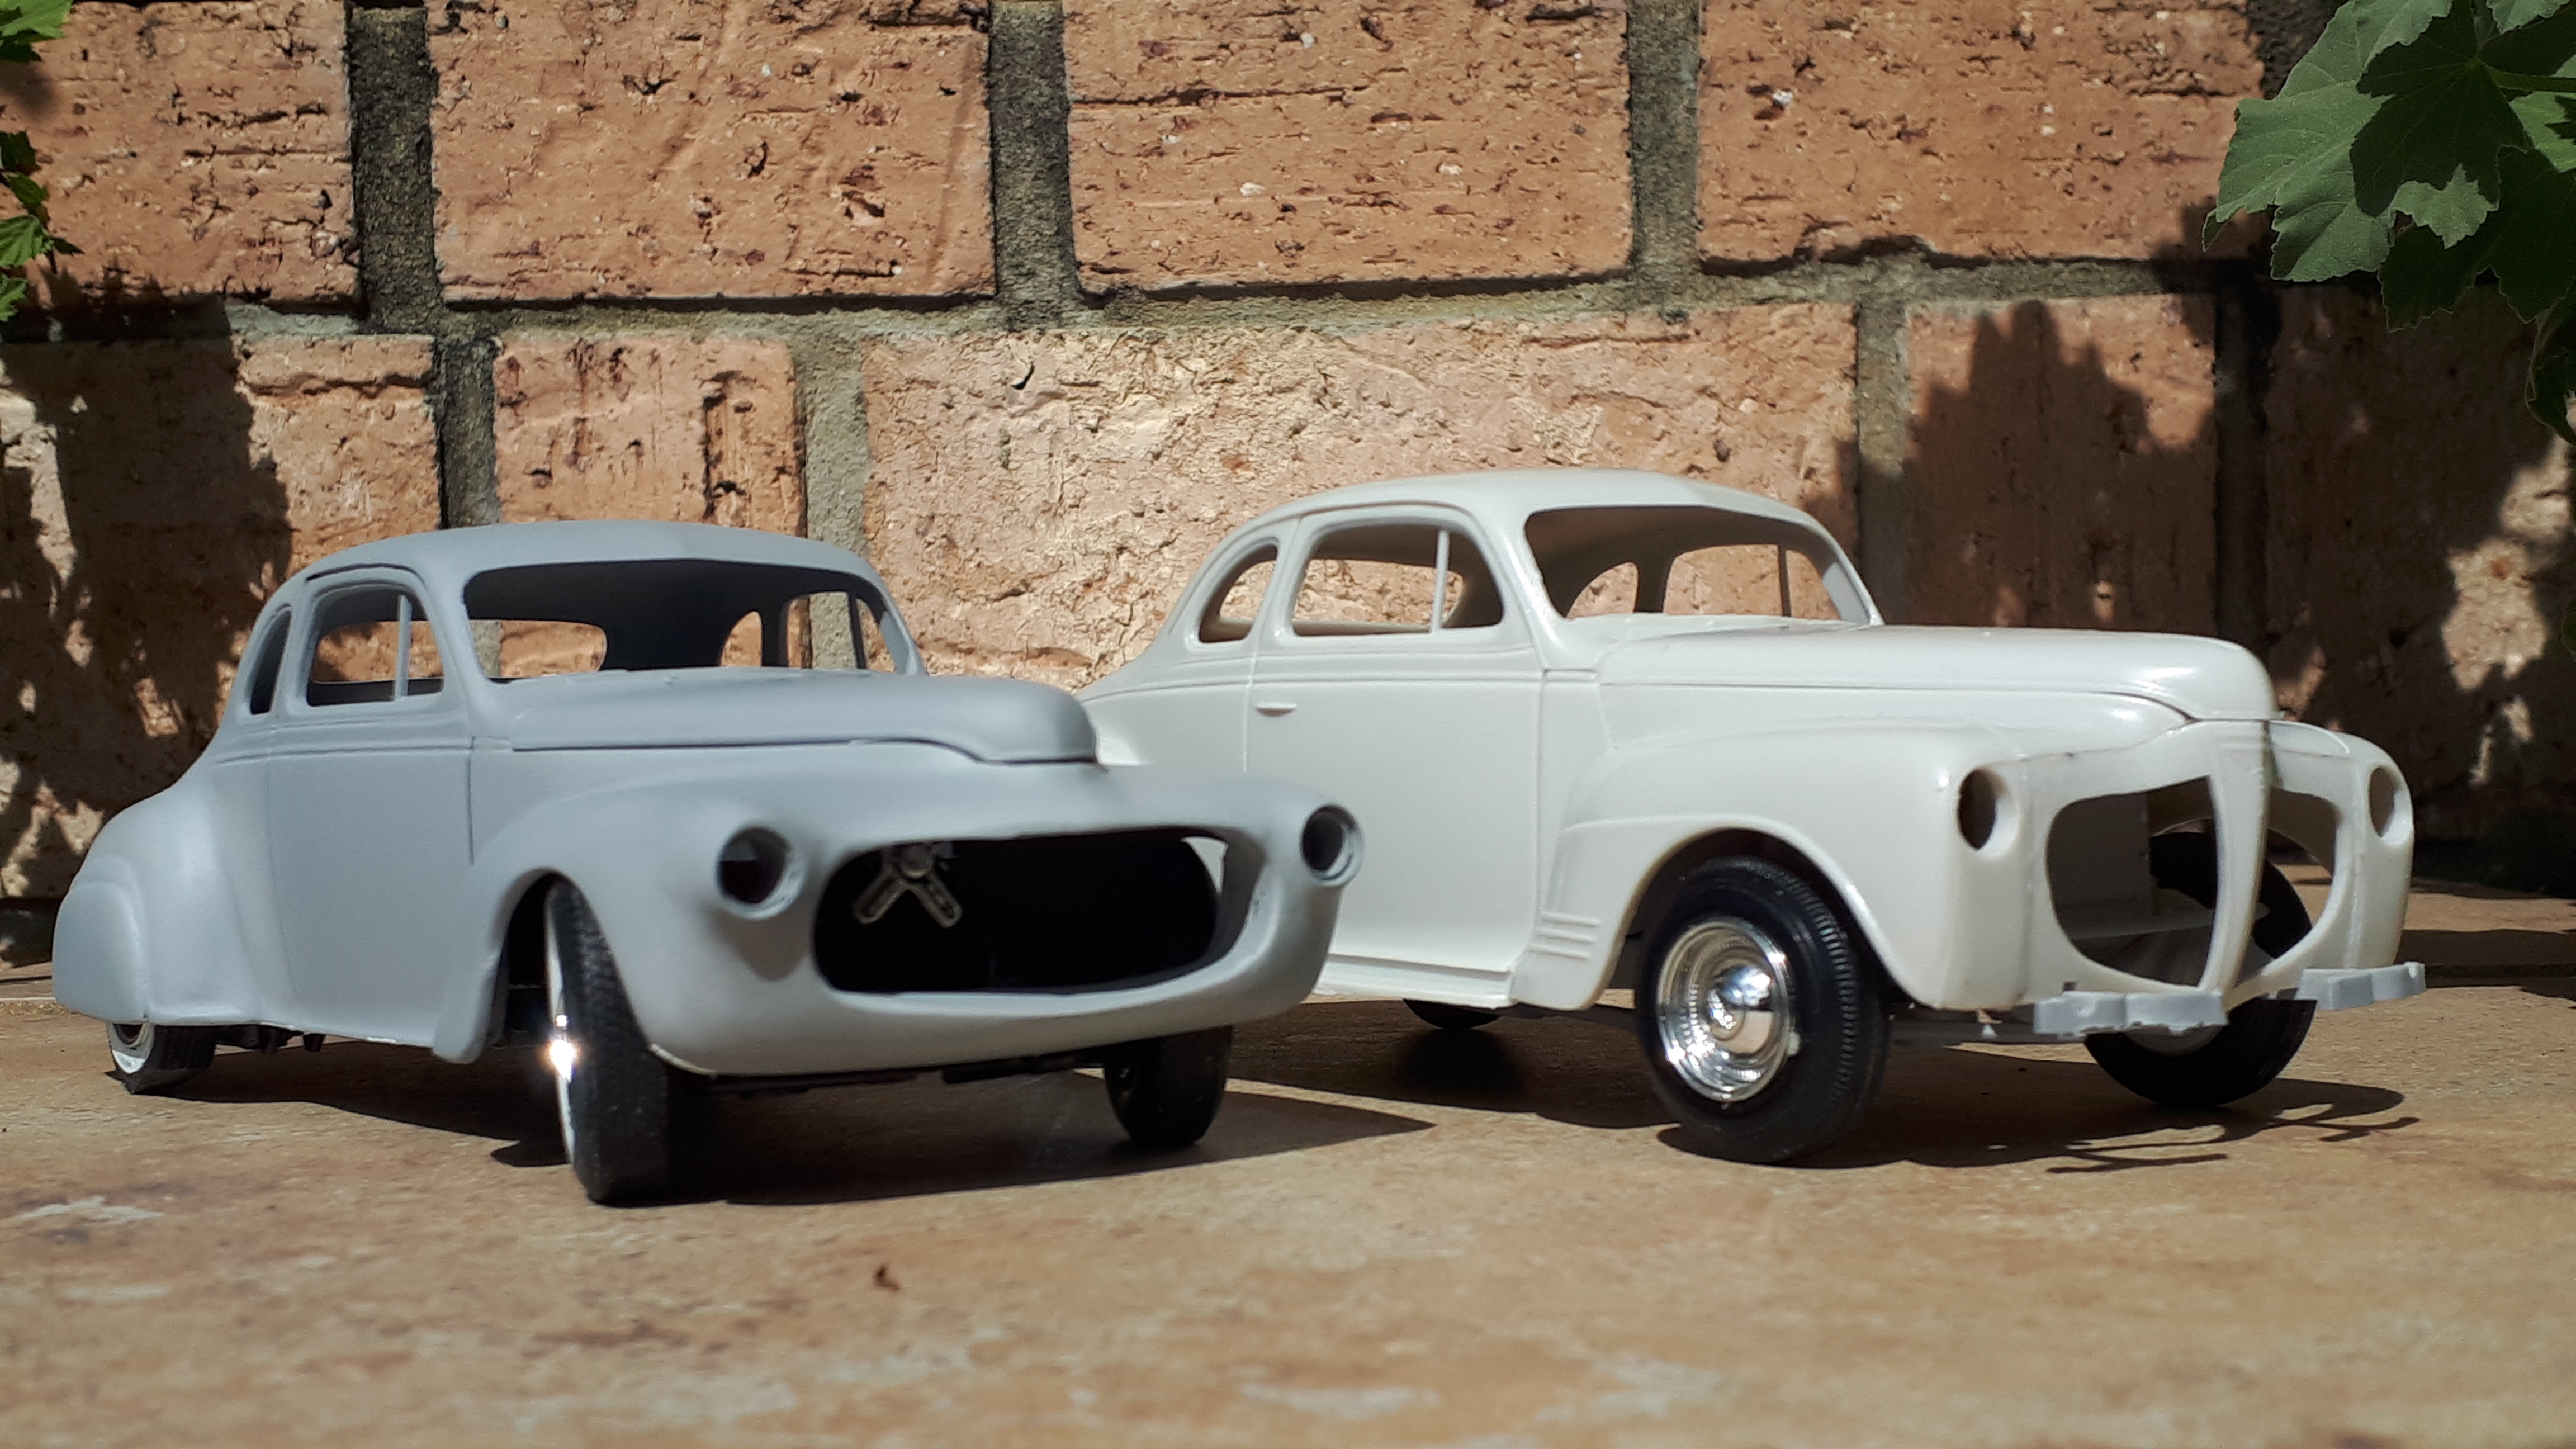
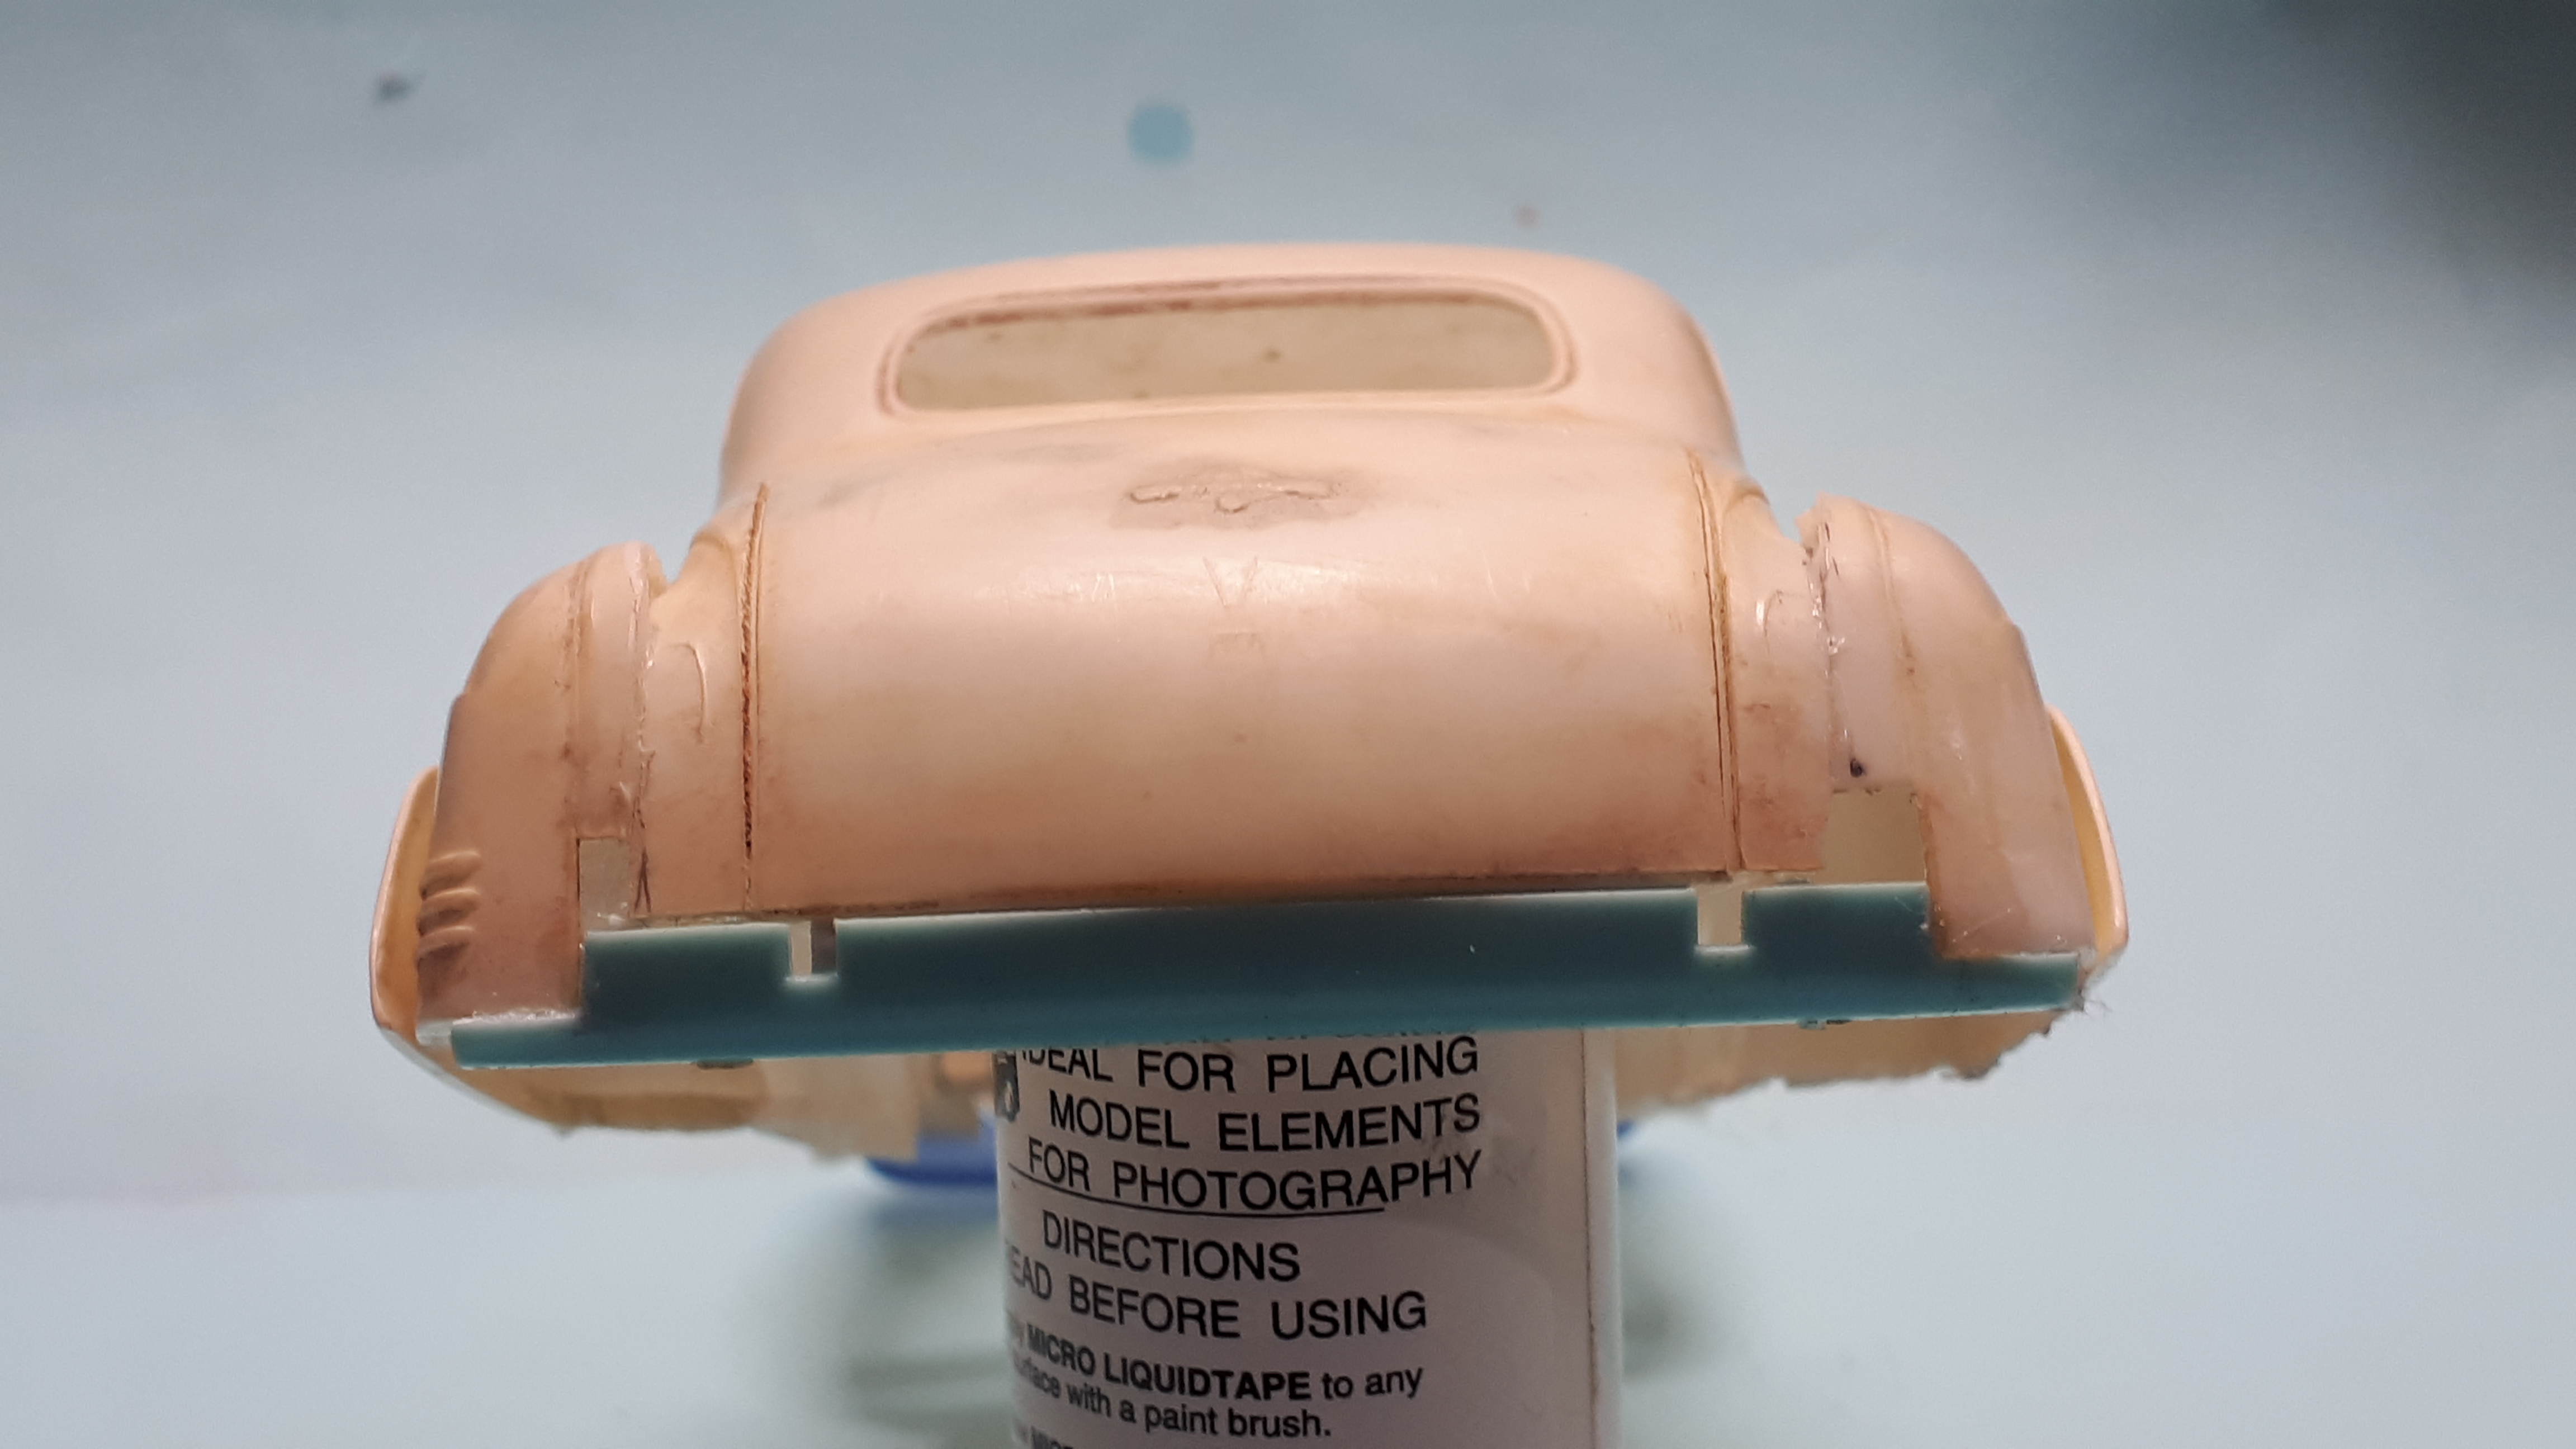
Thank you, David, Ray and Rusty for your support - it's one of the best things about participating on this forum. Finally got the first coat of primer on and I like where it is heading. The drop in height is immediately obvious -I will explain how I achieved that in my next post. The hood is essentially stock - I simply filled the indentation for the stock hood ornament. You can also see the results of adding additional distance between the end of the hood and the grille opening - this was a major step in getting rid of the very blunt front end of the stock Plymouth.
-
I can see that being very cool, especially if it is inspired by the artwork above. Go for it! Cheers Alan
-
Wow, that looks like it really took a hit - were there any survivors? I like the way you realistically buried the craft into the ground rather than having it sit on the surface - it is very convincing. Cheers Alan
-
I have been really enjoying this thread so far, Charlie. Your workmanship and attention to detail is breathtaking. I am a big fan of early oval track race cars of any sort and am currently building a Model T based early sprintcar similar to yours in general proportions, using a vacformed plastic body that I made. Your brasswork is inspirational. Did you have to do a lot of annealing to get that reverse sweep in the cowl up to the windshield? And thank you ,Tim, for the museum photos. I need to put that one on my list if we ever get to travel to the USA again. I have been fortunate to spend a fair bit of time at both the Speedway Motors museum in Lincoln Nebraska and the Knoxville Sprintcar Museum in Iowa. Problem is, you go to these places and want to build every car in there! I look forward to seeing the assembly of your Offy! Cheers Alan
-
This has been a fascinating project to watch! You deserve a Purple Heart for deciding to relocate those rear pontoons - I'm glad you did because it made a phenomenal difference to the accuracy of your Comet. I mentioned before that I have been building 1/32 scale rods for many years however in the main I have just built box stock. As a lifetime hot rodder I build these models to complete my collection - I figure the spare time I have can be invested in detailing 1/25th scale rods with more satisfaction. I view the 1/32 scale models as a historic appendix to hot rod modelling in general. But seeing your work, and Mike's gorgeous 34 coupe, makes me think I might just stretch myself on the next few. I have a partially restored Aurora Ram Rod a.k.a. Chilli Cattalo's Silver Sapphire a.k.a. Beachboys Little Deuce Coupe that deserves more love! I also have a WIP Scat Cat 32 roadster that is going to be a Bonneville car - it too should get some extra time. Thank you both for the inspiration and good luck with finishing your Comet. Cheers Alan
-
Out back, having already removed the rear fenders< I raised them until they were flush with the lower edge of the body. I let them setup over night before cutting some tapered strips to fill most of the remaining gap. The second photo indicates just how high the fenders were raised. And yes, that rollpan was an easy fit from the 51 Chevy kit again. Finally, I found some unidentified fender skirts that fit the Plymouth fenders like they were meant for them. A wipe of putty and things were looking good.
-
No Paul, no Hemi this time although I had entertained the idea of a Viper V10 before remembering the original back story of the young guy with a reasonable but not unlimited budget. So i want to see what I can do with the flathead six. Cheers Alan
-
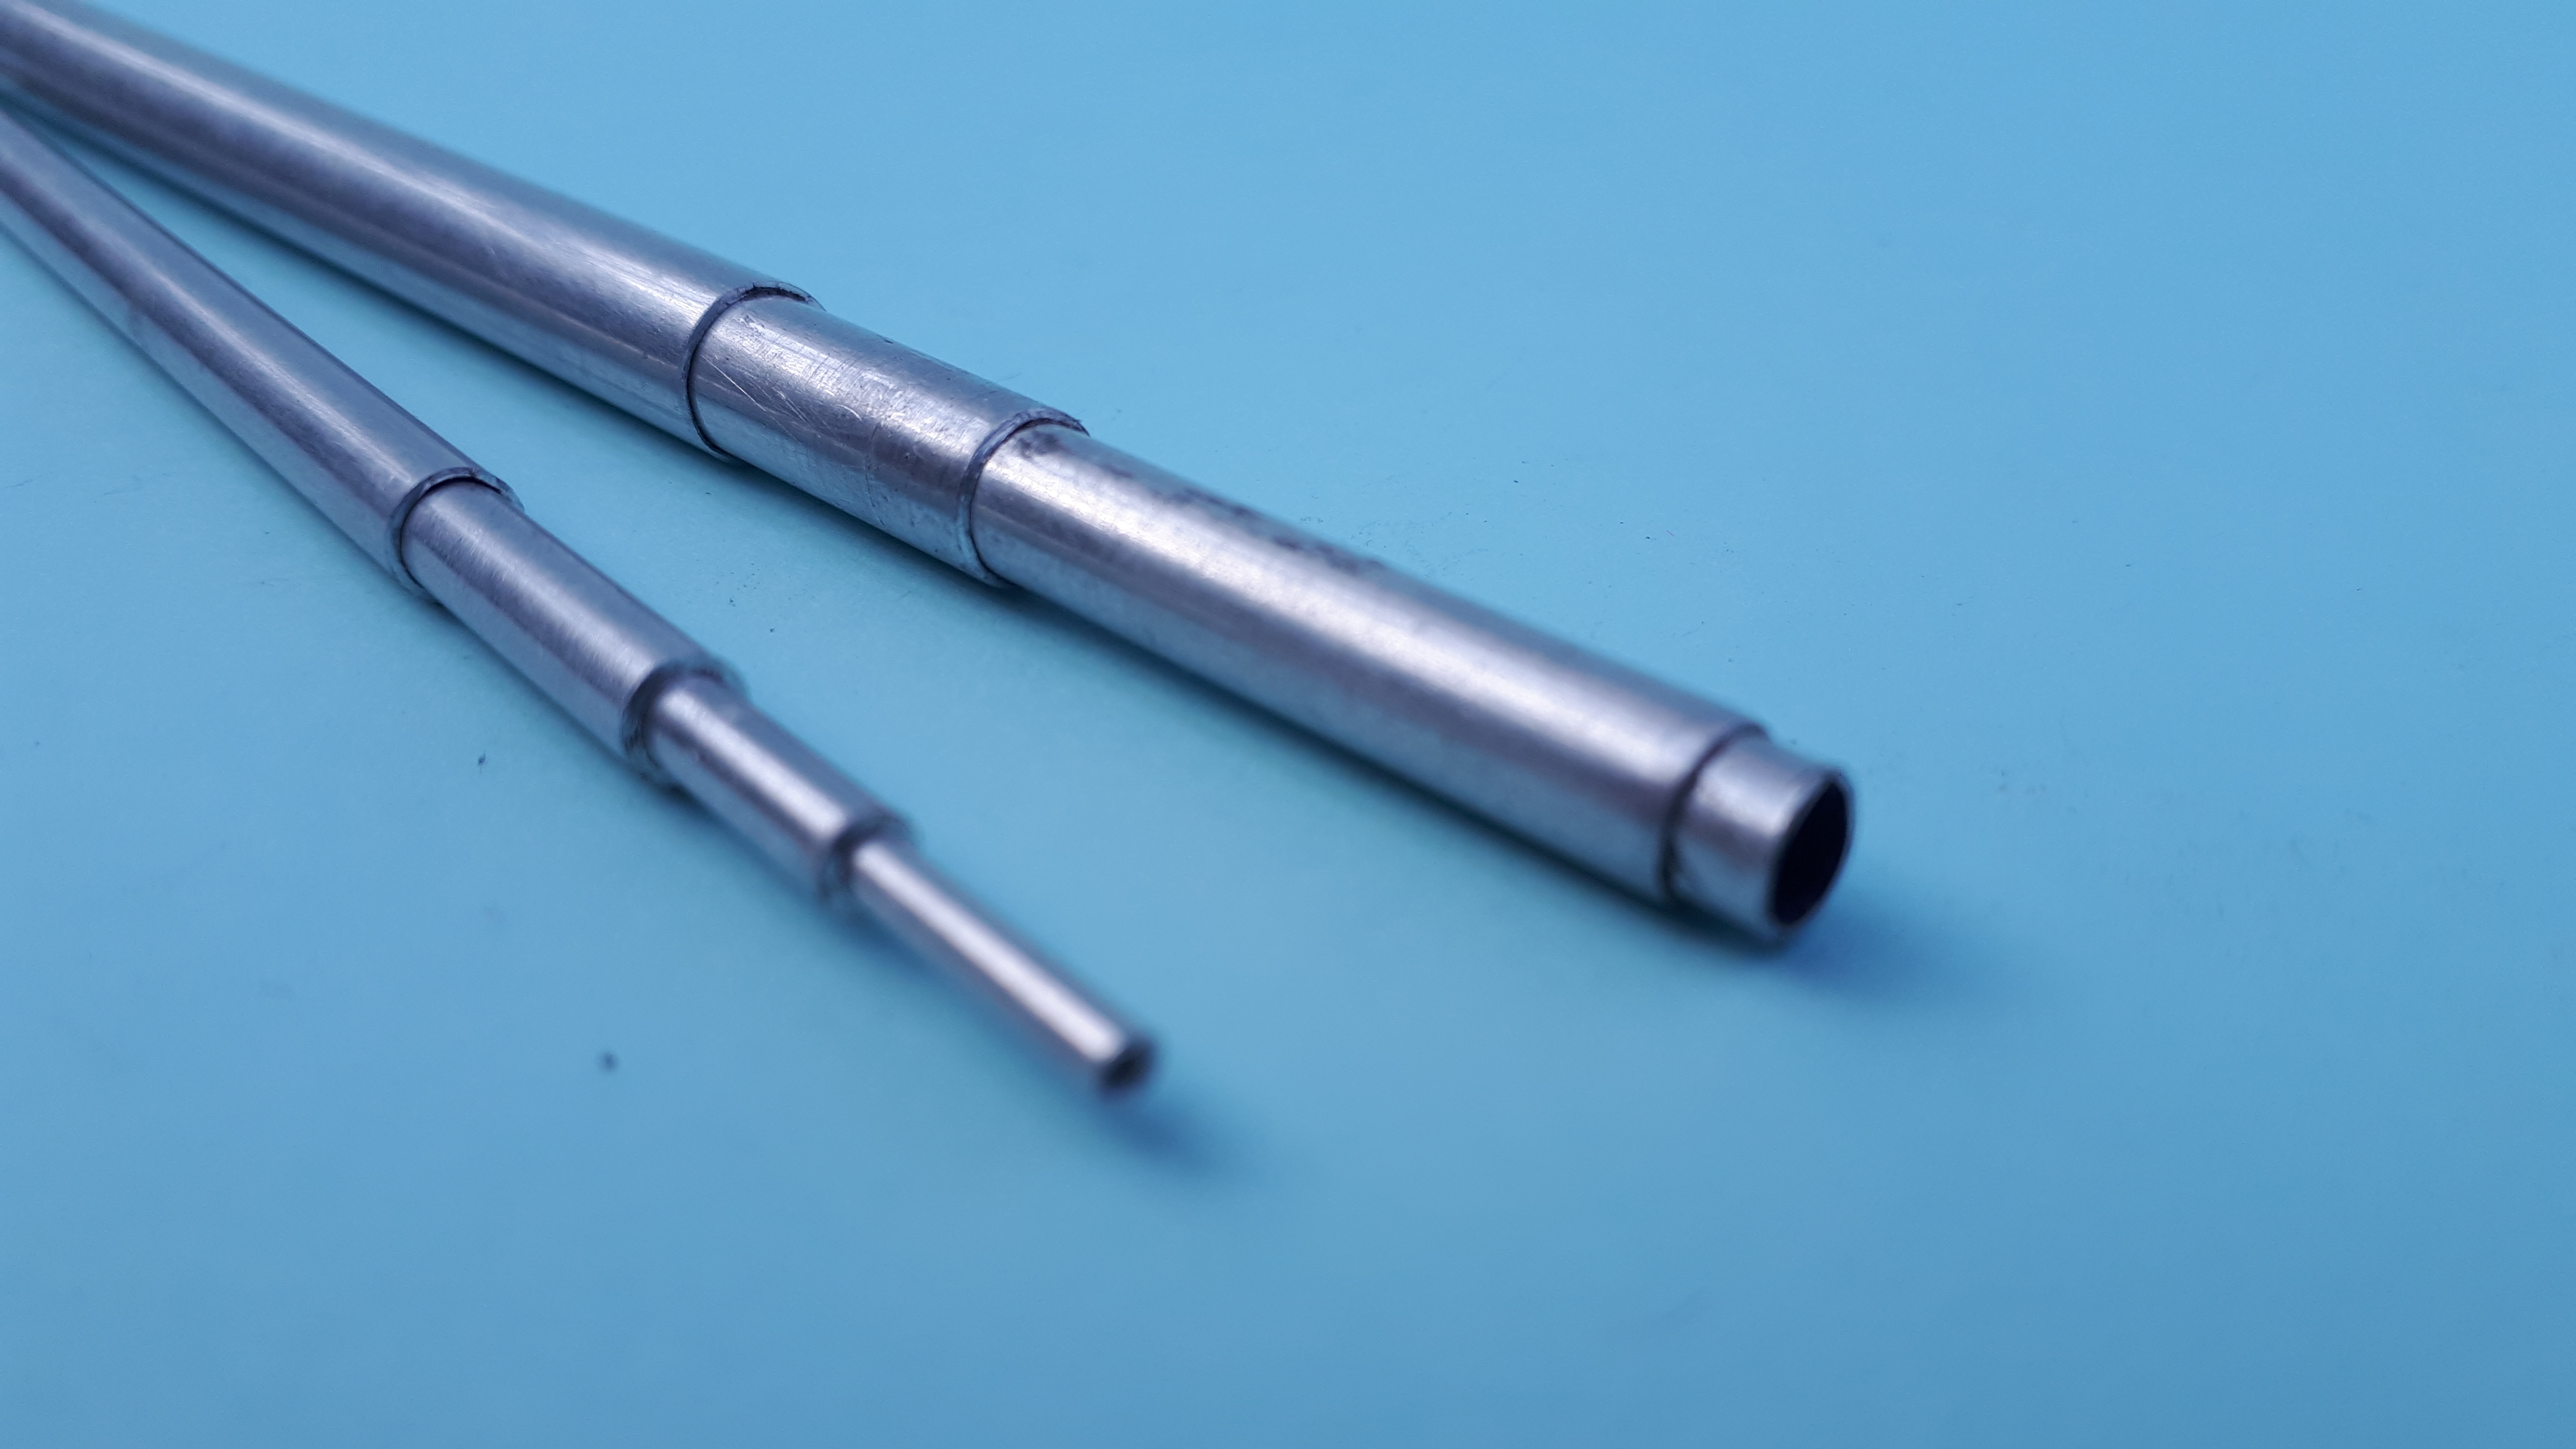
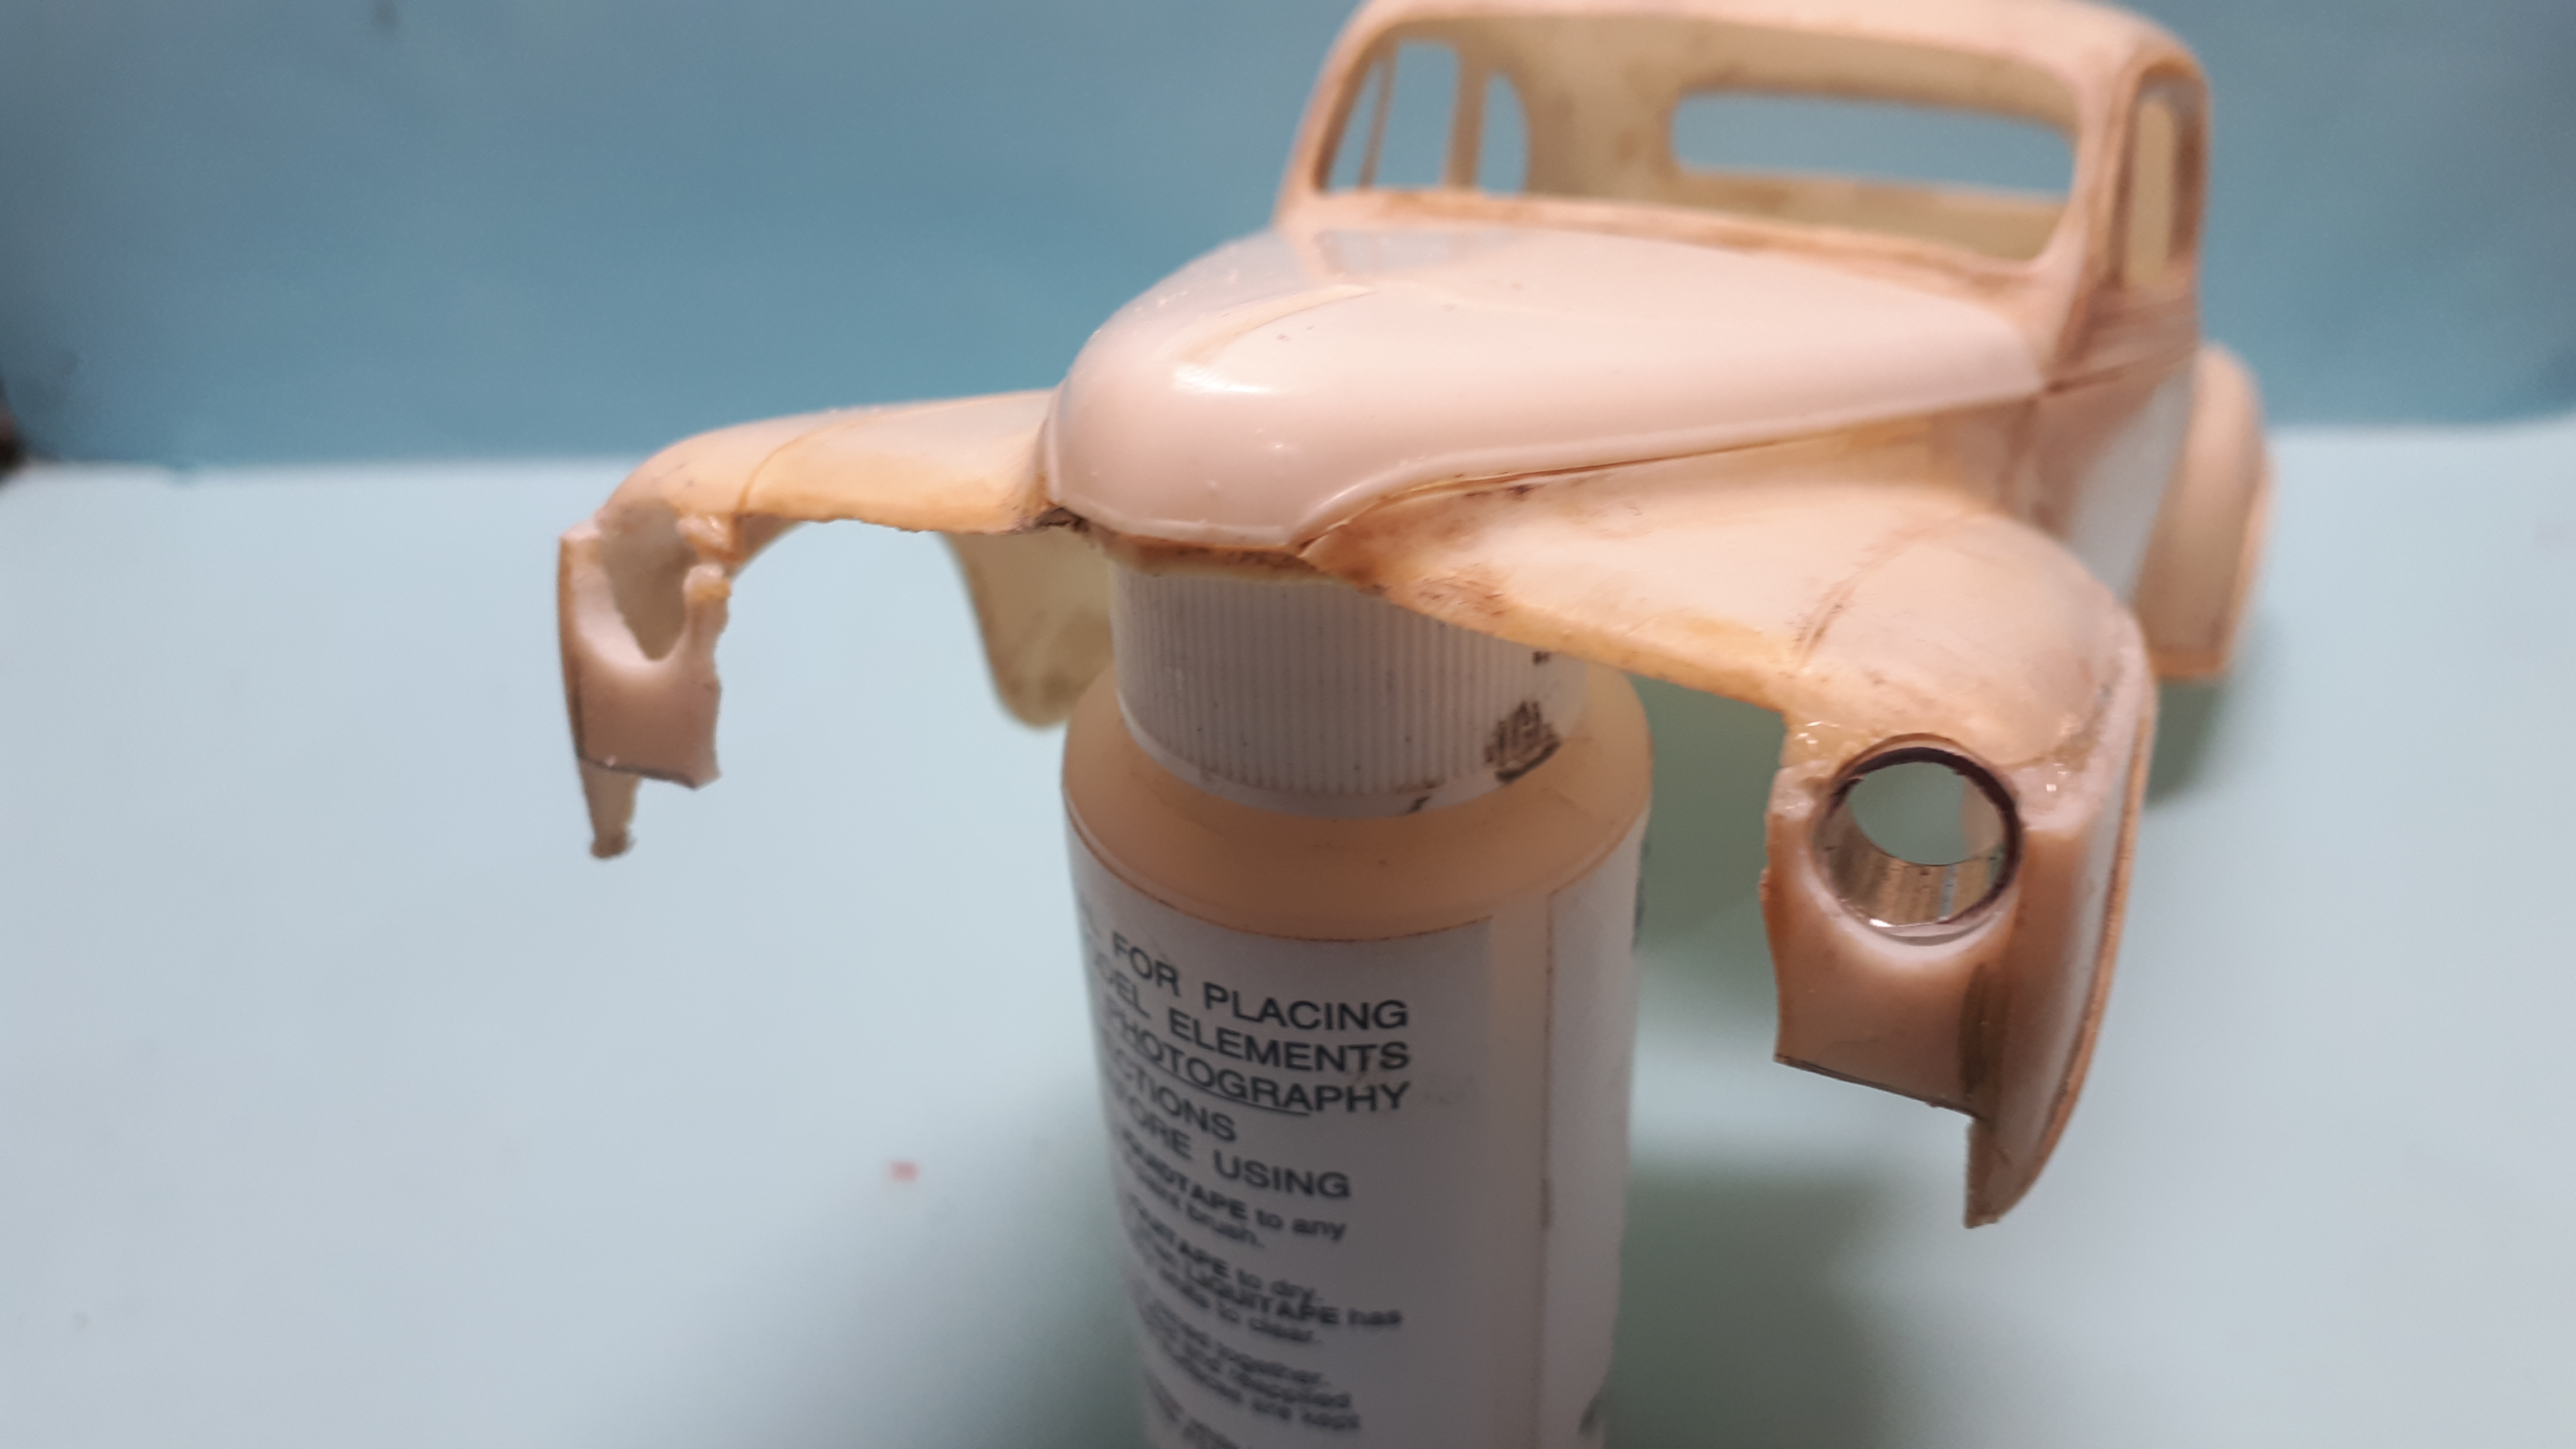
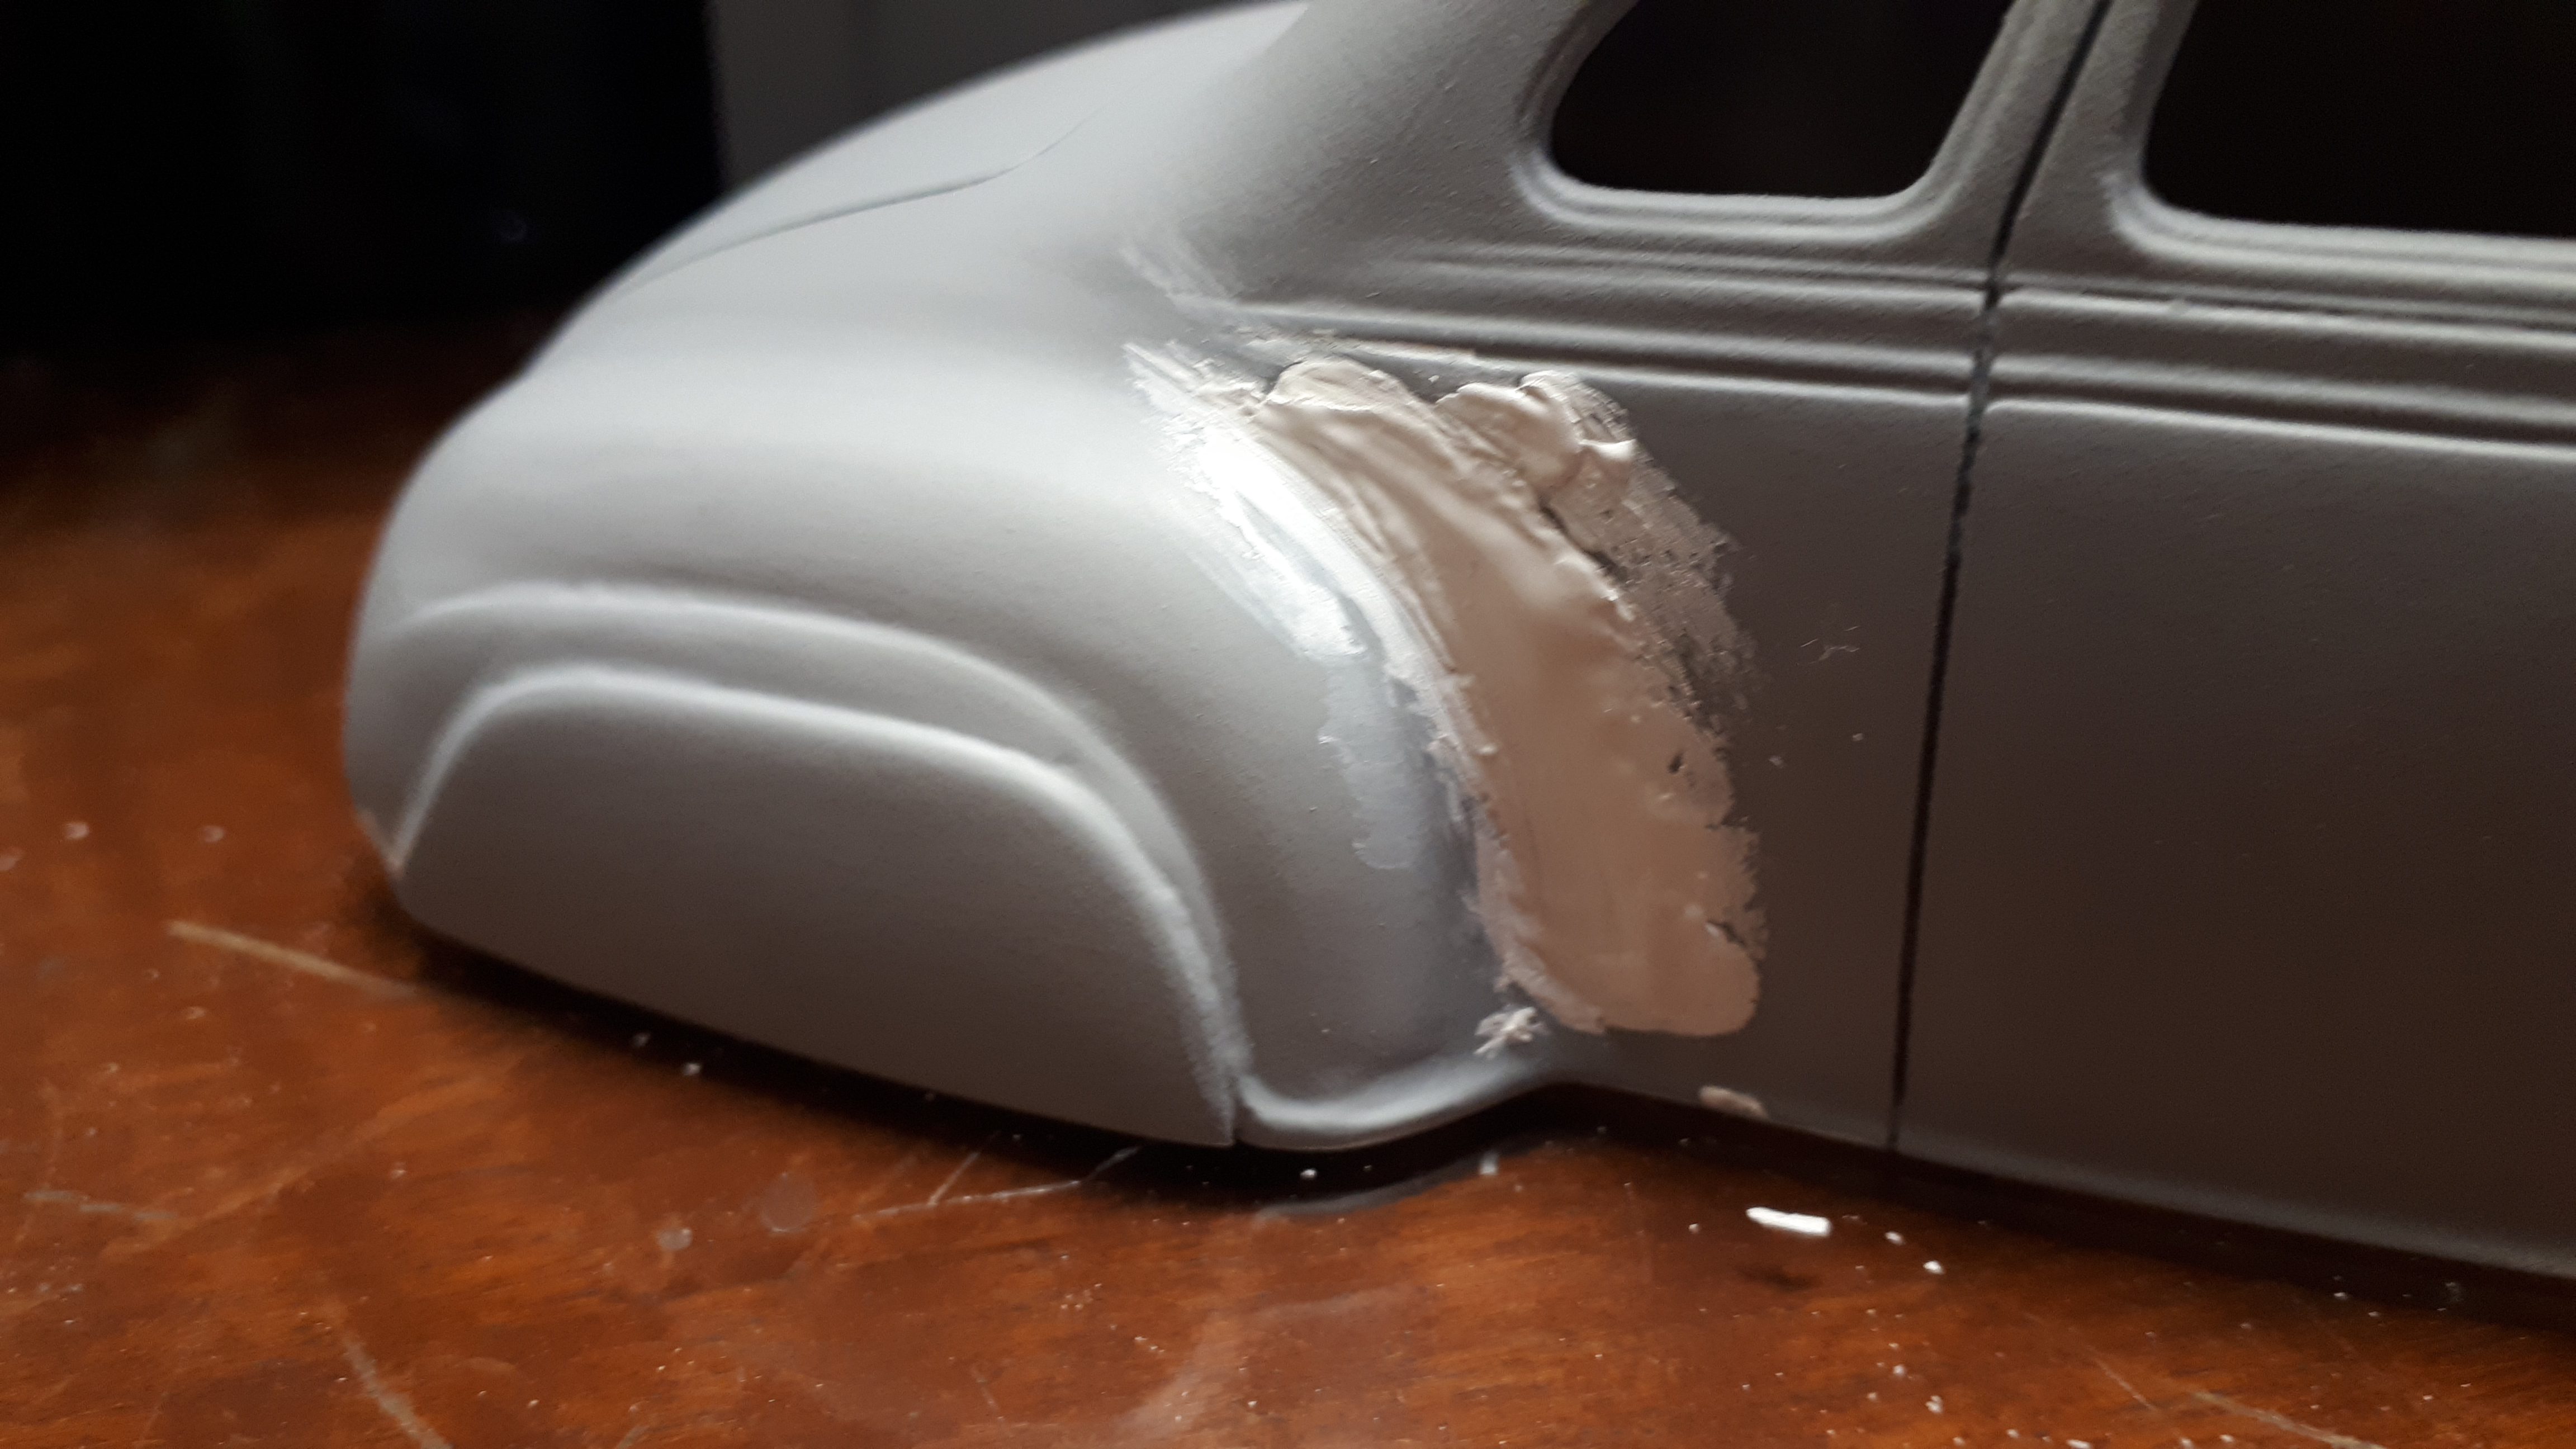
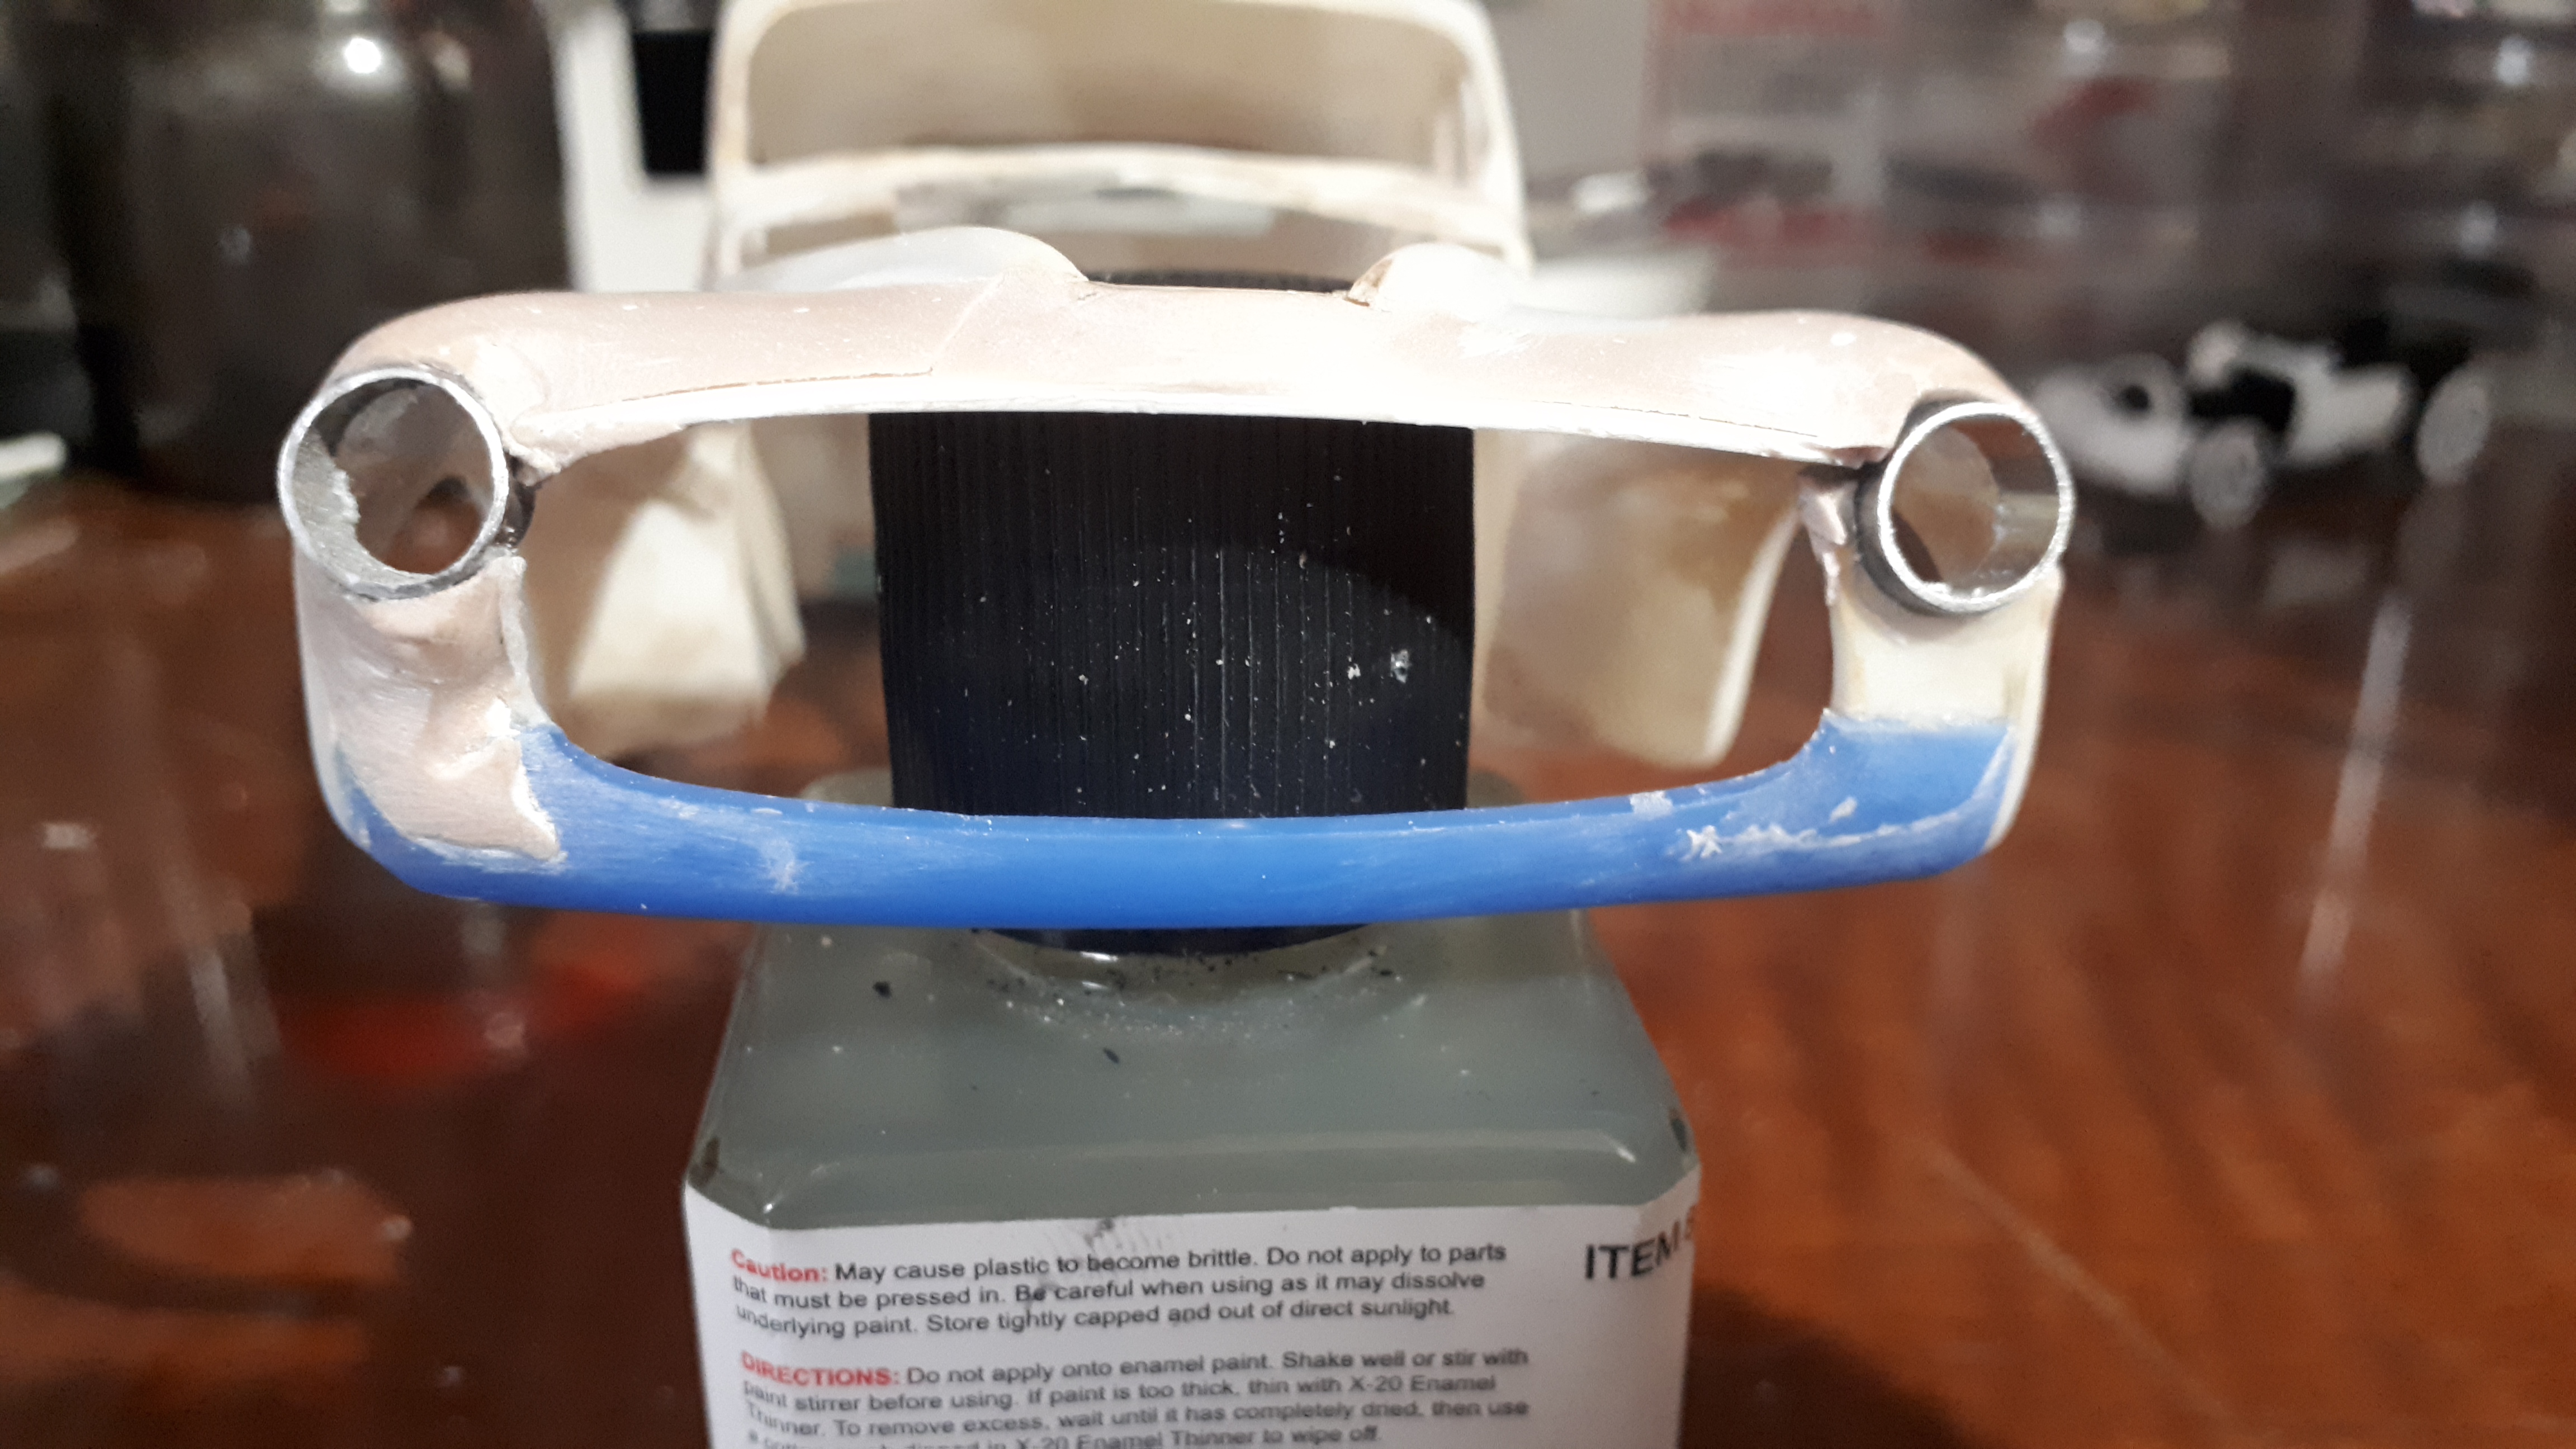
Only problem was, I was getting a distinctly "wide mouthed frog" look from this combo. The grille was crowding the headlights way too much. I then decided to summon up the courage to both narrow the grille and V butt it at the same time, to help remove the Plymouth blunt forehead. Not the easiest thing I've tackled but again, I seemed to be heading in the right direction. Of course, now, the grille opening no longer matched the grille. I grabbed some thin styrene and wrapped it around the V'd grille, using liquid cement to laminate it together. I let it sit overnight before inserting it back into the front of the Plymouth. In the last photo you can see how I installed the aluminium tubing for the headlights somewhat proud of the original headlight mounting surface, to try and achieve some Barris styling touches. I have also scraped all the original swage lines off the lower training edges of the fender and covered the whole assembly with a thin coat of filler to start getting this into shape.
-
I went through my custom grille box and really struggled to find a simple grille that would do the job. I enlisted the services of my good friend and custom building guru Dave who brought a few grilles with him and we spent a fun night trying things out but kept coming back to the custom grille from the AMT 51 Chevy kits. The rollpan from that kit took the tiniest bit of massaging so it looked like we were onto something.
-
Hi Rick, part of this vision was to remove the running boards altogether. In real life this car would probably be channelled - I'm not planning to do that just yet but I will see how low I can get the frame first before making a commitment one way or another. Cheers Alan
-
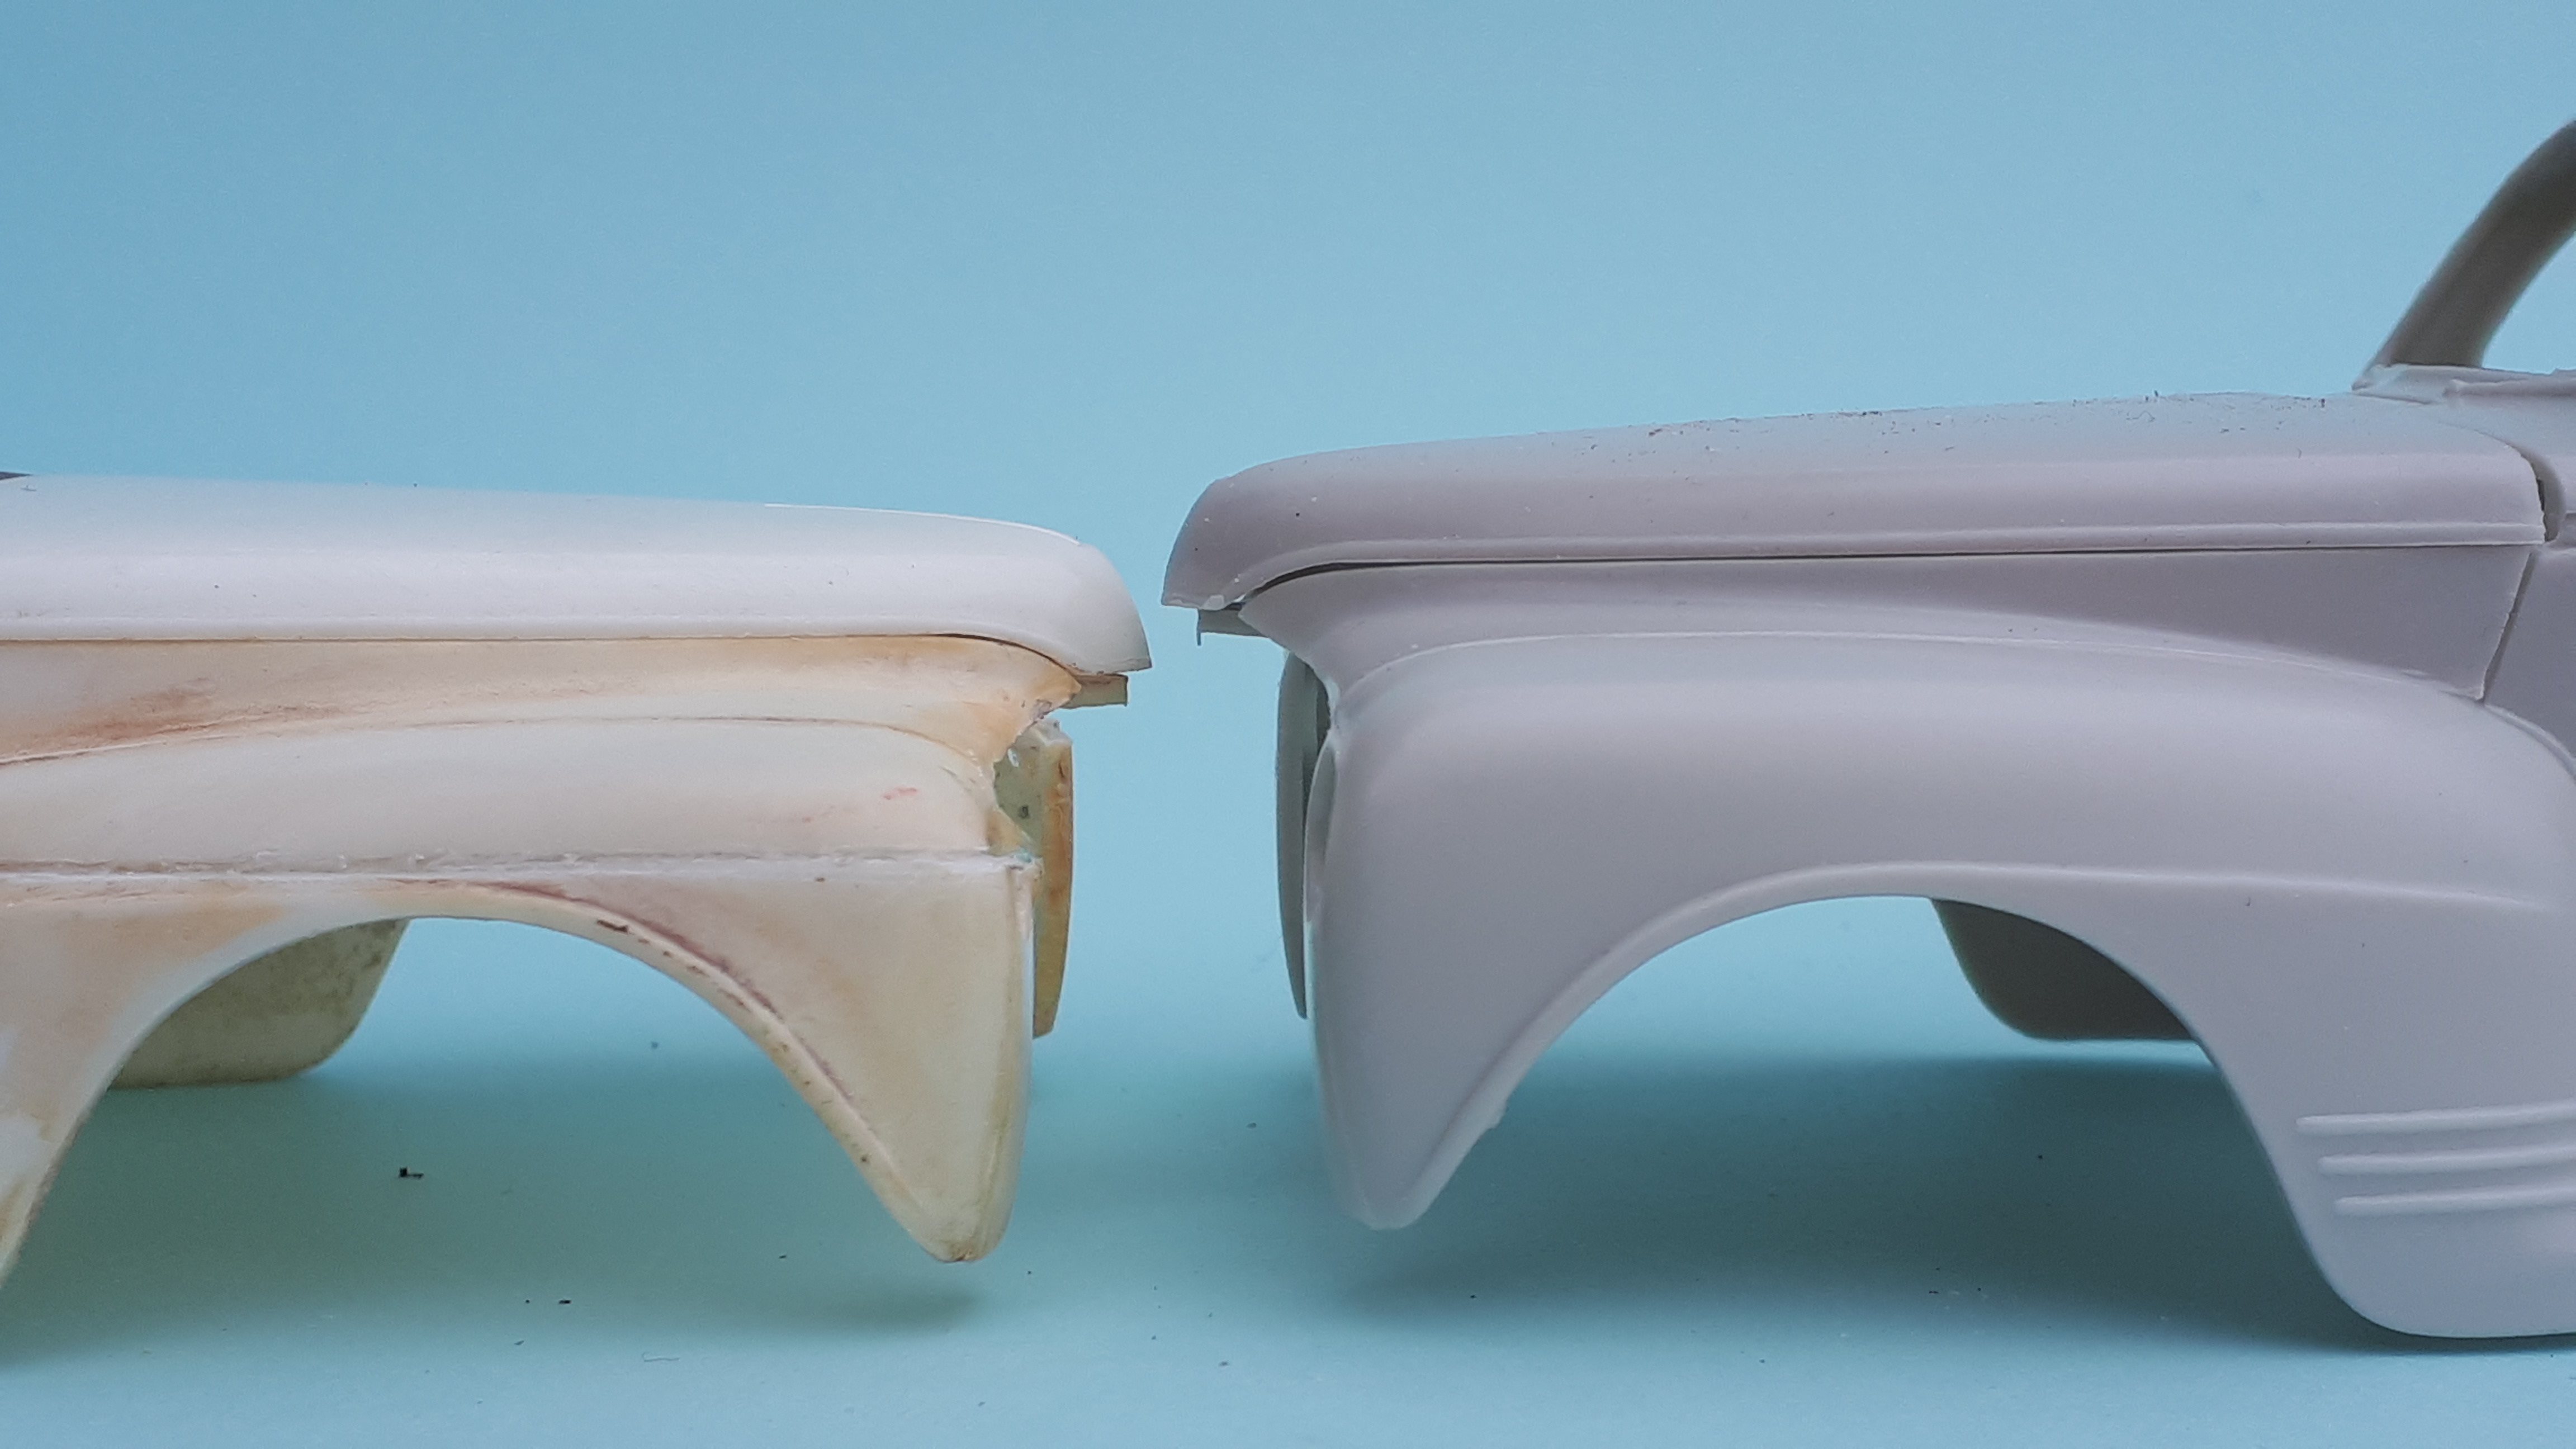
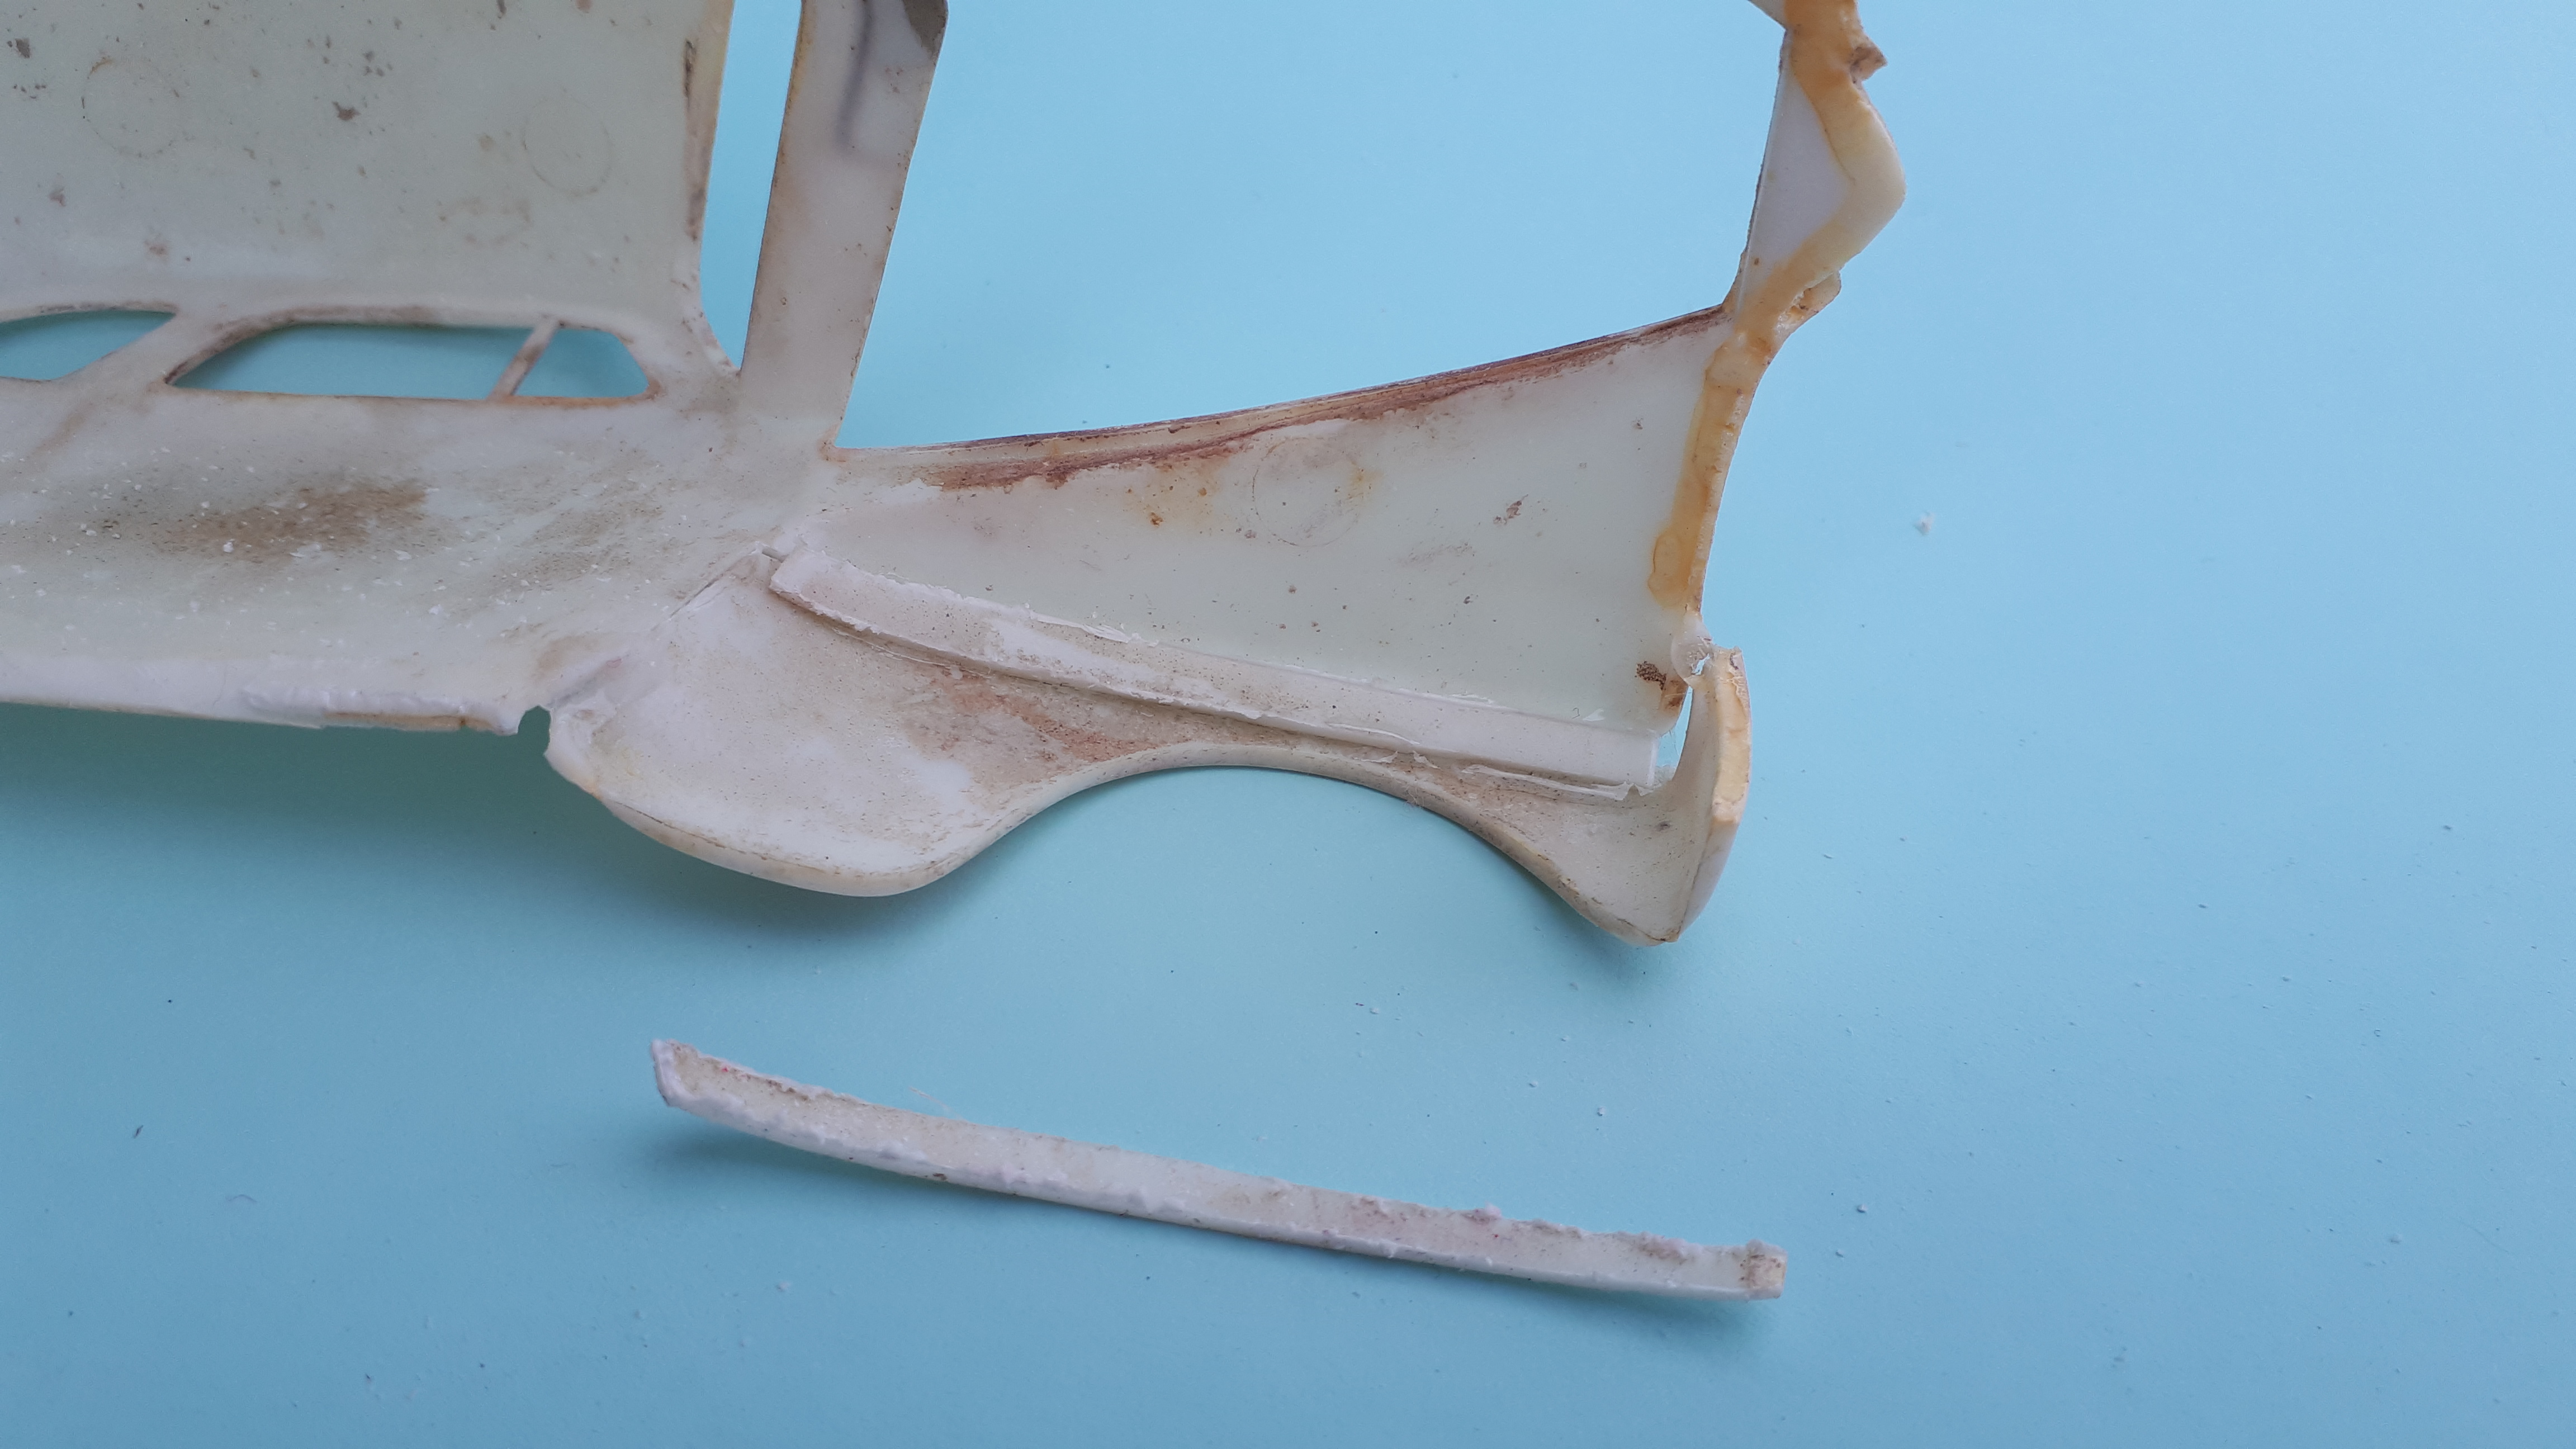
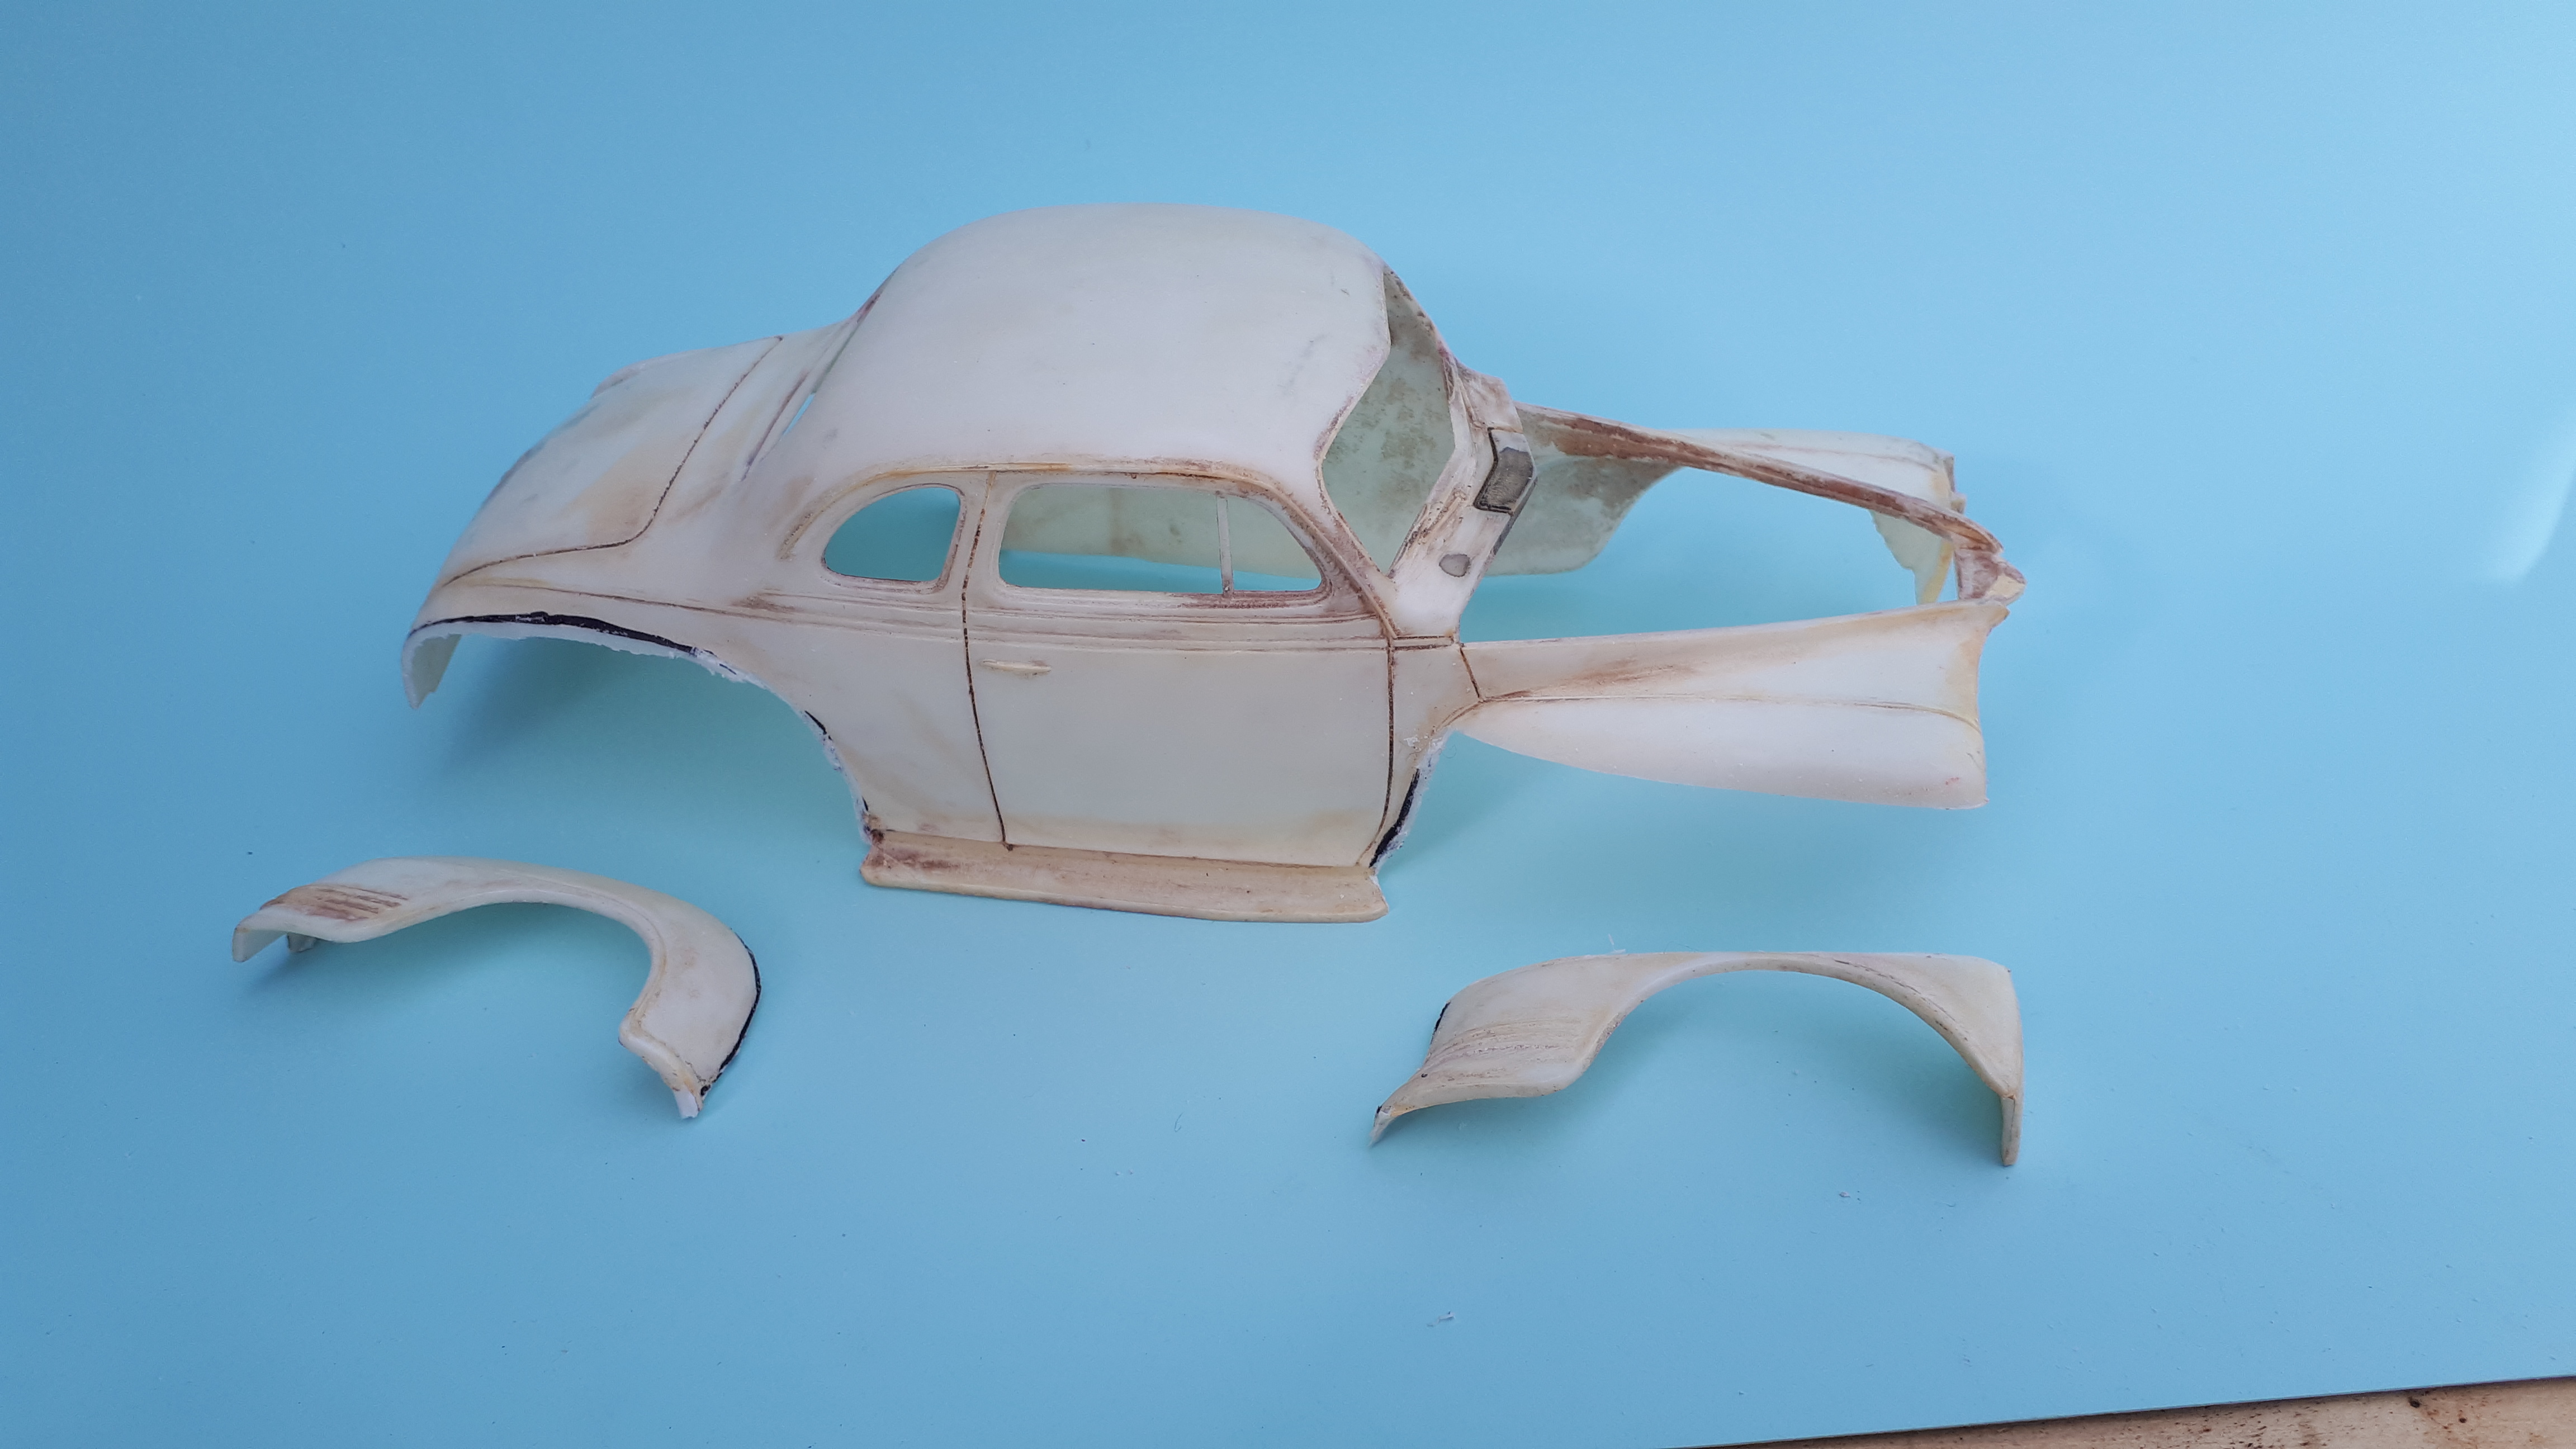
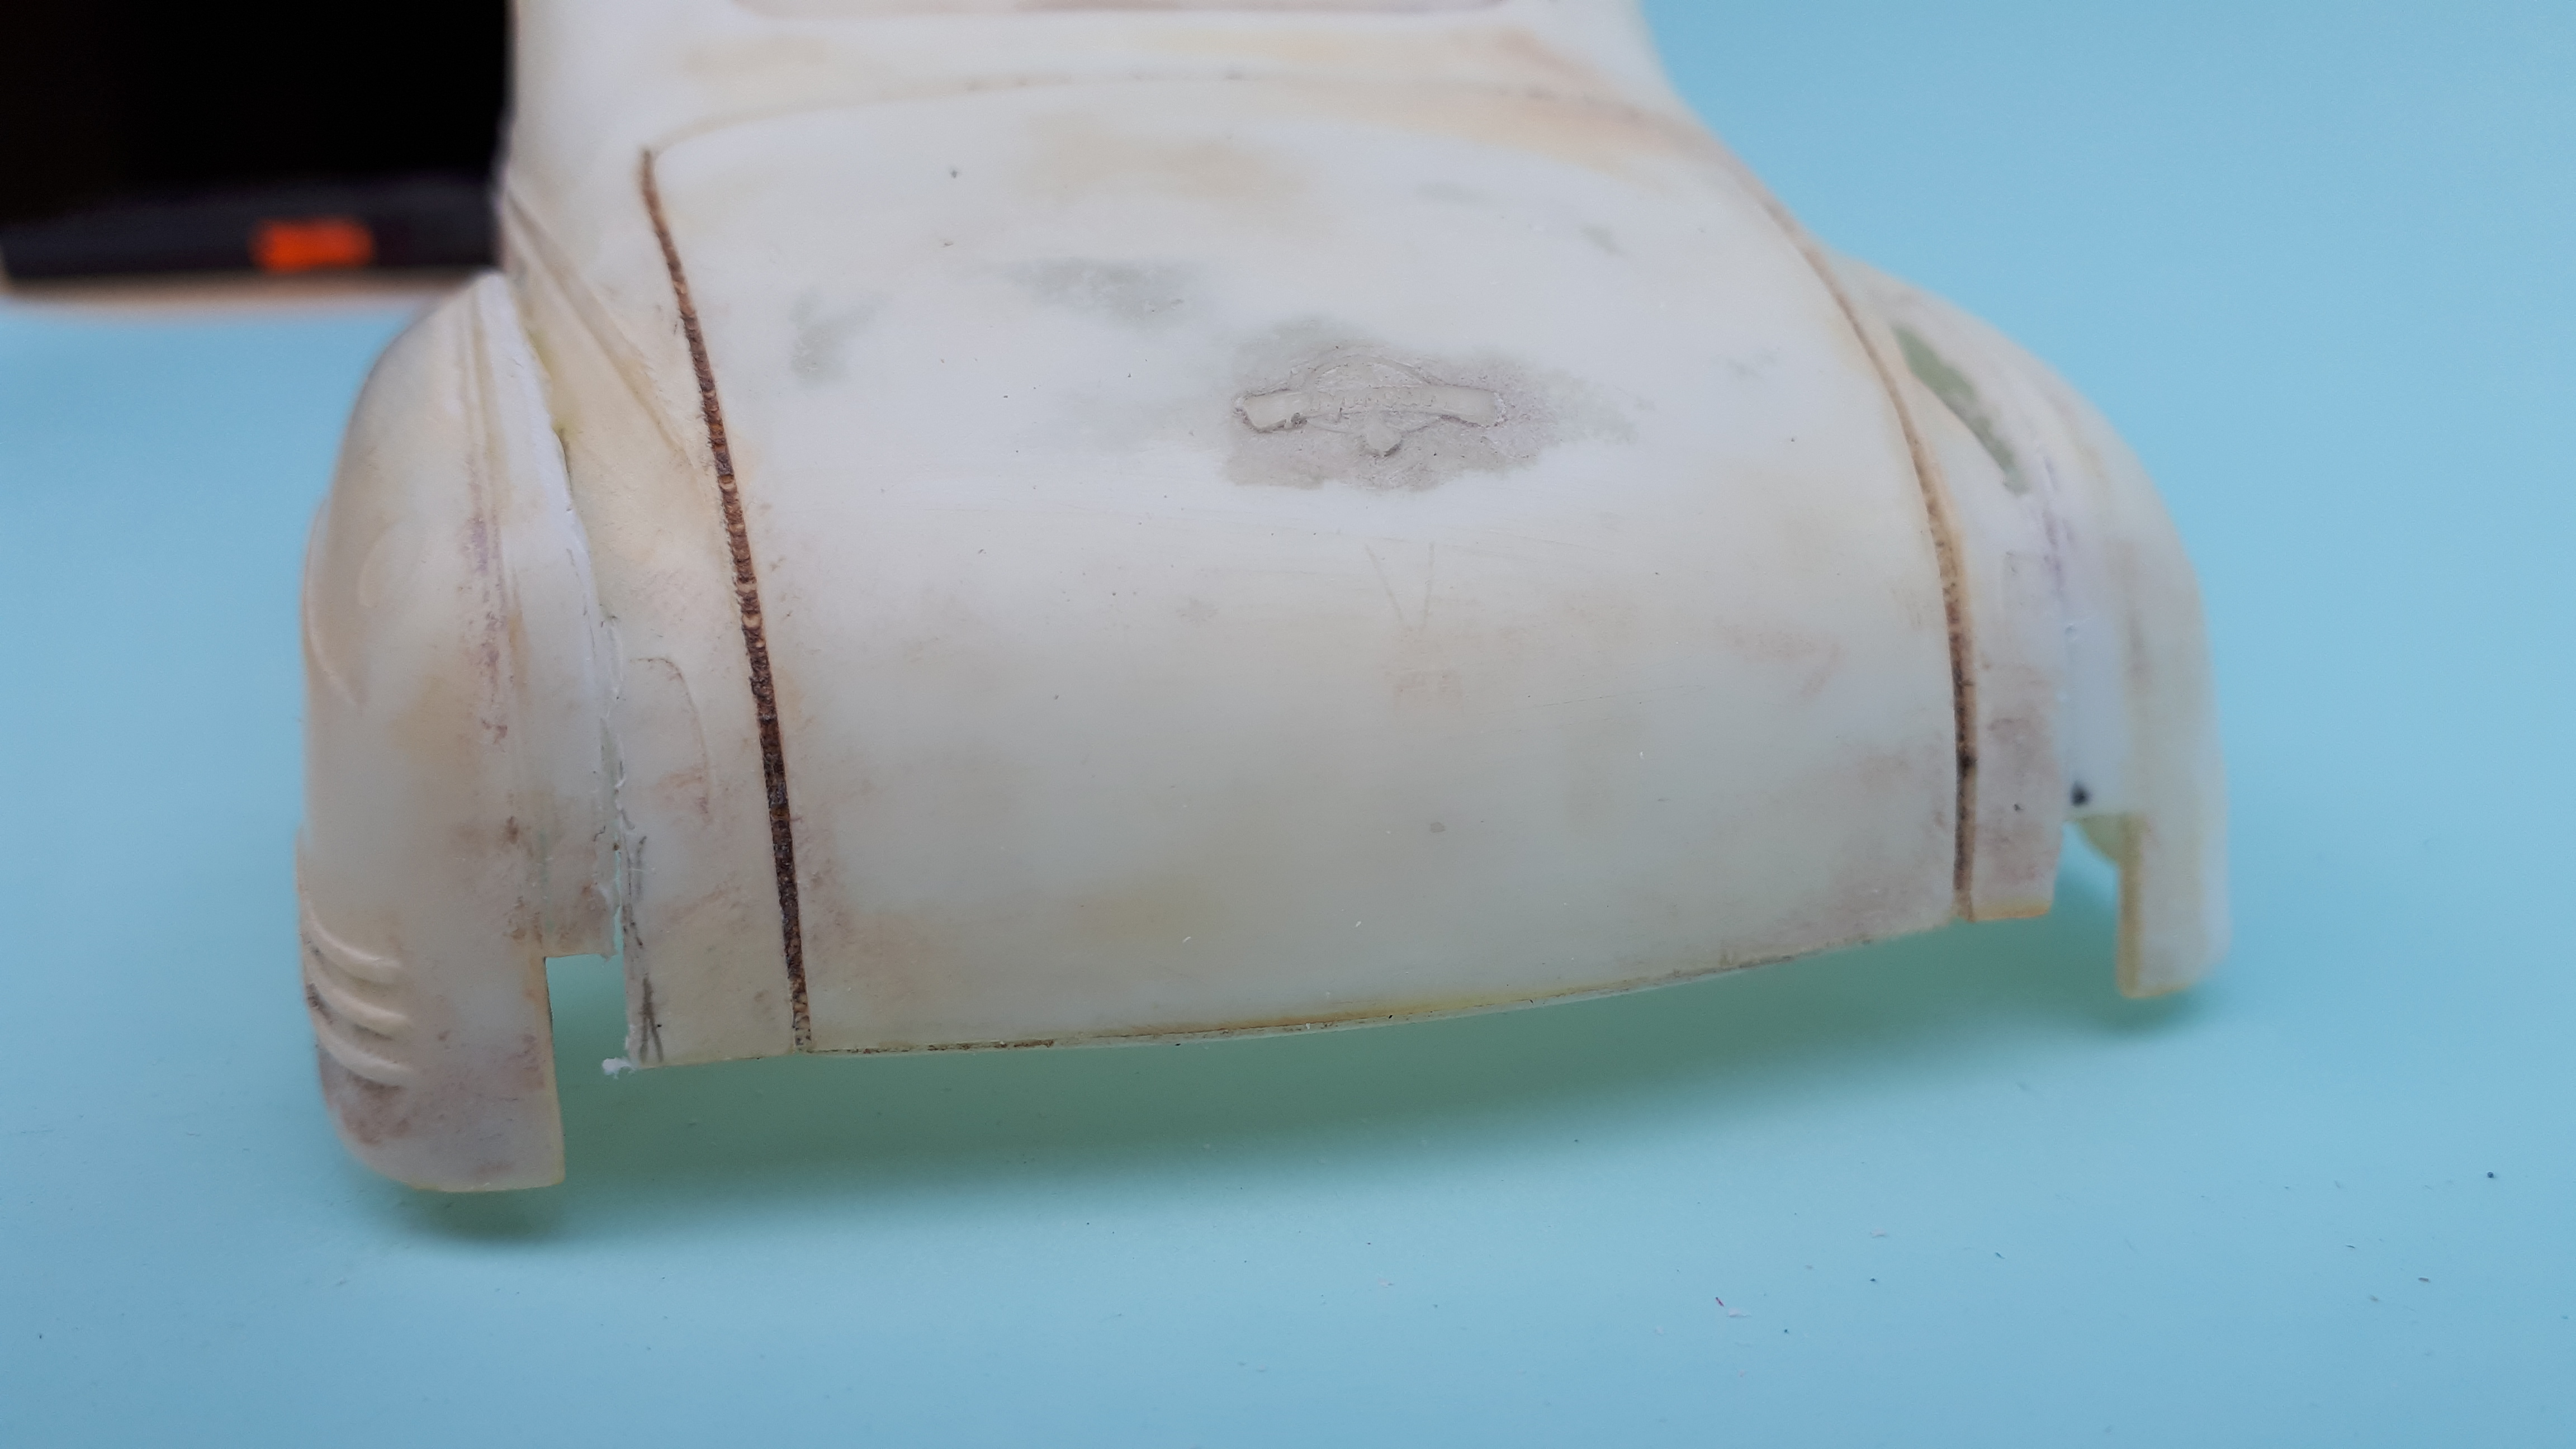
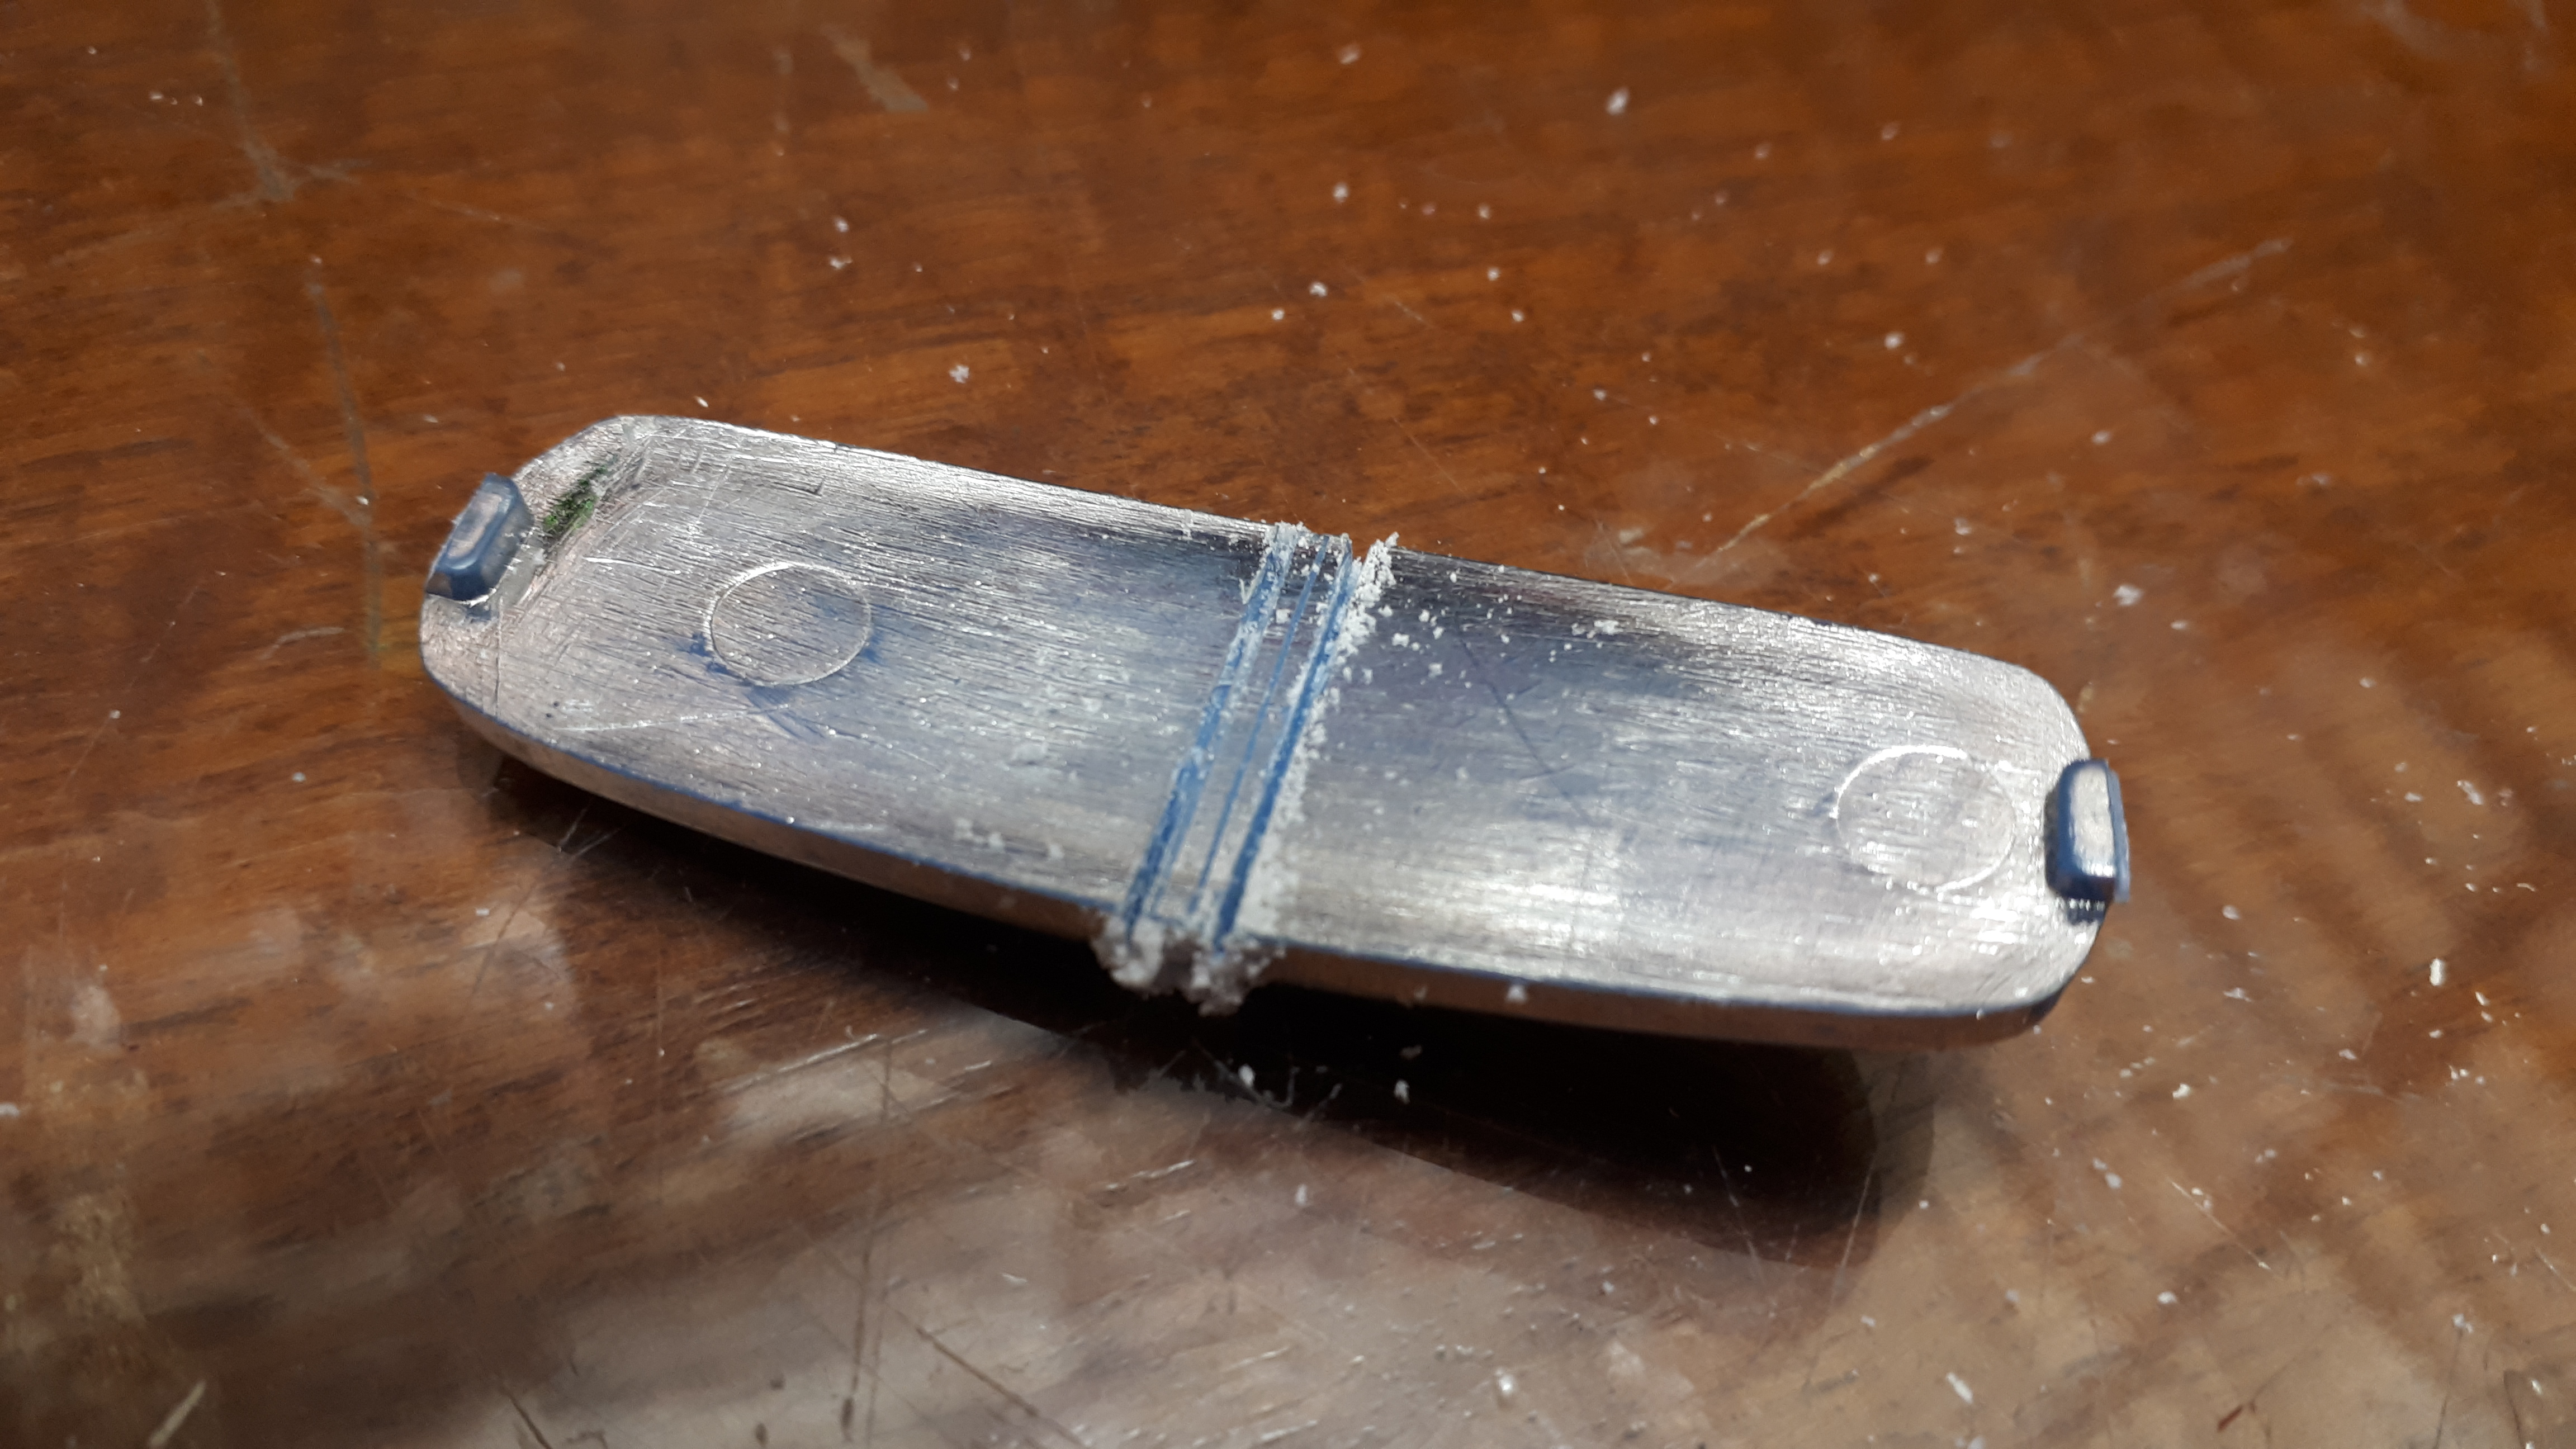
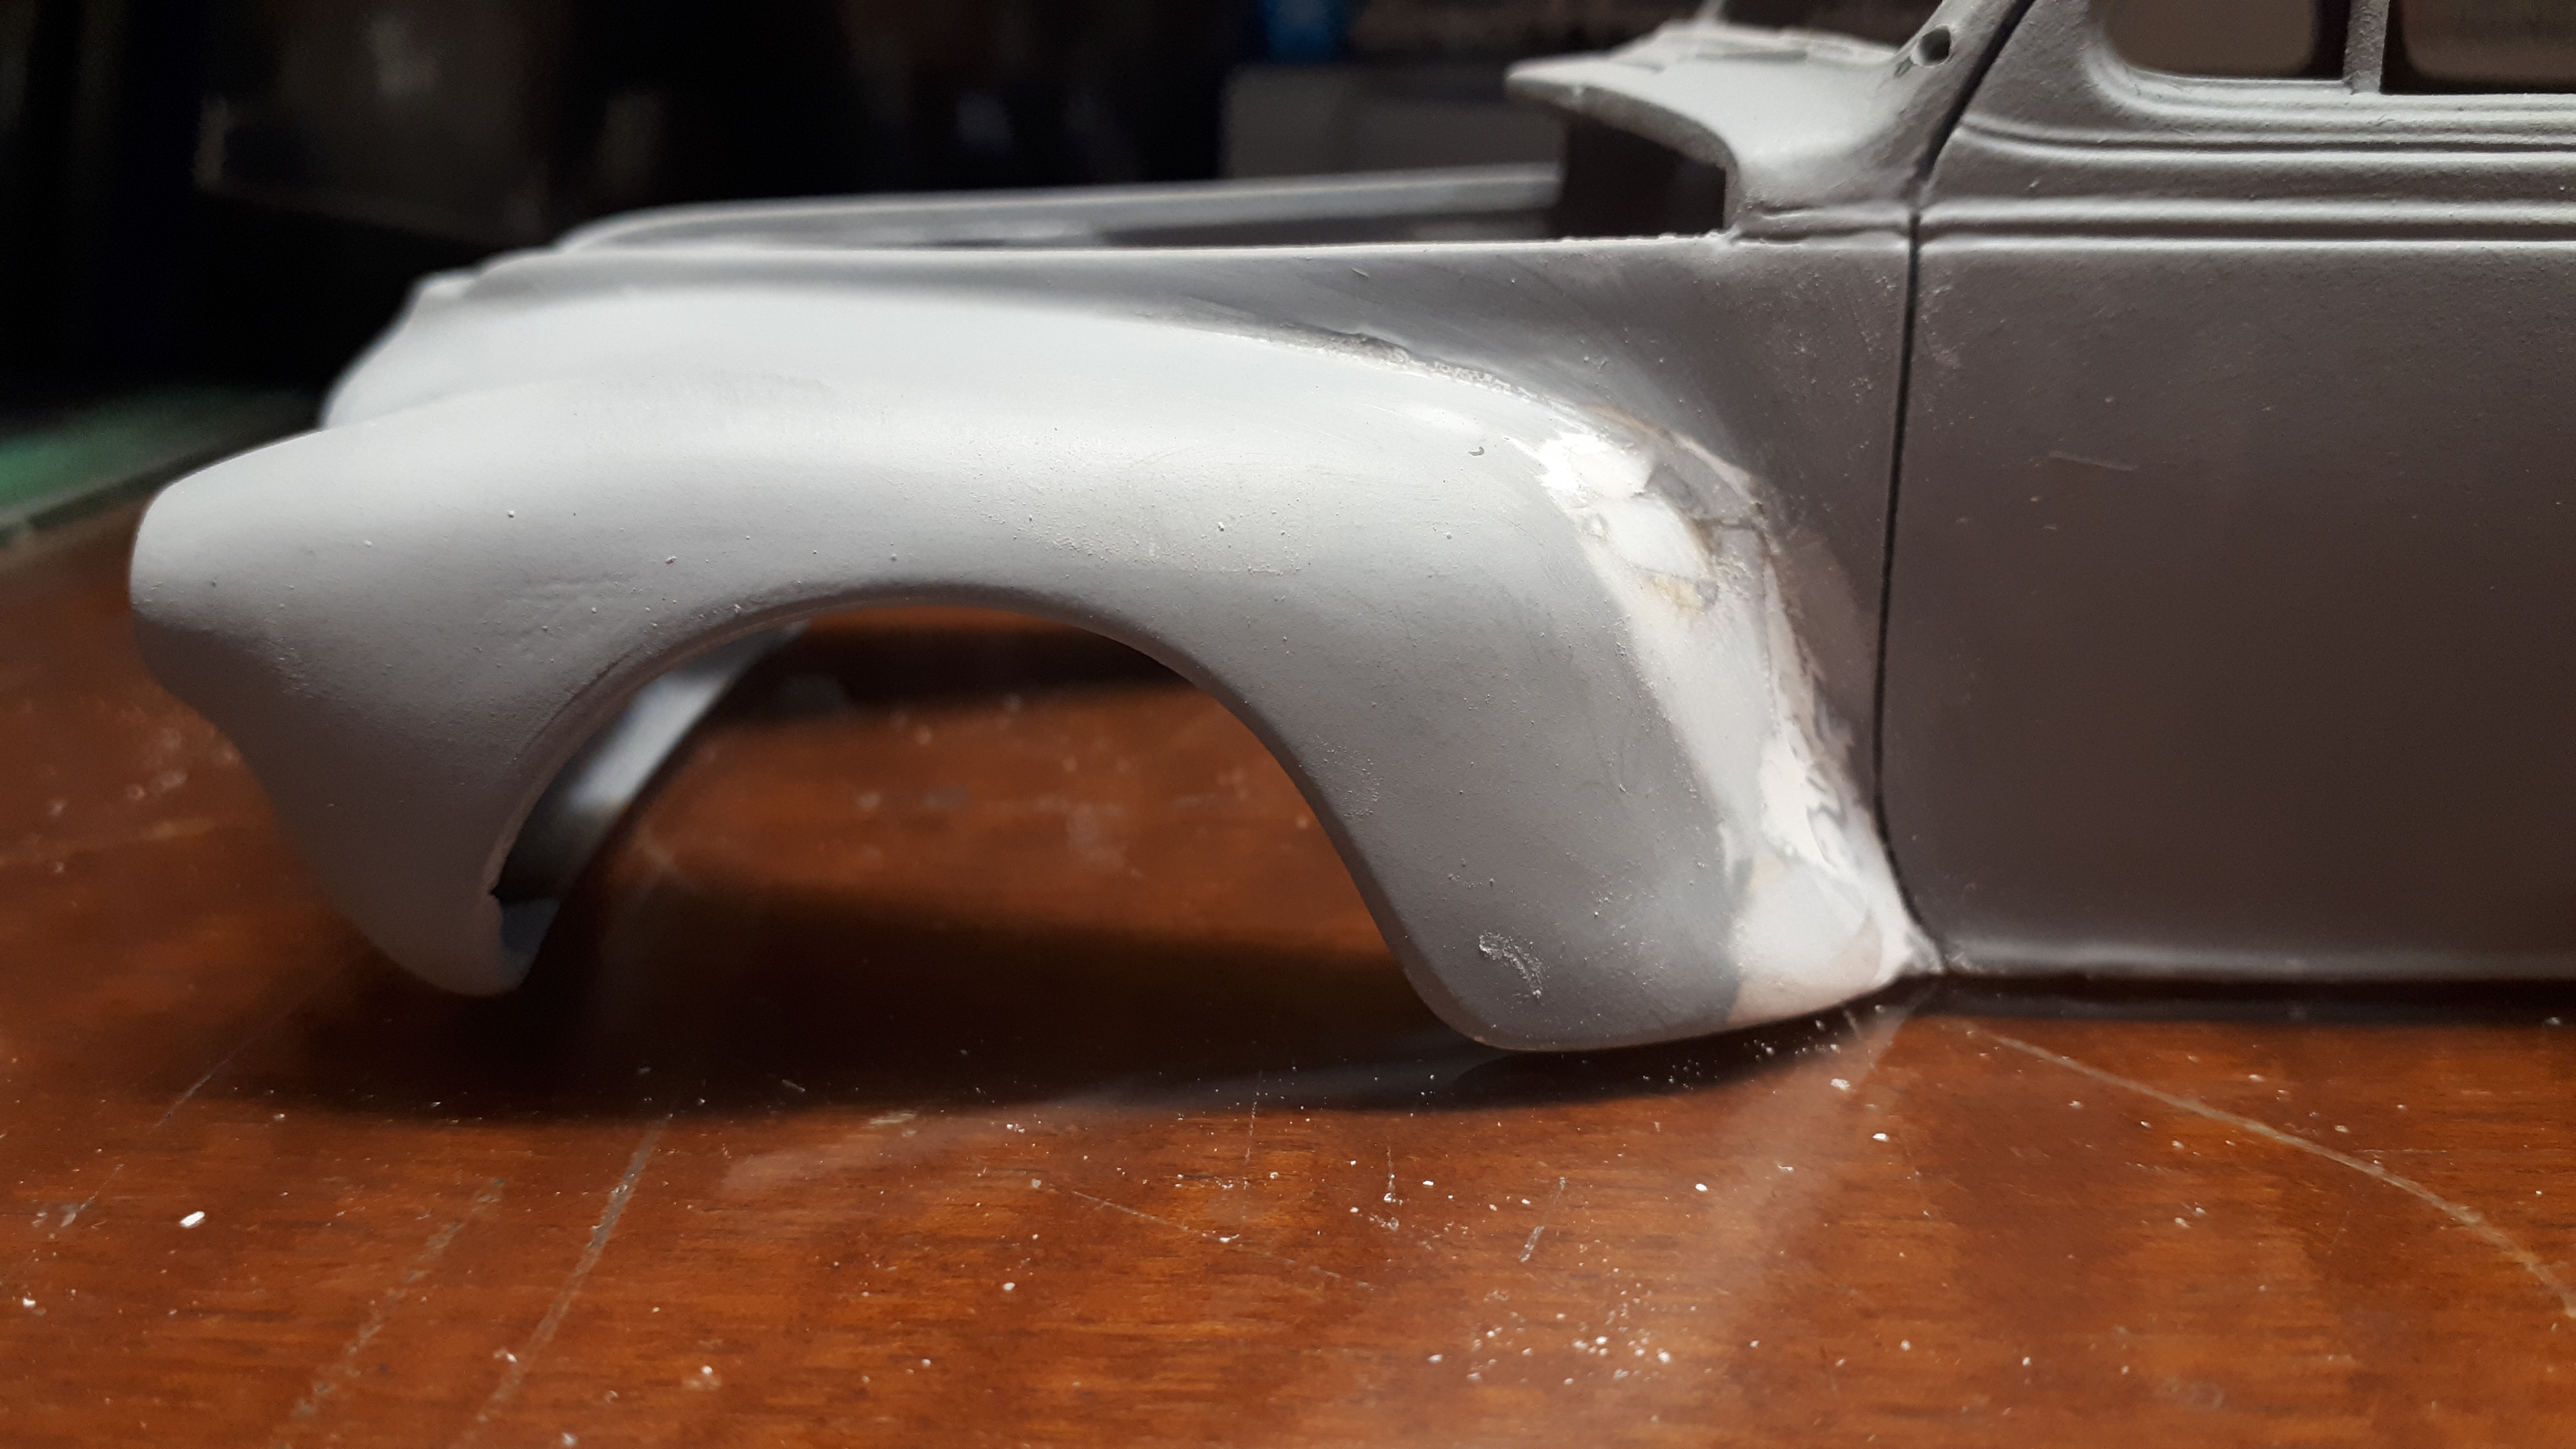
While I was at it, I removed the running board supports. I then glued the front fenders back together and glued the previously removed strip onto the seam on the inside of the fenders. The second photo shows just how much a difference the fender section produces. I'm a big fan of concertinaring aluminium tubing for a whole bunch of things. I was going to need to do some extensive reshaping of the headlight areas so i found a size that would allow a standard sized headlight lens to be inserted, and then found the next largest diameter to insert into the fender opening. The plastic was getting a bit brittle after all those years so I had to take it easy.
-
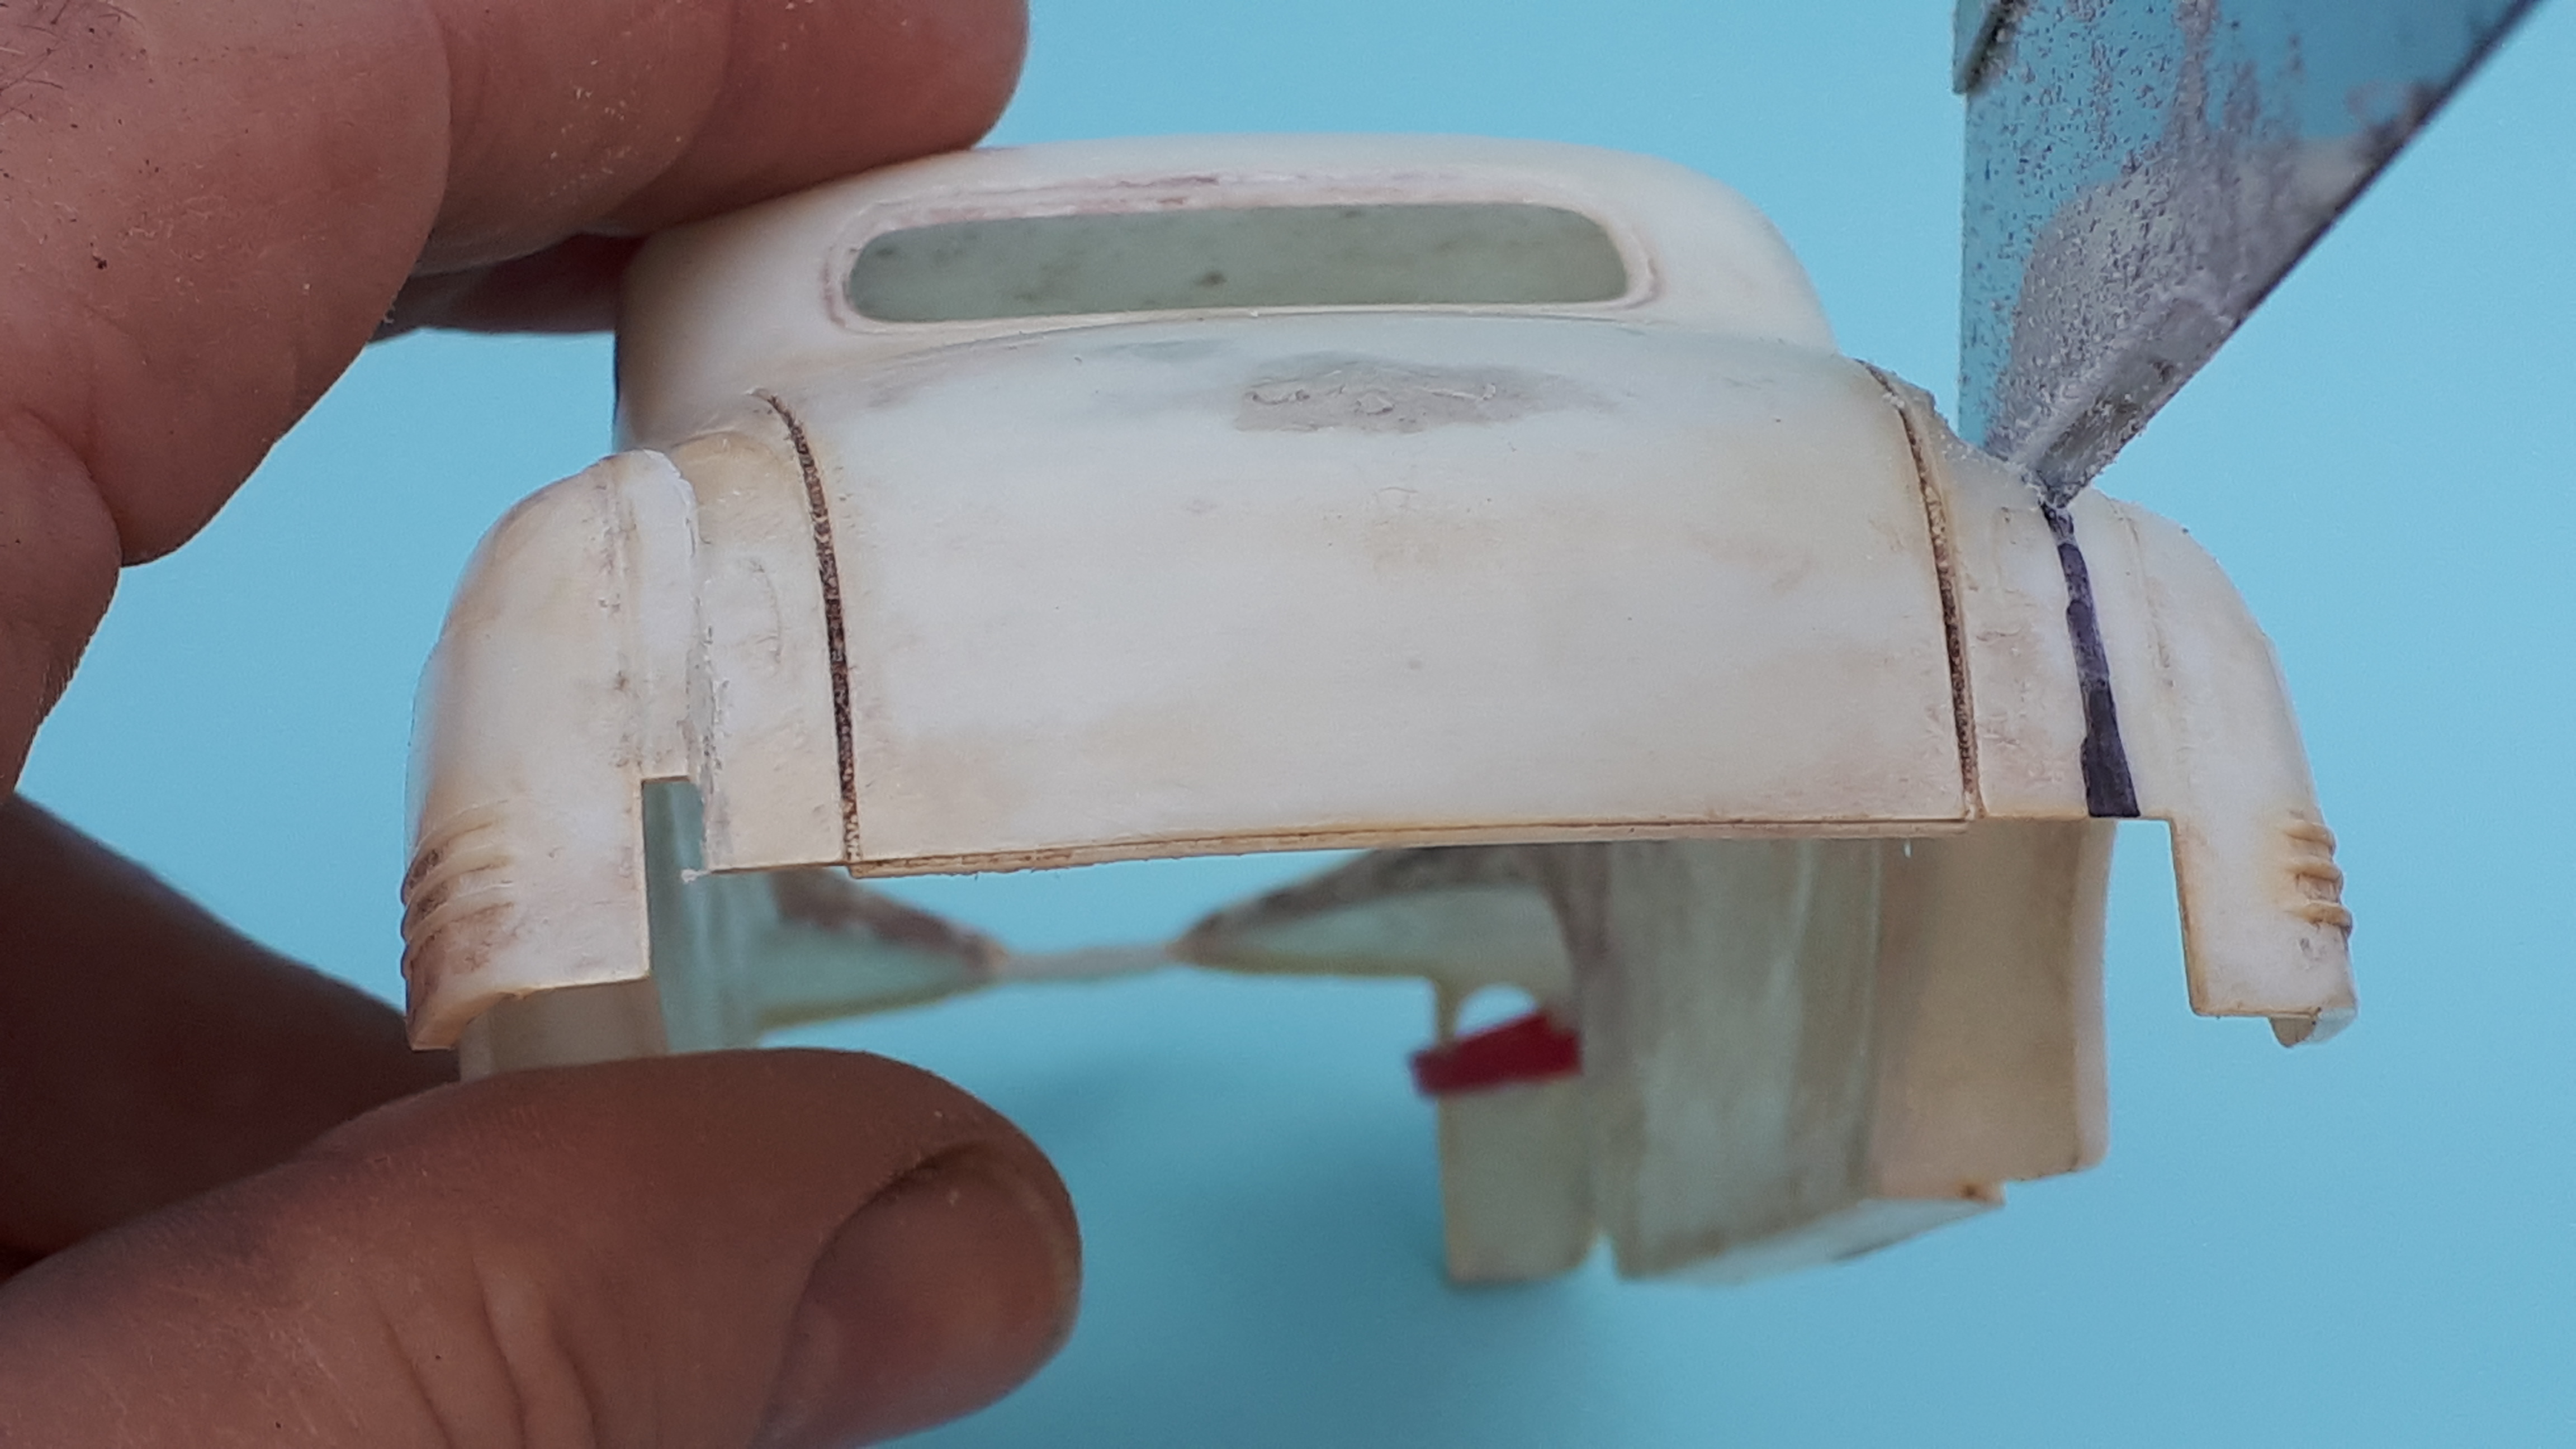
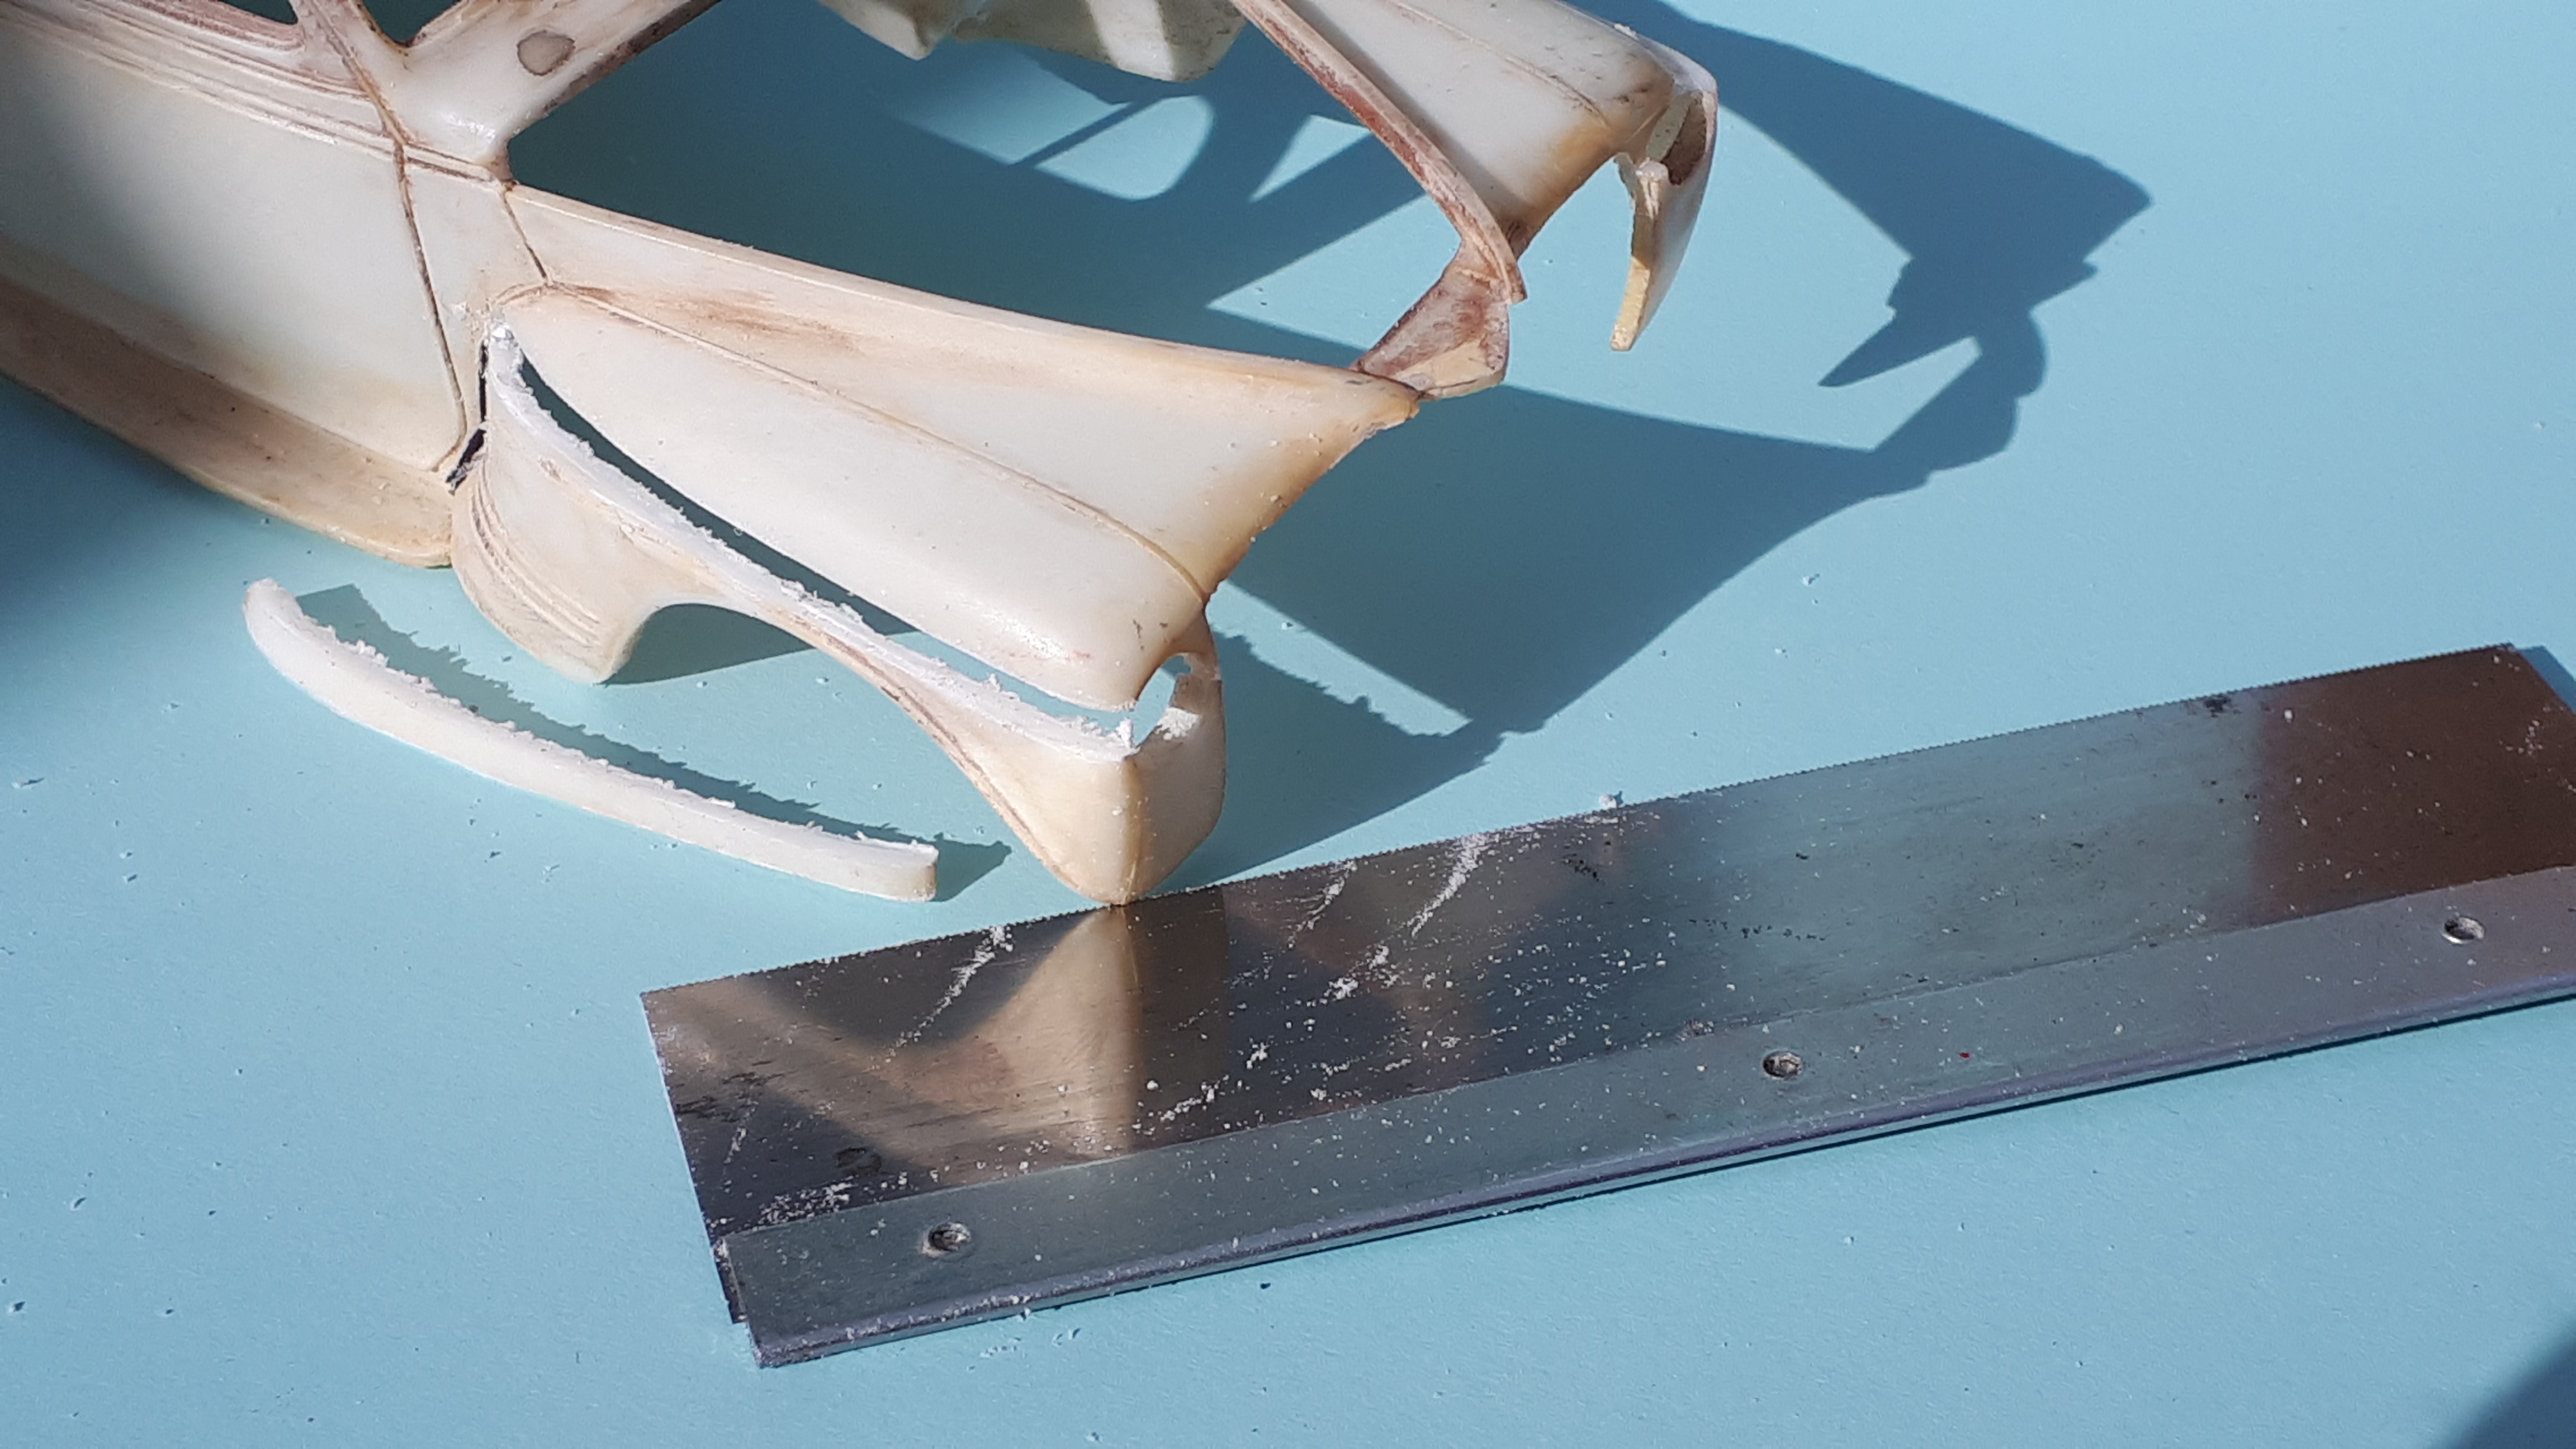
Moving to the rear of the coupe, I eyeballed a good spot to make a vertical cut through the rear fender to body join. The newly removed fenders await re-joining. So far so good.
-
Your wish is my command. I might ahve known this would appeal to your quirkiness and love of six cylinder Mopars! Cheers Alan
-
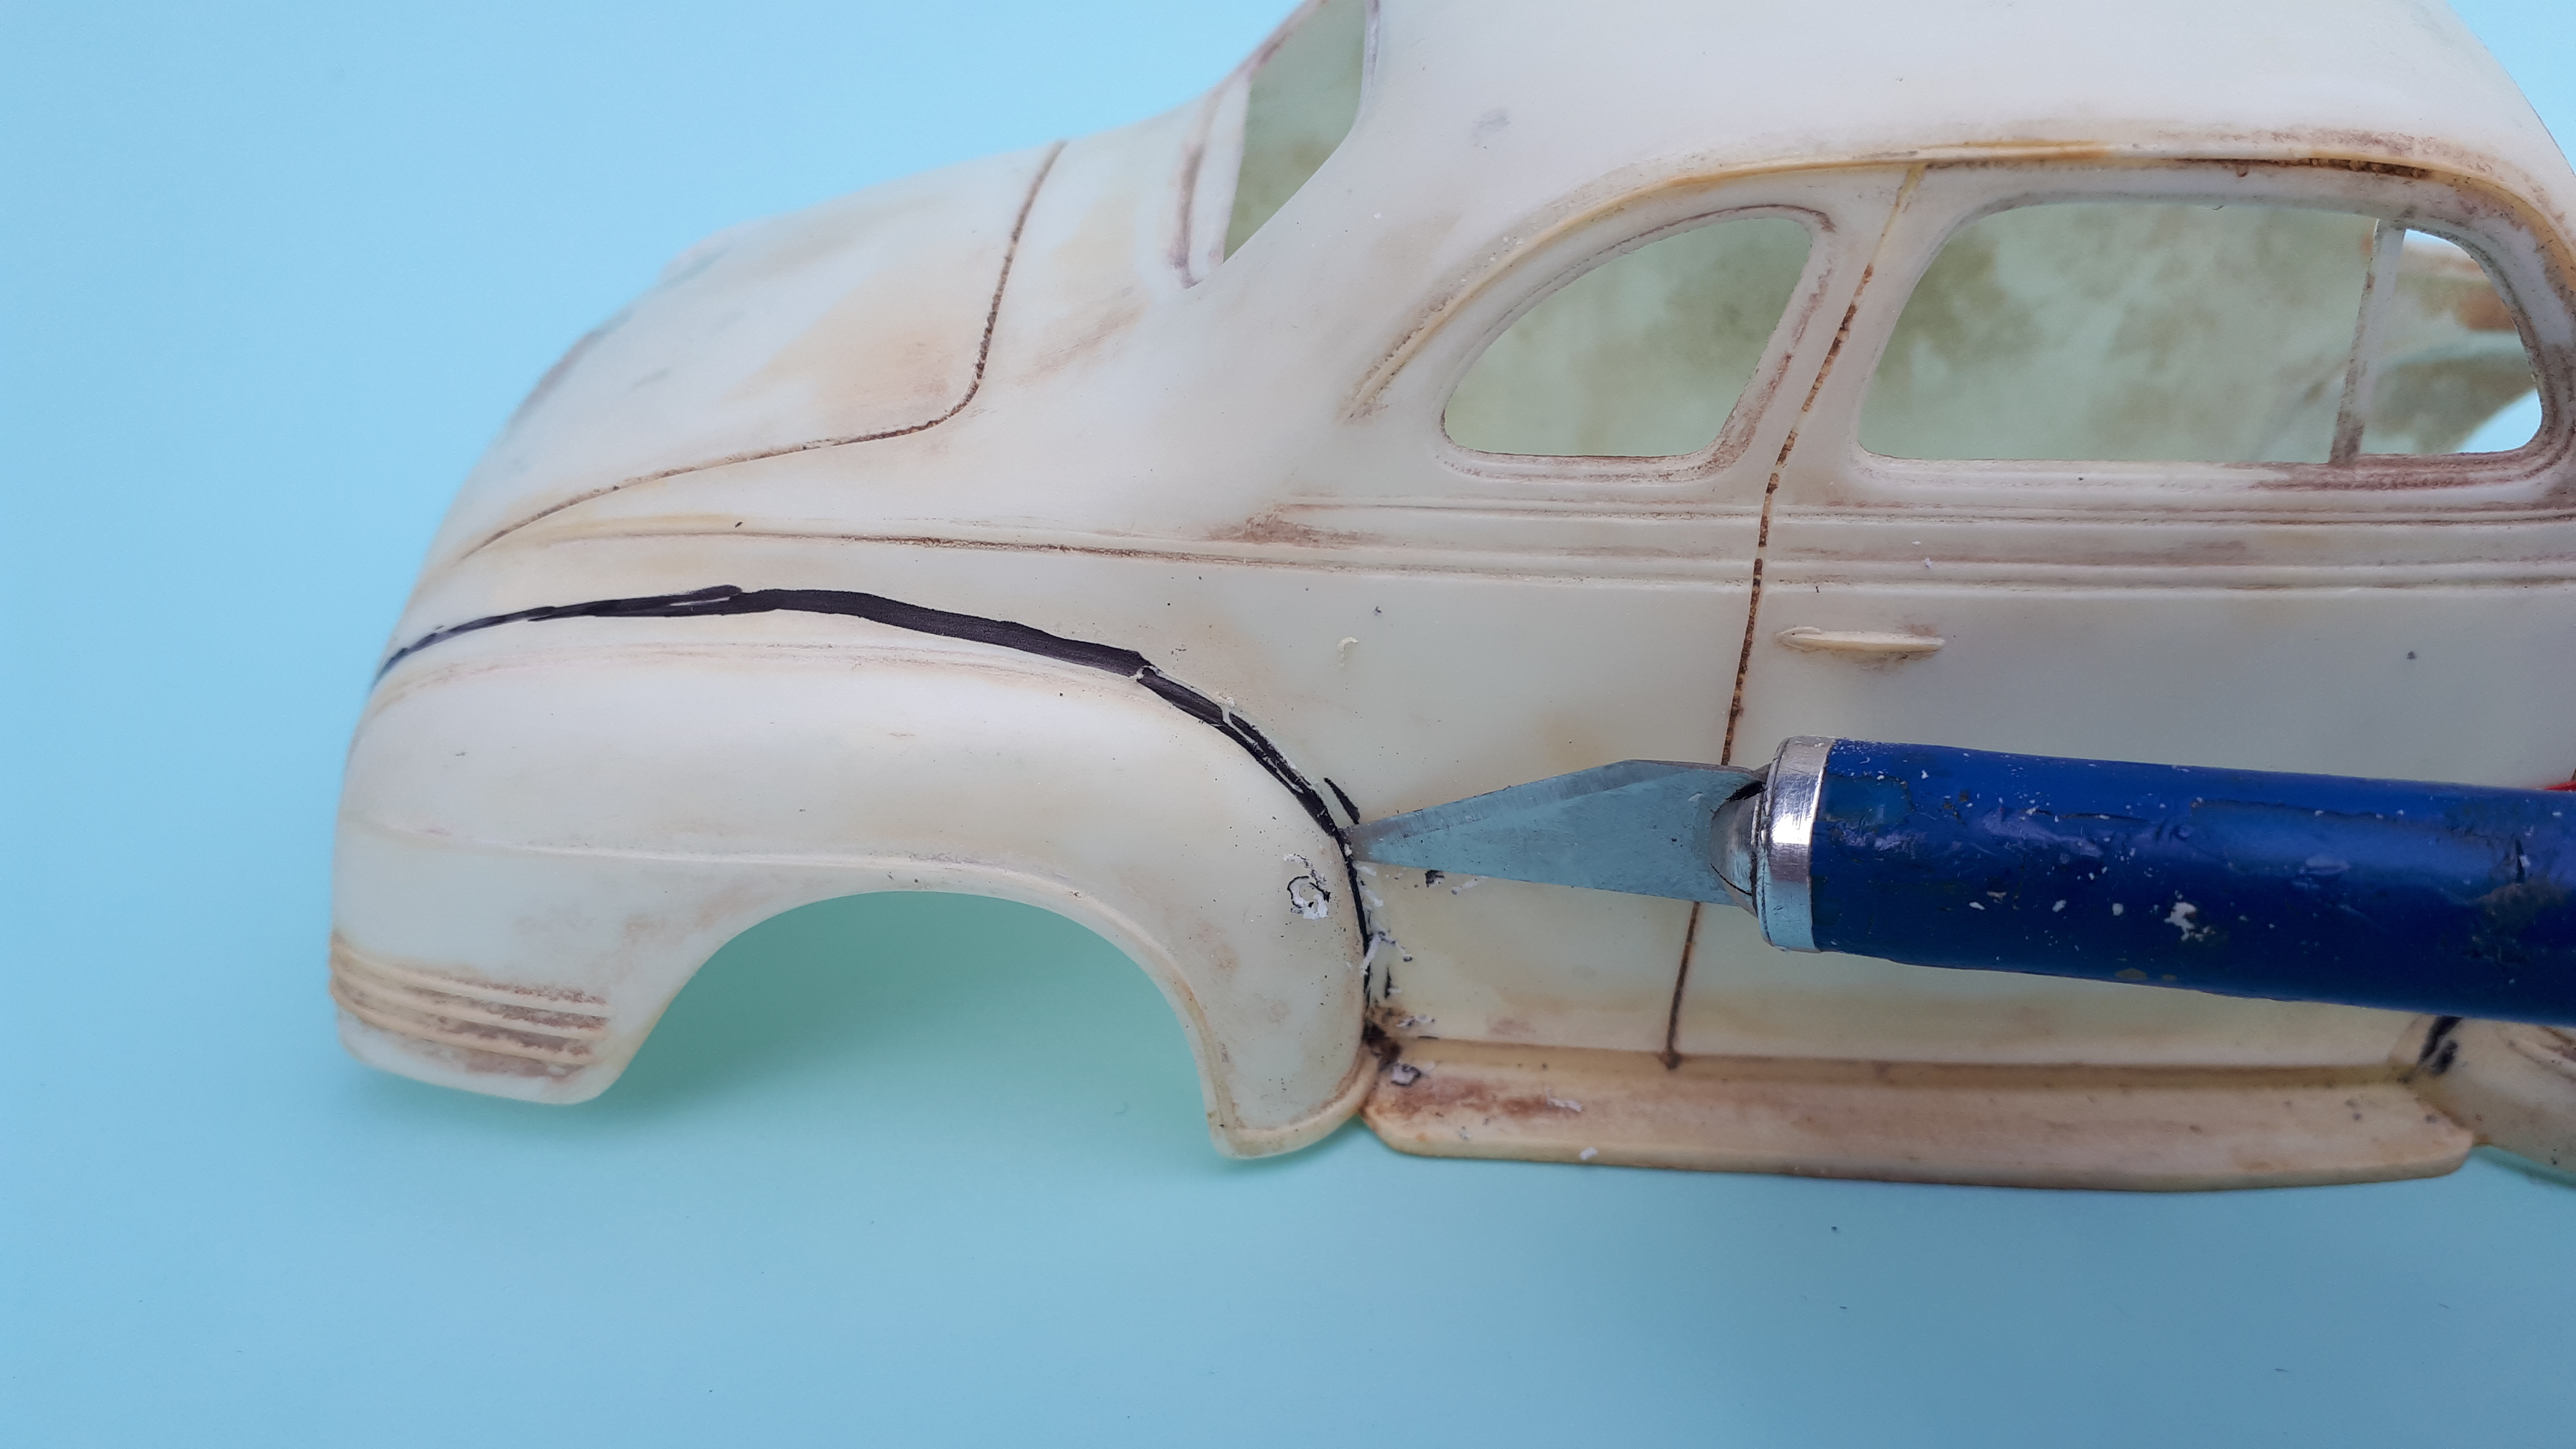
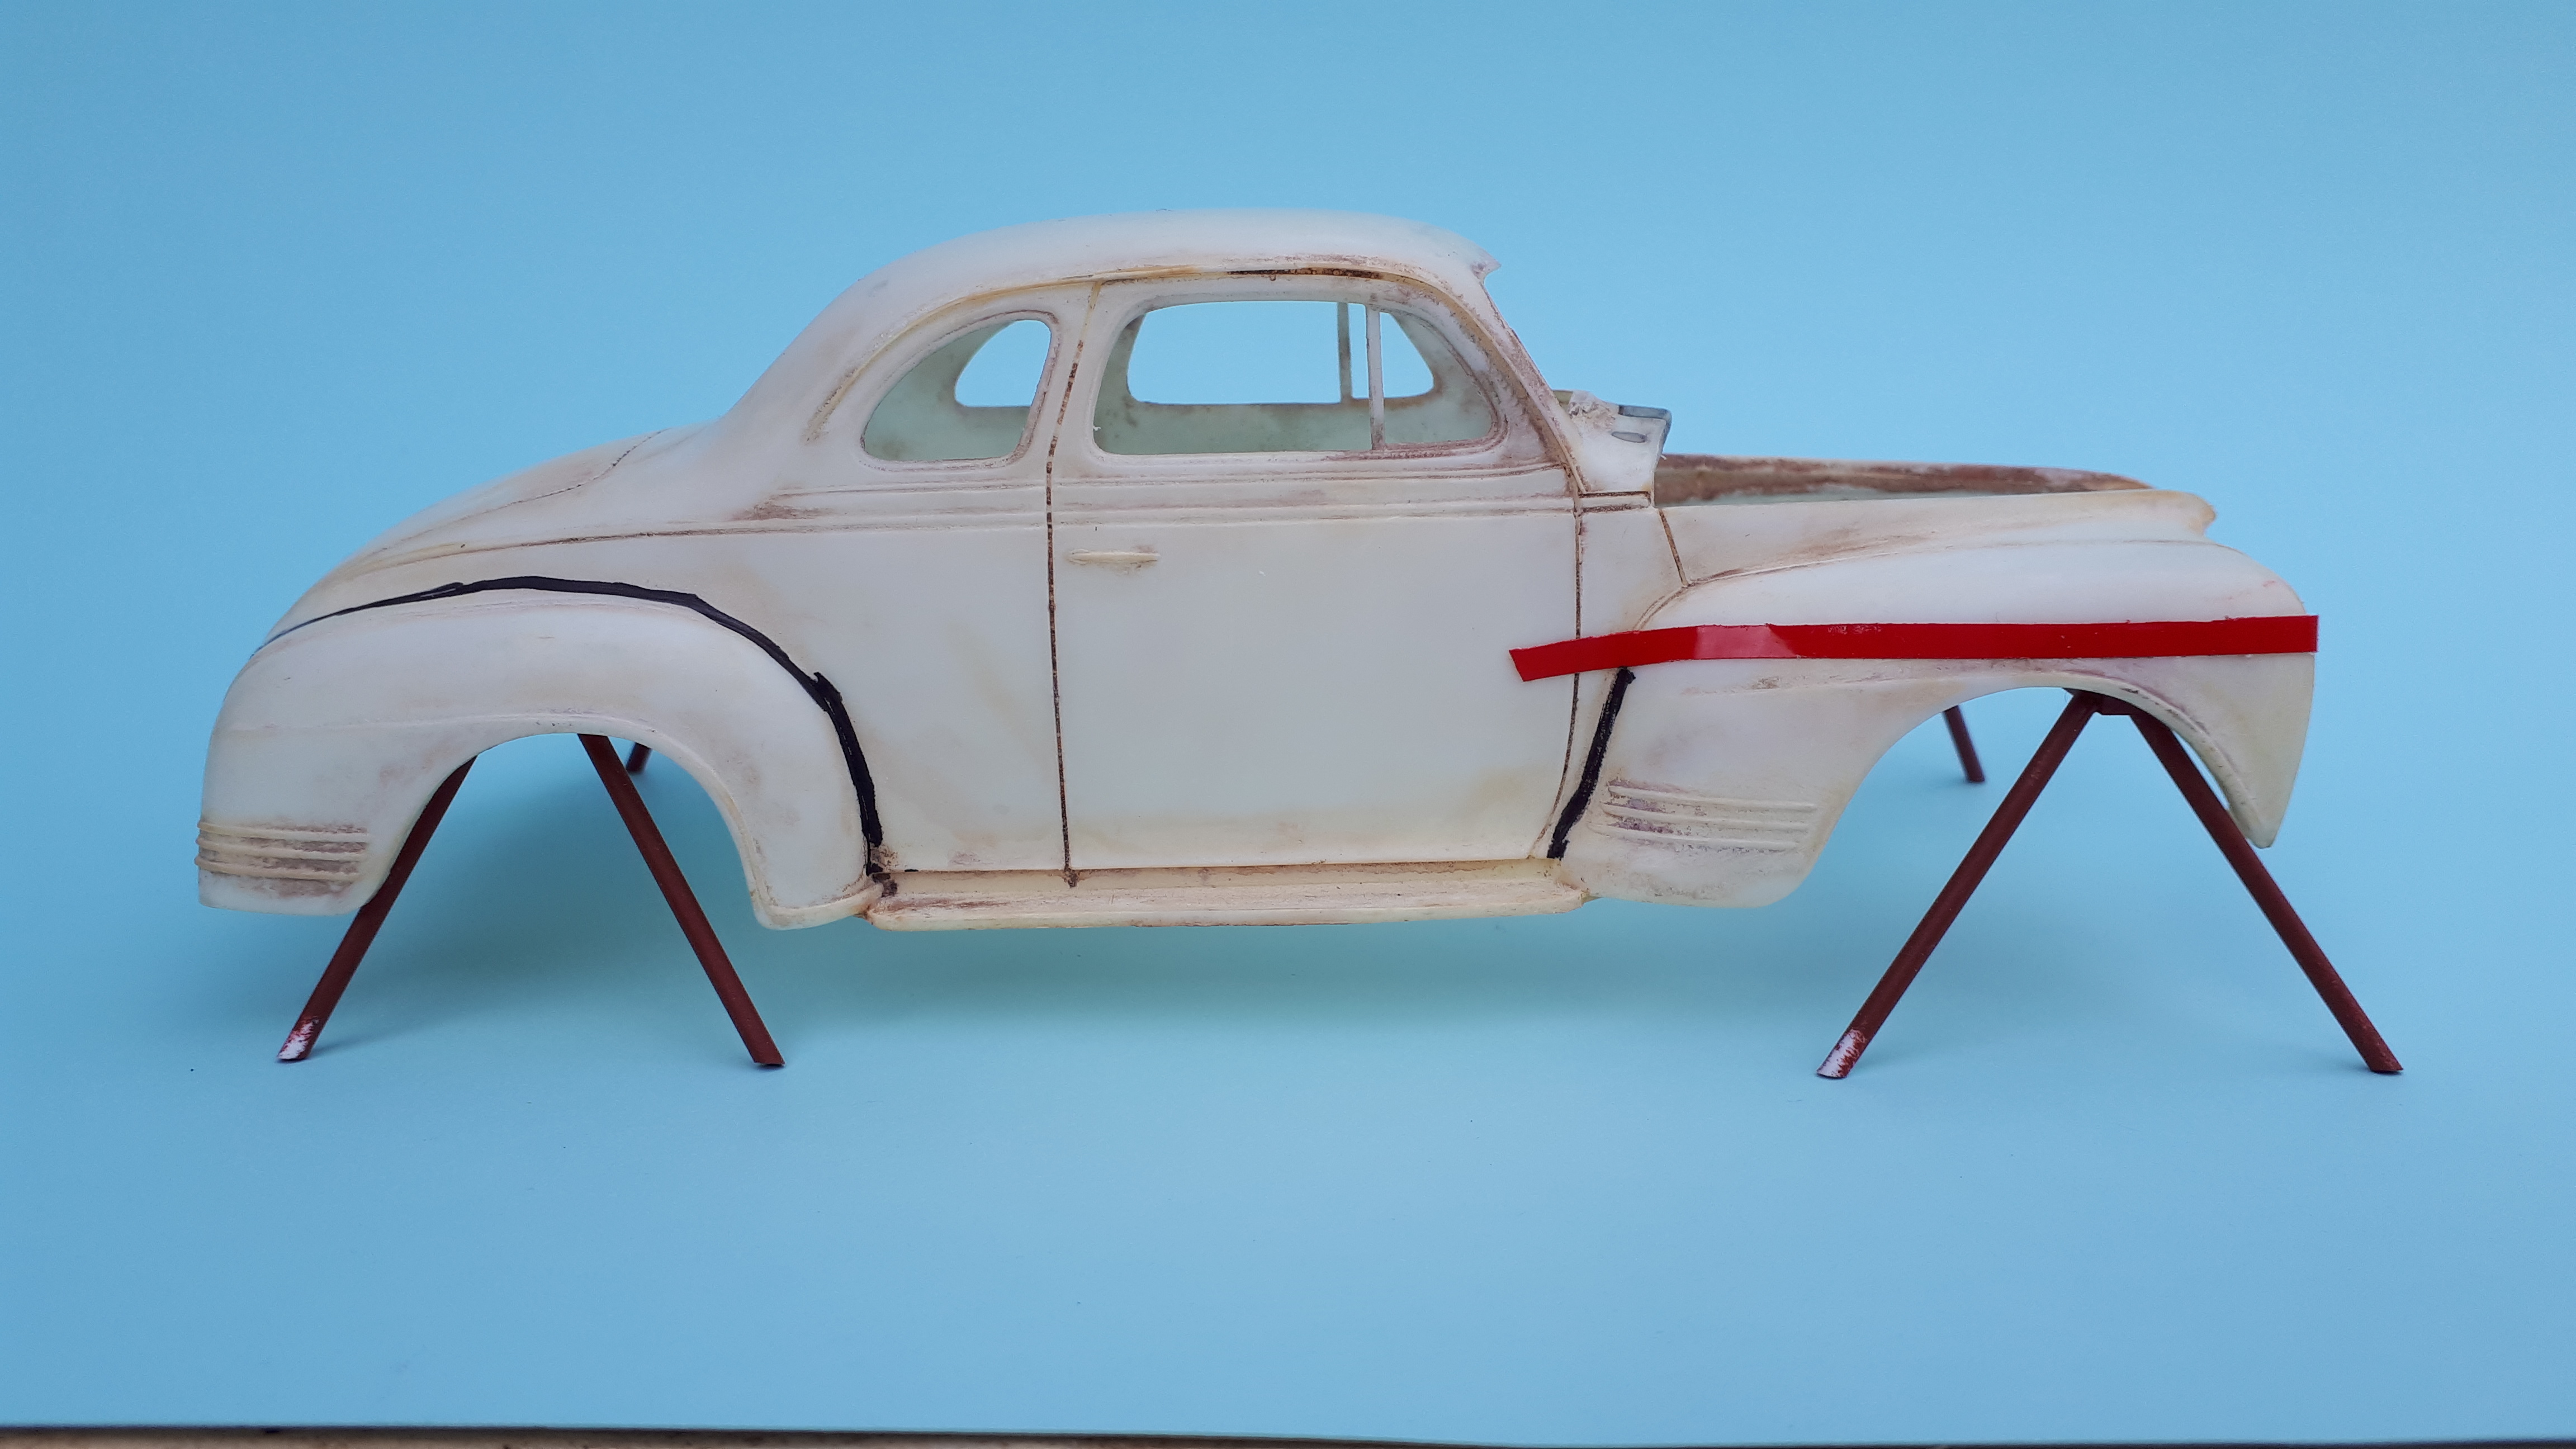
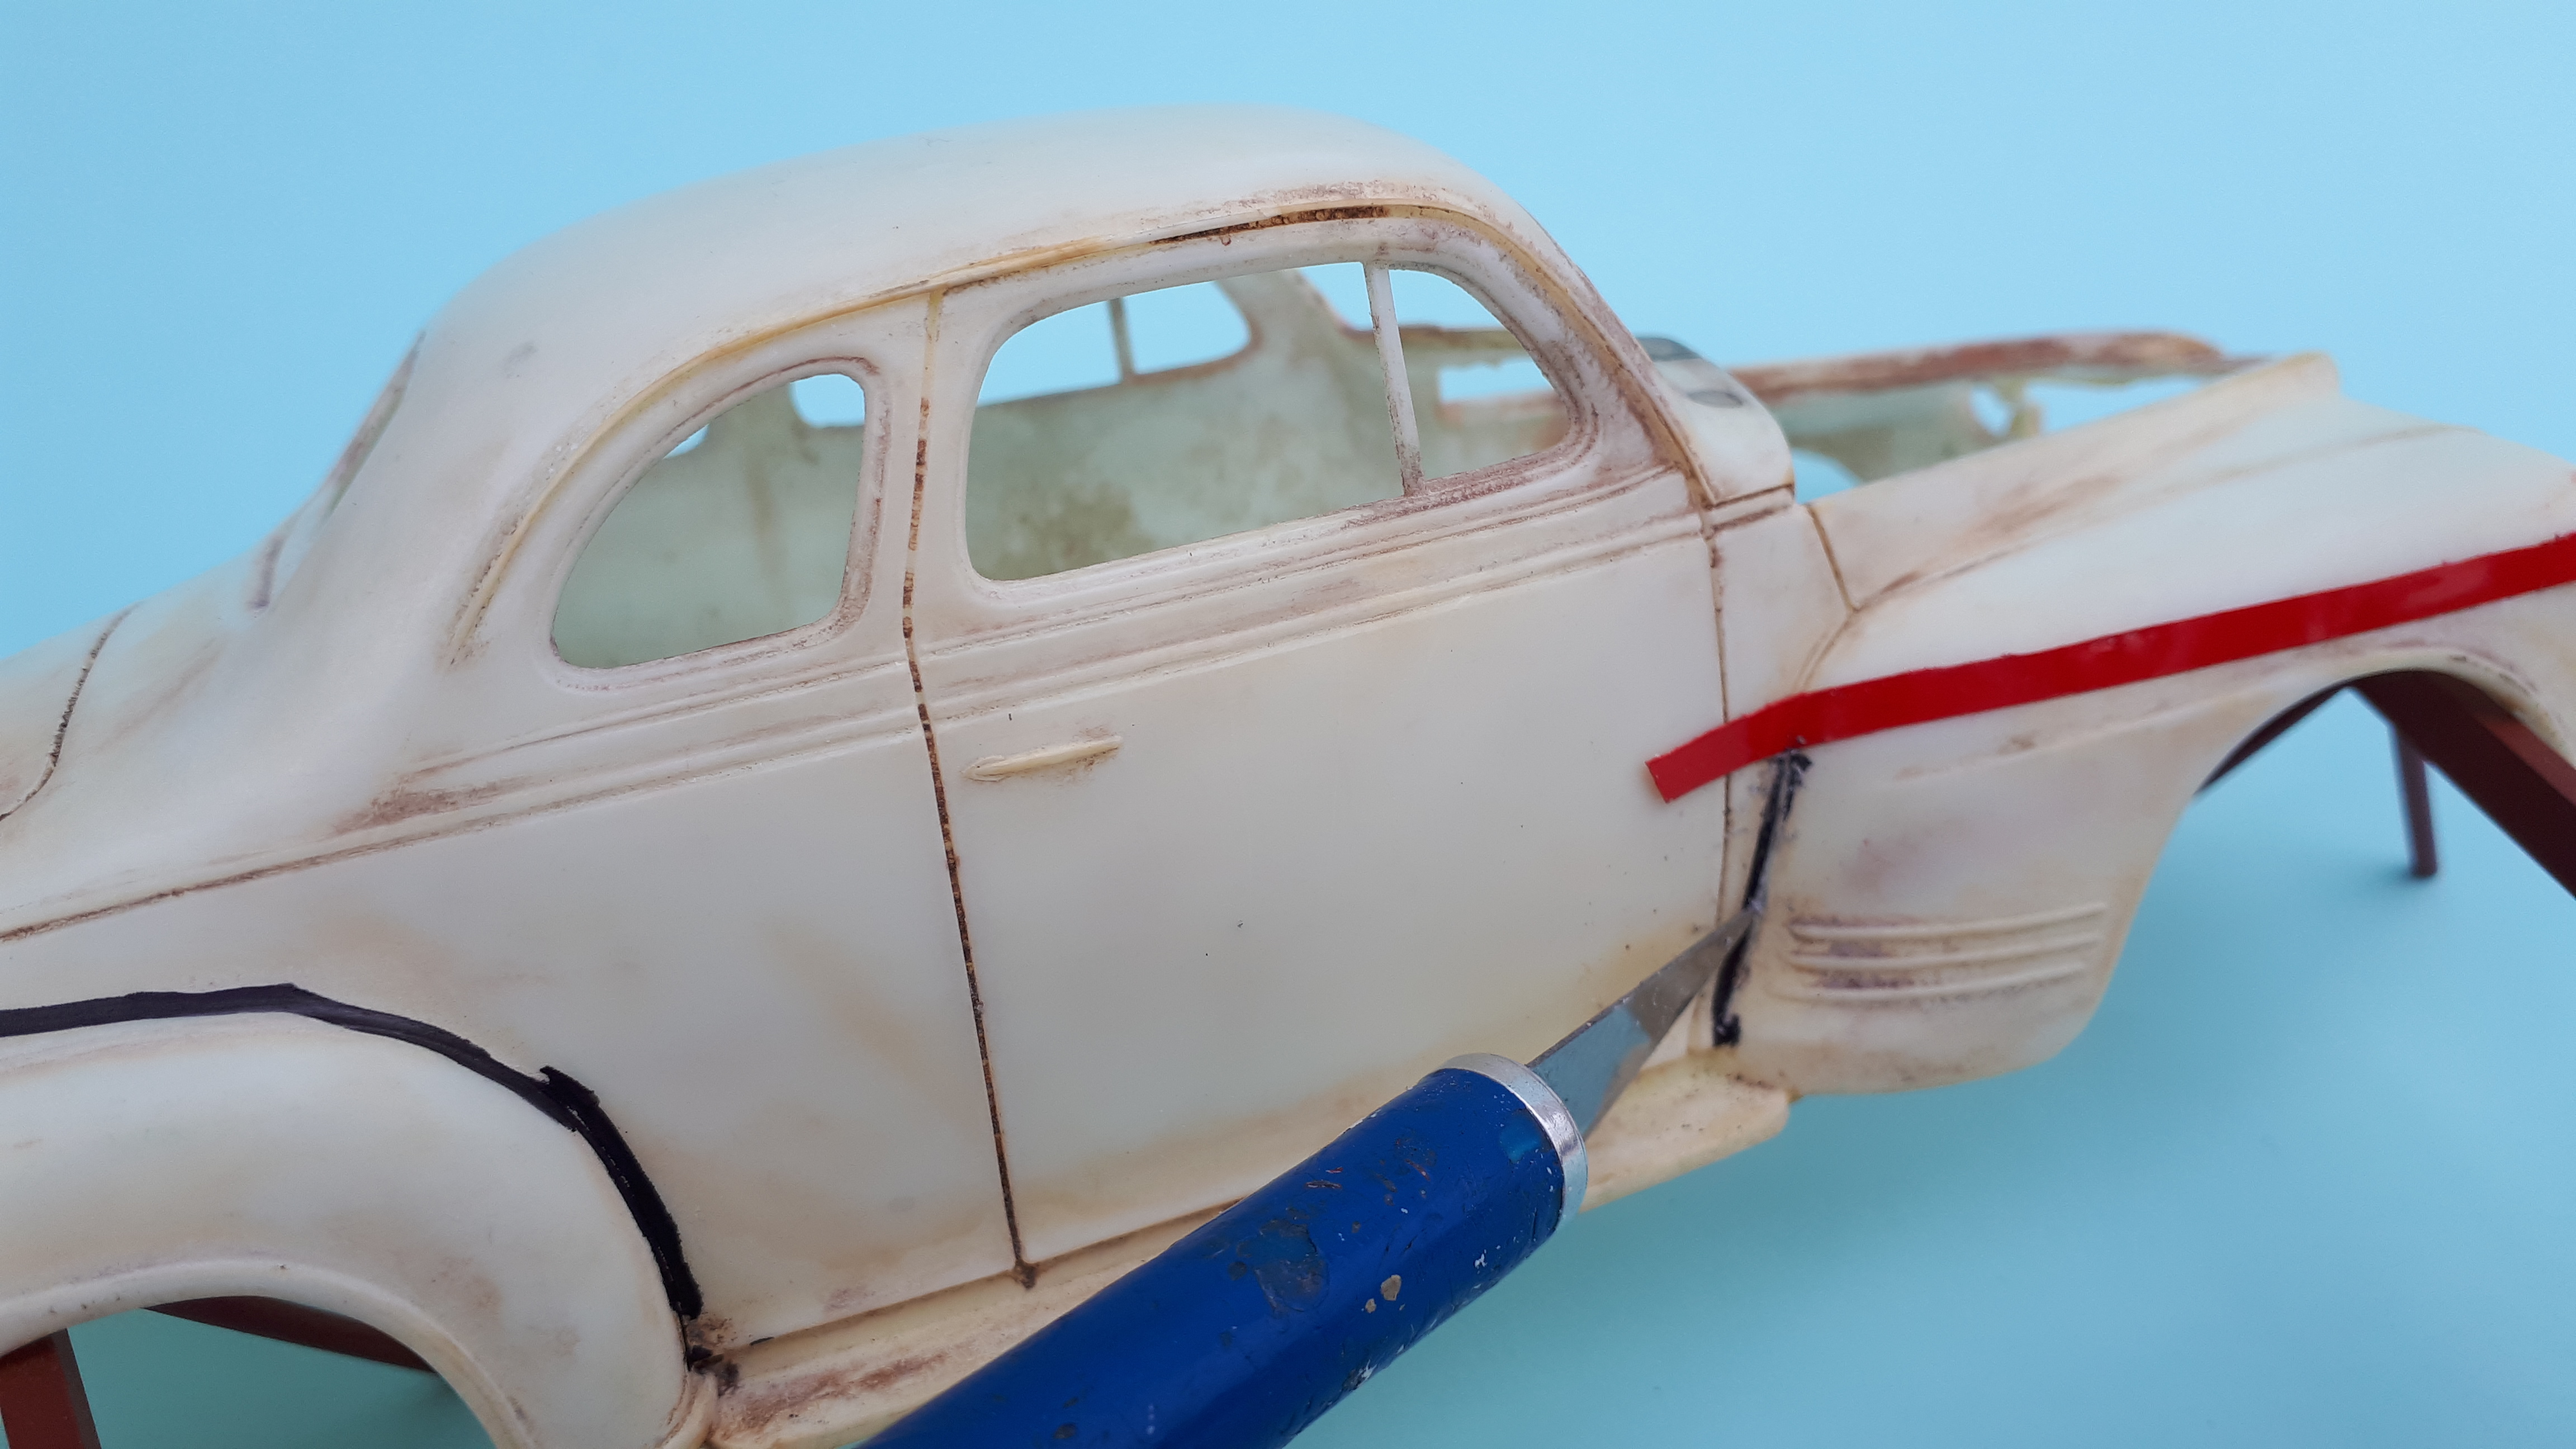
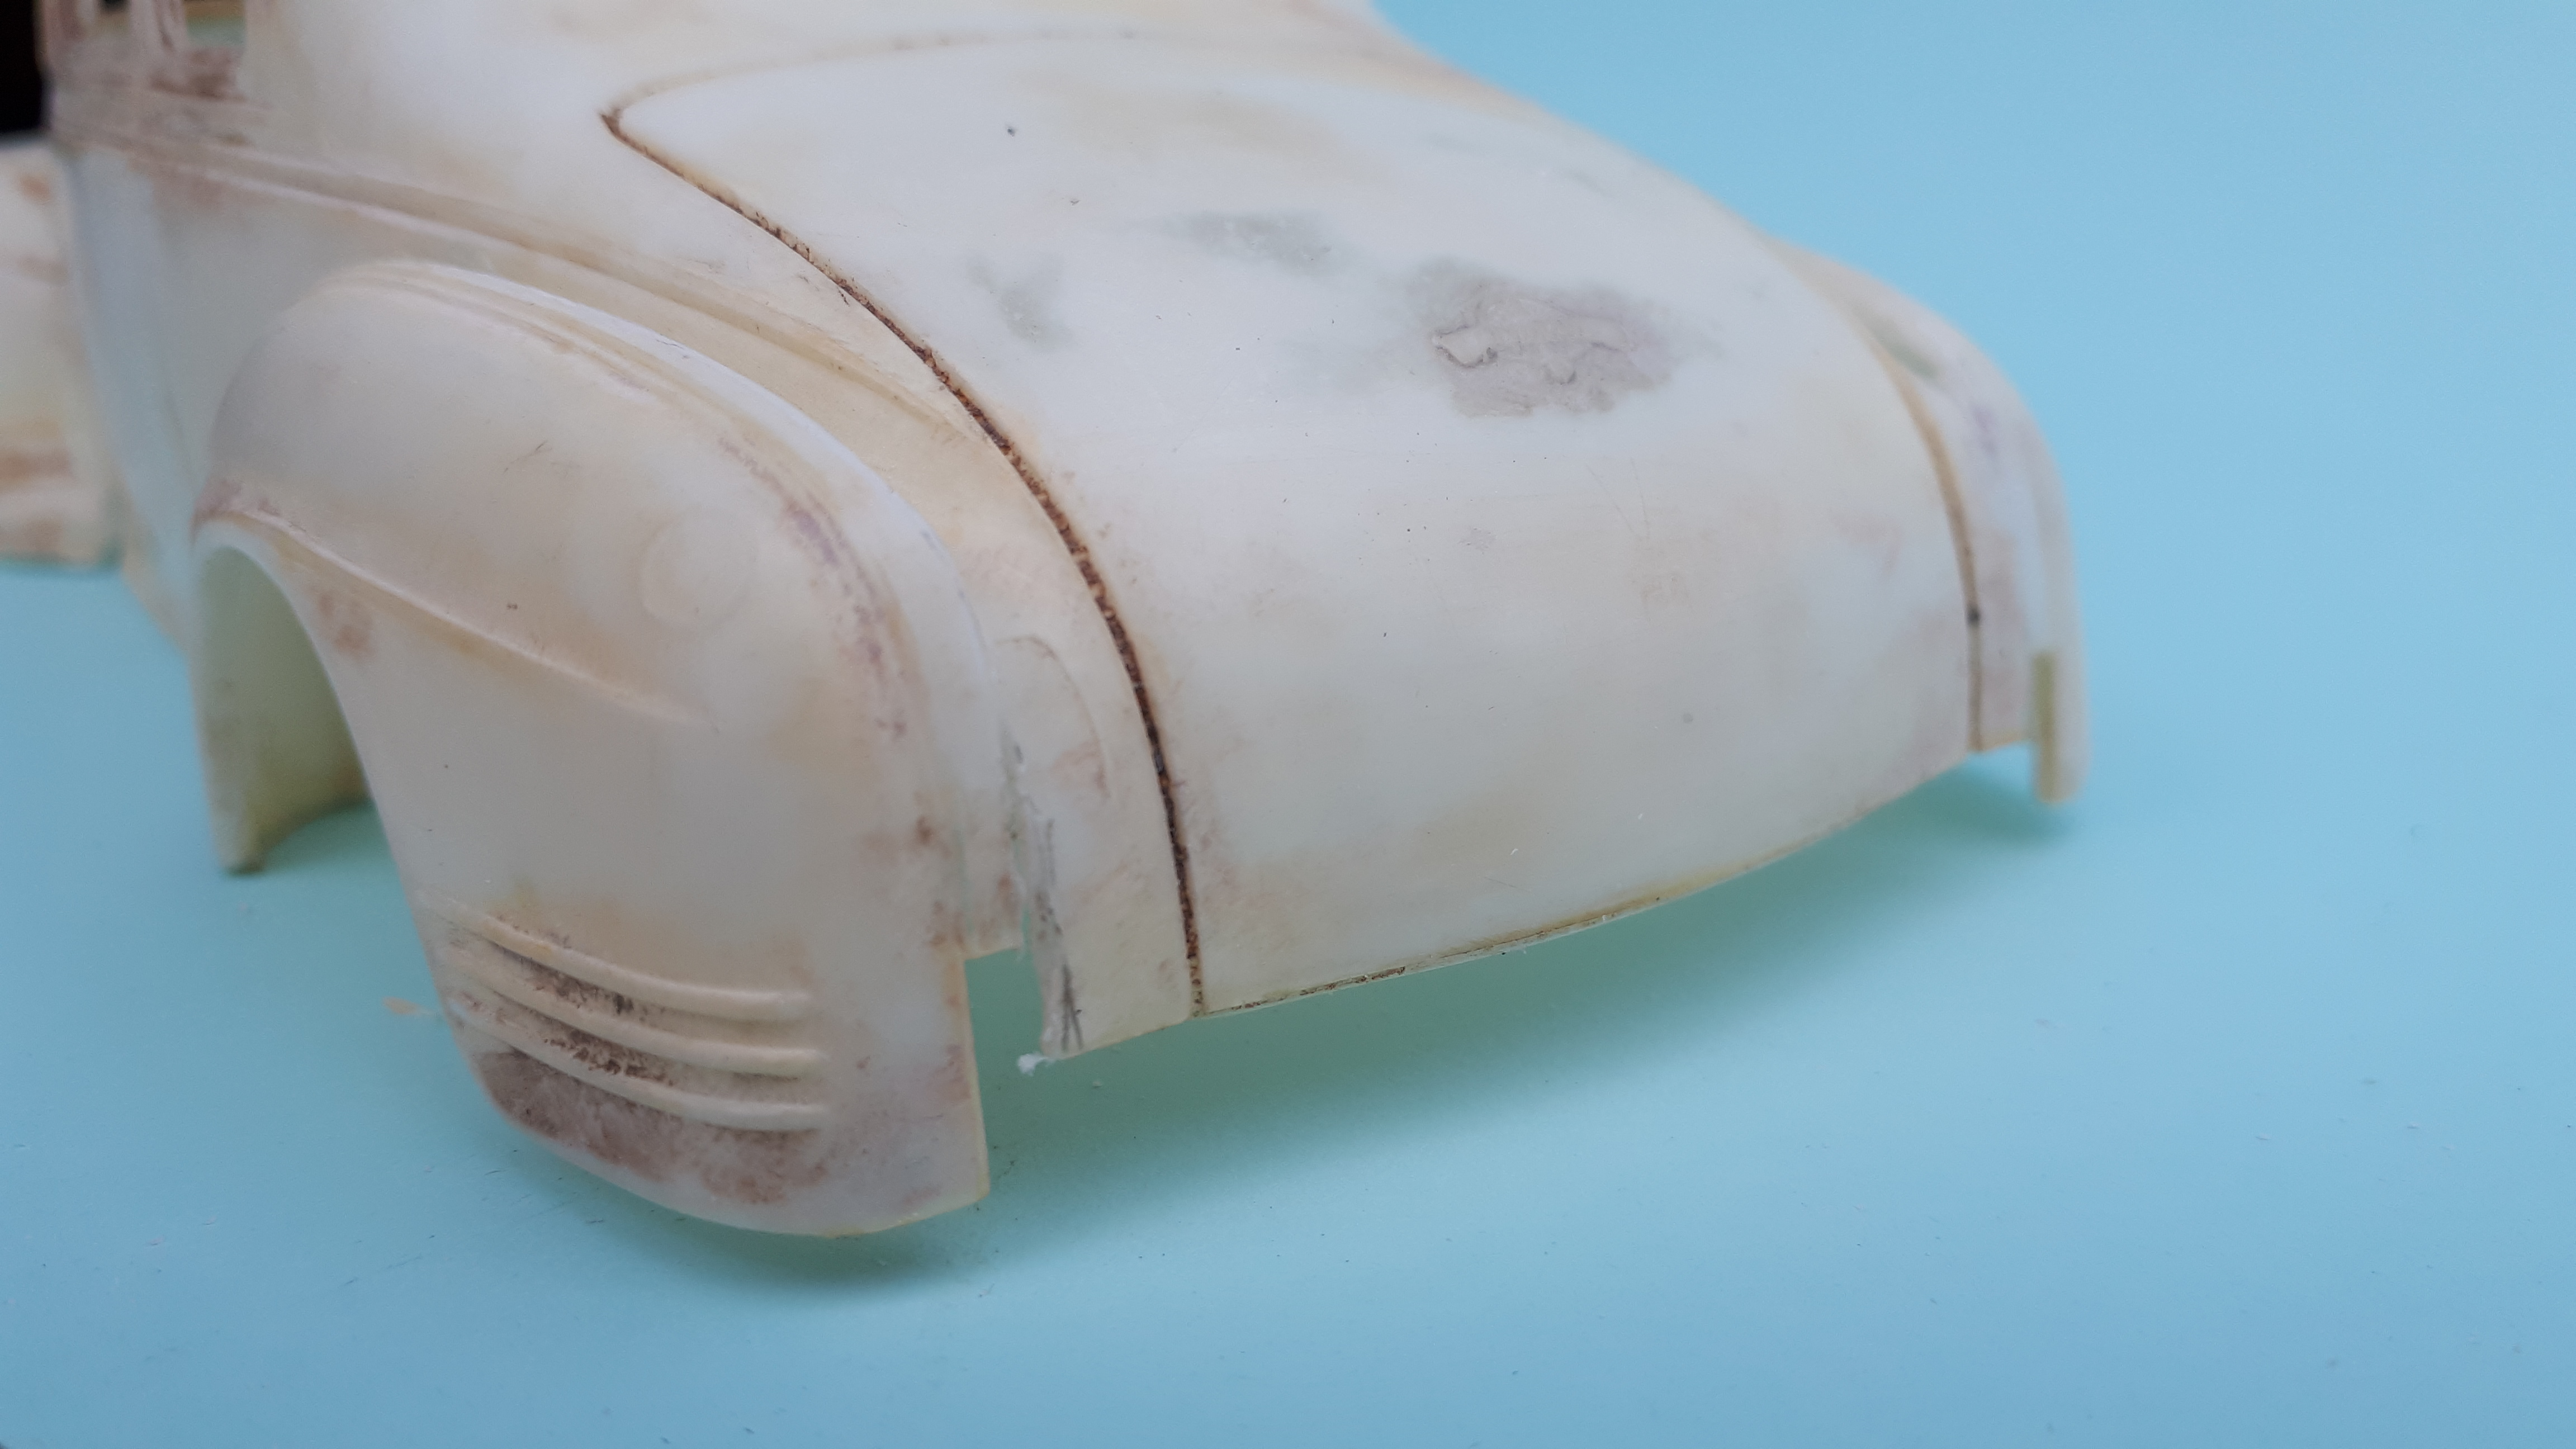
I've had three 41 Plymouth kits in my stash for some time now but never got one finished. After a disastrous first paint job decades ago, this was one of my first attempts at paint stripping, using caustic soda flakes in a solution of water. Much the same as Draino. My goal was to get rid of the boring appearance of the original car. My two main issues with the original design are the height of the sides and the bluntness of the front. The roof shape and the rear deck are quite a pleasing design so I set out to correct the shortcomings to be more harmonious with the strong points. I could imagine a young man who wanted to join all the cool kids in town with a hot Ford V8 coupe but his Dad was a Plymouth dealer, so it was a case of Mopar or Nocar! Still, Dad gave him a decent allowance and he had the workshops of the dealership at his disposal so why not make lemonade out of lemons? Dad wouldn't let him cut up a perfectly good car so he worked with the dealership auto body guys to hatch a plan. Leave the basic body shell alone but raise the fenders to give the impression of a section job. Could it work? Here is a clean untouched body. To my Ford biased eye, the front fenders are too tall, the rear fenders too low and the side just looks massive. My plan is to remove and raise the rear fenders and to section the front fenders. I used some old vinyl pinstriping tape to mark out my cut lines as well as a felt tip pin. To avoid hacking up the smooth surfaces of the door and quarter panels, I used the back of an X acto to scribe vertically down the join between the fenders and the vertical surfaces before I started any other cuts. I made the first horizontal cut along the top of the tape - it makes it easier than taking off the fender itself and then having to hold it while you remove the strip. The second cut, naturally enough, was below the tape. I kept the strip removed to help reinforce the join later on.
-
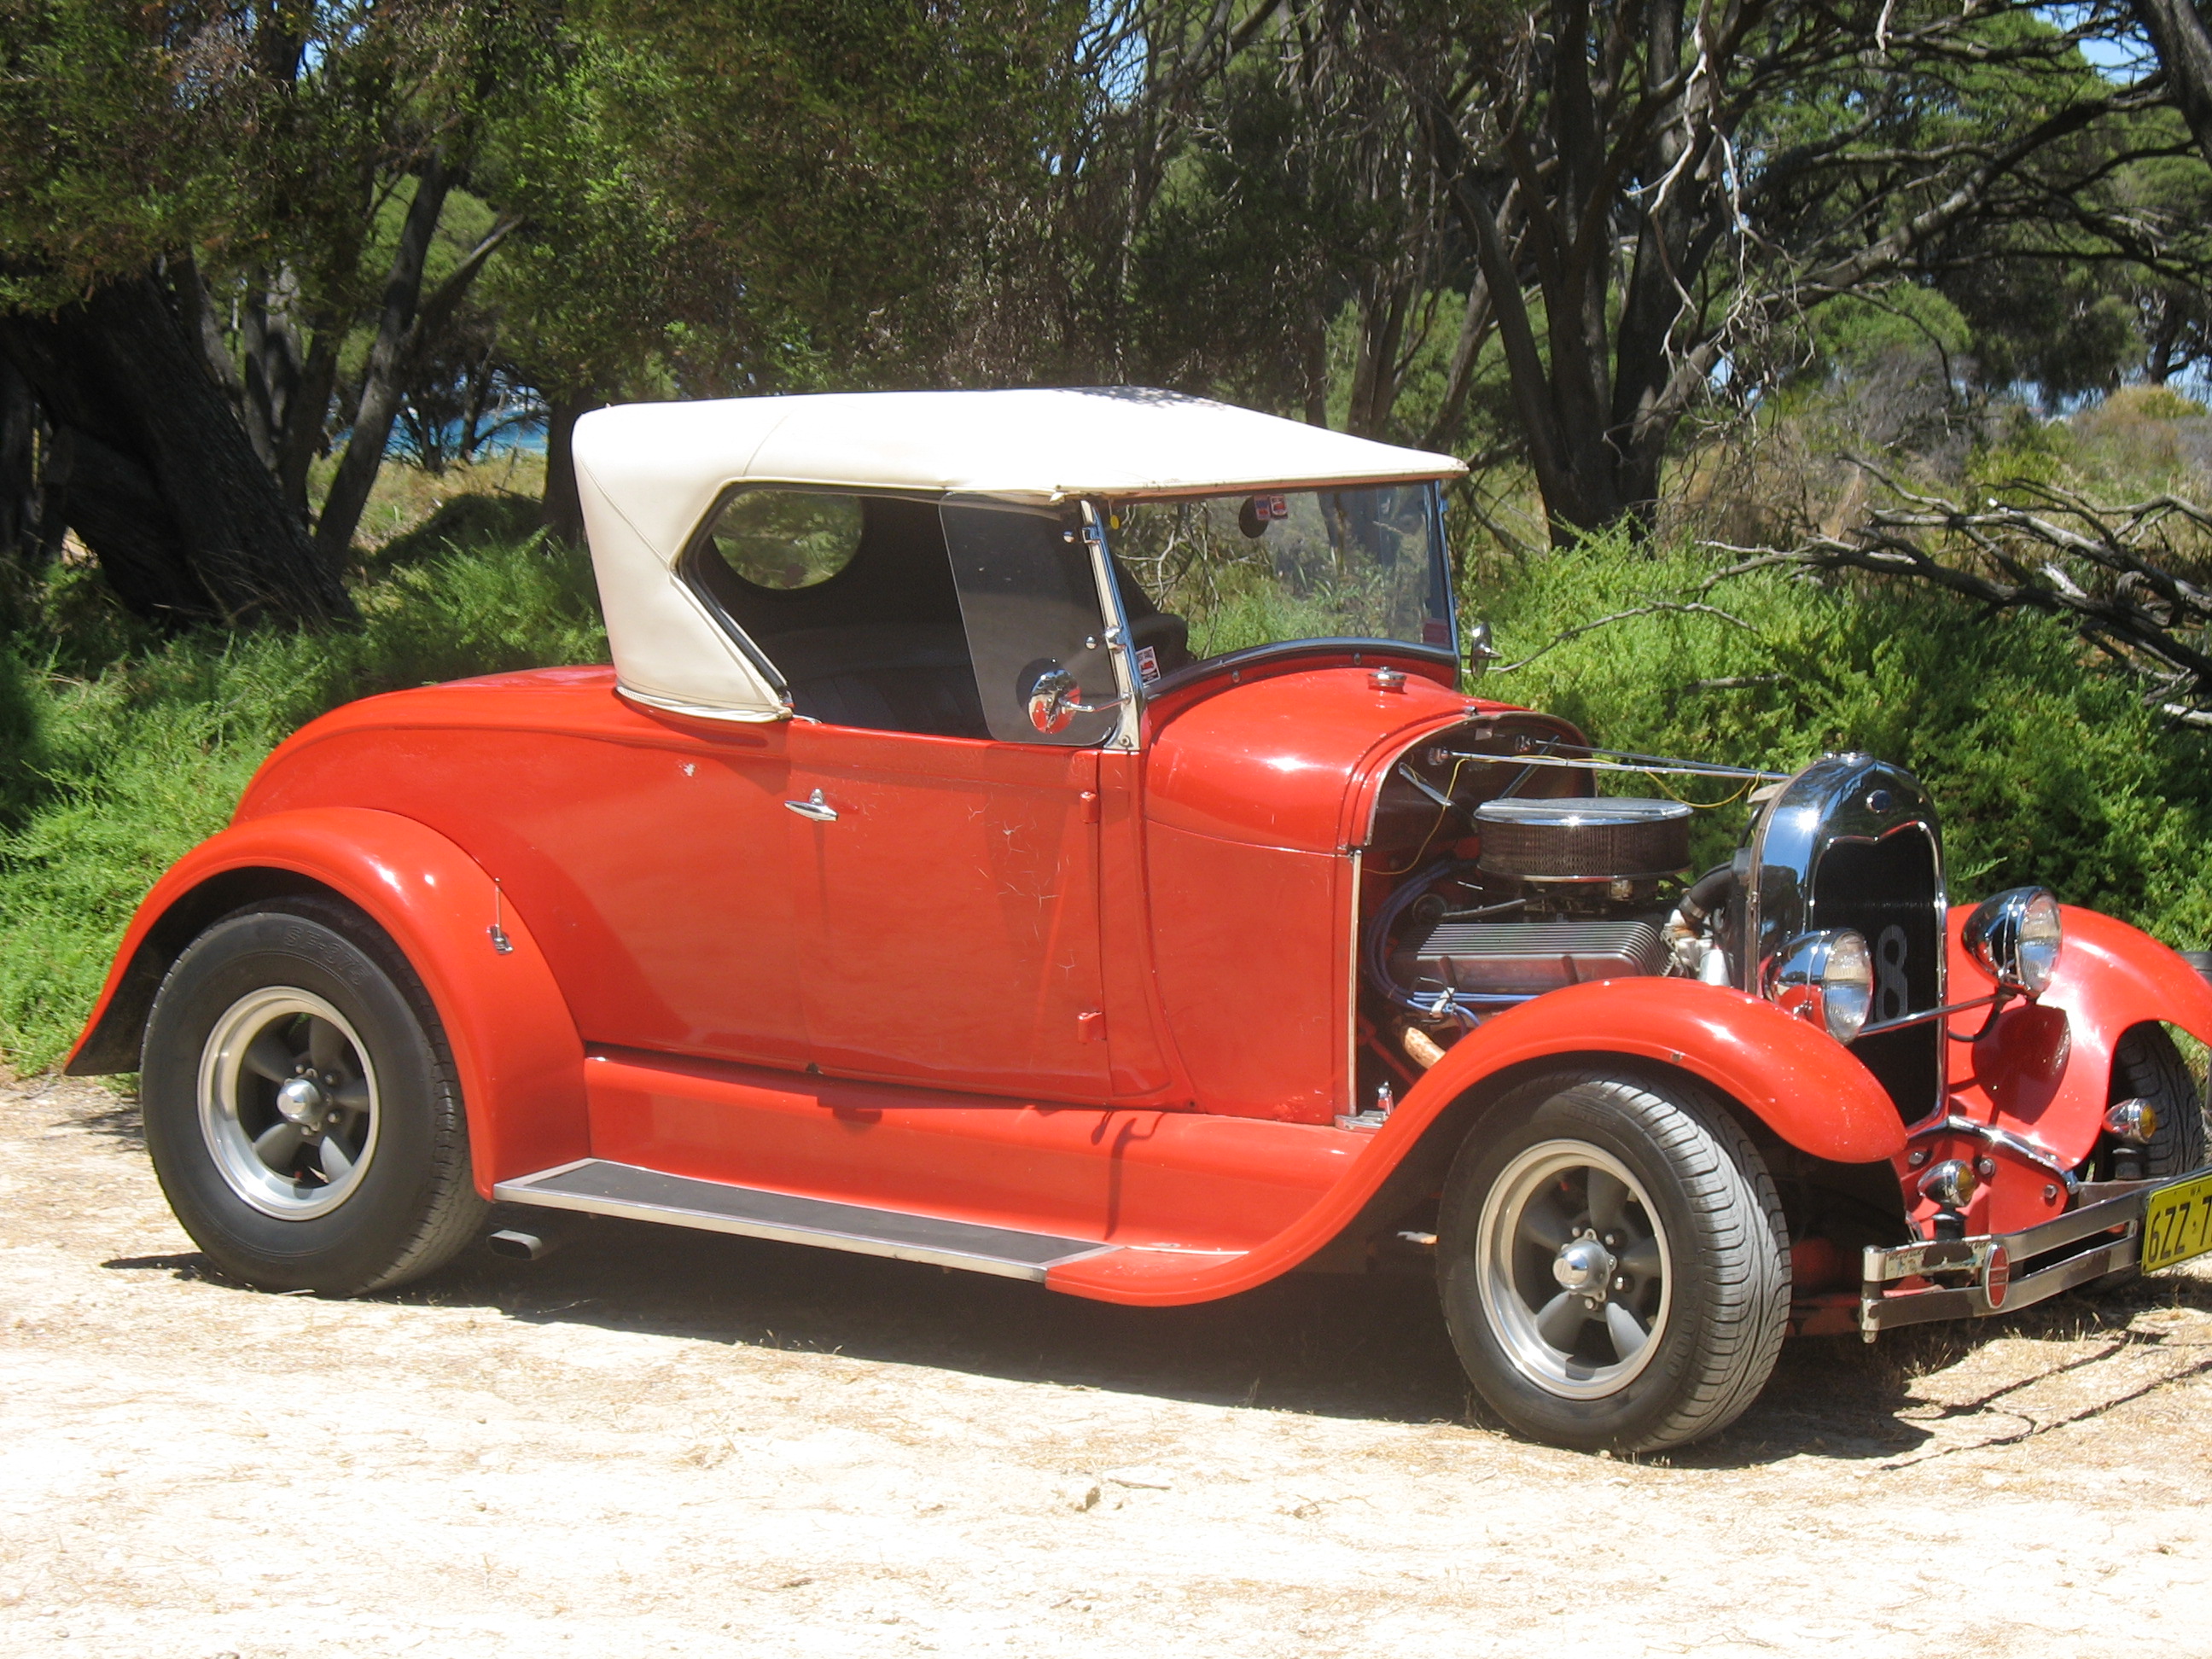
Here you go! I couldn't find a shot with the roof off - I get sunburnt way too easy so it stays on a lot these days. - skin cancer is no fun! Been driving it for nearly 37 years although off the road at the moment waiting for my new radiator to arrive from the other side of the country - COVID has blown out freight times like you wouldn't believe! Cheers Alan
-
That's nuts! I love crazy boats and this is definitely a boat, albeit one from Star Wars! You did some outstanding work blending all those pieces together. Too cool. Cheers Alan
-
Dave, that is a magnificent looking Model A roadster. I am VERY biased of course, because I drive a real red one with almost identical proportions and stance, right down to having a front bumper and no rear bumper! You have done some beautiful work here that is often overlooked by scale rodders. The detail you applied to the firewall makes a huge difference. The in scale radiator supports lead your eye to it. And I always wanted to fit the Ala Kart interior to a roadster - now I have a great tutorial to help me. If I could add two suggestions to your build, if they appeal to you. Firstly, run a bit of Molotow over the oval pads on the front fenders - these are part of the original headlight bar but no model company has ever moulded them to the bar so it is a detail that is often missed. Secondly, and I will completely understand if you prefer not to because it would be a bear to fix at this stage, there is a piece of bodywork, a trim panel of you like, that runs over the cowl under the windscreen frame. Revell's modern tool 29 roadster is the only Model A kit in history to have this panel correctly incorporated to the body rather than the windscreen frame itself. If the frame is still loose, you could mask off and paint red that panel. It will be more accurate to a real car and wil reduce the chrome bulk of the windscreen frame. No matter how you finish this beautiful little roadster, I will love it to bits. Funny thing is, I built my car with one inch whitewalls and chromed rims but some years later switched to blackwalls and grey spoke Americans. Your project has reversed the order! Cheers Alan
-
1957 Pontiac Bonneville "Safari Wagon" - PHANTOM
alan barton replied to carbuilder1950's topic in Model Cars
Having worked with die cast myself I understand the challenges you faced grafting these two bodies together. Your success can be measured by the fact that no-one would ever know that it didn't come out of the box this way. A truly beautiful model in every dimension! Cheers Alan -
Very crisp, a pleasure to view. Your model is making me think about using grey on my 48 Woody! Cheers Alan
-
Big Red. Never knew about this.
alan barton replied to BaBaBooey's topic in General Automotive Talk (Trucks and Cars)
Went to the biggest toy fair in Australia last weekend and spent the whole weekend anguishing over whether I should have bought a tin plate toy of Big Red, very close to 1/25th scale and in stunning condition for $170. I came so close but a) I have no room, b) I have no room and c) if I had room I would use it for more hot rods! But it was gorgeous and would have looked right at home in my collection. I know the guy well who owns it and it wasn't sold when I left. I doubt whether many other people in the hall even knew what it was. My mate Dave summed it up best - you don't collect trucks but the cool factor is off the scale! As a true friend, I tried to talk him onto buying it as he predominantly collects Mustangs and there is a Mustang in the double paged advert so I said it WOULD fit his collection - then I could go and visit it any time I wanted! What are mates for! Cheers Alan -
Thank you Bill, Gareth, Bob and Roger! I know we build for ourselves but it's always rewarding to get compliments from your peers. Yeah, I do punish myself by doing right hand drive conversions on most of my builds. Its an Aussie thing I guess but even my mates mostly build them LHD so maybe its just an Al thing after all! I did a coupe of quickies recently that I left LHD just because I was lazy and wasn't overly in love with the car ( finishing old, stalled builds from decades ago!) and some of my dirt track jalopies and late models speedway sedans are LHD simply because that's how the prototype was but for the most part I cut and shut into tiny pieces until I get the result I am after. Obviously pre-48 hot rods are easiest but I will tackle even modern cars with complex asymetrical dashboards. Cheers Alan
-
MCM #208 is HERE!
alan barton replied to larrygre's topic in Model Cars Magazine News and Discussions
Pleased to report my copy also arrived in Perth Western Australia on Tuesday 8th July. A great issue and congrats to all who assembled it. Until now I thought that my friend Richard and myself were the most remote subscribers but looks like Ash (oldcarnut) gets the title as he is another five or six hours south of us in a beautiful town amongst the tall timber forests. Great to see another West Aussie here, Ash, don't forget the Model Car Spectacular is on in Perth on 18th of July! Cheers Alan -
CHEVY 41 COE delivery
alan barton replied to CUSTOMBOY's topic in Model Trucks: Pickups, Vans, SUVs, Light Commercial
What an exceptional job in combining two resin bodies - it would have been tough enough if they were plastic but resin just makes it that much harder. You certainly did a great job blending them together and the colour scheme really sells it! What are the wheels off - I have never seen them before. Cheers Alan -
I don't know how I missed this one but WOW - Rodney, that is stunning. Definitely an improvement on the box art and I can just imagine this in the staging lanes at the Bakersfield Hot Rod re-union. The chopped one in my collection is a salt racer but now I want to do a funnycar! Cheers Alan

.jpg.bc49c7a41fba2132e6a15503b3fef60d.jpg)

.jpg.9b2bdd4a0e93ae09e0e146a8c802e86a.jpg)