Alan Barton
-
Posts
2,113 -
Joined
-
Last visited
Content Type
Profiles
Forums
Events
Gallery
Everything posted by Alan Barton
-
1937 Chevy convertible: 1/32, old Pyro model, BOX STOCK???
Alan Barton replied to ismaelg's topic in WIP: Model Cars
I have a large collection ( built) of 1/32 scale kits so I am really impressed with your progress so far. I did my 37 convertible as a taildragging mild custom and it looks pretty cool. Really loving your paint! Cheers Alan -
A different approach to the AMT 41 Plymouth coupe.
Alan Barton replied to Alan Barton's topic in WIP: Model Cars
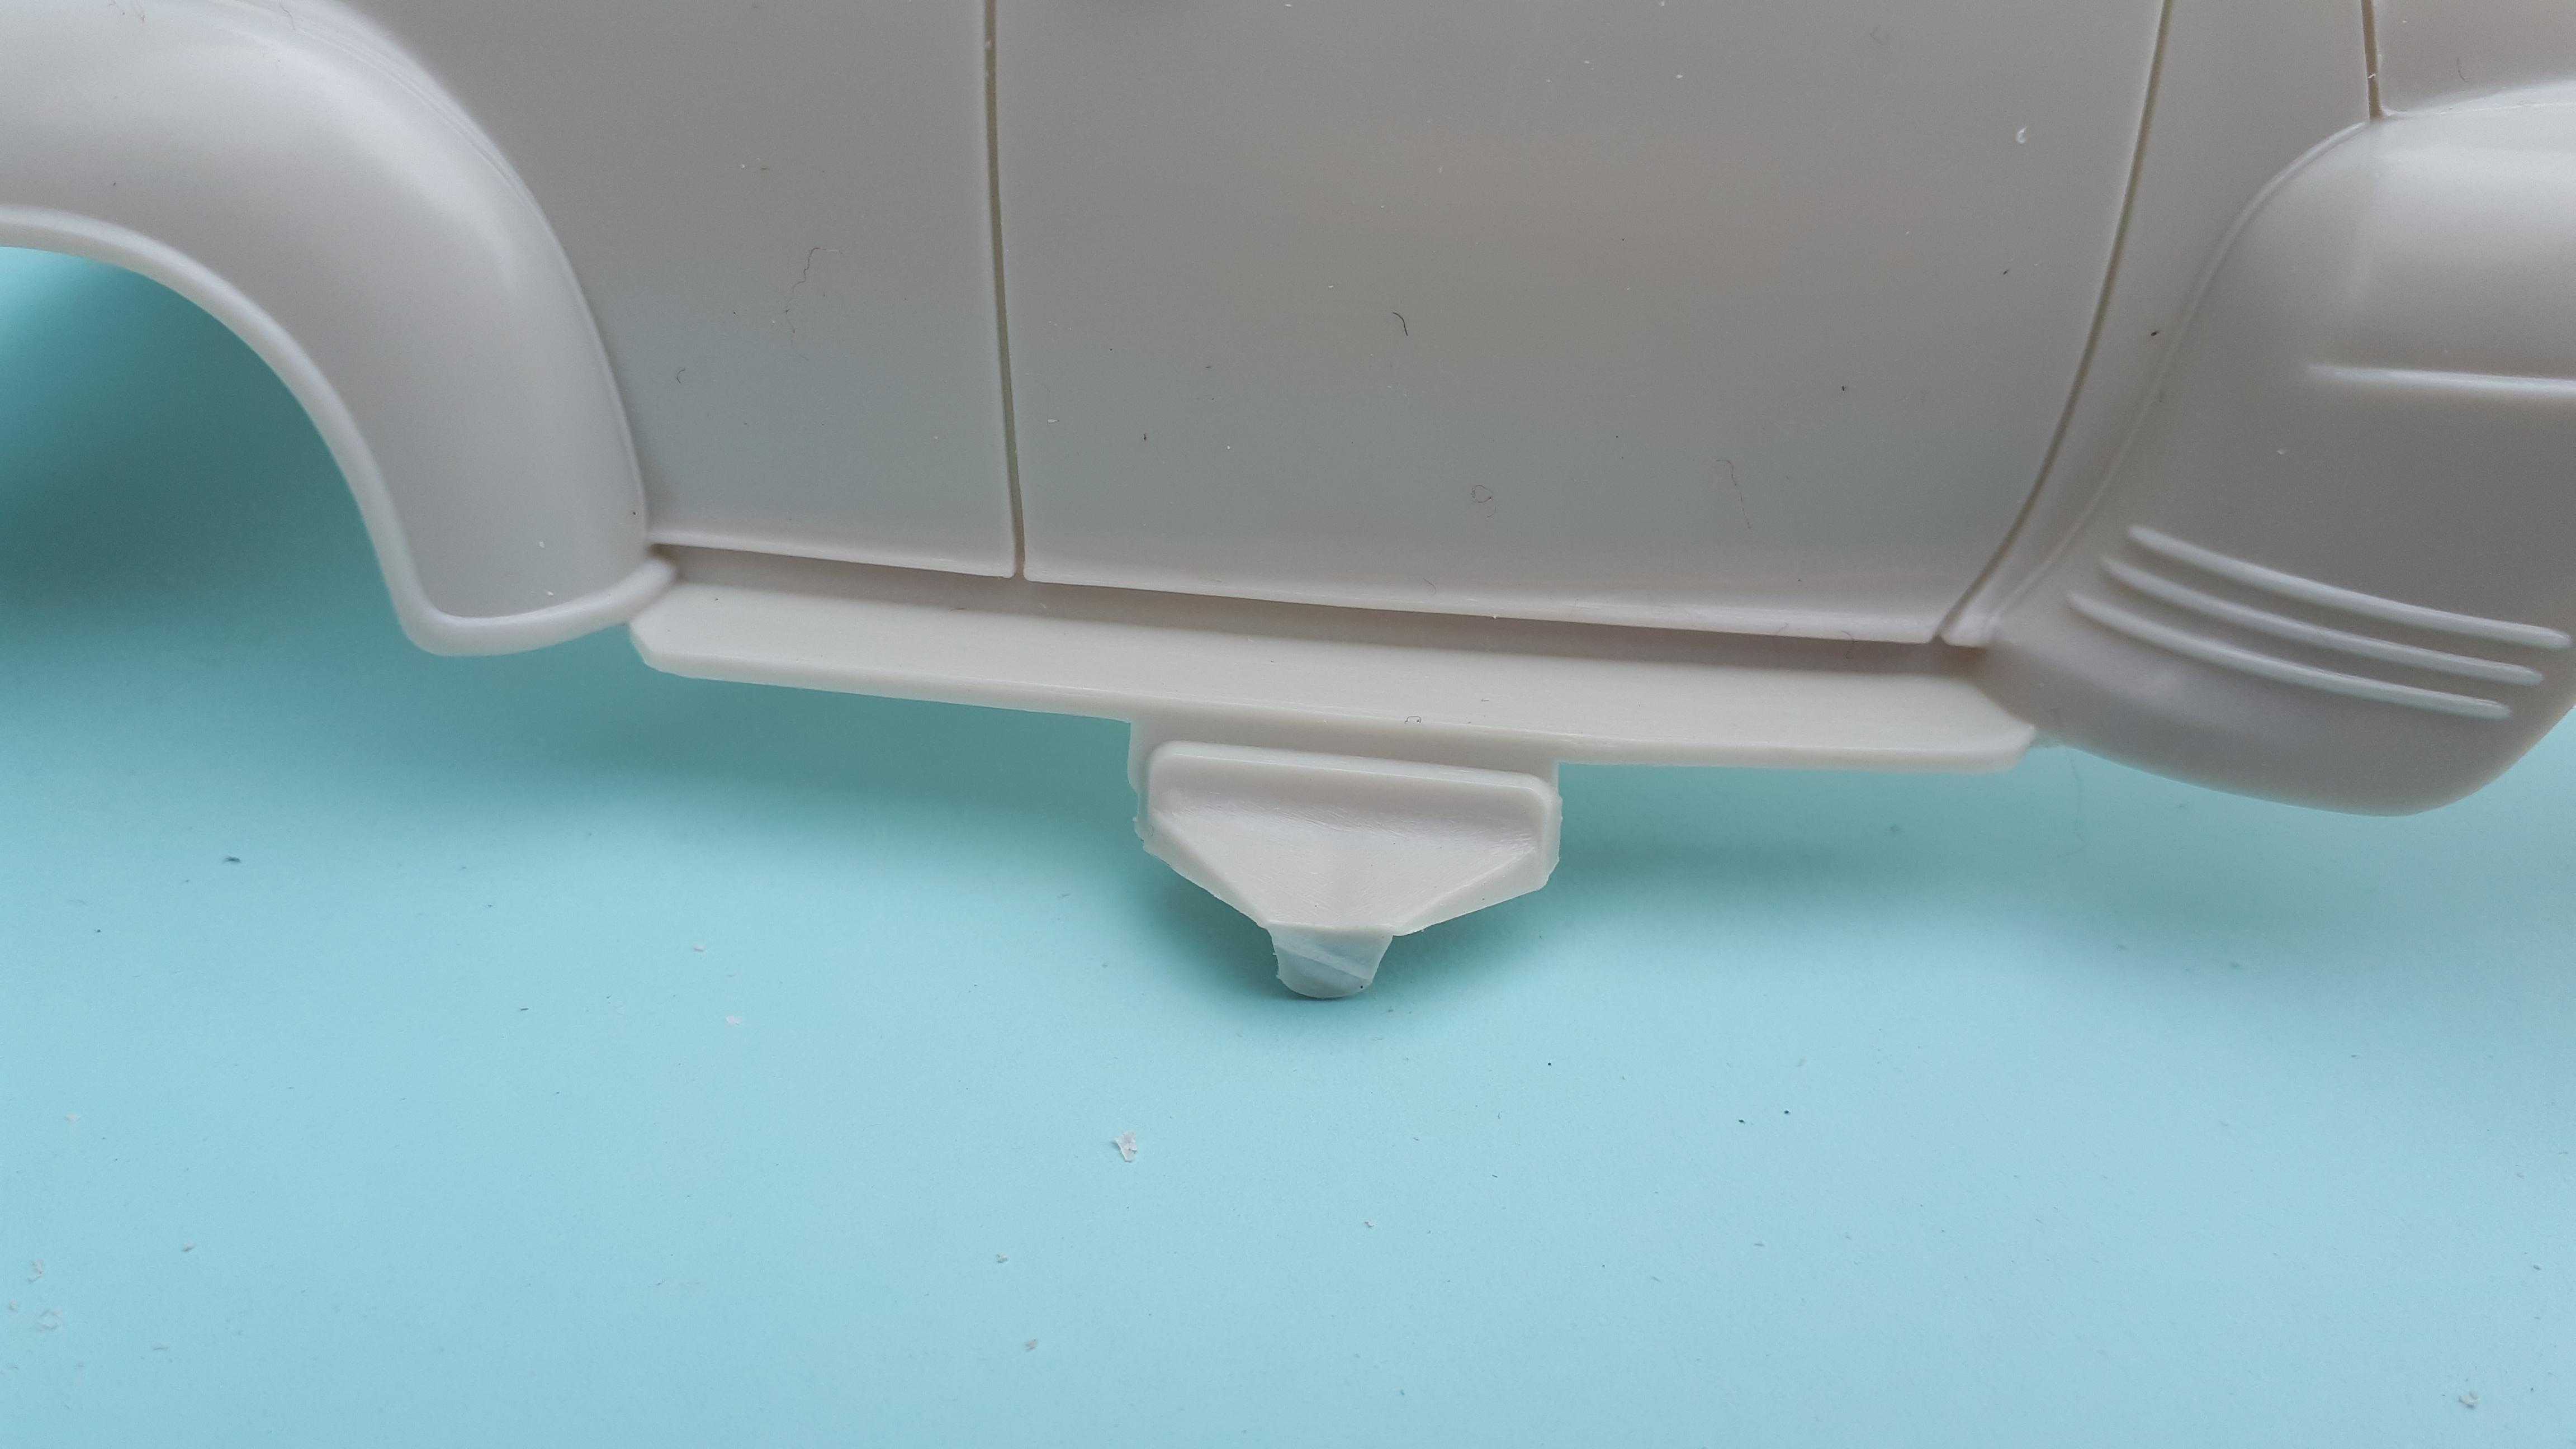
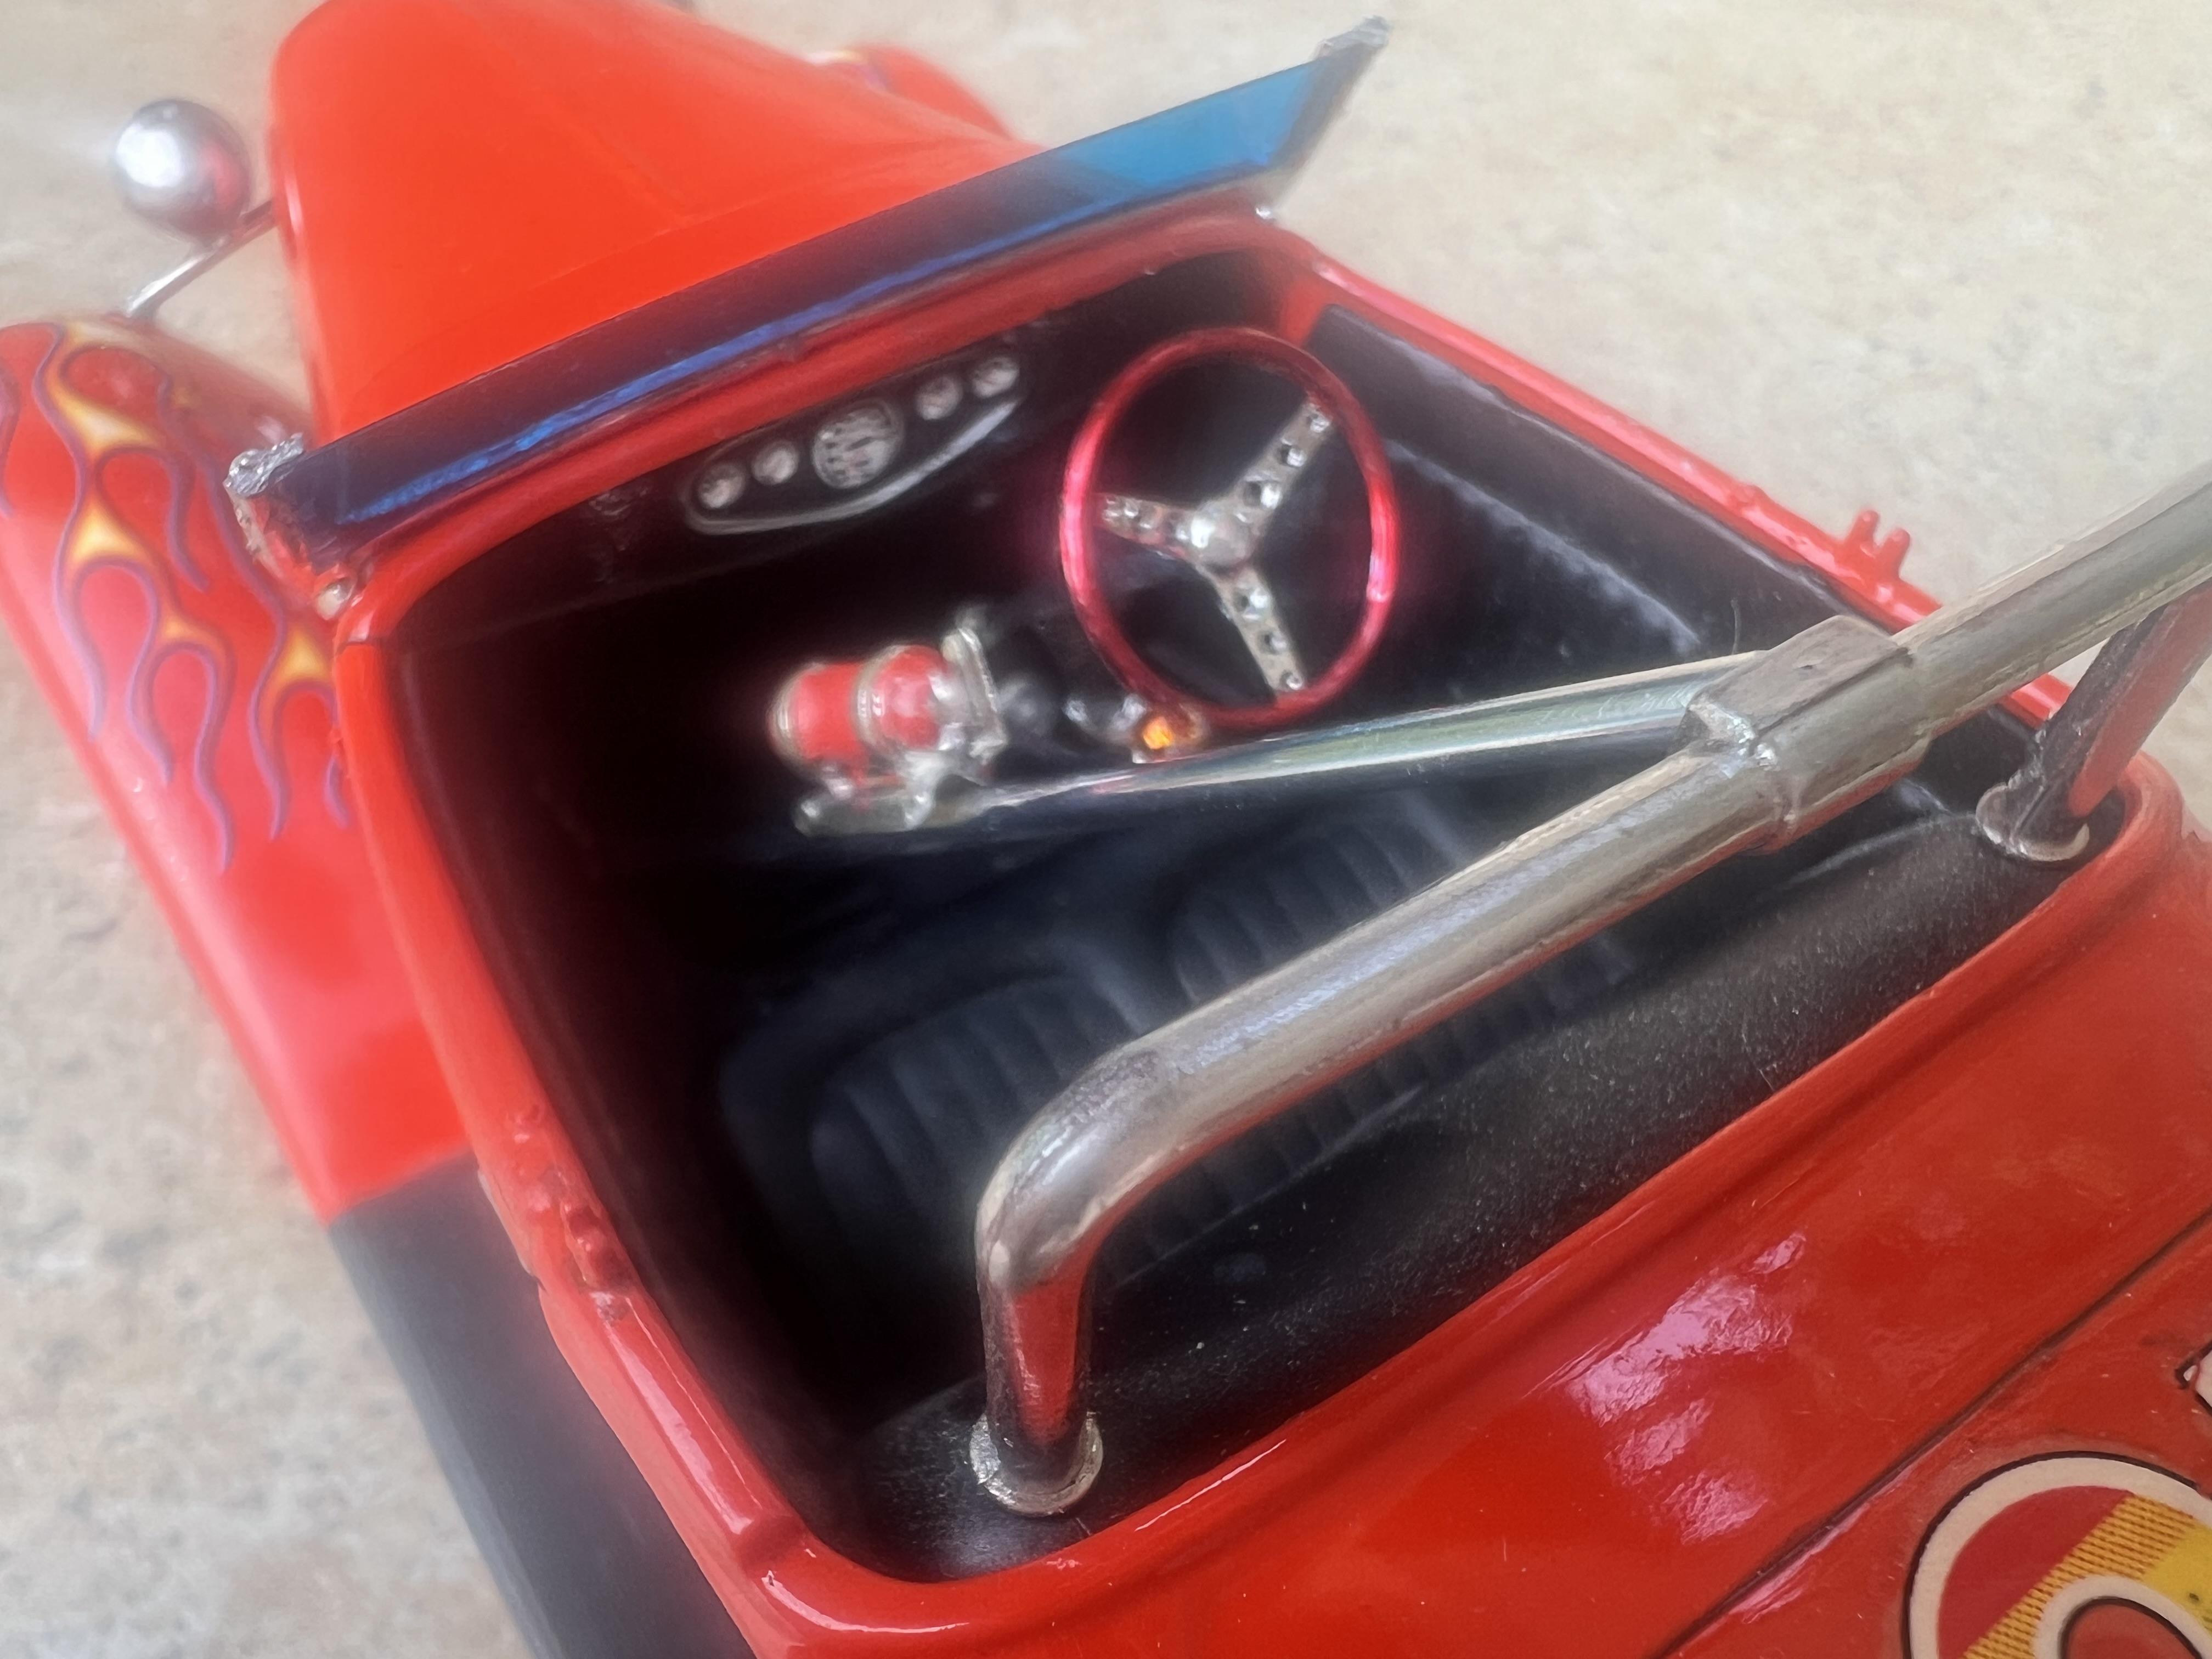
I'm not going to pretend that this is pretty or refined bodywork - it's not. I just let the car talk to me as I progressed and sometimes I had to go backwards to go forwards. You will see a lot of bog in the next bunch of photos ( you say Bondo, we say bog) but most of it ends up on the floor anyway! This first overhead shot shows the beak of the hood contrasting with the absolute flatness of the front grille panel. The other two Plymouth posts currently on this forum are spending a lot of time correcting this area and I am indebted to them for detailing their work as they go as my planned Plymouth conversion will need a much improved grille area. But our affluent teenage owner wants none of that boredom on his ride so we are going for a full custom front. I needed to establish some integrity in the front end before getting into the styling so I glued in place the rollpan of an AMT 51 Chevy. If nothing else it gave me a solid foundation to work with. The next step would be to install frenched headlights. I have seen this technique used before for frenched headlights but this is the first time. I have tried it and I must say it works very well. First, select the headlight lens you wish to use. Then, find a diameter of K&S aluminium tubing that the lens will sit in snugly - this will later become your frenched headlight ring.. You then need two more sizes of tubing, one the next size larger than this tube, the other the next size smaller. K&S tubing telescopes beautifully so we will be taking advantage of this feature. Cut two lengths of the largest size of tubing about 12mm or 1/2 and inch long. This will form the fender housings for your headlight. After all the sectioning work the front of the fenders are pretty fragile so I cut the opening roughly to size with a sharp X acto and then filed it to nearly the correct diameter. Finally I used a drill bit by twisting it in my fingers to ream it out to the accurate diameter. I took this opportunity to move these holes inboard as on the kit they are way too far out to the edge of the fender even if you were going for a stock look. Having done that I started to wonder if the custom 51 Chevy grille would work. It is very similar to the grille in an old Valley Custom creation called the Polynesian so would suit the period but it is very flat and one thing I wanted to get rid of was the flatness. It needed somewhere to sit so I roughed up an armature of sorts out of sheet plastic and glued everything into place. No going back now!
-
A different approach to the AMT 41 Plymouth coupe.
Alan Barton replied to Alan Barton's topic in WIP: Model Cars
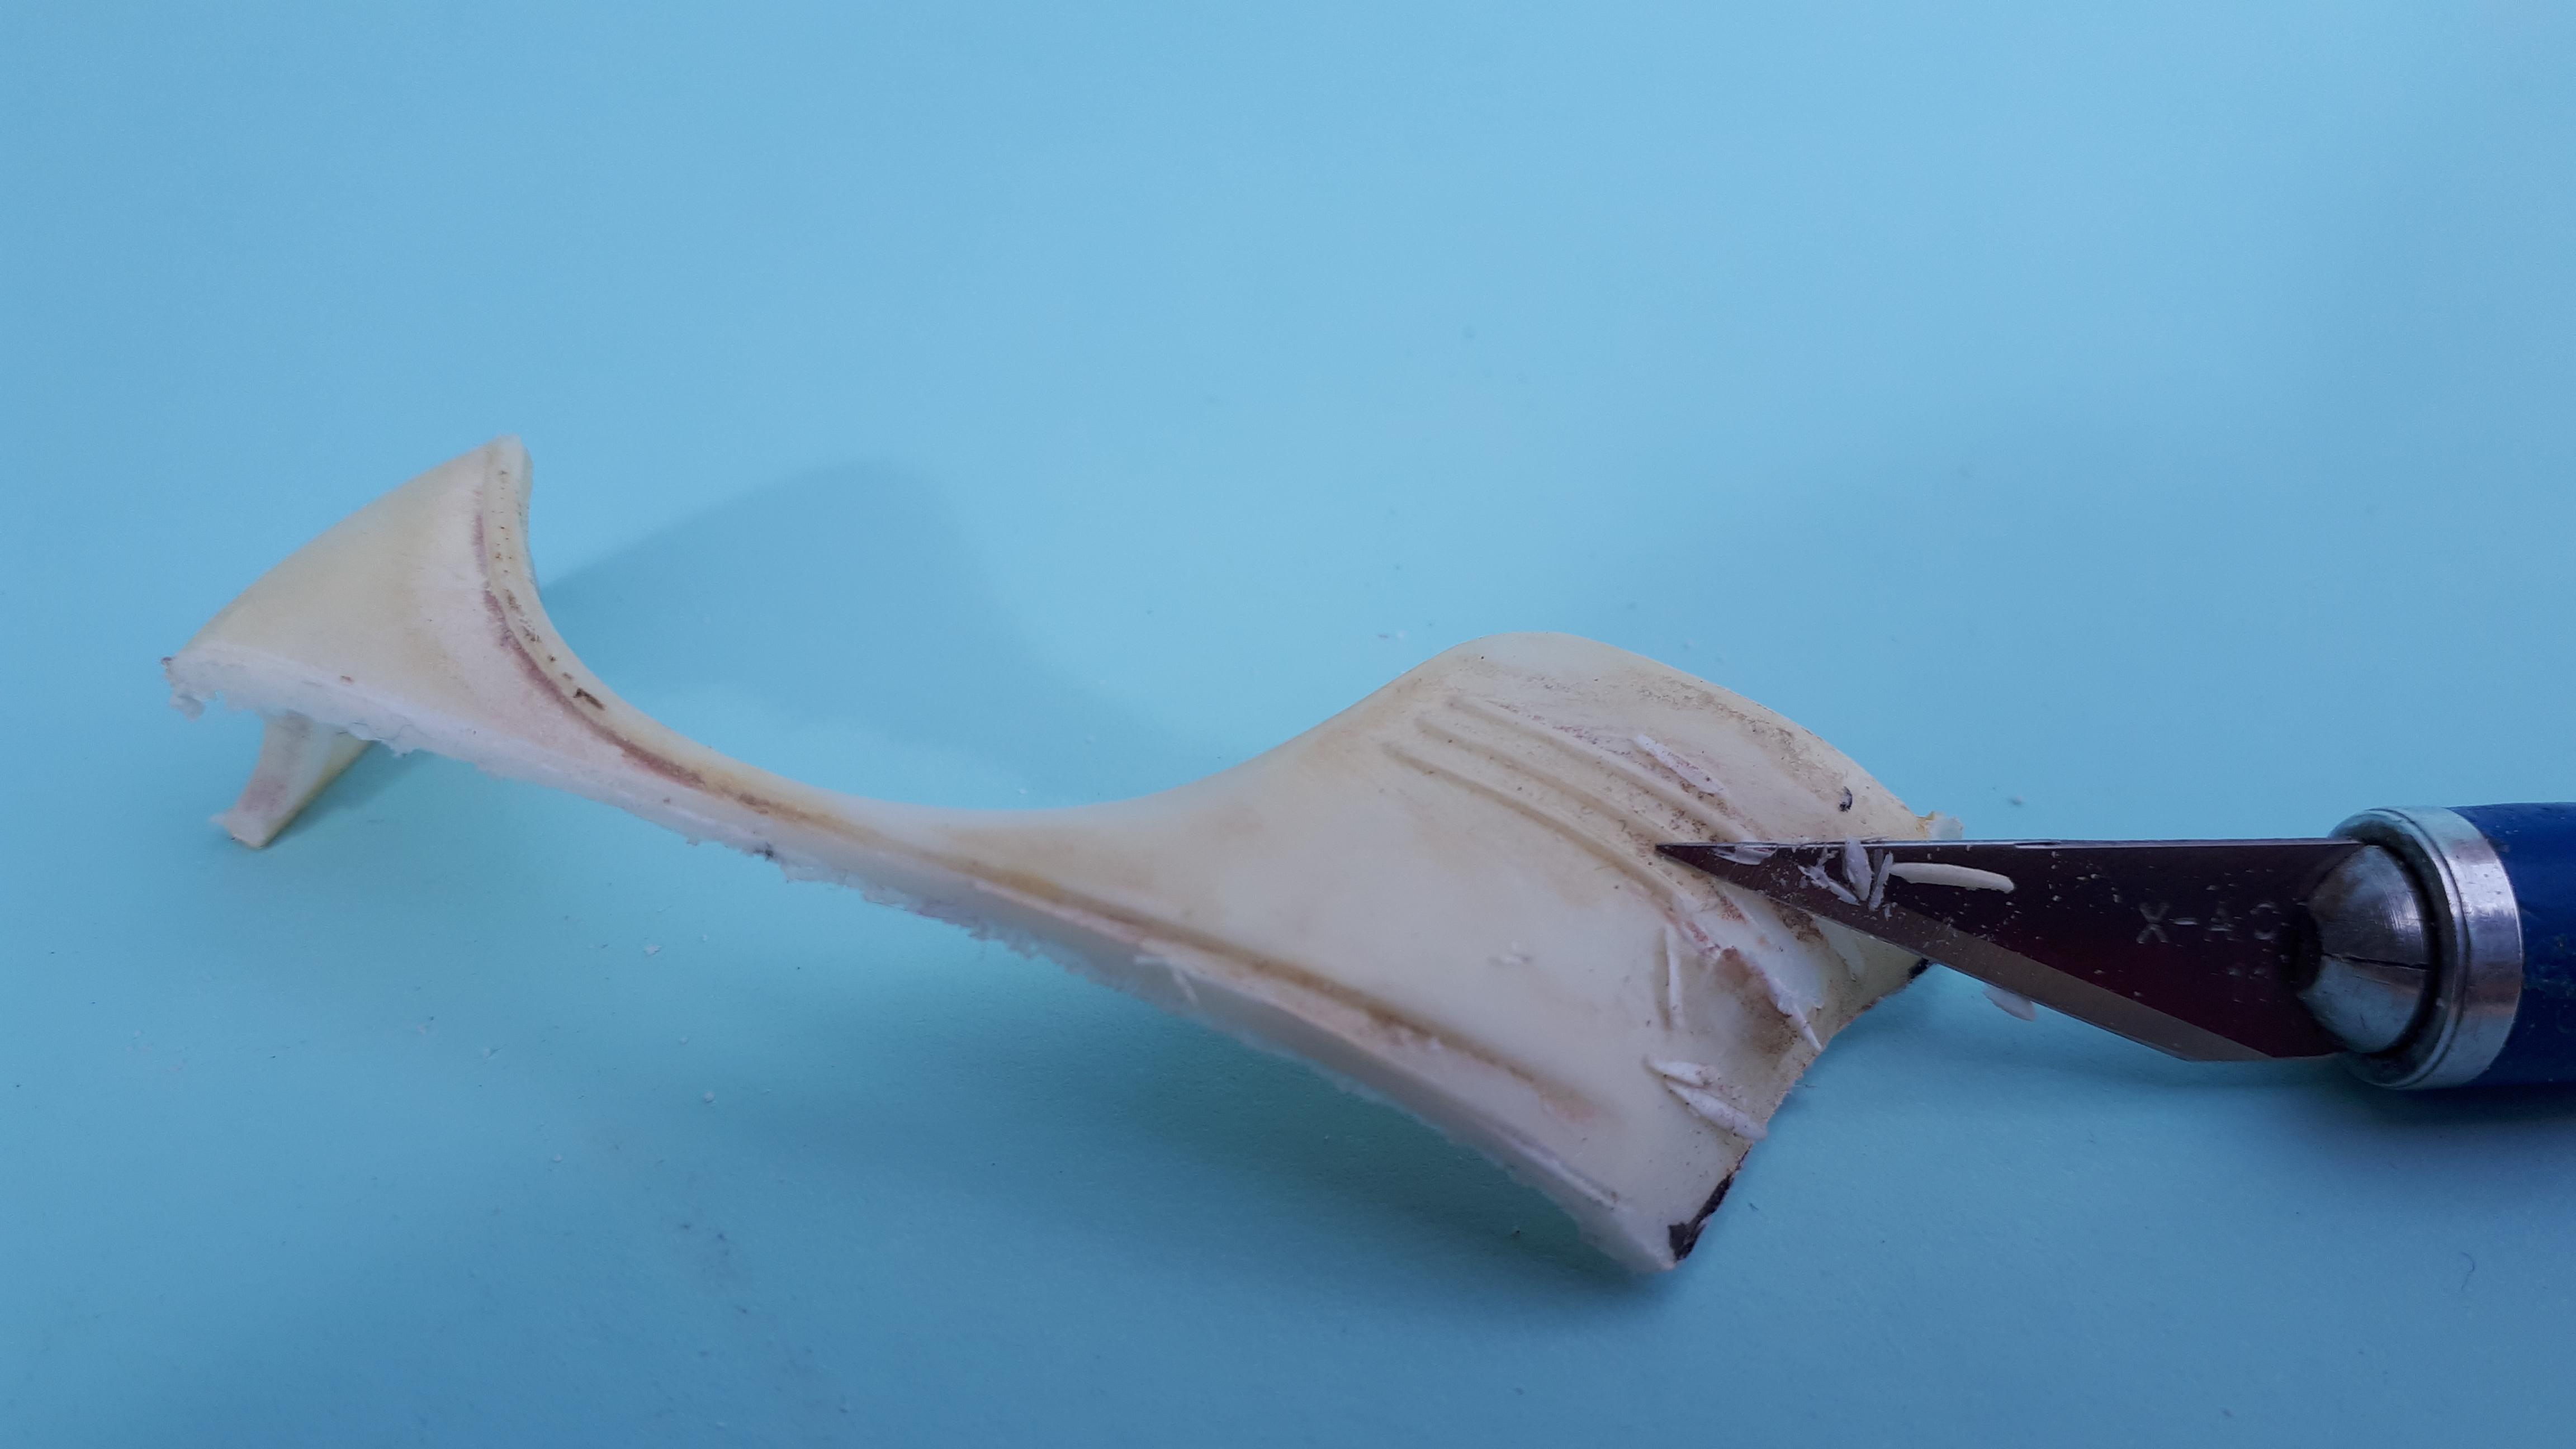
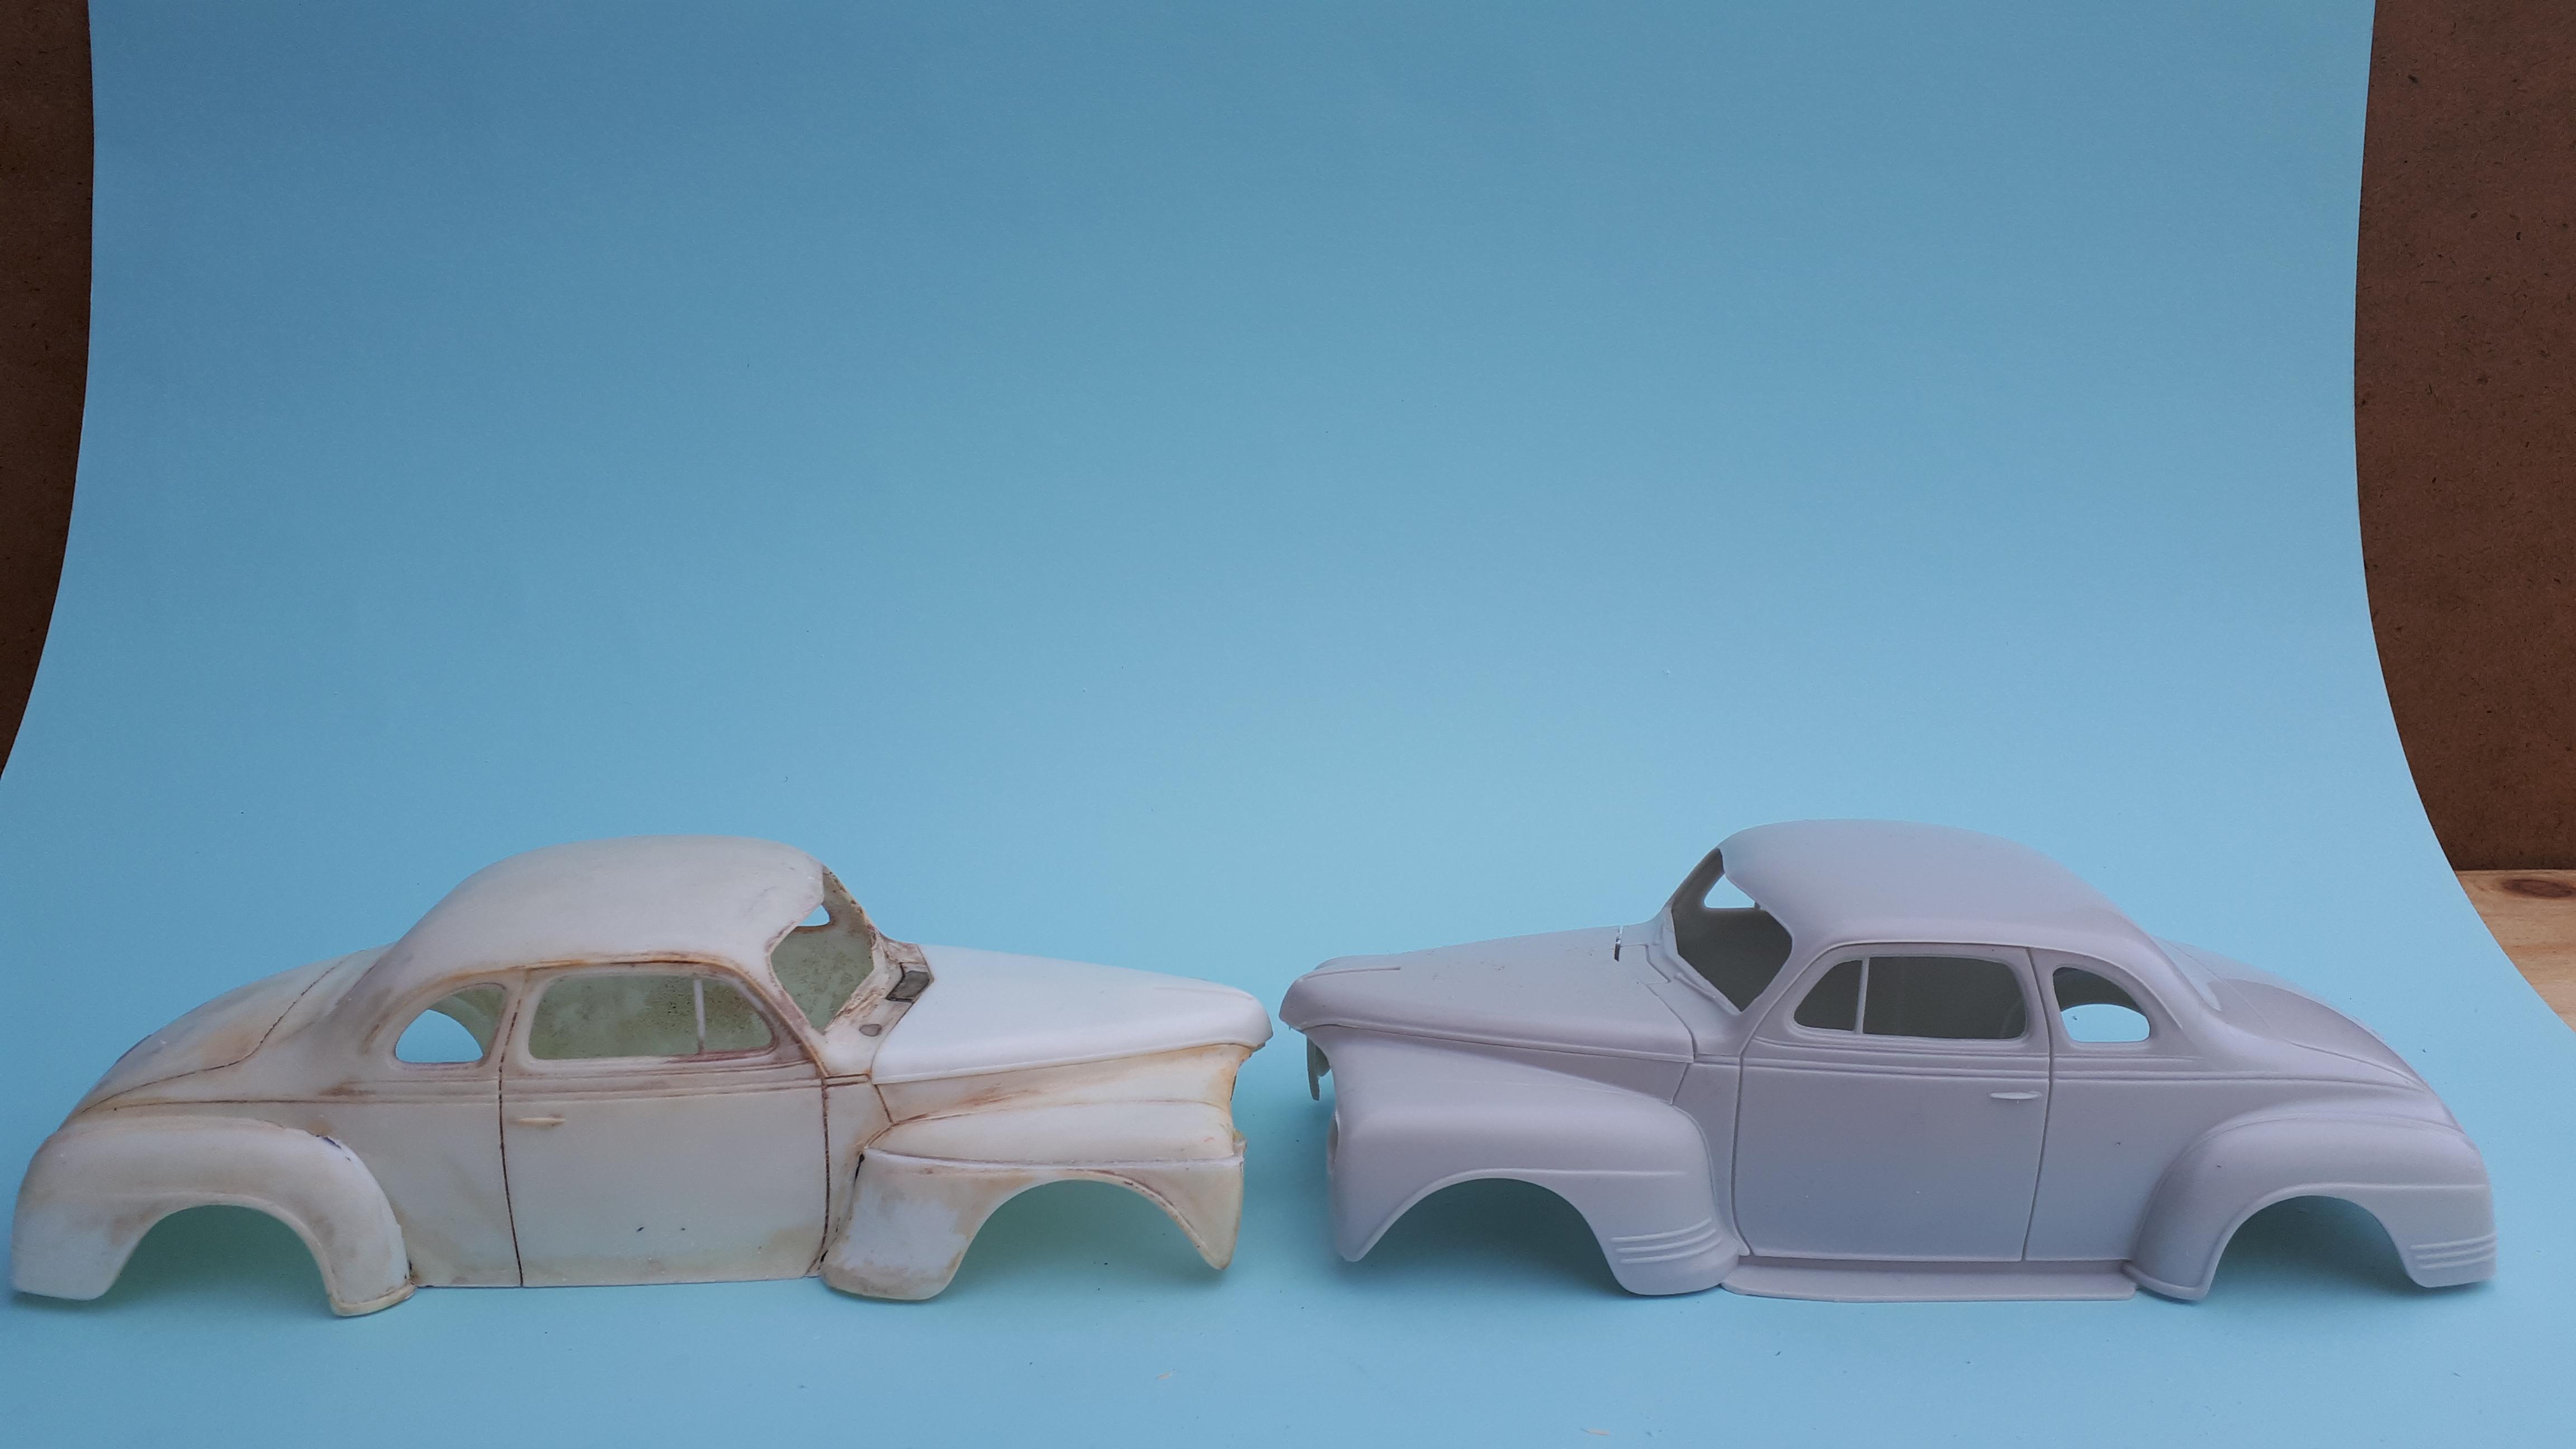
As my ideas developed, I figured that if I removed the running boards so that the doors became the bottom edge of the body, like a 48 Ford, I could then move the fenders up to match. That is pretty straight forward at the rear of the car but the front has a hood design that does not lend itself to having the engine bay messed with. Instead, I sectioned the front fenders so that the bottom edge of the fender was level with the bottom of the door. While the fenders were off the car, I carved and sanded the triple swage lines off the fenders, again to lighten things up. I used the piece removed from the front fender to reinforce the seam when I glued the pieces back together. The last two photos give you some idea of how dramatically this work has affected the profile of the car.
-
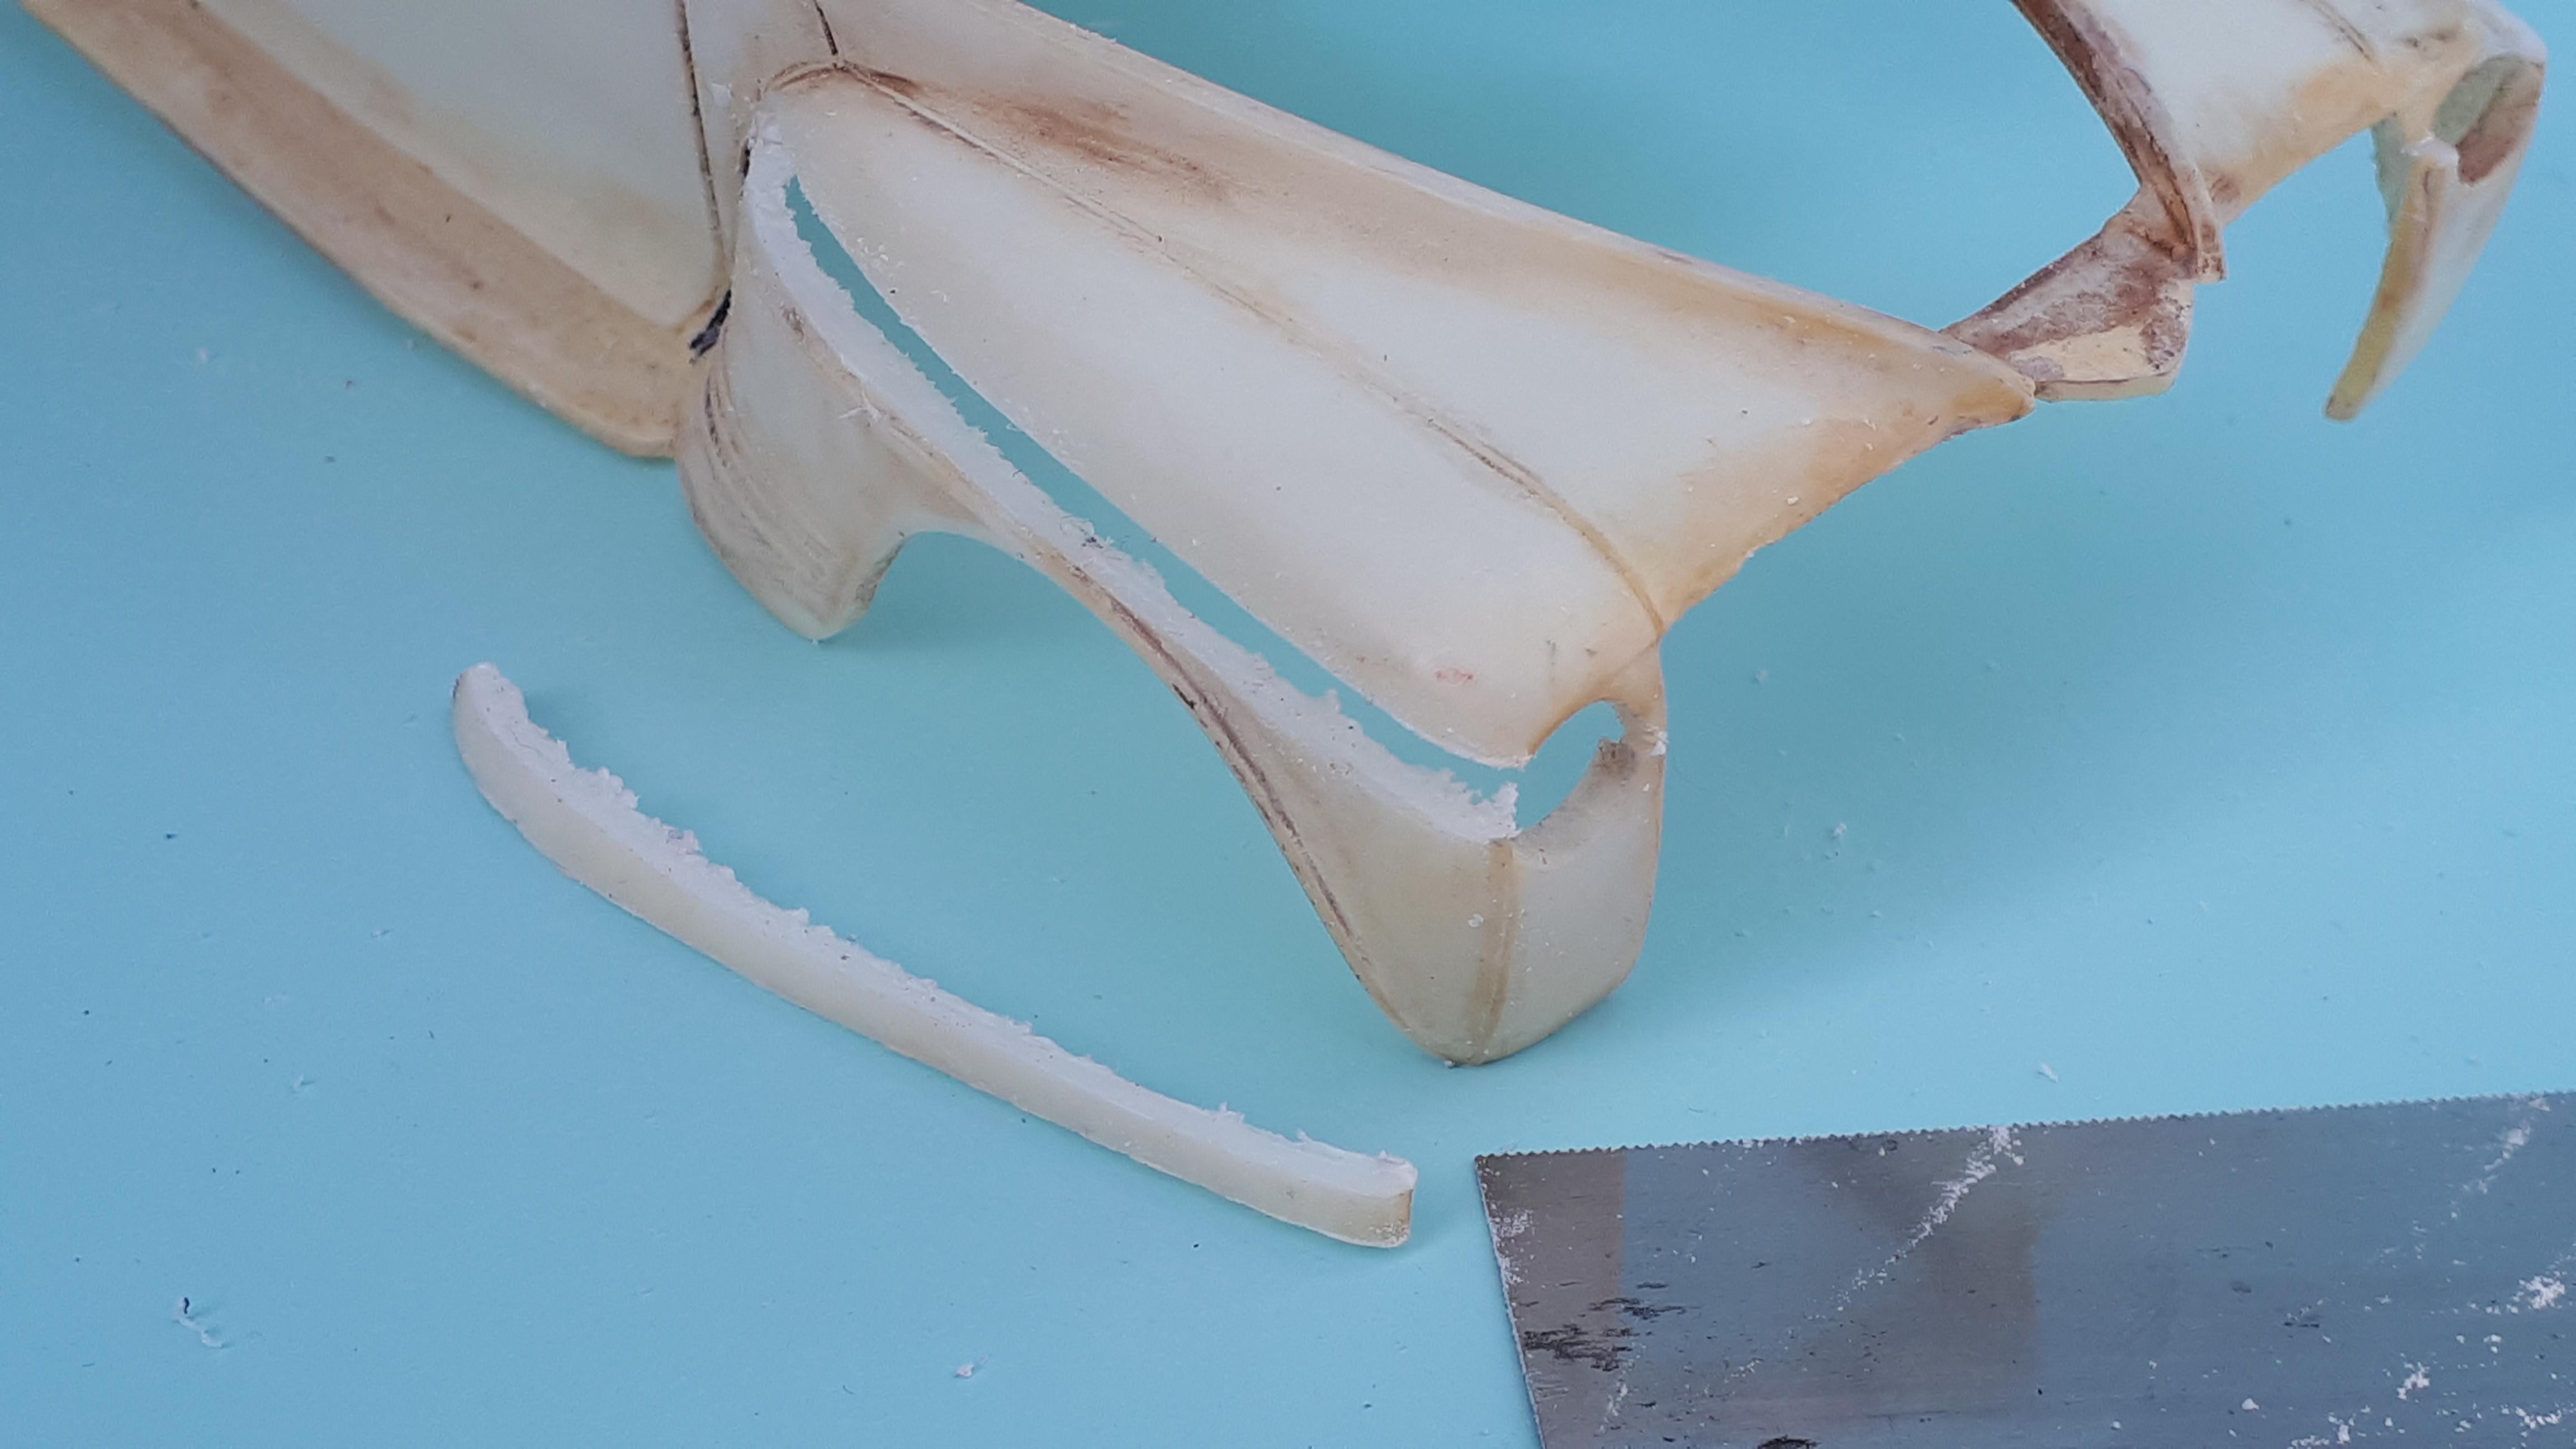
Hi everyone, seeing all the posts about 41 Plymouths made me decide to post one I completed recently. I bought this one back around 1980 and did my second ever Testors metallic spay job, which was a disaster! I then used caustic soda to do my first ever paint stripping exercise which was only partly successful so I gave it up. I have bought and started another two versions since but decided to have a look at the 40 plus year old mess and see if I could save it. The back story is that a kid in the fifties wanted to have a cool slammed 40 or 48 Ford coupe like all the cool kids but alas, his Dad owned the Plymouth dealership and that was never going to happen! On the plus side, that dealership did have a panel shop and some old school auto body men who had been with his Dad since before he was born. The trick was, how to create a cool custom out of a boring old Plymouth coupe? So here's the body I attacked. Forty years of grime and paint residue, damaged rain gutters, yep, it's not pretty so I won't cry any tears when I get the saw out! To my eye, 41 Plymouths are very heavy through the doors and quarter panels so my plan was to see if I could somehow section it without sectioning it. Sort of. I wanted to see if I could remove some of the stodge without actually cutting the doors or roof. After all, those old boys at the dealership have seen their share of cars that were cut past the point of no return! I decided to start by removing some or all of the fenders.
-
Jim, I've really enjoyed watching how you deal with the vagaries of this kit. I have recently completed a full custom 41 Plymouth and encountered many of the issues you have - plus I cut the daylights out of it and created some of my own issues. I have plans to build another two, a woody and a convertible so eveything in your post is going to come in very handy! Cheers Alan
-
Has anyone in Australia received their issue 222? Its March tomorrow and still no sign of my issue in Western Australia. I love the magazine but the postal authorities have a lot to answer for, not that they ever will! Cheers Alan
-
As a dyed in the wool hot rodder in both 1:1 and 1:24th scale, my favourite hot rod kit of all time is the 1932 Ford roadster produced by Monogram, starting with Little Deuce way back in 1962. In total I own 14 of them, eleven built and on display and another three to go including two channelled cars. Last year I started collecting parts and modifying a recent white issue (not sure of the date) to become a clone of the Son of Ford issue. I have had at least four, possibly five Son of Ford issues but never built it out of the box. I thought it would be nice to bring back the memory of the first hot rod kit in 1/24th or 25th that I ever bought with my own money. I was well underway, with the body painted, the engine mounts modified to suit the earlier Pontiac engine and everything looking good. An old friend Allen, a very talented model builder who has diverged into large scale plastic and diecast models, 1/18th or larger, dropped by one day and I was telling him of my renewed interest in old Monogram models. He replied that he still had a few Early Iron series kits kicking around, and also a 32 roadster but it was orange and had a funny name!!!! Are you kidding me? He said it was of no use to him and yes, it was a clean unpainted buildup of Son of Ford. He wanted to give it to me for free but I insisted on trading him for a diecast 32 3 window coupe that was far more useful to him than me. That got me to thinking about the direction to take with my clone build. I decided to build it as if Tom Daniel had been given freer rein by Monogram to update the kit back in 1970, keeping it as close to the era as possible. To wit, I swapped out the dropped beam axle for the straight tube axle from a Boothill Express. While up the front I also used some skinny AMT tyres instead of the very blocky monogram items. At the rear I swapped the rear axle for a 57 Chevy unit with coil over shocks and the ladder bars from, I think, the Garbage Truck. I couldn't bring myself to cut the mint windscreen frame that I had for the model so I cut and trimmed two AMT Deuce windscreen frames that are not very nice in stock form so no loss, LOL! The Mustang taillights are typical of the era even if they are a bit funky by today's standards. A parachute on a simple aluminium mount finishes it off. And, naturally, right hand drive! Shortly after finishing this model I spotted a great clone of :Little Deuce built by Craig Stanfield on the Scale Survivors Facebook page. I was in love! I have a survivor Little Deuce in red that I bought in the USA back in 1992 but here was a chance to build the "other" colour. I used the 1985 version with the yellow plastic body combined with a white interior from the most recent version. Wheels and tyres are from a Monogram Orange Hauler. Spare tyre mount is trimmed from an AMT Deuce and the Pontiac taillights are from a Revell 32 5W. The pleated firewall is from a Son of Ford. The front and rear ends and exhaust ( with filled in mufflers) are in Alclad chrome and the only other paint is the red engine block and interior inserts. I didn't have a spare custom Little Deuce grille but I never liked it a lot so was happy to go with the stock Deuce grille. The yellow plastic is polished out with Meguiars Scratch - X and I reckon it looks as good as paint! Cheers Alan
-
Thanks everyone, glad you liked it as much as I did! I've always had a soft spot for race teams of any sort so this one ticked a lot of boxes for me. Cheers Alan
-
Surely if a picture says a thousand words, a 3D scene must say a million? This is a sensational diorama in any scale but when you realise it is only 1/43rd scale, it is tremendous! Cheers Alan
-
2024 24 hour build - Ridge Runner Pinto
Alan Barton replied to Nacho Z's topic in Other Racing: Road Racing, Salt Flat Racers
That's a great looking dirt tracker. I have built about six of these modifieds and I think it was a great choice for a 24 hour build. Cheers Alan -
Some of my previous builds - kensar
Alan Barton replied to kensar's topic in Other Racing: Road Racing, Salt Flat Racers
Superb craftsmanship! Cheers Alan -
Simply beautiful I have to build one now! Cheers Alan
-
Neat and effective, just like the real car! Cheers Alan
-
Living proof that human beings can do anything! What a beautiful model, superlatives are inadequate! Congratulations on your accomplishments. Cheers Alan
- 61 replies
-
- 1
-

-
- scratchbuilt
- brass
- (and 1 more)
-
I'm late to the party but yeah, what they said! Corvettes make great looking gassers and here is proof! Cheers Alan
-
What a neat and very believable gasser! I love the idea of gluing small strips of plastic on the edge of the flip front to help guide it into position. I have an unpainted built-up in my collection that I plan to build with a Badman theme. I'm definitely using your idea on that one! Cheers Alan
-
Isn't it strange when a box stock build can be as challenging as a full custom job? You've done a great job on this despite the detours you had to make to deal with the stripes. I feel your pain - it must be something to do with wheelstanders! Years ago I built the re-issued Hemi Under Glass. When sliding the Hemi Under Glass decals onto the body, they froze exactly where they sat on the body - no amount of water or decal solutions could get them to move! Never had it happen before or since but, far out, what a demoralising event! The important thing is, you have a completed model of an iconic car on your shelf. You didn't let it beat you. I hadn't seen one before and after seeing how well yours came out, I need to look for one! Cheers Alan
-
Since retiring I have made a point of trying to finish long stalled projects rather than start new ones and progress has been solid - even though I still get a bit distracted from time to time! This is the 1989 issue ( yes, it's a 35 year old kit!) by Revell of the Tom Mongoose McEwen 1957 Chevy Funnycar. A really nice kit to assemble and for once in my life I can say I built a model completely box stock - except for colour scheme of course! While the frame and running gear on this kit were pretty much new parts, unfortuantely the original builder had been a little hamfisted with the body. The biggest issues were that the three pieces of glass were pretty much welded to the body. There were a few gluey fingerprints to deal with as well. I got the side windows off but the windscreen was threatening to crack any minute so I had to work around it. With some careful masking I managed to hide most but not all of the damage. The original decals were flaking off the body so I used carefully cut masking tape to replicate some 57 Chevy side trim. Colour is Tamiya Clear Orange and Tamiya Clear over a silver base. It was then polished with polishing pads and Meguiars Scratch - X. I had always been a Tamiya Fine Polishing Compound guy but not anymore - Scratch-X does an amazing job of eliminating scratches and bringing out a killer gloss! Comments and criticisms welcome! Cheers Alan
-
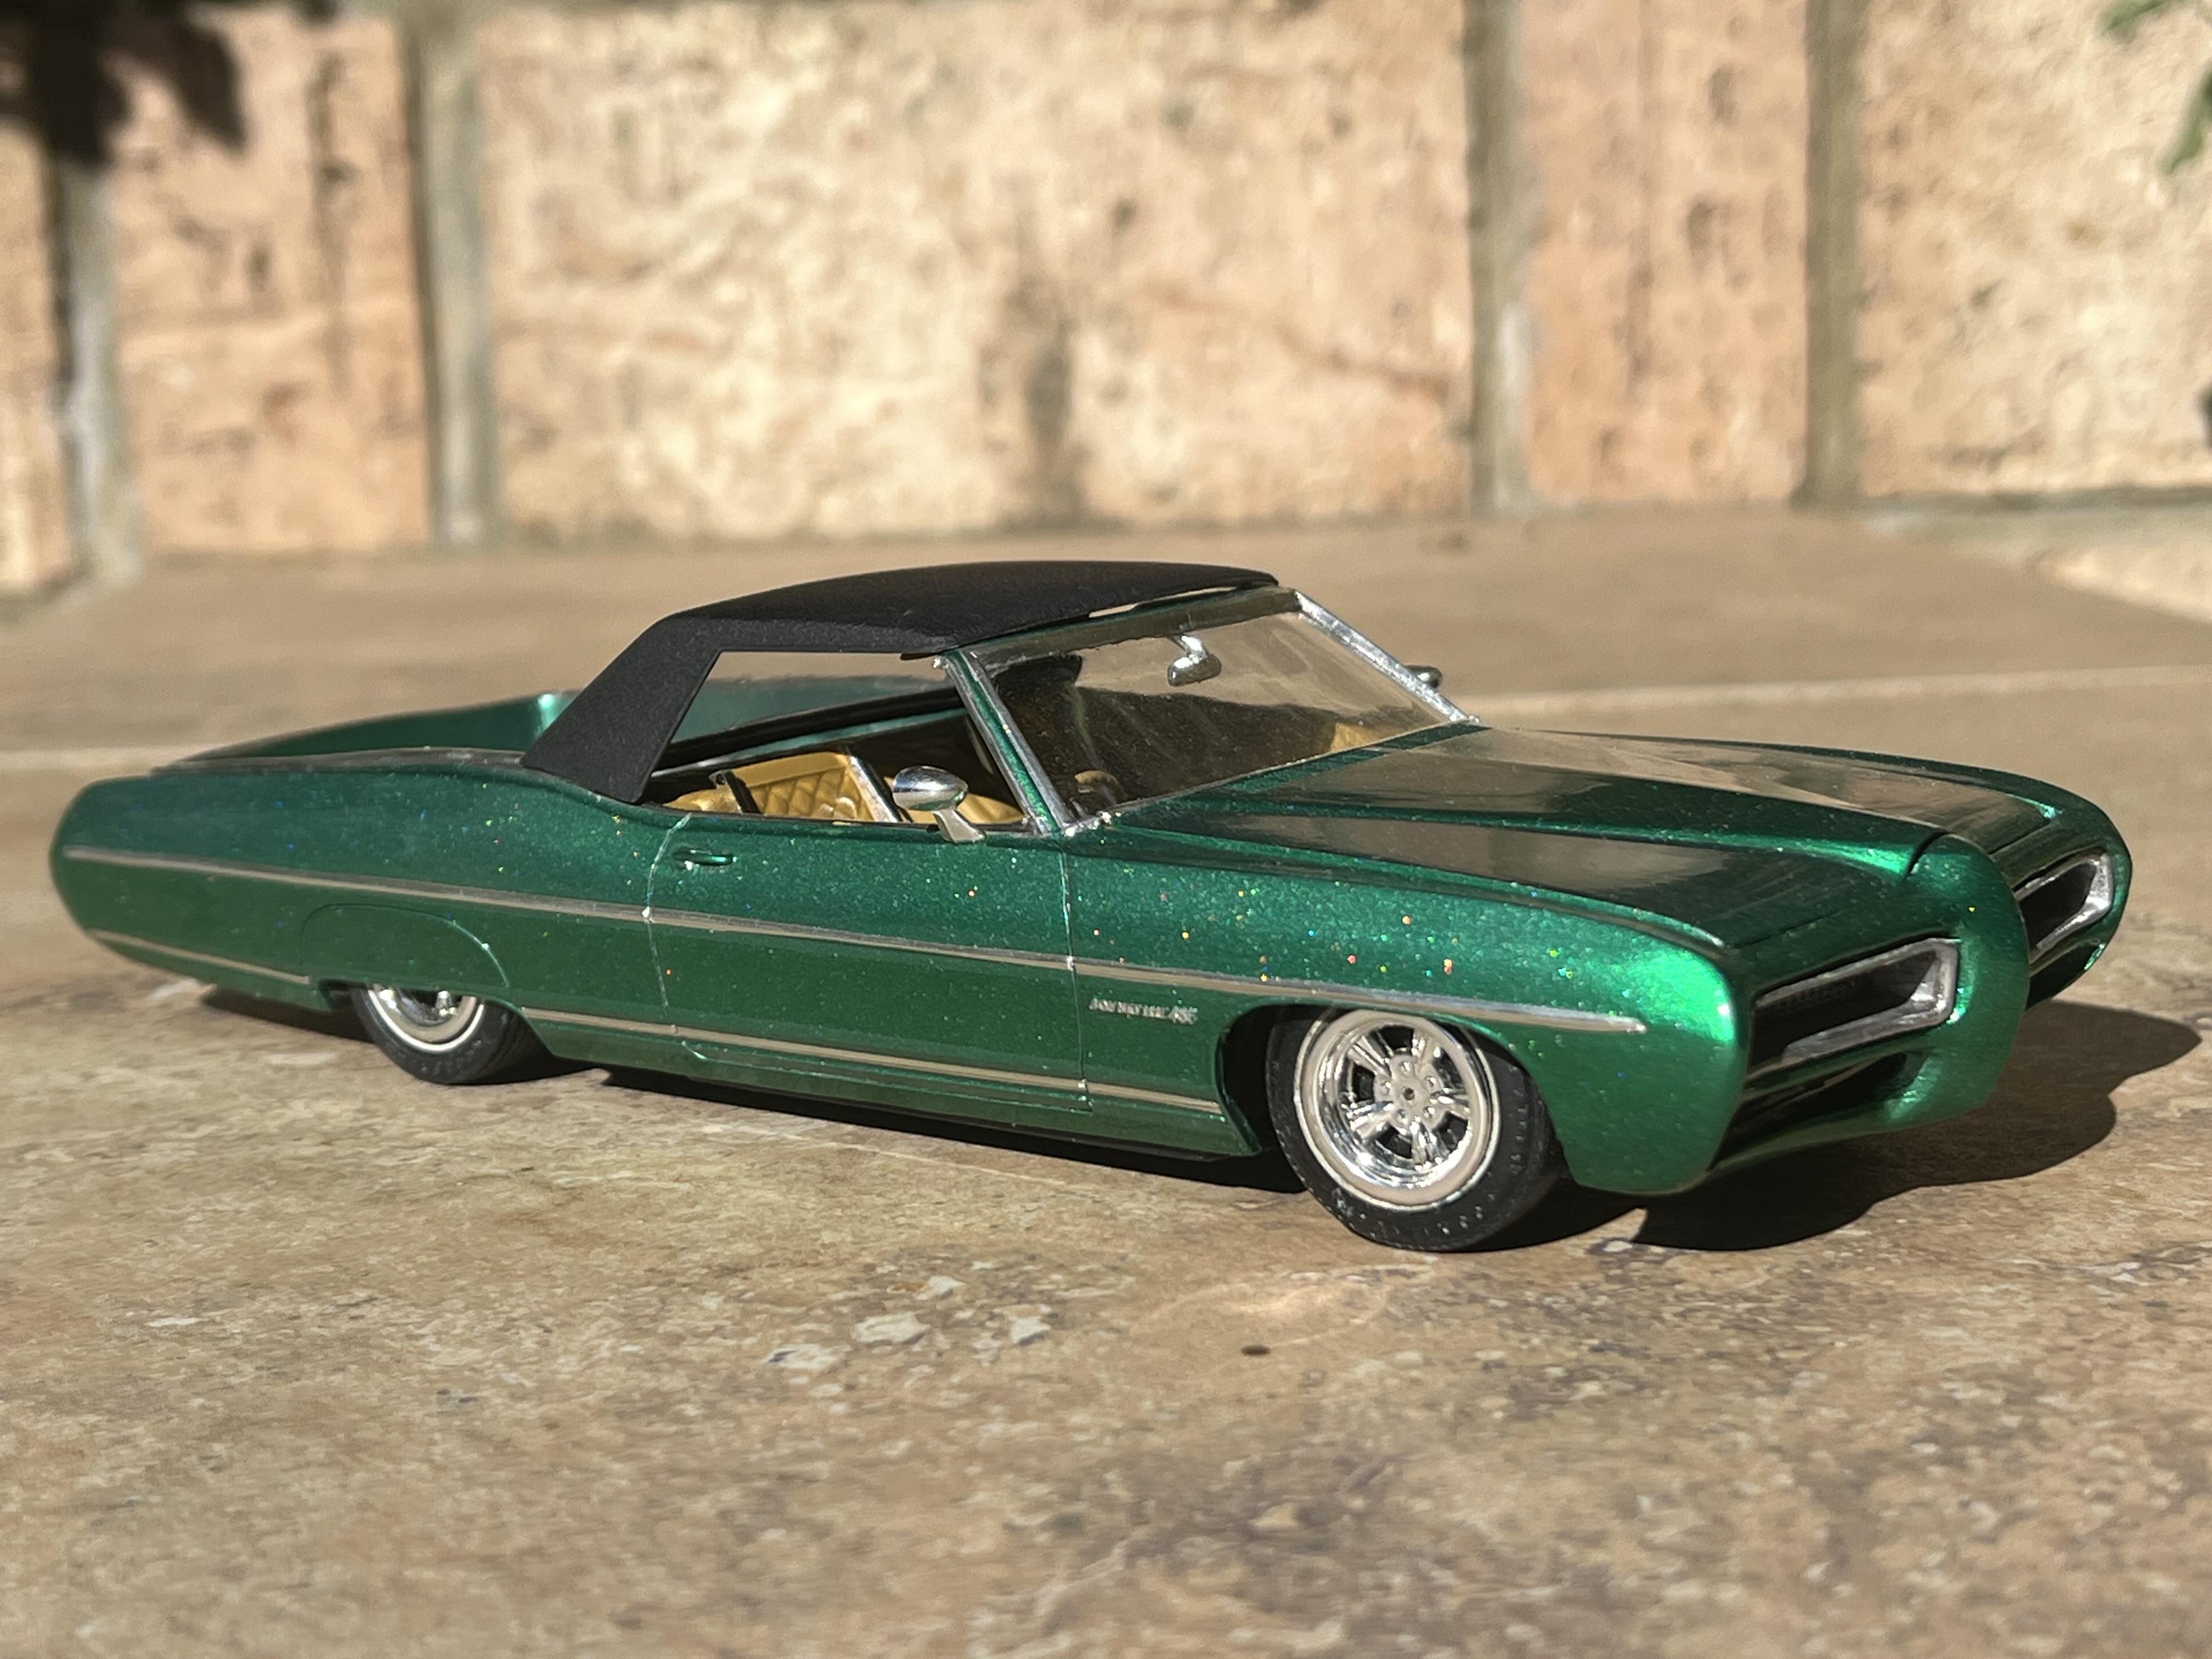
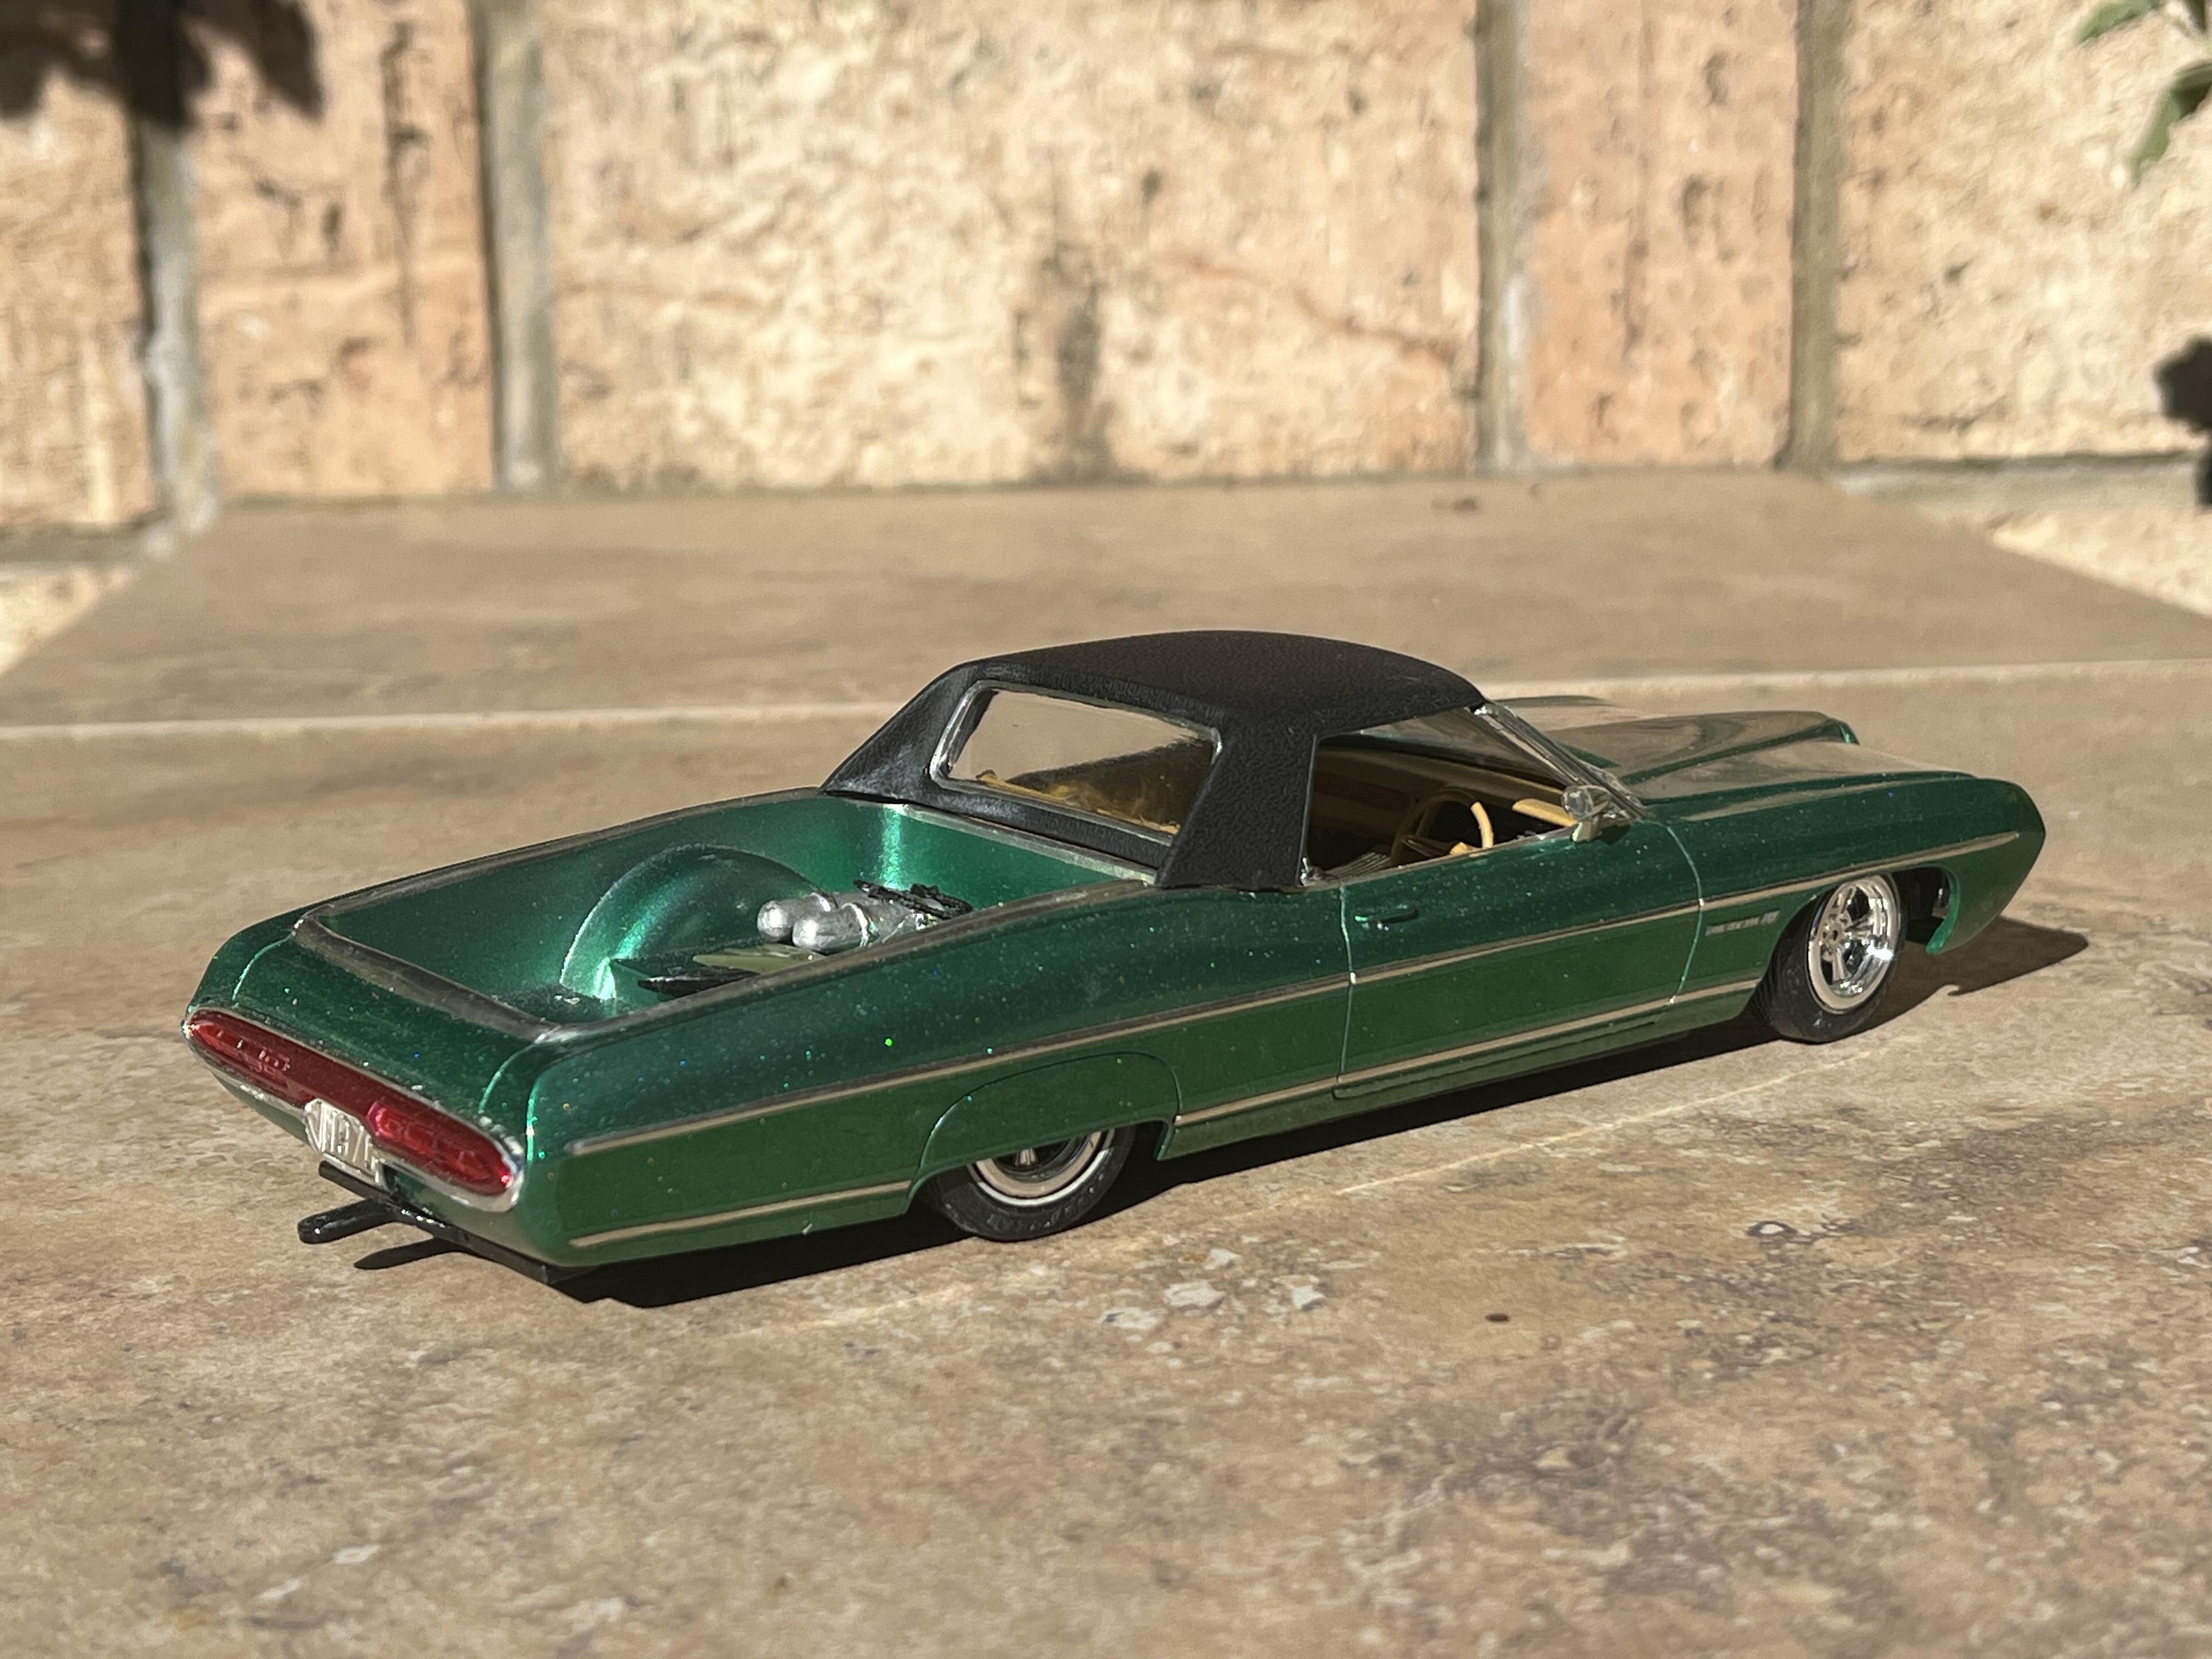
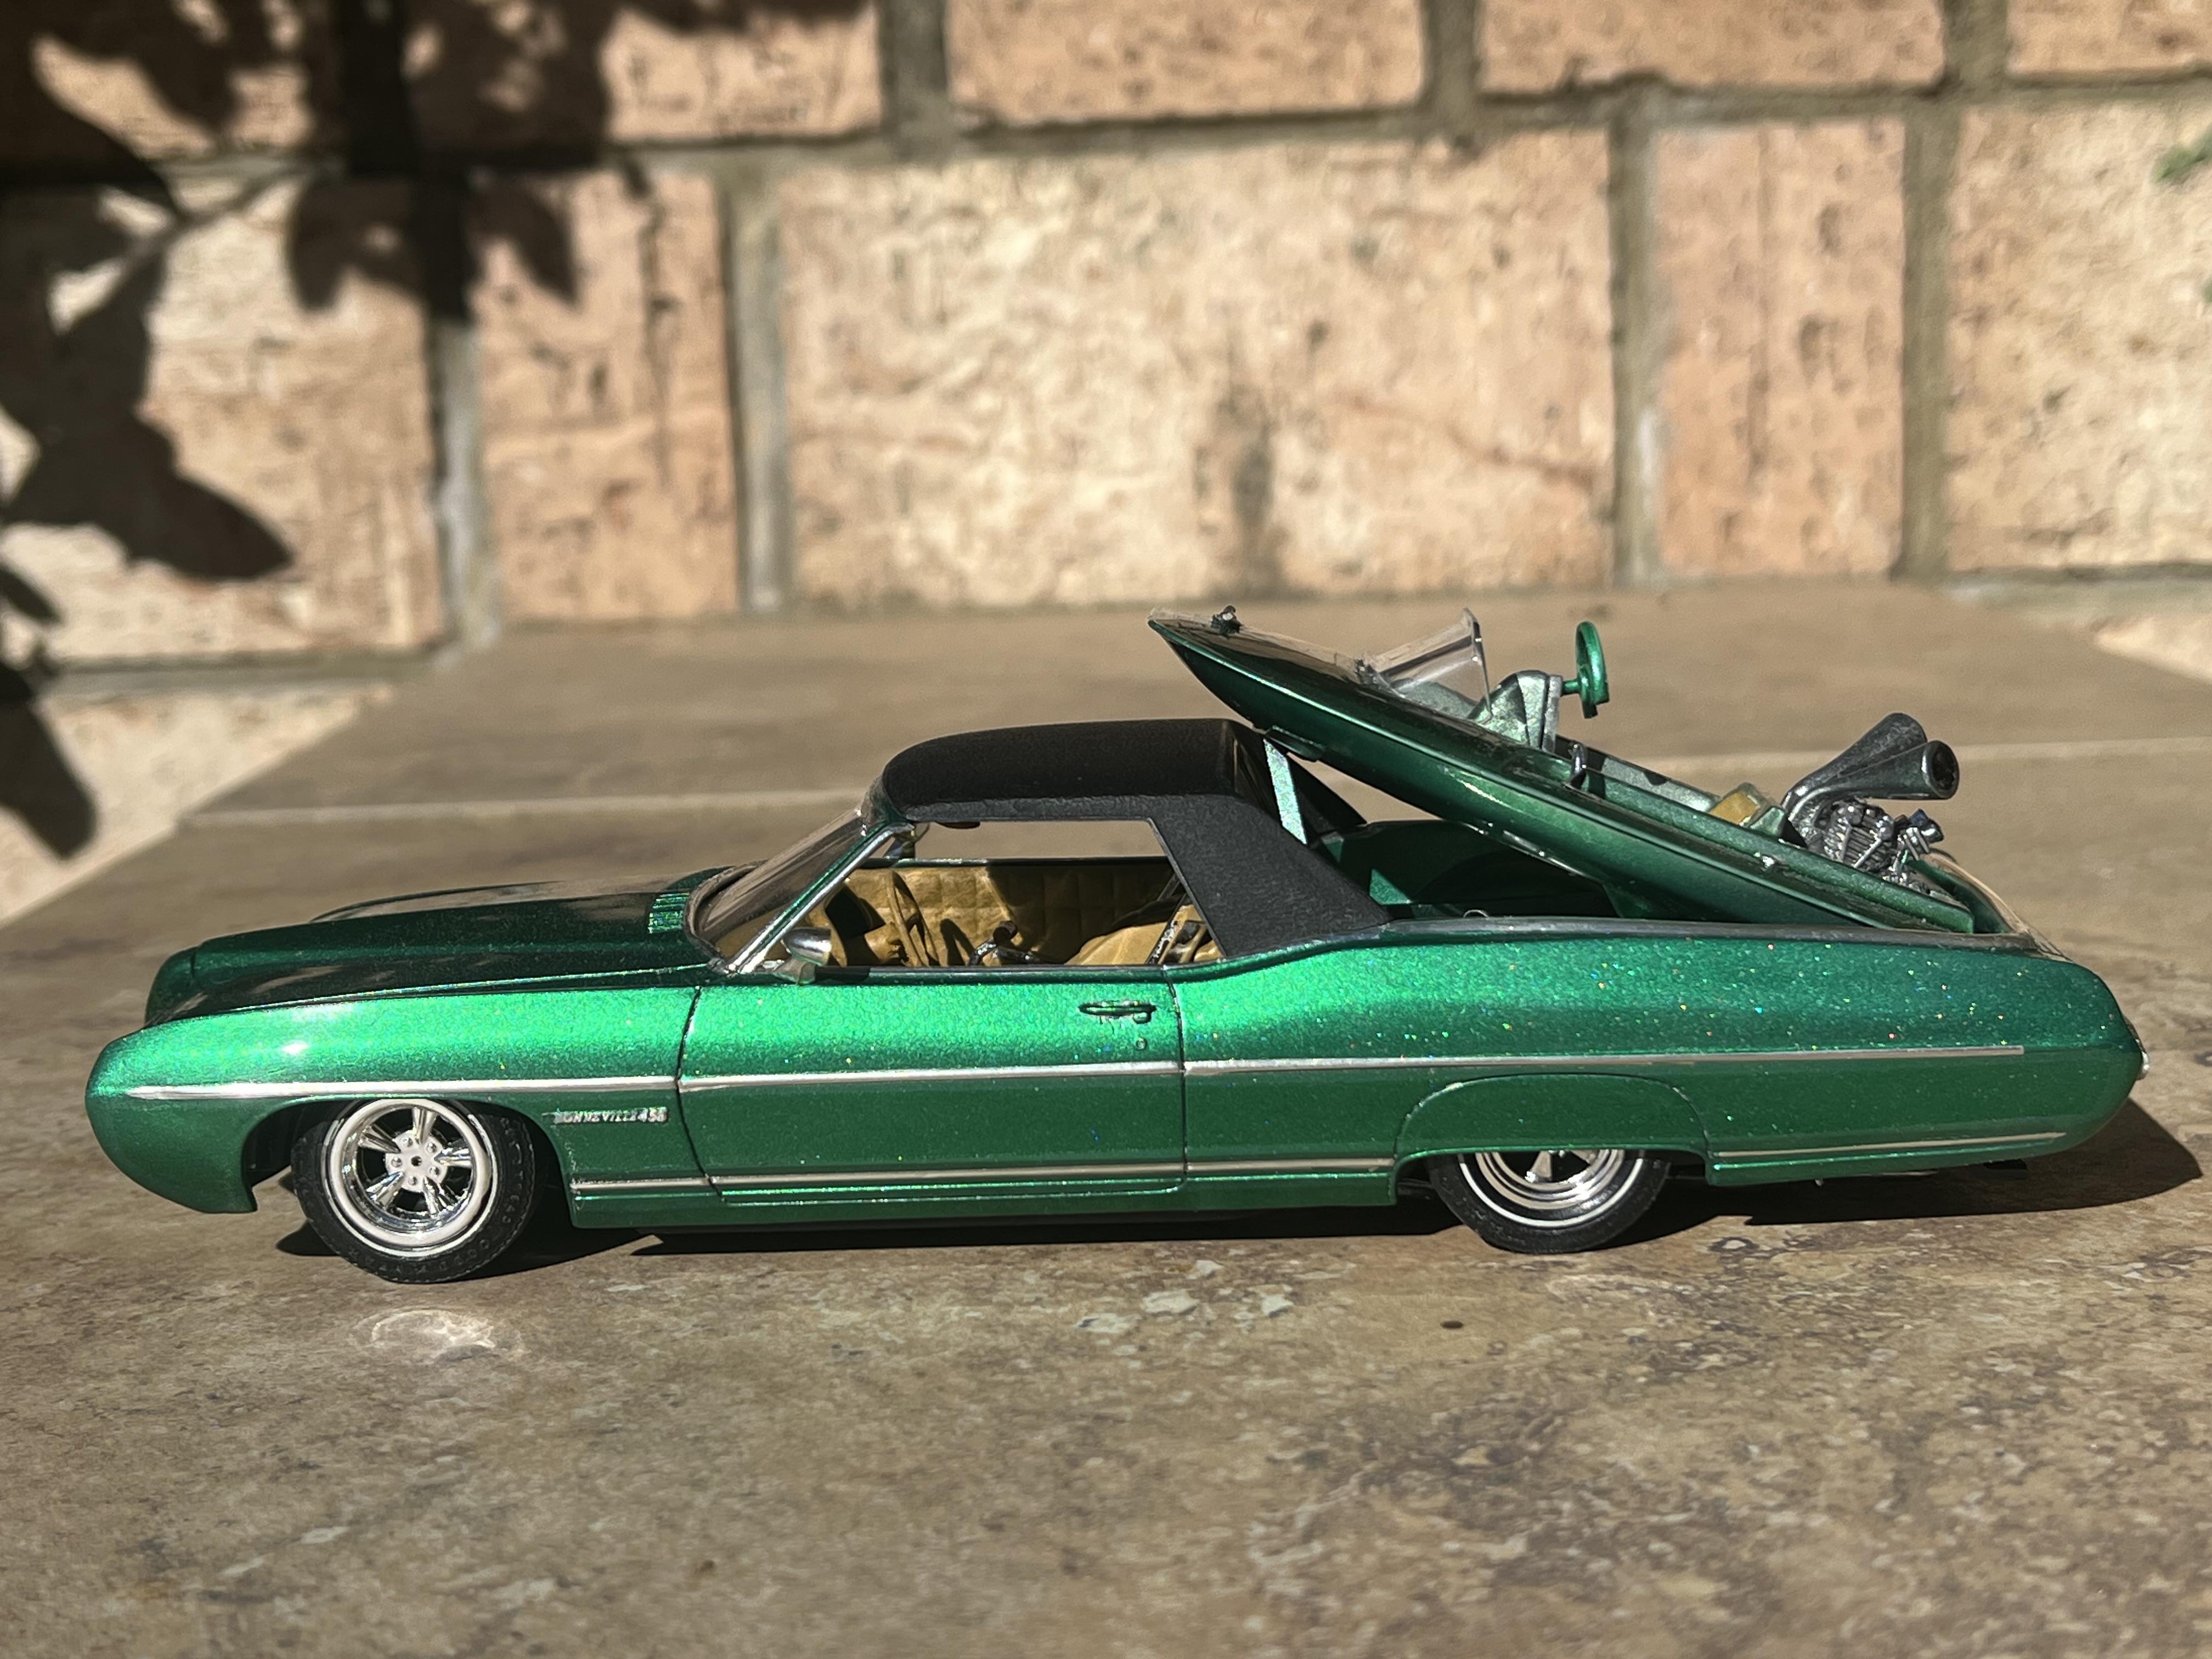
When Model King contracted the re-issue of the 1970 Pontiac Bonneville kit, I had to get one for two reasons - firstly, I love model boat kits and secondly, I had to make good the horrors I inflicted on a 1969 Bonneville kti when I was a teenager. I bought the kit while at high school and immediately built it as the El Camino option. I seem to remember painting the roof, interior and chassis but leaving the body in white plastic. It was a good looking model. Sometime .later I felt the need to customise the poor thing and there's where it all went pear shaped. I remember trying to shorten those enormous rear quarter panels but my ambition far outweighed my aptitude and sadly it died under the knife. I never throw anything out, however, so I was pleased to be able to use the dashboard, the hood and the custom front grille extensions from my 1969 disaster. In my opinion the 1970 is about the ugliest full sized Pontiac ever but it does have a nice rear end treatment. The 69 version was handicapped at the rear but quite cool and aggressive at the front. Thus I built it as a custom with a little touch of 69, 70 and a bit of Alexander Brothers style for good measure. This was one of my tougher challenged when It comes to my signature right hand drive conversion but as I still had the remains of the 69 dashboard, I used them to make the cutting and shutting on the 70 dash a bit less obvious. My grandfather owned a 69 Pontiac Parisienne back in the day so a right hand drive Pontiacs is definitely existed. THe beak at the front was constructed of flat plastic and putty to match up with the 69 hood. The rear bumper was removed from the taillight unit and moulded in as a rollpan. The entire light assembly was painted in Testors clear red to give the illusion of a one piece unit. The cargo for the pickup bed is the AMT Westcraft Go Boat that was an option in the 1964 El Camino kit. I had the two halves of the hull for over thirty years but sadly no other parts so I had to make do. The windshield is one side of the Revell Bass Boat spilt screen, the steering wheel is a heavily trimmed AMT billet item and the motor was lifted in its entirety from a weird little Hot Wheels car called Hyper Mite. It fitted like it was made for the job! The boat rests on a cradle scratch built form Evergreen. The boat on the back is the original AMT Raysom Craft speedboat , repowered by the SOHC from the Hullraiser kit, a very simple conversion. Paint is a combination of Duplicolour Silver base with Testors Candy green enamel and Tamiya metallic green acrylic lacquer, obviously not on the same model! Questions and comments welcome! Cheers Alan
-
"Outside" Pictures of a replica of: Rick Dore's "Illusion"
Alan Barton replied to John Teresi's topic in Model Cars
We are all truly privileged to be able to see this model up close and in so much detail. Thank you for sharing your beautiful work with us, John. magnificent! Cheers Alan -
At the risk of repeating what everyone else said, what a stunning example of a 36 roadster! So much to like. The hood treatment is very interesting and has given me ideas for my full sized custom 35 Phaeton - thank you!
-
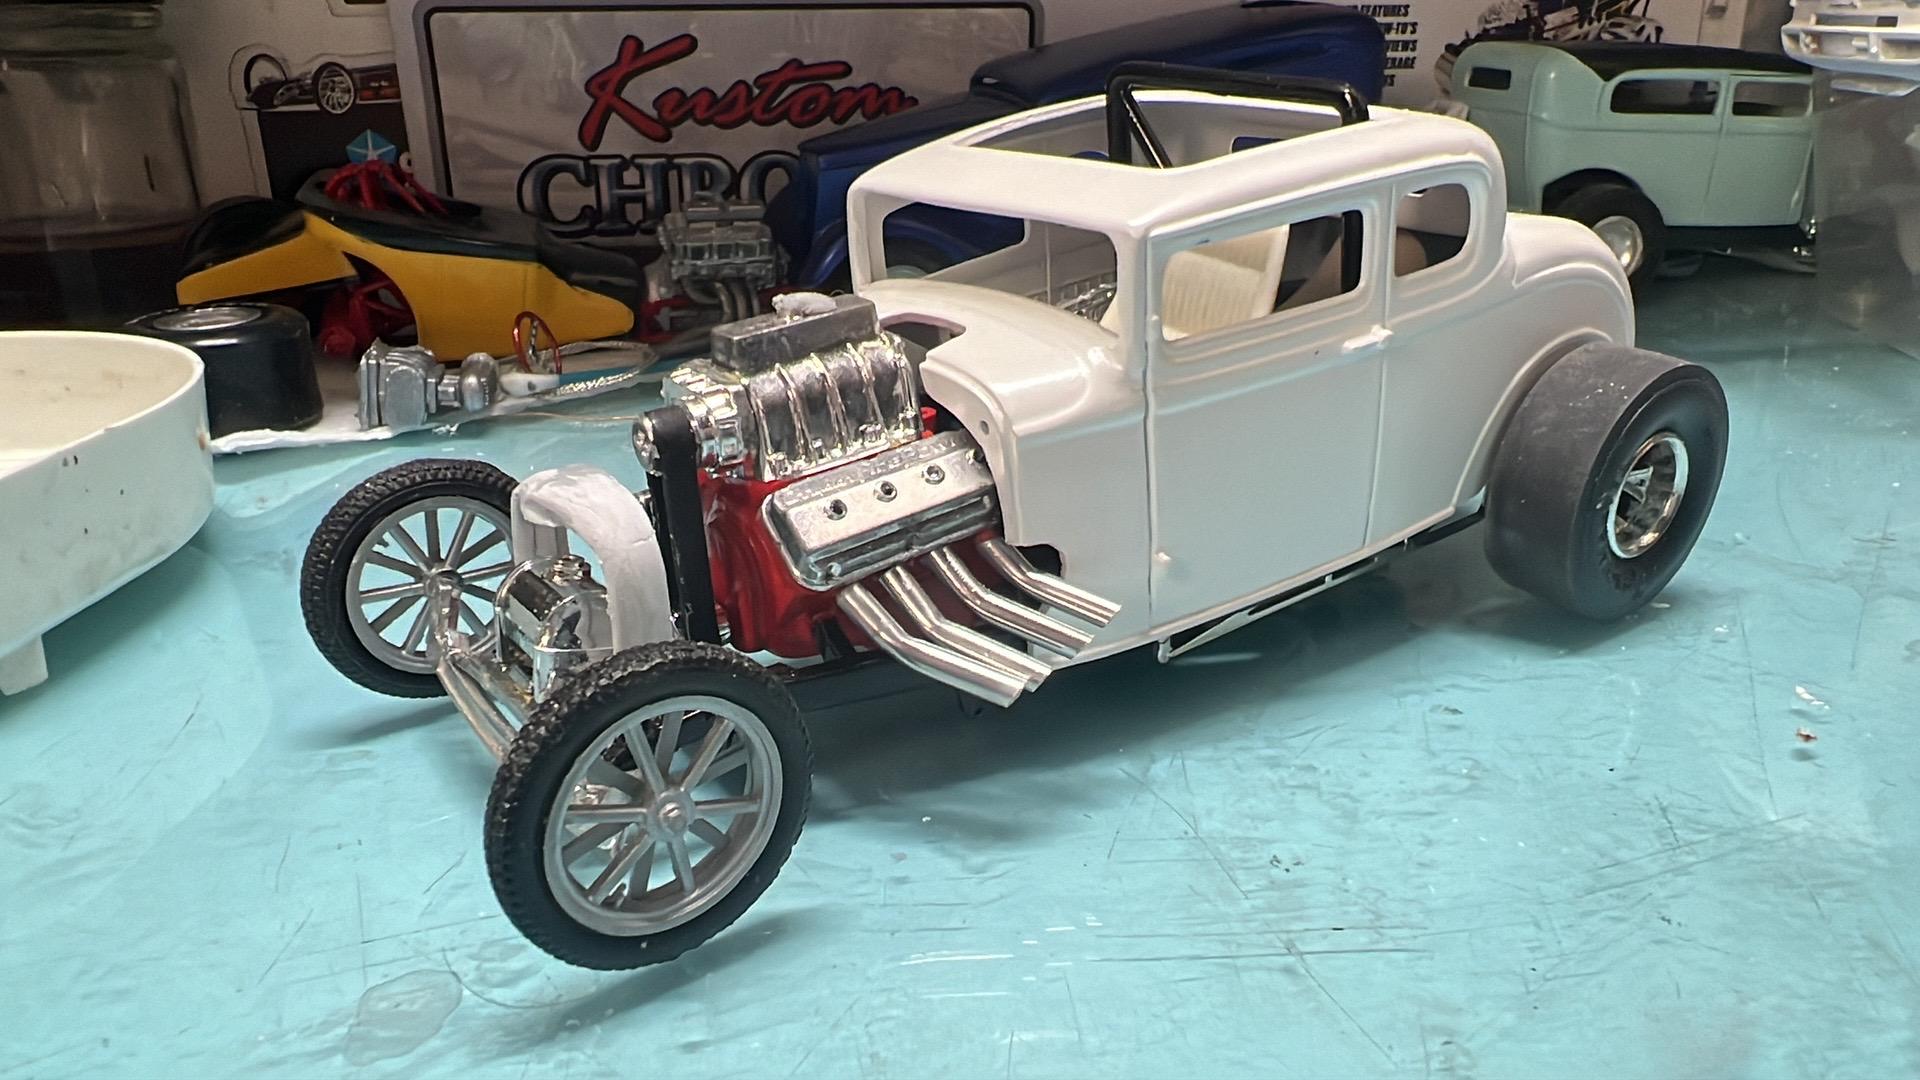
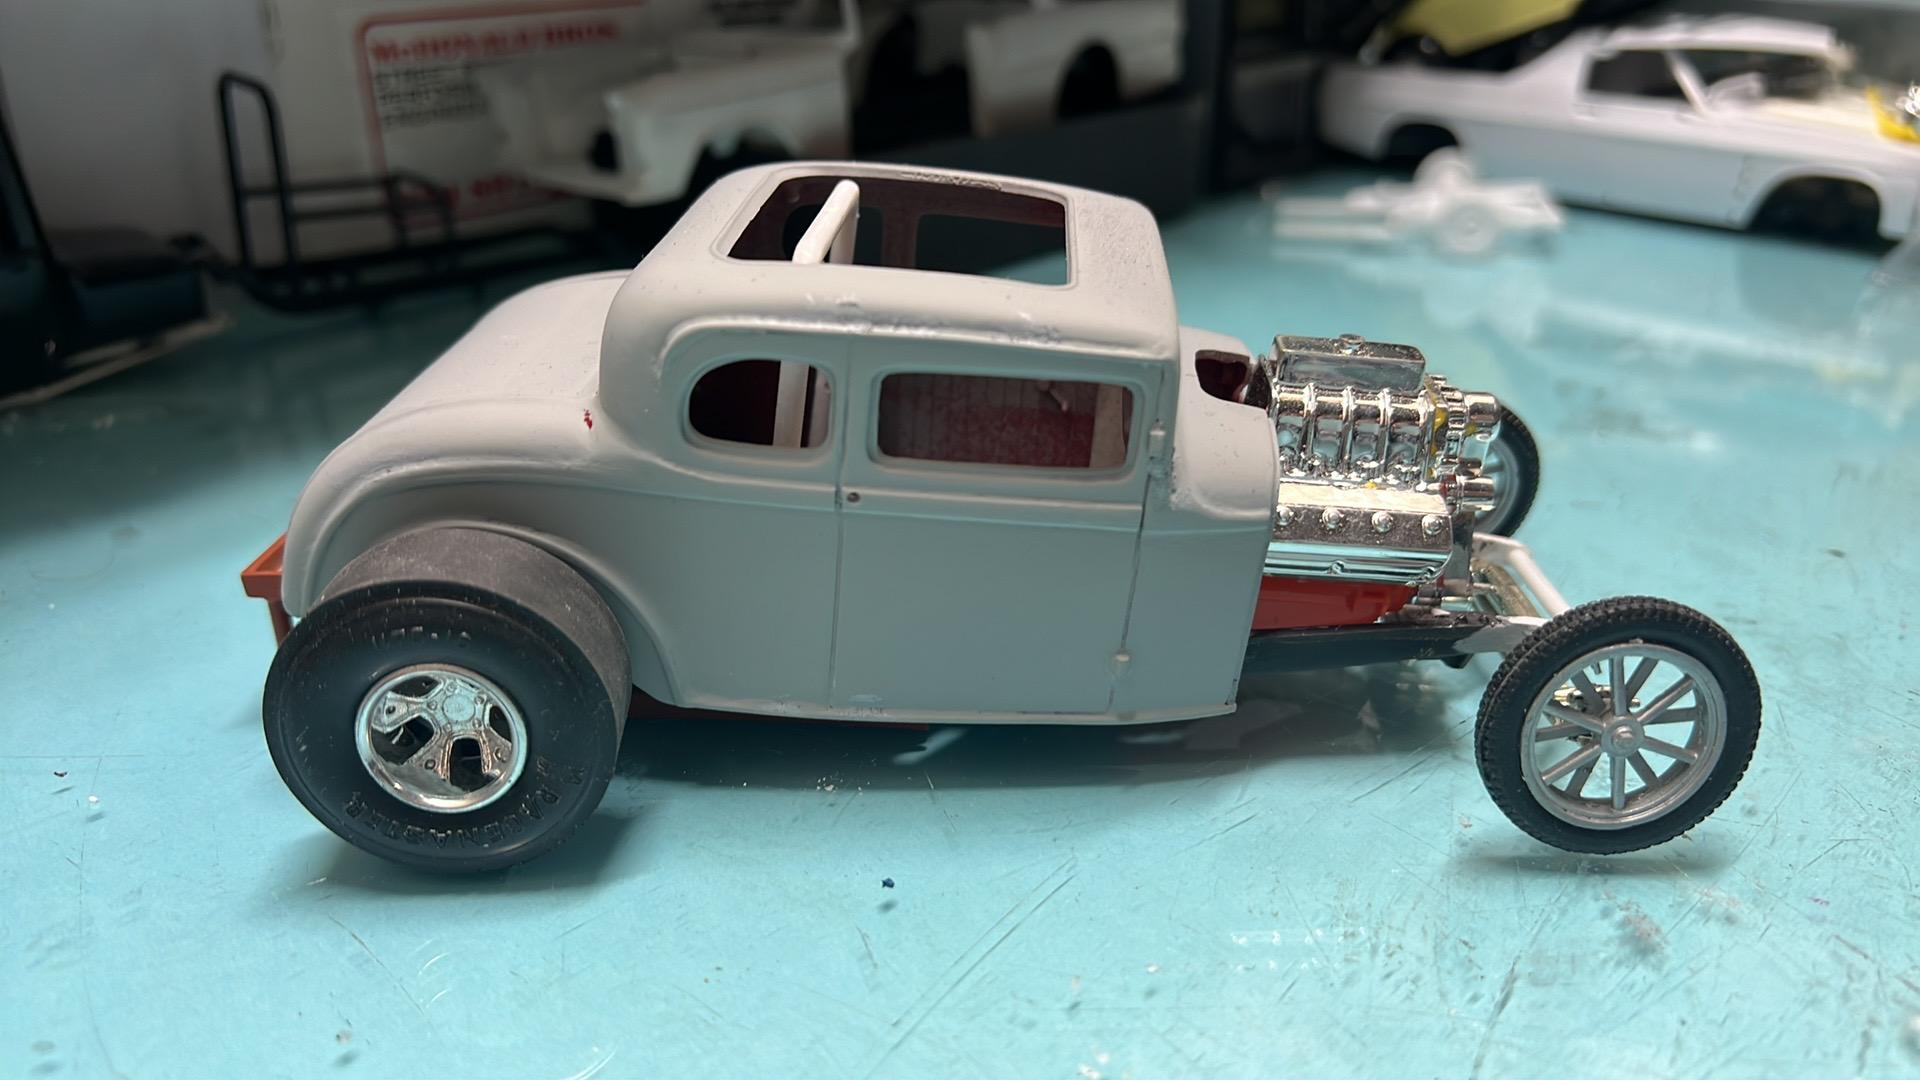
Thanks everyone, for your kind comments. I am working on multiple projects at the moment but the coupe is slowly making headway so here is a quick update. The body has been painted with Tamiya Pearl White - this will be the base coat for a panel paint scheme. I did not have a grille shell so I laminated thin plastic around a spare grille and created my own. The fuel tank is an oversized unit from the AMT 40 coupe. I have also started fabrication aluminium headers but it is quite a challenge getting them evenly spaced and at a consistent angle. Bill, your comments mean a lot to me. I have always been fascinated by the scale accuracy for which you strive. Like you, I seem to get some twisted pleasure from saving a glue bomb, even though I have a stash of new kits that probably wont get finished in my lifetime. I love bringing orphans back from the dead! Cheers Alan
-
A winter work bench of fuel altered’s
Alan Barton replied to M W Elky's topic in WIP: Drag Racing Models
That's my kind of chaos! Have built many of those Fiats and have a few more planned. You get a lovely finish on your paintjobs! Cheers Alan -
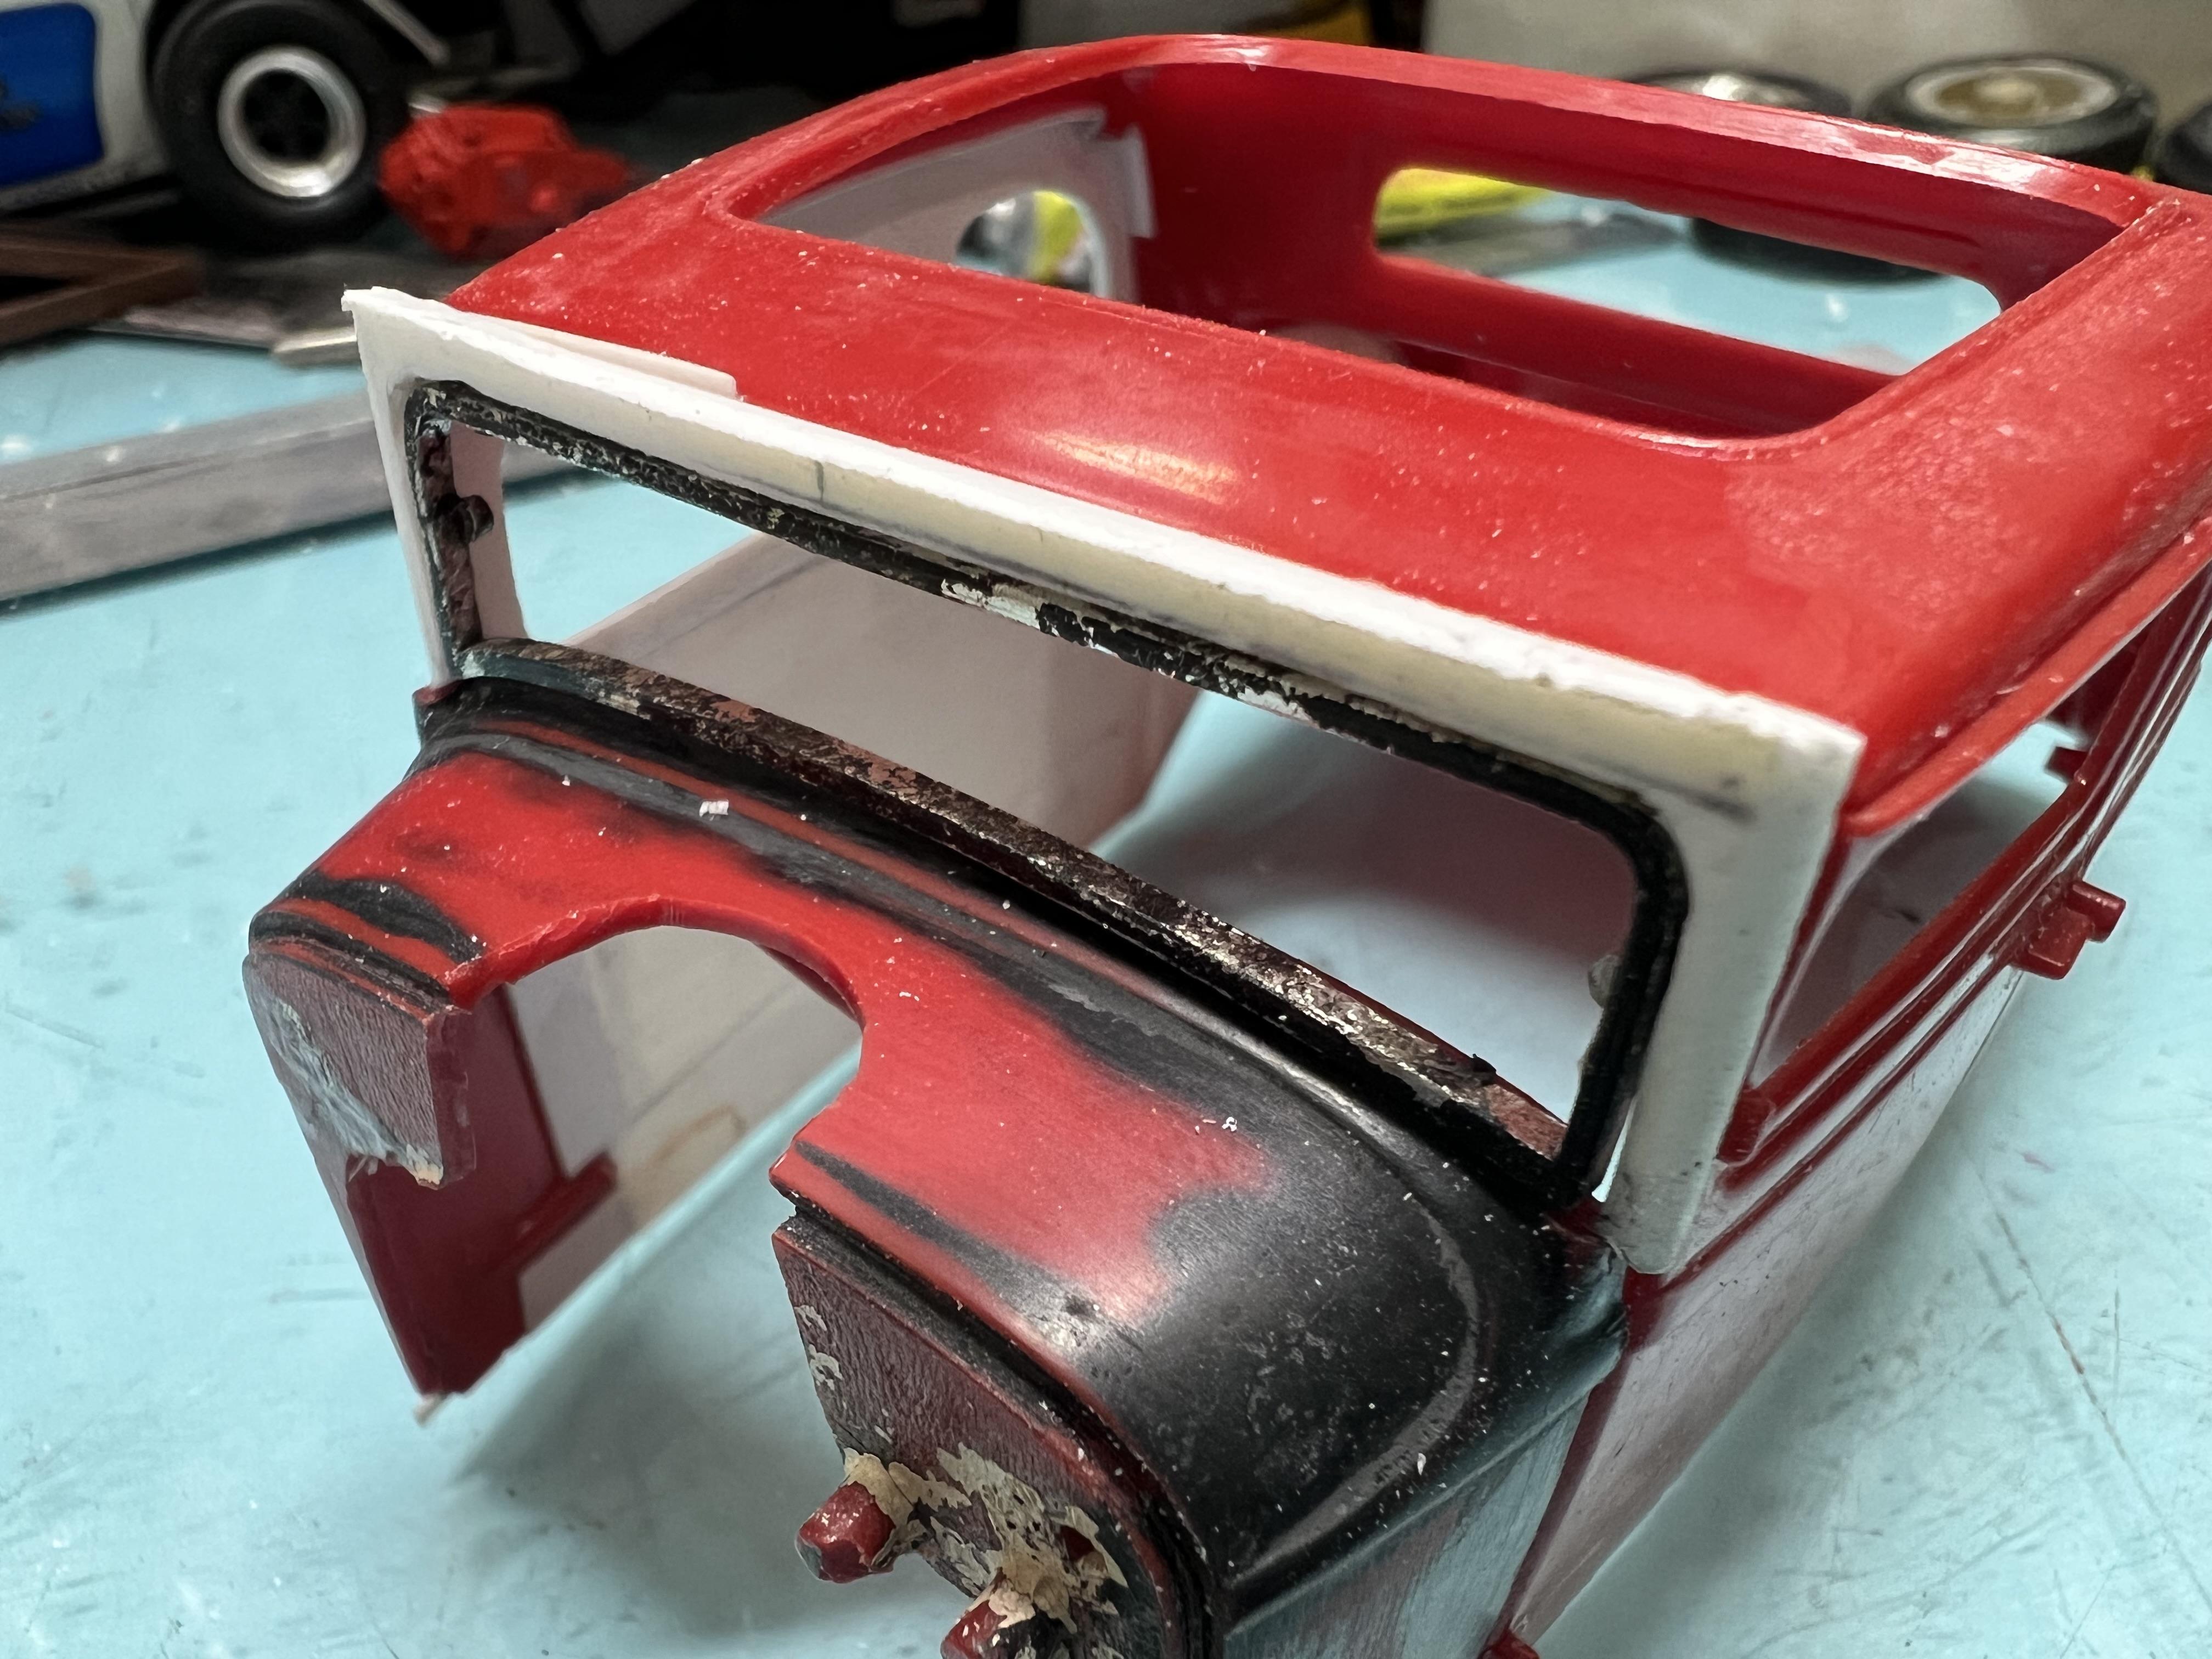
Here we are at first mockup stage. New front frame horns were created and the various breaks in the chassis were repaired and reinforced. A rollbar was created from a conveniently sized and shaped piece of sprue - I didn't actually have to bend it at all! I'm liking what I see! The body has now been painted Tamiya Pearl White and I am planning some panel painting to suit the era. Thanks Dan, I always enjoy your work so your comments mean a lot! Cheers and thanks for watching so far! Alan
-
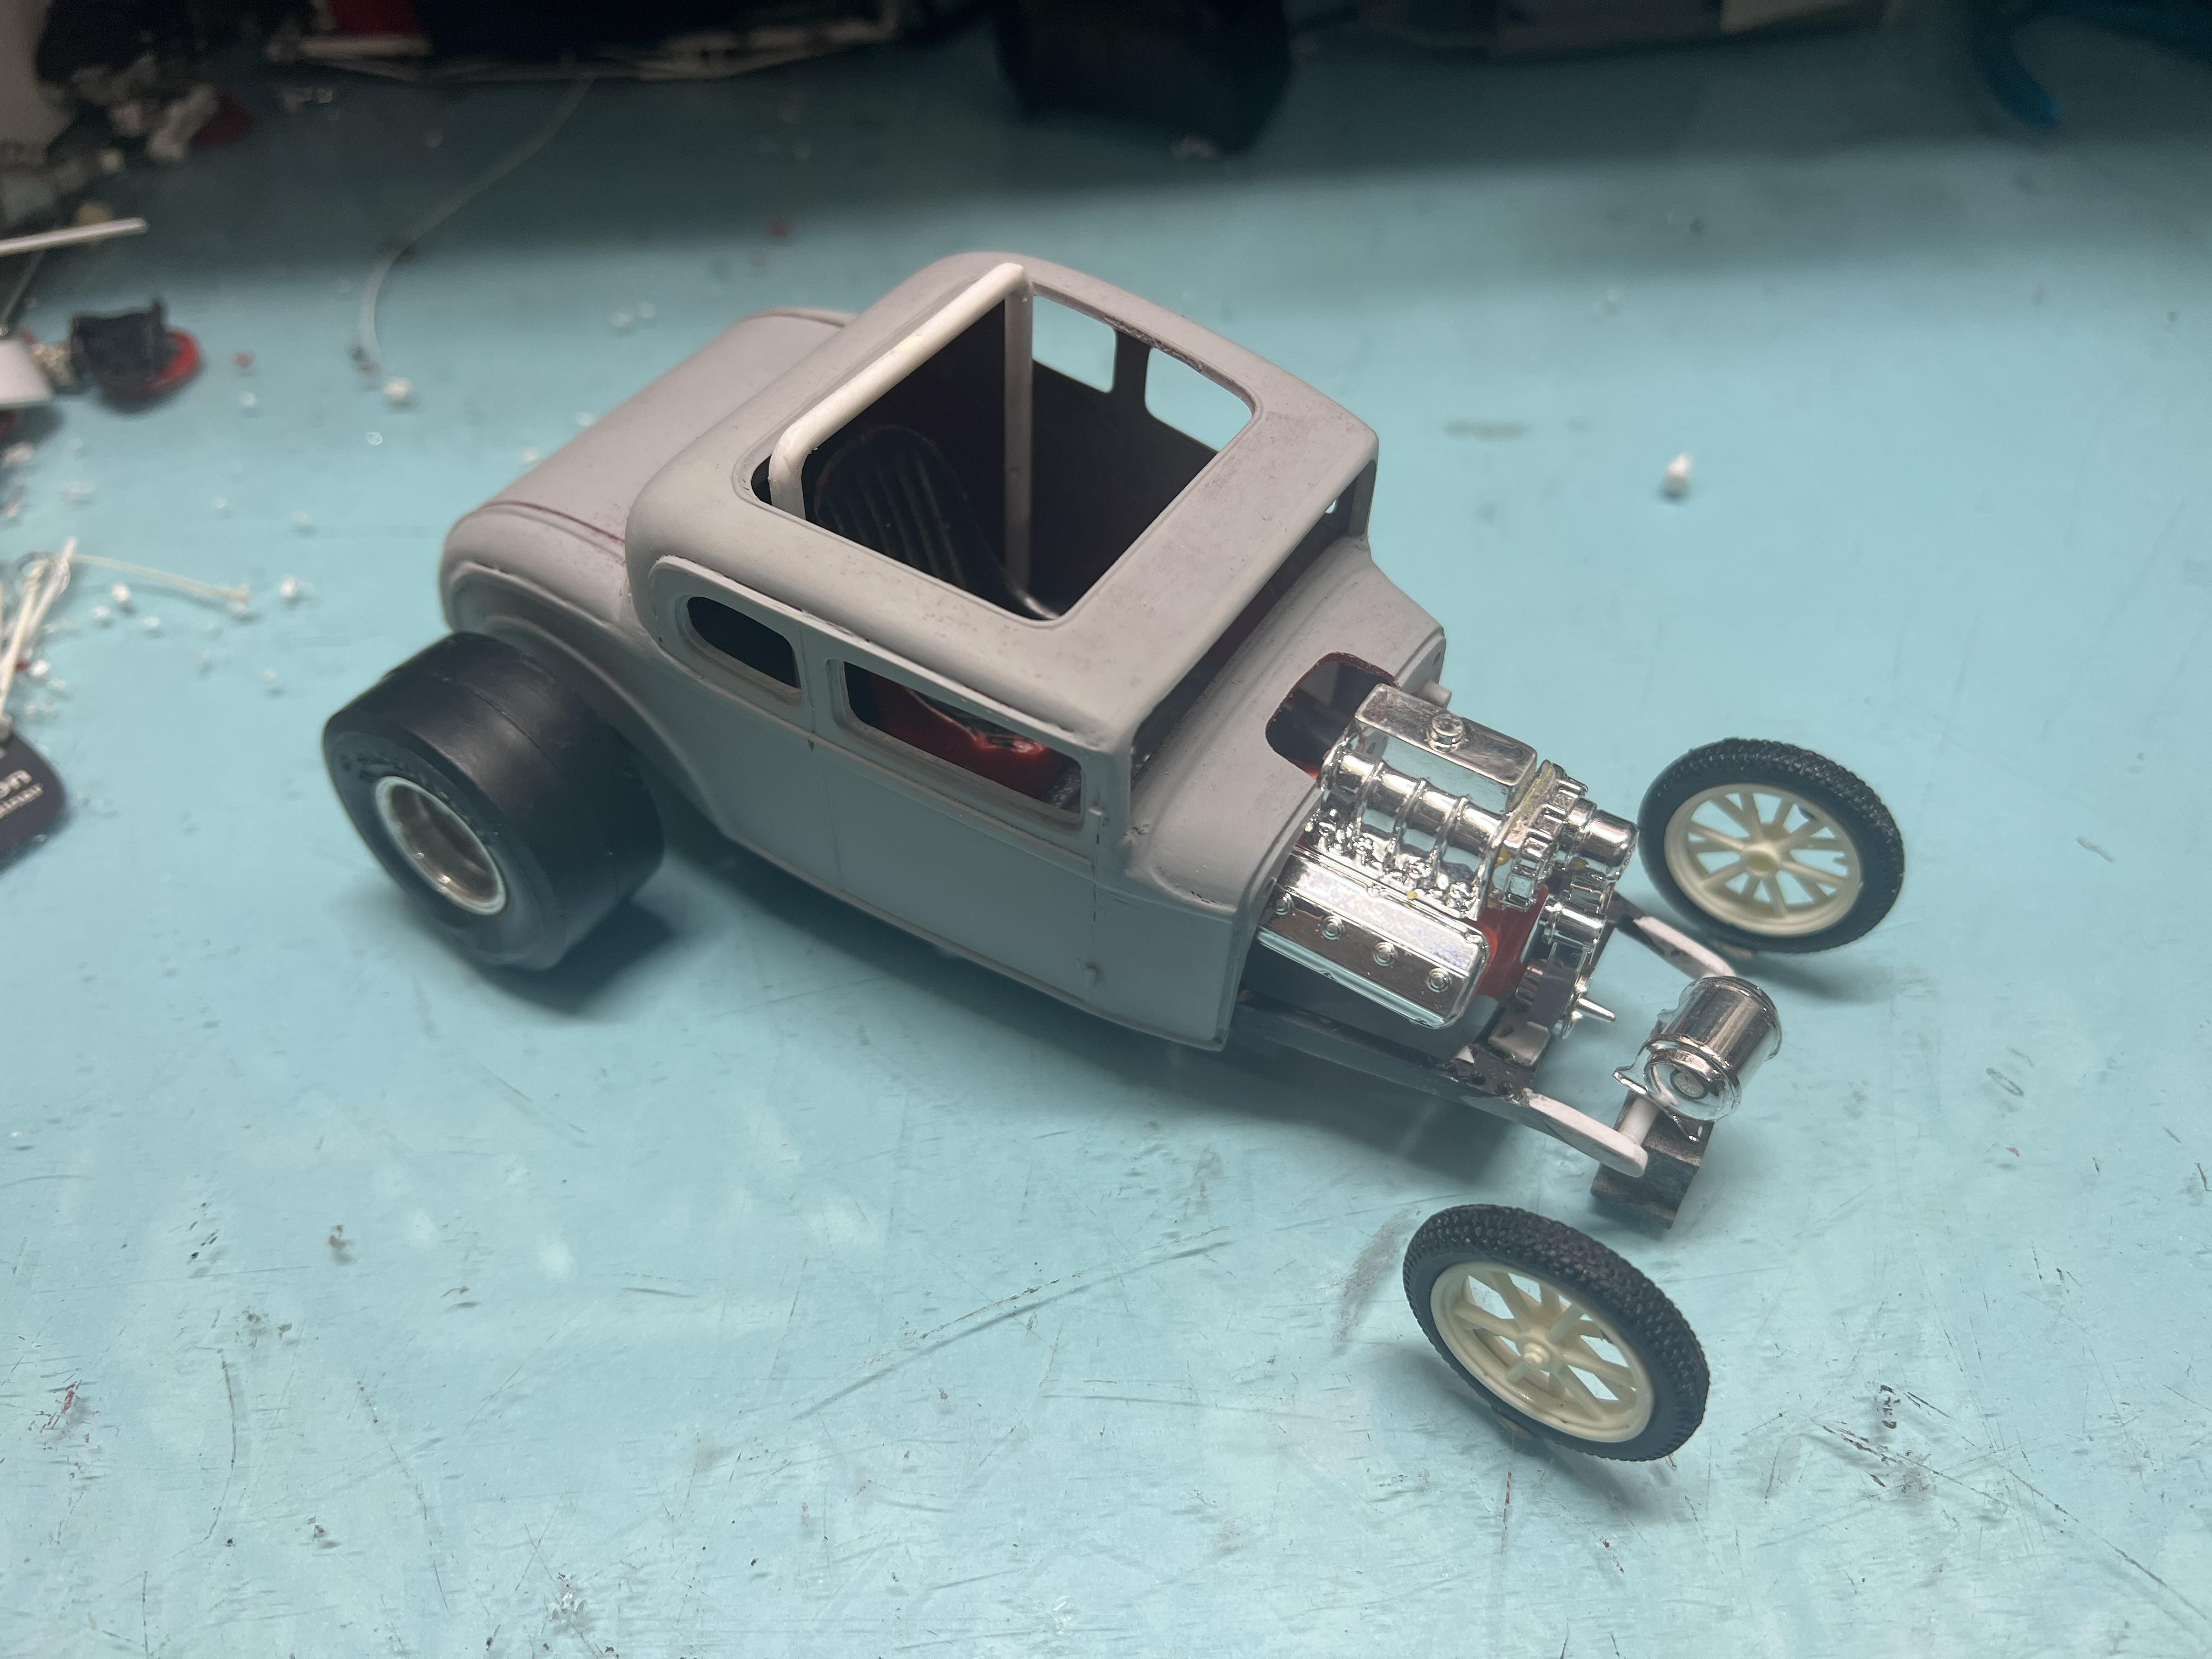
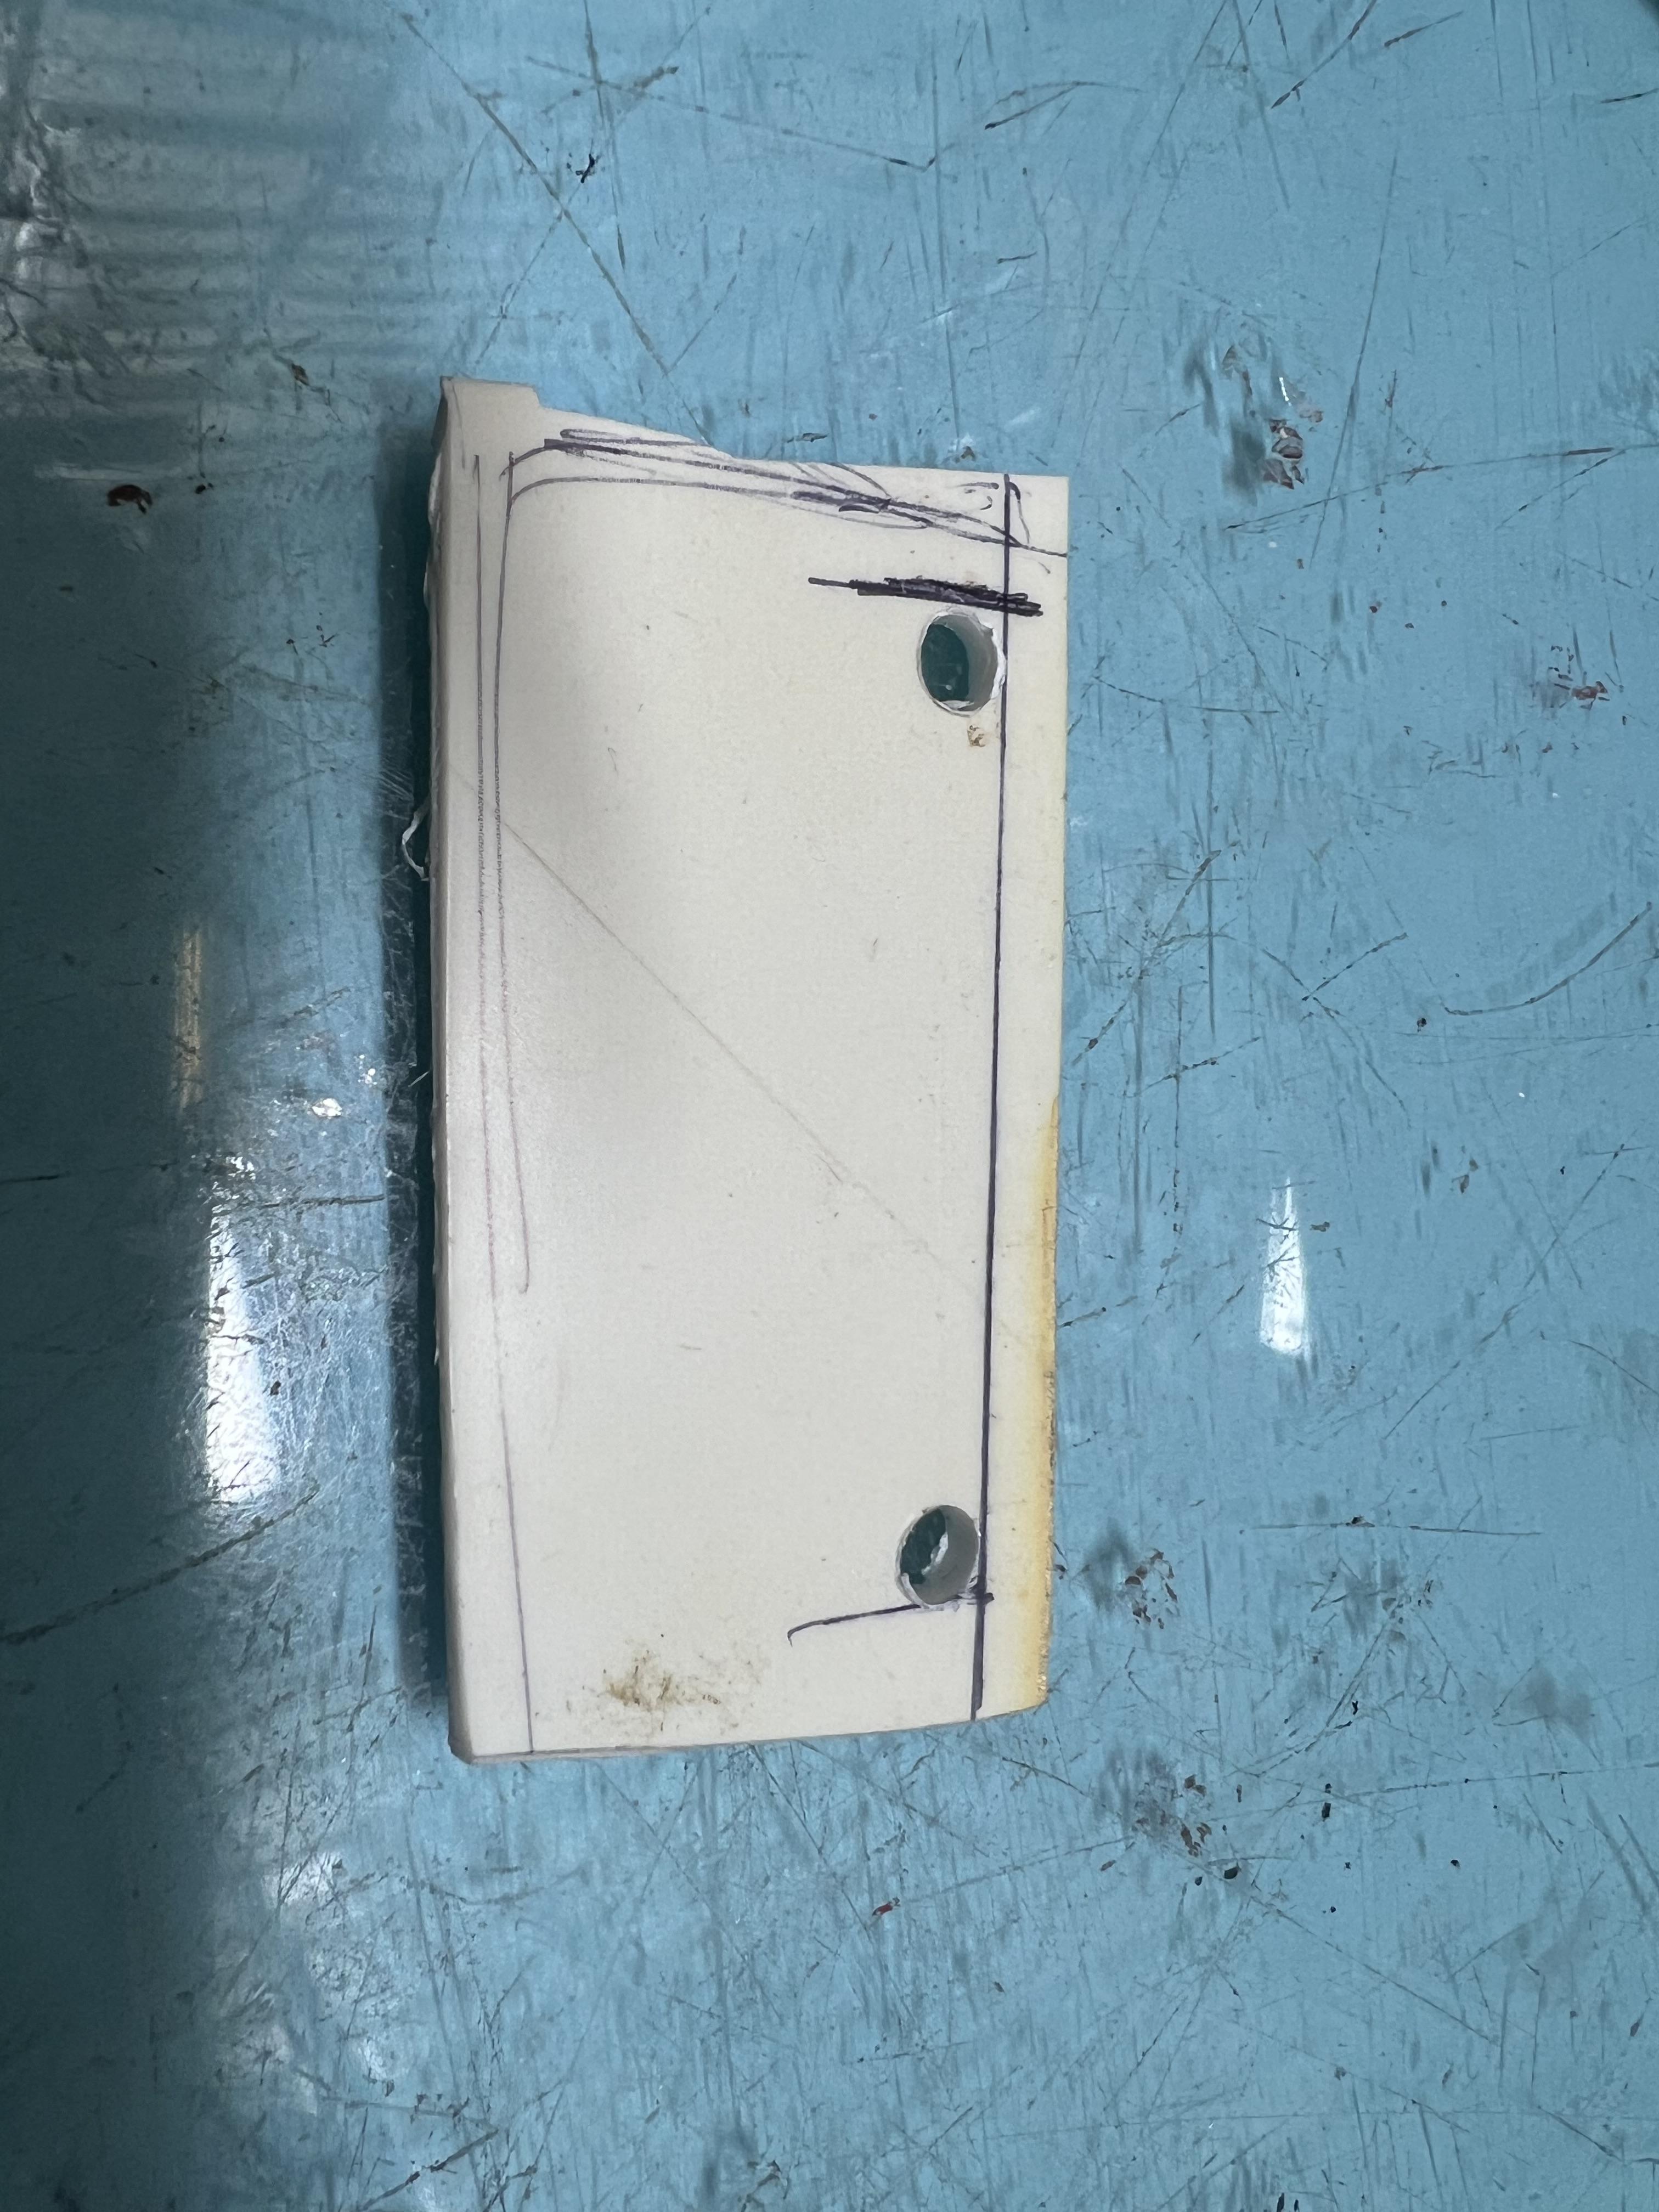
Next on the agenda was to repair the horribly damaged cowl. The missing windshield frame was cut from a thicker piece of styrene. Once again, no special skills being displayed here, just slow and steady and keep the sequence in mind. For instance, it is much easier to cut a smooth, accurately shaped hole out of an oversized piece of plastic than it is to cut it from a piece already cut to size! In the final photos you can see that I planned some serious engine setback in this puppy and made some equally serious relief cuts in the cowl and firewall in anticipation of that setup.