Alan Barton
-
Posts
2,113 -
Joined
-
Last visited
Content Type
Profiles
Forums
Events
Gallery
Everything posted by Alan Barton
-
DWNW Deuce Roadster
Alan Barton replied to TooOld's topic in All The Rest: Motorcycles, Aviation, Military, Sci-Fi, Figures
What a brilliant idea! I've got to try that for myself - so cool! Cheers Alan -
What a brilliant idea! I have struggled to get a realistic wood grained paint job on my AMT boat and the answer was staring me in the face all along - use wood! Can't wait to try this - thanks for the inspiration! Could you tell me what glue you used ? Cheers Alan
-
That is very very cool - keep em coming! Cheers Alan
-
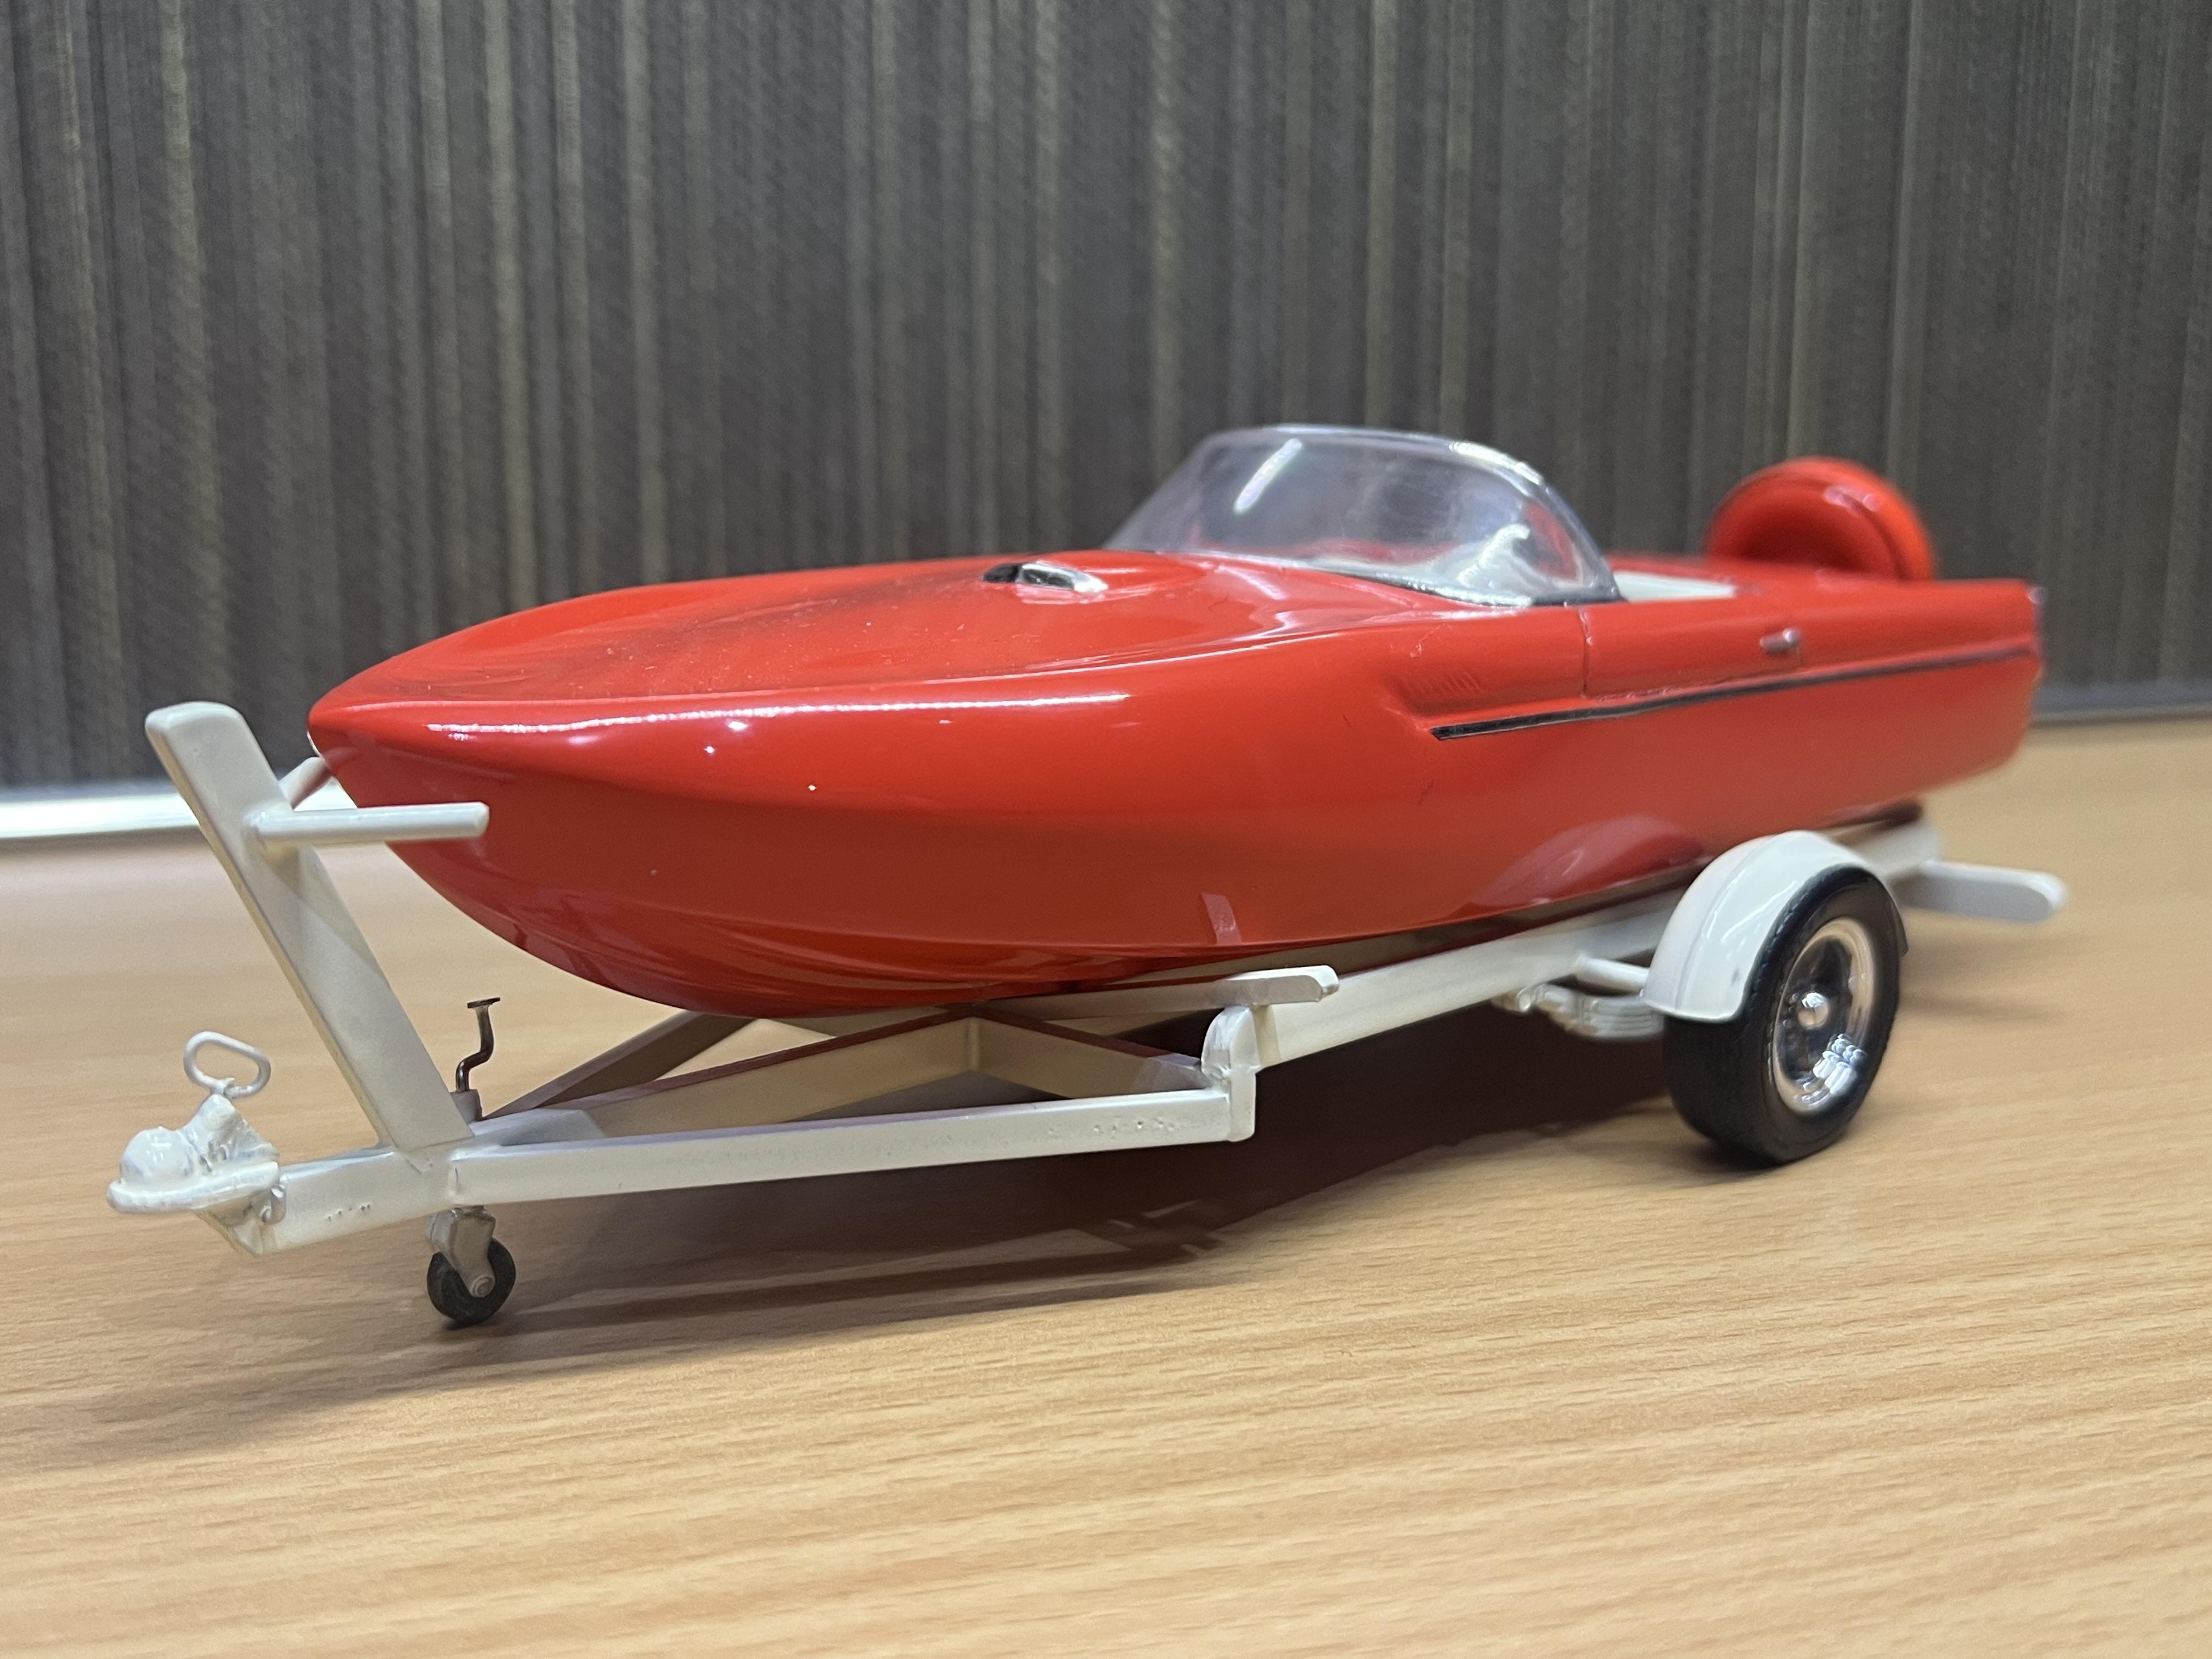
Been some time since we saw new posts on here but I think I have something to fix that problem! I give you my 1957 Ford Thunderboat! No 2 in a series of 3 car/boats in my collection. It started life as an approximately 1/28th scale pullback toy car. The proportions were very accurate and the smaller size suited my plans perfectly. Sometimes it seems that a scale speedboat on a trailer looks way bigger than the scale tow car. Its just a trick of the eye - we don't notice it so much in real life because we know roughly how big each item should be. Over the years I have collected various boat related toys and items to help with marine projects in the future. Unfortunately I did not take a picture of either of the toys that I started with but the other part of this project was a large ( in real life) battery powered cabin cruiser in maybe 1/32 scale? As it was, I still needed to narrow the hull to mate up with the T Bird. body. I spent a lot of time on bodywork because I wanted the T-Bird fender peaks to continue to the point of the bow. A good friend, Jackson, 3D printed me some replacement taillights with the exhaust going through the centre. I had lost one of the original taillights and shortly after he printed me these cool new ones, he lost the other one so I guess the stock items were just not meant to be! The trailer is scratch built from Evergreen rectangular section styrene with cycle fenders from the AMT 25 T kit. The towcar is still under construction - a 1956 Ford Crown Squire. In other words, a Crown Vicky with a Nomad style roof. It will receive the same orange and cream colour scheme (Tamiya) as shown here. Cheers Alan PS Espo, I never saw your boat way back in 2021 bur just saw it now and I love the entire combo. I especially like the trick seating arrangement!

-
I've just attended the Australian Street Rod NAtionals in Bendigo where colour schemes like this were very popular, especially on 33/34 Fords. You have really captured the style perfectly! Cheers Alan
-
Reminds me I must build mine! Nice job. Cheers Alan
-
Its rare for a builder/s to capture every angle, every nuance when building a replica. This one nails it - congratulations to both builders! Cheers Alan
-
Aurora's Show Rod kits in 1:32 scale
Alan Barton replied to blunc's topic in General Automotive Talk (Trucks and Cars)
Yeah, its all good! -
Aurora's Show Rod kits in 1:32 scale
Alan Barton replied to blunc's topic in General Automotive Talk (Trucks and Cars)
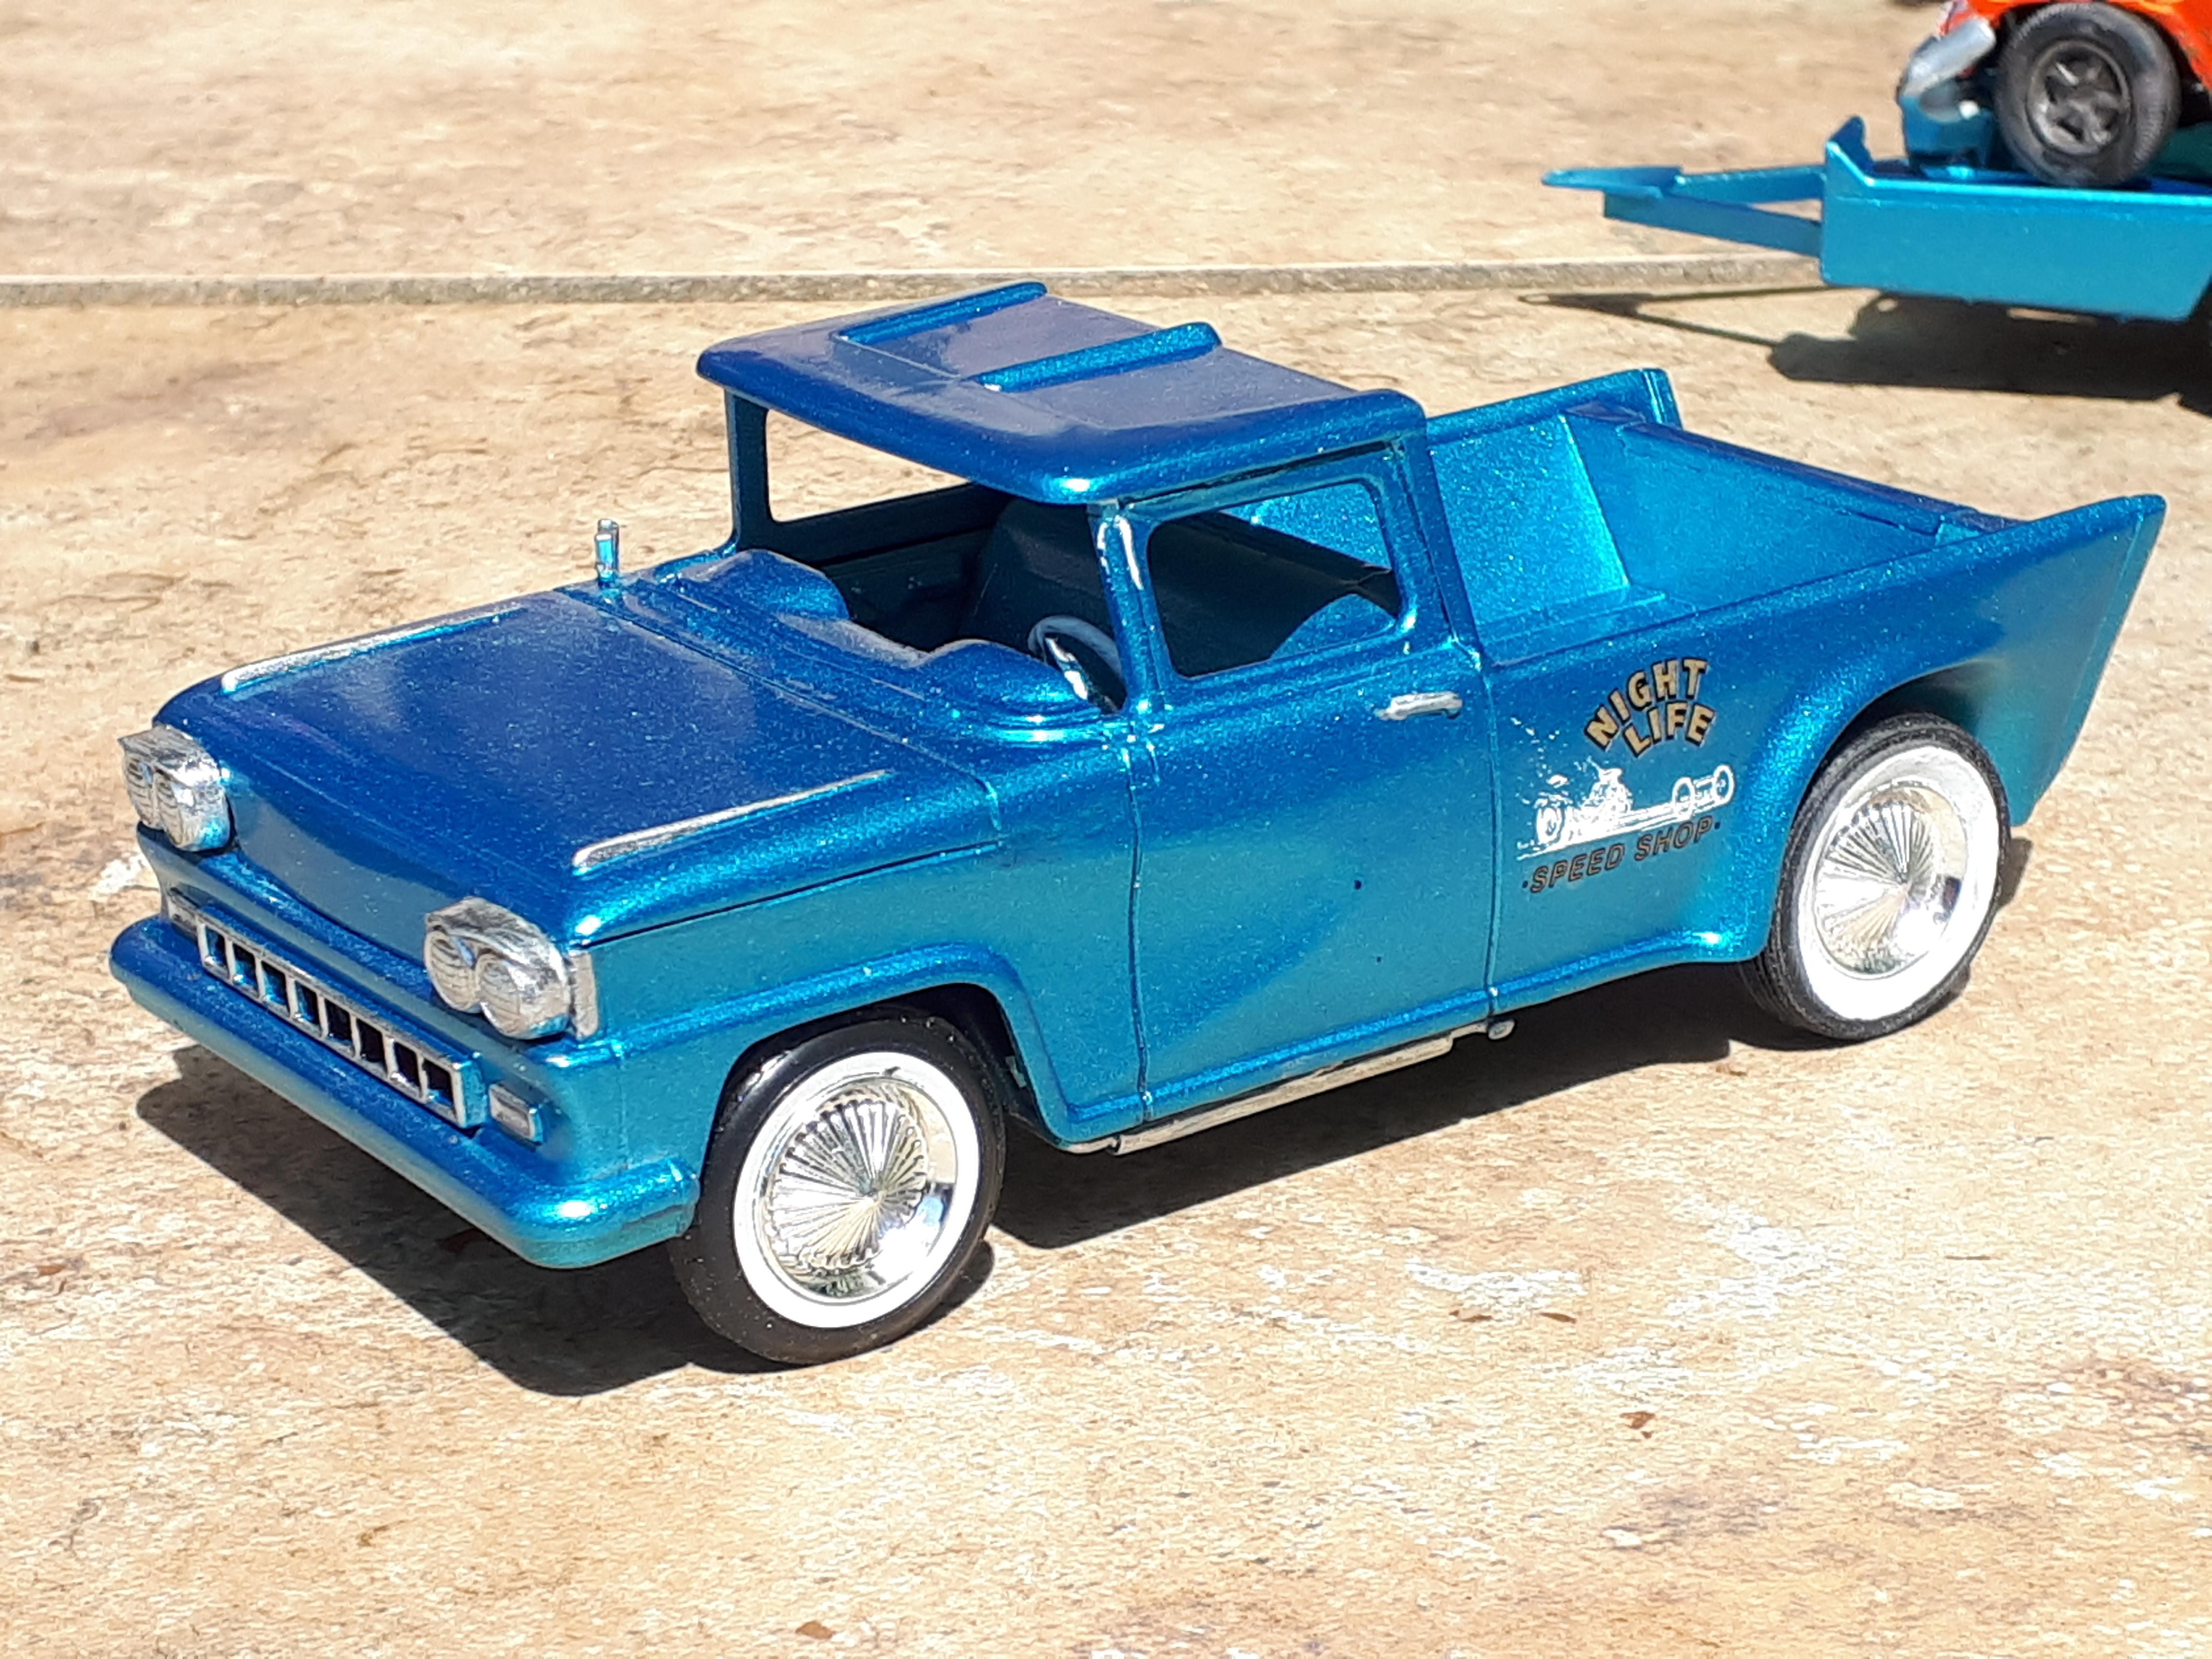
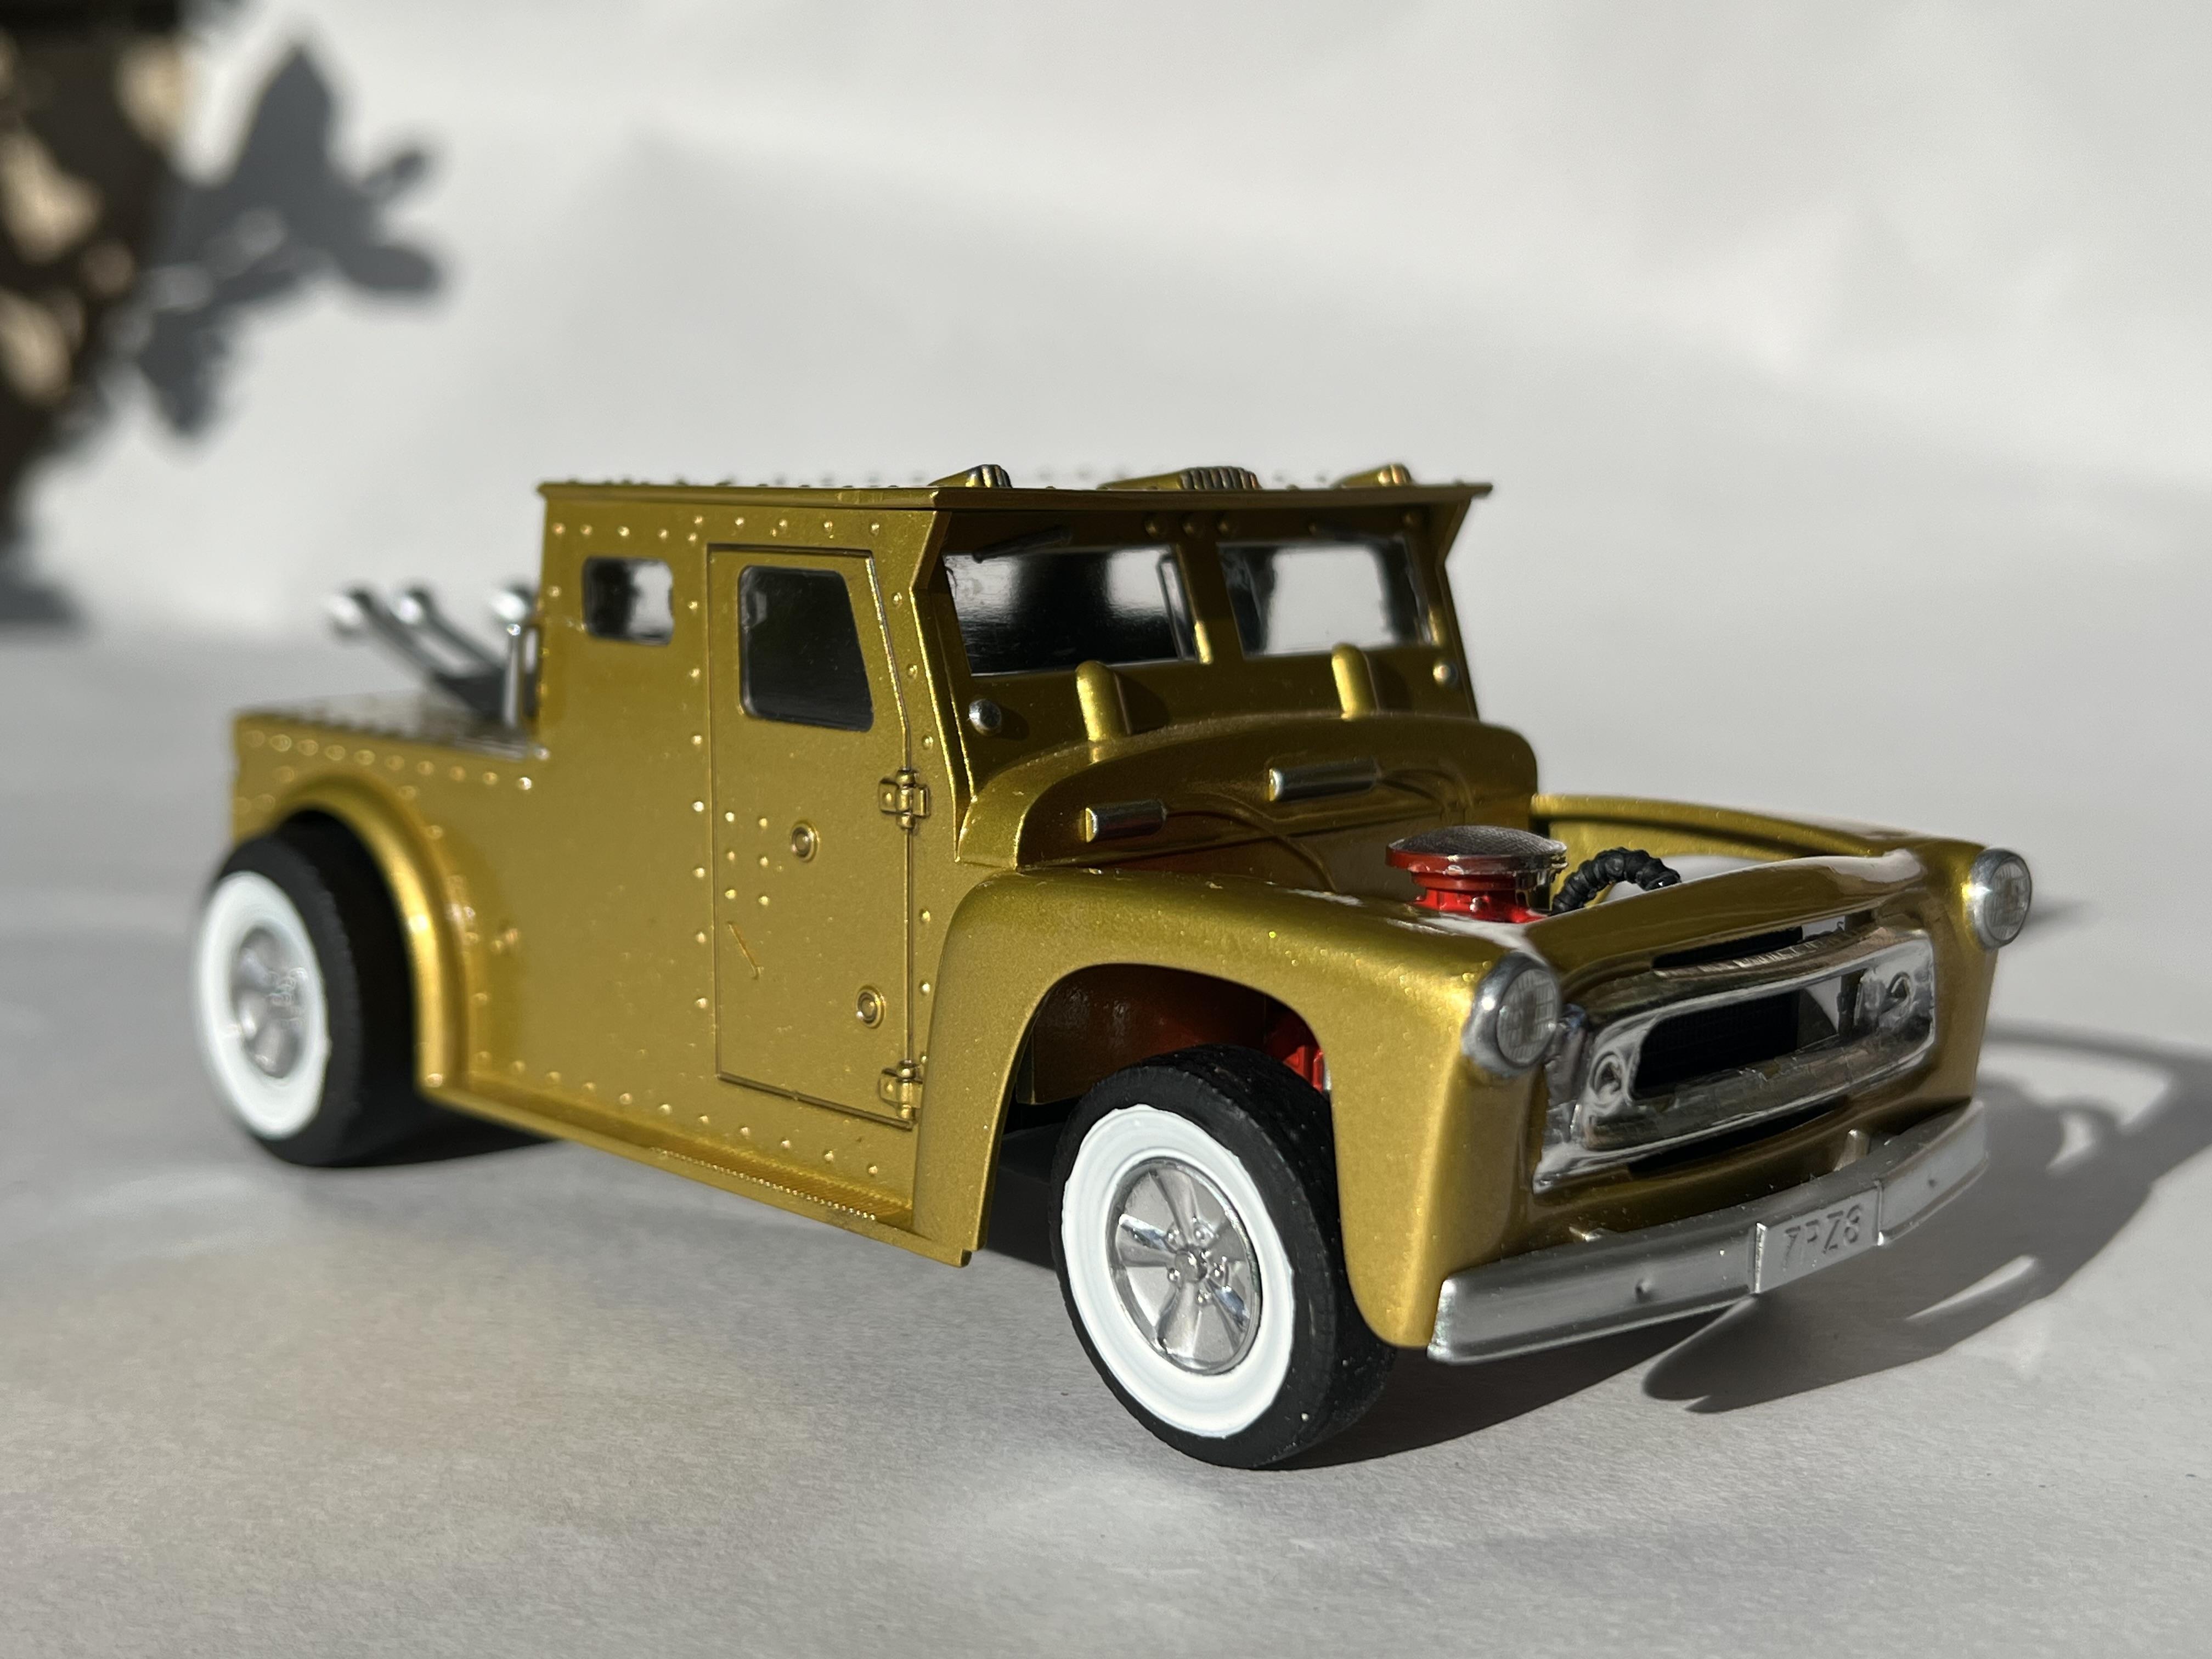
Stumbled on this old thread while looking for something and else and thought I would post my builds since 2018 so that people can see what these cool little models look like built up. Note that the green roadster and the cream and red roadster began life as Scat Cats but were modified from incomplete glue bombs. In fact, of all these models only the maroon Scat Cat and the Old Ironsides were built from minty fresh kits. I have a Hearse with A Curse coming shortly from the USA so am looking forward to completing the whole set this year! In order of appearance they are as follows. Chevy Pickup Hot Surfer Old Ironsides Scat CAt x 3 Ram Rod Demolition Demon Meatwagon Cheers Alan
-
32 Ford Roadster Pickup Bad Apple Drag City
Alan Barton replied to Silvercreeker's topic in Model Cars
What a beautiful build - so contemporary! I wouldnt change a thing. Cheers Alan -
I would love to see all the conversion work you did to create the master! You have really captured the lines of those pre-war Buicks very well indeed. Using the 41 Ford chassis is a great idea as cars of that era had many similarities in chassis design and as long as the owner of a real 41 Buick doesnt turn it over, you would never know!. So cool!!! Cheers Alan
-
Nice job, Michelle. You really have the knack for these Aussie classics. If you ever get the chance to buy the AMT Falcon Ranchero kit that came with the NHRA Nationals decals, blue box with a white car, it includes the correct XK grille. Only the XK Falcon shared its grille with the American car. All other early Falcons, XL, XM and XP had unique to Australia grilles. The American grille you have used is similar to, but not the same as, the XM grille. Cheers Alan
-
A very inspired transformation! Cheers Alan
-
The contrast between hi-end and crusty finishes really works! Cheers Alan
-
I really have to do this! I knew that already but seeing these two finished projects convinces me big time! Cheers Alan
-
Tom Daniel Pie Wagon w/ a little extra attitude! 1:24
Alan Barton replied to ea0863's topic in Model Cars
The biggest weakness in any of the Tom Daniel kits, by modern standards, is the tyres. Your upgrade improves the attitude significantly! Cheers Alan -
Hi Jim, Yes, that is basically all there is to the Hot Shot so I went with it. If I remember correctly, I used the rear wheels and tyres on the front and then found some bigger ones for the back. The thing with this kit is, the body was very accurately scaled ( it looks right at home next to the modern tool Revell midgets) but the wheels and tyres were undersized and the driver was massively oversized. Built out of the box it looks like a T.Q. or quarter midget rather than a full sized midget, if that makes sense. I believe there is now a slot car company making an injection moulded replica of the hot shot but I have no details to pass on. Cheers Alan
-
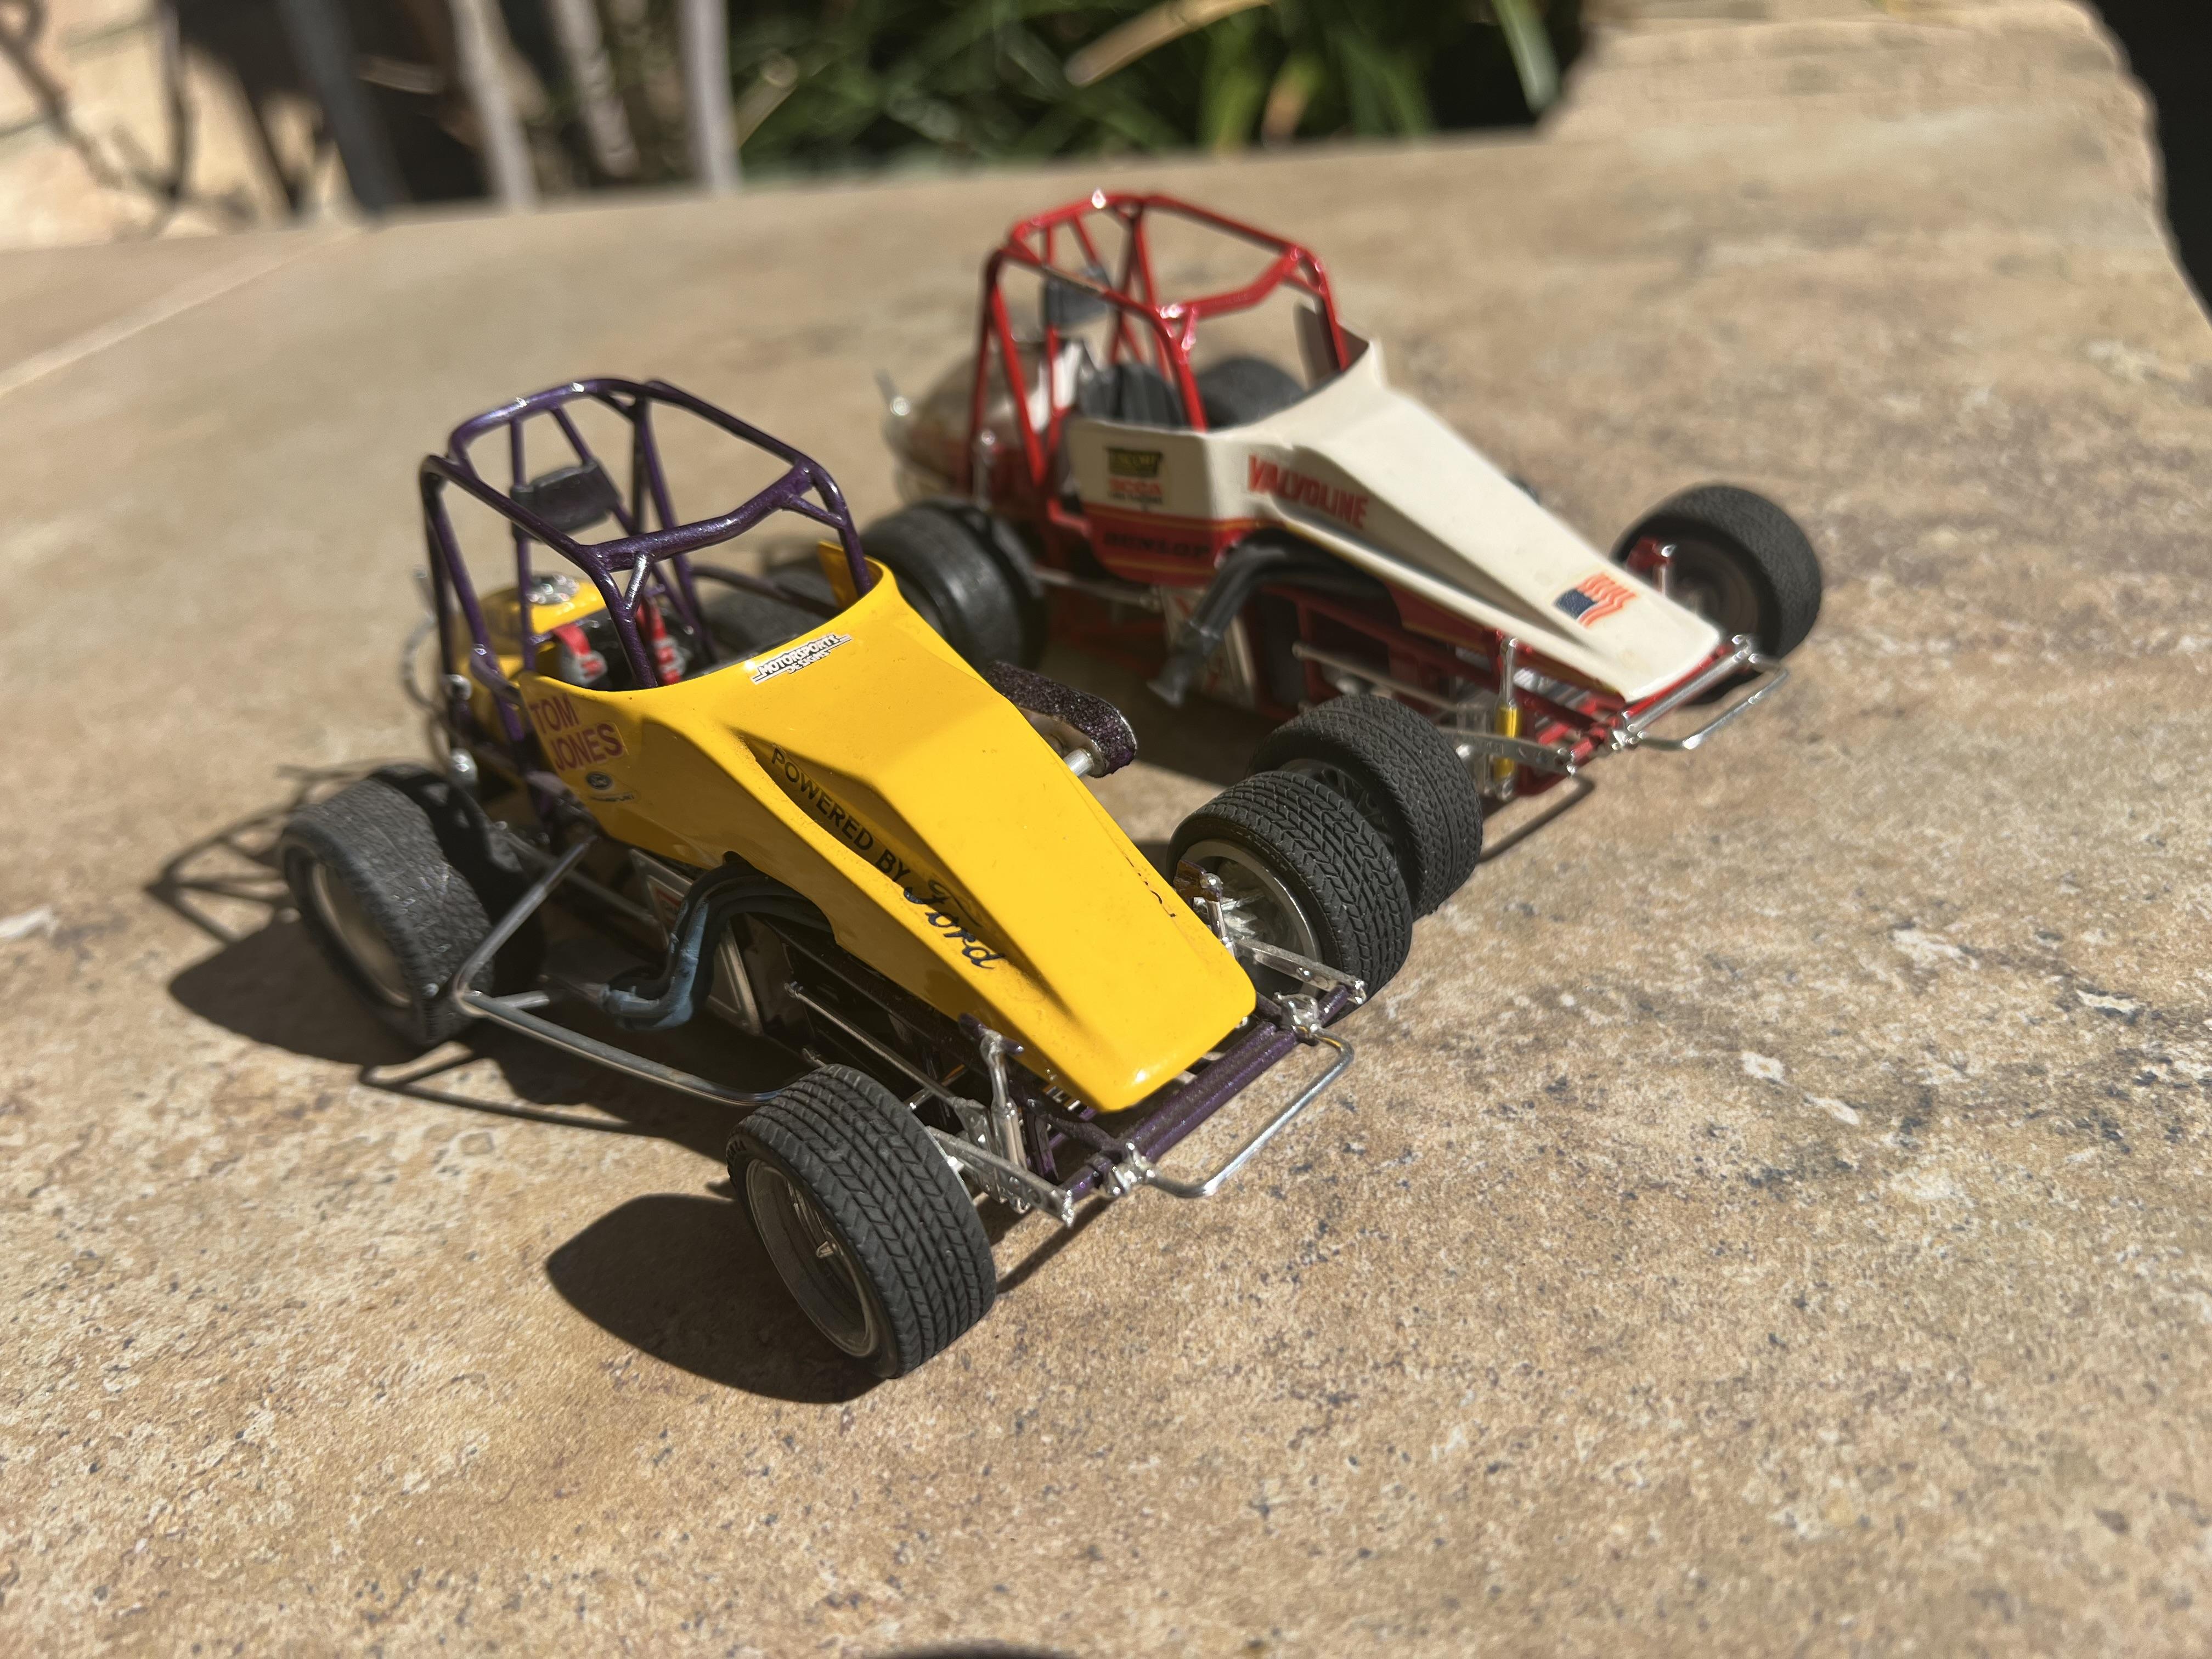
a subject dear to my heart - I may be the hot rod guy amongst my model building friends but I have an enormous soft spot for any kind of dirt racer. Here's some of mine. Monogram Hot Shot racer - curbside, 1/24th scale. Upgraded wheels and tyres, modified sprint car driver. Two modern era midgets modified from Monogram sprint car kits. The white and red one was built by my good friend Dave Whyte, while the yellow one was built by me after being inspired and tutored by Dave! They were both built from Monogram sprint car kits. They are shortened but still the stock sprintcar width - I intend to build a new version by narrowing the frame as well. The WIP model is my first attempt at building a classic LRC VW midget using the Revell Kurtis Kraft as a basis. Cheers Alan
-
Bit of T Cut would sort this…
Alan Barton replied to Earl Marischal's topic in General Automotive Talk (Trucks and Cars)
Who says you can overdo weathering? -
Do you like to shake paint bottles?
Alan Barton replied to khier's topic in Tips, Tricks, and Tutorials
Ive been using the Vortex style paint mixer for about twelve months and it is easily the best tool I have added to my arsenal. My brush paints are Humbrol enamel in tinlets and Tamiya acrylics in the glass jars. I use glass marbles out of spray cans and yeah, I know the can says it mustn't be punctured but there is a safe way that I have been using for twenty years or more without drama (or trauma). It is amazing how well any brand of metallic paint is mixed after ten seconds or so on the test tube mixer. I had a twenty year old jar of Tamiya flat white that I should have thrown out years ago - it was a solid lump with some clear on top. Every time I used the mixer I chucked the Tamiya white on just for giggles. After a week or so it was usable again. Amazing! For me the most obvious benefit was no more messy popsticks and way less waste. You dig up a lot of paint when you only want to, say, touch the tips of spark plugs with white or bolt heads with silver. The ratio of paint used to paint wasted on the popstick is terrible. I predict that I will get most of my paints to completely empty before discarding, something that almost never happened with my previous efforts. In other words, the reduction of waste will pay for the mixer in a few years. At $80 Aus it was expensive ( the price of a new Revell kit here in Western Australia) but I have no regrets at all. If you have the budget to buy one I would definitely recommend it. It sits on the front left corner of my bench and takes up minimal space for the benefits it provides. Cheers Alan -
WARNING! Not all 1/25 scale is equal.
Alan Barton replied to WillyBilly's topic in Tips, Tricks, and Tutorials
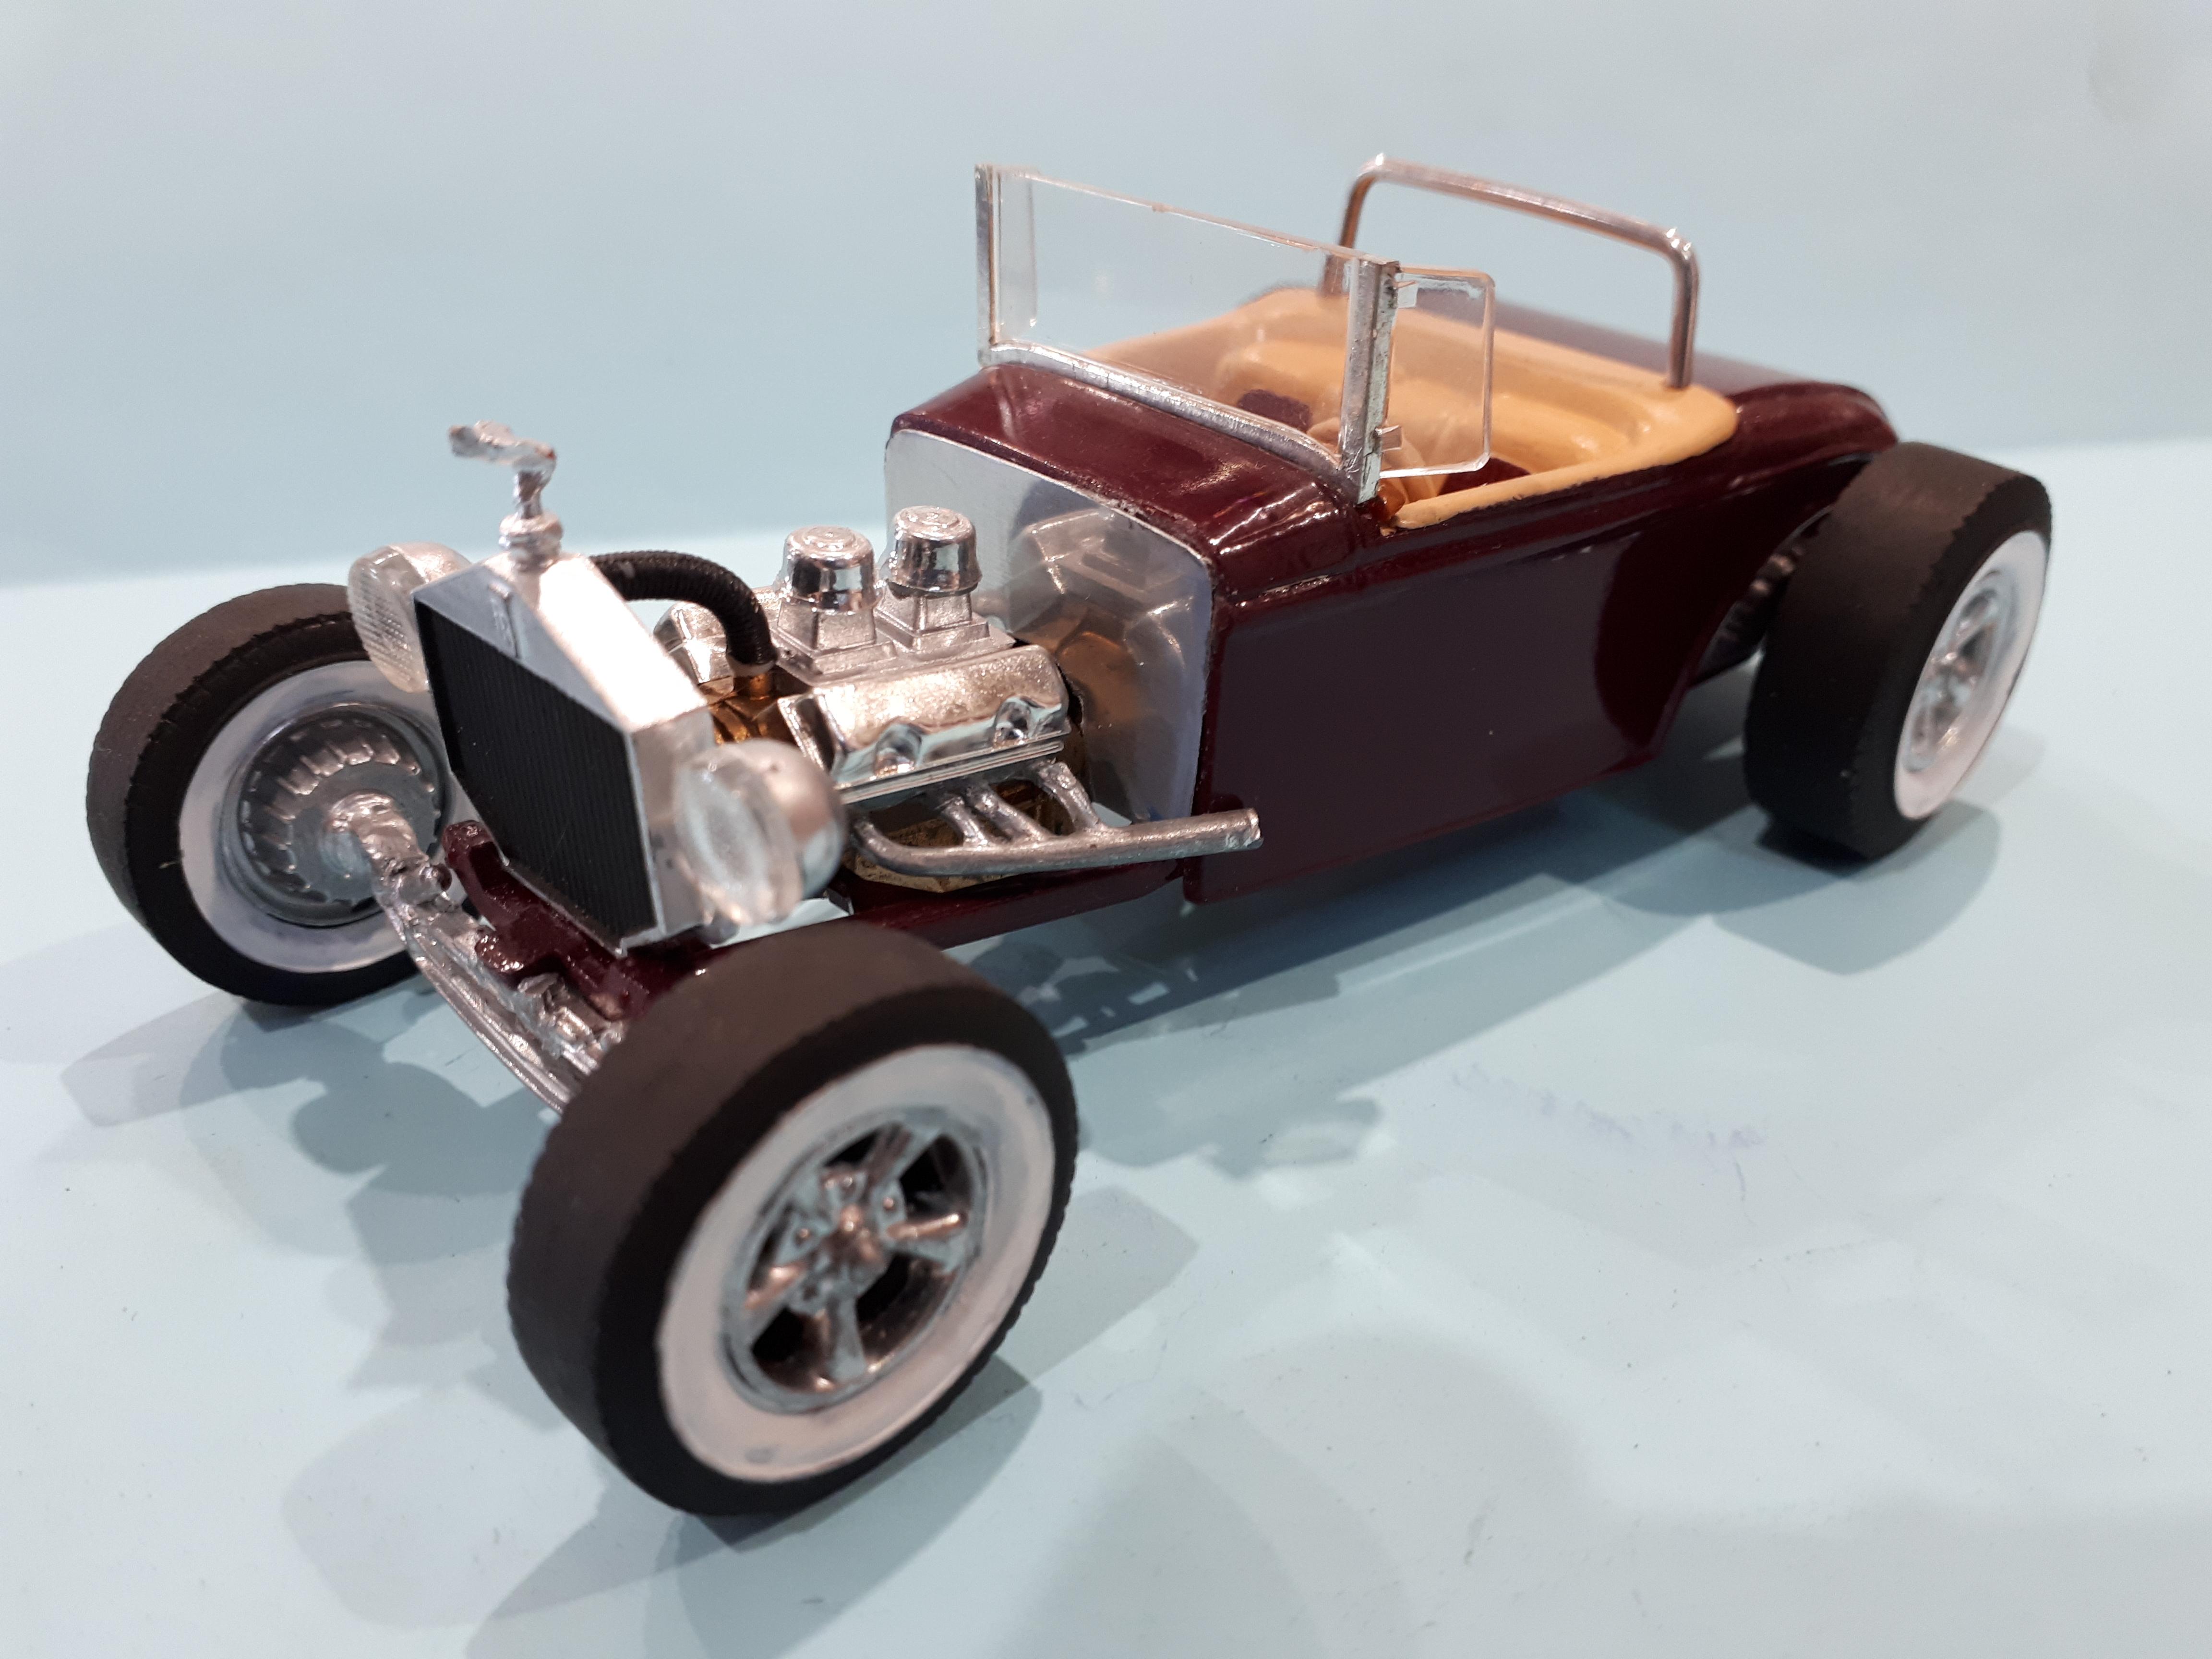
I am in full agreement with Bill in regards the seriously undersized Red Ram Dodge in the modern tool Ala Kart. To back up my beliefs I give you my recent hot rod build based on a previously glue bombed Aurora Scat Kat, in 1/32 scale. As you can see, the engine I used is the very same undersized Red Ram Dodge. It fits the 1/32 scale Deuce like it was made for it! I rest my case!
-
Good looking Charger there, Michelle. Cheers Alan
-
Really like the shades of metallic green - suits it nicely!
-
Very believable Claude! Nice job. Cheers Alan
-
What would YOU like to see as a model
Alan Barton replied to JeroenM3's topic in General Automotive Talk (Trucks and Cars)
I haven't gone through all 47 pages so this may have been suggested already. I apologise if that is the case but here goes anyway. I'm a hot rodder and really can't complain about the amazing range of model kits available to build cool hot rods from. Pre-war Fords have had a great run, even if some are dated and a bit funky. A 35 and a 38 something, anything, would be nice but its not a deal breaker. Surprisingly the Chevy side of the hot rod family tree has also fared pretty well. MPC did a nice 32 Chevy, AMT did an equally nice 37 Chevy, Monogram gave us a reasonable 39 Chevy tool and Galaxie gave us the awesome 46-7-8 tool a few years ago. That's four of the most popular generations of Chevy hot rod material. So where's the 34 Chevy? If my 50 years of attending Australian, American and Canadian rod runs is anything to go by, the most popular Chevy based hot rod by far is the 1934 version. Heck, they make fibreglass bodies of roadsters, coupes, and Tudors, a sure sign that people want them, that demand outstrips supply. So why is it that apart from a recent Matchbox release 5w coupe in 1/64th diecast and a dodgey French 1/43rd diecast delivery, they are non-existent in the miniature world? Why? Just the market for owners of 34 Chevies (or their wives and families who are hunting for birthday presents for Dad) would be huge! Never mind hot rod modellers hoping for something different to 32 Fords and 40 Fords. With the economic need for tool variants in today's model manufacturing world, you could do Tudor, roadster and 3 or 5 window coupe bodies with 33 and 34 grille and hood variations. Like the gasser Willys kits from Revell a while ago, you could have two distinct chassis formats, a stone cold stock chassis with stovebolt six and wire wheels or a pro street hot rod chassis with a blown big or small block. I'm sure police car modellers would love a 34 Chevy tudor patrol car. The mix and match opportunities would be considerable. Anyone else think like this or am I on my own on this one? Cheers Alan