David G.
-
Posts
11,307 -
Joined
-
Last visited
Content Type
Profiles
Forums
Events
Gallery
Everything posted by David G.
-
That's quite an impressive build Donald! I love the color, the wood looks great and the detail is excellent. Add in the lighting and wow! David G.
-
 It's the same with me Brian. This is the first airplane kit I've built since I was a teenager. As I recollect, it was this very kit in fact. I'm glad to know that you're enjoying the build thread. Thank you for taking the time to let me know. =D-
 -
Monogram's 1955 Lincoln Futura Concept Car: Finished
David G. replied to David G.'s topic in Model Cars
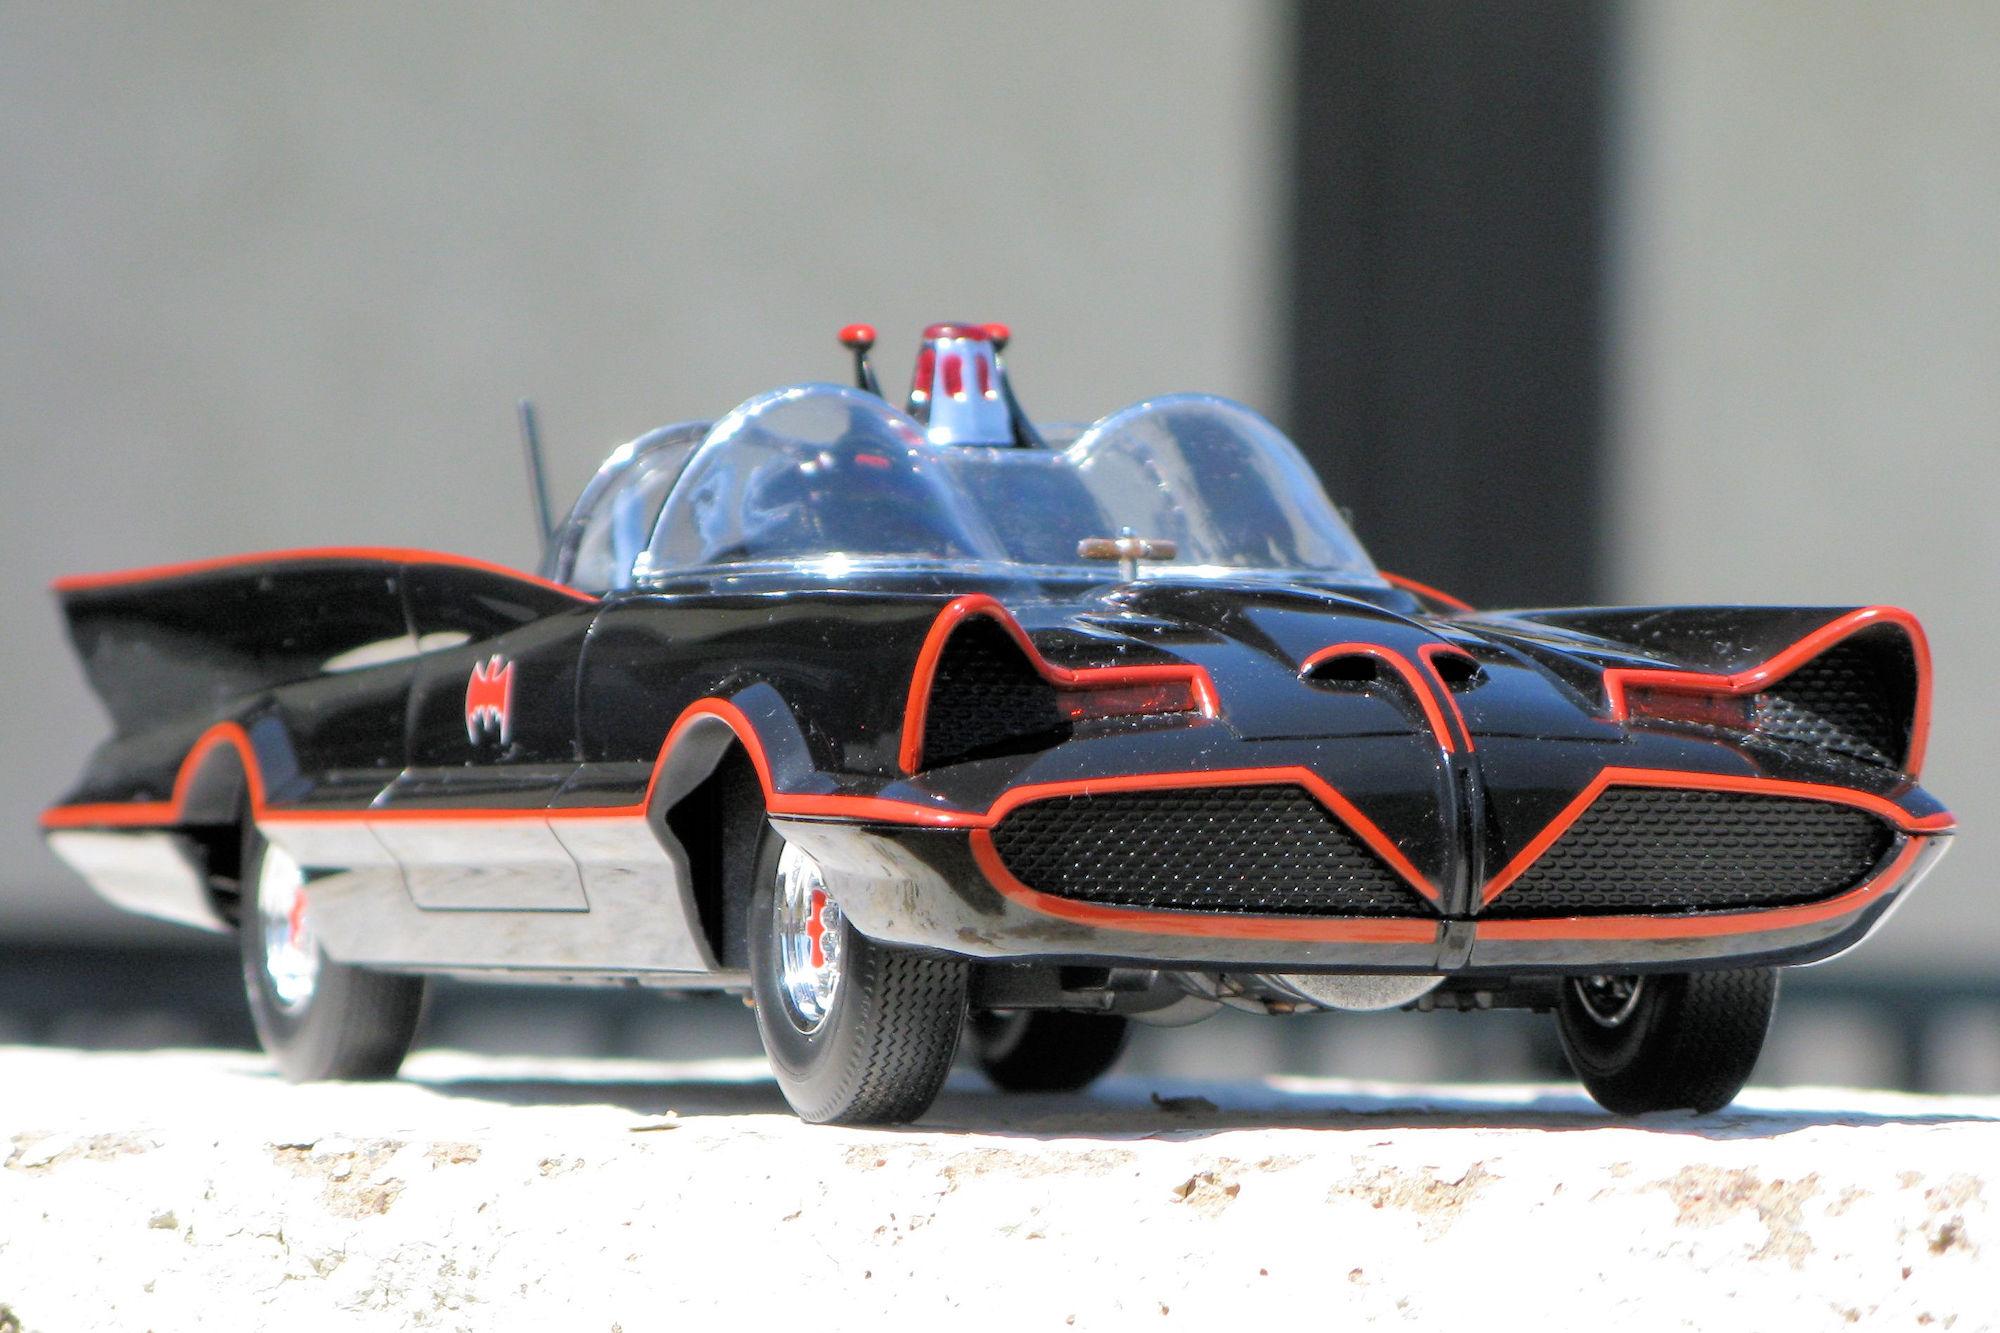
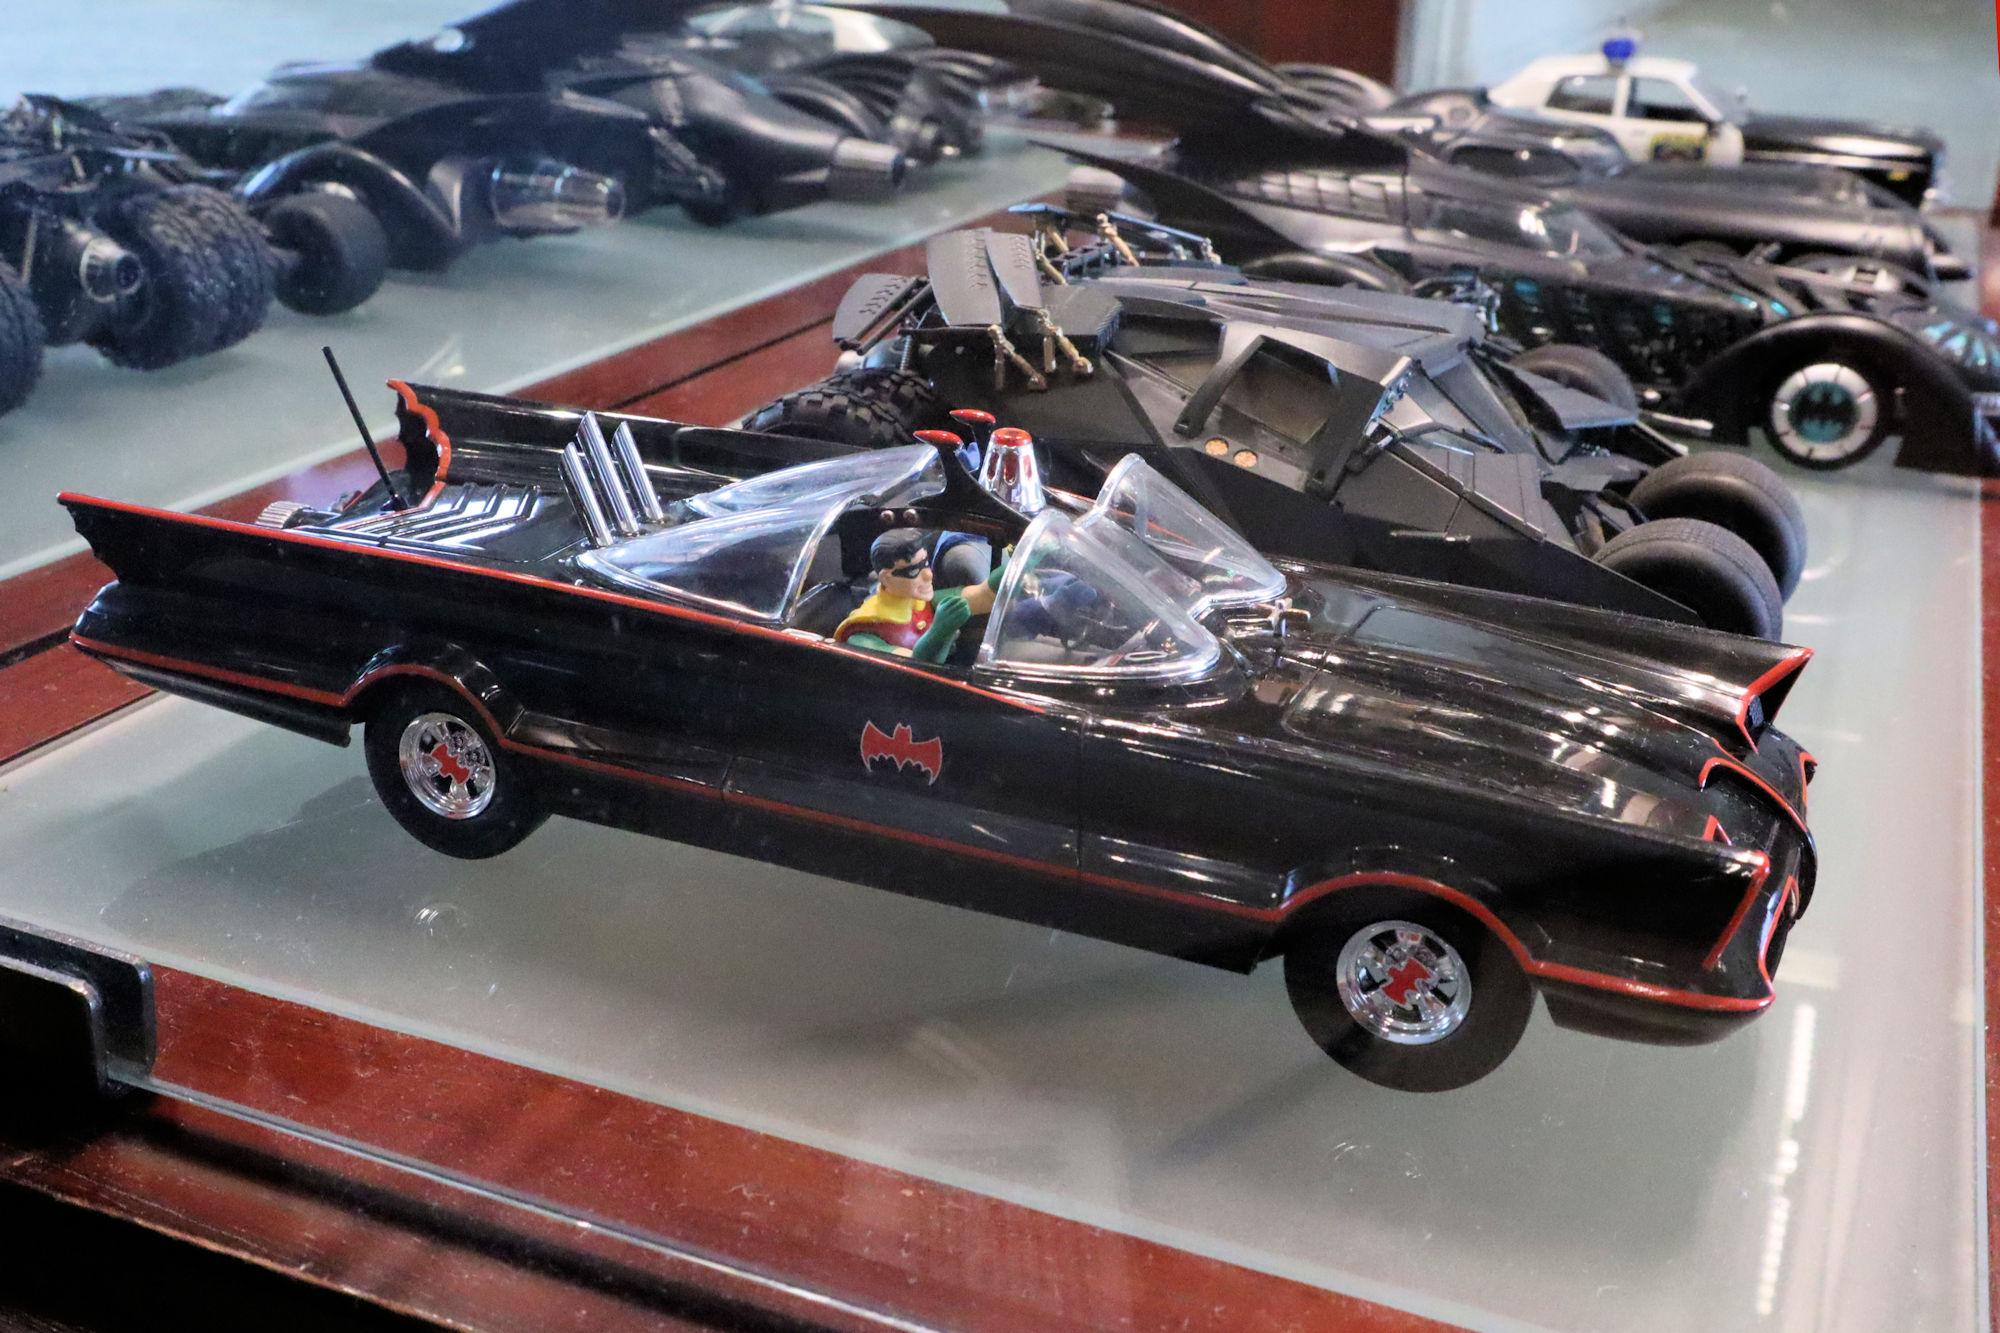
Thank you very much for your kind comment David. And I already do have a Polar Lights Batmobile that I built when they were first released back innnnn..... 2010? In fact, I have a whole Batcave full of Batmobiles. Yup, I'm a Bat-fan! Thanks again for your comment David. =D-
-
Monogram's 1955 Lincoln Futura Concept Car: Finished
David G. replied to David G.'s topic in Model Cars
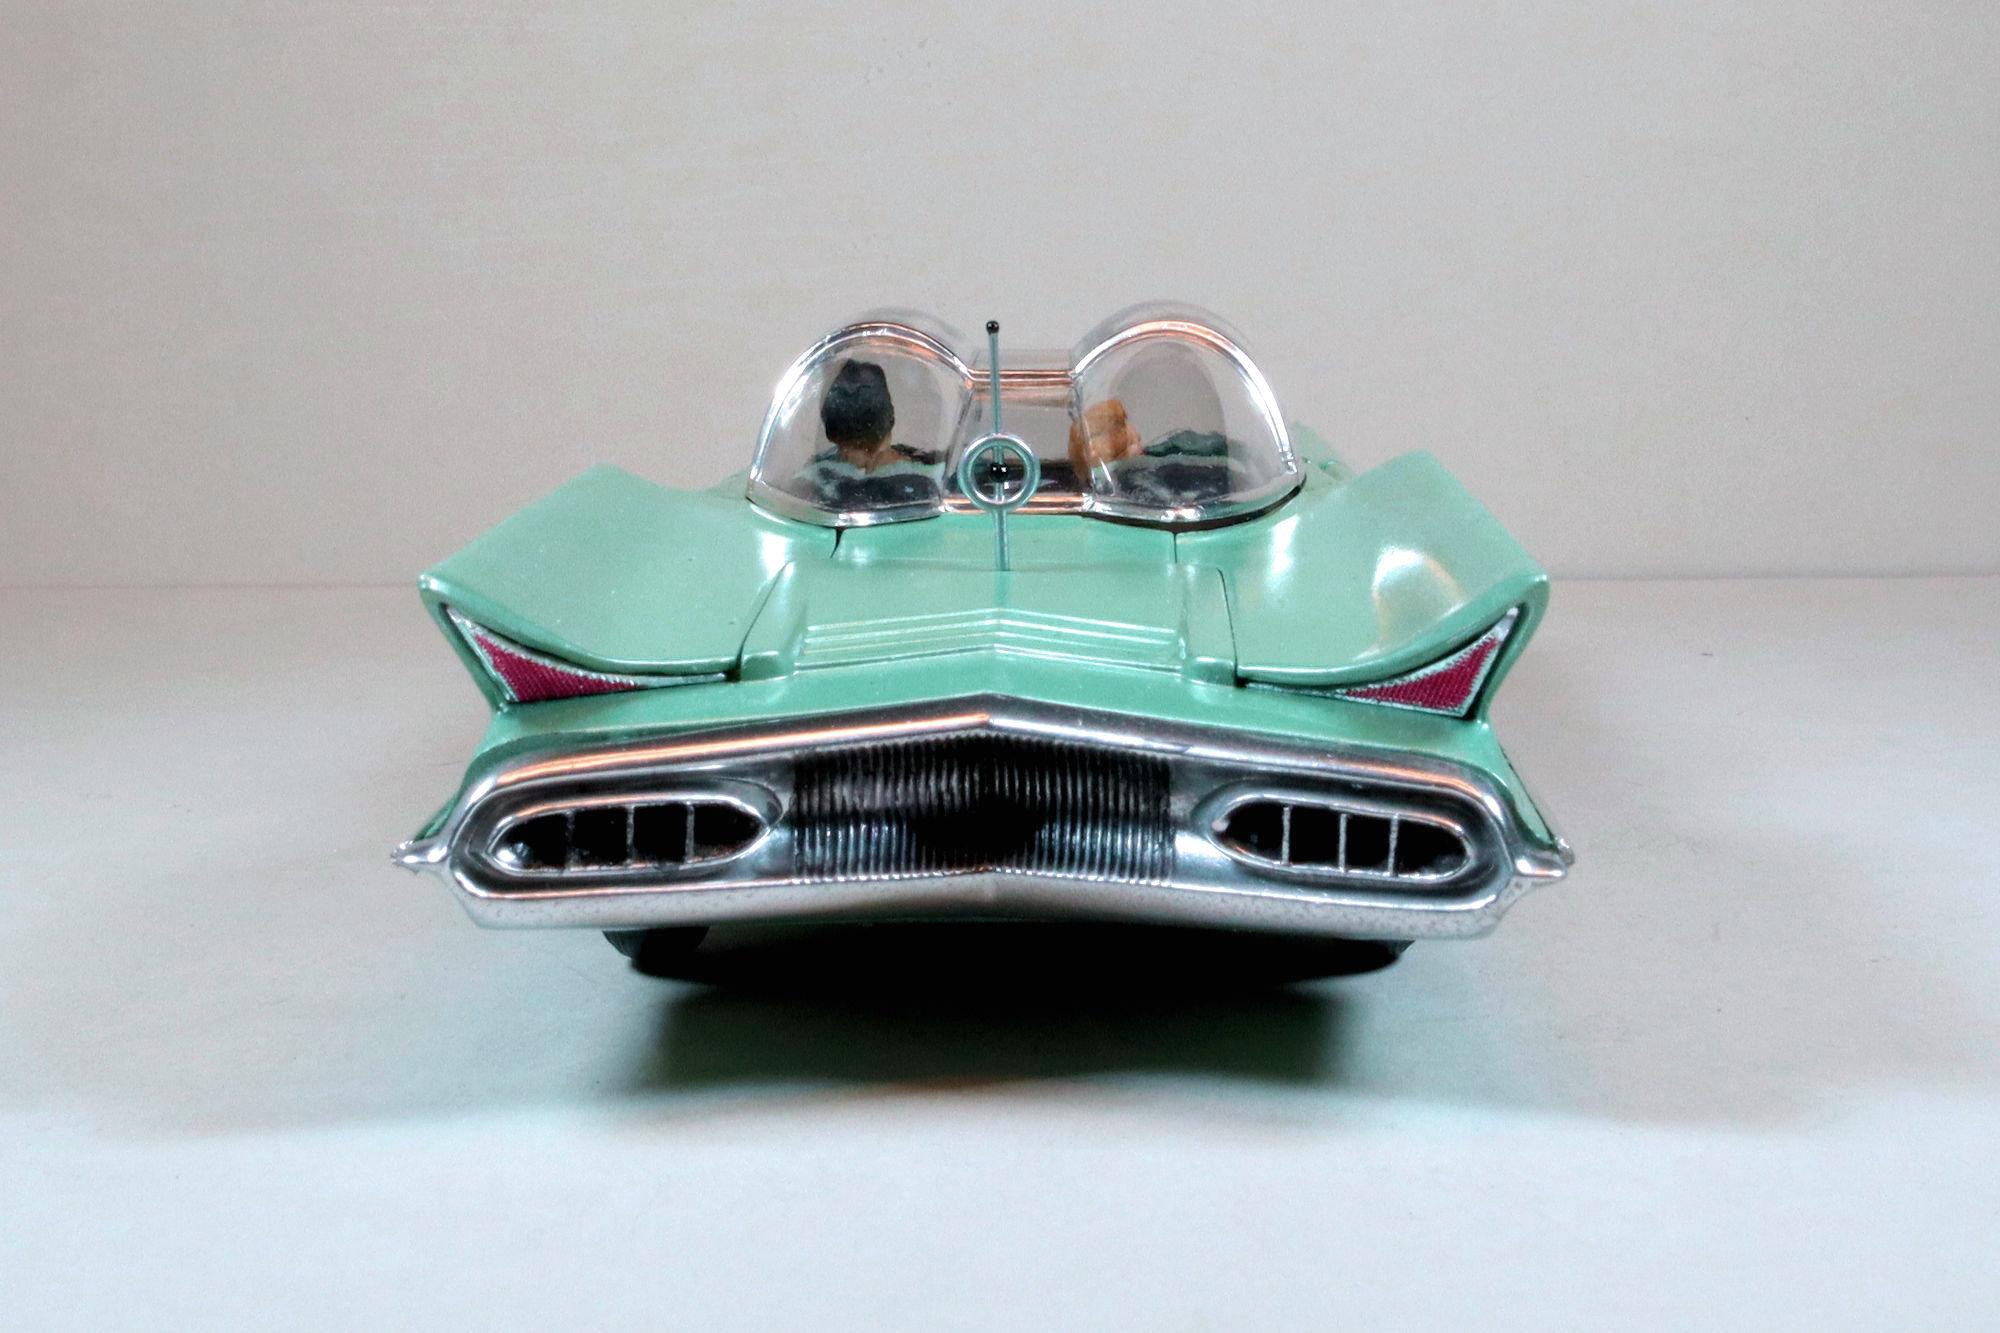
Hello Everybody! Here's the next set of photos for the Futura. One of the many minor modifications or corrections I made was to place vertical dividers into the exhaust ports in the rear bumper. For whatever reason Monogram didn't include them in the original bumper casting. The tail lights needed extensive filing to reduce their size and thickness so they would fit into the openings in the tail fins. The body side moldings and bumpers on this car were a nightmare! I ended up using BMF on the side strips after smoothing them out as much as I could. The multipiece body was a celebration of sink-marks. Every panel had multiple examples and needed much filling and smoothing. As always, thanks for taking a look and please feel free to post any comments or questions you may have. David G.
-
Monogram's 1955 Lincoln Futura Concept Car: Finished
David G. replied to David G.'s topic in Model Cars
Thank you kindly Bob. David G. -
Oh yeah, "The Shin-Kicker" I'd forgotten about that! Cool! =D-
-
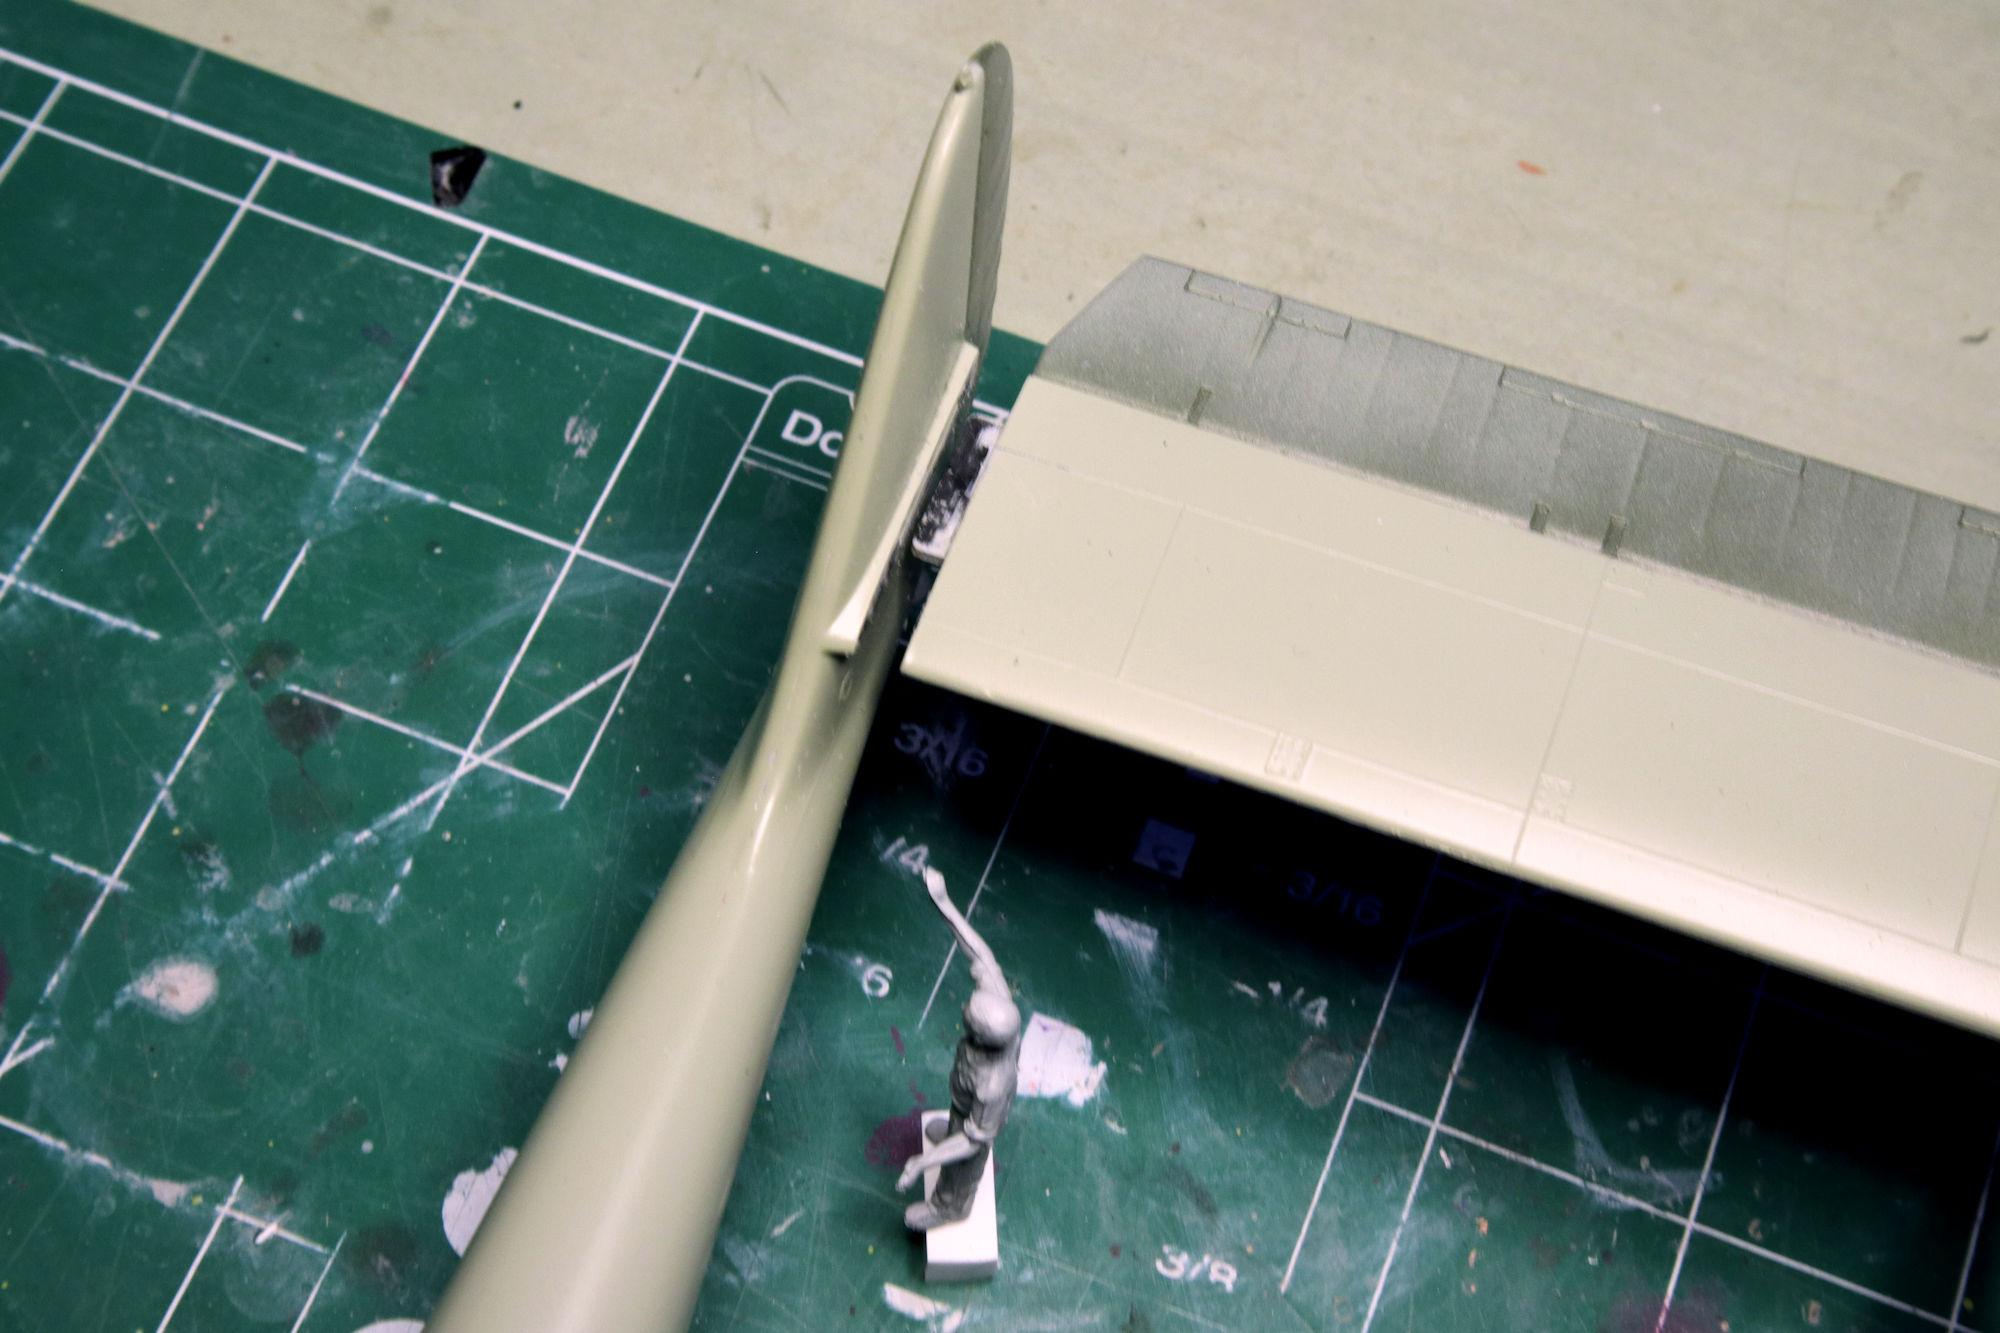
Thank you Daniel. What the photo doesn't show very well is the 3/4" elevation difference between the locator on the stabilizer and the slot it goes into on the tail. It seems that one or both of the booms is twisted due to either a casting issue or a builder issue. I already have the stabilizer dry-fitted into the slot and I'm going to let it rest there for a while. It looks like I'll be able to cement it in without causing any harmful stress on the other joints in the structure. Just having the styrene under partial load like that for a few days can be enough to help straighten it. Though I may still run some hot tap water on the left boom help it. Thanks again. =D-
-
It looks like you're converting the Hudson into a Mercury. David G.
-
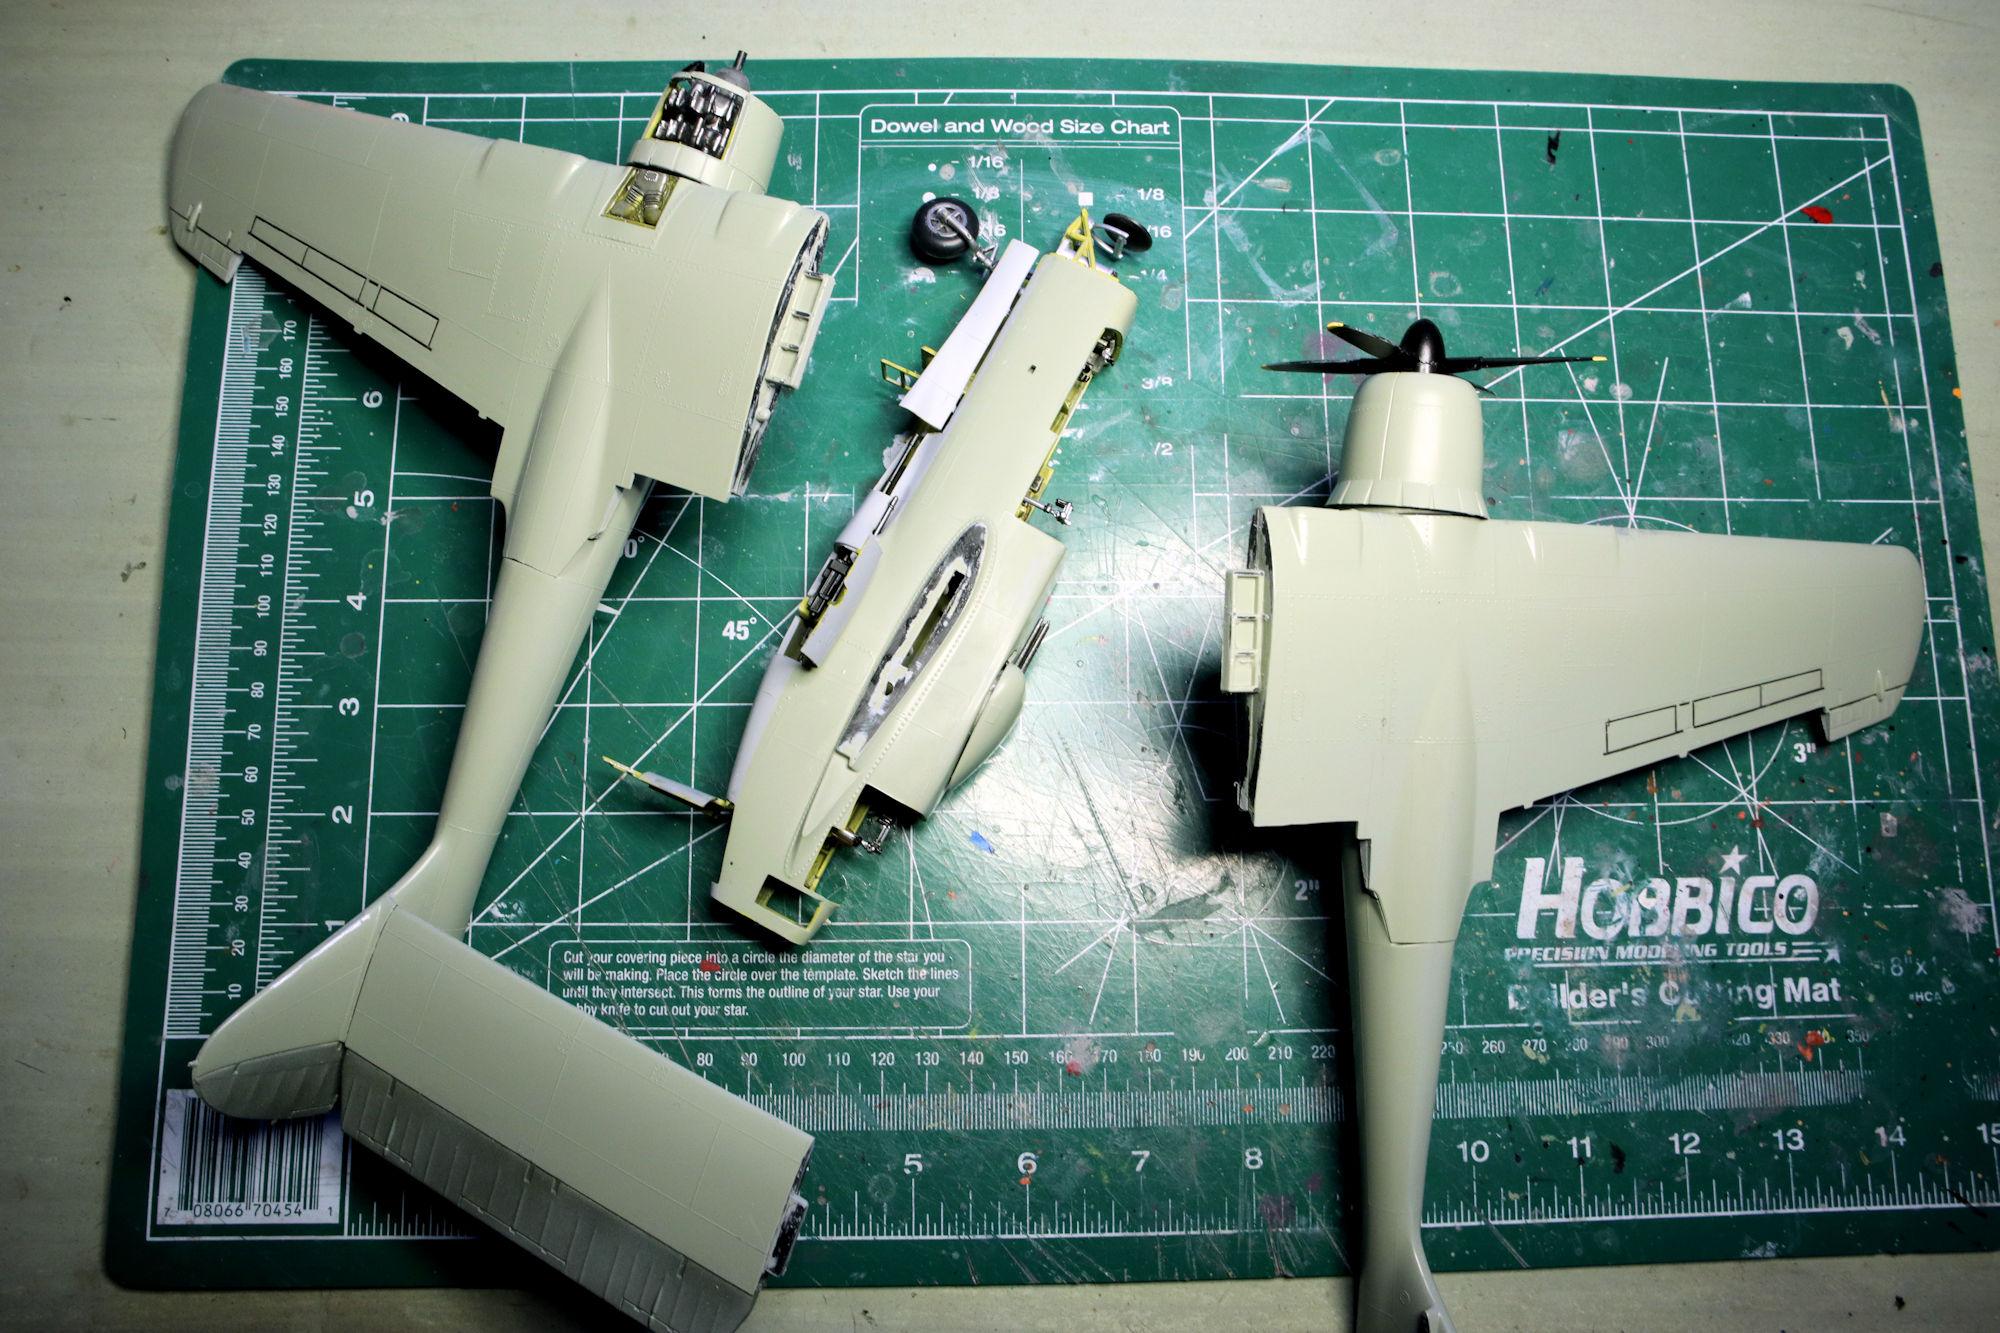
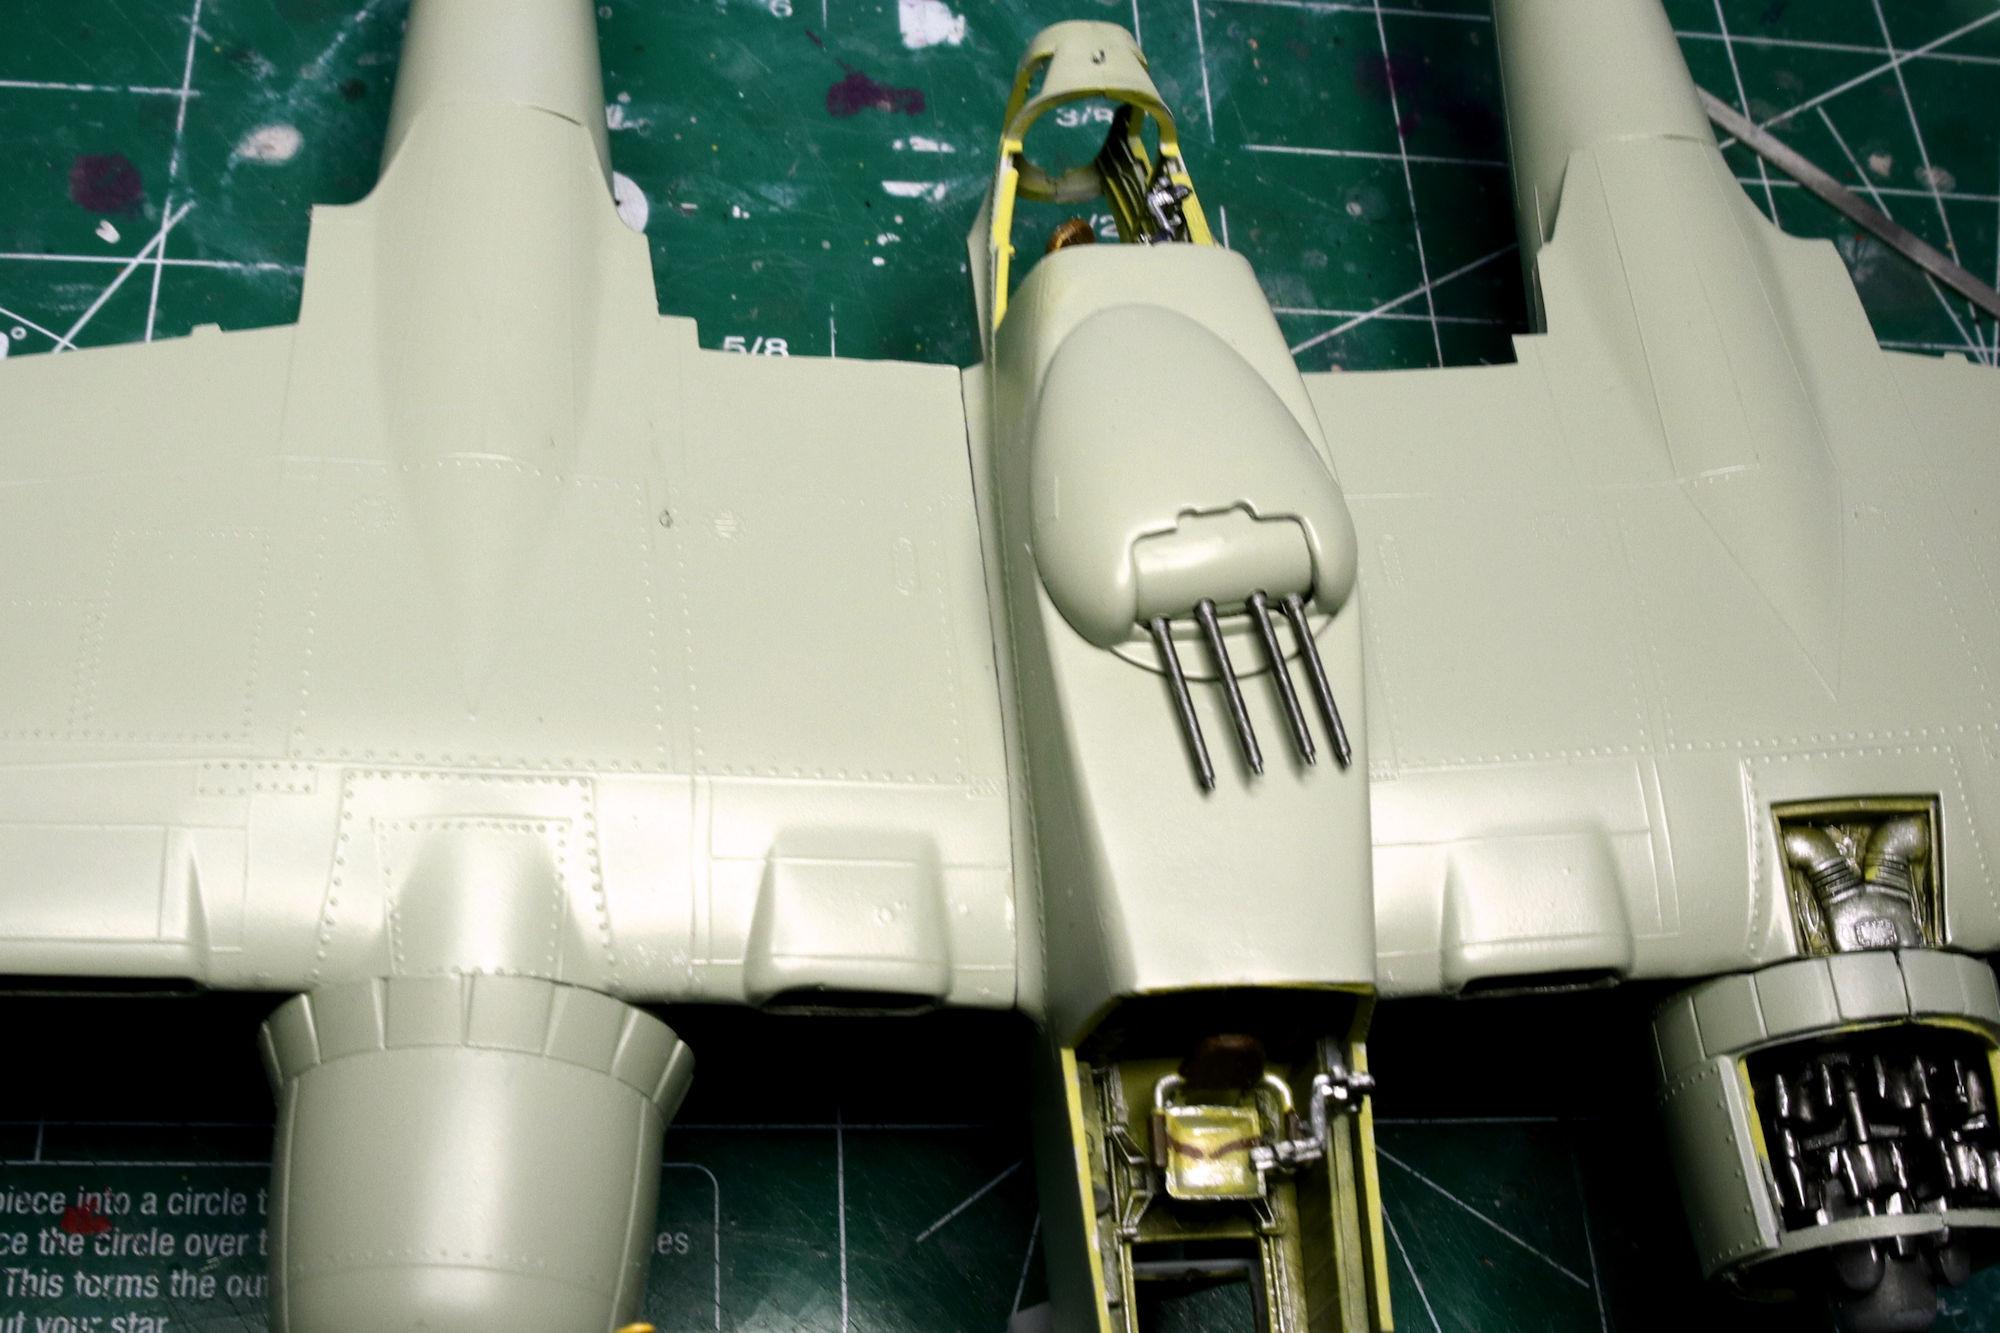
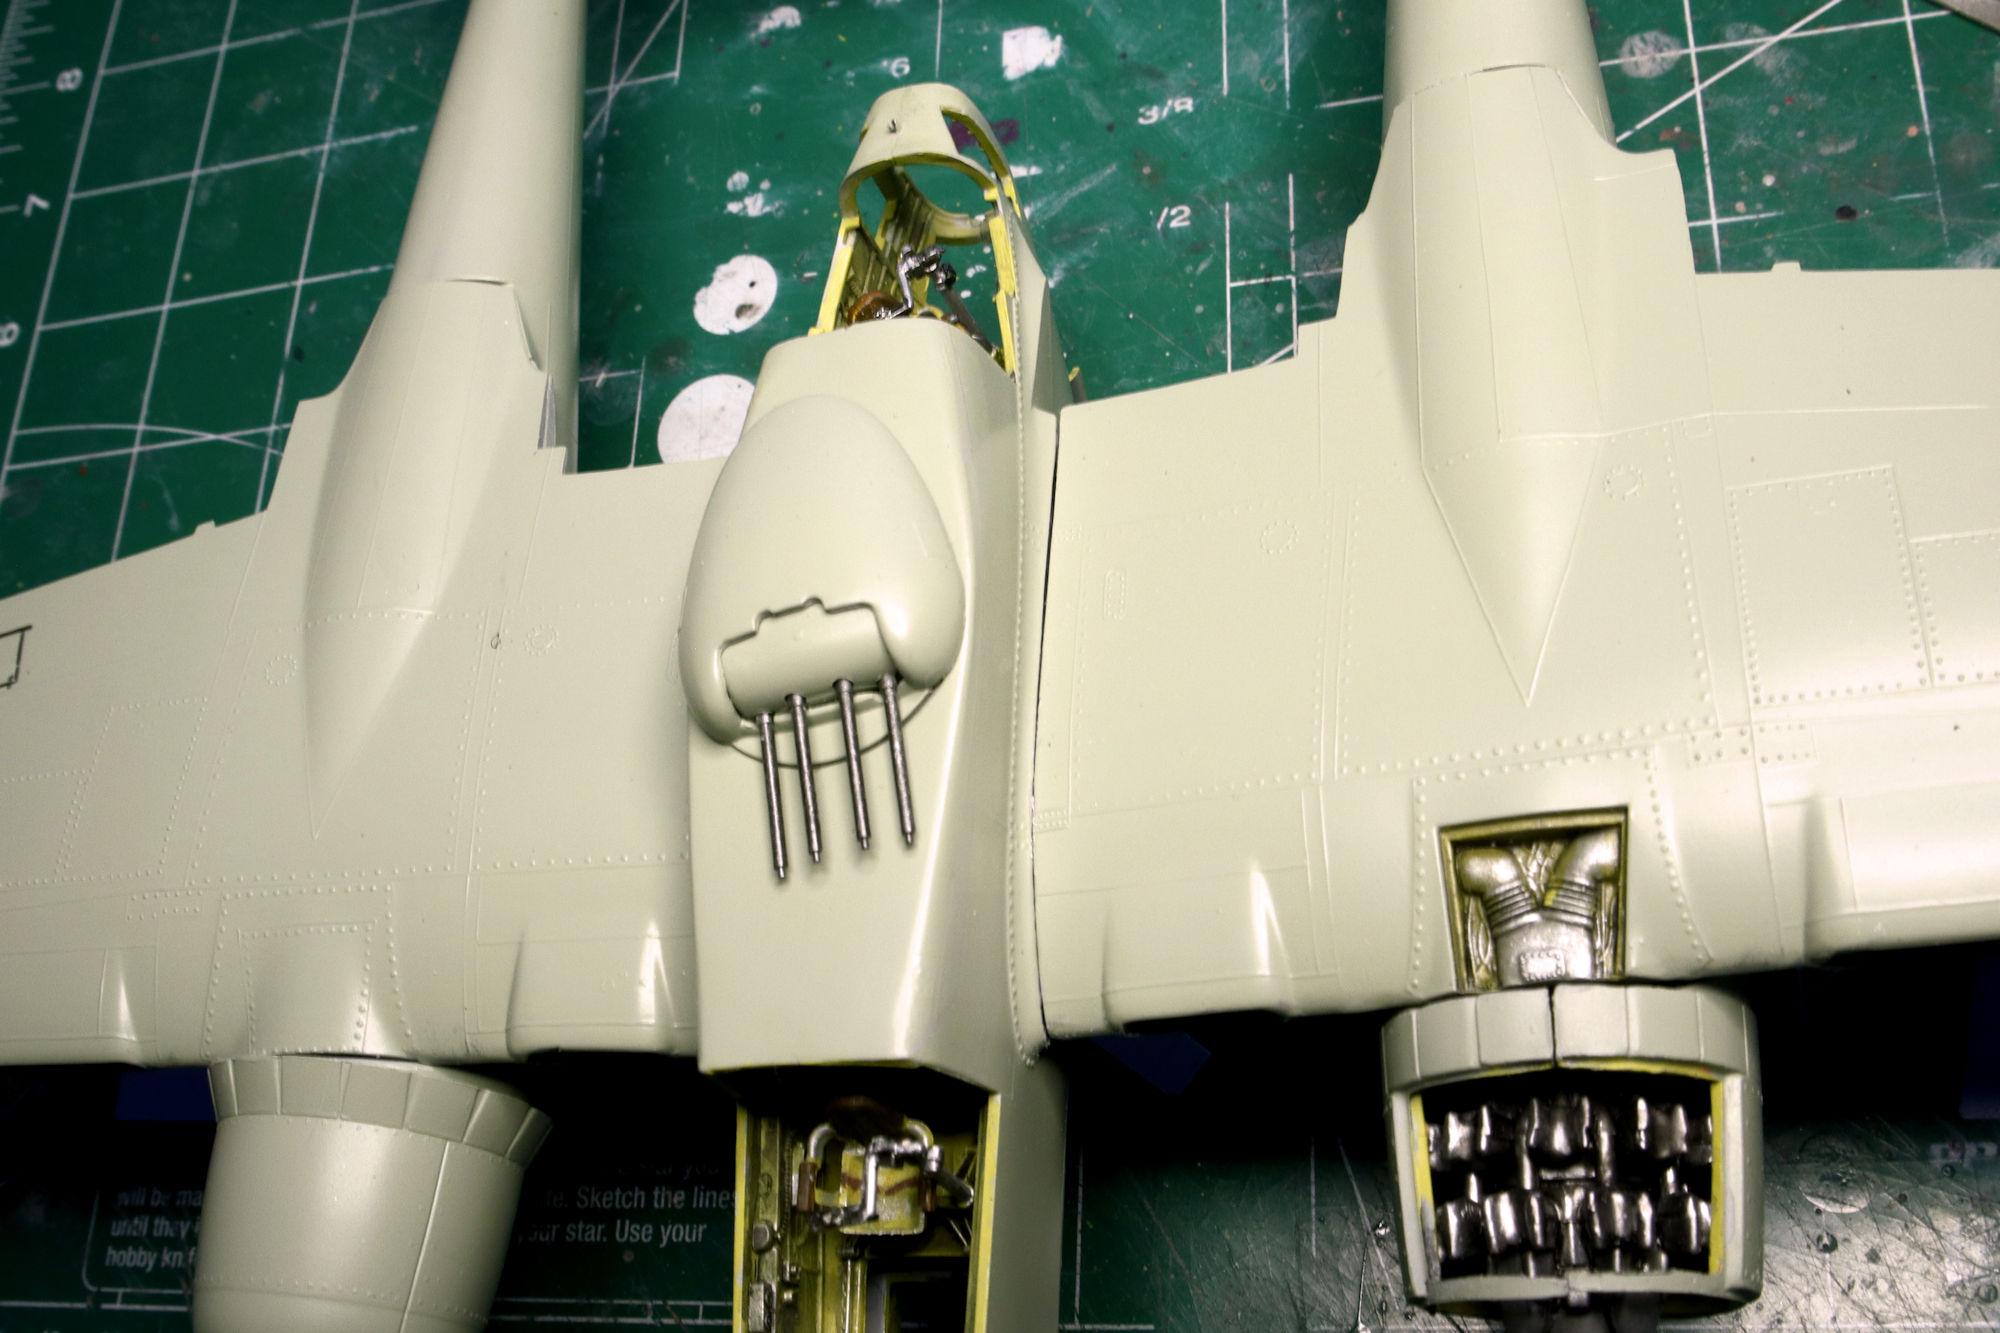
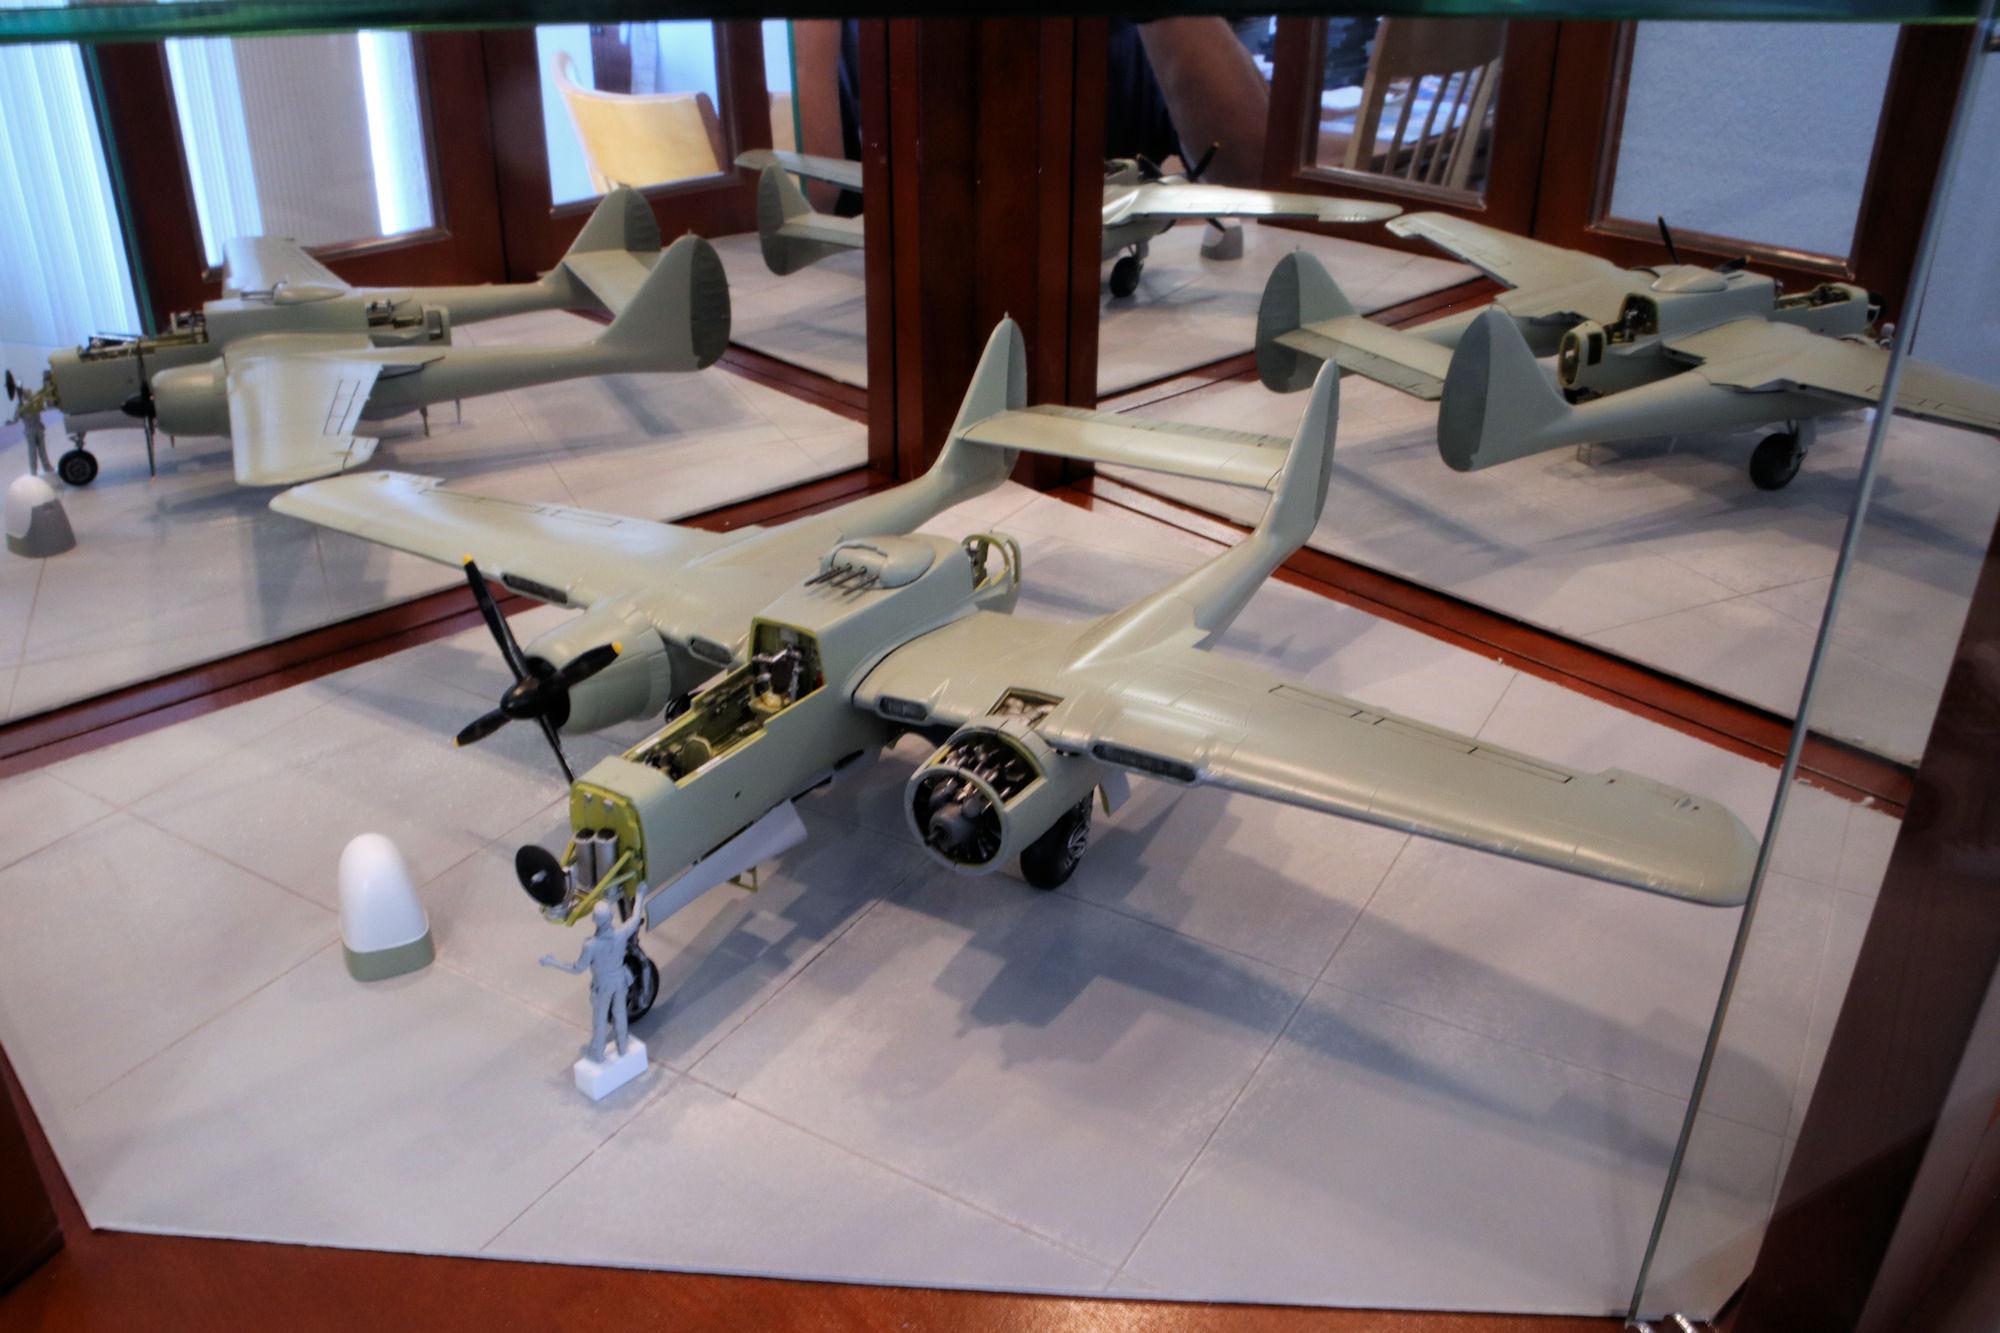
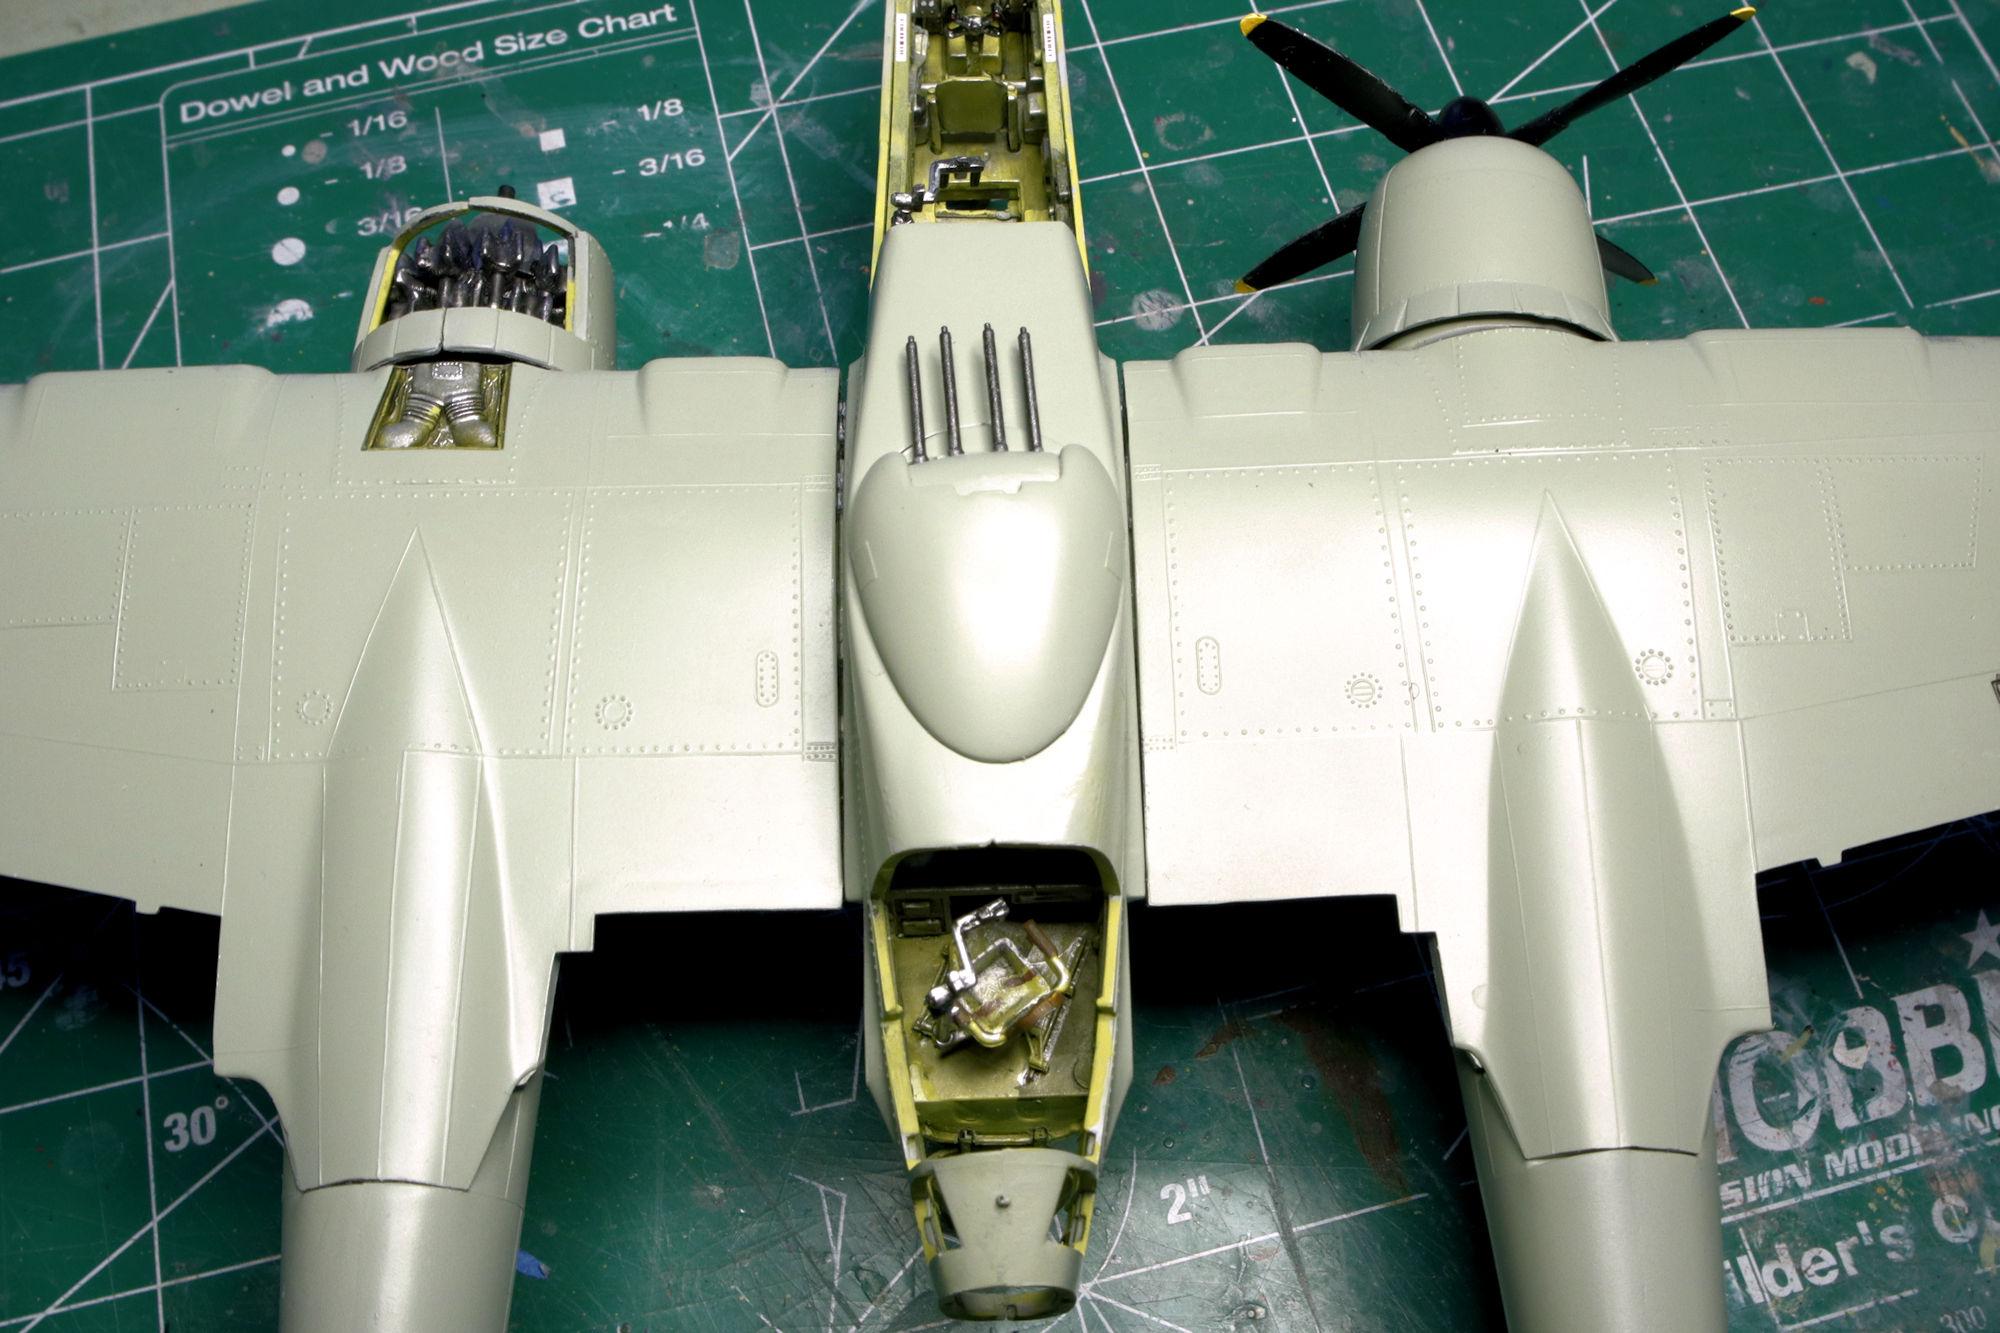
Hello Everybody! Here's the next update on the Northrop P-61. It's time for the obligatory mockup. This is the curio cabinet that will be the plane's permanent home when it's completed. I decided that I just can't live with the gaps between the wings and fuselage. Luckily, disassembly wasn't too bad. After almost two hours of filing, fitting, fussing and cussing, here's the result. It looks like it was worth the effort. Except that now our little friend Jack Tailer is pointing out another problem. It seems that with the wings more properly aligned with the fuselage, the rear stabilizer is now out of alignment with the tail. There must be some warping or fit and assembly issues somewhere else. Once the wings cure in place, it shouldn't be too difficult to straighten out. (Thanks Jack!) ? Oh well, on to the next adventure! As always, thanks for following along and please feel free to share any comments you ay have. David G.
-
I decided that I needed to at least try to fix the wings. It's supposed to be a fixed wing after all. (sorry) Check out the update below. =D-
-
That's a great looking build! Excellent detail in both the interior and engine bay. David G.
-
It looks kind of funny up on blocks with a big rubber sausage coiling out from the axle. Using the tubing as a keeper is a great idea. How do you plan to blacken the tube segment? David G.
-
It looks like this kit has a lot of hidden channels to run wires through. Great looking interior so far. David G.
-
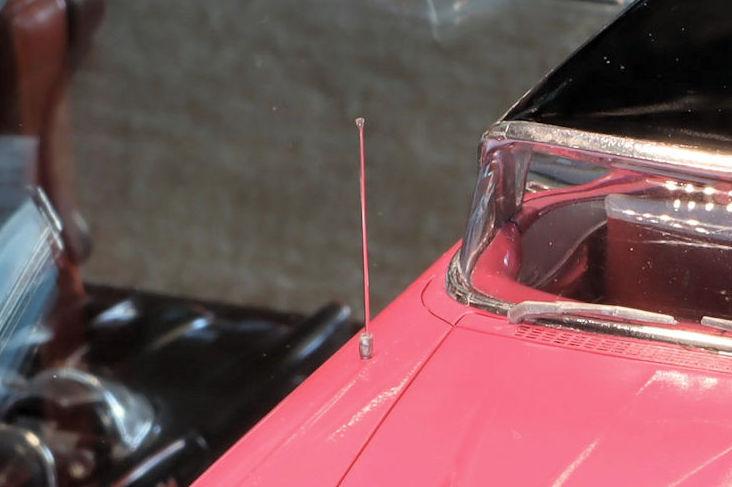
The antenna is a great finish to an excellent build Jim! I use 17 gauge guitar string for my antennae. They don't telescope but I think they look alright. Next time I'll have to find a better base for it. I like the idea you came up with. =D-
-
Such a wonderfully detailed interior, it's a shame to have to cover it by putting a body on it. Great work Daniel, I can't wait to see what you do with the body. David G.
-
Monogram's 1955 Lincoln Futura Concept Car: Finished
David G. replied to David G.'s topic in Model Cars
Thank you Jonathan. Thanks Bil, I appreciate your comment and your following the WIP. Thank you most kindly @ZIL 111V Thank you Larry. I'm glad you like it Glen, thanks for letting me know. Thanks Chris. David G. -
Monogram's 1955 Lincoln Futura Concept Car: Finished
David G. replied to David G.'s topic in Model Cars
Thank you most kindly David. Thank you Donato. I always thought of this car's design as outside of its time rather than ahead of its time; yet still a reflection if its time. Sort of a Contemporary Retro-Future style. Any wat you looks at, it's beautiful and unique. Which is why I wanted one in my collection. Thanks again, =D- -
Good progress on this one David. This looks to be an easy yet engaging build. David G.
-
The cowls look much more in scale now, nice work! David G.
-
Nice! It looks like it came out of the box that way. David G.
-
Everything looks great so far. I'm interested to see how you fill in the floors. David G.
-
Monogram's 1955 Lincoln Futura Concept Car: WIP
David G. replied to David G.'s topic in WIP: Model Cars
Whatever you call it, I like it. "Classic Kitsch" comes to mind too. =D- -
Thanks for sharing photos of your excellent '49 Mercury wagon here Bart. It's a fabulous looking build, especially the woodgrain detail. David G.
-
Monogram's 1955 Lincoln Futura Concept Car: Finished
David G. replied to David G.'s topic in Model Cars
Thank you Michael. One of my favorites too, thanks Nathan. Thank you Jeff, it is a good looking color, isn't it? Thank you Bob. I didn't have to do much scratch building but there were a lot of alignment and casting problems that I had to correct. And... the sink marks! ? This thing had almost as many dimples as a golf ball! Check out the build thread if you get a chance. Thank you very much Phil. Thank you Terry, I'm glad I went with that color too. Thank you Gregory, I'm glad you liked the build thread. Yeah, I could definitely see Ricky and Lucy in those figures! Thank you most kindly Bart. Thank you Harry, I appreciate that. Thanks again to you all, I have more photos coming soon. David G. -
Welcome back John, I'm glad you're feeling better. Nice progress on the engine. Based on the color, is that a 455? David G.