David G.
-
Posts
11,313 -
Joined
-
Last visited
Content Type
Profiles
Forums
Events
Gallery
Everything posted by David G.
-
Excellent work, great photos too! David G.
-

Steel Haul - NEW Tractor unit UPDATE!!!!
David G. replied to tiking's topic in Model Trucks: Big Rigs and Heavy Equipment
Excellent weathering and distressing! In the right setting it could pass for the real thing. David G. -
Got some of the foil work done! I'll try to get some more photos tomorrow. Thanks, David G.

-
Jaaaag XK120- Gentleman's Racer! Paint and Engine Update 7/26
David G. replied to jaymcminn's topic in WIP: Model Cars
Fantastic Work! David G. -
Sympathies- that's a bummer. David G.
-
I've been watching this one for a while. Excellent work! David G.
-
Great weathering and excellent mud effects! Mud is one of the more difficult things to do well and you nailed it. David G.
-
I'm still watching this one with great interest. Love all the added details and the ghost flames. David G.
-
Excellent diorama and photos! In some of the shots it could pass for the real thing. David G.
-
Impressive work! I love all the little details. David G.
-
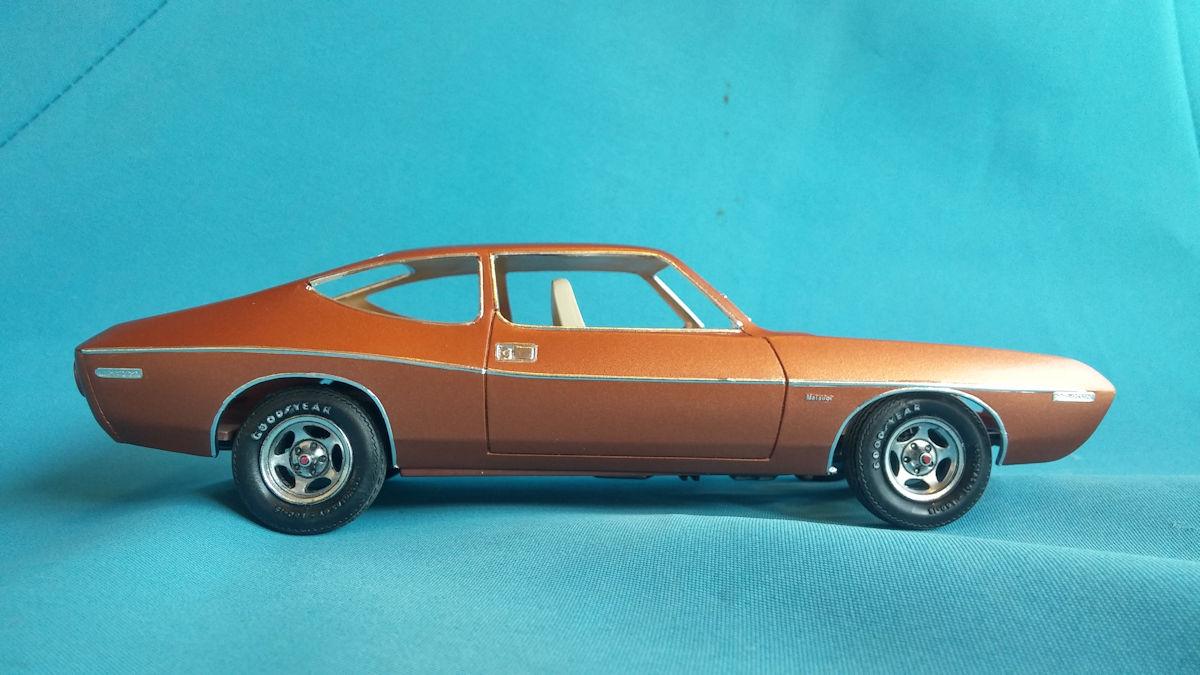
I always liked AMC because they were willing to take risks in designing. They weren't afraid to break away from the accepted conventions and do their own thing. The result wasn't always a fabulous success, but at least it was usually interesting. David G.
-
Thanks for your kind comments John. Sometimes I find my goals to be a little more ambitious than my skills will allow, but that's how we improve. David G.
-
Thanks Mattias, it is a bummer to have to do that but it's all a part of the game. David G.
-
1950 Chev Panel .
David G. replied to Silver Foxx's topic in Model Trucks: Pickups, Vans, SUVs, Light Commercial
Fantastic work, great color choice! David G. -
1971 rusty Ford Ranger XLT
David G. replied to Piero's topic in Model Trucks: Pickups, Vans, SUVs, Light Commercial
Nicely done- very convincing! David G. -
Moebius 71 Ford Ranger Pickup XLT
David G. replied to SteveG's topic in Model Trucks: Pickups, Vans, SUVs, Light Commercial
Superb! David G. -
Very cool- excellent color choice. David G.
-
Nicely done! Good photos too. David G.
-
Thank you Dave. I think from now on I should just treat areas like this with CA during the initial prep and save myself the aggravation. David G.
-
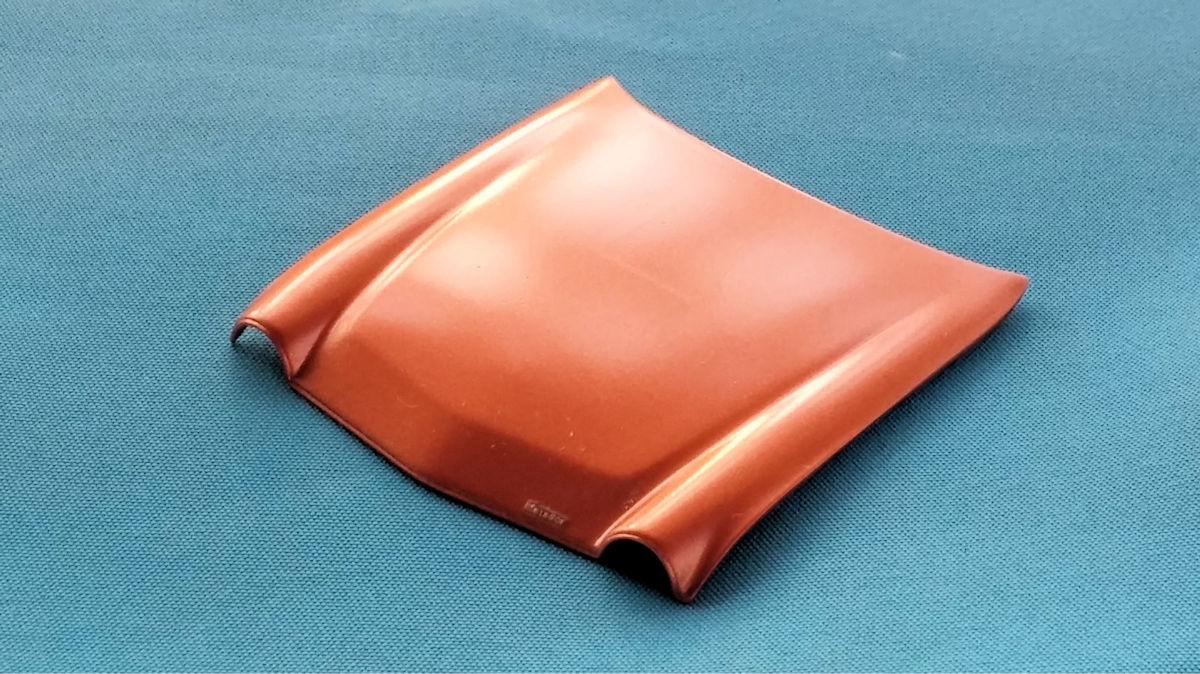
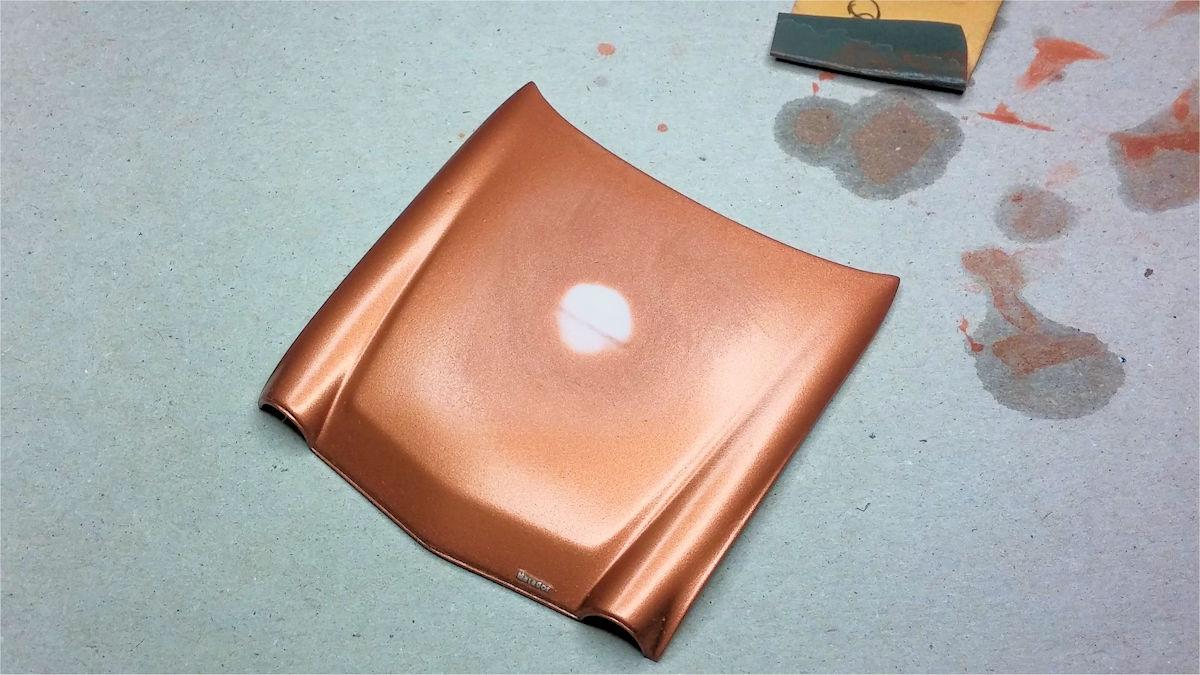
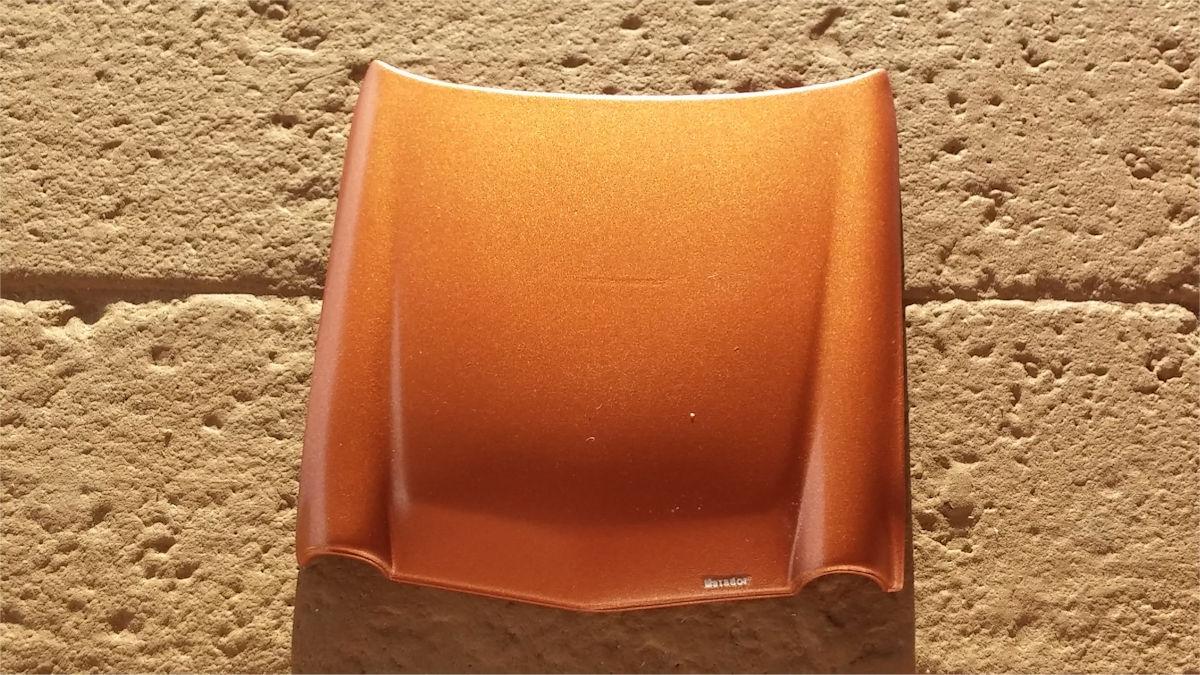
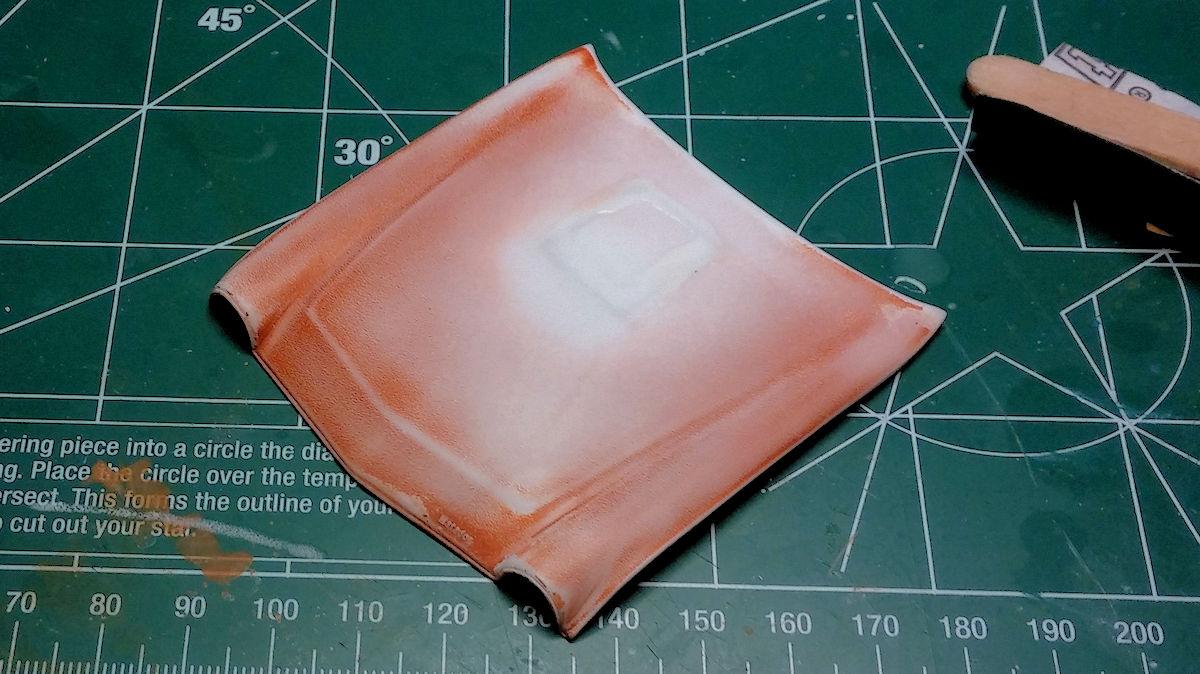
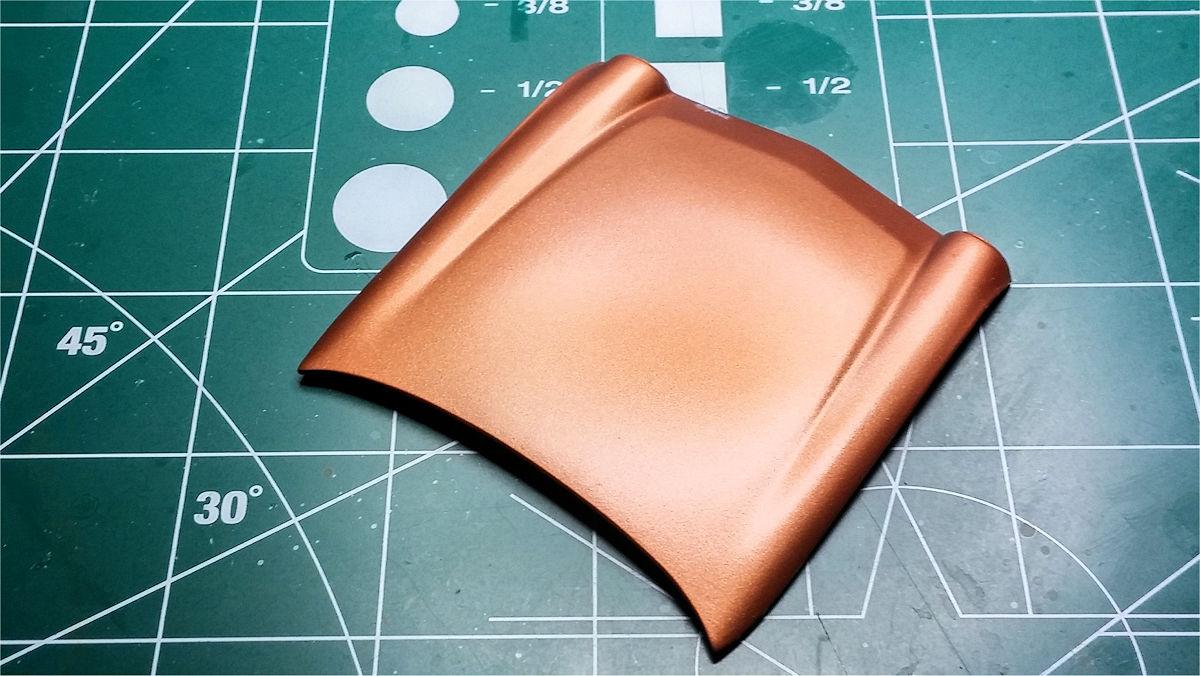
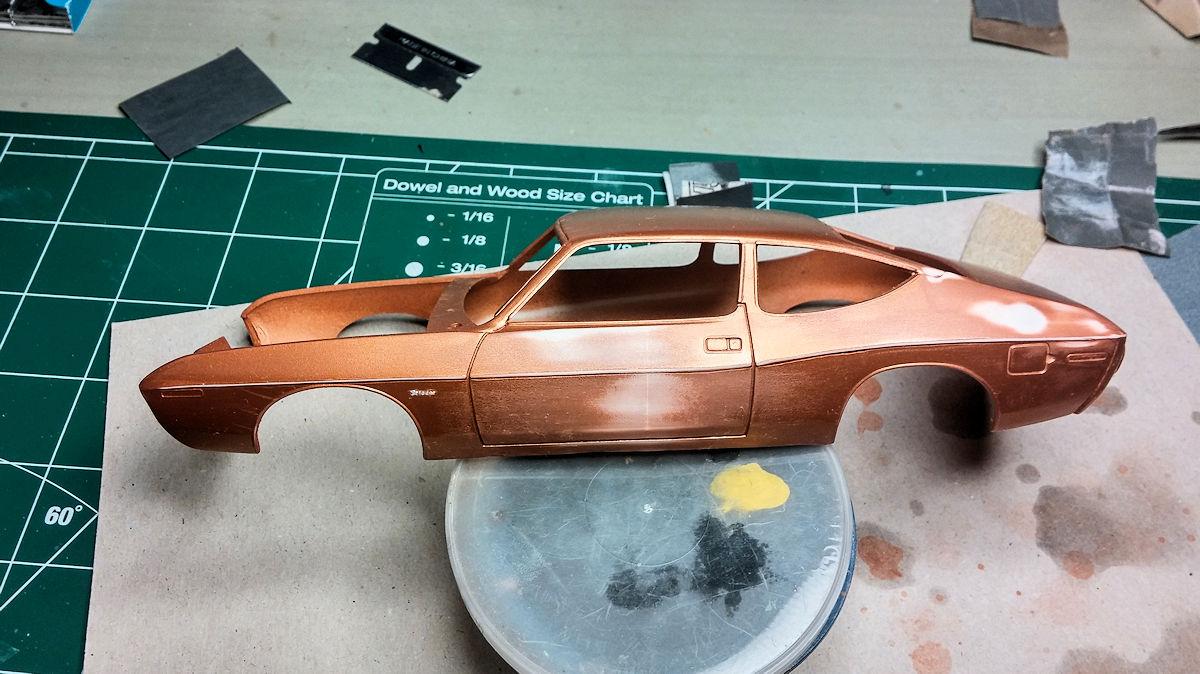
I've spent the last couple of weeks fighting ghosts. This ghost comes from the relief cut that was cast into the underside of the hood. It's intended provide a guide for those who want to cut the hood open to accommodate a blower or hood scoop. This is my first attempt to correct the issue by sanding, spot glazing and repainting the effected area. This is the result- better, but not good enough. I stripped the paint, covered the offending area with CA and sanded, primed and repainted. Mission accomplished! This other ghost was the result of a casting flaw. This one was easily corrected with a bit of sanding and spot putty. The same procedure that didn't work at first on the hood. As always, thanks for taking the time to look and feel free to comment. David G.
-
Very cool! David G.
-
Nice set. I'm working on a Matador myself. David G.
-
Thanks for your encouragement Jeff. I also have an MPC Pacer, but what I'd really like to find is a 77 Hornet hatchback. David G.
-
Yes, Mattias, most model kits come out a bit too high. It seems that I have to adjust (lower) most of the kits I build. The manifolds are painted first with Poly Scale flat acrylic rust then dry-brushed with Testors steel enamel. Thanks for the compliment, I like the way they turned out too. David G.
-
Looks like a fun project car. Is the roof painted or is it vinyl? David G.