David G.
-
Posts
11,326 -
Joined
-
Last visited
Content Type
Profiles
Forums
Events
Gallery
Everything posted by David G.
-

1:16 Gunze Sangyo 1937 Rolls-Royce Phantom III Sports Saloon
David G. replied to Anglia105E's topic in WIP: Model Cars
Impressive ambitions David! It would be fabulous to work those into your build, especially lighted semaphores! ? It's difficult to imagine more worthy subject for such a lighting project. David G. -
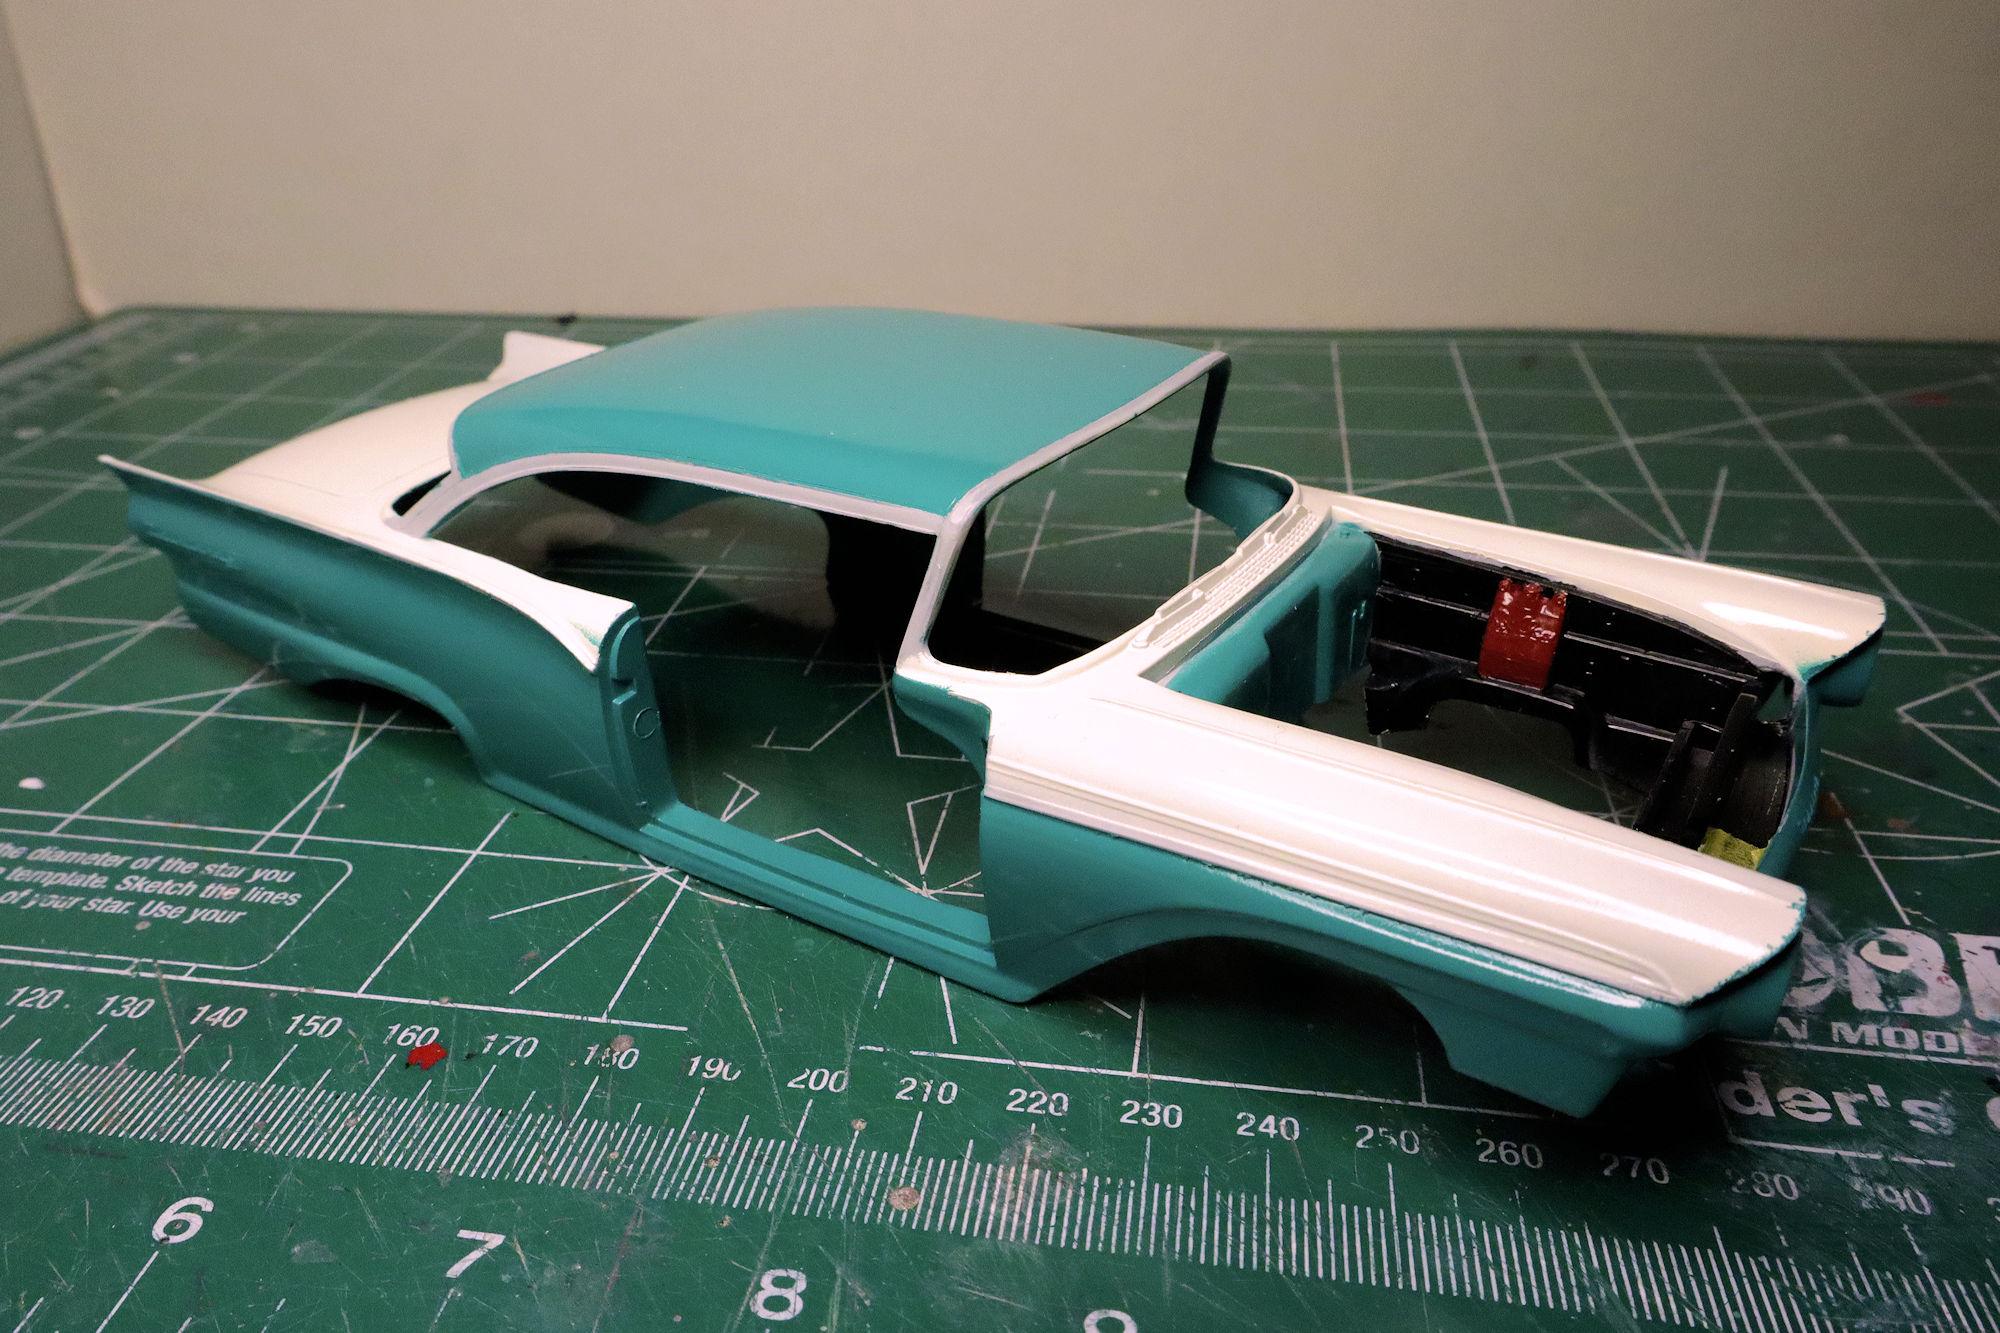
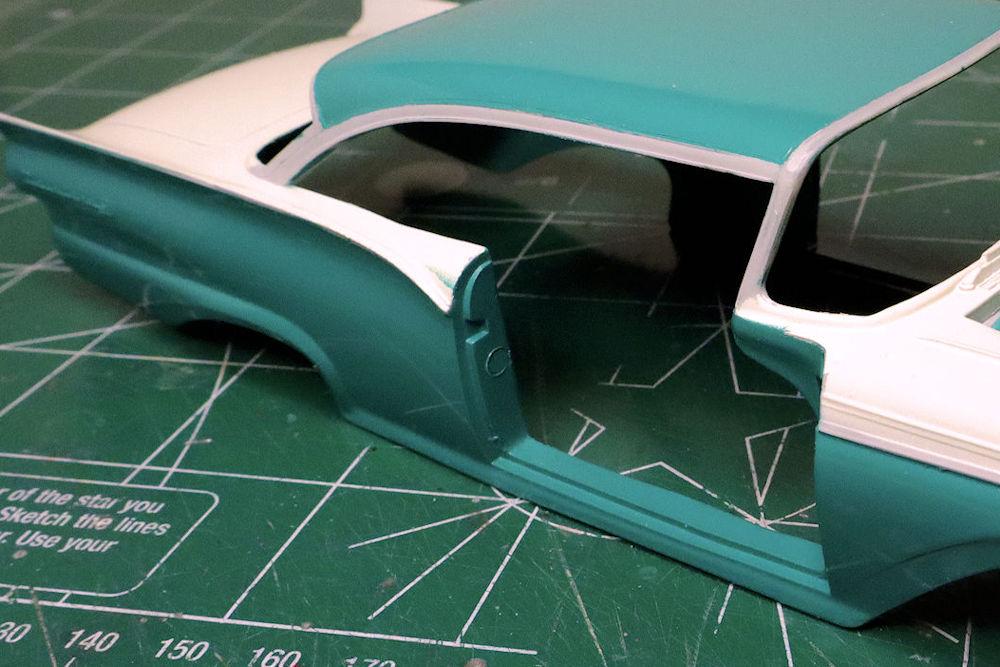
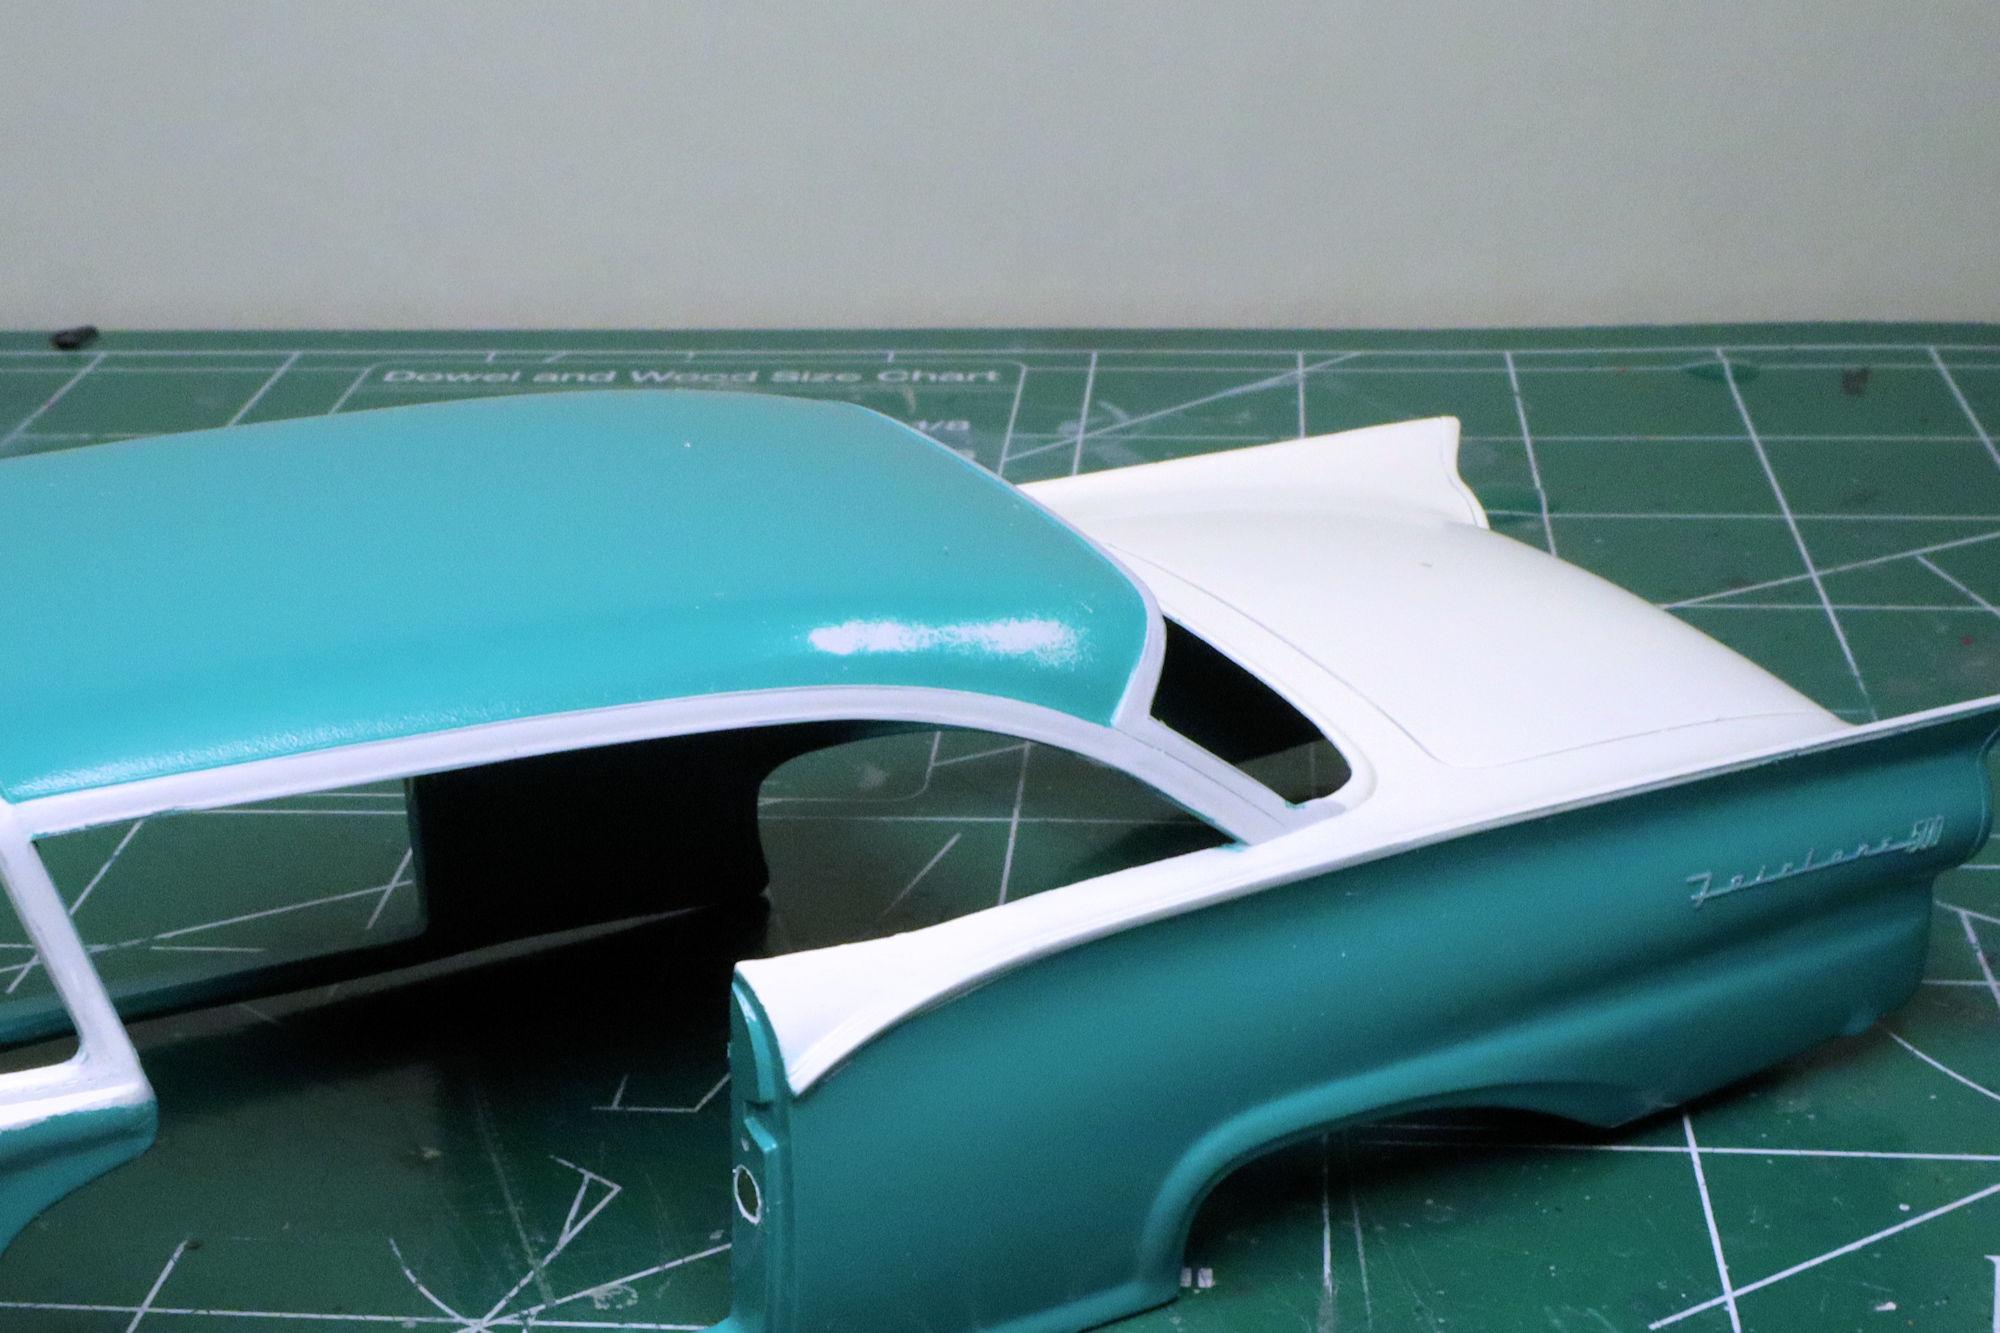
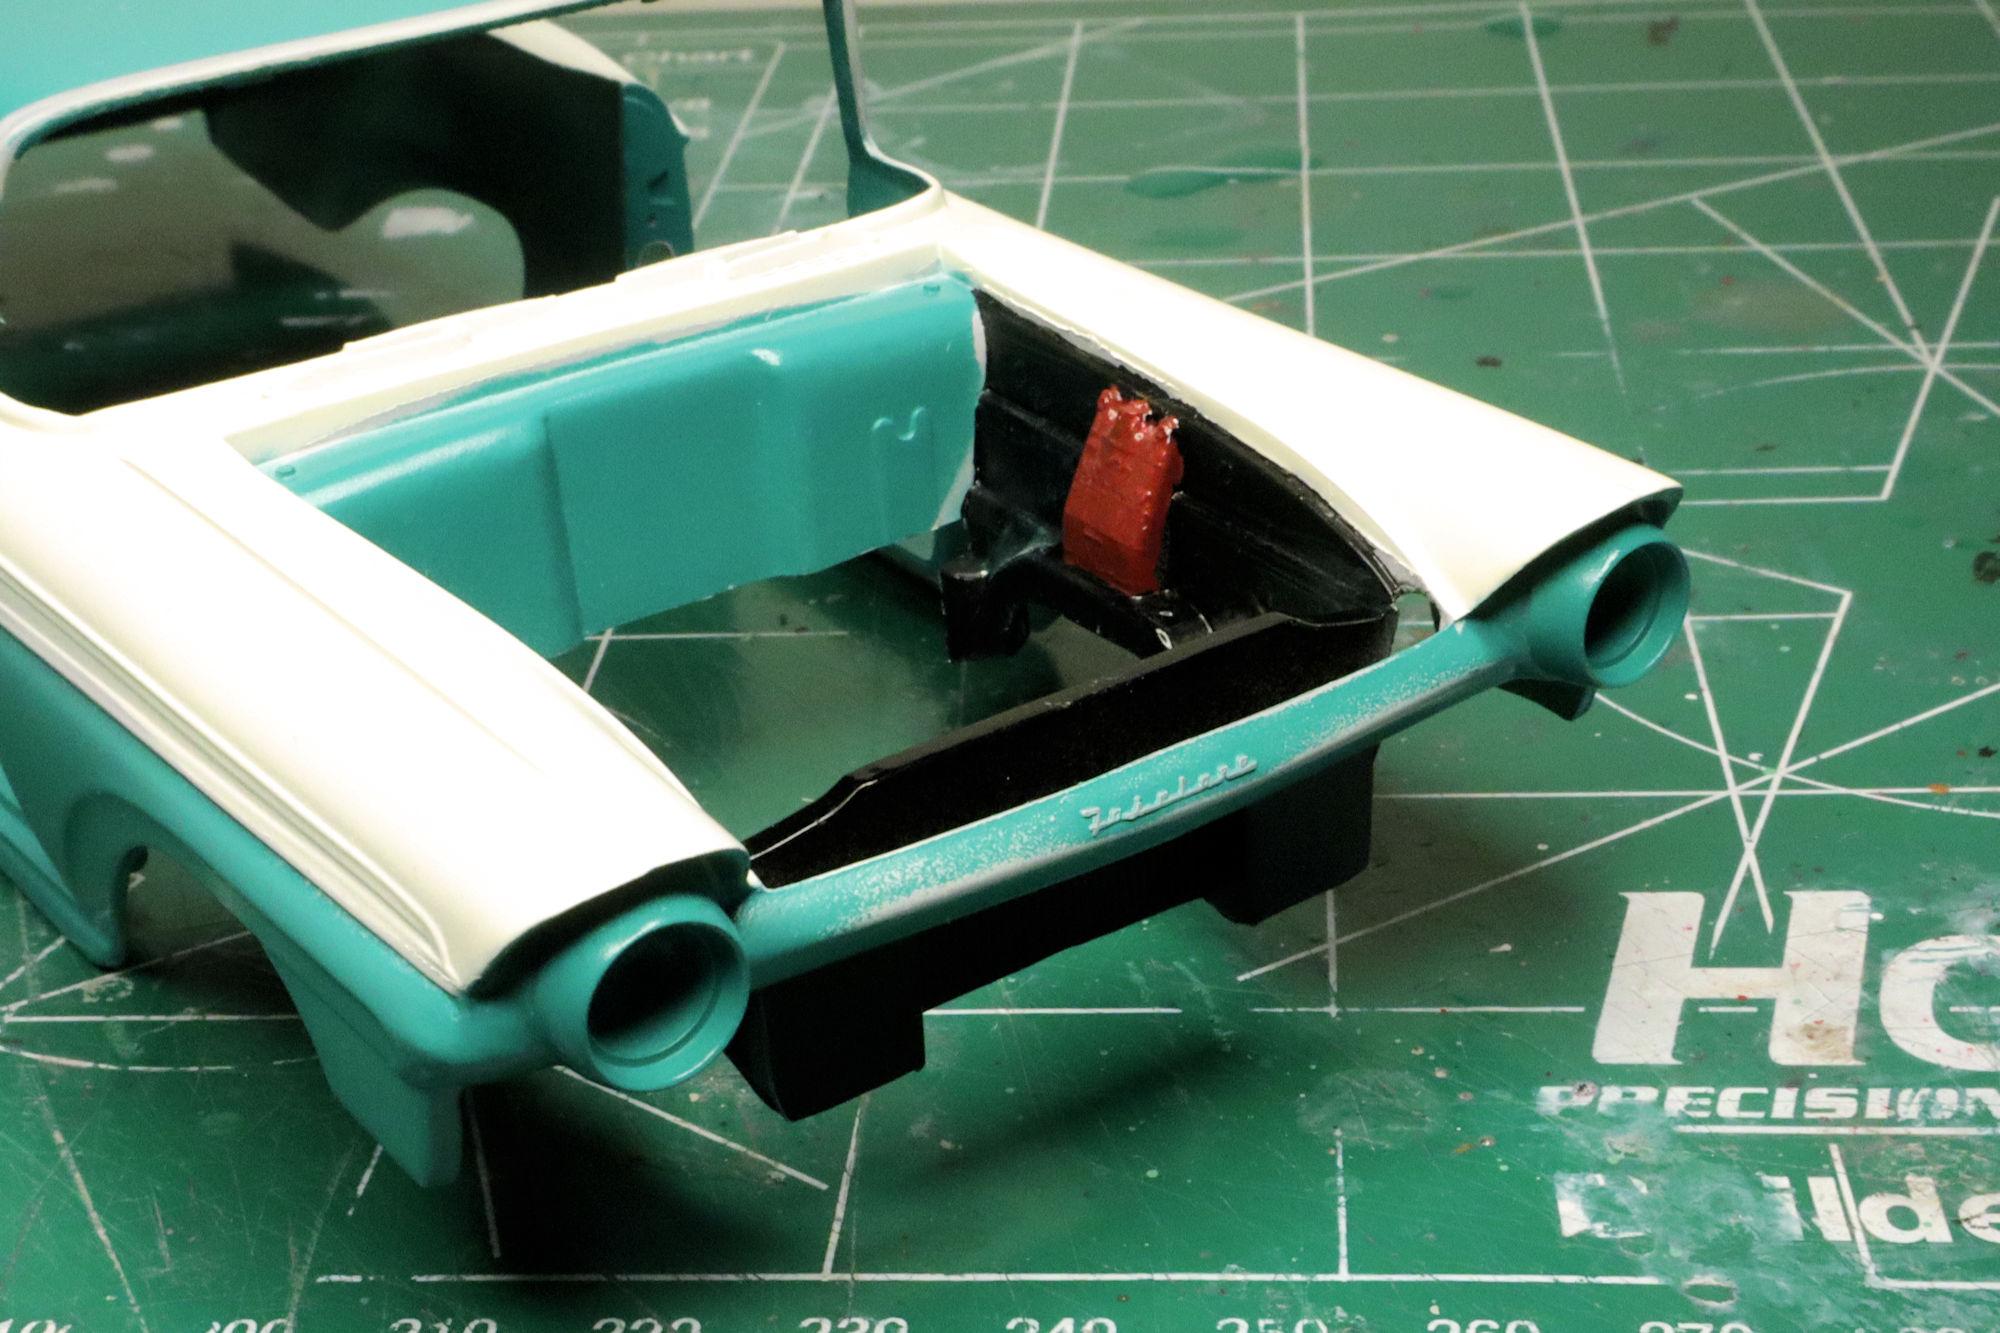
Hello Everybody! Even through the distraction of my other builds, the progress continues. The second coat of green came out as well as I could have hoped. As always, there is a bit of cleanup to do. That will be a part of the polishing process. This time that is a shiny spot! More to come soon. Thanks to all of you who follow along and thanks to those who offer their comments and advice. I always enjoy reading your comments. David G.

-
No, I don't think you're missing anything Jeremy. Getting the proper amount of cement, enough to hold the thin strips in place without melting them. Getting the thin strips to stay in place while the cement cures. Doing all that without messing up the surface you're applying the strips to. Those challenges are pretty challenging and it looks like you've handled them all well. No, I don't think you're missing anything Jeremy. It seems like you just have things well in hand. David G.
-
Great looking detail and excellent weathering! David G.
-
Nicely done with the finishing touches! I'll have a looks for it in the Under Glass section. David G.
-
1:16 Gunze Sangyo 1937 Rolls-Royce Phantom III Sports Saloon
David G. replied to Anglia105E's topic in WIP: Model Cars
Wow, you been going to town on this one! ? Excellent work across the board. Everything looks great, Just as as one would expect it to. Thanks for continuing to post the progress updates, I always enjoy seeing them. David G. -
Aw man, that sucks! I'm sorry to learn that. Do you have any pictures of it? David G.
-
Correct once again Bob. I do remember putting the 009 in when I built that engine. This was a 1971 engine with the dreaded "smog" distributor and 34 PICT carb. The vacuum retard on the stock smog distributor seemed to flatten out the whole advance curve and made the idle twitchy. The guy at the Bug shop I used at the time recommended swapping for the 009 and capping the vacuum ports on the carb. It worked well. It felt like it had a tighter advance at the top end and a rock steady idle with no timing flutter. Of course I compensated for the low end flat spot by over jetting the carb and over advancing the timing a little. But it was a lot easier to get them through emissions back then. I haven't built a Bug since that one got wrecked in 2003 so I'm sure my knowledge curve has flattened out a little but I still remember what a distributor looks like. Thanks again for the input Bob. You seem to be someone who builds and/or runs VWs. VWs have always been a passion of mine, do you have any current VW builds or projects going on? Cheers, David G.
-
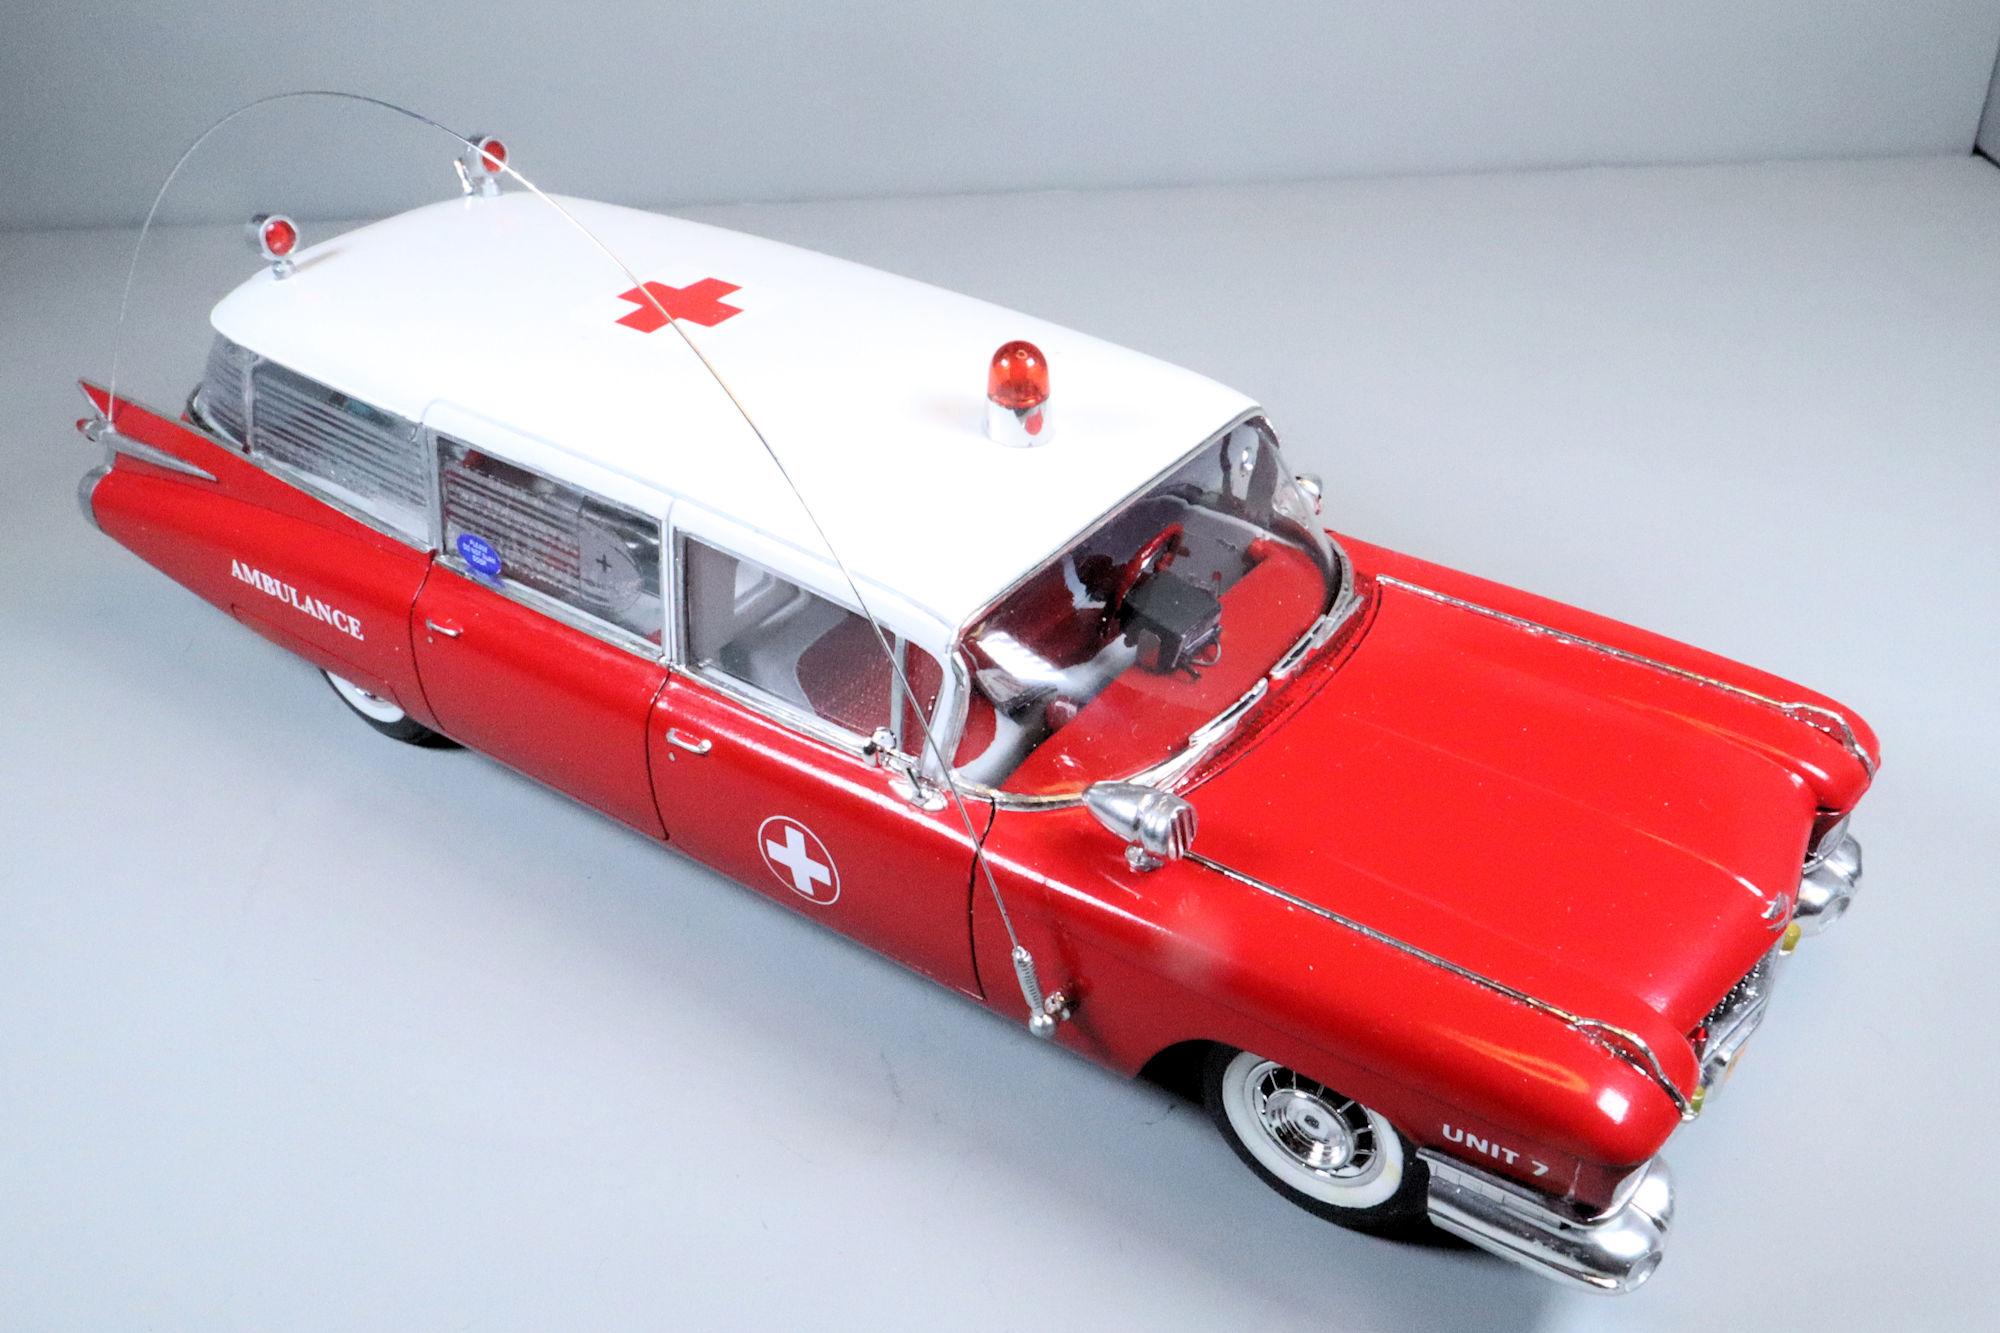
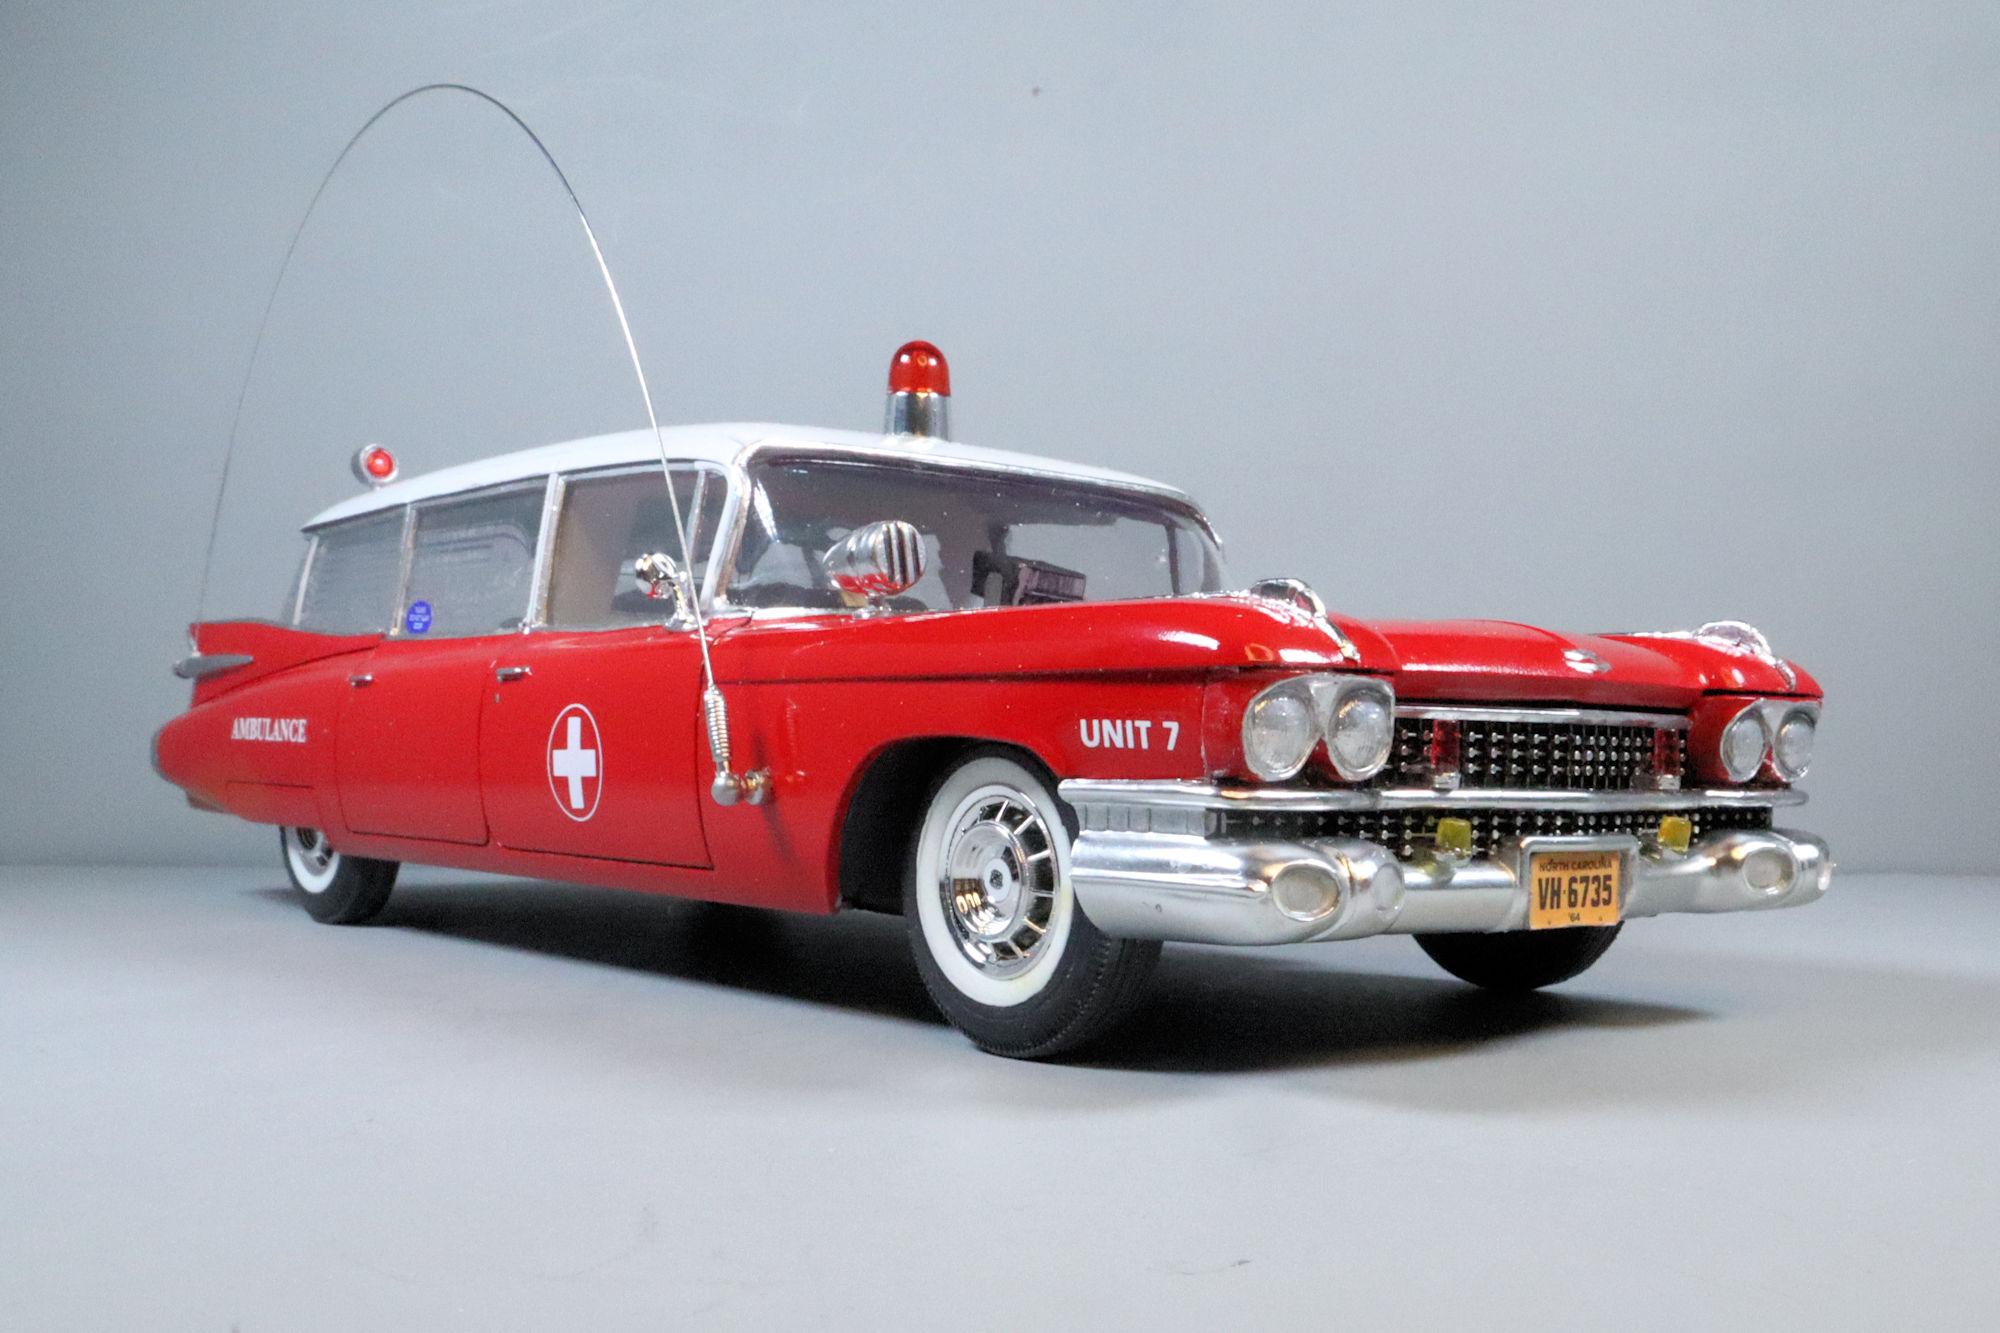
Thank you Mario! I'm not in the least upset or feeling put out by the timing of the ambulance release as I always intended to get one any way. And as you pointed out, I had the pleasure of doing it my own way. Thank you very much David. Thank you most kindly David. Honestly, my feelings regarding AMT's timing on the release of the revised ambulance version are entirely positive. Obviously, I'm glad that they made the conversion and gave us an honest-to-goodness ambulance. The timing of that release turned out to be ideal for me personally; in the midst of my converting the Surf Shark back into an ambulance. Having nearly completed the conversion of the Surf Shark, I was at the point of having to find suitable livery markings for it. The decals provided in the Surf Shark kit were limited in ambulance-appropriate markings. The Ambulance kit had more than enough appropriately styled decals which I immediately appropriated for the Surf Shark build. This also worked out well for my future plans to build the Ambulance kit as a hearse. First, the hearse I have planned will obviously not need any of the ambulance markings. Second, having already built one version of this kit, I have benefit of the experience of knowing where its potential shortcomings are and how to better address them on the next go around. It's like I say, "Each kit I build is really only practice for the next one!" I don't think I could have planned it better myself. Thanks again for your kind comment, -D- Thank you most kindly David. Thanks Jeremy. Thank you very much Jim. Thanks Larry! Thank you L M! Thanks Garry! I did manage to get one good Ecto-1 built with a complete and lighted interior. I also have a couple other donor kits in my stash left from my first hearse conversion attempt. There may be one complete kit among them. Thanks Chris. Thank you David, I appreciate that. Thank you Jeff. I'm quite fond of them myself, beautiful machines they are. Thanks Greg. Thanks for filling me in on the origin of the stickers. I remember building that kit with my son... in 1991 or thereabouts. ? Gah, I'm getting old! Thank you all for your kind comments. Cheers, David G.
-
That would be great! It's most kind of you to offer Les. I'll PM you soon. Thanks, David G.
-
Hello Everybody! Thank you all for your help, comments, suggestions and support! This one is complete and has taken up residence in the Under Glass section. Here's a link. Thanks, David G.
-
Thanks, I'm always happy to help.
-
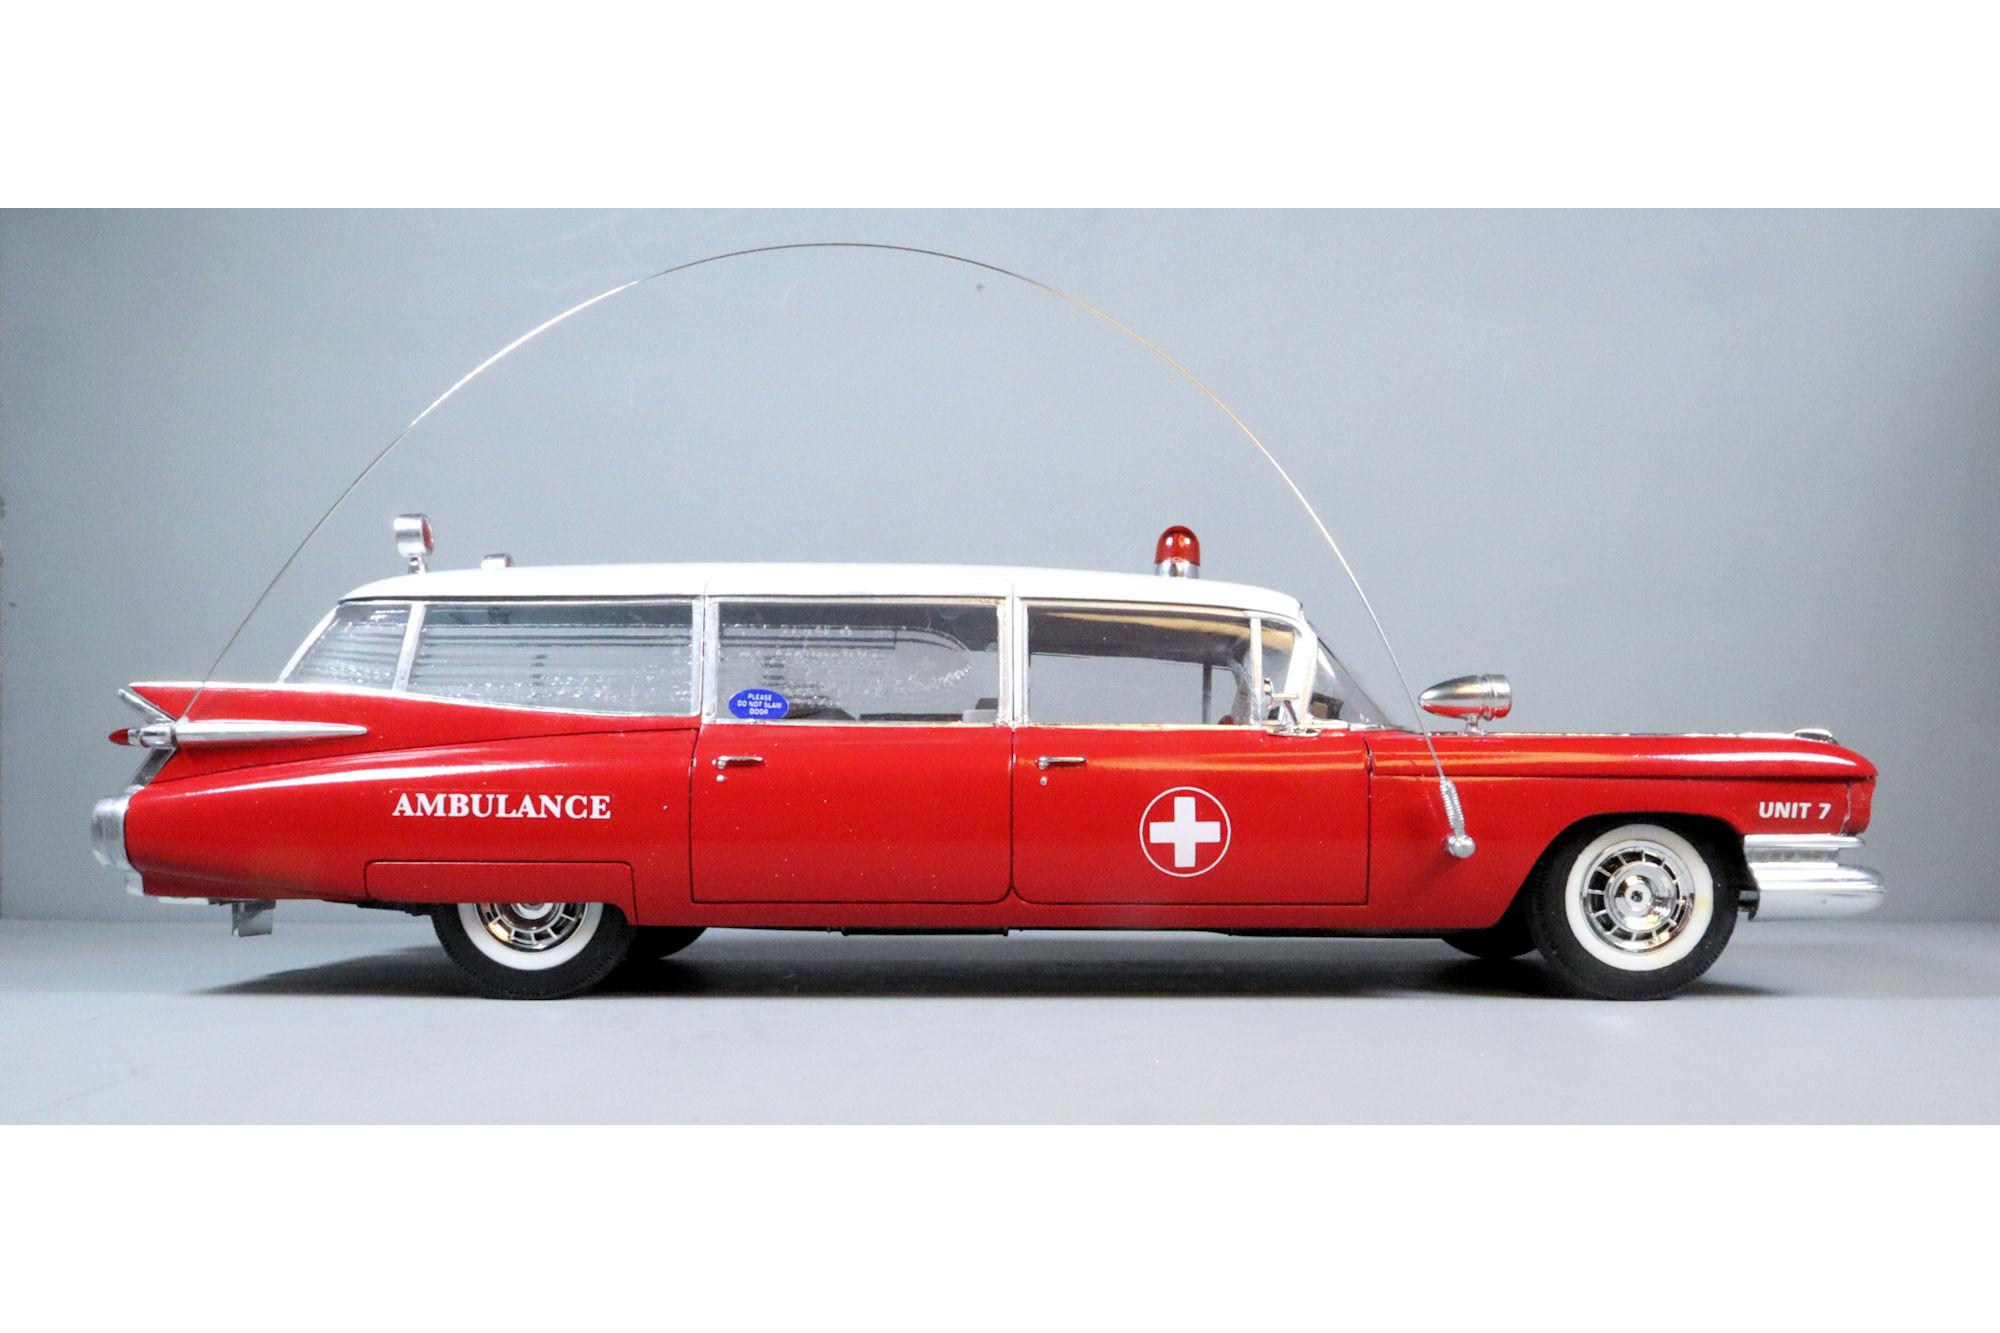
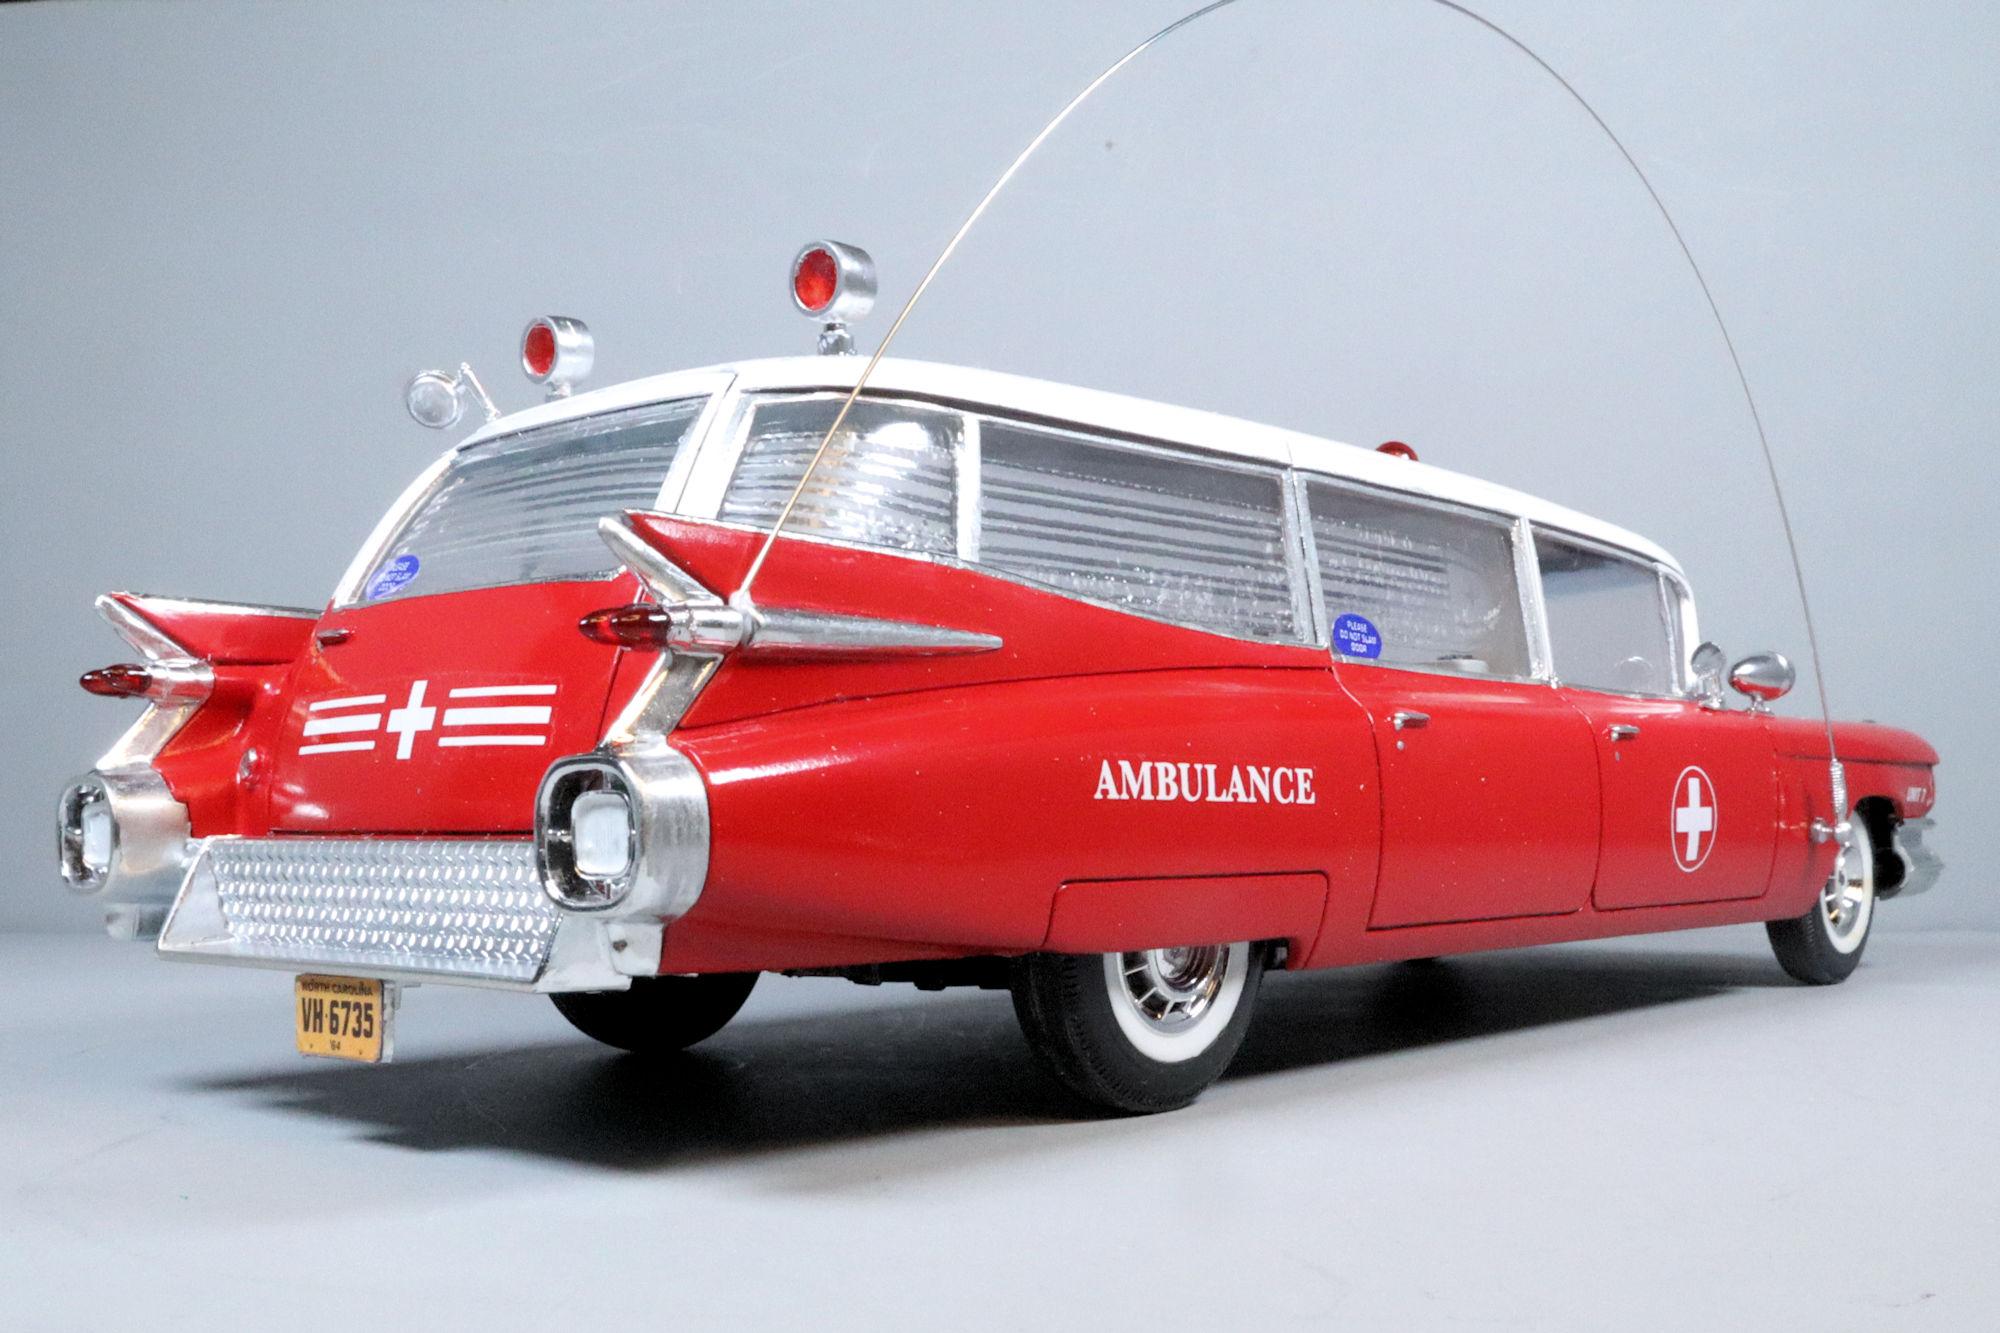
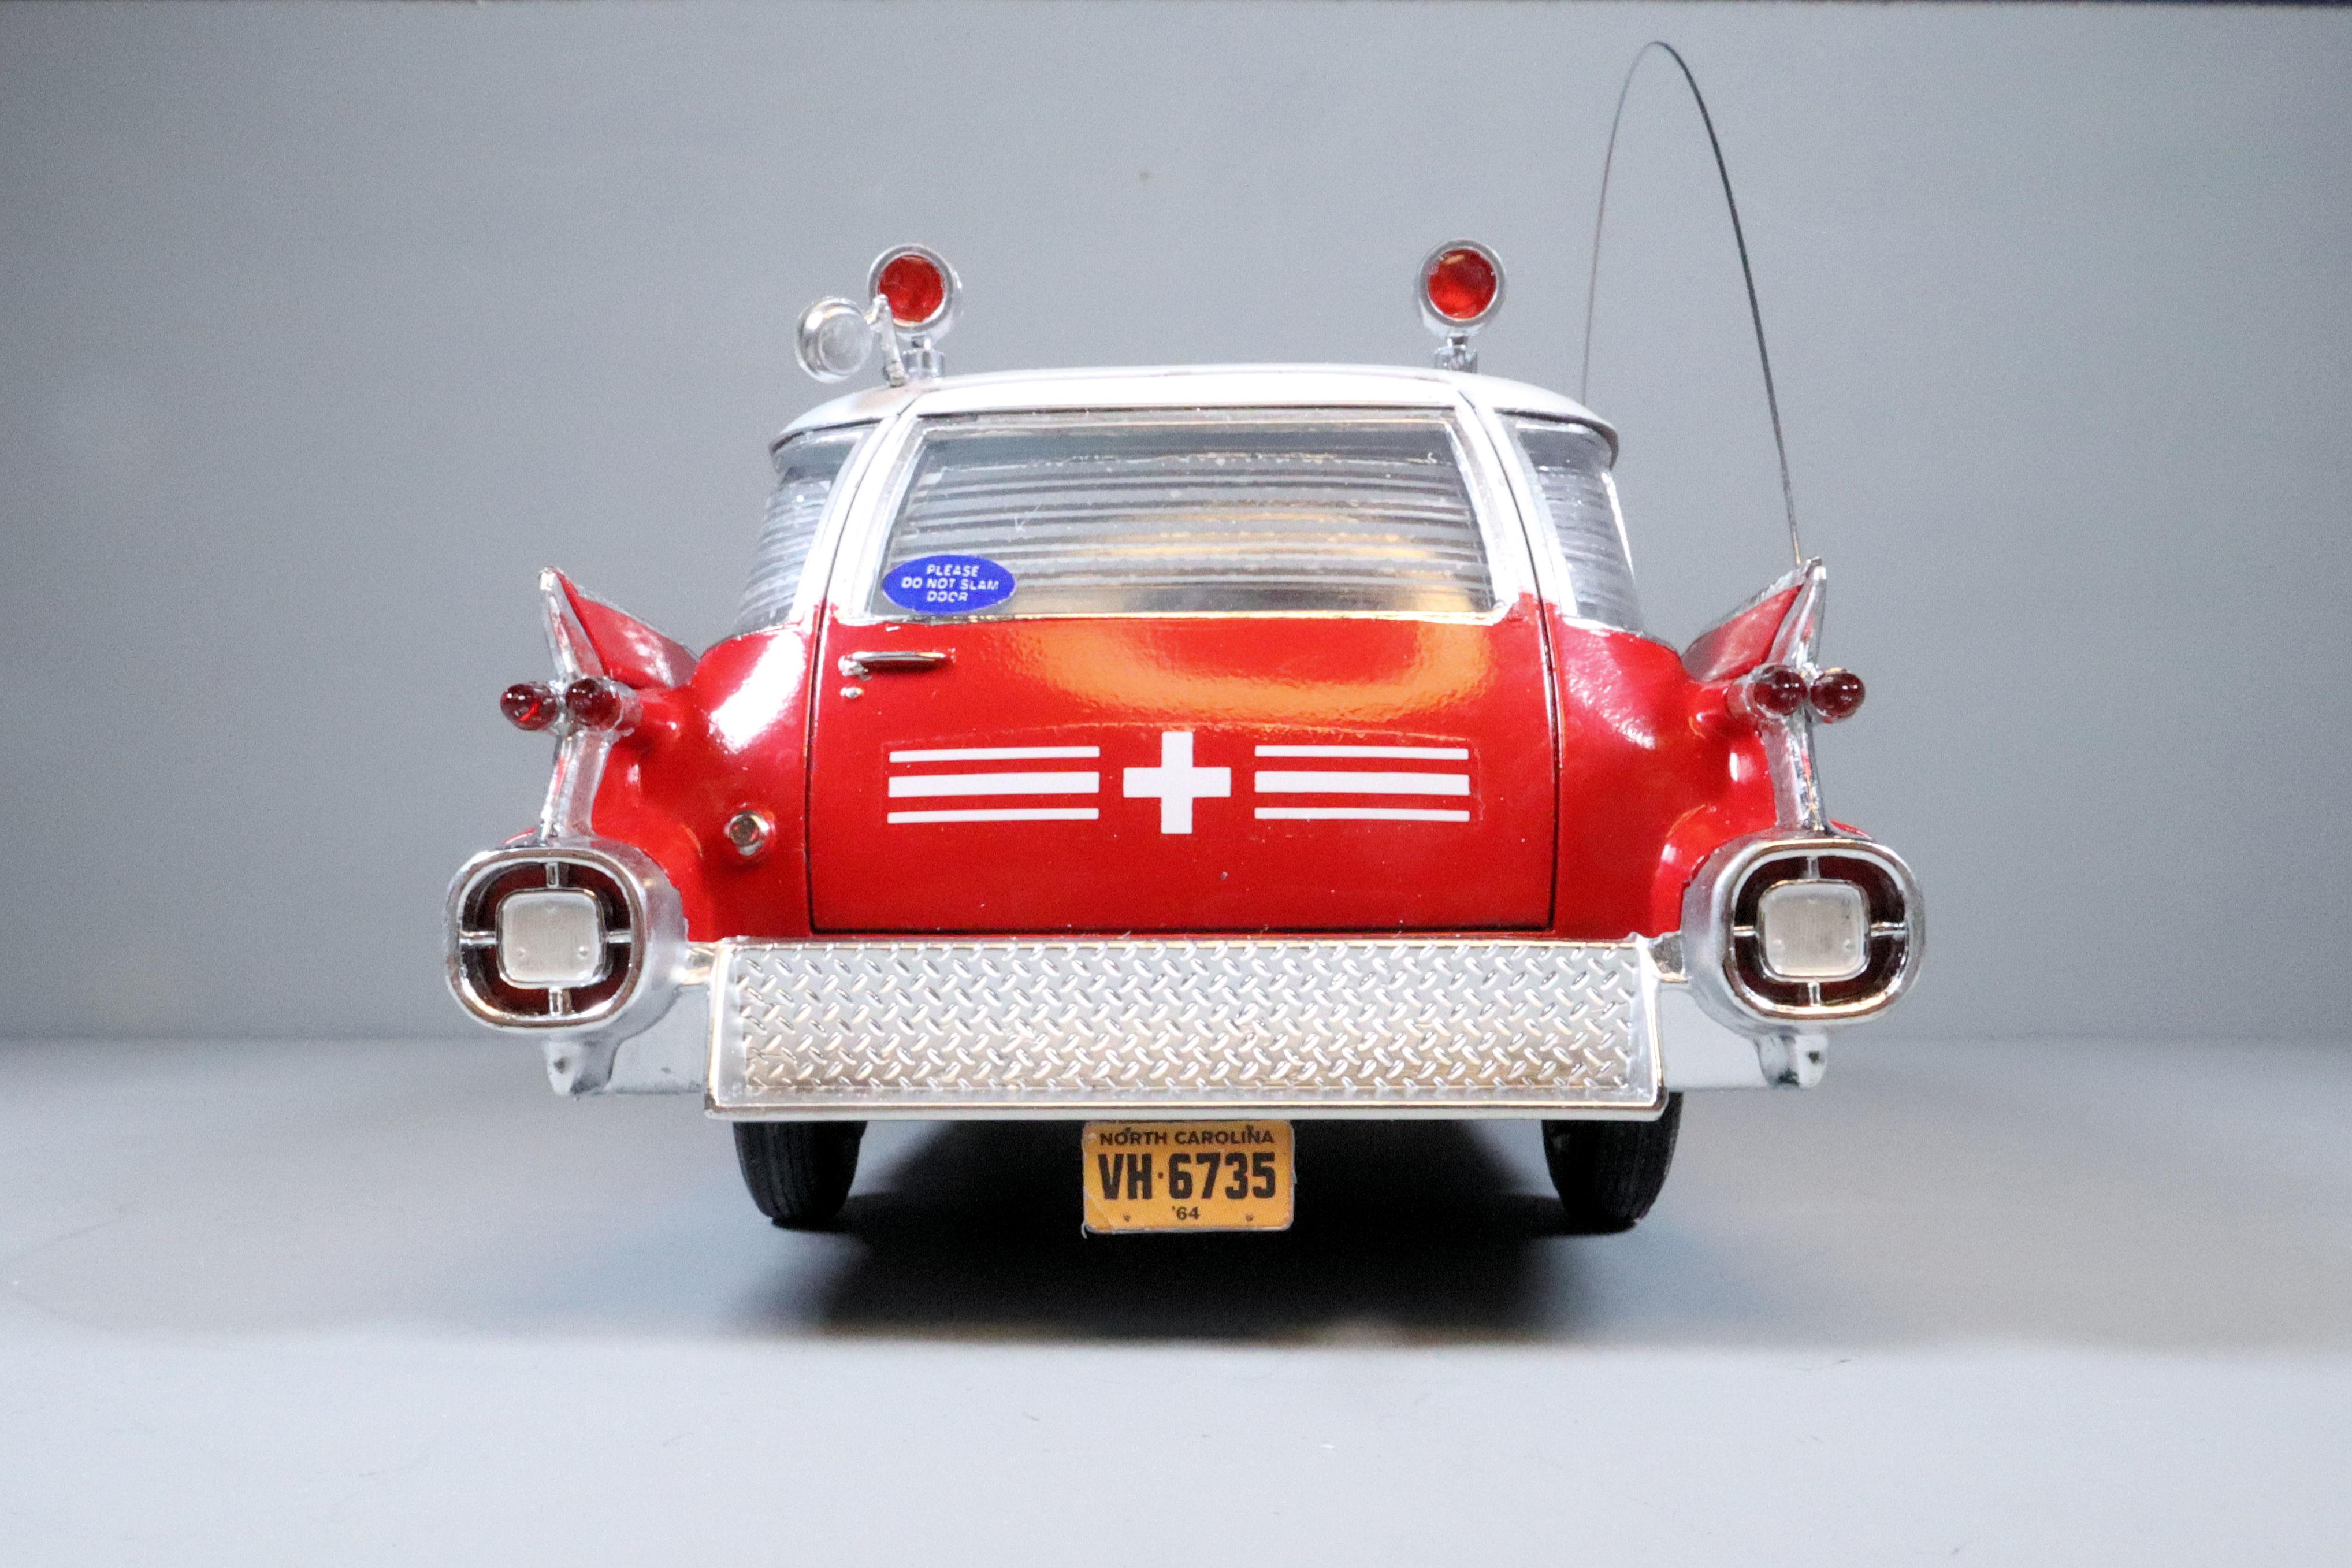
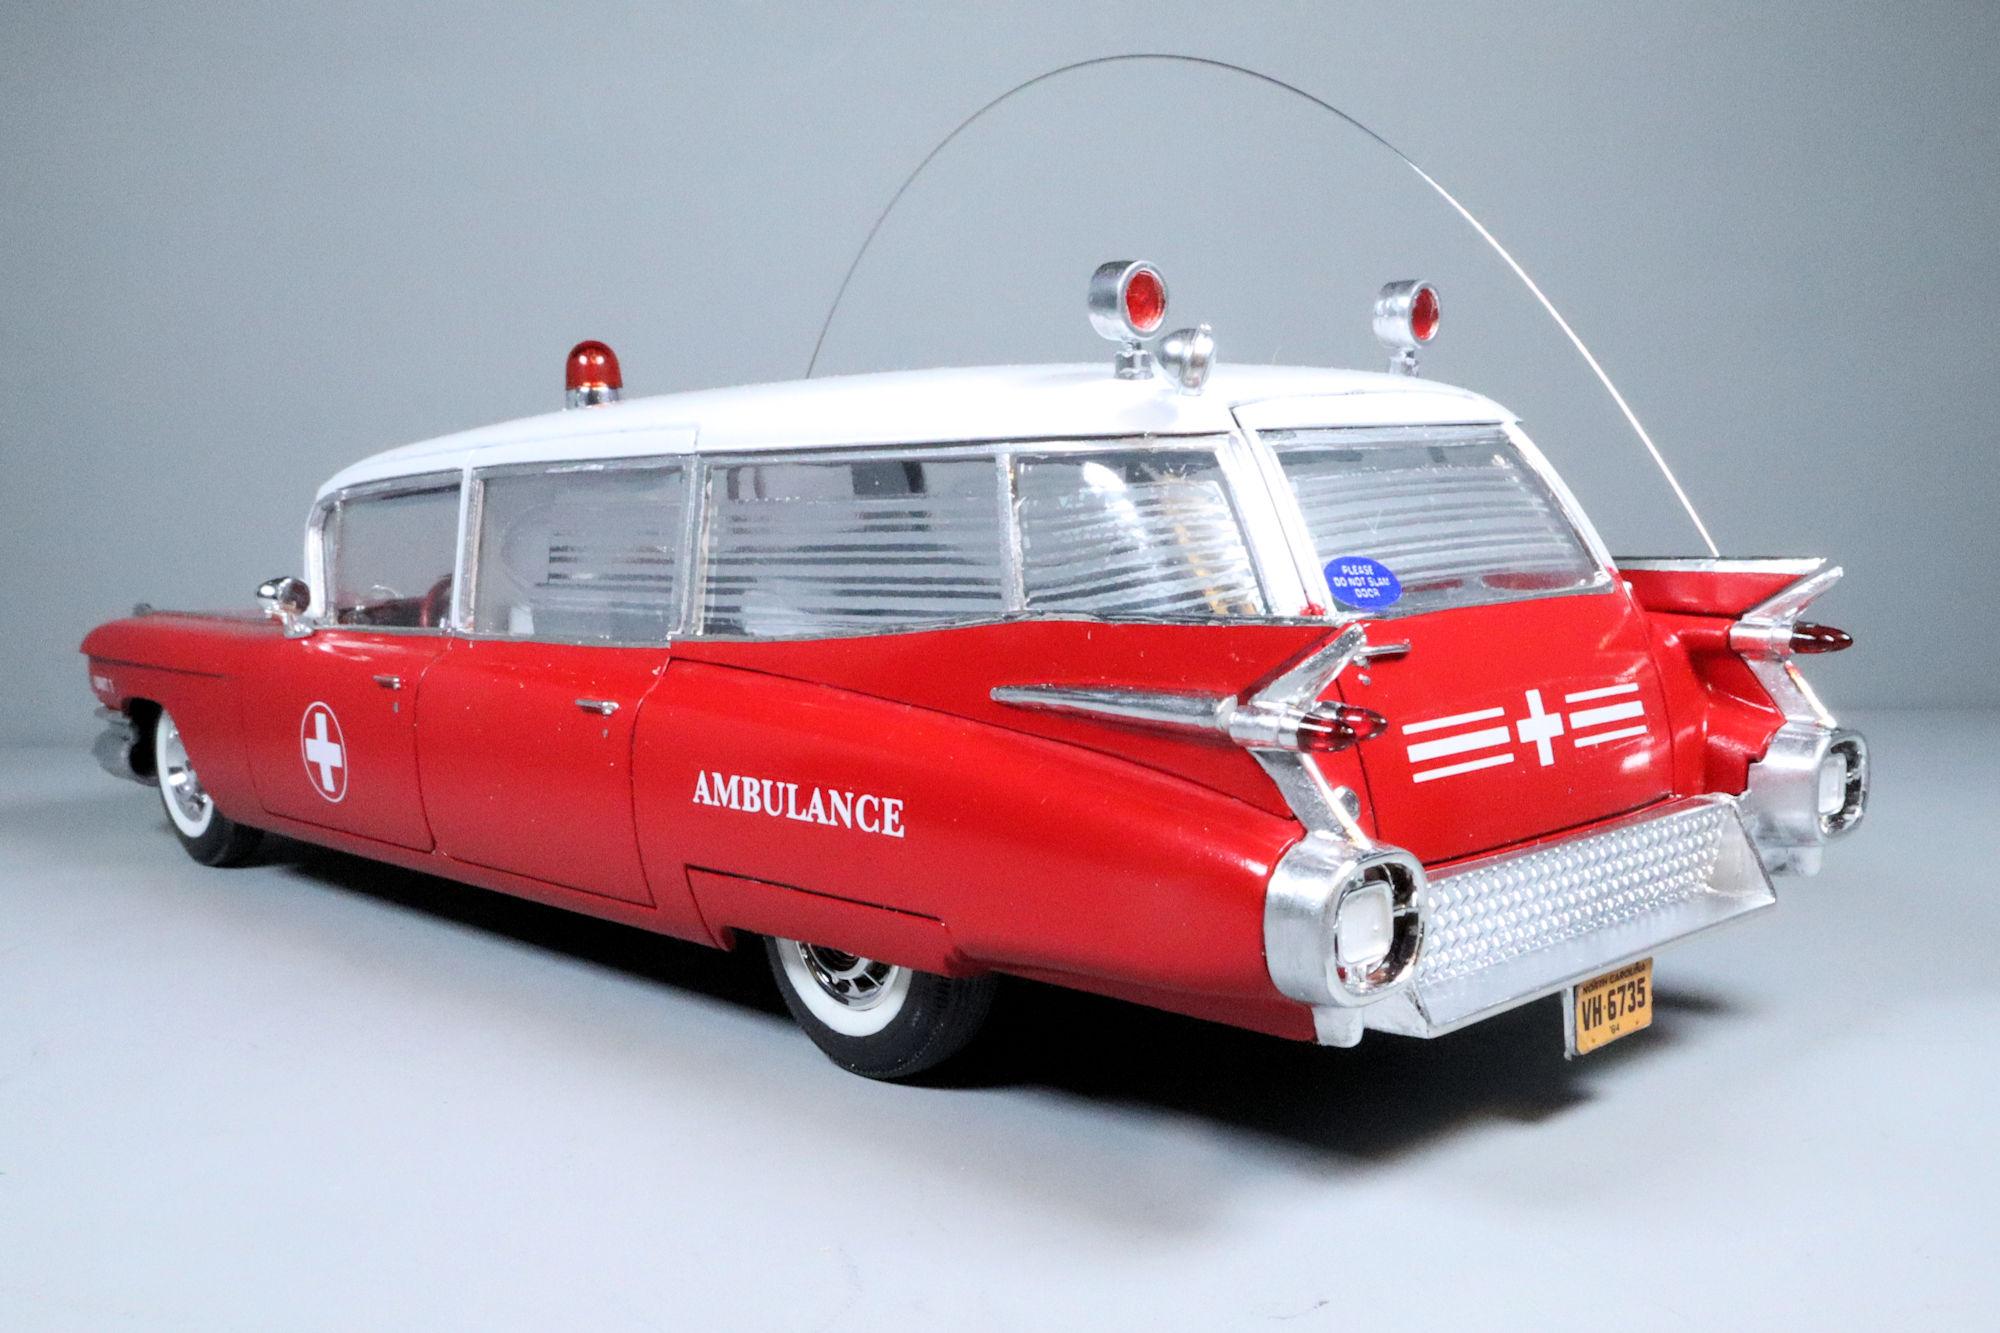
Hello Everybody! I have finally finished my version of AMT's Surf Shark! The Surf Shark is a cool concept which is obviously based on AMT's Ecto-1A kit. A kit which, due to licensing, will likely never again see the light of day. At least not in that particular configuration. Most unfortunate. When I started this conversion back in September of 2023 my plan was to build a traditional style ambulance while at the same time trying to keep with the simplicity of the kit. Unsurprisingly, the build became more complicated than I wanted it to but not overly so. I attribute most of the extra time and effort to building a resin gurney for the back area. Doing that nearly doubled the time invested. For those who may be interested, here is a link to the WIP. And right in the middle of converting the Surf Shark back into an ambulance, AMT released a version of the kit that they reworked into an actual ambulance! Complete with a gurney! Had I just waited a few months, I could have saved myself all the trouble. Ah, well. It's like I say: "Each kit I build is really only practice for the next one." Enough with the ranting, on with the show! It is done! This thing is so long that it wouldn't fit in a standard 4X6 format! Dat's one big booty! I found the "Please Do Not Slam Door" stickers in the parts box. I have no idea where they came from or what they were for but now their destiny is fulfilled. I had some trouble getting the fin attachments and bumper risers to mate up well. I have some tactics in mind to address this when I do my hearse build. There was just so much empty space on the top that I added the red cross just for visual interest. I do have a few more shots I'd like to get so I'll probably add them when I get them done. Until then, thanks for taking the time to have a look and please feel free to post any comments, questions or thoughts you wish to share. David G.
-
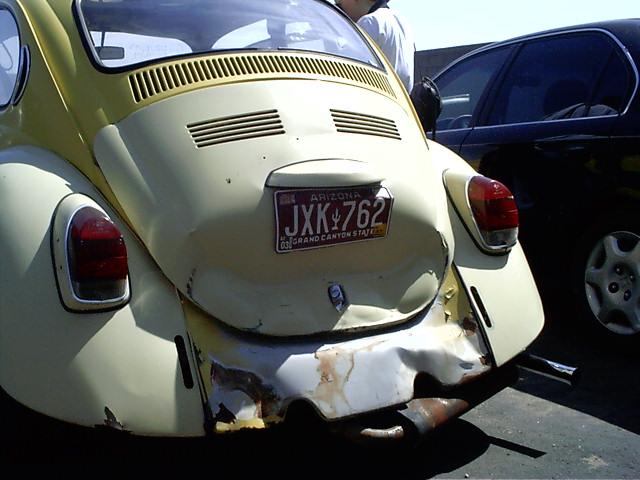
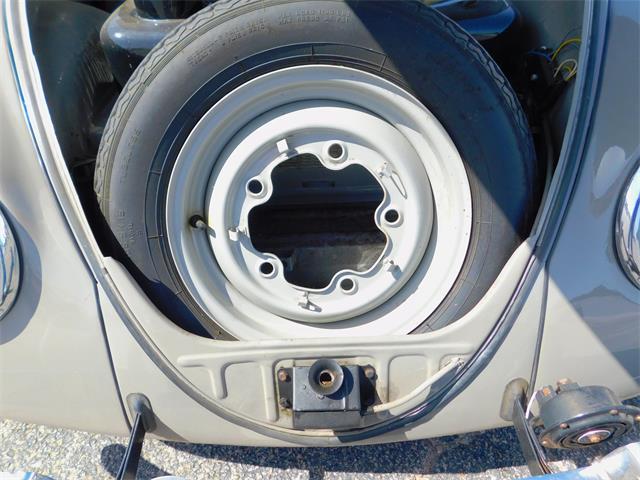
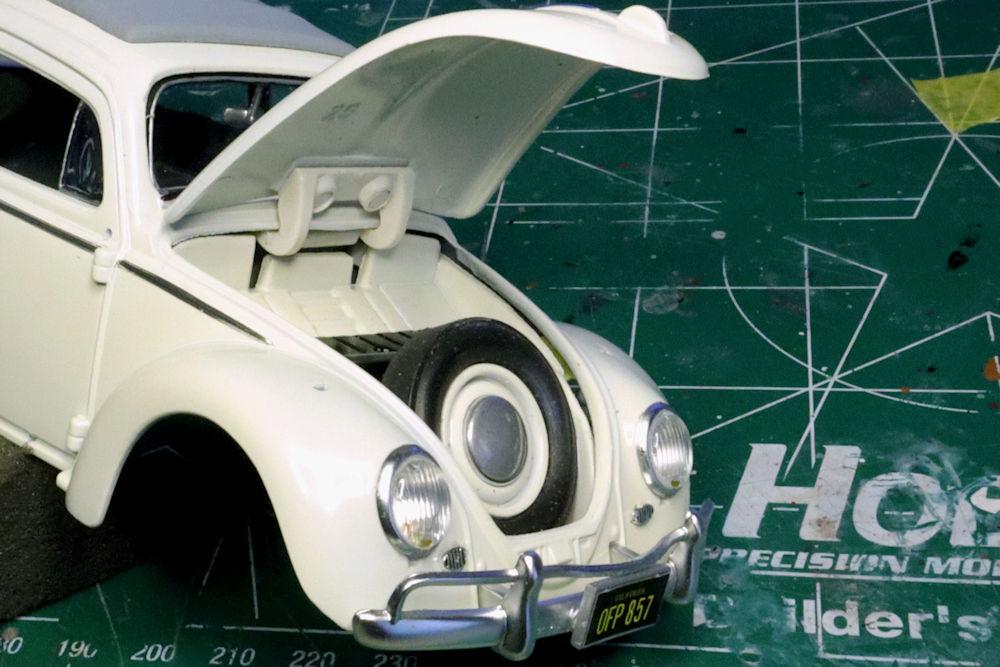
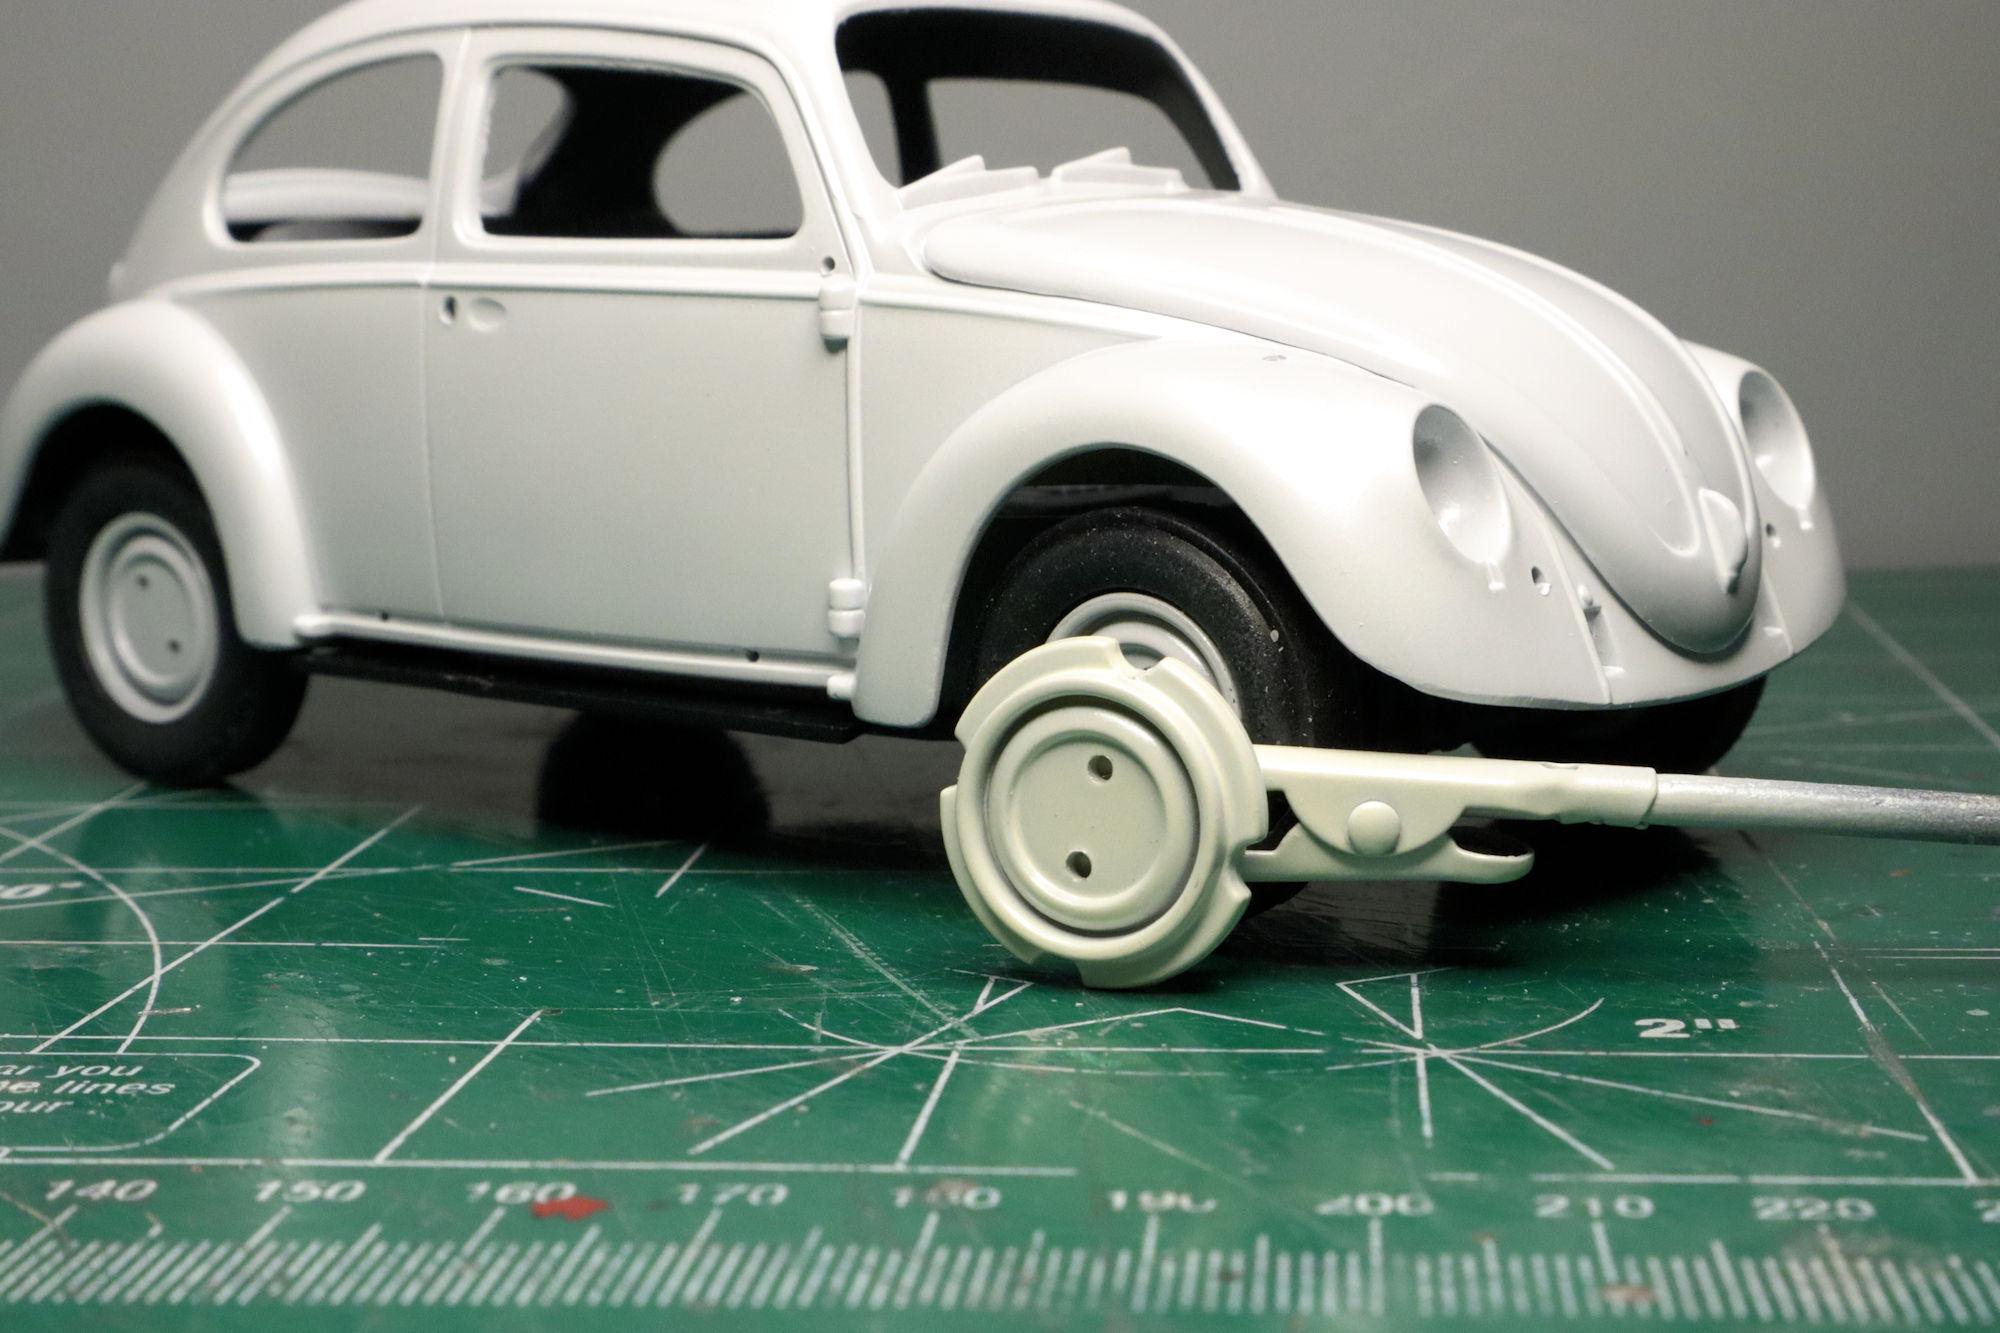
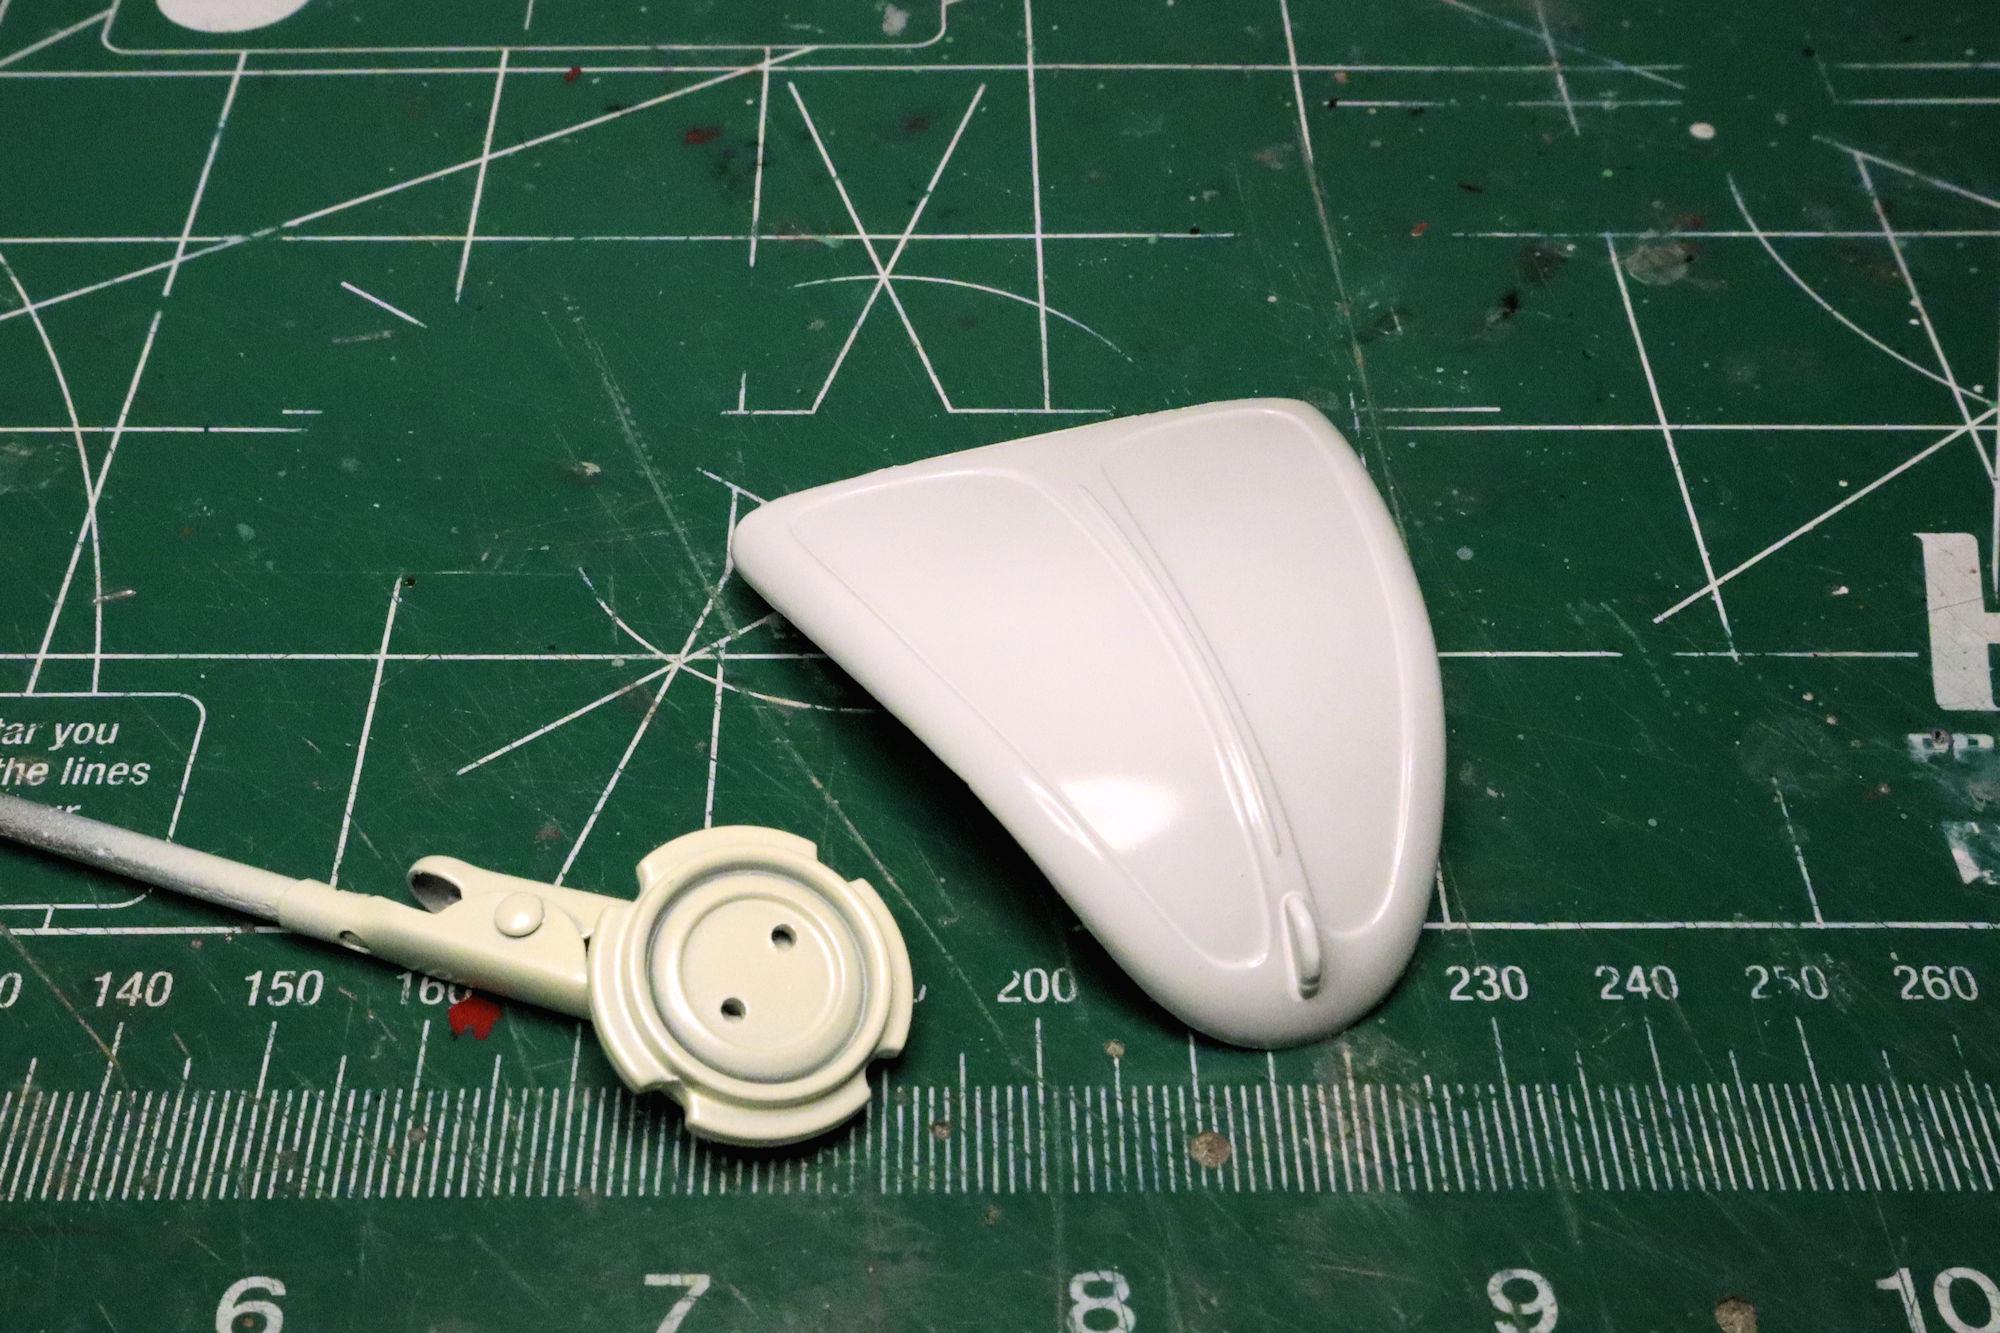
Oh, yeah! I remember those tool kits Les. I used to see them in VW magazines and at car shows (remember Bug-O-Rama?). Unfortunately none of the five Bugs I've owned ever had one. What I was hoping for was something more like an actual early VW wheel like this. Like the one in the movie which had been "Made into a pizza" by Thorndyke. I have several VW kits in my parts box but the wheels form those kits are all slugs similar to the one in this kit. There were some Empi mags and Porsche wheels but no standard WV wheels... of any kind. Thinking about it, I don't know if I've ever seen an old VW wheel in kit form. Well, at any rate. I've accepted things as they are and I'm ready to move on from this. Unless a stock VW wheel shows up, then all bets are off! Thanks again for your comment Les. Indeed you are correct Bob. But that thing which they put where the distributor is supposed to be looks more like a fuel pump than a distributor. So I painted it as such. ? I just figured that maybe it's some kind of "Movie Magic" thing. Maybe it's the thing that makes Herbie sentient. Maybe it's a magneto. Maybe it's just a mistake. It could be any one of a number of things. One thing it's not is a distributor. I thought about addressing the situation by using one the prewired distributors I have in stock but decided against it. I'm trying to avoid rabbit holes on this build. Besides, I'm kind of thinking of this kit as more of a cartoon character than a model car. Seeing it as such allows me to accept this... and some of the other inconsistencies and errors it offers. Thanks for the comment Bob, I do appreciate your feedback.
-
Thanks for your comment Len. I guess I let my disappointed opinion regarding the accuracy of the part slip through. I was hoping that at least the spare would be an old style five-lug VW wheel. I mean, who puts their spare in the trunk with a hub cap on it? ? I also got the color issue mostly worked out, details will be in the next update. Thanks again, David G.
-
Hello Everybody! Okay, there's been a change of plan. Upon further consideration and additional research, I've decided that this white just ain't right. It's too frosty and cold looking for Herbie. The white used on the Love Bug was VW L87 Pearl White. I mistakenly assumed that this was a "pearl" color and went with Tamiya TS-45 Pearl White. I mean, pearl is pearl, right? Wrong. I discovered that VW L87 is *not* a pearl color, it's just an off-white color. I had initially considered using Tamiya TS-7 Racing White but found its shade to be a little too yellow or ivory. But when sprayed on top of the Pure White and Pearl White, Racing White picks up just enough brightness to bring it satisfactorily close to the correct VW color. The color that I believe I need is somewhere in between the trunk lid and the wheel thingy. It's the average of the two. Back to the paint shop! As always, thanks for taking the time to look and please feel free to comment. David G.
-
Spot-on with that Carl! It's close, I just ended up having to work some paint magic to get it where I wanted it to be as you'll see below. David G.
-
Believe me Jim, I had considered that. I'm always considering that. I do have another of these kits in a slightly less complete state. I'm thinking of building it the same way but as a barn find forty years in the future. I think that would make a cool set of builds. Indeed it is Carl and I certainly do my share! Thanks Mike. This kit comes with opening doors so it's easy to keep the build clean. Thanks for the pointer Steve. I ordered the magnets right about the same time I started the build and didn't receive delivery on them until after I sprayed the first coat of paint. And I wasn't exactly sure how to use them so I had to spend some time experimenting to find the best use for this application. I figured I could address any appearance issues once I had all that sorted out and got them installed. I did go ahead and paint the body mounted units and they're rather flush so I didn't feel the need to complicate the build by back-filling them. This is also a proof-of-concept build too so I'd like to retain some visual evidence of the technique... if only for myself. Thanks for taking the time to offer your advice and post the supporting examples Steve. You're one of the best builders I know of and I truly value your opinion. Thanks to all of you who follow along and offer your comments, critiques and encouragements. David G.
-
That looks fantastic Bill, I love the color! Thanks for posting this. David G.
-
Fabulous work on the Vette James! David G.
-
Hello Everybody! Progress has been slow on this one lately as I've been focusing most of my attention on my Disney Love Bug build. (link) It's a Polar Lights snap together kit and I've allowed myself to be distracted ease of the build and the quick results. Working on Polar Lights snap kits is rather like the model building version of eating popcorn. Once you start, it's hard to stop as long as there's still something left in the box. Anyway, on with the update. Color sanding revealed some additional paint issues. The paint was kind of thin in some places and I was down to the primer by the time I got it smoothed out. Which is okay as I planned on spraying another coat anyway. No, that's not a shiny spot... that's primer. As always, thanks for taking the time to look and please feel free to comment. David G.
-
Thanks Steve. That's one of the things that I love about this hobby, there's always something new to learn. VW wouldn't come up with the Rabbit for nearly a decade yet. So no Rabbit, no holes. This one's going to be a pretty straight-forward build, just some minor tweaks here and there. Thanks for the tip Tom. I kind of worked that one out, all the details will be in the next update. Thank you for that Maxx. I did eventually realize that I didn't have the correct color. Though I didn't buy the actual VW L-87 I did come up with a suitable substitute. I'll have all the details in the next update. Thanks to everybody for your comments. David G.
-
Cool little scenes Paul. That's one of the best things about large dioramas like yours, a nearly endless opportunity for telling little stories. David G.
-
Welcome back James. Nice work on the Vette! Paint, CF and engine details all look great. David G.
-
Ah, the Seventies! There was just no escaping the "Avocado Green"! Seriously though, that's a great looking interior! Nice detail work, I especially like the wood inserts. David G.