
Old Buckaroo
-
Posts
1,968 -
Joined
-
Last visited
Content Type
Profiles
Forums
Events
Gallery
Everything posted by Old Buckaroo
-
1968 Freightliner coe
Old Buckaroo replied to Old Buckaroo's topic in WIP: Model Trucks: Big Rigs and Heavy Equipment
Hey guys I really appreciate the comments. John this truck has a blue sparkle steering wheel in just for you. Well here will be the last two pics for the workbench section as this one is coming to an end quickly. Got the foot stirrups made, cab is mounted . All that is left is the mudflaps, pogo stick and mirrors and a few more details. Thanks for looking in -
Pro Mod "Motown Missile" FINISHED! 4/6/14
Old Buckaroo replied to am73grand's topic in WIP: Drag Racing Models
I am having a hard time believing this is 1/25 scale. You must of robbed every electronic gadget in the house to source all that wiring. Looks really Fantastic. I really like the Hemi decal on the valve cover ! -
I cant believe I just found this. What a great way to spend my time with the morning cup of coffee. Simply amazing and so many new ideas learned with no gray area . I have wanted for years to make steerable fronts but was not quite sure how to go about it. Now there is no excuse. Most Excellent work , looking forward to seeing the rest.
-
Pete daycab log truck
Old Buckaroo replied to Q tip's topic in WIP: Model Trucks: Big Rigs and Heavy Equipment
I like the way that one is looking. Smancy fancy with those stripes also. What really catches my attention though is the frame color. What color did you use for that ? Good to see you back Q tip, thought maybe you were on holiday .. gotta build a logging truck someday. -
1968 Freightliner coe
Old Buckaroo replied to Old Buckaroo's topic in WIP: Model Trucks: Big Rigs and Heavy Equipment
Thanks for looking in and commenting, I cant even begin to tell you how much it has motivated me ! I am getting really excited to be where I am at on this build. I set the cab on for a visual on where to locate the foot stirrups. The front is sitting about 1mm high at this time as I dont want to take the chance of not being able to get the pins back out of mounting holes. Yee~ha ! -
Information request
Old Buckaroo replied to alangarber's topic in General Automotive Talk (Trucks and Cars)
Somewhere there has to be one , I know the current owner is - Stagecoach Diesel Motorsports out of Hastings MN. Social media maybe , I dont do any of that stuff so I cant look. Maybe these guys can help with contact info http://www.tyronemalone.net -
Information request
Old Buckaroo replied to alangarber's topic in General Automotive Talk (Trucks and Cars)
Hey Alan, Have you tried contacting the current owner ? When I was building my BJ McKay truck I exchanged several emails with the owner and he was very helpful. -
Amt truck reissues I'd like to see
Old Buckaroo replied to Bennyg's topic in General Automotive Talk (Trucks and Cars)
I have thought that would be a good one to build also. Wouldn't be too hard to scratch build. -
KW Car Hauler Finished
Old Buckaroo replied to kilrathy10's topic in Model Trucks: Big Rigs and Heavy Equipment
This turned out so swell I think you should build your own "race semi" for it. I double dog dare you -
There is not enough character space for me to tell you how impressed I am with this build. But I do need to tell you those "spring loaded latches " are amazingly insane Good to see the "glitter wheels " making a comeback. I did one for my '68 Freight-shaker
-
Not familiar with the length of the Revell kit. In 1/1 scale the 108" Aero cab used the 180" standard wheel base.
-
ebay, the search for Model trucks. I had been getting tired of seeing all the 1/87 scale stuff being placed there. But I am only one person and I would be looking for that scale under Model RR stuff . But I was willing to give that the befit of the doubt. But when people start listing sippy cups and things like this under the model truck section - http://www.ebay.com/itm/20-White-Gas-Range-Sealed-Type-Burners-/291089772204?pt=Model_Kit_US&hash=item43c64d6eac It is time for me to move on...
-
1968 Freightliner coe
Old Buckaroo replied to Old Buckaroo's topic in WIP: Model Trucks: Big Rigs and Heavy Equipment
Thanks Mike, I am glad you like the color. For weeks I thought about the exterior color and had decided on this color as it had that vintage look to it. I had also thought about adding another stripe but wanted to keep this truck looking within someones budget at that time. I have updated the pic with a black border stripe. Thanks Charles for the tip on the rivet decals. I really dont mind them missing from this build. (I think building Aircraft turned me away from rivets ) I have two more of these kits so I might try them out. Thanks for looking in -
Getting rid of tv programming tired of reality tv
Old Buckaroo replied to bobthehobbyguy's topic in The Off-Topic Lounge
My Wife and I have been married 23 years, and in that time we have Never had tv. We both have hobbies, kids grew up eating dinner at the table not in the living room watching tv. Sometimes when we travel and stay in a Hotel we will turn it on switch through half the channels and think "what a waste of time" We both grew up without it and never acquired the desire to have noise on in the background. -
1968 Freightliner coe
Old Buckaroo replied to Old Buckaroo's topic in WIP: Model Trucks: Big Rigs and Heavy Equipment
Got the second color on today. Updated pic with black decal border applied. Used the kit decals by cutting into 1mm wide strips. Thanks for looking in -
Classic kenworth w900A.
Old Buckaroo replied to freightshaker's topic in WIP: Model Trucks: Big Rigs and Heavy Equipment
Add one more for loving the paint job Interior looks fantastic also ! -
What type of "Box Art" do you prefer?
Old Buckaroo replied to Greg Myers's topic in General Automotive Talk (Trucks and Cars)
I like the artwork versions. Going way back to the Aurora monsters up through WWII Aircraft & Ships shown in Battle scenes. Cars and trucks artwork has more creativeness for the imagination then a pic of a real one for me. -
Revell Peterbilt 359 (First Build)
Old Buckaroo replied to TokyoDrift99's topic in Model Trucks: Big Rigs and Heavy Equipment
Pretty impressive, and your ahead of the game as you finished it. As said the paint looks nice. You can make this build "Pop" a little more by painting the door latches with a chrome silver or aluminum paint. Use tape to mask around them if you dont trust the steadiness of your hand (mine gets me every time ) Maybe add a touch of amber to the clearance lights up on the roof . You can slide a piece of masking tape under the are to be painted to keep from accidentally painting the roof. Nice to see another truck builder -
Kenworth W900L
Old Buckaroo replied to KJ790's topic in WIP: Model Trucks: Big Rigs and Heavy Equipment
Scratch built ? I would of sworn it was a high dollar resin. That filter looks good, real good. Made me smile thinking about the p/m techs that would come find me and ask what they were suppose to do with that one. Can ask what paint you used for your engine - perfect match. The decals just makes the icing for the cake. -
I think Aurora had a "wildlife series" but what you did is way cool.
-
Bravo , that is magazine cover worthy. Very nice work, the paint fade , the rust on the heat shield is beyond exclamations. I never could master this type of work .
-
Ford C-600 Flatbed
Old Buckaroo replied to Casey's topic in WIP: Model Trucks: Big Rigs and Heavy Equipment
Nice start on and great idea. Are you going to scratch build the ramp bed ? You tell it is going to be a fast one - it has the "Remove before flight" tabs on the windshield area. -
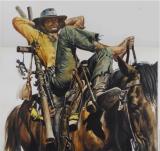
I think the movie is "Hell on Wheels" Nice to see pics of his cars again
-
Convoy Anyone?
Old Buckaroo replied to alangarber's topic in Model Trucks: Big Rigs and Heavy Equipment
Super looking Brauhn Trucking KW, Alan and a great topic. Dave your RD looks great , you need to get your camera back I am a few months away from having anything to contribute but have plans for "Love Machine / Pig Pen Mack" and a "RD" Mack also to be built. Need to finish up the two builds I have going on now. -
Boss Truck question
Old Buckaroo replied to Old Buckaroo's topic in General Automotive Talk (Trucks and Cars)
10-4 on that one, I dont look at them either