

Exotics_Builder
-
Posts
3,635 -
Joined
-
Last visited
Content Type
Profiles
Forums
Events
Gallery
Everything posted by Exotics_Builder
-

32 Ford Custom Grille ?
Exotics_Builder replied to Jon Haigwood's topic in Model Building Questions and Answers
I have a whole Orange Crate kit if you want -
32 Ford Custom Grille ?
Exotics_Builder replied to Jon Haigwood's topic in Model Building Questions and Answers
Ahhh!! Now see, if it was a Ferrari, I could have told you to the model (not necessarily year) ? -
32 Ford Custom Grille ?
Exotics_Builder replied to Jon Haigwood's topic in Model Building Questions and Answers
It is closer to the Ala Kart than Catallo's -
-
32 Ford Custom Grille ?
Exotics_Builder replied to Jon Haigwood's topic in Model Building Questions and Answers
Sort of reminiscent of Chilly Catallo's Deuce Coupe -
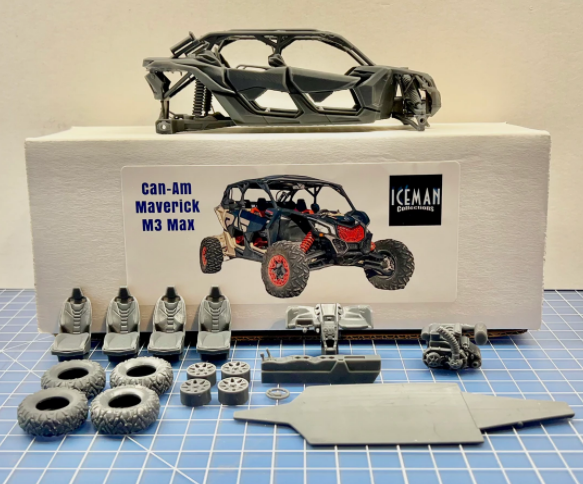
Rather than photo the kit, I borrowed this from Iceman's site. Relly nice model, except all online references tell me X3 not M3. But this is going to be a unique build.

- 39,016 replies
-
- 3
-

-
- johan
- glue bombs
- (and 1 more)
-
R and D Unique did for sure. Long out of production. I have one or two in the stash that I bought new. There were different configurations. But I don't recollect period running gear, although they could have. I know Replicas and Miniatures did 32 Ford frame rails for sure but would need to research if more than that. It's not an area that I do a lot of modeling in.
-
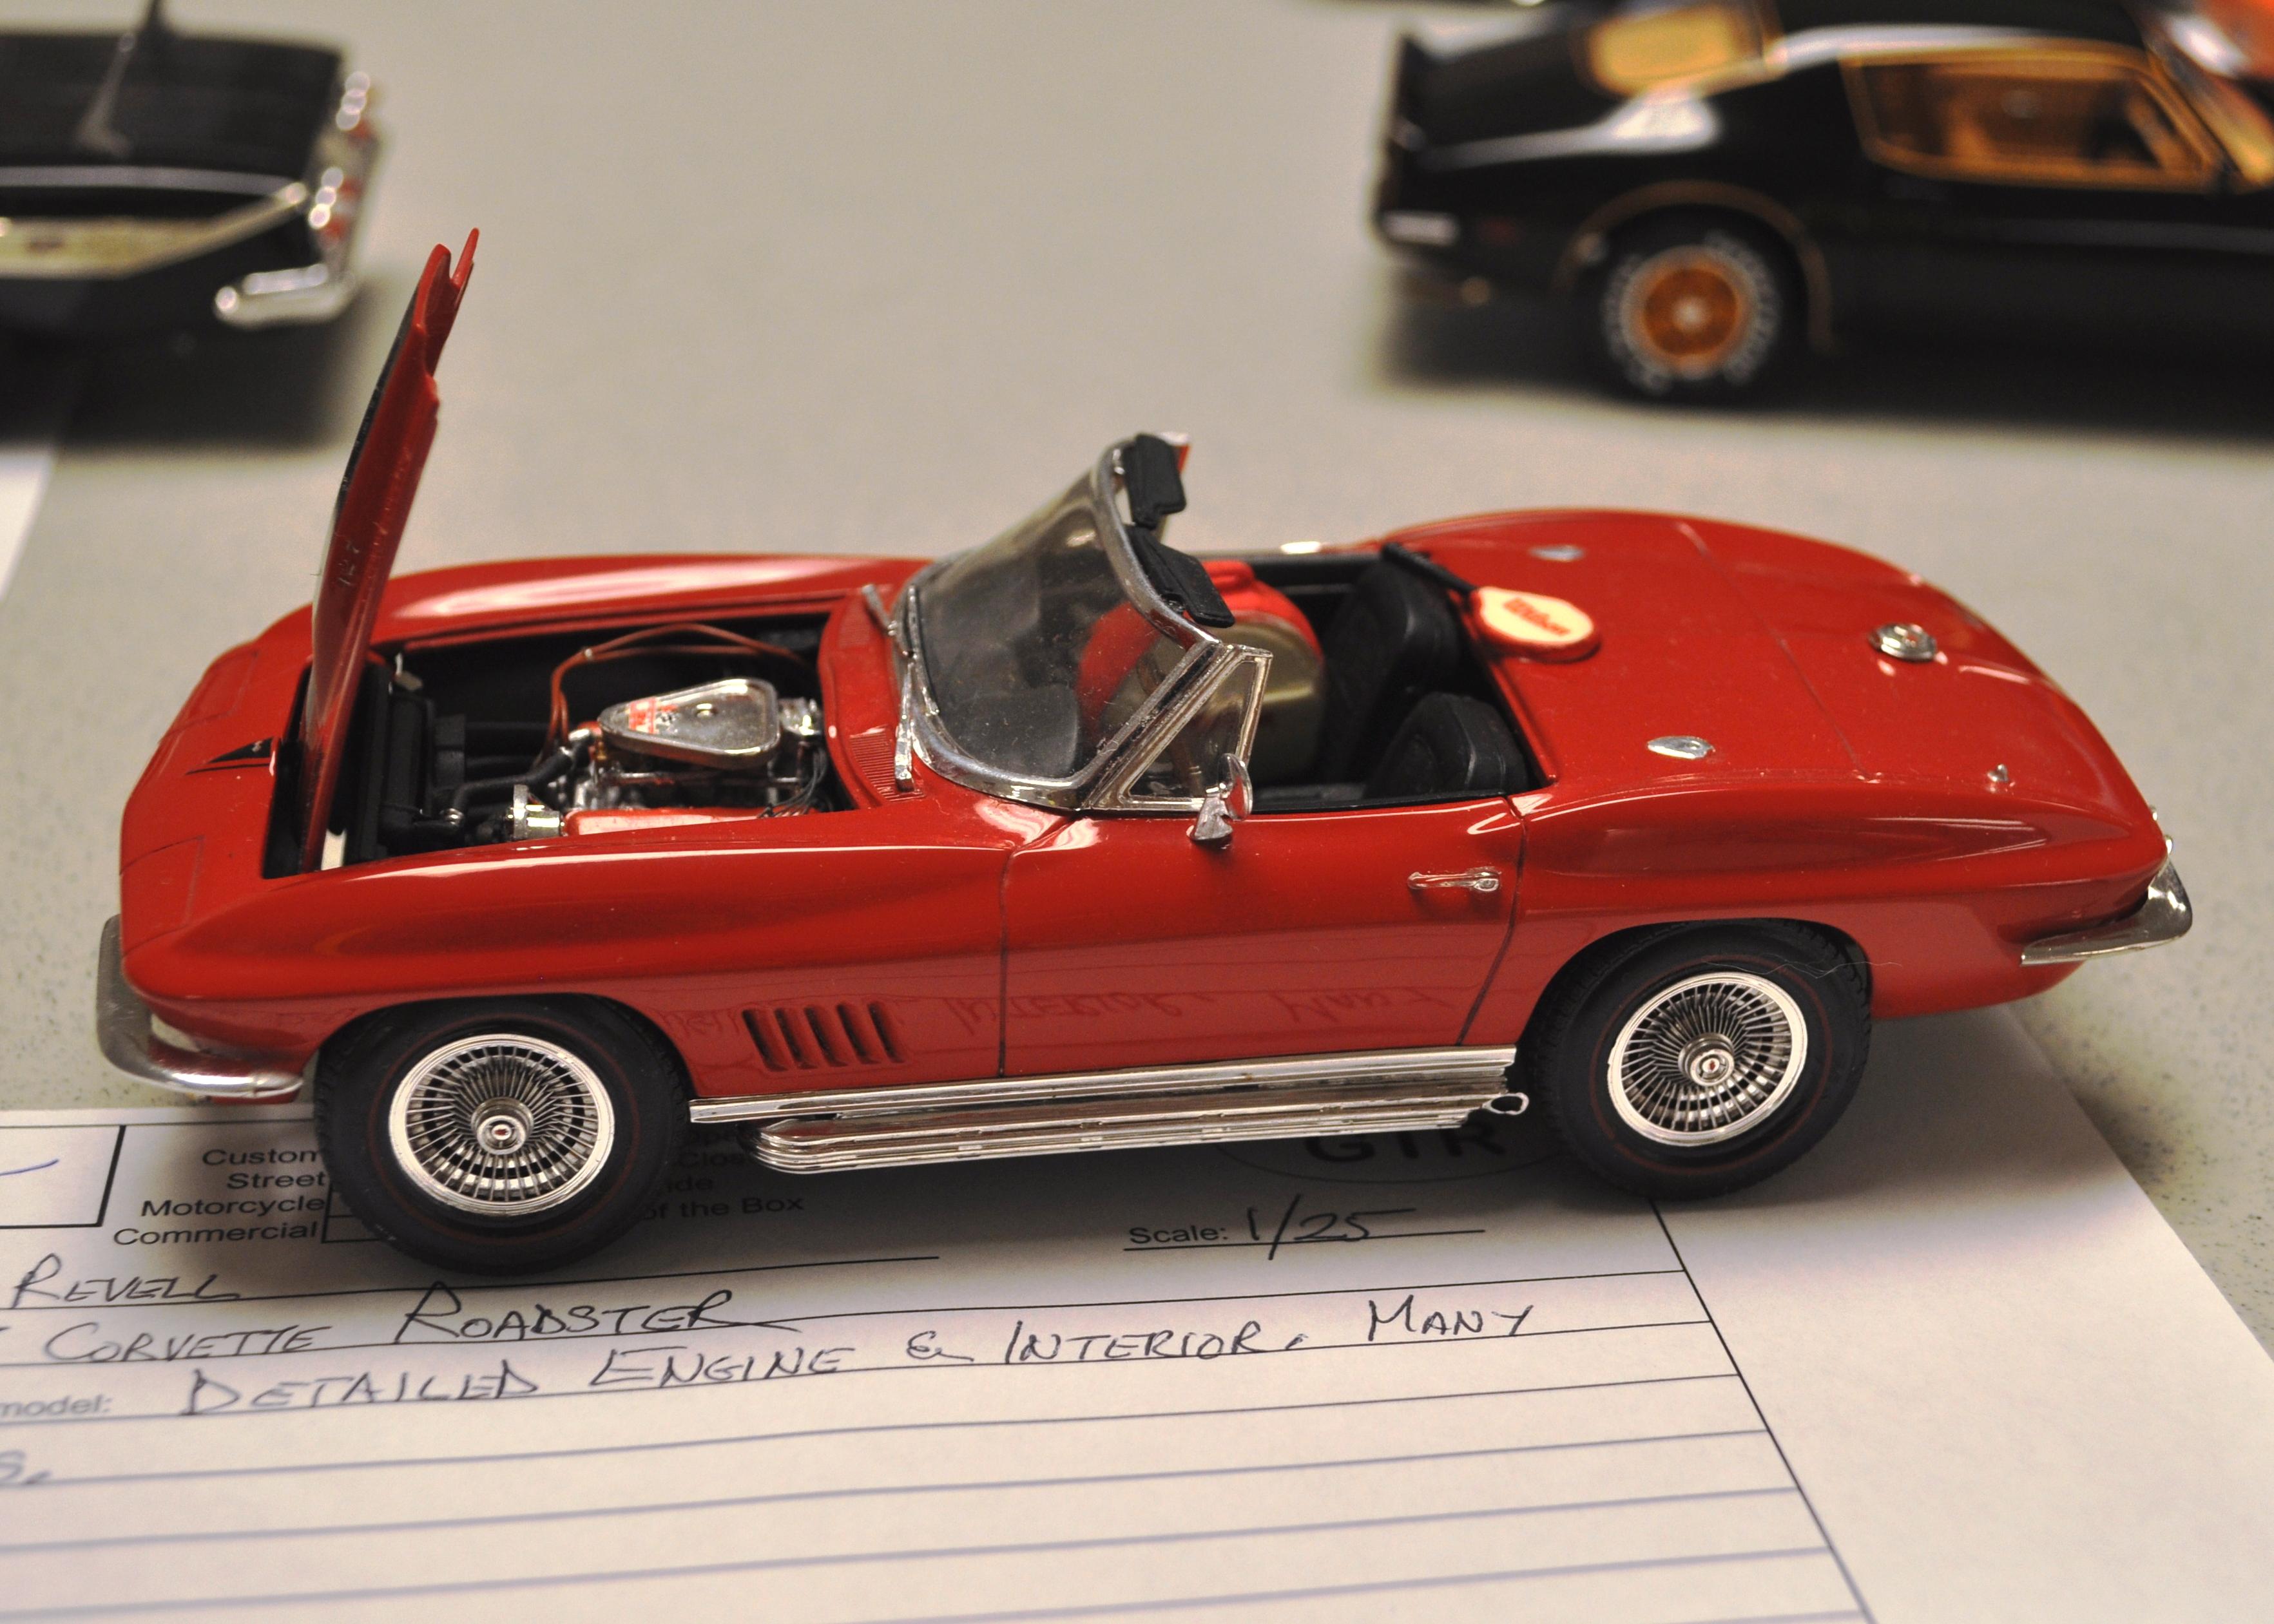
I have a coupe and roadster down in the stash. I can check, but the coupe has the single 4BBL BBC whilst the Roadster 3 2BBl BBC. The Coupe has Rally Wheels and Roadster the "finned" wheels. Also, the roadster has the side exhausts, and I don't believe the coupe does. Here is a Roadster I built years back when they first came out.
-
//Emissions Equipment\\
Exotics_Builder replied to 1972coronet's topic in Model Building Questions and Answers
Not that I have found. Creating one for my 69 Camaro pace car project. part way into the process. used the pump from the Nova kit and adding the extra bits.
-
I enlarged the photo
-
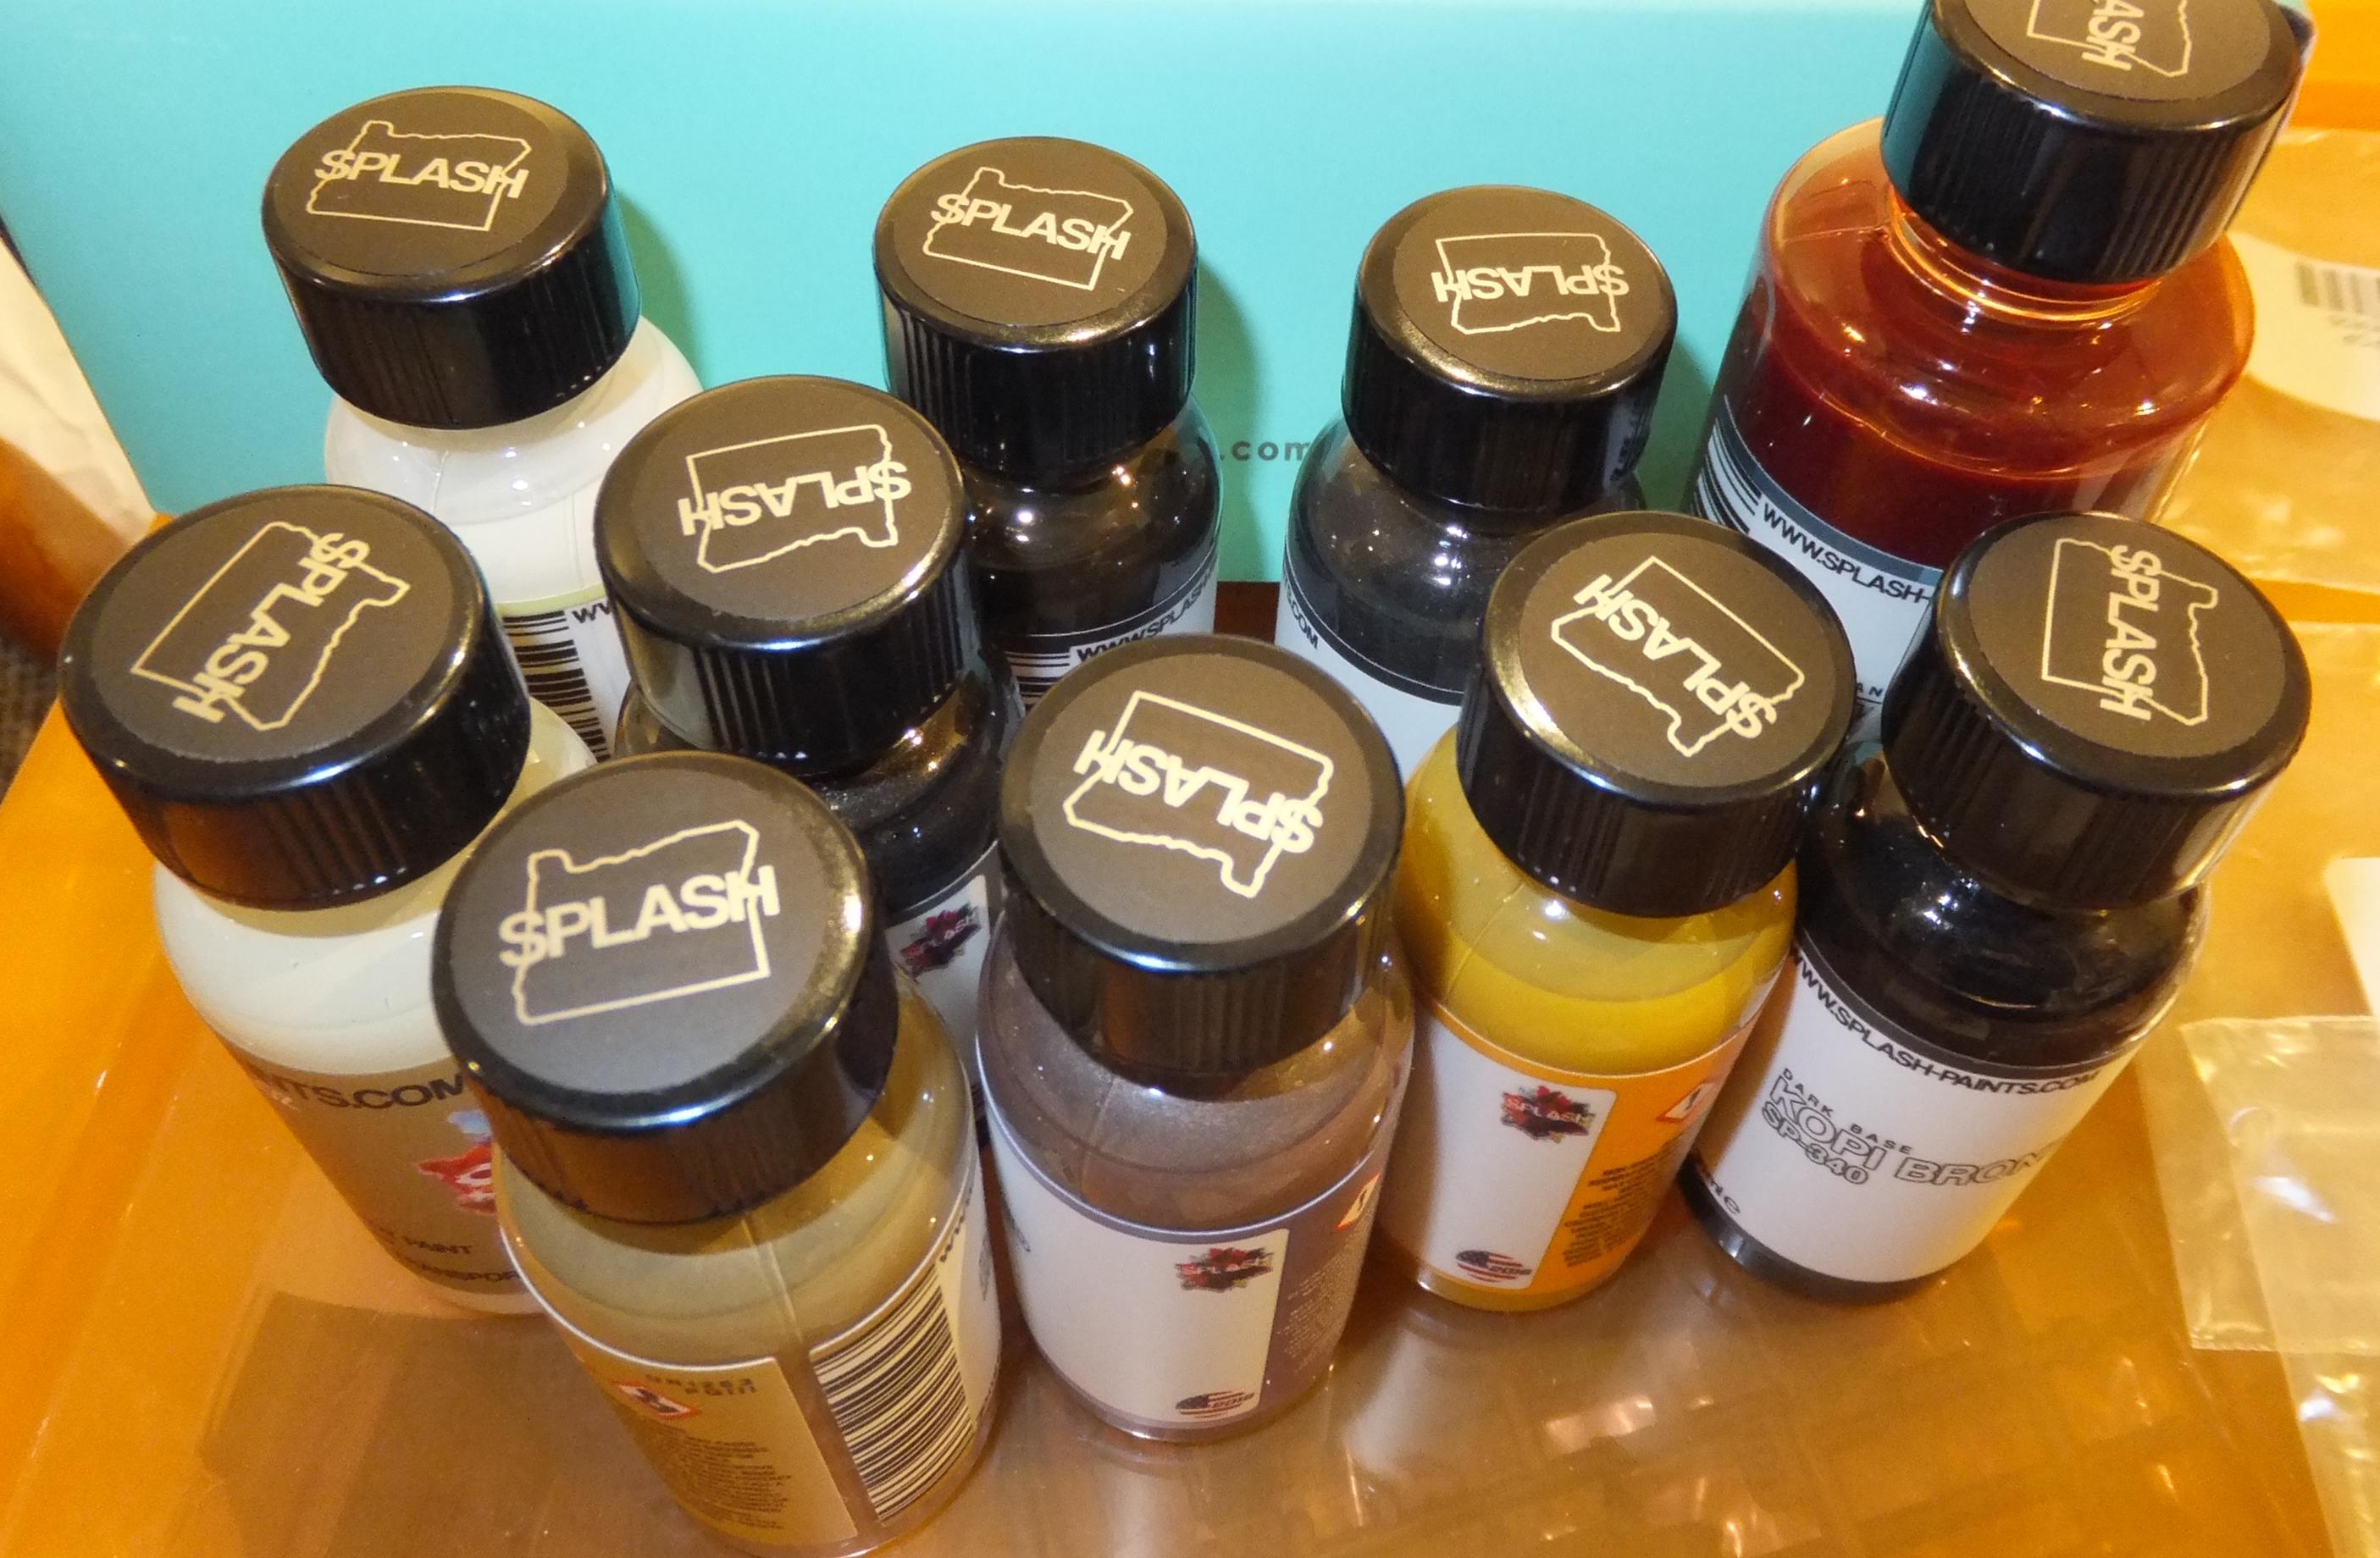
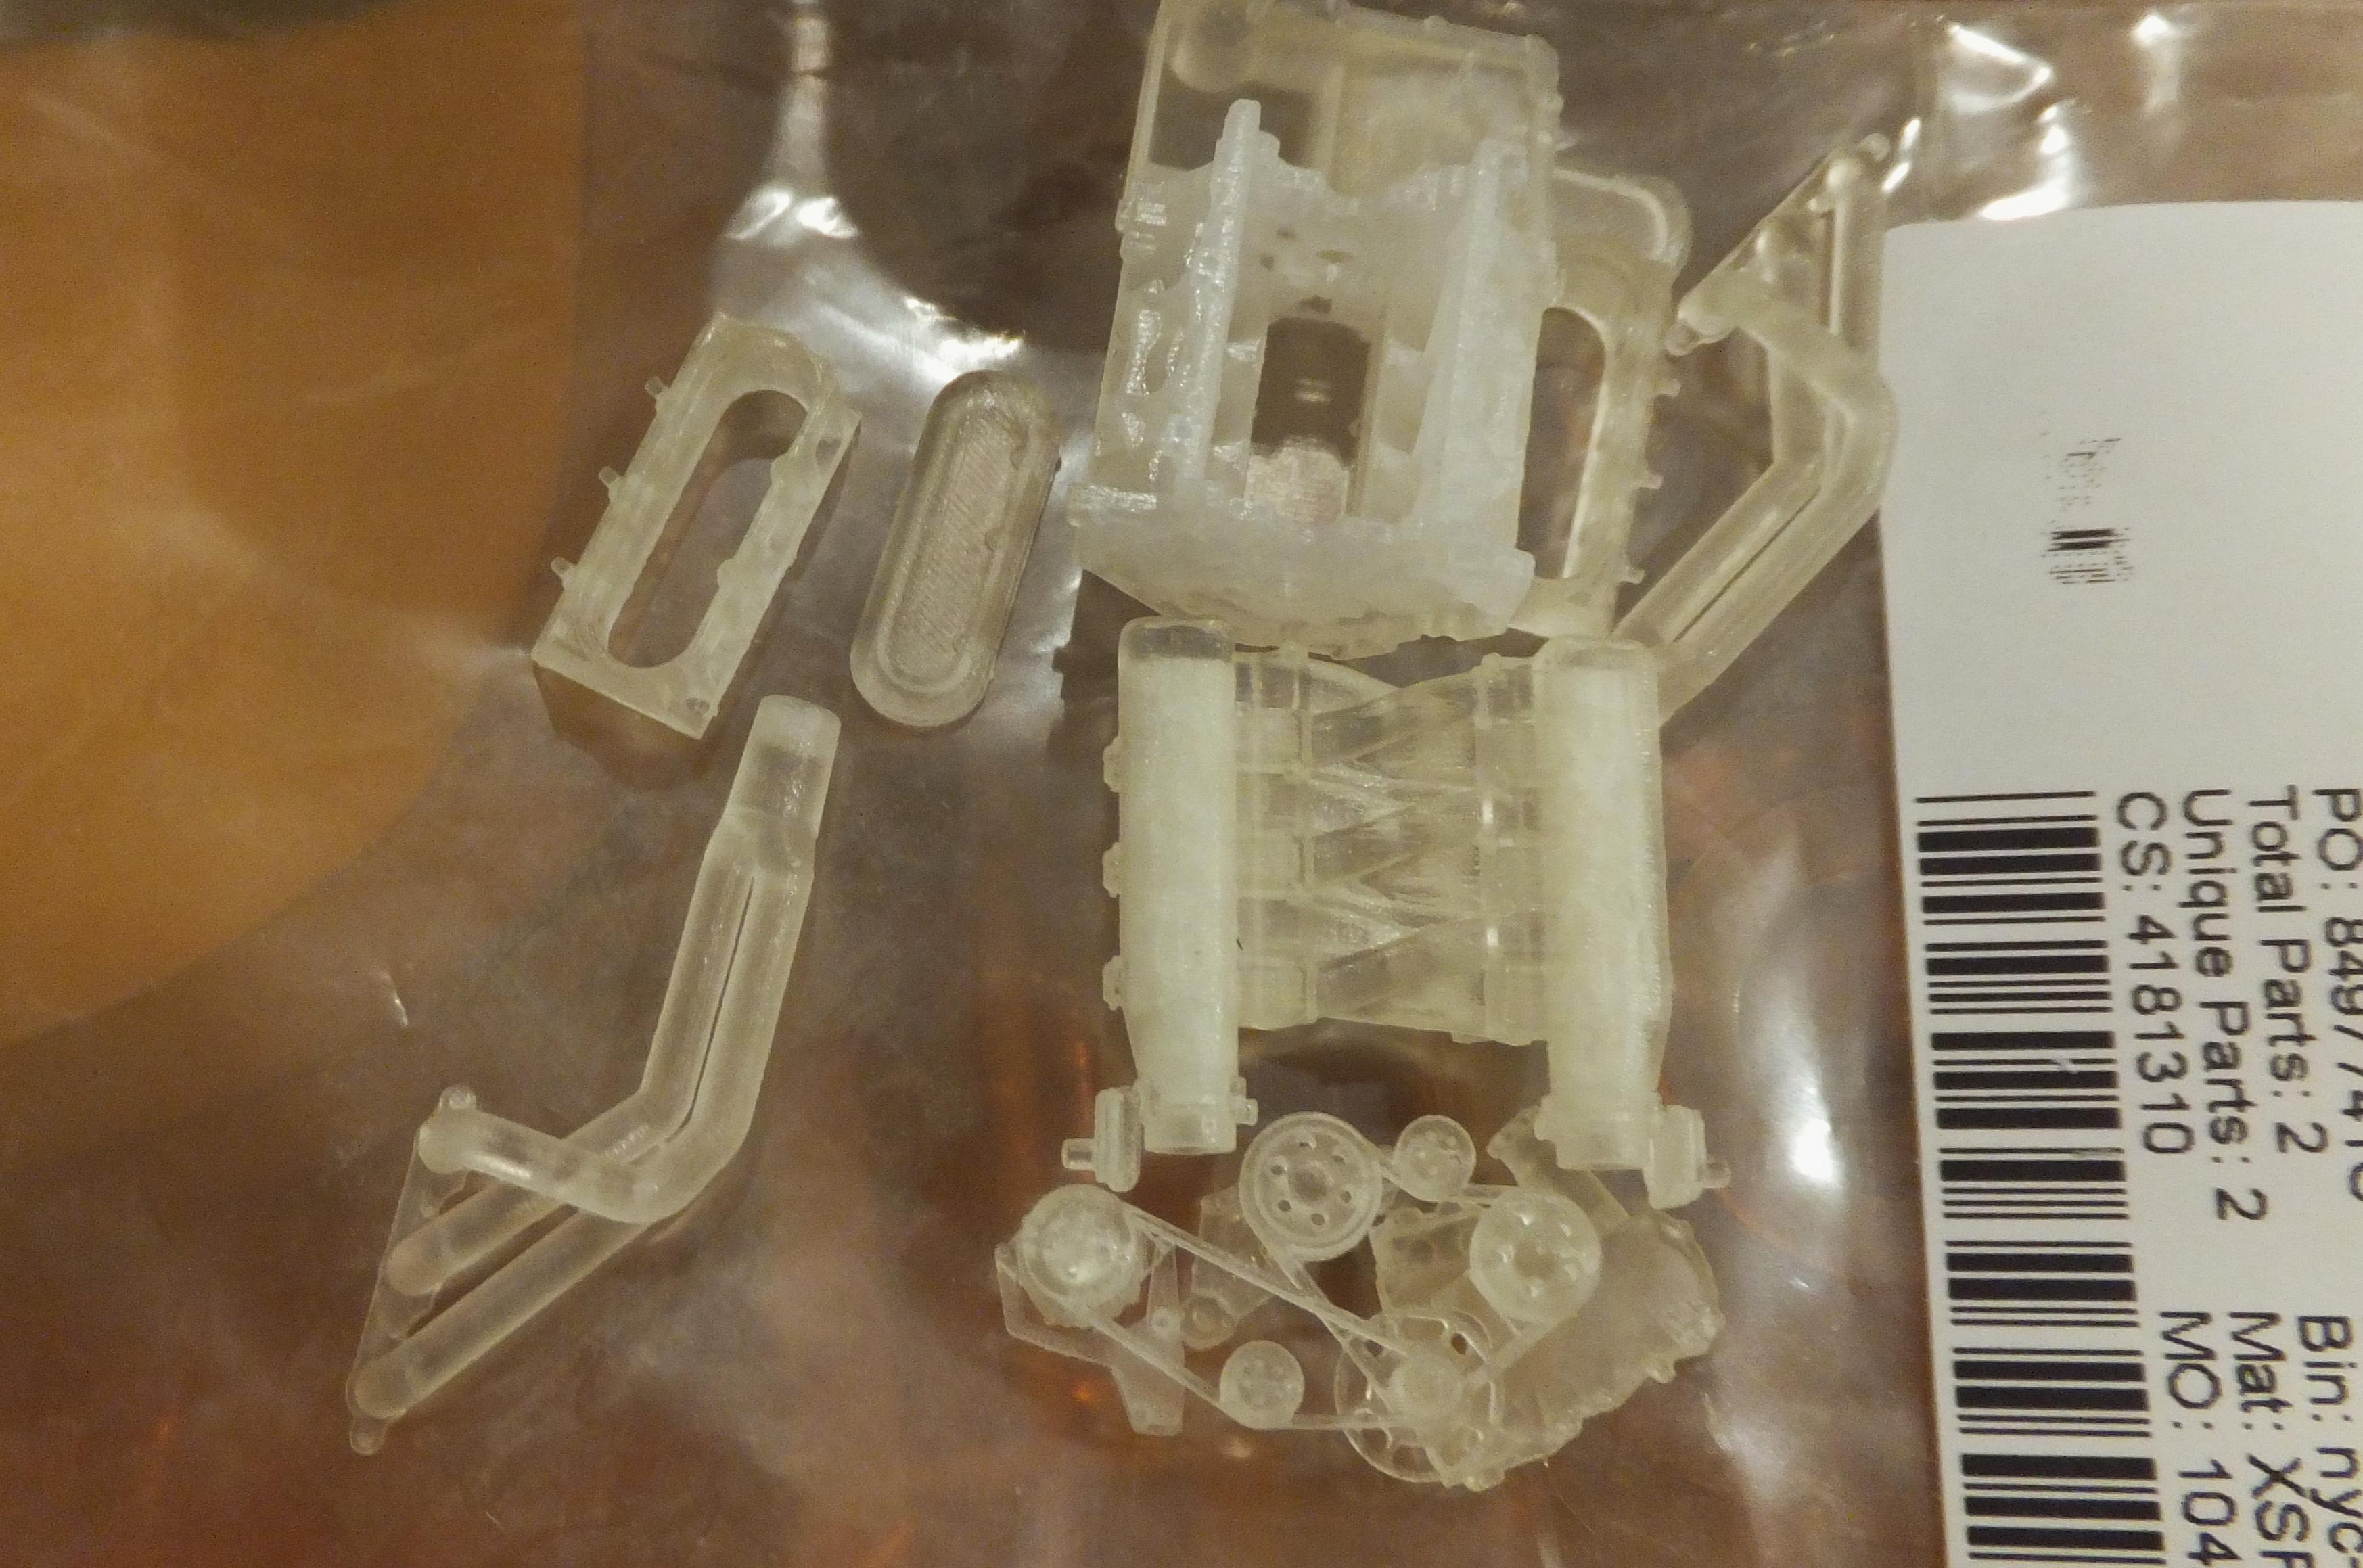
Multiple deliveries yesterday and today to keep me going on projects this year. The Splash paints are for several different projects. The first Shapeways photo is of a Ron Olsen designed (3D Model Specialties) 6 cylinder LS engine with Edelbrock injection intake.
-
Definitely not going to use.
-
Getting the decals. Now all I need are the engine mods and wheels, and I can do a Cosworth Vega
-
Lamborghini Aventador Miura edition...my version
Exotics_Builder replied to Dann Tier's topic in Model Cars
How did I miss this? Superb! -
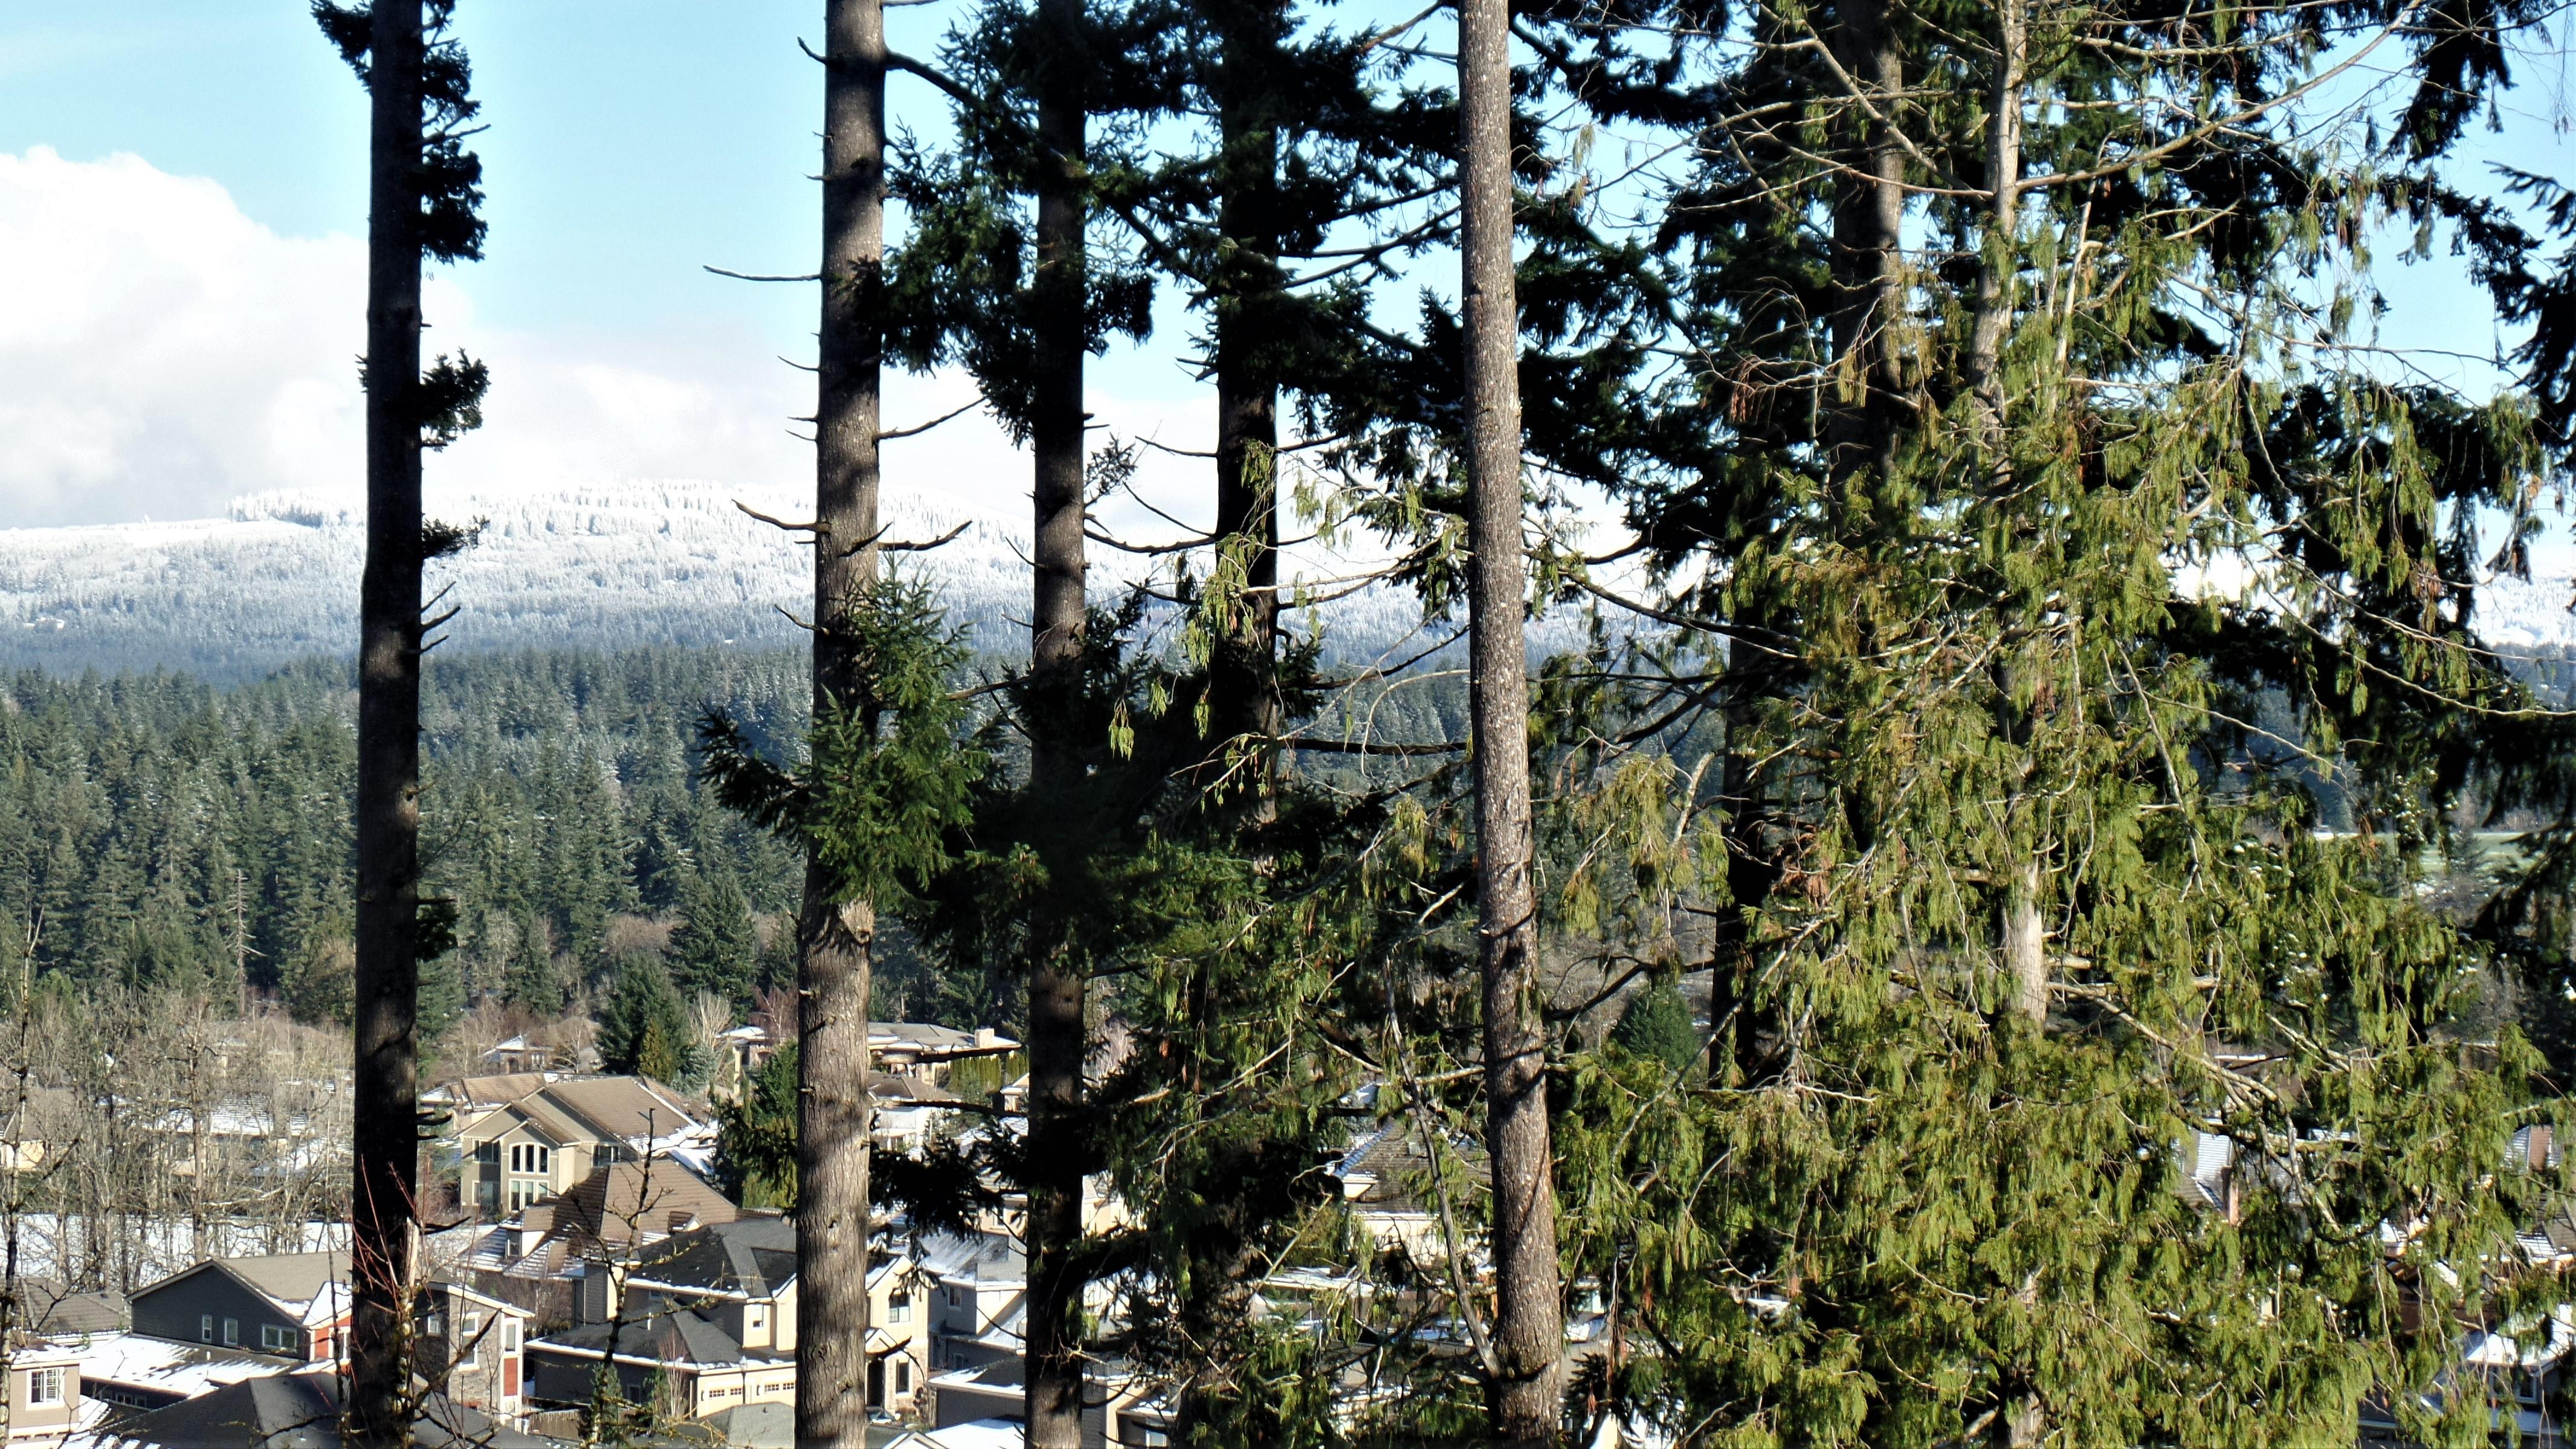
As well as can be expected. Hopefully things will start to loosen up. We are VERY wet right now, about 1.5 inches of rain in the last 24 hours and the Columbia Gorge has had heavy snow. We had a small shot of snow around Christmas, but the Cascade foothills harder hit (and Puget Sound even worse). View from our deck just before New Year's Day
-
Alpha Models Ferrari GTC4Lusso - Update 8/23/2022
Exotics_Builder replied to Exotics_Builder's topic in WIP: Model Cars
-
First start of 2022. I need a break from heavy detailing after the last few models. I also put the in work 69 Camaro Pace Car away for a bit while I decide what to do on the stripes. The decals are not quite Hugger Orange (and the Fred Cady decals I have are even more Orange). So, I decided to pull out the Alpha Models Ferrari GTC4Lusso for a build. For those of us unfamiliar with Alpha, they are the full model division of Hobby Design. They do high quality resin replicas of cars, mainly European. The kits are curbside, so limited chassis/suspension detail and engine detail only on cars that are midship with engines viewable from the rear hatch. And, in those cases, the engine is simplified. I would enjoy more detail in the engine area, even for a few more dollars. But modern engine bays are usually crowded and shrouded, so detail is limited. The same goes for suspension. Many modern high-performance cars have aerodynamic chassis “trays” to manage airflow, up to and including diffusers. Other manufacturers such as Tamiya, Aoshima and Revell of Germany have included more chassis detail in their styrene cars, and it would be nice to see Alpha do it as well. However, I would rather have the subjects available to build. Alpha does, in my opinion, do a great job in providing interior detail. This is an area where it would be nice to have a door opening option. The bodies are thick and attempting to open a door would be a major undertaking. So, I will concentrate more on visible detail. I have included photos of the resin parts (very well cast and looks as good as styrene). There is also an extensive PE set plus pre-cut windows with the blackened areas already applied (kudos there). I have cleaned the parts with soap and water plus an alcohol wipe and getting ready to prime. The panel and door/trunk lines are a bit soft and needed to be scribed deeper. Newer kits from Alpha have much crisper panel and door/trunk lines. Even though the kit comes with two different sets of 19” wheels, I opted to go with Hobby Design Novitec 20” with Hobby Design Michelin tires. I am still deciding on color scheme. I have three different choices and will narrow down after first primer coat and clean up.
-
Yes. First Rally car. Next one will be this one. Now, working on a Alpha Models GTC4Lusso. Stay tuned for a WIP posting ?
-
The Tamiya one may not have been reissued but the Fujimi version has.
-
Very nice. Are those wheels from Scale Production? Or just the wheels in the kit?
-
That is the first pic. It is a resin custom wagon that uses the Revell 49 Mercury Custom
-
Only got 4 done, but a lot better than the last couple of years. Also, one about 50% done.
-
Revell 1966 Pontiac GTO - Final Build of 2021
Exotics_Builder replied to Exotics_Builder's topic in Model Cars
I did find a minoir glitch when waxing that I need to fix (or just let be) -
-
Just got a chance to get photos of the finished kit. See it in Under Glass-Model Cars


.JPG.6877cbaa18cd1db6295074c4de8882a2.JPG)


.JPG.6a021f1b356fd4a20c27c67daa63e120.JPG)
.JPG.f07fee560cdfcd15aa714da581e16b1d.JPG)
.JPG.f30013d09990faa30b6dbb8ec7d0dee6.JPG)
.JPG.0272746e781a10a87dba9393e82797a0.JPG)
.JPG.7f1233c5d305f4be810e47c2aa9a2b85.JPG)
.JPG.731d1b7e812381213c52a5bd364a6270.JPG)
.JPG.c143f21f9c3e24498ce76e8b83b313ad.JPG)

.JPG.b5b91cbf93dc75caeaebecadb9b43ea4.JPG)
.JPG.8db53f57a0079b678d106eaa505c34d8.JPG)
.JPG.f2792b7b456312860e923f7a81868dc3.JPG)
.JPG.4ddcd73990e0f300ff506e0d9ee206e0.JPG)
.JPG.525f9886c59c0cc0d89b5b1d24fab151.JPG)
.JPG.aa85ac74a723985bf78c9406b5d0f71c.JPG)
.JPG.d19d22abe9e57c2c415bf8dee9aabc3f.JPG)
.JPG.34d124e71edab50fd94e9d2f5a8f1d22.JPG)
.JPG.d2357a13d109e6749a21a885c3c7614d.JPG)
.JPG.2e63e0799b36b6336e4da4cae3d779f4.JPG)
.JPG.542d338822f554feef0b86eb28a45b33.JPG)
.JPG.06ec5b98bfa2677cdcd4fdb966a30e89.JPG)
.JPG.51f70532a471ff4bf8acdb2331e579e3.JPG)
.JPG.74bda0af9b8359560bf5c10e29a38d89.JPG)
.JPG.d5e69eb8ea3be6bd5e5484bacd7141e2.JPG)