Exotics_Builder
-
Posts
3,641 -
Joined
-
Last visited
Content Type
Profiles
Forums
Events
Gallery
Everything posted by Exotics_Builder
-

Revell '69 Camaro pace car hood and deck stripes
Exotics_Builder replied to avidinha's topic in Wanted!
Keep in mind that the real pace car hood stripes are Hugger Orange. Most decals, including Revell's are too Orange. Keith Marks' are too red. I wound up making my own stripe decals. My version Real Car
-
I picked up a pair at an IPMS show a few years ago that looked pretty good and are still sitting in the parts box. Trying to remember whom, thinking it was UMM-USA. I'll have to pull them out to photo them. Seems to me they were about right for the AMT Double Dragster kit.
-
Monogram 1965 Impala SS Coupe -Update no. 3
Exotics_Builder replied to Exotics_Builder's topic in WIP: Model Cars
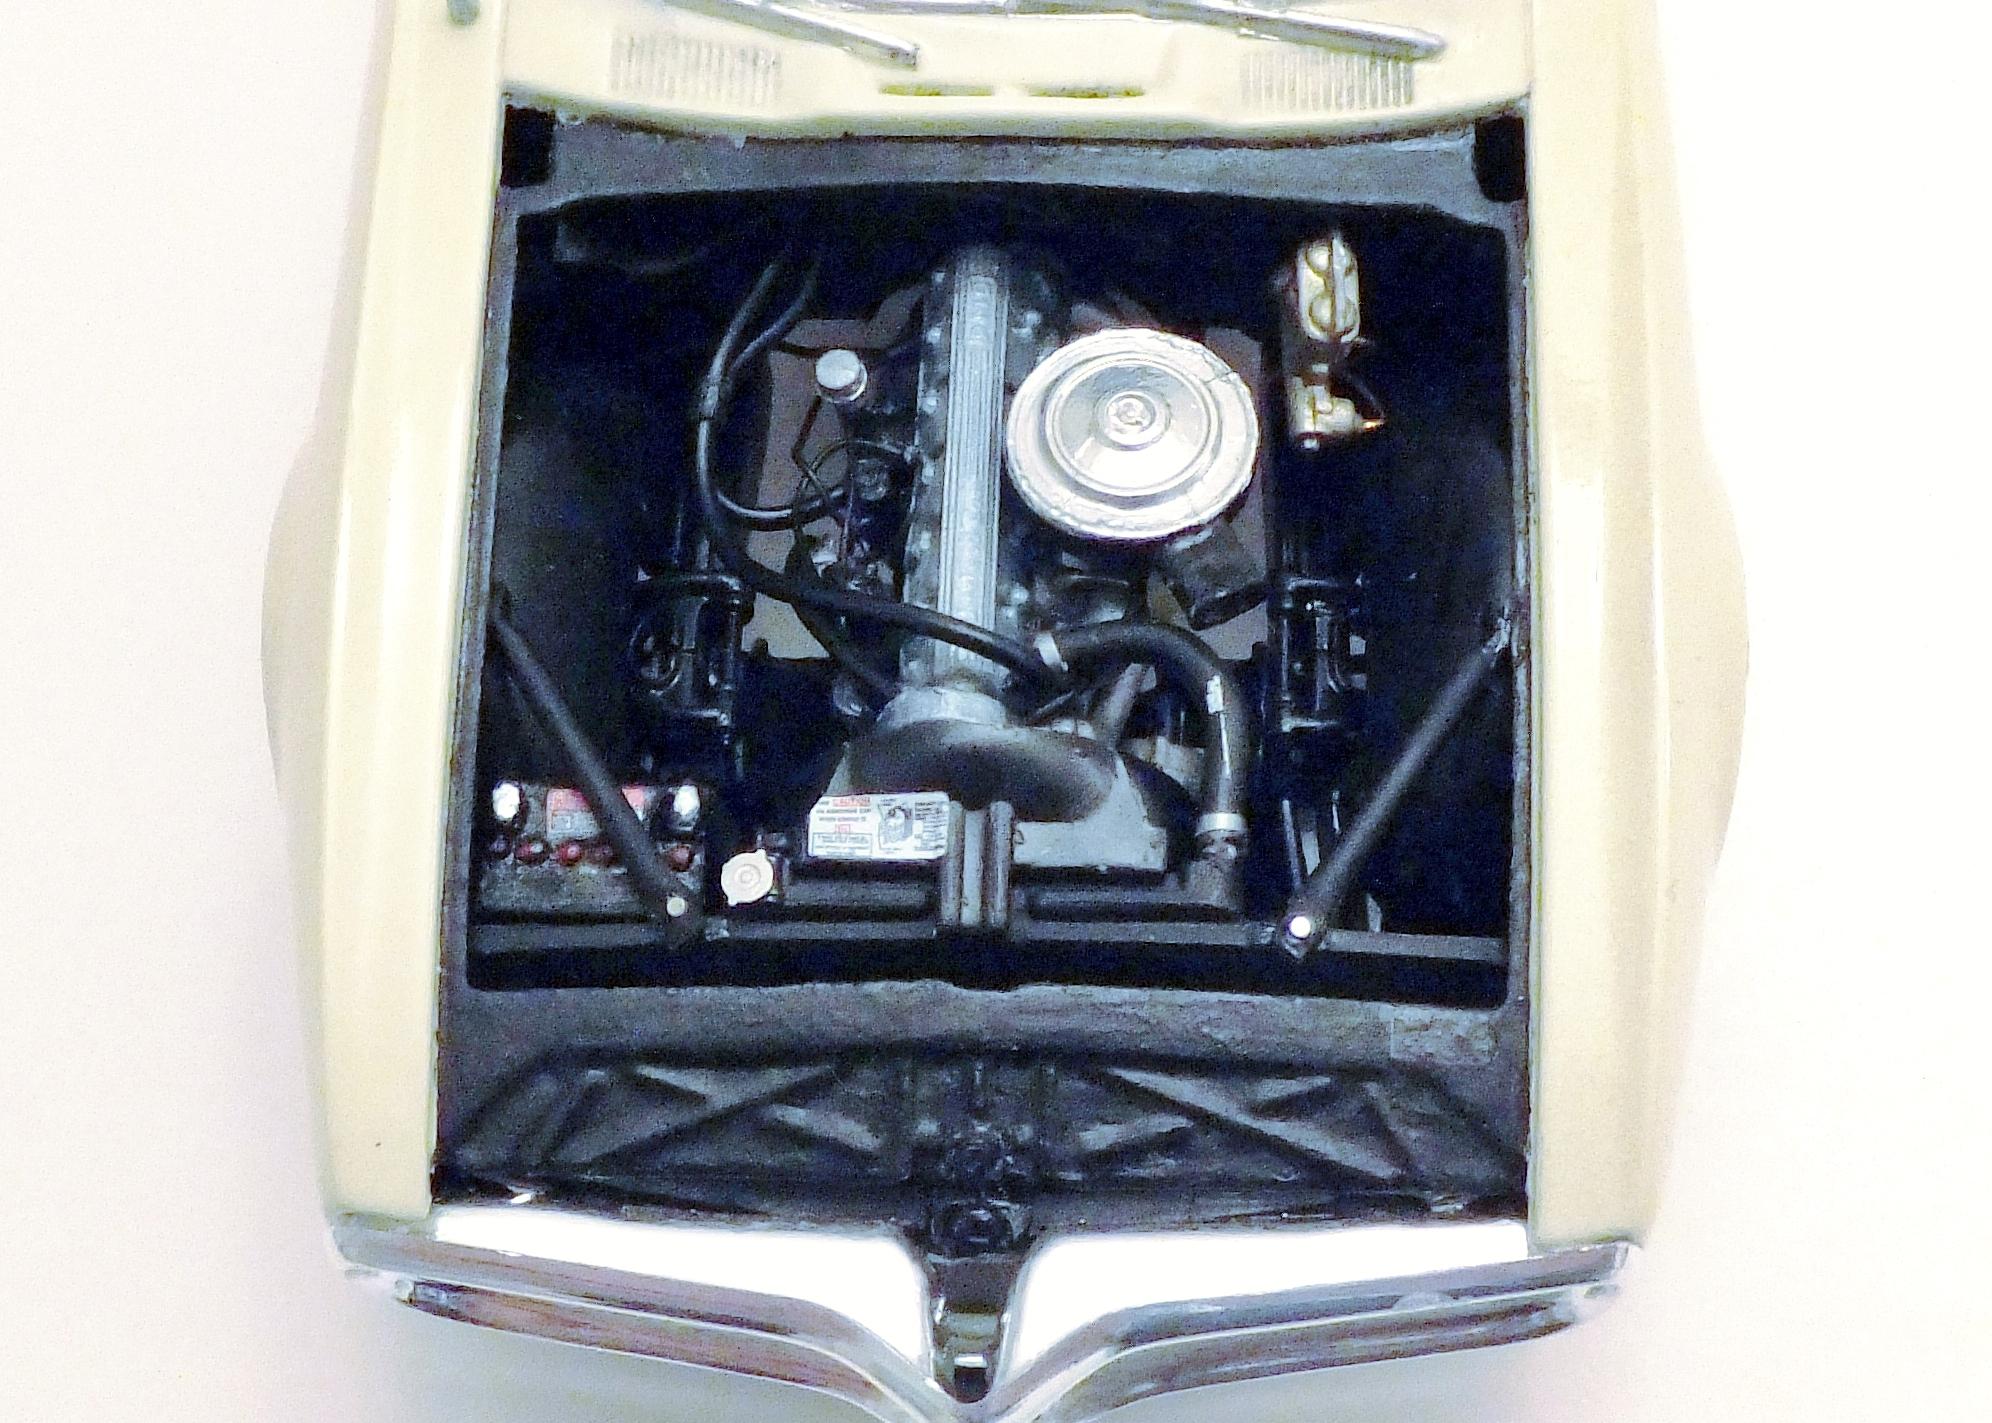
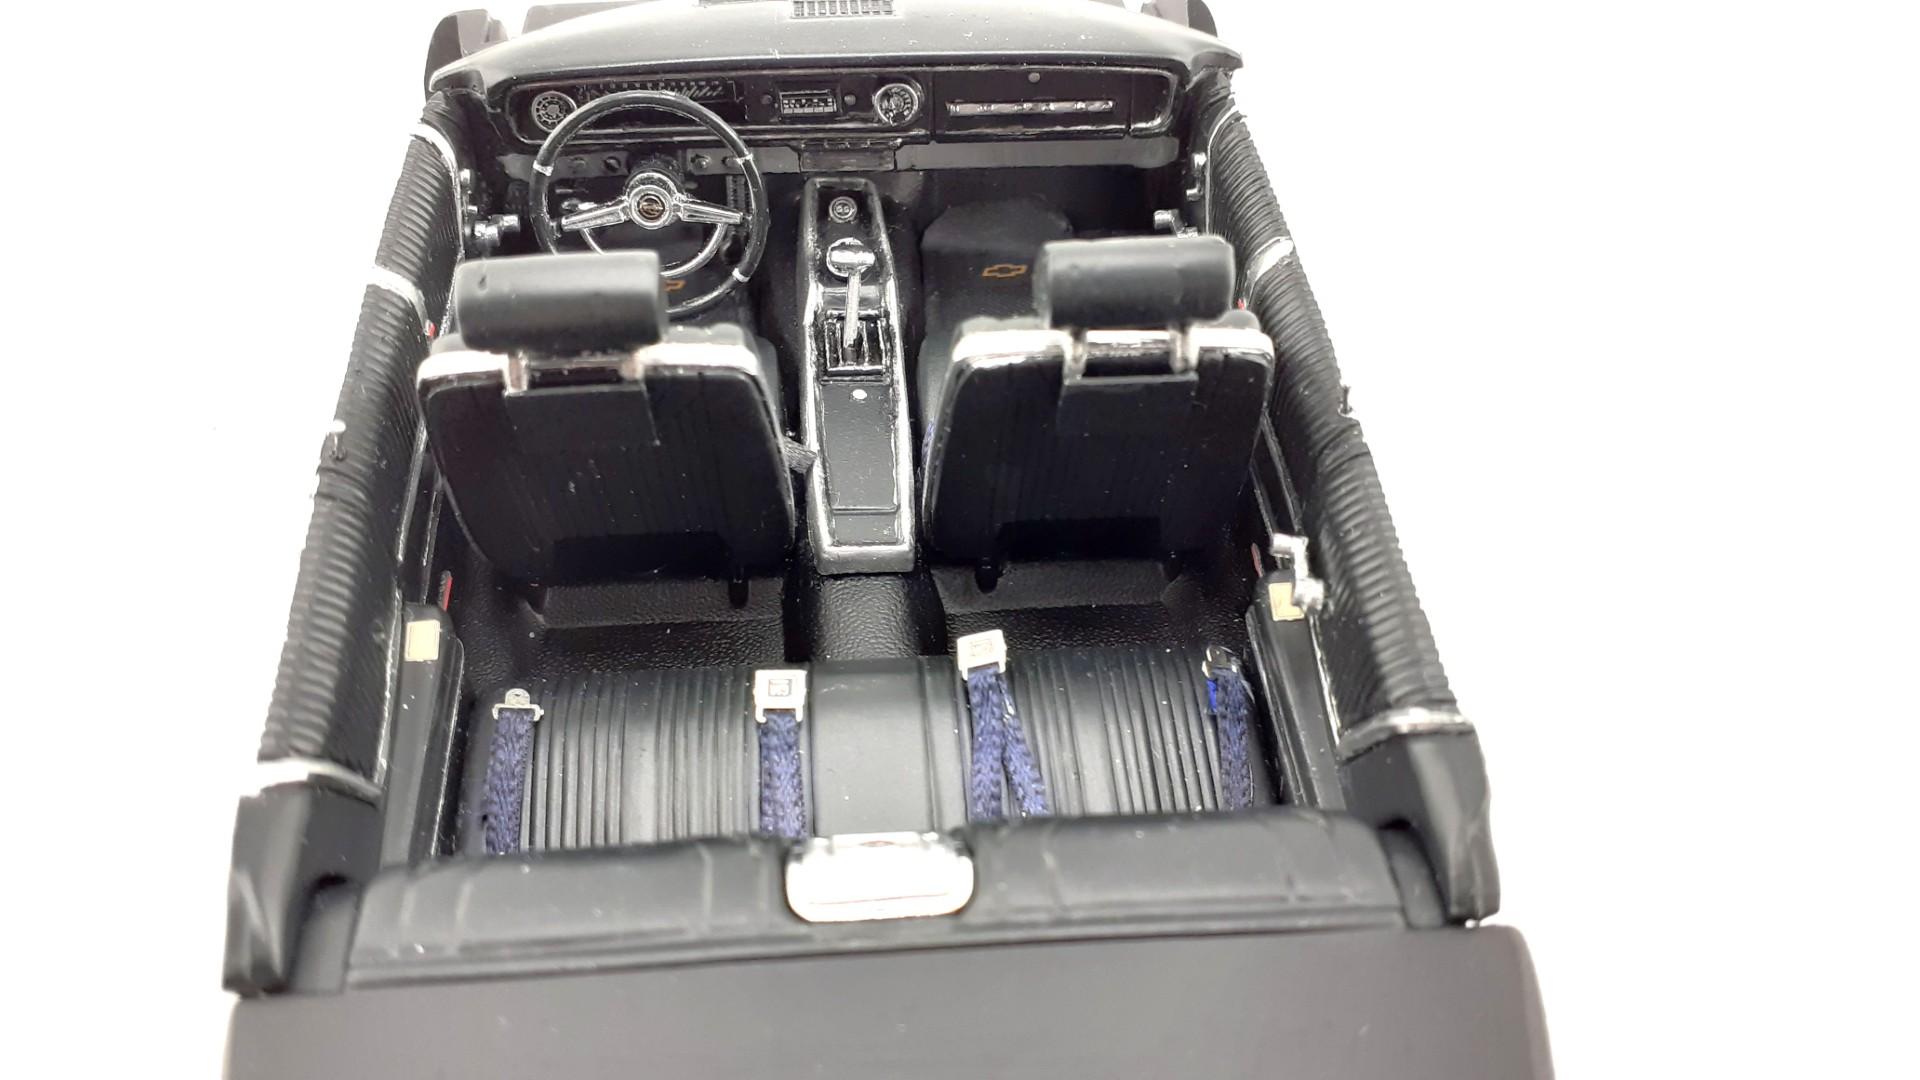
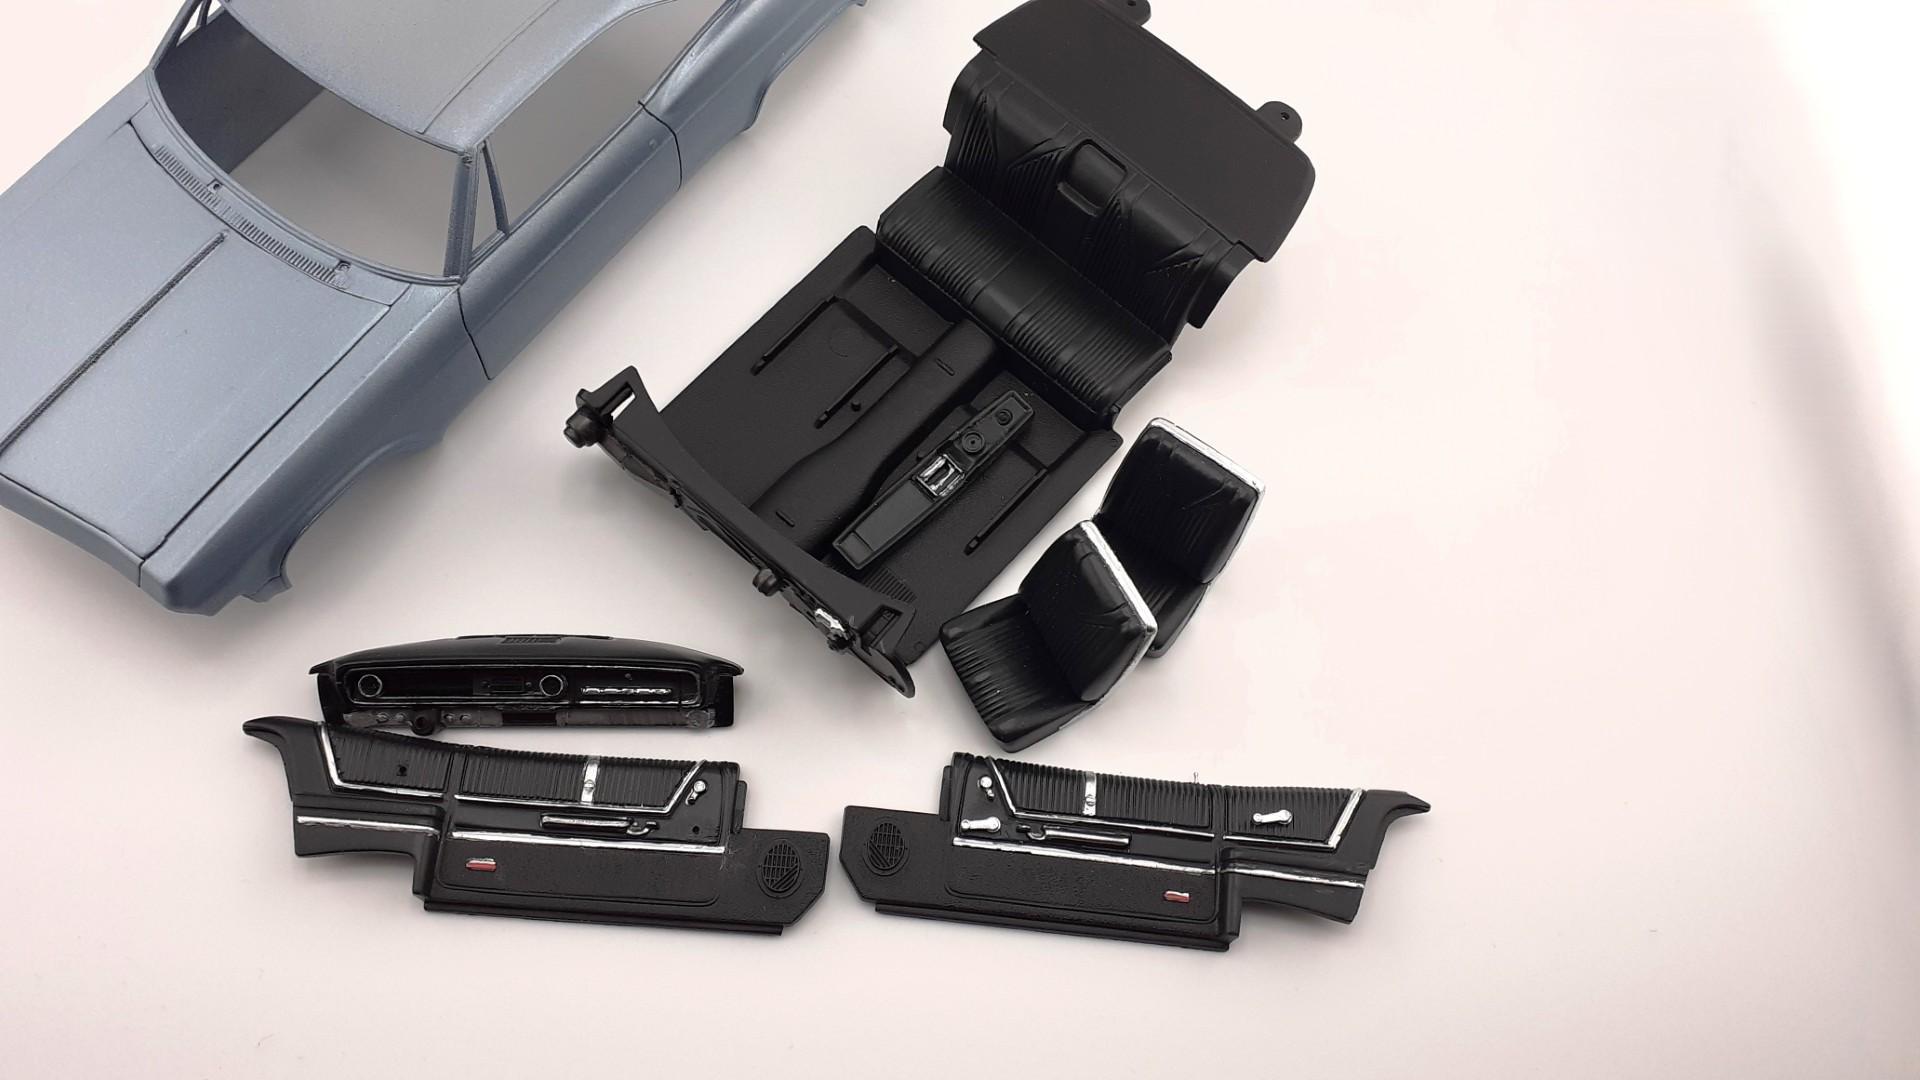
I’ve assembled the interior. Added the scratch built aftermarket slip on head rests as close as I can get them. Taking it as far as I plan other than some dusting before “marriage” to the body. It looks convincing to my eye and as how I remember it. I know most of the work will not be visible once installed in the body, but I just had to do it. A new technique for the door locks (to me anyway). Insect mounting pins. They’re thin enough and have a relatively decent shaped head for the lock top. They’re way longer than needed, but I clip off what I don’t need and put them in the detailing parts box. Engine is in work and the chassis underway. Getting ready for final clear coat on body before doing the vinyl top.
-
Monogram 1965 Impala SS Coupe -Update no. 3
Exotics_Builder replied to Exotics_Builder's topic in WIP: Model Cars
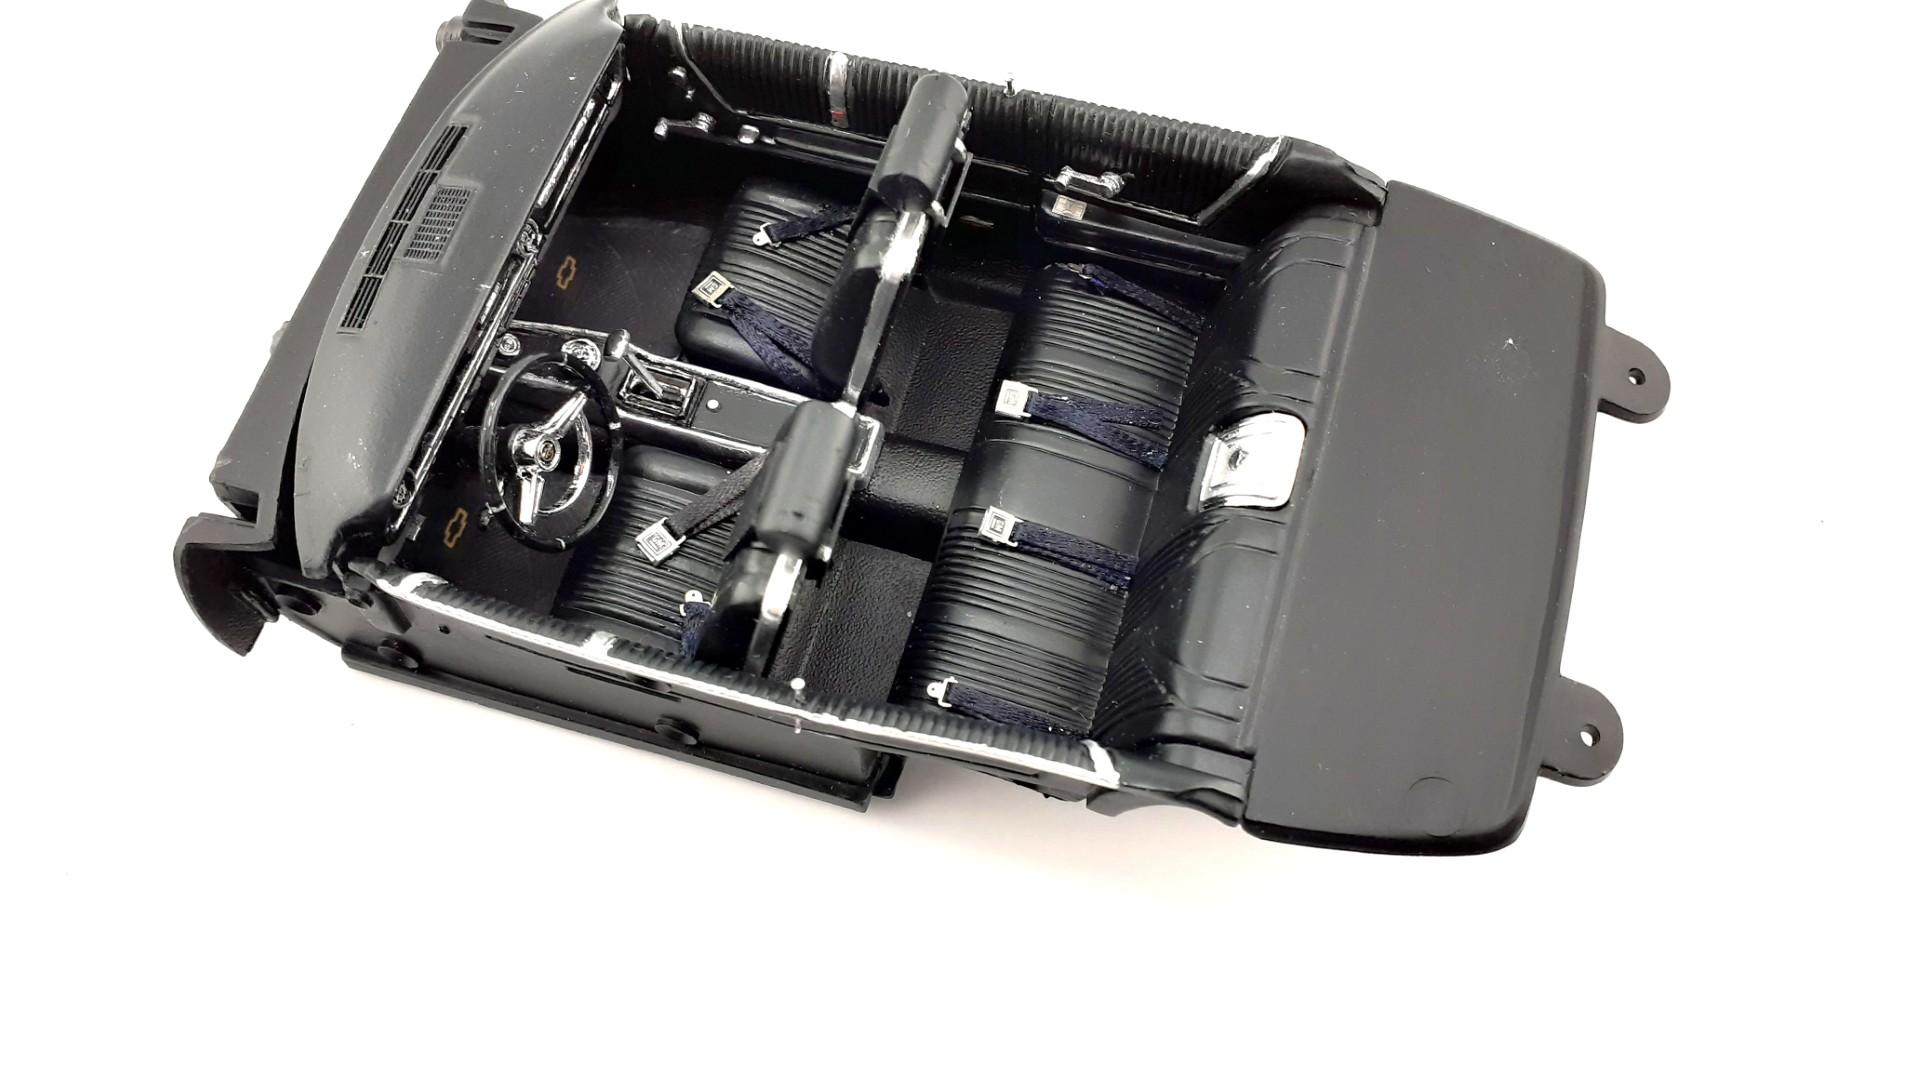
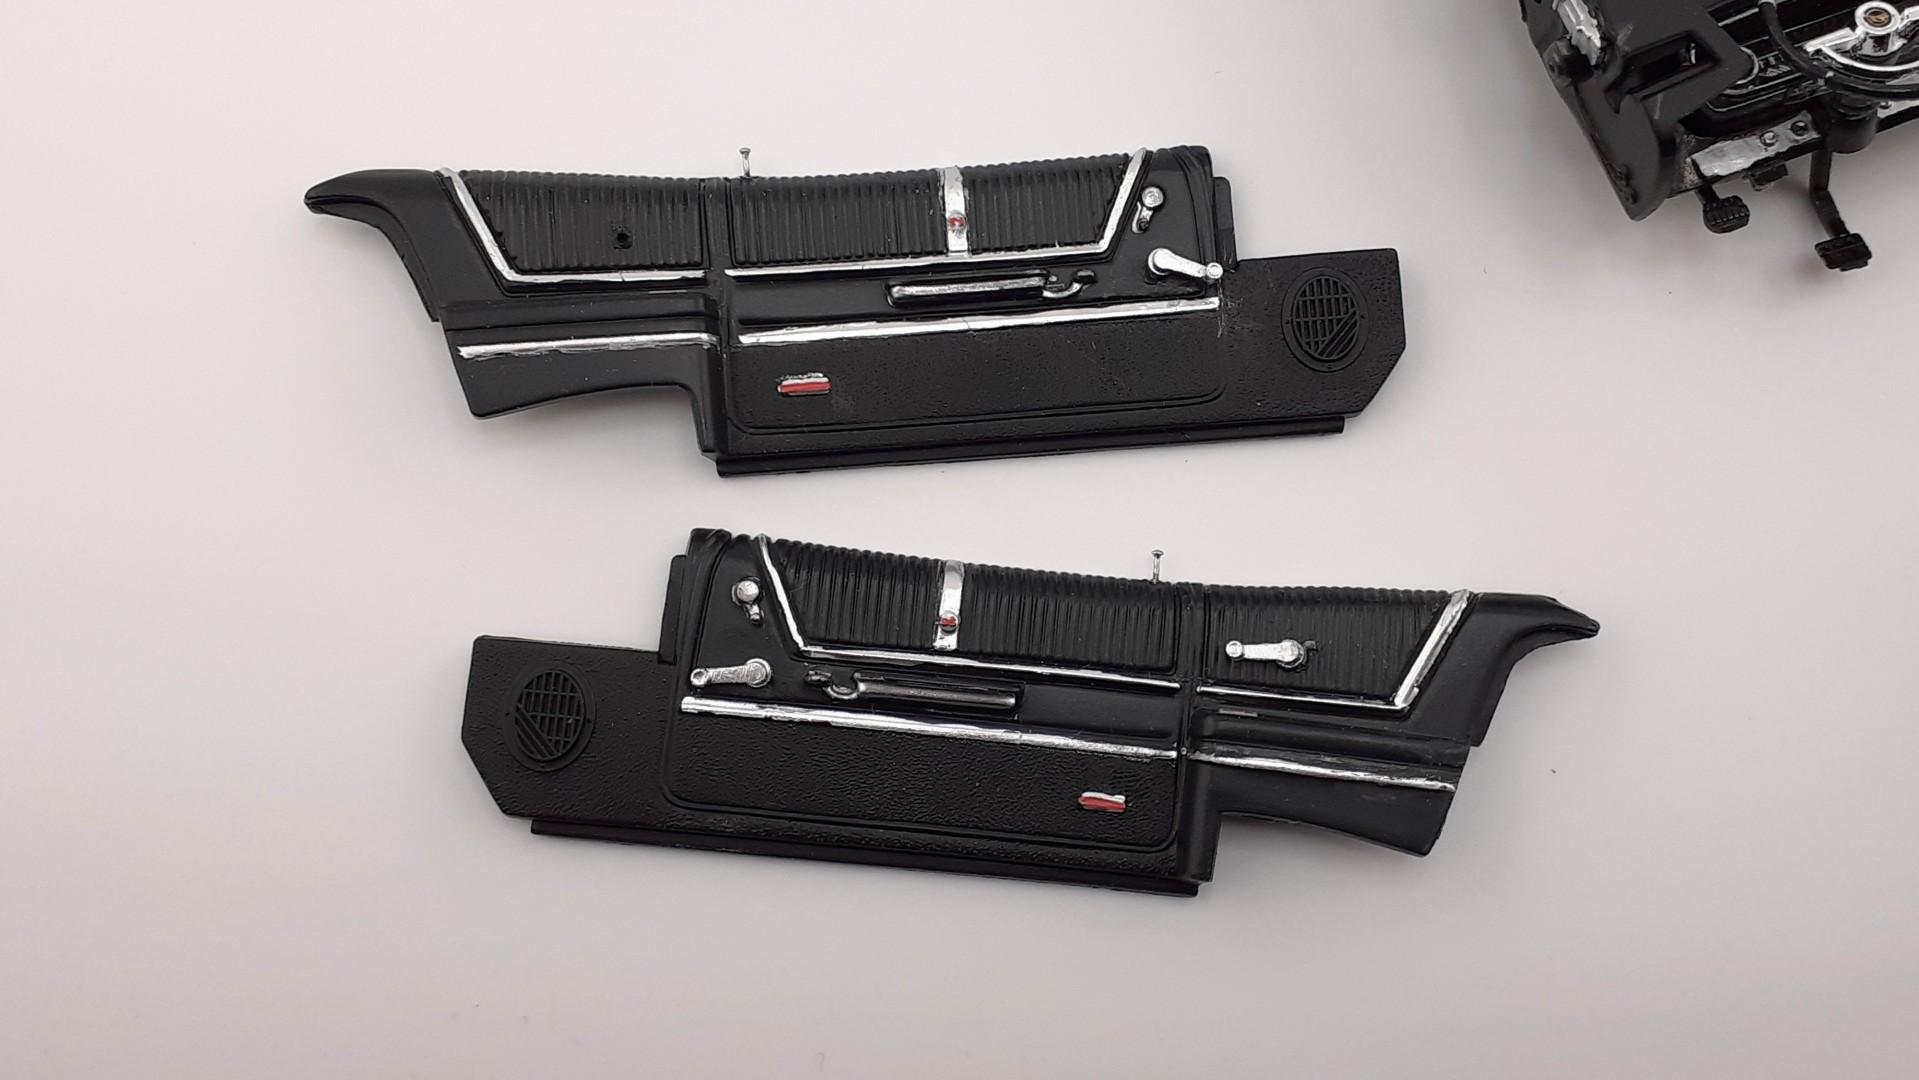
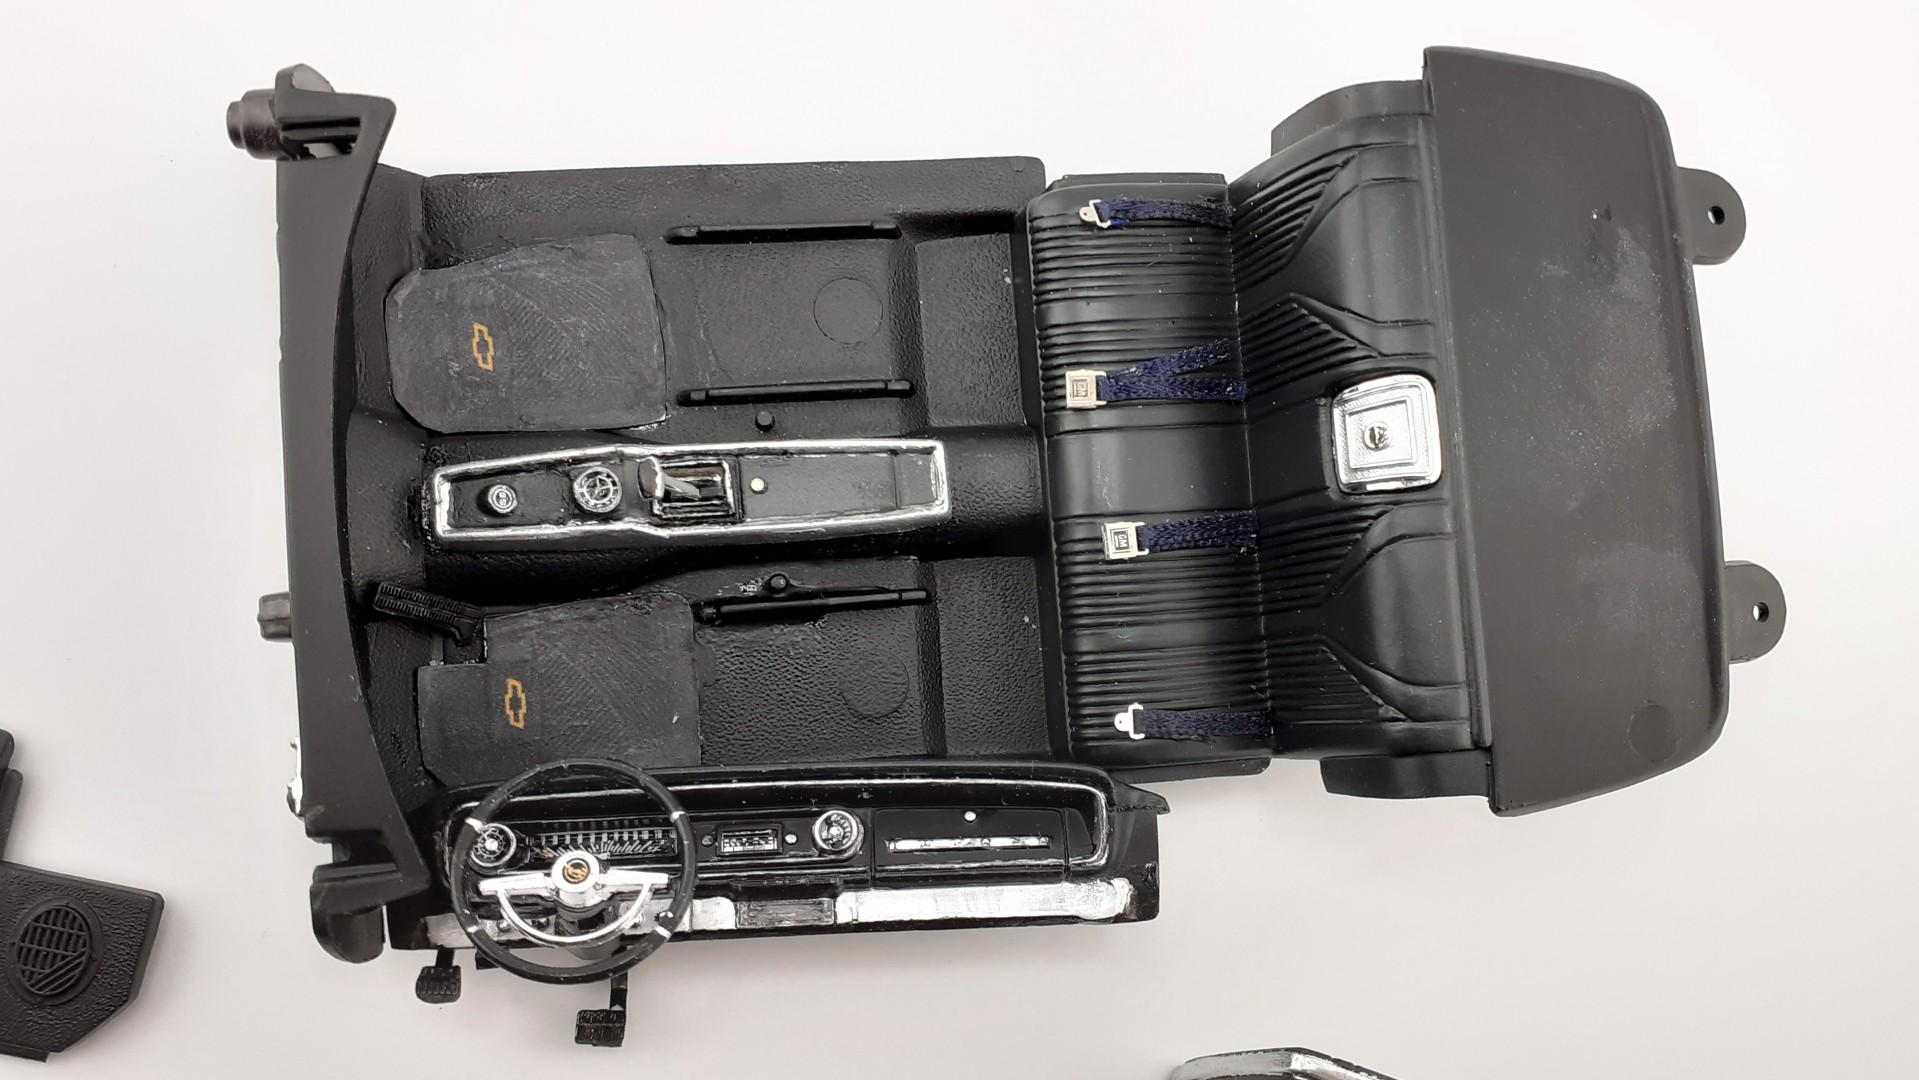
Interior getting close to finished. I added all the trim detail using chrome pen. I completed the center console adjustment for the auto trans. Added the seat belts (interesting for the big Impala in 65, no center seat belt in the back seat, just the two ends). Detailed up the dashboard but need to do a bit more cleanup. Added a parking brake pedal and release handle. Still need to cobble the slip-on headrests (bought from The Warshawsky Company). Next, assemble the interior and add to the chassis; finish clear coating the body and then mask and do the vinyl roof; and build up the engine.
-
Moebius - Planning and Tires
Exotics_Builder replied to IBuildOneFortyEight's topic in Model Building Questions and Answers
I've used Aoshima wheels on previous builds. One thing to consider is that they wheels are 1/24 and the model applied to is 1/25. Effectively, the 19 inch wheel shown in your photo would scale out to about a 20 inch on the model. The wheels/tires are also wider in many cases and could be a problem for fitment in the wheel wells, particularly the front. As Mark already said, it is best to have the model in hand and measure your clearances before making a wheel choice. Here's a 66 El Camino with Aoshima 18 inch wheels used.
-
I've always gotten great products from him.
-
Recognize these rims?
Exotics_Builder replied to Brenton's topic in Model Building Questions and Answers
Yep. Look it to me as well. -
1957 Ford Del Rio Street Machine
Exotics_Builder replied to Exotics_Builder's topic in WIP: Model Cars
Got a scratch on the roof from an accidental drop. So, stripping the body to repaint. I hate when that happens -
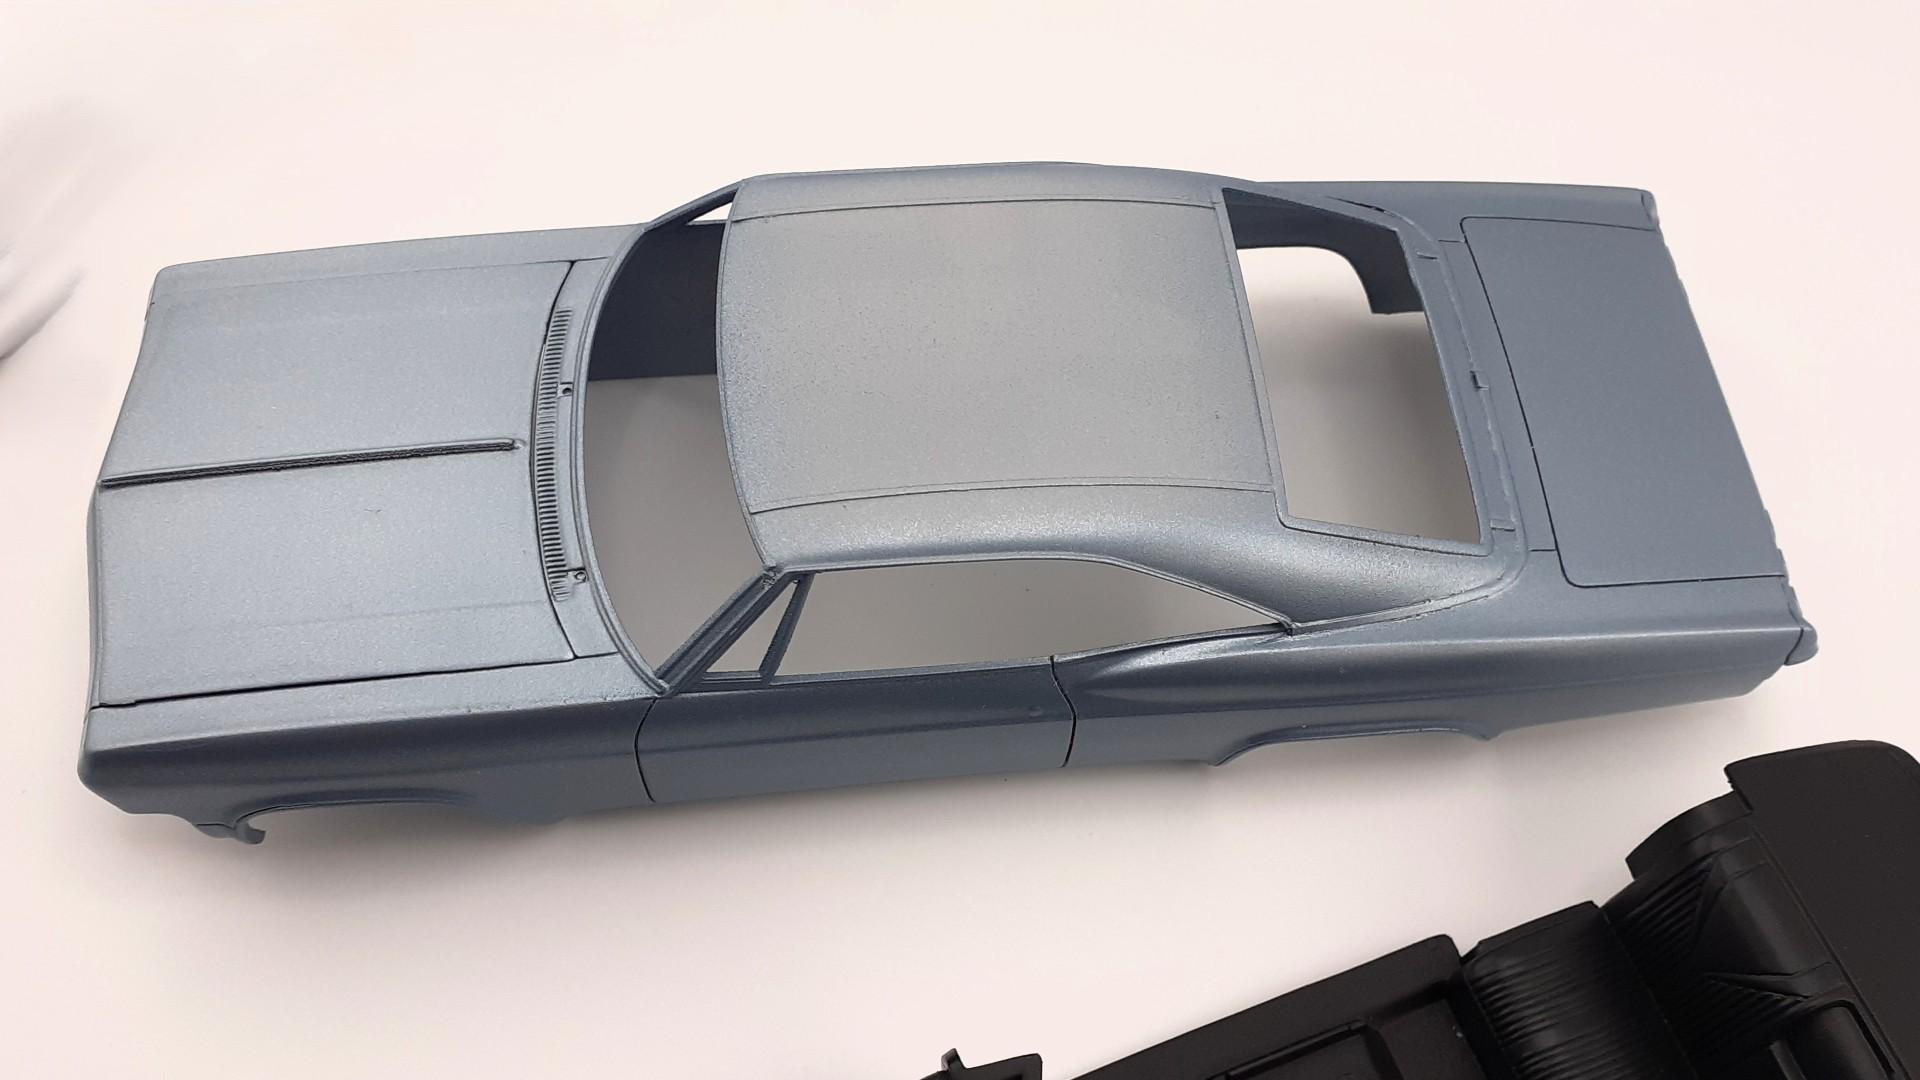
There are three model kits available that replicate the 1965 Impala SS Coupe by Monogram, the 1968 Camaro Z/28 by AMT, and the 1970 Camaro Z/28 by AMT (my first 3 cars). These kits have remained on the shelves for years. The necessary parts to closely replicate these cars have been collected over time, with occasional adjustments being made. After completing the Revell 1969 Camaro Pace Car replica kit, I started building the 1965 Impala SS. My parents bought this Mist Blue Metallic car with a black interior and vinyl top in late 1964. It had a 327 cubic inch, 300 horsepower V8 engine with a Powerglide transmission. When I bought it from them, I added headrests and Firestone redline tires on Cragar SS front wheels and Chrome Reverse rear wheels due to budget constraints. To reflect my car accurately, the Monogram Coupe kit required modifications. I sourced a 327 small block with Powerglide and ram horn exhaust manifolds from the Revell 1964 Impala kit. Additionally, I needed a different accessory drive for power steering, as the Revell small block only had an alternator. The model came with air conditioning and power windows, which I did not have. So, I adjusted the firewall configuration and removed the dashboard A/C vents and replaced the power window switches with 3D-printed window cranks. I modified the manual transmission console to fit an automatic. For the vinyl roof, I added molding using Evergreen strip and prepped the body before applying Scale Finishes Mist Blue Metallic. Still a bit of work to go. I need to finish off the interior with Seat Belts and decals. I was fortunate to get a Last Detail decal set for the 65/67 Chevrolet Impalas. And I have a Model Car Garage PE set for the build. The engine is in the process of assembly. Paint needs completing along with the vinyl top and detailing needs to get under way. More progress pics on the way. The first photo is the car with my dad and my brother’s fiancé standing in front of it. That is the only photo I have yet to find of it. These were on slides, and many were lost over the years. The next 3 photos are of progress to date. More to come later.
-
Modifications: 3D printed Diolex wheels were cleaned, primered, drilled for air valves, and sprayed with Revell Chrome. The air valves were added after drying. Tires were sourced from my parts bin. Missing body-to-chassis bolts were installed using a pattern, with holes drilled, and Calibre 35 resin bolts used. The engine was assembled with additional wiring. Subsequently, a Replicas and Miniatures of Maryland 4-cylinder hop-up kit with downdraft Weber carburetors, fuel lines, and linkages was installed. Replicas and Miniatures finned brake drums were fitted and adapted for the wheels. Drum brakes were chosen instead of disk brakes to better align with the period of the vehicle. Although I am not particularly satisfied with the straight rod simulating the drive axles (without boots), I decided to leave it as is. The dashboard was detailed with instrument decals, Wizard O trim rings, and clear coat to simulate plastic covers. Additionally, a control knob and key lock for ignition were added. Different front seats from the parts bin were installed along with Gofer Racing stock-type seat belt hardware for both the front and back. Paper adhesive bandage tape was applied to the lower body to simulate the rough fiberglass texture of the actual car. Created rear MANX and front Shield emblem decals from no royalty vector image file of logos. Painted Testors Flaming Orange covered with 2 coats Tamiya Pearl Clear and finished with Testor Wet Look Clear. Mr. Hobby Black Primer was daubed onto the lower body to add more texture to the paper tape.
- 12 replies
-
- 12
-

-
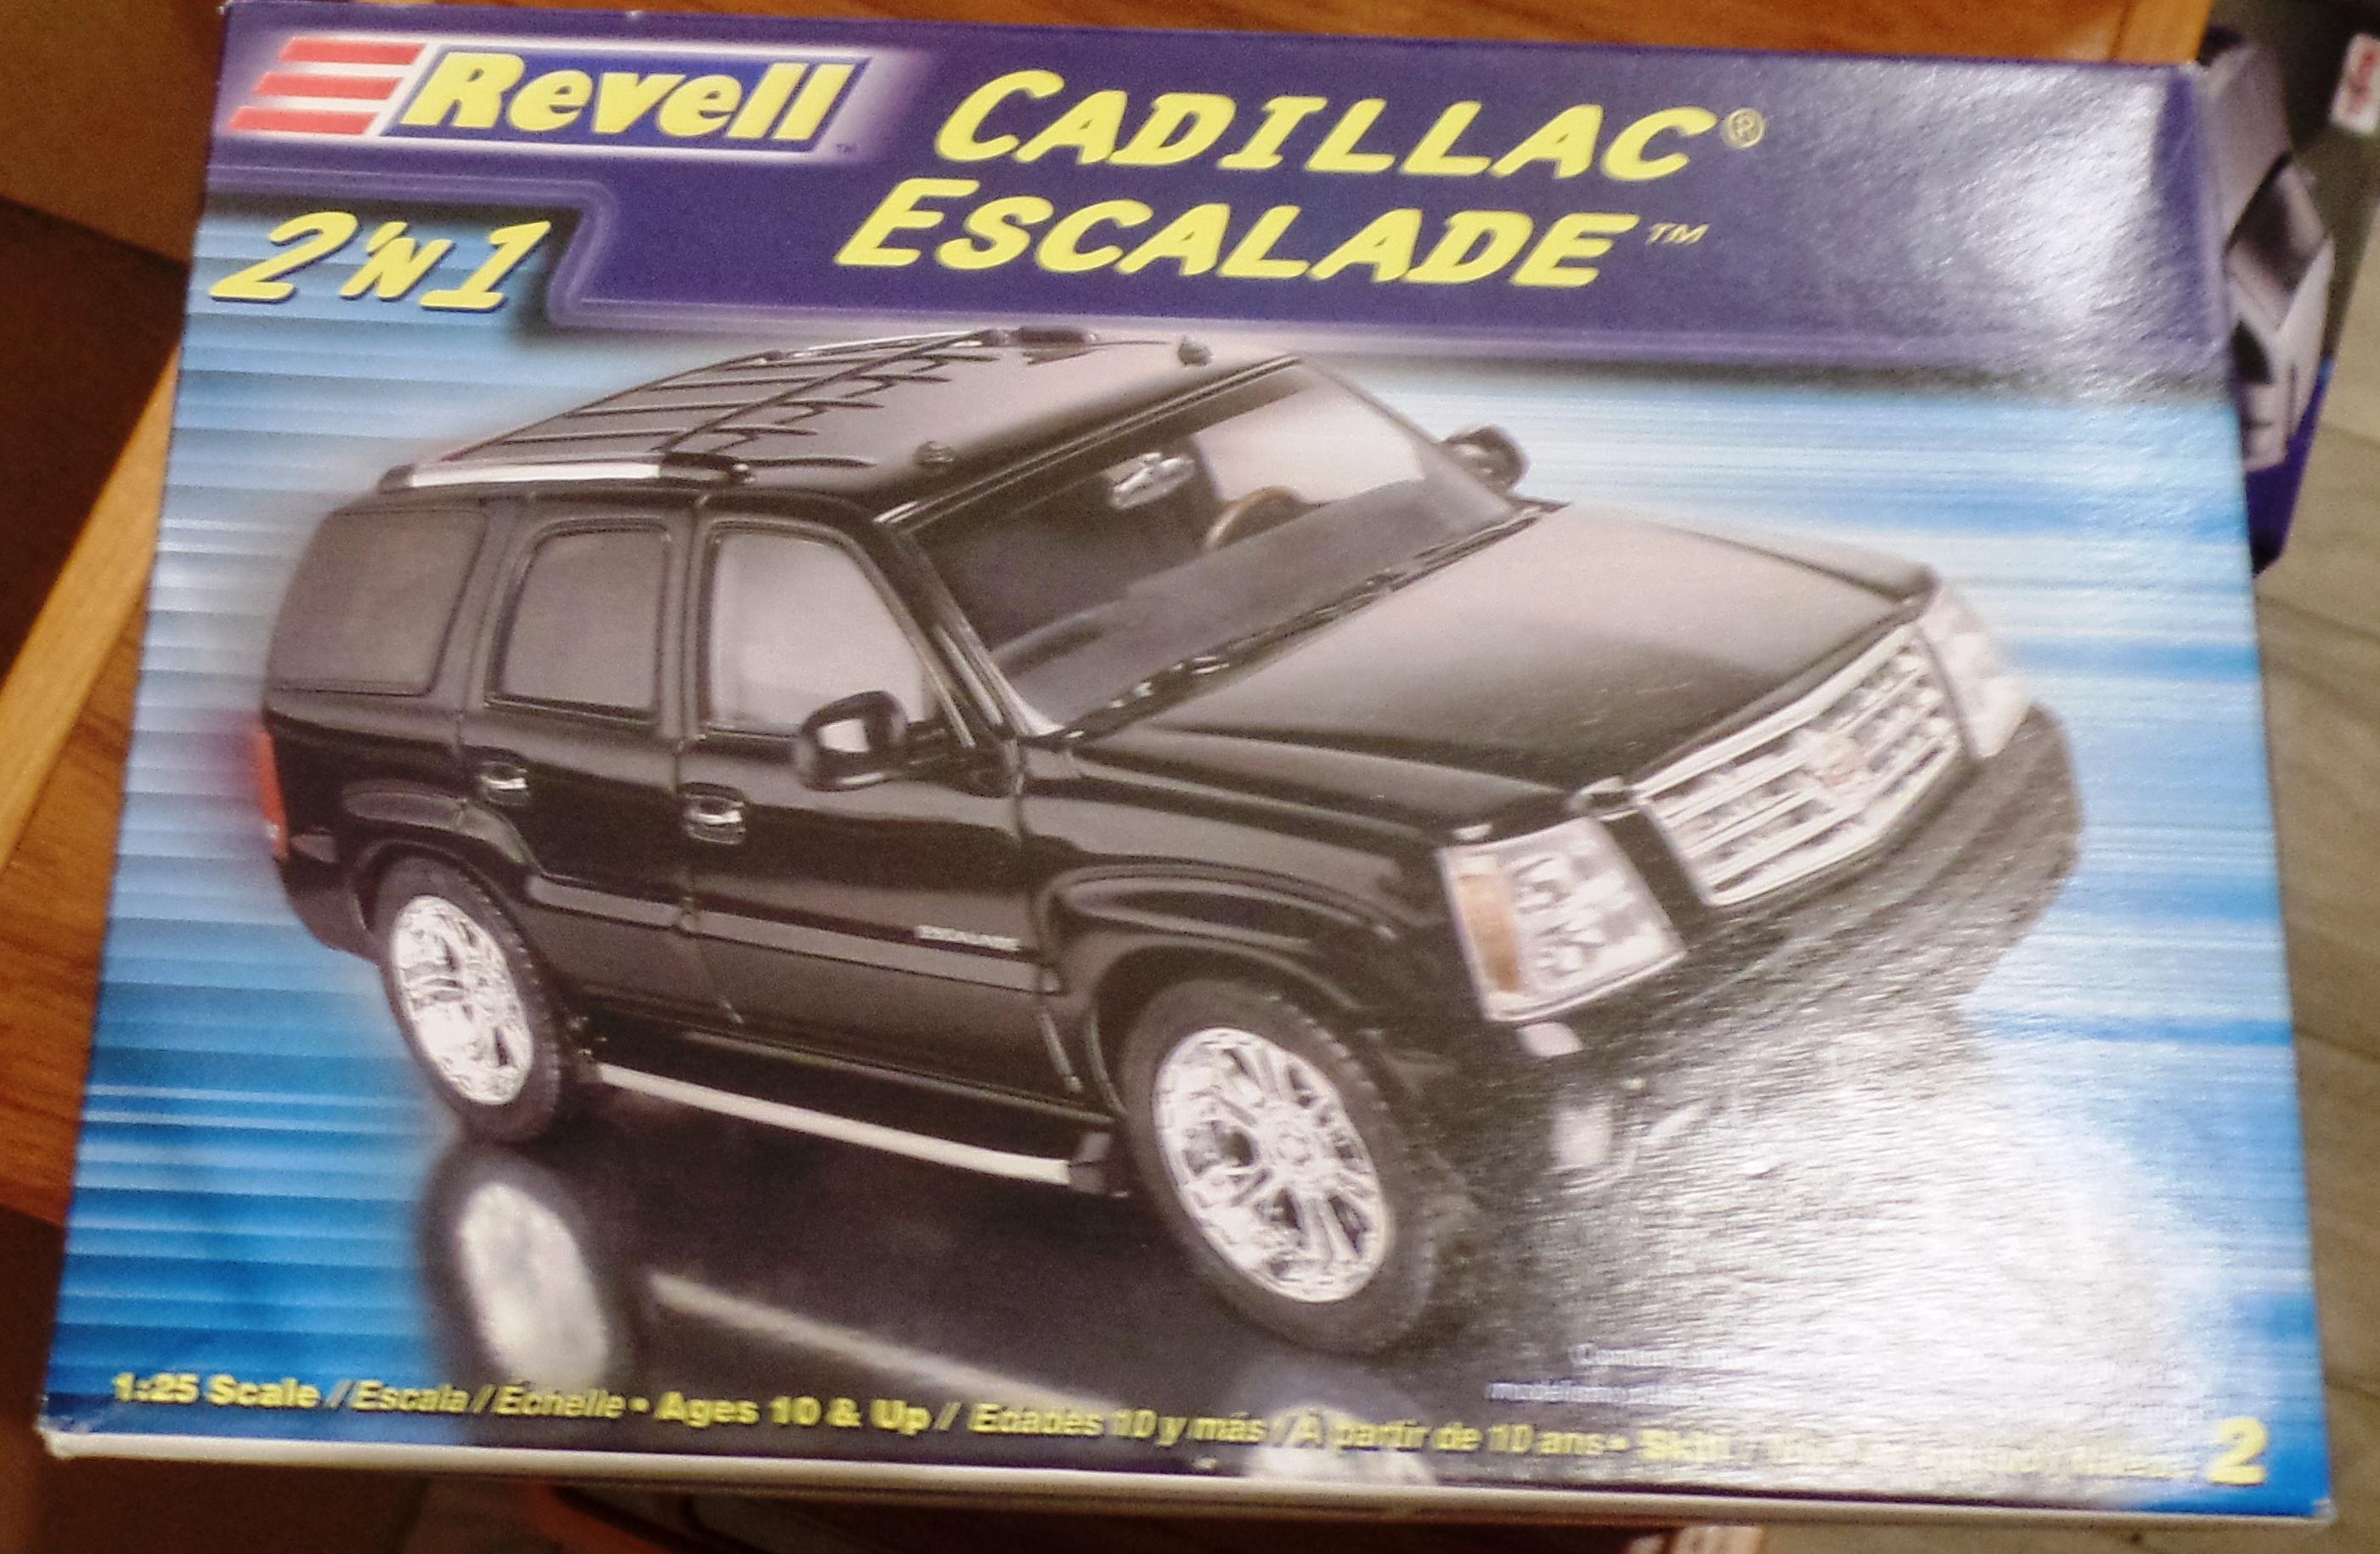
This is the Revell Escalade Ute. It may be a good alternative as well since on the truck chassis. But I'd need to research further
-
I have a stack of LS's in my parts boxes. Would love to get close to replicate this one I saw at Car Show last year
-
I do not yet know. I have a 3D print Duramax in the box or could use an LS. If I do curbside (easiest option by far) only the bottom half of the engine would be visible anyway. Here is the chassis/suspension the designer Andrey Bezrodny includes.
-
When I get to it. I've gotten the 3D printed kit from Andy Lesiak. It is curbside and I'm not sure it will be worth the effort to put in an engine bay. But the chassis/suspension with these prints (not Andy's fault it is what the 3D designer did) is not prototypical. I would like to be a bit closer to the actual vehicle with my model. The quality of Andy's prints is exceptional.
-
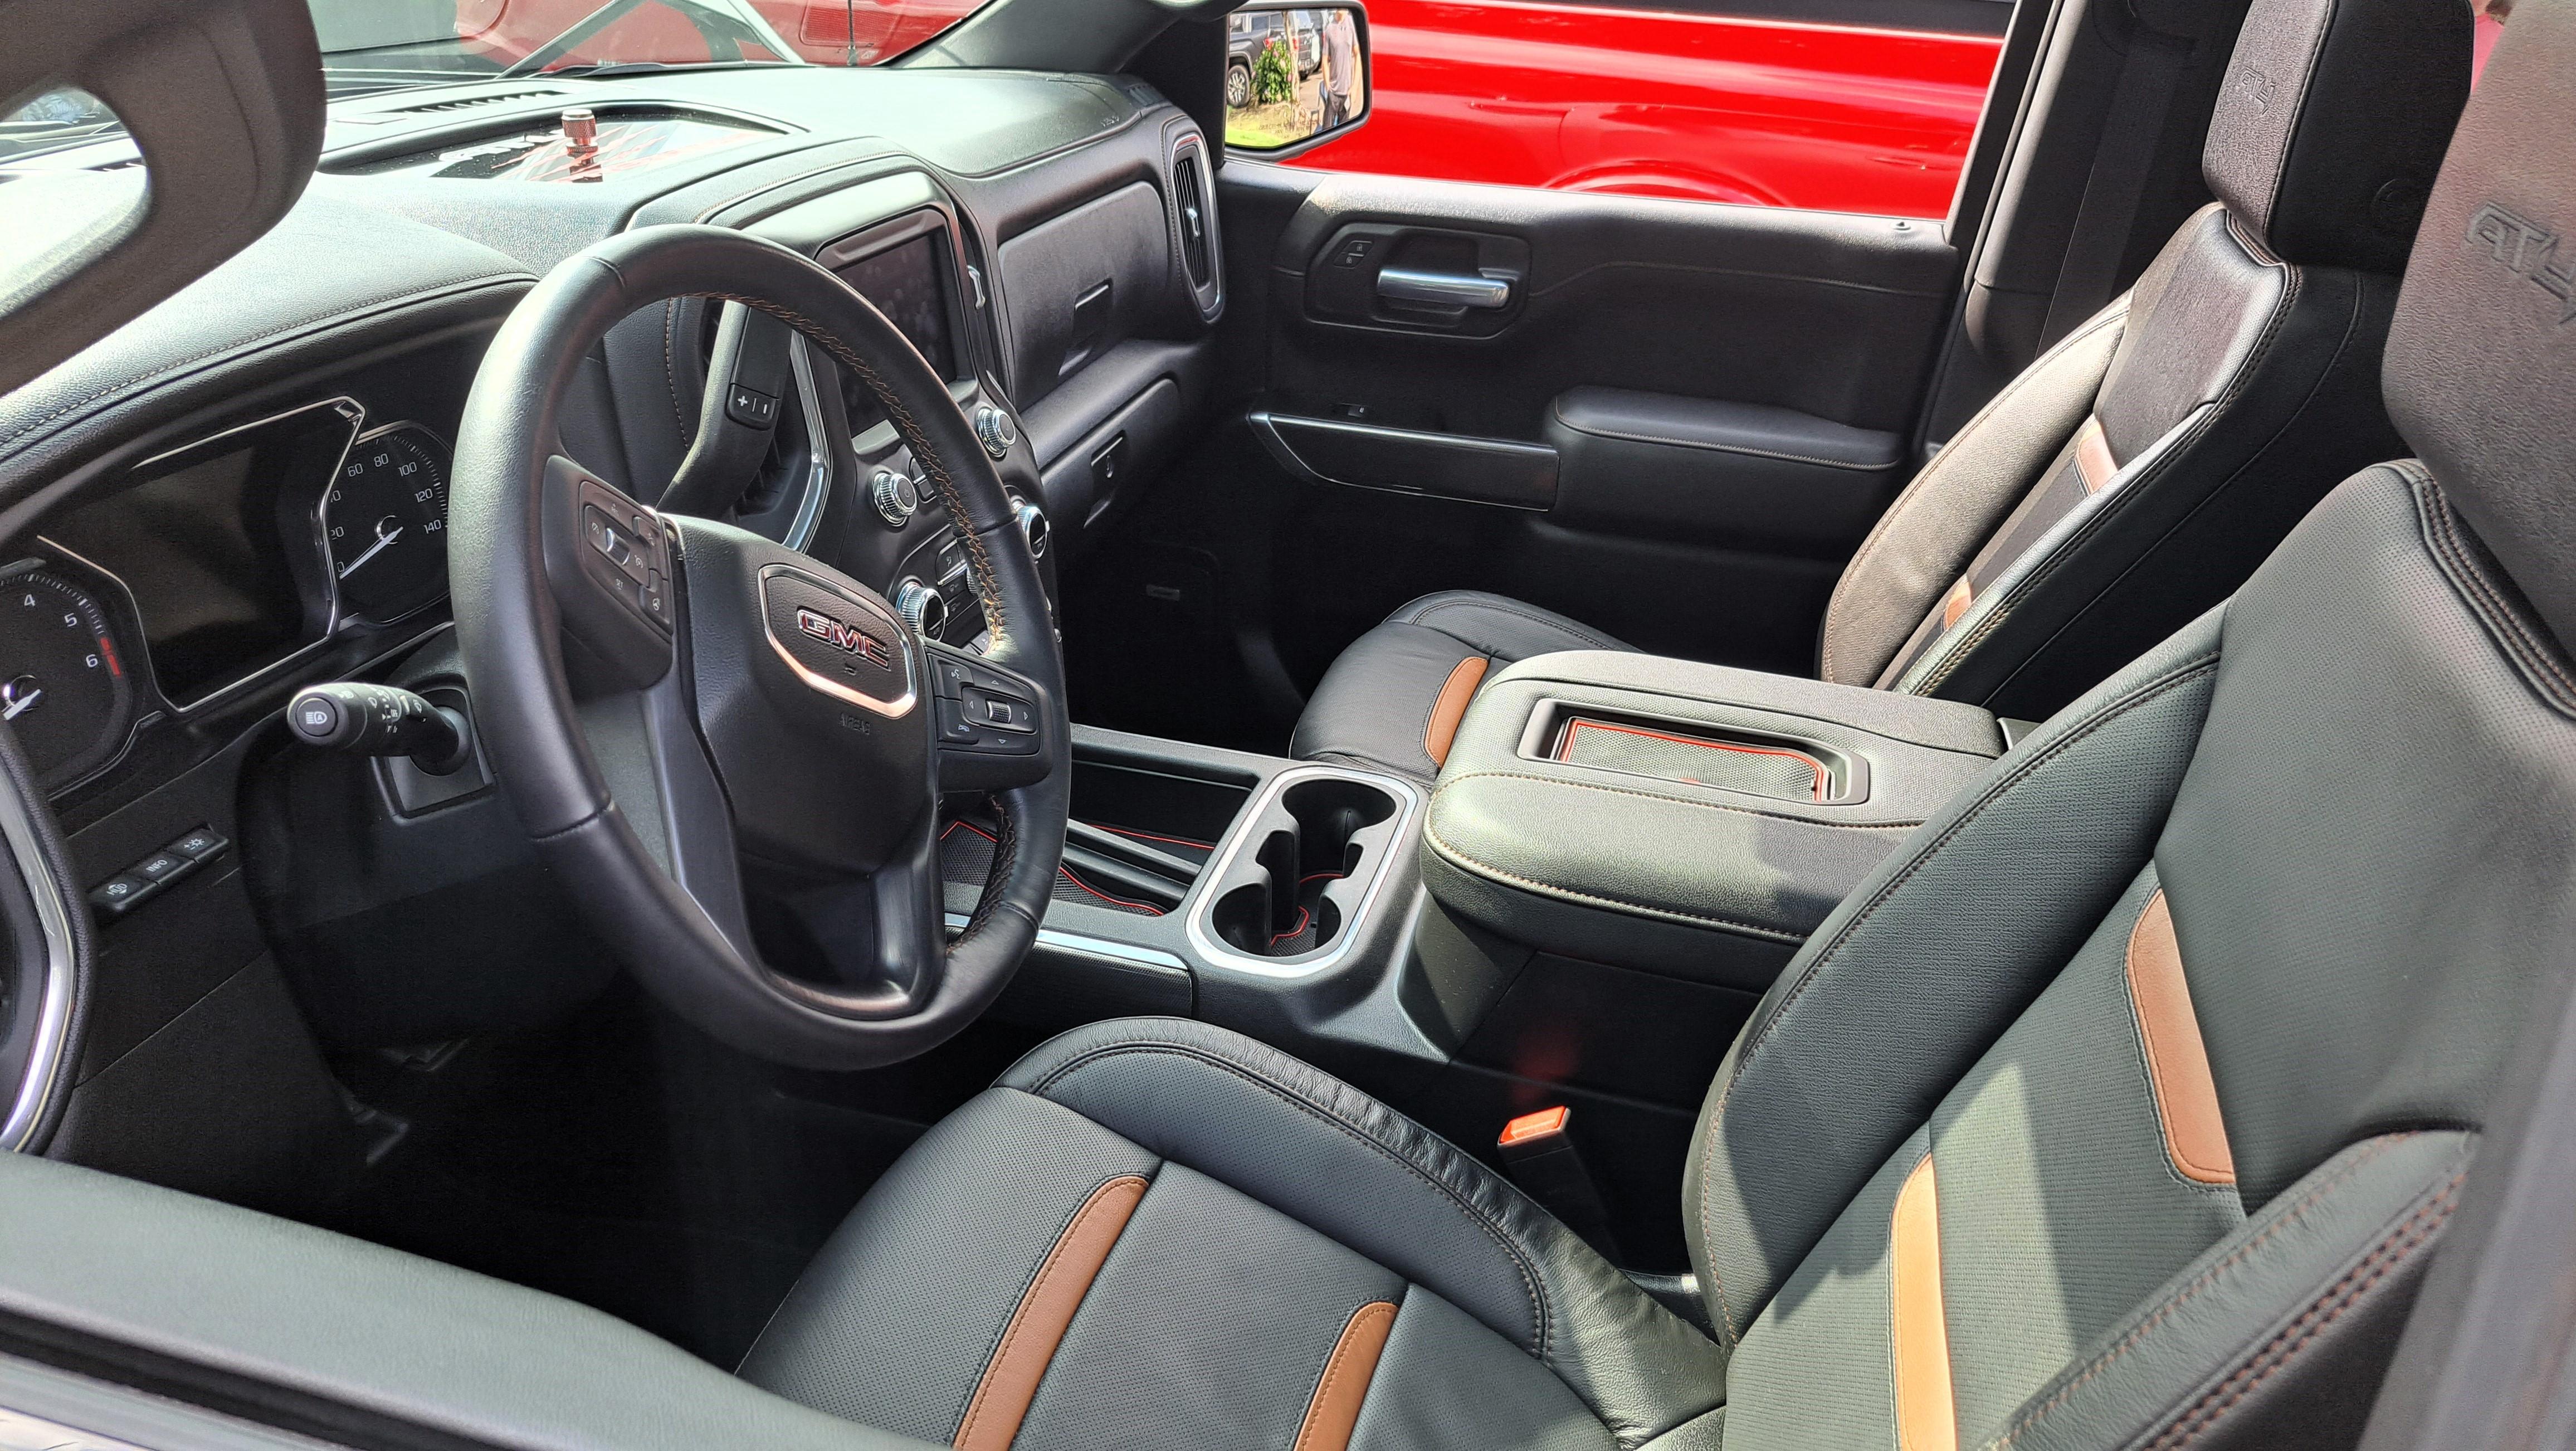
I intend to use as a base for a 2023 GMC 1500 Sierra Denali. Close, but needing work. The other kit I need to pull out and check is the Revell Escalade SUV (even though curbside).
-
Well, I'd toss the engine as it is not, in my opinion, very good. But the basics appear to be there.
-
Haven't checked this out in detail, but would not the AMT Cadillac Escalade Pickup be a better starting point? https://www.scalemates.com/products/img/6/0/0/1410600-63-instructions.pdf
-
Cosma Ray corvette
Exotics_Builder replied to gtx6970's topic in Model Building Questions and Answers
Just this one as far as I know. Sitting in the stash, unbuilt.
-
Even though an MPC 69 Camaro (optional engine in some kits) and the 1969 Firebird, I got my engine a few years back from Replicas and Miniatures of Maryland. MCW Finishes appears to offer one. You might give it a try https://mcwfinishes.com/shop/ols/products/pontiac-ohc-6-cyl-motor-125-scale Here's mt Replica and Miniature version. The Model Car Garage PE Set has the Sprint hood script.
- 39,274 replies
-
- 7
-
-
- johan
- glue bombs
- (and 1 more)
-
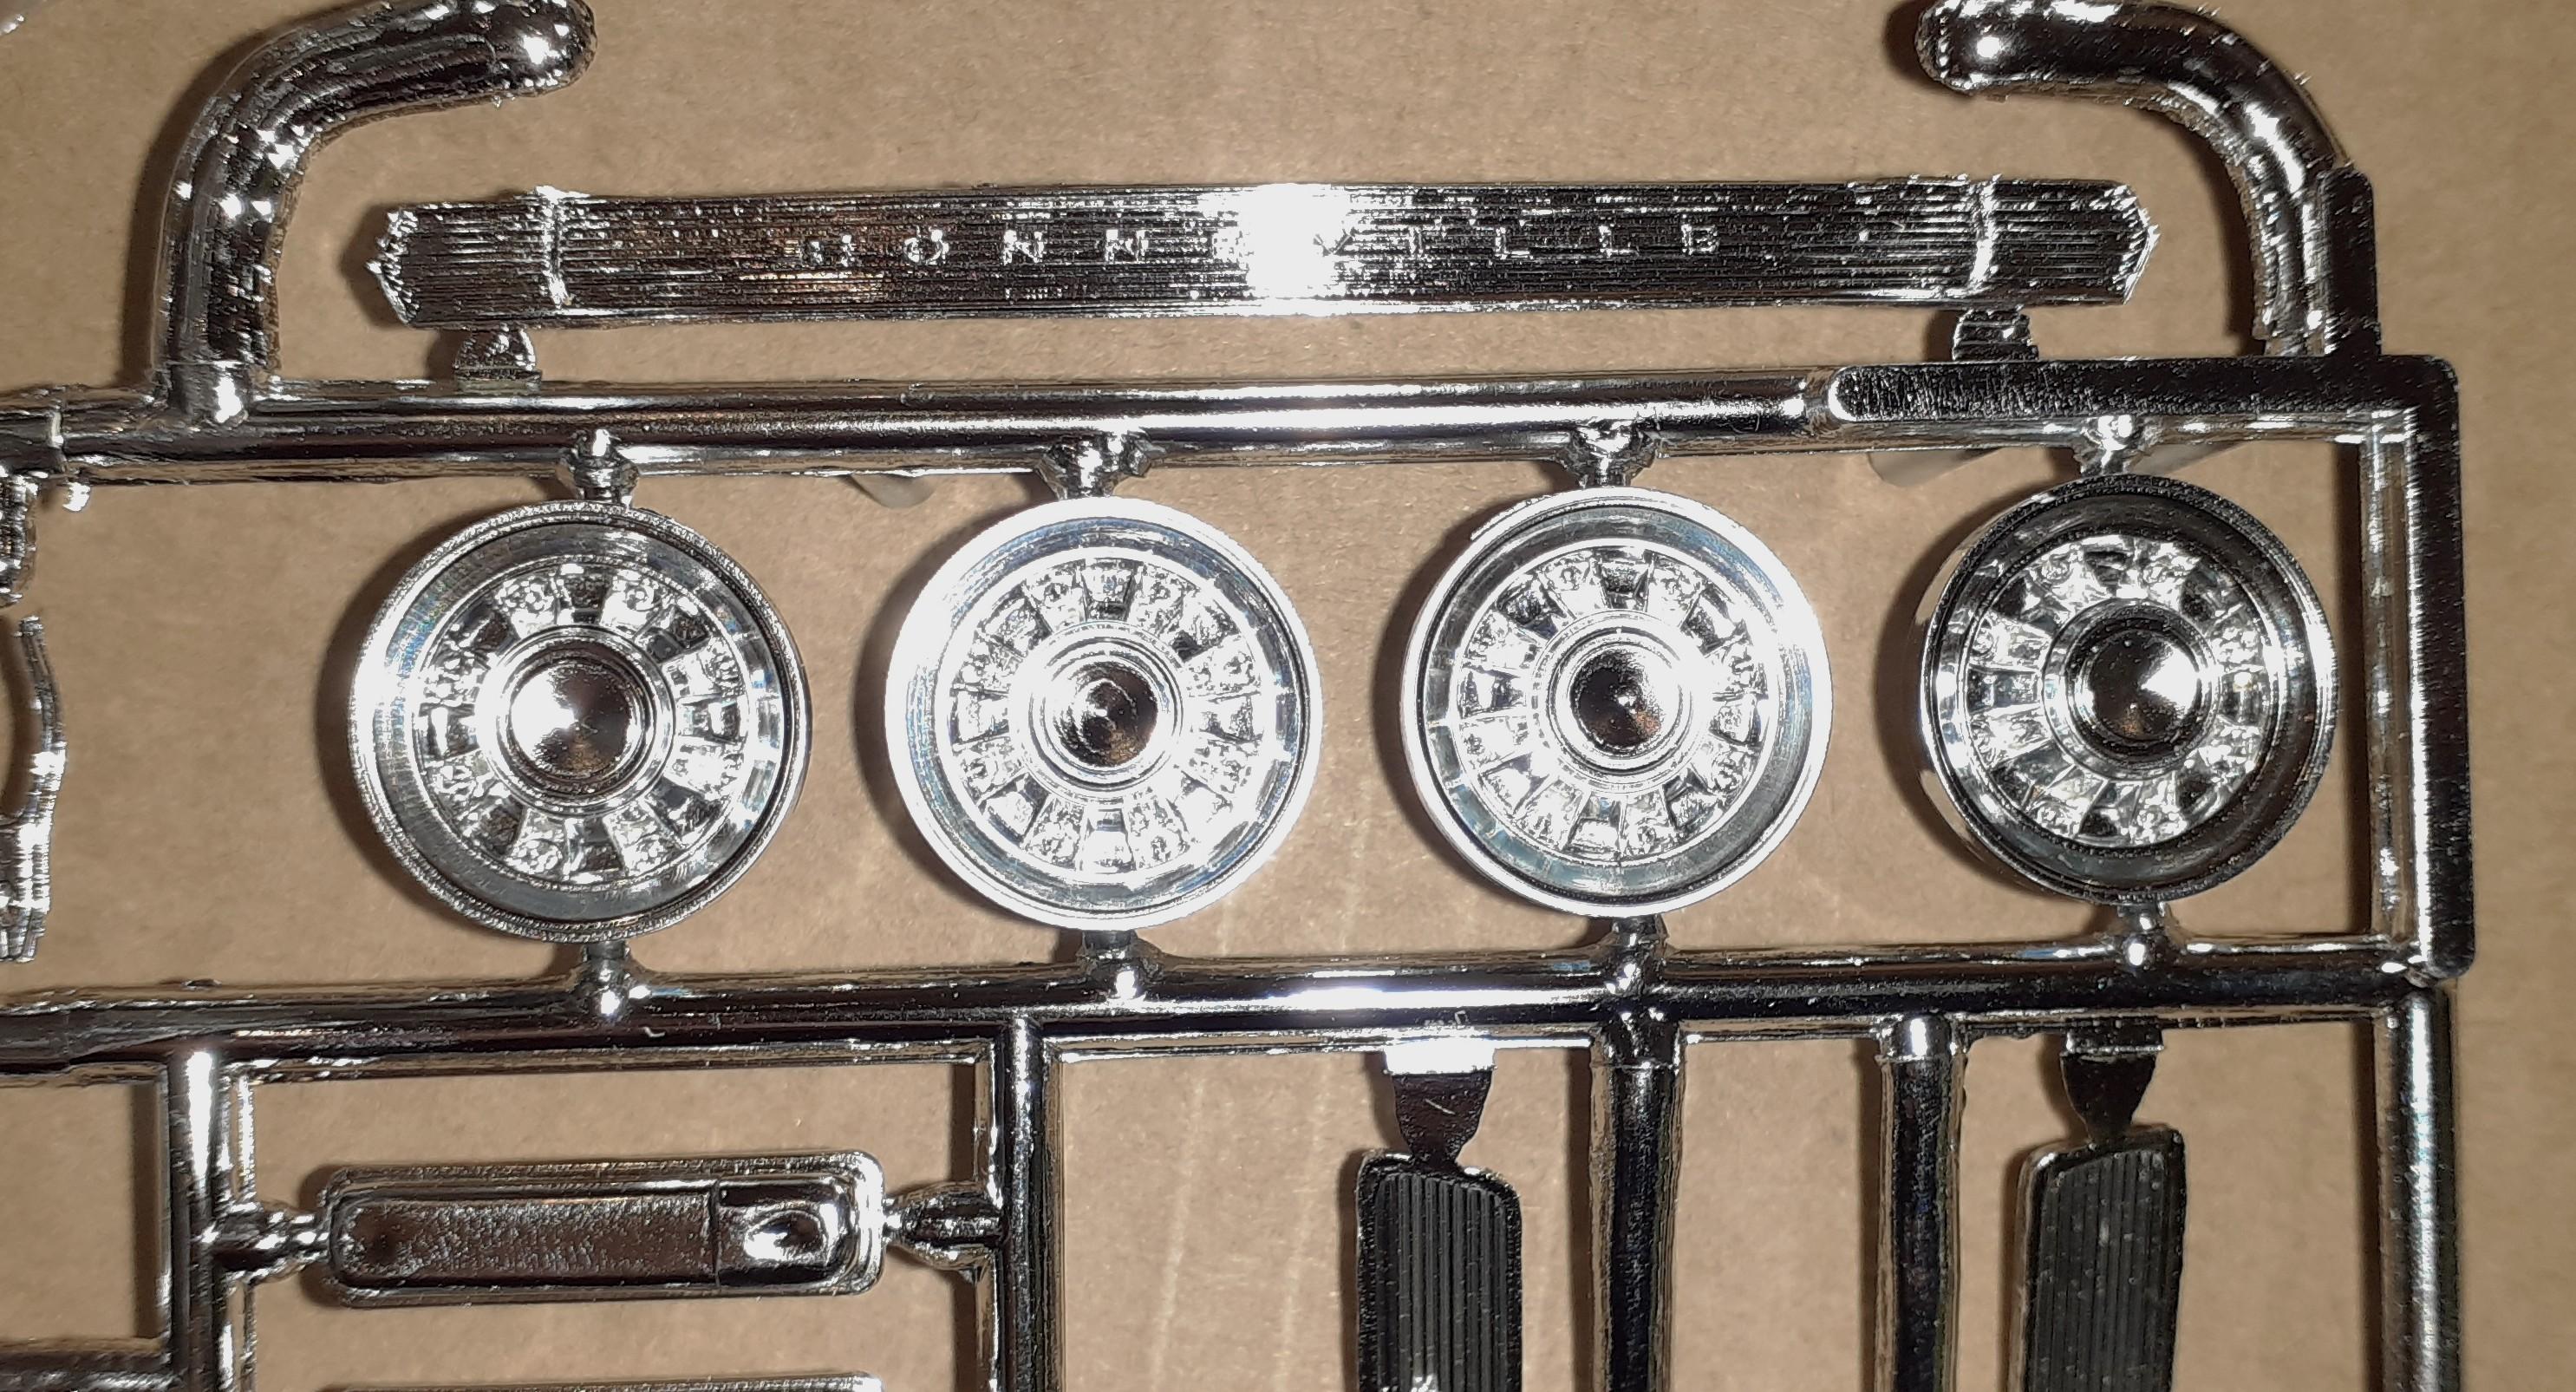
Well, these are what are respectively in original 63 Bonneville Convertible, 64 Tempest Convertible, and 65 GTO. My 64 Grand Prix kit does not ave anything like that and my 65 Bonneville and Grand Prix Prestige kits do not as well
-
LS engine question
Exotics_Builder replied to NOBLNG's topic in Model Building Questions and Answers
Well, it may be as stated. But, I'm looking at a photo of an LS with a similar "bauble" and it looks more like the accumulator/dryer can for the A/C system
-
Nothing on the box or instructions
-
I'll check the two I have downstairs later today.
-
Well, the set from the Coupster parts kit is on its it way to him. Spoke about my concerns. Hope it lasts.
.JPG.d7034a23240b1b76dfcb9b89d96c436e.JPG)


.jpg.005793c83c68189691e0e46b28bcf7a7.jpg)
.jpg.ef195f5f9e01c32ef672a6eb3285b3f5.jpg)
.jpg.2376c5f35e11e564863d84c5a834be31.jpg)
.jpg.36350e31cf884951de82c813f5cd5fa1.jpg)
.jpg.2652d0c42eb17cd4157cfe9aec94224d.jpg)
.jpg.6b38e93589693fc06f0bd8bc3e03f20c.jpg)
.jpg.7e8e727bc89ef8c3dc1ac393ed3b4d3f.jpg)
.jpg.359c89beb20690243fea74097fd8d00b.jpg)


.JPG.f9f9375c352a0d9fcc9e23622fa827d1.JPG)