
polybius
-
Posts
119 -
Joined
-
Last visited
Content Type
Profiles
Forums
Events
Gallery
Everything posted by polybius
-
RIVIERA ROYALE: a heavily customized coachbuilt 1966 Buick Riviera
polybius replied to Claude Thibodeau's topic in Model Cars
Brilliantly executed! Very nice!! -
Nice looking build! And agreed on the headlights, as they've always been ripe for improvement. You've done a great job of correcting them especially with the lenses and the spot-on chrome bezels!
-
Very nice! That's a classic color combo, too. Perfect choice!
-
Very nice! These kits were finicky and you've done it justice!
-
Beautiful builds! Well done!!
-
Thanks again for the great comments! I was curious about the tooling's lineage because there were two distinctive molded-in rivet looking things along the rear fenders that needed to be sanded smooth. It turns out the '88 release of the Exotic Car Series was the third issue of the kit, with the originals being in '81 with the stock 635CSi first and then the Group 2 version. It was certainly a departure from Monogram's typical US muscle car subjects. In the 80s as a kid any kits from Tamiya or Fujimi were much harder to get a hold of, so it was a real treat when something like this would pop up on the K-Mart shelf for under $6.

-
Amazing model and incredible build! Wow!!
-
Very nice work! Well done!!
-
Great looking build! These kits are getting harder to find and creeping up the $ ladder. It's nice to see one built so uniquely and cleanly. Well done!
-
Excellent, interesting, and obscure! It makes me wonder how the auto industry in the US would have responded had more JDM cars like this been imported to our market in the 70s and early 80s. At least we got the Cressida until Lexus emerged on the scene. Great work on this build!!
-
Moving yet another project from the WIP pile to the display shelf. This 80s issued Monogram T-Bird has been a thorn in my side for a couple years as it cycled its way from the bench to the shelf of doom and back. Originally it was planned to be silver, but when the first color coats were drying it was evident there were some issues with the lacquer I was using. Since I had some champagne gold that was a color offering on the T-Bird TC, it became the second attempt at laying down some base coat. When the same issues surfaced with the gold paint, it went back into its box for yet more simmering. Since it was a project I was looking forward to finishing, it got its third attempt using some Tamiya metallic grey that went down nicely and accepted the lacquer clearcoat suitably. While the grey was not the first pick, in the end it worked out just fine and I was pleased with the result. There's the added benefit of yet another spot cleared on the bench. Thanks for looking, much appreciated!
-
Beautiful clean build! Very nicely done!!
-
Thanks for the comments! This was a kit I tried building as a kid but it turned into a glue bomb and it likely met its fate in a scale model crash test ? Here are a few more pics as requested, and thanks again for the great feedback!
-
Keeping up with the momentum of clearing out the works in progress shelf of doom, this build finally made its way to the display case. I started it a couple years ago and was mostly awaiting the body and trim work. It's an old Monogram tooling from the late 70s and early 80s that I believe was first tooled as a race or rally variant. With other "better" kits of this E24 BMW that were made by Fujimi and Tamiya, this one from Monogram is a bit underappreciated. It fits together mostly well but the instructions are vague with identifying attachment points of some parts. It seemed to me the tooling represents a 1979 or 1980 model year, with the absence of the passenger side mirror being period-correct for these early-ish 635CSi coupes. I regretted not fitting and gluing the sunroof closed before body prep and paint, and it turned out to not fit very snugly so the tilt-up position was represented and would have been accurate for the 1:1 design. This was one among three BMWs that was stuck on the WIP shelf, so it was nice to finally finish it up and move it along. Thanks for looking!
-
Thanks everyone, much appreciated!
-
1989 Ford Probe GT AMT 1/25 scale in Garnet Metallic
polybius replied to polybius's topic in Model Cars
Thanks everyone, much appreciated! I'd owned a few 1:1 variants of this platform including an '88 and '89 MX-6 GT, '90 Probe GL, and later a 2nd gen '93 Probe GT, so this build was nostalgic in that sense. The kit itself was engineered decently and mostly everything fits as it should, but if you know the 1:1 cars you'll discover the instruction sheet wants you to attach the headlight doors to the hood rather than to the fascia and fenders. The one-piece window unit is a bit tricky, and it'd be an easy enough modification to trim out the side windows. After giving it some thought, and appreciating the structural rigidity the intact unit provided along with the relative sparsity of detail in the interior components, the windows stayed rolled up. Thanks again for looking and for the great feedback! -
This was a mojo-builder as I'd been in a slump for a few months and needed a quick fix. I had an AMT Taurus SHO promo that had seen better days, and some leftover parts bin items from the old Taurus police and RoboCop kits, so it seemed like an easy enough solution. It was also an experiment using some different finishes that I wouldn't normally consider, so not expecting much it moved forward. Aside from some scratch built items like the push bar, aux lights, and repurposed radar unit that became the search light, the annoying chrome plated headlights were recast in clear resin to more closely resemble the 'futuristic' units in some of the movie shots. It turned out that back in the late 80s when I was around 13yrs old I'd bought and built the first release of the '89 Taurus SHO kit and tried to replicate the tricky tail lights - they were still in my parts bin all these years later and finally found their home. It could use some bar code license plates, but it was intended as a quick build and so it was. Thanks for looking, and cheers!
-
As a fan of this era and these G bodies, it's delightful to see your build so accurately detailed! Great work!!
-
Very nice! Awesomely clean build!! The Monte looks amazing as well, and they're a perfect duo. Kudos!
-
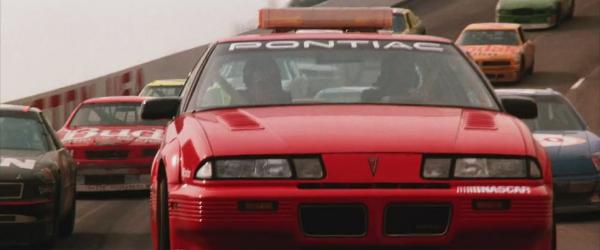
As mentioned in another recent post, this year's plan was to chip away at the 'shelf of doom' and move along some projects that have stalled over the years. This one was close to completion after some experiments with enamels and acrylics, as I tend to stick mostly to lacquer for body finishes. I wondered how Future would work over the Testors bottled enamel, and the result was pretty disappointing. The Future didn't seem to want to stick to the slick surface of the cured enamel. It was even more strange when the red enamel seemed to bleed through some of the decals after clearing it with the acrylic Future. As mentioned, it was close enough to being finished that I stopped fretting over the failed experiment that I just went ahead and slapped it together. It looks decent enough on the shelf, and generally I build factory stock street cars rather than NASCAR or other racers, so it's refreshing to break out of the habit every now and again. It's the third NASCAR kit I've managed to cobble together and I'm happy for the cleared space on the project shelf - a win/win! Thanks for looking, and cheers!
-
One of my New Year's resolutions this year was to attack the 'shelf of doom' and finish some of the projects that have long been underway. Among them was this '89 Probe GT released as the Probe IMSA kit, but still contained the stock parts for a GT. The body, interior, and chassis were started years ago and it ended up back in the box as I debated my approach to some of the tricky details of this kit. When AMT/MPC touts 'clear red lenses' as a 'feature' it makes me cringe, aside from the frustration of 'chrome plated lenses.' Regardless, it's all part of the challenge and fun of building. After realizing how close it was to completion it finally made its way out of the box, across the bench, and into the display case. The chrome plated lenses for the front turn signals and fog lamps were recast in clear resin. Otherwise it's essentially box and showroom stock. Eventually I'll build the updated '90 version that's still in its box untouched, and perhaps an IMSA version to round out the trio. For now, this one will do and it checks one off from the shelf of doom WIP list. Thanks for looking, and cheers!
-
Beautiful! Very nicely done!!
-
Great build of the Yodel kit as L-56! It'd look right at home next to the L-57 Turbo Z or Shelby Z ?
-
Beautiful build of an oft overlooked subject! Very nice work!!
-
1989 Ford Mustang GT ‘Vert in Light Gray (Smoke) 1/24 Monogram
polybius replied to polybius's topic in Model Cars
Thanks!! Yes, the aero headlights are pretty tricky but at least Monogram/Revell gives you clear lenses to start with. I found some good closeup shots online to reference. If you look closely at the 1/1 units, while the headlight bucket is reflective like chrome, the bottom (floor) of the bucket is slightly off-white. The clear portion of the sidemarker reflects some of the amber from the corner section of the sidemarker lens. The parking light has a slightly frosty clear lens. With that in mind, I chromed the reflector buckets with chrome tape and Molotow and then some flat white for the floor of the reflector bucket. From there, a small dot of clear amber simulates the parking light bulb. The sidemarker was masked for the amber section and left clear for the forward portion. The parking light lens then got a light dry-brush of pearl white to give it a slightly frosty yet clear look. Some black vinyl tape was trimmed into thin slices for the vertical separations, and then the whole lens got a thin line of black Sharpie to simulate the gasket and shadows. It was all rather tricky and I wasn’t sure if it’d work, but I was pleased with the results. For the tails, since they’re molded in clear red, the housing molded into the body got a strip of chrome tape and the reflector section (under the backup lights) got an additional chrome strip stuck directly to the backside of the clear red unit. The louvers were then hand-painted with primer and the lacquer Light Gray. There was a lot of swearing at this point. After drying, the backup slots were filled with Vallejo white acrylic which made tidying them up a bit easier, and any slipups in the red slots were fixed with a dab here and there of Tamiya clear red. Once finished, the units were clearcoated to match the rest of the body color parts. I appreciate the comments and questions!! Thanks again!!


.jpg.d518c38a0b4b2b2aaf69352e33b5da0d.jpg)
.jpg.d7201598c7fbdc658833b53a461635b0.jpg)
.jpg.63c662647a1eb35f9408f1723c282d12.jpg)
.jpg.570bdc125d6014eb71c1aa1efb1cbcc5.jpg)
.jpg.861dd75d424f72fe5433a11777a6e7fa.jpg)
.jpg.1a6eff9b6dc89c5512410e17b8d6228e.jpg)
.jpg.c968da6dbd552323f150b89916174acb.jpg)
.jpg.dc239b0ea2ac0d745de4f0b6aa5285c2.jpg)
.jpg.ab84119f6fd45262a1cb4ad6944cdab9.jpg)
.jpg.78895b7a7b0be913c1af949e1a9b777a.jpg)
.jpg.cd8c2256082e49e6a5913f57b61bc5a5.jpg)
.jpg.6e7b61cfaf9ab75a54dc08e4d942dfb9.jpg)
.jpg.2062e15f880ac45e1e8292dd34efa929.jpg)
.jpg.ae6b135bcf52ccbe5ccd43f2dd3f39db.jpg)
.jpg.bdebabc7d259753b40f8e5f8d957c661.jpg)
.jpg.0feab854a8723314af4c332da3a8f03c.jpg)
.jpg.b6caaf294d3eb54330d673a5c10fed09.jpg)
.jpg.26a51c3c90b3bf49ab62b3a49f9afd75.jpg)
.jpg.6608468aead089414b8cdbe781cff14e.jpg)
.jpg.c6d51be2a0f666a4548bf4265141b329.jpg)
.jpg.28c2e51ad94e09c41b8b98230170f329.jpg)
.jpg.f189cd8be25a289b78c9607df6bb54b8.jpg)
.jpg.5f16c3fc3e2bd0ee6074e5e26ac55285.jpg)
.jpg.c4f8231766b120e9cffe57e4c9748d9f.jpg)
.jpg.c791ecbde475351df99d4fbb3fdc90ce.jpg)
.jpg.f60c75e081af62aee213a95da7e13dcb.jpg)


