
futurattraction
-
Posts
1,647 -
Joined
-
Last visited
Content Type
Profiles
Forums
Events
Gallery
Everything posted by futurattraction
-
 I appreciate your stopping by Leonard. I feel like I saw you'd posted another project some time back. Are you making on progress on it? Hope so!
 -
Datsun 510 Pro/Stock "SWEET PAIN" COMPLETED BUILD
futurattraction replied to LeadFred's topic in WIP: Drag Racing Models
Those are some really nice details you've shown, Frederik. Your photos are superb, too! Can't wait for your next update... -
Thanks Mike... Whenever you're ready!
-
Thank you very much, Michael. Using the rod ends and tubing that can be telescoped certainly offers flexibility in fitting the door to the opening and the way mine is configured, it does, as you say, offer the capability to remove the doors, which is a cinch when the front end is off.
-
Hey Mike, I have a lever latch style of harness hardware available. It's on my chassis and suspension page, www.futurattraction.com Scott
-
Thank you Frederik. Hopefully everything will stay stable with the fitment of the major components and my door lines will remain good.
-
Thanks Chris. I appreciate your offer and encouragement. What hobby store did you get yours from? Depending on where you sourced yours, I may be able to find something here local. A pic would be appreciated!
-
Thanks for your kind words, Henry... Bill - I really appreciate your providing the info about those micro magnets. Those look like just the ticket for what I had in mind. Hey, thanks Ray. In principle, I think it makes tons of sense of sense to do the hinges this way. Of course, I still have to execute the plan! LOL Thank you Dennis. The goal is now to keep this progress moving forward! Thanks a ton, Kerry! Tyrone - thank, so much. I'm stoked to see you back on a project. I've missed seeing you around recently!
-
66 Chevy ll outlaw style..(update 12/23/16)..
futurattraction replied to tyrone's topic in WIP: Drag Racing Models
She's looking great, Tyrone. Your rear wheel wells look awesome, friend... Some super upgrades, for sure. -
Cool build, John. Any body-up shots you are willing to share?
-
Some WIP pics of how I'm going about hanging the doors. I cut some 1/16th inch brass tubing and attached it to the interior door panel. The interior panel is patterned off a 1:1 panel so is to scale. I am using RB Motion #1504 rod ends, which telescope inside the tubing. I used a pliers and deformed the shank end of the rod ends so they interference fit the tubing. I made sure the upper and lower tubes were parallel. This setup allows me fore-aft adjustment within the fender-body opening and also allows me to adjust the gap at the rocker panel to some degree. This view shows the leading edge of the door and interior panel with the rod ends CA's in place. Here you can see the door hung on the bulkhead-mounted rod ends. The top one is CA'd in solid. The bottom one is still floating at this point, but probably not for too much longer. Using the rod ends and tubing allows the door to be adjusted in and out at the top and bottom as well as what I mentioned above. I'm hoping/trusting that by having the body pinned to the chassis I can get door lines fitted pretty closely and I won't run into a bunch of misalignment issues later. Plain old 9 o'clock level shot of the door hung and in the body. It has a tendency to swing open, so is taped for the time being. I know some of you guys have used micro magnets to keep doors closed. What is the smallest those are available? Anybody know off-hand? A couple of shots of the door swung open. This one closeup shot shows the hinges more clearly. Thoughts, comments and questions welcome...
-
Thanks for looking in, Henry. I appreciate your enthusiasm... I'm glad things are going well for you, Kerry. Here's to a quick upcoming month so you can get back on days! I appreciate your compliment and thoughts, Bill. My challenge is that I will have the chassis in and out of the body a million times before it will reach final assembly, so I'm thinking 1) lightly supergluing it probably won't stand up to the flexing that does occur and 2) there's a strong chance that any supports will get in the way of various aspects of construction... Thanks for stopping by, Bob. It's always appreciated. Thanks for your kind words, Fred. Slixx now has decals for two versions of Dyno Don's Fairmont ('78 and '79 seasons) on one sheet and they've got Glidden's '78 decals available. They are working on a set of blue-on-white decals for Glidden's later ('81 season) car. Guys - I am hoping to get pics taken, soon, of what I'm doing to hinge the doors.
-
1/16 Scale Army Vega Funny Car - Finished 10/14/2018
futurattraction replied to Mooneyzs's topic in WIP: Drag Racing Models
Couldn't agree more. That's what's made this build so much fun to follow. We all have an opportunity to see the step-by-step process. Put as many pics up as you wish. I will be here... -
Hey Joe - I guess we're gonna have to draw straws to see who tells Mom. I don't relish experiencing her reaction when she finds out she's got all of us as sons. LOL Thanks Joe. Here's to more progress... I appreciate it Kerry. How've you been doing, buddy? Okay - as long as I've got the ball rolling I'm going to keep nudging it along as best I can. I got the passenger side door jamb installed a couple nights ago. I also went ahead and removed the front clip. I'm not certain yet whether it was the wisest time to remove it, but the driver's side A-pillar had already broken and I was concerned that with all the inserting and removing the chassis that I'm doing that it was only a matter of time before I break the other pillar or one of the rocker panel-to-fender joints. I decided I'll just live with whatever extra hassle it might be to deal with to at least control when stuff comes apart... LOL Although I don't have any pics of the WIP door itself, here are a couple of the door hing pivots at the front bulkhead/jamb: We've all seen discussions about "floating" alternators. In a similar fashion, I'm trying to figure out how, or if, there is a way to constructively deal with "floating A-pillars". This is just a plain, weird shot, but thought I'd include it... Let me know whatcha' think!
-
Bantam Fuel Altered - New pics 1-7
futurattraction replied to Codi's topic in WIP: Drag Racing Models
You've gone way beyond hitting it out of the park. I think, by now, it may be the universe...! -
Hey guys, Tim - It feels good to get back to this. I'll try to keep a place cleaned off so I continue to make progress! I appreciate your looking (and chiming) in, Henry. It is, indeed, resin Bill. Have been wanting to incorporate this mod into my build for a long time, so it feels good to have "broken through"... There's not doubt I'm a nut case, Joe. You did know that Mr. Sobak and I are brothers, didn't you??? Thanks Danny! You are a patient man, is all I can say. LOL Hey Chris. Thanks brother. I sort of feel like I've regained a direction and motivation for this project - I appreciate your encouragement! Thank you, Brad. Keep on keepin' on, I guess. My head is so full of what I'd like to do on this. Lord willing, I'll be able to accomplish a good share of them, anyway... Thanks for your kind words and encouragement, Michael. Leonard - Thanks for popping in! It's always nice to hear from you and see what you've got going on for projects.
-
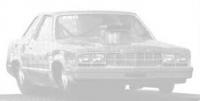
Time for an update. After a lengthy stretch of not having the time, losing my sense of direction and my work space being such a disaster it was difficult to get motivated, I finally took the plunge and jumped back into my Fairmont. A major step was I finally took a deep breath and opened up the doors. I am in the process of adding door jamb detail which, so far, I'm pretty happy with. It will be interesting to see how I get along with mounting the doors. I intend to use a combination of RB Motion rod ends and bolt pins to allow them to be removable. One of the next steps I'll be doing is removing the front end. While it will make this a bit more flexible than I would prefer, it will help me to at least see what's going on at the front of the door and front door jamb. As can be seen on the first pic, I have added some material to the forward and/or trailing edges of the doors to get them reduce the door gap. This really is a lot of what motivated me to open the doors on this build. I intend to have a number of pieces easily viewable, such as the pedal assembly, steering wheel, gauges and Lenco lever assembly when all is said and done, with the trans tunnel out of the car when on display. Other recent developments are the creation of a 3D-printed version of my original central frame rail section. While my hand-built version filled the bill, I was always a bit unhappy with how some of the joints looked and this was a way to have something that is as close to perfectly finished/fitted as is possible. I will have to go back in and add seat mount brackets, slide-in trans mount and drill for brake line clamps, but none of those should be a big deal. I finished getting my rear wheels drilled for functional wheel studs, got the holes drilled for valve stems and assembled the front and rear halves together. The last "new" detail is that I have come out with updated 14x32 and 16x33 slicks. The 16x33s have a somewhat smaller ID and the rubber is stretchy enough that the slicks can be fitted over the assembled wheels. Sorry for the "soft" photo... Finally, a high shot of the whole shebang... Comments and suggestions welcome!
-
Bantam Fuel Altered - New pics 1-7
futurattraction replied to Codi's topic in WIP: Drag Racing Models
Masterful work, Tim. So, so beautiful. I think Dave's got an excellent point about keeping this piece of art exposed rather than covered up with a body. -
Hey Greg. Actually... I am going to send a file to Shapeways for both 1/8th and 1/12th Dominators very soon. I will let you know when I have resin versions of them. Scott
-
Bantam Fuel Altered - New pics 1-7
futurattraction replied to Codi's topic in WIP: Drag Racing Models
Extraordinary work, Tim... I'm loving it! -
Bantam Fuel Altered - New pics 1-7
futurattraction replied to Codi's topic in WIP: Drag Racing Models
Gorgeous piece of machine work, Tim... -
Super clean build. Your paint look fantastic! Nice job "fixing" the decal problems...
-
37 Chevy Gasser - Hand Painted Artwork
futurattraction replied to 62 Parts's topic in WIP: Drag Racing Models
Very nice build all the way around. You did a super job on your weathering and your hand lettering turned out really good, too. It's got it all! -
Cool! Glad to see you back, Rickard... You do such clean, clean work.
-
1:10 Firebird Rocket Funny Car That Really Works
futurattraction replied to Hammerdown's topic in WIP: Drag Racing Models
x2